Thefilled.rest of the panel’s image placeholders will remain blank and will disappear during production. Students’ names are included in the portrait flow.
Add a Portrait Group to a Page (Flowing Portraits)
Contract & Book Settings Confidential and Proprietary Information. Property of Lifetouch.
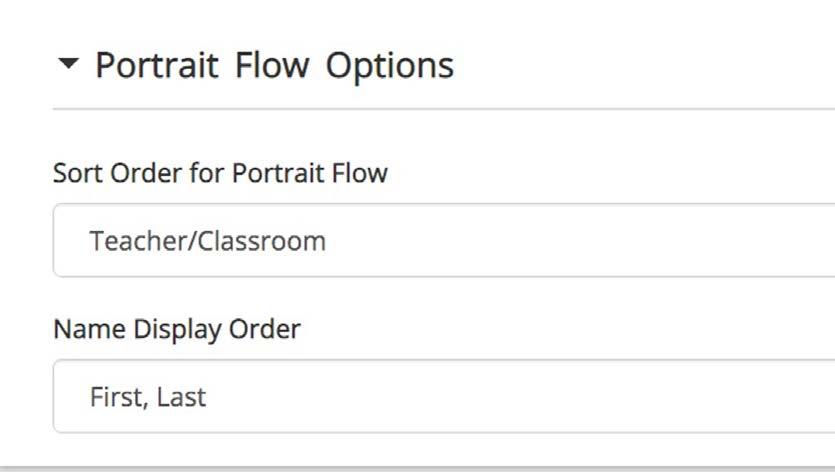
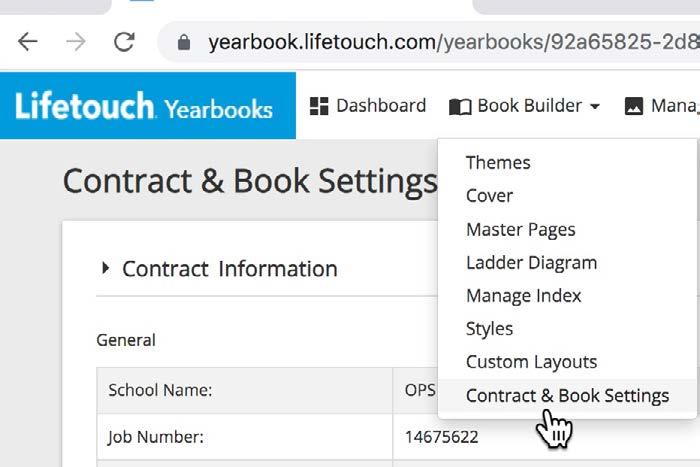
Before flowing a portrait group, check your Contract & Book Settings under Book Builder to select the desired method of identifying your students and the way you would like to include those who are not pictured.
What is a Portrait Group?
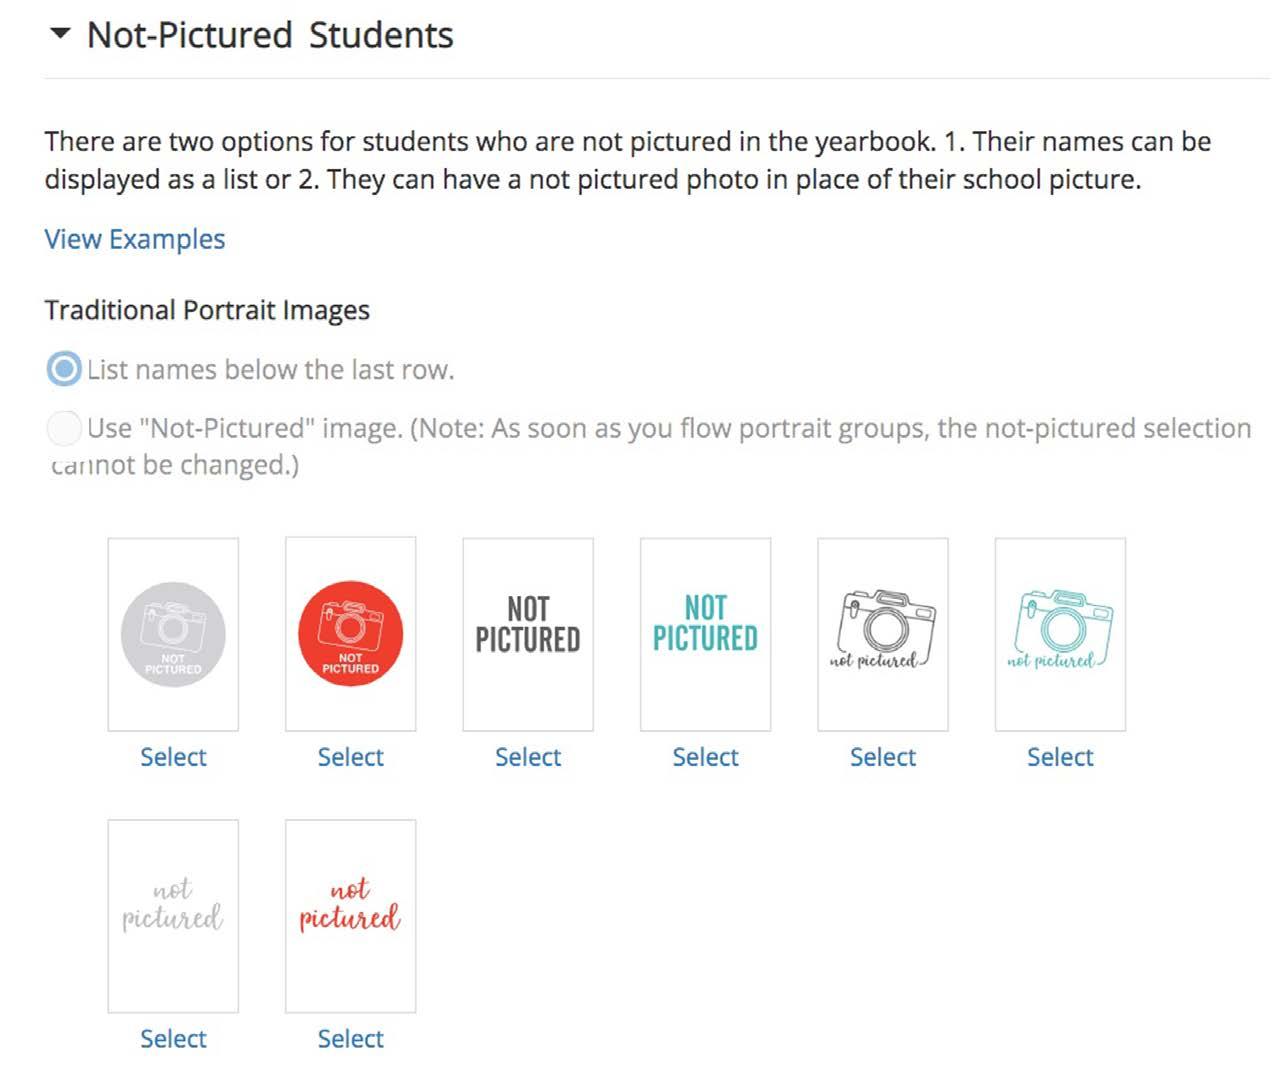
Also in Contract & Book Settings, under Name Display Order, you can choose the way the names appear in the book (first name/last name or last name, first name) and how you want to flow the portraits (by grade or by homeroom).Inaddition under Contract & Book Settings, you can choose to insert an image for those not pictured, or you can opt to have the names of those students listed at the end of the portraits. Most schools choose to include the list of those not pictured. Most elementary books feature students by teacher and grade level. Typically, middle school, junior high and high school books merge all students into grade levels (i.e., sixth, seventh, eighth, freshmen, sophomores, juniors and seniors.)
A portrait group displays school portraits in a panel. When the designer places portraits on a page, the panel fills horizontally. For example, if the panel design is five columns wide and five rows tall, and if the portrait group has 22 portraits, the first four rows will be filled and the fifth row will only have the first two images

Tip 2: Keep underclass portraits the same size and use the same frame and name placement throughout the book to maintain a unified look. Size D works well for the largest class of 35 students, and it allows space to place names under the portraits. Size D with name placement to the outside allows space for one more portrait in the panel. Confidential and Proprietary Information. Property of Lifetouch.
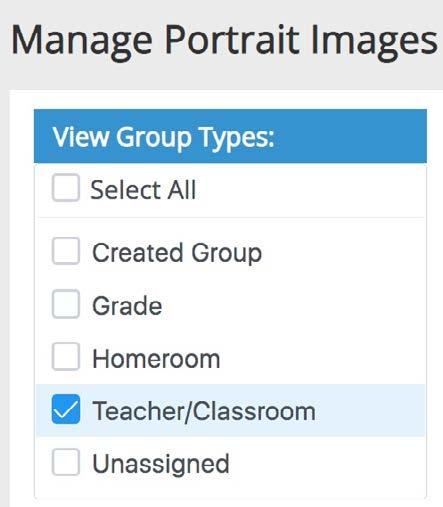
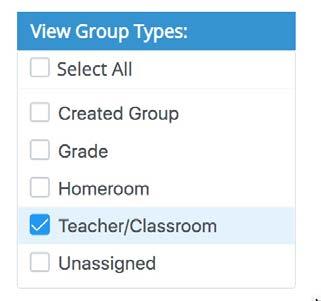
For schools flowing portraits by homeroom teacher: On the top menu, go to Manage Assets and scroll to Portrait Images Under View Group Types, select Teacher/Classroom. Look at the column titled Number of Records and find the teacher’s group with the largest number of portraits.
Before you flow portraits...
Consistency is essential: It is important to determine the portrait size for all students before creating pages and flowing portraits. To establish a unified look, most books feature a large portrait size for the top grade in the school and slightly smaller size for classes in the lower grades. Faculty portraits are typically larger than those used for the lower grade levels.
Portrait frames (lines around photos) should be consistent in size and color throughout the book. Name placement (left, right or under) should be the same for all lower grades, too. Staffs may choose a different look for the section featuring the top grade within the school.
Example: Let’s say the largest class has 35 students in it. If you use Size D (under Portrait Size), and if you place the students’ names under their photos, you can feature 35 students on one page. Thus,that staff would use Size D for all lower grades.
Tip 1: Always use the biggest portrait size possible so students’ faces are easily seen.


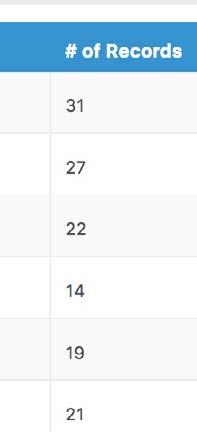
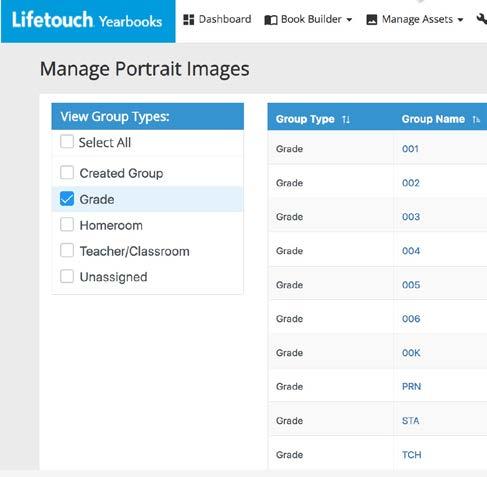
For schools flowing portraits by grade level: On the top menu, go to Manage Assets and scroll to Portrait Images. Under View Group Types, select Grade. Go to the column titled Number of Records and find the grade level with the largest number of portraits. We see that the largest grade level has 91 pictures. If we know we can include up to 72 portraits on one page with names placed to the outside when using Size A, we understand we will need two pages to accommodate the 91 images. If we choose to use Size B with names placed to the outside, we can fit 49 portraits on one page and the other 42 portraits on the facing page. If we select Size B with names placed under the portraits, we can place 48 photos on one page and the remaining 43 on the opposite page.
Size B works well for the largest group of 91 students. Placing names to the outside adds slightly more portrait spaces on the design.
Confidential and Proprietary Information. Property of Lifetouch.
Size A accommodatewill the largest number of portraits (72) when using tight spacing between photos and placing names to the outside. Size B allows enough space for the largest group of 91 students when using two or more pages for one classification. Placing names under the portraits adds slightly fewer portrait spaces on the design.

Once you have determined portrait sizes for all underclass students, you’re ready to flow the portraits. For elementary schools: Let’s say you’re going to create a page for Mr. Kohler’s class. Currently, he has 19 students in his group. Go to Mr. Kohler’s page in the yearbook either by entering the page number at the top of the menu bar or by going to the ladder diagram and clicking on that page. To Flow a Portrait Group TheDiagramLadder is located under Book Builder If you know the page number for Mr. Kohler’s class, you can type it in this blank space and click Go To locate the portraits in Mr. Kohler’s group, go to Manage Assets in the top menu and scroll to Manage Portrait Images Then view the Teacher/Classroom Group Type You can access a page through the Ladder Diagram. Scroll to the andwishnumberpageyoutoselectclickonthe blank page you would like to create. When you select it, the page opens and is ready for images and text to placed.be Confidential and Proprietary Information. Property of Lifetouch.


Confidential
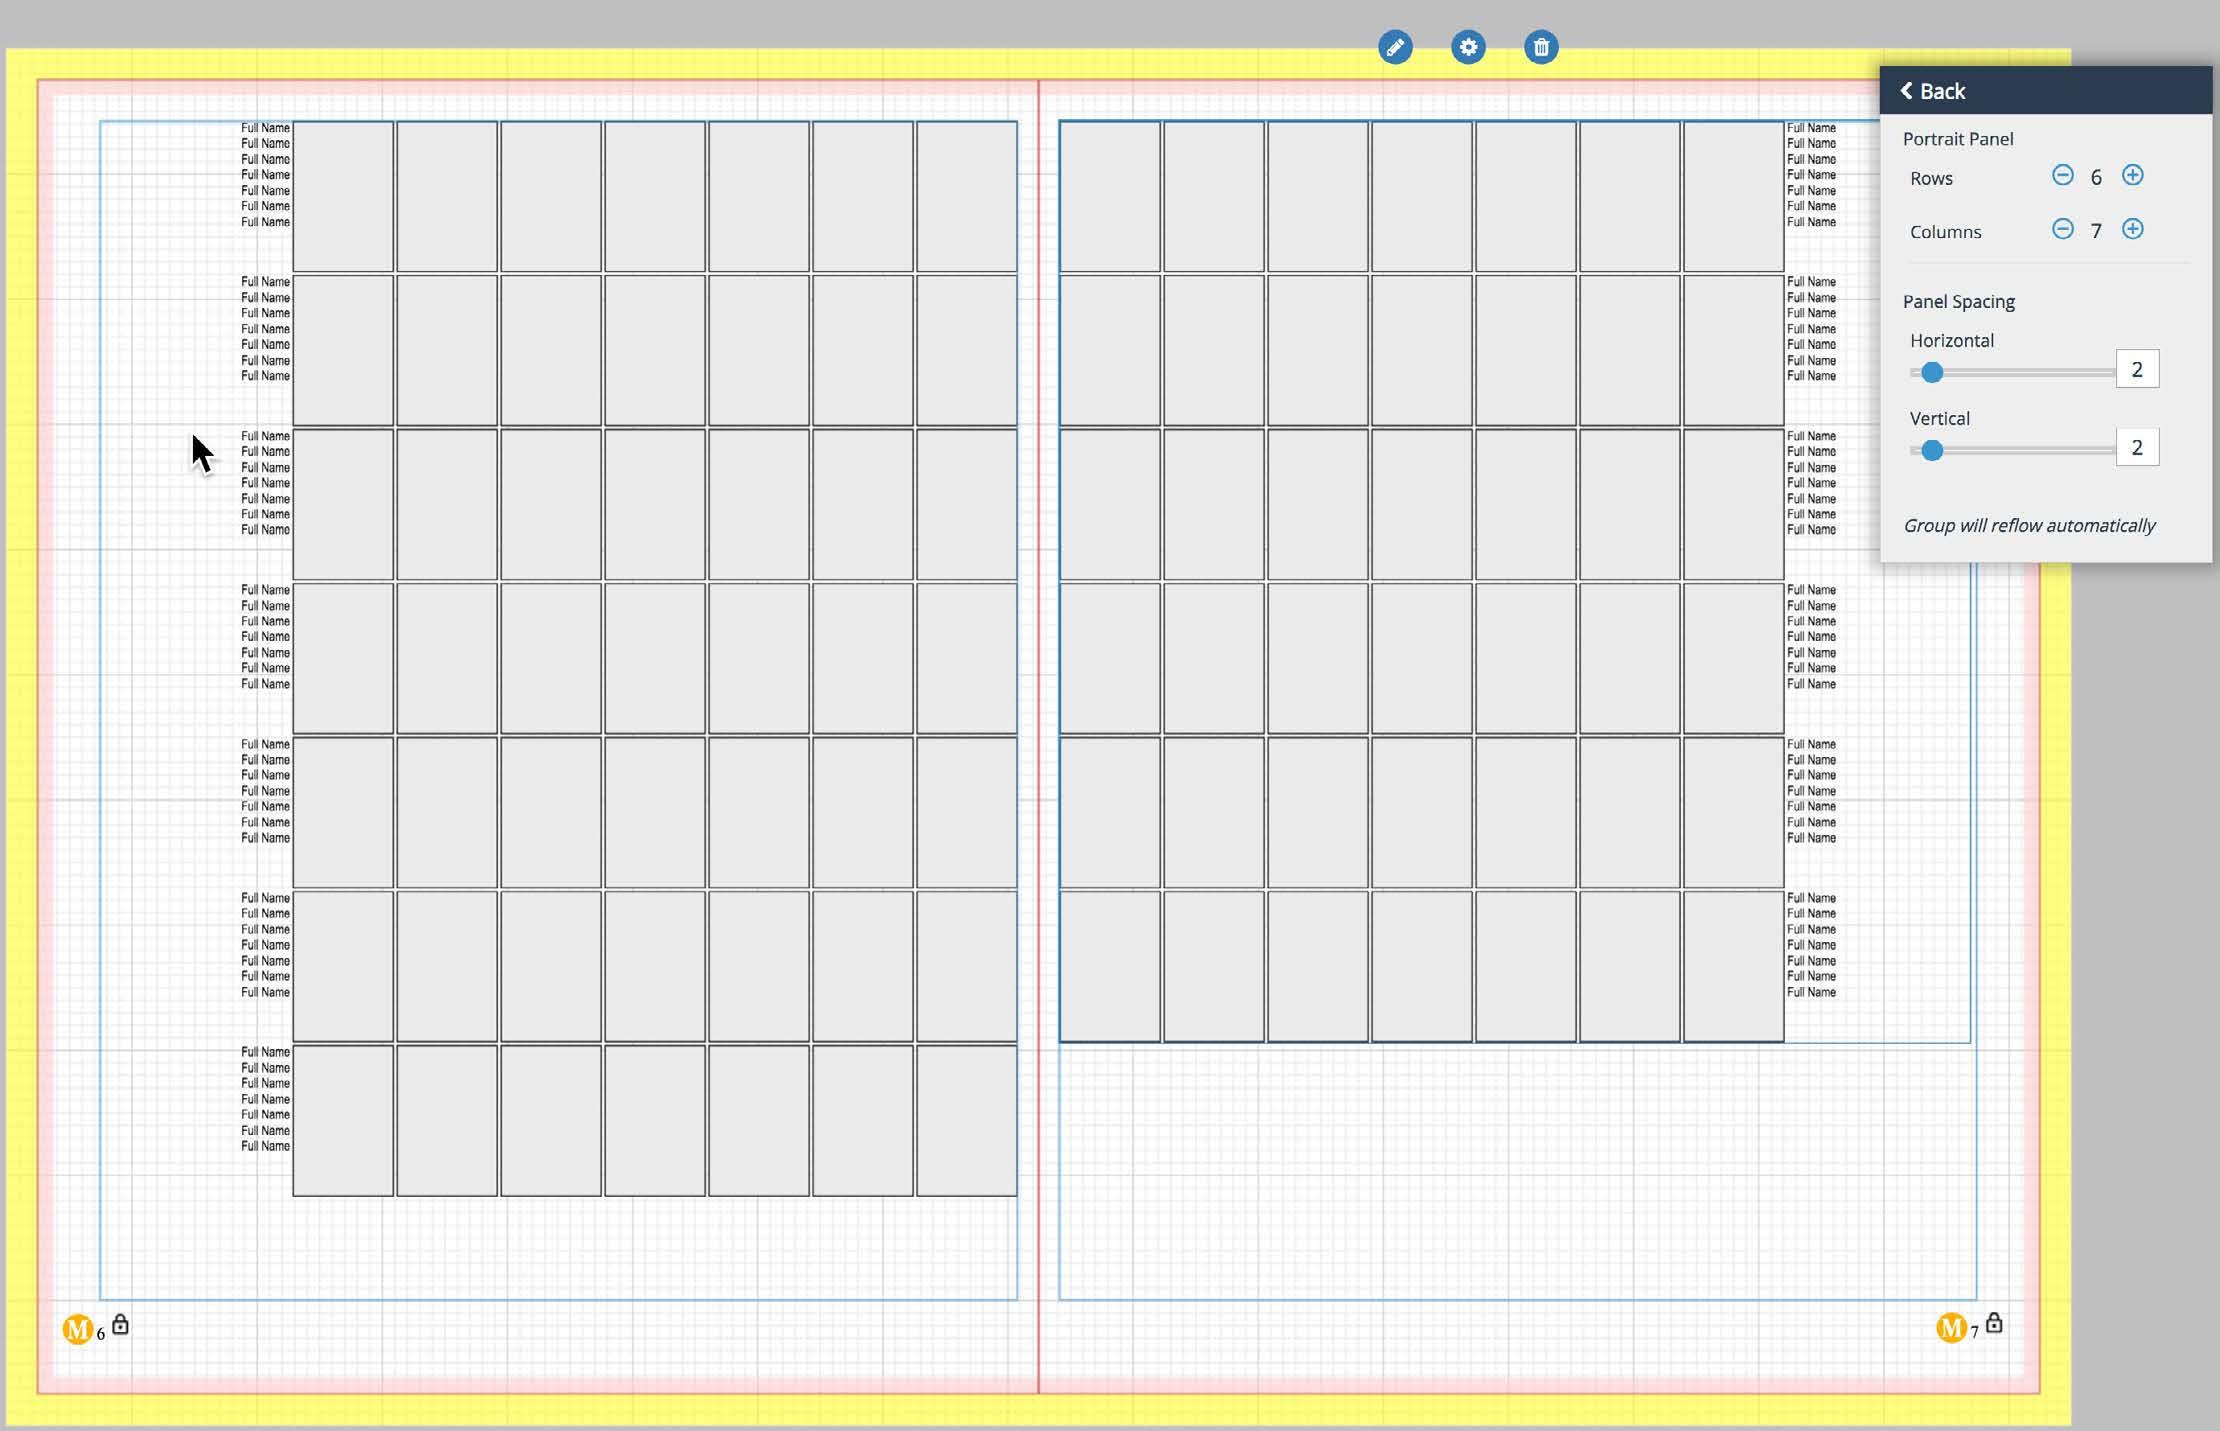
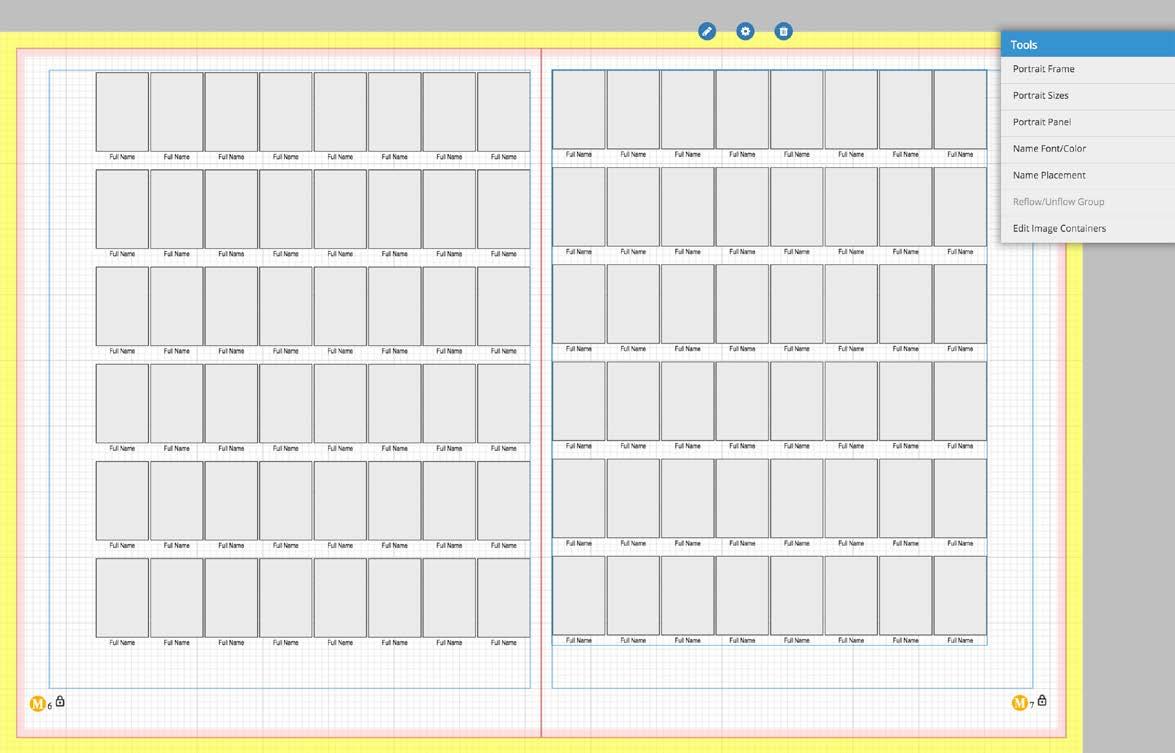
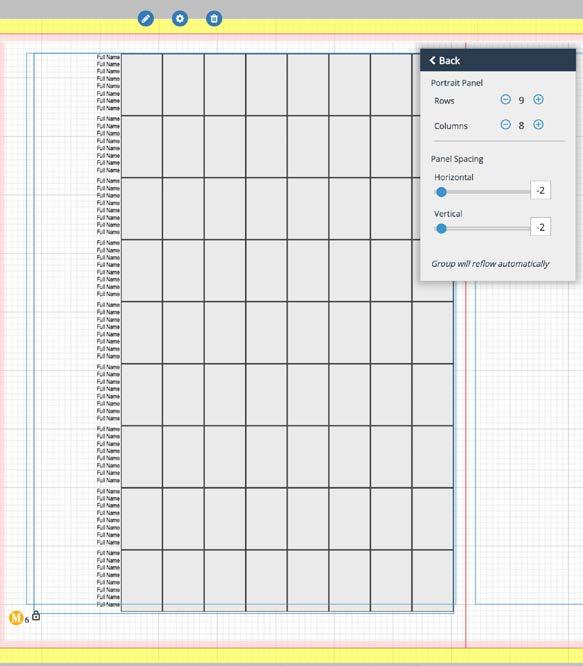
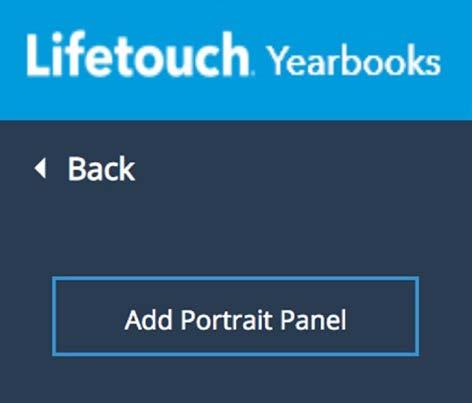
When the page appears on your screen, look to the upper left corner and click on Portrait Panels Then click on Add Portrait Panel and drag it to your page. A Portrait Panel with Size A portraits and names placed to the outside appears. Click on the gear above the panel to view your tool options for portrait frames, portrait sizes, panel specifications and other details.
From the Name Placement tool, note the way you want to have all names in the underclass placed.section Finally, choose the font and size for all names in the underclass section. The default setting is 7.5 Arial Narrow. and Proprietary Information. Property of Lifetouch.
Select the Portrait Size you will be using throughout the underclass section of the book. Also choose the solid line for the Portrait Frame and make it 1 point. The frame color should be one that causes the portraits to “stand out” from the background.


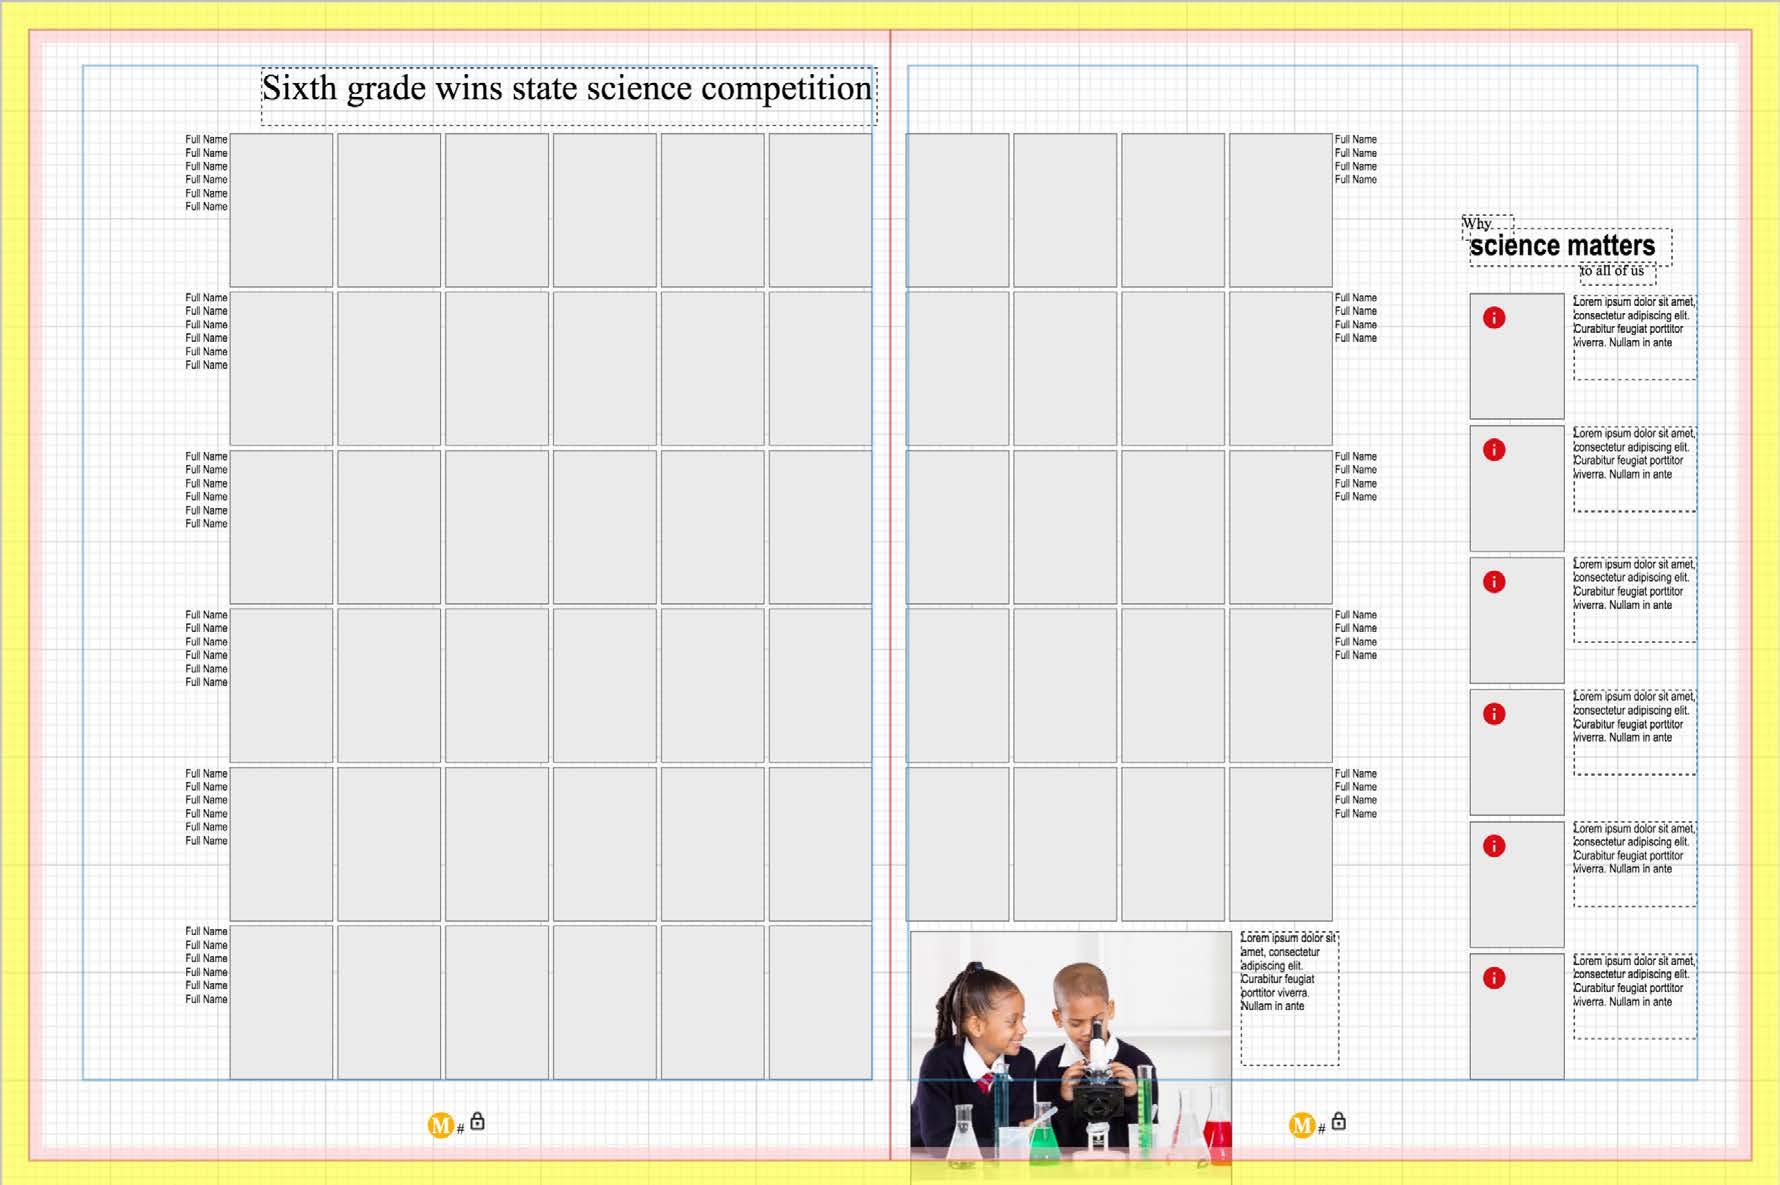
When you have determined portrait sizes for all underclass students, you’re ready to flow the portraits in “grade” groups. For secondary schools: Let’s say you’re going to create a spread for the sixth grade class. Currently, there are 56 students in this group. To flow all students in one grade together TheDiagramLadder is located under Book Builder If you know the page number for the sixth grade spread, you can type it in this blank space and click Go To locate the portraits in the sixth grade group, go to Manage Assets in the top menu and scroll to Manage Portrait Images Then choose to view the Grade Group Type You can access a page through the Ladder Diagram Scroll to the page number you wish to select andonclickthe blank page you would like to create. When you select it, the spread opens and is ready for images and text to be placed. Confidential and Proprietary Information. Property of Lifetouch.

A Portrait Panel with Size A portraits and names placed to the outside appears. Click on the gear above the panel to view your tool options for portrait frames, portrait sizes, panel specifications and other details.
Also choose the solid line for the Portrait Frame and make it 1 point. The frame color should be one that causes the portraits to “stand out” from the background.
Finally, choose the font and size for all names in the underclass section. The default setting is 7.5 Arial Narrow. Confidential and Proprietary Information. Property of Lifetouch.
From the Name Placement tool, note the way you want to have all names in the underclass placed.section
Select the Portrait Size you will be using throughout the underclass section of the book.
When the page appears on your screen, look to the upper left corner and click on Portrait Panels Then click on Add Portrait Panel and drag it to your page.
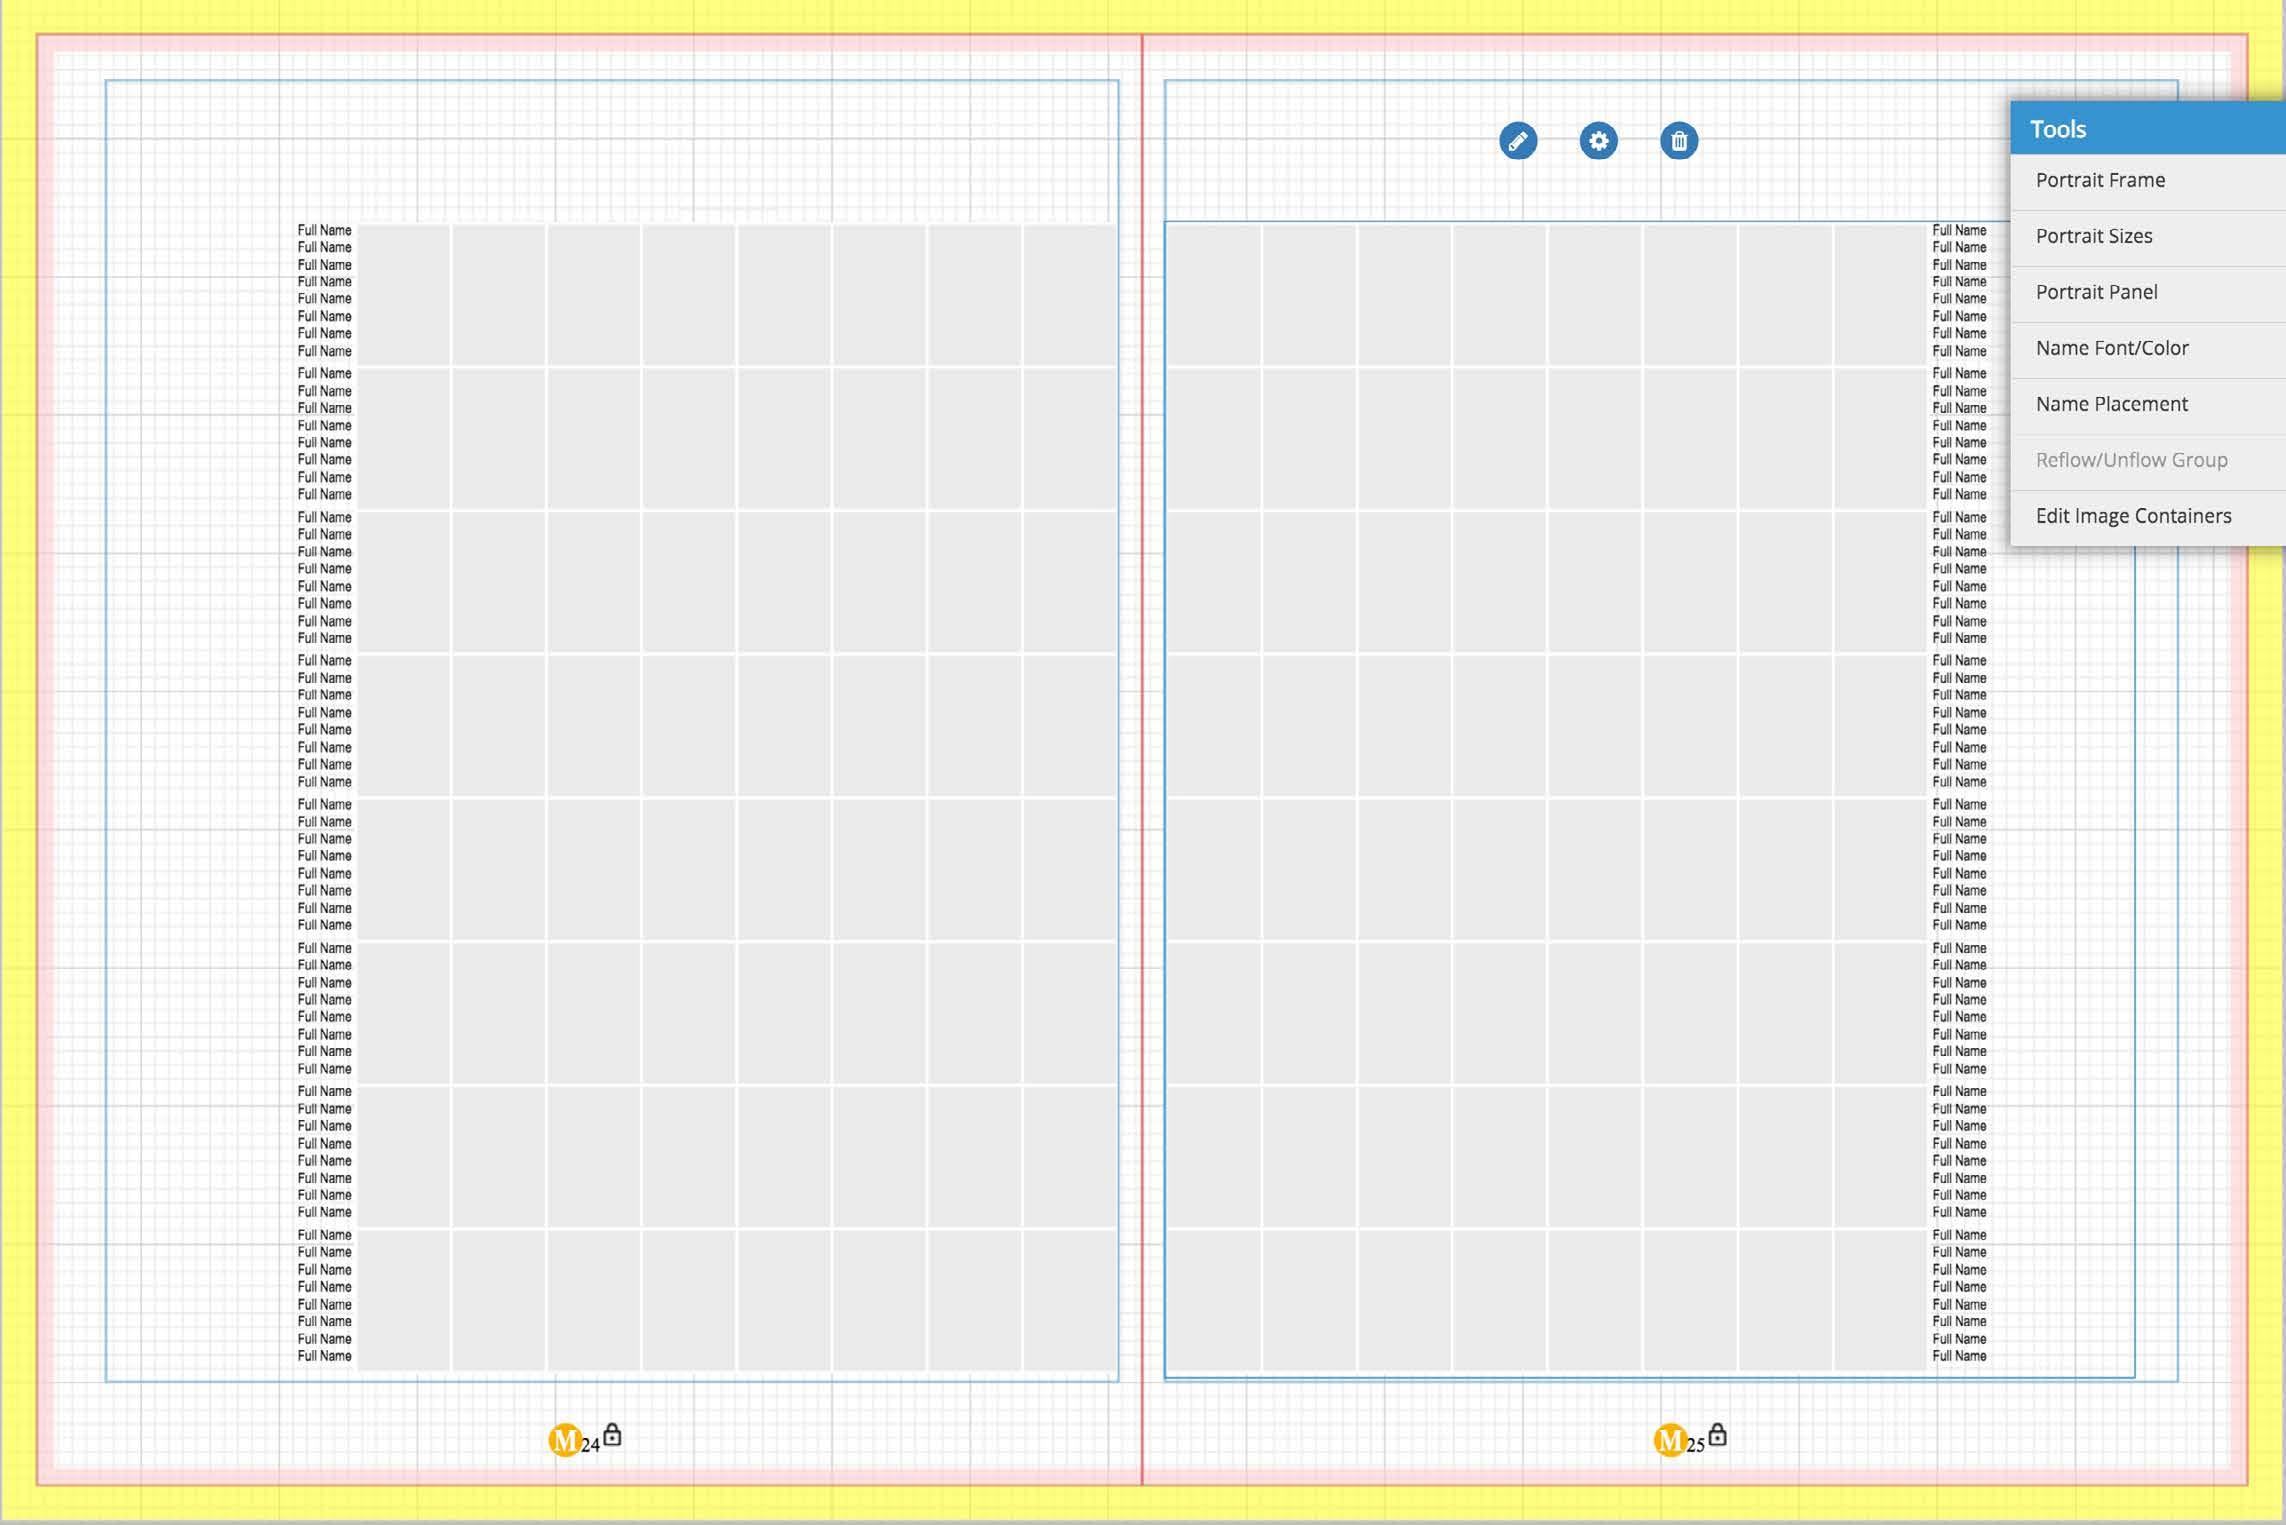
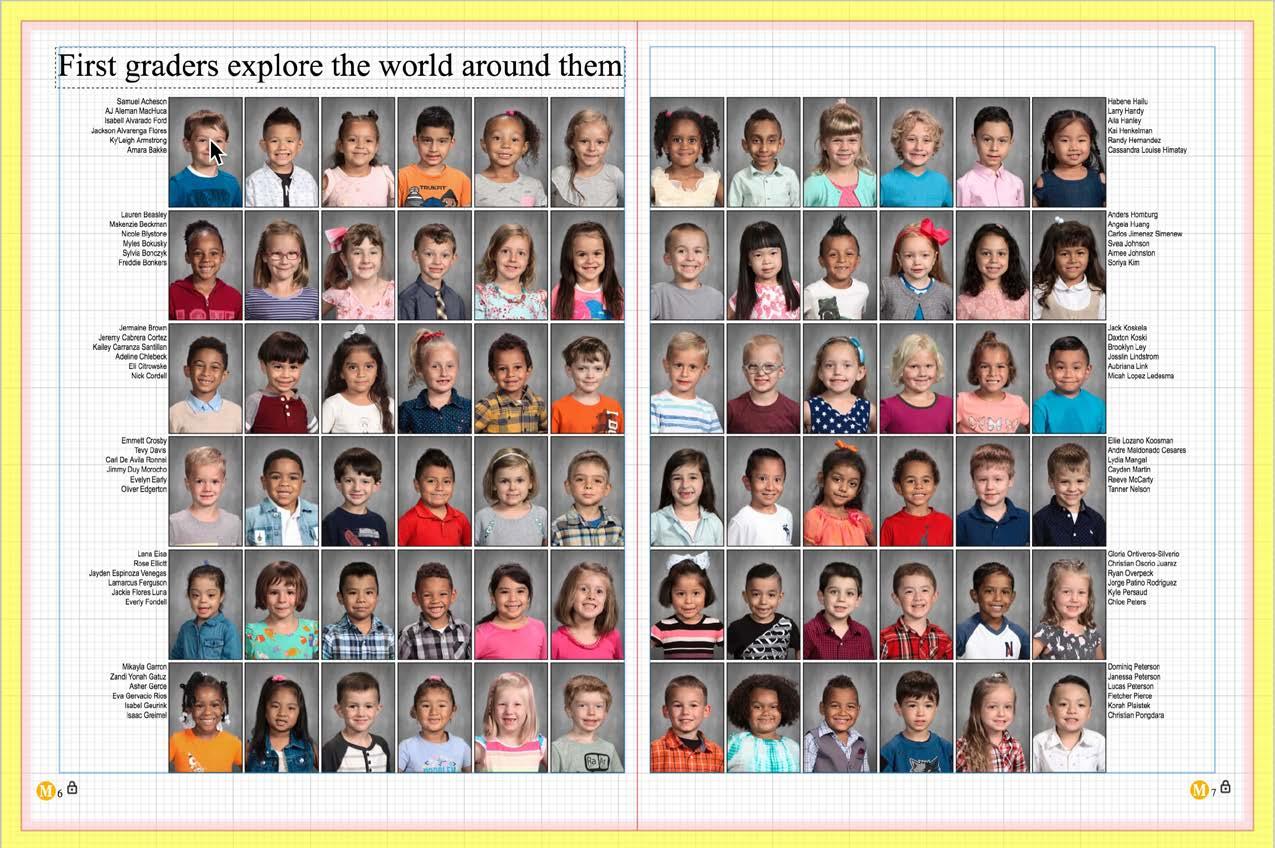
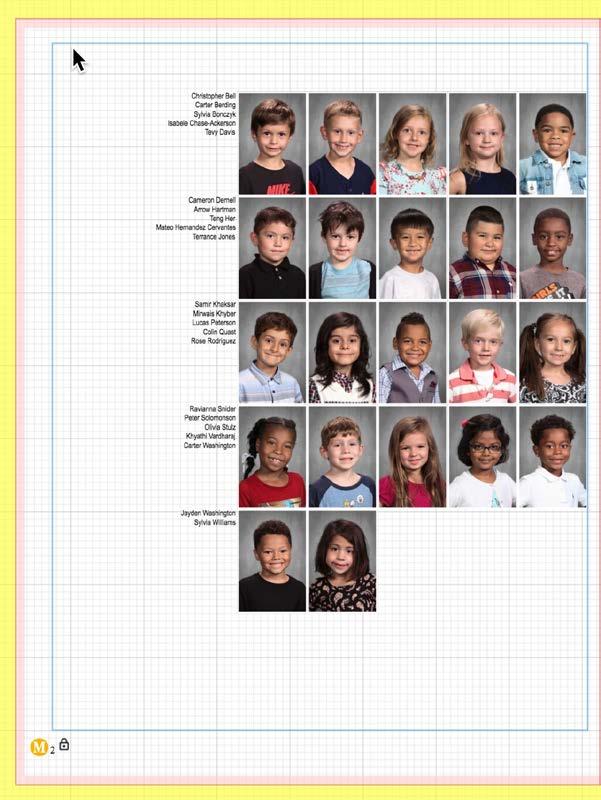
Because we selected Size D for all underclassmen, we are able to fit all 56 sixth graders on one spread. In the illustration below, we’ve placed 36 portrait boxes on the left page and 20 portrait placeholders on the opposite page. We also have room for a headline and secondary coverage in a photo/quote area. If more than one spread is needed for a group sorted by grade level, save the template with the same size portraits as a custom layout. In this instance, we used Size D portraits with thin black lines and tight spacing between columns and rows. Custom templates can be placed and adjusted on all underclass portrait pages.Confidential and Proprietary Information. Property of Lifetouch.
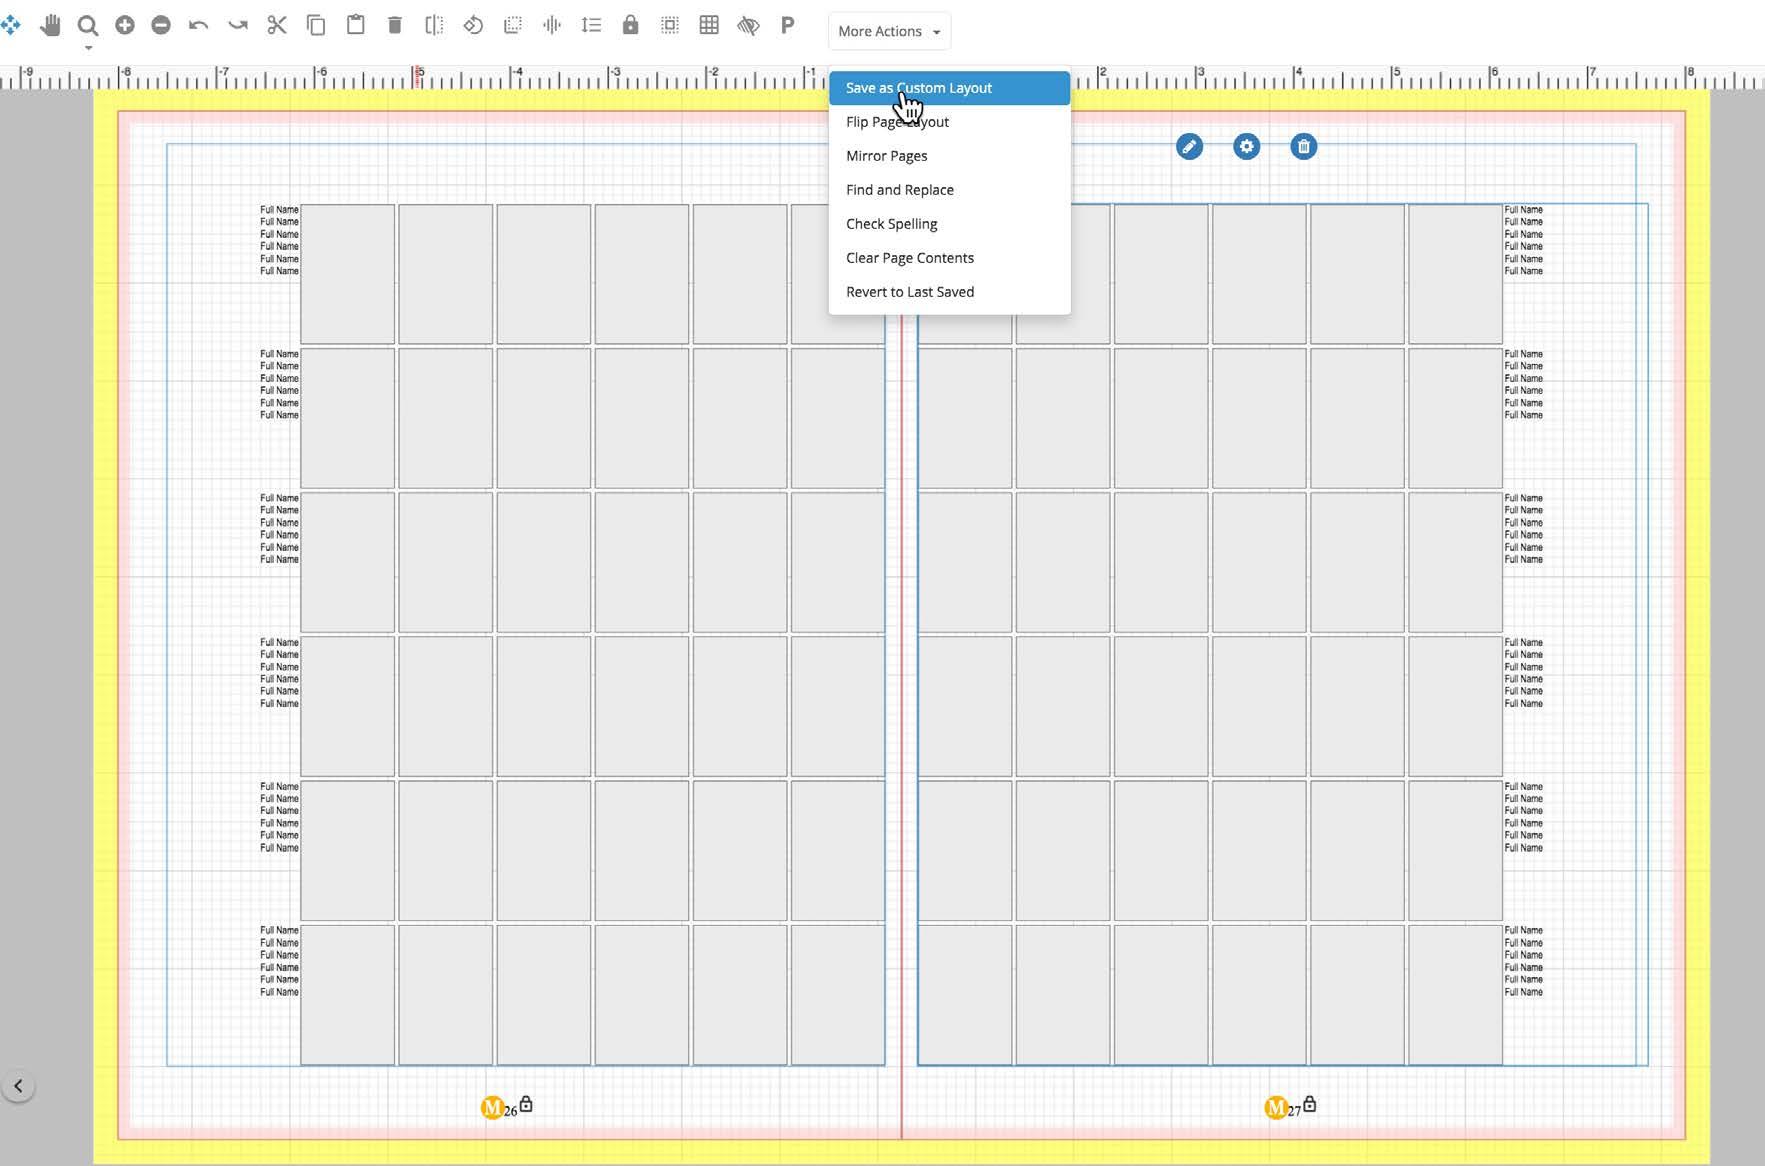
For containingclasses more portraits than the number that will fit on a spread, add the custom layout to the pages that follow until you have accommodateimagesplaceholdingenoughto all members of that particular grade. The program will notify the designer if there is not enough space to fit the students on the first spread.
Confidential
Click on the 006 group and drag them to the portrait panel. The images and names will automatically flow into the ident spaces and frames.
Once the spread is designed, go to Portrait Images and click on Grade Scroll to 006 grade Once the portraits are flown, add the images and text for candids and secondary modules.
Click and drag and Proprietary Information. Property of Lifetouch.
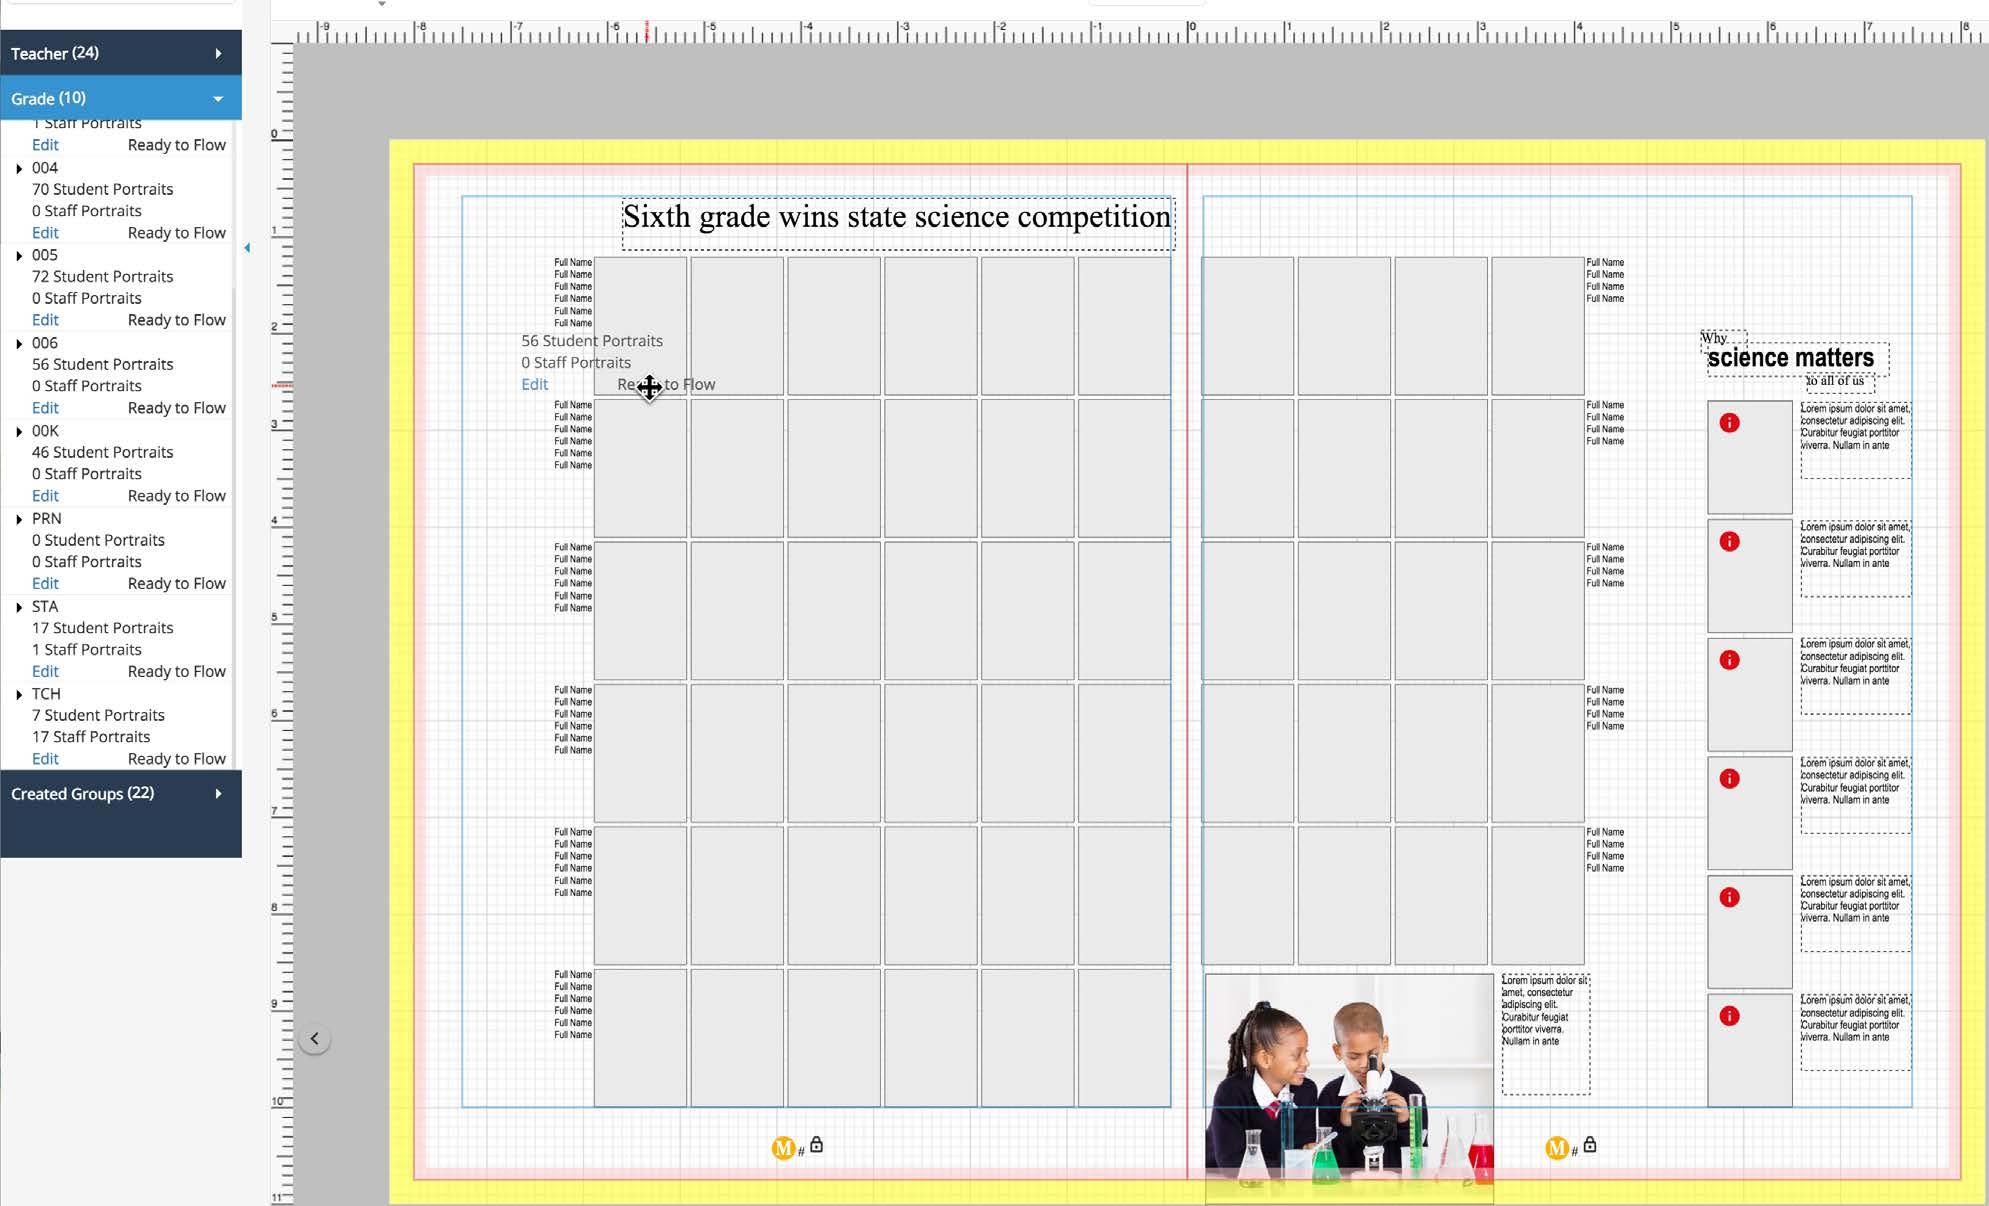


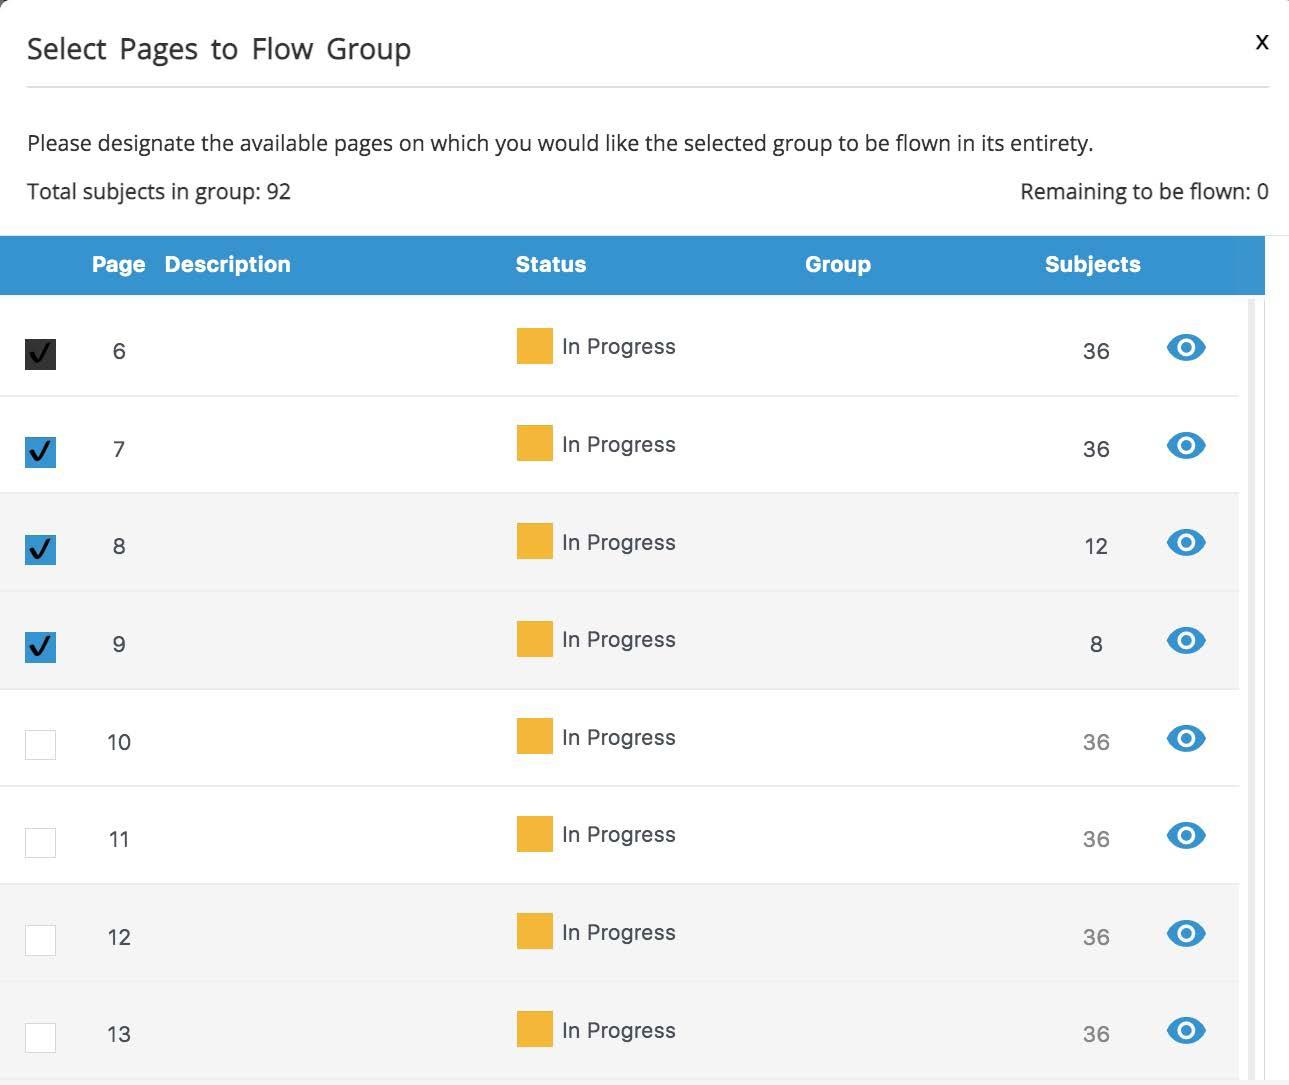
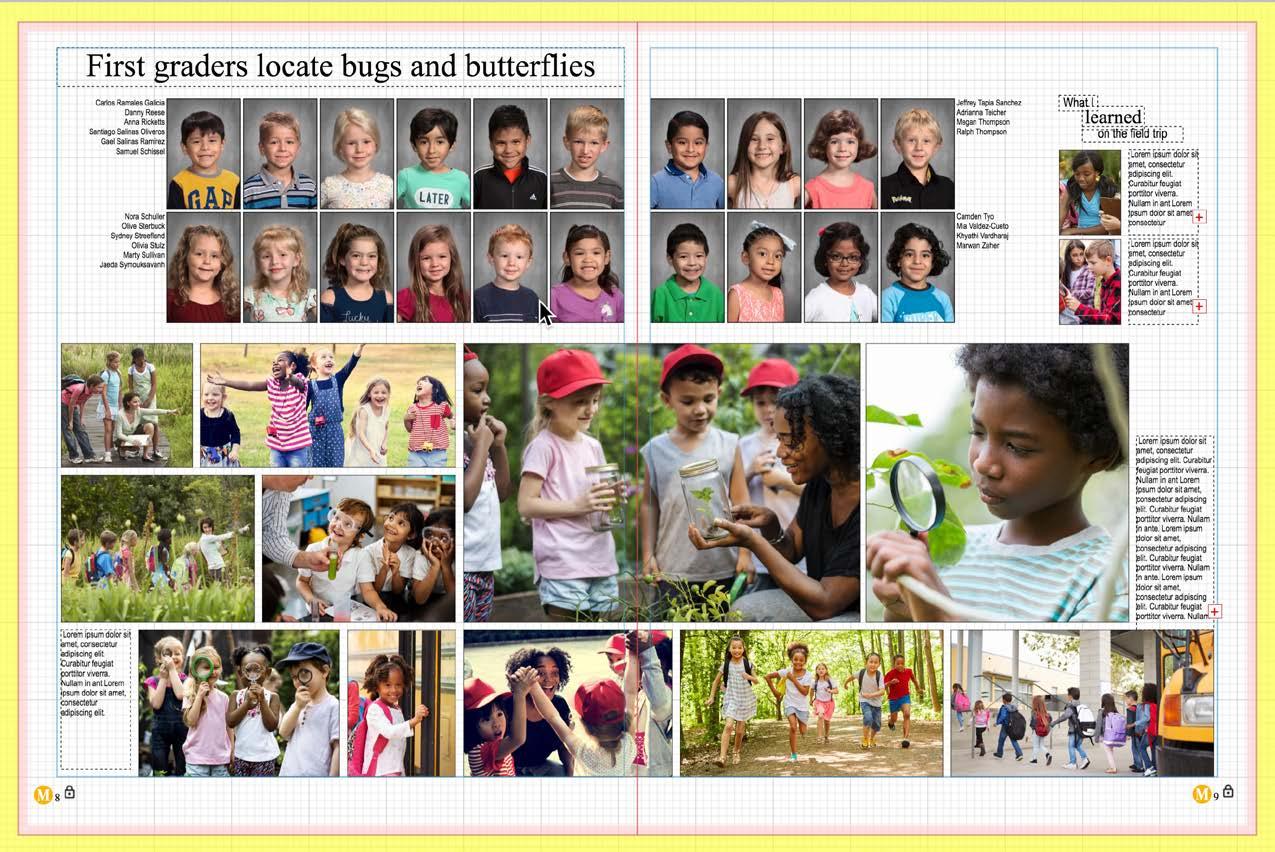
For particularfollownumberportraitscontainingclassesmorethanthethatwillfitonaspread,addthecustomlayouttothepagesthatuntilyouhaveenoughplaceholdingimagestoaccommodateallmembersofthatgrade.Theprogramwillselectthecorrectnumberofpagesneededforthatnumberofstudents.Inthiscase,weneededfourpagestoaccommodatethe92firstgradersingroup 001. The program showed the designer that she needs pages 6-9 to contain all 92 images. When classes include more portraits than a spread can contain, add a second spread with candids and a module to tell the story of the class events during the year. Portraits will automatically flow to the next spread if more than one set of facing pages is needed to accommodate the entire group. Confidential and Proprietary Information. Property of Lifetouch. Related video Create a Portrait Panel