Navigating Page Builder
Overview
Clicking on any page within the Ladder Diagram screen or the page number in the top navigation bar and clicking go. The page or its page spread displays in Edit Mode on the Page Builder Screen. This overview describes the functionality of Page Builder menu.
Menu Icons
a. Select- Allows you to click on and choose an element on the page. By default, Select is active.
b. Pan- Allows you to drag and drop the Canvas in any direction.
c. Zoom In-Zooms into the Canvas making it bigger.
d. Zoom Out-Zooms out of the Canvas making it smaller.
e. Undo-Removes the last action you made.
f. Redo- Adds back in the last action you made.
g. Cut- This removes an element from the page and copies it to the clipboard.
h. Copy- Copies any element on the page to a clipboard.
i. Paste- Pastes the element on the clipboard onto the page.
j. Delete- Deletes the selected element(s) from the page.
k. Flip- Allows you to move the page elements to the opposite place on the same page.
a. Options include flipping it horizontally or vertically on both left or right pages.
l. Rotate- Allows you to rotate an element clockwise or counterclockwise.
m. Order- Moves the selected element on top of (forward) or below (behind) other page elements.
n. Align- Align page elements to be even across the page (single side or spread). It can align portrait frames, embellishments, and text boxes to allow consistency across multiple elements.
o. Locking- Allows you to lock down the location of an element.
p. Group- Groups elements into one block (Group) or separates grouped elements (Ungroup).
a. Useful when you want to move multiple elements at one time without changing their layout.
b. To group elements you will want to press and hold SHIFT and click each element for the group.
q. Grid- Allows you to create a precise layouts guide, grids and columns.
a. Guides:


i. Show Guides: Drag line guides from the ruler (drag from the ruler to the Canvas). Guides display as red lines from the ruler through the Canvas so you can align elements. Show Guides is enable by default, you must create a guideline for it to be displayed. Guides are page specific. WARNING: When Snap to Grid is enabled, new guides will also be snapped to the grid. To drop a new guide between grid lines, temporarily turn off Snap to Grid.
b. Grid
i. Show Grid: Displays a grid across the entire page spread. Use the grid to quickly and easily layout a custom page. Show Grid is enabled by default.
c. Columns- By default, each page side is one column.
i. Number of Left Columns: Creates the entered number of columns on the left page of the page spread.
ii. Number of Right Columns: Creates the entered number of columns on the right page of the page spread.
d. Snap To
i. Snap to Grid: Ensures elements dropped onto the Canvas snap to the closest grid lines.
WARNING: When Snap to Grid is enabled, new guides will also be snapped to the grid. To drop a new guide between grid lines, temporarily turn off Snap to Grid.
ii. Snap to Guides: Ensures elements dropped onto the Canvas snap to the closest grid lines.
r. View Options: Turns on or off the Master Page and Locked element icons.
a. Master Pages Elements
i. To view the elements on the page that are applied from a Master Page select the Master Page element checkbox. Master Page elements are denoted by a small M icon.
b. Locked Elements
i. To view elements on the page that are locked, select the locked element checkbox Locked elements are denoted by a small padlock.
c. Elements that Won’t Print
i. To view elements on the page that will not print, select the checkbox The elements that won’t print will be denoted by a small letter “i”.
s. Moving to Parking Lot: Moves the selected element to the parking lot at the bottom of the page builder.
More Actions Dropdown
There are multiple actions to take on the page or page spread.
t. Save as Custom Layout: This saves the current page spread as a Custom Layout so
you can reuse it on other pages.
u. Flip Page Layout: Allows you to move the page elements to the opposite place on the SAME page. Options include flipping horizontally or vertically on both, left or right pages.
v. Mirror Pages: Allows you to switch the elements from one page to the OPPOSITE page without changing the layout of the elements.
a. A pop-up window will come up if you have portraits flown. Pages with flown portraits cannot be cleared. You’ll need to unflow first prior to clearing the content.


w. Check Spelling: Allows you to confirm the spelling of the text boxes on the current page spread.
a. Shortcut: Click Add to Dictionary to quickly add a new word to your Custom Dictionary.
x. Clear Page Contents: A pop up screen will come up and you can select which option you want to clear from the page. Click Clear when selections have been made and you’re ready to clear the content.
a. A pop-up window will come up if you have portraits flown. Pages with flown portraits cannot be cleared. You’ll need to unflow first prior to clearing the content.
y. Revert to Last Saved: Will return contents back to your last saved option.
Menu Buttons
z. Save: Saves all the updates on the current page. It is helpful to save frequently to capture the work that you have completed.
aa. All Pages: This displays the Ladder Diagram screen.
bb. Proof: This downloads the current yearbook page. Be sure you have saved your page prior to downloading a proof.
Screen Tabs
1. Page Details: Displays the details for each page in the page spread. Click the All-Pages menu button, scroll to find the page and click Edit to update any information that is necessary.
2. Pages: Displays all the yearbook pages in sequence right to left.
3. Parking Lot: Displays any elements previously saved to the Parking Lot for reuse using the Move to Parking Lot button.


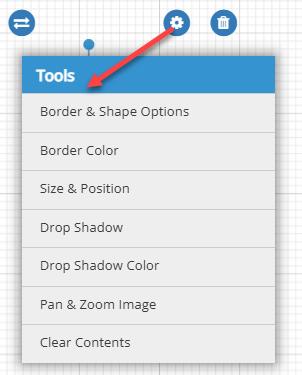
Contextual Page Elements Menus
All elements on the Page Builder screen display menu options specific to the selected element. To see the element’s menu options, click on (select) the element and then click on its Tools menu icon.

Navigation Menu
Left navigation menu provides access to all different available page elements. Click on each section to see what options are available.