
Edit Within Page Builder
Page Border and Page Background
Overview
There are multiple functions within Page Builder that you can use to create, add, edit elements to yearbook pages. Here you’ll be able to walk through how to add/edit Page Borders and Page Backgrounds.
Edit Page Border
WARNING: Borders are only available in size 7 books. You will not see this option if you are working in a size 8 or 9 book.
1. From the Home, hover over Book Builder and select Ladder Diagram.
2. Select which page you want to add a border to by clicking on the page.
3. On the left-hand side the navigation panel click on Borders.
4. Select which border you want to use on the page from the drop-down menu.

To have a border on both pages simply drag and position the border on the middle of the spread to be applicable to both pages
5. Drag and drop the border onto your page.
6. Click Save.
Edit the Page Background
1. Select which page you want to edit the page background by going through the Ladder Diagram and clicking on the specific page.
2. Select Background on the left-hand side navigation panel.
3. Choose from the drop-down option by clicking on the specific category to view the option.
4. After choosing an option you can drag and drop the background onto your specific page.
To have a background on both pages simply drag and position the background on the middle of the spread to be applicable to both pages.
5. Click Save to save your work.
Remove Page Border and Background
1. Open the page you want to remove the Border/Background.
2. On the top tool bar select More Actions drop down.
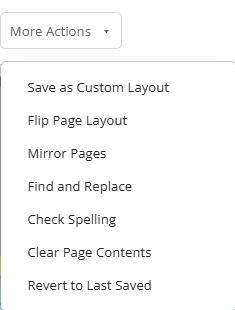


3. Select Clear Page Contents a popup window will come up to make your selection.
4. Check the page that you want the background/border you want removed
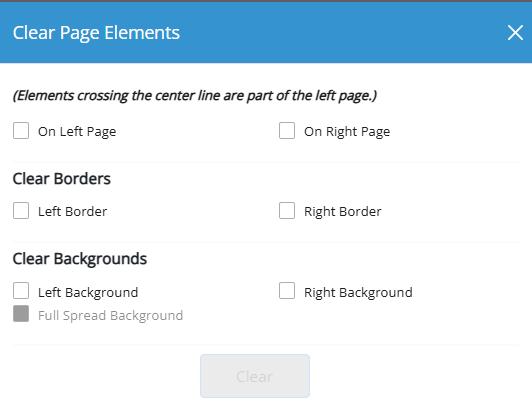

5. Select Clear