Create an Index
Overview
An index is a very useful way to find students in the yearbook. The Manage Index screen helps you manage your index list and select your index style settings.

All portraits are automatically tagged with their appropriate student names when imported.
Tag Student Names in the Yearbook
Tips:
• Create student tags throughout the year so you can track student frequency in the yearbook.
• Start tagging students as soon as portraits are imported. Waiting until AFTER portraits are imported alleviates spelling errors.
• Waiting until AFTER portraits are imported allows you to tag students directly in Page Builder. Before portraits are imported, you need to add the name manually in Manage Index to have the name available in Page Builder.
• The index can be edited before it is flown onto pages. This includes being able to delete duplicate name lines and manually editing the associated page numbers.
Steps to Tagging Students
1. From the Page Builder, drag an image or text box onto the page and modify it as necessary.
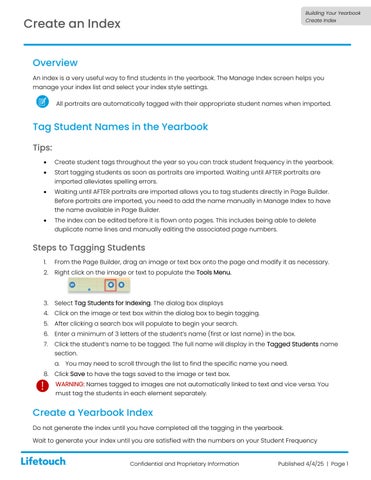
2. Right click on the image or text to populate the Tools Menu.


3. Select Tag Students for Indexing. The dialog box displays
4. Click on the image or text box within the dialog box to begin tagging.
5. After clicking a search box will populate to begin your search.
6. Enter a minimum of 3 letters of the student’s name (first or last name) in the box.
7. Click the student’s name to be tagged. The full name will display in the Tagged Students name section.
a. You may need to scroll through the list to find the specific name you need.
8. Click Save to have the tags saved to the image or text box.

WARNING: Names tagged to images are not automatically linked to text and vice versa. You must tag the students in each element separately.
Create a Yearbook Index
Do not generate the index until you have completed all the tagging in the yearbook.
Wait to generate your index until you are satisfied with the numbers on your Student Frequency

WARNING: Once you generate your index, you cannot modify any tags without taking down your index fist. This will require you to rebuild your index and re-do any manual updates.
1. From the Home page, hover over Book Builder and select Manage Index. The index screen displays.
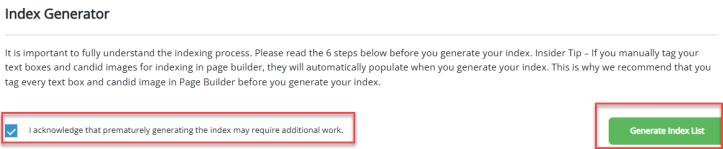
2. Check that you acknowledge that prematurely generating the index may require additional manual work.
3. Click Generate Index. The Manage Index screen displays the yearbook page(s) where each student is tagged and their overall count.
WARNING: Students will not show in the index if they are not tagged.

4. On the Manage Index screen there are few options that can be done:
a. Add the First Name, Last Name and Page #s a student is located on.
b. Can update the Index Styles (Letter Headers) and Index Names.
i. Clicking on the Edit option will open a dialog box that allows changes to the Font, Font Size, Format (bold, italics and underline), alignment (left, right, center, justified), Color (click on pencil icon to make selection) or drop shadow
ii. Click Save to save all work completed.
iii. Click View Example to view how the Index Styles will be visible.
5. Click Save Index List to have all changes save.
Edit an Index
This is only necessary if you have already flown the index to pages in the yearbook. A reset will remove any manual page edits. It will also add back in any students that were manually removed.
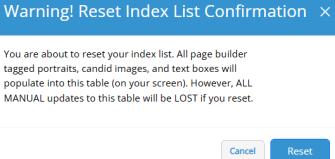
1. Click Reset Index List on the Manage Index page. The dialog box displays.
2. A pop-up window with a warning will come up and click Reset.

3. To edit a student, click the appropriate student’s Pencil icon. The dialog box displays
a. To delete a student row, click the student’s Trash icon.
b. Update the On Pages field to reflect any page changes to where the person is found. Use the comma to separate multiple pages.


c. Click Save
4. When all changes have been completed, click Save Index List
Search for a Student
There are two ways to search for a student in the Manage Index screen: search function or manually scroll
1. Enter the student’s name or the page number in the search field

2. Click Enter or click the magnifying glass.
3. Search results will appear click on the pencil icon to make necessary edits.
Flow Index to the Yearbook
You will need to unflow and reflow the index if you make changes to it. The best practice is to wait to generate and flow the index until all tags and any manual index updates are complete.
Fix a name or spelling error
If you need to update a student’s name or fix a spelling error, where you go to make the update depends on the state of your index.
• If the index is ALREADY flow to the yearbook, go back to the index and manually change it on the Manage Index screen.
• If the index is NOT flown, changes to the name or spelling changes can be done in the Manage Portraits screen. Changes will automatically reflect in the index.
1. Click Flow Index List to have the index flown.
Export Index
Index can be exported as a PDF or Excel (CVS) file.
1. Click on one of the file options to export your index. a. PDF


