
Create Styles
Overview
Capability to create new, edit, preview or apply styles to Yearbook pages which gives a creative
Types of Styles
There are 4 types of Styles:
• Headline Style-Main heading usually used at the top of an article or page.
• Sub Headline Style-A smaller, secondary headline that usually elaborates on the main headline above it.
• Caption Style-A title or brief explanation appended to an article, image, or embellishment.
• Body Copy Style-Main text part of a yearbook article or page.
Create a Custom Style
This process will be used to create a Custom Style for any of the styles (headline, sub headline, caption and body copy).
1. From the dashboard under Book Builder drop down select Styles.
2. Click on any Create Custom Style button to begin creating the specific style.
3. A dialog box will appear.
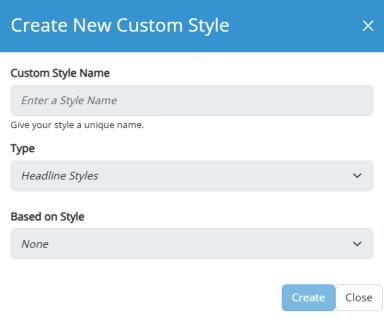

4. Enter in a Custom Style Name
5. Select the Type of style to create from the drop down. Options are the 4 styles listed under types of styles.
6. Based on Style drop down select what attribute you want for your style.
7. Click Create
8. A dialogue window will come up to select the font, font size, format, alignment, color, leading, tracking and capability to select drop shadow.
a. Font-based on your account settings
b. Font Size-change the sizing of the font
c. Format-selection include bold, underline, italics for text font.
d. Alignment-selection from the drop down include left, right or center.

e. Color-select color choice by clicking on the pencil icon
f. Leading (line spacing)-select from the drop down. Options include ‘0-74’. (‘0’ being tight and ‘74’ being very spread apart).
g. Tracking (text spacing)-select from the drop down. Options include ‘0-12’ (‘0’ being tight and ‘12’ being very spread apart).
9. Click Save for any changes made.
a. New style will display on the style screen.
10. After saving screen will return to the main Styles screen.
a. To preview the custom style created click on the magnifying glass.


Edit a Style
1. On the Styles screen, click the pencil icon next to the style to update. Styles dialogue box will come up to adjust features.


2. Update the Style settings to your specific needs.
a. If you update a custom style, those updates will automatically flow to all the prior places in the yearbook where it was applied.
3. Click Save
Apply a Style
1. Go the specific page to have the style applied.
2. Select Text Box left navigation panel.
3. Drag and drop the Drag to Add Text Box onto page.
4. Click the wheels (tools menu).
5. Click on Styles.
6. Select which style you want to be placed on your page by clicking from the drop-down options.


7. Click Save to save changes made on page.