
Flowing Portraits
Overview
Steps to build and format your student portraits onto pages.
Portrait Flow Options
Review options that are available by hovering over Book Builder then select Contract & Book Settings from the drop down.
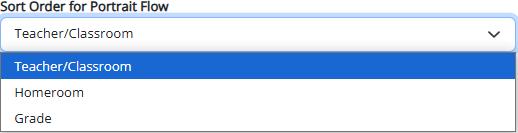
1. Review Portrait Flow Options:
a. Sort Order for Portrait Flow: Teacher/Classroom, Homeroom, or Grade

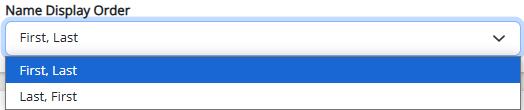
b. Name Display Order: First, Last or Last, First

Not-Pictured Students
There are two-options for students who are not pictured in the Yearbook.
1. List names below the last row.
2. Use “Non-Pictured” image.
3. Click Save Changes to save the choices that were selected.

WARNING: Once you flow your portrait groups, the not-pictured selection


Flowing Portraits
There are two options for flowing portraits either by homeroom teacher or grade level.

1. Go to Page Builder and select Layouts on the left-hand side of the navigation.
2. Select Portrait Layout and select which layout to use on the page.
a. Tip: Each layout has a number associated to it. A number with the letter B after it means it can be used for a double page spread. For example, P100 B.
3. Drag and drop the layout onto the page.
4. Click the Back button to return to the main screen for the navigation panel.
5. Click on Portrait Images on the left-hand side.
6. Select which group portraits need to be flown from. There may be three selections to choose from:
a. Teacher
b. Grade
c. Homeroom
7. Select from the specific group which portraits to flow by dragging and dropping them onto the page.
a. Portrait boxes will adjust based on the selected group of portraits flown to the page.
8. Portraits have been flown.
Flowing to Multiple Pages
1. Have a large class that will take several pages. Add your Layout to the number of pages you need. (Example: Class size 250 students- Chosen Layout 40 portrait boxes. 250 divided by 40= 6.25 A layout will need to be added to 7 pages)
2. Once all layouts have been added to the pages, go to the page where the class is to start from.
3. Go to Portrait Images locate your class, drag and drop to the layout.
4. A pop up will appear, check mark the pages you want your class to flow to, you may need to load more pages to make sure all pages have been checked and select continue.
5. Images will now flow to all pages.
6. These are now Linked pages, when submitted all pages linked together will submit together.
Tips
• Portraits can be adjusted by clicking the wheel (tools icon). Here you’re able to change the portrait frame, size, panel, name font/color, name placement, reflow/unflow group and edit image containers
• Always Save your changes to the work that was completed.