
Manage Users
Overview
Follow these steps to add, edit and/or remove user access to the Lifetouch Yearbook website.
Accessing Users
1. On the Dashboard page, hover over Manage Access and from the drop-down menu select Manage Users.

The Manage Users screen displays the current users who can access the yearbook


Adding a New User
1. Click Add New User. The User Info screen displays.
2. Enter in the new user’s email address.
a. If the user does not have an email, check the box for “This user does not have an email account” and fill in the information.

This is an excellent choice for students involved in creating the Yearbooks.
3. Click Continue.
The User Info screen displays, and an email is sent to the user. From this email the user can update their Name and Password.


4. Select their appropriate role from the Role dropdown.
a. The corresponding feature access rights are displayed based on the selected role.
b. You can add (or subtract) access rights by clicking additional (or unclicking) site features check boxes.
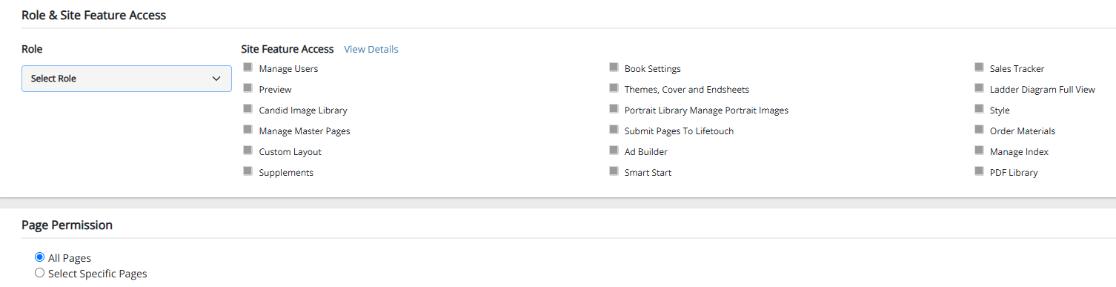

5. To allow user access to specific pages, select the Select Specific Pages radio button.

a. All the pages of the yearbook display
b. By default, the user has access to all pages.
Page Permissions
Use Page Permissions to give a user access to edit or view only specific pages.
1. Update multiple page permissions.
a. Select the appropriate pages, click the Permissions dropdown, and select either Edit or View.
Selecting the pages and changing permissions will auto change the selection under Page Permission
2. Update a single page permission.


a. Click the edit Page Permission once and it toggle to View. Click it again to toggle the permission back to Edit.
3. View Page
a. Click the View Page link for any page to see an enlarged thumbnail view of the page. Click Exit to close the View Page box.
4. When done, click Save New User
a. The Manage Users screen displays with the new user added to the list.
Edit a User
Need to make changes to permissions for user already listed.
1. Click the Edit User link for the appropriate user to edit. Results are matched with the Name field only.
a. The Edit User screen will display.
2. Make the desired edits.
3. Click Save Changes.
a. The Manage Users screen will display.
Removing a User
Deactivating a user that is no longer needing access to the website.
1. Click the Deactivate User link for the appropriate user to remove.
a. The user’s status is changed to de-activated.
To re-activate a de-activated user, click the Activate link. User will now have permission to access the website.