6 minute read
Waxing


Prepare the mixture
STEP 1: Select the color of dye and squeeze a pea size of dye into the mixing palette.
STEP 2: Then squeeze out the same amount of developer into the mixing palette. Both dye and developer should be in a 50:50 ratio unless you’re customizing the dye shades.
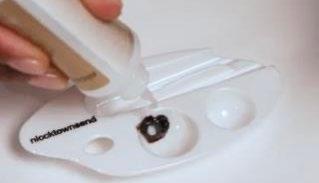
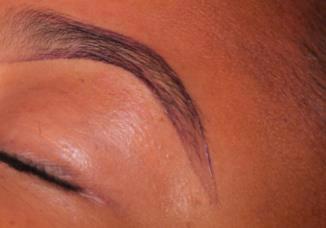
STEP 3: Mix the dye and developer into a paste like texture. STEP 4: Now, take the hybrid brush and use the slanted end of the brush and start applying the dye from the front of the brow to where the brow ends. Ensure you start right at the brow line. STEP 5: Next, work on the top of the eyebrow.


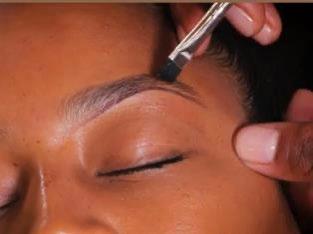

I like doing the bottom of the eyebrow first, and then the top of the eyebrow. This outlining technique helps in defining that perfect eyebrow shape.
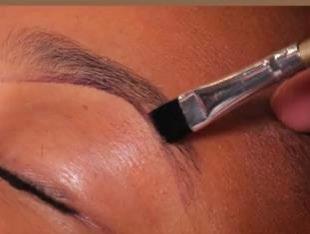
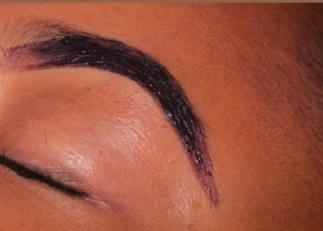
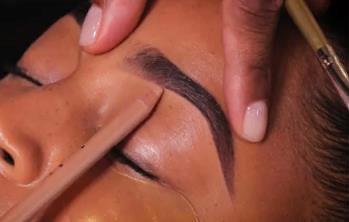
STEP 6: Next, apply generous amounts of dye in the body of the eyebrow. STEP 7: I like to start this process by applying at the center of the brow moving toward where the brow ends.


As you can see from the images above, I am focusing on body of the eyebrow. This is because as we age, we tend to start losing hairs at the tail end of the eyebrow.
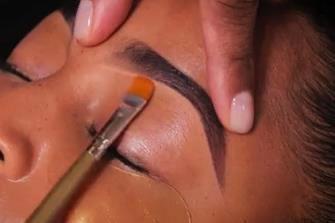
STEP 8: Lightly fill in the front part of the eyebrow.

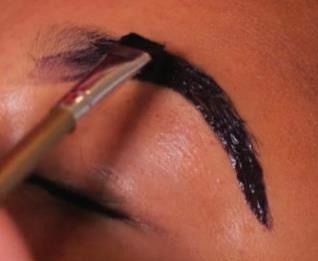
Be very gentle in your application when applying dye to the front of the brow. Do not apply an excessive amount of dye in the front of the eyebrow, that is not how most brows naturally grow; if they do, it is not for all eyebrows.
Please keep in mind that the hybrid brush has two ends. One end is slanted, which I have used to place the dye mixture on. I use the other side to clean up and create perfect lines. Looks beautiful, right? Repeat the same technique to the other brow.

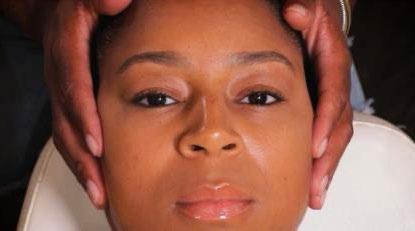
STEP 9: Next, add a hydrating mask. I will be using the Niccktownsend hydrating mask.

Why use under-eye masks? Undereye masks delivers a burst of hydration and targets the look of crow’s feet and dark circles. Awaken tired, dull eyes with these revitalizing eye masks.
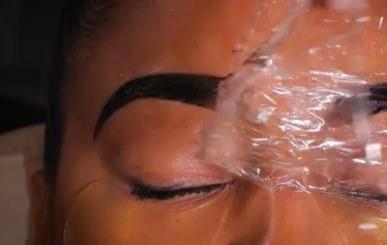
I apply these masks while the dye is processing on the eyebrows. Leave this on until you are finished ebellishing the brow. STEP 10: Apply plastic wrap on the eyebrows. Plastic wrap is designed to speed up the process of brow dye services, by trapping the heat in and therefore speeding up the processing times. The plastic wrap method also allows the dye to penetrate better.


LET BROWS PROCESS FOR 7-10 MINUTES WITH PLASTIC WRAP.
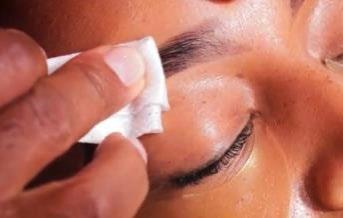
STEP 11: Carefully remove the plastic wrap from the dyed eyebrows.

As the images above show, the dye has molded to the eyebrows. STEP 12: Next, remove the dye. For this, you will need 4x4 gauze. Place gauze on the eyebrow. Then slightly press and finally begin gently removing the dye.

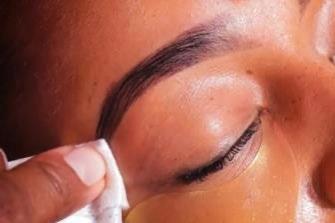
Repeat this process to the other eyebrow!
STEP 13: To finish, get your ‘just everything’ pencil. For our client, I will use highlighter pencil. Keep in mind that we are finishing the look. This pencil will heighten the brows and define the shape of the eyebrows. Ensure that the line is sharp.

Alternate between the pencil and the highlighter brush. After tinting, there are some basic maintenance tips that you can advise your clients to follow. As they will be taking care of their brows by themselves after they leave your station. These instructions will assist in the longevity of the tint. Please remember that the life of the tint can vary from client to client.
Tell them to:
•Allow the tint to settle. To do this, avoid getting the brows wet for at least 48 hours. Clean around the eyebrows when cleansing your face.
•Avoid rubbing the brow and eye area for at least the first 48 hours after tinting in order to protect the eyes.
•Use gel or cream-based cleansers around the brows instead of oil-based cleansers. Oil-based cleansers will reduce the tint life, stripping off the tint from the brows hairs a lot quicker.
•In case of reddening and irritation after tinting, ask clients to use a damp cloth to compress it on the area. Though this is rare, ask them to see a doctor if it persists.
•Strong UV light can lead to tint fading much quicker, so if clients can avoid direct sunlight, the tint will last longer.
•Avoid the steam room and sauna for 48 hours. If taking a shower, they should give it at least two hours if necessary. Use lukewarm water around the waxed area with antibacterial soap.
•The tint can last up to 4 to 6 weeks on the hair. Show the client that you will be more than happy to repeat the process on them after the tint has disappeared.
STEP 14: Take the highlighter brush and blend the Just Everything pencil by using a windshield wiping motion from the browline and into the skin.
REPEAT the process to the other brow. STEP 15: Remove the hydrating under eye masks.

STEP 16: Lastly, apply the brow & lash setting gel to the eyebrows. Our Brow & Lash Setting Gel locks in the dye color and rehydrates the brow hairs.

AND YOU’RE DONE!