13 minute read
Review Panasonic Lumix S5
by Paul Whitham LPSNZ
PANASONIC HAVE A long history of producing great cameras in the Micro 4/3 (M4/3) range but it was not until February 2019 that they entered the full frame market with the S1 and S1R. In September 2020 they announced a new addition to the range, the S5, which many commentors refer to as their entry level full mirrorless camera.
Through the support of Andrew Reid at Panasonic New Zealand I was loaned a S5, along with a 20-50mm f3.5-5.6 lens (sold as the kit lens).
I was fortunate enough to have the camera for nearly a month, providing time to use it in a number of situations, as well as giving me time to become familiar with the various settings that I could tweak (of which there are many).
This review is about how the camera performed in real life situations, and I am not going to go too much into the technical details or pixel peeping as there are several reviews about that online already. If you want to see some from a New Zealand perspective, check out Auckland photographer Richard Wong’s YouTube channel at https://www. youtube.com/c/PhotoByRichard/videos.
The table below shows how the S5 fits in with the other Panasonic full frame mirrorless cameras in terms of megapixels, frames per second and price. Panasonic cameras have long been used in video work and so they have developed models specifically for that market, as well as ones primarily aimed at stills photographers. The S1 falls into their category of hybrid camera, meaning that it shoots stills and video equally well but does not favour one over the other. As we are primarily still photographers, I did not go into the video capabilities of the camera.
First impressions
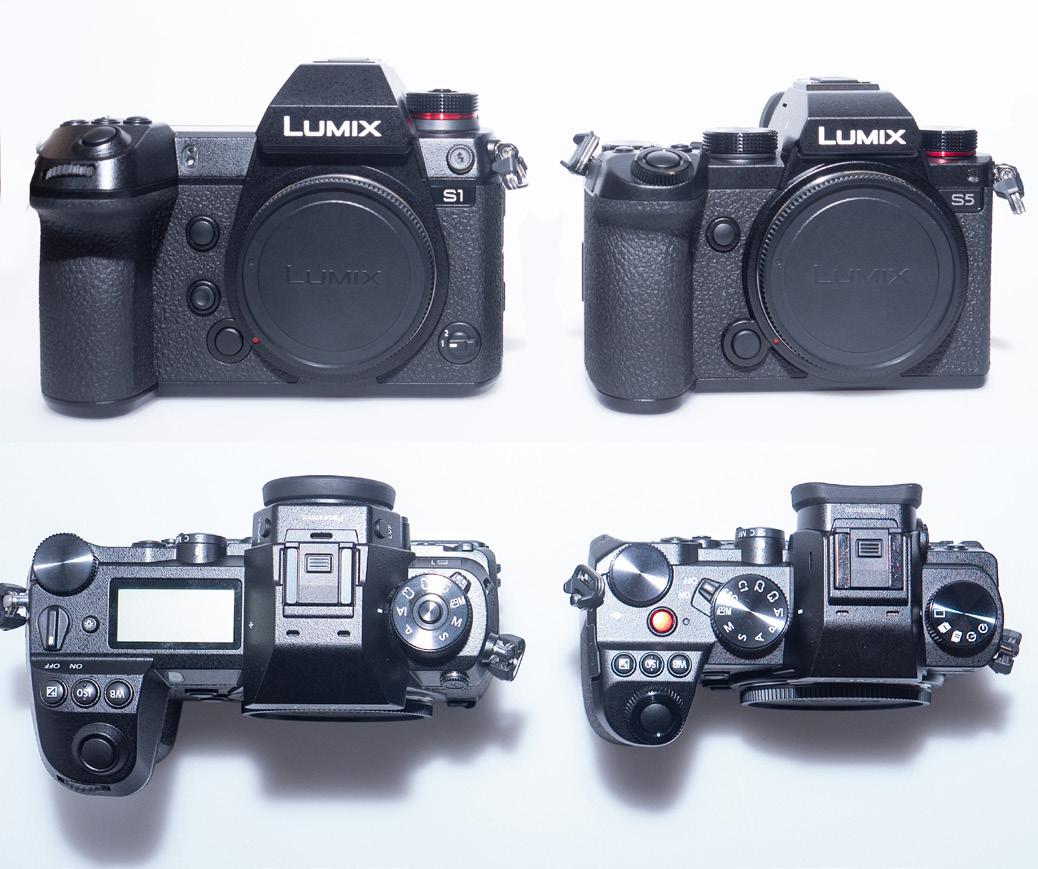
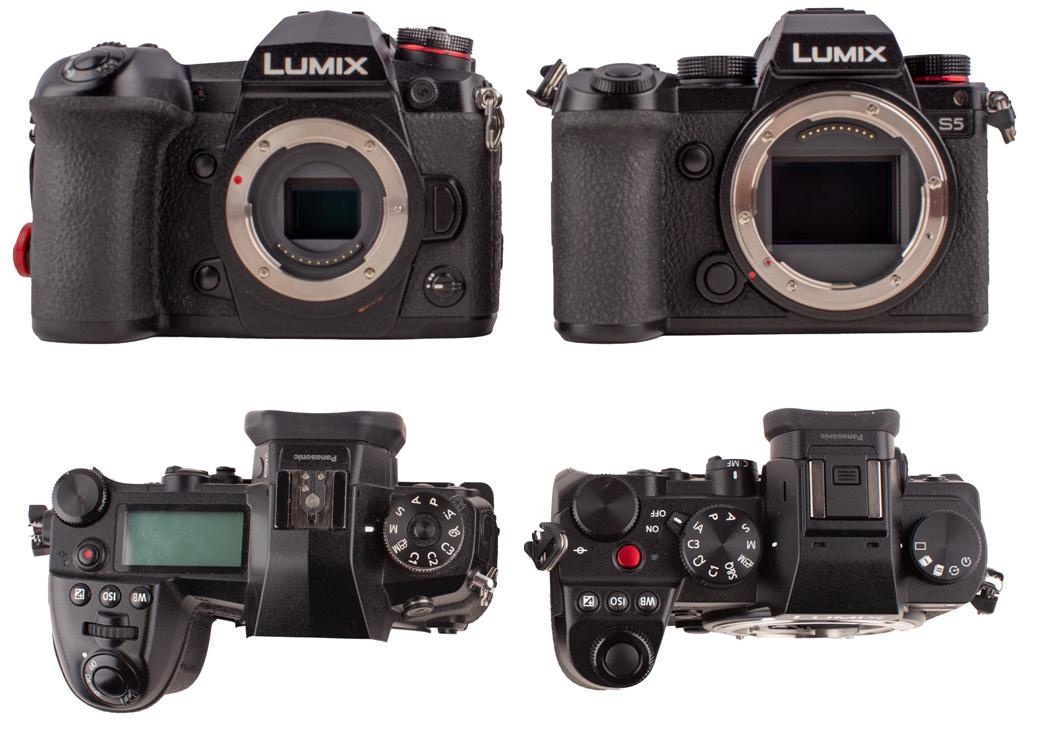
I first picked up a Panasonic Lumix S1 at the Hutt 2019 convention and was shocked at the size of it. It was no smaller than a SLR, which went against the notion that mirrorless cameras were smaller. With the S5 we are back to more of a size that you would associate with mirrorless. In fact, it is nearly the same size as my G9 which has a M4/3 sensor. Before giving me the camera, Andrew Reid from Panasonic told me that it would feel very similar to my G9, and that was certainly the case. It would be a very easy transition for anyone moving up from M4/3.
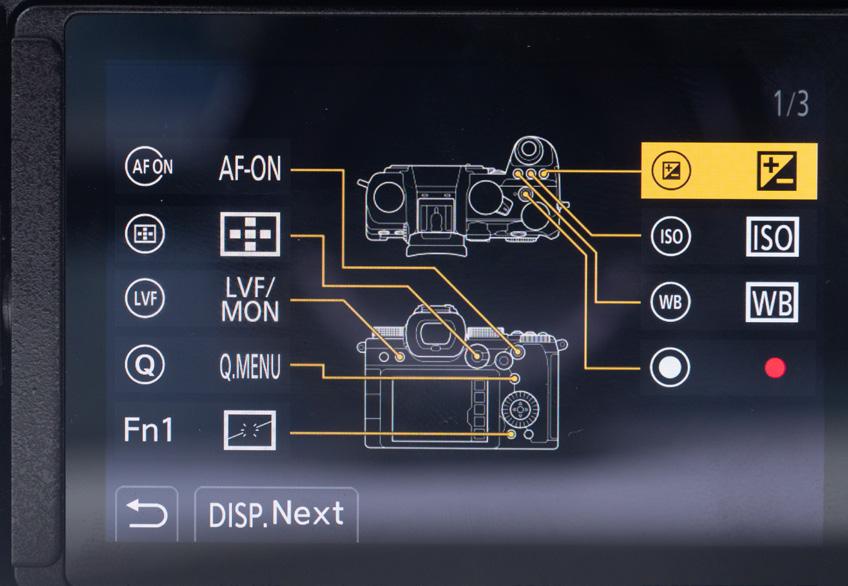
The menu system is extensive, but it is not that difficult to work your way around. The body contained a number of programmable buttons and there was a screen that showed easily what each one was set up to do. The buttons are set up in such a way that holding them down for a couple of seconds opens up the section of the menu where the functions are set.
Unlike the other full frame versions and the G9 there is no display panel on the top of the camera. Personally, I like having this feature but after using the camera for a while I did not really notice its absence.
Model S5 S1 S1R S1H MP 24.3 24 47 24 Primary market Stills/Video Stills/Video Stills Video FPS 7 6-9 6-9 9 Price (body only)* $3,498 $3,840 $4,785 $6,690
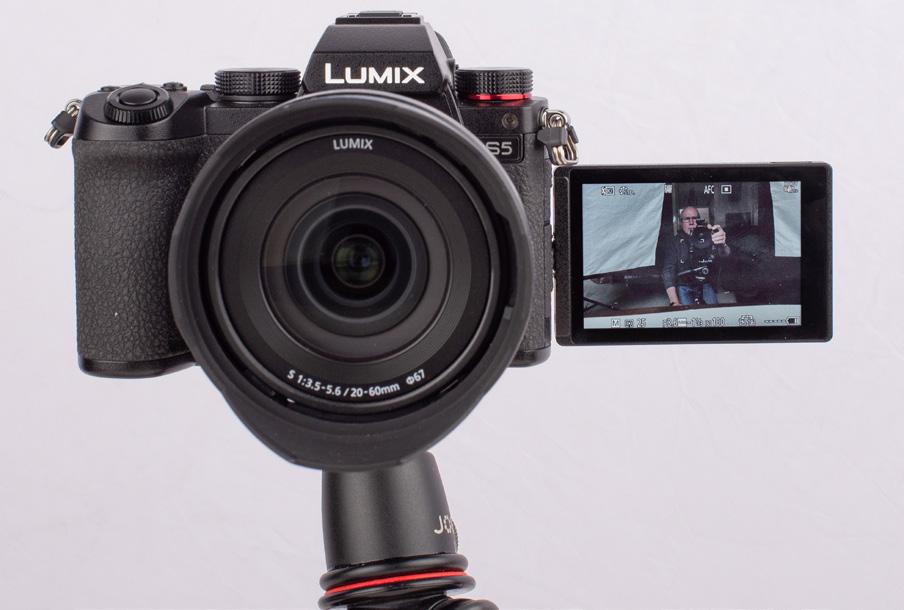
It may seem like a minor issue, but I particularly liked how the on/off switch was well protected in the body. The one on the G9 wraps around the shutter and on a number of occasions has been tripped when put back in the camera bag. There is nothing more frustrating than discovering that it has been ‘on’ when you thought it was ‘off’. As with other models the rear screens flips out to the side. This is great if you want to do selfies or are working in difficult situations.
The S5 (right) compared with the S1 (left) The S5 (right) compared with the G9 (left)
The flip-out screen THe custom button display screeen


In the field
I reviewed the S5 in the same way that I did the Nikon Z 5 (page 50) so you will see that many of the images are very similar. I have assumed that you have looked at that review first, so I have not repeated information that related more to the scene setup than the camera. That being said, the review is limited to those circumstances where I knew I could use the camera with the one lens available. Therefore, you will not see any sports, nature or macro images as the lens was not one that you would normally use in those circumstances.
Here are my findings: Dynamic range and colour quality
As often happens with new models, it took some time for Lightroom to enable me to look at RAW files. In fact, I worked with the camera for three weeks before I could process them, so all I had to go on were the JPGs.
The camera handled a wide variety of lighting conditions, which during the day was helped by being able to see what the camera was expecting on the back. On Panasonic cameras the feature to see the exposure is called ‘Constant Preview’ and is not turned on by default. It gives a true representation of what the scene will look like if you to press the button, but that also includes blur if you move the camera, so it can be a little off-putting when trying to compose a shot. I actually turned the function off.
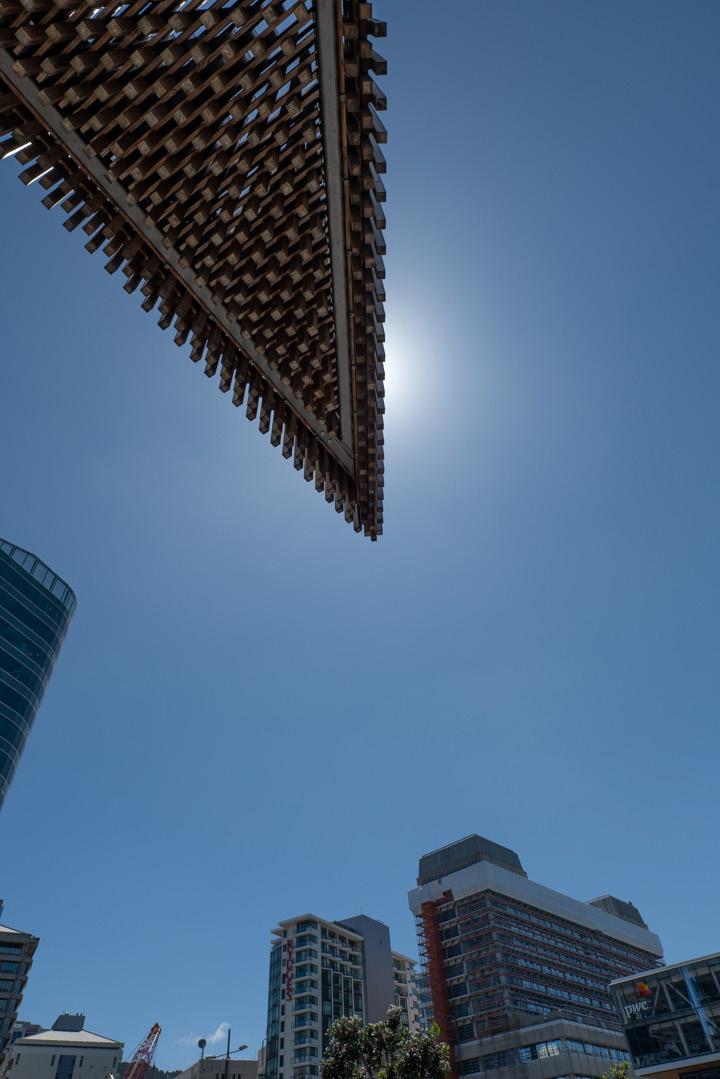
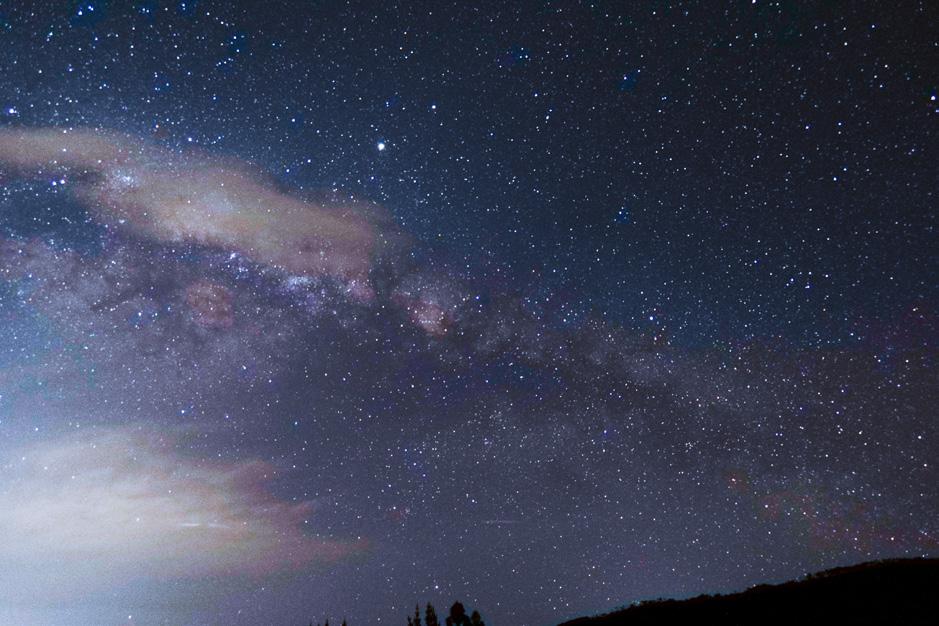
When I was able to process the shots, I found very little difference between the RAW files and JPGs. With the evening astro shots I was even able to push a JPG by three stops in ‘post’ and come up with a useable image. I would not recommend doing this as I was still much more limited in terms of what I could achieve when compared to the RAW file.
Shutter speed
The camera has a maximum shutter speed of 1/8000s on the mechanical shutter, which I know is fast enough to effectively freeze water providing that the light was sufficient to do it, so I didn’t bother to test it. The camera has five stops of image stabilisation built in so I concentrated on that instead. As expected, I was able to obtain a sharp image at 1/5th second hand-held. I later discovered that the lens I was supplied with did not have its own stabilisation, and that I would have been able to slow the shutter down even more.
The camera frame rate is between five and seven frames per second (fps) depending on the focus mode used. This means that it is not a speed demon when used in its normal mode; however it is consistent with the rate that a lot of equivalent cameras shoot at. I did find that shooting RAW and JPG at the same time pushed it too far to keep up with my shooting, and the camera told me that it was having issues.
Having said that, the cards I was using were quite old and not ones you would choose if you wanted really fast write speeds. It handled it fine when shooting just in JPG mode.
Like other cameras in the Panasonic range it can also shoot in 4k or 6k photo mode. This is essentially a high definition movie from which you can extract individual JPG images. This gives you speeds up to 60fps. Given the quality of the JPGs I was getting from the camera I would have no problem using this method.
The JPG (left) compared to the unprocessed RAW file straight out of camera


The JPG image (left) was pushed three stops in Lightroom as compared to a similarly adjusted RAW file.
Handhand image at 1/5 second

Low light (ISO Performance)
The S5 has a native ISO range from 100 to 51,200 and I have found that you can use the whole range with a caveat that it needed more noise reduction in ‘post’ than I found with the Z 5.
With the ridiculous setting of f3.5, 1/8000s and ISO 51200 there was more noise than the Z 5 produced when both were given the same amount of noise reduction.
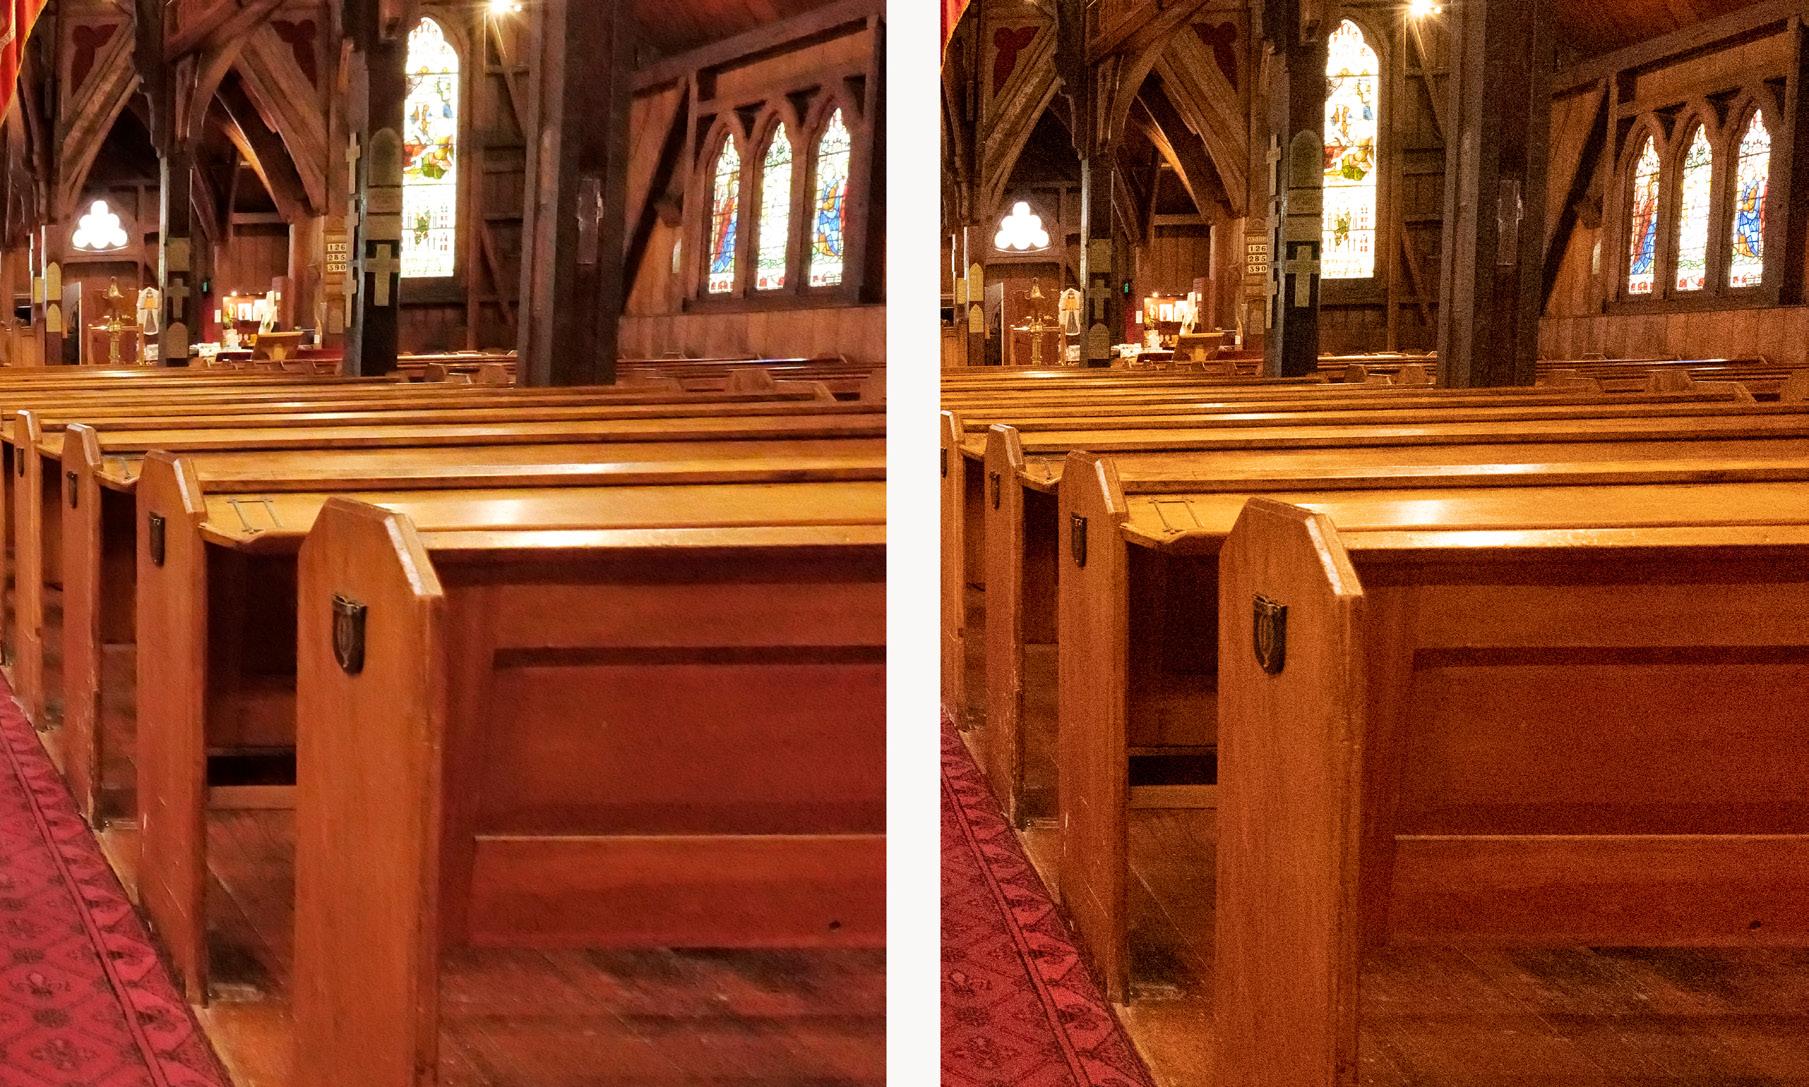
With the shoot at Old Saint Paul’s in Wellington I found a very similar result to the Z 5 in that while I was able to shoot a good image at 51,200, it was better to work at lower ISOs. What really amazed me, though, was that when I looked at the comparison of the RAW to the JPG, the camera had done a really good job at noise reduction in the JPG. I decided to settle around 16,000 to see what results I would get there. I had the camera in Aperture Priority (at f6.3) and depending on how much light was coming in from the windows I ended up with shutter speeds between 1/30s and 1/80s. While I knew that the camera would allow me to hand hold at those settings, it was a little slow in terms of eliminating motion blur. Knowing that I did have scope to move on both aperture and ISO gave me total confidence that I would be able to use the camera when shooting a wedding without needing flash. Furthermore, the camera handled the extreme lighting conditions well with minimal blow-out.

ISO 51200
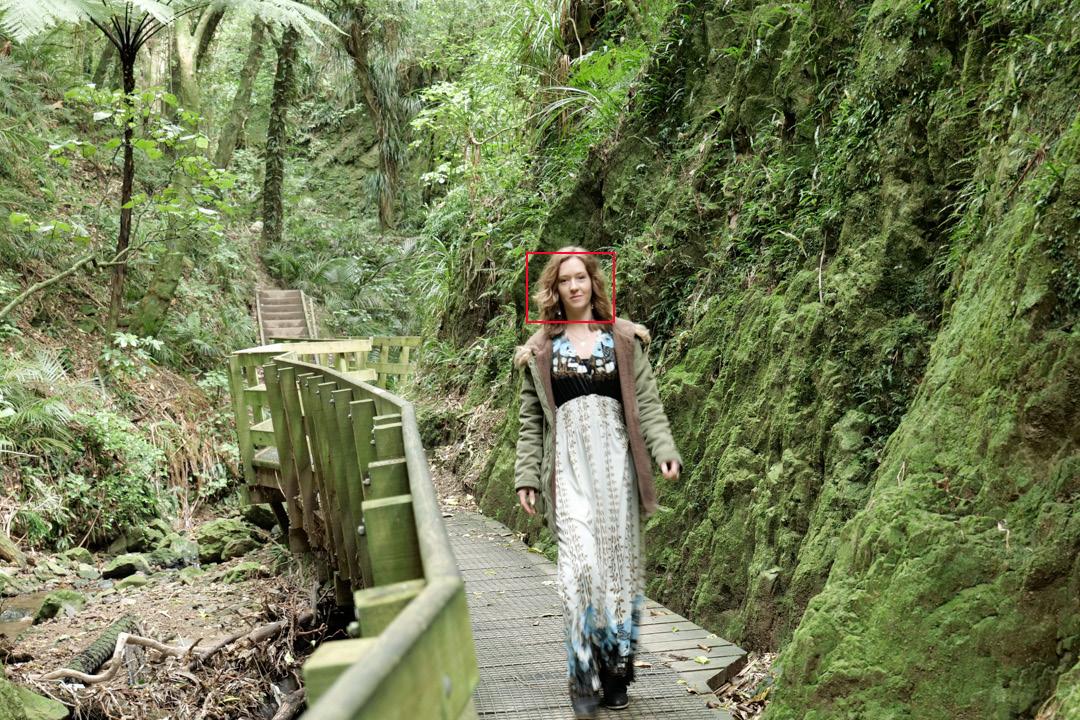
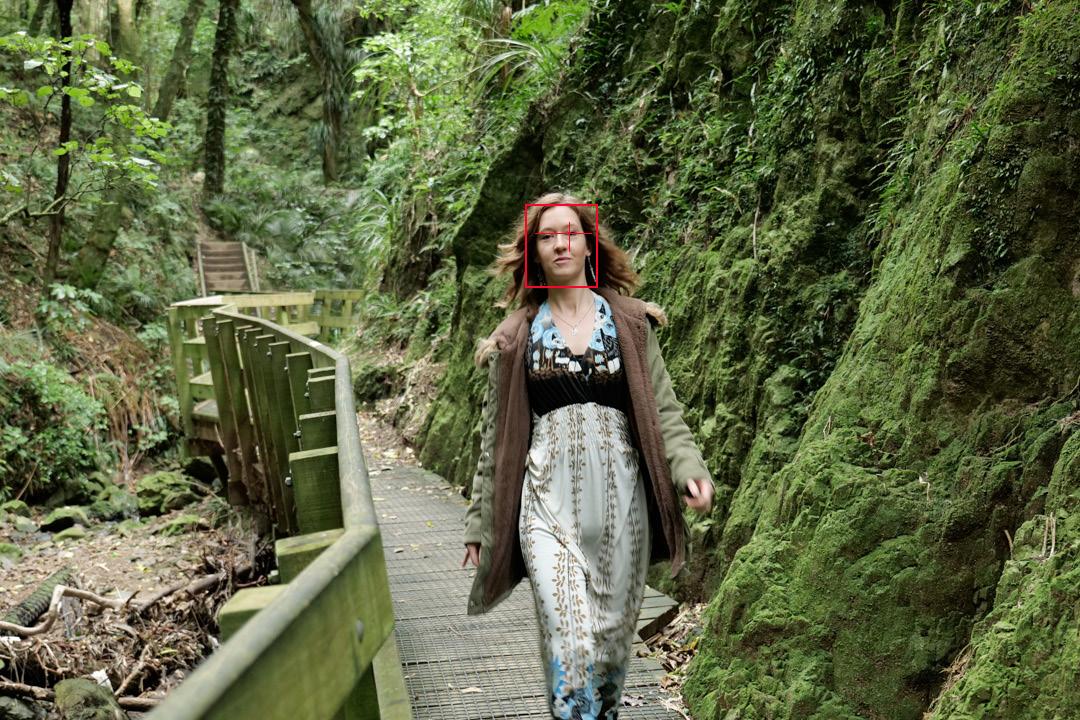
The S5 has several focus modes that you can deploy in addition to single and continuous focusing. These determine how much of the sensor comes into play and can be fine-tuned further, depending on the type of shooting you are doing. Given the lens combination that I had I mainly tested the face/eye option as this is what I use 90% of the time. While the option is called face/eye it is actually much wider than that as the system starts with recognising a body; it then switches seamlessly to the face and then the eyes. It gives you the option to include animals as well. The function also works well when the subject is moving around a lot. When Sian skipped around the park, to mimic shooting kids at play, of the 59 images taken only 10 were out of focus. Even when Sian was not facing the camera it held focus.
I will admit that you do need time to get used to autofocus systems and choose the best one for each scenario. I was quite happy with the results I got, especially knowing that with more time I would have been able to improve them further, especially when coupling the camera with a faster lens.
Not picking up a body. Focusing on bank Picking up the body

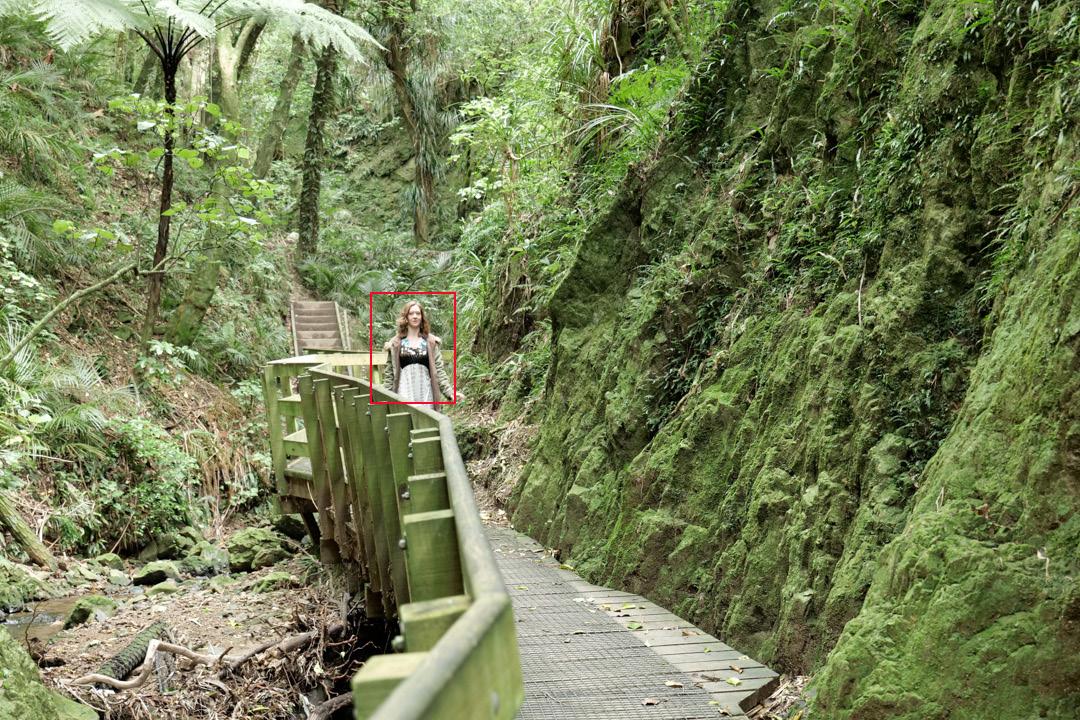
Switching to face detection Swiching to eye detection
High resolution mode
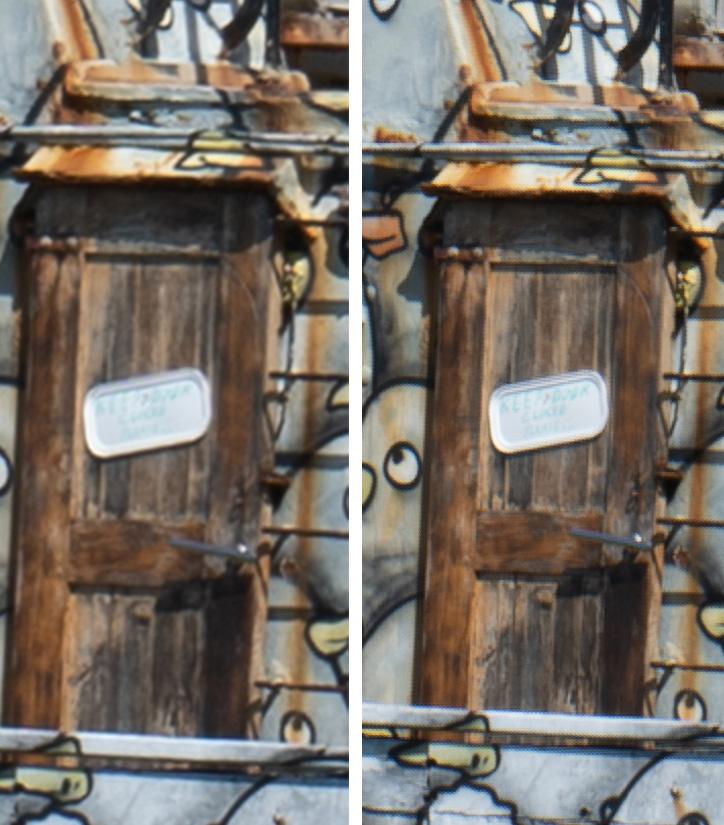
While the S5 shoots at a native 24mp, it does have a function that enables you to generate a much larger file, 96mp to be precise. The camera does this by shooting eight images in rapid succession, while moving the sensor between each image. Obviously, this requires the camera to be fairly stable and therefore a tripod is recommended. It also works much better on subjects that are not moving. While the resulting image may not look all that different it is the ability to crop that makes the difference. This function is already available on the G9, but as I don’t shoot landscapes I have never had much of use for it. My wife wanted me to scan an old photo, restore it and then print it up large, and I decided to try it. It was perfect for doing this. The original image was 25cm x 20cm while the native size of the 96mp file is 80cm x 64cm. This meant that there was plenty of detail to work on in the restoration, as well as being able to print it to A2 size.

At full size there is little difference between the 24mp (left) and 96mp (right) until you zoom in.


Using the function to restore and increase the size of an old photo.
Other features not tested
There are a couple of functions on the S5 that I want to mention, although I never actually tried either out; they are called Live Composite and Overlays.
Live Composite was introduced in the G95, allowing for easier recording of night scenery, astrophotography, star-trails, light-painting and more. Much like Olympus’ implementation (which was demonstrated at the 2019 Southern Regional), the S5’s Live View Composite mode is like a more sophisticated Bulb Mode. The camera will continue to “record” new light as it hits the sensor, but it won’t simply gather and record light across the frame continuously, as this would eventually result in an overexposed image. With Live View Composite, you can watch the scene build in real-time on the screen and then stop the image capture with another press of the shutter button. The camera does all the image compositing work in-camera.
Overlays are used in multiple exposures and let you see the previous frame in the viewfinder so you can line up the next shot. Final thoughts
I found the S5 an excellent camera to use and it would make a great entry level to someone wanting to make the move to full frame. To me it outperformed the Nikon Z 5 that I reviewed at the same time. For anyone currently using a Panasonic M4/3 the transition of look and feel is very smooth.
However, anyone who has looked at the move to mirrorless will know that in all brands of full frame cameras their older DSLR lenses do not fit the mirrorless bodies. To remedy this issue lens adapters have been produced, either by the companies themselves or by third parties.
Panasonic was not in the full frame market until last year, and the micro 4/3 lenses will simply not work on the full frame cameras. This is similar to what you face with other brand crop sensor lenses as well, so it is not a unique issue for Panasonic.
For anyone with existing full frame lenses, Sigma do produce an L-Mount adapter that works with Canon EF-Mount lenses. For Nikon, both Metabones and Novaflex produce F Mount adapters, but not all offer full functionality in terms of autofocus.
Ultimately, anyone making the move to full frame mirrorless will want to upgrade their glass to make the most of the new systems. Panasonic is part of the L-Mount alliance with Leica and Sigma so there is already a much greater range of native lenses on the market than currently available for either Nikon or Canon.
I thank Andrew Reid from Panasonic for the opportunity to have a serious play with this camera.


