6 minute read
DIY with Britt
with Britt
This Issue's ProjecT— concrete countertops
Advertisement

BritT Arnason
Britt Arnason bought her first house at 18 years of age in Melville, SK. A great bang for her buck, she paid $25,000 for a 900 sq. ft. single-family home. It needed a lot of TLC, so she gutted and renoed the home, learning how to do everything herself, only hiring out the plumbing and electrical. Today she owns and rents out 13 ‘doors’ (a combination of single-family homes and duplexes) throughout the province, including her original reno in Melville. A little about Britt...
Watch for Britt's Summer issue DIY — Pallet Projects.
diy — concrete countertops
1
SETTING UP A MOULD
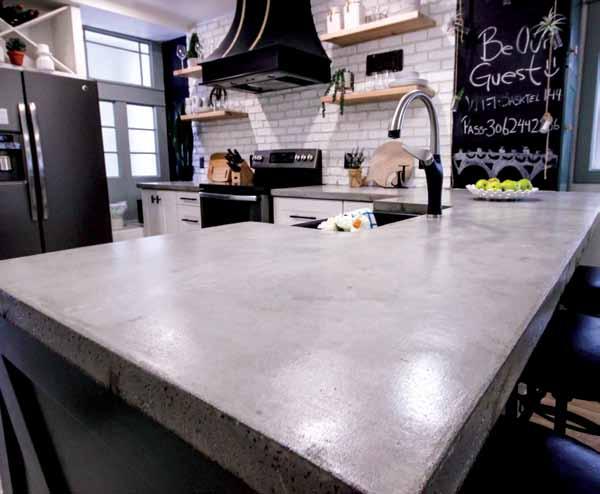
I recently poured concrete countertops in my latest home purchase on Avenue D in Saskatoon. I am currently renting it out on VRBO for short-term rentals.
I’m not going to lie; this isn’t the easiest DIY out there. This was my first time doing it. But it is very fun and rewarding and can save you a lot of money compared to quartz or granite countertops. All in, the cost for the countertops was $500.
Concrete countertops in general can have cracks, bubbles, slopes, colour variations. The imperfections are what make this type of project unique and beautiful.
Cut out 5/8” plywood to cover the counters. Mine were a little tricky as we did an 8” overhang for the island and we also have a farmhouse/apron sink we had to cut out. It’s very important to get these measurements for the sink right as there is no going back. The ply should hang about 1/4” over the cabinets.
Tip: Remember to leave a hole for the faucet. We didn’t do this and it made it harder to cut out with a hole saw later.
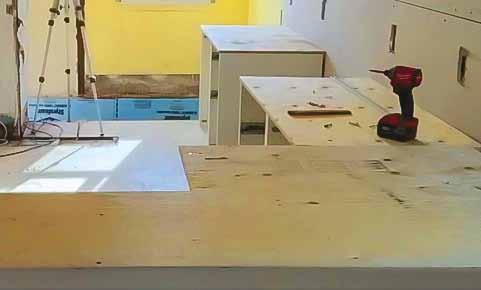
Next build a frame out of 2x4’s that goes tightly underneath the plywood to help support the weight of the concrete. You can screw together the sides so it is solid, but it should fit snugly underneath the plywood. Use shims if you have to.
Use a product called melamine to make side forms. This will give the concrete a smooth finish. We cut the melamine into 3 ¼” strips that will go along the perimeter of the countertops. Screw the melamine strips into your 2x4 frame. There should be a depth of 2” from the top of the melamine face to the 2x4 frame we built. This will give it a nice overhang and you will not be able to see the ply we have underneath.

2
THE POUR
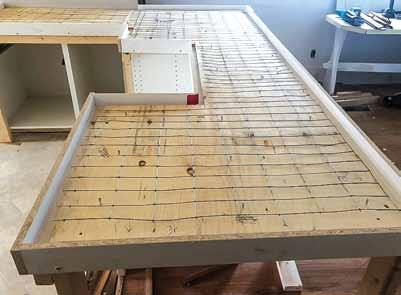
We used a galvanized stucco mesh (see top right photo) to strengthen the concrete. Similar to rebar in large concrete pours. We put screws in the ply sticking up into the concrete to ensure there would be no movement of the slab.
For the concrete, look for a mix specifically for counters. The benefit of this type of mix is the super-plasticizer additive which provides a flowable mix at a low water/cement ratio. High-flow formula minimizes the need for mechanical vibration, and it has a reduced-shrinkage formulation. It will be fully cured after 28 days.
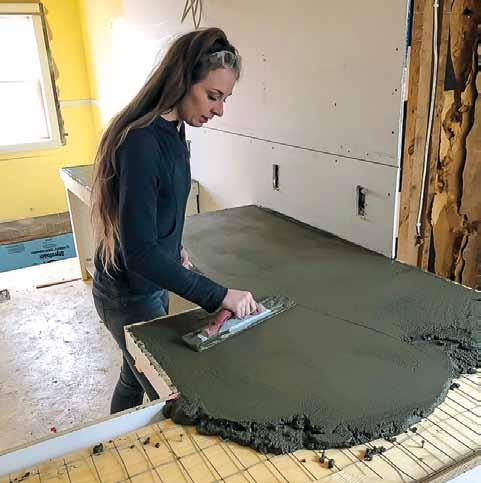
Mix with water and pour into forms. You will need a concrete trowel and a straight edge (like a 2x4) that can smooth out the surface.
Use a mallet to hit sides and bottom to release any air bubbles from the concrete. If you have a reciprocating saw, you can remove the blade and run it along the sides and bottom as well (see bottom right photo). The vibrations from the tool will let the air bubbles rise to the surface.
Once completely poured, continue the process of smoothing and misting with water while the counters are starting to cure. The amount of time needed will depend on your environment and project size, but allow for a full 12-hour day. The mixing and pouring will take a couple hours, then there is a lot of smoothing time while you wait for the concrete to set. Remember that once it is set, that is it, so keep an eye on them and trowel every 15 minutes.



3

FINISH COAT
Once your counters are set, give them a sand. I used a sanding block, but if you want more of a polished look you can use polishing pads.
There are a few different options for a finish coat. We chose a food-safe sealer. You have to apply a number of coats as concrete is a very porous material.
If you do not want to have water spots, beeswax is a great product as a top coat. But it requires a bit of maintenance as you have to recoat every six months. Poly is another option that requires less maintenance, but it is not food-safe.
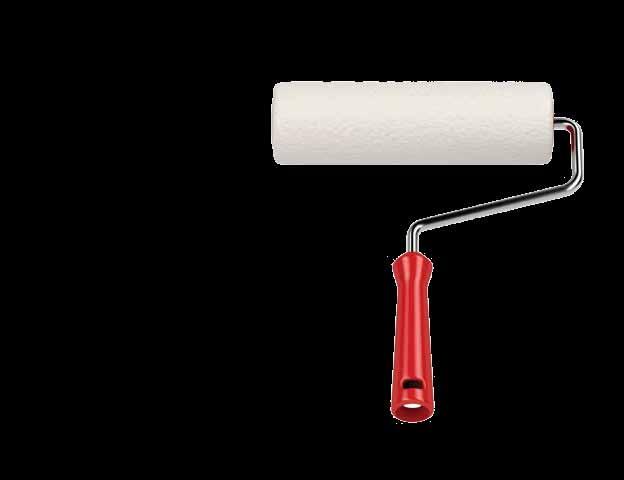
The finish coat is best applied with a lint-free roller.
BRITT'S TIPS

PRACTICE FIRST: If you have not done anything like this before, I would strongly suggest starting out with a small rectangular piece like a vanity top or coffee table top.
DO YOUR RESEARCH: I hope to give you some inspiration and tips, but there are tons of videos online. I always do my research and check out multiple sources when starting projects such as this one. Concrete can serve a wide variety of purposes and
be suited to your style. There are dyes and stamps. Have fun with it.
CHECK OPTIONS: There are multiple options on how to do these. We decided to pour in place because of the size and shape of them. There are benefits to pouring off-site and moving them in as well. Important: Concrete counters are very heavy! You have to make sure you have the structure to support the weight.
Cutting Edge Exclusive to Arctic Spa ®


NORDIC FENCING offers a wide range of quality durable fencing, from chain link to wood to PVC and even ornamental fencing! They know their fences.
SPA BOY


arctichottubssaskatoon.ca
Saskatchewan’s fencing specialists for over 40 years
Visit nordicfence.com or call 306-653-3663 Toll Free 1-866-518-9333
est. 1990
Find a Healthier You

NOW OFFERING DIRECT BILLING
Chiropractic Physiotherapy Massage Therapy Acupuncture Orthotics

