4 minute read
Customize your keyboard layouts in Big Sur


Switch between different languages. Roman Loyola reports
The Mac can support different keyboard layouts and you can switch between them quite easily. It’s one way you can get more out of the keyboard, especially if you work in multiple languages.
Advertisement
However, it’s not slap-yourface obvious on how to change the keyboard layout in macOS Big Sur. First, you’ll need to go to System Preferences and open the Keyboard pane. The keyboard layouts appear in the Input Sources tab, and the ones you currently have active will be in the left column. Apple offers several keyboard layouts based on different languages, and you can add more by
clicking on the ‘+’ button on the lower left (clicking ‘-’ removes a layout). A pop-up window will appear with the layouts that are available.
You can add as many keyboard layouts as you want. The trick then becomes how to switch the layout. You have a few options:
• If you check the box for Show input in menu bar, a menu bar icon appears, and you can quickly change the layout by clicking that icon and selecting the one you want. • If you prefer a keyboard shortcut, you can activate it in the Shortcuts tab. Select Input Sources in the left column, and you can use the default key combination or set up your own. • Under Input Sources, you can select
the Use Caps Lock key to switch to and from last used Latin input source checkbox. With this active, you’ll need to press and then hold the Caps Lock key to enable typing in all caps. • Also under Input Sources is an option to Automatically switch to a document’s input source. This allows you to assign a layout to a document. For example, if you are using the Maori layout but use English in a Word document, macOS will automatically switch the layout when you’re using Word.
CHANGE KEYBOARD LAYOUT AT LOGIN
You can set up macOS so that whenever a user logs in, they can
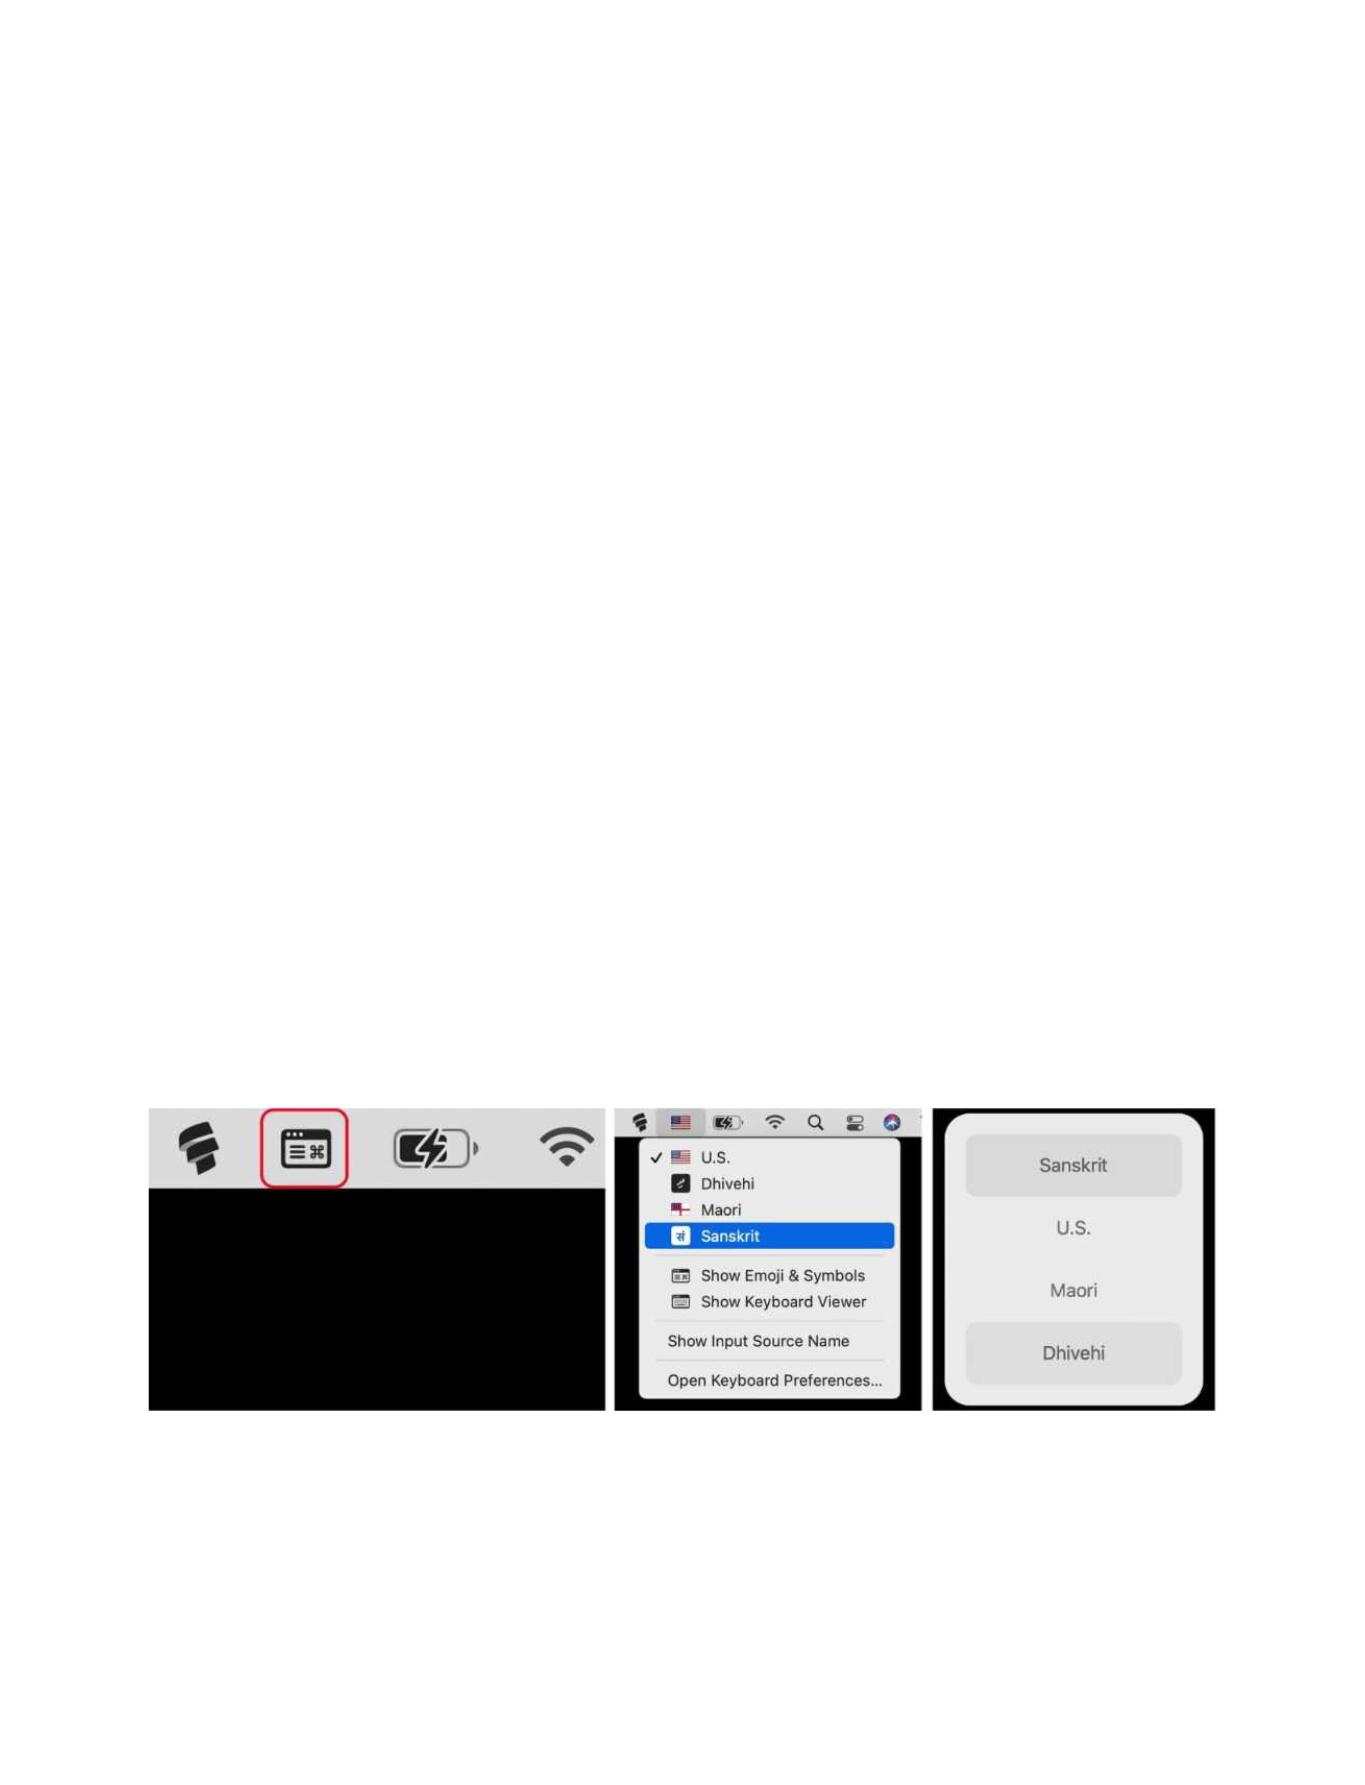
The default Keyboard menu bar icon (left) doesn’t look like a keyboard. When you set up Keyboard with different layouts (middle), the icon changes to a flag or symbol that represents the language that is active. If you activate the keyboard shortcut and use the default Control-spacebar combo, a layout switcher (right) appears in the middle of the screen and you tap the spacebar until the layout you want is highlighted.
select the keyboard layout at the login screen. To do this, you need to have administrator rights. Users can still change the layout in the Keyboard system preferences after logging in. Here’s how to set it.
1. While logged in to an administrator account on your Mac, go to > System Preferences > Users & Groups. 2. Click on the padlock on the lower left corner to unlock the settings and enter an administrator’s username and password. 3. Click Login Options in the bottom of the left column. 4. In the right section, check the box for Show Input menu at login window. 5. Click the lock and exit.
With that option on, the Keyboard icon appears in the upper right of the login screen. Click it and select the keyboard layout you want, and then log in to the Mac.
If you use multiple keyboard layouts and want to change the default one, you have to do that in the Terminal, the command-line interface for the Mac. The Terminal is located in Applications > Utilities. Here are the instructions.
1. Set macOS to the keyboard layout you want to use as your default. 2. In the Finder, hold down the Option key, and select Go > Library. 3. In the Library window that appears, open the Preferences folder. 4. Look for the file called ‘com.apple. HIToolbox.plist’ and then select it and copy it by pressing Command-C.
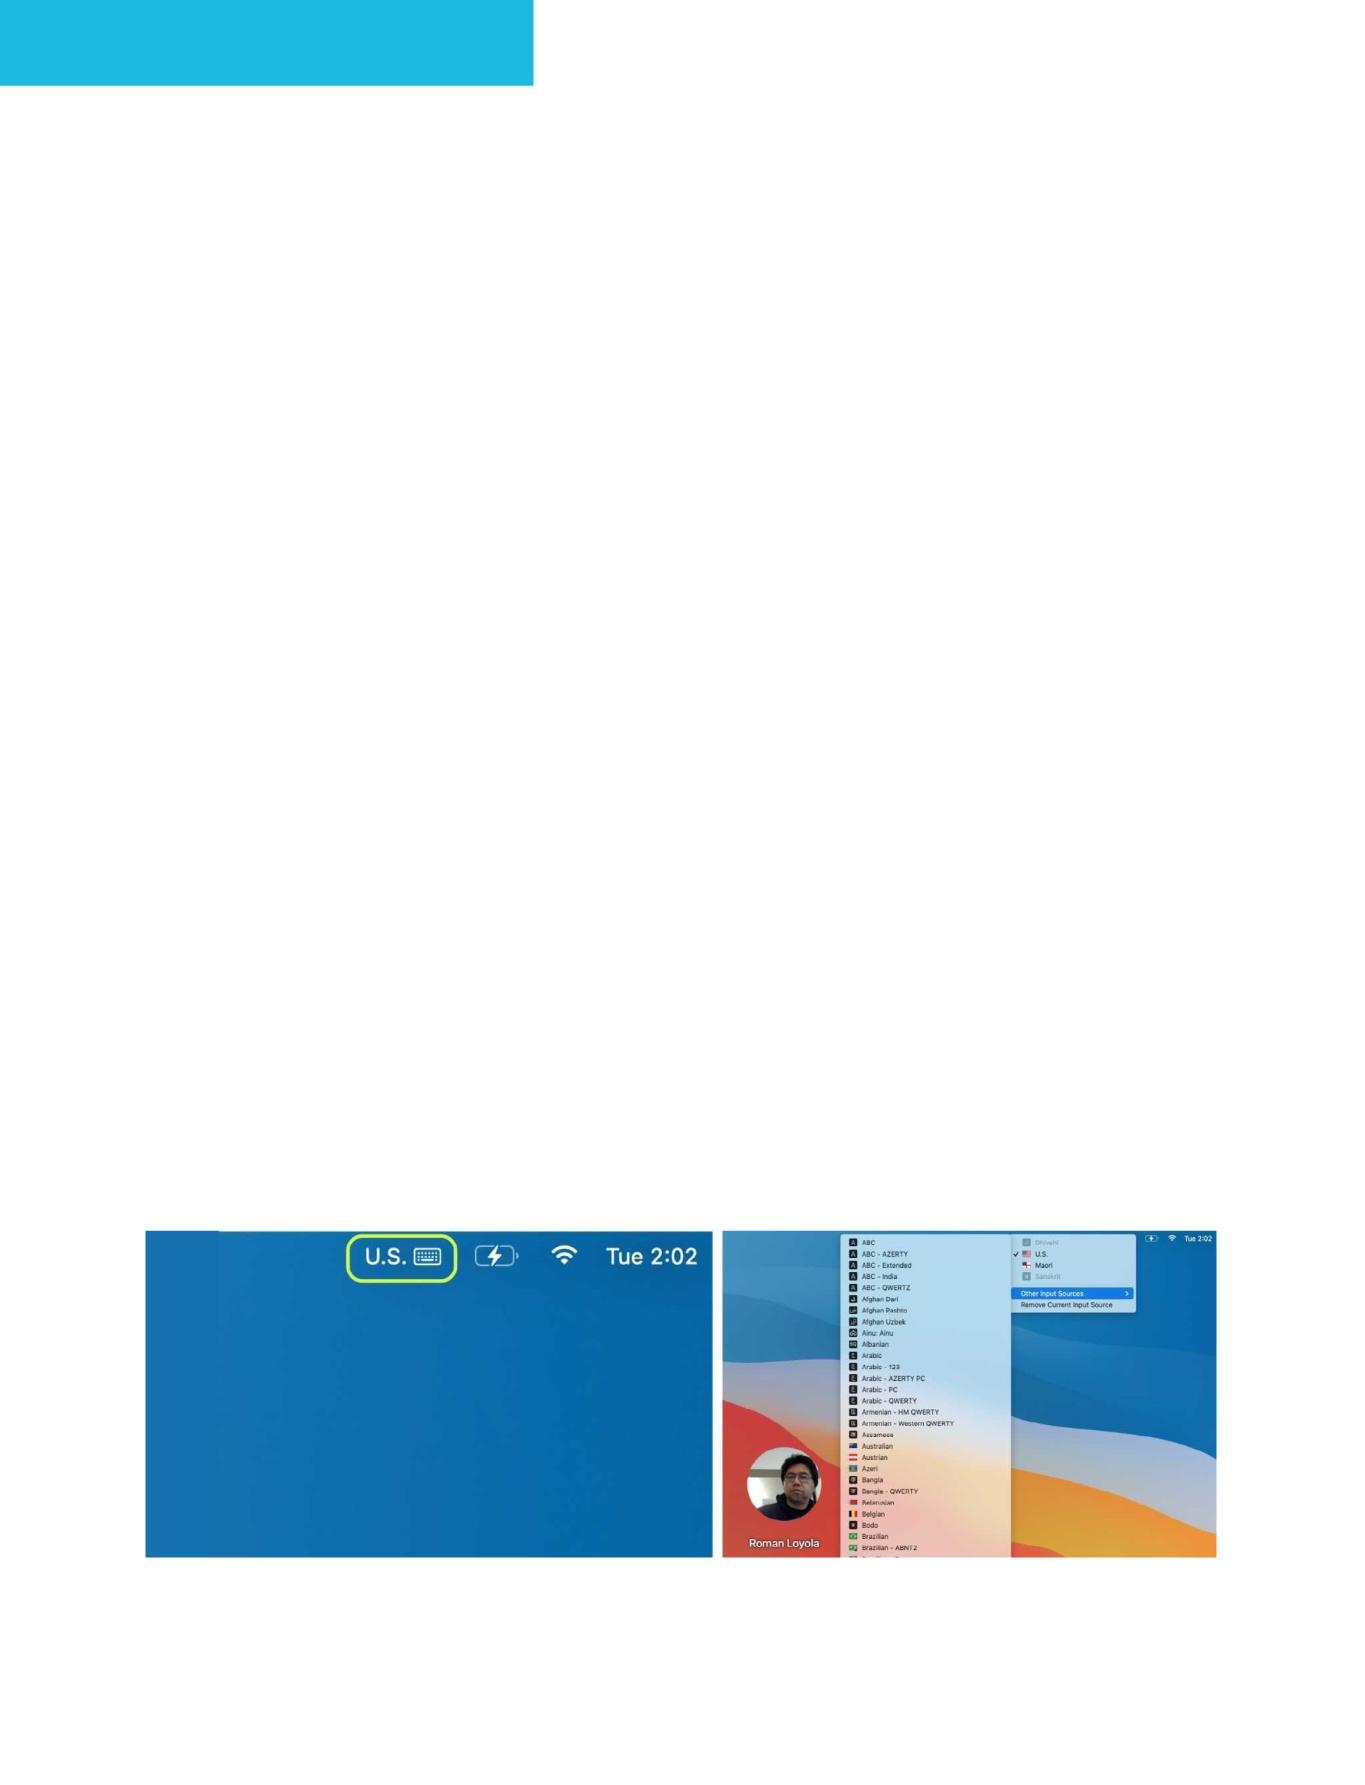
When the Input menu appears at login, you can select the layout you want to use when you log in.
5. Go to the Finder and then select Go > Computer. You should see your Mac’s storage device in the window. We’ll use the default Macintosh HD here, but you might have named it something else. 6. Open your storage device, then open Library > Preferences. 7. Find the file called ‘com.apple. HIToolbox.plist’ and add ‘-old’ to the end of the name. You will need to enter your password to confirm the change. This will be your backup file. 8. Now press Command-V to paste the file you copied previously into this folder. You will need to enter your password to confirm this.
Before restarting the Mac to implement this change, confirm that the files can be read by using the Terminal. Launch the Terminal and then enter the following (you can copy and paste the syntax below):
sudo chown root:wheel / Library/Preferences/com.apple. HIToolbox.plist; sudo chmod 644 /Library/Preferences/com. apple.HIToolbox.plist

After you enter that command, Terminal will ask for your password. If the Terminal prompt comes back up and no other messages appear, you’re good to go. Restart the Mac and you should see the keyboard layout that you picked as the one the Mac boots into.
If you want to revert the settings, go to Macintosh HD > Library > Preferences folder, delete the ‘com. apple.HIToolbox.plist’ file. Then look for the file named ‘com.apple. HIToolbox.plist-old.plist’ and rename it ‘com.apple.HIToolbox.plist’. Then restart your Mac to apply the changes.