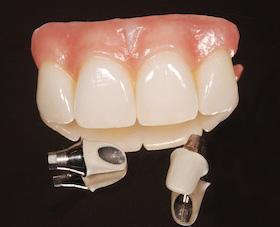
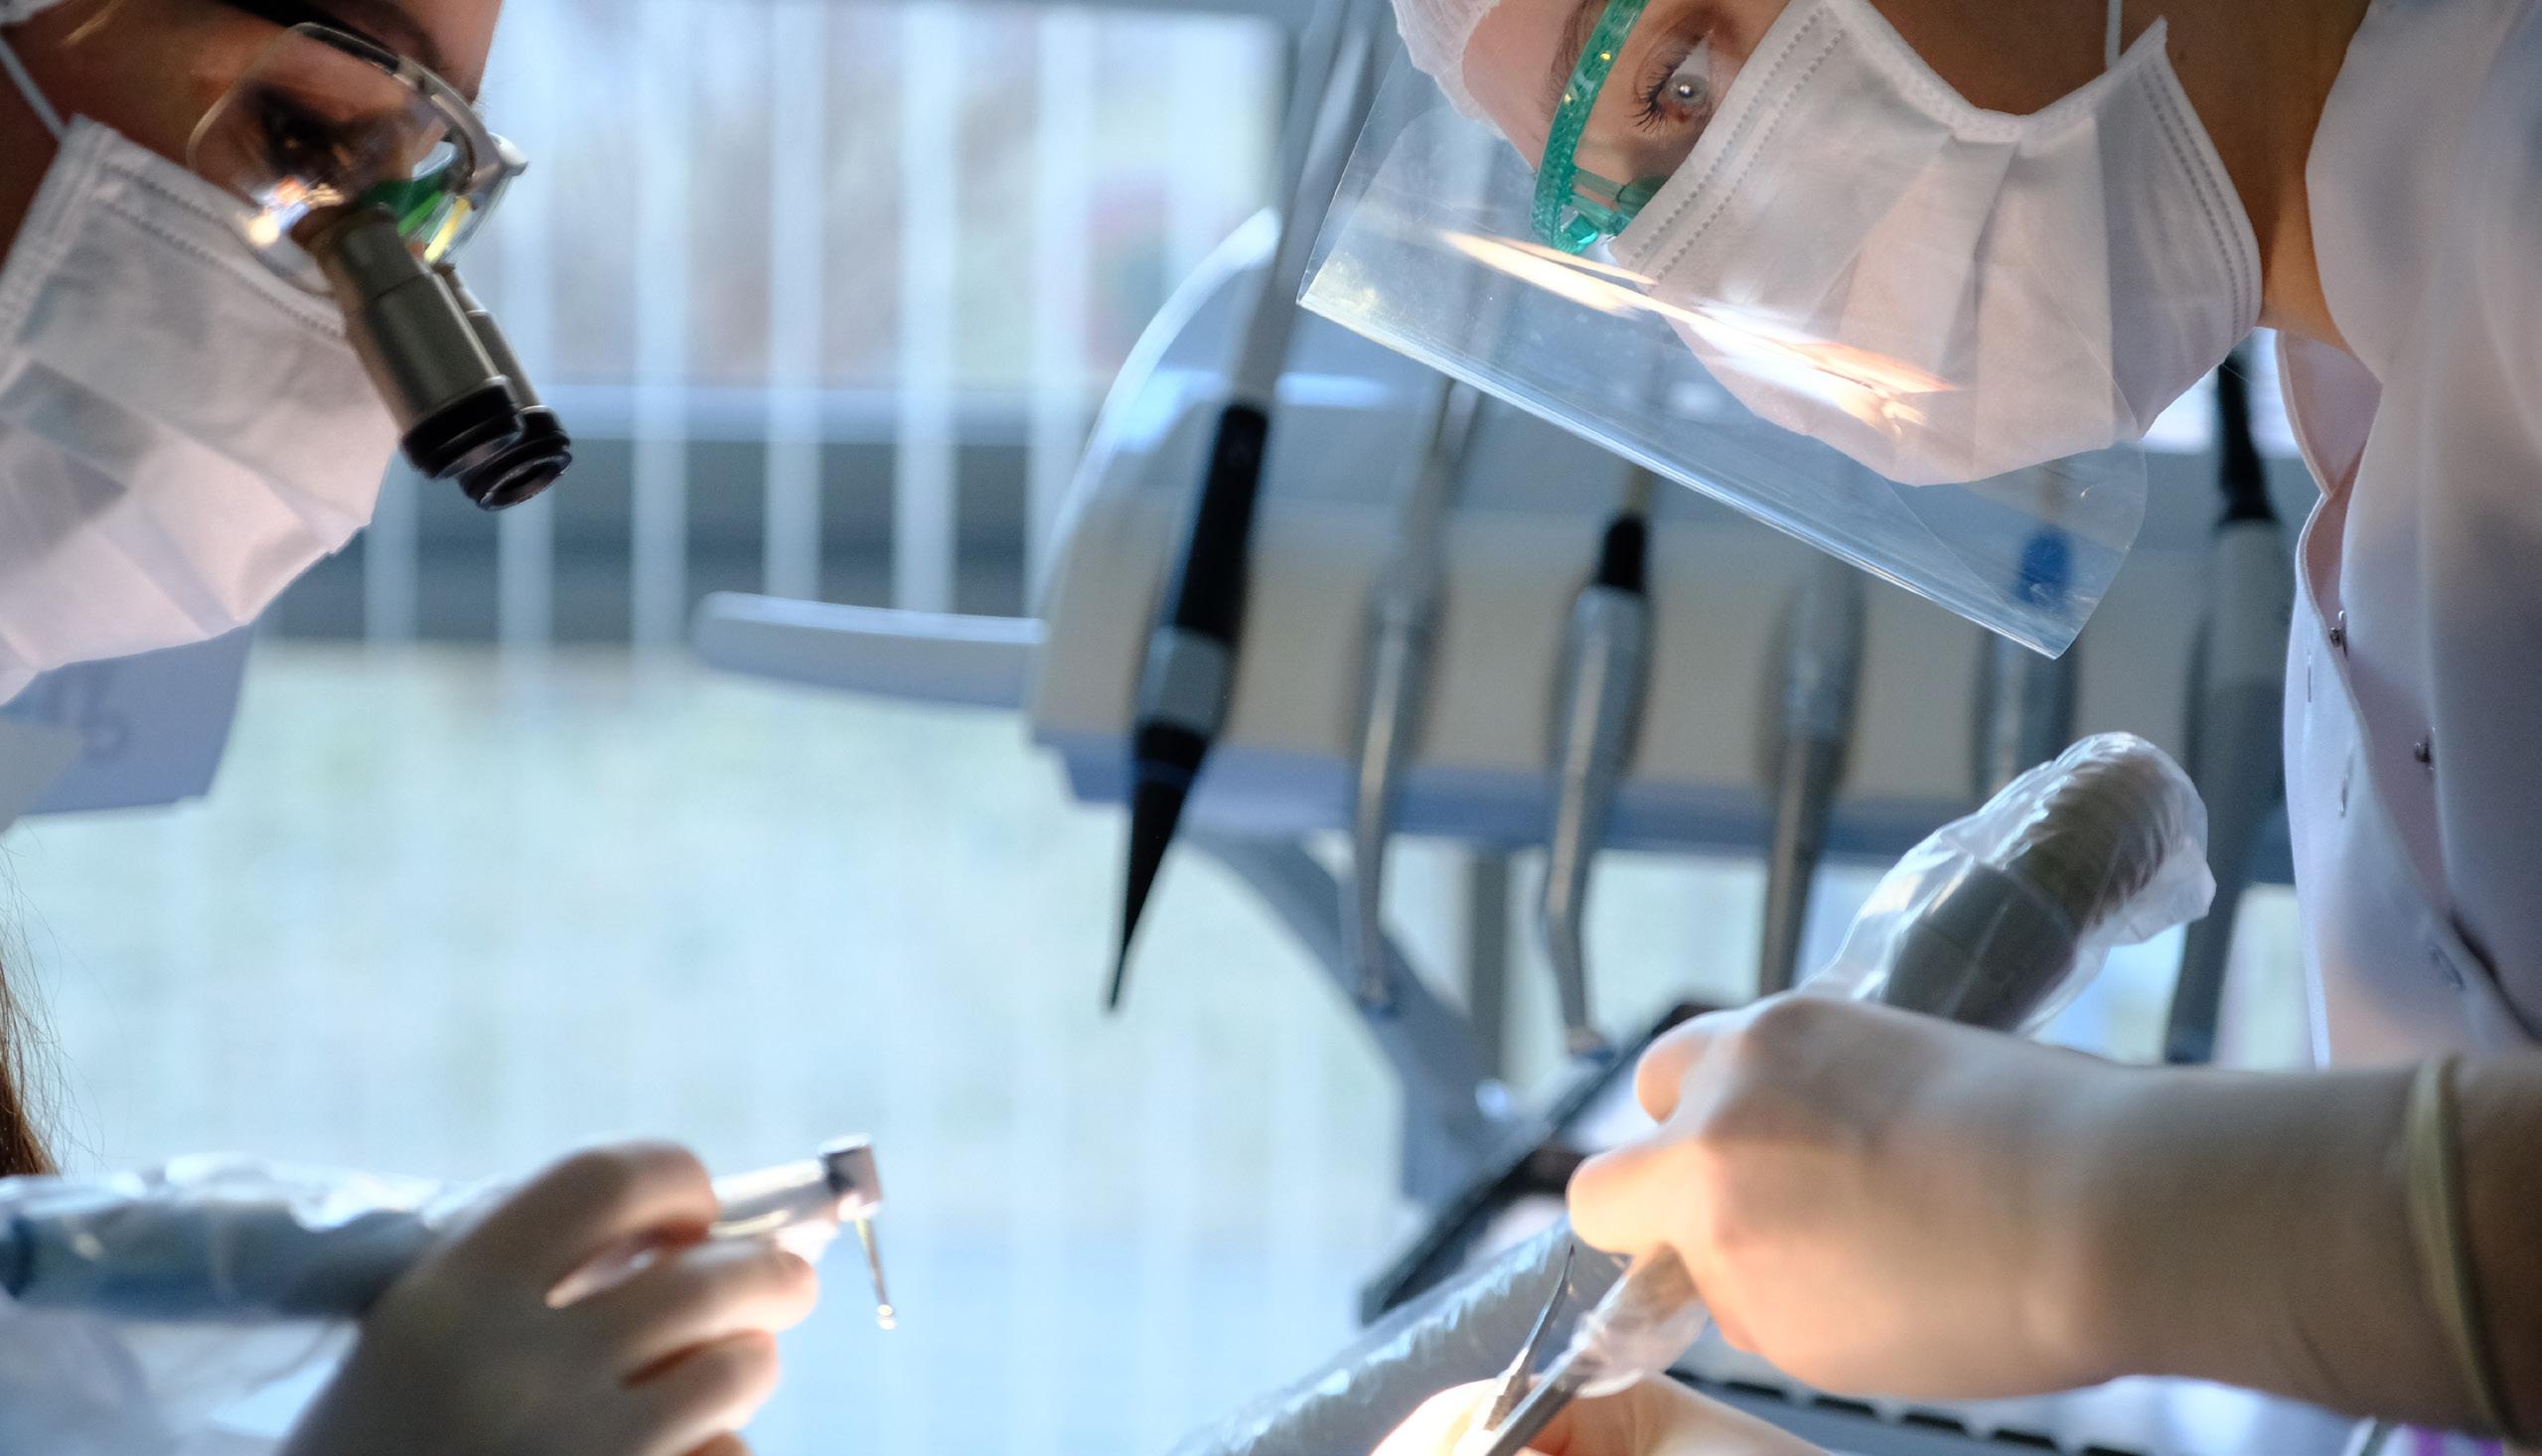
CEMENTED VS. SCREW-RETAINED IMPLANTS
Spear Education provides dental continuing education for striving dentists that are dedicated to the pursuit of clinical excellence in dentistry

ALL CONTENTS © 2021 SPEAR EDUCATION
CONTENTS
Implants: Screw-Retained vs. Cement-Retained
Understanding Cement-Retained Implant Restorations
Understanding Screw-Retained Implant Restorations
Should Molar Implant Restorations be Cemented?
Cemented vs. Screw-Retained Implant Restorations
Cementation of Crowns on Implant Abutments
How to Minimize Residual Cement on Implant Restorations
Managing Cement-Retained Implants
Pesky Screw Access for Implants
Sealing the Screw Access Hole on Screw-Retained Implant Restorations
About the Authors
References

4 6 8 10 12 14 18 20 22 24 26 28 32
Introduction
CEMENTED VS. SCREW-RETAINED IMPLANTS
INTRODUCTION
By Ricardo Mitrani, D.D.S., M.S.D.
For many years now, there has been controversy among clinicians regarding what works best when dealing with dental implant retention for fixed restorations: screw retention versus cement retention.
Both techniques offer very clear advantages and some shortcomings and, more often than not, the decision process becomes an issue of personal preference.

Having said this, contemporary restorative dentists have to be well acquainted with both techniques since there is room for both in the practice — whether that’s with implant-supported restorations that the restoring team is doing for the first time (on recently integrated implants) or in those cases in which the restoration needs to be redone (due to issues like fractured ceramics, inadequate esthetics and ill-fitting margins).
Moreover, there are certain situations in which the intended restoration is a screw-retained implant-supported crown and is prescribed as such to the surgeon, but in lieu of an inadequate residual ridge, the implant has to be angled toward the facial aspect of the restoration. This would make screw retention an invalid option, so a very valid Plan B – cement retention – should be considered.
This e-book compilation of Spear faculty articles offers practical ways of dealing with both types of restorations in your practice. We felt that showcasing the similarity of the opinions presented by various restorative dentists helps to establish the validity of the techniques and ideas presented.
I know that this e-book will give you a better understanding of the fundamental principles behind both types of restorations and provide clinically relevant tips that will enable you to deal with both implant retention options in a more predictable and consistent manner.
This e-book will give you a better understanding of the fundamental principles behind both types of restorations and provide clinically relevant tips
CEMENTED VS. SCREW-RETAINED IMPLANTS 5
IMPLANTS: SCREW-RETAINED VS.
 By Greggory Kinzer, D.D.S., M.S.D.
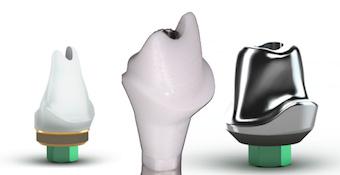
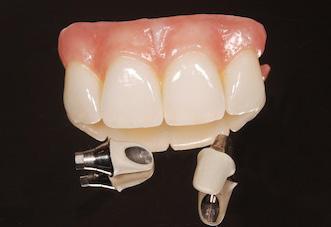
When it comes to the restoration of implants we typically have two treatment options: Screw-retained or cement-retained. Although both treatment options can be used predictably, they each have their own advantages and disadvantages.
SCREW-RETAINED
Advantages:
• Known retention
• Easy to remove/re-tighten if it were to become loose
• No risk of leaving residual cement
Disadvantages:
• Dependent on implant orientation/angulation
• May be unesthetic
CEMENT-RETAINED
Although both treatment options can be used predictably, they each have their own advantages and disadvantages
CEMENT-RETAINED
CEMENT-RETAINED
Advantages:
• Independent on implant orientation/angulation
• Enhanced esthetics
Disadvantages:
• Unknown retention
• Can be difficult to remove
Although a majority of the implants that I restore are done as cement-retained restorations, in the past few years I have transitioned to restore an increasing number of implants as screw-retained. Why this transition? Mainly because there is a lot of good research showing the problems associated with leaving residual cement.
CEMENTED VS. SCREW-RETAINED IMPLANTS 7
UNDERSTANDING CEMENT-RETAINED IMPLANT RESTORATIONS
By Greggory Kinzer, D.D.S., M.S.D.
In a previous article I discussed the advantages and disadvantages of both screw-retained and cement-retained implant restorations. Although I have significantly increased the number of screw-retained restorations I am placing throughout the mouth, by far the majority of what I place in the maxillary anterior is still cement-retained.
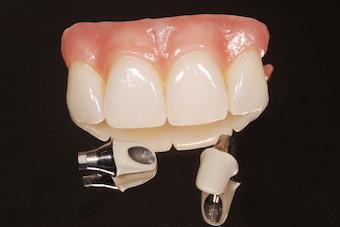
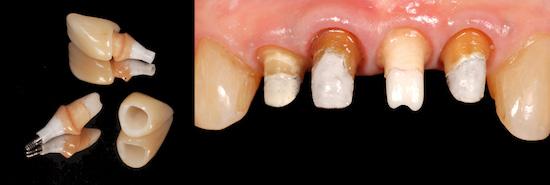
The main advantage of cement-retained restorations in this area is that they can be done regardless of the implant angulation. However, in order to predictably cement the restoration and minimize the chance of leaving residual cement, I find that in most situations it is advisable to use a custom abutment.
The rationale for using a custom abutment is two-fold. The first reason is that the subgingival emergence profile that was created by the provisional restoration (which ultimately supports the soft tissue architecture) can be reproduced in the custom abutment almost identically if a customized impression coping is used.
CEMENT-RETAINED RESTORATIONS
The benefit of this is that we are able to maintain the support of the soft tissue that was created in the provisional phase. If the position of the soft tissue is correct with the provisional restoration and the emergence profile of the definitive abutment is different, there is a risk that the position of the soft tissue around the definitive restoration will change. If you like the position of the soft tissue with the implant provisional, a change in the tissue position may negatively impact the overall esthetics.
The second reason for using a custom abutment is it allows you to place the cement margin at a more coronal position to aid in cement removal. Traditionally, the cement margin is placed just below tissue on the facial and interproximal (0.5-1.0 mm) and at the level of the tissue palatally. However, given the esthetics of customized zirconia abutments today, we are now able to place the cement margin at the level of the tissue circumferentially without detracting from the esthetics, even if the tissue were to move apically over time.
In the posterior we typically see less soft tissue scallop from facial to interproximal and as a result, we may be able to get away without using a custom abutment. Most implant companies have “anatomic” abutments that allow you to choose from a variety of different emergence profiles, scallops and cement margin heights.
In most situations a custom abutment will still make it easier to clean cement, especially given the fact that our accessibility in the posterior can be more difficult.
CEMENTED VS. SCREW-RETAINED IMPLANTS 9
The main advantage of cement-retained restorations in (the maxillary anterior) is that. they can be done regardless of the implant angulation
UNDERSTANDING SCREW-RETAINED IMPLANT RESTORATIONS
By Greggory Kinzer, D.D.S., M.S.D.
In a previous article, I discussed the pros and cons of both screw-retained and cement-retained implant restorations. In my own practice I have been increasing the number of screw-retained implant restorations for a variety of reasons but the main two are retrievability and eliminating the need for cement.
It is always nice to have the option to easily remove an implant crown or re-tighten the screw if the need were ever to arise. By removing cement from the equation, you remove the risk of leaving cement subgingivally that could cause peri-implantitis. Another factor that may be taken into consideration on whether you do a screw-retained or a cement-retained restoration is the comparison of the laboratory cost. Typically, the screw-retained implant crown will be associated with a lower lab bill because it is generally less time consuming to make.
If you desire to have a screw-retained implant restoration prior to beginning treatment, this information should be brought to the attention of the surgeon so that the orientation/angulation of the implant can be positioned accordingly. Although this typically does not pose a problem with posterior implants. The posterior implants are more axially positioned with regard to the alveolus and tooth. It may be an issue with anterior teeth where the anatomy of the hard tissues may not allow the screw access hole to exit palatally.
So, where do I choose to use screw-retained restorations over cement-retained? Generally, I find I place more of them in the posterior - upper posterior more often than the lower posterior - and I tend to use screw-retained restorations on complex multi-implant cases, especially ones that require pink porcelain.
The goal of having the restorations on these complex cases as screw-retained is retrievability if problems occur, hygiene (easily cleaned) and passivity of fit if the abutments are picked up in the mouth to finalize the screw-retained prosthesis.
Delve Deeper Into Your Referral Community
Do you feel blocked from networking with like-minded peers in your referral network?
Spear Study Club has virtual tools and online resources to directly address your practice’s clinical needs, in addition to extensive educational content to explore with your entire interdisciplinary team.

Meet virtually or in-person, supported by Spear curricula that’s proven to help streamline case work and generate more consistently predictable patient outcomes. Ask us how to join a club in your community, or start your own today.
Learn More

11
Discover how Spear Study Club impacts your entire practice: 855.773.2772 | studyclub@speareducation.com | speareducation.com/study-club
SHOULD MOLAR IMPLANT RESTORATIONS BE CEMENTED?
 By Doug Benting, D.D.S., M.S., F.A.C.P.
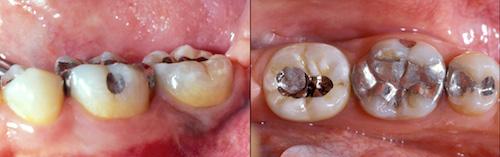
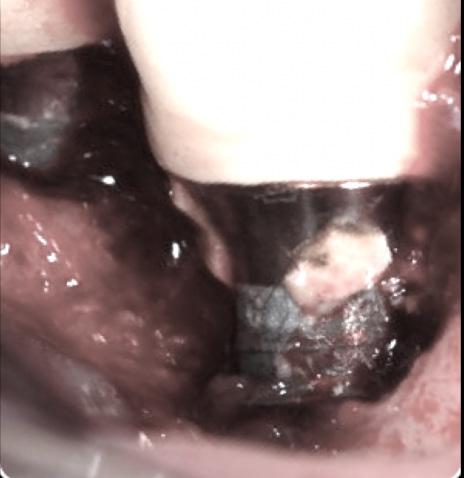
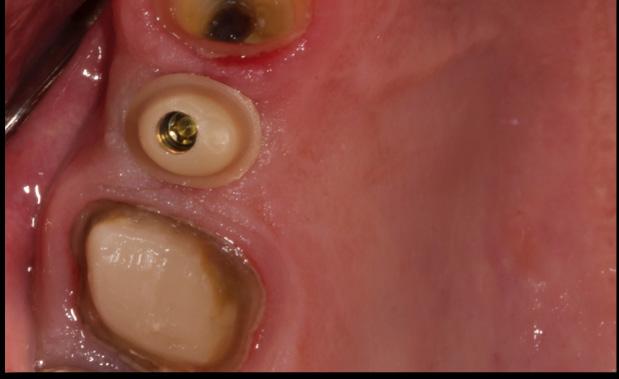
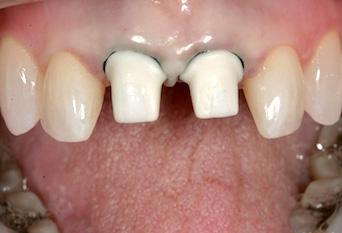
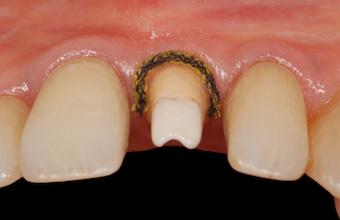
A patient presents for an evaluation with the primary concern that the “bite” has never felt right following insertion of dental implant supported restorations in the area of 14 and 15. The distal marginal ridge of 15 has fractured and after drying the occlusal surfaces, it appears that several adjustments have been made confirming the patient’s description of events.
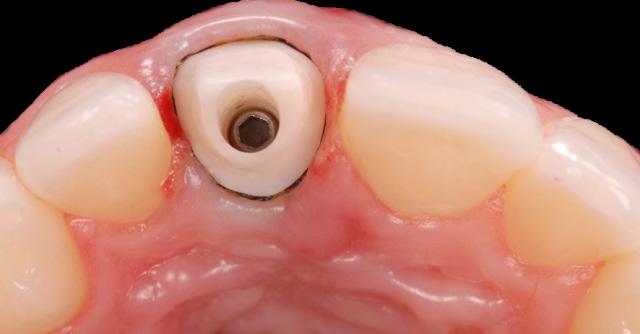
The pre-treatment radiograph of 14 and 15 demonstrates the restorations cemented on the abutments with a distally positioned dental implant. The Straumann bone-level implant is designed with a platform-switching concept, and is placed with adequate depth with supporting bone structure that appears to be intact. The abutment margin of 15 is visible apical to the margin of the “cement on crown” where 14 appears to have a better adaptation than 15 (Figures 1 and 2).
Figure 1
Figure 2
There are two times more cytokines present around dental implants than natural teeth and appear to be the etiologic agent of the breakdown of the supporting structure
IMPLANT CEMENTED?
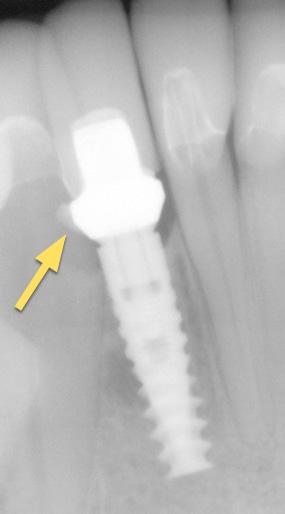
Take a look at the cemented restorations (15 has the fractured distal marginal ridge) and evaluate the cement specifically on the buccal aspect of the abutment for the restoration at 14 – presumably the easiest area to remove the cement. Compare the cement visible on the abutment to what you see on the pre-treatment radiograph (Figure 3). The tissue attachment in the area surrounding a dental implant allows for cement to flow much farther apically than would be expected with natural teeth. Peri-implantitis, depending on how the literature is interpreted, could be more common today than periodontitis. Problems related to cemented dental implant supported restorations occur in a time range of about four months to nine years with an average time to adverse event of just under three years. There are two times more cytokines present around dental implants than natural teeth and appear to be the etiologic agent of the breakdown of the supporting structure. Interleukin-1 Beta is a potent bone resorbing cytokine that has been found in peri-implantitis.
Dr. Bruce Houser has defined Cement Initiated Disease as iatrogenic with the disease process specifically initiated by excess dental cement. Considering the location (14 and 15) and required contours of the planned maxillary molar restorations as a result of the distal position of the dental implants, how effective is it to remove radiolucent or radio-opaque cement? How about screw-retained restorations in the posterior?
CEMENTED VS. SCREW-RETAINED IMPLANTS 13
Figure 3
CEMENTED VS. SCREW-RETAINED IMPLANT RESTORATIONS
By Steve Ratcliff, D.D.S., M.S., and Darin Dichter, D.M.D.
Historically, with the Branemark implant system, restorations were attached to implants and implant abutments with screws. Implant mechanics were challenging and complex and often confusing to restorative dentists. In the late 1980s, Straumann introduced the ITI system in Europe and then brought it to the U.S. market in 1989/1990.1 This system changed implant restorative dentistry by modifying abutments so that they could be treated like a tooth that had been prepared for a crown. The system allowed for snap-on impression copings and for the final restoration to be cemented in place. Soon followed by the CERA one system from Nobel, implant restorative dentistry slowly became routinized. Cemented restorations replaced screw-retained restorations as the method of choice for final restorations (Figure 1).
In 2009, Wilson described retained cement in peri-implant mucocitis and peri-implantitis with the disturbing finding that the reaction to retained cement could occur as long as nine years post-cementation 2 (Figure 2).
 Figure 1
SCREW-RETAINED RESTORATIONS
These modifications or “venting” procedures allow higher percentages of cement to stay within the crown, rather than being extruded (Figure 4).
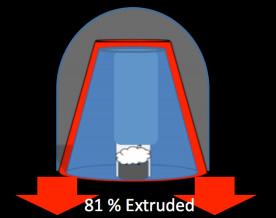
Since that time, Wadhwani and colleagues have described the mechanism for cement extrusion when restorations are cemented.3, 4, 5 They also have suggested that alterations to the abutment can reduce cement extrusion beyond the platform of the implant6 (Figure 3).
Sailer (2012), in a retrospective analysis, concluded that cemented implant/crown systems that fail are most prone to biologic failures (e.g. catastrophic bone loss) while screw-retained implant/crowns will fail mechanically from screw loosening, ceramic chipping or ceramic fracture and are less likely to lose the implant.7 Generally, screw-retained restorations have come back as the preferred method for attaching crowns to implants.
CEMENTED VS. SCREW-RETAINED IMPLANTS 15
Figure 2
Figure 3
Figure 4
HOWEVER, THERE ARE DEFINITIVE INDICATIONS FOR CEMENTED RESTORATIONS:
• Esthetics – This is where a screw access hole through a crown would create a poor esthetic result
• Severe clenchers and bruxers –Screw-retained crowns may be more susceptible to ceramic failure in these cases because of the screw access channel through the crown. A well-managed cemented restoration may be preferable to lower the chances of ceramic failure.
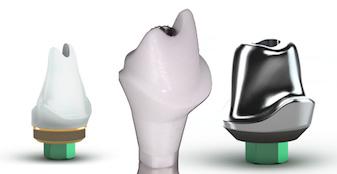
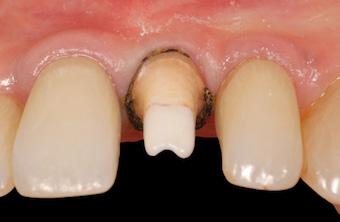
Minimizing cement extrusion and retention below the implant platform begins with abutment design. Stock abutments are not the best choice for managing cement; rather a custom abutment where the exact placement of the margins can be controlled by the dentist and technician is more predictable. Placing the abutment margin as close to the gingival crest as possible makes excess cement removal much easier (Figure 6).
• Implant position – Implants must be optimally positioned so that the screw hole is placed through the crown in the areas least likely to create compromise of structural integrity. If the screw access would be through a cusp tip that is a centric stop, the chances of porcelain failure significantly increase (Figure 5).
• Interarch space – In order to use a screw retained restoration, there must be adequate space for the driver to be placed into the screw access hole. If the patient has limited opening, there may be enough room to screw an abutment in place, but not the final restoration.
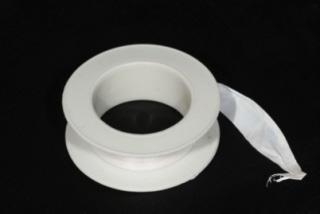
Once the abutment is torqued to place, the screw head must be protected. Medical grade PTFE tape works well. Use only enough to cover the screw head. The remaining space acts as a channel into which any excess cement can flow.
Crowns can be successfully cemented on implants. Wadhwani (2009) described a technique to deliver a cemented restoration with minimal cement extrusion.
 Figure 5
Figure 6
Figure 5
Figure 6
HERE ARE FIVE STEPS TO CREATING A COPY DIE FOR CEMENT MANAGEMENT:
1. Line the intaglio of the crown with medical grade PTFE tape (e.g. CS Hyde & CO.) to create a protective barrier and also to create a thin cement space much like die spacer on a conventional crown die.
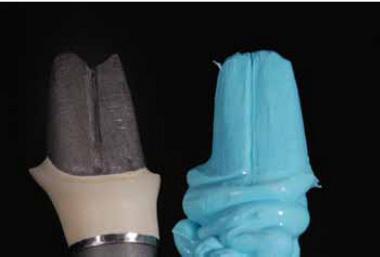
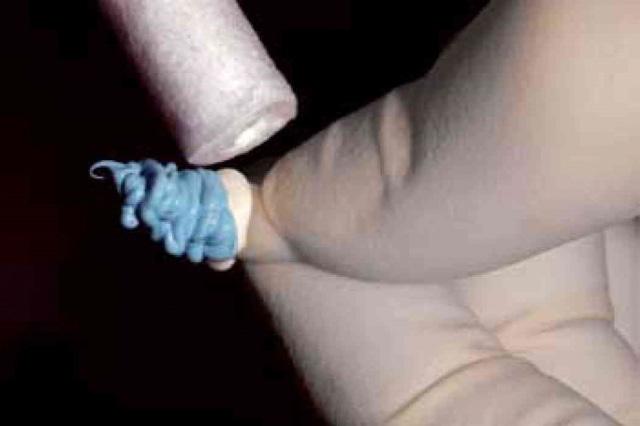
2. Inject a rigid bite registration paste into the crown and extrude past the crown margins to create a “tail” (Figure 7).
5. The crown is then seated intraorally on the implant abutment with very little excess to then be removed.
Retraction cord placed around the abutment has also been advocated as a way to block cement from flowing apically. If the cord is placed in tow pieces, one on the facial and one on the lingual, it can be removed without a sawing motion that might drag cement remnants apically (Figure 9).
3. The PTFE tape is removed from the intaglio of the crown and the surface is cleaned based on the manufacturer’s recommendations for the ceramic substrate.
4. Cement is loaded into the crown and the crown is firmly seated on the silicone die. Excess is wiped away with a cotton swab or cotton roll (Figure 8).
Choice of cement is also important. Use of a zinc-containing cement has been suggested by Wadhwani to optimize the chances of detecting retained cement radiographically. Currently that would mean ZOE cements or zinc phosphate. Because of its less retentive properties, ZOE, specifically TempBond (Kerr), can be used with abutments with good retention and resistance form. Zinc phosphate can be used with less retentive abutments. 3
Once the restoration is cemented and cleaned, it is important to check radiographically for any cement remnants and remove them as soon as possible.
CEMENTED VS. SCREW-RETAINED IMPLANTS 17
Figure 7
Figure
8
Figure 9
CEMENTATION OF CROWNS ON IMPLANT ABUTMENTS
By Robert Winter, D.D.S.
The most critical factor when cementing an implant crown to an abutment is to avoid cement you may not subsequently detect from getting into the sulcus. This undetected cement will cause peri-implantitis.
To prevent this from occurring, prior to cementation of the crown, place two gingival retraction cords into the sulcus. You will end up with the cords overlapping in the interproximal areas. Start the first cord on the distal aspect of the abutment just palatal to the crowns interproximal contact point.
This cord extends onto the facial aspect and to the mesial aspect of the abutment, just palatal to the contact point. The second cord is placed in the palatal sulcus, extending just facial to the mesial and distal contact points. Be certain to place the cord apical to the margin to prevent trapping it under the crown margin during cementation. Use minimal cement, but be sure that the margins of the crown are coated to prevent voids, which can lead to micro-leakage. Remove all excess cement before removing the gingival retraction cords.
You may ask: “Why use two retraction cords?” Two are recommended to make their removal easier and to prevent any remaining cement caught on the cord from being dragged through th interproximal areas.
Virtual Seminars- Engage in the Campus Experience Online with the Entire Team
New format provides the same dynamic CE content as campus seminars – but with online flexibility
The new virtual Spear Seminar format allows you to refine your clinical skills following the same lessons that you would at the Spear Campus in Scottsdale — but from anywhere, as a safe online alternative to large-attendance campus events.
Experience the same clinical dental CE seminars as you would in Scottsdale, but in the safe and comfortable atmosphere of home – in shorter hours, with more opportunity to connect with faculty and share on-demand recordings with your practice team.
What would your practice team like to accomplish next? New dates are now available.
Register for the Spear Seminar that addresses your clinical needs and works with your schedule at SPEAREDUCATION.COM/VIRTUAL-SEMINARS
HOW TO MINIMIZE RESIDUAL ON IMPLANT RESTORATIONS
 By Greggory Kinzer, D.D.S., M.S.D.
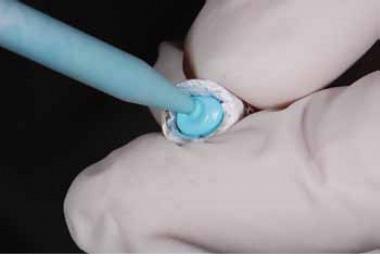
Multiple approaches have been discussed in the dental literature on how to best cement an implant restoration and minimize the chance of leaving residual cement (Figure 1).
SOME OF THE OPTIONS INCLUDE:
1. Only line the apical 1/3 of the restoration with cement.
2. Place a cement “vent” in the restoration to minimize the hydraulic pressure pushing the cement subgingival.
3. Fabricate a “cementation device” (inject silicone directly into the crown, thereby creating an abutment analog). The restoration is then loaded with cement, seated on the cementation device, immediately removed and seated in the mouth. The cementation device acts to displace excess cement before the restoration is seated to help prevent excess cement from being expressed at the margins.
4. Place retraction cord around the implant abutment prior to cementation. I have tried all of the above treatment options, and they can all work. However, the literature is clear that using a cementation device does result in the least amount of excess cement compared to other methods.
Figure 1
RESIDUAL CEMENT RESTORATIONS
I have also had a fair number of restorations come “uncemented” with this technique. So, the technique I routinely use when cementing implant restorations involves the use of retraction cord. However, rather than placing one piece of retraction cord like we typically do around natural teeth, the placement of cord is slightly modified (Figure 2 and 3).
The technique I use is one that was described to me by a friend and fellow prosthodontist in Spain, Dr. Inaki Gamborena. In the technique, I place two pieces of retraction cord. The first piece is placed on the facial and goes from palatal line angle to palatal line angle. The second piece is then placed on the palatal and goes midway through the interproximal. This enables the cord to be removed in two distinct directions (one from the palate and one from the facial) thereby minimizing the dragging of the cord through the interproximal embrasure.
When a single cord is used, inevitably the cord, as well as any cement that is stuck to the cord, is pulled through the interproximal thereby increasing the risk of cement breaking off and being left behind. Typically the size of cord I use is kept small (00) and placed just below the cavosurface margin of the restorations, rather than being pushed as far apically as possible.
In addition to the use of cord, I never completely fill the screw access hole of the abutment prior to cementation. I will place a cotton pellet or Teflon tape just over the screw itself and leave the rest of the chimney open. This space will then act as a cement “vent” or “reservoir” so that any excess cement gets shunted internally rather than subgingivally. And lastly, my assistant knows to lightly “line” the restoration with cement.
CEMENTED VS. SCREW-RETAINED IMPLANTS 21
Figure 2
Figure 3
MANAGING CEMENT-RETAINED IMPLANTS
By John Carson, D.D.S.
While cement-retained implants are widely popular, especially in the U.S., cement sepsis is one issue that is becoming increasingly clearer with cement-retained implant restorations.
Cement sepsis is caused when residual cement is left around the implant, which results in cement-induced peri-implantitis. Needless to say the results of having this occur can be severely devastating. If you are thinking to yourself, “well that’s not happening with my cement-retained implants,” the scary part is that the literature shows it can take up to nine years for it to develop. The good news is there are some simple ways to avoid this, which is what I want to talk about in this article.
The biggest thing we can do to avoid this is to design our abutments appropriately. The key here, at least when it comes to being able to remove all your cement, is margin placement. Simply put, this means the margins must be easily accessible and must be no more than 1 mm subgingival. Personally in most cases, I place my facial margin 0.5 mm subgingival while my lingual margins are often either equagingival or even supragingival with the interpoximal margin being no more than 1 mm subgingival.
IMPLANTS
CEMENT-RETAINED IMPLANTS: SOME THINGS TO CONSIDER
When it comes to cement-retained implants, it makes total sense to use a custom abutment. There are cases where a stock abutment can be used very well with no compromise. The catch when using stock abutments is they nearly always need to be modified to work appropriately –which takes time and skill. And when these modifications are done by your technician, you can expect them to have a cost associated with them that will often make the total cost of the stock abutment and modification approach and possibly surpass the cost of a custom abutment.
In my opinion, the next most important consideration is cement selection for cement-retained implants. While there are many choices when it comes to cements, the two most important factors are that it is radiopaque and easy to clean up. For me, this means resin cements are not a good option since they are all too difficult to clean up. In my hands I find Fuji Cem works well, which is a RMGI.
Another tip? Leave whatever you place over the abutment screw short of the top of the screw channel. Leaving the material short like this, my favorite thing to use is Teflon tape. It leaves a ‘vent’ for excess cement to flow into the area, thereby lowering the risk of hydrostatic pressure forcing cement subgingivally. While this certainly will not alleviate all the risk of cement being forced subginvially, it is so easy to do that it makes total sense for me. Yet another thing to consider is placing retraction cord to act as barrier to cement being forced subgingivally in cement-retained implants. The important thing to remember here is the cord needs to be placed in two pieces rather than one circumferential piece that is typically placed for an impression. The reasoning behind this is that if you place one piece from palatal to palatal line angle and a second from facial to facial line angle, you can reach in and grab an end and pull it out – rather than through the interpoximal as would be the likely result with 1 circumferential piece.
CEMENTED VS. SCREW-RETAINED IMPLANTS 23
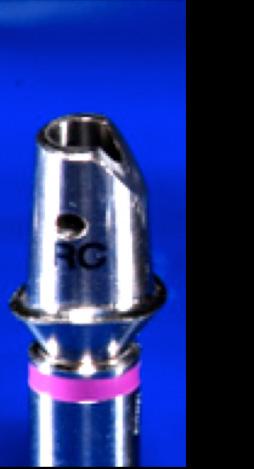
PESKY SCREW ACCESS FOR IMPLANTS
By Steve Ratcliff, D.D.S., M.S.
Hate stuffing cotton pellets into implant screw access? Tired of squirting light bodied impression material into those same openings and then trying to clean it up?
Here is a very quick and easy solution that will make life much easier. Go to your favorite hardware store and buy a couple of rolls of plumber’s tape, yes of course you ask them for the sterile rolls. (This is my attempt at journalistic humor.) Your total investment should be less than $2 per roll.
When you are ready to protect your implant screw access opening, simply tear off one to two inches of the tape and roll it into a tight ball. Using a cotton plier push it into the screw opening and compress it tightly. The tape is easy to manipulate and you can form it against the walls of the abutment cylinder to completely cover the top of the screw.
If the time comes that you need to access the screw again, cut away the restorative material until you expose the tape and then hook it with an explorer and it will lift out easily. Fast, easy, simple!
The Gateway to Great Dentistry
Dentistry’s Most Innovative Online Learning Resource

PATIENT EDUCATION
Make chairside case presentation more engaging with our new tablet app, or stream animated videos to your lobby monitors via Fire TV Stick and Apple TV — options designed to empower even the most hesitant patient to take ownership of their oral health.
CLINICIAN EDUCATION
Increase your skills and earn continuing education credits on your own schedule with more than 1,500 clinical and practice management lessons presented by dentistry’s most respected clinicians.
TEAM TRAINING AND MEETING RESOURCES
Utilize tools designed for your front office, hygienists and assistants. When your staff understands and communicates the value of the dentistry you provide, patients are better informed and more receptive to accepting treatment.
SPEAR TALK
Connect with thousands of like-minded colleagues in a safe, supportive, clinicianonly environment meticulously monitored by Spear faculty and contributing authors to find answers to any clinical or practice challenge.
 Membership to Spear Online provides your entire practice team with:
Discover how Spear Online impacts your entire practice: 855.625.2333 | online@speareducation.com | speareducation.com/spear-online
SEALING THE SCREW ACCESS SCREW-RETAINED IMPLANT
By Greggory Kinzer, D.D.S., M.S.D.
When seating a screw-retained implant restoration there are many techniques and materials that can be used to seal the screw access hole. The most common material to use is direct composite, although there are some clinicians that have advocated pressing or milling a separate ceramic plug to cement over opening.
Prior to seating the restoration, it is advisable to treat the ceramic around the screw access hole outside the mouth to get it ready for bonding. Evaluate the ceramic interface carefully.
If the ceramic surrounding the screw hole looks like it is glazed, it is advisable to gently roughen the surface either with a diamond bur using slow speed or light air abrasion. Once prepared, the area can now be etched with HFl acid. The specific etching time is material dependent. If you are unsure about the material and/or etching time, please consult with your technician. After rinsing the etchant, I will place the restoration in distilled water and set it in the ultrasonic for five minutes.
ACCESS HOLE ON IMPLANT RESTORATIONS
I will always clean the abutment screw prior to seating the restoration. Although some implant systems use a “lab” screw and send a “new” screw for seating the restoration, most of the time the technician is using and handling the same screw we are going to put in the mouth.
Often the screw gets a build-up of debris on the threads that can affect the fit if it isn’t cleaned. Using an alcohol soaked 2x2 I will hold the screw threads tightly while turning it with the driver. It’s amazing how much debris you will often see removed from between the threads.
Once the restoration is seated and the screw properly torqued, it is advisable to place something over the screw itself. I generally use cotton pellets, but many materials will work (i.e. Teflon tape, Fermit and gutta-percha). Essentially, you just don’t want to have the composite directly on top of the screw head. After treating with the ceramic with silane (if appropriate) and placing/curing the adhesive, composite can be placed. The type of composite used depends on the crown material and the depth of the access hole. If the crown is metal ceramic, I typically place an opaque composite up to the top of the metal to help mask the metal, followed by body/enamel materials. If I don’t have to mask any metal, I may still use an opaque composite; however, this usually depends on the depth access hole.
CEMENTED VS. SCREW-RETAINED IMPLANTS 27
The most common material to use is direct composite, although there are some clinicians that have advocated pressing or milling a separate ceramic plug to cement over opening
AUTHORS ABOUT THE
DOUG BENTING
D.D.S., M.S., F.A.C.P.
Dr. Benting has developed content for Spear Digest and for several Spear Study Club modules. He developed, and continues to present, the Restoring the Edentulous Arch workshop with fellow Resident Faculty member Dr. Darin Dichter.
JOHN CARSON
D.D.S.
Based in Tucson, Arizona, Dr. Carson is a member of Spear Visiting Faculty. A longtime contributor to Spear Digest and moderator on the Spear Talk online forum, his extensive contributions over the past several years include some of the most-read clinical articles on Digest.


DARIN DICHTER
D.M.D.
Dr. Dichter brings nearly 20 years of clinical, research and teaching experience — as a general practitioner and prosthodontist — to his position with Spear. He serves as an instructor in the Treating the Terminal Dentition and Fully Edentulous Patient seminar, in addition to Spear Workshops, and has also taught at his alma mater, Oregon Health and Science University School of Dentistry.


GREGGORY KINZER
D.D.S., M.S.D.
A gifted academician and clinician, Dr. Kinzer’s interdisciplinary approach to dentistry is founded in empirical research and clinical experience. His unique ability to impart complex clinical processes in a logical, systematic and understandable way differentiates him from other dental educators of our time. He maintains a private practice in Seattle limited to comprehensive restorative and esthetic dentistry.
CEMENTED VS. SCREW-RETAINED IMPLANTS 29
AUTHORS ABOUT THE CONTINUED
RICARDO MITRANI
D.D.S., M.S.D.
Dr. Mitrani has authored many scientific articles and chapters in textbooks on implant prosthodontics and esthetic dentistry. He has given more than 500 lectures in 30 countries, maintains a private practice in Mexico City limited to prosthodontics and implants, serves as an instructor in Spear Seminars, frequently contributes to Spear Digest, and develops numerous lessons for Spear Online.

STEVE RATCLIFF
D.D.S., M.S
Dr. Ratcliff is Spear’s Executive Vice President of Business Development, a role in which he helps specialists and their restorative colleagues embrace the gifts and challenges of interdisciplinary care. His primary responsibilities are working with business partners to widen the reach of the Spear learning community and creating content for Study Club modules and Spear Online.

ROBERT WINTER
D.D.S.
As one of the world’s most recognized prosthodontists and ceramists, Dr. Winter teaches dentists in Spear Workshops to understand the interdependence between laboratory procedures, treatment planning, restorative techniques, materials and laboratory procedures. He also produces Spear Study Club modules, creates clinical content for the Spear learning ecosystem, and has taught more than 900 didactic, clinical and technical courses in more than 40 countries.

CEMENTED VS. SCREW-RETAINED IMPLANTS 31
REFERENCES
PAGE 6: IMPLANTS: SCREW-RETAINED VS. CEMENT-RETAINED
The positive relationship between excess cement and perio-implant disease: A prospective clinical endoscopic study. Wilson TG Jr. J Periodontol 2009 80(9): 1388 – 92)
PAGE 15: CEMENTED VS. SCREW-RETAINED IMPLANT RESTORATIONS
1. Taylor TD, Agar JR. Twenty years of progress in implant prosthodontics. J Prosthet Dent. 2002 Jul;88(1):89-95.
2. Wilson TG Jr.The positive relationship between excess cement and peri-implant disease: a prospective clinical endoscopic study. J Periodontol. 2009 Sep;80(9):1388-92.
3. Wadhwani C, Rapoport D, La Rosa S, Hess T, Kretschmar S. Radiographic detection and characteristic patterns of residual excess cement associated with cement-retained implant restorations: a clinical report. J Prosthet Dent. 2012 Mar;107(3):151-7.
4. Wadhwani C, Goodwin S, Chung KH. Cementing an Implant Crown: A Novel Measurement System Using Computational Fluid Dynamics Approach. Clin Implant Dent Relat Res. 2014 Sep 5.
5. Wadhwani C1, Piñeyro A. Technique for controlling the cement for an implant crown. J Prosthet Dent. 2009 Jul;102(1):57-8. 6. Wadhwani C, Piñeyro A, Hess T, Zhang H, Chung KH.
6. Effect of implant abutment modification on the extrusion of excess cement at the crown-abutment margin for cement-retained implant restorations. Int J Oral Maxillofac Implants. 2011 Nov-Dec;26(6):1241-6.
7. Sailer I, Mühlemann S, Zwahlen M, Hämmerle CH, Schneider D. Cemented and screw-retained implant reconstructions: a systematic review of the survival and complication rates. Clin Oral Implants Res. 2012 Oct;23 Suppl 6:163-201
PAGE 20: HOW TO MINIMIZE RESIDUAL CEMENT ON IMPLANT RESTORATIONS
Evaluation of the amount of excess cement around the margins of cement-retained dental implant restorations: the effect of the cement application method. Chee WW, Duncan J, Afshar M, Moshaverinia A. J Prosthet Dent. 2013 Apr;109(4):216-21.
CEMENTED VS. SCREW-RETAINED IMPLANTS 33
THE PURSUIT OF GREAT DENTISTRY
Based in Scottsdale, Arizona, Spear Education is an innovative dental education company that includes the following practice-building, member-based services:
Spear Online
The “Gateway to Great Dentistry” includes more than 1,500 video lessons spanning restorative, esthetics, occlusion, worn dentition, treatment planning and more. But access is not only for dentist continuing education. Membership provides the entire office team with staff training, team meeting and patient communication tools — like the Patient Education video platform and enhanced mobile app — to align the entire practice on patient care.
Spear Study Club
Involves small groups of general practitioners and specialists that meet locally as many as eight times a year to collaborate on real-world cases, improve their clinical expertise and discuss growing practice profitability. Spear has the largest network of study clubs, with active clubs in more than 40 states and six countries.
Spear
Masters Program
The specialist-focused program brings your entire referral network together for stronger patient outcomes and more cohesion on complex cases.
Spear
Campus
Thousands of dentists visit Spear’s scenic Scottsdale campus annually for seminars and workshops. Members attend sessions in a state-of-the-art, 300-person lecture hall and receive hands-on training in Spear labs.
Spear
Faculty Club
Spear
Practice Solutions
The technology-enabled business and clinical solutions platform blends custom education, personalized coaching and real-time analytics to help your practice reach its full potential.
Designed as a prestigious community of doctors who share the journey to Great Dentistry with others. While all Faculty Club members demonstrate a commitment to continued learning, professional growth and providing the best patient care, many also serve as Visiting Faculty and mentor attendees during campus seminars and workshops.
CEMENTED VS. SCREW-RETAINED IMPLANTS 35


