2 minute read
Components
The building mass is a series of Push/Pulled faces that define levels, edges, and areas. There are many ways to manipulate a volume to create mass. The easiest method for articulating building mass is to use existing building geometry to generate more detail.
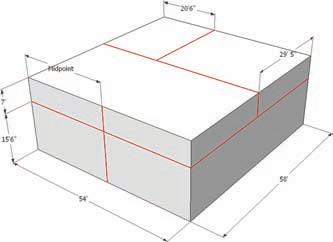
Start with the roof. Subdivide the vertical faces of the building volume (Fig. 9-1) by selecting the flat “roof” face of a building volume and copying the face down, using the vertical building edges as references. The subdivided faces can be Push/Pulled to create building arcades, overhangs, and other details (Fig. 9-2).
Advertisement
You can further articulate the building mass by using the Line tool to subdivide faces (Fig. 9-3). Subdivided faces can be Push/Pulled to create a specific look and feel for the building (Fig. 9-4).
Fig. 9-2: Push/Pulling volumes of subdivided faces. Fig. 9-5: Creating a window component on the 10´ × 10´ × 10´ cube.

Fig. 9-3: Subdividing a building volume using the Line tool. Fig. 9-4: Push/Pulled faces subdivided by the Line tool.

Making Window and Door Components
Window and door components provide scales, and detail, and further define a building’s aesthetics. These specialized components are created from building mass geometry to cut holes through the surfaces on which they are placed. When window faces are transparent, geometry on the other side becomes visible.
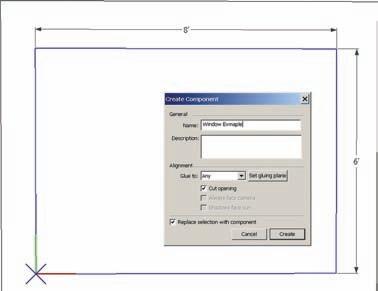
To create a window component, follow these steps: 1. Create a 10´ × 10´ × 10´ cube (Fig. 9-5). 2. On one of the vertical faces, draw a rectangle 8´ wide × 6´ high (Fig. 9-5).

3. Delete the subdivided center face.
4. Select the remaining edges of the deleted face.
5. While hovering the cursor over one of the edges, right-click and select Make Component (Fig. 9-6). 6. In the Component menu, the Glue To dropdown box should be set to Any and the Cut
Opening box should be checked. Once it is checked, enter a name for the component (Window Example) and select OK. This will create the base for the window component (Fig. 9-6). 7. Edit the newly created component. In the component instance, use the Line tool to heal the missing face (Fig. 9-7). 8. Offset the new face 2˝ inward. Push/Pull the center face in 2˝ (Fig. 9-8).
Fig. 9-6: Select the edges of the deleted face, right-click, and select Make Component.


Fig. 9-7: Heal the face in the Window component instance. Fig. 9-8: Offset the component face 2˝. Push/ Pull the face 2˝ inward.

9. From the Materials > Translucent menu, select Translucent_Glass_Blue. Paint the color onto the center face.
10. Exit the component instance. 11. Copy (Edit > Copy) and Paste (Edit > Paste) the window and place it around the cube. Notice how it cuts a hole in the surface, allowing the other placed windows to be visible (Fig. 9-9). 12. Delete one of the placed components. Notice that the face of the cube reseals after the window is deleted (Fig. 9-10).


