
2 minute read
Adding Detail to the Building


57. Insert Window 2, 2´-6˝ below Window 3.
58. Copy/Array Window 2 downward on each face. The top-edge distance from window to window should be 10´-6˝. Do this for each of the 6 faces.
Advertisement
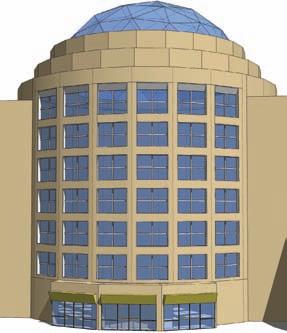
Once all the windows and doors have been added, the building center mass should appear as indicated in this image.

Adding Detail to the Building
Now that the building has doors and windows, you can add the finer details. This set of steps will detail the parapet running at the top of the roofs. 59. Locate the first parapet as shown in the graphic. Detail the parapet as outlined in steps 60–62. Repeat these steps to the parapets along the front part of the building.
Parapet
60. Starting with the left edge of the parapet face, draw a square as indicated. The square should be 2´-6˝ by 2´-6˝. It should be located 2´-6˝ from the left edge of the parapet and 2´-6˝ from the top edge. 61. Use Move/Copy and copy the drafted square to the far end of the face. Place it 2´-6˝ from the far, dashed edge. Array/Divide (4/) to create three equidistant copies. 62. Using Push/Pull, Push each face in, snapping to the back end of the parapet. The faces should be deleted, leaving a void.


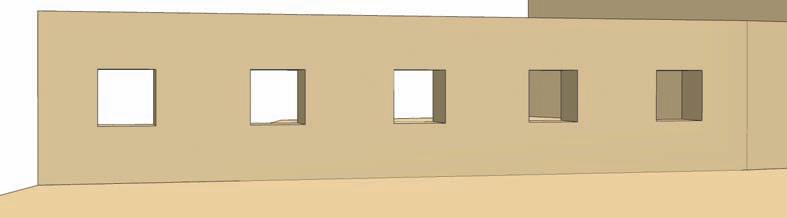
63. Move to the next Parapet along the top of the building. Repeat the steps outlined above to create the 2´-6˝ by 2´-6˝ parapet voids. Adjust the number of voids in each face as needed.

64. Repeat the process of creating the parapet voids on the other side of the building. This way the parapet details match on both sides of the building. 65.Focus on the two faces on either side of the round building central mass. Offset each face 10´ inward. Push/ Pull the center face 2´ inward and Add Color: Materials > Markers > Chipboard. 66.Place a rectangle around the bottom nine windows placed on the face in steps 47 (the first set of Window 1s). Make sure the rectangle snaps to the bottom edge of the face. Do not overlap or connect to the edges to the left and right of the face. 67. Push/Pull the subdivided face inward 2´. The affixed components will move with the face. Paint the face chipboard to add color. Repeat this step for other face locations on the front end of the building.

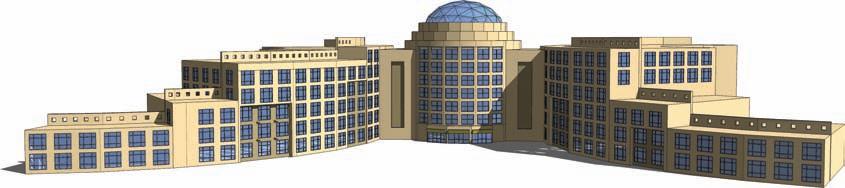
The building model is complete. You can add even more detail, such as shadows, to make it look even more realistic.


The Sandbox Tools
part 3


