Teacher Manual
Grade 6

NEP 2020 aligned Digital coding platform included


1. Introduction to Loops
2. The while Loop
3. The range() Function
4. For versus while Loop
5. Nested Loop
6. Control Statements

Note: Use the following points to prepare for the session beforehand. Avoid reading the points in the class.
● Mel and Conji found out that the first wizard ever was given a unique spell to defend Avora from any upcoming dangers.
● On the basis of Ms. Idea’s input, they attempted to learn more about the spell.
● After a few unsuccessful attempts, they visited the Idea centre.
● They learned from Ms. Idea how to use the unique spell.
● On their way back to Avora, Mel and Conji were able to successfully shield their friend Eva from Ero.
● They landed in the Ministry of Happiness, a mysterious location, as a side effect.
● In an attempt to learn about Avora’s level of happiness, they received bad news.
● Mr. Time informs Mr. Fate of the decline in Avora’s level of happiness.
● Mr. Fate tells the children that this is due to the binary digits getting exchanged.
● Mel can fix the robots because she left Avora before the change took place.
● Mel and Conji hurry to the Anywhere room to board the spacecraft returning to Avora
● On the way, Mel teaches Conji about computer number systems.
● They arrive in Avora with plans to repair the robots.
The content covered in this chapter is aligned with the following CSTA Standard
● 2-AP–11 Algorithms and Programming
This chapter is divided in the following classroom sessions
1. Introduction to Number Systems
2. Uses of Number Systems
3. Decimal to Binary Conversion
4. Binary to Decimal Conversion
In this session, students will learn about –
● Number systems
● Base and range of number systems
● Types of number systems
Keywords
● Number System: A technique used to represent numbers in the computer
● Base: Number of digits a number system uses to represent a number
Invite students to brief the story and CS concepts covered in the previous grade
Discuss the key concepts covered – Number systems
Types of Number Systems
● Recap the story covered in the previous grade.
● Say: There are two new characters in this chapter.
● Introduce Mr. Fate and Mr. Time to the students.

●
● Instruct: Let’s learn how the story moves ahead. We will read from page 2 to panel 3 of page 3 until the text “number systems”
● Read the story aloud OR invite some students to read the characters’ dialogue aloud.

● Explain the following CS concepts –
■ Types of Number systems
● Present the scenario: Consider you have a few gadgets at home.
● Discuss:
■ Which devices do you think use binary digits for ON and OFF?
Possible Responses: Computer; Fan; Refrigerator; Lights; anything that goes ON and OFF.
■ Which binary digit would mean ON?
Possible Responses: 1
■ Which binary digit would mean OFF?
Possible Responses: 0
■ Suppose you create a number system with base 9, which digits would it use?
Possible Responses: 0 to 8; 0 to 6 with A and B
● If time allows, discuss all four questions, or discuss the first two.
● Conduct Fill Up on Page 11:
12 min
■ Say: Mel and Conji have discovered a magical lamp that needs a passcode to light. Let’s help them complete the sentences to unlock the lamp.
■ Read Q1, 2, 3 and 5 aloud, one by one.
■ Invite some students to share their answers and others to validate their peers’ answers.
■ Instruct: Fill in the final answers in your books.
● Conduct Find the Truth on Page 12:
■ Say: Let’s practise some more to revise what we have learned.
■ Read Q3 and 4 sentences aloud one by one. After each sentence, ask if it is true or false.
■ Invite some students to share their responses.
■ Discuss and validate the answers with the whole class.
■ Instruct: Fill in the final answers in your books.
● Conduct Answer in short on Page 12:
■ Say: Let’s help Eva access the lamp by answering these questions.
■ Read Q1, 2, 3 aloud, one by one.
■ Invite some students to share their answers and others to validate their peers’ answers.
■ Write the final answer on the board so that students can take notes.
● If time permits, discuss the section ‘Tick the Correct Answer’ – Q1, 2. Or, assign it as homework.
5 min
● Conclude: Today, we learned about Number Systems and their types.
● Ask the following probing question:
■ Why do you think we need to use letters of the alphabet in number systems with bases more than 10?
Possible Responses: digits repeat after the number 9; 10 consists of digits 0 and 1
■ For what purposes do you think we need different types of number systems?
Possible Responses: to make computers understand what we are saying; to communicate with computers
● Assign the following as homework:
■ Answer in detail – Q1
■ Tick the Correct Answer – Q1, 2
In this session, students will –
● Revise the types of number systems
● Learn about the uses of number systems
Keywords
● Arithmetic operations: Calculations such as addition, subtraction, multiplication, and division
● Computer memory: A place to store data or programs in a computer system
Invite students to brief the story and CS concepts covered in the chapter
Discuss the key concepts covered–Uses of number systems Activity 1
Tick the correct answer –Q3, 4, 5 Answer in short – Q4, 5 Answer in detail – Q3
Conclude the concepts Assign homework
● Recap the story covered in the previous chapter.
● Instruct: Let’s revise what we have learned in the previous session.
● Read the story aloud or call the students to read the characters’ dialogue and take the lesson forward as given in Panel 2 on Page 5.
● Say: Let me explain the uses of number systems. CS
Uses of Number Systems
As given in Panel 3 on Page 5
●
■ Activity 1 on page 6.
Build
● Conduct Tick the correct answer on Page 11:
11 min
■ Say: Mel needs guidelines to make the magical lamp work. Let’s help Mel find the correct answers to the following questions to unlock the guidelines.
■ Read Q3, 4, and 5 aloud one by one.
■ Invite some students to share their answers and others to validate their peers’ answers.
■ Instruct: Fill in the final answers in your books.
● Conduct Answer in short on Page 12:
■ Say: Let’s help Eva access the lamp by answering these questions.
■ Read Q4 and 5 aloud, one by one.
■ Invite some students to share their answers and others to validate their peers’ answers.
■ Write the final answer on the board so that students can take notes.
● Conduct Answer in detail on Page 13:
■ Say: Let’s get the first wish fulfilled by answering this question.
■ Read Q3 aloud.
■ Invite some students to share their answers and others to validate their peers’ answers.
■ Write the final answer on the board so that students can take notes.
Note
● If time permits, discuss the section Find the truth– Q5. Or, assign it as homework.
● Conclude: Today, we learned about the uses of number systems and recognised the numbers according to their base.
● Ask the following probing questions:
■ Which number systems do the letters of the alphabet A, B, C, D, E, F not belong to?
Possible Responses: 0; 1; All numbers except those represented by alphabets in Hexadecimal Number System
■ In which devices can you use the binary number system?
Possible Responses: TV; refrigerator; setup box; cell phones; computers; calculators
● Assign the following as homework:
■ Find the truth – Q5
In this session, students will learn about –
● Conversion of Decimal numbers to Binary numbers
● Remainder: The value left after the division is completed
Invite students to brief the story and CS concepts covered in the chapter
Discuss the key concepts covered – Decimal to Binary Conversion
Fill Up – Q4 Find the truth – Q2
Answer in detail – Q2
Conclude the concepts Assign homework
● Recap the story and terms covered in the previous session.
● Instruct: Let’s learn how the story moves ahead. We will read from panel 2 of page 6 to panel 1 of page 7 until the dialogue, ending with text “to binary”
● Read the story aloud OR invite students to read the characters’ dialogue aloud.
● Say: Let me explain how to convert decimal numbers to binary.
Decimal to Binary Conversion
● Do the following:
As given in Panel 3 on Page 7 to Panel 1 on Page 8
■ Discuss Activity 2 in panel 2 of page 9 under the subheading, “Convert from Decimal to Binary”
■ Invite some students to share their responses.
■ Validate the answers with the whole class.
● Conduct Fill Up on Page 11:
■ Say: Memory Palace is under attack. Let’s help Mel complete the sentences to reach it and save it.
■ Read Q4 aloud.
■ Invite some students to share their answers and others to validate their peers’ answers.
■ Instruct: Fill in the final answer in your books.
● Conduct Find the Truth on Page 12:
■ Say: Let’s practise some more to revise what we have learned.
■ Read Q2 sentences aloud, one by one. After each sentence, ask if it is true or false.
■ Invite some students to share their responses.
■ Discuss and validate the answers with the whole class.
■ Instruct: Fill in the final answer in your books.
● Conduct Answer in detail on Page 13:
■ Say: Let’s get the first wish fulfilled by answering this question.
■ Read Q2 aloud.
■ Invite some students to share their answers and others to validate their peers’ answers.
■ Write the final answer on the board so that students can take notes.
● Conclude: Today, we learned to convert decimal numbers to binary numbers.
● Ask the following probing question:
■ Can you think of a way to convert from the decimal to the octal number system?
Possible Responses: Dividing the number by 8; the number remains the same if it is less than 8, etc.
■ Why do decimal numbers have a base 10 and not any other number?
Possible Responses: because we use a total of ten numbers to write a number in decimal number systems; it is the base of decimal numbers, etc.
● Assign the following as homework:
■ Lab time – part B – Q1
In this session, students will learn about –
● Conversion of Binary numbers to Decimal numbers
● Product: The value obtained when numbers are multiplied together
Invite students to brief the story and CS concepts covered in the chapter
Discuss the key concepts covered –Binary to decimal conversion
Find the truth – Q1 Lab time – part A Conclude the concepts Assign homework
● Recap the story and concepts covered in the previous session.
● Say: Let me explain how we can convert binary numbers to decimal number systems.
CS Concepts Explain
Binary to Decimal Conversion As given in Panel 2 on Page 8
● Do the following:
■ Discuss Activity 2 in panel 2 of page 9 under the subheading, “Convert from Binary to Decimal”.
■ Invite some students to share their responses.
■ Validate the answers with the whole class.
● Conduct Find the Truth on Page 12:
■ Say: Let’s practise some more to revise what we have learned.
■ Read Q1 aloud. After the sentence, ask if it is true or false.
■ Invite some students to share responses.
■ Discuss and validate the answer with the whole class.
■ Instruct: Write the final answer in your books.
● Conduct Conversions section from Lab Time on Page 15:
■ Say: Let’s practise some more to help Conji win the challenge.
■ Read – Convert from binary to decimal – Q2 – a, b, c aloud one by one. After the question, ask the students to attempt the solution.
■ Invite some students to share their responses.
■ Discuss and validate the answers with the whole class.
■ Instruct: Write answers in your notebooks.
● Conclude: Today, we learned to convert binary numbers to decimal numbers.
● Ask the following probing question:
■ Why is the binary/octal/hexadecimal number system given that name?
Possible Responses: named according to bases; binary has base 2; hexadecimal has base 16; octal has base 8
■ If you represent true or false using a binary number system, which digit would you choose for true, and which one for false?
Possible Responses: 1 for True; 0 for False; 0 for True; 1 for False
● Assign the following as homework:
■ Lab Time – part A – Corrections
Note: Use the following points to prepare for the session beforehand. Avoid reading the points in the class.
● Mr. Time informed Mr. Fate of the decline in Avora’s level of happiness.
● Mr. Fate told the kids about the change in binary digits.
● Mel could fix the robots because she left Avora before the change took place.
● Mel and Conji boarded the spacecraft from Anywhere room to Avora.
● On the way, Mel taught Conji about computer number systems.
● They reached Avora with plans to repair the robots.
● Mel and Conji land in Avora where Joy is waiting for them.
● The three rush to the Elder Robot.
● On the way, Mel teaches Conji about the concepts of Network.
● Elder Robot connects the mainframe to Mel’s digital DNA.
● After a few minutes, the situation in Avora starts returning to normal.
● Everyone breathes a sigh of relief and heads to the council room.
The content covered in this chapter is alligned with the following CSTA Standard
● 2 - CS - 02 Computing Systems
This chapter is divided into the following classroom sessions
1. Computer Network, Basic Network Terms
2. Types of Networks
3. Network Topologies
4. Revision and Network Security
In this session, students will learn about –
● A computer network
● An example of a network
● Basic network terminologies
Keywords
● Computer Network: Collection of interconnected computers
● Nodes: Also known as workstations; computers connected to a particular network
● Server: A computer that helps in sharing resources on a network
● Client: A computer that connects to a computer and uses its resources
● NIU: Creates communication between a server and a client
● IP Address: Unique identifier of a computer
● Domain name: Names given to IP addresses to easily identify addresses
students to briefly explain the story and CS concepts covered in the chapter
● Recap the story covered in the previous chapter.
● Invite students to briefly explain the story and CS concepts covered in the chapter.
● Say: Let me explain what Computer Network is.
● Present the scenario: Consider a classroom where the teacher and students are interacting like computers.
● Discuss:
■ In computer terms, what are they doing?
Possible Responses: Networking; interacting with each other just like computers; interconnecting with each other; etc.
■ What are they called in computer terms?
Possible Responses: Nodes; Workstations; etc.
■ What will the teacher be?
Possible Responses: A server; a node; a workstation.
■ Since the students are using the resources shared by the teacher, what can we call them?
Possible Responses: Clients; nodes; workstations Note
● If time allows, discuss all four questions, or discuss the first two.
● Conduct Find the Truth on Page 28:
■ Say: Let’s practise some more to revise what we have learned.
■ Read Q1, 2, and 3 sentences aloud one by one. After each sentence, ask if it is true or false.
■ Invite some students to share their responses.
■ Discuss and validate the answers with the whole class.
■ Instruct: Fill in the final answers in your books.
● Conduct Answer in short on Page 30:
■ Say: Let’s help Conji unlock the entry gate of Electronic City by answering these questions.
■ Read Q1, 3, 4, 5 aloud, one by one.
■ Invite some students to share their answers and others to validate their peers’ answers.
■ Write the final answers on the board so that students can take notes.
Note
● If time permits, discuss the section Answer in Detail - Q4 or, assign it as the homework.
● Conclude: Today, we learned about Computer networks and related basic terminologies
● Ask the following probing questions:
■ What information of yours can be used as an IP address?
Possible Responses: Roll number; Enrollment number; Contact number; Email address; GPS location
■ Other than the internet, can you think of more examples of computer networks?
Possible Responses: School network; banking network; mobile phone network
● Assign the following as homework:
■ Brain Teaser – Tick the Correct Answer – Q1, 2
■ DIY – Abbreviations – Q3
In this session, students will learn about –
● Various types of computer networks
● LAN: Local Area Network; a network that covers a small area like a home, an office, etc.
● MAN: Metropolitan Area Network; a network that covers large areas like cities, and towns
● WAN: Wide Area Network; a network that spreads across countries, and continents
● PAN: Personal Area Network; a network that covers very small areas within approximately 10 meters
Invite students to briefly explain the story and CS concepts covered in the chapter
Discuss the key concepts covered Types of Networks
Fill up – Q3, 4, 5 Tick the correct answer – Q3, 5 Answer in detail - Q1
Conclude the concepts Assign homework
● Recap the story covered in the previous session.
● Invite students to briefly explain the story and CS concepts covered in the chapter.
● Read the story aloud and the concepts to be taught, one by one.
● Say: Let me explain the types of computer networks.
Types of Computer Network
As given in Panel 2 on Page 22 and Panel 1 on Page 23
● Present the scenario: Consider you are in the computer lab of your school.
● Discuss:
■ Which type of network do you think the computers are interconnected with?
Possible Responses: PAN; LAN
■ Name the term we can use for a mobile phone that uses UPI to make payments?
Possible Responses: Node; Client; Workstation
■ Can you think of more places where a LAN is used?
Possible Reponses: supermarkets; outdoor events; malls; amusement parks; zoos; hotels; airports
■ Which type of network do you think your city is connected with?
Possible Responses: MAN; Mobile network; Road network; Hospital network
● If time allows, discuss all four questions, or discuss the first two.
● Conduct Fill Up on Page 28:
10 min
■ Say: Conji wants to reserve a seat in the Electronic City of Avora. Let’s help him by answering the following questions.
■ Read Q3, 4, 5 aloud, one by one.
■ Invite some students to share their answers and others to validate their peers’ answers.
■ Instruct: Fill in the final answers in your books.
● Conduct Tick the correct answer on Page 29:
■ Say: Let’s practise some more to revise what we have learned.
■ Read Q3, and 5 sentences aloud one by one. After each sentence, ask the students to choose one of the options as the correct answer.
■ Invite some students to share their responses.
■ Discuss and validate the answers with the whole class.
■ Instruct: tick the final answers in your books.
● Conduct Answer in detail on Page 30:
■ Say: Let’s get access to the exit gate for Joy by answering this question.
■ Read Q1 aloud.
■ Invite some students to share their answers and others to validate their peers’ answers.
■ Write the final answer on the board so that students can take notes.
● If time permits, discuss the section Answer in Short – Q2 or, assign it as homework.
5 min
● Conclude: Today, we learned about various types of computer networks.
● Ask the following probing questions:
■ How are computers in a network connected?
Possible Responses: using cables; using fiber; using wifi
■ Where do you think you could establish a PAN?
Possible Responses: at home; in a room; in a bus; in a cafe; in computer labs
● Assign the following as homework:
■ Find the truth – Q4, 5
■ Answer in Short – Q2
In this session, students will learn about –
● The different connectivity methods of computers, also called “Network Topology”
● Network Topology: A way of connecting devices to each other.
Warm-Up Engage Build Sum-Up
Discuss Network Topologies Fill up - Q2 Tick the Correct Answer - Q4 Answer in Detail - Q2, 5 3 min 12 min 10 min 5 min
Conclude the concepts Assign homework
● Recap the story covered in the previous chapter.
● Invite students to briefly explain the story and CS concepts covered in the chapter.
3 min Warm-Up 12 min Engage
● Say: Let me explain Network Topologies.
Page Number
Network Topology and its types As given in Panel 2 on Page 23, Page 24, and in Panel 1 of Page 25
● Present the scenario: Consider the digital payment method (UPI) Google Pay.
● Discuss:
■ What type of network do you think it is?
Possible Responses: WAN; MAN
■ Which type of network topology do you think Google Pay uses?
Possible Responses: Star Topology; Mesh Topology
■ Where do you think a mesh topology can be used?
Possible Responses: Military; Public Sectors; Industrial Sectors
■ Where do you think a ring topology can be used?
Possible Responses: LAN; Fibre optics; Domino game
● If time allows, discuss all four questions, or discuss the first two.
● Conduct Fill Up on Page 28:
■ Say: Conji wants to reserve a seat in the Electronic City. Let’s help him by answering the following question.
■ Read Q2 aloud.
■ Invite some students to share their answers and others to validate their peers’ answers.
■ Instruct: Fill in the final answer in your books.
● Conduct Tick the correct answer on Page 29:
■ Say: Let’s practise some more to revise what we have learned.
■ Read Q4 sentences aloud. Ask the students to choose one of the options as the correct answer.
■ Invite some students to share their responses.
■ Discuss and validate the answers with the whole class.
■ Instruct: Tick the final answer in your books.
● Conduct Answer in detail on Page 30:
■ Say: Let’s get access to the exit gate for Joy by answering this question.
■ Read Q2, 5 aloud, one by one.
■ Invite some students to share their answers and others to validate their peers’ answers.
■ Write the final answers on the board so that students can take notes.
● If time permits, discuss the section Odd one out – Q2 or, assign it as homework.
● Conclude: Today, we learned about various network topologies.
● Ask the following probing questions:
■ What are the advantages of mesh topology?
Possible Responses: Robust; fast; easy to identify the problem; private
■ Which topology do you think is best when we need less maintenance?
Possible Responses: Star topology; Bus topology; Ring topology
● Assign the following as homework:
■ DIY – Abbreviations – Q1, 4, 5
■ DIY – Odd one out – Q2
In this session, students will –
● Revise the concepts covered in previous sessions
● Learn about network security
● Network Security: Set of rules designed to keep the computer network safe
Invite students to briefly explain the story and CS concepts covered in the chapter
● Recap the story covered in the previous session.
● Say: There is a new character in this chapter.
● Introduce Elder Robot to the students.
● Invite students to briefly explain the story and CS concepts covered in the chapter.
● Revise the concepts covered in previous sessions.
● After the revision, say: Let me explain Network Security.
Network Security
As given in Panel 3 on page 25 and Panel 1 on Page 26
● Present the scenario: Consider the cyber security of your city is prone to cyber attack.
● Discuss:
■ Which places need to be secured on priority?
Possible Responses: Banks; Defence; Hospitals; Schools; Offices
■ Which systems should you secure?
Possible Responses: Phone; Wifi; Computers; Laptops; Servers; Clients; Digital Scanners
■ What are the different methods you can use to secure networks?
Possible Responses: Antivirus; firewalls; VPNs; strengthen the password
■ What can happen if you fail to secure the systems?
Possible Responses: Banks can be robbed; internet might shut down; personal information could be spread around; data can be lost
● Conduct Fill Up on Page 28:
■ Say: Conji wants to reserve a seat in the Electronic City. Let’s help him by answering the following question.
■ Read Q1 aloud.
■ Invite some students to share their answers and others to validate their peers’ answers.
■ Instruct: Fill in the final answer in your books.
● Conduct Answer in detail on Page 30:
■ Say: Let’s get access to the exit gate for Joy by answering this question.
■ Read Q3 aloud.
■ Invite some students to share their answers and others to validate their peer answers.
■ Write the final answer on the board so that students can take notes.
● Conduct Decode section from Lab Time on Page 32:
■ Say: Let’s help Conji correct the scrambles to form correct words.
■ Read scrambles one by one.
■ Give the students some time to think and attempt the activity.
■ Invite some students to share their responses.
■ Discuss and validate the answers with the whole class.
■ Instruct: Fill in the final answers in your books.
Note
● If time permits, discuss the section Decode or, assign it as homework.
● Conclude: Today, we learned about network security.
● Ask the following probing questions:
■ What can happen if a network is not secure?
Possible Responses: Data loss; Money theft; Cyber crime; Cyber bullying
■ Which personal information should you protect in a computer network?
Possible Responses: Password, OTP, ATM Pins, Phone numbers, Card number, etc.
● Assign the following as homework:
■ DIY – Abbreviations - Q2
■ DIY – Odd one out - Q1, 3
Note: Use the following points to prepare for the session beforehand. Avoid reading the points in the class.
● Mel and Conji landed in Avora and rushed to the Elder Robot along with Joy.
● On the way, Mel taught Conji about the concepts of Network.
● Elder Robot connected the mainframe to Mel’s digital DNA.
● After some time, the situation in Avora started returning to normal.
● Everyone breathed a sigh of relief and headed to the council room.
● With Mel and Conji’s help, the robots and wizards of Avora have been reunited.
● Elder Wizard announces a grand dinner to celebrate the event.
● Mel and Conji jump in to help with the preparations.
● Conji gets introduced to Canva while making the invites for the event.
The content covered in this chapter is aligned with the following CSTA Standard
● 2-AP-10 Algorithms
● 2-AP-13 Modularity
This chapter is divided into the following classroom sessions
1. Get Started with Canva
2. Adding Templates, Creating Designs, Making Posters
3. Uploads Option, Elements, Adding a Line, Formatting a Line
4. Activities: Design with Canva
In this session, students will –
● Be introduced to Canva
● Learn about Templates
● Get started with Canva
● Templates: Readymade design patterns
● Canva: An online graphic design platform
Revise the story and CS concepts covered in the previous chapter
Invite students to brief the class on the story and CS concepts covered in the session
Discuss the introduction to Canva, templates, and how to get started with Canva
Fill Up – Q1, 2, 3 Answer in Short – Q1, 2 Answer in Detail – Q1
● Invite students to briefly explain the story covered in the previous chapter.
● Invite students to brief the class on the story covered in the chapter from Page 34 to Panel 1 on Page 35.
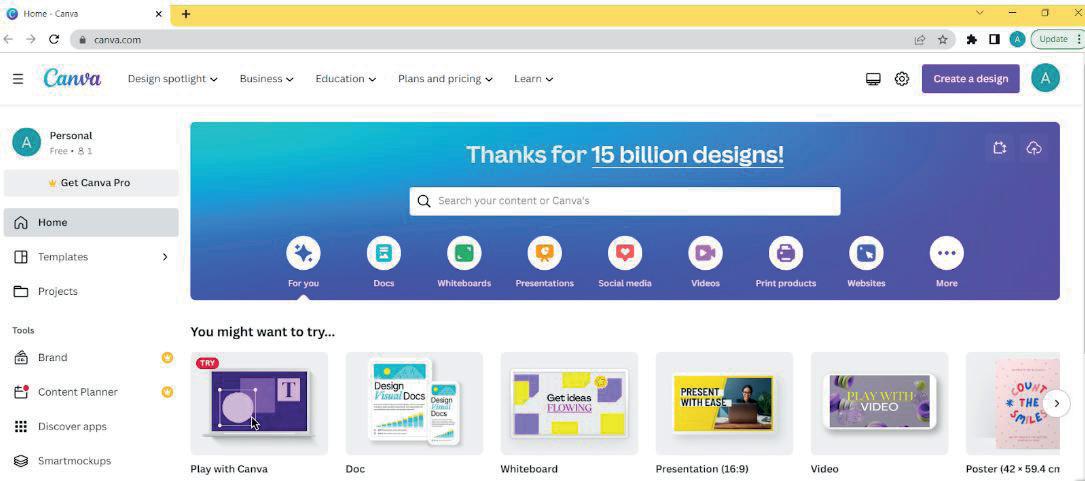
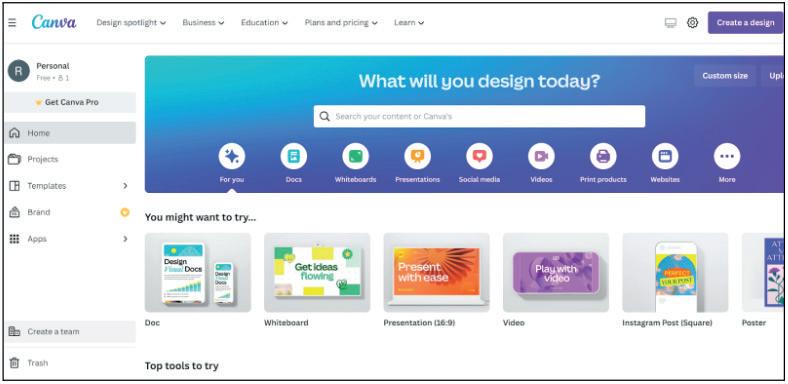
● Say: Let me introduce you to Canva - an online graphic designing platform.
● Explain or demonstrate the CS concepts as mentioned in the table below.
Scenarios
If you are teaching without a projector
What is Canva? As given in Panel 2 on Page 35
The Canva interface
Templates As given in Panel 4 on Page 35 Templates
How to Start Canva As given in Panel 1 on Page 36
How to Sign Up As given in Panel 1 on Page 37
How to start Canva – Log In or Sign Up
How to Sign Up
● Present the scenario: Consider you want to decorate your classroom.
● Discuss:
■ What elements can you use to decorate your classroom?
Possible Responses: Posters; charts; maps; checklists; calendars; project models.
■ Which of the following elements can you design online?
Possible Responses: Posters; charts; maps; checklists; calendars.
■ What are the different ways you can create these elements?
Possible Responses: Draw everything by hand; use design templates; use Canva; use stencils; by tracing.
■ Suppose you do not have enough time to draw everything manually, what options would you prefer to quickly get the task done?
Possible Responses: Go online and use design tools; use Canva; use templates; use readymade patterns.
Note
Build
● Conduct Fill Up on Page 45:
■ Say: Let’s help Conji complete his assignment by filling in the blanks.
■ Read Q1, 2, 3 aloud, one by one.
■ Invite some students to share their answers and others to validate their peers’ answers.
■ Instruct: Fill in the final answers in your books.
● Conduct Answer in Short on Page 46:
■ Say: Let’s help Conji unlock the entry gate of Electronic City by answering these questions.
■ Read Q1, 2 aloud, one by one.
■ Invite some students to share their responses.
■ Discuss and validate the answers with the whole class.
■ Write the final answers on the board so that students can take notes.
● Conduct Answer in Detail on Page 46:
■ Say: Let’s help Conji ace the test prepared by Mel by answering these questions.
■ Read Q1 aloud, one by one.
■ Invite some students to share their answers and others to validate their peers’ answers.
■ Write the final answers on the board so that students can take notes.
● Conclude: Today, we learned about Canva, templates, and how to get started with Canva.
● Ask the following probing questions:
■ For what purpose do you think we can use Canva?
Possible Responses: to make birthday cards; to make designs; school fest; Diwali posters; Invitation cards.
■ What template designs do you think should be included in a design platform?
Possible Responses: Birthday; treats; notices; anniversaries; achievements.
● Assign the following as homework:
■ DIY: Fill Up – Q1, 4
■ Brain Teasers: Find the Truth – Q1, 2, 3, 4
In this session, students will learn about –
● Adding Templates
● Creating Designs
● Making Posters
● Toolbox: Has different options to add shapes, images, texts, background, etc.
● Templates: Readymade design patterns that can be edited
Revise the story and CS concepts covered in the previous session
Invite students to brief the class on the story and CS concepts covered in the session
Discuss adding templates, creating designs, making posters, and the in-class activity
Fill Up – Q4, 5 Answer in Short – Q3, 4 Answer in Detail – Q3
Conclude the concepts Assign homework
● Invite students to briefly explain the story and CS concepts covered in the previous session.
● Say: Let me explain different elements of Canva.
● Demonstrate the CS concepts as mentioned in the table below.
How to Add Templates How to add a template to begin working on your design
Create a Design How to create your own design
How to Make a Poster How to make a poster and make use of the toolbox
Activity Help the students make the poster given in the activity in Panel 2 on Page 39
● Present the scenario: Consider you are creating a poster for “The Summer Party”
● Discuss:
■ What is the first step you will take?
Possible Responses: Start Canva; login; signup; select the template.
■ After logging in/signing up, how will you proceed to start designing the poster?
Possible Responses: Choose suitable template; create a design on my own; choose a poster; use toolbox.
■ What elements could you include in your poster for the summer party?
Possible Responses: Text; shapes; images; background.
■ What colours of the template do you think would be suitable for your poster?
Possible Responses: Yellow; green; orange; blue; bright colours; cool colours.
If time allows, discuss all four questions, or discuss the first two.
● Conduct Fill Up on Page 45:
■ Say: Let’s help Conji complete his assignment by filling in the blanks.
■ Read Q4, 5 aloud, one by one.
■ Invite some students to share their answers and others to validate their peers’ answers.
■ Instruct: Fill in the final answers in your books.
● Conduct Answer in Short on Page 46:
■ Say: Let’s help Conji with his semester exams by answering these questions.
Note: Replace Q3 with “How can we change the line weight? List the steps.”
■ Read Q3 and 4 aloud, one by one.
■ Invite some students to share their responses.
■ Discuss and validate the answers with the whole class.
■ Write the final answers on the board so that students can take notes.
● Conduct Answer in Detail on Page 46:
■ Say: Let’s help Conji ace the test prepared by Mel by answering these questions.
■ Read Q3 aloud, one by one.
■ Invite some students to share their answers and others to validate their peers’ answers.
■ Write the final answers on the board so that students can take notes.
If time permits, discuss the section Find the Truth – Q5 or, assign it as homework.
● Conclude: Today, we learned how to add templates, create designs, and make posters using Canva.
● Ask the following probing questions:
■ Where do you think you can use the design created in Canva?
Possible Responses: Instagram posts; YouTube thumbnails; Pinterest uploads; school projects; events.
■ Name the ways to create a design in Canva.
Possible Responses: Use templates; readymade design patterns; create a design from scratch; create a poster.
● Assign the following as homework:
■ Answer in Detail – Q2
■ Find the Truth – Q5
Objectives
In this session, students will learn about –
● The Uploads Option
● Elements
● Adding a Line
● Formatting a Line
Keywords
● Uploads option: Helps add elements to our Canva gallery from our own device
● Formatting: The way in which something is arranged or set out
● Elements: help customise any image or graphic design
Revise the story and CS concepts covered in the previous session Invite students to brief the class on the story and CS concepts covered in the session
Discuss the Uploads option, elements, search for elements, adding a line, changing line weight and line style
Answer in Short – Q5
Answer in Detail – Q4, 5
Conclude the concepts Assign homework
● Invite students to briefly explain the chapter story and CS concepts covered in the previous session.
● Say: Let me explain more about the design tool - Canva.
● Demonstrate the CS concepts as mentioned in the table below.
CS Concepts Explain
How to Upload Elements How to Upload Elements as given in Panel 2 on Page 40 Elements Range of Elements in Canva
Search for Elements How to search for Elements as given in Panel 3 on Page 41
Adding a Line How to add a line and use options to customise the line as given in Panel 1 on Page 42
How to Change Line Weight How to change the line weight using the line weight icon as given in Panel 2 on Page 42
Changing Line Style How to change the line style using different types of lines as given in Panel 2 on Page 43
● Present the scenario: Consider you wish to enhance your poster for “The Summer Party”.
● Discuss:
■ How can you make the poster more appealing to your invited audience?
Possible Responses: adding gifts; offers; adding gifs and images in the poster.
■ How will you proceed with your poster if you don’t find a suitable element in the Canva gallery?
Possible Responses: Use the Uploads option; upload from my own device; use the Upload Media option; search deeper in the Canva gallery.
■ Name different elements you can upload in the Canva gallery.
Possible Responses: Shapes; graphics; photos; frames; gifs; emojis.
■ Name different line elements you have learned in Canva.
Possible Responses: Add a line; change line weight; change line style.
If time allows, discuss all four questions, or discuss the first two.
● Conduct Answer in Short on Page 46:
■ Say: Let’s help Conji unlock the entry gate of Electronic City by answering these questions. Note: Replace Q5 with “How can we change the line style? List the steps.”
■ Read Q5 aloud.
■ Invite some students to share their answers and others to validate their peers’ answers.
■ Write the final answers on the board so that students can take notes.
● Conduct Answer in Detail on Page 46:
■ Say: Let’s help Conji unlock the entry gate of Electronic City by answering these questions.
■ Read Q4 and 5 aloud, one by one.
■ Invite some students to share their responses.
■ Discuss and validate the answers with the whole class,
■ Write the final answers on the board so that students can take notes.
● Conclude: Today, we learned about Canva elements, how to upload them and search for them; and how to add and format lines.
● Ask the following probing questions:
■ Spot and name some instances of Canva designs in daily life.
Possible Responses: Book covers; desktop wallpapers; photo collage; mind maps; advertisement posters.
■ Name the Canva elements you can see on the cover of your favourite book from your school bag.
Possible Responses: Texts; images; shapes; quotes; dog pictures; car picture; floral image; colours.
● Assign the following as homework:
■ DIY: Fill Up – Q2, 3, 5
In this session, students will apply what they learned from the previous class to practise Canva with the help of activities.
● Canvas: The white space on the screen
● Halloween: Celebration observed in different parts of the world on 31 October
● Say: Do you remember what we learned in the previous session?
● Invite responses from some students.
● Say: Let’s revise what we have learned.
● Instruct: Go to the Panel and open Lab on Introduction to Canva II.
● Show slides one by one and discuss the concepts shown on the slide on the panel.
● Say: Let’s recap various elements we have learnt so far in Canva.
About Canva
As given in the learning slides of the chapter on Tekie Platform
● Present the scenario: Consider you are organising a Halloween Party at your house.
● Discuss:
■ What preparations do you think you would need to do?
Possible Responses: Food; venue; invitation cards; cake; costumes; lights.
■ Where can you use Canva in the preparations?
Possible Responses: to prepare the menu; to create posters; invitation cards; to decide on the theme.
■ Which background do you think would be suitable for the Halloween party?
Possible Responses: Dark theme; light theme; horror theme; night theme; dim; Halloween theme.
■ Name the elements that can be added when making a poster to invite your friends to the party.
Possible Responses: Pumpkin shapes; witch images; broomstick stickers; texts; background.
If time allows, discuss all four questions, or discuss the first two.
● Invite answers from as many students as possible.
● Address if students have any other doubts related to the concepts presented in the slides.
Build
● Instruct: We know how to use Canva for design purposes.
10 min
● Now, let’s practise our learning. Click on the Go to Canva button on the Assignment page to attempt the activity.
● Click on the Attempt button to open the activity page.
● Walk around in the classroom and observe the activity done by the students.
● Conduct Lab Time on Page 48:
■ Say: Conji is organising a Halloween party at his house. Help him make a poster to invite his friends.
■ Read the instructions given as help, one by one.
■ Help the students create a poster on the given topic.
■ Invite some students to share their design.
■ Correct the mistakes if required and complete the activity.
Sum-Up
● Conclude: Today, we revised the chapter on Canva.
● Instruct: We should practise the same activity at home.
5 min
● Ask the following probing questions:
■ Which activities in the party will need you to design something on Canva?
Possible Responses: Games; food menu; invitees list; to-do list; invitation cards; Halloween decorations.
■ How can you create a food menu for your party?
Possible Responses: prepare a list; ask my parents; prepare pumpkin snacks; create a menu in Canva using images, shapes, texts.
● Assign the following as homework:
■ DIY: Fun Time
Note: Use the following points to prepare for the session beforehand. Avoid reading the points in the class.
● With Mel and Conji’s help, the robots and wizards of Avora were reunited.
● Elder Wizard announced a grand dinner to celebrate the event.
● Mel and Conji jumped in to help with the preparations.
● Conji was introduced to Canva while making the invites for the event.
● Eva is reading about Cyborg when Lord Ero appears.
● Lord Ero casts a spell on Eva and she disappears into the mirror dimension.
● Meanwhile, Mel and Conji take a look at the invite they created using Canva.
● Conji wishes to learn more about Canva.
The content covered in this chapter is aligned with the following CSTA Standard
● 2-AP-10 Algorithms
This chapter is divided into the following classroom and lab sessions
1. Canva Tools I
2. Canva Tools II
3. Canva Tools III
4. Canva Tools IV
5. Canva Tools V
In this session, students will learn about -
● Adding an Arrow to a Line
● Adding Shapes
● Editing Shapes
● Resizing and Rotating an Element
● Art board: An on-screen design surface in a drawing application
● Interface: A program that enables a user to communicate with a computer
Revise the story and CS concepts covered in the previous chapter Invite students to brief the class on the story and CS concepts covered in the session
Discuss how to add an arrow to a line, add and edit shapes, resize and rotate an element, start a video project, and the Canva user interface
● Invite students to briefly explain the story covered in the previous chapter.
● Invite students to brief the class on the story covered in the chapter on Page 50.
● Say: Let me explain how to add an arrow to a line, add and edit shapes, resize and rotate an element, start a video project, and the Canva User Interface.
Add an arrow to a line
How to Add Shapes
How to edit a shape
How to resize elements
As given in Panel 1 on Page 51
As given in Panel 3 on Page 51
As given in Panel 2 on Page 52
As given in Panel 4 on Page 52
How to rotate an element
How to start a video project
Canva User InterFace
As given in Panel 4 on Page 52
As given in Panel 2 on Page 53
As given in Panel 4 on Page 53
● Present the scenario: Consider you are teaching your younger sister shapes.
● Discuss:
■ How can you draw attention to different shapes?
Possible Responses: By pointing with your finger; By using the mouse pointer; By describing the shape
■ What are the different arrow styles present in Canva?
Possible Responses: Triangle; Circle; Square; Diamond
■ What elements can be added in Canva?
Possible Responses: Lines; Arrows; Circles; Boxes; Squares.
■ What manipulations can we do on shapes?
Possible Responses: We can add; Resize; Rotate; And edit shapes
● If time allows, discuss all four questions, or discuss the first two.
● Conduct Fill Up on Page 62:
■ Say: Let’s help Mel become a graphic designer by filling in the blanks.
■ Read Q3 and 4 aloud, one by one.
■ Invite some students to share their answers and others to validate their peers’ answers.
■ Instruct: Fill in the final answers in your books.
● Conduct Tick The Correct Answer on Page 62:
■ Say: Let’s help Conji tick the correct answer.
■ Read Q1 aloud
■ Invite some students to share their responses.
■ Discuss and validate the answers with the whole class.
■ Instruct: Tick the final answer in your books.
● Conduct Answer in Short on Page 63:
■ Say: Let’s help Conji get his first client by answering these questions.
■ Read Q1 aloud.
■ Invite some students to share their answers and others to validate their peers’ answers.
■ Write the final answer on the board so that students can take notes.
min
● Conclude: Today, we learned how to add an arrow to a line, add and edit shapes, resize and rotate elements, start a video project, and the Canva user interface. Ask the following probing questions:
■ What can you create or design using Canva?
Possible Responses: Invitations; Social media images; Videos and gifs for posters; Websites; Booklets; Multimedia presentations; Posters
■ Do you know any other apps or software that are similar to Canva?
Possible Responses: Adobe Express; Drawtify; Pictochart; Stencil; Snappa.
● Assign the following as homework:
■ Match Me
In this session, students will apply the concepts learned in the previous session with the following -
● Starting a Video Project
● Canva User Interface
● Art board: An on-screen design surface in a drawing application
● Interface: A program that enables a user to communicate with a computer
● Say: Do you remember what we learned in the previous session?
● Invite responses from some students.
● Say: Let’s revise what we have learned.
● Instruct: Go to the Panel and open Lab on Canva II.
● Show slides given in the Tekie panel one by one to recall the concepts covered in the previous session.
● Ask students to answer the questions given on the slide and discuss them.
● Discuss the following questions one by one to check students’ understanding:
■ What can you create using templates in Canva?
Possible Responses: We can create presentations; Invitations; Lesson plans; YouTube intros and so on.
■ What options does the toolbox in Canva contain?
Possible Responses: Shapes; Images; Texts; Backgrounds; Videos; Audios
● Invite answers from as many students as possible.
● Address any other doubts students may have related to the concepts presented in the slides.
● Conduct the activity given in the Tekie panel:
■ Explain the activity to the students.
■ Instruct: Click on the Practice button on the Assignment page to attempt the activity.
■ Instruct: Click on the Attempt button to open the activity page.
■ Walk around in the classroom and observe the activity done by the students.
● Instruct: Click on the Confirm button to submit your work when you are done with the activity.
● Conclude: Today, we have learned a few basic concepts of using Canva Tool.
● Instruct: Practise the same activity at home.
● Assign the following as homework:
■ Ask the students to create a poster for any upcoming festival (Holi, Diwali, Eid, Christmas, and so on)
● The project is optional. Kindly assign if feasible.
In this session, students will learn about -
● Importing Footage to Canva
● Editing and Trimming Footage
● Adding Multiple Videos
● Adding Titles
● Animating Text
● Animation: Is the act of creating visual effects and animations for a variety of multimedia, including video games, videos, and digital assets like websites and apps
Revise the story and CS concepts covered in the previous chapter
Read or Invite students to read the story of the chapter
Fill
Up
● Recap the story covered in the previous session.
● Invite a few students to recall the CS concepts covered in the previous session.
● Say: Let’s learn more about Canva tools.
Importing Footage
Editing and Trimming Footage
Adding Videos
Adding Titles
Animating Text
As given on Page 54 and in Panel 1 on Page 55
As given in Panel 1, 2, and 3 on Page 55
As given in Panel 2 on Page 56
As given in Panel 3 on Page 56 And Panel 1 on Page 57
As given in Panel 3 on Page 57 And Panel 1 on Page 58
Adding Effects and Transitions
Adding Music
Exporting Video And Audio
As given in Panel 2 on Page 58
As given in Panel 1 on Page 59
As given in Panel 1 on Page 60
● Present the scenario: Consider you are working to create a music video for your school’s website.
● Discuss:
■ What kind of music will you select for the video?
Possible Responses: Soft instrumental; Pop; Jazz; High beat; Rhythm; Blues; K-pop; Metal.
■ What kind of animated objects or elements can be used in the video?
Possible Responses: Texts; Characters; Elements; Gifs; Graphics; Photos; Arrows; Stickers.
■ What can you do with a music and video file in Canva?
Possible Responses: We can Edit; Trim; Merge; Split; Add it using drag and drop.
■ What can you do to make the video look more appealing?
Possible Responses: We can add Animated elements; Texts; Transitions; Effects; Music; Mp4; Gifs; Voiceovers.
● If time allows, discuss all four questions, or discuss the first two.
● Conduct Fill Up on Page 62:
■ Say: Let’s help Mel become a graphic designer by filling in the blanks.
■ Read Q1, 2, and 5 aloud one by one.
■ Invite some students to share their answers and others to validate their peers’ answers.
■ Instruct: Fill in the final answers in your books.
● Conduct Tick The Correct Answer on Page 62:
■ Say: Let’s help Conji tick the correct answer.
■ Read Q2, 3, 4 and 5 aloud, one by one.
■ Invite some students to share their responses.
■ Discuss and validate the answers with the whole class.
■ Instruct: Tick the final answers in your books.
● Conduct Answer in Detail on Page 64:
■ Say: Let’s help Conji by answering these questions.
■ Read Q2 and 3 aloud, one by one.
■ Invite some students to share their answers and others to validate their peers’ answers.
■ Write the final answers on the board so that students can take notes.
● Ask the following probing questions:
■ Name the functions that you can perform on a video in Canva.
Possible Responses: Upload a video; Trim; Merge videos; Add transitions; Add music,
■ What kind of videos can you make using Canva?
Possible Responses: We can create personal videos and design them; Edit them; We can create birthday invitation videos; Wedding invitations; Birthday wishes for friends and family videos.
● Assign the following as homework:
■ DIY: Definitions
In this session, students will apply the concepts learnt in previous class -
● Importing Footage to Canva
● Editing and Trimming Footage
● Adding Multiple Videos
● Adding Titles
● Animating Text
● Animation: Is the act of creating visual effects and animations for a variety of multimedia, including video games, videos, and digital assets like websites and apps
Revise the Story and Concept Covered in the Previous Chapter
Discuss how to import footage, edit and trim; add multiple videos, titles, and animate text
● Say: Do you remember what we learned in the previous session?
● Invite responses from some students.
● Say: Let’s revise what we have learned.
● Instruct: Go to the Panel and open Lab on Personal Website Design.
● Show slides one by one and discuss the concepts shown on the slide in the panel.
● Say : Let us discuss how to upload to Canva, trim, merge videos, add transition, add music and export our project.
● Introduce them to various important tags related to the topic.
● Show the usage of the tags.
● Discuss the following questions one by one to check students’ understanding:
■ What are the options to duplicate an element in Canva?
Possible Responses: Hold Alt and drag the element to make a copy; Select any element and press ‘Ctrl + D’ to make a copy.
■ What can we upload in Canva?
Possible Responses: Music; Videos; Images; Elements; Text.
■ How can we share the video or our project with our friends?
Possible Responses: We can download the project and share it through email; Whatsapp; Chat messenger; Share it using the bluetooth or airdrop technology (shareIt).
■ What can you add to a timeline in Canva?
Possible Responses: Pages; Notes; Images; Videos; Music; Gifs; Animated texts; Animations; Transitions.
● Invite answers from as many students as possible.
● Address any other doubts students may have related to the concepts presented in the slides.
● Instruct: Click on the Confirm button to submit your work when you are done with the activity.
● Conclude: Today, we have learned more about Canva.
● Instruct: Practise the same activity at home.
● Assign the following as homework:
■ Import footage, add titles to it, and also add animated text. The topic of your footage can be any one of your choice.
Note
● The project is optional. Kindly assign if feasible.
In this session, students will learn and apply the following concepts -
● Adding Effect and Transitions
● Adding Music
● Exporting Video
● Animation: Is the act of creating visual effects and animations for a variety of multimedia, including video games, videos, and digital assets like websites and apps
● Transition: Change
Revise the Story and Concept Covered in the Previous Chapter
Discuss how to add effects, Merge Videos, Add Transition, and Add Music
● Say: Do you remember what we learned in the previous session?
● Invite responses from some students.
● Say: Let’s revise what we have learned.
● Instruct: Go to the Panel and open Lab on Canva Video Editing.
● Show slides one by one and discuss the concepts shown on the slide in the panel.
● Say: Let us discuss how to add transition, music and export our project.
● Introduce them to the topics related to video editing.
● Show the usage of video editing.
● Discuss the following questions one by one to check students’ understanding:
■ Why do we edit videos?
Possible Responses: To make it more appealing; For smooth transitions; To blend images with audio or music.
■ Where do you think video editing is done?
Possible Responses: While making youTube videos; Films; Documentaries; Projects; Songs; Tutorial videos or e-learning videos.
● Invite answers from as many students as possible.
● Address any other doubts students may have related to the concepts presented in the slides.
For instance, a plant native to a warm shallow lake in the tropics could not survive on the steep banks of a cold, fast-moving mountain stream. Freshwater ecosystems provide homes for a wide variety of animal life including insects, amphibians and fish. One estimate of fish species puts the number that lives in freshwater at 40 percent of the Earth's total. Worms, molluscs, algae and bacteria all live in freshwater systems, as do innumerable varieties of plants. In addition, animals such as birds, otters and bears use freshwater ecosystems as a food source.
● Instruct: Click on the Confirm button to submit your work when you are done with the activity.
● Conclude: Today, we have learned about video editing in Canva.
● Instruct: Practise the same activity at home.
● Assign the following as homework:
■ Lab time on Page 66
Note
● The project is optional. Kindly assign if feasible.
Note: Use the following points to prepare for the session beforehand. Avoid reading the points in the class.
In the Previous Chapter…
● Lord Ero met Eva and reminded her of her betrayal.
● Lord Ero cast a spell on Eva and sent her into the mirror dimension.
● On the other side, Mel and Conji were sending invitations to the natives of Avora.
● They created invitations in Canva and explored the tool together.
● Mel, Conji, and Eva are confronting Cyborg.
● Eva tries to cast a spell on Cyborg but misses.
● Lord Ero joins them and threatens the three kids.
● Mr. Geebal, who followed Lord Ero, comes to their rescue.
● Joy takes the kids to the ministry of happiness where they learn about Google Sheets.
The content covered in this chapter is aligned with the following CSTA Standard
● 2-DA–08 Data & Analysis
This chapter is divided into the following sessions
1. Introduction to Google Sheets I
2. Introduction to Google Sheets II
3. Functions in Sheets I
4. Functions in Sheets II
In this session, students will learn about –
● Basics of Sheets
● Naming a cell
● Cell Formula
● BEDMAS rule
● Google Sheets: Are made up of rows and columns and are used to store and analyse data
● Cell Address: A combination of the column letter and row number that identifies a cell
Revise the story and CS concepts covered in the previous chapter
Read or Invite students to read the story of the chapter
Discuss the basics of Google Sheets; what cells are and how we name them; cell formula and BEDMAS rule
● Recap the story covered in the previous chapter.
Conclude the concepts Assign homework
● Read or Invite two students to read the story aloud from Page 68 to Panel 1 on Page 71 up to Mel’s words, “Look here. ”
Let me recall about a database, learn about its importance, MS Access and relational databases. Explain the CS concepts as mentioned in the table below.
If you are teaching without a projector
Scenarios
If you are teaching with a projector Open Google Sheets on your computer system
Show how we name cells. Cell Formula As given in Panel 1 on Page 72 Show how we create cell formula. BEDMAS Rule
given in Panel 4 on Page 72 and Panel 1 and 2 on Page 73 Explain the BEDMAS rule and its working.
● Present the scenario: Consider your father asks you to help him store the data related to his business.
● Discuss:
■ What purpose will you mention about Google Sheets that can be helpful to him?
Possible Responses: Sheets are used to edit; Analyse; Organise data; We can perform mathematical calculations; We can collaborate and work on the same document simultaneously.
■ What kind of data can be added in cells?
Possible Responses: Plain text or names and special characters (like _ * % $ @); Numbers; Currency; Date; Time; Percentage; Formulas
■ How can you perform calculations in Sheets?
Possible Responses: Use cell formulas; Built-in functions; Sheets use BEDMAS rule to solve Cell formulas
■ Who uses Google Sheets?
Possible Responses: Sheets are used by managers; Business firms; Teachers; Doctors; Digital services; Accountants; Salespeople; Analysts; Businessmen; Corporate workers. (All use them to maintain their data) Note
● If time allows, discuss all four questions, or discuss the first two.
● Conduct Fill Up on Page 79:
■ Say: Let’s help Mr. Fate fill in the blanks and create marksheets for his students.
■ Read Q5 aloud.
■ Invite some students to share their answers and others to validate their peers’ answers.
■ Instruct: Fill in the final answers in your books.
● Conduct Tick the Correct Answer on Page 79:
■ Say: Let’s practise some more to revise what we have learned.
■ Read Q1 and 3 aloud, one by one. After the sentence, ask which of the options is correct.
■ Invite some students to share their responses.
■ Discuss and validate the answers with the whole class.
■ Instruct: Mark the final answers in your books.
● Conduct Find the Truth on Page 80:
■ Say: Let’s practise more to revise what we have learned.
■ Read Q2 and 5 sentences aloud one by one. After each sentence, ask if it is true or false.
■ Invite some students to share responses.
■ Discuss and validate the answers with the whole class.
■ Instruct: Fill in the final answers in your books.
● If time permits, discuss Answer in Short – Q1 and 2 or assign them as homework.
● Conclude: Today, we learned about the basics of Google Sheets.
● Ask the following probing questions:
■ What are the benefits of Google Sheets?
Possible Responses: We can collaborate and work; Store data in tabular form; We can use cell formulas; Functions; We can style data and present it in a more visual way.
■ Do you know any other platforms/software that do the same work as Google Sheets?
Possible Responses: Microsoft Excel; Libreoffice Calc; Smartsheets; Zoho sheets; Airtable
● Assign the following exercises as homework:
■ Answer in Short – Q1 and 2
■ Answer in Detail – Q1 and 2
In this session, students will apply what they learned from the previous class to complete tasks on Google Sheets.
● Google Sheets: Are made up of rows and columns and are used to store and analyse data
● Cell Address: A combination of the column letter and row number that identifies a cell
● Say: Do you remember what we learned in the previous session?
● Invite responses from some students.
● Say: Let’s revise what we have learned.
● Instruct: Go to the Panel and open Lab on Google Sheets – Introduction II.
● Show slides one by one and discuss the concepts shown on the slide in the panel.
● Discuss the following questions one by one to check students’ understanding:
■ What are the uses of Sheets?
Possible Responses: Sheets are used to edit; Analyse; Organise data; We can perform mathematical calculations; We can collaborate and work on the same document simultaneously.
■ How do we open Sheets?
Possible Responses: From our Google Drive; Type in the URL for sheets and press the new + button.
■ How do we name cells in Google Sheets? (Ask the students to give the cell address of a few cells – give them random row and column numbers)
Possible Responses: Column letter and row number
■ How can we perform calculations in cells?
Possible Responses: Add cell formulas; Functions; Begin with equal (=).
● Invite answers from as many students as possible.
● Address any other doubts students may have related to the concepts presented in the slides.
● Instruct: We know a few basics of Google Sheets.
● Now, let’s practise our learning. Click on the Practice button on the Assignment page to attempt the activity.
● Click on the Attempt button to open the activity page.
● Walk around in the classroom and observe the activity done by the students.
● Instruct: Click on the Confirm button to submit your work when you are done with the activity.
● Conclude: Today, we have learned a few basic concepts of Google Sheets.
● Instruct: Practise the same activity at home.
● Assign the following as homework:
■ Ask the students to create a list of their marks in 5 subjects in three terms (for the previous academic year).
1. They will find the Sum and Average of their marks per term.
2. They should spot the highest and lowest marks scored in the year.
Note
● The project is a replacement of the DIY activity on Page 82.
Note
● The project is optional. Kindly assign if feasible.
In this session, students will learn about –
● Functions in Google Sheets
● SUM(); AVERAGE(); MIN(); MAX()
● MEAN(); MEDIAN(); MODE()
Keywords
● SUM(): Calculates the sum of all the numbers
● AVERAGE(): Calculates the average or mean of all the numbers
● MIN(): Gives the minimum among all the numbers
● MAX(): Gives the the maximum among all the numbers
● MEDIAN(): Gives the midpoint of all the numbers
● MODE(): Gives the number that occurs the maximum number of times
Revise the story and CS concepts covered in the previous chapter
Read or Invite students to read the story of the chapter
● Recap the story covered in the previous session.
● Invite a few students to recall the CS concepts covered in the previous session.
● Say: Let me explain some functions of Google Sheets.
Scenarios
If you are teaching without a projector
If you are teaching with a projector Open Google Sheets on your computer system
CS Concepts Explain Demonstrate Functions As given in Panel 4 on Page 73. What are functions?
SUM() As given in Panel 4 on Page 73 and Panel 1 and 2 on Page 74.
OR
Show the output and use of the SUM function.
AVERAGE() As given in Panel 4 on Page 74. Show the output and use of the AVERAGE function.
MIN() and MAX() As given in Panel 1 on Page 75. OR Show the output and use of MIN and MAX functions. MEDIAN() As given in Panel 3 on Page 75. Show the output and use of the MEDIAN function. MODE() As given in Panel 1 on Page 77. Show the output and use of the MODE function.
● Present the scenario: Consider you have a lot of data in a workbook that contains multiple sheets.
● Discuss:
■ You need to perform some calculations on the data. What functions can be used?
Possible Responses: On numbers; SUM(); AVERAGE(); COUNT(); PRODUCT(); MIN(); MAX(); MODE(); MEDIAN().
■ How can you add data in Sheets?
Possible Responses: Use ADD(); =(A1+A2…) Use cell formula; Use Autosum function
■ How will you find information about a person in a huge list/data?
Possible Responses: Use find functionality; Use filters.
■ Do you know what “auto generate” is in Google Sheets? What can be generated automatically?
Possible Responses: Auto generate means we can create a list of items just by writing the first two elements, selecting, and dragging them down; It helps generate numbers; Dates; The alphabet; Letters
● If time allows, discuss all four questions, or discuss the first two.
● Conduct Fill Up on Page 79:
■ Say: Let’s help Mr. Fate fill in the blanks and create marksheets for his students.
■ Read Q1, 2, 3, and 4 aloud one by one.
■ Invite some students to share their answers and others to validate their peers’ answers.
■ Instruct: Fill in the final answers in your books.
● Conduct Tick the Correct Answer on Page 79:
■ Say: Let’s practise some more to revise what we have learned.
■ Read Q2, 4, and 5 aloud, one by one. After the sentence, ask which of the options is correct.
■ Invite some students to share their responses.
■ Discuss and validate the answers with the whole class.
■ Instruct: Mark the final answers in your books.
Note
● If time permits, discuss Answer in Short – Q 3, 4, and 5 or assign it as homework.
● Conclude: Today we learned about some tools in Google Sheets.
● Ask the following probing questions:
■ What are the scenarios where you can use Google sheets in your day-to-day life?
Possible Responses: To create a budget for a birthday; Create a shopping list with item cost; Store marks in various subjects over a period of different semesters; Store information in a tabular form
■ What tools/functionality are you aware of with Google Sheets?
Possible Responses: We can add information; Format data; Add charts; Edit information to present well; Data visualisation
● Assign the following Brain Teaser exercises as homework:
■ Answer in Short – Q3, 4, and 5
■ Answer in Detail – Q4, 5
■ Match Me
In this session, students will apply what they have learned from the previous class to complete tasks on Google Sheets.
● SUM(): Calculates the sum of all the numbers
● AVERAGE(): Calculates the average or mean of all the numbers
● MIN(): Gives the minimum among all the numbers
● MAX(): Gives the maximum among all the numbers
● MEDIAN(): Gives the midpoint of all the numbers
● MODE(): Gives the number that occurs the maximum number of times
● Say: Do you remember what we learned in the previous session?
● Invite responses from some students.
● Say: Let’s revise what we have learned.
● Instruct: Go to the Panel and open Lab on Functions in Sheets – II.
● Show slides one by one and discuss the concepts shown on the slide in the panel.
Engage
● Discuss the following questions one by one to check students’ understanding:
■ Name a few tools that we can use in Google Sheets?
Possible Responses: Spell check; Find and replace; Autocomplete; Arithmetic functions
■ Name a few mathematical functions and how we can use them.
Possible Responses: SUM(); AVERAGE(); COUNT(); PRODUCT(); We start typing in the cell which should contain the answer/result; Each function begins with an = (equal to) sign.
■ How can we add and rename sheets?
Possible Responses: Click on + → Click on the small triangle just beside the sheet tab → Select an option to duplicate/rename the sheet; Double-click on the sheet and rename it.
■ In what cases can we use functions/Google Sheets in various walks of life?
Possible Responses: To maintain data like marks; Customer details in business; Supplier details in business; Records of clients; List of students; List of teachers; Maintain records of employees.
● Invite answers from as many students as possible.
● Address any other doubts students may have related to the concepts presented in the slides.
● Instruct: We know a few features that we can use in Google Sheets.
● Now, let’s practise what we have learned. Click on the Practice button on the Assignment page to attempt the activity.
● Click on the Attempt button to open the activity page.
● Walk around in the classroom and observe the activity done by the students.
● Instruct: Click on the Confirm button to submit your work when you are done with the activity.
Note
● Make the students practise the activity up to the concepts covered in the session.
Sum-Up
● Conclude: Today, we have learned about functions in Google Sheets.
● Instruct: Practise the same activity at home.
● Assign the following as homework:
■ Lab Time on Page 83.
Note
The case study is optional. Kindly assign if feasible.
5 min
Note: Use the following points to prepare for the session beforehand. Avoid reading the points in the class.
● Mel, Conji, and Eva confronted Cyborg.
● Eva tried to cast a spell on Cyborg but missed.
● Lord Ero arrived and threatened the three kids.
● Mr. Geebal, who followed Lord Ero, came to the kids’ rescue.
● Joy took the kids to the Ministry of Happiness where they learned about Google Sheets.
● Mel teaches Conji about data analysis in Google Sheets.
● She teaches him how to freeze rows and columns.
● She teaches him how to filter data as well.
● Conji learns to group rows and columns.
● Mel teaches Conji various ways to visualise data in the form of charts.
The content covered in this chapter is aligned with the following CSTA Standard
● 2-DA–07 Storage
● 2-DA–08 Collection Visualisation & Transformation
This chapter is divided into the following classroom and lab sessions
1. Freeze and Filter I
2. Freeze and Filter II
3. Group and Visualise I
4. Group and Visualise II
In this session, students will learn about -
● Data Analysis
● Freeze
● Filter
● Data Analysis: Is using data to get useful information and make important decisions
● Freeze: To stop the movement of rows and columns on scrolling
● Filter: To look at the information we want only while hiding everything else
Recap the story and the CS concepts covered in the previous chapter Invite students to brief the class on the story and CS concepts covered in the chapter
● Recap the story covered in the previous chapter.
● Invite students to:
■ Recap the story covered in the previous chapter briefly with the CS concepts covered.
■ Recap the story covered in the current chapter with the CS concepts covered.
● Say: Let me explain data analysis and some of the tools we can use.
As given in Panel 2 on Page 86 Steps of Data Analysis As given in Panel 4 on Page 86
Freeze
Filter
As given in Panel 2 and 3 on Page 87
As given on Page 89
● Present the scenario: Consider that you are asked by your teacher to keep records of the students in a Google Sheet.
● Discuss:
■ What will you do so that the first row of data does not move while scrolling?
Possible Responses: Freeze; Freeze 1st row; Freeze 1st column
■ You have added a column with the total marks of an exam. You want to see the highest scorer at the top. What tools would you use?
Possible Responses: Filter tool; Max; Filter by total score
■ What are the possible reasons for freezing rows and columns?
Possible Responses: Keep rows and columns visible while scrolling; Keep heading visible; Preventing accidental edits
■ What will be the possible benefits of using filters in your sheet?
Possible Responses: Sorting records; Finding minimum and maximum easily
● If time allows, discuss all four questions, or discuss the first two.
● Conduct Find the Truth on Page 97:
■ Say: Help the friends to mark the sentences as true or false.
■ Read Q1, 3, and 5 aloud, one by one.
15 min
■ Invite some students to share their answers and others to validate their peers’ answers.
■ Instruct: Mark the final answers in your books.
● Conduct Answer in Detail on Page 99:
■ Say: Help the scientists to answer the following questions.
■ Read Q2 and 3 aloud, one by one.
■ Invite some students to share their answers.
■ Discuss and Validate their answers.
■ Write the final answers on the board for all students to take notes.
● If time permits, discuss the sections Fill Up – Q1 or assign it as homework.
min
● Conclude: Today, we learned about data analysis, freezing and filtering data in Google Sheets.
● Ask the following probing questions:
■ There are 5 columns with name, roll number, total score, and grade. Which field/s can we use to filter data?
Possible Responses: Name; Roll number; Total Score; All
■ Can we freeze more than one row or column in Google Sheets?
Possible Responses: Yes; No; Maybe
● Assign the following as homework:
■ Fill Up – Q1
■ Tick the Correct Answer – Q2, 5
In this session, students will learn about -
● Applications of Freeze Tool
● Applications of Filter Tool
● Say: Do you remember what we learned in the previous session?
● Invite responses from some students.
● Say: Let’s revise what we have learned.
● Instruct: Go to the Panel and open Lab on Freeze and Filter.
● Show slides one by one and discuss the concepts shown on the slide in the panel.
● Say: Let me explain how to use the freeze and filter tools.
Use Freeze Tool
Use Unfreeze Tool
Use Filter Tool
Remove Filter
As given in Panel 4 on Page 87
As given in Panel 1 on Page 88
As given on Page 89
As given in Panel 1 on Page 90
● Discuss the following questions one by one to check students’ understanding:
■ What orders of filtering are available in Google Sheets?
Possible Responses: A to Z; Z to A; Numerically
■ Once frozen, can we move the rows and columns in Google Sheets?
Possible Responses: Yes; No; Maybe
■ Can the filter tool be used to remove records from the Google Sheets?
Possible Responses: Yes; No; Maybe
■ Filters are added to ____.
Possible Responses: Column header; Rows
● Invite answers from as many students as possible.
● Address any other doubts students may have related to the concepts presented in the slides.
● Instruct: We know how to freeze and filter data in Google sheets.
● Now, let’s practise what we have learned.
● Click on the Practice button on the Assignment page to attempt the activity.
● Walk around in the classroom and observe the activity done by the students.
● Instruct: Submit your Google Sheets file on the platform.
Note
● Make the students practise the activity until they have mastered the concepts covered in the session.
● Conclude: Today, we have learned freeze and filter tools in Google sheets.
● Instruct: Practise the same activity at home.
● Assign the following as homework:
■ DIY Activity – Crosswords
■ Project: Collect data about 10 famous buildings, their addresses and other fields as well, and use freeze and filter tools to find the tallest, the shortest and the average building height.
Note
● The project is optional. Assign only if feasible.
In this session, students will learn about -
● Grouping of Rows and Columns
● Visualising Data Using Charts
Keywords
● Grouping: Is a technique to show and hide rows and columns
● Data Visualisation: Looking at data in a graphical manner
● Pie Chart: Percentage-based graphical representation that has a circular form
● Bar Graph: Is used to compare different items or same items over a period of time
Recap the story and the CS concepts covered in the previous session Invite students to brief the class on the story and CS concepts covered in the chapter
● Recap the story covered in the previous chapter.
● Say: Let me explain the group tool and charting tools.
Grouping
As given in Panel 2 on Page 91
Data Visualisation As given in Panel 3 on Page 92
Pie Chart As given in Panel 5 on Page 92
Bar Graph As given in Panel 1 on Page 93
● Present the scenario: Consider that you took part in an inter-school sports competition in which five schools competed.
● Discuss:
■ In a Google Sheet, data is kept of student names and school names. You want to visualise the percentage of students from each school. Which tool can you use?
Possible Responses: Charts; Visualisation; Pie Chart
■ What kinds of data can be shown in Bar graphs?
Possible Responses: Comparison among items; Change in an item’s attribute over time
■ How many parts of the pie chart will be there if we choose it to visualise the students’ schools?
Possible Responses: 5; Equal to the number of students; Equal to the number of schools.
■ Which charting options are available in Google Sheets?
Possible Responses: Bar graph; Pie chart; Column chart
● If time allows, discuss all four questions, or discuss the first two.
● Conduct Tick the Correct Answer on Page 98:
■ Say: Help tick the correct option to fix the scientist’s broken equipment.
■ Read Q1, 3 and 4 aloud, one by one.
■ Invite some students to share their answers and others to validate their peers’ answers.
■ Instruct: Tick the final answers in your books.
● Conduct Answer in Detail on Page 99:
■ Say: Help the scientists to add to their research.
■ Read Q1, 4 and 5 aloud, one by one.
■ Invite some students to share their answers.
■ Discuss and Validate their answers.
■ Write the final answers on the board for all students to take notes.
● If time permits, discuss the sections Find the Truth – Q4 and Fill Up – Q2, 3 or assign them as homework.
● Conclude: Today, we learned about grouping and visualisation of data in Google Sheets.
● Ask the following probing questions:
■ In which ways can we show data in Google Sheets?
Possible Responses: Numerical form; Alphabetical form; Visualisation form
■ What are the few possible advantages of visual representation of data?
Possible Responses: Better understanding; Looks better; Quick understanding
● Assign the following as homework:
■ Fill Up – Q2, 3, 4, 5
■ Find the Truth – Q4
In this session, students will learn about -
● Applications of Group Tool
● Applications of Charting Tools
Keywords
● Grouping: Is a technique to show and hide rows and columns.
● Data Visualisation: Looking at data in a graphical manner.
● Pie Chart: Percentage-based graphical representation that has a circular form.
● Bar Graph: Is used to compare different items or same items over a period of time.
● Say: Do you remember what we learned in the previous session?
● Invite responses from some students.
● Say: Let’s revise what we have learned.
● Instruct: Go to the Panel and open Lab on Group and Chart.
● Show slides one by one and discuss the concepts shown on the slide in the panel.
● Say: Let me explain how to use group and charting tools in Google Docs.
CS Concept Demonstrate
Use Groups
As given in Panel 2 on Page 91
Ungroup As given in Panel 1 on Page 92
Create Data Charts As given in Panel 3 on Page 93 and Page 94
● Discuss the following questions one by one to check students’ understanding:
■ What operations can you perform using the group tool?
Possible Responses: Show rows; Show columns; Hide rows; Hide Columns
■ Which checkboxes can be used to make the charting process easier?
Possible Responses: Switch rows; Switch columns; Use row 1 as header; Use column as header
■ What things can we use as labels in charts?
Possible Responses: Column header; Row header
■ What are the options you have while grouping data?
Possible Responses: Group rows X-Y; Group columns X-Y
● Invite answers from as many students as possible.
● Address any other doubts students may have related to the concepts presented in the slides.
● Instruct: We know how to use grouping and charting tools.
● Click on the Practice button on the Assignment page to attempt the activity.
● Walk around in the classroom and observe the activity done by the students.
● Instruct: Submit your Google Sheets file on the platform.
● Conduct Match Me on Page 99:
■ Say: Match the Google Sheet options with their features.
■ Read options on both sides aloud, one by one.
■ Invite some students to share their answers.
■ Discuss and Validate their answers.
■ Match the final combinations in your books.
● Make the students practise the activity until they have mastered the concepts covered in the session.
● Conclude: Today, we have learned applications of grouping and charting tools in Google Sheets.
● Instruct: Practise the same activity at home.
● Assign the following as homework:
■ DIY Activity – Case Study
1 What is my system?
2 Fun with Conversions
● (1010101)2 – Binary Number System
● (541)8 – Octal Number System
● (79)10 – Decimal Number System
● (C)16 – Hexadecimal Number System
1. Convert from Decimal to Binary
a. (99)10 – (1100011)2 b. (110)10 – (1101110)2
c. (41)10 – (101001)2 d. (67)10 – (1000011)2
e. (150)10 – (10010110)2
2. Convert from Binary to Decimal
a. (11011)2 – (27)10 b. (101011)2 – (43)10
c. (111)2 – (7)10 d. (10111)2 – (23)10
e. (10011)2 – (19)10
1. A number system is the technique used to represent numbers in the computer system.
2. Binary numbers are the numbers made up of 0s and 1s. As a binary number is made up of two digits (0 and 1), its base is 2.
3. Base is the number of digits a number system uses. For example, the base of the binary number system is 2 since it uses 2 digits, 0 and 1.
4. The binary number system is used by different digital devices like computers, calculators, Digital TV Decoder boxes, cell phones, burglar alarms, etc.
5. The octal number system is widely used in computer application sectors like the aircraft sector. The octal numbers are used in the form of code.
E Answer in Detail
1. There are four types of number systems.
a. The decimal number system is a base 10 number system that uses 10 digits ranging from 0 to 9. For example, 12.
b. The binary number system is a base 2 number system that uses two digits zero and one. Each binary digit is also called a bit. For example, 1101 is the binary representation of the number 13.
c. The octal number system has a base of 8. It has 8 digits ranging from 0 to 7.
d. The hexadecimal number system has a base of 16 digits ranging from 0 to 9 and A to F where A is 10, B is 11 and so on up to F. For example, 7A is the hexadecimal representation of the number 122.
2. Decimal to Binary Conversion
Step 1: Divide the decimal number repeatedly by 2 and note down the remainder.
Step 2: Write the reminders in reverse order
The number obtained in Step 2 is the binary representation of the given number.
3. Different Number Systems are used for different purposes.
● The binary number system is used by different digital devices like computers, calculators, digital TV decoder boxes, cell phones, burglar alarms, etc.
● The decimal number system is used to perform arithmetic operations.
● The hexadecimal number system is commonly used in computer programming and microprocessors. It is used to describe locations in Computer memory.
● The octal number system is widely used in computer application sectors like the aircraft sector. The octal numbers are used in the form of code.
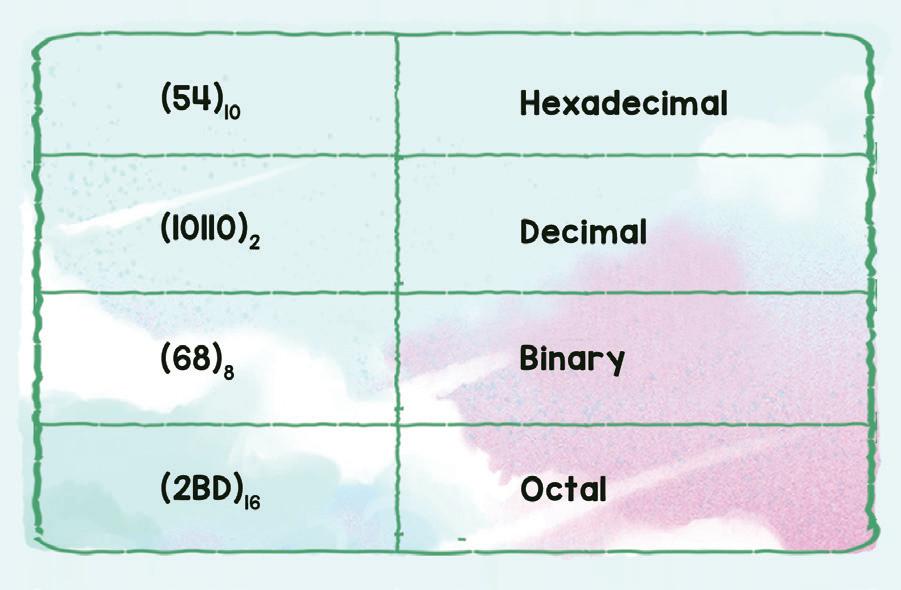
D Answer in Short
1. When two or more devices connect to one another, a network is formed. Over a network, we can exchange information such as text, images, documents, etc.
2. Interconnected computers are a group of two or more connected devices.
3. The Internet is the largest network of connected computers in the world.
4. A server is a computer that allows network resources such as data, software, and hardware to be shared.
5. The Network Interface Unit is abbreviated as NIU. It is a tool that establishes communication between a client and a server.
E Answer in Detail
1. There are four different types of network –
a. Personal Area Network (PAN): PAN is a small network that establishes connections between systems within 10 metres of each other. Bluetooth-enabled headphones are one of the examples.
b. Local Area Network (LAN): LAN is a privately owned computer network that covers a small area like a home, school or an office. WiFi is an example of LAN.
c. Metropolitan Area Network (MAN): MAN covers larger areas like cities and towns. Cable TV networks are one such example.
d. Wide Area Network (WAN): WAN is a telecommunication network that spreads across countries. A network of ATMs is an example of WAN.
2. Network topology is a way of connecting devices to each other. There are four basic network topologies.
a. Mesh Topology: In this topology, every computer is connected to every other computer.
b. Star Topology: In this topology, each device is linked to a central controller called a hub. Data is exchanged via the hub.
c. Bus Topology: This is a multipoint setup which means several devices are connected to a main cable. Data flows from one end of the main cable to the other.
d. Ring Topology: In Ring topology, each node is connected to two other nodes to form a ring. Signals are transmitted in one direction along the entire ring in a circular manner.
3. We can keep a network safe by designing a set of rules called Network Security. Safeguarding a network is very important as everything happens through networks. Having a secure system helps us make sure that we can use the network without having to expose ourselves to unauthorised users. There are different kinds of security such as Antivirus software, Firewalls, VPNs, etc.
4. The IP (Internet Protocol) Address is a unique identifying number given to every device on a network. These numbers help the devices connect to a network and exchange information.
5. Bus topology is a multipoint setup where several devices are connected to a long cable called a main cable. Nodes are connected through drop lines. Data flows from one end of the main cable to the other. This topology is flexible and nodes can easily be added or removed. It can include a certain number of nodes, but the signal grows weaker with distance.
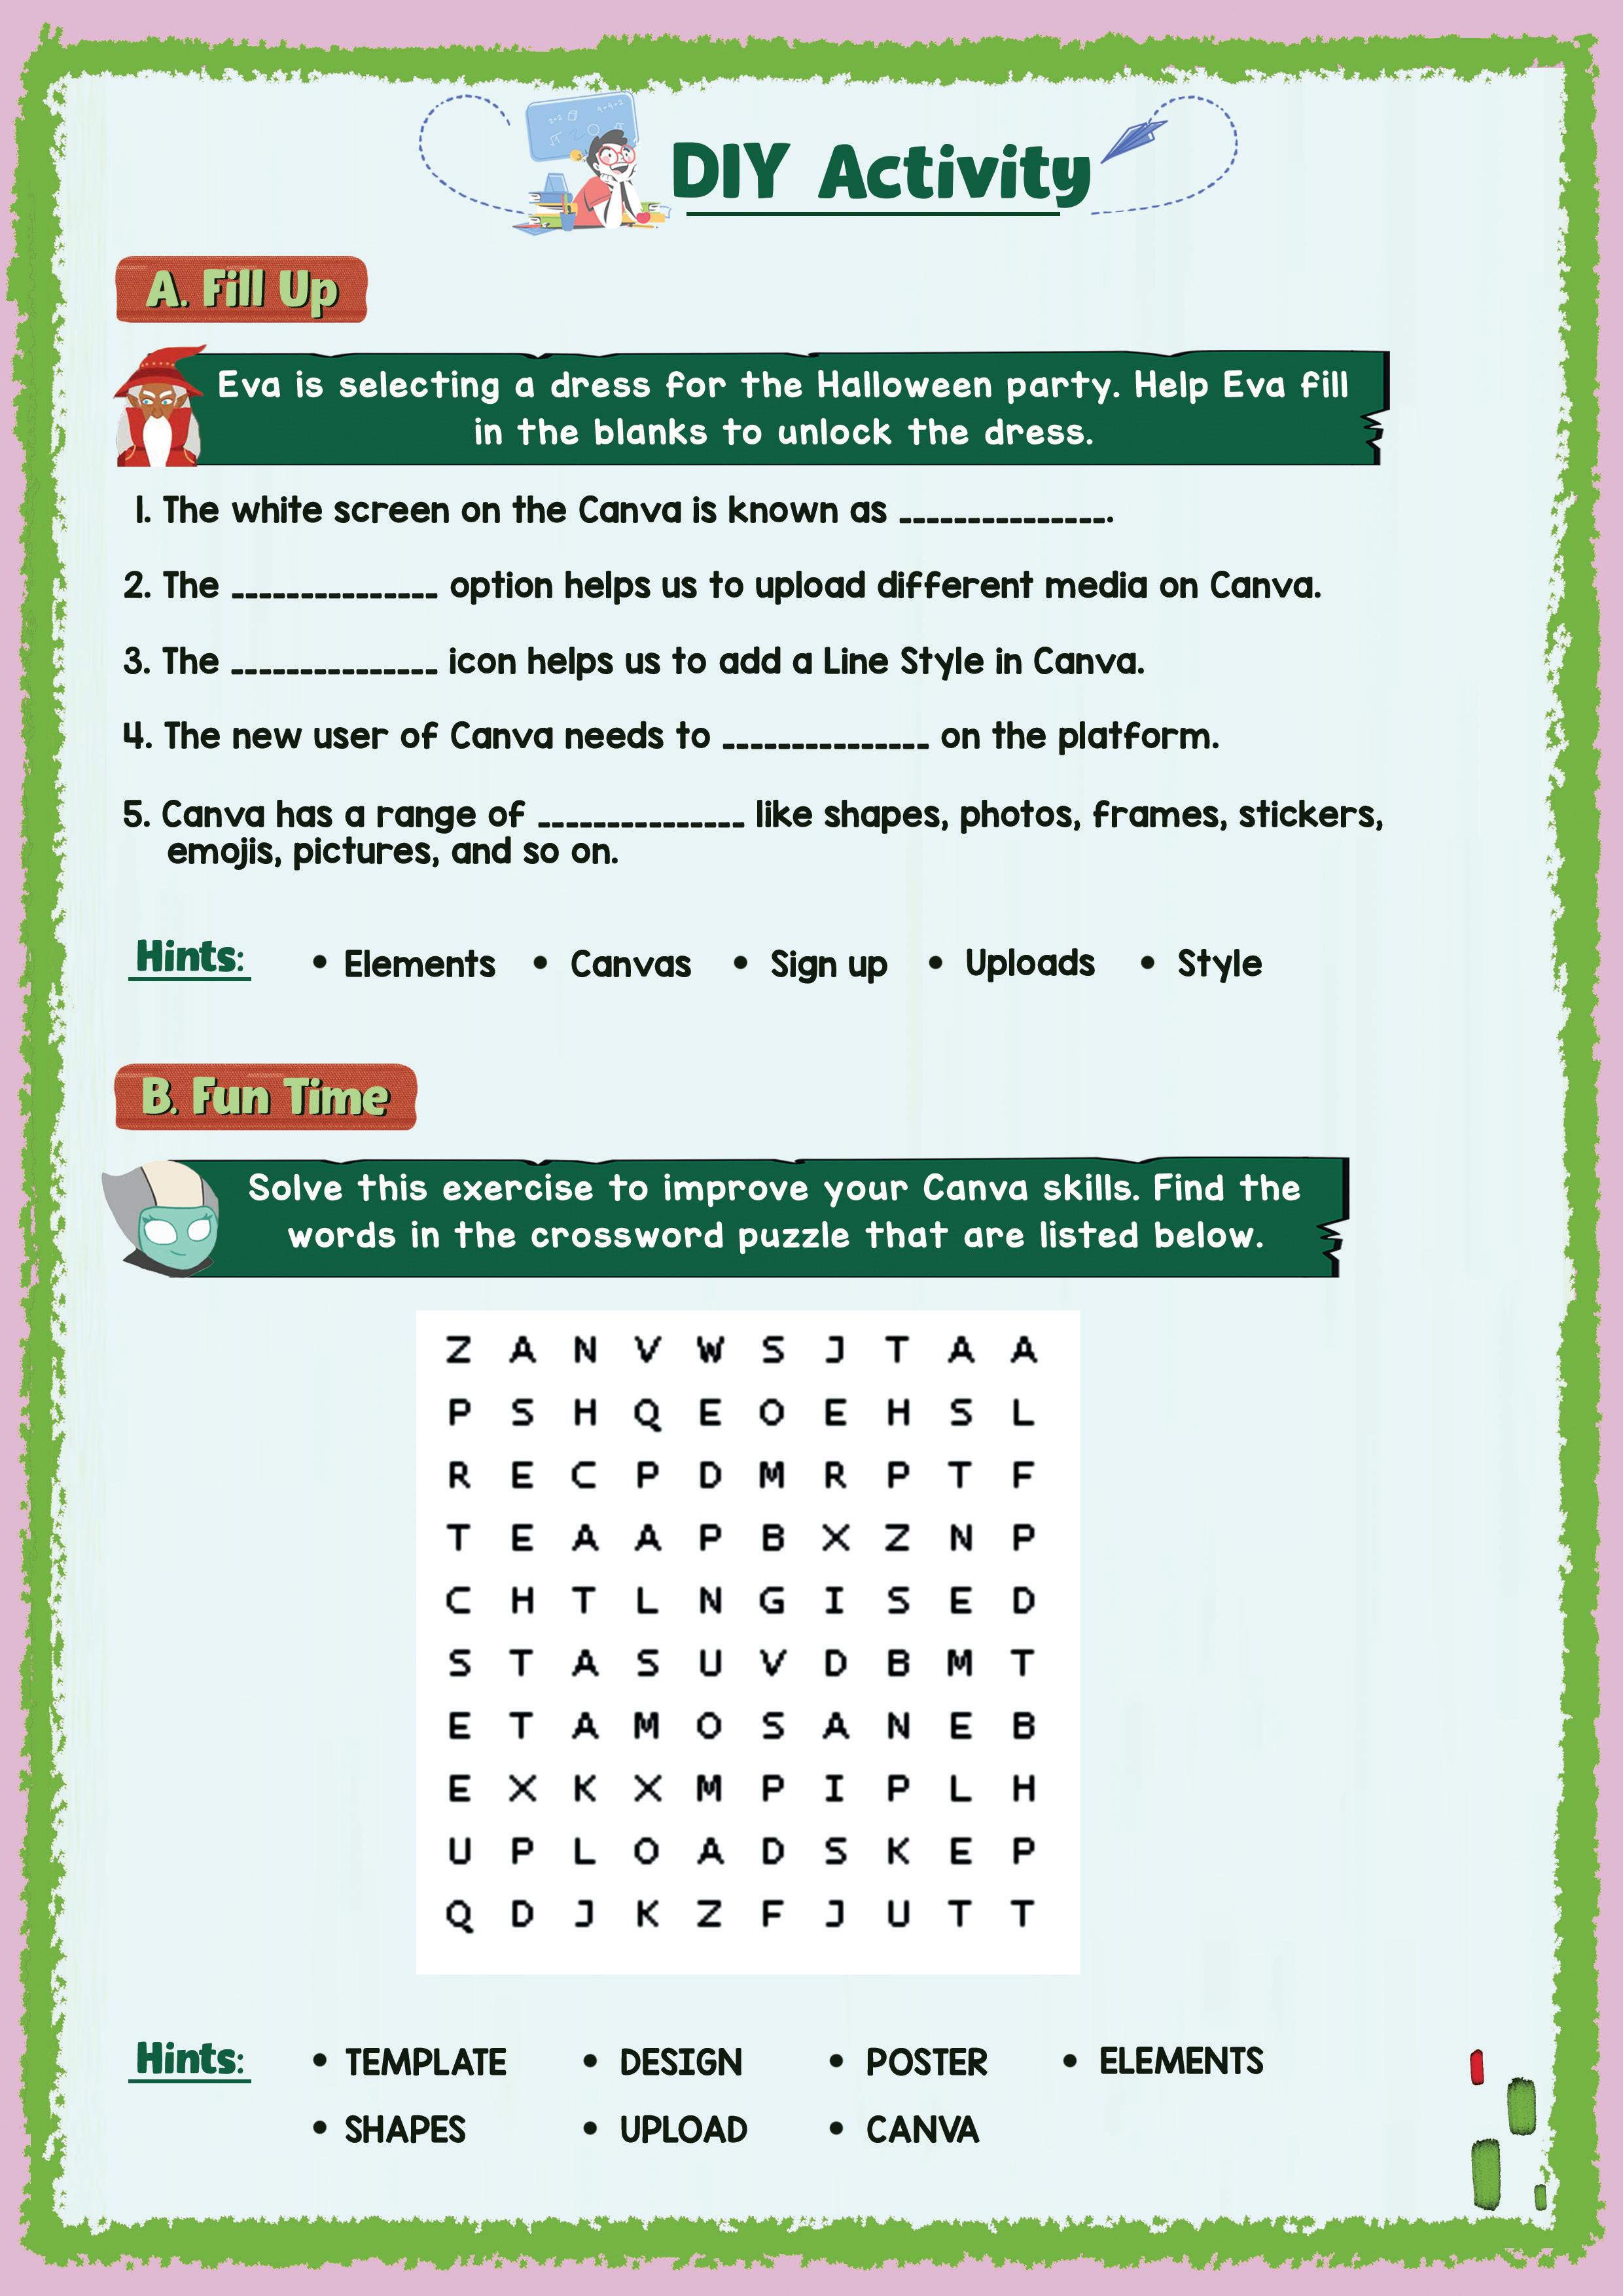
B Find the Truth
C Answer in Short
1. Canva is a graphic design platform that allows us to make beautiful designs for posters, book covers, and invites.
2. Ready-made designs of invitation cards are called templates in Canva.
3. Following are the steps can be taken to change the line weight in Canva –
1. Click on the line weight icon
2. Drag the slider right or left to increase or decrease the width of the line.
4. We should click on the “Templates” option in the Menu bar to add templates in Canva.
5. The following are the steps can be taken to change the line style in Canva –
1. Click on the style icon
2. Select a style of your choice from the dropdown
D Answer in Detail
1. Templates are ready-made design patterns that can be used by editing the content according to r our choice. The Templates option can be found in the Menu bar, there is a list of templates to choose from.
2. There are two ways to start a new project in Canva. We can use templates if we want readymade design patterns and simply edit out the content as we need to. Alternatively, if we want to make a canvas of our choice, we can create a design from scratch by clicking on the “Create a Design” button.
3. The “Create a Design” option lets you make a canvas of our own preference. It is most often used by experienced designers who want to create their own designs instead of using templates.
4. Yes, we can upload designs or documents in Canva gallery from our own device. To upload a document in Canva, we have to click on the “Upload Media” option, then choose the design we want to upload.
5. To add a line, press L and drag your mouse on the Canvas. After you have added a line, you will also see a small Edit tab above the top of your canvas. A line is also called a Stroke in design language.
B Tick the Correct Answer
C Find the Truth
D Answer in Short
1. Canva elements are divided into several categories, including Lines, Shapes, Frames, Stickers, Charts, Grids, and Gradients. Canva elements can be either still or animated images.
2. Yes, the thickness of a line can be changed. We can adjust the line weight using the Line Style tool.
3. A framework of spaced bars that are parallel to or cross each other.
4. Once you have selected your image, simply click on the image to open the editor. Then, click on the “Add more images” button in the top left-hand corner of the editor.
5. The timeline is the area of a video editing application where you arrange your video clips and map out all the edits you would like to apply.
E Answer in Detail
1. The steps to upload a video are –
a. On the video editor side panel, click the Uploads tab.
b. Click Upload media, and select the videos that you want to upload. You can also drag the files to the Uploads tab to upload them.
c. Click on an uploaded video to add it to your design.
Yes, we can add multiple videos in Canva.
a. Simply split the video where you want to.
b. Click on the Plus icon.
c. This makes a space for the new video. Drag and drop the file here.
2. The steps to add music to a video are –
a. Head over to the audio tab.
b. Choose a file or upload it.
c. Drag and drop the file onto the video canvas.
d. It creates an audio track on the Timeline. We use the “Ctrl+Z” command to undo any action.
3. A rotate icon appears at the bottom of the shape. Click on it and drag your mouse to rotate the element.
4. Steps for formatting a stroke are:
1. To add a Stroke in Canva, You need to select the image and then click “Edit Image“.
2. Search for “Shadows” and double-click “Glow“.
3. Adjust the Transparency to 100% and Blur to 0 to make the stroke solid. Change the size and colour of the stroke based on your desire.
5. We can resize, rotate, edit elements in Canva.
1. Editing is the process of correcting and adapting a text, such as an article or a book.
2. Trimming is cutting small pieces off a video.
3. Timeline is a graphical representation of a period of time, on which important events are marked.
4. Transition is a change from one page to the next.
5. Importing means to bring from an external source.
1. In Google Sheets, the formula to add cells can be written as =SUM(A1:A6) or =(A1+A2+A3+A4+A5+A6).
2. BEDMAS is the rule or order that we follow while solving questions. We solve in the following order – brackets, exponents, division, multiplication, addition, and subtraction.
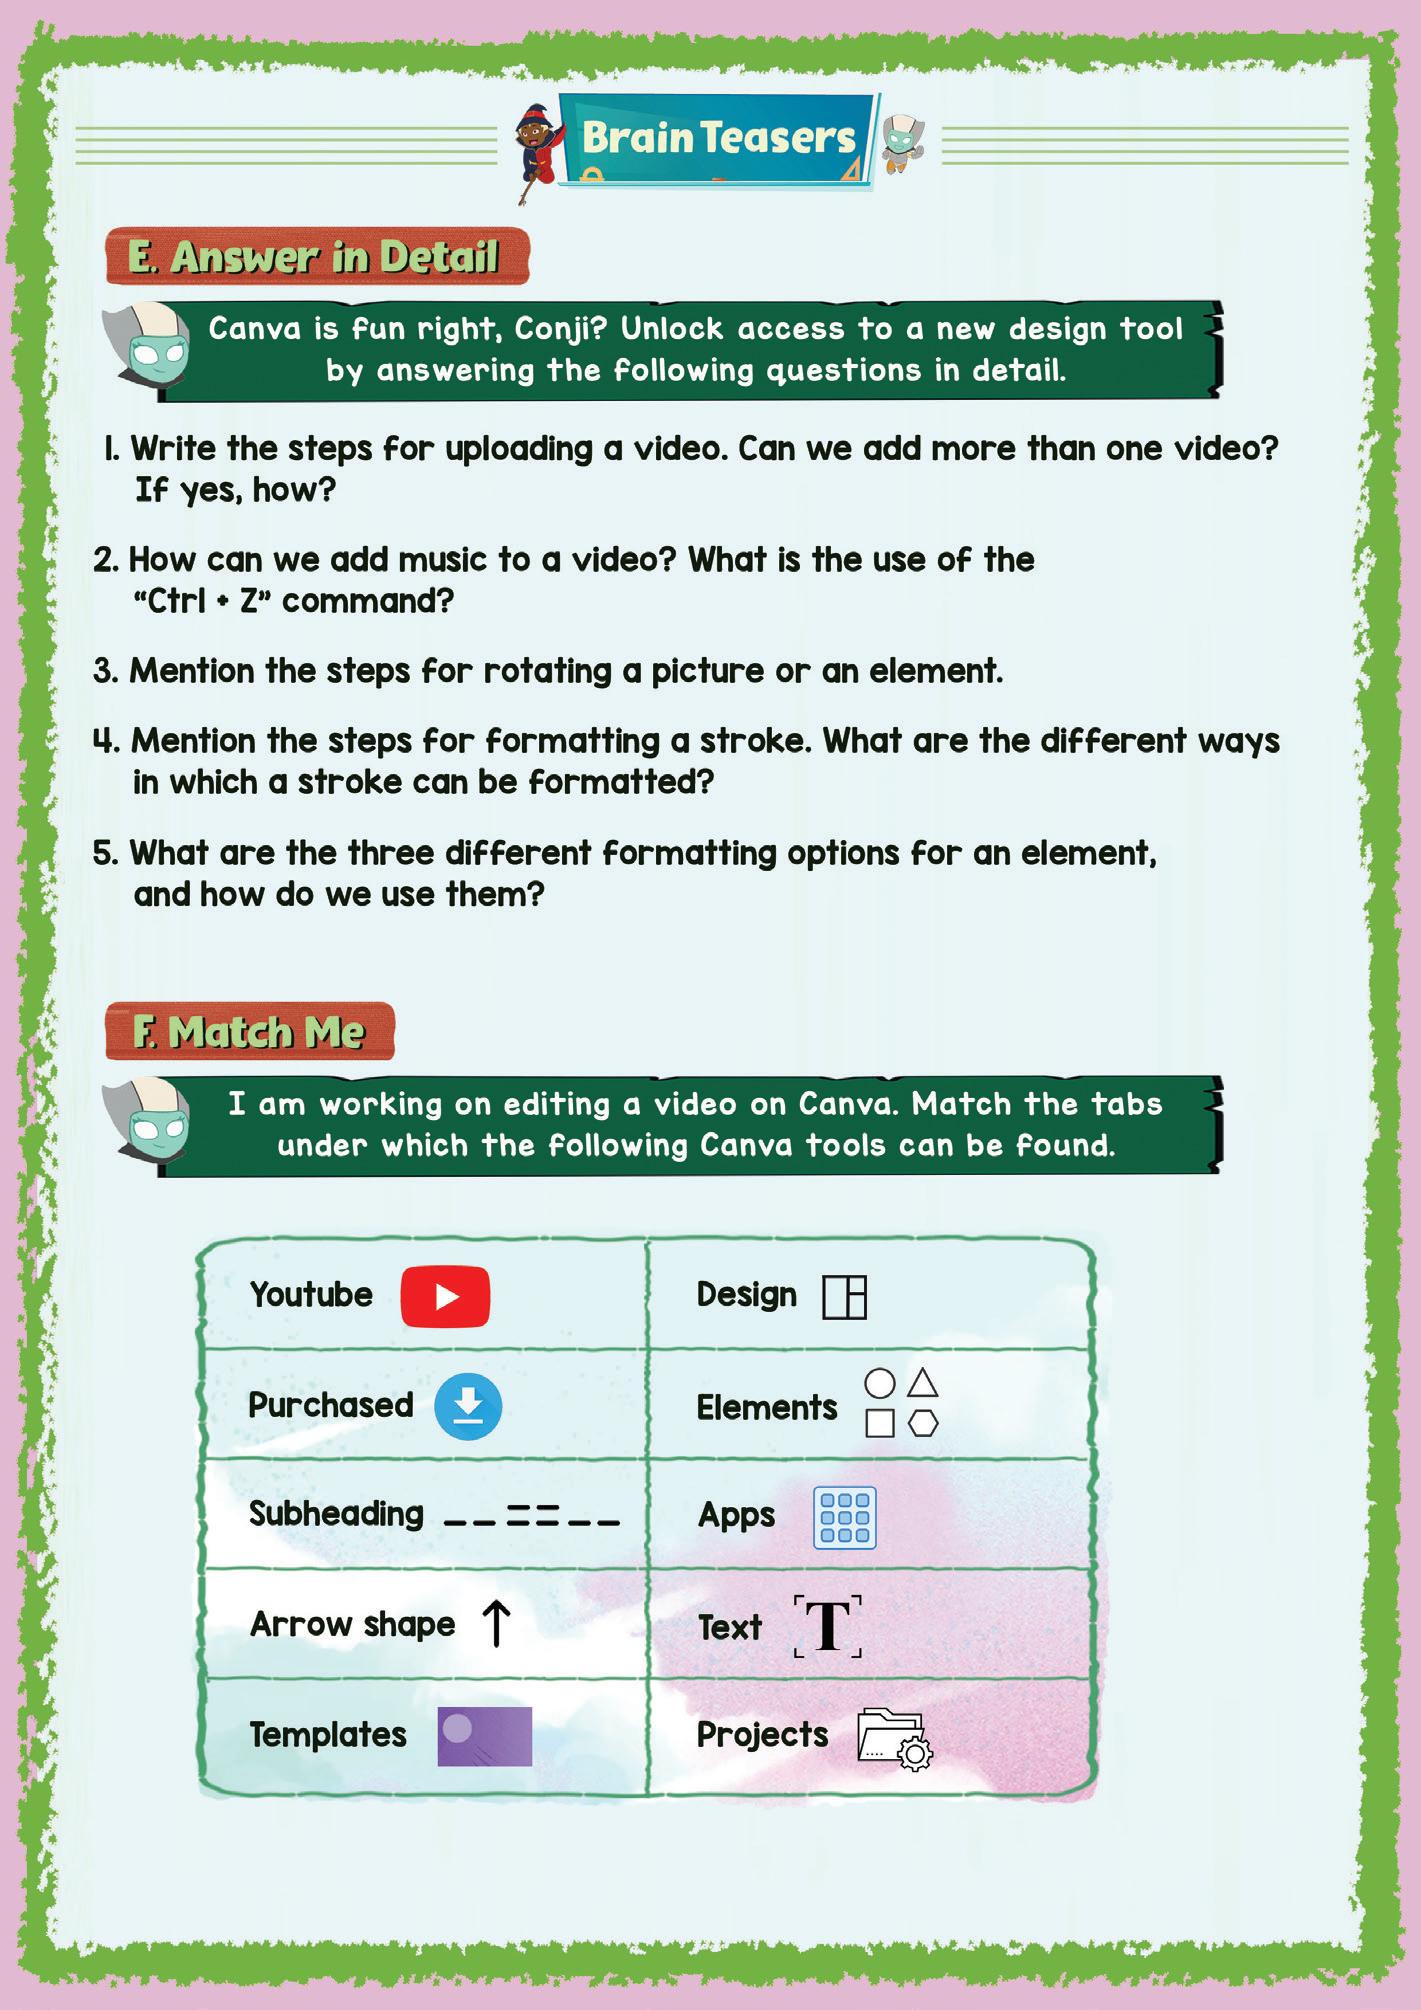
3. Functions are ready-made formulas that help us perform specific operations in Sheets.
4. COUNT function helps us count all numeric values in a sheet (selected range), including those which appear more than once.
5. The range is set by first entering the cell reference for the top left corner, then the bottom right corner. Selecting multiple cells in a sheet can also be referred to as a range.
E Answer in Detail
1. The intersection of rows and columns forms the cells. The rows are identified using numbers and the columns are marked by letters. A cell name is a combination of numbers and letters. Column Letter+Row Number forms it. For example, if we want to write the cell address of the 3rd row in Column C we will name the cell C3.
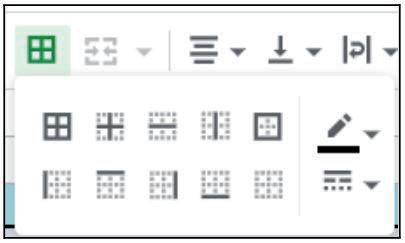
2. Double-click on the cell where you want your formula to appear, then type “=” without quotes followed by the formula. Press Enter to save the formula or click on another cell. The results will appear in the cell while the formula appears in the formula bar.
Example=SUM(C1+C2+C3) or =AVERAGE(C1:C10)
3. Click on the cell/cell range where you want to apply the border. From the toolbar, select the borders options.
4. A short note:
a. Average – returns the mean of the combined value arguments. We can also call it the sum of the values in the value arguments divided by the number of such values.
b. Median – finds the center value of the data rather than the mean. The numbers are arranged in ascending or descending order and we try to find the middle value.
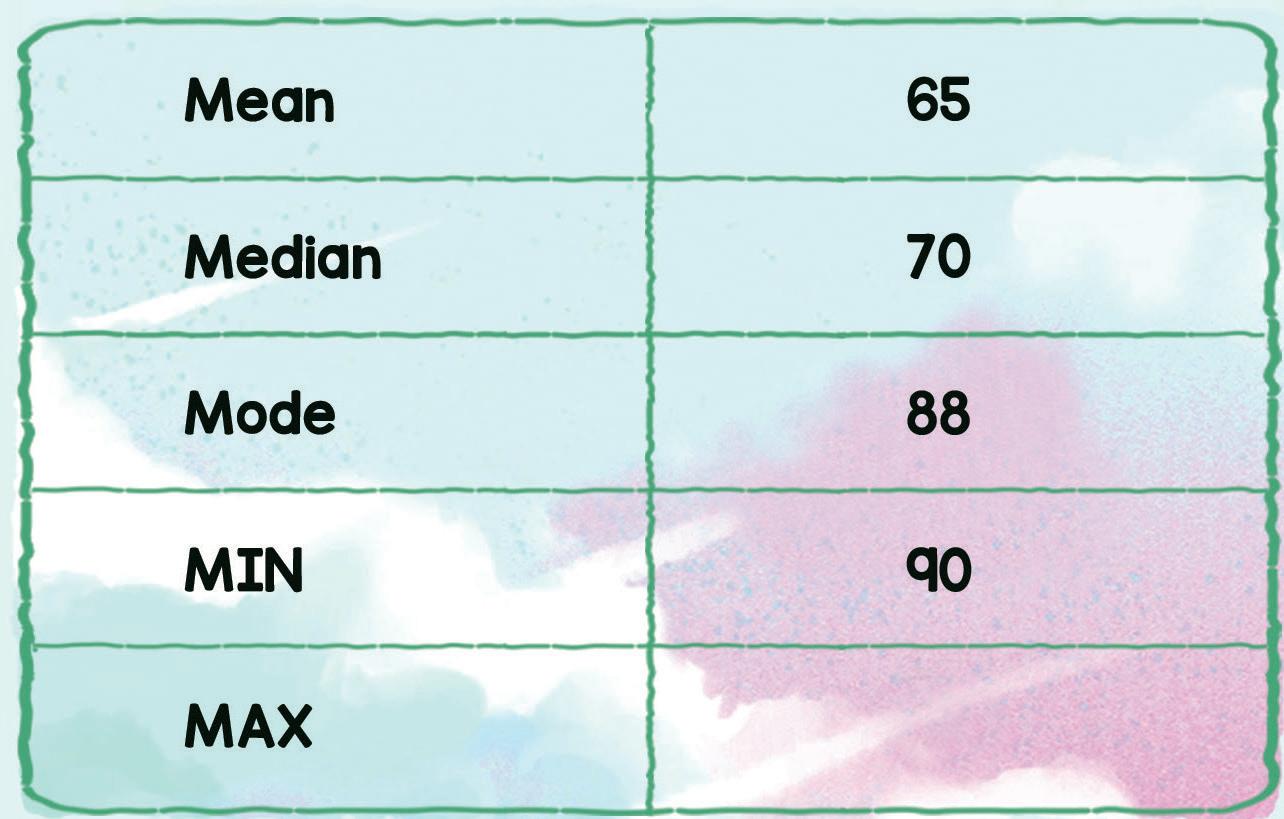
c. Mode – returns the most commonly occurring value in a given data.
5. To calculate the midpoint of numbers we can simply use the MEDIAN function in sheets. Ex: =MEDIAN(A1 : A10)
F Match Me
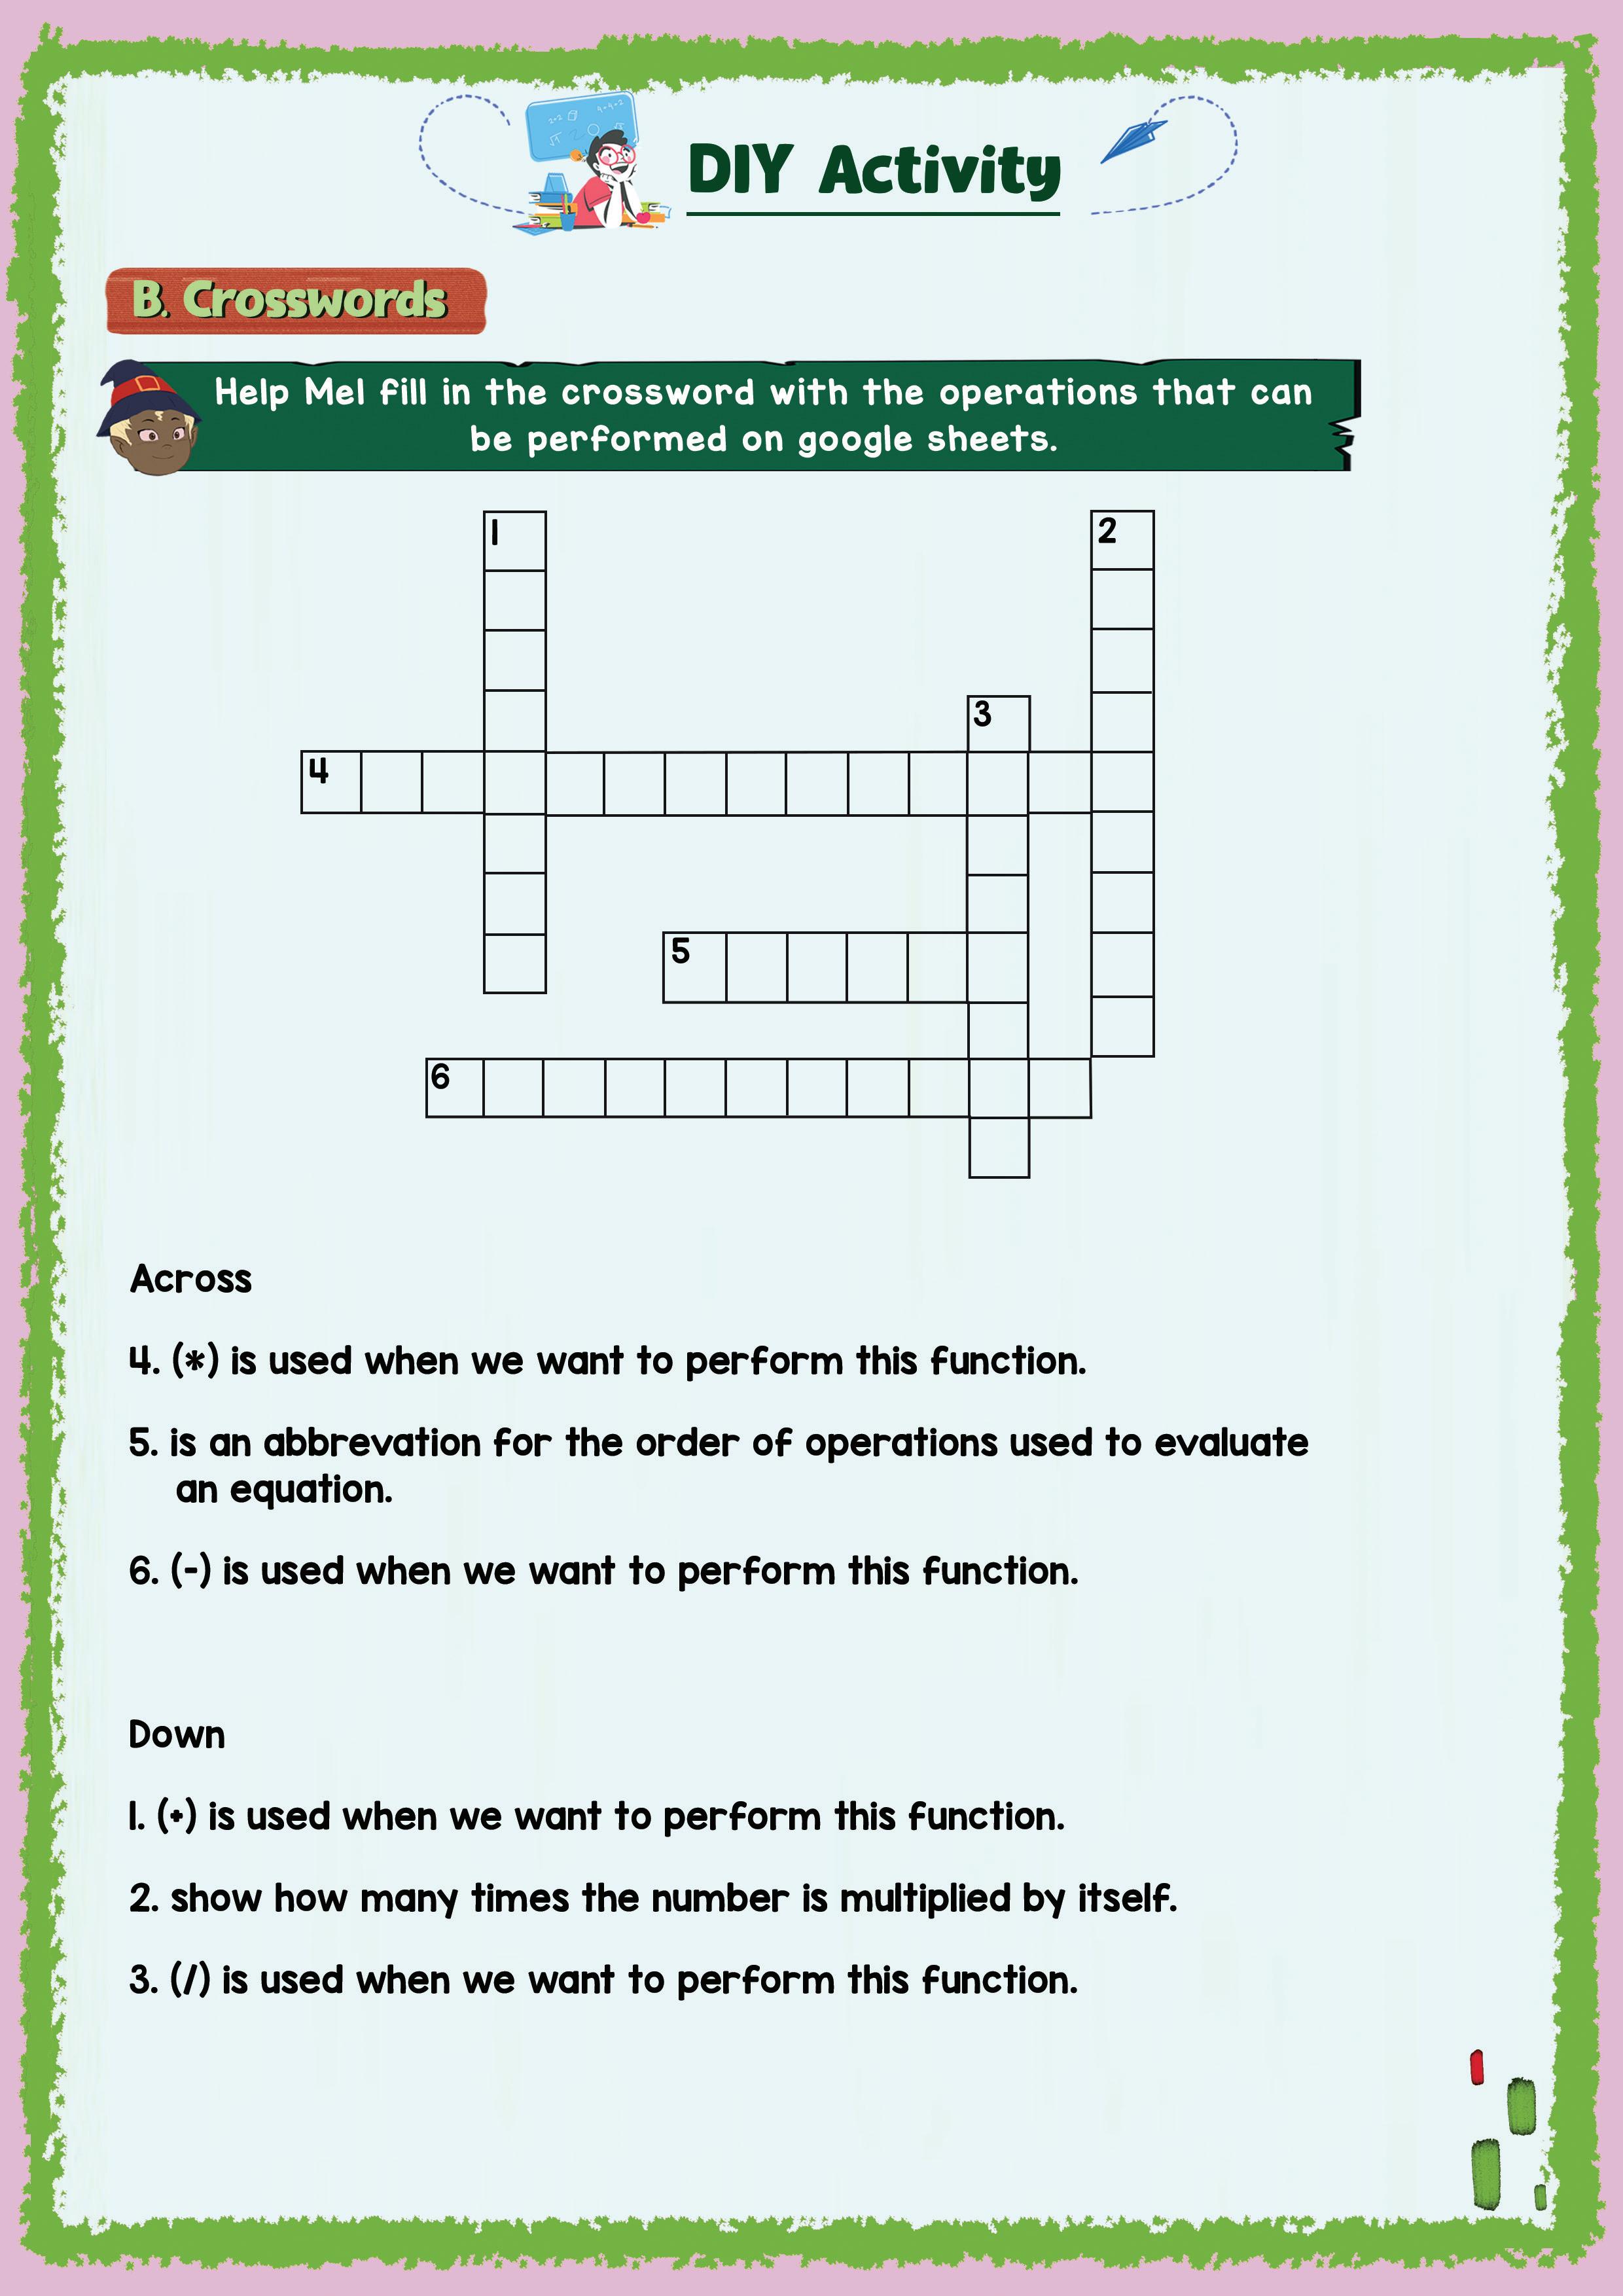
1. Data visualisation in Sheets is representing numerical data in a visual format. You can organise data in a spreadsheet into a more accessible and organised format like a line graph, pie chart, or bar graph.
2. Filters allow you to sort and filter the data that you see when you view a spreadsheet. The steps to filter data are –
a. Select the cells that you want to filter.
b. Click on Data in the menu bar.
c. Select Create a filter from the drop-down menu.
d. This will add filters to all the column headers.
3. The steps to freeze a column are –
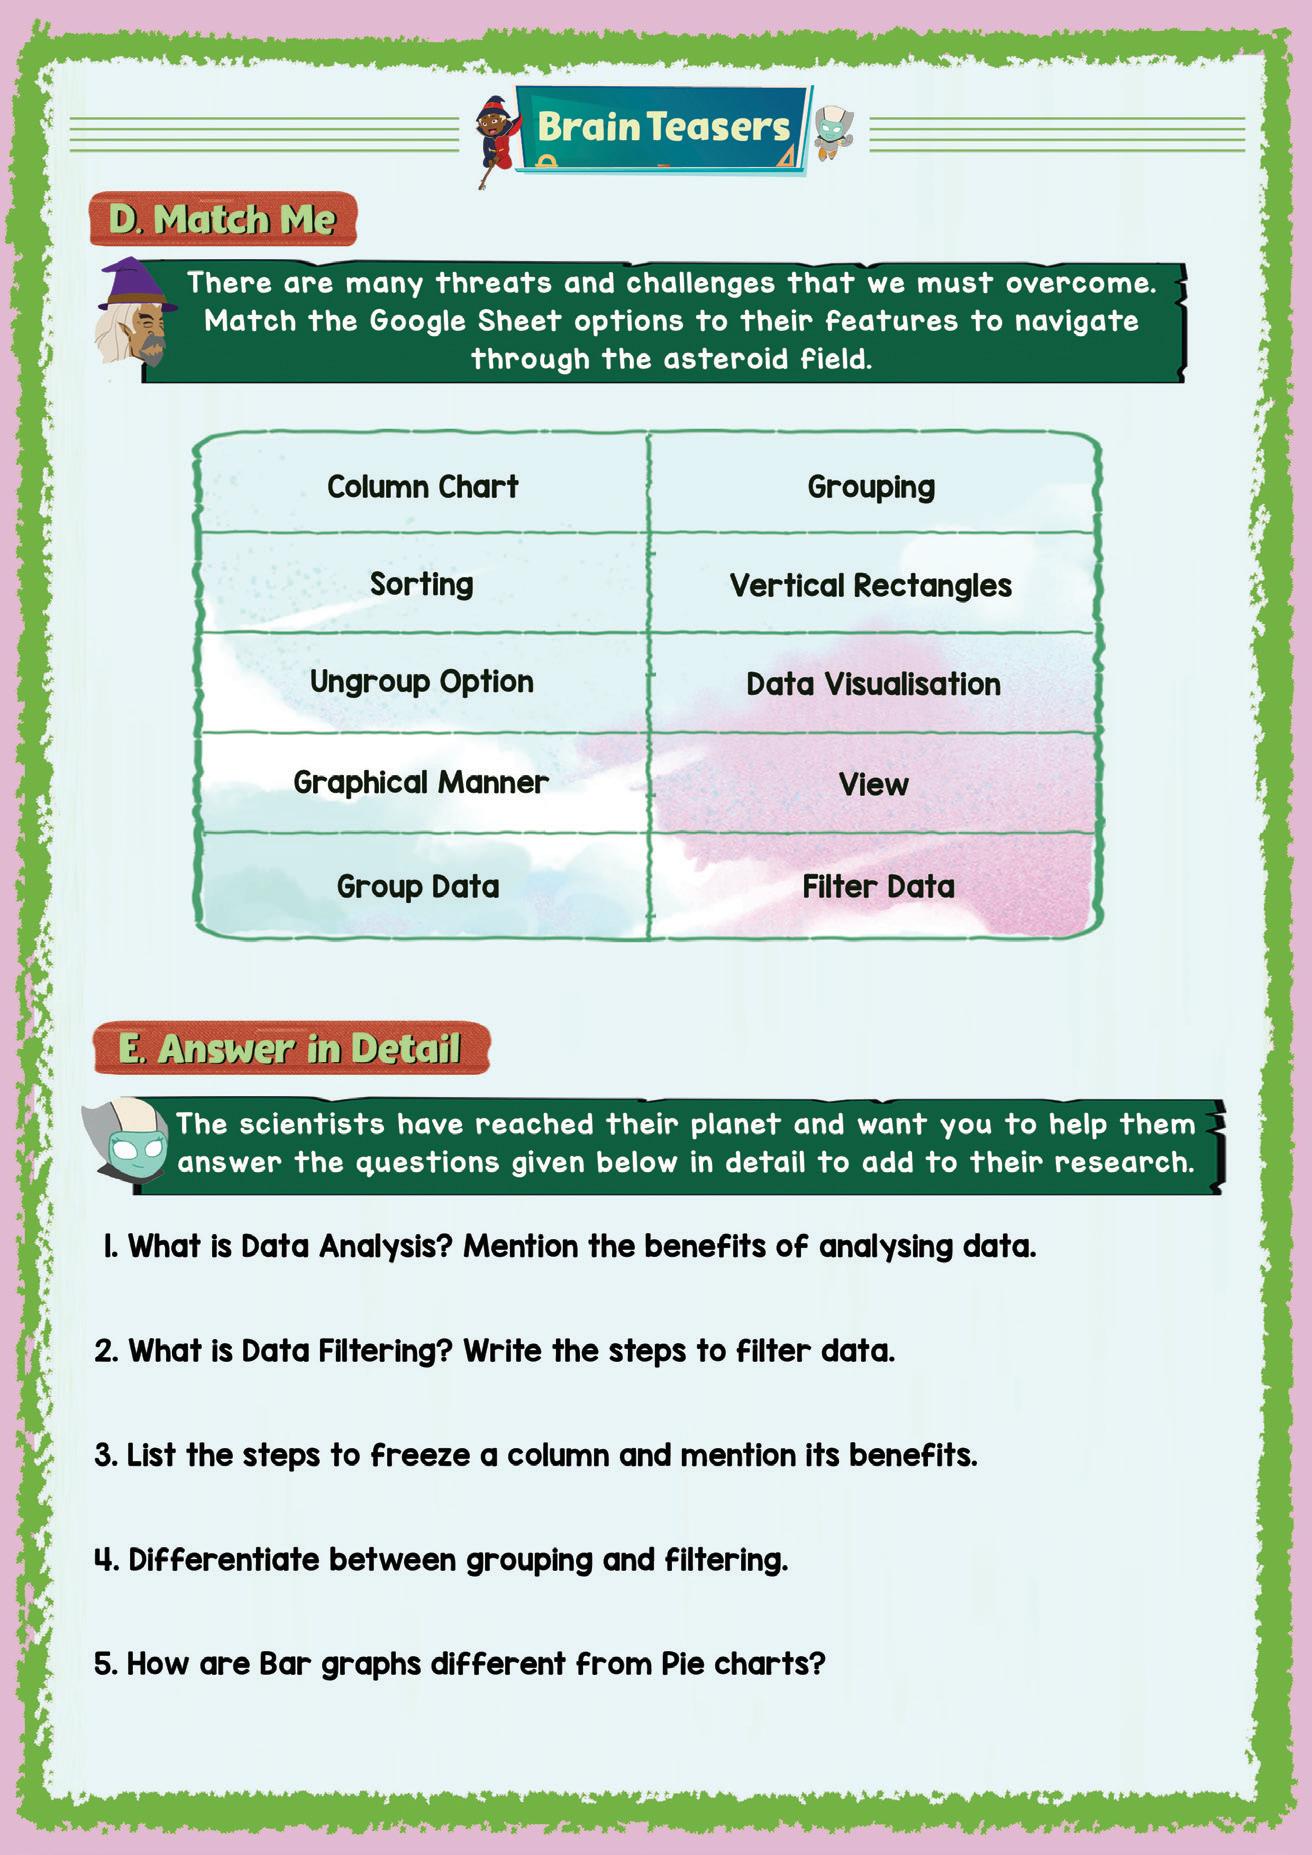
a. Select the row you wish to freeze.
b. Click on the View menu and click the Freeze option.
c. Choose up to the ‘x’ column.
Freezing a column will help you to pin data in the same place and see it when you scroll.
4. Filters allow you to sort and filter the data that you see when you view a spreadsheet. Filters don’t change the data values in your spreadsheet. You can use filters to temporarily hide or sort information. Data that matches the specified filter criteria doesn’t appear while the filter is on. While, grouping allows the user to visually aggregate/group data together.
5. Bar graphs are vertical bars. They are useful to compare the same item over a period of time. They are also called “Time Series Analysis”. Pie charts are a form of circle that is divided into portions that look like slices of a pizza. It is useful to compare different options.
The content covered in this chapter is aligned with the following CSTA Standard
● 2 - AP - 11 - Variables
This chapter is divided into the following lab sessions
1. Introduction to Programming
2. My First Python Program
3. Introduction to Variables
4. Naming a Variable
5. Assignment Statement
6. Data Types - Numbers, String and Boolean
7. Data Types - Type Casting
8. Operators - I
9. Operators - II
10. Project: Currency Converter
In this session, students will learn about –
● Programming Languages
● Features of Python
● Execution of a Python Code
Keywords
● Program: A set of instructions given to the computer to perform a particular task
● Programming Language: A language that is used to give instructions to the computer
● Python: An easy-to-learn high-level programming language
Discuss the word “programming” with students
Show the video “Journey to the land of mystery” on the panel Discuss the key concepts covered
Brainstorm the “write a word on the board” problem with the students
Action Plan
Conclude the concepts Assign
min Warm-Up
● Say: Today, the session topic is “Introduction to programming”. What does the word “programming” mean?
● Invite 1 or 2 responses from the students, but don’t give the correct answer yet.
● Say: Let’s watch a video together and we will come up with the definition of “programming” afterwards.
● Show the video “Journey to the land of mystery” on the panel.
● Say: Computers do not understand human languages. That is why we have programming languages which we use to communicate with computers.
● Explain the following concepts -
CS Concepts Explain
Types of Programming Languages
● Present the scenario: Let’s assume that I (the teacher) am a computer. Consider you are instructing me to write the word on the board. What should your instructions be?
1. The instructions should be in English for now.
2. To conduct this activity smoothly, consider picking one kid at a time.
3. Whenever the students give you an instruction, think if it is a clear instruction or not. If not, come up with a counter-question.
4. Let the students think. Do not give away the answer. Here are some possible responses
● Students: Please, pick up the chalk or marker.
● Teacher: But I (the computer) don’t know where the chalk or marker is.
● Students: On the table, there is a chalk-holder. Look in the chalk-holder. Locate a piece of chalk and pick up the chalk.
● Teacher: With what should I pick up the chalk?
● Students: With your hand
● Teacher: Yes, but I have two hands. Which one should I use?
● Students: Use your right hand to pick up the chalk up from the chalk-holder on your table.
● Teacher: *picks up the chalk and stands still*
● Students: Turn around to write the board.
● Teacher: *turns around exactly at her position and tries to write in the air, as the board is a little distance away from the teacher*
(Teacher keeps this conversation going until students come up with a clear set of sequential instructions.)
When the students come up with a clear set of instructions, ask them to draw conclusions from this activity. Here are the conclusions:
1. A computer needs clear instructions to perform a task.
2. The instructions should be in the proper sequence.
3. The instructions should be given in a language that the computer understands.
4. The computer performs a task with the help of a set of instructions. That is what a program is.
Sum-Up
2 min
● Conclude: Today, we learned about programming. We were introduced to a programming language named Python.
● Ask the following probing questions: (Conduct this activity only if the time permits)
■ Do you think a computer would understand my instructions, if I gave the instructions in Hindi?
Explanation: No. Hindi is a human language. The computer does not understand Hindi.
■ Name a few high level languages.
Possible Responses: Python, Java, C++, C, JavaScript, etc.
Additional Project:
● Assign the following task as Homework:
■ Read Features of Python on Page 3 of the Coding Booklet
In this session, students will learn about –
● The print() Statement
● The sep and end Parameter
Keywords
● Syntax: Rules of writing a sentence in a certain language
● Syntax Error: Mistakes (related to the rules of the language) in code, such as spelling mistakes, missing quotes, missing brackets, etc.
Revise the concepts from the previous coding class
Discuss the key concepts covered Attempt the activities related to the print() statement
Conclude the concepts Assign homework
● Say: Do you remember what we learned in the previous session?
● Invite responses from some students.
● Revise the topics learned in the previous class.
● Instruct: Go to the Panel and open Lab on My First Python Program.
● Show slides one by one and discuss the concepts shown on the slide on the panel.
● Discuss the Quiz questions given on the Panel.
● Invite answers from as many students as possible.
● Ask the students to complete the Coding Assignment.
● Walk around in the classroom and observe the activity done by the students.
Sum-Up
2 min
● Conclude: Today, we have learned about the print() statement. Additionally, we have learned about sep and end parameters.
● Assign the following program as Homework:
■ Print the following statement using Python code: “Hi, my name is ______. I am in grade 6.”
In this session, students will learn about –
● Variables
● Variable: A memory location on a computer where we can store a value
Revise the concepts from the previous coding class
Show the video “Oakians love Python” on the panel
Attempt the activities related to the variables
Conclude the concepts Assign homework
● Say: Do you remember what we learned in the previous session?
● Invite responses from some students.
● Revise the print() statement.
● Instruct: Go to the Panel and open the Lab on Introduction to Variables.
● Play the video with the title “Oakians love Python” on the panel. Let the student watch the complete video.
● Show the slides one by one and discuss the concepts shown on the slide on the panel.
● Discuss the Quiz questions given on the Panel.
● Invite answers from as many students as possible.
● Ask the students to complete the Coding Assignment
● Walk around in the classroom and observe the activity done by the students.
● Conclude: Today, we have learned about variables.
● Assign the following program as Homework:
■ Store your favourite cartoon character’s name in a variable and print it on the screen using Python code.
In this session, students will learn about –
● Rules of Naming a Variable
● Case Styles
● Comments
Keywords
● Comments: Used to add description/documentation to your program
● Case-Sensitive: A case-sensitive computer language differentiates between lower-case and upper-case letters
Revise the concepts from the previous coding class
Show the video “What’s in a name?” on the panel Attempt
● Say: Do you remember what we learned in the previous session?
● Invite responses from some students.
● Revise the concept of variables which we learned in the previous class.
● Instruct: Go to the Panel and open the Lab on Naming a Variable.
● Play the video with the title, “What’s in a name?” on the panel. Let the students watch the complete video.
● Show slides one by one and discuss the concepts shown on the slide on the panel.
● Discuss the Quiz questions given on the Panel.
● Invite answers from as many students as possible.
● Ask the students to complete the Coding Assignment.
● Walk around in the classroom and observe the activity done by the students.
● Conclude: Today, we have learned about case styles and comments.
● Assign the following project as Homework:
■ Name the following variables using snake case :
❍ A variable that holds the rate of interest.
❍ A variable that holds the date of birth.
❍ A variable that holds the user’s name.
In this session, students will learn about –
● Assignment Operator
● Assignment Statement
Keywords
● Assignment Operator (=): Assigns a value to the variable on the left-hand side of the “=” symbol
● Variable Initialization: Declaring and assigning a variable with an initial value e.g. roll = 7
● Say: Do you remember what we learned in the previous session?
● Invite responses from some students.
● Revise the case styles which we learned in the previous class.
● Instruct: Go to the Panel and open the Lab on Assignment Statement
● Play the video with the title “Defeating Zo is fun!” on the panel. Let the students watch the complete video.
● Show slides one by one and discuss the concepts shown on the slide on the panel.
● Discuss the Quiz questions given on the Panel.
● Invite answers from as many students as possible.
● Ask the students to complete the Coding Assignment.
● Walk around in the classroom and observe the activity done by the students.
Sum-Up
● Conclude: Today, we have learned about assignment operator.
● Instruct: We should practise the same activity at home.
2 min
In this session, students will learn about –
● Data Types
● Strings
● Boolean
Keywords
● Data Types: Types of data a variable can hold
● Integer: Non-decimal numbers
● Float: Numbers with decimal point
● Strings: Words or characters, must be enclosed in double quotes or single quotes
● Boolean: True or False
● Say: Do you remember what we learned in the previous session?
● Invite responses from some students.
● Revise assignment operator.
● Instruct: Go to the Panel and open Lab on Data types – Numbers, String and Boolean.
● Play the video with the title “Theo finds his twin” on the panel. Let the students watch the complete video.
● Show slides one by one and discuss the concepts shown on the slide on the panel.
● Discuss the Quiz questions given on the Panel.
● Invite answers from as many students as possible.
● Ask the students to complete the Coding Assignment.
● Walk around in the classroom and observe the activity done by the students.
2 min
● Conclude: Today, we have learned about assignment operators.
● Instruct: We should practise the same activity at home.
In this session, students will learn about –
● Type Casting
● Type Casting: Changing the data type of a variable into another
Revise the concepts from the previous coding class
Address students’ doubts from the previous classes Attempt the activities related to the variables
Conclude the concepts
● Say: Do you remember what we learned in the previous session?
● Invite responses from some students.
● Revise the case styles which we learned in the previous class.
● Invite the students to ask questions if they have doubts
● Address the doubts and discuss the challenges faced by the students
● Instruct: Go to the Panel and open Lab on Data types – Type casting.
● Show slides one by one and discuss the concepts shown on the slide in? the panel.
● Discuss the Quiz questions given on the Panel.
● Invite answers from as many students as possible.
● Ask the students to complete the Coding Assignment.
● Walk around in the classroom and observe the activity done by the students.
Sum-Up 2 min
● Conclude: Today, we have learned about assignment operator.
● Instruct: We should practise the same activity at home.
Objectives
In this session, students will learn about –
● Operators
● Modulus Operator
● BEMDAS rule
Keywords
● Operator: A memory location on a computer where we can store a value
● Modulus (%): An operator which calculates the remainder for a division
● BEMDAS rule: Mathematical operations are solved in the following order: Brackets, Exponent, Multiplication, Division, Addition, Subtraction
● Say: Do you remember what we learned in the previous session?
● Invite responses from some students.
● Revise the case styles which we learned in the previous class.
● Instruct: Go to the Panel and open Lab on Operators - I.
● Play the video titled as “Operators” on the panel. Let the students watch the complete video.
● Show slides one by one and discuss the concepts shown on the slide on the panel.
● Discuss the Quiz questions given on the Panel.
● Invite answers from as many students as possible.
● Ask the students to complete the Coding Assignment.
● Walk around in the classroom and observe the activity done by the students.
2 min
● Conclude: Today, we have learned about assignment operators.
● Assign the following as homework:
■ Practice Question - Q2 (Remove the spaces after and before the brackets coding booklet, page 25)
In this session, students will learn about –
● Exponent
● Floor Division
Keywords
● Exponent (**): The number of times a number is multiplied by itself
● Floor division (\): Divides two numbers and rounds the result down to the nearest integer
Revise the concepts from the previous coding class Discuss the concepts covered in the class
Attempt the activities related to the variables
Conclude the concepts Assign homework
● Say: Do you remember what we learned in the previous session?
● Invite responses from some students.
● Revise the case styles which we learned in the previous class.
● Discuss the functions ceil(), floor(), round(), random(), randint() methods from the coding booklet as given on pages 21 and 22.
● Instruct: Go to the Panel and open Lab on Operators - II.
● Show slides one by one and discuss the concepts shown on the slides on the panel.
● Discuss the Quiz questions given on the Panel.
● Invite answers from as many students as possible.
● Ask the students to complete the Coding Assignment.
● Walk around in the classroom and observe the activity done by the students.
Sum-Up
● Conclude: Today, we have learned about assignment operators.
● Assign the following as homework:
■ Practice Question - Q1 (coding booklet, page 25)
2 min
In this session, students will build a project named “Currency Converter” to showcase their learnings.
● Currency Converter: Converts one currency’s value into the relative value of other currencies
● Exchange Rate: The price of one country’s currency in terms of another’s
Revise the concepts from the previous coding class
Discuss the problem with the students
Ask the students to complete the project
Conclude the concepts Assign homework
● Say: Do you remember what we learned in the previous session?
● Invite responses from some students.
● Revise operators which we learned in the previous class.
● Instruct: Go to the Panel and open the Lab on Project: Currency Converter.
● Discuss the challenge with the students.
● Explain the terms like Currency Converter, Exchange Rate to the students.
Currency Converter: Different countries use different currencies. Currency of one country differs in value from another country. Let’s say, we are visiting the US. We will need US currency which is called the dollar. A currency converter will help us understand how many dollars we will get for a certain amount of rupees.
● Ask the students to complete the Coding Assignment
● Walk around in the classroom and observe the activity done by the students.
● Conclude: Today, we have learned about assignment operators.
● Assign the following as homework:
■ Practice Question - Q3, Q4 (coding booklet, page 25)
The content covered in this chapter is aligned with the following CSTA Standard
● 2-AP–11 Variables
This chapter is divided into the following lab sessions
1. Single and Multiline Strings
2. Concatenation and Repetition
3. Input and Formatting
4. String Formatting and Indexing
5. String Slicing
6. Find and Replace
In this session, students will learn about -
● Single Strings
● Multiline Strings
● Escaping
● Newline
● Single String: Is a sequence of characters enclosed in single quotes or double quotes
● Multiline String: Is a sequence of characters that spans multiple lines and is enclosed by three single quotes or three double quotes
● Escaping: An escape character like backslash (\) is used to indicate that the next character should be treated specially
● Newline: Is used to indicate the end of a line text and the start of new line
Recall the concepts covered in the previous coding session
Discuss Single Strings, Multiline Strings, Escaping, Newline 7 min 5 min 15 min 3 min
The Match, The Sports Conclude the session Assign the Homework
Action Plan 7 min Warm-Up
● Say: What does a “Single and Multiline Strings” mean?
● Invite 1 or 2 responses from the students.
● Say: Single line string is a sequence of characters enclosed in single quote or double quote while a multiline string is a string that spans multiple lines, enclosed using a triple-single or tripledouble quote.
● Say: Let’s understand Single and Multiline Strings.
● Open Lab on Single and Multiline Strings.
● Explain the following concepts -
Single Strings
Multiline Strings
Escaping
Newline
As given on Page 27
As given on Pages 27 and 28
As given on Page 28
As given on Pages 28 and 29
● Conduct The Match given in Panel:
■ Instruct: Click on the Assignment section.
■ Instruct: Click the Go to Practise button to attempt the activity.
■ Walk around in the classroom and observe the activity done by the students.
● Conduct The Sports given in the Panel:
■ Say: Define a program using triple quotes to write about your favourite sport.
■ Instruct: Click on the Assignment section.
■ Instruct: Click the Go to Practise button to attempt the activity.
■ Walk around in the classroom and observe the activity done by the students.
Note
● If time permits, conduct the additional activity given in the panel.
● Conclude: Today, we learned about Single and Multiline Strings.
● Ask the following probing questions:
■ What can be used to define the string?
Possible Response: Append, Single quote, Multiple Quote
■ What is used to avoid errors while using special characters in a string?
Possible Response: Backslash (\), Newline (\n), Quotations
● Assign the following Assignment as Homework:
■ Ask the students to create a code on “favourite food” using \ and single/double quotes.
In this session, students will learn about -
● Concatenation
● + operator
● The join() function
● String repetition
● Concatenation: Is the technique of combining two or more strings together
● + operator: Is used to join two strings
● join() function: Is used to join the values present in different variables
● String repetition: Is making multiple copies of a string using the repetition operator
Recall the concepts covered in the previous coding session
Play the video given in the panel to introduce the concepts to be covered in this session
Discuss Concatenation, + operator, join() function, String repetition
Name creation, numbers and strings
● Say: What are concatenation and repetition?
● Invite 1 or 2 responses from the students.
● Revise the concepts learned in the previous class.
● Say: Concatenation is combining two or more strings into a single string, while repetition is repeating a string a certain number of times.
● Say: Let’s understand Concatenation and Repetition.
● Open Lab on Concatenation and Repetition.
● Show the video with the title “Concatenation and Repetition”.
● Explain the following concepts -
Concatenation
+ operator
The join() function
String repetition
Explain
As given on Page 30
As given on Page 30
As given on Page 30
As given on Pages 30 and 31
● Conduct Name creation given in Panel:
■ Instruct: Click on the Assignment section.
■ Instruct: Click on the Go to Practise button to attempt the activity.
■ Walk around in the classroom and observe the activity done by the students.
● Conduct Number and strings given in the Panel:
■ Instruct: Click on the Assignment section.
■ Instruct: Click on the Go to Practise button to attempt the activity.
■ Walk around in the classroom and observe the activity done by the students.
● If time permits, conduct the additional activity given in the panel.
● Conclude: Today, we learned about Concatenation and Repetition.
● Ask the following probing questions:
■ What symbol is used for concatenation?
Possible response: minus, plus, backslash
■ What symbol is used for string repetition?
Possible Response: plus, Backslash, Asterisk
● Assign the following Practice Problems as Homework:
■ Ask the students to complete Q3 of Practice Problems on page 47.
In this session, students will learn about -
● The input() function
● The islower() function
● The isupper() function
● The lower() function
● The upper() function
Keywords
● The input() function: Is used to take input from the user
● The islower() function: Returns True if all the characters in a string are in lowercase, otherwise False
● The isupper() function: Returns True if all the characters in a string are in uppercase, otherwise False
● The lower() function: Converts all the characters of a string to lowercase
● The upper() function: Converts all the characters of a string to uppercase
Recall the concepts covered in the previous coding session
Play the video given in the panel to introduce the concepts to be covered in this session
Discuss the input() function, the islower() function, the isupper() function, the lower() function, the upper() function
● Say: What are Input and Formatting?
● Invite 1 or 2 responses from the students.
● Say: “Input” is used for taking the user’s entry while “formatting” is how to present any data.
● Revise the concepts learned in the previous class.
● Say: Let’s understand input and Formatting.
● Open Lab on Input and Formatting.
● Show the video with the title “Input and Formatting”.
● Explain the following concepts –
The input() function
The islower() function
The isupper() function
The lower() function
The upper() function
Explain
As given on Page 32
As given on Page 32 and 33
As given on Page 33
As given on Page 33
As given on Page 33 and 34
● Conduct Flipping out given in Panel:
■ Instruct: Click on the Assignment section.
■ Instruct: Click on the Go to Practise button to attempt the activity.
■ Walk around in the classroom and observe the activity done by the students.
● Conduct Capitals characters given on Panel:
■ Instruct: Click on the Assignment section.
■ Instruct: Click on the Go to Practise button to attempt the activity.
■ Walk around in the classroom and observe the activity done by the students.
Note
● If time permits, conduct the additional activity given on the panel.
● Conclude: Today, we learned about Input and Formatting.
● Ask the following probing questions:
■ What is the input() function?
Possible Response: Built-in function, Function used to take user input.
■ Which function is used to take the user input
Possible Response: Input()
● Assign the following program as Homework:
■ Ask the students to complete Q1 of Practice Problems on page 47
In this session, students will learn about -
● The f-string formatting
● The format() function
● The Index() function
● Negative indexing
● Immutable strings
Keywords
● String Formatting: Is the process of presenting the string dynamically
● Indexing: Is the process of accessing the individual elements of a string
WEBS at a Glance
Recall the concepts covered in the previous coding session
Play the video given in the panel to introduce the concepts to be covered in this session
Discuss f-string formatting, the format() function, the Index() function, Negative indexing, Immutable strings
Find the last, Format variables
● Say: What is String Formatting and Indexing?
● Invite 1 or 2 responses from the students.
Conclude the session Assign the homework
● Say the operations that can be performed on the data in the list data structure.
● Revise the concepts learned in the previous class.
● Open Lab on String Formatting and Indexing.
● Show the video with the title “String Formatting and Indexing”.
● Explain the following concepts -
The f-string formatting
The format() function
String indexing
The Index() function
Negative indexing
Immutable strings
Explain
As given on Page 36
As given on Page 36 and 37
As given on Page 38
As given on Page 39
As given on Page 39 and 40
As given on Page 40
● Conduct Find the last given in the Panel:
■ Say: Write a program to find the last number in a list.
■ Instruct: Click on the Assignment section.
■ Instruct: Click on the Go to Practise button to attempt the activity.
■ Walk around in the classroom and observe the activity done by the students.
● Conduct Format variables given on the Panel:
■ Say: Define a program to Format variables using a string.format() method.
■ Instruct: Click on the Assignment section.
■ Instruct: Click the Go to Practice button to attempt the activity.
■ Walk around in the classroom and observe the activity done by the students.
Note
● If time permits, conduct the additional activity given in the panel.
● Conclude: Today, we learned about String Formatting and Indexing.
● Ask the following probing question:
■ For which datatype do we use string formatting?
Possible Response: String, List
■ How do we access a single character from a string?
Possible Response: Indexing, Slicing, String
● Assign the following Activity as Homework:
■ Ask the students to create a program for taking user input and displaying the same using formatting.
In this session, students will learn about -
● String Slicing
● The len() function
Keywords
● String Slicing: Is used to extract part of a string
● len() function: Returns the total number of characters in a string
Recall the concepts covered in the previous coding session
Play the video given in the panel to introduce the concepts to be covered in this session
● Say: What is String Slicing?
● Revise the concepts learned in the previous class.
● Open Lab on String Slicing.
● Show the video with the title “String Slicing”.
● Explain the following concepts –
len() function
given on Page 40, 41 and 42
given on Page 42
● Conduct Slice the list given on Panel:
■ Say: Write a program to Slice the list into 3 equal chunks and reverse each chunk.
■ Instruct: Click on the Assignment section.
■ Instruct: Click on the Go to Practise button to attempt the activity.
■ Walk around in the classroom and observe the activity done by the students.
Note
● If time permits, conduct the additional activity given in the panel.
● Conduct String length given in Panel:
■ Say: Write a program to find the length of the string.
■ Instruct: Click on the Assignment section.
■ Instruct: Click on the Go to Practise button to attempt the activity.
■ Walk around in the classroom and observe the activity done by the students.
Sum-Up
● Conclude: Today, we learned about String Slicing and the len() function.
● Ask the following probing question:
■ What is slice notation?
Possible response: Semicolon
■ What is the return value of len() function?
Possible Response: Integer, Number
● Assign the following Activity as Homework:
3 min
■ Ask the students to create a program for extracting Email addresses from the input text.
In this session, students will learn about -
● The Find() function
● The Replace() function
Keywords
● Find() function: Returns the index of the first occurrence of the specified character in the string
● Replace() function: Replaces a specified character or substring with another
Recall the concepts covered in the previous coding session
Play the video given in the panel to introduce the concepts to be covered in this session
● Say: What is Find() and Replace()?
● Revise the concepts learned in the previous class.
● Open Lab on Find() and Replace().
● Show the video with the title “Find() and Replace()”.
Engage
● Explain the following concepts -
CS Concepts Explain
Find() function As given on Page 44
Replace() function As given on Pages 44 and 45
5 min
● Conduct Find the word given in Panel:
■ Say: Write a program to Find your name in the string.
■ Instruct: Click on the Assignment section.
■ Instruct: Click on the Go to Practise button to attempt the activity.
■ Walk around in the classroom and observe the activity done by the students.
● Conduct Find the number given in Panel:
■ Say: Write a program to Find integers in the string.
■ Instruct: Click on the Assignment section.
■ Instruct: Click on the Go to Practise button to attempt the activity.
■ Walk around in the classroom and observe the activity done by the students.
● If time permits, conduct the additional activity given in the panel.
Sum-Up 3 min
● Conclude: Today, we learned about Find() and Replace() functions.
● Ask the following probing questions:
■ What does replace() function do?
Possible response: Update, Change, Modify the string
■ What is the return type of the find method?
Possible Response: Integer, Index, Number
● Assign the following Practice Problems as Homework:
■ Ask the students to complete Q2 and 4 of Practice Problems
The content covered in this chapter is aligned with the following CSTA Standard
● 2-AP-12 Control
This chapter is divided into the following lab sessions
1. Comparison Operators
2. Logical Operators
3. Conditional Statements
In this session, students will learn about -
● Decision-making
● Comparison operators
● Decision Making: The process of making a decision based on certain conditions
● Comparison Operators: The operators that compare two different values and return either True or False as a result
Play the video given in the panel to introduce decisionmaking in respect of Comparison
Conduct
activity “Comparison
Action Plan
● Play the video given in the Tekie panel to introduce decision making in respect of Comparison.
● Show the slides given in the Tekie panel one by one to discuss decision-making.
● Ask students to answer the quiz questions given on the slides in the Tekie panel.
● Discuss the answers and clear the doubts if any.
7 min Warm-Up Build 15 min 5 min Engage
● Conduct Comparison Game given in the Tekie panel:
■ Say: Compare the number of oranges in box 1 and the number of oranges in box 2.
■ Instruct: Compare the boxes for different values of oranges in each box. Each scenario should be applicable for the usage of one operator.
■ Walk around in the classroom and observe the activity done by the students.
● Conclude: Today, we learned about decision making and comparison operators.
● Ask
3 min
■ How do you use comparison operators to check if a value falls within a specific range?
Possible Responses: Using >= and <= operators; Using < and > operators
■ Can you define “decision making” on the basis of what we learned today in class?
Possible Responses: Decision Making is the process of making a decision based on certain conditions
● Assign the following project as homework:
■ Grocery shopping: Given a certain amount of money
■ Decide if each product in a list can be bought or not
● The project is optional. Assign it if feasible.
In this session, students will learn about -
● Logical Operators
Keywords
● Logical operators: Are used to compare two or more conditions
Recall the concepts covered in the previous coding session
Play the video given in the panel to introduce logical operators
Show the slides to discuss logical operators and their types
Also discuss quiz questions given in the Tekie panel
● Instruct: Go to the Panel and open the Lab on Logical Operators.
● Play the video given in the panel to introduce logical operators.
● Show the slides to discuss logical operators and their types.
● Explain: The differences between comparison operators and logical operators.
● Ask students to answer the quiz questions given on the slides in the Tekie panel.
● Discuss the answers and clear the doubts if any.
● Conduct Solved Examples given on Page 54:
■ Read: Question in solved example 2.2.
■ Assign: The input values of scores.
■ Instruct: Build a logical program to select students for the upcoming project.
■ Walk around in the classroom and observe the activity done by the students.
■ Instruct: Provide a different input and check if the program works.
Note
● If time permits, conduct the additional activity Solved Example 2.1 given in the Coding Booklet on Page 53.
Sum-Up
3 min
● Conclude: Today, we learned about logical operators and how they are different from comparison operators.
● Ask
■ How do you separate multiple logical operators in a single statement?
Possible Responses: Using parentheses
■ Give any two examples of real-world scenarios where logical operators are used
Possible Responses: Push button lock; Light-activated burglar alarm; Safety thermostat; An automatic watering system
● Assign the following project as homework:
■ Check if a student has passed in both Maths and English
■ Pass mark is 50
Note
● The project is optional. Assign it if feasible.
In this session, students will learn about -
● Conditional Statements
■ If-else
■ elif
■ Nested if-else
● Conditional Statements: Tell a program to execute different actions depending on whether a certain condition is true or false
Recall the concepts covered in the previous coding session
Play the video given in the panel to introduce conditional statements
Show the slides to discuss conditional statements: if-else, elif and nested ifelse and quiz questions given in the Tekie panel
Conduct Solved examples 3.3 on Page 61
Conclude the session Assign the Homework
● Say: Do you remember what we learned in the previous session?
● Invite responses from some students.
● Revise the concepts learned in the previous class.
● Play the video given in the Tekie panel to introduce conditional statements.
● Show the slides given in the Tekie panel to discuss conditional statements: if-else, if and nested if-else.
● Ask students to answer the quiz questions given on the slides in the Tekie panel.
● Discuss the answers and clear the doubts if any.
● Conduct Solved Example 3.3 given on Page 61:
■ Explain the activity to the students.
■ Instruct: Click on the Practice button on the Assignment page to attempt the activity.
■ Instruct: Click on the Attempt button to open the activity page.
■ Walk around in the classroom and observe the activity done by the students.
■ Assist the students if any of them are struggling.
■ Instruct: Try the same activity for another year and check output.
● If time permits, conduct the additional activity Solved Example 3.1 given in the Coding Booklet on Page 60.
● Ask the following probing questions:
■ Can you provide an example of a real-world scenario where you would use conditional statements?
Possible Responses: If my cat is hungry she will rub my leg; Else she will sit on my lap; If I score good marks I will get a new phone; Else I won’t.
■ How would you handle multiple conditions in a conditional statement?
Possible Responses: Using a combination of logical operators and parentheses
● Assign the following project as homework:
■ Write a program to check if a student has passed an exam or not
■ Pass mark being 35
● The project is optional. Assign it if feasible.
The content covered in this chapter is aligned with the following CSTA Standard
● 2-AP-12
This chapter is divided into the following classroom sessions
1. Introduction to Loops
2. The while Loop
3. The range() Function
4. for versus while Loop
5. Nested Loop
6. Control Statements
In this session, students will learn about -
● Loops
● Process of a Loop
● Infinite Loop
● Loops: Repeat a set of instructions again and again until a particular condition remains true
● Infinite Loop: A loop that runs endlessly as the test condition never becomes false
Play the video given in the panel to introduce the concepts to be covered in this session
Discuss loops and infinite loops
Our Daily Routine Activity [Our daily routine like waking up in the morning, brushing teeth, bathing, having breakfast and going to school, etc. can be sequenced one after another to explain loops]
● Instruct: Go to the Panel and open the Lab on Introduction to Loops.
● Play the video given in the panel.
● Discuss the Quiz questions given in the Panel.
● Invite answers from as many students as possible.
min
● Conduct Our Daily Routine Activity given in the Panel:
■ Say: Students, let us do this activity to learn how the correct and repeating sequences make a loop.
■ Instruct: Click on the Assignment section.
■ Instruct: Click on the Go to Practice button to attempt the activity.
■ Walk around in the classroom and observe the activity done by the students.
■ Instruct: Click on Yes button to submit the activity.
● If time permits, conduct the additional activity given in the panel.
Additional Activity: Round the Clock Activity [Students can make their clocks as the needles of a clock move endlessly.]
3 min
● Conclude: Today, we learned about loops and infinite loops with the help of videos and activities.
● Ask the following probing questions:
■ What real life activity do you think best explains loops?
Possible Responses: Daily routine; Day and night; Week wheel; Month wheel; Skipping; Birthday celebration; Escalator, etc.
■ Is time an infinite loop?
Possible Responses: Yes; No
In this session, students will learn about -
● The while Loop
● The for Loop
● while Loop: Repeats a set of instructions when the condition is true hence also known as conditional loop
● for Loop: Used to count up to a number or go through a sequence of values hence also known as counting loop
Recall the concepts covered in the previous coding session
Play the video given in the panel to introduce the concepts to be covered in this session
Discuss while and for loops
Making My Music Playlist Activity
[Students can make their choice of music playlist. When they play it in an app, it will play until the last song]
Conclude the session Assign the homework
● Instruct: Go to the Panel and open the Lab on while Loop.
● Play the video given on the panel.
● Discuss the Quiz questions given in the Panel.
● Invite answers from as many students as possible.
● Conduct Making My Music Playlist Activity given in the Panel:
■ Say: Students, let us make our own songs playlist and play it to observe when it stops playing songs.
■ Instruct: Click on the Assignment section.
■ Instruct: Click on the Go to Practice button to attempt the activity.
■ Walk around in the classroom and observe the activity done by the students.
■ Instruct: Click on the Yes button to submit the activity.
● If time permits, conduct the additional activity given in the panel.
Working of ATM Machine
[Students can make a program in which they can match the user’s response for a particular number code.]
● Conclude: Today, we have learned how a while loop and for loop work with the help of videos and activities.
● Ask the following probing questions:
■ Is “Traffic Light Signal” an example of a while loop?
Possible Responses: Yes; No
■ Can we use a loop in the software of an ATM Machine? Justify your answer.
Possible Responses: Yes; No. It can be used to give alerts for the wrong number of password entries.
● Assign the following project as homework:
■ Do Q1 from section Practice Question on page 71.
● The project is optional. Assign it if feasible.
In this session, students will learn about -
● Create a loop with range() function
● Create a loop without range() function
Keywords
● range(): Used to specify a starting and an ending number for the “for loop”
● start: An integer number to specify the start position
● stop: An integer number required to specify the end/stop position
● step: An integer number to specify the increment/decrement value of a loop variable
Recall the concepts covered in the previous coding session
Play the video given in the panel to introduce the concepts to be covered in this session
Discuss range() function and other keywords
Finding Odd/Even Numbers [Students can use skip counting method]
Conclude the session Assign the homework
● Instruct: Go to the Panel and open the Lab on the range() function.
● Play the video given in the panel.
● Discuss the Quiz questions given in the Panel.
● Invite answers from as many students as possible.
● Conduct Finding Odd/Even Numbers given in the Panel:
■ Say: Students, let us use the skip counting method to learn how the range function works.
■ Instruct: Click on the Assignment section.
■ Instruct: Click on the Go to Practice button to attempt the activity.
■ Walk around in the classroom and observe the activity done by the students.
■ Instruct: Click on the Yes button to submit the activity.
Note
● If time permits, conduct the additional activity given in the panel.
Additional Activity
Let’s Count Backwards [Students will recite backward counting. They can skip numbers to play this activity.]
● Conclude: Today, we have learned to use the range() function in for loop with the help of videos and activities.
● Ask the following probing questions:
■ Can we use the range() function to iterate a for loop over letters in a string?
Possible Responses: Yes; No
■ Does the for loop iterate up to the ending number in the range() function?
Possible Responses: Yes; No
● Assign the following project as homework:
■ Do Q2 from section Practice Question on page 71.
■ Write a program to display the name entered by the user as shown in an example under the section Without using the range() function on page 67.
Note
The project is optional. Assign it if feasible.
In this session, students will learn about -
● Difference between for and while loop
● while Loop: Repeats a set of instructions when the condition is true, hence it is also known as the conditional loop
● for Loop: Used to count up to a number or go through a sequence of values, hence also known as the counting loop
Recall the concepts covered in the previous coding session
Play the video given in the panel to introduce the concepts to be covered in this session
Discuss differences between for and while loop
Reading Activity [Students will read for 10 minutes or until the lesson ends]
● Instruct: Go to the Panel and open the Lab on for versus while Loop.
● Play the video given in the panel.
Engage
● Discuss the Quiz questions given in the Panel.
● Invite answers from as many students as possible.
Conclude the session Assign the homework
5 min
● Conduct Reading Activity given in the Panel:
■ Say: Students, let us do the reading activity to understand the difference between for and while loop.
■ Instruct: Click on the Assignment section.
■ Instruct: Click on the Go to Practice button to attempt the activity.
■ Walk around in the classroom and observe the activity done by the students.
■ Instruct: Click on the Yes button to submit the activity.
● If time permits, conduct the additional activity given in the panel.
Guess the Word
[Students will guess the word until they guess the right word or in 10 chances.]
Sum-Up
3 min
● Conclude: Today, we have learned the difference between for and while loop through different activities.
● Ask the following probing questions:
■ Which is the best loop to use when we know the number of times we need to execute a piece of code?
Possible Responses: For loop
■ Will the set of instructions execute if the test condition is false at the beginning of loop execution?
Possible Responses: No
● Assign the following project as homework:
■ Do Q3 from section Practice Question on page 71 using for loop as well as while loop and discuss the difference you notice at the execution part.
● The project is optional. Assign it if feasible.
In this session, students will learn about -
● Nested loop
● Nested Loop: Loop inside another loop
● Outer Loop: The first loop we start off
● Inner Loop: All the loops written inside the outer loop
Recall the concepts covered in the previous coding session
Play the video given in the panel to introduce the concepts to be covered in this session
Discuss nested loops as well as inner and outer loops.
Draw Number Pyramid [Students will draw a number pyramid so that 1 in the first row 1 and 2 in the second and so on]
Conclude the session Assign the homework
● Instruct: Go to the Panel and open the Lab on Nested Loop.
● Play the video given in the panel.
● Discuss the Quiz questions given in the Panel.
● Invite answers from as many students as possible.
● Conduct Draw Number Pyramid given in the Panel:
■ Say: Students, let us draw a pyramid with numbers.
■ Instruct: Click on the Assignment section.
■ Instruct: Click on the Go to Practice button to attempt the activity.
■ Walk around in the classroom and observe the activity done by the students.
■ Instruct: Click on the Yes button to submit the activity.
Note
● If time permits, conduct the additional activity given in the panel.
Additional Activity
Create Multiplication Grid
[Students will create a multiplication table grid from tables 1 to 10.]
Sum-Up
3 min
● Conclude: Today, we have learned about nesting loops through different activities and videos.
● Ask the following probing questions:
■ How many inner loops can we write inside an outer loop?
Possible Responses: 2; 3; 5
■ Can we close an outer loop without closing its inner loop?
Possible Responses: No
● Assign the following project as homework:
■ Do Q4 from the section Practice Question on page 71.
Note
The project is optional. Assign it if feasible.
In this session, students will learn about -
● The break and continue statements
Keywords
● Break statement: Used to break out / get out of the loop
Recall the concepts covered in the previous coding session
Play the video given in the panel to introduce the concepts to be covered in this session
Discuss break and continue statements My Diet Plan [Students will create a diet plan for obese people who can enjoy junk food only on Sunday]
Conclude the session Assign the homework
● Continue statement: Used to skip the execution of statements ahead in the loop 7 min
● Instruct: Go to the Panel and open the Lab on The break and continue statements.
● Play the video given in the panel.
● Discuss the Quiz questions given in the Panel.
● Invite answers from as many students as possible.
● Conduct My Diet Plan given in the Panel:
■ Say: Students, let us create a diet plan for obese people to have healthy food from Monday to Saturday and enjoy junk food on Sunday.
■ Instruct: Click on the Assignment section.
■ Instruct: Click the Go to Practice button to attempt the activity.
■ Walk around in the classroom and observe the activity done by the students.
■ Instruct: Click on the Yes button to submit the activity.
● If time permits, conduct the additional activity given in the panel.
Get an Award
[Only 5 students who have scored more than 90% will get the award.]
Sum-Up
3 min
● Conclude: Today, we have learned about the break and continue control statements through different activities and videos.
● Ask the following probing questions:
■ Can a break statement be used to get out of the innermost loop?
Possible Responses: Yes; No
■ Can we use a continue statement in a loop to skip 2 continuous statements?
Possible Responses: Yes; No
● Assign the following project as homework:
■ Write a program to demonstrate each of the break and continue statements.
● The project is optional. Assign it if feasible.
This Teacher Manual has been designed to implement Tekie, the storytelling-based Coding and Computer Science program. The manual consists of lesson plans within each chapter that teachers transact within classrooms and computer labs. Each lesson is based on a research-based ‘WEBS’ framework that simplifies pedagogical practices for teachers and enables them to deliver effectively.

• Sharp Lesson Planning: Each lesson plan focuses on specific sub-learning outcomes within a chapter and are designed for delivery within the stipulated class or lab time.
• Real-life and Application-based Questions: Additional questions that link Computer Science to real-life contexts and assist teachers to develop learners’ conceptual understanding and application skills.
• Support and Detailed Solutions: In-depth solutions for in-class and post-class activities to reinforce learning.
Uolo partners with K12 schools to bring technology-based learning programs. We believe pedagogy and technology must come together to deliver scalable learning experiences that generate measurable outcomes. Uolo is trusted by over 8,000 schools with more than 3 million learners across India, South East Asia, and the Middle East.
hello@uolo.com