2 minute read
4. MS Access Forms – IV
Objectives
In this session, students will apply what they have learned from the previous session -
● Data types and changing data type of a field
● Form creation
● Adding rows in a table
● Filtering data in a table
● Custom Filtering
Keywords
● Data type: Type of data in a column of a table
WEBS at a Glance
● Say: Do you remember what we learned in the previous session?
● Invite responses from some students.
● Say: Let’s revise what we have learned.
● Instruct: Go to the Panel and open Lab on Forms in MS Access II
● Show slides one by one and discuss the concepts shown on the slide in the panel.
● Say: Let me explain: What is a form, Automation using form, Data Types and form creation.
CS Concepts Explain
What is a Form
Automation using form
Data Types
Changing data type of a field
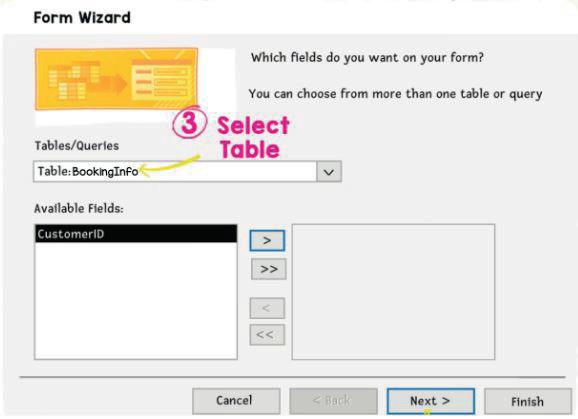
Form creation
Learning Slides on Tekie platform
Learning Slides on Tekie platform
Learning Slides on Tekie platform
Learning Slides on Tekie platform
Learning Slides on Tekie platform
● Discuss the following questions one by one to check students’ understanding:
■ What are some common data types used in MS Access, and what types of data are they used for?
Possible responses: Text and Memo are used for text values; Number for numeric values; Date/Time for dates and times; Currency for monetary values; Yes/No for true/false or yes/no values.
■ What are some ways to customise a form in MS Access?
Possible responses: Adding and removing fields; changing the layout; adding graphics and images; applying formatting; adding command buttons; adding filter and sort controls.
■ What is custom filtering in MS Access?
Possible responses: drop-down lists; combo boxes; check boxes; to select and compare specific criteria.
■ What are some advantages of using forms in MS Access to enter and edit data?
Possible responses: provide a user-friendly interface; allow for data validation; can be customised to display specific fields; can include command buttons to perform specific tasks.
● Invite answers from as many students as possible.
● Address any other doubts students may have related to the concepts presented in the slides.
● Instruct: We know Form creation, Datatypes and automation using forms.
● Now, let’s practise our learning. Click on the Practice button on the Assignment page of Forms in MS Access II to attempt the activity.
Note
Make the students practise the activity until they understand the concepts covered in the session.
● Walk around in the classroom and observe the activity done by the students.
● Instruct: Click on the Confirm button to submit your work when you are done with the activity.
● Conclude: Today, we have learned to use data types, form creation, adding rows in a table and filtering data.
● Instruct: Practise the same activity at home.
● Assign the following as homework:
■ Project: Labtime on Page 93.
Note
The project is optional, kindly assign if feasible.
Note to the Teacher
1. Recall the concepts covered in the previous session.
2. Reinforce the learnings at the end of the session.
3. Brief the students about the homework and how they need to attempt it.
4. All of the in-class activities mentioned in the action plan are not mandatory to be completed in a session. Do as the time permits.
5. Select the activities left over in the upcoming session.


