
NEP 2020 aligned ICSE compliant Digital coding platform included
Teacher Manual Grade 7
Part - 1


Note: Use the following points to prepare for the session beforehand. Avoid reading the points in the class.
● People of Avora celebrated saving their central system and planet.
● Eva got into trouble trying to learn about evil Cyborg.
● Eva was stuck in the Mirror Dimension.
● Mel and Conji attempted to save Eva from the Mirror Dimension.
● Elder Wizard and Elder Robot discuss the evil Cyborg.
● The Elders recall losing their powers while fighting Cyborg in the past.
● Eva tells Mel and Conji the bad news.
● Fortunately, Mel knows that technology and magic can secure Avora.
The content covered in this chapter is aligned with the following CSTA Standard
● 2-CS-02 Hardware & Software
This chapter is divided into the following classroom sessions
1. Hardware
2. Input and Output Devices
3. Storage Devices and Cloud Storage
In this session, students will learn about –

● Hardware and its importance
● Types of hardware
● External hardware
● Hardware: All the physical components that are a part of the computer system
Recap the story and the concepts covered in the previous book
Invite students to brief the class on the story and CS concepts covered in the chapter
Discuss what is hardware, importance of hardware, types of hardware and external hardware
Find the Truth – Q1 Answer in Detail – Q1 Tick the Correct Answer –Q1, 5
Conclude the session Assign the Homework
● Invite students to briefly explain the story covered in the previous grade.
● Invite students to brief the class on the story and CS concepts covered in the chapter Page 2 to Page 6.
● Say: Let’s learn about hardware, importance of hardware, types of hardware and external hardware.
● Explain the CS concepts as mentioned in the table below.
● Present the scenario: Imagine you go to a shop that sells computer systems and devices. The kind shopkeeper lets you look around and see all the devices available in his shop.
● Discuss:
■ Name any three devices in his shop.
Possible Responses: Monitor; CPU; Keyboard; Mouse; Webcam; motherboard
■ What are these devices called?
Possible Responses: Hardware devices
■ Name any two internal hardware devices.
Possible Responses: CPU; Motherboard; RAM
■ Name some external hardware devices you see.
Possible Responses: Mouse; Keyboard; Webcam; Microphone; Monitor; Speaker
● If time allows, discuss all four questions, or discuss the first two.
● Conduct Find the Truth on Page 16:
■ Say: Let’s help Mel mark the statements as true or false.
■ Read Q1 aloud.
■ Invite some students to share their responses and others to validate their peers’ answers.
■ Instruct: Mark the right response in your books.
● Conduct Answer in Detail on Page 16:
■ Say: Let’s answer these questions to help Eric repair the damage.
■ Read Q1 aloud
■ Invite some students to share their responses.
■ Discuss and validate the answers with the whole class.
■ Write the final answers on the board so that students can take notes.
■ Instruct students to write the final answer in their books.
● Conduct Tick the Correct Answer on Page 15:
■ Say: Let’s mark the correct answer to find out more about the glitch at Zorix.
■ Read Q1, and 5 aloud
■ Invite some students to share their responses and others to validate their peers’ answers.
■ Instruct: Mark the right responses in your book.
● If time permits, discuss Q2, 3, 4 and 5 of Answer in Short, or assign them as homework.
● Ask the following probing questions:
■ What are the two components of hardware?
Possible Responses: Internal hardware; External hardware
■ What are the three types of hardware devices?
Possible Responses: Input; Output; Storage
● Assign the following questions as homework:
■ Q2, 3, 4, and 5 of Answer in Short on Page 17
In this session, student will learn about –
● Input devices
● Output devices
Keywords
● Hardware: All the physical components that are a part of the computer system
● Input Devices: Help us give instructions to the computer
● Output Devices: Display results of the instructions given to the computer
Recap the story and the concepts covered in the previous session
Invite students to brief the class on the story and CS concepts covered in the session
Discuss input devices and their examples, output devices and their examples
Find the Truth – Q2, 3, 5 Answer in Detail – Q3 Answer in Short – Q1
Conclude the session Assign the
● Invite students to briefly explain the story covered in the previous session.
● Say: Let’s learn about input devices and their examples, output devices and their examples.
● Explain the CS concepts as mentioned in the table below.
Input devices
Output devices
As given in Panel 2 on Page 8 to Panel 1 on Page 10
As given in Panel 2 on Page 10 to Panel 2 on Page 11
● Present the scenario: You and your friend are doing a video call on your computer to discuss your plans to meet up in the summer holidays.
■ Name the input devices you used to communicate with your friend.
Possible Responses: Webcam; Microphone
■ Name the output devices through which you can understand your friend.
Possible Responses: Monitor; Speaker
■ You need to send your friend an email reminding him when your summer holidays start. What will you use to type that email?
Possible Responses: Keyboard; smartphone
■ Your friend sent you an image on WhatsApp. To view that image you need to first unlock your phone with your fingerprint. How does the phone recognise your fingerprint?
Possible Responses: With the help of sensors
● If time allows, discuss all four questions, or discuss the first two.
● Conduct Find the Truth on Page 16:
■ Say: Let’s help Mel mark the statements as true or false.
■ Read Q2, 3, and 5 aloud.
■ Invite some students to share their responses and others to validate their peers’ answers.
■ Instruct: Mark the right responses in your books.
● Conduct Answer in Detail on Page 16:
■ Say: Let’s answer these questions to help Eric repair the damage.
■ Read Q3 aloud
■ Invite some students to share their responses.
■ Discuss and validate the answers with the whole class.
■ Write the final answer on the board so that students can take notes.
■ Instruct students to write the final answer in their books.
● If time permits, conduct Q1 of Answer in Short, or assign it as homework.
3 min
● Ask the following probing questions:
■ Which input device is used to click icons on the computer screen?
Possible Responses: Mouse; Touchpad
■ Which output device will you use to make a hardcopy of any document?
Possible Responses: Printer
● Assign Q1 of Answer in Short as homework.
In this session, students will learn about –
● Storage devices
● Cloud storage and its advantages
● Hardware: All the physical components that are part of the computer system
● Storage Devices: Hardware devices that are used to store digital data and applications
● Cloud storage: A type of data storage that uses the internet to store data
Recap the story and the concepts covered in the previous session
Invite students to brief the class on the story and CS concepts covered in the session
Discuss storage devices and their examples, cloud storage and its advantages
Tick the Correct Answer – Q2, 3, 4
Fill up the Blanks Answer in Detail – Q2
Conclude the session
Assign the Homework
● Invite students to briefly explain the story covered in the previous session.
● Say: Let’s learn about storage devices and their examples, cloud storage and its advantages.
● Explain the CS concepts as mentioned in the table below.
Storage Devices
Cloud Storage
Advantages of cloud storage
As given in Panel 3 on Page 11 to Panel 2 on Page 12
As given in Panel 4 on Page 12
As given in Panel 1 on Page 13
● Present the scenario: Imagine you and your best friend spend the summer holidays together and take many pictures of all the places you went to and all the things you did.
● Discuss:
■ Which device will allow your friend to save and carry the pictures to his house?
Possible Responses: Pen drive; SD card; hard disk; smartphone
■ Since you have hundreds of pictures from the holidays you are running out of space on your computer. Where can you store these images and keep them safe?
Possible Responses: SD card; Hard disk.
■ Your father tells you there is a better way of storage which uses the internet. What is he talking about?
Possible Responses: Cloud storage
■ Why do you think cloud storage is better?
Possible Responses: It is reliable; It is accessible from anywhere; It is convenient
● If time allows, discuss all four questions, or discuss the first two.
● Conduct Tick the Correct Answer on Page 15:
■ Say: Let’s mark the correct answer to find out more about the glitch at Zorix.
■ Read Q2, 3, and 4 aloud
■ Invite some students to share their responses and others to validate their peers’ answers.
■ Instruct: Mark the right responses in your book.
● Conduct Fill Up the Blanks on Page 16:
■ Say: Let’s complete these sentences to help Eric to increase his knowledge.
■ Read the paragraph aloud.
■ Invite some students to share their responses and others to validate their peers’ answers.
■ Instruct students to write the final answers in their books.
● Conduct Answer in Detail on Page 16:
■ Say: Let’s answer this question to help the robot have feelings.
■ Read Q2 aloud.
■ Invite some students to share their responses.
■ Discuss and validate the answers with the whole class.
■ Write the final answer on the board so that students can take notes.
■ Instruct students to write the final answer in their books.
● If time permits, conduct Match the Following, or assign it as homework.
● Ask the following probing questions:
■ What is a hard disk?
Possible Responses: The primary storage device in a computer attached directly to its motherboard
■ Give examples of cloud storage we use in our day-to-day lives.
Possible Responses: Gmail; Yahoo Mail; Google Photos
● Assign the following questions as homework:
■ Brain Teasers: Match the Following
■ DIY Activity: Fill up
Note: Use the following points to prepare for the session beforehand. Avoid reading the points in the class.
In the Previous Chapter…
● The Elders were sitting in the council room, discussing the battle with Cyborg.
● The two revisit the deadly battle in which they lost their powers.
● They realize of the danger hovering Avora and so decide to combine technology with magic.
● In the present, Eva informs Mel and Conji about this mishap.
● Mel and Conji land in an unknown place when a strange thing happened in Avora.
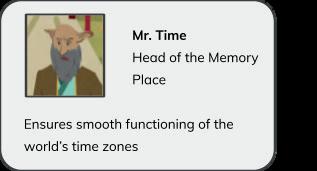
● Mr Fate and Mr Time meet Mel and Conji.
● Mr Fate tells them about happiness index falling in Avora.
● Mr Fate tells the two kids about binary numbers and sends them back to Avora to resolve the issue.
● Conji learns more about number system on their way back to Avora.
The content covered in this chapter is aligned with the following CSTA Standard
● 2-AP–11 Algorithms and Programming
This chapter is divided in the following classroom sessions
1. Introduction to Number Systems
2. Uses of Number Systems
3. Decimal to Binary Conversion
4. Binary to Decimal Conversion
In this session, students will learn about –
● Number systems
● Base and range of number systems
● Types of number systems
Keywords
● Number System: A technique used to represent numbers in the computer
● Base: Number of digits a number system uses to represent a number
Invite students to brief the story and CS concepts covered in the previous grade
Discuss the key concepts covered – Number systems
Fill
Find the
● Say: There are two new characters in this chapter.
● Introduce Mr. Fate and Mr. Time to the students.

● Instruct: Let’s learn how the story moves ahead. We will read from page 20 to panel 3 of page 21 until the text “number systems”.
● Read the story aloud OR invite some students to read the characters’ dialogue aloud.
Plan 3 min Warm-Up 10 min Engage ● Introduce Mr Fate and Mr Time to the students ● Instruct: Let s learn how the stor y moves ahead We will read from page 2 of page 3 until the text “number systems” ● Read the stor y aloud OR invite some students to read the characters dialo ● Explain the following CS concepts –
● Explain the following CS concepts –
CS Concepts Explain Number Systems As given in Panel 4 on Page 21 Types of Number Systems As given in Panel 1 on Page 22 to Panel 1 on Page 23
● Present the scenario: Consider you have a few gadgets at home.
● Discuss:
■ Which devices do you think use binary digits for ON and OFF?
Possible Responses: Computer; Fan; Refrigerator; Lights; anything that goes ON and OFF
■ Which binary digit would mean ON?
Possible Responses: 1
■ Which binary digit would mean OFF?
Possible Responses: 0
■ Suppose you create a number system with base 9, which digits would it use?
Possible Responses: 0 to 8; 0 to 6 with A and B
● If time allows, discuss all four questions, or discuss the first two.
● Conduct Fill Up on Page 29:
12 min
■ Say: Mel and Conji have discovered a magical lamp that needs a passcode to light it. Let’s help them complete the sentences to unlock the lamp.
■ Read Q1, 2, 3 and 5 aloud, one by one.
■ Invite some students to share their answers and others to validate their peers’ answers.
■ Instruct: Fill in the final answers in your books.
● Conduct Find the Truth on Page 30:
■ Say: Let’s practise some more to revise what we have learned.
■ Read Q3 and 4 sentences aloud one by one. After each sentence, ask if it is true or false.
■ Invite some students to share their responses.
■ Discuss and validate the answers with the whole class.
■ Instruct: Fill in the final answers in your books.
● Conduct Answer in short on Page 30:
■ Say: Let’s help Eva access the lamp by answering these questions.
■ Read Q1, 2, 3 aloud, one by one.
■ Invite some students to share their answers and others to validate their peers’ answers.
■ Write the final answer on the board so that students can take notes.
● If time permits, discuss the section ‘Tick the Correct Answer’ – Q1, 2. Or, assign it as homework.
5 min
Sum-Up
● Conclude: Today, we learned about Number Systems and their types.
● Ask the following probing question:
■ Why do you think we need to use letters of the alphabet in number systems with bases of more than 10?
Possible Responses: Digits repeat after the number 9; 10 consists of digits 0 and 1
■ For what purposes do you think we need different types of number systems?
Possible Responses: To make computers understand what we are saying; To communicate with computers
● Assign the following as homework:
■ Answer in detail – Q1
■ Tick the Correct Answer – Q1, 2
In this session, students will –
● Revise the types of number systems
● Learn about the uses of number systems
Keywords
● Arithmetic operations: Calculations such as addition, subtraction, multiplication, and division
● Computer memory: A place to store data or programs in a computer system
Invite students to brief the class on the story and CS concepts covered in the chapter
Discuss the key concepts covered –Uses of number systems Activity 1
Tick the correct answer –Q3, 4, 5 Answer in short – Q4, 5 Answer in detail – Q3
Conclude the concepts Assign homework
● Recap the story covered in the previous chapter.
● Instruct: Let’s revise what we have learned in the previous session.
● Read the story aloud or call the students to read the dialogue and take the lesson forward as given in Panel 2 on Page 23.
● Say: Let me explain the uses of number systems.
■ Activity 1 on page 24.
■ Validate the answers shared by the students and fill in the final answers in their notebooks.
● Conduct Tick the correct answer on Page 29:
■ Say: Mel needs guidelines to make the magical lamp work. Let’s help Mel find the correct answers to the following questions to unlock the guidelines.
■ Read Q3, 4, and 5 aloud one by one.
■ Invite some students to share their answers and others to validate their peers’ answers.
■ Instruct: Fill in the final answers in your books.
● Conduct Answer in short on Page 30:
■ Say: Let’s help Eva access the lamp by answering these questions.
■ Read Q4 and 5 aloud, one by one.
■ Invite some students to share their answers and others to validate their peers’ answers.
■ Write the final answer on the board so that students can take notes.
● Conduct Answer in detail on Page 31:
■ Say: Let’s get the first wish fulfilled by answering this question.
■ Read Q3 aloud.
■ Invite some students to share their answers and others to validate their peers’ answers.
■ Write the final answer on the board so that students can take notes.
Note
● If time permits, discuss Find the truth – Q5 or, assign it as homework.
● Conclude: Today, we learned about the uses of number systems and recognised the numbers according to their base.
● Ask the following probing questions:
■ Which number systems do the letters of the alphabet A, B, C, D, E, F not belong to?
Possible Responses: 0; 1; All numbers except those represented by the alphabet in the Hexadecimal Number System
■ In which devices can you use the binary number system?
Possible Responses: TV; Refrigerator; Setup box; Cell phones; Computers; Calculators
● Assign the following as homework:
■ Find the truth – Q5
■ DIY – A and B
In this session, students will learn about –
● Conversion of Decimal numbers to Binary numbers
● Remainder: The value left after the division is completed
Invite students to brief the class on the story and CS concepts covered in the chapter
Discuss the key concepts covered – Decimal to Binary Conversion
Fill Up – Q4 Find the truth – Q2
Conclude
● Recap the story and terms covered in the previous session.
● Instruct: Let’s learn how the story moves ahead. We will read from panel 2 on page 24 to panel 1 on page 25 until the dialogue, ending with the text “to binary”.
● Read the story aloud OR invite students to read the dialogue aloud.
● Say: Let me explain how to convert decimal numbers to binary.
Decimal to Binary Conversion
● Do the following:
As given in Panel 3 on Page 25 to Panel 1 on Page 26
■ Discuss Activity 2 in panel 2 of page 27 under the subheading, “Convert from Decimal to Binary”.
■ Invite some students to share their responses.
■ Validate the answers with the whole class.
● Conduct Fill Up on Page 29:
■ Say: Memory Palace is under attack. Let’s help Mel complete the sentences to reach it and save it.
■ Read Q4 aloud.
■ Invite some students to share their answers and others to validate their peers’ answers.
■ Instruct: Fill in the final answer in your books.
● Conduct Find the Truth on Page 30:
■ Say: Let’s practise some more to revise what we have learned.
■ Read Q2 sentences aloud, one by one. After each sentence, ask if it is true or false.
■ Invite some students to share their responses.
■ Discuss and validate the answers with the whole class.
■ Instruct: Fill in the final answer in your books.
● Conduct Answer in detail on Page 31:
■ Say: Let’s get the first wish fulfilled by answering this question.
■ Read Q2 aloud.
■ Invite some students to share their answers and others to validate their peers’ answers.
■ Write the final answer on the board so that students can take notes.
● Conclude: Today, we learned to convert decimal numbers to binary numbers.
● Ask the following probing question:
■ Can you think of a way to convert from the decimal to the octal number system?
Possible Responses: Dividing the number by 8; The number remains the same if it is less than 8, etc.
■ Why do decimal numbers have a base 10 and not any other number?
Possible Responses: because we use a total of ten numbers to write a number in decimal number systems; It is the base of decimal numbers, etc.
● Assign the following as homework:
■ Lab time – part B – Q1
In this session, students will learn about –
● Conversion of Binary numbers to Decimal numbers
● Product: The value obtained when numbers are multiplied with one another
Invite students to brief the class on the story and CS concepts covered in the chapter
Discuss the key concepts covered –Binary to decimal conversion
Find the truth – Q1 Lab time – part A Conclude the concepts Assign homework
● Recap the story and concepts covered in the previous session.
● Say: Let me explain how we can convert binary numbers to decimal number systems.
CS Concepts Explain
Binary to Decimal Conversion As given in Panel 2 on Page 26
● Do the following:
■ Discuss Activity 2 in panel 2 on page 27 under the subheading, “Convert from Binary to Decimal”.
■ Invite some students to share their responses.
■ Validate the answers with the whole class.
● Conduct Find the Truth on Page 30:
■ Say: Let’s practise some more to revise what we have learned.
■ Read Q1 aloud. After the sentence, ask if it is true or false.
■ Invite some students to share their responses.
■ Discuss and validate the answer with the whole class.
■ Instruct: Write the final answer in your books.
● Conduct Conversions section from Lab Time on Page 33:
■ Say: Let’s practise some more to help Conji win the challenge.
■ Read – Convert from binary to decimal – Q2 – a, b, c aloud one by one. After the question, ask the students to attempt the solution.
■ Invite some students to share their responses.
■ Discuss and validate the answers with the whole class.
■ Instruct: Write answers in your notebooks.
● If time permits, conduct Lab Time - A - Corrections, or assign it as homework.
● Conclude: Today, we learned to convert binary numbers to decimal numbers.
● Ask the following probing question:
■ Why are the binary/octal/hexadecimal number systems given their name?
Possible Responses: named according to bases; binary has base 2; hexadecimal has base 16; octal has base 8
■ If you represent true or false using a binary number system, which digit would you choose for true, and which one for false?
Possible Responses: 1 for True; 0 for False; 0 for True; 1 for False
● Assign Lab Time - A - Corrections as homework.
In a web-based service, all emails are stored on servers rather than on your computer’s hard drive. This means you can access your email from any computer with an internet connection. It also means you’ll be able to recover your emails if something happens to your computer
1. Computer hardware can be categorised into internal components and external components.
a. Internal Hardware components: Internal hardware components are those necessary for the proper functioning of the computer. Example: Motherboard, CPU, RAM, Hard drive etc.
b. External hardware components: External hardware components are attached to the computer to add or enhance functionality. Example: Mouse, keyboard, microphone, camera, touchpad etc.
2. The main reasons for using cloud storage are convenience and reliability. In a web-based service like Gmail and Yahoo, all emails are stored on servers rather than on your computer’s hard drive. This means you can access your email from any computer with an internet connection. You can even recover your emails if something happens to your computer.
3. Output devices are used to accept data from the computer. These devices are used to provide output to the users.

a. Monitor: The monitor displays information as images or text. A CRT monitor uses a vacuum tube, while LCD displays use liquid crystals.
b. Speakers: Speakers are audio output devices. The computer has its own internal speakers, but the sound quality of these speakers is not very good. So users attach external speakers for better sound quality.
A Answer in short
1. The keyboard is the most important input hardware device. Most data is entered through the keyboard. There are many buttons on the keyboard. Every button performs a different function.
2. Hardware is defined as all the physical components that are part of a computer system. For example: the computer screen, keyboard, mouse etc.
3. Hardware is the foundation of every computer system. Without hardware, computers would be useless.
4. External hardware components are attached to the computer to add or enhance its functionality.
5. Internal hardware components are necessary for the proper functioning of the computer.
D Answer in Short
1. When two or more devices connect to one another, a network is formed. Over a network, we can exchange information such as text, images, documents, etc.
2. Interconnected computers are a group of two or more connected devices.
3. The Internet is the largest network of connected computers in the world.
4. A server is a computer that allows network resources such as data, software, and hardware to be shared.
5. The Network Interface Unit is abbreviated as NIU. It is a tool that establishes communication between a client and a server.
E Answer in Detail
1. There are four different types of network –
a. Personal Area Network (PAN): PAN is a small network that establishes connections between systems within 10 metres of each other. Bluetooth-enabled headphones are one of the examples.
b. Local Area Network (LAN): LAN is a privately owned computer network that covers a small area like a home, school or an office. WiFi is an example of LAN.
c. Metropolitan Area Network (MAN): MAN covers larger areas like cities and towns. Cable TV networks are one such example.
d. Wide Area Network (WAN): WAN is a telecommunication network that spreads across countries. A network of ATMs is an example of WAN.
2. Network topology is a way of connecting devices to each other. There are four basic network topologies.
a. Mesh Topology: In this topology, every computer is connected to every other computer.
b. Star Topology: In this topology, each device is linked to a central controller called a hub. Data is exchanged via the hub.
c. Bus Topology: This is a multipoint setup which means several devices are connected to a main cable. Data flows from one end of the main cable to the other.
d. Ring Topology: In Ring topology, each node is connected to two other nodes to form a ring. Signals are transmitted in one direction along the entire ring in a circular manner.
3. We can keep a network safe by designing a set of rules called Network Security. Safeguarding a network is very important as everything happens through networks. Having a secure system helps us make sure that we can use the network without having to expose ourselves to unauthorised users. There are different kinds of security such as Antivirus software, Firewalls, VPNs, etc.
4. The IP (Internet Protocol) Address is a unique identifying number given to every device on a network. These numbers help the devices connect to a network and exchange information.
5. Bus topology is a multipoint setup where several devices are connected to a long cable called a main cable. Nodes are connected through drop lines. Data flows from one end of the main cable to the other. This topology is flexible and nodes can easily be added or removed. It can include a certain number of nodes, but the signal grows weaker with distance.
The content covered in this chapter is aligned with the following CSTA Standard
● 2-AP-16 - Program Development
This chapter is divided into the following lab sessions
1. Introduction to Web Development
2. Text Formatting and Adding Images
3. Hyperlinks, Lists, and Bookmarks
4. Working with CSS – I
5. Working with CSS – II
In this session, students will learn about –
● Web Development
● HTML
● Terms Related to Web Development
● Basic HTML Tags
● Structure of an HTML Document
● Web Development: The process of creating, structuring, and organising a website
● HTML: Stands for HyperText Markup Language, and is the oldest language used to create web pages
● Web Page: A hypertext document page written in HTML to display information on the World Wide Web
● Website: A collection of web pages
● CSS: Stands for Cascading Style Sheets and it defines design and layout styles for a webpage. It helps in adding variations to display web pages for different devices and screen sizes
● JavaScript: A text-based programming language that is used to add interactive elements to web pages and make them more engaging
● HTML Tags: Used to indicate the beginning and end of an HTML element in an HTML document
● Paired HTML Tag: Also called container tag that contains an opening tag, content, and closing tag
● Unpaired HTML Tag: Also called an empty tag that doesn’t have a closing tag
Play the video given in the panel to introduce the concepts to be covered in this session
● Instruct: Go to the Panel and open the Lab on Introduction to Web development.
● Play the video given in the panel.
● Discuss the Quiz questions given in the Panel.
● Invite answers from as many students as possible.
● Conduct Know Me Better given in the Panel:
■ Say: Students! Today we will learn about web development and create our own first web page.
■ Instruct: Click on the Assignment section.
■ Instruct: Click on the Go to Practice button to attempt the activity.
■ Walk around in the classroom and observe the activity done by the students.
■ Instruct: Click on Yes button to submit the activity.
● If time permits, conduct the additional activity - Know More About Me in the Tekie panel.
● Conclude: Today, we learned about web development and created our first webpage ‘Know Me Better’.
● Ask the following probing questions:
■ What is the extension of an HTML document?
Possible Responses: .html ; .htm
■ Is HTML a Front-end development or Back-end development?
Possible Responses: Front-end development [It focuses on the visuals of an application.]
● Assign the following project as homework:
■ Create a webpage on the topic ‘My Favourite Sport’.
● The project is optional. Assign it if feasible.
In this session, students will learn about –
● Text Formatting
● Adding Images
● Comments
● Text Formatting: Enhancing the look of text written in an HTML document
● <b></b>: A tag used to display text in bold
● <i></i>: A tag used to make text italic
● <u></u>: A tag used to underline the text
● <br>: An empty tag used to insert a single line break
● <hr>: An empty tag used to add a horizontal line to separate the information
● <img>: An empty tag used to add an image in an HTML document
● src: Stands for source, is an attribute used to provide the location of an image to be added
● alt: Stands for alternative and is an attribute used to display alternative text describing the image when the image does not load on the webpage
● Comments: Used to add information related to a source code using <!--...--> tag. They are not displayed on the browser
Recall the concepts covered in the previous coding session
Play the video given in the panel to introduce the concepts to be covered in this session
Discuss text formatting, adding images in an HTML document, and comments
Conduct “Awesome Looks“ in the Tekie panel
Conclude the session Assign the homework
● Instruct: Go to the Panel and open the Lab on Text Formatting and Adding Images in HTML.
● Play the video given in the panel.
● Discuss the Quiz questions given in the Panel.
● Invite answers from as many students as possible.
● Conduct Awesome Looks given in the Panel:
■ Say: Students! Today we will learn to enhance the look and to add images in our existing webpage.
■ Instruct: Click on the Assignment section.
■ Instruct: Click on the Go to Practice button to attempt the activity.
■ Walk around in the classroom and observe the activity done by the students.
■ Instruct: Click on the Yes button to submit the activity.
● If time permits, conduct the additional activity – Crop Me in the Tekie panel.
● Conclude: Today, we learned about different text formatting tags and how to add an image to our web page.
● Ask the following probing questions:
■ Give some reasons for images not loading on your web page.
Possible Responses: The image is missing from the location; The image name is incorrect; Slow internet connection; Access restricted to the file.
■ What is the importance of the height and width attributes of <img> tag?
Possible Responses: It helps the web browser to identify the size of the image.
● Assign the following project as homework:
■ Add an image of your favourite sport to your web page ‘My Favourite Sport’.
● The project is optional. Assign it if feasible.
In this session, students will learn about –
● Hyperlinks
● Lists
● Bookmarking
● Hyperlink: An element, like a text, a button or an image, that points to another location
● Target: Is the attribute of <a> tag that determines where the linked web page or document should open
● List: A way to represent information in bullet points
● Ordered List: A list of items arranged in a numbered order. It is represented by <ol></ol> container tag
● Unordered List: A list of items without any order. It is represented by <ul></ul> container tag
● Bookmarking: Is helpful to jump directly to a specific part of a lengthy web page
Recall the concepts covered in the previous coding session
Play the video given in the panel to introduce the concepts to be covered in this session
Discuss hyperlinks, lists, and bookmarking
Conduct “Link with Me“ in the Tekie panel
Conclude the session Assign the homework
min
Warm-Up
● Instruct: Go to the Panel and open the Lab on Working with Hyperlinks, Lists, and bookmarking.
● Play the video given in the panel.
● Discuss the Quiz questions given in the Panel.
● Invite answers from as many students as possible.
● Conduct Link with Me given in the Panel:
■ Say: Students! Today we will learn to link and bookmark our important details using lists in our existing webpage.
■ Instruct: Click on the Assignment section.
■ Instruct: Click on the Go to Practice button to attempt the activity.
■ Walk around in the classroom and observe the activity done by the students.
■ Instruct: Click on the Yes button to submit the activity.
● If time permits, conduct Practice Question Q2 on page 16 in the Tekie Panel given in Homework section.
Sum-Up
● Ask the following probing questions:
■ Which tag can we use to make an image a linking element?
Possible Responses: We can use <a> tag.
■ Mention the attribute that acts like the address of each tag.
Possible Responses: Id.
● Assign the following project as homework:
3 min
■ Create a list of your favourite players of your favourite sport and add hyperlinks to find out more about them by clicking on their image in your web page ‘My Favourite Sport’.
● The project is optional. Assign it if feasible.
Objectives
In this session, students will learn about –
● CSS
● Properties of CSS
● Hex Codes
● The div Tag
● The margin Property
● The padding Property
Keywords
● CSS: Stands for Cascading Style Sheets and is used to define styles using the <style> container tag inside the <head> section for your web pages
● Properties of CSS: Are properties such as font-size, background-colour, and colour
● Hex Codes: Another method of representing the colour format as #rrggbb
Recall the concepts covered in the previous coding session
Play the video given in the panel to introduce the concepts to be covered in this session
Discuss CSS, Properties of CSS, Hex Codes, The div Tag, The margin Property, The padding Property,
Conduct “See My Style“ in the Tekie panel
Action Plan
Conclude the session Assign the homework
7 min
Warm-Up
● Instruct: Go to the Panel and open the Lab on Working with CSS - I.
● Play the video given in the panel.
Engage
● Discuss the Quiz questions given in the Panel.
● Invite answers from as many students as possible.
5 min
● Conduct See My Style given in the Panel:
■ Say: Students! Today we will learn to add different styles to our existing webpage.
■ Instruct: Click on the Assignment section.
■ Instruct: Click on the Go to Practice button to attempt the activity.
■ Walk around in the classroom and observe the activity done by the students.
■ Instruct: Click on the Yes button to submit the activity.
● If time permits, conduct Practice Question Q1 on page 16 in the Tekie Panel given in Homework section.
Sum-Up
● Conclude: Today, we learned about styling webpages.
● Ask the following probing questions:
■ Mention the property used to create space around elements.
Possible Responses: The margin Property
■ Mention the property used to create space around an element’s content.
Possible Responses: The padding Property
● Assign the following project as homework:
■ Add more styles to your web page ‘My Favourite Sport’ using CSS.
Note
● The project is optional. Assign it if feasible.
3 min
Objectives
In this session, students will learn about –
● The text-align Property
● The height and width Properties
● The float Property
● Classes
● CSS Border Properties
Keywords
● Classes: Are an attribute used to identify particular elements and what they are designed for
● CSS Border Properties: Are the properties such as Border-style Property, Border-width Property, and Border-colour Property
Recall the concepts covered in the previous coding session
Play the video given in the panel to introduce the concepts to be covered in this session
Discuss The text-align Property, The height and width Properties, The float Property, Classes, and CSS Border Properties
Conduct “Enhance My Style” in the Tekie panel
Action Plan
Conclude the session Assign the homework
Warm-Up
● Instruct: Go to the Panel and open the Lab on Working with CSS - II.
● Play the video given on the panel.
Engage
● Discuss the Quiz questions given in the Panel.
● Invite answers from as many students as possible.
5 min
● Conduct Enhance My Style given in the Panel:
■ Say: Students! Today we will learn to add more styles to our existing webpage.
■ Instruct: Click on the Assignment section.
■ Instruct: Click on the Go to Practice button to attempt the activity.
■ Walk around in the classroom and observe the activity done by the students.
■ Instruct: Click on the Yes button to submit the activity.
● If time permits, conduct the additional activity: Stylish Image.
Sum-Up 3 min
● Conclude: Today, we learned about styling web pages.
● Ask the following probing questions:
■ Mention the property used to set the colour of an element’s border.
Possible Responses: The Border-colour Property
■ How can we apply the same styling to all the labelled elements at once in CSS?
Possible Responses: By making elements part of the same class
● Assign the following project as homework:
■ Add more styles to your web page ‘My Favourite Sport’ using CSS.
● The project is optional. Assign it if feasible.
This Teacher Manual has been designed to implement Tekie, the storytelling-based Coding and Computer Science program. The manual consists of lesson plans within each chapter that teachers transact within classrooms and computer labs. Each lesson is based on a research-based ‘WEBS’ framework that simplifies pedagogical practices for teachers and enables them to deliver effectively.
• Sharp Lesson Planning: Each lesson plan focuses on specific sub-learning outcomes within a chapter and are designed for delivery within the stipulated class or lab time.
• Real-life and Application-based Questions: Additional questions that link Computer Science to real-life contexts and assist teachers to develop learners’ conceptual understanding and application skills.
• Support and Detailed Solutions: In-depth solutions for in-class and post-class activities to reinforce learning.

Uolo partners with K12 schools to bring technology-based learning programs. We believe pedagogy and technology must come together to deliver scalable learning experiences that generate measurable outcomes. Uolo is trusted by over 8,000 schools with more than 3 million learners across India, South East Asia, and the Middle East.