3 minute read
REVIEWS
17

Advertisement
reheating small areas and because it had its own oxygen supply could be used in areas such as deep inside the firebox without extinguishing the f lame. The cost of oxy-acetylene is now prohibitive, however, so when I no longer had access to it I set myself up with oxy-propane gear (Photo 16).
Propane is readily available at many outlets so is not a problem. For the oxygen I have a bottle that is a one-off payment for deposit, in other words rent-free for life, I only have to pay for refills.
At one of the model engineering shows we spoke to the guys on the Sievert stand (usual disclaimer) and bought a torch kit from them (Photo 17). Back home and keen to try my new torch I connected it to the propane bottle and lit it. To be honest I was a little disappointed, it didn’t seem to be much better. It was not until a few weeks later when the need to do some silver soldering arose that I changed the regulator for the one supplied with the Sievert kit. An amazing difference – it was clearly hotter than the cheapo torch. I haven’t gone into the technicalities but I imagine the regulator and torch are a balanced pair and I think the regulator allows a greater f low of gas.
I have since built another boiler for my new loco and had no trouble at all with the setup I have. Y-connectors that have separate valves are available for the propane bottles so two outlets can be used (Photo 18).
So to summarise money is well spent on a quality torch and regulator while an oxy-propane set up, although not essential, is a real asset. Have a bucket of water and a fire extinguisher to hand. A pair of leather welding gauntlets and some tongues are useful as well. I’ll describe more about the actual boilermaking process later on in this series.

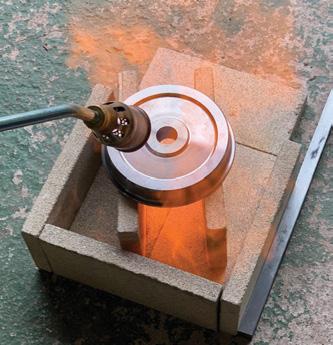
PHOTO 15: The author’s brazing hearth setup – note the bucket of water close to hand.
PHOTO 16: A typical oxypropane torch.
PHOTO 17: A good quality propane torch
PHOTO 18: Twin outlets on the propane tank are useful. n NEXT TIME: Rich starts the actual build of his loco with the frames, and then straight onto the boiler...
Part 1 of this series appeared in last month’s December 2022 edition of EIM. A digital back issue can be downloaded or a printed copy ordered from www. world-of-railways.co.uk/store/backissues/engineering-in-miniature or by calling 01778 392484.
Making Model Victorian Stationary Engines
By Stewart Hart
Stationary engines offer a lot to the model engineer – they are generally not that difficult or time-consuming to build and when complete are great to operate or simply display on the mantelpiece, allowing one to say proudly “I made that” in response to the inevitable questions from visitors.
In this excellent new 176-page hardback Stewart Hart describes in detail every thing you need to know about building such engines, even if this will be your very first model engineering project.
The book opens with an in-depth description of what the stationary engine is and how it works, with plenty of easy-to-follow diagrams making understanding the processes much easier. Stewart then details what one needs in the form of workshop equipment to build such a model, before going on to describe the construction of three specific engines – a vertical cross-angle design, grasshopper haulage engine and open-frame horizontal engine.
Dimensioned drawings for the components of all three engines are included along with materials parts lists, and plentiful photos help to make the techniques described more understandable. There is also a chapter suggesting where to progress to next in your model engineering career.
This is an excellent book – get a copy and you could sooner than you think have three superb models to impress your friends with! AC


