3 minute read
BENCH TALK – FLATENDED BORING TOOL
3mm perforated metal screens – I’m not sure how a smaller mesh would work, however we wouldn’t struggle with sooting up like some fuels we tried later in the year.
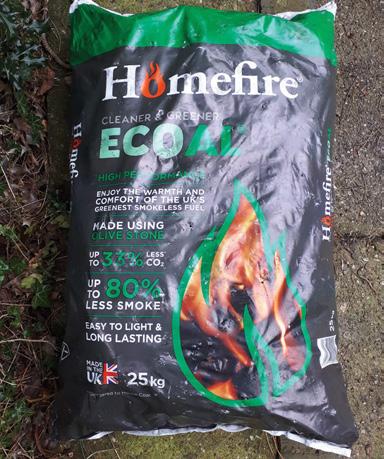
For the afternoon session, having lost my running mate, I dropped back to four carriages which is the norm for me. Two drama-free hours passed by, and come the end of the day when dead fires were drawn, we found we had pretty much the same results as during our trials a few weeks previously, so at least we could be fairly confident the fuel was going to be consistent. We’d only bought 5 bags of the Ecoal 50, and that was now gone, so going forward we’d be looking to try something else, or settle on the Ecoal as our fuel of choice.
Advertisement
Being the experimenters we are, we opted to try something else! Throughout the year there’s been quite a lot more testing including with our East African Garratt locomotive number 5928 ‘Mount Kilimanjaro’, and as that burns five bags of Welsh in a day, we could be looking at getting through eight bags of alternative fuels.
So far, however, it does appear that the Ecoal 50 could be a workable fuel. Following the trials, our conclusion was that any loco over the size of a Thomas II will probably be okay running on the full-size lumps af ter lighting up, requiring broken lumps for lighting up, so there’s a greater surface area to catch and build up the firebed. Thomas 2s and under will almost certainly need coal crushed to 20-40mm grade, regardless of whether it will fit through the firehole door.
We still have a very good supply of 20mm anthracite suitable for the smaller locos, such as 7¼ -inch gauge standard gauge models and down to 3½ -inch gauge, at some point though we’ll need to try the Ecoal in a smaller engine to see whether it can perform. Crushing the standard lumps does produce smaller lumps as noted above, so if we can make use of that in smaller models it won’t be wasted.
Next time I’ll describe how we have tried some more manufactured fuels and some ordinary lump coal, but I’ll leave you with this image of the Romulus failure! (Photo 12).
EIM
12
■ Edward intends to continue his description of these trials, which are highly relevant to the future of miniature steam, next month. The Future Steam series will also include a study of potentially revolutionar y boiler technolog y under development in New Zealand – apologies that this feature, originally planned for this month, has been slightly delayed.
BENCH TALK A flat-ended boring tool
Harry shows that if you don’t have the right tool to hand, you simply make it...
BY HARRY BILLMORE
Elsewhere I have described the making of a f lat-bottomed pocket. To produce this I did not have a milling cutter of the right size available, so I made the tool that is described here.
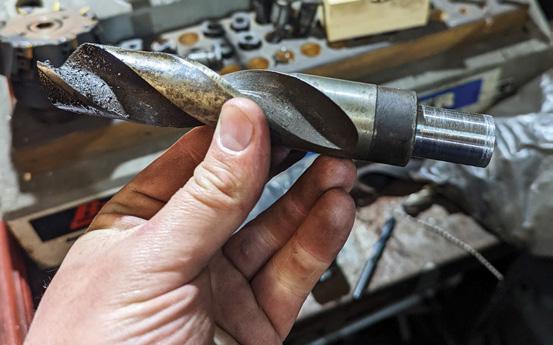
I started with a taper-shank drill that had suffered the destruction of its edge and tip at some point in the past, so was pretty useless as a drill without major work being done to it.
I turned down the taper on the lathe to fit the largest ER32 collett chuck I have before starting to grind the tip. I ground the whole thing completely f lat to start with, before grinding the rake on the cutting edges to about 10 degrees.
BELOW: An old drill with one end machined to fit an ER32 collett and the other ground to a flat cutter.
BELOW RIGHT: End of the tool ground to two flat cutting edges. Further uses
The suitably-modified drill then performed excellently as a f latbottomed boring tool and it has wider uses – the same technique can be used to make a sheet metal tool. If you grind the centre into a concave shape so the tips are the part that do the cutting, you will be able to cut neat circles without the drill snatching and lifting material up the shank.
EIM
■ More useful workshop tips from Harr y on page 25
