by Daniel John Bugeja
Daniel John Bugeja has a Masters Degree in Law and practices as a Notary Public. He got into the hobby at the age of four years old when he was gifted a free set. From there he was hooked. He somewhat quit building with LEGO in his early twenties, but when the Lord of the Rings sets came out, a friend gifted him the Gandalf with cart set (9489). From there it was a Renaissance, so to speak. With a vengeance, he was hooked again, and still is to this very day. Since childhood, Daniel was always into the castle theme, and later the Lord of the Rings theme.
Daniel was inspired by the huge talent of work by other LEGO builders, and slowly but surely he wanted to give it a go. To be fair, he builds other non-LEGO models, so it really was just a switch from using polystyrene to construct models, to LEGO building.
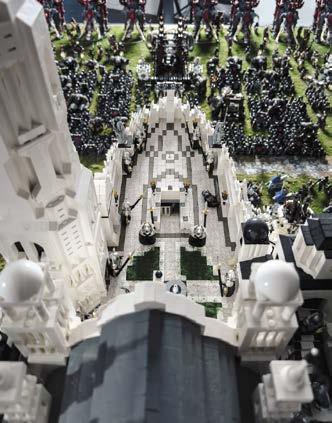
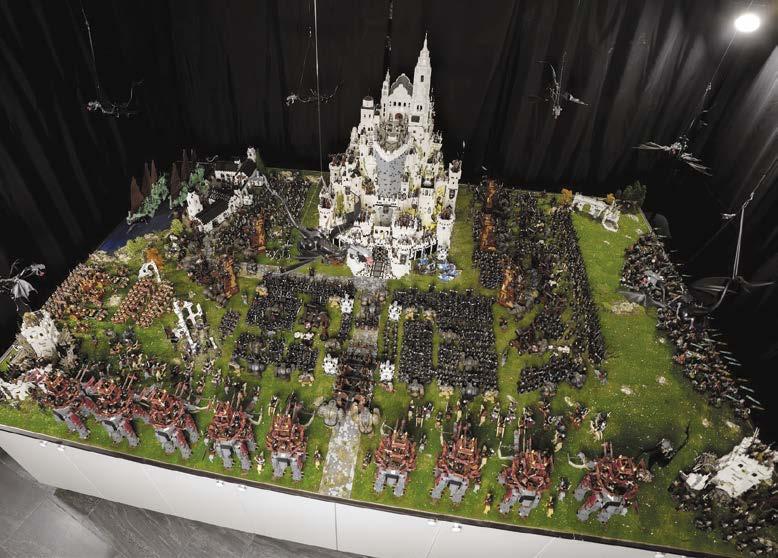
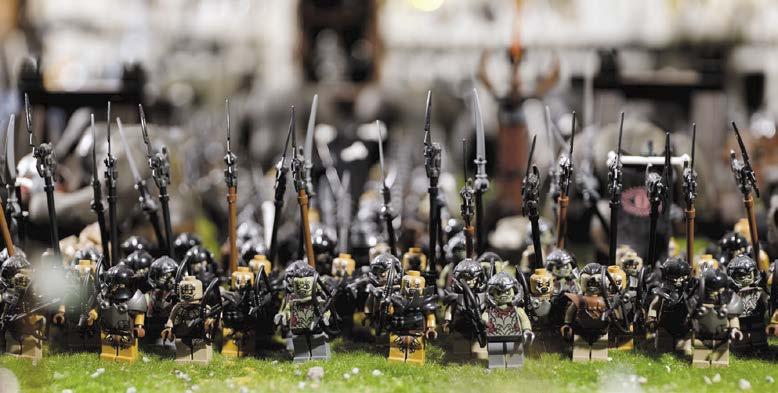
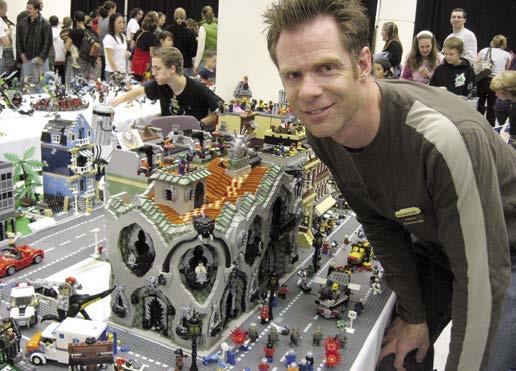
When he was an 11-year-old bookworm, he sometimes borrowed books that his father got from the library. One day his father brought the Fellowship of the Ring and from there, Daniel was hooked on Middle Earth. When the movies came out, they had a huge visual impact on him, and he has always wanted to have a Minas Tirith layout. Such a MOC was not easy to build, as this was his first time venturing into these waters, but he had years of experience building models, so he took the plunge. It took around five years on and off to build this model, starting before his daughter was even born!
To build Minas Tirith, Daniel planned ahead first with sketches, and pored over source materials, images of movies, and other MOCs on the subjects. Then he started planning it bit by bit, section by section, designing a section on the old LDD program, and then building bit by bit. Obviously, there was a lot of trial and error, and he made a lot of changes; however, nothing beats the spontaneity of building something that wasn’t planned. If he encountered a problematic section he just went with it and built it there — it usually worked out fine!
Article and Photography by Mark Staffa
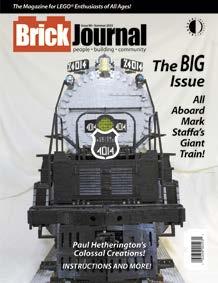
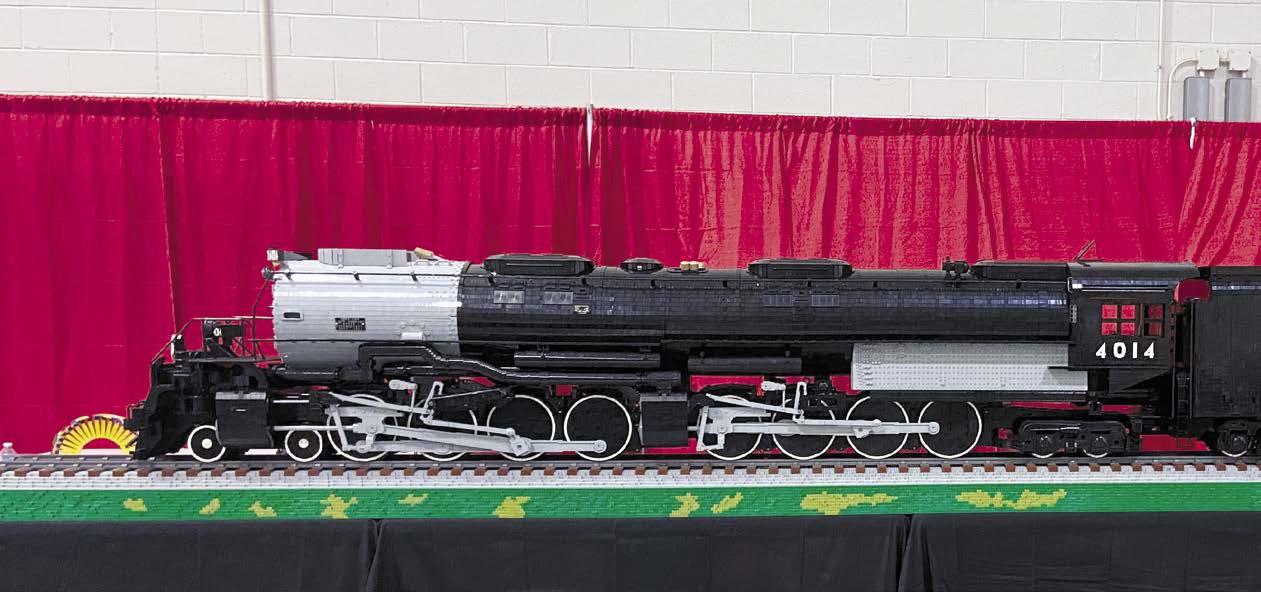
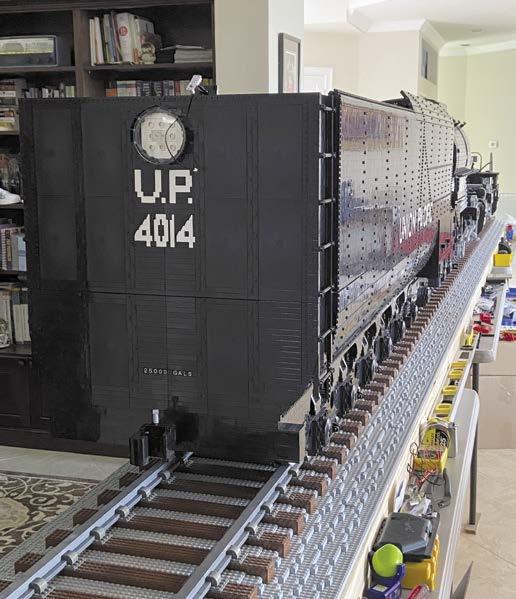
Mark Staffa has been a LEGO builder for some time, specializing in train and train related builds. With his deep interest in trains, it would only make sense to create another train, but not at LEGO scale—at 1:7 scale. The resulting build, which is still in progress, is currently over 18 feet long! BrickJournal was able to talk to him about his ongoing project.
BrickJournal: When did you think about making the train, and what inspired you?
Mark Staffa: I had a template for a wheel. It originated from the geometry of an earlier MOC of the Westin Hotel in Atlanta. It is a round building and my version was 30 studs in diameter. So it was going to be a big wheel. I hadn’t decided on anything specific at that point. It could have ended up a large car build, or a different steam or diesel locomotive. My father is a model railroader and had kickstarted my love of trains at a young age. I didn’t really get into any common gauges, but I also had a love of LEGO at an early age, and that let my train creativity grow. I decided on a steam locomotive to add to the difficulty—far fewer straight lines. And if I was going to attempt a very large model, I may as well select one of the largest steam engines ever built, a Big Boy. Another deciding factor was Union Pacific was in the process of restoring a Big Boy, number 4014, and converting it from coal burning to oil burning. So that finalized the choice, and gave me another decision to make: Building my model pre- or post-restoration. I decided on the original coal burning for one key feature, the stoker pipe located from the tender, under the cab into the firebox. This feature enabled me to give a supporting structure for the cab that would otherwise not be there in the restored version.
How did you incorporate power and motorization?
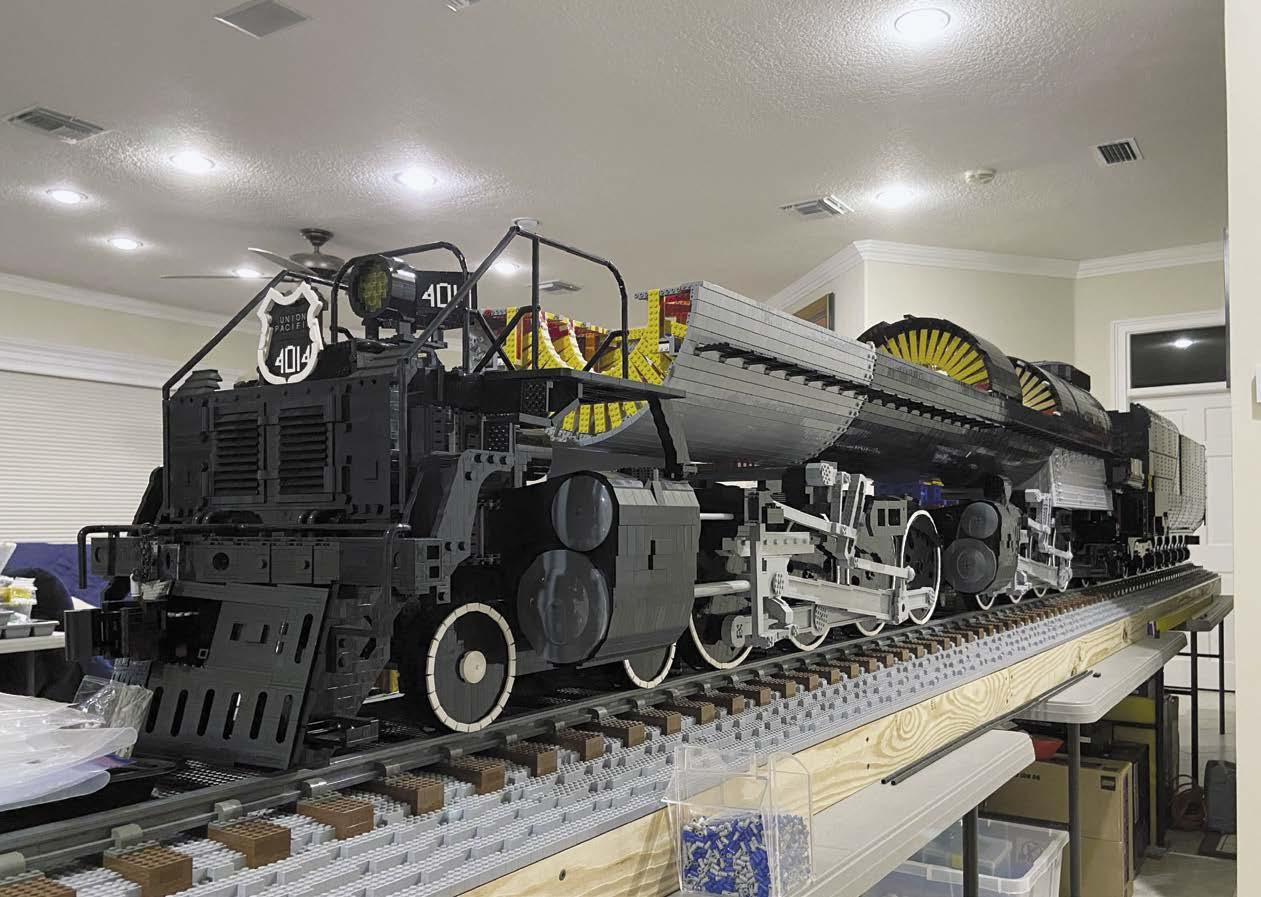
From the beginning of the project, I had a list of details I wanted to make sure I included in the build. Motorizing the driver wheels was near the top of the list. When I had the driver wheels, axles, chassis, and connecting rods built, I did build in a Power Function motor (the large, I believe) on each axle, eight in total. I have support pillars underneath the chassis sections to elevate the driver wheels ever so slightly above the track. At this stage, less than a year into the build, I was successful in motorizing the driver wheels. Over the next few years of building I didn’t revisit the motorizing until a few months before the Big Boy’s debut. At that time the motorizing was not working. I had other details I wanted to finish, so getting the wheels moving was put on hold.
What was my most challenging part of the build and most gratifying?
When I had the entire chassis built and started building the upper body, I started to see some significant sagging in the tables I was using. I was building on top of four standard 6’ folding tables. I went back to build a wood frame with 2x4s and cross bracing that assembles in three parts. I also had to figure out how to self-support the front end of the boiler and smokebox area. That section essentially cantilevers about 18 inches past its last support
Article by Wayne Hussey
Photography by Wayne Hussey and Joe Meno
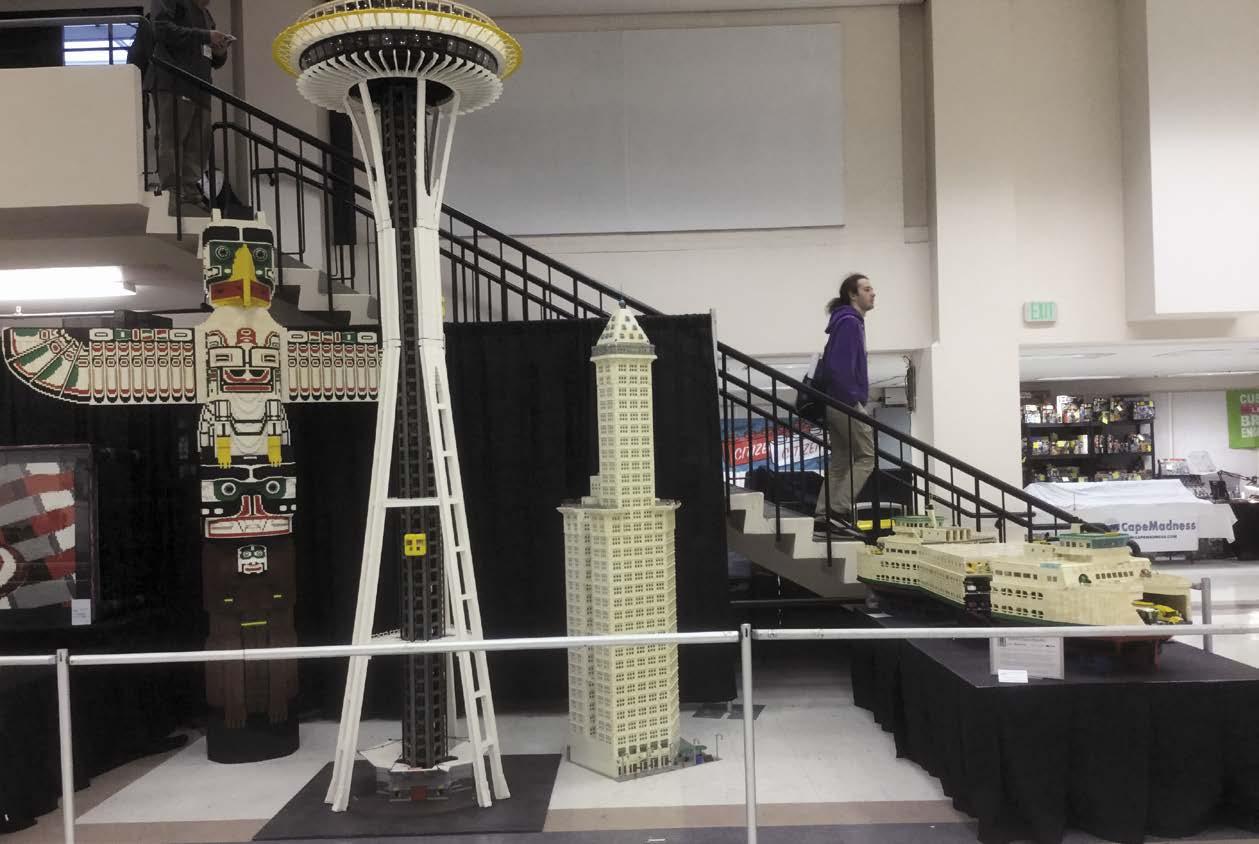
Wayne Hussey is a builder of both community and MOCs. He ran conventions and also built large scale models inspired by landmarks of the Pacific Northwest. Two of them, the Issaquah Ferry and the Seattle Space Needle, have been installed at their namesakes. Here are their stories, as told by Wayne himself
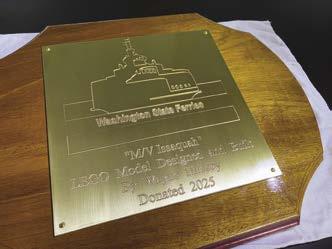
The model of the Issaquah was completed in 2002 and debuted as one of three centerpieces I provided at the the very first NWBrickCon, also in 2002. Shortly after NWBrickCon, I had the opportunity to display/store the ferry model at the Maritime Discovery Center at Pier 66 in Seattle. The model was there until
The Issaquah brand new in 2002. In the background are the two other ‘centerpieces’.
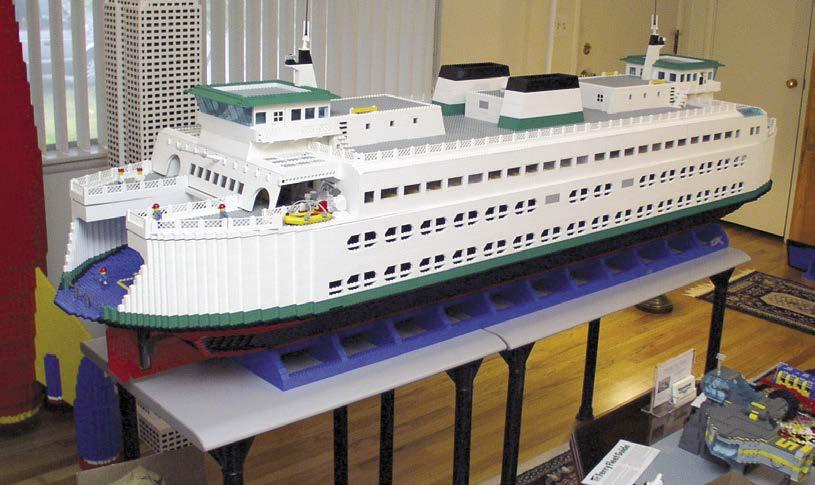
just before BrickCon 2013, when I was informed of their closing. The pier had become a cruise ship landing and they needed to remodel the building to become a cruise terminal. I took it home and made some minor modifications (adding vehicles and adding another “cut” to ease its transportation) to enable it to return to BrickCon by 2014. By that time, the model was beginning to “yellow.” I continued to show it until 2019.
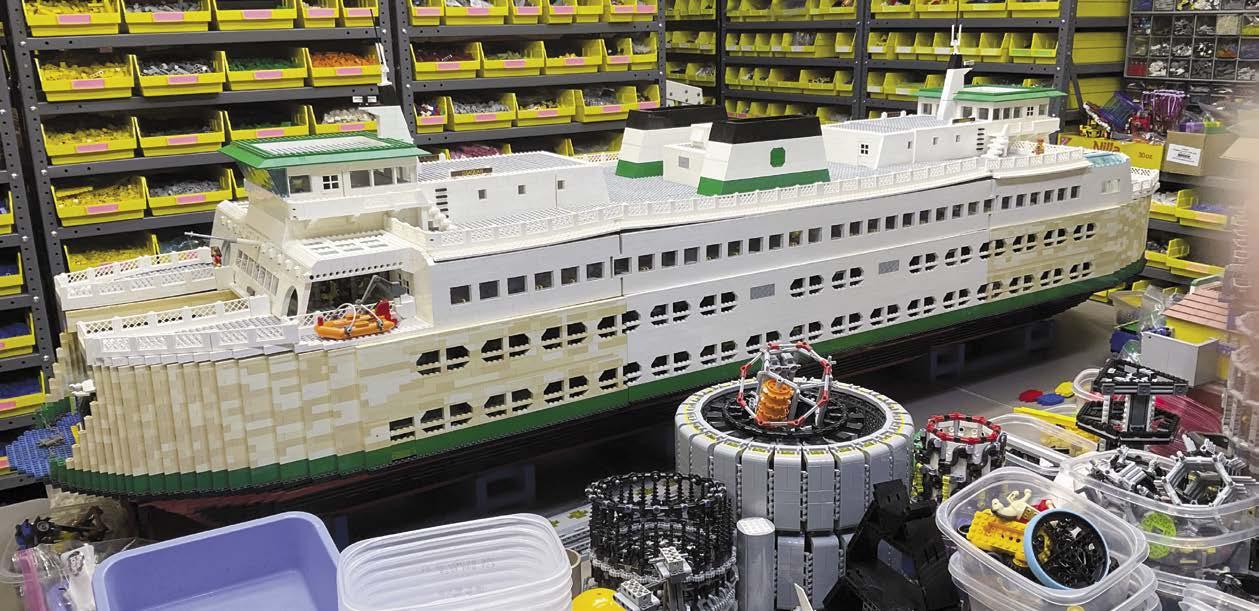
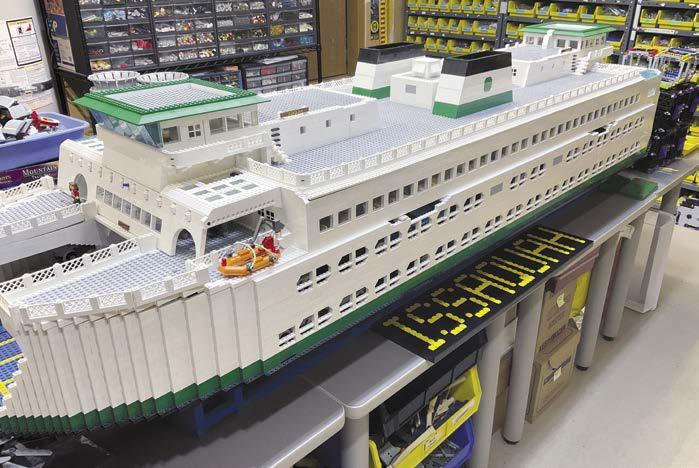
In the summer of 2022, there was an episode of Pawn Stars: On the Road that was filmed at the BrickCon Warehouse, where they claimed interest in Carlyle Livingston’s and my model of the Batcave. As part of the set-up for filming, I put up the Ferry and a couple of other models on display as background decoration. The yellowing on the ferry had accelerated and it looked awful.
After BrickCon 2024, due to intermediary conversations I had at the event, Washington State Ferries offered to house the model on the actual ferry - the M/V Issaquah. Their carpentry lead, Michael Dryden, visited me in October and took measurements of the model as I was starting to refurbish it. His team then built a really nice cabinet for it. We installed the model on January 31, 2025.

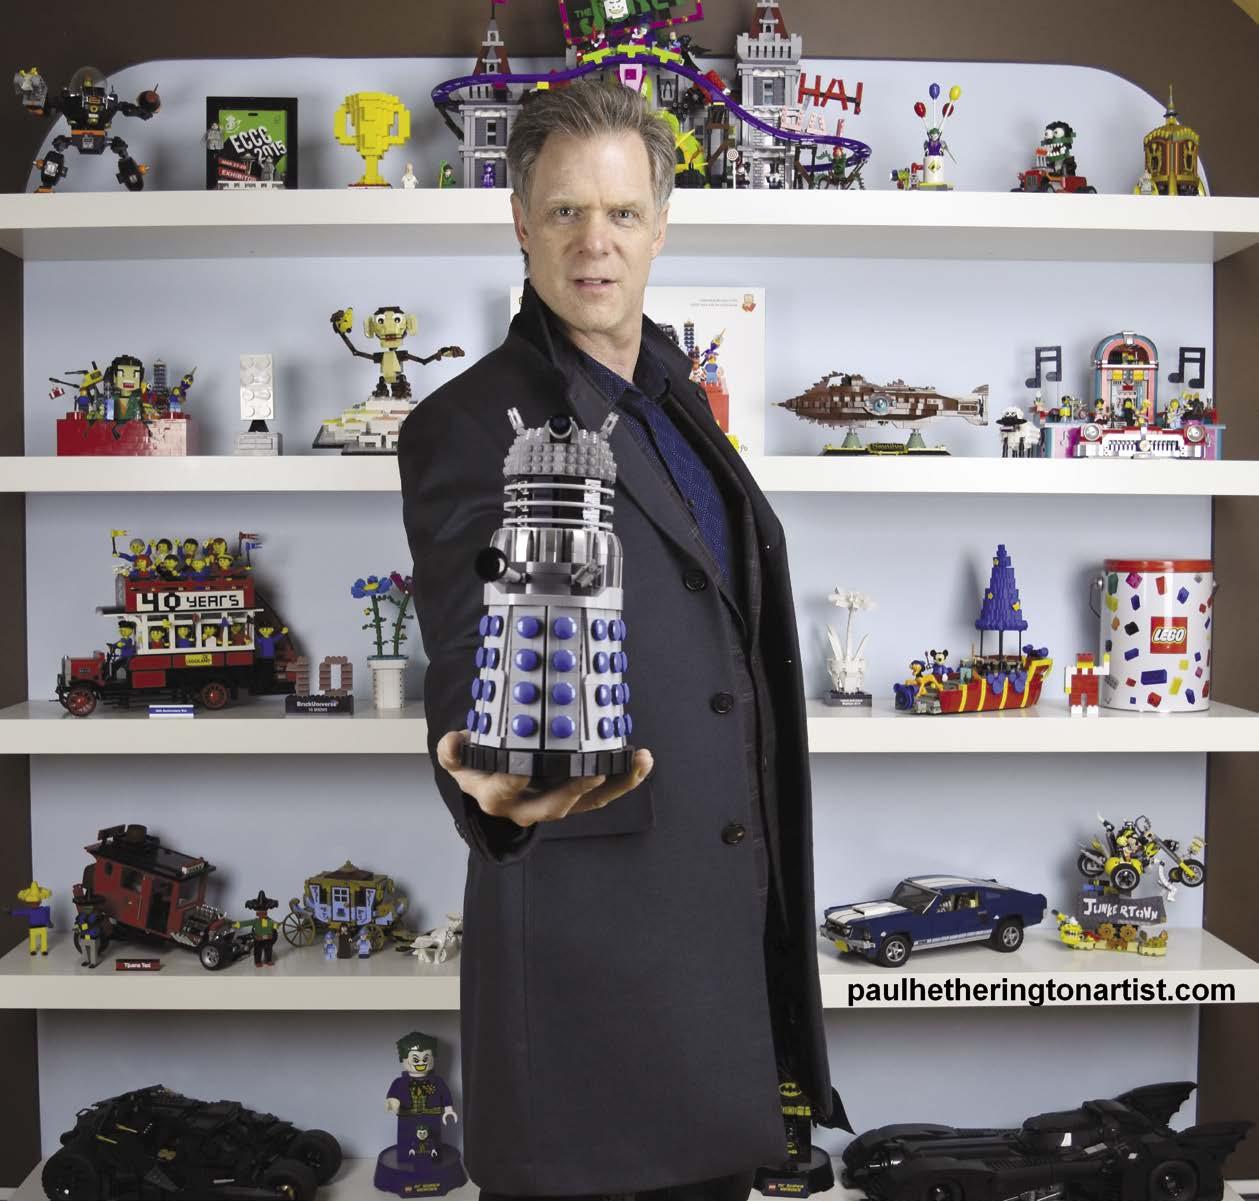
Article by Paul Hetherington
Paul Hetherington has been a builder for a long time. A very long time, and in that period, he went from building as a fan to professionally building. BrickJournal got in touch with him, and he told his story...
I didn’t plan to end my Dark Ages. It happened in the summer of 1991, when I, at the tender age of 21, purchased two small M-Tron space sets. I then quickly became obsessed with collecting all the Space-themed sets. I remember a big part of the thought process into buying the sets was when you looked on the back of the boxes of that era. They all had the alternate builds on the back panel, so I envisioned buying a set, building the set model, but then also using those parts to create some of the alternate models or ideas.
That year I won Best in Show for this little two-baseplate build, which was a complete surprise. Nowadays, it would be quite challenging to win Best in Show with a small creation, as many builds are much larger in size nowadays. At that point I was just considering building as a hobby again. Winning a Best in Show would seem such an unachievable thing, I thought that this would never happen to me. When it did happen I thought, “Maybe there’s something to this. Maybe I should take this more seriously.” And it gave me the inspiration and the passion to build larger and more intricate creations.
At the time I worked full-time in healthcare at a day program supporting people with disabilities. I am a caretaker, taking people out in the community, and I’m still at it. I’m coming up to my 25th anniversary at Community Living Society. I keep that tie because I consider some of the clients that I have known for 25 years as friends, so I don’t want to lose that connection. But unfortunately, now I hardly ever work there because I’m so busy building LEGO commissions. The job allowed me the freedom to be out in the community instead of stuck in an office. My creative process works the best when I am out going on walks. By helping my friends access their community, I was also helping myself by having so much time to think creative thoughts.
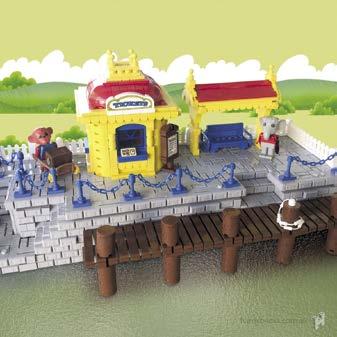
My first creation for the Vancouver LEGO Club Train show display was a giant European train station that had a 3’ x 8’ footprint. I started out big because I was already amassing LEGO and collecting it for ten years, so I had a lot of LEGO
Article by Shawn and Kim McMahon
Photography by Shawn and Kim McMahon and Joe Meno
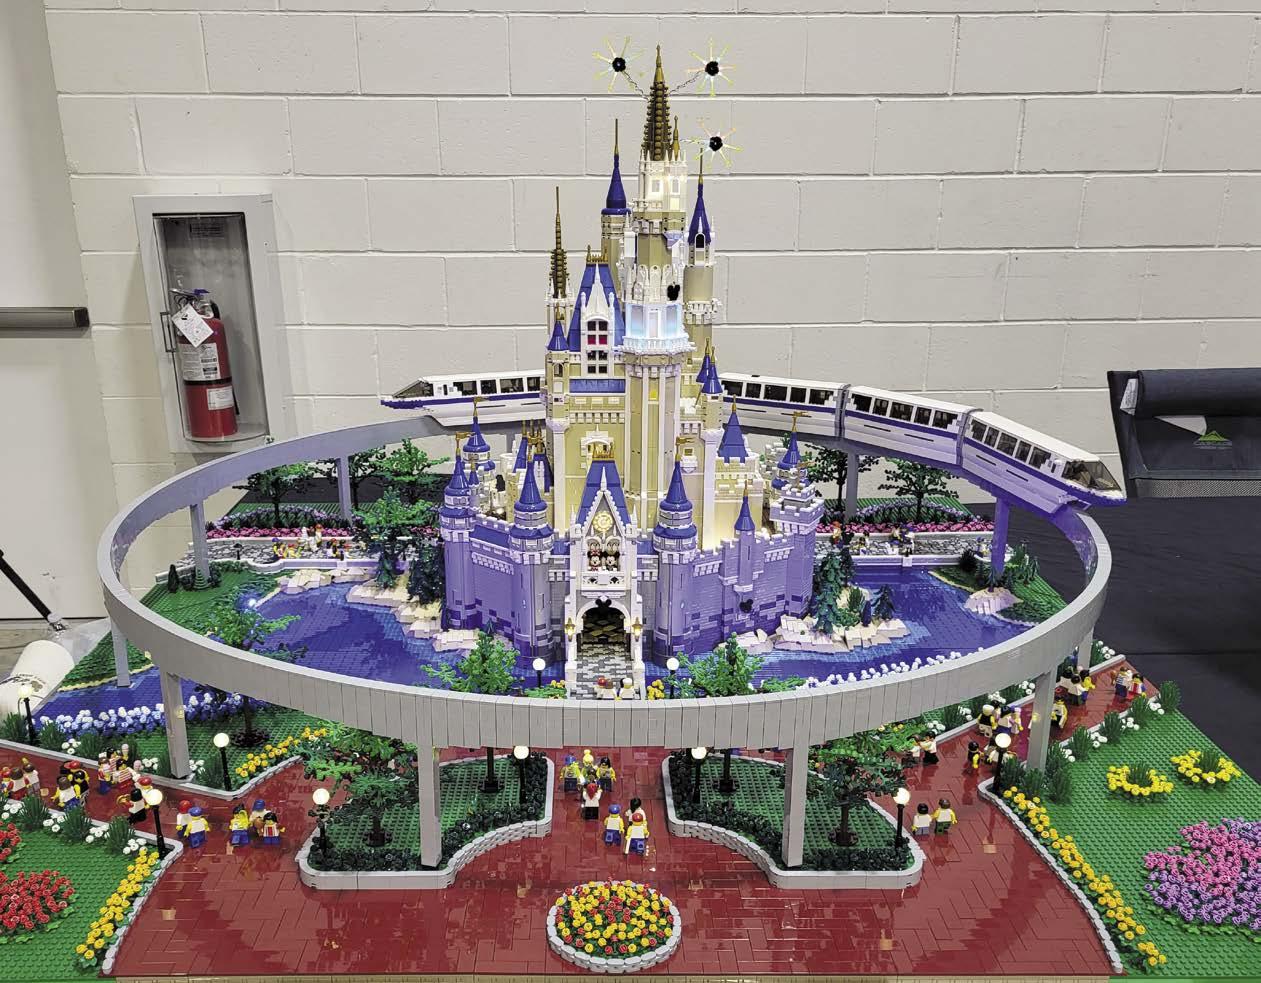
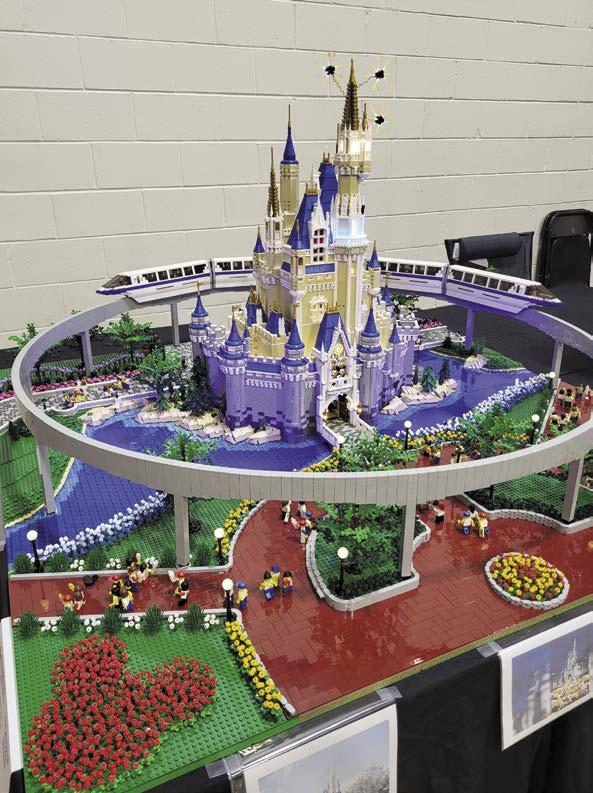
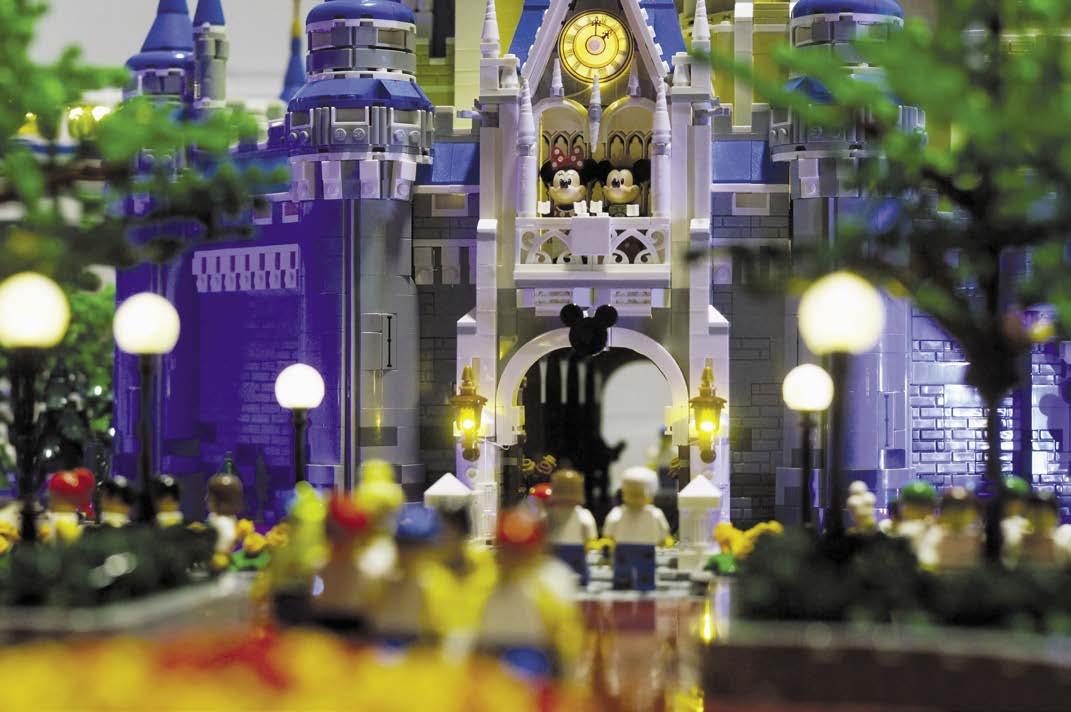
At BrickFair Virginia 2024 there was an outstanding model built up of the Magic Kingdom’s Cinderella Castle at Walt Disney World. Surrounding it was a motorized model of the Disney monorail that was also lit. The builders behind this layout were Shawn and Kim McMahon. BrickJournal got to talk to them about the layout—but first, let’s get to know them.
Shawn is an mechanical engineer who has been building as long as he can remember. Like many, he didn’t build much when he was in high school and college. He thinks it was a Christmas set that got him back into building, followed by some of the Creator Expert sets. Overall his favorite theme is classic Technic with Technic bricks, although he does not build much Technic anymore. His current favorite theme is probably Creator Expert/Icons.
As a child, Shawn built mini MOCs. He built a set and played with it and if it had a B model (an alternate model), he would build it too. As a child some of the best sets were the ones for the B models with lots of unused pieces, because he could use them for MOCs and still have a complete build from the set.
As an adult, his first MOC was the Disney monorail that is included in the Magic Kingdom 1971 display. He designed it in 2015 and was inspired by the LEGO highspeed passenger train 60051, which he thought resembled the Disney monorail. Around the same time, he found a Futuron monorail 6990 in his parent’s basement. His initial thought was that he could combine both to make a Disney monorail, but he realized he could do better. The result was Monorail Blue on display.
Kim is a meteorologist and program manager. She built as a child casually, but didn’t consistently start building until 2018 when her husband built several of the LEGO holiday sets and trains under their Christmas tree.
Following the aforementioned Christmas holiday LEGO sets in 2018, her husband introduced her to the Chinese New Year’s sets for 2019, and they’ve been building together regularly ever since.
The Creator Expert theme is certainly Kim’s favorite because it is not only challenging, it has nice parts usage and has expanded her knowledge of LEGO parts and building techniques. There is always something new, different, and interesting in the theme. With the variety to choose from the creator expert sets, anyone can find something they love. A close second is LEGO Ideas for similar reasons. She very much enjoys realism in art work, be it paintings or sculptures, so the Ideas sets fulfill that niche.
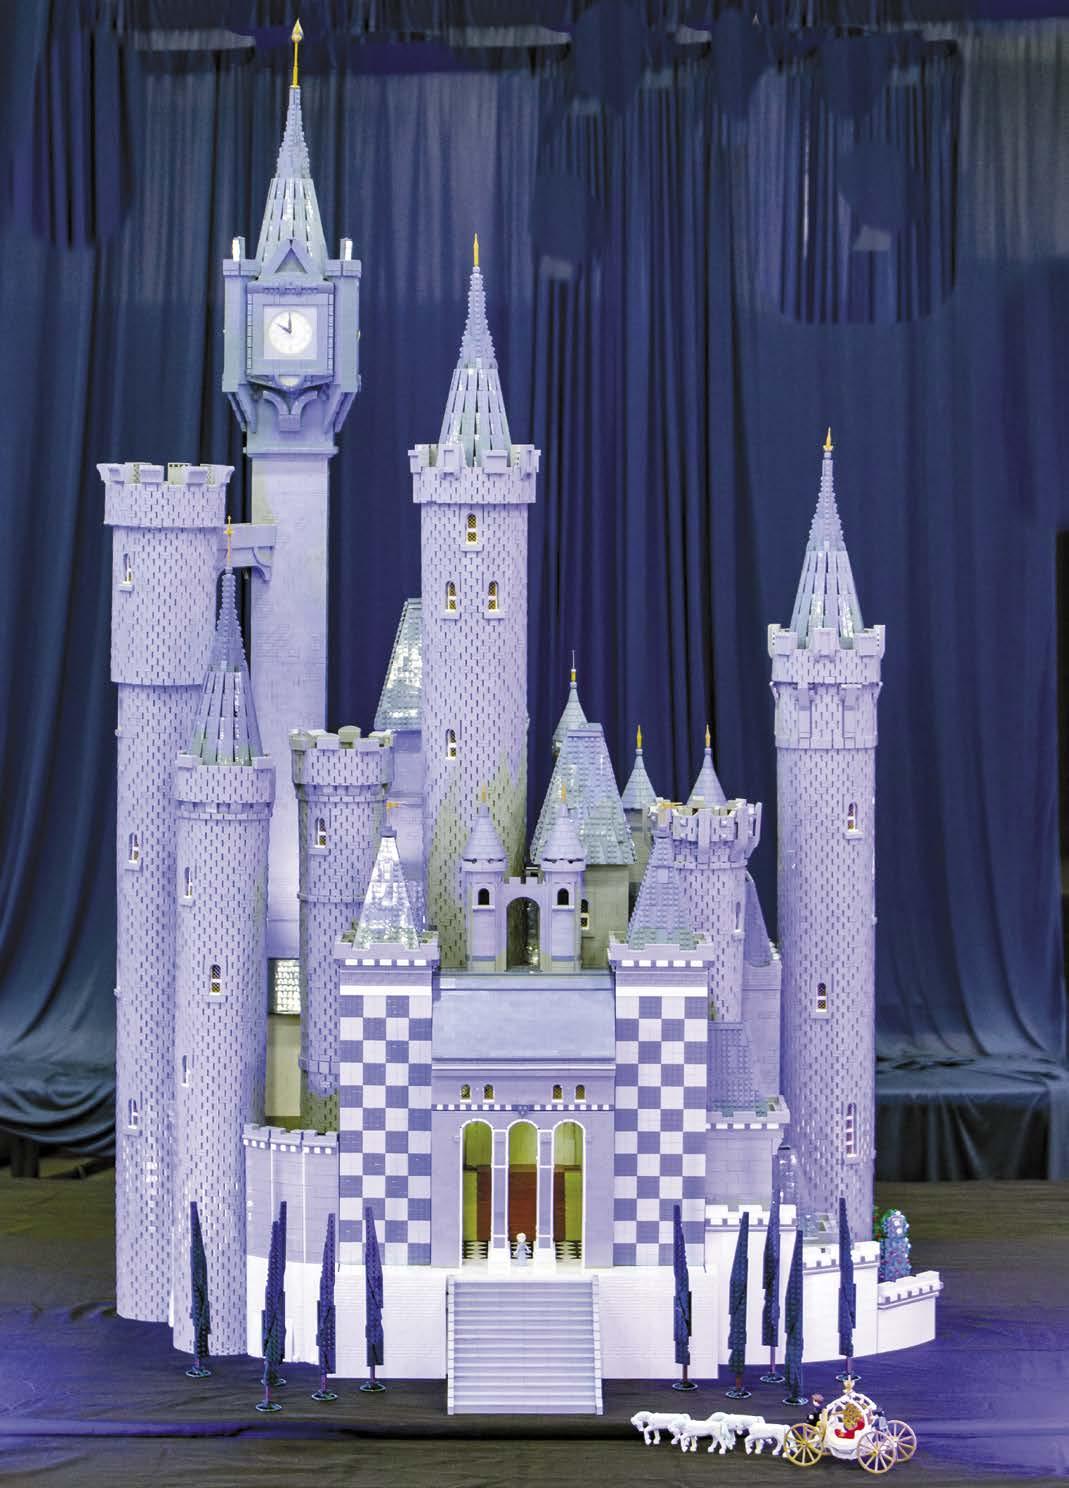

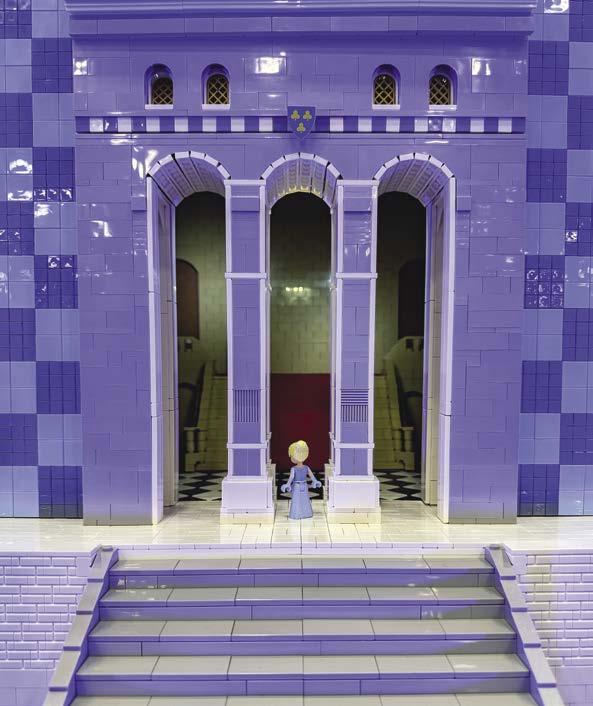
Martin Harris, a LEGO Disney artist, unveiled his latest creation: the King’s Castle from the original Cinderella film. Inspired by Mary Blair’s whimsical illustrations, the castle rises six-and-a-half feet tall, built with nearly 100,000 LEGO bricks. Debuting at Atlanta BrickCon 2025, it captures the enchantment of moonlit dreams and Disney magic.
When asked about the inspiration behind this project, Martin replied, “The idea came about three or four years ago during BrickFair Virginia. I was walking with Abner Finley (a convention attendee) and Joe Meno (BrickJournal editor) when they challenged me to build something not built with LEGO bricks before. The King’s Castle from Cinderella was suggested, and it immediately sparked my interest. I knew it was something I wanted to do, but at the time, I wasn’t quite sure how to approach it. That uncertainty made it even more exciting as a challenge.”
In the years leading up to this build, Martin honed his skills on Disney-inspired projects, including Disneyland California’s Sleeping Beauty Castle, the Queen of Hearts’ castle, and Rapunzel’s Tower. Each of these projects sharpened his techniques, preparing him for this ambitious build.
Article by Dale Harris
Photography by Dale Harris, Brickset and BrickLink.
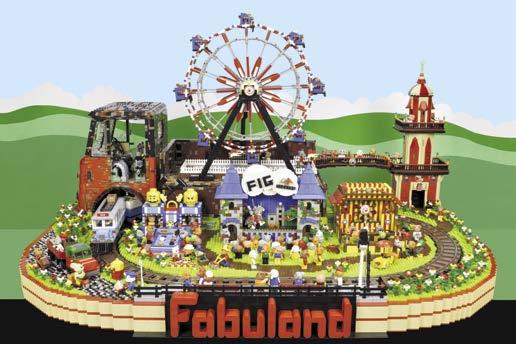
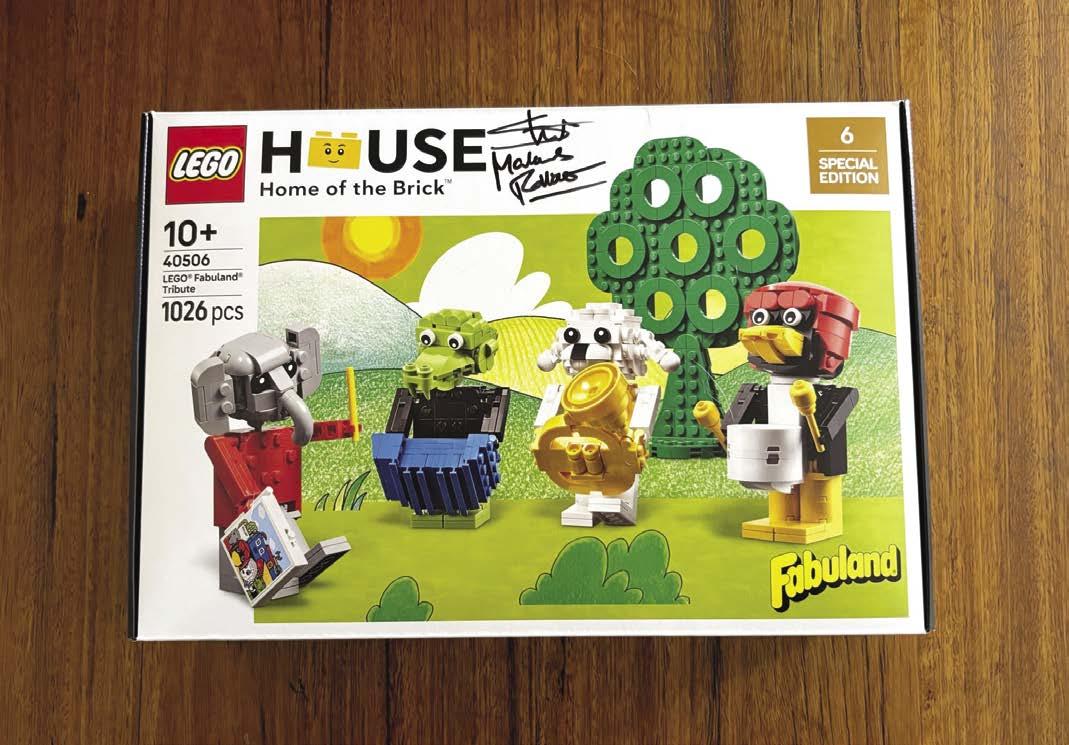
As a self-professed “Fabufan,” I had the opportunity on behalf of BrickNerd to look at set 40506 LEGO Fabuland Tribute, the next exclusive LEGO House set developed by LEGO Senior Designer Markus Rollbühler from the original design of LEGO House Master Builder Stuart Harris. The set will be available exclusively from the LEGO House shop in Billund, Denmark from March 2025. But first, here’s a little story about my history with Fabuland.
My Fabuland Story
I was born in 1980, which means that I was in the perfect age range for Fabuland for the early part of its run. I remember playing with the few Fabuland sets that my brother and I had at an early age. While I got older and progressed onto LEGOLand town, space and castle sets, I retained a fondness for Fabuland into adulthood. I particularly love the 1970s whimsical storybook style of the figures and elements of the Fabuland world, and the feeling of nostalgia it creates is also pretty strong.
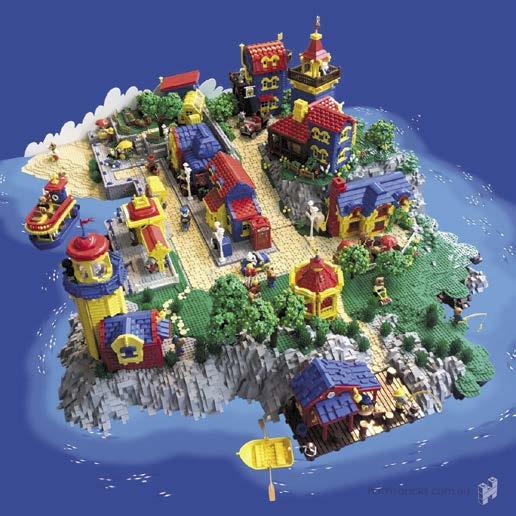
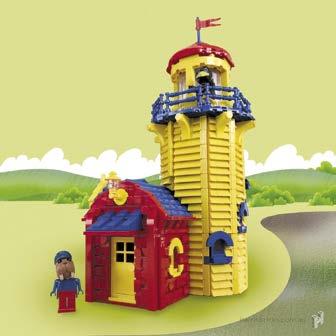
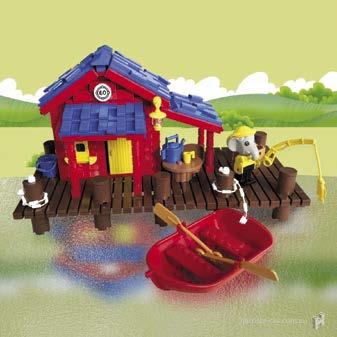
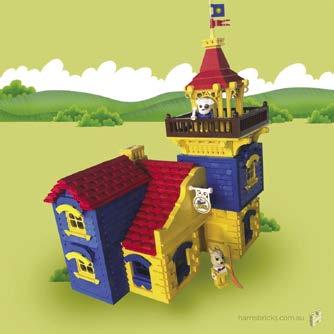
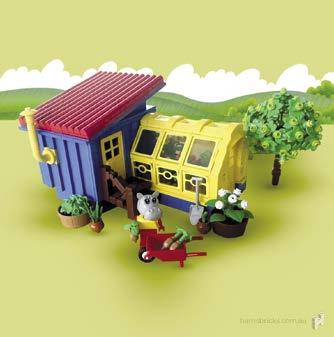
When I came out of my Dark Ages, my first major MOC was a Neo-Classic Space base, which lead me to think back on Fabuland, and how someone might undertake a “Neo Fabuland” build—the idea of employing Fabuland as a visual style, in much the same way that Neo-Classic Space looks to Classic Space as a set of design conventions. The resulting build was called Edward’s Island, a large Neo Fabuland island featuring ten unique buildings including Edward’s Fishing Hut, Boris’ Post Office, Wilfred’s Lighthouse, Gertrude’s Studio, Hannah’s Greenhouse, Bonnie’s B&B, The Dock, and The Bandstand, Bernhard’s Tavern and Dr. Dog’s Office as well as various vehicles, trees, plants and landscaping. (Note: BrickJournal covered Dale’s work in issue #70 — Editor)
Five years have now passed since I built Edward’s Island, and this year I have started to undertake a new group of Neo Fabuland builds for display at events in 2026. So all of that history combined is why I think BrickNerd reached out to me about the official return of Fabuland.

The purpose of this article is to take a quick look at the new set, paying special attention to all the great callbacks to those original Fabuland sets from 1979–89, but also to respond to the set by building something new! I hope you enjoy my review and extrapolation of 40506 LEGO Fabuland Tribute.

Design by Will Hafner
All aboard for a trip down memory lane! As a kid, my days were filled with Duplo, LEGO, and the occasional BRIO train adventure. Sometimes, I’d even line up minifigs on the tracks and let my brother’s Thomas the Tank Engine barrel through—but that’s another story!
So when we at BrickNerd learned an issue was rolling in with a giant train on the cover, I knew had to build something small but mighty. With some expert trackside assistance from our Nerd-in-Chief Dave Schefcik, I designed this delightful little locomotive. Thanks to the new 1x1 round plate with a clip on the bottom, this train’s cars couple together just like the real deal, letting them pivot smoothly.
In the spirit of toy trains, we chose a bright and cheery color scheme with a classic blue locomotive and playful crimson caboose. You can also make the train as long as you like by adding more passenger and box cars or making whatever new train car you want (instructions for the passenger car and box car can be found on BrickNerd.com). Fair warning, though—the engine uses the older variant of the modified 1x4 plate with 2 studs, so you might need to raid your older piece stash.
So grab a little bit of coal, fire your engines, and get chugging along, because this tiny train is ready to sound the whistle and go full steam ahead!
(Parts can be ordered through Bricklink.com by searching by part number and color)
Qty Part Color Description
1 1762.dat Black Slope Brick 31 2 x 2 Double, Curved
1 2654a.dat Black Dish 2 x 2 with Rim
1 3004.dat Black Brick 1 x 2
1 3023b.dat Trans Clear Plate 1 x 2
1 3023b.dat Black Plate 1 x 2
1 3024.dat Black Plate 1 x 1
1 3048b.dat Black Slope Brick 45 1 x 2 Triple
1 3176.dat Black Plate 3 x 2 with Hole
2 3941.dat Blue Brick 2 x 2 Round without Reinforcement
1 4032a.dat Blue Plate 2 x 2 Round with Axlehole
2 4081b.dat Black Plate 1 x 1 with Clip Light Type 2
5 4274.dat Blue Technic Pin 1/2
1 4304.dat Black Plate Modified 2 x 2 x 2/3 with 2 Studs on Side - Hollow Bottom
1 5264.dat Black Plate Round 1 x 1 w/Clip on Bottom
4 6141.dat Pearl Silver Plate 1 x 1 Round
4 6541.dat Black Technic Brick 1 x 1 with Hole
1 15535.dat Black Tile 2 x 2 Round with Hole
1 17485.dat Black Brick 2 x 2 Round with Pin Holes
1 17485.dat Blue Brick 2 x 2 Round with Pin Holes
1 18674.dat Blue Plate 2 x 2 Round with 1 Center Stud
4 18978b.dat Pearl Silver Wheel Rim 11 x 18 Front with 10 Angled Spokes
1 36841.dat Black Bracket 1 x 1 - 1 x 1 Down
1 44728.dat Black Bracket 1 x 2 - 2 x 2 Down
2 54200.dat Black Slope Brick 31 1 x 1 x 0.667
6 85861.dat Black Plate 1 x 1 Round with Open Stud
1 85975.dat Black Minifig Hat Fez
2 87087.dat Black Brick 1 x 1 with Stud on 1 Side
3 92593.dat Black Plate 1 x 4 with Two Studs
1 98138.dat Blue Tile 1 x 1 Round with Groove
2 99563.dat Black Tile 1 x 2 Chamfered with 2 Top Indentations
“Try Not to Have a Good Time... This is Supposed to be Educational.”
— Charles M. Schulz
Article by Jared K. Burks
I grew up reading and watching Peanuts, including every TV special produced. Charles M. Schulz’ world of Charlie Brown simply spoke to me, as it did to so many, clearly. Charlie Brown was that young man who always came in second, had an interesting relationship with his dog and a football, and was infatuated with that Little Redheaded Girl. Charles M. Schulz was the American cartoonist and creator of the comic strip Peanuts, which featured his two best-known characters, Charlie Brown and Snoopy. At its height, Peanuts was published daily in 2,600 papers in 75 countries, in 21 languages. Over nearly 50 years, Schulz drew 17,897 published Peanuts strips. During the strip’s run, Schulz took only one vacation, a five-week break in late 1997 to celebrate his 75th birthday; reruns of the strip ran during his vacation, the only time that occurred during Schulz’s life. Perhaps it was this dedication to the strip, or simply his philosophy on life, that colored both Charlie Brown’s persona or his many quotes which seemed to take an ironical spin on life. I have included many in this issue.
“All you need is love. But a little chocolate now and then doesn’t hurt.”
— Charles M. Schulz
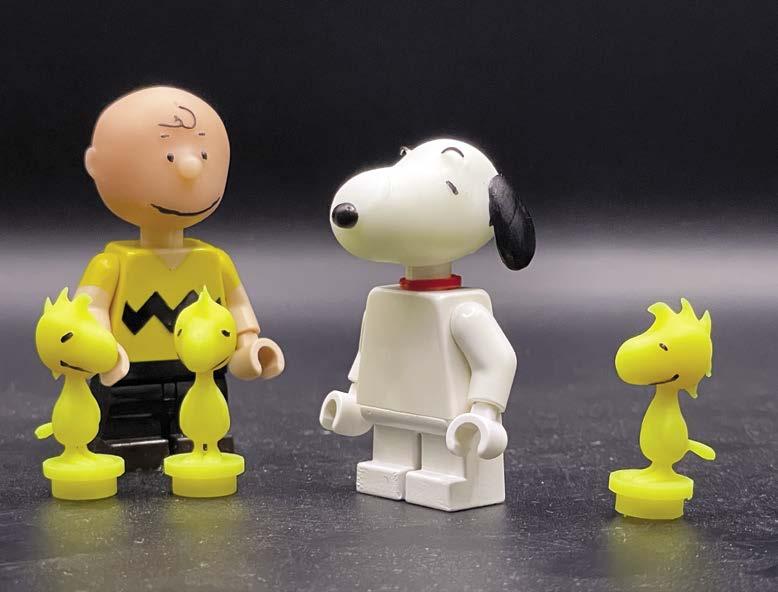
As noted above, a minifig creation of Charlie Brown is not enough. We need his very cool, dynamic, and WWII fighting ace of a dog, Snoopy. Snoopy also has his own companion: a small yellow bird, Woodstock. So in this issue of BrickJournal, I will show you how I constructed a custom LEGO version of Charlie Brown, Snoopy, and Woodstock.
To begin, let’s figure out what we need to construct these figures. I want to keep the process as simple as possible to show you just what is possible with some simple tools and options. I cheated, of course, using one complex tool: a 3-D printer. That said, let’s begin with an evaluation of the characters. One of the critical elements is scale. Charlie Brown is taller than Snoopy and Snoopy is much larger and taller than Woodstock. This is the foundation that I want to keep for this trio of figures.
“What’s the good of living if you don’t try a few things?”
Charles M. Schulz
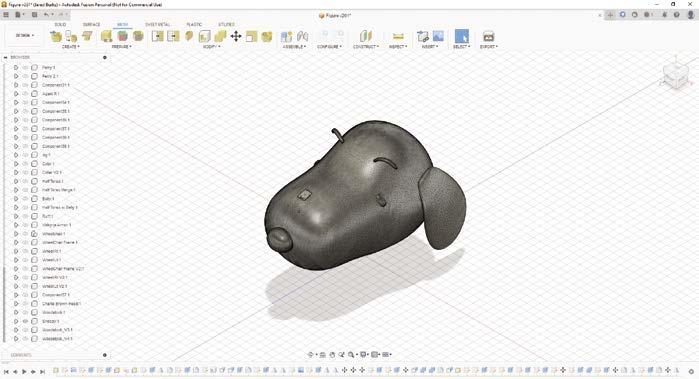
In order to make a custom figure for Charlie Brown, I had to revisit how Charles M. Schulz drew him. Charlie Brown is a simple design of a character, and likely was so because of all the appearances in newspapers. He wears a simple yellow shirt, with black shorts with yellow socks and brown shoes. Some of this is quite simple and some is quite complicated due to the classic LEGO scale issues we commonly discuss in these articles. Also of note is that all characters in Schulz’ universe feature oversize heads that are way out of portion to the characters’ bodies (something nearly perfect for LEGO scale). All characters also feature a thin, but very prominent neck. It is these two traits that make me believe we can create a very special LEGO version of Charlie Brown. In order to make Charlie Brown a child—which he is, but taller than Snoopy—we have to consider using the teen legs (37364 - https://www.bricklink. com/v2/catalog/catalogitem.page?P=970cm00#T=C) for Charlie and the stubbies (41879 - https://www.bricklink.com/v2/catalog/catalogitem.page?P=41879#T=C) for Snoopy. We have the basic LEGO elements needed; however, he will need a custom head. I will modify this one from Thingiverse (https://www.thingiverse. com/thing:2510789).


We now have to consider Snoopy, who is a simple white dog. This means white torso, arms, hands, and stubbies legs. The two critical elements for Snoopy are his red collar and his head. These will be created just like Charlie Brown’s head. We will create these elements through 3-D printing. Luckily these characters are very prominent and we can search and find examples of both Charlie Brown and Snoopy (https://www.cgtrader.com/3d-print-models/games-toys/toys/snoopy-andwoodstock) that we can use for making their custom heads—and in Snoopy’s case, his red collar as well.
Teen legs.


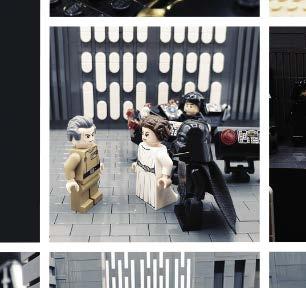
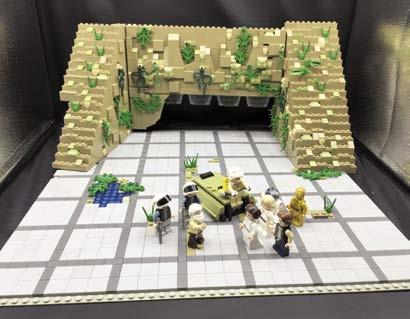
Article by David Strenzler, Bantha Bricks: Fans of LEGO Star Wars
Galactic greetings! We are Bantha Bricks: Fans of LEGO Star Wars. As administrators of one of the best LEGO Star Wars-themed groups on Facebook, David Strenzler, Frank Averstegge and Eloi Parizeau witness amazingly creative builds by Star Wars fans worldwide on a nearly daily basis.
This time, we would like to introduce you to talented MOC builder and Bantha Bricks community member Hauke Jürgensen (codyaner.bricks).
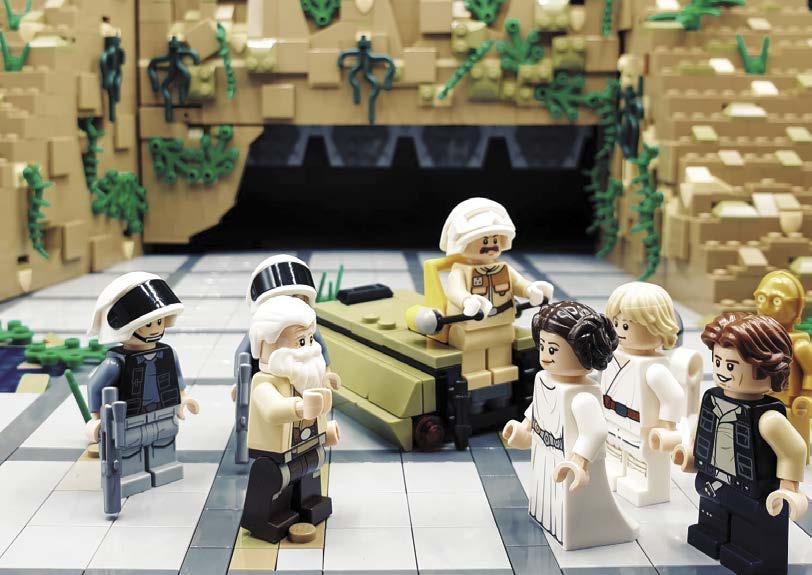
A while ago, Hauke completed his impressive five-year project of building the Original Trilogy in LEGO, and it was a pleasure to talk to him about it.
DIAMOND COMIC DISTRIBUTORS
FILED FOR BANKRUPTCY IN JANUARY without paying for our December and January magazines and books, leaving us with enormous losses— and we still have to pay the expenses on those items, and keep producing new ones. Until payments from our new distributors begin in the Fall, we’re staying afloat with WEBSTORE SALES
Every new order (print or digital) and subscription will help TwoMorrows get through this, and emerge even stronger for 2026. Please download our NEW 74-PAGE 2025 CATALOG and order something if you can: https://shorturl.at/gA9Fv
Also, ask your local comics shop to change their orders from Diamond to LUNAR DISTRIBUTION, our new distributor. We’ve had to adjust our release dates for the remainder of 2025 while we wait for orders from our new distributor, so you may see some products ship earlier or later than originally scheduled. We should be back to normal by end of Fall 2025; thanks for your patience!
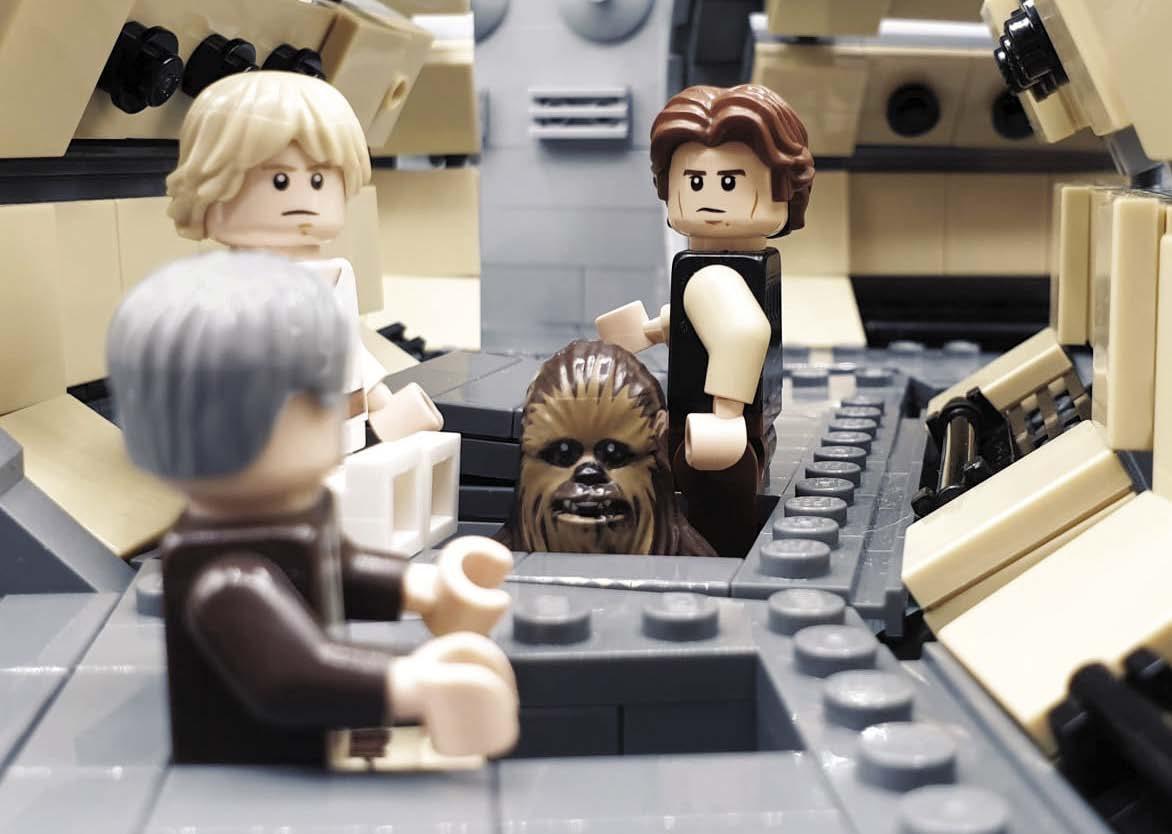
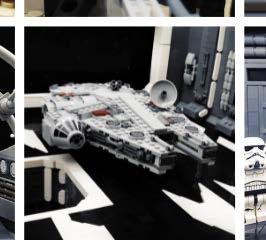
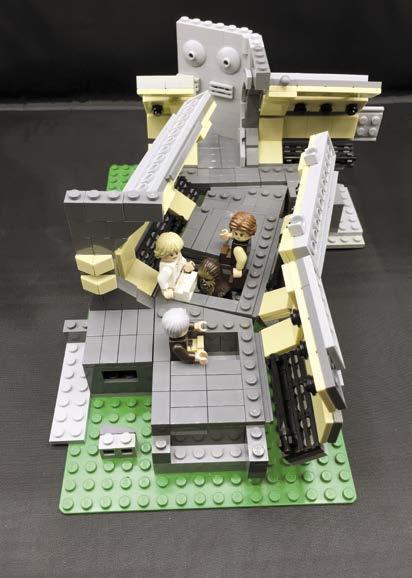
Hiding in the Millennium Falcon.
David Strenzler: Hello, Hauke. Welcome to the Bantha Bricks Files! The LEGO Star Wars community has been familiar with your creative and skilled Star Wars-inspired designs for many years. Could you please introduce yourself and what you do?
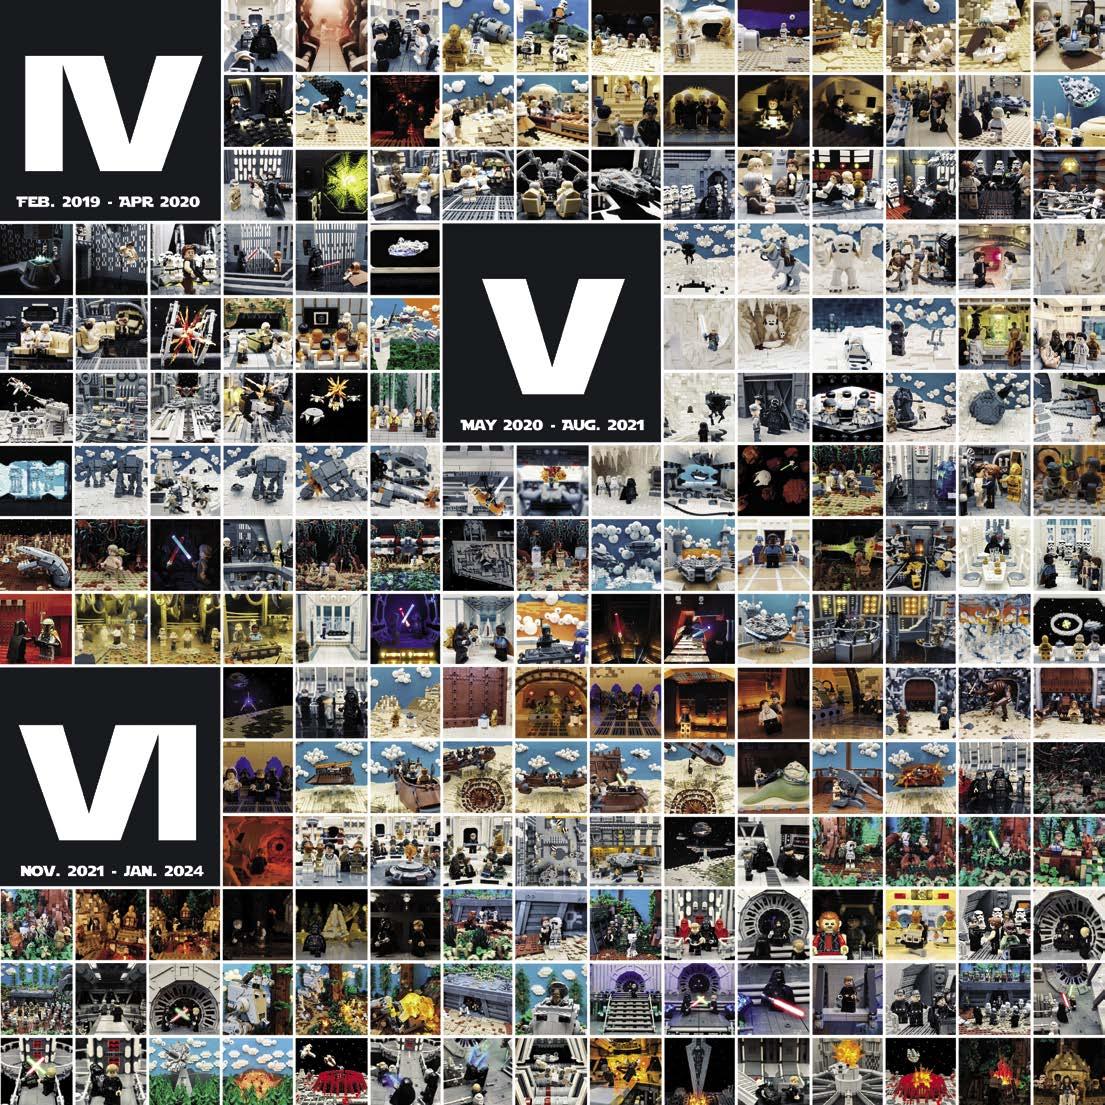
Hauke Jürgensen: David, thank you for the interview invitation. It‘s both an honor and a pleasure. I‘m 29 years old, residing in beautiful Hamburg, Germany. Since 2008, I‘ve been active under the username Codyaner.bricks, initially in communities like Imperiumdersteine.de and Eurobricks, and also on Instagram since January 2019. During my early MOC building years (2008–2011), my focus was primarily on vehicles from the Clone Wars era. After a period of absence (my personal Dark Age) from MOC building, I returned in 2019 with a distinctive project that has now earned recognition within the LEGO Star Wars Community. The aim of this project was to recreate the entire Original Trilogy scene by scene out of LEGO bricks. After five years of dedication, crafting around 150 MOCs, and amassing a following of twenty-three thousand LEGO and Star Wars enthusiasts, I proudly concluded this long-term endeavor in January 2024.
IF YOU ENJOYED THIS PREVIEW, CLICK THE LINK TO ORDER THIS ISSUE IN PRINT OR DIGITAL FORMAT!