

Equestrian Traveler’s COMPANION


What Members Are Saying About Recent Services
"Less than 20 minutes from call for service and the tow company was on the spot, replaced spare on flat area and made sure it had enough air to keep me road safe. Thank you for your prompt assistance."
— Carla K, CA (Feb ’25)
"Mike was an unbelievable help to my husband and I (and horse) in an unexpected issue with our truck while hauling our horse on the first day of our move due to being military. We have never moved with a horse before and I honestly do not know what we would have done if I didn’t have Mike helping us through our unexpected truck breakdown. He was incredibly attentive and was a life ring when it felt like everything was going wrong that day."
— Kasaun H, WA (Feb ’25)
"One of the best customer service experiences I've ever had. I'm so glad I was referred to this company. I'll never go back to AAA!"
— Ella Y, OH (Jan ’25)
"We have subscribed to USRider since 2022. First time needing it in January 2025 & we couldn’t be more satisfied with our experience. We are so happy we had USRider roadside assistance as no other places we called, wanted to really handle our horse trailer, or be able to help us with our horses. Everyone was kind, generally concerned & very helpful. We had our tow within 20 minutes. Tow truck driver dropped off our trailer at a KOA, & truck at dealership for repair. Highly recommended!"
— Paulette A, WI (Jan ’25)
"I was extremely pleased with the Member Care Specialist. I was amazed at how quickly and professionally she took care of the issue. Keep up the great job!!"
— Tamara B, IN (Jan ’25)
"Excellent customer service as always!! Call was answered quickly and tow dispatched, Tow arrived quickly with updates until arrived. Everyone was friendly, professional, and very helpful. Excellent experience."
— Richard C, VA (Jan ’25)

Travel with confidence knowing USRider will get you back on the road safely and efficiently, should unexpected vehicle or trailer problems occur.
SEASONALTIP
Watch Spring Footing
This spring, your horse might be the first to trudge through neglected trails. Mud might abound due to spring rains. Surfaces that appear hard and dry might mask gripping, sticky mud. New grass might lack the necessary roots to keep the ground in place under the weight of you and your horse. Your horse’s feet could sink in, causing him to slide and spook. Worse, he could lose a shoe, pull a muscle, or fall in the sucking ground. To be safe, hike your favorite trails on foot to check the footing in advance of your ride. Work with the land owner or manager to mitigate any footing issues.
— Bonnie Davis
TRAILERINGTIP
Check Tire Tread

Check the tires on your tow vehicle and trailer once per month; tires can lose traction long before they’re worn out. Testing by Consumer Reports® shows that tread can give up a significant amount of grip when it’s still at the halfway point.
A new tire has a groove depth of about 10/32nds of an inch. When the grooves reach 2/32nds of an inch deep, they’re considered bald. With diminished tread comes the augmented risk for an accident.
If you don’t have a depth gauge, use coins to check tire tread. Consumer Reports offers the following guidelines:
• Place a penny into several tread grooves across the tire. If the tread always covers part of Lincoln’s head, there’s more than 2/32nds of an inch depth remaining.
• Place a quarter into several tread grooves across the tire. If the tread always covers a part of Washington’s head, there’s more than 4/32nds of an inch depth remaining.
• Place a penny into several tread grooves across the tire. If the tread always covers the top of the Lincoln Memorial, there’s more than 6/32nds of an inch depth remaining.
• Complete the measurement by placing the coin into additional locations at least 15 inches apart around the each tire’s central circumferential groove, as well as in its inner and outer grooves. This will help detect uneven wear caused by mechanical or service conditions.

Check the tires on your tow vehicle and trailer once per month; tires can lose traction long before they’re worn out.
PHOTO BY KENT AND CHARLENE KRONE
PHOTO BY CATE LAMM
Spring trails might not be in top shape as soon as the weather warms. Mud might abound due to spring rains.
Know the Health Requirements
For those who travel with horses, USRider provides contact information for each state veterinarian in the United States. To find this information, log on to the USRider website, and click on Travel Safety. From there, click on Transportation Info, then State Equine Info.
Well before your trip, contact the state veterinarian for every state you plan to travel through, as well as your destination state. The state veterinarian’s office can provide you with up-to-date information on vaccination and testing requirements, such as those you’ll need for a Certificate of Veterinary Inspection (health certificate). Then schedule an appointment with your veterinarian to get your horse tested and vaccinated, and to complete the paperwork.
HEALTHTIP
Hay-Net Hint

It’s a good idea to provide your horse with low-dust hay in the trailer, whether you’re going on a short or long journey. That quick trip to the veterinary clinic can unexpectedly turn into a longer time away from home if you experience a breakdown or end up waiting longer than you’d anticipated for your veterinarian to treat your horse.
Free-feeding hay will help keep your horse calm in and out of the trailer, and will keep his digestive tract moving, which will help prevent colic. If you use a hay net, avoid overstuffing it. Allow enough room behind the net so your horse can move his nose around the net to grab the hay rather than pushing his nose in the net, which could cause him to inhale small particles into his lungs.
Finally, tie your horse so that he can put his head down to remove any hay dust and debris from his lungs, but high enough so that he won't get tangled in the rope.
— Top trainer/clinician Julie Goodnight
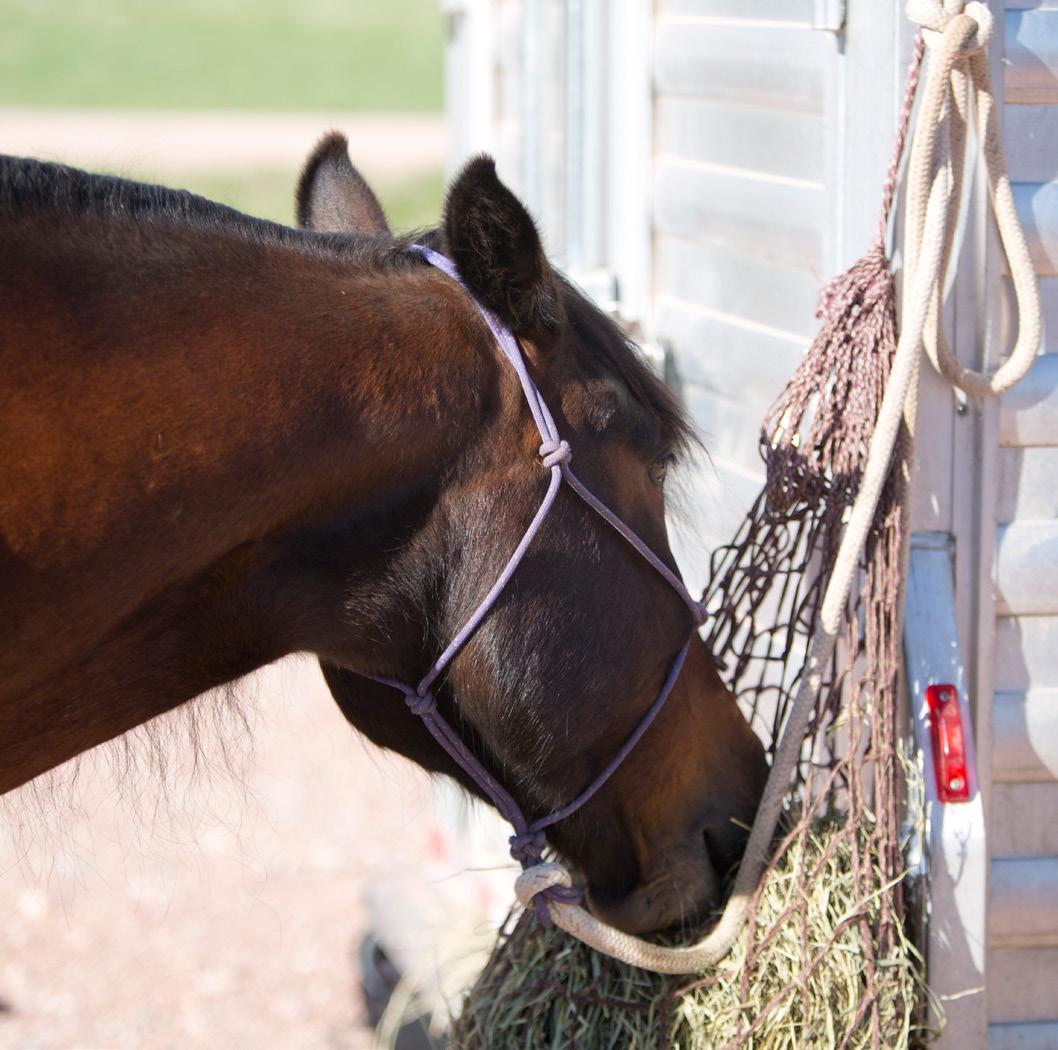
Avoid overstuffing your horse’s hay net. Leave enough room behind it so that your horse can move his nose around the net to grab the hay.
PHOTO BY HEIDI MELOCCO
PHOTO BY HEIDI MELOCCO
Well before your trip, schedule an appointment with your veterinarian to complete the required health requirements.
Are You Horse Aware?

When hauling, always be mindful of your horse, and he’ll learn to gratefully tolerate and possibly even enjoy his trailer trips.

Considerate driving will help your horse feel more refreshed when you reach your destination, as balancing takes energy, and strains his muscles and tendons.
When hauling, always be mindful of your horse, and he’ll learn to gratefully tolerate and possibly even enjoy his trailer trips.
Practice driving. If trailering is new to you, practice driving your rig before loading your horse into your trailer. To hone your rig-driving skills, enlist a friend to drive your tow vehicle hitched to your trailer. Ride in your trailer on private property with permission. (Note that it’s illegal to ride in a tagalong trailer on public roads). You might be surprised how it
feels each time your tow vehicle turns or stops suddenly.
Know how to back up.
Backing isn’t so hard once you know the secret. Put both hands on the bottom of the steering wheel. To make the back of the trailer to go to the left, turn your hands to the left (which moves the steering wheel to the right). To make the back of the trailer to go to the right, turn your hands to the right. Note that a longer trailer is a bit easier to back up than a shorter one, and a tagalong trailer with a long tongue is easier to back up than a trailer with a short tongue.
PHOTO BY HEIDI MELOCCO
PHOTO BY HEIDI MELOCCO

Drive at least 5 miles per hour under the speed limit to give yourself time to maneuver. Don’t let other drivers push you to drive faster.
Know that loaded horse trailers are heavy. The extra weight strains your tow vehicle, increases stopping distances, and slows acceleration. These problems are emphasized when you’re close to your maximum towing capacity, so take great care when driving. Allow plenty of room between you and the vehicle in front of you. Don’t dart into traffic. Change lanes gradually.
Be a considerate driver. Considerate driving positively affects your horse’s attitude about riding in the trailer, which can ease trailer-loading. Considerate driving will also help your horse feel more refreshed when you reach your destination, as balancing takes energy, and strains his muscles and tendons. Stop and accelerate slowly to give your horse time to prepare. Travel carefully over bumpy roads.
Go slow. Drive at least 5 miles per hour under the speed limit to give you time to maneuver. (Note that some states have a separate speed limit for vehicles hauling trailers.) Don’t let other drivers push you to drive faster.

Considerate driving positively affects your horse’s attitude about riding in the trailer, which can ease trailer-loading.
Turn with care. When turning, return to normal speed only after your trailer has cleared the turn and has straightened out, and your horse has regained his balance. If you want your trailer to move sharply, turn the steering wheel before you move your tow vehicle. If you want to turn more gradually, turn the steering wheel as your vehicle is moving. A shorter trailer jackknifes more easily than a longer trailer.
Use low gear. Use a lower gear to travel up or down steep hills. If you’re on a downhill grade and feel your trailer pushing your tow vehicle, apply the hand brake to slow your trailer. On long uphill grades, downshift the transmission, and slow to 45 miles per hour or less to reduce the possibility of overheating your tow vehicle.
Stay in control. Crosswind, drafts from large rigs, an unbalanced trailer load, and incorrect braking on downhill grades can all cause trailer sway (fishtailing). To help prevent loss of control—including a jackknife—keep forward motion and tension on the hitch. Don’t apply the
brakes on your tow vehicle. Instead apply the hand brake on the controller to your trailer in brief spurts. This slows your trailer while keeping your tow vehicle going forward, which should straighten out your rig. You may apply the brakes on your tow vehicle once your trailer is under control.
Park
safely. Avoid parking your rig on a grade, if you can. If you find yourself in a situation where you must park on a grade, minimize the risk of slipping with this technique: Apply the regular brakes. Ask a helper to chock your trailer tires. Release the regular brakes, and allow the chocks to absorb the load. Apply the regular brakes again, apply the parking brake, put the transmission into Park, then release the regular brakes. To get back on the road, leave the transmission in Park, apply the regular brakes, and start the engine. Release the parking brake. Release regular brakes, and drive forward until your trailer is free of the chocks. Apply the regular brakes, and ask your helper remove the chocks.
— Tom Scheve and Neva Kittrell Scheve
PHOTO BY HEIDI MELOCCO
PHOTO BY HEIDI MELOCCO
8 Great Trailering Tips
Use these expert tips to help keep your horse safe and comfortable on the road.
By Rebecca Gimenez Husted, PhD

PHOTO BY HEIDI MELOCCO
Getting ready to travel to equine events and adventures this spring with your horse in tow? Use these expert tips to help keep your horse safe and comfortable on the road.
Tip #1. Clean Your Trailer

Spring is the perfect time to clean your trailer, especially if you’ve let it sit all winter long. To clean the outside of your trailer, you can head to a commercial truck wash. (Tip: Call first to negotiate a price.) Here’s how to clean your trailer’s interior.
Interior Cleaning
mats. Remove the mats, and wash them with soap and water. Hang them up to dry.
Rinse and scrub. Use a hose or a pressure washer to remove the rest of the loose dirt and scruff from the ceiling, walls, floors, ramps, and doors. Then scrub the interior with soapy water and brushes You may wish to follow with a bleach solution to kill any microorganisms. Finish with a final rinse.
Add neutralizer. Add a pH neutralizer or baking soda where the urine usually lands, and allow it to dry. Clean surfaces. Use material-specific cleansers to clean painted surfaces, diamond plate, windows, etc. As you do, watch for hazards, such as rotting wood, jutting obstacles, or sharp metal that you can fix later. After everything is dry, replace the mats.
Lubricate. Lubricate everything made from metal that moves, or opens and closes, such as ramps, hinges, doors, and gates.
Tip #2. Prep for Your Trip
wires, and poor connections. This applies to old and new trailers alike. New trailers aren’t trouble-free; inspect them closely. Have your trailer axles serviced annually or every 6,000 miles, whichever comes first.
Replace your tires. Replace your tow-vehicle and trailer tires every three to five years regardless of mileage. Make sure that tires are rated to support more than the gross weight of the trailer and its contents. Check the air pressure in all tires (tow vehicle, trailer, and spare) at least every 30 days. Purchase a high-quality air pressure gauge, and learn how to operate it.
Check the inside dually tires. If you pull your trailer with a dually truck, check the inside tires for wear. Since these tires are “hidden” behind the outside tires, they’re easy to neglect. Also check the inside tires’ air pressure. Even if an inside tire is completely flat, it’ll be supported by the outside tire, making it appear properly inflated.
Apply reflective material. Apply reflective material to the back of your trailer. If you lose trailer lighting or experience an electrical failure, this material will help other drivers see you as they approach.

Prepare. Unload everything so you can clean your entire trailer. Then sweep out your trailer. With a screwdriver, loosen dried mud, manure, bedding, and other gunk, then vacuum it all out. Wash the

Once your trailer is clean, follow these guidelines to prepare for your trip.
Maintain your vehicle and trailer. Perform regular maintenance on your tow vehicle and trailer. Have your trailer wiring inspected for uninsulated, loose, and/or exposed
Draw up a power-of-attorney document. In conjunction with the ICE program, initiate a power-of-attorney document with a trusted friend or relative. If you become incapacitated, this will provide for your horse’s emergency medical treatment. Also, prepare the corresponding Notice to Emergency Responders document. Keep copies of both documents in glove box of your tow vehicle. Hitch up safely. Improper hitching is a common cause of trailer accidents. Use a hitch that’s the correct type, size, and rating to match the coupler. Make sure the hitch is properly in-
PHOTO BY REBECCA GIMENEZ HUSTED
PHOTO BY REBECCA GIMENEZ HUSTED
PHOTO COURTESY CAUTION HORSES SAFETY PRODUCTS

stalled onto your towing vehicle. Securely fasten the safety chains and breakaway switch actuating chain. Balance your load. An unbalanced load can cause a trailer to overturn in an accident. When loading your trailer, load the heaviest cargo on the left. If you’re loading only one horse, load him on the left side of the trailer. After loading, secure trailer doors and hatches.
Carry a first-aid kit. Carry a current veterinarian-approved first aid kit. (For first-aid-kit recommendations from USRider, click here.
Tip #3. Apply Equine Protective Gear

Equine protective gear includes head bumpers, travel sheets, fly masks, and tail wraps. One of the most important pieces of gear is lower-leg protection. I highly recommend leg protection every time you trailer your horse. Shipping boots and leg wraps help
protect your horse’s lower legs as he gets in and out of the trailer, if he falls or is kicked by another horse en route, and even in an accident. Shipping boots (shown) run from knee to ground. With their hook-andloop fasteners, they’re easy to apply and remove. Leg wraps are elastic wraps/bandages you carefully wrap around your horse’s lower legs; these take longer to apply and require skilled application to avoid placing too much pressure on your horse’s tendons. You’ll also need to make sure you don’t leave the wraps on for extended periods of time.
Tip #4. Decide Whether to Tie Your Horse

Should you tie your horse in the trailer? Here are trailer-tying pros and cons, plus safety tips.
Trailer-tying pros: Tying a horse in the trailer is supposed to help prevent him from hurting himself, turning around, and biting or disturbing a neighboring horse. A loose horse can
hurt another one that can’t defend himself and can cause a wreck as the injured horse seeks to escape from the attack. Tying a horse also prevents him from lying down, crawling under a divider, and/or from putting his head down under a barrier, then panicking when he raises his head. Tying also controls the head of fractious or aggressive horses.
Trailer-tying cons: The biggest trailer-tying con is that a horse can catch a foot or a trailer part in the tie rope, then panic and injure himself. You can tie a horse tightly enough to prevent him from catching a foot (and annoying his traveling buddy), yet still give him enough slack to balance himself. Another con is the one described earlier—a tied horse may injure himself pulling back to try to escape through an open trailer door. It’s extremely important to untie a horse before unsnapping the butt bar and opening the trailer door.
Tip #5. Calm a Restless Traveler

In the trailer, does your horse scramble, kick at the trailer wall, and/or shake/sweat nervously? Here’s how to calm him.
PHOTO BY HEIDI MELOCCO
PHOTO BY HEIDI MELOCCO
PHOTO BY HEIDI MELOCCO
PHOTO BY CLIXPHOTO.COM
Check trailer size. The trailer may be too small for your scrambling horse (length, height, width, or all three). Most scramblers I’ve met calm down in a larger trailer. Consider box-stall-size transport, where your horse can choose his orientation and comfort zone.
Enhance comfort. Relentless kicking at the trailer stall when your rig is in motion isn’t just a bad habit. Your horse is terrified about trailering or has some other hidden reason why he’s so upset. A horse that reacts in this manner should be transported in a larger trailer until he learns that transport isn’t something to become upset about.
Retrain your horse. Nervous shaking/sweating inside the trailer indicates that your horse is fearful. During his early training, he might’ve been forced into a trailer instead of trained to enter it. Regress his training until he’s more comfortable about the concept of willingly going into a dark, tight space. Retrain your horse to load quietly and calmly using the kind, natural-horsemanship method of your choosing.
Check the other horse. Your scrambling horse’s trailer mate could be picking on him.
Provide good bedding. Offer your restless traveler good footing to help prevent a fall. Tight-fitting rubber mats absorb shock, but can be slick, so cover them with shavings. Shavings also help trap slick urine and manure. Choose high-quality, dustfree shavings, so your horse doesn’t inhale small particles of dust, which can lead to lung problems. Provide hay. Let your horse eat hay to keep him busy and calm in transit. Anytime you can keep your horse’s jaws moving, he’ll usually be calmer. Make sure it’s a type of hay he likes, so you know he’ll eat.
Tip #6. Get Out of Tight Parking Spots

You’re comfortable hauling your horse on the road, but when it comes to parking, you’re sometimes a little unsure of the best course of action. You’re not alone! Here are my top tight-spot parking techniques. Practice at home. The best way to gracefully ease out of a tight spot is to improve your rig-driving skills at home. With an empty trailer, practice driving through obstacles, turning, and backing. On the road with your horse, follow these tips.
Drive with a buddy. If you can, find a travel buddy who can jump out and help you maneuver.
Ask for help. If you’re driving alone, don’t be afraid to ask someone to guide you from outside the vehicle. Relax. In a sticky situation, relax. Breathe. Know that you’ll figure out a way to get back on the open road. Develop a strategy. Take time to figure out what you’ll do and how you’ll do it. Jump out of your truck, if necessary.
Ignore others. Ignore others who might be watching you—this isn’t a performance. Focus on ensuring that that your horse is comfortable during the maneuver and that you’re safe. Make small corrections. Go slow, and make several, short forward-and-reverse maneuvers. In this way, you’ll eventually get into the

clear. Don’t go too far into a tight spot in an attempt to create a way out, or you might be forced to wait until cars move or barriers are taken down to get free. Check clearance. In drive-through fast-food outlets, make sure there’s enough clearance. Look for overhead obstacles and verifying your height before you drive through a parking lot.
Tip #7. Safely Respond to a Blowout

Tire blowouts are the most common travel emergency. If you experience trailer-tire trouble, here are vital steps to take, whether you change your tire yourself or call USRider emergency roadside assistance.
Pay attention. Signs of tire trouble include loud banging sounds, bumping, jerking, scraping, or grinding. Pull over safely. As soon as you have a tire problem, pull to a safe area well off the road. Driving on a compromised tire can destroy it. However, if you need to for safety’s sake, you may continue to drive slowly to get to a safe place. Tires can be replaced; your life cannot. If you can, find shade and
PHOTO BY REBECCA GIMENEZ HUSTED
PHOTO BY KENT AND CHARLENE KRONE
PHOTO BY HEIDI MELOCCO


flat pavement. Set up reflective devices. Set up cones, triangles, and flares to increase visibility.
Assess the damage. Check the affected tire, and decide whether you have the tools and skills to fix or replace it. To check wiring destruction and brake lines, look for oily fluid on the road next to the tire and wires hanging from the underside. Other signs are locked-up brakes and if the trailer sensor in your truck says the brakes are disconnected.
Call for emergency roadside assistance. If you find complications, such as multiple blowouts, or destruction of wiring or brake lines—and/or if you don’t have the proper tools or knowledge to safely get back on the road, call USRider for emergency roadside assistance.
Tip #8. Know Proper Accident Response


Do you know what to do in the event of a trailering emergency? Here are my top emergency-response guidelines.
Pull over safely. If your vehicle becomes disabled, continue driving until you can pull over to a safe area, if at all possible. Do this even if you have a flat tire and it means destroying a wheel. Stopping on the shoulder is extremely dangerous, particularly
on an interstate highway. When safe, pull onto the road’s shoulder as much as possible, away from the white line. Stay out of the trailer. In large animal emergency rescue training, I emphasize to emergency responders that no one should be allowed inside a horse trailer for any reason, especially one flipped on its side or roof with terrified, injured animals inside. This includes owners, bystanders, and veterinarians who may wish to go into that confined space to save the horses. Stay calm, and wait for trained emergency responders to arrive at the scene. They’ll perform an external rescue using tools to extricate the animals.
Leave your horse in the trailer.
Note that most horses survive trailer wrecks amazingly well if they stay inside the trailer and avoid being ejected. They tend to injure themselves attempting to stand up, which is why I recommend using a breakaway tie strap.
Call for help. Your job is to first call 911, and then USRider for help. Increase your rig’s visibility. Set out cones, triangles, and flares so you are visible to passing motorists. On the side of the road, responders will be more worried about your safety than that of your horse—and for good reason. This is a very dangerous situation to be in as traffic rushes by. USR
Rebecca Gimenez Husted, PhD (animal physiology), is president and a primary instructor for Technical Large Animal Emergency Rescue. A Major in the United States Army Reserve, she’s a decorated Iraq War veteran and a past Logistics Officer for the American Veterinary Medical Association’s Veterinary Medical Assistance Team. She’s an invited lecturer on animal-rescue topics around the world and a noted equine journalist.
PHOTO BY REBECCA GIMENEZ HUSTED


Banish the Balk
When your horse balks, you need a solution that embodies tact and patience to get him going forward again.
By Jody Gilbert with John Lyons

Your horse will encounter things on the trail and at events that make him hesitate, perhaps his own reflection on the water. But if you earn his trust and train him to respond to the go-forward cue, you’ll help him relax.
PHOTO BY ROBERT DAWSON


One of the most unfortunate misconceptions about equine behavior is when we think that if a horse balks, he’s trying to “get away” with something. And more often than not, we impose a little attitude of our own to try to show our horses “who’s boss.” But if we use a punitive, frightening, or coercive method to get a balky horse moving forward, we’re ultimately taking a giant step backward. We’re not building confidence and a willingness to trust us and cooperate with our requests. We’re just upping the ante on our horse’s dread of certain situations and our own reaction to them.
Instead of trying to strong-arm our horses into submission, we need to figure out why they won’t move forward and then deal specifically with the cause.
Diffusing Emotions
Changing our way of thinking and acting is an especially tricky problem because these situations usually involve a good deal of emotion—for both the horse and rider. Your horse may be confused. He may be scared. He may lack confidence in you and feel safer following his own agenda. You may be afraid you’ve lost control, angry that your horse isn’t doing what you ask, or worried that you’re holding up the ride for everyone else. You may even worry about looking stupid.
Riders may express their emotions by escalating their request by kicking harder, spurring, whipping, or slapping the horse with the reins. To compound the problem, a balky horse is often a wreck-in-the-making. Take whatever made him refuse to go forward and add to it an aggressive reaction from the rider, and things start unraveling in a hurry.
If you can move one part of your horse, you have the means of holding his attention and regaining some measure of control. But if a horse is locked up like a statue, poised to buck, bolt, rear, or find some other outlet for his emotions, you could be in big trouble!
Obviously, horses balk for a variety of reasons, and you’ll need to use good judgment to determine what the situation calls for. But you’ll have a much better shot at dealing with the problem if you can isolate the cause and fine-tune your solutions. Not surprisingly, this means doing some foundational work. Let’s look at a few things that will help when you need to get your horse out of neutral.
Cut the Confusion
A lot of times, a balky horse is just a confused horse. You need to teach your horse a specific cue that tells them to speed up their legs—in this case, to go from a standstill to taking a controlled step forward. If you haven’t taught your horse to respond to the speed-up cue, the time will come when he doesn’t want to go, and you’ll have no way to ask him to.
Many riders miscommunicate the request by going overboard. They kick hard, throw themselves forward, or get agitated with the reins. And sometimes, when the horse responds to this request (often with some enthusiasm, matching the rider’s energy), the rider hauls back on the reins, which tells the horse, “NO, don’t speed up when I do that!”
Other riders stop kicking before their horse starts moving, which gives the horse a release even though he hasn’t responded to the request. And still others never give the release: They kick their horse constantly, or randomly, or >>
It’s important to recognize and reward even the smallest forward movement by stopping all cues. When the horse relaxes, ask again. Gentle persistence pays off.
PHOTOS BY ROBERT DAWSON


When John Lyons’ horse, Preacher, comes to a small ravine in the park, he’s uneasy about stepping across it. Here, Lyons shows what happens when a rider gets impatient and applies too much pressure.
to “keep him going.” None of these approaches will teach your horse to go forward calmly and consistently when you ask.
To correctly cue your horse to move forward (or speed up) slightly squeeze or bump with your legs. The idea is to be “a little aggravating,” yet remain well under your horse’s sensitivity radar. All you want is for him to think, “Oomph, that’s unpleasant,” and entertain the “idea” of taking a step—or actually taking a step. That reaction is the building block for the speed-up cue.
If you bump your horse and nothing happens, bump again. Don’t bump harder. Just bump more often—as though you’re going to do it until he moves, or until the end of time, if necessary. This is highly annoying for your horse and, sooner or later, it’s likely he’s going to move forward out of pure aggravation.
to move forward.
As soon as your horse picks up the first foot to begin walking, stop kicking and allow him to walk freely. If he goes into a trot, that’s okay. After 20 or 30 feet, ask him to stop. Let him stand for a moment, and then ask him to go forward again, nudging with your legs.
At this point, your job is to help him figure out the sequence: You kick, he moves forward, you stop kicking. Since that’s your sole focus, try to eliminate other distractions, such as steering, unless it’s necessary for safety.
“ Add challenges gradually, so your horse isn’t so overwhelmed that he can’t do what you ask.”
Most important, the instant you see a positive response—and initially it might be as subtle as a little weight shift forward— stop kicking. If he backs up, don’t stop kicking. If you do, you’ll be developing a back-up cue.
Start-and-Stop
Here’s how a practice session should go. With your horse standing still, sit tall in the saddle and let your legs hang long, feet resting in the stirrups. Begin rhythmically nudging your horse’s sides, kicking lightly with both your legs. Don’t give any other body or voice cues to tell your horse
Helping your horse see the pattern requires repetition, so put in a lot of time practicing the start-andstop exercise. When your horse consistently moves forward when you nudge him, you can work on the same exercise in a more exciting or unfamiliar situation. For example, you might ask him to go forward between two trees, do simple start-and-stops at the scary end of the arena, or practice the routine with other horses working nearby.
Never work on the start cue unless you have a reasonable chance of getting the right response. Add challenges gradually, so your horse isn’t so overwhelmed that he can’t do what you ask. You want him to be so confident and well-schooled in responding to the cue that he’ll move forward even if he’d much rather stay put. But you need a thousand tiny successes to get there.
As you work on the speed-up cue with your horse, you should also work on your own habits. Be hyper-aware of >>
PHOTOS BY BETSY LYNCH

When Lyons uses a patient approach, giving Preacher time to think and respond, the horse steps quietly forward.
what you’re doing with your legs. Train yourself not to kick unless you’re specifically cueing your horse to move forward. If you kick him to keep him going, for instance, the cue will become ineffective as a signal to speed up. Your horse will no longer recognize that clear connection between speeding up and having the kicking stop.
The Hips-Over Cue
There are times when kicking your horse to get him moving is a bad idea. For instance, if he’s frozen in place because he’s facing something scary, kicking him may launch him into motion—not a controlled step, but a panicky escape, possibly a fast and dangerous backward retreat. The best way to handle that type of situation is to use a hips-over rein cue.
Just take the slack out of one rein and put light tension on it until your horse takes a big step to the side with his hindquarters. At first, he’ll only turn his head to the side. But as you continue to hold pressure on the rein, he’ll eventually step under himself and turn roughly 90 degrees. As soon as he does, release the tension from the rein to reward him. At that point, you can decide whether he’s ready to respond quietly to a go-forward nudge or whether you need more hips-over steps first.
Going Forward
You aren’t going to drive your horse relentlessly toward the object, but you will be asking him to go forward. As a matter of fact, what you’re really teaching him here is to be able to respond to your cues even though he’s scared. When he sees that nothing bad happens as a result of trusting you, it will get easier and easier for him to do

what you ask when things are stressful for him.
One good starting place for obstacle training is to have him walk across a tarp. Warm up in the arena, practicing some of the exercises he does well to help bolster his self-confidence and get him focused on you. Now, get off your horse and spread a tarp out on the ground. Then, place a white towel on the tarp where you’ll ask him to walk across. Get back on and resume riding. This will be a good test of how well your horse responds to your cues when he’s distracted.
Go back to what you were working on before you put down the tarp. Don’t ask him to go near the tarp; just make everything business as usual. Tarp, what tarp?
When you can ride around the arena and the tarp isn’t a major distraction anymore, direct your horse toward it. If you have an exceptional horse, he may simply walk across it like it wasn’t there. If that happens, pet him and keep walking.
More than likely, however, your horse will stop on the approach to the tarp. When he does, just pet him and let him stand. He’s telling you that’s as close to the tarp as he can get and still feel safe. Your objective is to keep him calm, so this is a good place to hang out at first. If he isn’t calm 20 feet from the tarp, he sure won’t be calm 2 feet from it.
As you stand there, focus on the towel—the spot where you want to cross. The more specific you are, the better the lesson will go. When you feel your horse is relaxed enough to respond correctly to the speed-up cue, go ahead and ask him to move forward. As soon as he does, stop kicking and pet him. It doesn’t matter if he takes one tiny step or 10; let him know he did the right thing.
PHOTOS BY BETSY LYNCH


The most effective way to break a stalemate is to apply pressure to one rein and to ask your horse to step over with his hips.
Lyons lightly bumps with his calves to encourage forward movement, but notice he’s not using his spurs. Pain has no place in unlocking a balky horse; gentle nagging does.
Your horse will probably move sideways at this stage. Keep his nose pointed toward the towel and let him keep moving. When he stops, he’s likely to be farther from the tarp than when he stopped the first time. That’s okay. Again, pet him and let him stand. Keep his nose pointed toward the towel and wait until you feel him relax before giving him the speed-up cue again. This time, he’ll probably walk toward the tarp. But if he doesn’t, just repeat the process of turning his nose to the towel and letting him stop.
Eventually, your horse will go right up to the towel. Let him stand, drop his head, even snort and back up. That’s okay. This is an important moment, so make sure you don’t kick him. If you do, he’ll raise his head and back up quickly, getting upset in the process. You’ll have lost some ground and the next approach will be more difficult.
Your only reaction should be to give him lots of slack in the reins so he can drop his head. Pet him when you think he’s thinking about crossing. Pawing the tarp is one sign he’s considering going across.
If your horse has backed up, let him relax when he stops. When you think he’s calm enough to move forward, give him the speed-up cue, resuming the lesson as you did before. You may need to repeat this step several times, as his relaxation increases. Finally, he’ll step onto the tarp.

Once your horse is moving forward, make sure you’re no longer applying pressure with your legs or the go-forward request will lose its meaning.
Once your horse is on the tarp, he might get scared. Your job is to simply let him get himself across. If you interfere—tense up, kick, tighten the reins—you’ll scare him even more. If he goes sideways or hops off the tarp instead of walking across, that’s okay. Just stay relaxed and try again. When you’ve gotten him comfortable crossing the towel a few times, you can try approaching from different angles and crossing in other spots.
After you’ve mastered the tarp lesson, you can introduce him to additional objects. Poles, logs of various sizes, heavy rubber mats and thick plywood are all good training objects. Just make sure that the items you choose are completely safe. USR

PHOTO BY BETSY LYNCH
PHOTO BY ROBERT DAWSON
PHOTO BY BETSY LYNCH
When AAA says no,
USRider’s roadside assistance program provies 24/7 roadside assistance for any vehicle our members are traveling in, including tow vehicles and trailers carrying horses. If the unexpected happens, our members know they can call us anytime, day or night.
*Applies to passenger vehicles or light-duty trucks maximum GVWR 14,000 lbs.
LOCKOUT
BATTERY ASSISTANCE
ROADSIDE SERVICE: FLAT TIRE ASSISTANCE, JUMPSTARTS, FUEL DELIVERY
HORSE TRAILER SERVICE & TOWING
EMERGENCY STABLING, VETERINARY & FARRIER REFERRALS
WINCH-OUT
COVERAGE ON DUAL-WHEELED VEHICLES
$5,000 THEFT REWARD FOR TOW VEHICLE & TRAILER
WINNER’S CIRCLE ADVANTAGE DISCOUNTS ONE FREE ASSOCIATE
EMERGENCY DISABLEMENT EXPENSE REIMBURSEMENT
24-HOUR CONCIERGE SERVICE


6 Ways to Detect Lameness

When it comes to lameness, a prognosis for a full and speedy recovery often corresponds with diagnosing problems as soon as possible, so the ability to spot problems early on is crucial.
Use these six vet-tested ways to detect lameness in your horse at home and on the road.
By Eleanor M. Kellon, VMD
Photos by Heidi Melocco
Lameness can be definitively diagnosed only by your veterinarian, but the detective work of the diagnosis is best performed as a team. A prognosis for a full and speedy recovery often corresponds with diagnosing problems as soon as possible, so the ability to spot problems early on is crucial. Here, I’ll give you six ways to detect lameness at home and on the road: (1) Look for nonspecific signs (physical and attitudinal changes); (2) look at the whole horse; (3) watch your horse move; (4) listen to your horse’s footfalls; (5) feel for under-saddle clues; (6) observe your horse’s feet. You can use these techniques both at home and on the road.
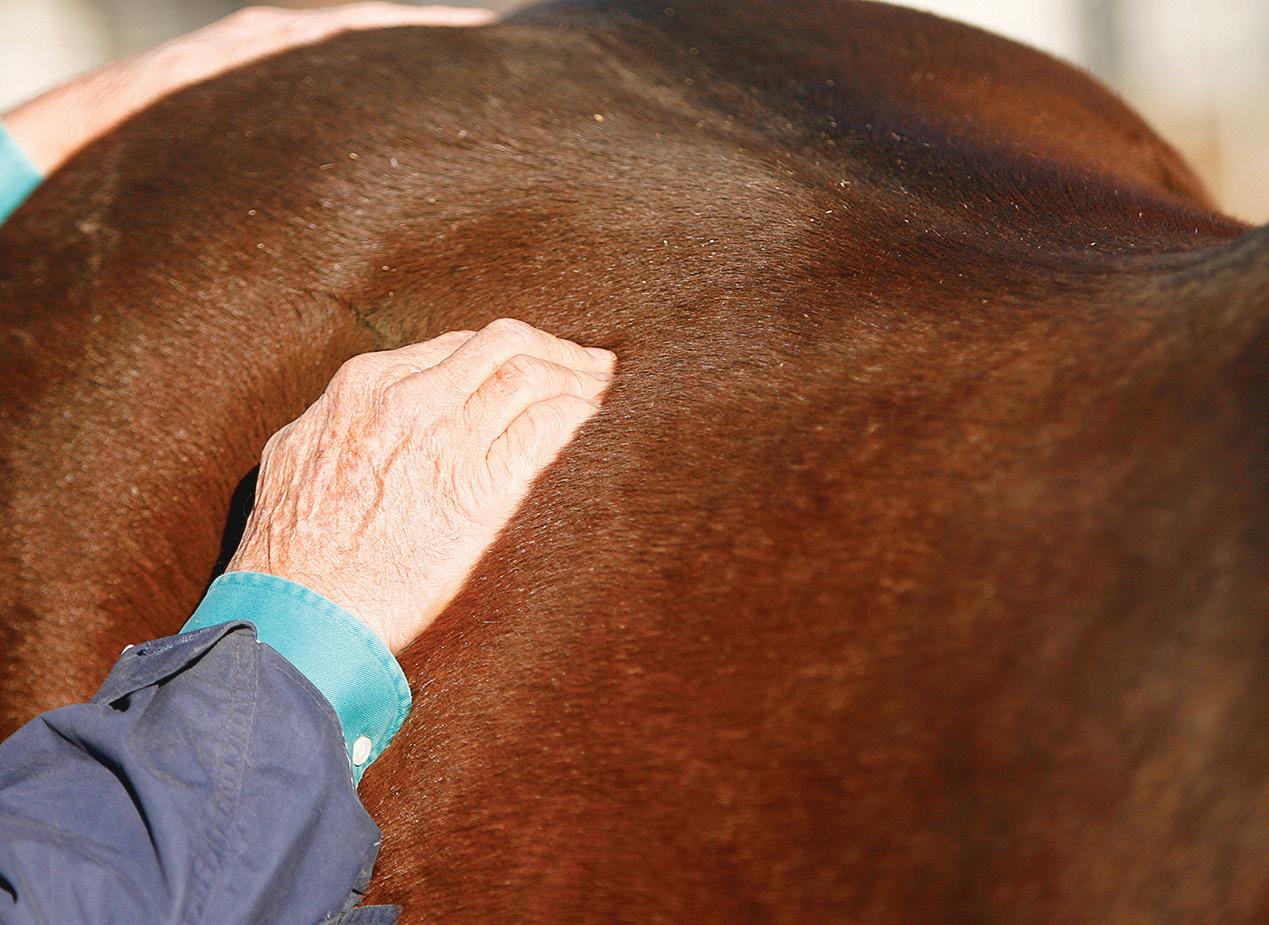
When you groom your horse, watch his back—especially his lumbar area as shown here—for skin flickers or muscle flinches. These may indicate back pain of some type, which could translate to lameness.
1. Look for Nonspecific Signs
Nonspecific signs don’t tell you what’s wrong with your horse, or even if it’s a lameness issue. They do tell you that it’s time to take action to figure things out. These nonspecific signs include: Personality changes. When something bothers your horse, his behavior may change. You may see grumpiness or irritability, a more subdued or withdrawn temperament, and even aggression. Any horse can have a bad day, but if these personality changes persist, take steps to figure out what’s bothering him.

Feel for tension or rigidity in your horse’s neck muscles. Neck pain can easily cause him to travel differently.
your horse is experiencing foot pain, you’ll see him perhaps spend more
"Lameness can be definitively diagnosed only by your veterinarian, but the detective work of the diagnosis is best performed as a team."
or pulse. If your horse sweats more than normal for the weather and level of work, suspect pain as the cause. He may also be breathing harder and have a higher pulse.
Passing more manure or urine than normal. This can be a sign of stress and pain. Horses with back pain or muscular hind end pain may want to defecate or urinate more frequently than normal under saddle.
Decreased play and/or movement. Showing resistance or reluctance to move as usual is your horse’s way of telling you something’s wrong. Isolation from the other horses. If you notice your horse hanging off alone rather than with the rest of the herd, try to figure out what’s going on. Bring him in from the group for further checking.
More or less lying-down time. If
time off his feet and lying down. If the painful area is under more stress when he has to get up, then you may notice him not lying down as much. Change in appetite. Nagging pain may make your horse less enthusiastic about eating.
Change in work ethic. Most horses look forward to being exercised. Always take any change in your horse’s attitude about work seriously. They’re not machines and may vary a bit from day to day, but any obvious and persistent change is your horse’s way of telling you something is wrong. Changes in sweating, breathing,
2. Look at the Whole Horse
When you decide something is bothering your horse, take time to look him over closely from head to toe. Observe him at rest in his stall and on turnout. Does he habitually point one front leg forward, or rest one hind leg more than the other? Does he stand with his elbows turned out? Does he stand with his toes or stifles rotated out behind? Does he stand with all four legs squarely perpendicular to the ground?
Starting at your horse’s head and ears, run your hands over his whole >>

3. Watch Your Horse Move
Watch your horse move in a circle, going both directions, first free of tack, then with tack but no rider, and finally tacked up with a rider.
Lameness tends to be exaggerated when a horse is moving in a circle and is easiest to spot at the trot. If the tack itself is bothering your horse, you may be able to see this difference in how nicely he moves with and without tack, especially if you’re careful to tightly cinch the saddle.
Carrying a rider’s weight can worsen a horse’s lameness for several reasons: a saddle-fit problem may be made worse; more weight is put on the horse’s front legs; the hind end has to work harder to move weight forward; it’s difficult for the horse to make subtle changes in how he carries his weight.
First, observe your horse at the walk. Does he look relaxed? Is he swinging freely through his back, shoulders, and haunches, and is he taking smooth, generous strides? Are his head and neck moving in rhythm with the walk? Are his ears pricked? Does he bend smoothly on the circle in both directions? Does he move the same in both directions? Observe the same things at the trot in both directions.
body and down each leg. When you run your hands over certain areas, note if he shrinks away, flicks his skin, pins his ears, kicks, etc. Check for any obvious swelling or heat. Observe your horse from the front, sides, and back when someone is at his head and he’s standing squarely. Look for any differences in how well your horse is muscled from side to side. You’ll often see smaller, less-welldefined muscles if there’s pain in the associated leg. Localized areas of muscle tension (muscles will feel hard) are also commonly found when a horse is hurting somewhere.
Check your horse’s feet. When there are longstanding painful conditions in a front leg, the hoof on the painful side will often be smaller than the opposite front. When painful conditions involve the front or back legs, you may see shoes/hoof walls wear more quickly on the comfortable side than the sore one, and wear patterns may be different.
Then tack up your horse, and note any differences with and without a rider. Horses that move in a stiff, wooden way are uncomfortable somewhere. After observing your horse move on a circle, watch him from directly in front, directly behind, and from the side at both the walk and trot. Watch him on both a soft and a hard surface. From the front, check to see if he has normal head movements and if he’s landing evenly with his feet. Is he flexing his knees as high on both sides? Is he dragging a toe or stumbling?
From behind, watch your horse’s rump to see if it rises and falls equally from left to right. Check to see if his back legs move forward in a straight line, swing in before the foot lands, or swing outward before landing. Does the hock flex smoothly or with an obvious “wobble”?
Watch from both sides. Does your horse bring his hind legs forward so the hooves land in (or even beyond) the print of his front hooves? If not, he’s short striding behind. If only one leg is doing this, that’s usually the painful one. If both legs are doing it, then he may be painful in both hind legs, or his pelvis, rump, or back.
Does your horse flex all joints evenly? Watch his fetlocks when each foot contacts the ground. Are they dropping the same amount on both sides? If not, he’s not carrying his weight evenly from side to side. The fetlock that drops the most is taking more of the weight.
Your veterinarian will likely palpate the muscles, tendons, and ligaments in your horses legs to check for heat and/or pain.

Lameness can be definitively diagnosed only by your veterinarian, but the detective work of the diagnosis is best performed as a team. Your vet will likely use flexion tests to check for joint pain in your horse.
Compare the diagonal legs. A horse with a problem will often distribute more weight to the diagonal front or back leg. For example, a horse with pain in the left front may drop his ankle more in the right front and the right hind.
4. Listen to Your Horse’s Footfalls
Learn to “see with your ears.” When moving your horse on a hard surface, you’ll be able to hear subtle differences in how hard he’s landing. Close your eyes, and concentrate on listening to the sound of his feet striking the ground. Each footfall should be as loud as the others, and you should hear an even rhythm.
You can hear many changes long before they can be seen. A softer sound will be heard when your horse isn’t putting full weight on a leg, and the sound that follows will often be louder. If the rhythm—that is, the interval between footfalls—has a “skip” in it, with a loud ground contact following quickly after a softer sounding one,
that’s your horse hopping off a sore leg more quickly and shifting weight to another leg.
5. Feel for Under-Saddle Clues
You can pick up important lameness clues when you’re in the saddle. Do you feel a relaxed sway at the walk or does your horse’s back feel rigid? If rigid, there’s pain somewhere. When you post the trot, does your horse throw you evenly on both diagonals? If not, the side with the weak thrust may be hurting. Does he take both canter leads evenly? If he’s resisting a lead, suspect the hind leg on that side. Reluctance to turn to either direction suggests pain in a leg to the inside of that turn.
6. Observe Your Horse’s Feet
Watch how your horse stands and whether he habitually points a front foot. Also watch for frequent weight-shifting up front. Look at the feet themselves. When one foot hurts more than the other, it’ll often be smaller. It’s also often more prone to thrush because the horse will try to avoid putting full weight on that foot. Bearing full weight on a foot forces manure and bedding out of the foot, keeping it cleaner. A narrower heel and frog are other signs of decreased weight bearing.
The back of the pastern should be smooth and tight, not puffy. Filling or edema can be caused either by inflammation in the foot or problems with the deep flexor tendon or the ligaments that insert on the back of the pastern.
Look for both diffuse swelling and defined pockets of swelling or fluid as you travel up each leg. Also pay attention to any areas that feel warmer than the rest of the leg and warmer than the same area on the opposite leg.
When you pick up your horse’s legs for routine tasks, such as cleaning hooves, pay attention to whether he objects to lifting a particular leg for you. How well your horse stands for the farrier is an even better test of the same thing. When a horse doesn’t want to pick up a leg, it’s often because either the opposite one hurts to stand on, or the one you’re asking for hurts when you flex a joint. USR
Eleanor M. Kellon, VMD,, is a staff veterinarian for Uckele Health and Nutrition, Inc., and is the owner of Equine Nutritional Solutions, a nutritional consulting firm. Dr. Kellon completed her internship and residency in Large Animal Medicine and Surgery at the renowned University of Pennsylvania New Bolton Center. She’s the author of Horse Journal Guide to Equine Supplements and Nutraceuticals.
Capture the Moment

Sharpen your digi-pix skills with this guide from a top professional equine photographer.
Story and Photos by Heidi Melocco
As an equine photographer, you have unique opportunities to show dramatic action and scenery. Rather than centering all your subjects, add extra sky to show the scope and seclusion of the scene.
Do you enjoy taking photos of horses? If so, you need to know the ins and outs of digital photography. With digi-pix, not only do you need to master photo-shooting basics, but also technical specifications for optimal results. Here, we’ll first explain megapixels. Then we’ll tell you how to sharpen your shooting skills, and size photos for print and online use.
Consider Megapixels
Choose a camera with as many megapixels as you can afford. A
camera’s megapixel designation tells you how many little dots make up the digital photos you take. Think of megapixels as grains of sand. The more grains of sand, the more precise and detailed an image you could create. One megapixel means that your camera is collecting one million pixels.
When the transition from film to digital cameras first began, rumors told that 35mm film was equivalent to 14 megapixels—or 14 million pixels. That’s what you were used to seeing with sharp-grained, high-quality film that could be
used to make prints up to 16-by-20 inches without too much distortion.
That general rule will help you understand why you’ll want a camera that’s at least 8 megapixels— and probably more if you want to print and publish your pictures. Also, choose the highest image quality setting on your camera. If you choose a low-image quality, you may save space on your camera’s memory card, but you’ll lose resolution. In essence, you’ll store only part of the colors and details your camera actually saw.
Sharpen Shooting Skills
Tip #1: Find the light. If you’re in a half-shaded setting, move your horse-and-rider subject either fully in the light or fully in the shade. Your camera’s automatic settings will work best in consistent lighting.
Tip #2: Choose your settings. In low light, set your camera’s ISO setting to 400 speed to help stop the action and get a good exposure. If you shoot in the automatic setting in low-light conditions, your photos will show motion blur.
Tip #3: Watch the flash. If you must shoot in the shade, your flash will help even out the lighting and bust through speckled shadows. Know how to turn your camera’s flash on and off. If you use the camera’s automatic setting, it may fail to fire due to ambient light.
Tip #4: Be creative. Look for interesting angles and close up opportunities. Shoot through a tree to show the depth of the scene, include more sky than usual to show the view and the area’s seclusion.
Tip #5: Capture the bond. If a horse buddy has asked you to take portraits, try to capture the bond she has with her horse.
Tip #6: Pan with the action. As your subjects ride by, pan your camera to follow their moves. Keeping the camera focused on your subjects will help the camera continually focus and will help you hit the shutter release at just the right moment.
Tip #7: Take two, three, or four. Always take an extra shot of the same scene, even if you think you have the perfect picture. When you’re photographing horses, small movements, such as tail swishes and ear twitches, may make or break the photo you want.
Size It Right
Upload your photos immediately to save space on your memory card. Make appropriate files, and stay on top of organizing the images. Save two copies of your photos—one storage file is like your original negative. You’ll never edit photos from that file to ensure you’ll always have a high-quality image.
• Print prep. For print, each image needs to be 300 DPI (dots per inch), in the size it’ll appear in print. If you have an 8 megapixel camera, its pictures will print well at about 8-by-12 inches. That means the photo has 300 DPI when sized 8-by-12-inches for print. Your photo-editing software will likely do the math for you. If you type in 300 DPI, your software will tell you what pixel and print height correlate. You may even have an option that asks you if you want to save the image for print or web; if so, the program will take care of the rest.
• Web prep. For the web, you’ll aim for 72 DPI. At this resolution, photos are easy to e-mail and access via the Internet. The photos will look great on your computer and website, but won’t print well. USR
Heidi Melocco is a lifelong horsewoman and an award-winning equine photographer based in Mead, Colorado.


Wild Lands, Wild Horses
Ride and camp in Bighorn Canyon National Recreation Area’s 120,000 acres of forests, mountains, valleys, prairies, canyons, lakes, and wetlands.
By Kent and Charlene Krone

Bighorn National Recreation Area encompasses the Pryor Mountain National Wild Horse Range, where you can catch glimpses of the famous wild mustang herd that roams there.
PHOTO COURTESY OF THE NATIONAL PARK SERVICE
If you’re looking for an adventure off the beaten path, hitch up and head to Bighorn Canyon National Recreation Area, which straddles the border between southern Montana and northern Wyoming. The area is bordered by the Pryor Mountains to the west and the Bighorn Mountains to the east, and encompasses the Pryor Mountain National Wild Horse Range.
Here, you’ll ride and camp in 120,000 acres of forests, mountains, upland prairies, deep canyons, broad valleys, lakes, and wetlands. Wildlife includes bighorn sheep, beaver, mountain lions, coyote, bear, elk, and mule deer. More than 200 species of birds live in the region.
Wild Horse Range
While you’re here, be sure to view the famous wild mustang herd that roams the Pryor Mountain National Wild Horse Range. The Pryor Mountain herd is a genetically unique population. Blood-typing by the University of Kentucky has demonstrated that these horses are closely related to the old type of European Spanish horse. Many herd members have unusual colorings that correspond to their Spanish lineage, such as dun, grulla, blue roan, and sabino. The Pryor Mountain Wild Mustang Center was incorporated in 1998 to preserve the future of the Pryor Mountain herd.
"The common belief is that these horses escaped from local Native American herds and found a safe haven in the Pryor Mountains."
The common belief is that these horses escaped from local Native American herds and found a safe haven in the Pryor Mountains. In 1968, 31,000 acres were set aside as a public range for wild horses. This was the first public wild horse range in the nation.
You might be familiar with Cloud, the pale palomino stallion in the Pryor Mountain herd, who’s been featured in documentaries, books, and calendars. According to the The Cloud Foundation, Cloud was born on May 29, 1995, and disappeared in late 2016; his body has never been found.
The Cloud Foundation is dedicated to preventing >>


The Krones’ rig parked at the corrals at the horse camp at Bighorn Canyon National Recreation Area.
Warning sign on highway in the recreation area to drive carefully in wild horse range.
Charlene Krone looking out at the junction of Layout Creek and Bighorn Canyon on the Layout Creek Trail.
PHOTO BY KENT & CHARLENE KRONE
PHOTO BY KENT & CHARLENE KRONE
PHOTO BY KENT & CHARLENE KRONE


the extinction of Cloud’s herd through education, media events and programming, and public involvement. The foundation is also determined to protect other wild horse herds on public lands, especially isolated herds with unique characteristics and historical significance.
Ewing-Snell Ranch
We accessed the Bighorn Canyon National Recreation Area from Lovell, Wyoming, by driving north on Highway 37 into the recreation area. We continued north on the park road into Montana to our camping spot.
To get there, drive one mile past the turnoff for the Ewing-Snell Ranch, then take the first dirt road on the right. A short distance later, you’ll see a set of corrals. When these corrals aren’t being used by ranchers, they’re available for public use. There’s a large fenced area around the corrals and plenty of room to park your trailer among stubby juniper trees. Water for horses drips into a 20-by-50-foot shallow concrete pond. No potable water is available, so bring your own.
Early in the morning, we’d take our steaming coffee mugs, sit quietly by the pond, and watch a colorful display of bluebirds and yellow warblers, all chitter-chattering, coming to the pond for water and insects. Rabbits also hopped in and out; one morning, we even saw six mule deer.
On our first ride, we rode straight from camp to the Ewing-Snell Ranch and Layout Creek. We rode along the highway, one mile back from the camp, to the turnoff for the Ewing-Snell Ranch. There are a number of buildings and artifacts still here. Erastus Ewing came here in 1896, prospecting and ranching. By 1920, the ranch went to the
Snell family. The Snells lived here until the 1950s.
From the ranch, we continued west, past a staggering old corral, toward the Pryor Mountains. Here, we had a good viewpoint of the Pryors, a forested wall punctuated with gray rock outcroppings and blotches of brown-andred soil. To the east, we could see the Bighorn Mountains towering to 10,000 feet.
We rode back past the ranch, turned right on the highway for a short distance, then turned left, through a gate, to the Layout Creek Trail. This is where the real gem of this ride begins. Ride down a nonmotorized two-track to a fork in the road. Turn right onto a trail. (If you turn left, you’ll end up in a box valley with no easy trail out.)
As we rode along, several wild horses appeared in the distance. We experienced some exciting moments when they ran through a nearby patch of brush and junipers. Cowboy and Nate, our Missouri Fox Trotter geldings, surged at the bit to run wild and free, but their attempt was short-lived, and they soon calmed down.
Be careful camping in wild horse country. Once, our cousin was camping in Montana when a wild stallion came into his camp at night and lured away two of his best mares. It took him two days of riding, following the wild horses, before he was able to get his mares back. Although both of our horses are geldings, we appreciated the high, sturdy corrals and fenced-in area of our camp.
The highlight of the Layout Creek Trail is the canyon view. Layout Creek Canyon comes in on the left. Follow this, and do a clockwise loop with the Bighorn Canyon forming the outside boundary. Gaze down into the canyon’s grandeur—jade-green water hundreds of feet below. A visual feast!
Kent Krone rides Cowboy above the Bighorn Canyon on the Barry’s Island Trail.
Charlene Krone rides Nate above the Bighorn Canyon on the Barry’s Island Trail.
PHOTO BY KENT & CHARLENE KRONE
PHOTO BY KENT & CHARLENE KRONE
Lockhart Ranch
Next, we trailered a few miles north to the Caroline Lockhart Ranch. Caroline Lockhart (1871-1962) was a journalist and author. Through her writings, she exposed political corruption, and abuses of women and children in public institutions.
In 1926, Lockhart purchased a 160-acre homestead near Davis Creek at the foot of the Pryor Mountains. She expanded the property to about 7,000 acres and operated the ranch almost singlehandedly until 1955.

The L-and-heart symbol on the chimney of the main house at Caroline Lockhart Ranch.
We enjoyed checking out the buildings of Lockhart’s well-preserved ranch, which includes a blacksmith shop, stables, bunkhouse, powerhouse, and her ranch house.
The Lockhart symbol, an L and a heart, is cemented in the main house chimney.
A short way past the ranch, we rode through a gate that leads to recreation area land. Here, you may ride cross-country on old trails and even follow a meandering two-track trail toward the Pryor Mountains.
We certainly enjoyed the views of the mountains! To our left, we could see furry brown mountains with random, red patches rubbed raw by the wind. In front of us stretched a long ridge. Green junipers flourished near the bottom of the ridge; in the middle was a choker chain of pearl-gray boulders and on top, rocks resembling sharks’ teeth.
The Barry’s Island Trail
Under a mantle of bright-blue sky, we loaded Nate and Cowboy into the trailer, and set off for Barry’s Landing, the starting point for our next trail ride. Barry’s Landing is a spacious parking area with vault toilets and, surprisingly, bear-proof trash cans.
The Barry’s Island Trail leads north from the Barry’s Landing parking lot. The first half-mile is a two-track road, but this is soon replaced by a trail with gorgeous views. A shoreline of ruby-red mountains embraced sapphire water. Emerald shards of juniper bushes were splashed over the mountains.
When we approached a trail junction, we turned right, which took us around the gentle mountain peninsula. This is a very easy trail, so it was fun to relax, enjoy the lake view, and watch for wildlife. USR
Seasoned equestrian travelers Kent and Charlene Krone combine their interest in photojournalism with a passion for horses. They enjoy sharing their horseback adventures and equestrian-travel tips with fellow enthusiasts.


PHOTO BY KENT & CHARLENE KRONE
Port in a Storm
This caring dad felt fortunate to have a USRider membership when his tow vehicle broke down in a driving rainstorm.
By Bill Janssen

USRider Member Bill Janssen says he wasn’t carrying reflective triangles on the rainy afternoon his truck broke down, but he wishes he had.

USRider Member Bill Janssen was hauling his daughter’s beloved mare, Gussie, when his truck broke down in a rainstorm yards from a multiple-vehicle accident. (Shown is Janssen’s daughter and Gussie.)
Since my wife and I live in Tampa, Florida, and our daughter attends school in Virginia, I find myself traveling to Virginia to either deliver our daughter, and her beloved mare, Gussie, to school, or bringing them home. It was during one of those trips that I felt very fortunate for my USRider membership.
Heavy Rainfall
As I was returning home on a Friday afternoon, around 3:40 p.m., I was traveling south on I-95 just north of Ridgeland in South Carolina. Quite suddenly, my Ford F-250 truck inexplicably lost all power. I was towing a two-horse bumper-pull trailer with Gussie aboard.
Luckily, I was able to coast to the edge of the pavement on the right shoulder of the highway. The traffic was very heavy, and visibility was extremely limited by heavy rainfall.
The situation was made more precarious because a multiple-vehicle accident that had occurred shortly prior to our breakdown was on the left shoulder barely 30 yards from where we were stuck. As emergency vehicles arrived in response to the accident, traffic was drifting to the right, toward us, to avoid them.
PHOTO BY BILL JANSSEN

PHOTO BY BILL JANSSEN
“The tow-truck driver drove us 20 miles to a repair facility, where the breakdown was traced to a failed alternator,” says USRider Member Bill Janssen. “The mechanic fixed the truck [shown], and we were back on our way.”
Prompt Help
After finally getting out of the traffic lanes, I immediately called USRider and provided all the details of our situation and our location.
The USRider Member Care Specialist told me that he’d search for assistance and get back to me. In less than five minutes, he called back to let me know that a tow vehicle from Autolta of Ridgeland, South Carolina, was being diverted from a different call to our location, primarily because of the precariousness of our situation.
I was told the tow vehicle would arrive in 45 minutes to an hour. A few minutes later, the dispatcher at Autolta called to reiterate the scheduling.
The tow vehicle from Autolta arrived at approximately 4:25 p.m., earlier than expected. The driver immediately moved my rig off the pavement to get us into a safer location, farther from traffic.
The driver then placed my disabled Ford F-250 onto his flatbed and hooked up my trailer to tow. I asked him to take us to the closest Ford dealer, but he assured me that he knew a repair facility where we stood a better chance of getting a repair that late on a Friday afternoon.
Since it appeared we might be delayed overnight, I made another call to USRider to find out where Gussie could stay overnight. Another Member Care Specialist was able to provide me with contact information for three barns in the area that could board Gussie, if needed. A value can’t be placed on the peace of mind this simple act provided.
failed alternator. The mechanic fixed the truck, and we were back on our way by 7:25 p.m.
‘Many Heroes’
This misadventure starred many heroes. First, the folks at USRider were fantastic. David, the Member Care Specialist, answered the call with a reassuring, “Are you and your horses okay?” He immediately grasped the potential danger of our situation and was able to convey the urgency to the towing service.
There are neither enough words nor sufficient positive adjectives in the English language to express how great a service USRider provides.

“The technicians at the service facility were truly the epitome of Southern hospitality,” says Janssen. “One of the mechanics even dashed to a nearby grocery store to get my daughter’s mare, Gussie, some carrots.”
Second, the towing service was amazing. Company personnel voluntarily rearranged their schedule, because our situation was correctly perceived as being the most dangerous. Moreover, their follow-up— giving us an update regarding when the tow vehicle would arrive and recommending a service facility—was helpful, to say the least.
The ultimate gesture of kindness was when the towing-service dispatcher, after finishing her shift, drove more than 20 miles to the repair shop to make sure we were being taken care of and, most importantly, that Gussie was okay.
The technicians at the service facility were truly the epitome of Southern hospitality. One of the mechanics even dashed to a nearby grocery store to get Gussie some carrots.
“There are neither enough words nor sufficient positive adjectives in the English language to express how great a service USRider provides.”
In the meantime, the tow truck driver drove us 20 miles to a repair facility, where the breakdown was traced to a
I hope I never again break down with a horse in tow. But if I do, I have tremendous confidence that, with help from USRider, the experience will be as well-handled as this one.
This experience did teach me a lesson. I’d like to convey to fellow horse-haulers the value of carrying reflective triangles in your vehicle. I didn’t have them on that rainy afternoon, but seriously wished that I had. Reflective triangles would’ve provided an extra measure of security from oncoming traffic in the rain. USR

Click & Shop
Horse-Trailer Camera
The Equine Eye Voyager wireless horse-trailer camera is your “eyes and ears” while transporting your horse providing improved safety and peace of mind. The advanced-technology camera delivers live video and audio of your traveling horse right to your cellphone via a custom app (iOS or Android). This gives you sharing capabilities, yet doesn’t use data or require a cellphone signal. Features include night vision, up to eight hours of battery life, and quick installation via a magnetic connection. Equine Eye also offers cameras for stables and paddocks. As a USRider Discount Partner, the company offers Members a 10% discount.

Moisture-Wicking Bandage
Cotton bandages can soak in and hold the very moisture that exacerbates problems caused by wet environments and fungal infection. Silver Whinnys Sox for Horses’ modern alternative are made from breathable poly-yarn with fiber to wick moisture from the legs, while keeping them cool. The yarn is embedded with silver ions that won’t wash out, and inhibit the growth of bacteria, fungi, and mold. Silver Whinnys offer a clean environment around the leg, as well as the benefits of light compression.


Roadside-Visibility Triangles
BriteAngle Flashing LED Triangles protect vehicles and horse trailers in roadside emergencies. The company’s highest priority is preventing the agony of people or equipment of any kind resulting from being hit because of a roadside emergency. BriteAngles warn oncoming traffic to SLOW DOWN and MOVE OVER. As a USRider Discount Partner, the company offers Members an 11% discount when ordering a twopack, plus two free cone-mounting brackets.

Luxurious Equine-Soap Collection
This soap and skin care line from Virtue Soap Company offers a blend of premium ingredients that create a luxurious, velvety lather to gently cleanse your horse’s coat, mane, and tail without stripping natural oils or drying their skin. The handcrafted, vegan, emollient-rich soaps are scented with botanicals and beneficial essential oils. a recyclable scrubbing pouch is included to keep the soap bacteria-free between uses. As a USRider Discount Partner, the company offers Members a 10% discount.


EVERYTHING YOU LOVE ABOUT HORSES ALL IN ONE PLACE


Discover Ride TV, the ultimate equine streaming platform.


Whether you want to watch the biggest events in equestrian sport, bingewatch your favorite series, or learn from top pros, Ride TV makes it easy to watch your favorite videos anywhere, anytime, all in one place.


Start your 7-DAY FREE TRIAL!


Access Discounts: Rental Cars & Trucks
As a Member of USRider, you can enjoy money-saving discounts from our nationally recognized equine-industry partners. You’ll find exclusive deals on items for you and your horse, including trailering products, tack and equipment, apparel, veterinary supplies, equestrian gifts and jewelry, equine publications, services, and more! If you’re a USRider Member, please log in to access exclusive discount codes. Not a Member? Join today! This issue, we spotlight Rental Cars & Trucks. For more information on each of these companies, and for more Members-only discounts, click here.


Alamo Rent A Car --------------------------------------------------------------------
Alamo has a large selection of quality vehicles—economy, compact, midsize, hybrid, full-size, luxury, convertibles, mini-vans, and sport utility vehicles. With Alamo Rent A Car, USRider Members receive unlimited mileage and year-round discounts on already great rates.
Avis Rent A Car System --------------------------------------------------------------
The Avis Rent A Car System is recognized as the industry leader in applying new technologies and services to its 4,750 locations worldwide. USRider Members receive up to 25% discount.
Budget Rent A Car System ----------------------------------------------------------
With its 250-plus airport locations, and more than 540 downtown and suburban locations, Budget Rent-A-Car System is the owner and franchiser of one of the world’s best-known car-rental brands. USRider Members can receive up to 20% discount.
Enterprise Rent-A-Car ---------------------------------------------------------------
Operating the largest rental fleet in North America, Enterprise Rent-A-Car has more than 6,600 neighborhood and 220 airport locations in the United States, Canada, the United Kingdom, Ireland, and Germany. USRider Members can receive a 10% discount at all U.S. Enterprise locations.
Enterprise Truck Rental
-------------------------------------------------------------
You have come to trust Enterprise Rent-A-Car for exceptional customer service. It’s what we’ve been delivering since 1957. Today, we’re bringing that commitment and expertise to pick-up, cargo van, and moving-truck rentals. Ask about our USRider Member discounts.
Hertz
----------------------------------------------------------------------------------
With over 8,100 locations in more than 147 countries, Hertz is the world’s leading vehicle-renting organization. USRider Members can receive special year-round discounts on daily, weekly, weekend, and monthly rentals for business or pleasure when traveling in the United States or worldwide.
National Car Rental ------------------------------------------------------------------
National Car Rental has been a leader in the car rental industry for over 50 years. USRider Members receive unlimited mileage and year-round discounts at the 3,000-plus National locations worldwide.

Fly Predators® are nature’s most powerful fly control solution. By killing flies before they hatch, Fly Predators dramatically reduce your fly problem without the use of harsh chemicals. Backed by decades of research and more than 23,000 reviews, Fly Predators are the fly control solution that really works!


Be Fire Savvy
Are you ready to evacuate your horse in the event of a wildfire? Help keep your horse safe with this checklist.
As we’ve seen with the devastating fires in Southern California last winter, an out-of-control fire can strike any horse property at any time of the year. A wildfire threatening your barn will lead to an evacuation order—and a lifesaving trailer trip for your horse. Here are expert ways to minimize fire risk and to prepare to evacuate, should the worst strike.

Minimize Risk
■ Gather information. Ask your insurer and local fire department personnel to walk through your barn to identify hazards and offer fire-risk-reduction suggestions.
■ Design for fire safety. Design or retrofit your barn with fire safety in mind. Install open ventilation and frost-free hydrants. Create at least 33 yards of defensible space around each structure to allow fire crews to better protect your farm from falling cinders and direct flames. Invest in a fireproof roof, such as steel or tile, rather than one made from shake or composite material.
automated sprinkler. It’s also a depreciable expense.
■ Minimize fire fuel. Store hay and bedding in a separate building, keep your barn clean and cobweb-free, and enforce a strict “no smoking” policy. Spray fire retardant to limit flame spread on existing wood surfaces.
■ Landscape with care. Use xeriscaping (landscaping with drought-tolerant plants) and Firewise plants to reduce flammable vegetation around structures. (For more information, go to the Firewise page of the National Fire Protection Association’s website.) Avoid landscaping with “kindling,” such as combustible mulch. Keep plants away from buildings.
■ Store water. Store enough water to keep all horses hydrated should you lose power.
■ Consider alternate power sources. Consider investing in generators or solar-powered sources to run pumps, appliances, and your sprinkler system in the event of a power loss.
Prepare to Evacuate
■ Plan evacuation transportation. How many trailer spaces do you have available? If you pack that four-horse gooseneck trailer with four horses, where will you put your pets and human family members? Would you have to make two trips to get the other horses in your barn?

Make sure everyone in your horsehold knows the location of barn-fire response equipment, such as emergency phones, hoses, water sources, fire extinguishers, and heavy-duty cutters. A wildfire threatening your barn will lead to an evacuation order—and a lifesaving trailer trip for your horse.
■ Invest in a sprinkler system. Install and maintain an automated sprinkler system. Although the initial cost can be high, note that many insurance companies will cut premiums by as much as 50 percent if you have an
■ Train horses to load. Keep trailering halters handy, and train all horses on your property to load into the trailer, no matter what Practice loading each
horse alone. Practice when it’s hot, when it’s raining, when it’s windy, and at night.
■ Identify short-term boarding. Find an alternate place to board your horse during an evacuation, both in and out of state.
■ Ready your rig. Keep your truck fueled and hitched to your trailer with everything loaded, so you’ll be ready to go within a few minutes of an evacuation warning.
■ Know equipment location. Make sure everyone in your horsehold knows the location of barn-fire response equipment, such as emergency phones, hoses, water sources, fire extinguishers, and heavy-duty cutters.
■ Develop an escape route. Drive through every road in your neighborhood to identify escape routes. Keep in mind that officials may close off roads to enforce the evacuation order. Do you have more than one way to safety? Keep printed maps in every vehicle for reference in an emergency.
■ Decide where to meet. Choose in advance a place where everyone involved in your household and

Drive through every road in your neighborhood to identify escape routes. Keep in mind that officials may close off roads to enforce the evacuation order.
horsehold will meet offsite, if you’re evacuated.
■ Perform practice drills. Post your evacuation plan, and practice it down to every detail. Practice catching all the horses and loading them into the trailer. Haul out a few miles, and return.
— Rebecca Gimenez Husted, PhD
