OU ILT
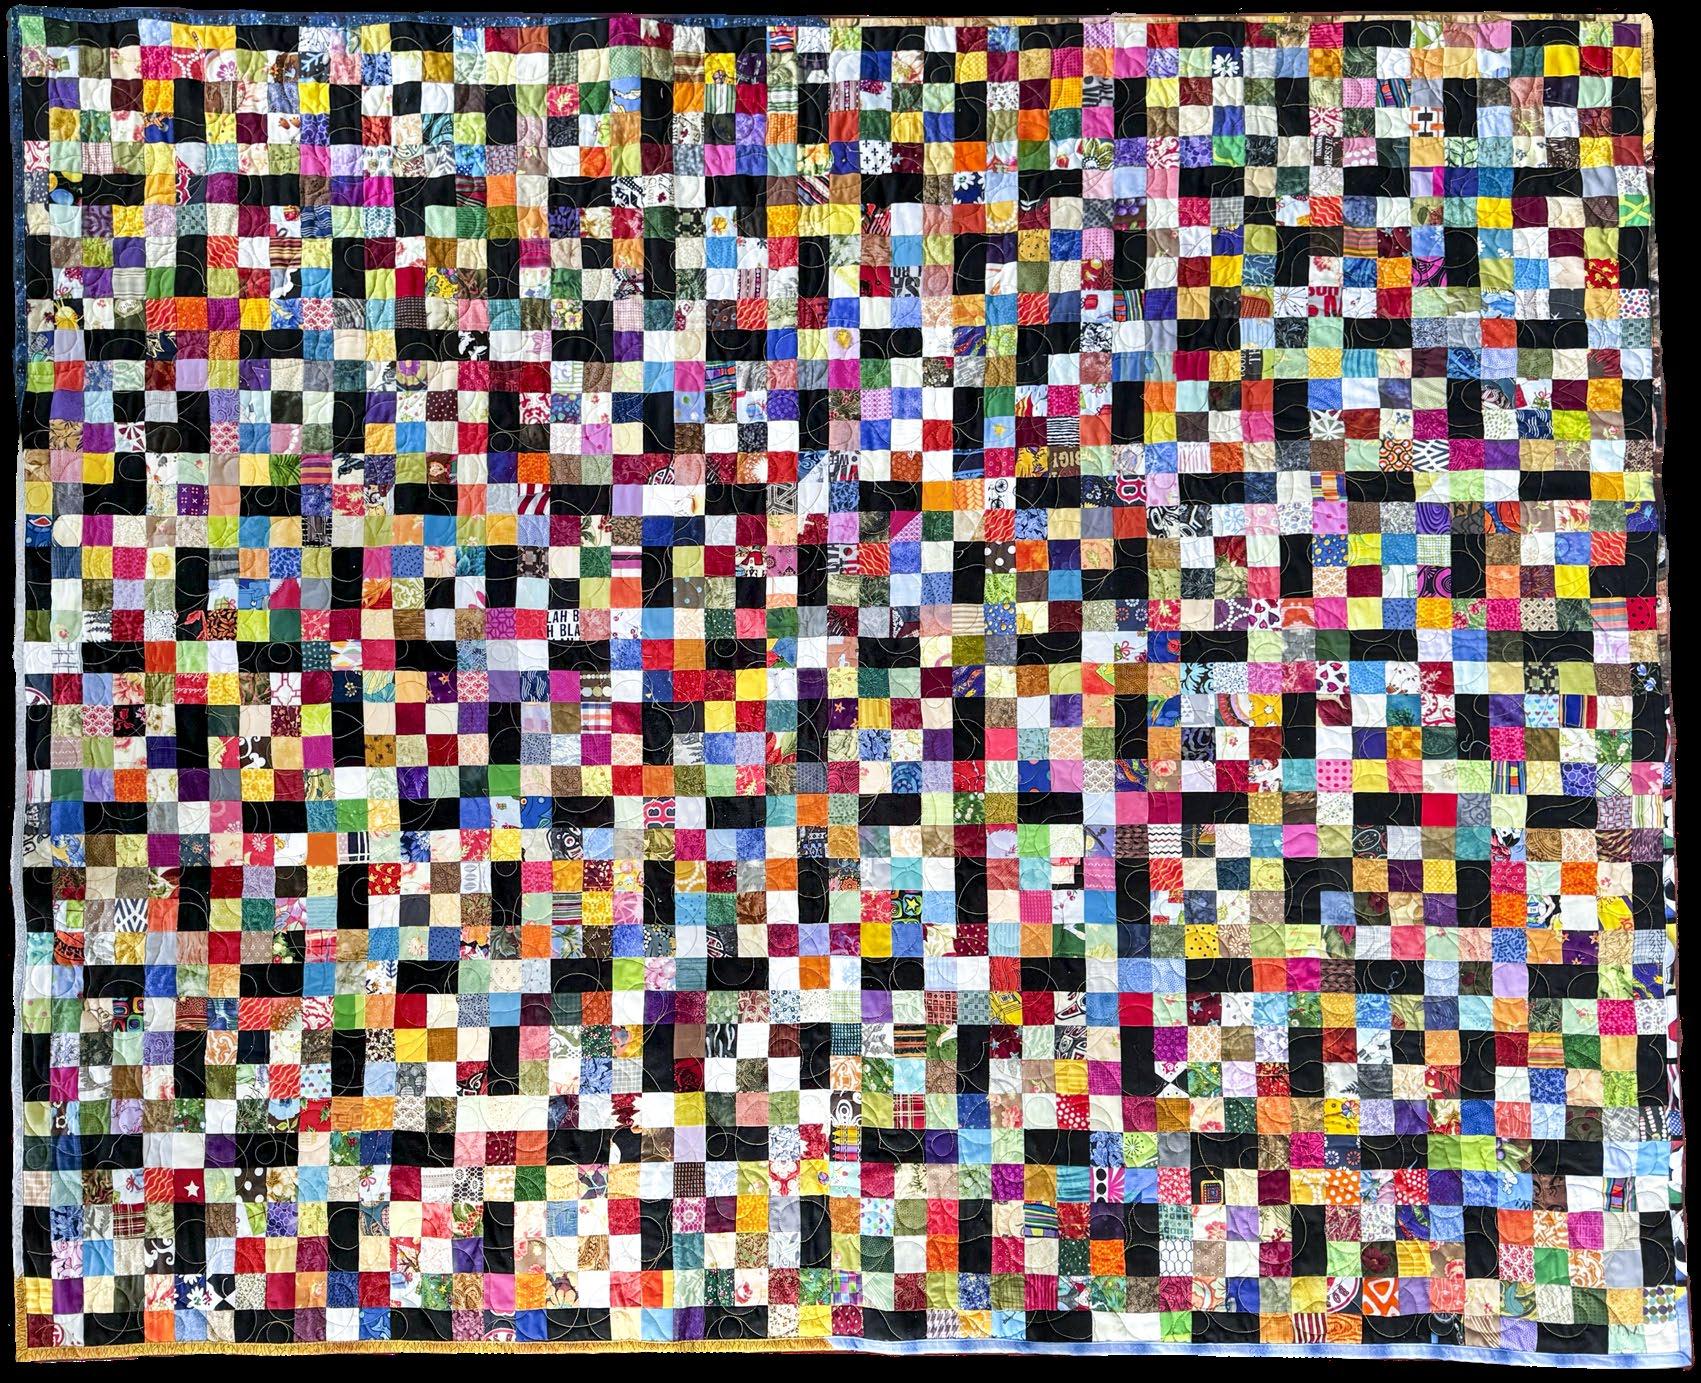
Cutting fabric scraps into usable pieces
PFAFF
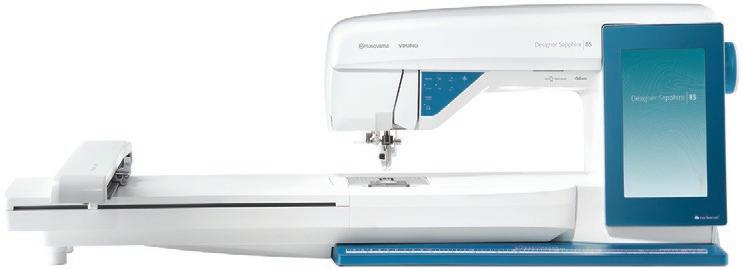
creative icon 2: first impressions
SUSTAINABILITY
repurpose men’s shirts into quilted placemats working successfully with 1½”, 2”, 3” square fabric scraps
Scrappy Quilts
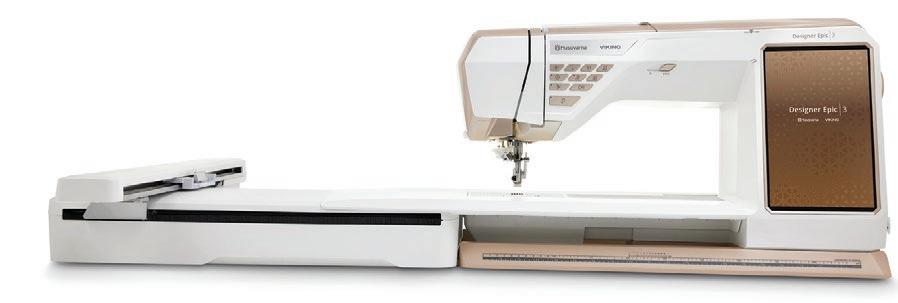
Husqvarna VIKING DESIGNER EPIC 3: What’s new in the internal software?
ISSUE
29
♥ ♥ ♥
Oh Joy




2
Editor's Letter
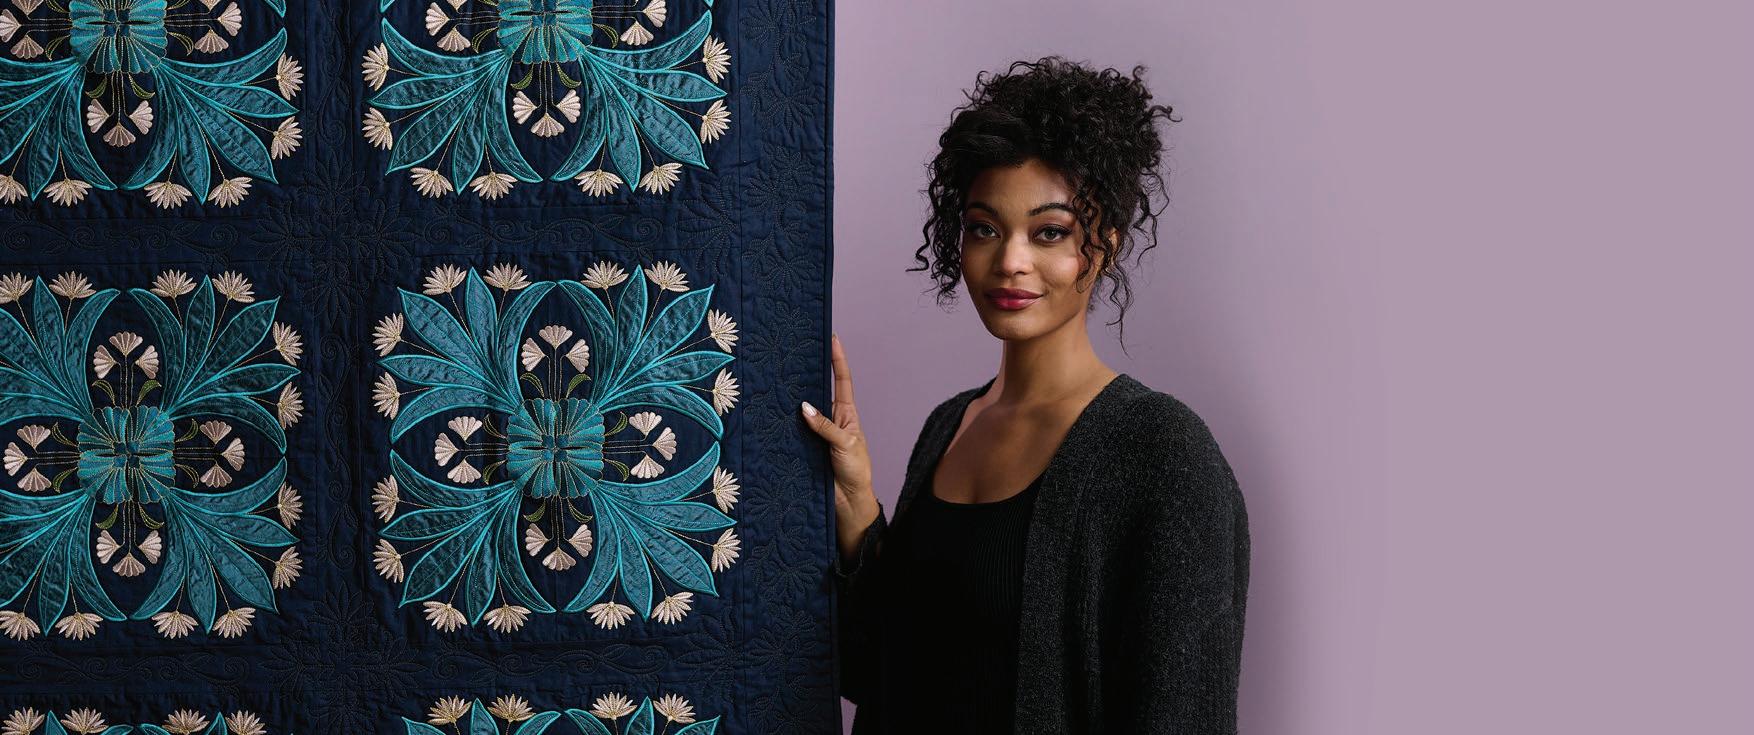
Welcome to the latest issue of our quilting magazine, where creativity knows no bounds and sustainability is stitched into every project. In this edition, we're thrilled to present key ideas and techniques to elevate your quilting experience while also celebrating the art of repurposing.
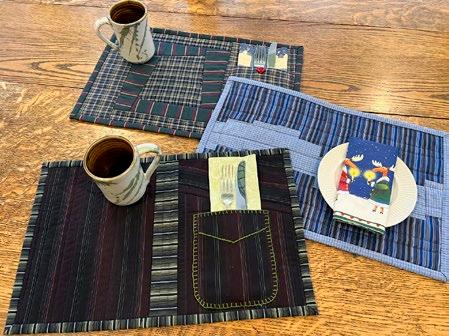
Our journey begins with a nod to sustainability as we delve into the art of repurposing men's shirts into quilted treasures. From charming placemats adorned with hand-stitched shirt pockets to whimsical wonky quilt block designs, we explore the endless possibilities that lie within these familiar fabrics. Whether you're a seasoned quilter or just starting out, these projects offer a delightful blend of creativity and ecoconsciousness.
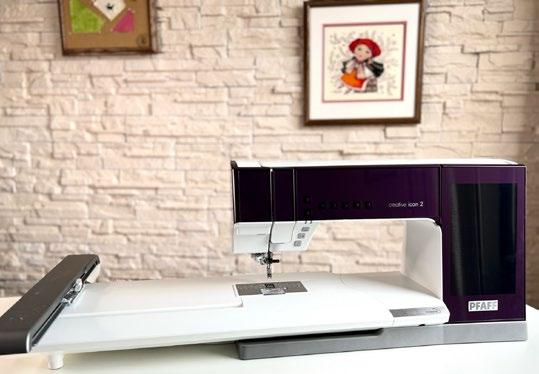
Speaking of innovation, we're excited to unbox and explore the PFAFF creative icon 2. Join us as we share our first impressions and essential steps for getting started with this cutting-edge machine. From mastering presser feet to diving into embroidery exploration, we'll guide you through the features that make the creative icon 2 a true game-changer in the quilting world.
But the magic doesn't stop there. We're also diving into scrap quilting, where every fabric scrap tells is a treasure. Learn essential techniques for cutting fabric scraps into usable pieces and discover the joy of creating with 2", 3", and 1½" fabric scraps without going insane. With our expert guidance, you'll transform leftover fabrics into stunning works of art that showcase the beauty of random and imperfect quilt design.
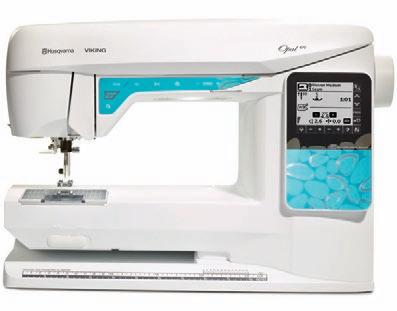
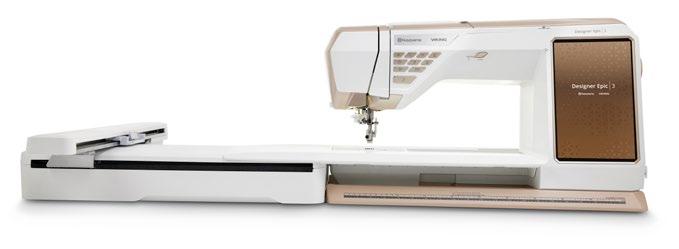
In our exploration of sustainability and innovation, we can't overlook the unveiling of the NEW Husqvarna VIKING DESIGNER EPIC 3. Join us as we unbox this marvel of engineering and discover what's new in its internal software and sewing mode. Plus, get an exclusive look at three new embroidery hoops that promise to take your embroidery projects to new heights of creativity.
As you embark on your quilting journey, we invite you to embrace the spirit of experimentation and creativity. Whether you're repurposing fabrics, exploring new machine features, or breathing new life into fabric scraps, remember that quilting is as much about the process as it is about the finished product. So, gather your fabrics, thread your needles, and let your imagination run wild as you embark on your next quilting adventure. Enjoy the issue!
Cheerfully,


| issue 29 3 OUILT
OUILT


PUBLISHER,
Carla A. Canonico carla@QUILTsocial.com
PUBLISHER, ADVERTISING SALES
John De Fusco john@QUILTsocial.com
PHOTOGRAPHERS
Carla A. Canonico, John De Fusco
BLOGGERS/CONTRIBUTORS
Jean Boyd quiltsocial.com/author/qs_jean/ Elaine Theriault crazyquilteronabike.blogspot.com
Paul Léger paullegerquilts.com
Olesya Lebedenko olesya-l-design.com
GRAPHIC & WEB DESIGN
Carla A. Canonico carla@QUILTsocial.com
GRAPHIC ASSISTANT and SOCIAL MEDIA
Sondra Armas
Maria Corina Guillen
WEBSITE / BLOG : https://QUILTsocial.com
Like us on Facebook : QUILTsocial
Follow us on Pinterest : quiltsocial
Follow us on Instagram : quiltsocial
Follow us on X: @QUILTsocial
WHERE TO GET YOUR COPY
QUILTsocial is a quarterly eMagazine published by A Needle Pulling Thread. It is available free for personal use online at https://QUILTsocial.com
A limited number of printed copies of QUILTsocial are available for purchase at select quilt shops and specialty stores. Ask for it at your local shop. QUILTsocial is not available by subscription.
QUILT SHOPS
If you are interested in carrying QUILTsocial in your store, please email john@QUILTsocial.com
EDITORIAL
Designers and other contributors who would like to be considered for future issues please email carla@QUILTsocial.com with a brief description of your work and your proposed project for the magazine.
©2024 QUILTsocial. All rights reserved. Issue 29. ISSN 2368-5913
No part of this publication may be reproduced without written permission from the publisher.
All designs, patterns, and information in this magazine are for private, non-commercial use only, and are copyrighted material owned by their respective creators or owners.
4 | issue 29 OUILT Advertiser Index 17 A Needle Pulling Thread Magazine 61 Business Directory 16, 37, 49 Gütermann creativ 02 Husqvarna VIKING 12, 22, 41 Odif 62 PFAFF 60 QUILTsocial.com 13 Singer
EDITOR-IN-CHIEF, ART DIRECTOR
Visit QUILTsocial.com and download our free ebook Elaine’s Quilting Tech Tips!
FREE! ALL { daily blog { weekly newsletter { quarterly magazine { fun Facebook page { yummy Pinterest page { app on iTunes/Google Play { ALL of the above! projects techniques product reviews * * *
6
Sustainable style: repurpose men’s shirts into quilted placemats
8 Repurposing men's shirt fabrics | Wonky quilt block placemat
10 Repurposing men’s shirt fabrics | Adding a hand- stitched shirt pocket
11 Repurposing men’s shirt fabrics | Improv strip-pieced placemat
14 Repurposing men’s shirt fabrics | Quilt-as-you-go scrappy mug rug
18 PFAFF creative icon 2: Unboxing delight and first impressions
20 Essential steps for getting started on the PFAFF creative icon 2
23 PFAFF creative icon 2 | Presser Feet
26 PFAFF creative icon 2 | Embroidery Exploration
30 Cutting fabric scraps into usable pieces | Oh JOY, Scrappy Quilts!
32 Scrap Quilt 1 – working with 2” x 2” fabric scraps
34 Scrap Quilt 2 – working with 3” x 3” fabric scraps
36 Scrap Quilt 3 – working with 1½” x 1½” fabric scraps
38 5 ideas for using large-size leftover fabric in quilting projects
40 Unboxing the NEW Husqvarna VIKING DESIGNER EPIC 3
44 Unveiling the NEW embroidery unit for the Husqvarna VIKING DESIGNER EPIC 3
47 What’s new in the internal software on the HV DESIGNER EPIC 3
52 4 new features in Sewing Mode on the HV DESIGNER EPIC 3
56 3 NEW embroidery hoops for the HV DESIGNER EPIC 3


29
CONTENTS
OUILT
Sustainable style: repurpose men’s shirts into quilted placemats
Jean Boyd
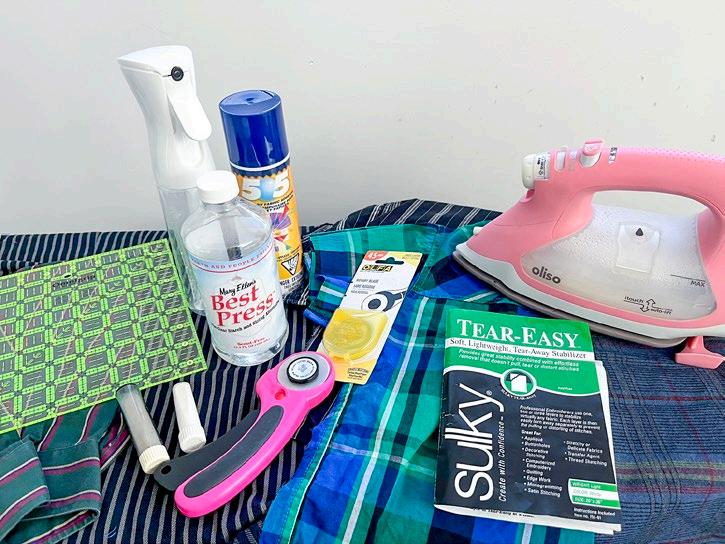
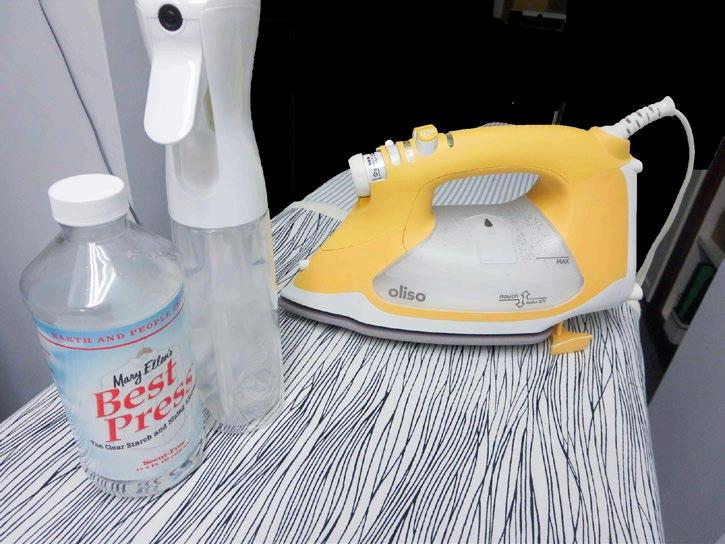
I’m using OLFA, OMNIGRIP, and Sulky products to create unique placemat designs using the fabric from men's shirts. I'll be using Mary Ellen's Best Press in the Spray and Misting Bottle and the OLISO PRO TG1600 Pro Plus Smart Iron
Here's a quick review of some of the products I'll be using:
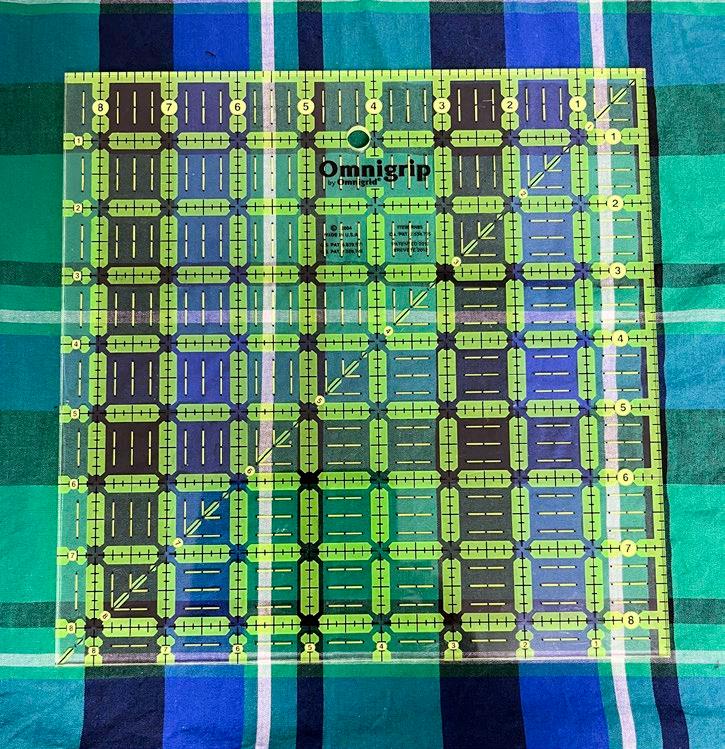
OMNIGRIP Ruler 8½" x 8½"
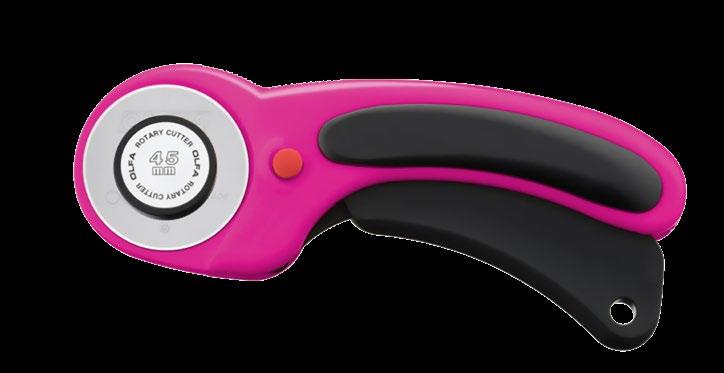
This ruler, designed for use with rotary cutters and straight-edge blades, has a right and left- hand numbering and angle system. The transparent, neon green double-sight lines seem to glow on both light and dark fabrics. The non-slip backing is a bonus. OLFA 45 mm Ergonomic Rotary Cutter (in the latest color –magenta)
This OLFA rotary cutter is a combination of comfort, convenience, strength, and safety. Its ergonomic handle with anti-slip rubber grip eliminates hand fatigue and stress, while the squeeze trigger allows the blade to self-retract for safety. The dual-action safety lock allows the blade to be locked while in use or locked inside the handle when not in use. The cutter can handle up to 8 layers of thin materials and is designed for both right and left-handed users. As a bonus, the OLFA 45mm Ergonomic Rotary Cutter comes with an OLFA Endurance Rotary Blade that cuts twice as long as the standard OLFA blade.
6 | issue 29 OUILT
Materials for the project
OMNIGRIP Ruler 8½" x 8½"
OLISO PRO Iron, Mary Ellen’s Best Press and Spray and Misting Bottle
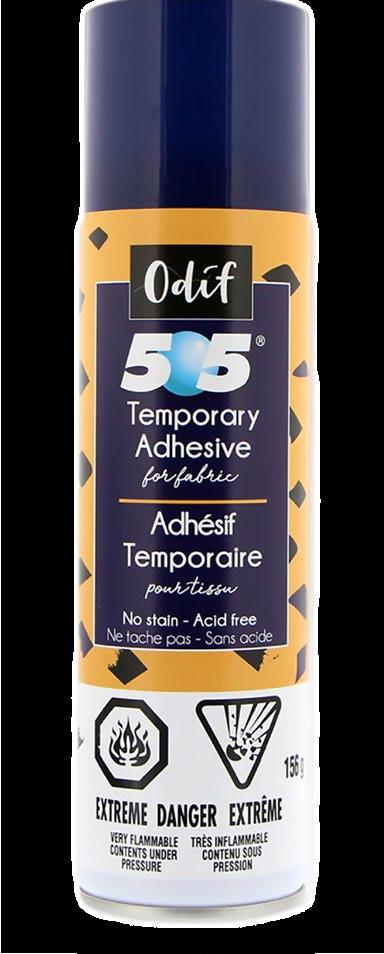
Odif 505 Temporary Quilt
Basting Adhesive Fabric Spray
This product is acid-free, odorless, and it won’t gum up your needles while sewing fabric. Odif 505 Adhesive Fabric Spray is perfect for holding the layers of the placemats together in preparation for quilting.
OLISO PRO TG1600 Pro Plus Smart Iron
Simply touch the handle and the iron lowers, ready to work. Take your hand off and the patented scorch guards lift the iron off the board preventing scorches, burns, and tipping. It’s not only safer but also saves time as well as your wrists! Other classic features include 1800 watts of power and horizontal or vertical bursts of steam. The TG1600 Pro Plus features a 30-minute extended auto-shut-off.
Best Mary Ellen's Best Press Best Press makes ironing easier, and fabrics look like new again. Plus, there’s no flaking, clogging, or white residue on dark fabrics! A special stain shield protects fabrics, and Best Press helps relax stubborn wrinkles.
Spray and Misting bottle
This 10 fl. oz. (295 ml) spray bottle features a unique bladder design that allows for easier refilling. It gives a consistent, non-drip spray of extra fine mist and has an extra wide, two- finger trigger with an ergonomic bottle design for less strain.
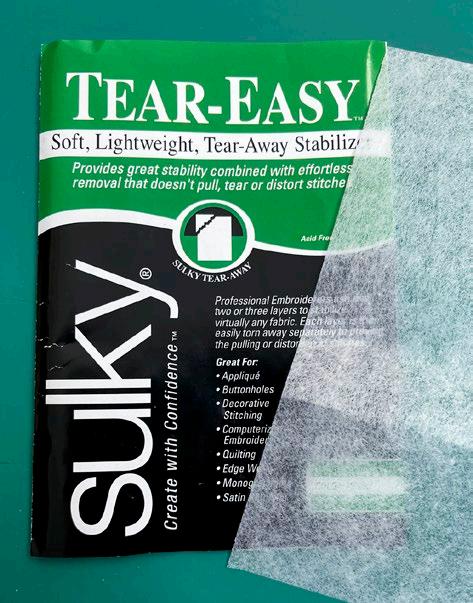
Sulky Tear-Easy Stabilizer. This lightweight, tear-away stabilizer is ideal as a backing stabilizer. Use as many layers as needed for support, then easily tear away one layer at a time. Using Tear-Easy prevents the pulling, tearing, or distorting of delicate straight or decorative stitching during removal. Sulky Tear-Easy is available in both black and white.
| issue 29 7 OUILT
Photos by Jean Boyd
Sulky Tear-Easy Stabilizer
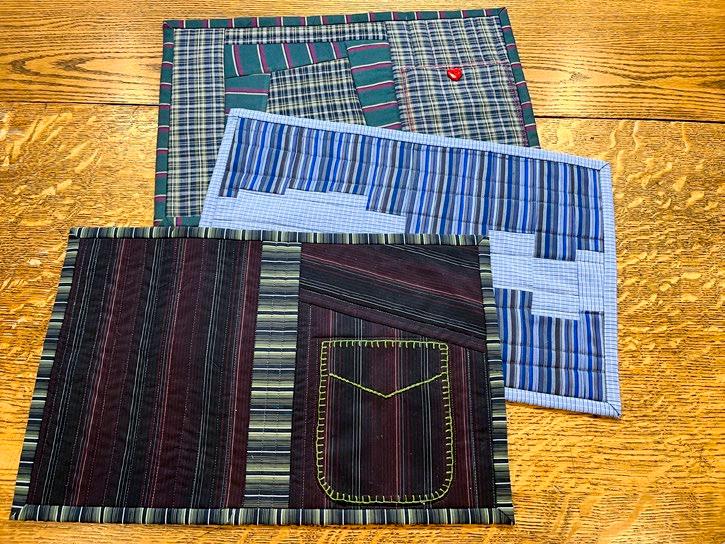
Placemats made from repurposed men’s shirts
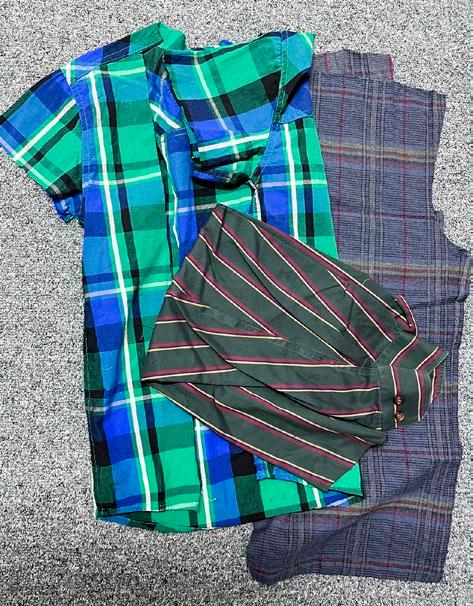
Shirts from the thrift shop
Repurposing men's shirt fabrics Wonky quilt block placemat
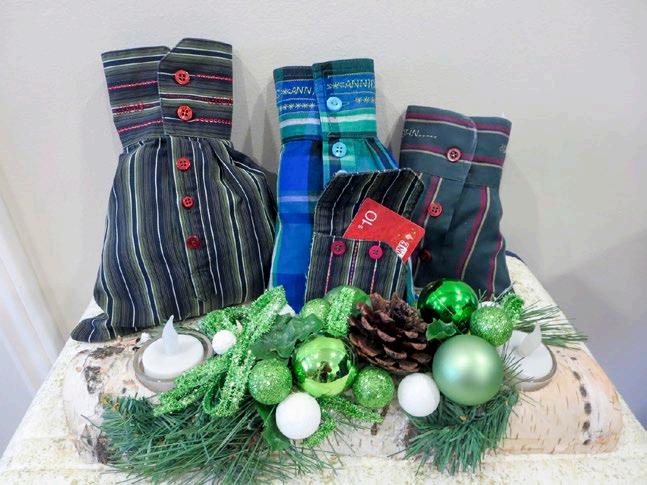
A few years ago, on QUILTsocial, I showed you how to transform a shirt sleeve into a gift bag as a great way to upcycle using shirt cuffs and sleeves to make gift card holders and gift bags. I still had the rest of the shirt fabric, so I used it to make some placemats for this project. I even used one of the original pockets on the shirt for a napkin and cutlery. The shirts were found at a local thrift shop, so this is repurposing at its best!
Placemat 1
The finished placemat is 11" x 17", but you can easily change the finished size to meet your needs. Spray the shirt fabrics with Mary Ellen's Best Press in the Spray and Misting Bottle, and press them with the OLISO PRO TG1600 Pro Plus Smart Iron.
To make the pieced block, cut 1 – 6" square from one fabric and 4 – 3" x 8½" strips from the contrasting fabric.
materials fabric
• 2 contrasting shirt fabrics, one piece with an original pocket intact
• 12" x 18" lightweight batting other
• 11" x 17" Template plastic
• 505 Temporary Fabric Adhesive
• OLFA 45 mm Ergonomic Rotary Cutter
• Clover Chaco liner chalk marker
• OLISO PRO TG1600 Pro Plus Smart Iron
• Mary Ellen's Best Press
Note: The fabric in repurposed shirts is not always the 100% cotton that we usually work with. Best Press in the Spray and Misting Bottle will give the fabric some extra body and smooth any wrinkles when pressed.
Let’s get started!
Sew a 3" strip to the 6" square on an angle leaving the first 3” open to create a partial seam. Press the seam towards the strip.
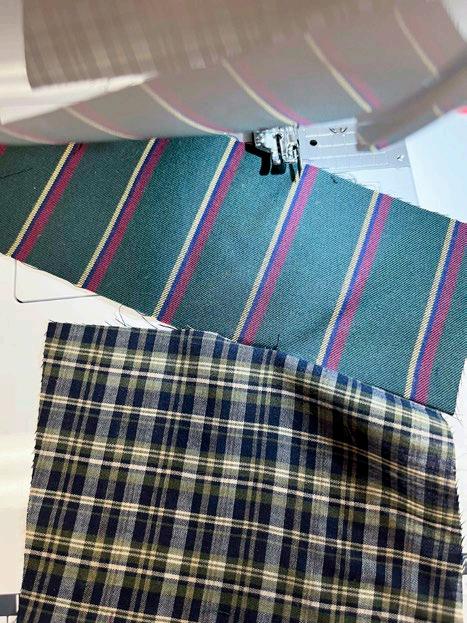
Turn the square to the left and sew another 3" strip to the next side of the square on an angle. Press the seam towards the strip.
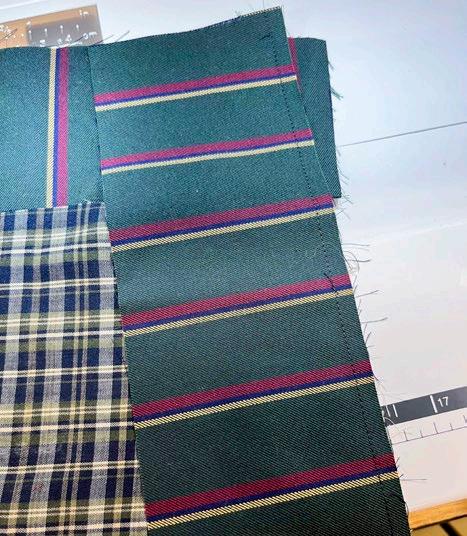
Continue sewing 3” strips around the
and then finish sewing

8 | issue 29 OUILT
Gift bags made from shirt sleeves and gift card holder made from a shirt cuff
The next 3” strip sewn on an angle Sewn strips all around the square
square
the partial seam.
A 3" strip partial seam sewn on an angle
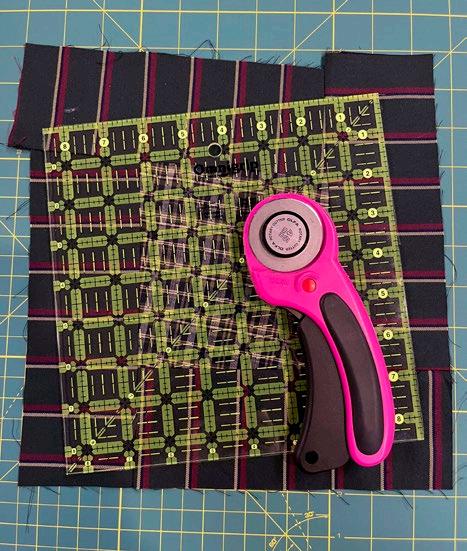
Place the 8½" x 8½" OMNIGRIP Ruler on the pieced square, also on an angle, and using the OLFA 45 mm Ergonomic Rotary Cutter, trim to 8½" x 8½".
From the shirt fabric, cut 1 strip containing a pocket approximately 7" x 12½" (width can be adjusted to accommodate the pocket size of the shirt you are using), 1 strip 4½" x 12" and 2 strips 2½" x 8½".
Place a piece of Sulky Tear-Easy stabilizer under the pocket section. A little spritz of 505 Fabric Adhesive will help hold it in place.

Use a straight or decorative stitch, and sew around the pocket section with a contrasting thread.
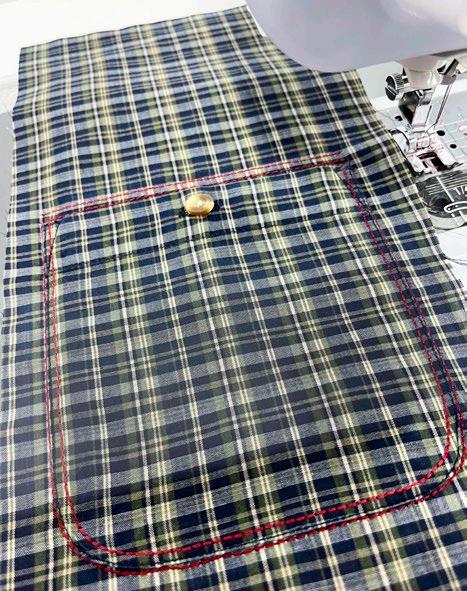
When you’ve finished stitching, tear away the excess stabilizer. You'll find that the Sulky Tear-Easy stabilizer is very easy to remove.

Sew a 2½" x 8½" strip to the top and bottom of the pieced square.
Sew the pocket section to the righthand side of the pieced block and the 4½" strip to the left-hand side.

Finishing the placemat
Use an 11" x 17" plastic template as a guide for the size of your placemat. Trace around the plastic with a Clover Chaco liner chalk marker. This will be your cutting line for later.
From the remaining shirt fabric, cut 1 piece 12" x 18" for the backing. Cut 1 piece of batting 12" x 18".
Layer placemat top, lightweight batting and backing with right sides out.
Use ODIF 505 spray adhesive to hold the 3 layers together.
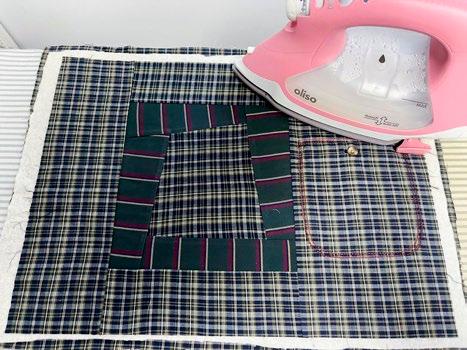
Using the chalk lines as guides, trim the placemat so it measures 11" x 17".
For the binding, cut 3" strips from leftover shirt fabric and piece them together to make a strip long enough to go all around the placemat. Press the seams open and fold the strip in half lengthwise with wrong sides together. Press.
Sew on the binding using a scant ½" seam. Fold the binding to the back and hand-stitch in place. This will give you a ½" finished size binding. Check out my detailed guide on changing the way you make quilt binding, in one of my earlier posts on QUILTsocial.
And there you have it – your first repurposed shirt fabric placemat with a pocket for holding a napkin and cutlery!

| issue 29 9 OUILT
Trim pieced square to 8½" x 8½".
Machine stitching around the pocket.
Sulky Tear–Easy stabilizer
Tear away excess stabilizer
Sew strips to the center square.
Layer backing, batting and placemat top
Finished placemat with a shirt pocket
Repurposing men’s shirt fabrics Adding a hand-stitched shirt pocket
I’m making a second placemat repurposing men’s shirts and quilting it. The 11" x 17" plastic template and Clover Chaco liner chalk marker will be very handy.

materials
fabric
• 2 contrasting shirt fabrics, one piece with an original pocket intact
• 12" x 18" lightweight batting thread
• embroidery floss using a colour to match your fabric other
• 11" x 17" Template plastic
• 505 Temporary Fabric Adhesive
• OLFA 45 mm Ergonomic Rotary Cutter
• Clover Chaco liner chalk marker
• OLISO PRO TG1600 Pro Plus Smart Iron
• Mary Ellen's Best Press Let’s get started!
Placemat 2
Spray the shirt fabrics with Mary Ellen's Best Press in the Spray and Misting Bottle, and press them with the OLISO PRO TG1600 Pro Plus Smart Iron
From the first shirt fabric cut 1 strip 8" x 12".
Cut 1 pocket section. Mine is 8" wide, but you can change the size to accommodate the size of pocket you have. My pocket section was not going to be 12” long, so I sewed a piece of shirt fabric on an angle to the top to make the full pocket strip. Hand stitch around the pocket using a blanket stitch and embroidery floss.
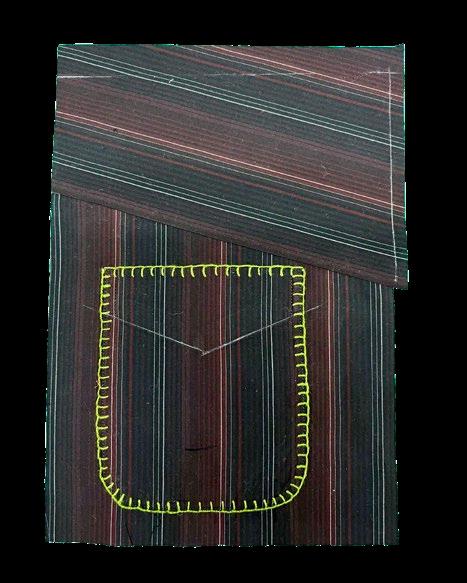
Finished pocket section
From the contrasting shirt fabric cut 1 strip 2" x 12" and some 3" strips for binding. Sew the 3” strips together to make 1 long strip that will go all around the entire placemat for the binding.
Batting: 12" x 18"
Backing: 12" x 18"
Putting it all together
Sew the 8" strip, 2" contrasting strip and pocket strip together.
Using an 11" x 17" plastic template, draw around the outside edges with a Clover Chaco liner chalk marker. These lines will be the cutting lines after the quilting is finished.
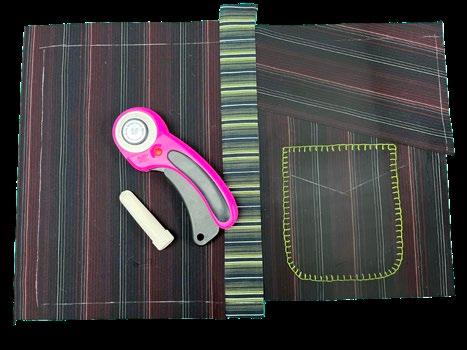
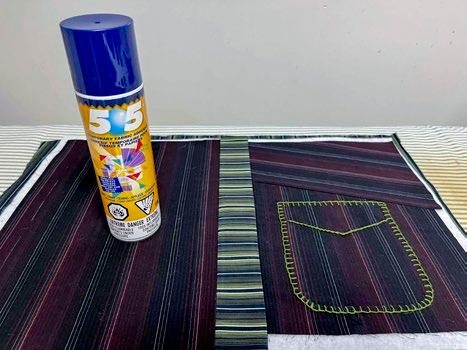
Layer the placemat top, lightweight batting and backing.
Use ODIF 505 spray adhesive on the batting to hold the 3 layers together. Quilt as desired. I used some simple straight-line quilting for this design.
Check out my detailed guide on changing the way you make quilt binding, in one of my earlier posts on QUILTsocial. And now you have another upcycled shirt placemat!
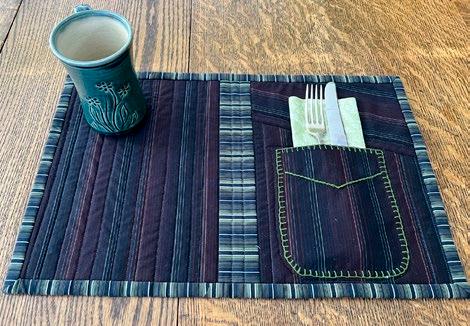
10 | issue 29 OUILT
Placemat made from repurposed shirt fabric with pocket
Sew strips together and mark cutting lines.
Layer backing, batting, and placemat top.
Finished placemat with hand-stitched shirt pocket
materials
fabric
Repurposing men’s shirt fabrics
Improv strip-pieced placemat
• 2 contrasting shirt fabrics, one piece with an original pocket intact
• 12" x 18" lightweight batting other
• 11" x 17" Template plastic
• 505 Temporary Fabric Adhesive
• OLFA 45 mm Ergonomic Rotary Cutter
• Clover Chaco liner chalk marker
• OLISO PRO TG1600 Pro Plus Smart Iron
• Mary Ellen's Best Press
Let’s get started!
Placemat 3
Use your OLFA 45 mm Ergonomic Rotary Cutter to cut 2 strips 6½" x 25" from shirt fabric. Sew strips together if necessary to get the required length.
From contrasting shirt fabric cut 1 strip 3" x 25" and 3" strips for binding.
Sew the 3” strips together to make 1 long strip that will go all around the entire placemat for the binding.
Batting: 12" x 18"
Backing: 12" x 18"
Putting it all together
Sew the 6½" strips and the 3" contrasting strip together to make a strip set.

Cut the strip set into 3½" segments that are slightly angled on each side. The strips should be about 3½" at the widest point.
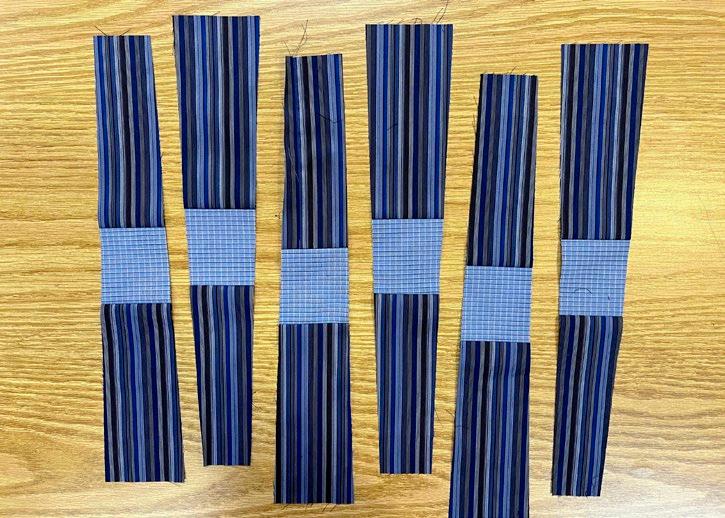
Sew the segments together, alternating wide and narrow ends, to make 1 panel that is about 12" x 18". Using the OLISO PRO TG1600 Pro Plus Smart Iron, press the seams in one direction.

| issue 29 11 OUILT
Sew the strips together.
Cut strips into angled segments.
Pieced placemat



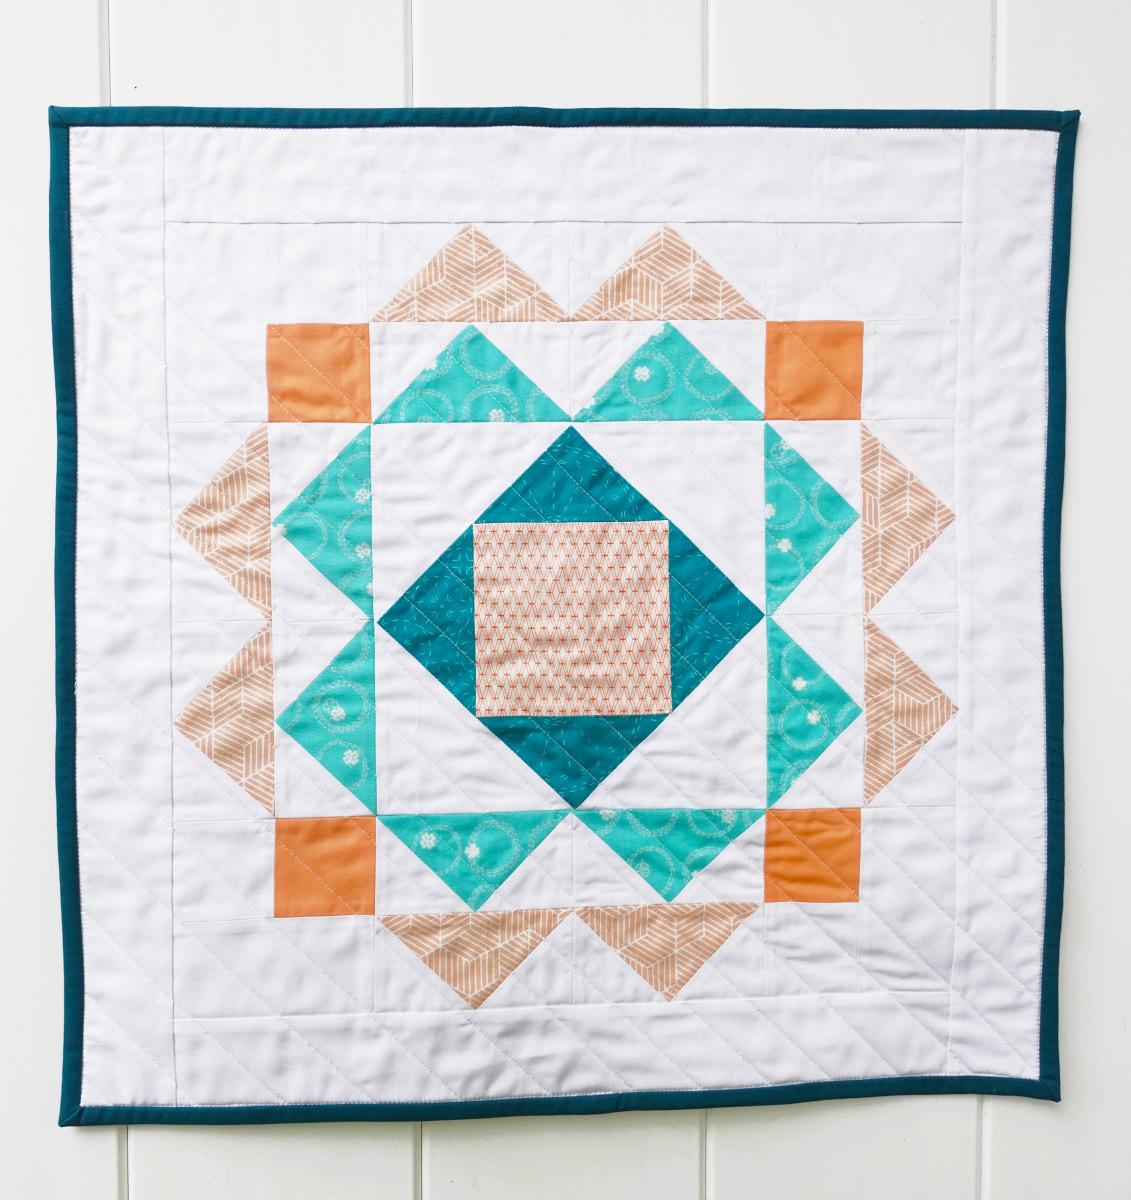
Follow the instructions from my second article in this feature about my wonky quilt block and a shirt pocket to sew on the binding.
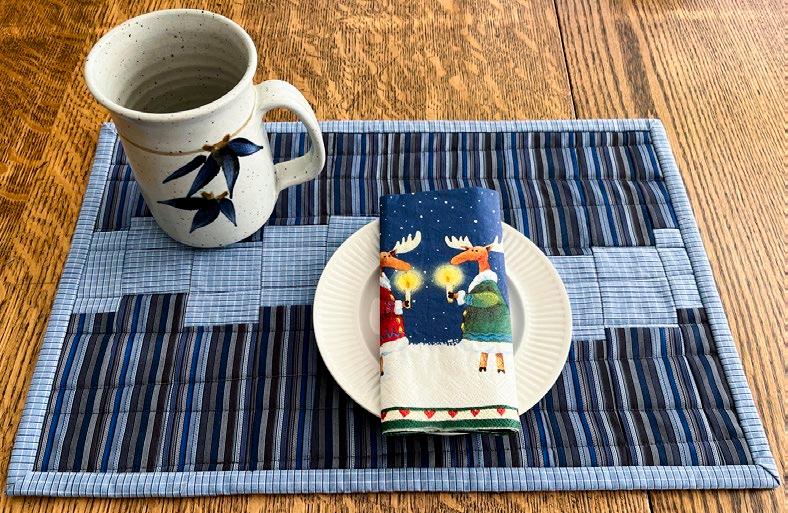
And here’s the finished placemat!


12 | issue 29 OUILT
Finished placemat


13
Repurposing men’s shirt fabrics
Quilt-as-you-go scrappy mug rug
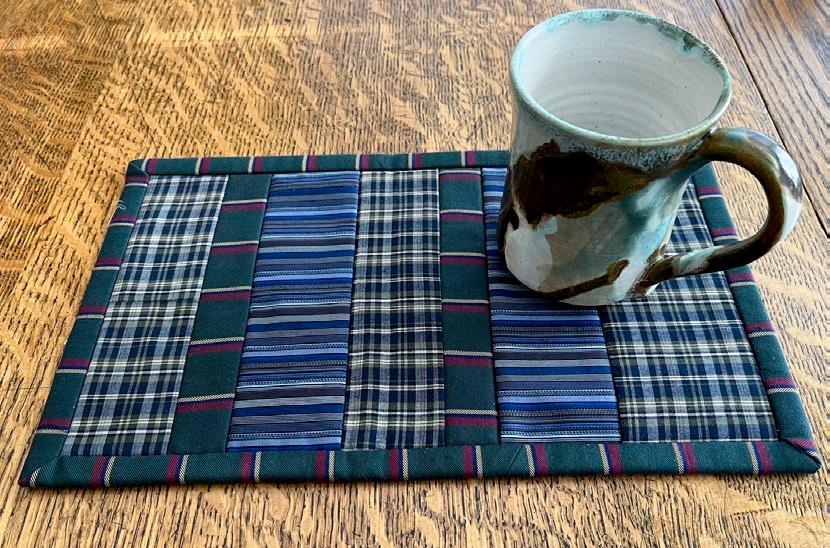
Here's an idea for using up the scraps from this week’s placemats to make a small mug rug or tray mat. My small mat is 8" x 12", but it's easy to adjust the size. materials
fabric
• leftover scraps of shirt fabric from the first 3 placemats
• 9" x 13" lightweight batting
• 9" x 13" backing fabric other
• 505 Temporary Fabric Adhesive
• OLFA 45 mm Ergonomic Rotary Cutter
• OLISO PRO TG1600 Pro Plus Smart Iron
• Mary Ellen's Best Press
Let’s get started!
Scrappy mug rug
Spray the shirt fabrics with Mary Ellen's Best Press in the Spray and Misting Bottle, and press them with the OLISO PRO TG1600 Pro Plus Smart Iron
Use your OLFA 45 mm Ergonomic Rotary Cutter to cut the fabric into strips that are 2" – 3" wide and about 9" long. It's OK if you have some longer strips. They will be trimmed when the quilting is finished.
Putting it all together
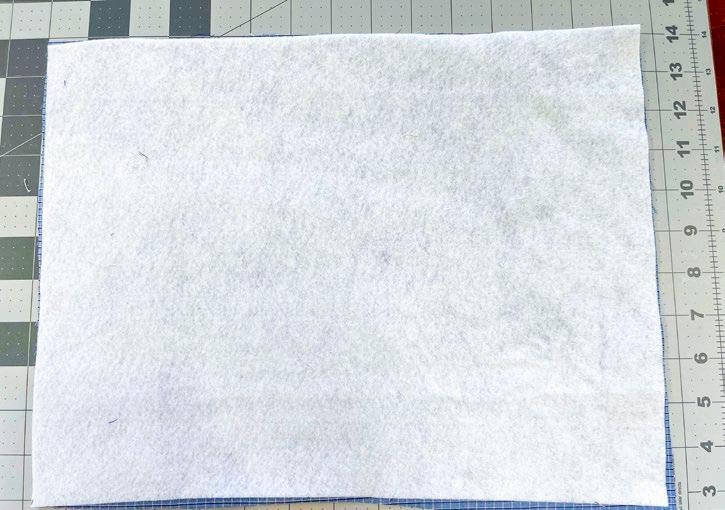
Place the backing, right side down, on a work surface.
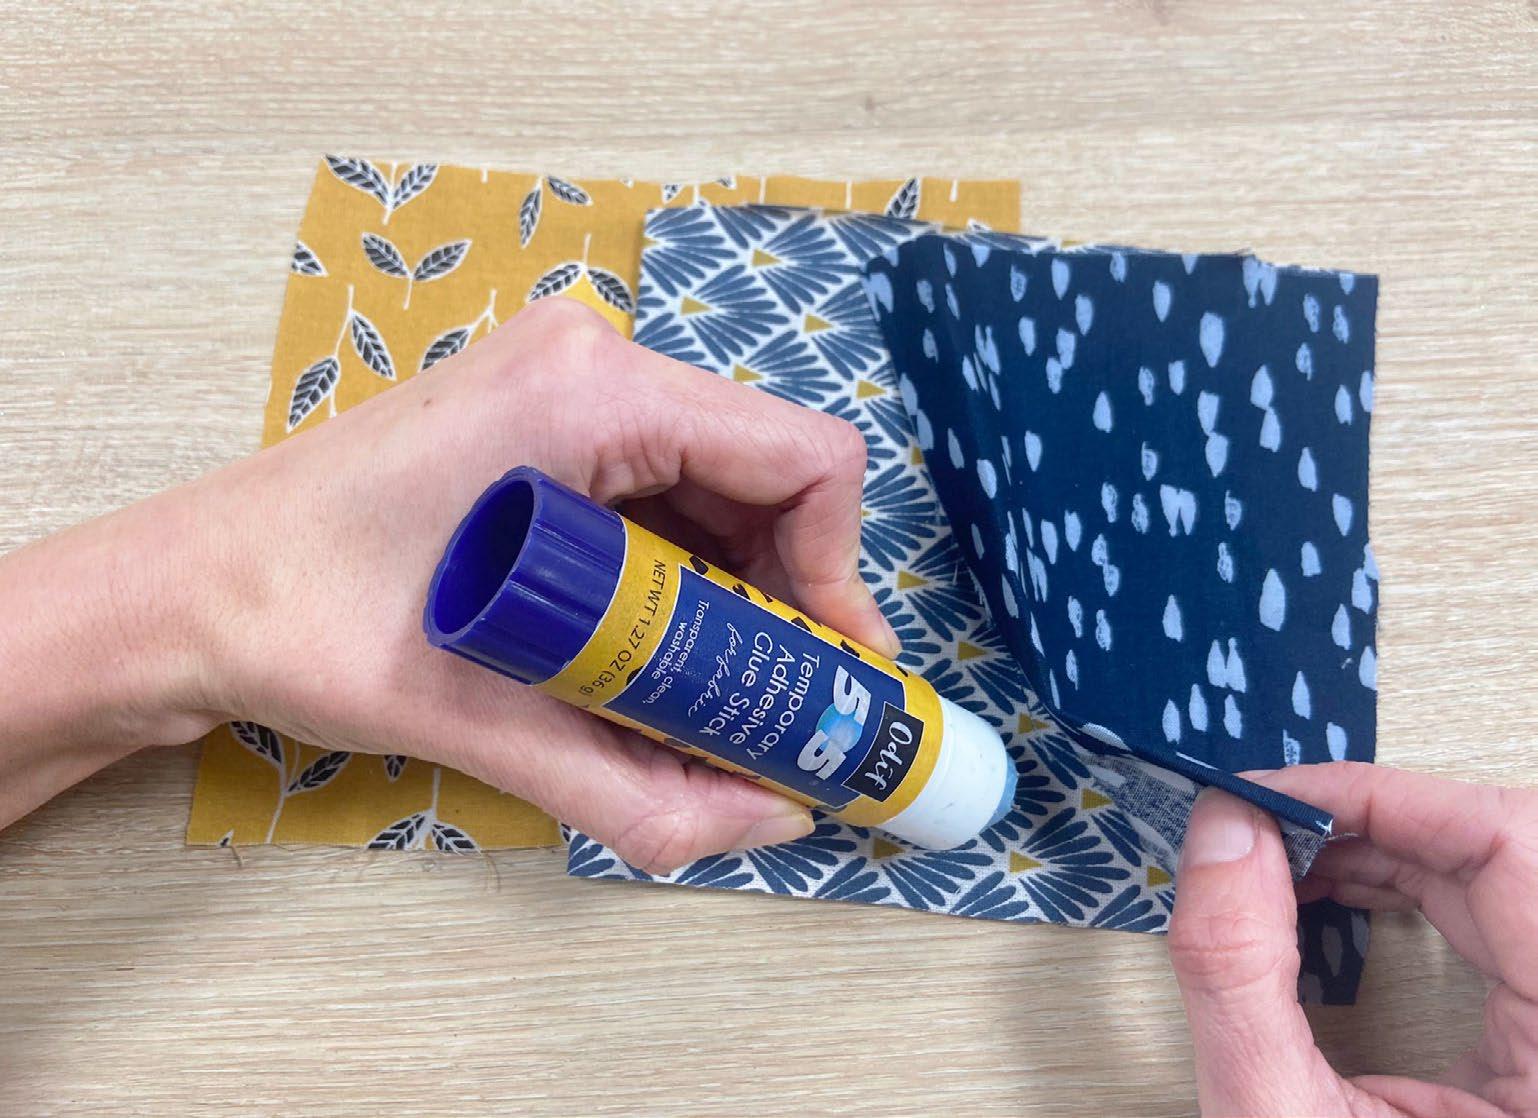
Spray the batting with a little ODIF 505 spray adhesive so it will stick to the fabric.
Place batting on top of the backing fabric.
Here's a quick and easy way to sew the strips together and complete the quilting all in one step. This method is often referred to as flip-and-sew or quilt-as-you-go.
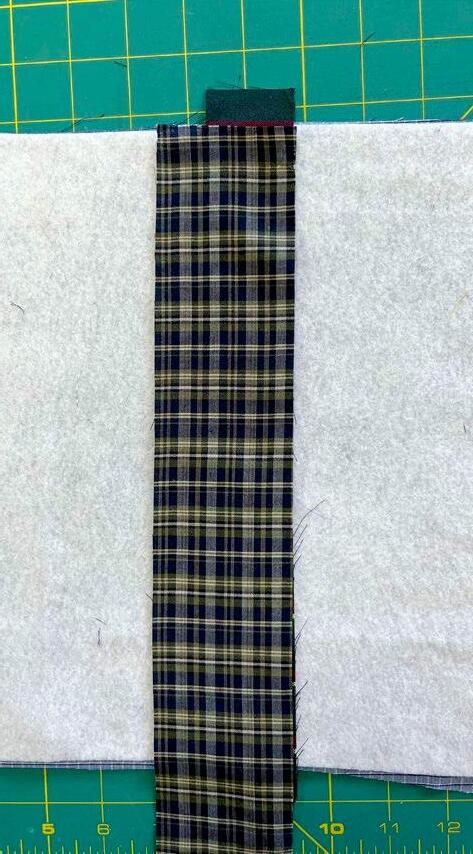
Lay 1 – 9" strip, right side up, in the middle of the batting.
Place another strip on top of the first strip, right sides together.
Sew the strips together with ¼” seam allowance through all layers.
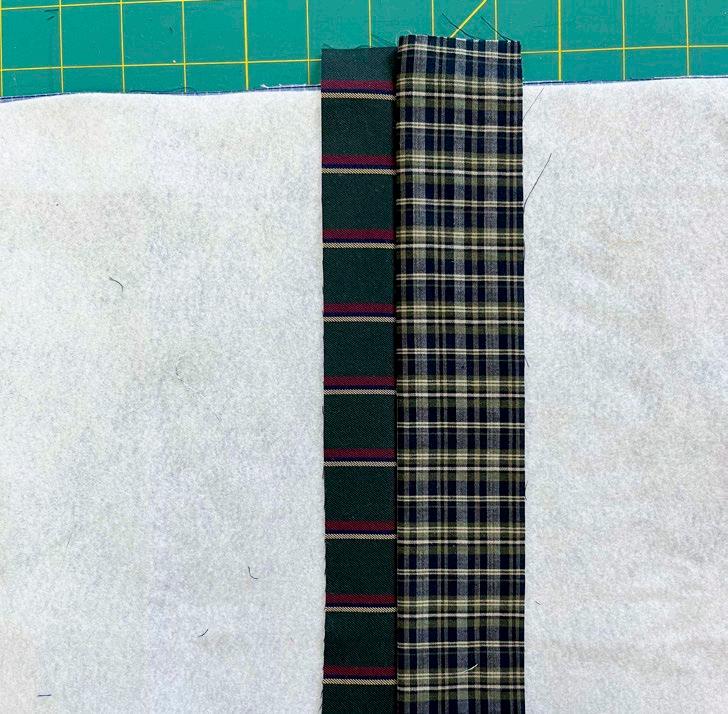
Open the strip and press in place.
14 | issue 29 OUILT
Batting secured to backing fabric with spray adhesive.
Sew 2 strips sewn together through all layers.
Press strip in place.
Keep adding strips on both sides of the center strip until the batting is covered.

Press carefully. Using your OLFA 45 mm Ergonomic Rotary Cutter, trim so all edges are even. For the binding, cut 3" strips from leftover shirt fabric and piece them together to make a strip long enough to go all around the mug rug.
Press the seams open and fold the strip in half lengthwise with wrong sides together. Press.
Sew on the binding using a scant ½" seam. Fold the binding to the back and hand-stitch in place. This will give you a ½" finished size binding. For a detailed description of sewing on the binding, see my earlier blog post on how to change up the way you make your quilt binding
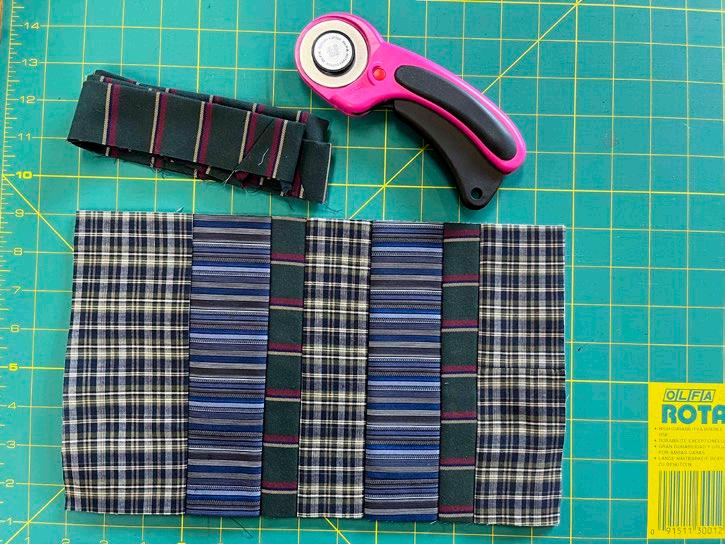
And now you have a miniature version of the repurposed shirt fabric placemat that can be used as a mug rug or tray mat.
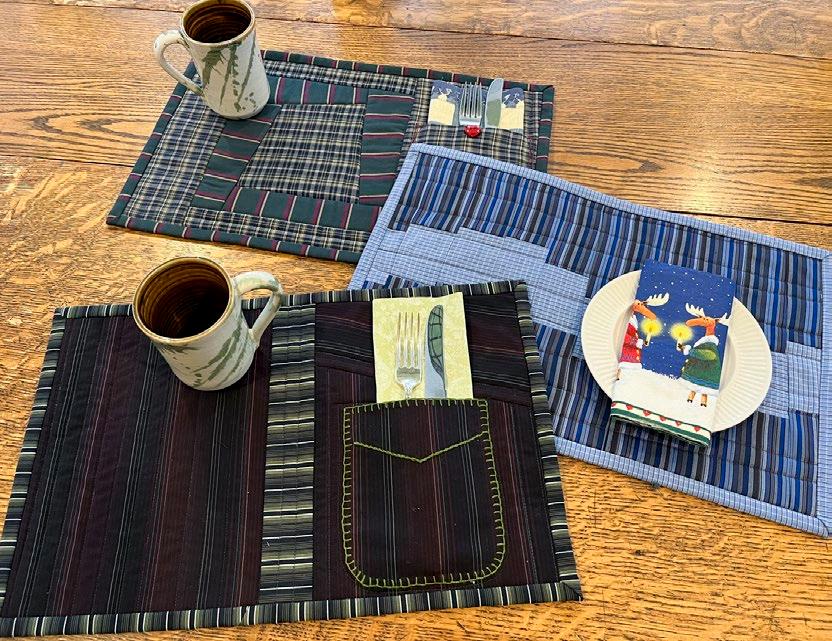
I hope you've enjoyed repurposing some shirt fabric to make these useful placemats using the featured products. My quilting guild donates placemats to our local Meals on Wheels program, so my placemats will soon be going to a good home!
 Jean Boyd quiltsocial.com/author/qs_jean/
| issue 29 15 OUILT
Keep adding strips.
Trim edges and square to desired size.
Finished mug rug or tray mat
Finished placemats









16 | issue 29 OUILT Arnprior Shopping Centre 375 Daniel St S, Arnprior, ON K7S 3K6 www.sewinspired.ca 613-623-0500 info@sewinspired.ca Sewing, Knitting & Having a Good Time Ottawa Valley Authorized Dealer 1-888-853-7001 www.thequiltstore.ca - - - NEWMARKET & BURLINGTON - -1-888-853-7001 www.thequiltstore.ca - - - NEWMARKET & BURLINGTON - -The Quilt Store, Evelyn’s Sewing Centre 17817 Leslie St #40, Newmarket, ON L3Y 8C6 905-853-7001 / 1-888-853-7001 The Quilt Store West 695 Plains Rd E #1, Burlington, ON L7T 2E8 905-631-0894 / 1-877-367-7070 1390 Clyde Ave, #107, Ottawa, ON K2G 3H9 613-695-1386 www.ottawasewing.com Your Authorized Dealer for: www.kellyscreativesewing.ca Specialize in Sewing, Embroidery machines, Sergers and Long arm Quilting Systems 804 Main Street Dartmouth, Nova Scotia B2W 3V1 kellyscreativesewing@gmail.com


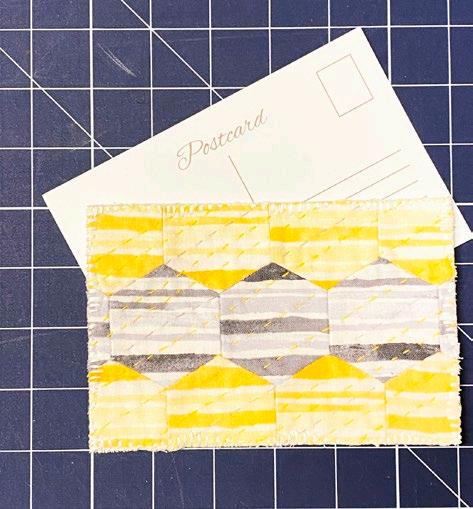
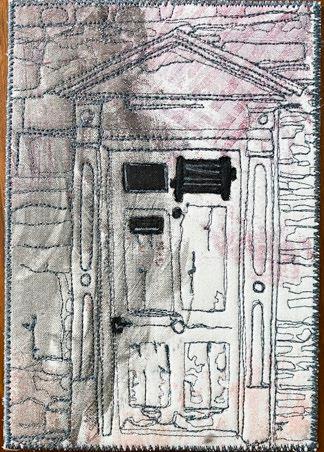

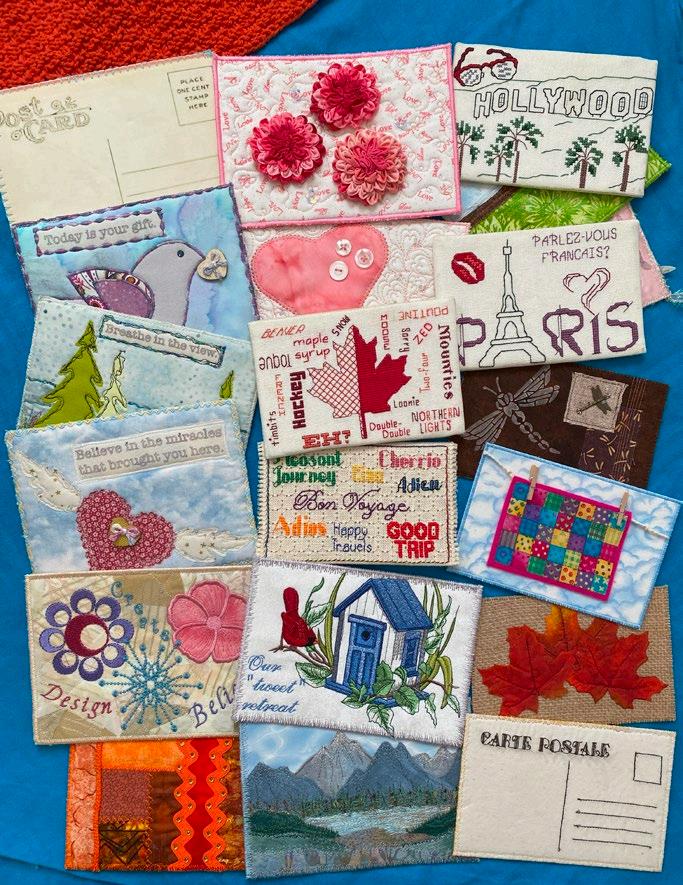
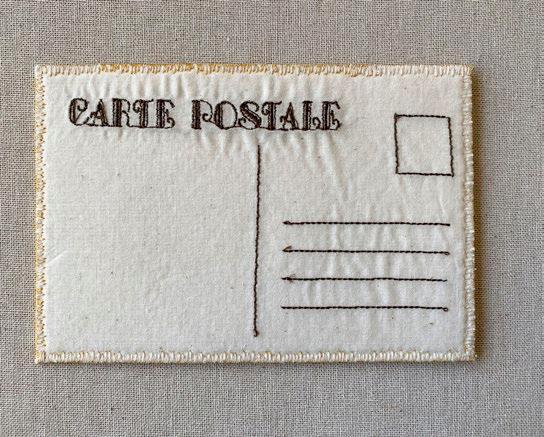

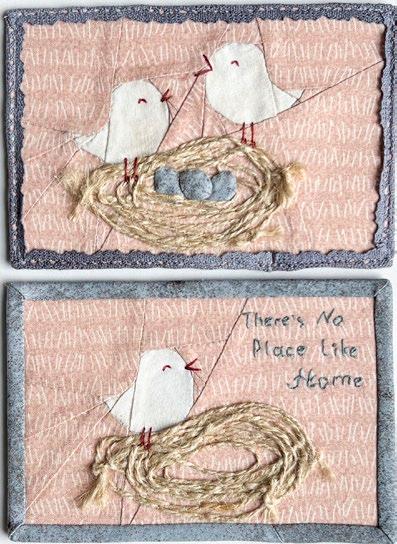
| issue 29 17 OUILT QUILT SEW KNIT CROCHET CROSS STITCH EMBROIDER HOOK RUGS Visit www.ANPTmag.com to order ! QUILT SEW KNIT CROCHET CROSS STITCH EMBROIDER HOOK RUGS Aneedle pulling thread www.aneedlepullingthread.com Postcards Inspired by Get quilting! A needle pulling thread issue 66
creative icon 2
Unboxing delight and first impressions
Welcome to a new era of sewing and embroidery with the arrival of the PFAFF creative icon 2 Sewing and Embroidery Machine! This innovative sewing machine marks a significant development in sewing, quilting and embroidery with enhanced capabilities and new features. In this feature, I’ll explore key features of this machine and talk about exciting new developments.
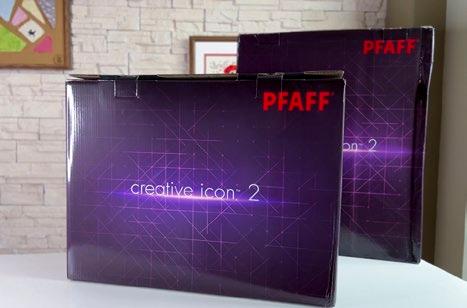
I’ll begin by pointing out noteworthy features. This sewing machine stands out from the conventional ones. It incorporates artificial intelligence and voice control, adding a distinctive aspect to your crafting space. This integration functions as a helpful assistant, capable of assisting you with various creative tasks.
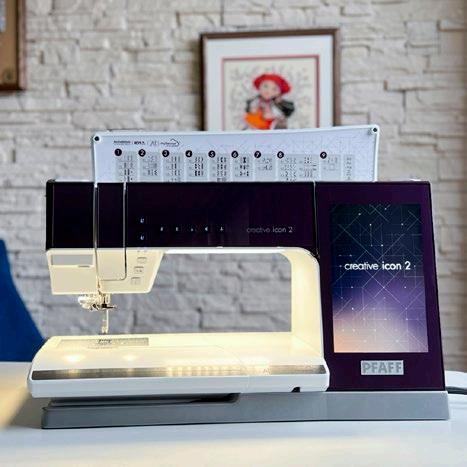
Upon acquainting myself with the creative icon 2, it became evident that it surpasses mere functionality. Its advanced features and state-of-theart technology broaden the scope of creative possibilities. The seamless incorporation of precise sewing and intricate embroidery capabilities enhances my creative endeavors significantly.
Now, let's delve into the core attributes of this machine. With over 870 stitches at your disposal, customization options abound, allowing you to create stitches tailored to your preferences. The versatility extends from straightforward stitch planning to the intricacies of tapering for seamless cornering.
I will briefly highlight the features that have left a lasting impression on me.
The machine is equipped with innovative features, including AI technology and embellishment attachment capabilities. Notable functionalities comprise the hoop scanning feature, a projector in sewing and embroidery mode, and an expanded help center, enhancing the overall crafting experience.
The accessories accompanying the machine consist of 12 presser feet designed for different stitches and a comprehensive set of tools. This kit caters to sewing enthusiasts, offering an additional straight stitch needle plate and bobbin case for straight stitch left, both seamlessly fitting into the machine tray along with the feet.
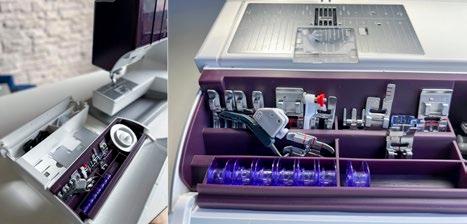
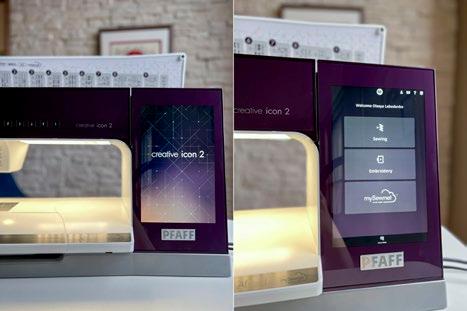
Let's focus first on the touch screen and the workspace lighting. The 10.1-inch capacitive touchscreen boasts various creative options and functions as a command center for a smooth crafting experience. Through simple touch commands, you can navigate an intuitive interface, choose stitches or embroidery designs, and access a range of innovative features. It serves as more than just a screen; it becomes your canvas, bridging imagination and technology for the creation of artistic pieces.
The LED workspace light, meticulously crafted by optical specialists, provides optimal illumination, accurately depicting colors and minimizing shadows in your projects.
18 | issue 29 OUILT
PFAFF
The PFAFF creative icon 2 Sewing and Embroidery Machine
The PFAFF creative icon 2 Sewing and Embroidery Machine
The PFAFF creative icon 2 Sewing and Embroidery Machine brand feature
The PFAFF creative icon 2 Sewing and Embroidery Machine accessory tray
The PFAFF creative icon 2 Sewing and Embroidery Machine 10.1-inch capacitive touchscreen
Olesya Lebedenko
Photos by Olesya Lebedenko
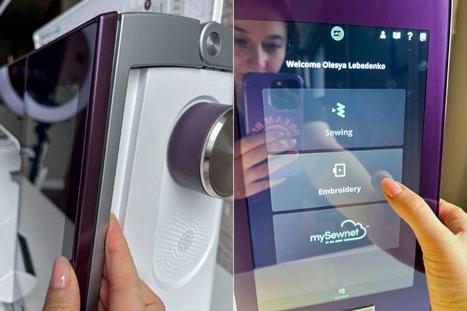
Upon interacting with the screen, it became evident that the PFAFF team prioritized user comfort and health. The screen's responsiveness required minimal pressure, ensuring effortless and natural interaction. Notably, the inclusion of a comfortable handle on the side was a thoughtful design choice that provided relief and enhanced the ergonomic experience, reducing strain on the wrist during navigation through features.
Upon powering up the PFAFF creative icon 2, the welcome screen presented three distinct pathways: sewing, embroidery, and the innovative MySewnet subscription service for embroidery editing and design. Each option featured an inviting icon, serving as a clear guide to exploration. The sewing and embroidery paths offered tailored features, promising a variety of stitches, designs, and crafting possibilities. The addition of MySewnet, a pioneering subscription service providing a digital platform for designs, tutorials, and community connections, introduced a modern dimension to the crafting experience for both experienced artisans and newcomers alike.
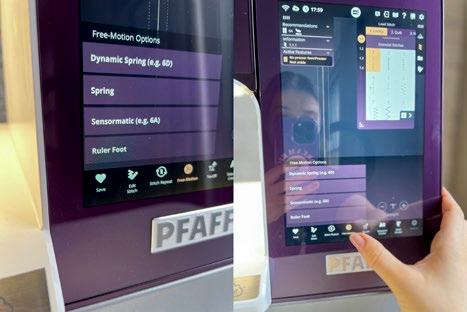
Each icon on the screen is accompanied by a clear graphic and its name. Tapping on any icon reveals a set of clear, logical subcategories. The interface design is thoughtful, guiding users effortlessly through various options like a personalized journey ensuring a seamless and enjoyable experience from the start.

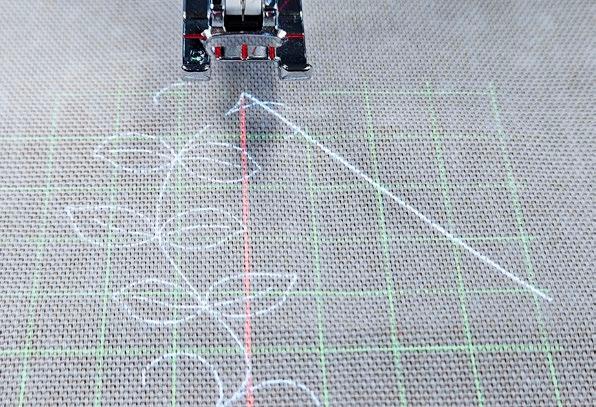
A notable addition to the PFAFF creative icon 2 is the updated projector function, now accessible through a dedicated physical button on the control panel. This enhanced feature illuminates the sewing path with adjustable guides and grids, enhancing precision stitching. What sets it apart is the capability to preview embroideries or stitches directly on the selected fabric. By seamlessly integrating technology with traditional craftsmanship, this projector allows us to visualize our creations, offering a preview before the initial stitch is made.
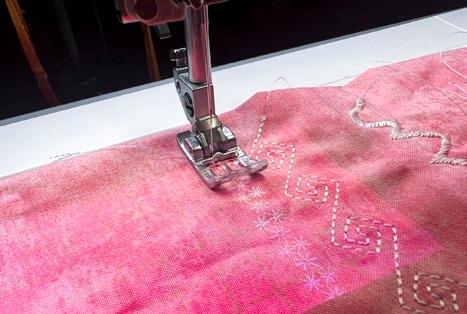
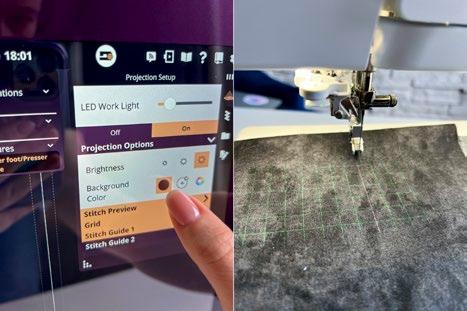
This innovative projector function allows you to tailor the light settings to match your fabric’s color and value characteristics, ensuring optimal contrast for visibility and accuracy.

Shifting focus from the advanced functionality of the projector to the innovation within the embroidery unit, I explored the contents of the embroidery unit box and discovered a noteworthy addition: a small camera seamlessly integrated into the PFAFF creative icon 2. This little wonder unlocked a whole new level of creativity. By scanning a hooped fabric, the camera displayed it as a background on the screen in embroidery mode, serving as a guide for precise placement of designs. In this embroidery context, technology and imagination work together to help your creative vision come to life.

Are you ready to explore a new dimension of sewing, quilting and embroidery? The PFAFF creative icon 2 Sewing and Embroidery Machine serves as a creative ally, ready to bring your ideas to life.
| issue 29 19 OUILT
The PFAFF creative icon 2 sewing and embroidery machine side handle
The PFAFF creative icon 2 sewing and embroidery machine touchscreen
The PFAFF creative icon 2 sewing and embroidery machine projection feature
The PFAFF creative icon 2 Sewing and Embroidery Machine Projector Mode
The PFAFF creative icon 2 Sewing and Embroidery Machine projector options
The PFAFF creative icon 2 Sewing and Embroidery Machine embroidery unit pack
The PFAFF creative icon 2 Sewing and Embroidery Machine with the embroidery unit
Essential steps for getting started on the PFAFF creative icon 2
For those well-acquainted with PFAFF machines, certain notions and features may not come as groundbreaking news. However, for someone like me returning to PFAFF after exploring other machines, some features revealed themselves as truly remarkable, so let's get started.
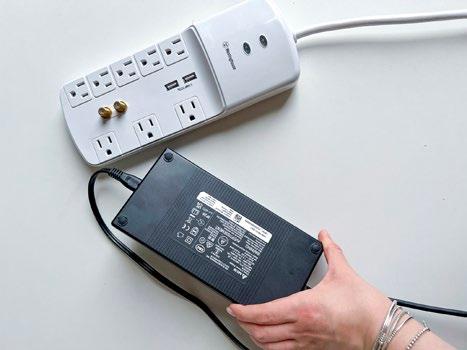
Two new and innovative additions from the PFAFF team stood out to me. The first is the power cord, which is distinct from typical cords. It includes a substantial box in the middle, serving as a power supply like those common in laptop cords. This built-in surge is significant because the creative icon 2 requires more power due to its advanced computerized features compared to its predecessor. The PFAFF team had to decide whether to integrate this weighty component into the machine, increase its overall weight, or cleverly position it as part of the power cord. I appreciate their decision to incorporate it into the cord rather than the machine. This design choice makes it easy to transport the machines, whether for classes or workshops, distributing the weight for greater convenience.
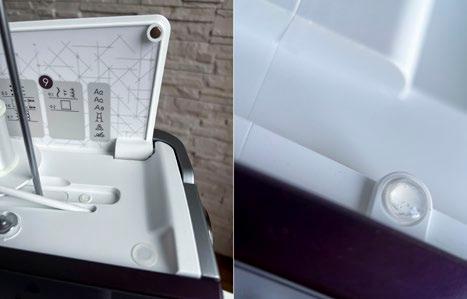
Another noteworthy addition is the pair of strategically placed magnets to secure the lid, and silicone protection stickers in key areas. The magnets keep the lid firmly in place and the stickers act as a shield, protecting vulnerable spots and ensuring durability while contributing to the thoughtful craftsmanship in the machine's design.
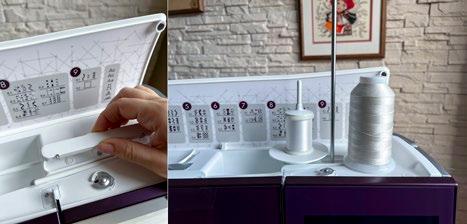
Let's explore the process of threading the machine. Start by opening the lid and raising the integrated thread stand, designed with extra height to allow the thread to relax as it unwinds from the spool. This extra space promotes smoother thread flow. With two wellpositioned spool stands, place the spool base directly onto the left spool pin, taking note of the protective shell on the right to ensure secure placement. This setup ensures stability and proper alignment for an efficient spool threading process.
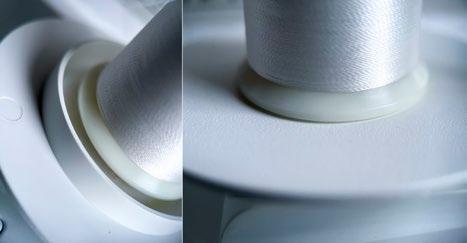
The spool base is versatile and can be used on both sides. I prefer the flat side as it provides better visibility. Opting for the flat side allows for clearer observation if the thread starts to wrap around the end of the post. This way, I can easily identify when to use the thread net for smoother thread flow.
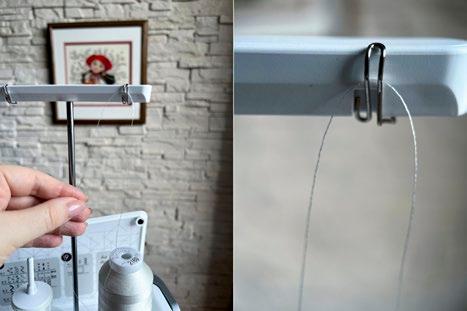
To wind a bobbin, use the right spool pin. Take the thread and guide it upwards, moving directly across the hook. Loop it around and pull it straight down, ensuring the thread goes from right to left all the way in for a secure and even winding process.
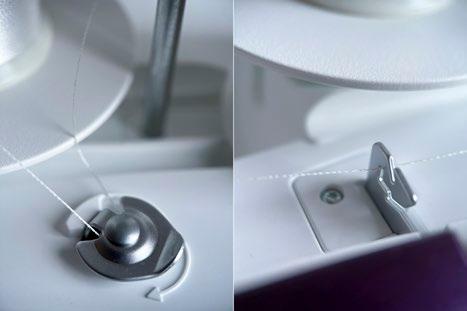
Next, guide the thread through the bobbin winding thread tension guide. Keep the tail of the thread down, looping it as if you were flossing, then insert it and pull it back until it clicks securely into place. Thread the tail through the lower section of the winding thread guide, positioned directly underneath. Gently pull the thread towards the bobbin spindle, ensuring a smooth and even winding process.
20 | issue 29 OUILT
The PFAFF creative icon 2 Sewing and Embroidery Machine power cord
The PFAFF creative icon 2 Sewing and Embroidery Machine
The PFAFF creative icon 2 Sewing and Embroidery Machine thread stands
The PFAFF creative icon 2 Sewing and Embroidery Machine spool base
The PFAFF creative icon 2 Sewing and Embroidery Machine thread system
The PFAFF creative icon 2 Sewing and Embroidery Machine thread system
The PFAFF creative icon 2 Sewing and Embroidery Machine bobbin
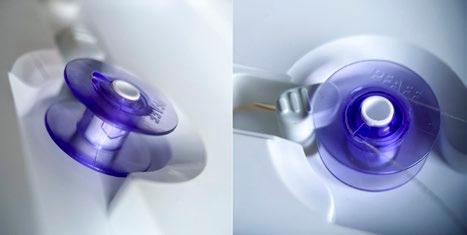
Thread the tail of the thread through the bobbin hole. Position the bobbin onto the bobbin spindle, with the logo facing up. The bobbin interior features arrows, guiding its placement in the correct orientation. Push the bobbin winding lever to the right.
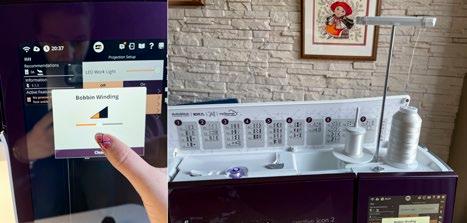
When you push the bobbin winding lever to the right, the screen displays a speed control option. Touch the screen to activate the bobbin winder, as the foot control doesn't wind the bobbin; it's managed by a separate motor. You can adjust the bobbin winding speed directly on the screen, offering convenient control over the process. Once the bobbin is fully wound; the lever will automatically pop back to the left, stopping the winding process. Then, you can safely remove the bobbin and cut the thread.
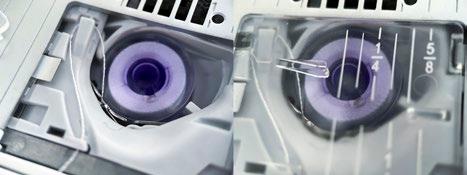
When installing the fully wound bobbin, the process is straightforward, and the bobbin is visible under the clear cover. Start by pushing the button to the right to open the bobbin cover. Take the fully loaded bobbin, ensuring the thread is directed over the top and to the left, with the PFAFF logo facing up. Insert the bobbin into the case, holding it to prevent turning, then pull the thread firmly to the right and left into the tension spring until it audibly 'clicks'. Follow the directional arrows for threading, and once completed, replace the bobbin cover. Pull the thread to the left to cut it.
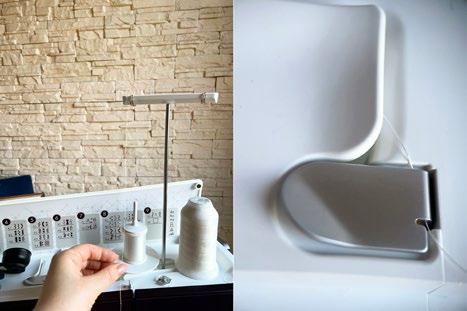
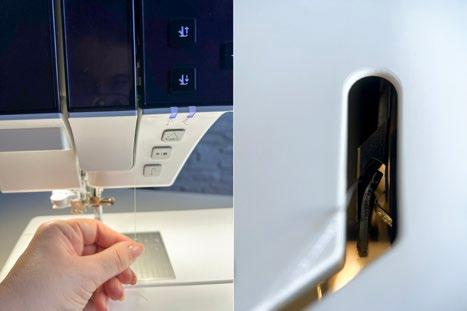
Place the spool on the base, adhering to the PFAFF machine's designed configuration where the thread stands upright. This has been my practice since my first PFAFF machine, as it's tailored for seamless functionality. If any issues arise with the thread descending and wrapping around the post, consider using a thread net on the spool. Now, guide the thread upward, bring it straight across the left hook, and pull it down in a straight line to ensure the thread is fully seated. Grasp the thread with both hands and gently guide it under the thread guide from the front to the back.
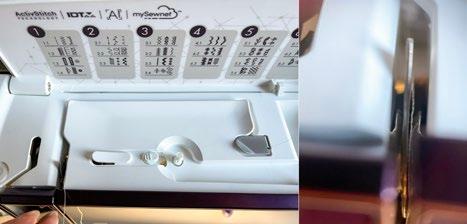
Retrieve the thread, guiding it back into and through the threading slot. When threading the machine and navigating the tension discs, there are various opinions about which side to position the thread. Personally, when using a single thread, I prefer placing it on the right side of the tension assembly flange. My rationale behind this choice is that the active stitch aligns directly under the right side, where there are three independent rollers constituting another tensioning system. Thus, by positioning the thread on the right-hand side, it logically aligns directly with those components at the stitch point.
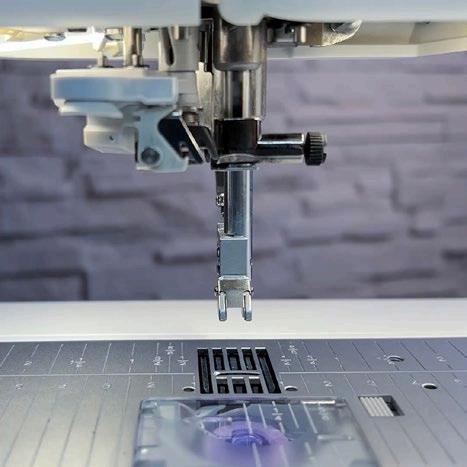
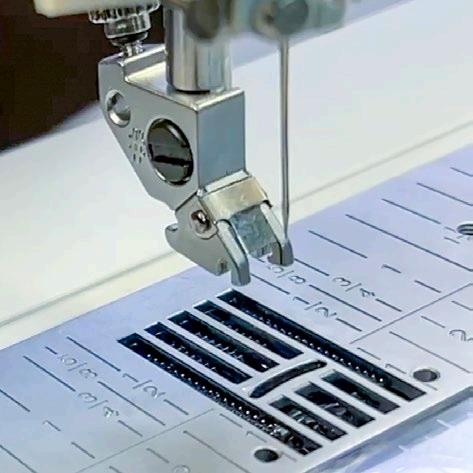
Pull the thread straight down through the right threading slot, then guide it upwards through the left threading slot. Next, bring the thread from the right into the take-up lever until it clicks into place. Lastly, guide it downward through the left threading slot, following through to the last thread guide positioned just above the needle.
| issue 29 21 OUILT
The PFAFF creative icon 2 Sewing and Embroidery Machine touch screen for bobbin winding
The PFAFF creative icon 2 Sewing and Embroidery Machine bobbin case
The PFAFF creative icon 2 Sewing and Embroidery Machine thread guide
The PFAFF creative icon 2 Sewing and Embroidery Machine thread guide
The PFAFF creative icon 2 Sewing and Embroidery Machine thread guide
The PFAFF creative icon 2 Sewing and Embroidery Machine attaching the presser foot
The PFAFF creative icon 2 Sewing and Embroidery Machine needle and needle threader



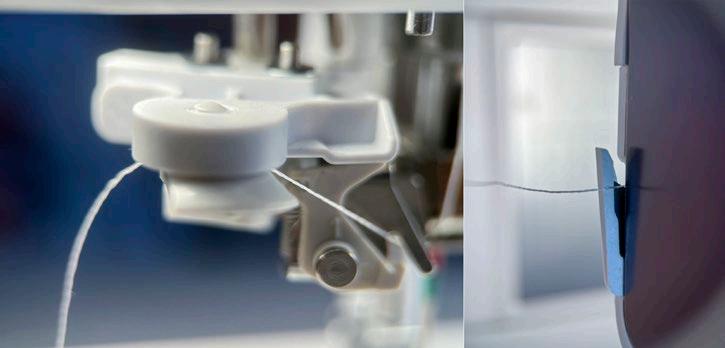
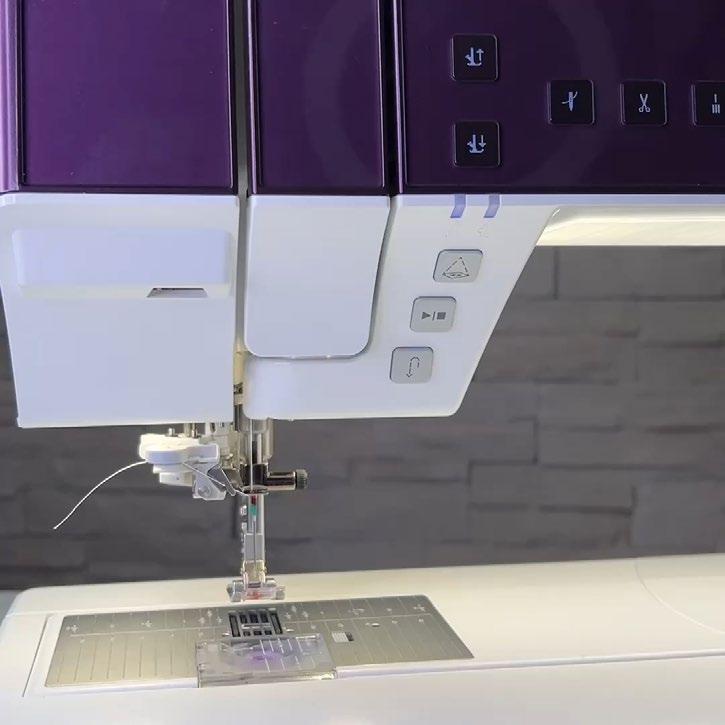
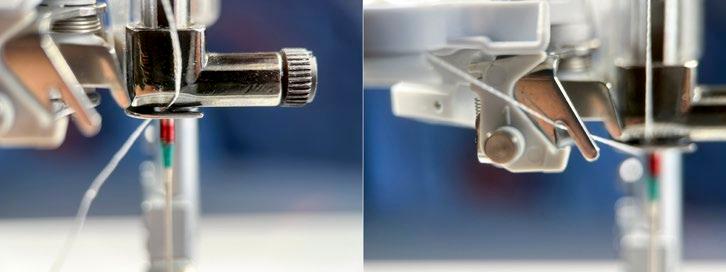
To install or change the needle first loosen the needle screw. Then, position the needle of your choice, pushing it upward with the flat side away from you until it reaches its limit. Carefully tighten the needle screw to secure it in place. To attach the presser foot, align the pins on the foot with the gap underneath the presser foot holder. Press upward firmly until the foot snaps securely into place.
On the right-hand side, pull the thread from the right, guiding it towards the left through the needle guide. Then, position the thread under the hook on the threader.
Pull the thread between the discs until it securely "clicks" into place. Then, guide the thread up to the sewing head thread cutter and trim any excess thread by pulling it from the back to the front in the thread cutter.
Lastly, I want to emphasize the automatic needle threader, a noteworthy feature. With a simple touch of a button, threading the needle becomes a seamless process. The presser foot is automatically lowered during the threading sequence and rises again when threading is finished, ensuring efficient preparation for your sewing tasks.
22 | issue 29 OUILT
The PFAFF creative icon 2 Sewing and Embroidery Machine thread guides
The PFAFF creative icon 2 Sewing and Embroidery Machine thread guides
The PFAFF creative icon 2 Sewing and Embroidery Machine needle threader
PFAFF creative icon 2 | Presser Feet
I’m now exploring the accessories that come with The PFAFF creative icon 2 Sewing and Embroidery Machine. It’s all about the presser feet, the innovative IDT System, and the simplicity of changing the presser feet. Each presser foot plays a crucial role in enhancing the crafting experience with this exceptional machine.

As mentioned briefly in my initial article, the accessory kit accompanying the PFAFF creative icon 2 is noteworthy. This kit has exceeded expectations by including not only standard tools, but also 12 presser feet, 10 bobbins, a straight stitch plate, and a pack of machine needles. The comprehensive nature of this kit enhances each crafting session and provides you with a wellequipped experience.
Change the presser foot without a screw - it’s a pure joy! To detach the presser foot, gently pull from the back of the presser foot. When attaching the presser foot, align the pins on the foot with the gap below the presser foot holder. Press upwards firmly until the foot securely snaps into place.
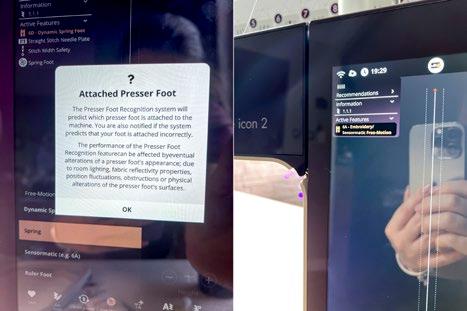
Explore the functionality of the Presser Foot Recognition System! Upon switching to a different foot, the screen promptly displays its name and number, facilitating instant identification. Additionally, the machine intelligently alerts you if the chosen foot is compatible with your selected stitch.
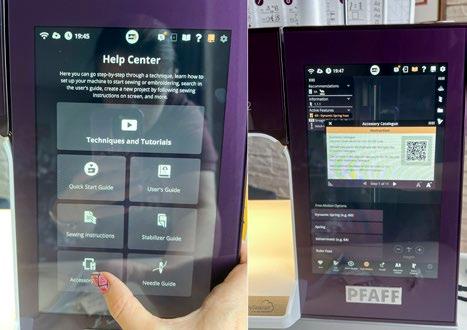
Access the help center for comprehensive information. In the "Accessory" category, you will find a window with a QR code. Scanning this code will take you directly to the PFAFF website, providing insights and guidance on each presser foot's functionality and usage.
The PFAFF creative icon 2 Sewing and Embroidery Machine simplifies the creative process by making information readily available at your fingertips.
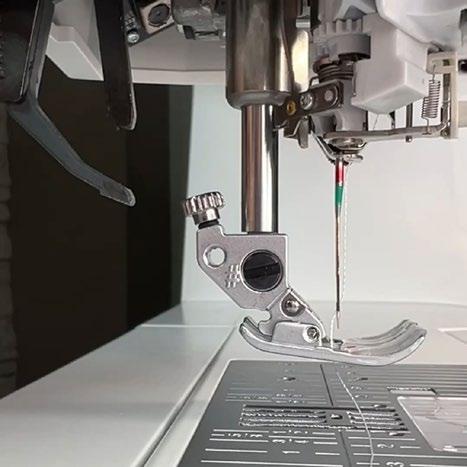
Let's discuss the Integrated Dual Feed (IDT) system, an innovation developed by PFAFF over 45 years ago. This system involves a finger walking foot at the rear of the machine, allowing easy activation or disengagement without complete detachment. Unlike traditional machines, which use feed dogs to feed fabric from below, the IDT system includes an additional feeder, the finger feeder, operating from above. This ensures even feeding of both the top and bottom fabric layers during simultaneous stitching, resulting in consistently even stitches.
Note: When using the IDT system, use presser feet with a center back cut-out (A) for seamless operation. Activating the IDT system is straightforward. Raise the presser foot to the extra-high position and pull the IDT system down until it engages. The creative icon 2 features an IDT sensor that alerts you when it's necessary to engage or disengage the IDT system, ensuring smooth and error-free sewing experiences.
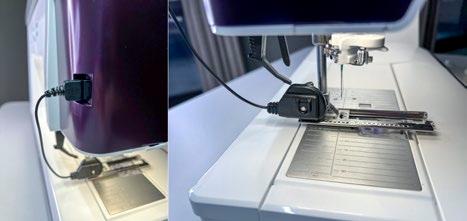
Let's explore the Sensormatic Buttonhole Foot 5M, a presser foot designed for crafting precise buttonholes. This foot ensures consistency by sewing both sides of the buttonhole in the same direction, resulting in a uniformly polished outcome. Once connected to the machine, the buttonhole is sewn to match the length entered into the machine's settings.
| issue 29 23 OUILT
The PFAFF creative icon 2 Sewing and Embroidery Machine Accessories
The PFAFF creative icon 2 Sewing and Embroidery Machine Presser Foot Recognition System
The PFAFF creative icon 2 Sewing and Embroidery Machine helps center screen
The PFAFF creative icon 2 Sewing and Embroidery Machine Integrated Dual Feed (IDT) system
The PFAFF creative icon 2 Sewing and Embroidery Machine Sensormatic Buttonhole Foot 5M
When using the Sensormatic Buttonhole Foot, I typically adjust the slit length to be slightly larger than the actual button size. This adjustment ensures that the button fits comfortably within the completed buttonhole.

The 6A Embroidery/Sensormatic FreeMotion Foot has various uses, such as stippling, free-motion embroidery, and darning. This clear foot improves visibility during stippling and free-motion embroidery allowing the user to see the stitches beneath the foot.
Here's how it works: During low-speed free-motion sewing, the presser foot elevates and lowers with each stitch to secure the fabric on the stitch plate while the stitch forms. At higher speeds, the presser foot glides over the fabric while sewing, enabling smoother movement and precision.
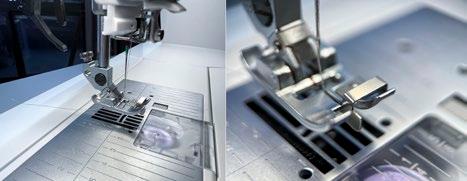
The Bi-Level Guide Foot for the IDT System is designed for executing exclusive stitch techniques like edge stitches and floating stitches. It has a unique design with an elevated underside on the right side and a centred guide. This configuration allows the presser foot to smoothly traverse along a folded edge, ensuring precise and flawless stitching for these specialized stitch techniques.
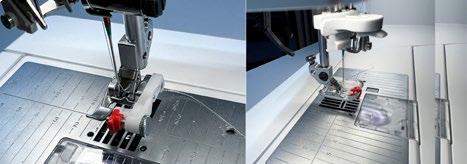
Bid farewell to hand-sewing with the 3 Blind Hem Foot for the IDT System, providing a seamless solution for crafting invisible hems. This tool is perfect for sewing concealed hems without the need for additional finishing touches. The foot has a guiding toe that effortlessly navigates the fabric, and the red guide on the foot is designed to glide along the fold of the hem edge, ensuring precise and immaculate results.

When dealing with very small fabric pieces or reinforced edges, the large 5A Sensormatic Buttonhole Foot may not provide optimal feeding. In such cases, choose the 5M Manual Buttonhole Foot. Use the foot's markings to position the garment edge accurately, and the finger at the back secures cording for corded buttonholes.
On the other hand, the 5M Sensormatic Buttonhole Foot ensures flawless buttonholes by sewing both sides in the same direction for a uniformly balanced finish. The buttonhole process is conveniently automated for seamless completion.
A helpful tip: To stabilize fabrics prone to shifting or stretching, reinforce them with water- soluble or lightweight stabilizer. For increased stability and durability, insert a gimp thread while sewing. For particularly striking linen buttonholes, opt for a heavier-weight thread using a topstitch needle.
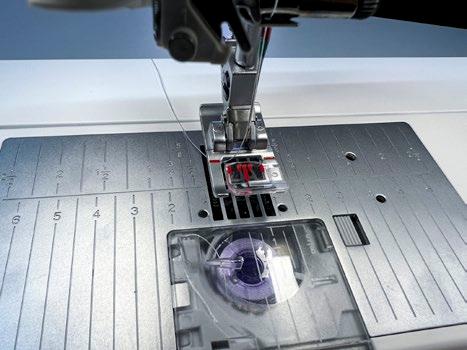
The 2A Fancy Stitch Foot is designed to easily accommodate decorative stitches during sewing sessions. Its guide marks provide precise positioning for these stitches, allowing you to embellish projects with ease. The foot has visible markings to assist in accurately positioning decorative stitches or borders on fabric. Additionally, its specialized groove on the underside ensures optimal feed, even for densely stitched patterns, making sewing dense stitches straightforward.
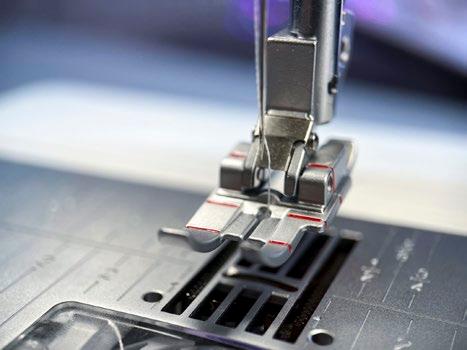
The ¼” Quilting Foot for the IDT System is an excellent choice for piecing and patchwork, particularly when paired with the straight stitch needle plate. It maintains a precise distance of 1/4 inch (6mm) from the needle to the outer edge of the foot and 1/8 inch (3mm) from the needle to the inner edge. This accurate spacing ensures consistent piecing in projects where that ¼” seam allowance is crucial.
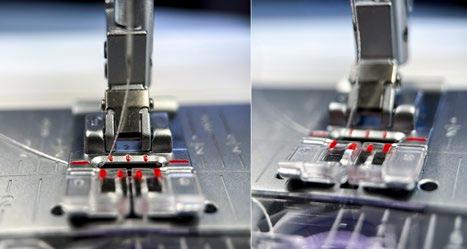
The Maxi Stitch foot boasts a distinctive groove on its underside, enabling the machine to effortlessly create extravagant stitches with flawless precision. These stitches use side motion feeding to achieve even wider stitches, some of them upwards of 52mm.
24 | issue 29 OUILT
The PFAFF creative icon 2 Sewing and Embroidery Machine 3 Blind Hem Foot for the IDT System
The PFAFF creative icon 2 Sewing and Embroidery Machine 5M Manual Buttonhole Foot
The PFAFF creative icon 2 Sewing and Embroidery Machine 2A Fancy Stitch Foot
PFAFF creative icon 2 Sewing and Embroidery Machine ¼” Quilting Foot for the IDT System
The PFAFF creative icon 2 Sewing and Embroidery Machine 8 Maxi Stitch Foot
The PFAFF creative icon 2 Sewing and Embroidery Machine 6A Embroidery/Sensormatic FreeMotion Foot
The PFAFF creative icon 2 Sewing and Embroidery Machine machine Bi-Level Guide Foot for IDT System
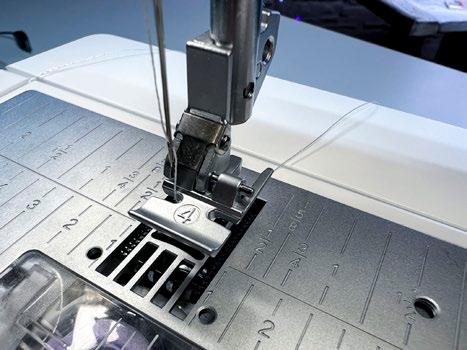
When attaching a zipper, precision is key, especially when stitching close to the zipper teeth. The versatile 4 Zipper Foot for the IDT System is your ideal companion, offering the flexibility to snap onto the shank from either the left or right side. Adjust the needle position to the right or left to sew even closer to the zipper teeth, ensuring impeccable and accurate zipper installation.
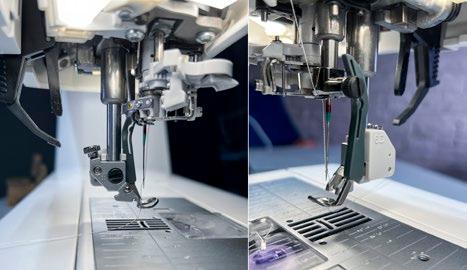
A notable component in the creative icon 2 kit is the 6D Dynamic Spring Foot, which serves various purposes such as embroidery, free-motion sewing, and quilting. Its design provides an unobstructed view, ideal for stippling or following intricate fabric designs. The spring action of the foot prevents the fabric from lifting alongside the needle during stitching, offering enhanced control over sewing endeavors.
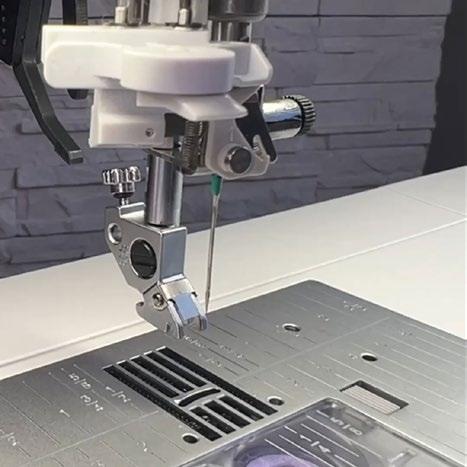
To attach the Dynamic Spring Foot, follow these simple steps:
1. Carefully loosen the small screw at the rear of the presser foot holder.
2. Squeeze the 6A Dynamic Spring Foot and guide its pin into the cross-hole of the presser foot holder, ensuring the foot's arm is positioned behind the needle screw.
3. Tighten the screw securely.
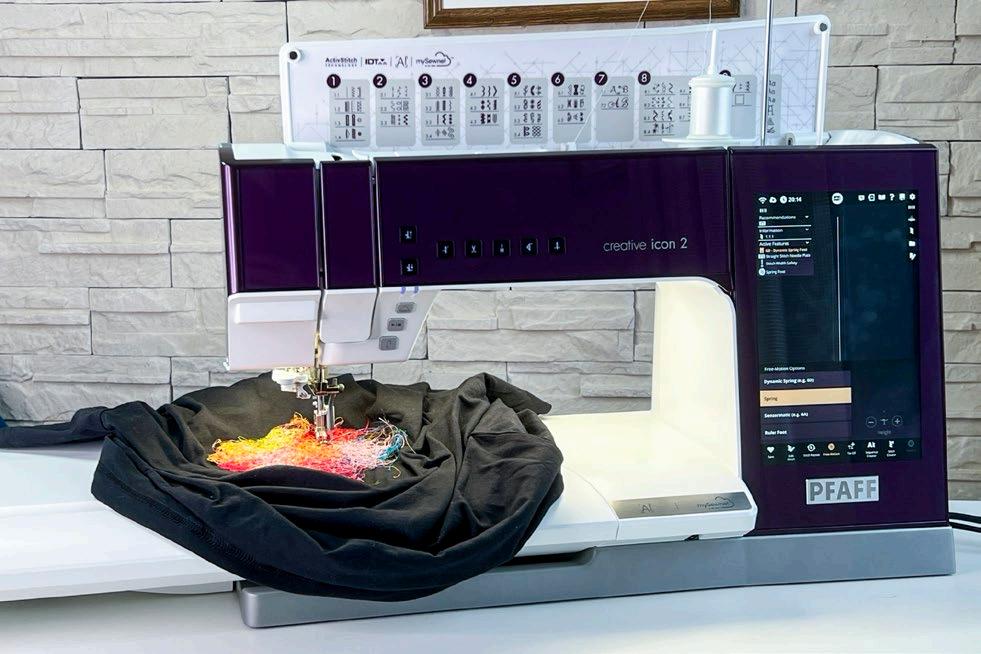
When the Presser Foot Recognition system identifies the Dynamic Spring Foot, press the Free Motion icon at the bottom of the screen to begin quilting. Position your project under the presser foot. In Free Motion mode, manually guide your fabric, controlling the stitch length with your movement.
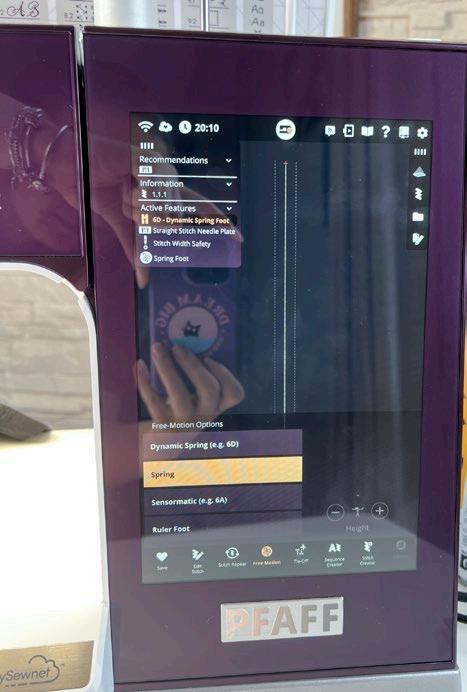
Maintain a smooth and consistent motion to achieve evenly spaced stitches while quilting.
If you think we've covered all the features and feet of this versatile machine, there's more to discover!
| issue 29 25 OUILT
The PFAFF creative icon 2 Sewing and Embroidery Machine 4 Zipper Foot for the IDT System
The PFAFF creative icon 2 Sewing and Embroidery Machine 6A Dynamic Spring Foot
The PFAFF creative icon 2 Sewing and Embroidery Machine 6A Dynamic Spring Foot
The PFAFF creative icon 2 Sewing and Embroidery Machine 6A Dynamic Spring Foot; free motion demo
The PFAFF creative icon 2 Sewing and Embroidery Machine with the attached embroidery unit
PFAFF creative icon 2
Embroidery Exploration
We'll unbox the embroidery case, explore its contents, and delve into the software that complements The PFAFF creative icon 2 Sewing and Embroidery Machine. Let's uncover this embroidery toolkit and see how it transforms visions into stitched realities.

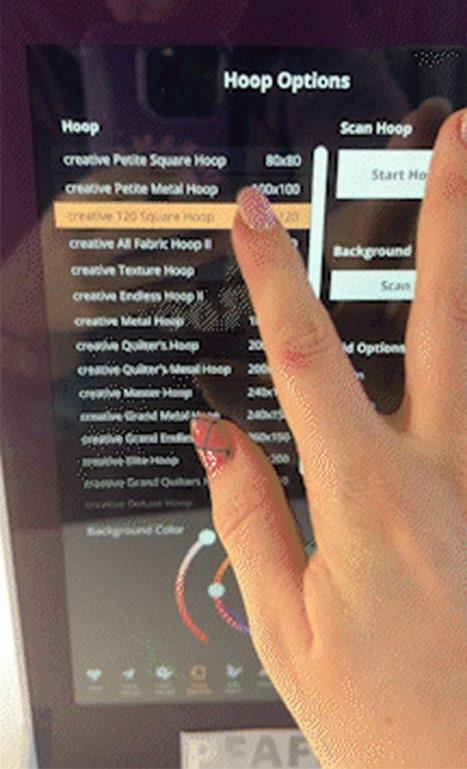
The embroidery unit pack for the PFAFF creative icon 2 Sewing and Embroidery Machine is comprised of the travel case, embroidery unit, and an impressive selection of hoops, including the creative Grand Dream Hoop, creative Supreme Hoop (360 x 260 mm), creative Elite Hoop (260 x 200 mm), and the versatile creative 120 Square Hoop (120 x 120 mm). This comprehensive assortment is designed to optimize embroidery tasks, streamlining the process to save time and minimize material usage.
Let's get into our embroidery session! To get started, gently pull and remove the accessory tray.
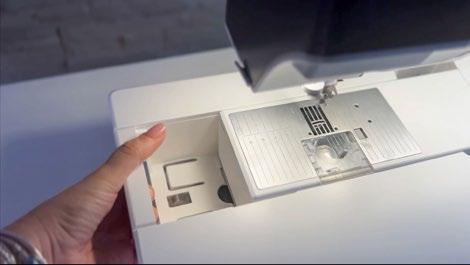
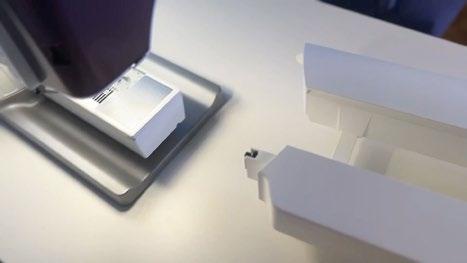
If this is your first time using the embroidery unit, ensure to remove the red manufacturer's clip located on the bottom of the embroidery unit. Turn the unit upside down and gently pull out the red clip. Once this clip is removed there is no need to put it back.

Quick TIP Ensure your machine is positioned on a spacious, level, and stable surface to secure both the machine and the embroidery unit. I use a robust table measuring 140cm x 60cm with a weight capacity of 40 kg, ensuring stability even during intense embroidery sessions that may cause vibrations.
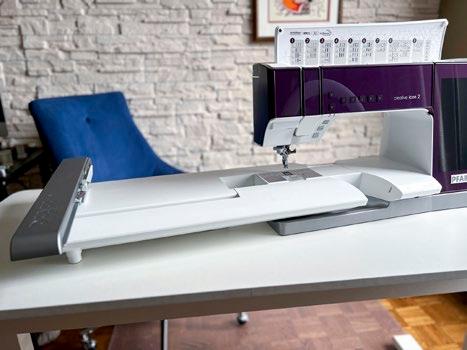
Gently slide the embroidery unit onto the free arm of the machine until it firmly plugs into the socket at the back. Whether you were previously in embroidery mode or you switched to it now, a pop-up message prompts you to clear the embroidery arm and remove the hoop before calibration. Tap 'OK,' and the machine will proceed to calibrate while the embroidery arm moves to the ready position.
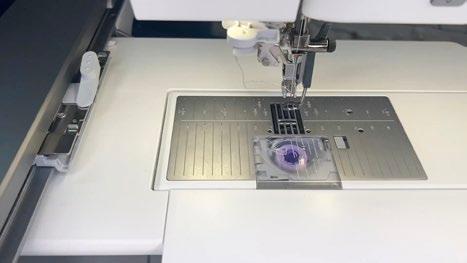
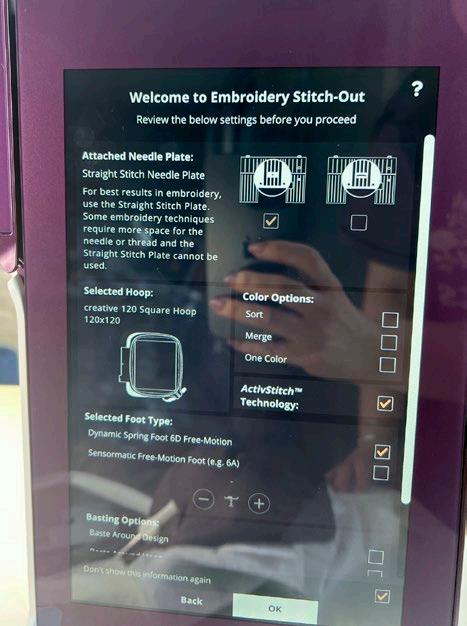
It is recommended to use the straight stitch plate for embroidery. However, if you forget to switch, the embroidery navigation on the screen will provide all the necessary recommendations and reminders before the embroidery process.
26 | issue 29 OUILT
The PFAFF creative icon 2 Sewing and Embroidery Machine embroidery unit pack
The PFAFF creative icon 2 Sewing and Embroidery Machine tray accessories
The PFAFF creative icon 2 Sewing and Embroidery Machine embroidery unit
The PFAFF creative icon 2 Sewing and Embroidery Machine
To hoop the fabric, prepare a sandwich with a layer of stabilizer and fabric. Ensure that the layers are smooth and securely hooped together. To attach the hoop, slide the hoop connector into the hoop attachment from front to back until it clicks into place. To remove the hoop from the embroidery arm later, press and hold the gray button on the hoop attachment, then slide the hoop towards you. For now, keep the hoop attached and click the Embroidery mode.


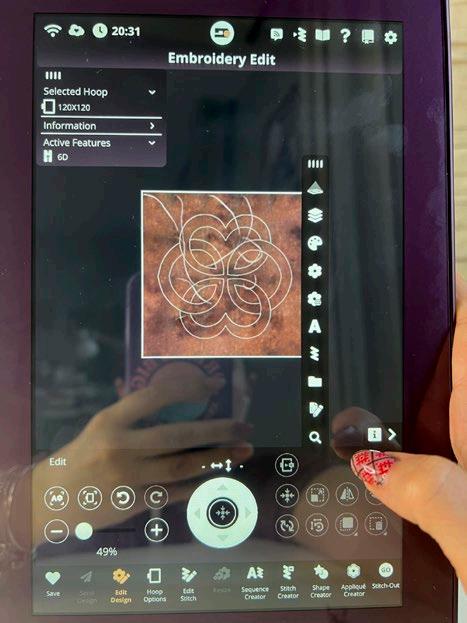
In Embroidery mode, click on the screen and select an embroidery design from the menu to get started. Touch and hold the chosen design to load it into the Embroidery edit section, allowing you to place it precisely where you desire. Next, click on the hoop icon and choose the correct hoop size from the list. Finally, click 'Start Hoop Scan' to initiate the hoop scanning process.

| issue 29 27 OUILT
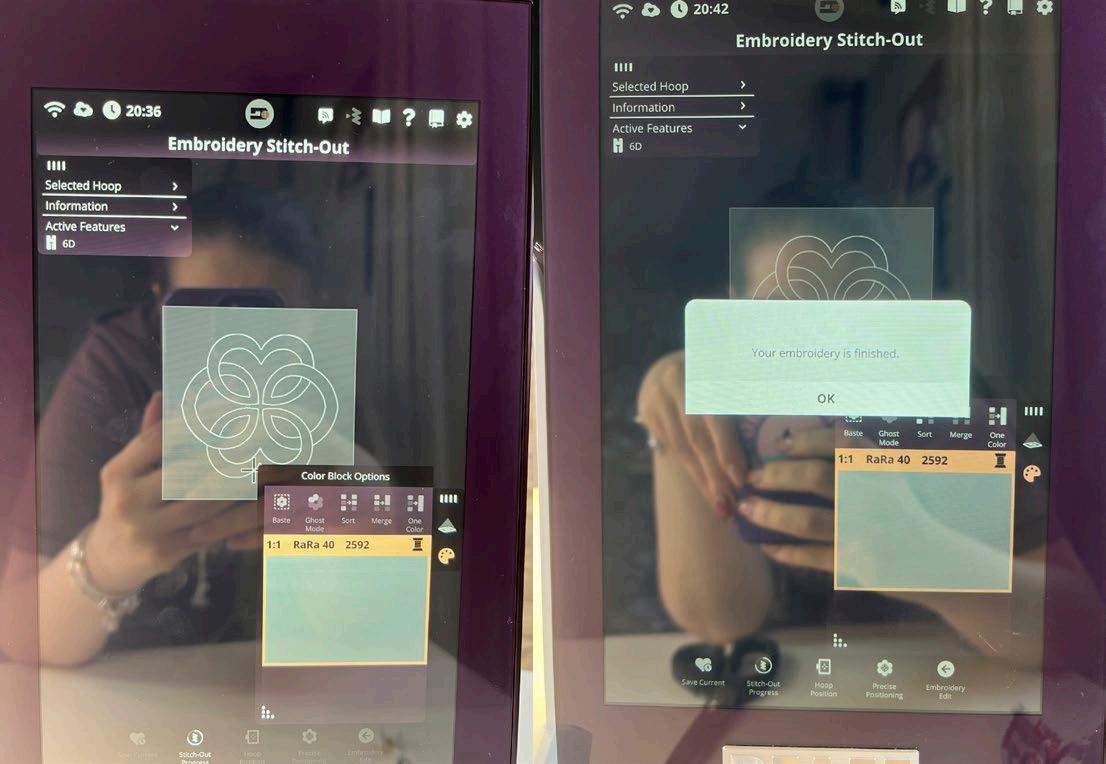
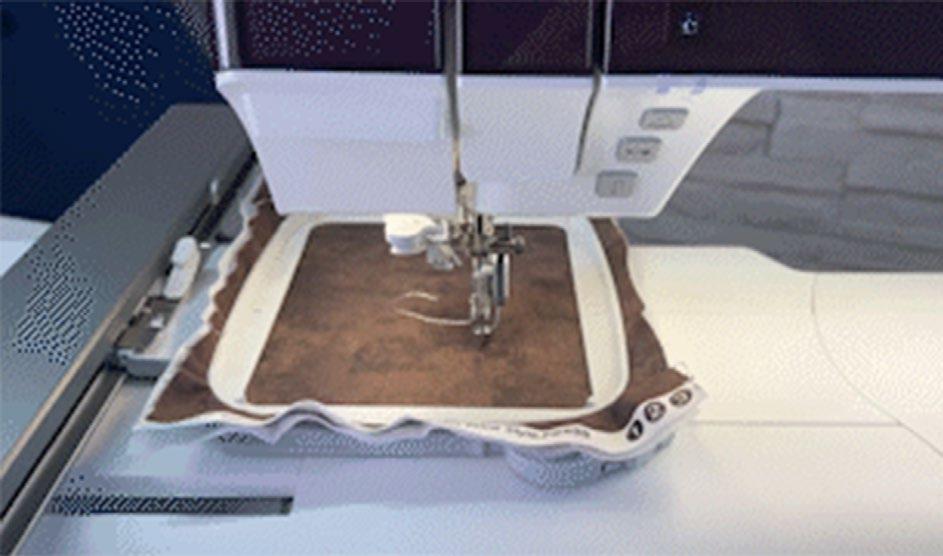
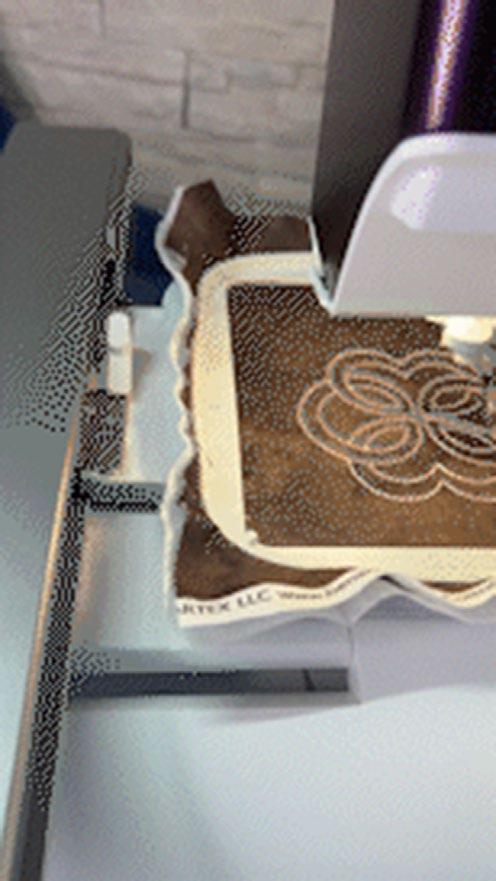
You can monitor every stitch on the embroidery stitch-out screen and pause the embroidery at any moment. Once the embroidery is complete, a notification will prompt on the screen.
To remove the hoop from the embroidery arm, press and hold the gray button on the hoop attachment, then slide the hoop towards you. Remove your stitched design, then incorporate it into any of your sewing, quilting or garment projects! The entire embroidery process is a delight from start to finish.
After scanning the hoop and resizing the design, fine-tune its placement within the hoop using the Move and/or Rotate options. When the frame turns white, indicating proper positioning, you're all set to begin stitching your embroidery design. Press the Start button and enjoy the stitching process.
28 | issue 29 OUILT
The PFAFF creative icon 2 Sewing and Embroidery Machine embroidery stitch-out screen
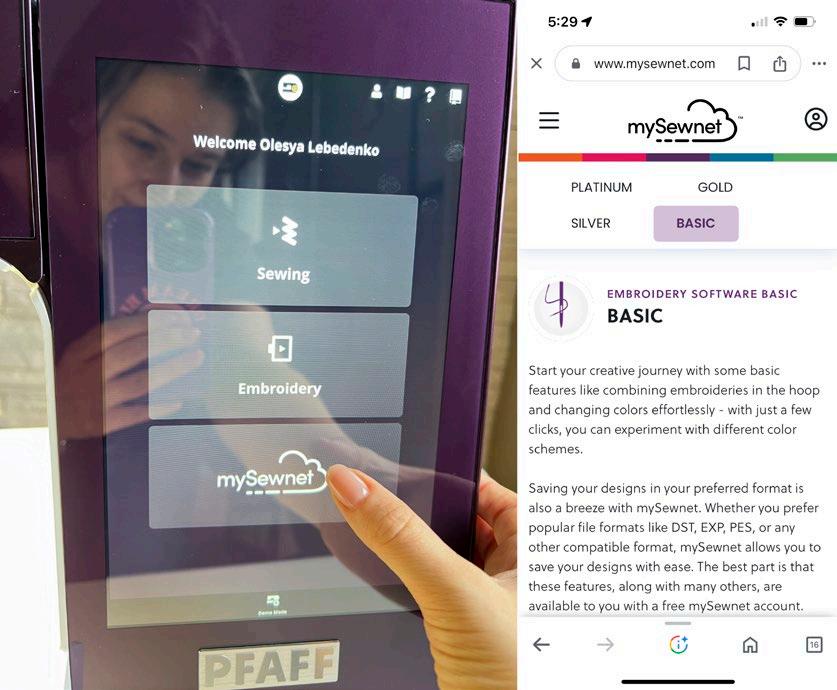
Let's delve a bit deeper into the embroidery features. There's something more to add. I'll briefly mention mySewnet, an online platform and subscription service that includes embroidery and design software. It offers users tools for editing, creating, and managing embroidery designs. The platform often integrates with compatible embroidery machines of different brands, allowing users to transfer designs directly for stitching. Moreover, the platform provides a 30-day free trial of EMBROIDERY SOFTWARE PLATINUM, offering advanced tools and features to enhance your imaginative designs.
Concluding this exploration into embroidery with The PFAFF creative icon 2 Sewing and Embroidery Machine, I'm captivated by the possibilities it offers. The diversity of embroidery hoops, the intuitive interface, and the integration with mySewnet have redefined what's possible. This machine is more than a tool; it's a way to bring dreams into reality. The precision, software, and ease of use create an unparalleled embroidery and quilting experience. With this powerhouse, my creative journey takes on a new dimension, ensuring every stitch and design tells a story of artistry and innovation throughout 2024.
Olesya Lebedenko olesya-l-design.com

| issue 29 29 OUILT
The PFAFF creative icon 2 Sewing and Embroidery Machine welcome screen
Cutting fabric scraps into usable pieces Oh JOY, Scrappy Quilts!
Paul Léger

Experienced quilters accumulate a lot of fabric scraps and have a significant stash. Even if we don't, we likely know someone who does and would be happy to assist by sharing some of their stash for an exciting quilting project. This leads me to this week's topic: Scrappy Quilts.
Here are the tools I’ll need to create the quilts materials thread
• Gütermann Cotton 50wt Thread 250m - Lt. Slate
• Gütermann Cotton 50wt Thread 250m - Ivory needles
• SCHMETZ #1709 Universal Needles Carded - 80/12 - 5 count
• SCHMETZ #1710 Universal Needles Carded - 90/14 - 5 count cutting tools
• INFINITI Thread Snips - Black – 4½” (11.4cm)
• OLFA RTY-2/C - Splash Handle Rotary Cutter 45mm - Aqua
• OLFA RB45-2 - Tungsten Tool Steel Rotary Blade 45mm - 2pc
rulers and mat
• OLFA QR-4S - 4½” Square Frosted Acrylic Ruler
• OLFA QR-6x12 - 6” x 12” Frosted Acrylic Ruler
• OLFA QR-6x24 - 6” x 24” Frosted Acrylic Ruler
• OLFA RM-SG - 18” x 24” Double Sided Rotary Mat other
• OLISO PRO TG1600 Pro Plus Smart Iron - Turquoise
Years ago, I had bags and boxes filled with fabric scraps for projects I’d worked on. I decided to empty those bags and boxes. Every day I’d go in the studio for 30 to 60 minutes and I’d cut up scraps. I decided to cut most scraps in squares measuring 1½” x 1½”, 2” x 2”, 2½” x 2½”, 3” x 3”, 4” x 4”, 5” x 5” and 6” x 6”.
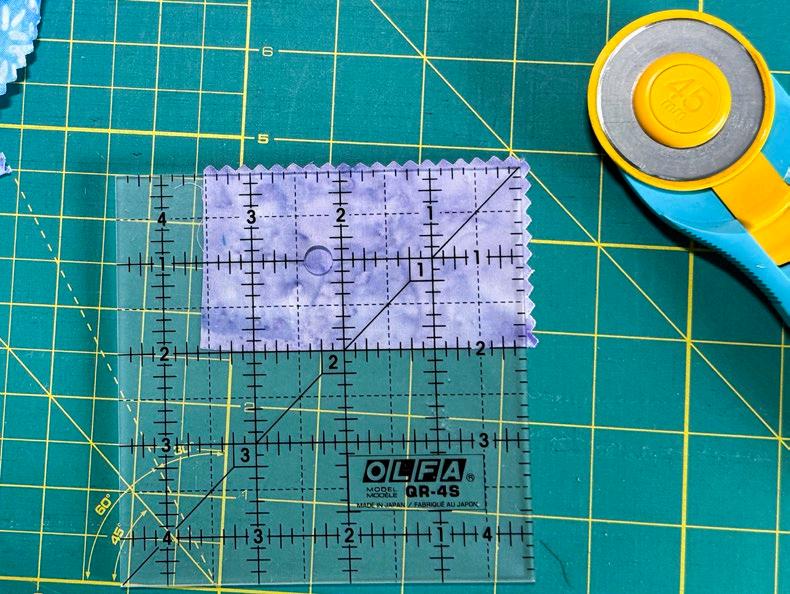
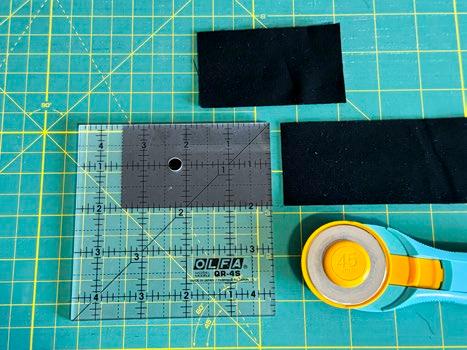
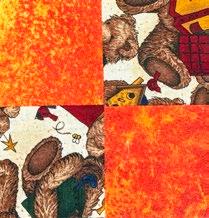
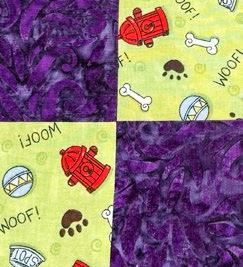
From the piece of fabric in the photo to the left I could cut one 2” x 2” square and a 1½” x 1½” square using the OLFA 4½” x 4½” Ruler
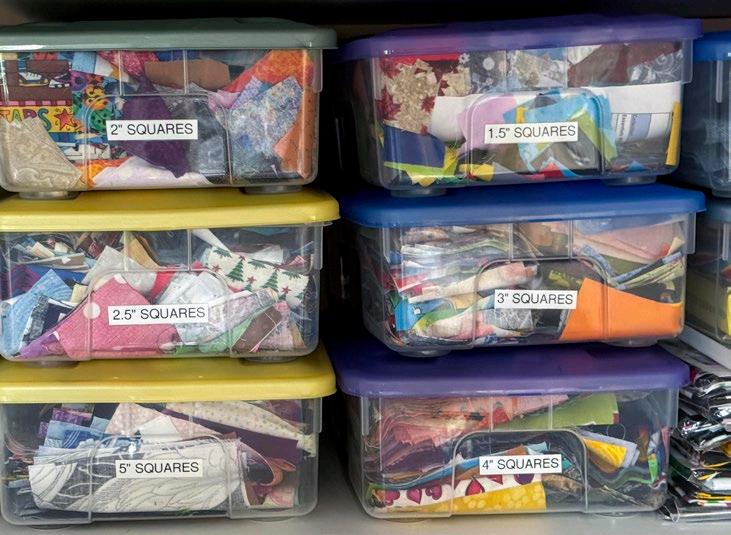
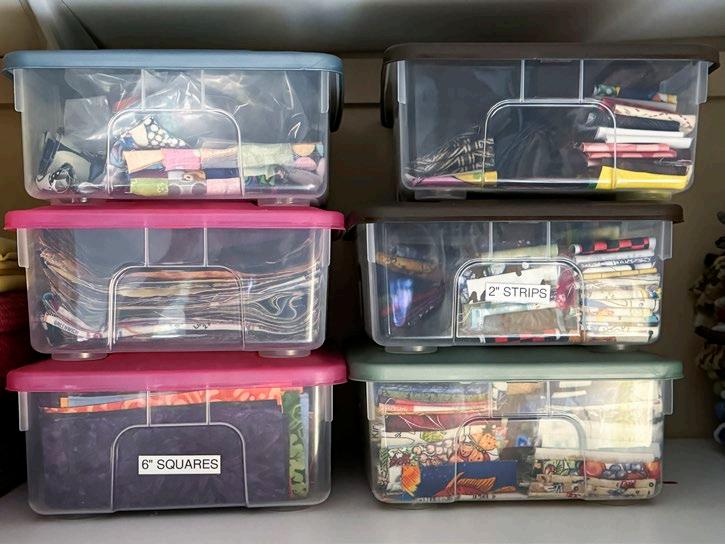
As the different-sized squares are cut, they go into labelled containers ready to be used.
Another thing I do is when I finish cutting yardage and there’s fabric left, I cut long strips using the OLFA QR-6 x 24 - 6” x 24” Frosted Acrylic Ruler. The width of these strips is 2”, 2¼” and 2½” x the width of the fabric.
30 | issue 29 OUILT
Essential quilting tools and notions
Cutting fabric: do not throw away fabric scraps, cut them up into usable pieces.
Photos by Paul Léger
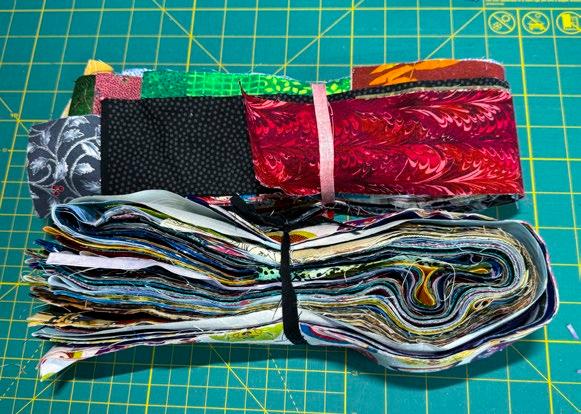
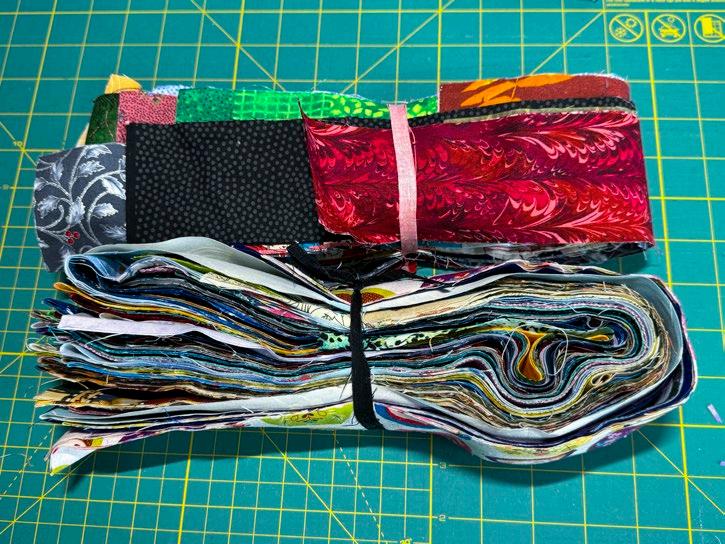
The 2” and 2¼” wide strips I use as bindings. When I have enough 2½” wide strips I put 20 of them together to make my homemade jelly rolls. In the past, I’ve gone to retreats with enough of these jelly rolls for every attendee! Then on a predetermined evening, we had ourselves a good oldfashioned jelly roll race.
TIP To increase the chances of winning a jelly roll race, as people are sewing full speed ahead, cut their threads! This will slow them down and increase your chances of winning the race.
What I do with the 2” and 2¼” strips, depends on my mood and needs. I sometimes use them for binding and sometimes I use them to make smaller jelly roll quilts. Until I decide, I place them in containers properly labelled.
It took me a long time to go through all the scraps I had. Once I was done, I swore I’d never be in that predicament again, and I haven’t been. Now, as soon as I’ve completed a project, I cut up all the scraps and put them away. It’s one less thing for me to worry about.
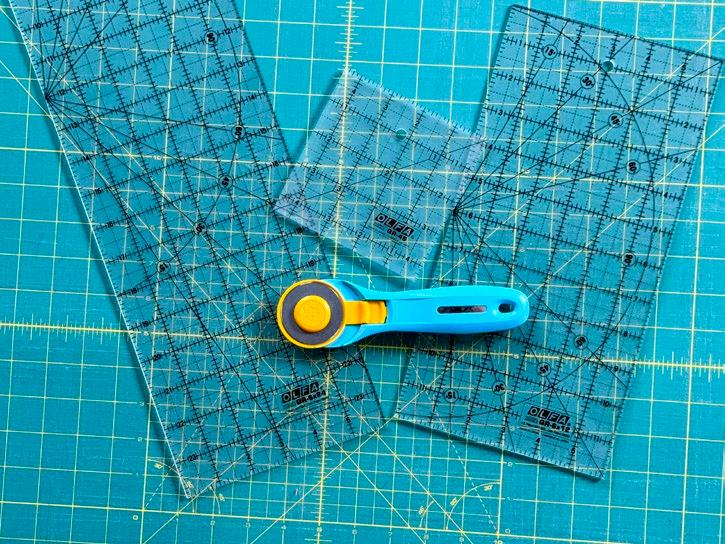
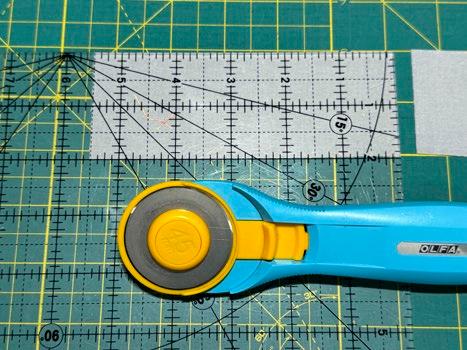
What made the whole process easy was using tools such as the OLFA QR-4S - 4½”, Square Frosted Acrylic Ruler, OLFA 6” 12” Ruler, OLFA 6”, x 24”, and the OLFA Rotary Cutter 45mm

| issue 29 31 OUILT
Store cut fabrics in labelled bins.
Strips can also be stored in labelled bins.
Cutting a long strip.
Homemade jelly rolls
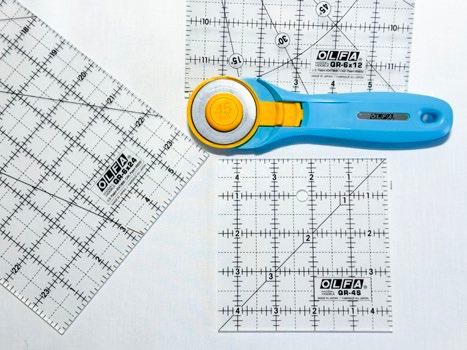
OLFA rulers and cutter
Scrap Quilt 1 working with 2” x 2” fabric scraps
The black lines on the frosted acrylic surface make it easy to read and use even on the most colorful fabrics to create said stash.
I’m using the OLFA 4½” x 4½” square Frosted Acrylic Ruler, OLFA 6” x 24” Frosted Acrylic Ruler along with my trusty OLFA Rotary Cutter 45mm - Aqua
1. I start by making 16 patch blocks using 2570 precut 2” x 2” squares from scrap fabrics.
2. I also use 1 yard of fabric from which I’ll cut 178 – 2 x 3½” black rectangles.
3. Using the OLFA 6” x 24” Frosted Acrylic Ruler I cut nine 3½” strips of fabric. With the help of the OLFA QR-4S4½” Square Frosted Acrylic Ruler I was able to cut 20 – 2 x 3½” black rectangles from each strip.
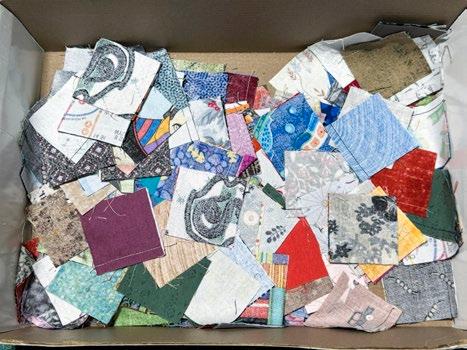
The process of making these very small fabric scraps starts while working on other quilts by using Leaders and Enders.
What is a Leader and Ender? A leader and ender are small pieces of scrap fabric that are put under the foot when starting or finishing to sew. This prevents an accumulation of thread at the start of the sewing. This is also called a “Bird Nest”.
When I started using leaders and enders, I would use any piece of fabric scrap I had and would use and reuse it often. Then one day a friend recommended using two precut squares of the same size and sewing a ¼” seam. This started a new way to make scrap quilts that in the end saved a lot of time.

With this new of turning leaders and enders into useful sewn pairs, I put them in a box as they are sewn until I have enough for another quilt project.
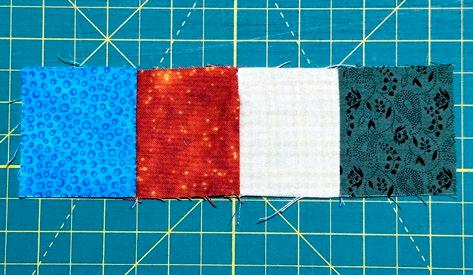
4. Once I have a considerable quantity of pairs, I sew two pairs together creating a small row. 320 small rows are required.
Note: All seams are ¼”
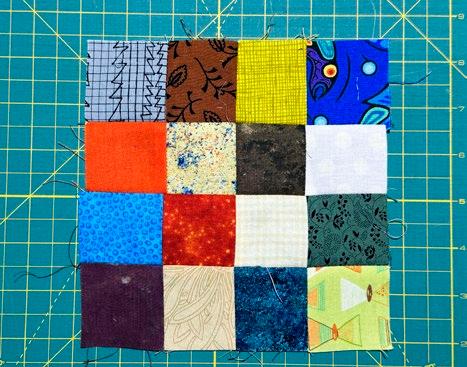
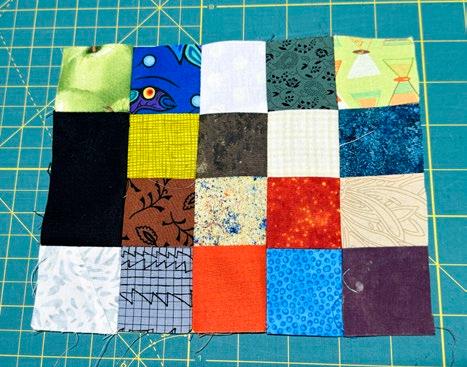
5. From the 320 four 2” x 2” fabric scraps rows created above, sew four of the rows creating a 16 patch. A total of 80 – 16 patches are needed to make this quilt.
6. Take 90 of the 2” x 3½” black rectangles and sew a 2” x 2” square on each end.
7. Take 80 sets from the above step and sew one to each of the 80 – 16 patches as shown in the photo that follows.
32 | issue 29 OUILT
OLFA rulers and rotary cutter
Cut 178 - 2” x 3½” rectangles
Turning leaders and enders into useful quilt pieces.
Accumulating sewn leaders and enders.
Four 2” x 2” fabric scraps make one row.
A 16-patch block
Sew 2” x 2” squares on each end of a 2” x 3½” black rectangle.
8. Make 8 piles of 10 – 16 patches. Taking one pile at a time sew them end to end.
Note: Due to difficulty in photographing wide rows some of the next photos will only show the partial rows.

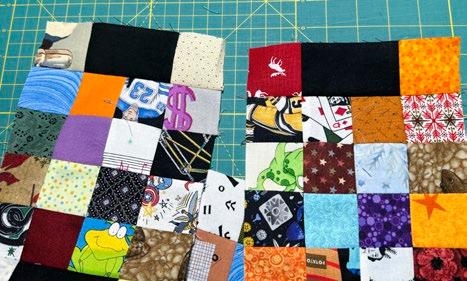
9. There are still 10 black rectangles with 2” x 2” square sets. Sew them on the end of each of the rows that do not yet have these sets sewn on. Both ends should look as shown in the next photo.
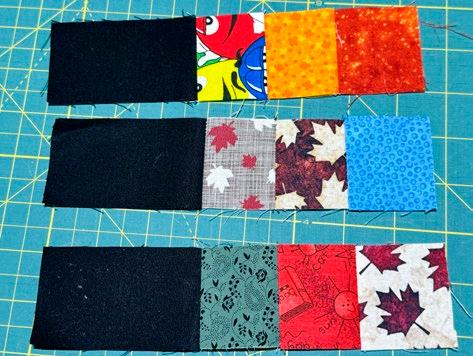
10. For the rows that go between the rows of the 16 patch blocks, sew three 2” x 2” squares on one end of the 77 – 2” x 3½” black rectangles.
11. Sew 7 sets of these strips together to make a partial row. Make 11 rows in total.

Making rows for the quilt.
Sew two 2” x 2” squares at the end of each row. This step will complete the eleven rows needed for this quilt. I’ll call these the thin rows

Complete rows with two 2” x 2” squares added to each end a.k.a thin rows
12. Take 10 thin rows and sew one to each of the 10 rows with the blocks. Then sew each row together.

13. Once all the ‘16 patch’ rows are sewn to a thin row, sew each pair of rows together. Sew the last remaining thin row at the bottom of the last row of blocks that does not have a thin row.
14. With the rows sewn, the quilt top can be quilted and bound.
The 2” x 2” squares can make a cheerful quilt in the end and when the square scraps are collected over some time, the task isn’t as tedious.
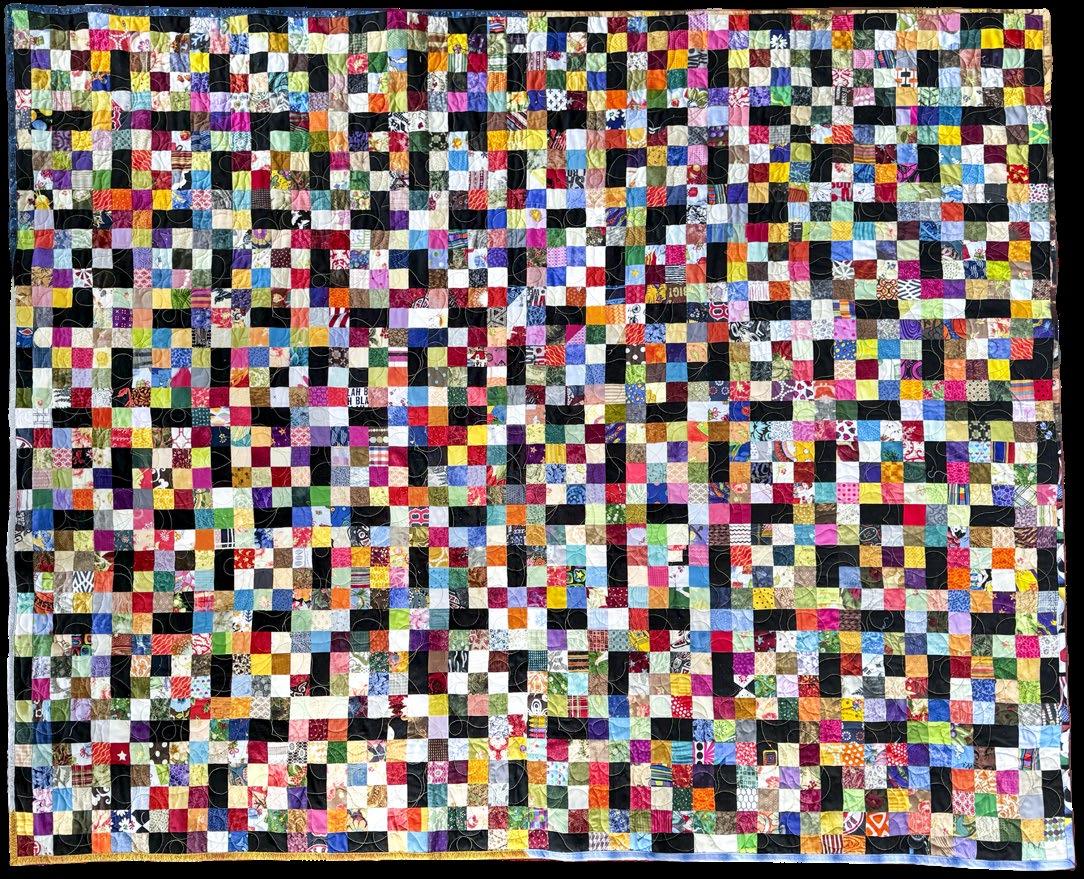
Using the OLFA 4½” x 4½” square Frosted Acrylic Ruler, OLFA 6” x 24” Frosted Acrylic Ruler along with my trusty OLFA Rotary Cutter 45mm - Aqua makes the task of cutting the 2” x 2” squares from haphazard fabric pieces a lot easier.
| issue 29 33 OUILT
Sew the row with the black rectangle to a block.
Sew the 16 patch blocks to black rectangle strips, together.
The end of each 16-patch block with black rectangle strips
Sew three 2” x 2” squares to the end of each black rectangle.
Sew the thin rows to each row of blocks.
The completed quilt, quilted by Michel Verville.
Scrap Quilt 2 working with 3” x 3” fabric scraps
I’m diving into my 3” x 3” scrap fabric bin for a different scrappy quilt design. Let’s get to it!
The fun with OLFA rulers is they’re easy rulers to use with all possible black line markings that quilters need. Although I have most of the OLFA rulers, my favorite is the OLFA 6” x 12” Frosted Acrylic Ruler. I can do so much with this ruler!

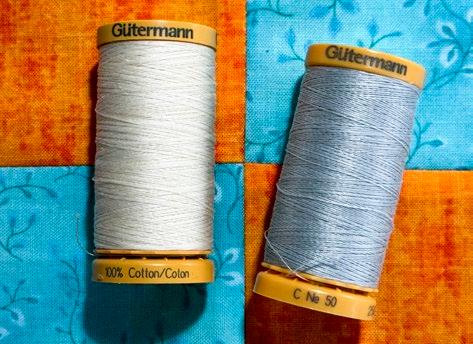
Same as for the 2" x 2" scrappy quilt, all seams will be ¼” seams. This quilt will measure 60½” x 60½” before quilting. A word about threads… Anyone who knows me, knows I love threads of all colors and weights. I love using colored threads when quilting and I sometimes love the texture a heavier-weight thread can give when quilting or when using decorative stitches. When it comes to piecing, I typically only use a 50wt gray or tan colored threads such as the Gütermann Cotton 50wt Thread 250mLt. Slate or the Gütermann Cotton 50wt Thread 250m - Ivory. I find these colors blend so well with all fabric colors.
From the 3” x 3” bin, I searched for pairs of the same fabric to make this quilt. 182 Pairs are needed.
Also required for this design is ¾ yards of light gray fabric for the quilt’s sashing.
1. From the gray fabric cut 20 – 2” x 30½” strips.
2. From the remaining fabrics cut 90 – 2” x 5½” rectangles.
3. With the gray fabric cut, find 182 pairs of 3” squares from the bin.
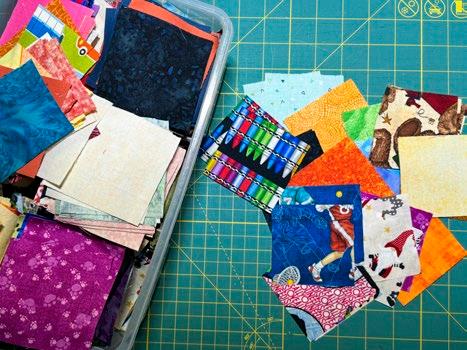
pairs
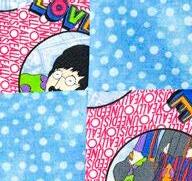
4. Sew two pairs together. Don’t overthink this step just take two pairs, ensure there is a contrast and sew them together, even if they don’t match. Remember this is a scrap quilt, just enjoy and sew. In the end, it will look great!

5. With all the pairs sewn, make four patch blocks. The total amount of four patch blocks, 81.

Make four patch blocks.
6. Sew a 2” x 5½” rectangle to each of the 81 four-patch blocks.

Sew gray rectangles to each 81 four-patch
34 | issue 29 OUILT
OLFA 6'' x 12'' ruler
Gütermann Cotton 50wt Thread in Lt. Slate and Ivory colors
Cut 80 – 2” x 5½” rectangles
Find
of 3” fabric squares.
Match pairs together and sew.
block.
7. In quantities of nine, sew the four patch blocks with the gray rectangles into rows. There’ll be a total of nine rows when completed.
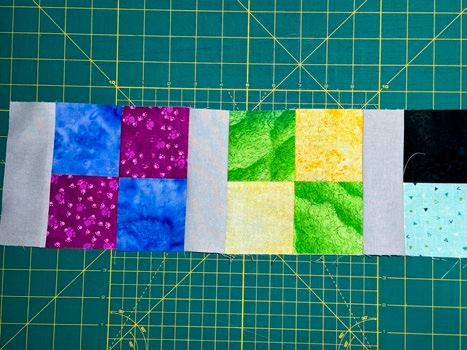
8. At the end of each row sew the remaining nine 2” x 5½” rectangles.
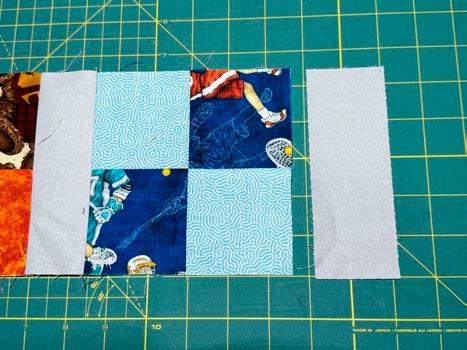
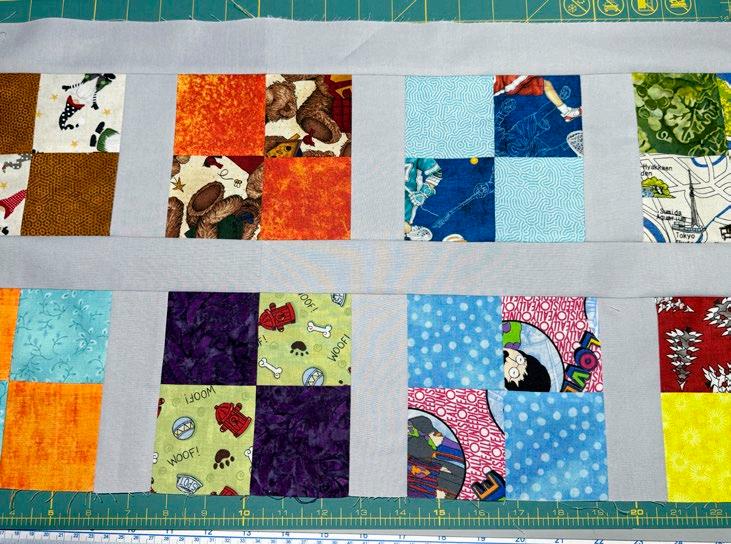
9. Pair all the gray 2” x 30½” strips and sew end to end. Center seam with the center of the row of blocks. Then sew it to the row. As shown in the next photo.
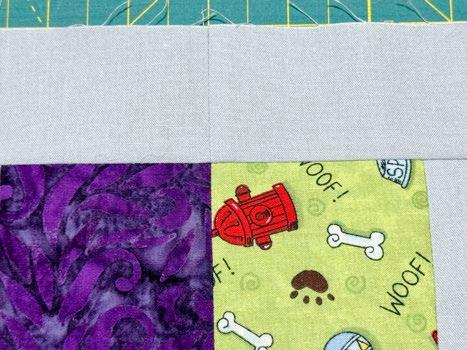
10. Once all the gray rows have been sewn to the row of blocks sew all the rows together.
Note: There will be one last gray row, sew to a row of blocks that do not have one.
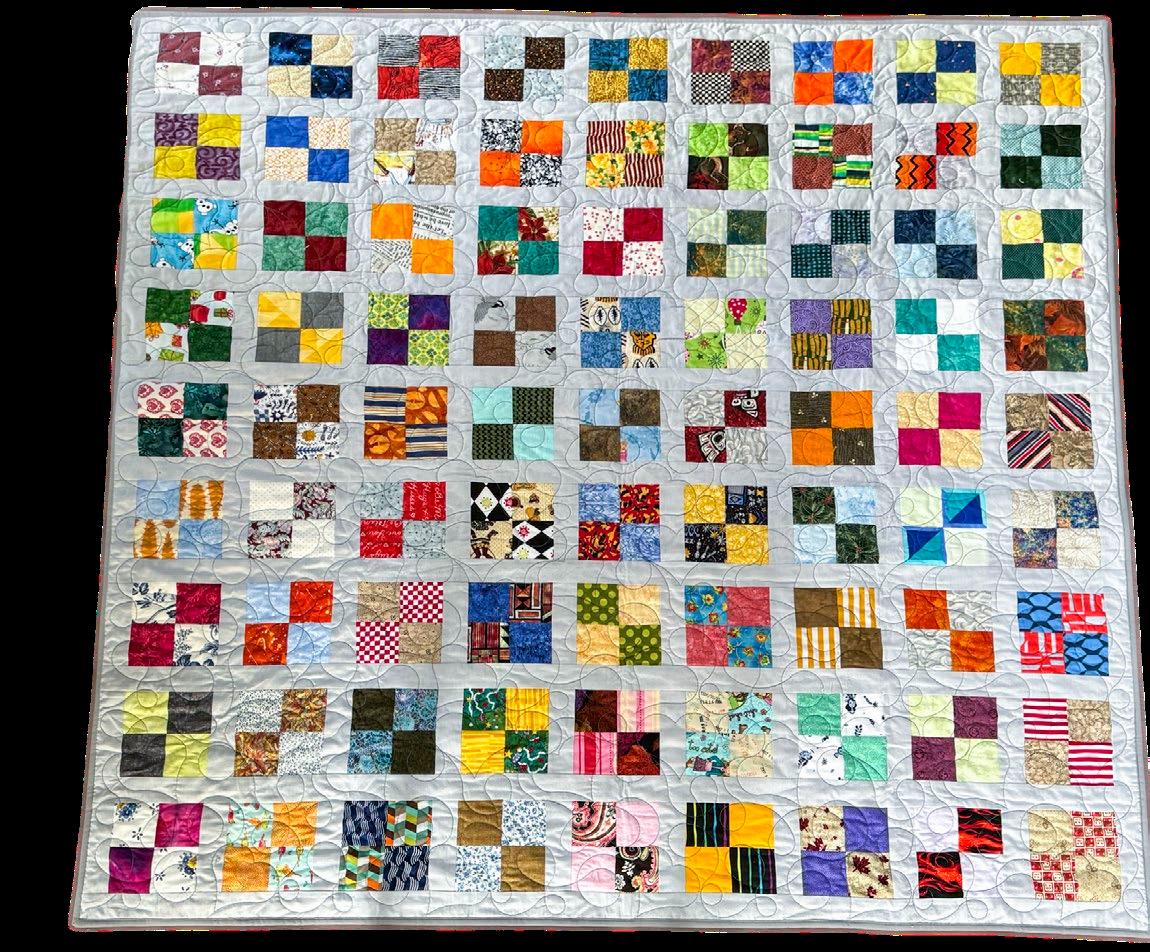
With all the quilt rows sewn, the quilt top can be quilted and bound.
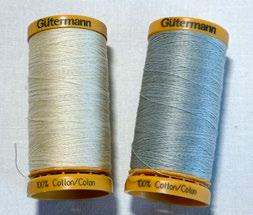
Remember when selecting sewing thread only purchase quality threads. Thread will be one of the most important parts of the quilt as it holds everything together. That is why I love using Gütermann 50wt threads. I always have my favorite neutral colors on hand, Gütermann Cotton 50wt Thread 250m - Lt. Slate and the Gütermann Cotton 50wt Thread 250m - Ivory.
| issue 29 35 OUILT
Sew four patch blocks with gray rectangles to each other.
A 2” x 5½” rectangle is sewn at the end of each row.
Match the seam on the gray pairs of strips to the center of the 9 path rows.
Sew rows to each other.
The completed quilt, quilted by Michel Verville
Scrap Quilt 3 working with 1½” x 1½” fabric scraps
My two go-to needle sizes are the SCHMETZ #1709 Universal Needles 80/12 and the SCHMETZ #1710 Universal Needles 90/14 When should I use which? It all comes down to the quality of the thread used. Within the same brand, such as GÜTERMANN, all 50wt are the same size threads. Other brands may be a bit thinner and others a bit thicker. With GÜTERMANN 50wt thread I use a SCHMETZ 90/14 needle. If I use the GÜTERMANN 60wt threads, then I would use a SCHMETZ 80/12 needle.
Note: Although most threads will pass through the eye of any needle it does not mean the needle is well suited for the thread.
The wrong needle size could cause issues with the thread such as breakage, fraying, bad tension, and other issues. Use the correct needle for the fabrics and threads being used. This link will show all the SCHMETZ needles that are available. SCHMETZ Needles

Here are the fabrics needed to make the quilt.
• 5150 - 1½” x 1½” squares (5120 for the blocks + 30 for the corner stones)
• for each of the 20 blocks, four strips are needed: two measuring 1½” x 16½” and two measuring 1½” x 18½”. For these, I went looking in my scrap stash of solid-colored strips that were at least 3” x 36”.
• 11/8” yd for 49 black 1½” x 18½” strips
The quilt will measure 77½” x 96½” before quilting.
I started by cutting the 49 black 1½” x 18½” strips using the OLFA 6” x 24” Ruler and the OLFA Splash Handle Rotary Cutter 45mm. Then I proceed to cut the colored strips that would be next to the blocks.
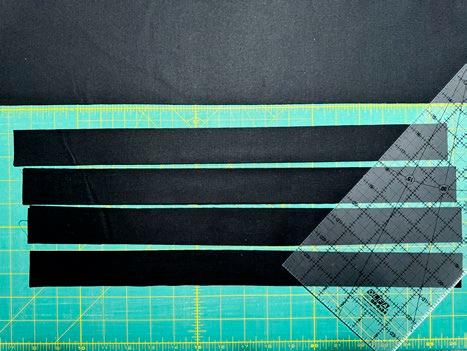
There are days when I want to sit at the machine and sew for the sake of sewing. On those days I simply chain piece so I get to sew and sew without putting much thought into it. It’s surprising how many squares can be sewn in one day!

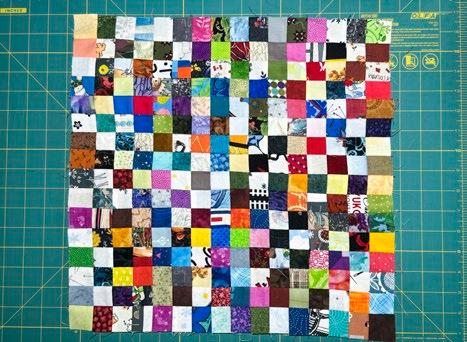
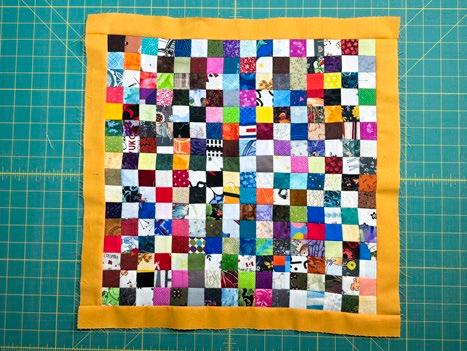
Anytime I make blocks using scrap squares, my blocks will always be sewn in multiple of twos: a four-parch, a 16-patch, or in this case a 256-patch.
The reason for this is, I find it easier and quicker. Once my pairs are sewn together, I pair them up with another pair making them into fours, I then take the fours together and get sets of eights, and I keep going.

Sewing pairs into sets of four, then eight and then 16.
36 | issue 29 OUILT
SCHMETZ needles
Cut 49 – 1½” x 18½” strips.
Chain piecing










Sew on the colored strip to each block. Start by sewing the stripes measuring 1½” x 16½” to the left and right sides of a block then sew the strips measuring 1½” x 18½” to the top and bottom of the block.
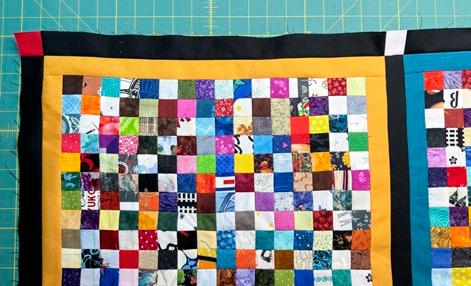
To make the rows of blocks, divide the blocks into five stacks of four. Sew black 1½” x 18½” strips between each block and at each end of the rows.
With the remaining 24 black 1½” x 18½” strips, make six rows. Each row will have
at each end.
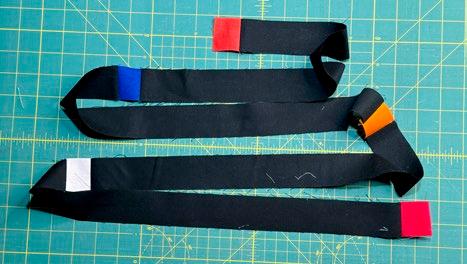
Sew the black strips between each row of blocks one on the top of the first row and one on the bottom of the last row.
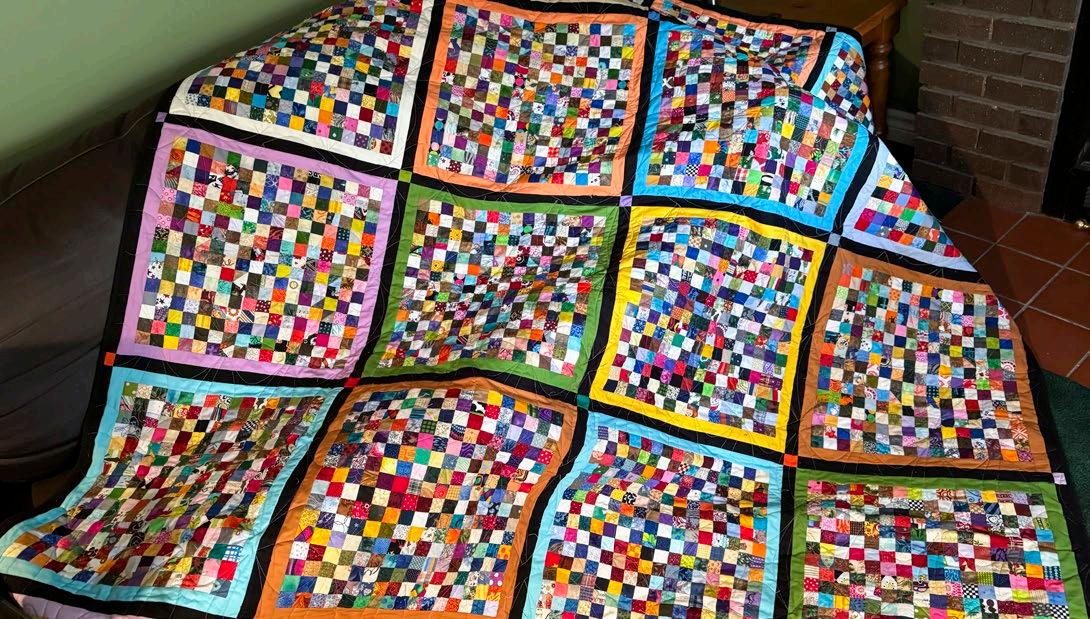
Once the above step is completed all there is left to do is to quilt and sew on the binding.
Make sure to have spare SCHMETZ sewing machine needles at the ready (military term), can’t go wrong with SCHMETZ #1709 Universal Needles 80/12 and SCHMETZ #1710 Universal Needles 90/14
| issue 29 37 OUILT
A 256-patch block
A complete block with a border.
Make rows with black strips and cornerstones.
Adding the black strips.
The completed quilt, quilted by Angi Anderson.
5 ideas for using large-size leftover fabric in quilting projects
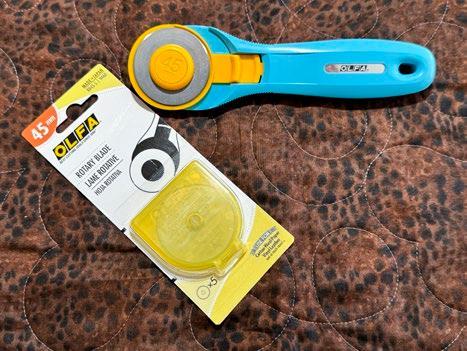
Like sewing machine needles, we don’t change our rotary cutting blades often enough. When should the blades be changed? Well, in my opinion, these are some situations, but not limited to when to replace rotary cutting blades:
• when dull,
• when nicked,
• when cutting but some of the fabric’s threads remain uncut,
• when it sounds like it’s cutting through paper, and
• when cutting batting, fibers get stuck in the cutting mat.
Remember a blade should cut through fabrics like a hot knife cuts through butter.
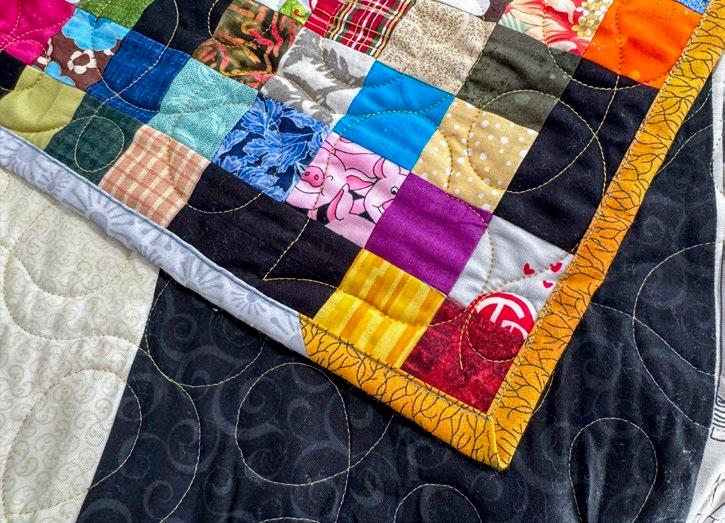
I’m talking about sharing ideas on ways to use larger scraps or fabrics from your stash. The first idea is one of using strips. Use them as bindings. What better way than to use scrap strips for a scrap quilt?
In the photo below I used 2” wide strips as I was machine sewing the binding. If I would have hand sewn it on, then I would have used 2½” wide strips.
How long were the strips? Some strips were regular lengths of fabric others were shorter and one was longer as it was cut from a long length of fabric.
How many times have we gone into a quilt shop and purchased a yard of fabric just because we liked it? Too often in my case!
And so, what to do with all those beautiful fabrics? Backings, make large backings. This is a great way to use up those yard cuts.
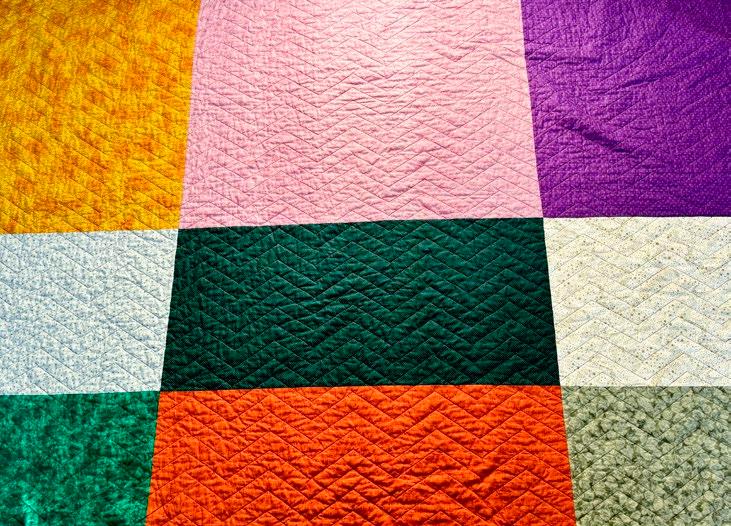
Backing made with unused fabric.
Another thing I do all the time is when I buy fabrics for a specific project is buy more than I need. I ask for an extra ¼ to 1/3 yard more. “Just in case”. I have made mistakes and I’ve been happy to have the extra to fix my mistakes but in many cases, I still had an extra ¼ to 1/3 yard of unused fabric. What I’ve done in this case is I make sure they’re the same width and length, and then I sew them together to make backings.

38 | issue 29 OUILT
OLFA rotary cutter and blades
A binding made with a variety of 2” strips.
Using leftover yardage for backing.
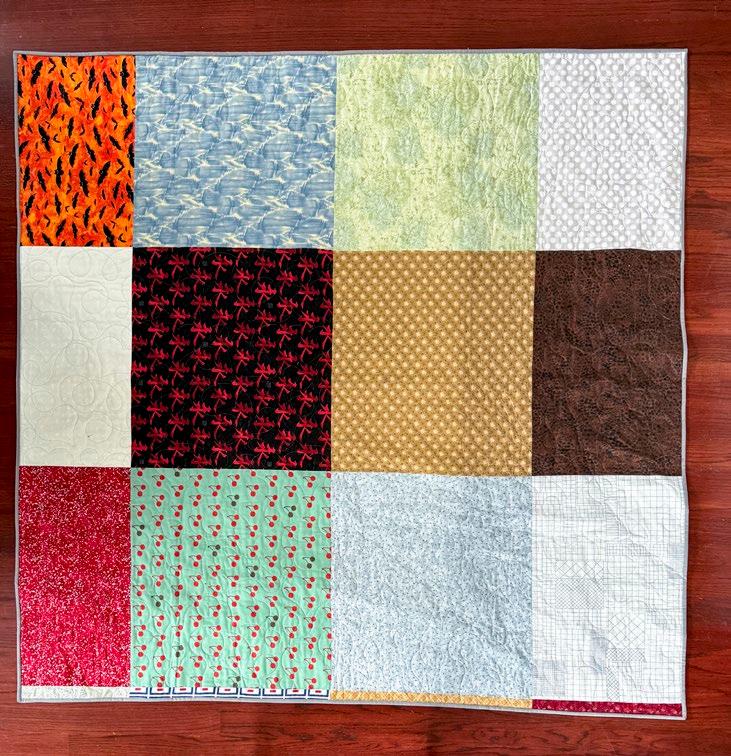
Now what to do with all those fat quarters (FQ) we buy, because they were cute or on sale? I make sure to cut them all to the same size, which should be approximately 18” x 21”. Like with the two proposed ideas, I sew the FQs to make up a backing.
I know we all have great intentions to use what we buy for a project. Unfortunately, for many reasons, some of those projects do not get made and the fabrics remain in our stashes. The fabrics do look good and tempting, but they don’t get used. Make backings.
When I do these backings, I don’t have any particular quilts to match them to. Because I like to make large quilts, the backings I sew together are approximately 80” x 100” in size. I also make some smaller backings knowing I’ll also make small bed quilts for my nieces and nephew.
Now there’s one more small dilemma. As many of the backings are always bigger than the quilt itself, what to do with all the extra fabric from those backings? Cut more scrap squares and strips to make more quilts. Don’t waste anything.
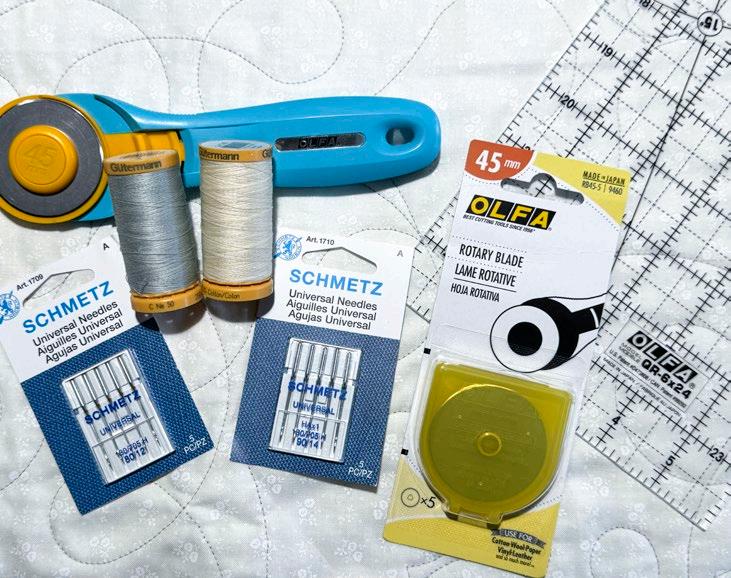
Before I finish, I wish to highlight again some of the tools I used in the making of these quilts.
• GÜTERMANN Cotton 50wt Thread 250m - Lt. Slate
• GÜTERMANN Cotton 50wt Thread 250m - Ivory
• INFINITI Thread Snips - Black – 4½” (11.4cm)
• OLFA QR-6x24 - 6” x 24” Frosted Acrylic Ruler
• OLFA RTY-2/C - Splash Handle Rotary Cutter 45mm - Aqua
• OLFA RB45-2 - Tungsten Tool Steel Rotary Blade 45mm - 2pc
• SCHMETZ #1709 Universal Needles Carded - 80/12 - 5 count
• SCHMETZ #1710 Universal Needles Carded - 90/14 - 5 count


| issue 29 39 OUILT
Backing made with fat quarters.
Cutting squares from scraps
Quilting tools and notions
Paul Léger paullegerquilts.com
Unboxing the NEW Husqvarna VIKING DESIGNER EPIC 3
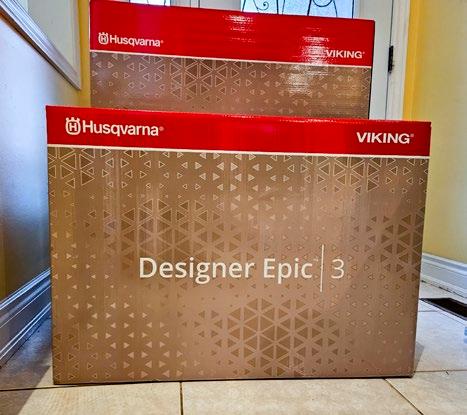
Is there anything more exciting than having a BRAND-new top-of-the-line sewing and embroidery machine arrive at your front door? These are the boxes for the Husqvarna VIKING DESIGNER EPIC 3 – a sewing and embroidery machine.
I’m so excited, but let’s unbox the machine and look at it; next, I’ll unbox the embroidery unit as there is a lot to see in each box.
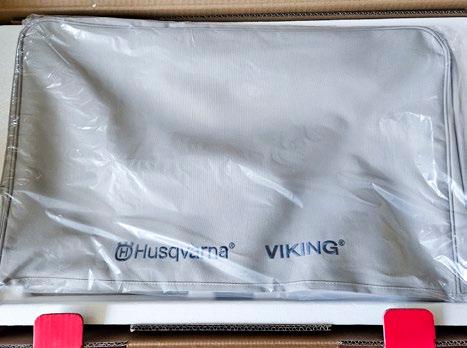
The first thing we see is a soft cover. I LOVE the soft covers and much prefer them to a hard case. They are easier to store when not in use, and because of the size of this sewing and embroidery machine, a hard case would be massive.
The soft cover will be helpful to keep the machine free from lint and dust when I’m not using the DESIGNER EPIC 3. I love the soft cover.
Then we get some goodies in the top storage area. I’m very impressed with the packing foam. If you want to keep the storage boxes, it’s easy to repack this machine, which is a bonus when some of us pack and unpack frequently!
There’s a PRINTED copy of the User’s Guide. While the User’s Guide is available as a PDF (and it's built-in the DESIGNER EPIC 3) that you can download, having the printed copy is very nice. There’s the foot pedal, the accessories pouch, and PART of the power cord. Wait for more details.
If you want to see all the accessories (presser feet, bobbins, etc.) in the pouch, you can check out Pages 17 and 18 in the online User’s Guide
With all the new features of the DESIGNER EPIC 3, a new type of power source is necessary, and you’ll find the second part of the power supply unit supply under the User’s Guide.
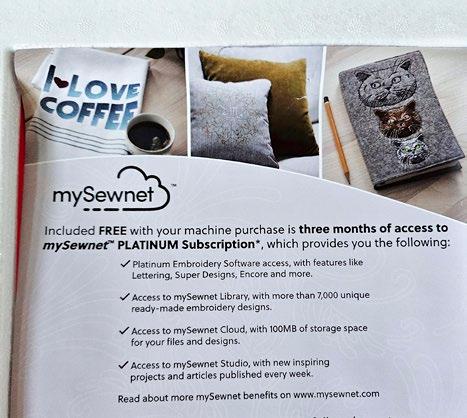
You’ll also find a code that will give you three months of complimentary access to the mySewnet Platinum software. This access is HUGE, as it provides a reasonable time frame to explore the software to decide if you want (YES!) access to the mySewnet embroidery software. Life would be dull without access to the embroidery software, as I use it constantly. You also get access to the mySewnet Library for 90 days, and it currently has over 9,000 designs. What I love about the library and the software is the ability to grab designs and get creative.


40 | issue 29 OUILT
The boxes for the Husqvarna VIKING DESIGNER EPIC 3
Elaine Theriault
The dust cover
The accessories in the top tray of the packing box
The power supply unit
Information sheet about the link to the mySewnet embroidery software
Photos by Elaine Theriault




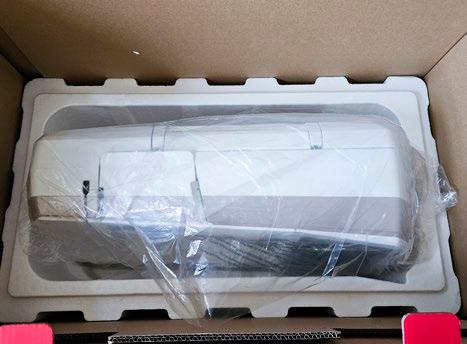
After removing the top piece of packaging, there she is! The Husqvarna VIKING DESIGNER EPIC 3!
OH – this is so exciting!
The DESIGNER EPIC 3 is sitting on one of my sewing tables, and we’ll talk more about the required space when I open up the embroidery unit. While there were two unique colors you could order (Coastal Mist and Twilight Plum), this is the standard color of Starlight Bronze. At first glance, quite a few changes are visible on the front, the sides, and the back, but I LOVE the clean lines.
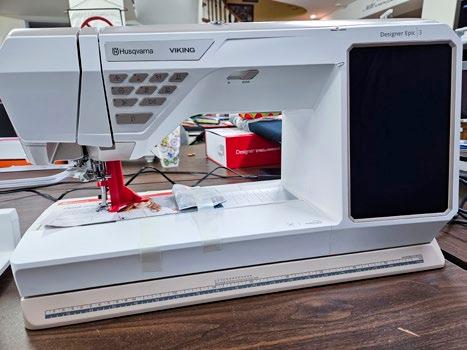


I LOVE that ruler along the front, and I use it all the time when I work with quilt block pieces that are similar in size. I’m NOT one to take the time to mark; this is an easy way to find the correct size and orientation of the necessary pieces. There’s also a ruler in millimeters on the front to help size buttonholes. It’s a simple tool but extremely practical. Once the machine was on the table, I grabbed the two parts of the power cord, connected them, and turned it on! WAIT a minute – this is new. The connections (power, foot pedal, and power switch) are all near the front on the right-hand side. WOW!! Love that. And WAIT – the power switch is now a PUSH BUTTON, not a rocker switch. LOVE that!

And there it is --- the DESIGNER EPIC 3 powering up! We will have so much fun this week as we explore this fantastic sewing and embroidery machine together. I don’t think a week will do justice to all the things I heard it can do.
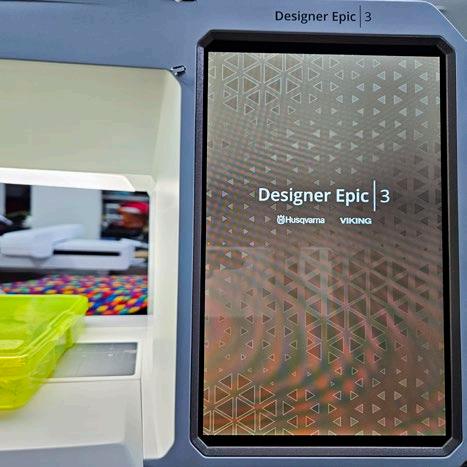
There’s so much new already that it should be called something else besides EPIC, as it’s an entirely different sewing and embroidery machine, and we’ve barely done anything.
Here’s something else that’s new – a SET-UP process that takes me step by step through the initial set-up. WOW –you have to love this. There’s no need to search out what I should do – I just follow the commands on the screen! How simple and easy is this?
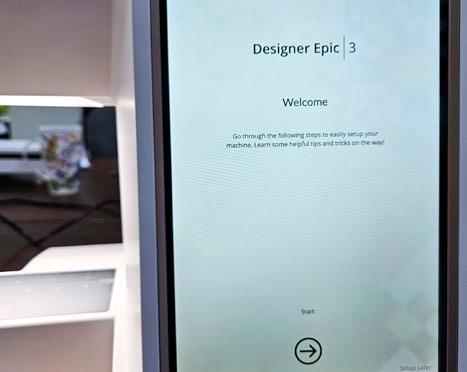
| issue 29 41 OUILT
Unboxing the DESIGNER EPIC 3
The Husqvarna VIKING DESIGNER EPIC 3 – fresh from the shipping box
The DESIGNER EPIC 3 as it powers up
The set-up menu on the DESIGNER EPIC 3
The power switch is now a push-button
The first option is to choose my language. That’s easy enough, and it’s easy to switch to another language should I need to. I’ve used this feature if I need to learn sewing/embroidery terms in French!
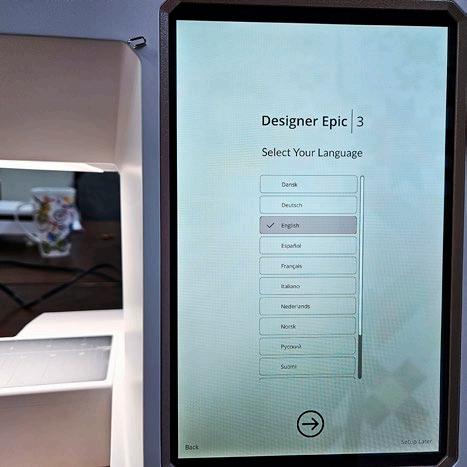
Choosing the language for the machine.
Remember, the DESIGNER EPIC 3 is a Wi-Fi-enabled sewing and embroidery machine, so I must connect to the Wi-FI. That’s super easy – you just need your password. I’ve learned to keep a copy of that password in the drawer beside my sewing table.
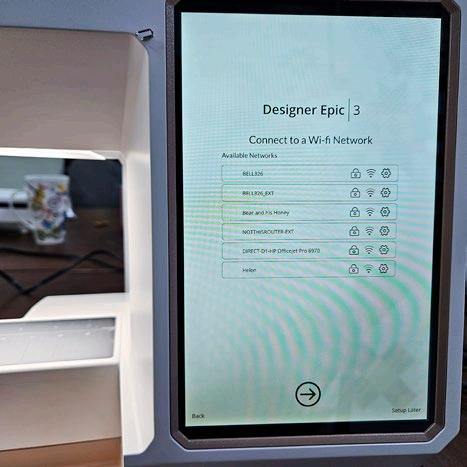
When you need to type in things, like your password, a keyboard pops up automatically at the bottom of the screen. The X on the keyboard will close it. By logging into your mySewnet account, you’ll get the maximum benefit of the mySewnet ecosystem. Once connected to the Wi-Fi and your account, you won’t need to log in whenever you turn on the sewing machine. Sometimes, I get booted out, but it’s easy enough to log back in.
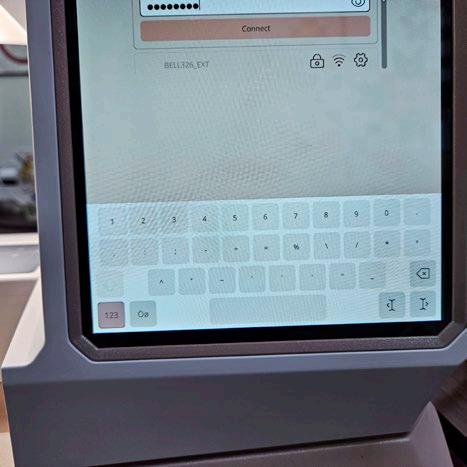
Then, the set-up process allows you to enter your name, which is fun as when you turn on the DESIGNER EPIC 3, it greets you by name at the top of the screen. You can also give your DESIGNER EPIC 3 a nickname, for some reason, I’m not one to name my machines, but I know many people do! You also have the option to choose the background color, and there are six choices – three are light, and three are dark. Having the options in one place during the initial set-up makes starting much more straightforward. Remember, you can change any of these options in your Settings menu.

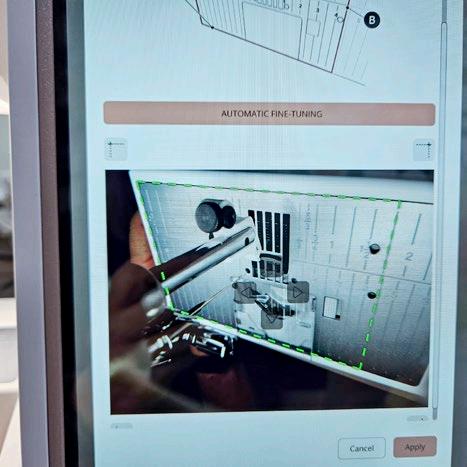
You can test the camera and projector alignment. YES – there is a camera and a projector on the DESIGNER EPIC 3! You can also calibrate them from the Settings menu.
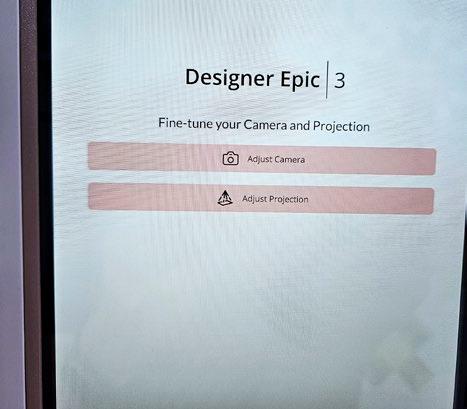
It’s super easy to align both items, and it took seconds to complete. The best part is that ALL of the instructions are on the screen. No need to ask your dealer or dig out the User’s Guide! NOW, I love the User’s Guide, and there is valuable information in there, but having appropriate messages pop up on the screen at the right time? Well, that’s HUGE!
Be sure to READ all and any of the popup messages on the screen. It can save you a lot of hassle!

42 | issue 29 OUILT
The keyboard
Color theme options for the background
The menu to fine-tune the camera and projection
Fine-tuning the projection system
Aligning the camera
Connecting to a Wi-Fi network
As if all that isn’t enough, the last part of the set-up menu includes tips on using the capacitive touch screen with specific gestures, Quick Help, and other helpful information. It’s amazing!!!! Be sure to follow/read all the instructions, as it will answer many questions!!!
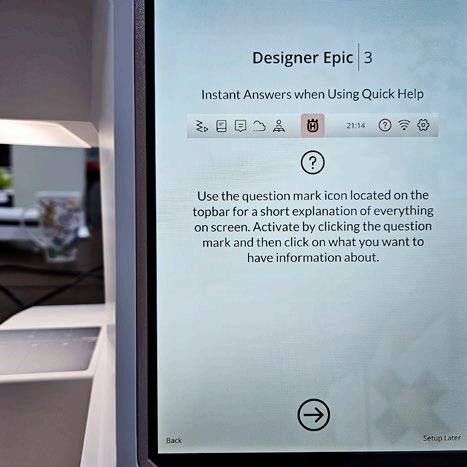
After you complete the set-up process, you'll end up on the home screen. Here’s the CLEAR interface with large buttons to choose between sewing or embroidery mode! WOW --- this is amazing!!!
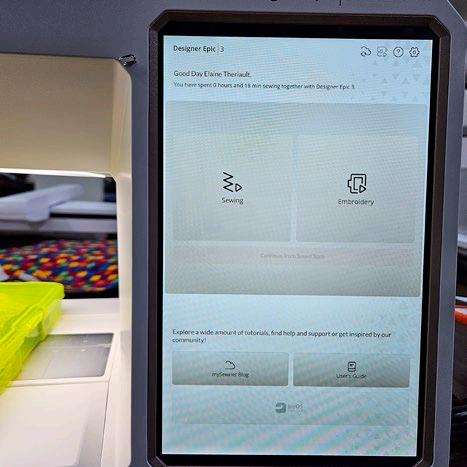
Here are a couple of other great things – look at the light on the right-hand side of the machine. WOW – that’s super bright and useful when I’m winding bobbins.
Notice there are two USB ports on the side of the machine. And did you see the Husqvarna crown on the hand wheel? LOVE!
There’s also a light that illuminates the name on the back of the DESIGNER EPIC 3. WOW – with all that light, everyone will notice my fantastic sewing machine!
The Function Panel is located above the needle, making all functions quickly accessible. Some of the icons have changed to make it easier to identify the functions. That took me a few minutes to wrap my head around those new functions. But the more I use it, the more I love it!
One other change you're going to find is the speed control. It’s now a physical slider on the front of the sewing machine. Hmm – I was OK with the function buttons, but there’s no room; I can live with this. The change is good because the function buttons got moved because the projection and camera are sitting behind that blank panel, and I’m super excited about those two functions.
I think that’s enough excitement for one day! There is so much NEW on this machine that it’s hard to stop, but let’s take a break and think about all the new things – an easy-to-use set-up menu, WiFi connectivity, camera and projection, new buttons to move between sewing and embroidery modes, and a whole lot more.
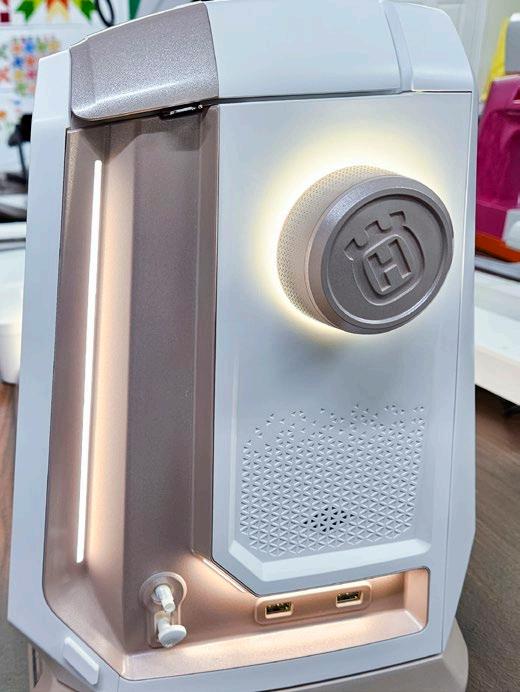
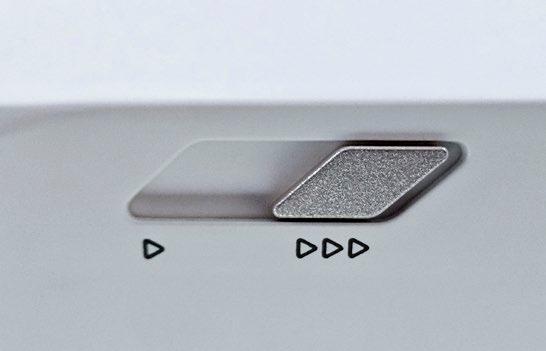
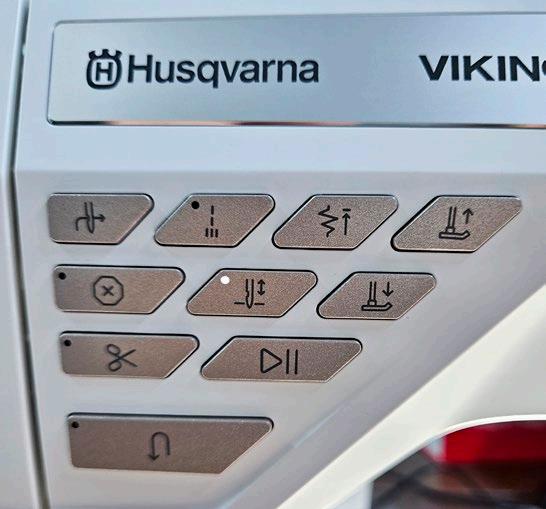
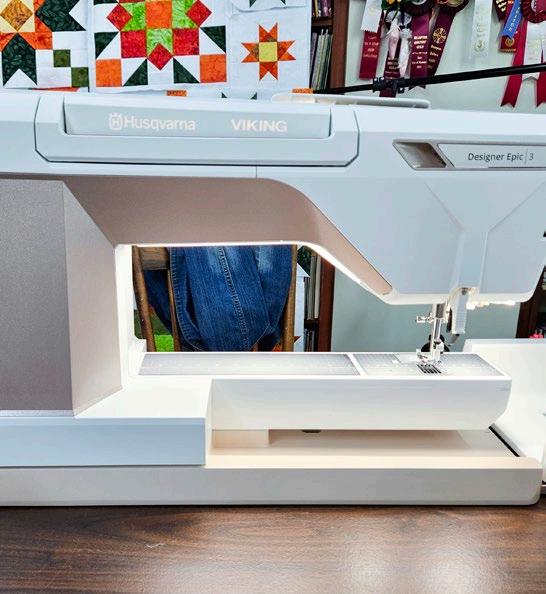
| issue 29 43 OUILT
Helpful information in the set-up screens
The Husqvarna VIKING DESIGNER EPIC 3 home screen
The speed control slider
Bright lights on the right-hand side of the DESIGNER EPIC 3
The back of the sewing machine
The Function Panel
Unveiling the NEW embroidery unit for the Husqvarna VIKING DESIGNER EPIC 3
The embroidery unit comes in a separate case with all the components neatly tucked into slots. The case is large, so it’s on wheels, making it easy to move around.
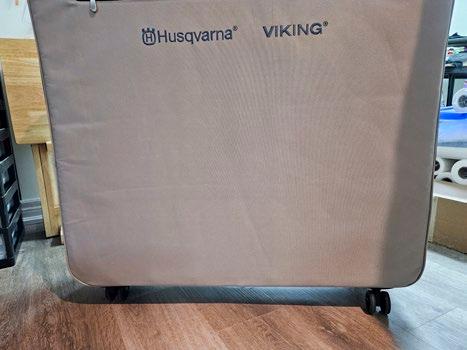
Unzipping the cover reveals a protective piece of packing Styrofoam. I can’t wait to see it!

Removing the Styrofoam reveals lots of new parts, either in engineered slots in the packing material, strapped down, or both.
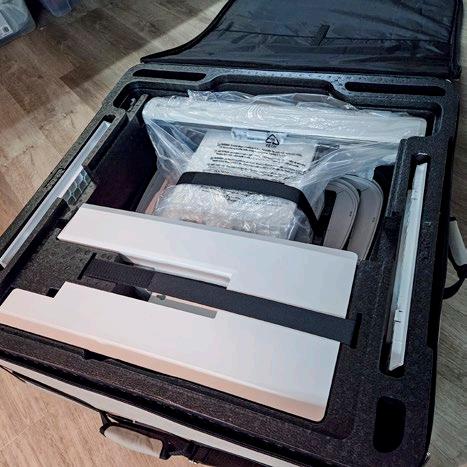
The first thing you’ll notice is that the embroidery unit is HEAVY. It has been reinforced with a steel structure to provide the stability needed to access larger embroidery hoops. Not that any of us want larger hoops. Of course, we want larger hoops! The design and abilities are BRAND-new, and I can’t tell you how excited I am.
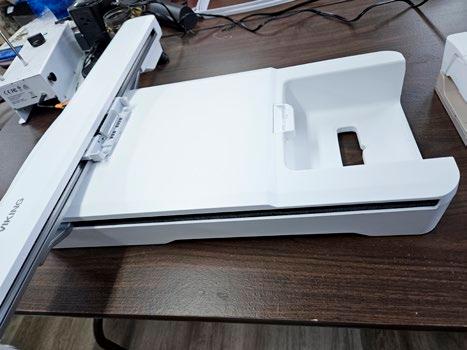
Four hoops come with the DESIGNER EPIC 3. Each hoop has a secure place to reside in in the case of the embroidery unit. The sizes of the included hoops are:
• Splendid Square Hoop II (120 by 120)
• Jewel Hoop II (240 by 150)
• Royal Hoop II (360 by 200)
• Regal Hoop (465 by 260)
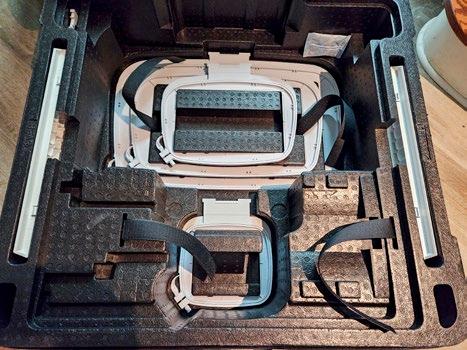
A redesign of the embroidery hoops provides more stability. Did you notice that the shape differs from what we’re used to? It’s slightly asymmetrical and thicker on the side where the embroidery hoop connector is. While this helps with stability, it also ensures the inner hoop will only fit into the outer hoop in one direction. None of us have ever made that mistake - right?
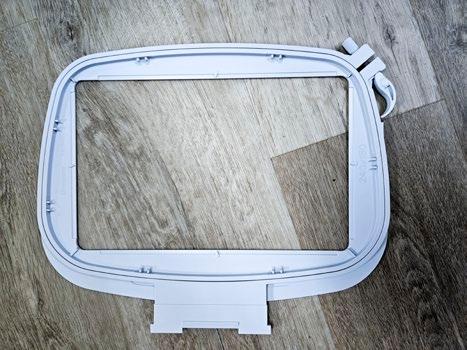
You’ll also notice that the embroidery hoop connector is different.
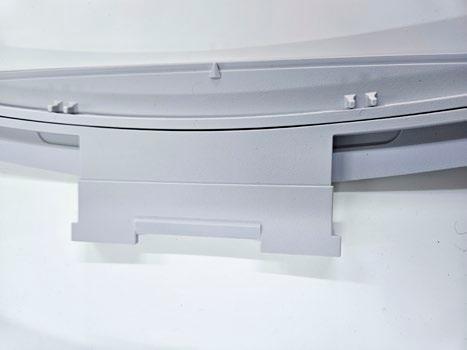
44 | issue 29 OUILT
The embroidery unit case is on wheels
A protective layer of Styrofoam
The components of the embroidery unit
The embroidery unit for the Husqvarna VIKING DESIGNER EPIC 3
Four hoops that come with the DESIGNER EPIC 3
The new shape of the embroidery hoop
The NEW embroidery hoop connector
And, of course, the embroidery hoop attachment on the embroidery arm has also changed.
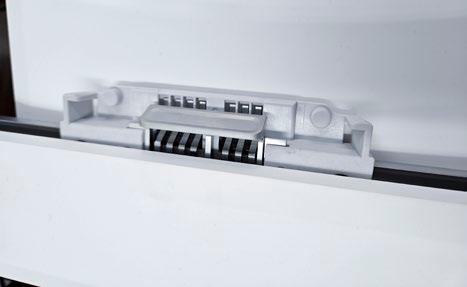
hoop attachment on the
unit
This new system makes it easy to attach and detach the hoops. There is ZERO strain on the embroidery arm and well. I love it! Here’s a short video showing how easy it is to hoop and unhoop using the new system.
I know what you’re thinking. If we get four hoops with the DESIGNER EPIC 3 and we have a bunch of legacy hoops with the old attachment system, you want to know if you can still use those other hoops. The answer is YES. There’s a hoop adapter, which will allow you to use SOME of the legacy hoops. When you open up the Hoop Options on the embroidery edit screen, you’ll see which legacy hoops you can use–currently, there are twelve legacy hoops, including all the metal hoops, endless hoops, and more.

Three specialty hoops have been designed specifically for the DESIGNER EPIC 3, and I’ll chat about those later this week. They are SO EXCITING!
I referred to the size of the Regal Hoop earlier, but look at the size! It’s HUGE –can you imagine doing free-standing lace ornaments or designing items in the hoop and having all that space without rehooping? I LOVE this and can’t wait to embroider something!

Something else new is how the embroidery unit attaches to the DESIGNER EPIC 3. The end of the base of the embroidery machine opens to reveal the embroidery unit connector, containing two holes and two sockets. You’ll find two pins and two plugs on the underside of the embroidery unit. There’s a notch in the base of the sewing machine and the embroidery unit, so it’s easy to match up those notches to get everything in the correct place.

The embroidery unit settles into place, and you want to extend it to the left as far as it goes. You should see a gap of approximately ¼” between the embroidery unit and the sewing machine.

I forgot to mention that removing the accessory tray is necessary BEFORE you connect the embroidery unit. Once the embroidery unit is attached, you’ll notice a lot of space between the embroidery unit and the embroidery machine. This gap allows us the ability to do FREE ARM embroidery! WOW!!! Exciting!

| issue 29 45 OUILT
The embroidery
embroidery
The hoop adaptor beside the embroidery hoop attachment on the embroidery arm
The size of the Regal Hoop
The embroidery unit settles into place, and you want to extend it to the left as far as it goes. You should see a gap of approximately ¼” between the embroidery unit and the sewing machine.
The embroidery unit connected to the DESIGNER EPIC 3
The embroidery unit is attached to the DESIGNER EPIC 3
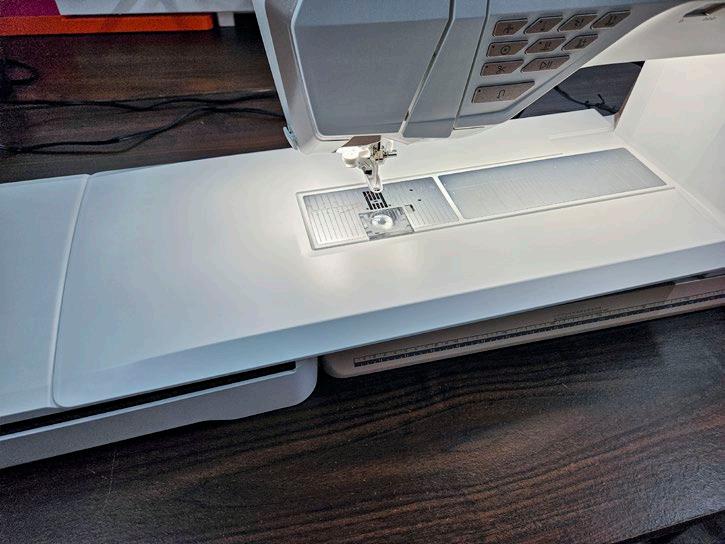

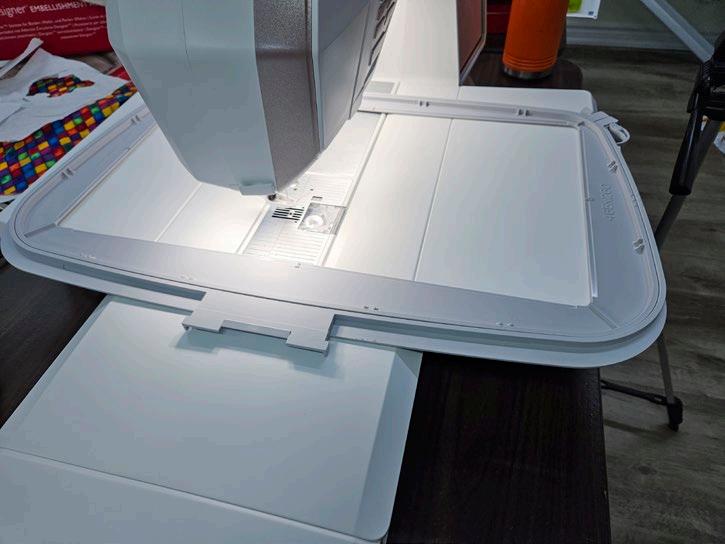
That gap is too large for regular embroidery, as the embroidery hoops need support. There’s an embroidery unit extension table that fills the gap. Note that this extension table is NOT for sewing; it’s to be used for embroidery only.
WOW --- that’s so exciting! But wait, there’s more! If I use the new Regal Hoop (465 by 260) or the NEW Mega Turnable Hoop (450 by 450), there’s not enough support for those longer hoops. So, two Hoop Supports can be added to the front and back to provide additional support.
And now, when I place the Regal Hoop on the embroidery unit, there’s plenty of support.
Something else that’s new is there are electronic components in the embroidery unit. Therefore, if you update your embroidery machine, it’s a good idea to do so with the embroidery unit attached. If not, you’ll have to update the embroidery unit the next time you connect it.
WOW – that’s a LOT of new in the embroidery unit. WAIT –there’s one more thing. The new unit is much more robust, and the embroidery arm is supported by TWO rods inside the unit rather than one. Again, this provides more stability for those larger hoops and heavier items we know we will embroider.
But it’s also super quiet. Here’s a quick video of the calibration process. You can barely hear the unit calibrate!
There are some serious changes made to the embroidery unit for the Husqvarna VIKING DESIGNER EPIC 3, and all are good! I can hardly wait to start embroidering!
46 | issue 29 OUILT
The embroidery unit extension table
The Hoop Supports in place
The Hoop Supports provides support for the Regal Hoop
Updating the embroidery unit
What’s new in the internal software on the HV DESIGNER EPIC 3
If there are that many changes on the outside, what changes are there to the software that runs the DESIGNER EPIC 3? I suspect there’s a whole lot more new! Let’s check it out! Wait – did you notice the icon to access the User’s Guide? Yep – it’s built-in and searchable by Table of Contents, Index, or topic. LOVE!
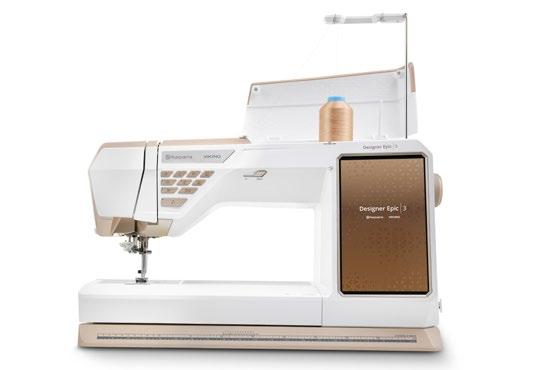
Let’s start by moving into Sewing mode, which takes me to the JoyOS Advisor. The JoyOS Advisor allows me to choose the type and weight of fabric for the project I’m about to sew. If I’m performing a sewing style or using one of the Exclusive Sewing Techniques, or perhaps I want some instructions for a Sewing Project, I can choose that right here on this screen. When I want to start a new project or sew for the day, I’ll touch the START NEW icon in the middle of the screen.

Wow – the entire interface, while familiar, is different, but in a good way. I find the stitches and techniques broken out into logical menus, making them easier to find.
You’ll find new categories in the Exclusive Sewing Techniques tab. There are THREE new categories – Motif Builder Stitches, Floating Stitches, and Guided Pictogram Stitches.

You’ll find instructions for some projects in the JoyOS Advisor, with two categories – Fashion and Home Dec. There are a couple that I want to make! If the project involves embroidery, opening the instructions will move you to embroidery mode, and the design is available to download from the instructions. It’s so cool that you have projects at your fingertips if you want to jump in but are unsure what to make.
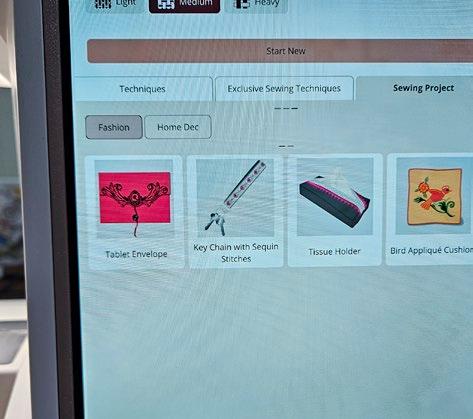
There are MANY tutorials in the JoyOS Advisor, so if you get stumped with something or want to learn a new technique, be sure to explore the tutorials, which include videos to assist your learning process.
Let’s touch Start New and go to Sewing Mode. Again, while this screen is familiar, it’s new and in a good way. The look is cleaner. Let’s take a closer look at the top section.
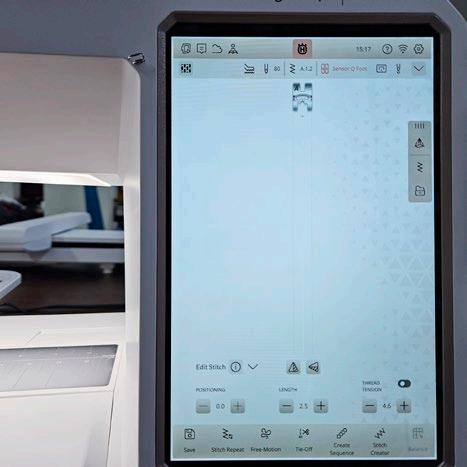
| issue 29 47 OUILT
Husqvarna VIKING DESIGNER EPIC 3
The JoyOS Advisor
Exclusive Sewing Techniques
Sewing Projects in the JoyOS Advisor
The Sewing Mode screen
On the ribbon at the top, there’s a toggle icon to move between sewing and embroidery mode without starting a new project. Next is the mySewnet blog, where you can find new projects and sewing inspirations. The next icon allows access to your mySewnet account and the icon for Project Viewer. OH! This icon enables you to toggle a tutorial on and off the screen. I LOVE this – it was on my wish list!
The large crown with the H in the middle will take us back to the Home Screen.
Then we see the clock (super important) and the Quick Help, which is AMAZING. If you touch Quick Help and ANY icon on the screen, it’ll tell you what that icon is. There’s the Wi-Fi symbol; the last is the Settings menu.
The second ribbon bar shows the type and weight of fabric that I chose in the JoyOS Advisor. If I need to change that, I can touch that icon, and the selection menu pops up. On the right-hand side, I see the recommendations for the stitch that I’ve chosen – using the Integrated Dual Feed (IDF), a size 80 needle, the stitch number (wait for that), and the needle down is selected.
What’s new is the down arrow. That’s an indication that another menu will open if we touch it, and it’ll provide the recommended settings in a list format rather than as icons across the top right. In the central part of the screen, we see an image of the stitch in actual size and the recommended presser foot.
On the right is the MENU to select stitches from the sewing machine or a file. But there are TWO NEW icons on the top. We’ll get to those later. So much NEW – it’s hard to take it all in!
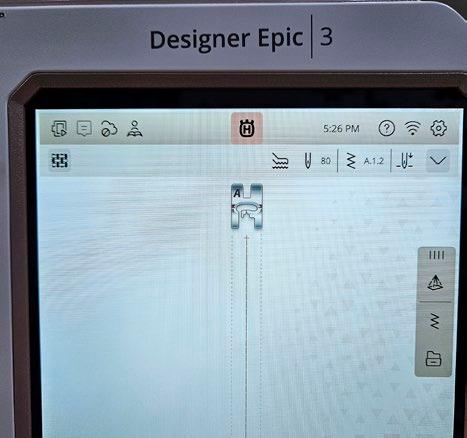
Here’s a close-up of the bottom half of the screen. If you see an “I” with a circle around it, touching it will provide more information on the names of icons on the screen. In this case, there wasn’t room to put the words for the mirroring functions, but the “I” tells me what they are. The down arrow will close the stitch edit menu if I need more room on the screen. I love all the flexibility we have to make the screen layout work for us!
The row of adjustments allows me to move the needle to the left or right to adjust the stitch position. I can also adjust the length of the stitch and manually change the thread tension if needed. Look at the very bottom of the screen. I see icons, but they are LABELED. Some are NEW, like Stitch Repeat and Stitch Creator.
Two were existing functions, but the names were changed, and the functionality changed somewhat.
Tie-Off used to be called Fix, and by opening it up, you get a menu for whether you want the Tie-Off at the beginning, the end, or both. Create Sequence used to be called Program, a scary term, so this is more user-friendly. And it's NOT scary at all.
WOW – so much new, yet much better, and it is easier to read and find the functions. I LOVE the new menus.
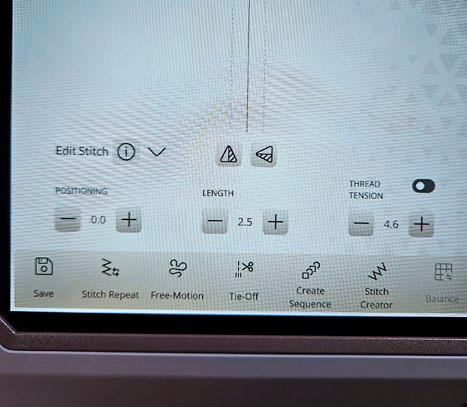
If I choose a decorative stitch, the stitch editing options look different. I see toggles beside each of the adjustments. Not only can I change the width of the stitch, but if the stitch is less than 9.00 mm wide, I can adjust the stitch position, remembering that the maximum stitch width is 9.00 mm for standard stitches. If the stitch is satin, the length can toggle to adjust the density. The thread tension
was switched to thread portioning automatically as a preferred method of thread delivery. The toggle allows me to change the pressure on the presser foot.

Let’s look at the stitch menus. Wait a minute – this looks different, and it is! Notice how each stitch is easy to spot in its little box. The icons are large and easy to read. But the stitch menu is small, as I can only see eight stitches.
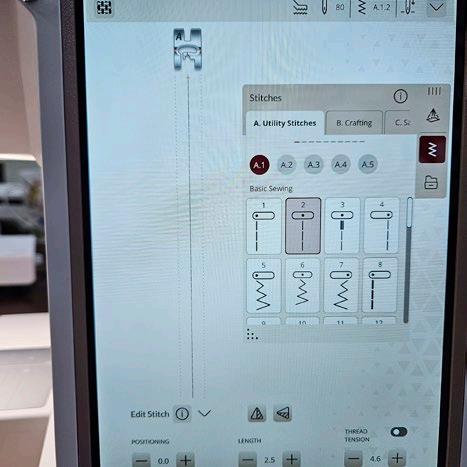
There’s a fix for that. Do you see that little dotted triangle in the bottom left corner of the stitch menu? Grab it and pull either down, to the left, or both. Guess what happens? Yep – I can make the stitch menu as big or small as I need. OK – I LOVE this feature!
48 | issue 29 OUILT
The top ribbon bars in sewing mode
The bottom half of the sewing mode screen
The bottom half of the sewing mode screen
The stitch menu is resizeable


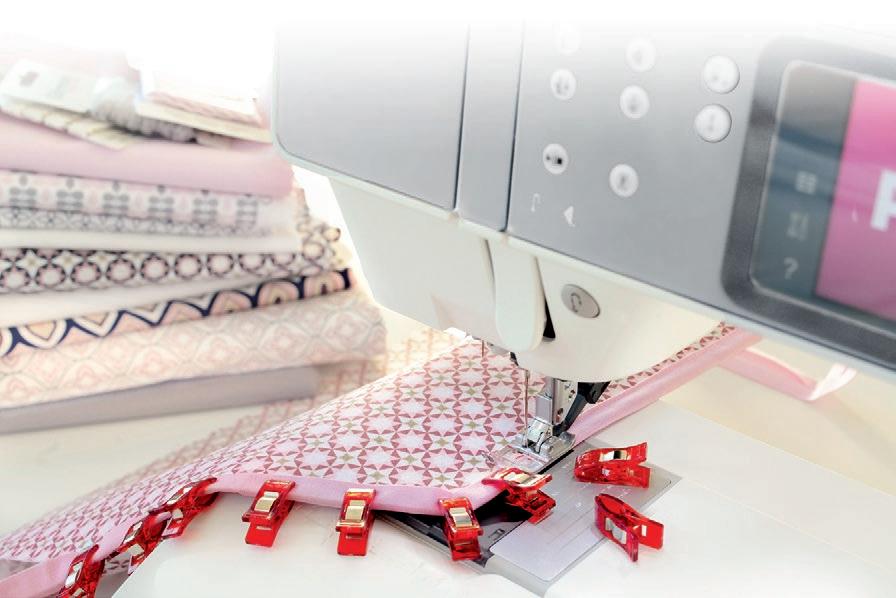


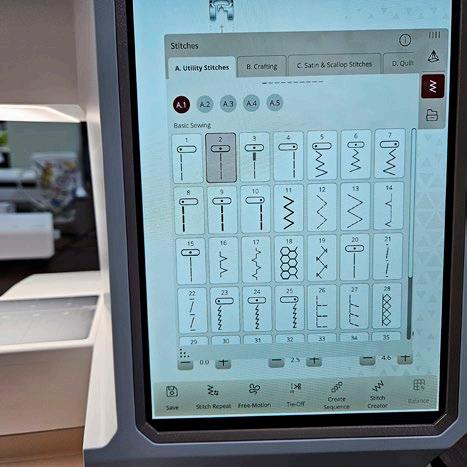
Wait – did you notice something else? Yes – the A Menu (Utility Stitches) is now broken into sub-menus! WOW – this will make finding a particular stitch much more straightforward than scrolling through lengthy menus of stitches.
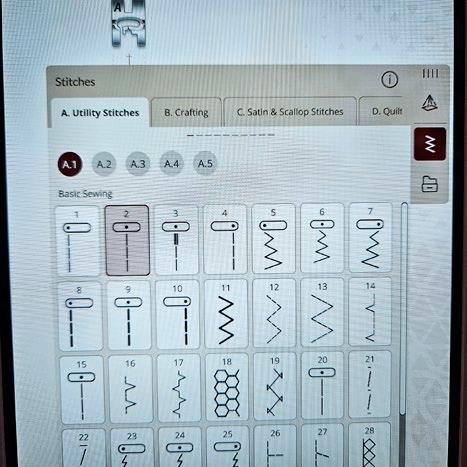

There are two new stitch sub-categories. One is Floating Stitches, and the other is Guided Pictograms, and we’ll explore them later this week. I need more time to share all the NEW features with you!


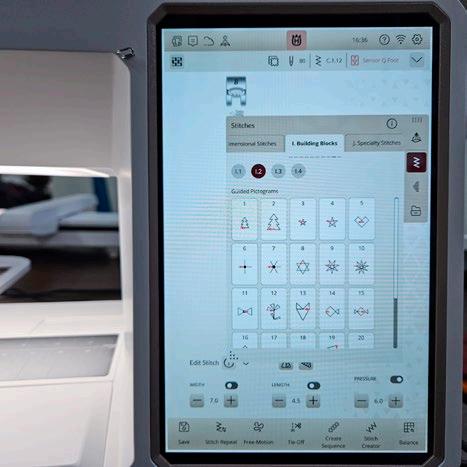
I also love the ability to move the menu bar around the screen. You can move the menu around the screen whenever you see the four vertical lines. This feature works for stitch menus, tutorials, and probably others. This feature was on my wish list, and I’m so excited to see it here!

| issue 29 49 OUILT
The stitch menu is resizeable
The name of each stitch sub-category
The Guided Pictogram menu
Stitch menus now have sub-categories.
The menus are moveable on the screen
We could spend oodles of time investigating everything new, but let’s move into the embroidery edit screen. Remember, we have two ways to get there. We can move between Sewing and Embroidery by using the toggle icon without losing our work in sewing or embroidery mode. Alternatively, we could return to the JoyOS Advisor page and touch Start New, which erases any stitches or embroidery designs we were working with. Here’s the top of the embroidery edit screen. The icons on the top ribbon have not changed, except that the toggle button shows Sewing Mode since we are in Embroidery Mode.
The second ribbon shows new information. On the left is the UNDO tool, and beside that is the Zoom tool. You’ll also see the selected hoop size and information about the feet. The recommended foot for Embroidery is the Q foot, but the Artificial Intelligence shows that the A Utility Foot for IDF is currently in place. Yep – there’s AI in the DESIGNER EPIC 3 to identify the presser foot presently installed on the DESIGNER EPIC 3. It’ll also tell you if the foot is backward or not! That’s awesome!
On the right-hand side (notice the four bars on the top, so this menu bar moves around the screen) are the icons used to input designs/stitches/files into embroidery edit. I can pull from the built-in designs, fonts, stitches from sewing mode (YES!), Files, and the mySewnet Library! Did you know you could do all that with the DESIGNER EPIC 3? It’s not just for loading existing embroidery designs.
On the bottom half of the embroidery edit screen are familiar tools, like mirror top to bottom and side to side, as well as duplicate and the trash can. The tools for scaling, positioning, and rotating are also there.
Again, along the bottom are tools labelled to provide even more options within the embroidery edit. Save embroidery designs, send designs through the mySewnet Cloud, Hoop Options, Resize, and more! Again, some features have gone through a name change; Create Sequence used to be called Program, Create Shape used to be Design Shaping, and Create Applique was called Design Applique. The icon for saving a file is now a disk rather than the heart.

As we move into Embroidery Stitch Out, there’s the Welcome to Embroidery Stitch Out screen, now called Embroidery StitchOut Settings. You can bypass this page, but it provides valuable information, so I suggest leaving it active and ensuring you read everything before you move to Embroidery Stitch-Out.
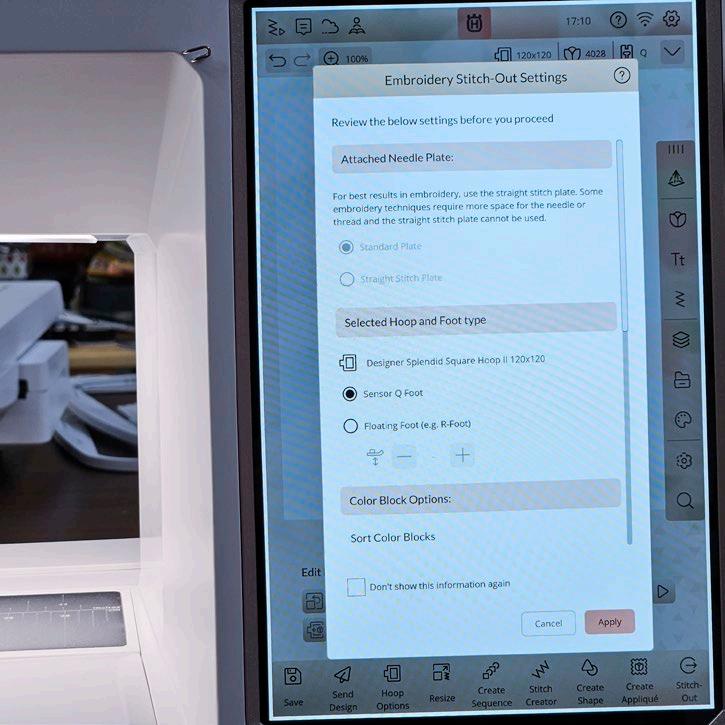
50 | issue 29 OUILT
The top of the Embroidery Edit screen
The bottom of the Embroidery Edit screen
The Embroidery Stitch-Out Settings
Now we can move into the Embroidery Stitch-Out. Wow – there are so many cool things here as well. Some of them are new, and some are not. I always find it amazing when people haven’t even explored some essential tools on their Embroidery StitchOut screen. There’s no time to go into them in detail, but use that Quick Help!
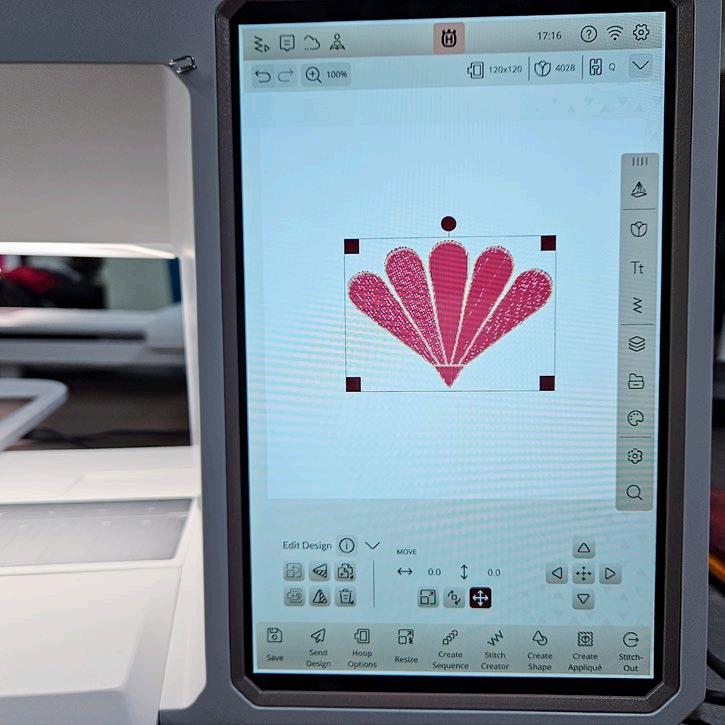
The last screen I’ll go is the Settings Menu. That’s the gear icon in the top right. What I find about the DESIGNER EPIC 3 is that the menus are much cleaner and easier to read. The categories seem to be easier to decipher. Perhaps it's just me, but I LOVE the new layout.

Here are the settings for Embroidery. Again, they seem to be very clear and easy to read.
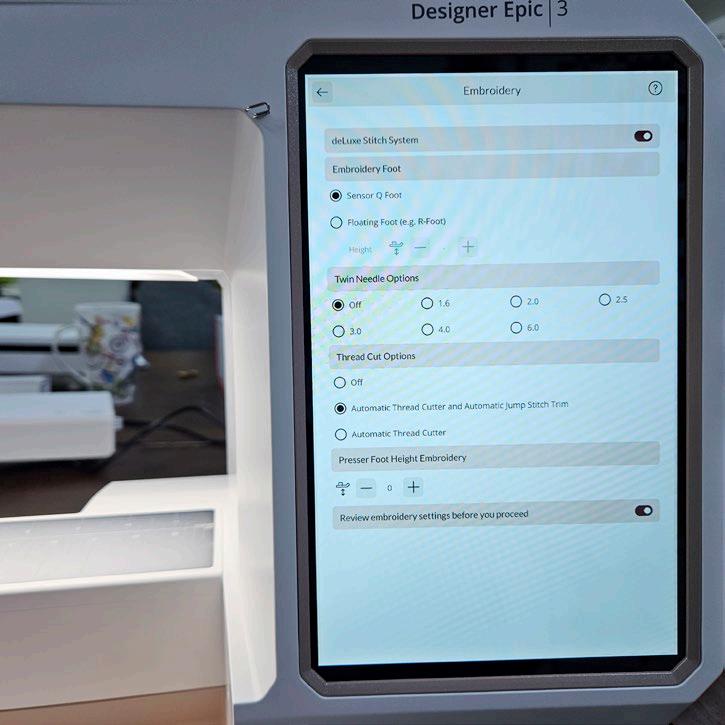
One of my favorite little extras is the clock. It’s a minor detail, but I always refer to the clock. There’s also an alarm in the DESIGNER EPIC 3. I learned that to use the alarm, you need to set the TIME that you want the alarm to sound, not the time between now and when you want the alarm to ring. That makes sense –it’s like your alarm clock – you set a time when the alarm goes off. So, if you need to be mindful of the time, and who wouldn’t get lost in sewing and embroidery on this fantastic sewing and embroidery machine, be sure to set the alarm! Remember, it’s an alarm, NOT a timer.

If you live in North America, scroll a bit to find your time zone. WOW --- I haven’t even sewn anything, and I’m so excited! Before I started sewing, I wanted an idea of what tools were available and how to use them on the Husqvarna VIKING DESIGNER EPIC 3
| issue 29 51 OUILT
The Embroidery Stitch-Out screen
The Settings Menu
The settings for embroidery
Setting the time zone


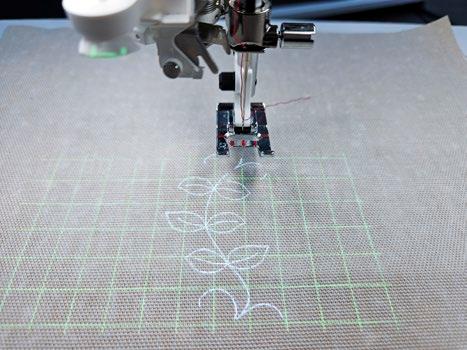
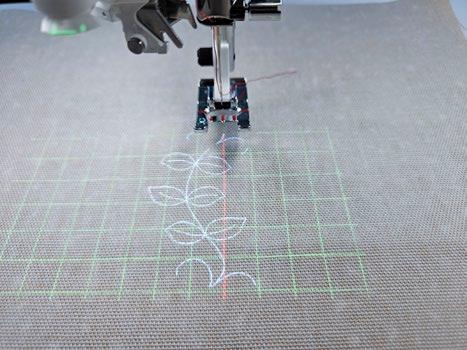
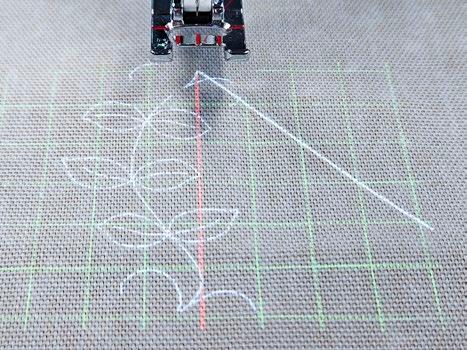
4 new features in Sewing Mode on the HV DESIGNER EPIC 3
Projection
The first thing to look at is the PROJECTION. Yes, the DESIGNER EPIC 3 has a camera and a projection system that works in sewing and embroidery modes. Let's look at what we can do in sewing mode.
On the menu bar on the right-hand side, you'll spot a new icon – Projection. Like all the icons, it's a toggle –on or off. The icon will open the Projection Menu but does not automatically turn the Projection on. The menu has an on/off toggle to start the Projection. When you turn the Projection on, the work lights on the DESIGNER EPIC 3 will automatically dim, and you can manually set the LED lighting, as there's a slider on the projection menu.
There are four projection features in sewing mode – the grid, stitch projection, and not one, but TWO stitch guidelines. Depending on your needs, you can use one, two, three, or all four projection functions together.
Let's start with stitch projection. Whatever stitch you have selected will project onto your fabric in the actual size. WOW! I love this. It's easy to see how the stitch will look on your project before you sew. You may need to adjust the size of the stitch, or you may not like this stitch, and it's easy to select another and preview it.
The grid has maximum flexibility with the ability to change the size of the grid, the color of the lines, and the angles of the lines. The grid is beneficial if you need to stitch a line of stitches between two lines – a sashing on a quilt, handles on a bag, or multiple rows of decorative stitches. Adjust the size of the grid to match your project and start stitching.
Now, let's add one of the Stitch Guides. You can change the color of the line, the angle, and the thickness to suit your needs. I'm super excited about Projection!
And because we can – let's add in the Second Guideline. I've changed the angle and the color so you can see the two guidelines.
The guidelines are super handy; I use them almost every time I sew! Why? I marked the seam lines with a pencil every time I made half-square triangles, flying geese units, stitch and flip seams, joining binding strips, etc. No longer! I now use Projection, and the guidelines save a lot of time.
Even though the line doesn't go to the corner, it's super easy to aim the line at the corner and eyeball it. Initially, I was slightly off, but I've become proficient, and my stitching lines are straight.
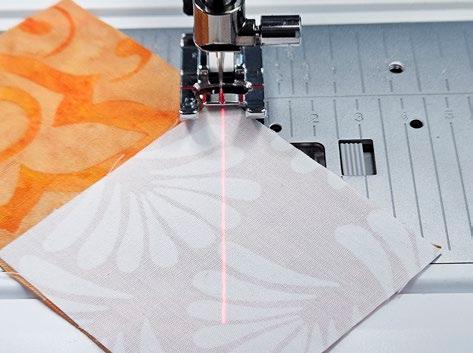
When you stitch a flying geese unit or a stitch and flip corner, you stitch from one corner to the other on the diagonal. But when stitching half-square triangles, you need to stitch ¼" away from the center line. That's super easy. I move the guideline to the right by ¼" (6mm) and then, keeping the guideline down the center of the diagonal on the squares, I'm stitching ¼" away from the line. The Projection is brilliant, and I'm constantly using it!
52 | issue 29 OUILT
The Projection Menu
Stitch Preview
The grid and stitch projection
The grid, stitch projection, and a stitch guideline
The grid, the projected stitches, and the TWO stitch guidelines
Using Projection to stitch a flying geese unit
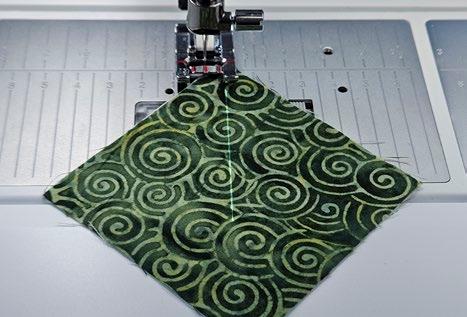
Guided Pictogram Stitch Technique
The new category of Guided Pictograms, which you'll find in Menuy I.2, also uses Projection.
Because these stitches are brand new, here's a video to show you how they work since I'm not sure I could describe it in words well enough. Using the START/ STOP Function is better, as the built-in stops are part of the stitch file.
Here's the finished star. Yes – my start/ stop is a bit off, but I'm chalking that up to operator error and my FIRST attempt.

Isn't that just the neatest thing? However, that's not all you can do. If you want to position a piece of fabric where you stitch the Guided Pictogram, you can trim the excess away and have a rawedge applique.
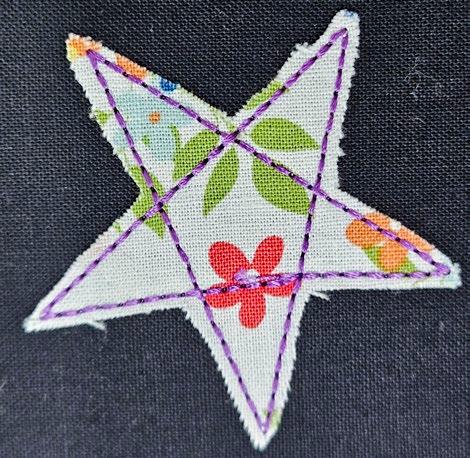
Or why not place a ribbon along the projected stitch lines (use the Stitch Guide) and get another unique effect? I see many more playing with these Guided Pictograms to create fun projects.
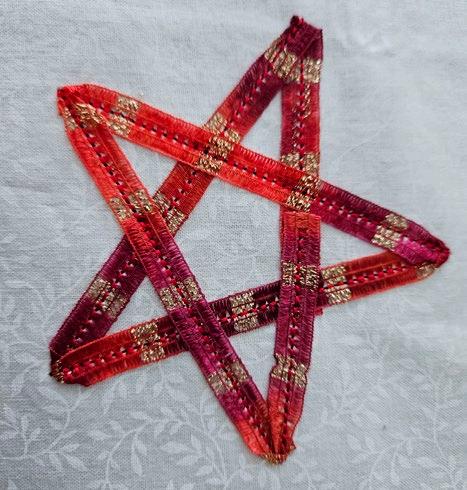
Floating Stitches
Let’s look at a new category of stitches, called Floating Stitches, which are in sub-menu
J.4. They are satin motifs, but the travelling stitch from each motif appears only on the wrong side of the project, so you can't see it, which is very cool. There are two kinds: Floating Stitches – Folded and Floating Stitches – Joined.
For the Floating Stitches folded, I like to use the Adjustable Stitch in Ditch Foot for the IDF System with a guide in the center to help keep the fabric in the correct position.
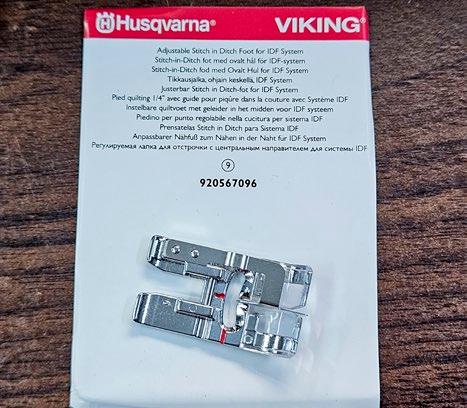
If you forget how to do the floating stitches, you can check out the tutorials in the JoyOS Advisor. Mark the WRONG side of your fabric where you want the floating stitches to be. It's essential to mark the end and the beginning as well. Fold the fabric along that line with the right sides together. I cut a narrow strip of Tear-A-Way stabilizer and placed it under the fold.
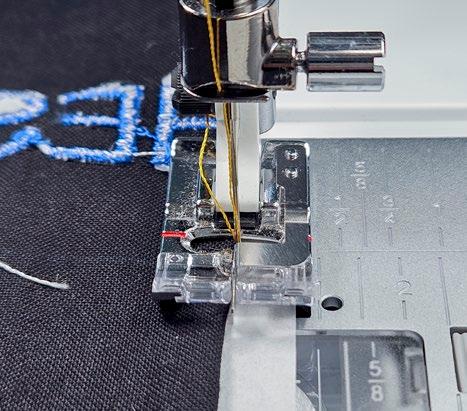
As you stitch, your stitch will go half on the stabilizer and half on the fabric. The travel stitches between the motifs should be on the stabilizer. That guide in the center of the Adjustable Stitch in Ditch foot is a huge help. Here's a short video to see how the stitch forms, half on the fabric and half on the stabilizer.
And this is what it looks like. Remember, this is the wrong side of the fabric, and notice the travel stitches right beside the fabric but on the stabilizer.

you look at the front of the fabric, all you see is a fold.
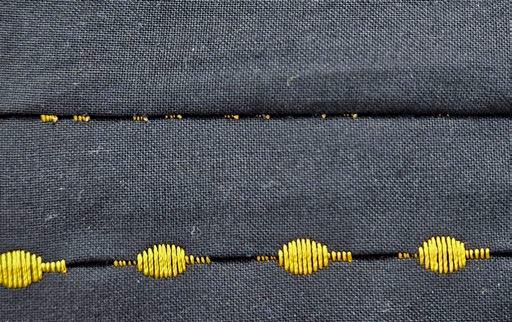
| issue 29 53 OUILT
Stitching ¼" away from the projection line
An example of the Guided Pictogram Stitch Technique
Using ribbon on a Guided Pictogram
Raw edge applique using the Guided Pictogram Stitch Technique
The Adjustable Stitch in Ditch Foot for IDF System
If
Setting up to do a folded Floating Stitch
The back side of the Floating Stitches – Folded
From the front – we see a fold


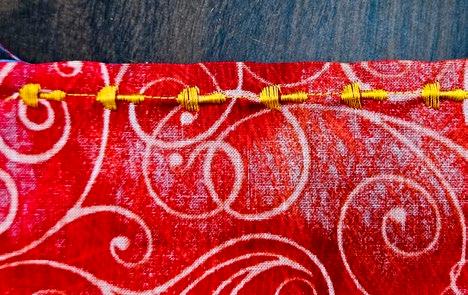

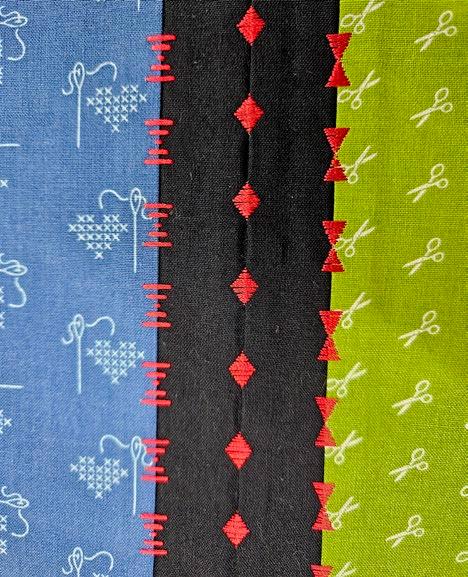
But tug at the edge to pull the fabric taut, and VOILÁ – the floating stitches magically appear. Isn't that amazing? The second Floating Stitch technique is called Floating Stitches – Joined and is used to construct seams. Yep. You start with two pieces of fabric with right sides together, and it's best to use your B Foot. This technique works best for simple piecing as you'll have a larger than ¼" seam allowance. Borders, sashings, log cabins, crazy quilts, and placemats are projects where the joined floating stitches work best.
The inside of the seam looks like this, and since some floating stitches are directional, remember you can mirror those stitches from top to bottom!
The little mushrooms appear along the seam allowance when you open the seam up. It's a very clever technique and can add a lot of whimsy to your project. I believe the tension was off when I did this sample, so I want to experiment a bit more, as the bobbin thread should not have appeared. Hey, I'm learning a new stitch and a new sewing machine. Something is bound to go wonky!
See the examples on this page where I used both methods of floating stitches. The center line is the folded method, and the two outer seams use the join technique. That's very cool and adds a neat element to any project.
Stitch Creator
The final new tool is Stitch Creator. Remember, I'm only talking about the NEW features of the DESIGNER EPIC 3. All the stuff we loved in the DESIGNER EPIC 2 is in the DESIGNER EPIC 3 or has enhancements!
Stitch Creator allows me to modify built-in 9 mm stitches by adding or subtracting stitch points. I can make the stitch into a triple stitch or create a brand-new one! You can never get lost as I see the name of the tool I'm in at the top of the screen. If you're in trouble, touch the Crown with the H at the top to return to the home screen.
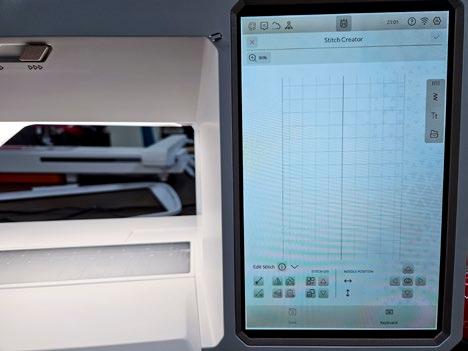
I can load a stitch to edit in one of two ways. I can load a stitch in sewing mode and then touch the screen to get a menu that links to the Stitch Creator tool. Or I can select the Stitch Creator icon from the bottom of both the sewing and embroidery modes and then load the stitch from within Stitch Creator.

Once we have a stitch on the screen, you can open the preview window to see what the stitch looks like when stitched out. The new sequence appears in the preview window as you change the stitch. There's no need to move in and out of Stitch Creator to see what the stitch looks like.
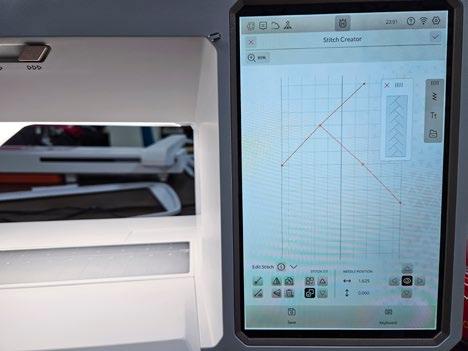
54 | issue 29 OUILT
The Floating Stitches – Folded
Using the B foot to sew Floating Stitches – Joined
A line of Floating Stitches – Joined
The front of the Floating Stitches – Joined
Examples of the two styles of Floating Stitches
Stitch Creator window
Loading a stitch into Stitch Creator
The preview window in Stitch Creator
I've moved the direction of the just added stitch point; you can see how the original stitch changed.
There are many small icons on this screen, and to make it easy to identify what does what – touch the "I" icon, and a menu pops up naming all the icons. This Icon Explanation popup is brilliant and so handy. And I LOVE being able to move the menus around the screen. It's fluid! It allows us to work how we like, not how the engineers want us to work!
And you could continue to play for hours!
Here’s an example of how Stitch Creator changed one stitch in two ways. The center (purple) stitch is the original stitch. It was modified to eliminate the satin stitch element and stitched in gold thread. Then, using the triple stitch icon, the stitch became a triple stitch.
It blows my mind to think that we have 870 stitches in the DESIGNER EPIC 3, but with Stitch Creator, we can create even more stitches to play with!
WOW – that should give you a good overview of the NEW features in sewing mode!
I've skimmed the surface of some of the fantastic things you can do with this sewing and embroidery machine!
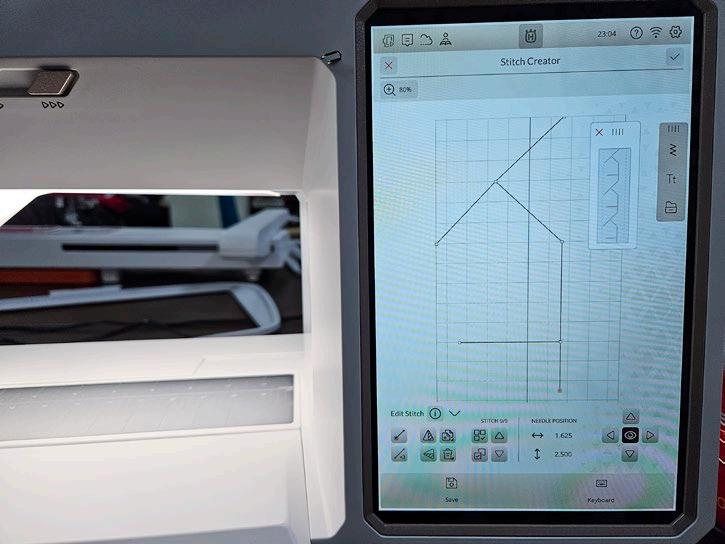
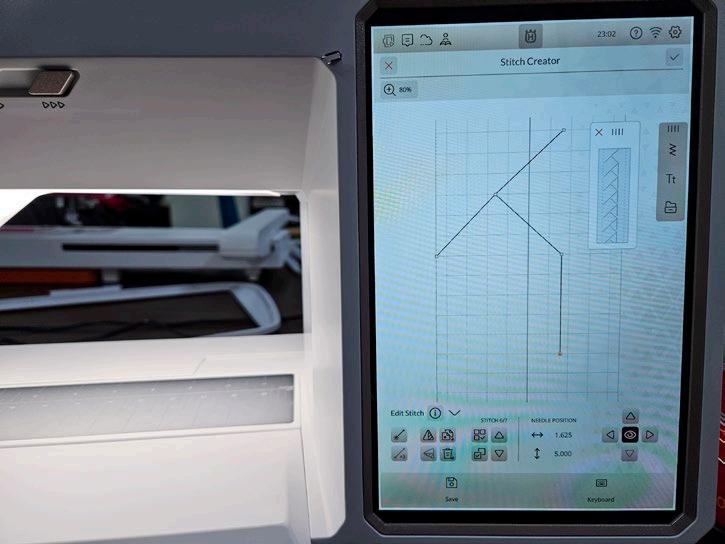
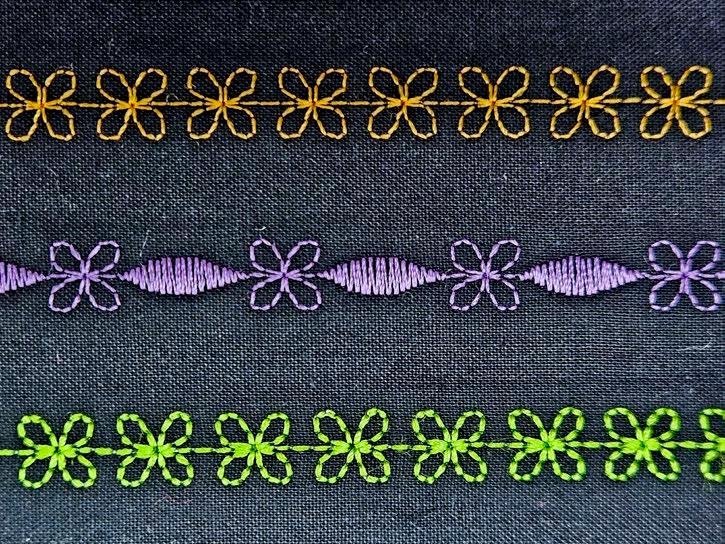

| issue 29 55 OUILT
The preview window in Stitch Creator shows the new stitch sequence
The Icon Explanation popup window
Creating new stitches in Stitch Creator
Examples of using Stitch Creator to modify a stitch
3 NEW embroidery hoops for the HV DESIGNER EPIC 3
Free Arm Embroidery Hoop
The first hoop I’ll look at is the Free Arm Embroidery Hoop. The ability to do freearm embroidery is fantastic, and I was so excited when I saw this feature. I can’t wait to explore this technique a lot more, but as mentioned, there’s NO more time for much playing this week. Did you know if you follow the link above, you’ll find an instruction sheet on how to use the Free Arm Embroidery Hoop and loads of tips and tricks? That information sheet also comes in the box with the hoop!

What is interesting about this hoop is that the embroidery hoop connector is NOT on the outer part of the hoop as we’re used to. Nope – this connector is on the inner part. Wait – I’ll show you why.

I’m very visual and need to see things to understand them. With the embroidery hoop connector on the inner, not the outer hoop, it took a minute or two to visualize how to hoop my tote bag. I had to put the bag on the embroidery machine to help figure it out.
I forgot to mention that when you do free-arm embroidery, you must remove the embroidery arm extension table from the DESIGNER EPIC 3.
Then, you hoop your fabric. You may find it easier to hoop your item and then position a piece of stabilizer underneath the hoop just before touching START.
Notice that the connector is towards the bottom of the tote bag, and the outer part of the hoop is inside the bag. It’ll all make more sense in a minute.
You must pay attention to the orientation of the design relative to the orientation it appears on your project. Mostly, we create designs in portrait orientation in the embroidery edit screen. But when the tote bag is in the hoop, it’s NOT in the same orientation, so the embroidery design needs to rotate 90 degrees so it’s stitched in the correct orientation on the tote bag.

You get a better idea of how it works when you see it on the DESIGNER EPIC 3. The opening of the tote bag goes around the free arm, and the embroidery hoop connector (on the inner hoop) attaches the hoop to the embroidery arm.
I think of the possibilities with this free hoop. Garments for children, like T-shirts and onesies, will be a snap, and there’s no danger of the garment falling into the hoop – not that that has ever happened to us! No longer will you be required to open a tote bag to embroider on the outside. I can’t wait to play with this hoop some more.
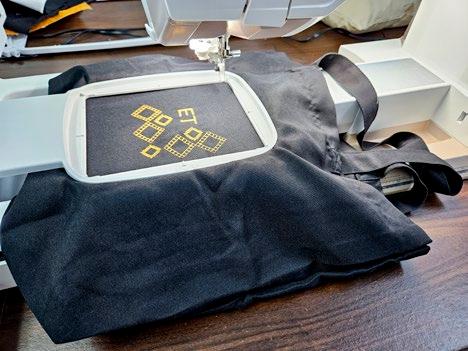
I wanted to stitch a design on a pant leg the moment I saw this feature. So, I grabbed a pair of pants to check it out.
Here’s something that has probably never happened before. As machine embroiderers, we’re always asking for larger hoops – in this case, I want a SMALLER one! I got a chuckle about that.
A note about hooping - You may find it easier to hoop the garment and position the stabilizer UNDER the hoop once it’s attached to the embroidery arm, especially if things are tight.

Two things to consider for free-arm embroidery is that whatever you want to embroider has to fit around the free-arm of the DESIGNER EPIC 3 and fit in the hoop.
56 | issue 29 OUILT
The free-arm embroidery hoop
The two parts of the free-arm embroidery hoop
A tote bag in the free-arm embroidery hoop
The set-up for stitching a tote bag in free-arm embroidery mode
The pant leg in the free-arm embroidery hoop
It was tight to hoop the pants, but because they were stretchy, it worked. You can see where the hoop clip is stretching in the bottom right corner.
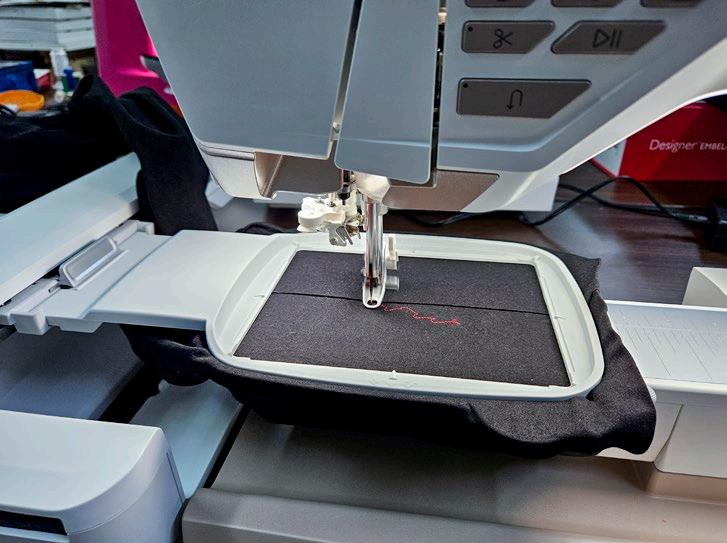
I was a bit worried as even though I could stretch the pant leg around the free arm, I wasn’t sure it would work as I thought there might be too much drag to stitch correctly.
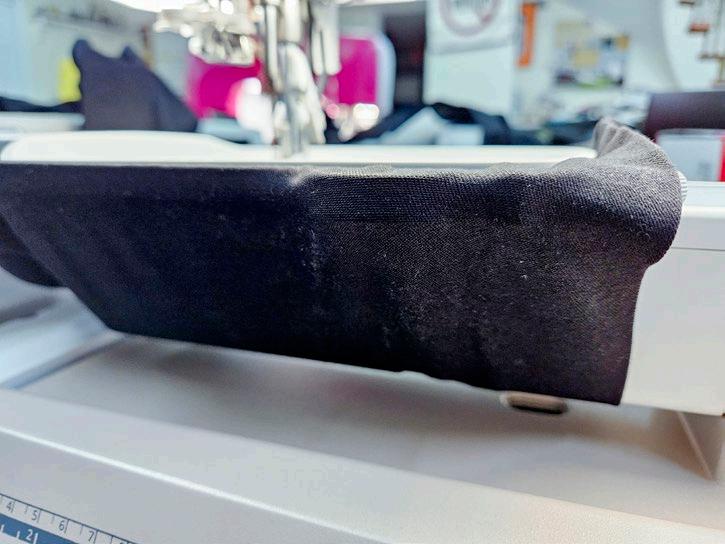
However, it stitched like a charm, and there were zero issues with it.
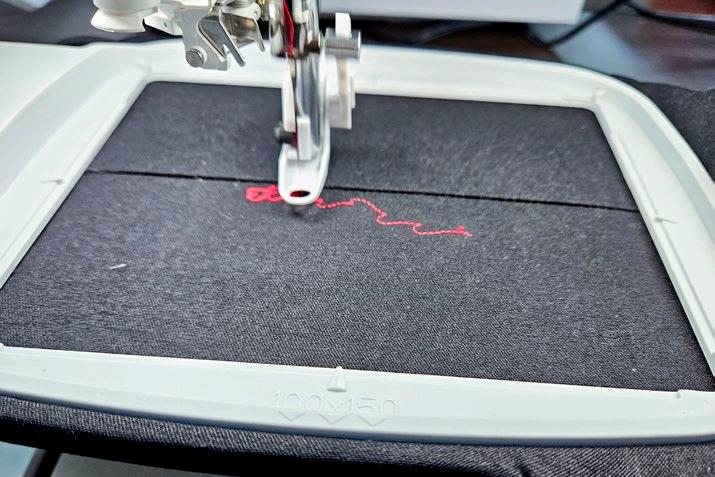
So you can see why a longer and narrower hoop is desirable, but this new hoop and free- arm feature is a game changer!!

See the close-up of the design. I am so impressed. Now that I’ve figured out the maximum size I can work with, I have many more items lined up for free arm embroidery.


| issue 29 57 OUILT
The pant leg is ready for free arm embroidery
The pant leg stretched around the free arm
The embroidery design on the pant leg
The embroidery motif
Embroidering the pant leg in free-arm mode
Husqvarna VIKING DESIGNER EPIC 3
Special Techniques Hoop

The second new hoop is the Special Techniques Hoop, another exciting addition to our collection of hoops. Several techniques, including bobbin work and felting, are stitched upside down. Let's take that concept further and add embroidery to those bobbin work or felting designs, which means I have to flip the hoop over and add the embroidery! While technically, we could have done this in a traditional embroidery hoop; it would have been a nightmare to line everything up.
With the new Special Techniques hoop, I don’t have to unhoop my fabric to switch from technique to technique! WOW!!!!!
The Special Techniques hoop has two embroidery hoop connectors. One on either side, and one of them faces up, and the other faces down. They are labelled Side A and Side B. These hoop connectors allow me to hoop the work face up or face down. Some people are calling it the reversible hoop.
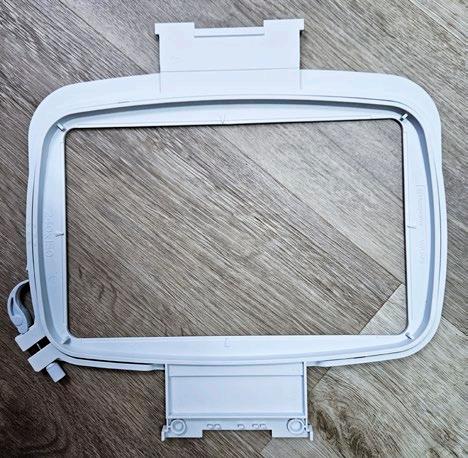
The amazing thing is when you start embroidering a design with multiple techniques, like felting or bobbin work, AND embroidery with thread, you’ll get instructions on the screen telling you which side needs to be attached. It’s so EASY to do – just follow the instructions on the screen.
And if you do an embroidery design with bobbin work, you’ll need the Specialty Bobbin Case. In case you don’t know, bobbin work allows us to use a thick thread (that won’t go through the needle) in the bobbin case, and it’s such a fun technique. I’ve used the specialty bobbin case with thick thread in free motion, and it’s terrific.
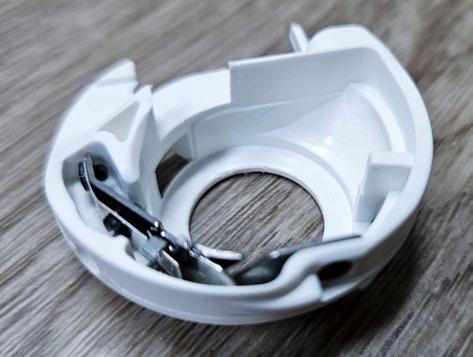
Like always, you start by hooping your base fabric and a stabilizer. Ensure that you hoop correctly with Side A facing up. Depending on the embroidery design, I will need to follow the instructions in the Color Block List on the Stitch Out screen on the DESIGNER EPIC 3 to know what side should be face up for each Color Block and also if I need to be using the Felting Kit, the Specialty Bobbin Case, or the Sensor Q foot. It’s strange to hoop your work upside down with the stabilizer on top but trust the instructions, and it’ll work out fine.
Sorry – I didn’t take photos of all the steps, but in this sample, I started with Side B facing up and added the green craft felt to the back. I used Projection to ensure the felt was in the correct position and then touched Start!
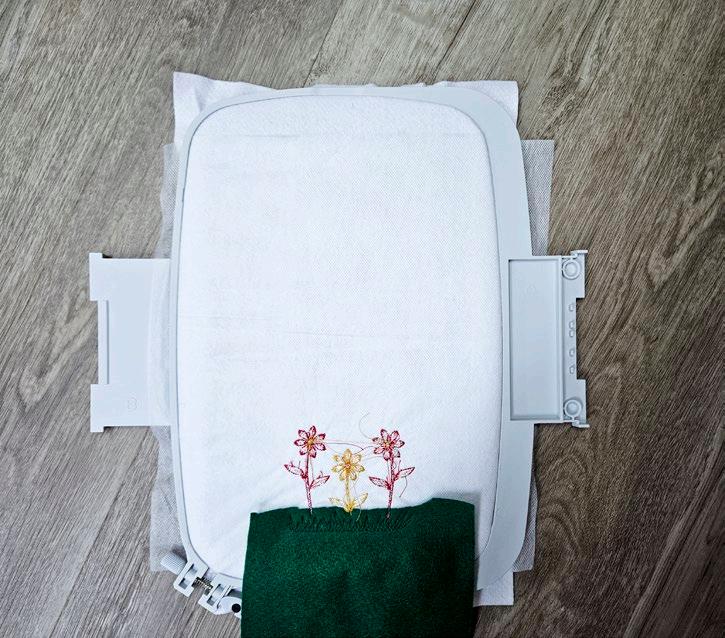
If you do a felting design, you’ll need the Felting Kit
Next, the instructions indicate flipping the hoop over and attaching Side A to the embroidery arm. I’ll switch to the Sensor Q foot this time and use embroidery thread to finish the design. Depending on the design, you may flip back and forth several times before the design is complete.
58 | issue 29 OUILT
The green felt on the wrong side of the hoop for the felted embroidery
The Specialty Bobbin Case
The Special Techniques Hoop
The Special Techniques Hoop with two embroidery hoop connectors
The felting kit
The result is adorable, and I can’t wait for more time to play with this embroidery technique. I promise to be back so we can explore this a bit more. There are embroidery designs in the DESIGNER EPIC 3 for the Special Techniques Hoop, and I’m sure new designs will appear in the mySewnet Library. We should also be able to create our designs in the mySewnet Software at some point.
Here’s a closer look at the design. I LOVE the felting texture and the embroidery thread design. I can see many possibilities for this technique - felted animals for textured quilt blocks for children, clothing, and much more.
Mega Turnable Hoop
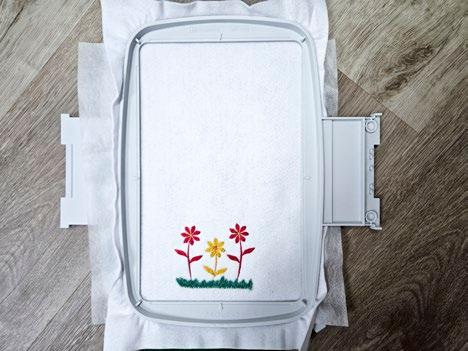
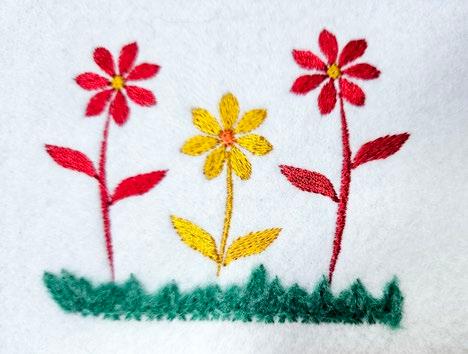
The third new hoop is the Mega Turnable hoop, the largest embroidery stitching area on the market. It’s HUGE with a stitchable area of 450 by 450! WOW!!! Can you believe that? The hoop has been reinforced on the underside for maximum stability during stitching.
I have not had a chance to stitch anything with this hoop, but I thought you’d get a kick from this picture of me using the hoop as a picture frame to appreciate the size!!!
There’s an embroidery hoop connector on both sides with two quick releases. I see many possibilities with this giant hoop and can’t wait to get my hands on one!
All I can say is that I’m AMAZED by all the new features and benefits
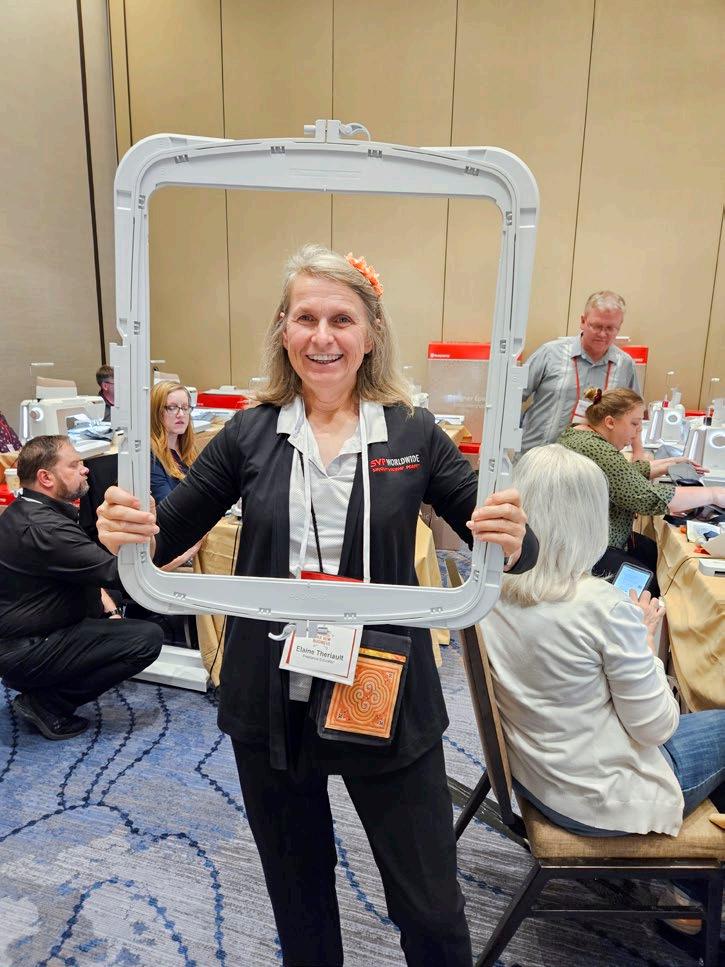
Elaine Theriault crazyquilteronabike.blogspot.com
Schedule an appointment with your local Husqvarna VIKING

| issue 29 59 OUILT
The completed Special Technique embroidery design
The design detail of the special techniques (felted) design
The Mega Turanable embroidery hoop
The Husqvarna VIKING DESIGNER EPIC 3
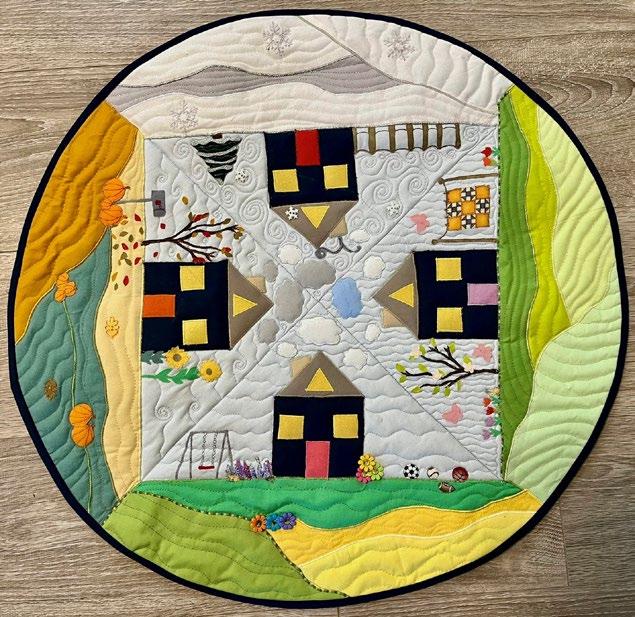


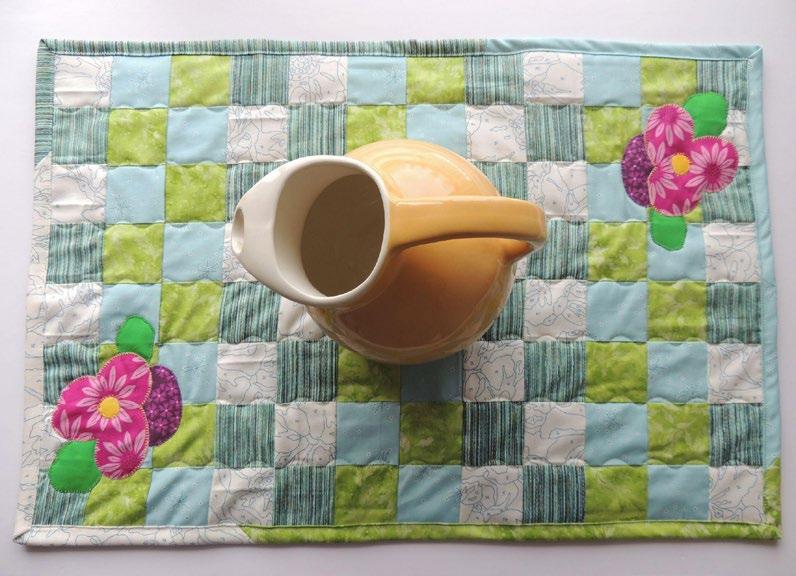
60 | issue 29 OUILT don't miss these projects & tutorials online! READ NOW PFAFF passport 2.0: The finish! Using the blanket stitch and binding the spring table topper .com OUILT and there's so much more! No-sew embellishmentsEasy with ribbons, buttons, and a little glue READ NOW The trick to quilting for texture | Double batting READ NOW Husqvarna VIKING DESIGNER EPIC 3 Piecing a quilt with Floating Stitches | Decorative and Constructive READ NOW
BUSINESS DIRECTORY
CANADA
Brandon Sewing Centre
821 Princess Ave, Brandon MB R7A 0P5, 204.727.2752
Bytowne Threads - Ottawa, ON
1.888.831.4095 bytownethreads.com
mlj@bytownethreads.com
Featuring Aurifil thread from Italy. Long staple Egyptian cotton threads - 270 colours in 12, 28, 40 and 50 wt; 88 colours in 80 wt. Polyester Aurilux - 240 high sheen colours. Wool threads - 192 colours. Many kits available. Check our website!
Canadian National Fabric - Brampton, ON
https://canadiannationalfabric.com/
info@canadiannationalfabric.com
We are an online fabric shoppe offering a wide variety of fabrics, patterns, books and notions for all your sewing needs. Flat rate Canada wide shipping of $15. All orders over $55.00 before taxes and shipping will get a free mystery fat quarter. Shop in person available by appointment!
Carellan Sewing Centre
1685 Corydon Ave, Winnipeg MB R3N 0J8 204.488.2272, facebook.com/CarellanSewingCentre Country Concessions
35 King Street N, Cookstown, ON L0L 1L0 (new address) 705.458.4546, countryconcessions.com
Gitta's
271 Lakeshore Rd E, Mississauga, ON L5G 1G8
905.274.7198 gittas.com
questions@gittas.com
Nestled in the east village of Port Credit, Gitta's is the place where stitchers meet with their stitching friends, shop for stitching supplies and see the new stitching designs from Europe and the United States. Hardanger House, designs by Betty Stokoe Oldham PO Box 1623, Penhold, AB T0M 1R0
403.573.2003 bettyoldham53@gmail.com
etsy.com/shop/HardangerHouse
Haus of Stitches
626 Main Street, Humboldt, SK S0K 2A0
306.682.0772 or toll-free 1.800.344.6024
hausofstitches.ca
Our one of a kind store offers everything you need for sewing, quilting, knitting, rug hooking and needlework.
Authorized dealers for Janome and Elna.
Kelly's Creative Sewing
804 Main St, Dartmouth, NS B2W 3V1
902.435.7380 kellyscreativesewing.ca
kellyscreativesewing@gmail.com
We offer sales and on-site service of high-end domestic embroidery, sewing machines and sergers, as well as a variety of educational programs.
Ottawa Sewing Centre
1390 Clyde Ave, #107, Ottawa, ON K2G 3H9
613.695.1386 ottawasewing.com
ottawasewing@gmail.com
Authorized Dealers for Brother, BabyLock, Elna, Q'nique & Grace quilting frames. Specialize in sales, parts & servicing for all makes & models of quilting/embroidery/ sewing/serger/overlock machines & cabinets by Sylvia Design.
Sew Inspired
375 Daniel St S, Arnprior, ON K7S 3K6
613.623.0500 sewinspired.ca
info@sewinspired.ca
Your Ottawa Valley PFAFF® Authorized Dealer. We have a large supply of quilting & sewing supplies, knitting supplies, as well as in stock PFAFF® sewing machines. We also have a listing of sewing and quilting classes.
Sew With Vision
480 Parkland Dr, Halifax, NS B3S 1P9 902.479.2227, sewwithvision.net
Stitch By Stitch
550 Days Rd Unit 1, Kingston ON K7M 3R7 613.389.2223, stitchbystitchkingston.com
That Sewing Place
16610 Bayview Ave #10, Newmarket, ON L3X 1X3
905.715.7725, thatsewingplace.ca
The Quilt Store / Evelyn's Sewing Centre
17817 Leslie St, Unit 40, Newmarket, ON L3Y 8C6
905.853.7001 or toll-free 1.888.853.7001
The Quilt Store West
695 Plains Rd E, Unit 6, Burlington, ON L7T 2E8
905.631.0894 or toll-free 1.877.367.7070
thequiltstore.ca
Now with 2 locations to serve you, we are your Quilt Store Destination! The staff here at The Quilt Store is always on hand to provide Quilt Wisdom, Quilt Inspiration and most of all we pride ourselves as the place to make... All Your Quilt Dreams Come True!
The Stitcher's Muse Needleart #101 - 890 Crace St, Nanaimo, BC V9R 2T3
250.591.6873 thestitchersmuse.com
info@thestitchersmuse.com
A divine little shop with supplies for all your hand stitching needs! Friendly, knowledgeable, helpful staff. Cross stitch, canvaswork, needlepoint, embroidery, counted thread, lace making & more. Books, patterns, fabric, threads, tools.
The Yarn Guy
15 Gower St, Toronto, ON M4B 1E3
416.752.1828 or toll-free 1.800.836.6536 theyarnguy.com info@sewknit.ca
See us on Facebook, follow us on Twitter! Knitting machines, sewing machines, repairs, parts for Passap, Studio, Singer, Silver Reed, Superba, White. Sewing notions and supplies, books, ball yarns, coned yarns, TAMM yarns, Paton's yarns, Bernat yarns, Phentex yarns, Bernat kits & crafts.
Upper Canada Quiltworks – Quiltworks Studio PO Box 64, Brockville, ON K6V 5T7 613.865.7299 uppercanadaquiltworks.com uppercanadaquiltworksstudio@gmail.com
Quilt patterns and books, fabric and notions, felted wool, wool kits, punchneedle patterns and supplies and Valdani embroidery floss. Workshops in quilting, punchneedle, wool applique, rug-hooking, sewing, sign painting & more!
UNITED STATES
A Quilter's Folly
8213 Brodie Ln #100, Austin, TX 78745 512.899.3233, aquiltersfolly.com
A-1 Singer Sewing Center 1012 S Oliver St, Wichita KS 67218 316.685.0226, a-1singer.com
Charlotte Sewing Studio 1109 Tamiami Trl Unit 2, Port Charlotte FL 33953 941.235.3555, charlottesewingstudio.com Close to Home Sewing Center 277 Hebron Ave, Glastonbury CT 06033
860.633.0721, closetohomestores.com
Discount Fabric Warehouse 933 Kanoelehua Ave, Hilo HI 96720 808.935.1234, discountfabricwarehouse.com
El Cajon Sew & Vac 1077 Broadway, El Cajon CA 92021
619.442.2585, sewezr.com
Hursh's Country Store
2425 W Main St, Ephrata PA 17522
717.721.2575, hurshscountrystore.com
Jessamine Quilt Shop LLC 1301 Old Cherokee Rd, Lexington SC 29072-9047
803.490.1031, jessaminequiltshop.com
JS Linen and Curtain Outlet 1250 Northside Dr, Statesville NC 28625 704.871.1939, jslinenoutlet.com/js-quilt-shop
Just Sew Studio
51 Third St NE, Waite Park MN 56387 320.654.1580, justsewstudiomn.com
Keeping You Sewing
226 4th Ave S, Clinton IA 52732 563.242.6135, keepingyousewing.com
Maryland Vacuum and Sewing Center 26845 Point Lookout Rd (Rt 5), Leonardtown MD 20650 240.309.4019, mdvacsew.com
New England Sewing 501 Hartford Rd, Manchester CT 06040 860.647.8119, nesewing.com
Options Quilt Shop 102 E Commerce St, Jacksonville TX 75766 903.586.9546, facebook.com/optionsquiltshop
Paramount Sewing & Vacuum 3960 Rickey St SE, Salem OR 97317 503.990.8186, paramount-sew-vac.com
Pick Your Stitch 6701 Manlius Center Rd, East Syracuse NY 13057 315.437.0962, pickyourstitch.com
Quality Vac and Sew 1213 Gilmore Ave Ste E2B, Winona MN 55987-2632 507.452.2203, qualityvacandsew.com
Quilter's Attic Sewing Center 118 Maple Ave, Pine Bush NY 12566 845.744.5888, quiltersattic.com
Quilters' Corner @ Middlebury Sew-N-Vac 260 Court St Ste 4, Middlebury VT 05753 802.388.3559, middleburysewnvac.com
Quintessential Quilts 940 East Main St, Reedsburg WI 53959 608.524.8435, qquilts.com
Select Sewing 2415 East 65th St, Indianapolis IN 46220 317.255.6332, selectsewingservice.com
Sew Special 688 W Main St, Uniontown PA 15401 724.438.1765, sew-special.biz
Sew What? Fabric Shoppe 7 W Front St, Addison NY 14801 607.359.4308, sewwhatfabricshoppe.com
Sewing Solutions
1505 S Glenburine Rd, Ste G, New Bern SC 28562-2689 252.633.1799, sewingsolutionsnc.com
Sierra Sewing, Quilting, and Vacuums 8056 S Virginia St Ste 6, Reno NV 89511 775.823.9700, sierrasewing.com
Singer Factory Distributor
4914 W Irving Park Rd, Chicago IL 60641 773.545.6834, singerfactorydistributor.com
Suddenly Sewing
5850 Kroger Dr Ste 110, Fort Worth TX 76244 817.741.5400, suddenlysewing.com
Thimbelina's Quilt Shop
118 North B St Ste B, Livingston MT 59047-2662 406.222.5904, thimbelinasquiltshop.com
Wise Monkey Quilting 501 Hwy 39 N, Denison IA 51442 712.393.7979, wisemonkeyquilting.com
| issue 29 61 OUILT
To
john@quiltsocial.com
list your business please email


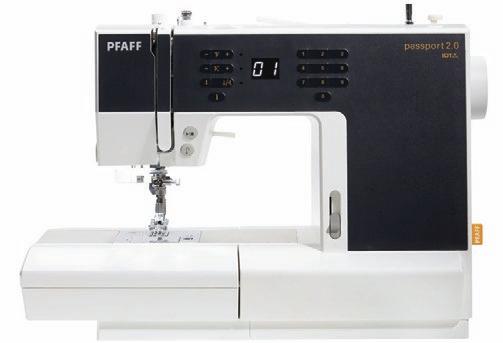
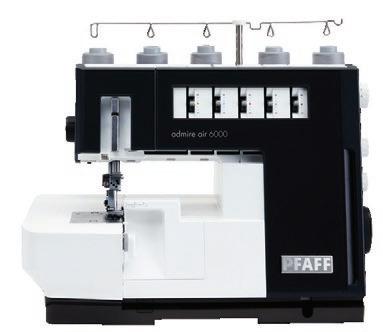

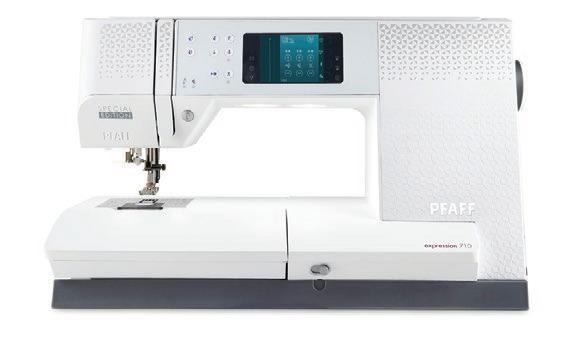
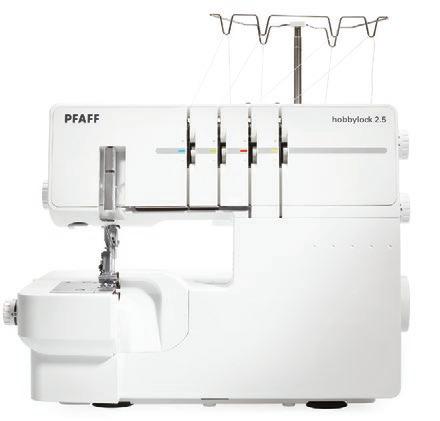

62


 Jean Boyd quiltsocial.com/author/qs_jean/


