eLearning Newsletter Spring 2016

Page 1

KING’S GROUP | SPRING 2016

ELEARNING

Newsletter

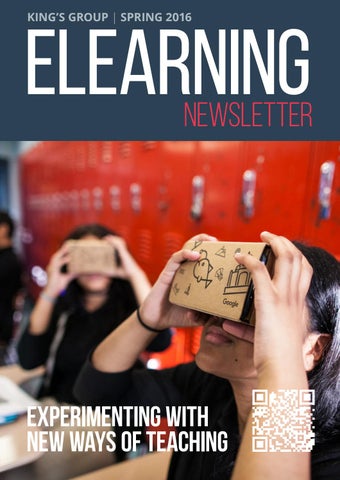
experimenting LEARNING SKILLS with ST new ways of teaching FOR THE 21 CENTURY


experimenting with new ways of teaching During Term Three we have made great ​​ advancements in eLearning in all schools. Pupils with Chromebooks are using this technology daily offering teachers flexibility in teaching never seen before. Pupils today have an innate understanding of technology, and using tools such as Chromebooks, tablets and smartphones is already second nature to them. These devices have brought new-found freedom to the classroom with teachers being able to use technology at all times - providing a more dynamic, creative, participative and collaborative learning environment. I would like to thank all teachers for the additional effort made this year to help us integrate technology into the classroom. Secondary teachers have embraced Chrome OS and the entire ecosystem of Google Apps for Education that enables a new world of creativity, and are beginning to be more confident using new devices, creating activities and experimenting with new ways of teaching. Many teachers have lost their fear and are creating virtual classrooms thanks to Google Classroom where they can manage their assignments and communication in a digital and engaging way without always relying on paper. We already have 205 virtual Google Classrooms operating in our Google domain - quite an achievement in such a short period of time! Throughout the year we have also been testing Omnito as a Chromebook management solution and it has proven to be vital for teachers. With Omnito, teachers can take total control of Chromebooks in their classroom. Omnito allows teachers to monitor all open tabs, restrict internet access, open and close tabs and lock devices - all in realtime. This is a key part of ensuring control remains with our teachers to increase their confidence in using Chromebooks in a learning environment whilst also ensuring pupils are on task and kept safe. Omnito products are fully integrated with Google Classroom - teachers’ courses and pupils assigned to them are automatically synced and ready to use the moment a teacher logs in. Online safety and security is another area thanks to the implementation of Securly in all our schools - a new filtering system for users of Chromebooks. The software allows us to manage and apply filtering policies both at school and at home and its notification system keeps the school informed about the possible misuse of devices. Pupils have two different filtering profiles, one at school where the system doesn’t allow gaming and social networking websites and a more flexible home profile for outside the physical school building where pupils can use their devices for non-educational purposes. From September we aim to launch the Securly parent portal where parents will be able to monitor the usage history of their child’s Chromebook as well as be able to design and manage their child’s filtering profile of devices once they are at home. This system is currently in beta testing and will be rolled out to parents starting September 2016. Our eLearning programme in Primary using iPads has also seen a very successful year and the incorporation of new applications such as “Explain Everything” is allowing teachers and pupils to create, collaborate, communicate and consume content at any age. Explain Everything is an incredibly flexible tool that can be used with any content


area by virtually any grade level. Teachers are able to use it to record lessons, create demonstrations, and export their videos to their blogs or Google Classroom to support their teaching. They have also been able to use videos that pupils create as an assessment tool. I would like to wish everyone a great summer holidays and I hope you find a little bit of time to experiment with some of the new eLearning tools available to you to further engage your pupils next year. We look forward to hearing all about your experiences and would be delighted for you to share them with our thriving school community.

Carlos Lรกzaro Head of eLearning


10 Most Engaging Uses of Tech Integration o Technology By Saga Briggs Saga has taught and tutored writing at the elementary, secondary, and post-secondary levels. Her educational interests include psychology, creativity, and system reform. She earned a B.A. in Creative Writing from Oberlin College and lives in Portland, Oregon, USA.

Educators know that “tech” is not synonymous with engagement. But how do we recognise an engaging use of edtech when we see it? Most of us hardly have enough time to fully integrate the tools we want into our curricula, so measuring the relative success of one method over another is usually out of the question. That’s where a little research can help. Want to know whether or not to try VoiceThread with your students? Someone has probably tested it already, and you can look over the data with a quick Google search. Below we’ve curated some of the most effective uses of technology to enhance student engagement, backed by case studies, literature reviews, and documented rounds of trial-and-error. Save yourself some precious time and browse this list for ideas. Trust us, you’ll be glad you didn’t have to road test everything yourself.

1. Audio/Video Feedback Google Docs, screencasts, Evernote, Livescribe pens, you name it. There are now countless tools teachers can use to provide students with timely feedback, thereby keeping the learning momentum going. Educators at the University of Chicago recommend using audio/video feedback for optimal engagement: “One of the common pedagogical challenges is that students appear unwilling or unable to respond to instructor feedback effectively. When instructors return their assignments, students often just look at the final grade and without thinking through how the feedback can help them improve their future work.” Providing feedback in audio/video format instead of traditional written feedback improves engagement in the following ways: ►► Students have reported that they found video feedback more personal and more informative (Turner and West 2013, Kolowich 2015). ►► The novelty of the approach and the accompanying Hawthorne effect helps keep students engaged. ►► The multimodal nature of the feedback, particularly in video format, offers comparative advantages for visual and auditory learners above “unimodal” written or audio feedback. ►► According to Turner and West (2013), providing feedback [using video] took instructors no longer than if they were to provide the standard level of written feedback. Yet, instructors can often include more details above that typically provided by written feedback.


2. Digital Portfolios Curating your learning journey is easier than ever in the age of tech. But the key to making this process engaging in an educational setting is to hold students accountable for what they produce. In other words, be sure students create their digital portfolios with the intention of sharing them. “If you step back just outside the circle of a teacher’s charismatic performance,” says Steve Zimmerman, Director of the Open School Project, “you will see a better key to student engagement–the audience. We all love a good performance, but we all have an innate need to be a performer, too, and nothing will engage students as much as having an audience to perform for. The very best tool we have for cultivating that audience is a digital portfolio that can be shared and commented on by peers as well as teachers and parents.”

3. Blended Learning When Kavita Gupta decided to try the blended approach with her AP Chemistry students in 2014, she found that student enrollment increased from 4 to 7 sections (140 to 235 students, 162% increase) and AP scores increased by 12%. My two biggest challenges as a teacher for over 16 years have been time and keeping the students engaged,” she writes. “For most part of my teaching career, I have used the direct instruction method with less than desired outcomes. Hence, I decided to change the direct method of instruction to the blended model for past three years.” Supplementing her flipped model with a course website and Facebook learning support group, Gupta had her students watch teacher-generated video lectures at home and then used course time to discuss them. She also created video recording of her lectures (podcasts) so students could watch these at home. These video lectures allowed students to pace their own learning with the option to watch a segment multiple times, freeing up valuable course time for collaborative problem solving. “Since problem solving is more challenging for students, there is peer and teacher support for this task during course time. Also, because students work in collaborative groups during (course time), it gives the teacher more bandwidth to provide one-on-one support to the struggling students. While it is easy for students to zone out or gets disengaged during the lectures, it is hard to do so when students are working in small collaborative groups with teacher floating around to address their misconceptions.” Gupta summarises the results of her experiment as follows: ►► The blended model of instruction freed up (course) time to allow authentic problem solving and deeper thinking. ►► Students were actively engaged in learning with their peers while designing labs, solving problems, or taking performance task assessments. ►► Learning was individualised and self-paced. Learning was truly extended beyond the (formal learning setting) by use of Facebook group, podcasts and the website. ►► This blended model definitely provided increased engagement and extended the learning beyond the (formal learning setting).

4. Social Media Researchers at Cape Peninsula University of Technology in South Africa are just one of many groups to have found a positive correlation between social media integration and student engagement. In-depth interviews with lecturers who use Facebook and blogs and focus groups with their respective students were carried out to establish the following: usage in teaching and learning; the context of use; challenges encountered in usage; and whether these technologies enhanced student learning. A significant finding of the study was that appropriate use of blogs and Facebook groups, if accepted by students as a learning tool, enhances students’ engagement in learning activities of an academic nature on and off campus.


5. Game-Based Learning According to neurologist Judy Willis, games create the perfect conditions for engagement: “In humans, the dopamine reward response that promotes pleasure and motivation requires that they are aware that they solved a problem, figured out a puzzle, correctly answered a challenging question, or achieved the sequence of movements needed to play a song on the piano or swing a baseball bat to hit a home run. This is why students need to use what they learn in authentic ways that allow them to recognise their progress as clearly as they see it when playing video games.”

6. Collaboration Tools Solomon Negash and Tamara Powell of Kennesaw State University have found evidence that collaboration tools can increase student engagement. Studying students’ use of the online tool VoiceThread, Negash and Powell discovered “successful student engagement” when the course structure includes “giving students options to comment and share the assignment, giving students opportunities to ‘show off’ their multimedia skills as they think about the assignment, making the discussion more engaging by giving the students more freedom in how and what they share, elevating the… discussion to the level of intellectual exchange, fostering ‘concept checkup’ opportunities using collaborative interaction, setting clear goals and directions for each assignment, creating assessment and grading for each assignment, and giving students something to gain by interacting with others in this assignment (gamifying the assignment).” Chandrasekar et al found that collaboration tools enhance students’ behavioural, emotional, and cognitive engagement. Stafford et al found that students’ engagement with collaborative tools like Wikipedia can even predict enhanced written exam performance.

7. Design Thinking At the West Michigan Centre for Arts and Technology (WMCAT), educators are making waves by engaging urban high school students in an after-school programme grounded in design thinking. “Design thinking and project-based learning surfaced as an essential model in innovative school redesign that improves students’ attitudes toward learning,” says Kim Dabbs, Executive Director of WMCAT. “One of the stars in project-based learning was High Tech High (HTH) in San Diego. The WMCAT Teen Arts team traveled to HTH to complete a residency with their staff on the merits, metrics and ins-and-outs of project-based learning. Back in Grand Rapids, we also selected a team to complete a course in Human-Centered Design for Social Innovation from IDEO and Acumen. And then, last summer I was lucky enough to study at the famed d.school at Stanford, where I began to learn just how we could transform our program for teens.” Here’s what Dabbs learned about engagement through design thinking: ►► The best projects are student-driven and student-led. The more we engaged our teens in choosing their issues, selecting their partners and driving the conversation, the stronger the projects were. ►► Give students plenty of opportunities to complete mini design challenges along the way. This helped us teach art and tech skills, kept ideas fresh and retained student interest. ►► Keep giving staff the opportunity to learn and practice design thinking. This spring, our entire team is completing a Mixtape course designed by the d.school at Stanford and refreshing our skills through the IDEO and Acumen course again.


8. Reaching Individuals and Groups During a history project, educator Kerry Gallagher had her students study the topic of voting rights for freedmen. Students were instructed to put digital copies of drawings from Harper’s Weekly in an online folder. Then they created a QR code for their peers to scan so they could access the folder full of images on their devices. Students were assigned one of the images and told to put it into Skitch, an image annotation tool. They were instructed to point out the freedmen and the white Americans in the images and add text explaining what the image taught them about the reality of voting for African Americans at this time. Finally, the annotated images were projected on a large screen at the front of the room and discussed by all students. “This activity would not have been possible without technology,” Gallagher writes on her blog, “because digital annotation can be more detailed and in higher definition than on paper. Also, the resulting analysis could not be enlarged to a size that the whole class can see if it were done on paper. Finally, students could save those digital images in paperless notebooks, which are less likely to be destroyed or lost than a single sheet in a paper notebook.”

9. Tracking Progress Many of the most engaged students are self-directed. If we give them the chance to track their own learning journy, they’ll be more motivated to improve because they’ll know where to start. “For years I have been dutifully tracking student progress, doing statuses of the classes, collecting data, hording data and developing full pictures of students as learners that no one ever seemed to look at,” writes educator Starr Sackstein. “All that work seemed rather useless to the kids considering how much effort I’ve put into it. This year, I asked the kids to start tracking their own progress in terms of: informal conversations about their their learning, feedback on papers, general feedback in their online grade books, and their own reflection based on the standards.” In preparation for reflection, Sackstein asked students to gather the following: ►►

Feedback and progress notes from prior assignments

►►

A list of strengths students feel they are developing based on the standards

►►

A list of challenges students feel they need help with based on the standards

►►

3 goals students would like to accomplish by the end of the 2nd marking period

►►

Questions students have about course

Sackstein hopes that by putting the progress tracking in her students’ hands, she can empower them to develop a sense of self-advocacy. This is the direction we should be heading with adaptive technology tools and virtual assessments.

10. Visual Literacy According to a report released in May, we currently upload and share 1.8 billion photos every single day. On Instagram alone, 20 billion photos have been uploaded since 2010. The Internet has completely revolutionised the way images serve communication. Today’s students are all visual learners, and technology can help acommodate this shift. Forget visual aids–make visual learning a unique experience, facilitated by design tools, creativity apps, image curation, presentation tools, and other visual learning software.


Pupil Social Media Guidelines Speak to you Pupils about how to Create the Digital Image They Want Align your online image with your goals A digital footprint is the reputation you leave online and can include material posted on blogs, and mentions on websites and videos that are uploaded onto sharing sites. Online actions leave a permanent record and remain online, even if you click “delete.” Be thoughtful about what you share online and consider how it would appear to family, friends, colleges, and future employers. Because many colleges and employers search social media before making admissions and hiring decisions, pupils might want to use social media as a tool to demonstrate their interests in positive ways. For example, social media allows you to show who you are as a student online by sharing what you think about and what matters to you. This can help as pupils get closer their graduation and begin considering postsecondary education and career options. Some examples of how you can use social media for academic advancement include: ►► Commenting on articles in a knowledgeable way; or ►► Starting a blog about current events.

Stand behind your words Pupils should always take responsibility for the content they post in all social media environments. While you may think that using a fake name may prevent posts from becoming part of your footprint, there are still ways to link that information to the person who posted it (for example, through an internet address or other distinguishing information linking posts). Be your best self online – post accurate information and be accountable for what you say.

Families can be helpful partners Ask pupils to share there digital footprint with their parents and consider their suggestions. Get their parents’ input about what information they feel should remain private and what is fine to post publicly. Parents are responsible for what they do online if you they are a minor and may want their passwords and usernames to monitor their social media use. Additionally, because technology is constantly changing, pupils know more about social media than their family, so pupils may also want to show their parents and other family members how to create an online

Post Responsibly: Be Mindful of Your Audience Using social media academically is an extension of your classroom environment When you use social media for academic purposes, such as for a school assignment, treat the platform as a digital extension of your classroom – the same rules apply online as they do at school. For example, if you would not make fun of a classmate in English class, do not do it online either. For school-related social media, do not tag student posts, photos, or videos unless your teacher gives you permission, as this may expose the content to audiences for whom it was not intended.


Put your best foot forward People of all ages sometimes act differently on social media than they would “face-to-face,” assuming that, because they are not communicating in person, they are not accountable for their actions. In fact, because of the nature of the digital world, pupils should be as responsible, if not more, when acting online. Since you never know who will ultimately be reading content online, always assume that anyone might have access. If you do not know who will be reading it, ask yourself if you would be okay with a parent or relative reviewing their content. If not, there might be a better way to get your point across.

Pause before you post Once a comment is posted online, you cannot later say, “never mind.” It may seem funny or harmless when you post it, but it could hurt or offend someone. As guidance, pupils should take a few extra minutes to think about whether a post will be hurtful or embarrassing or whether it could negatively affect a future opportunity. For example, if you post an aggressive or inflammatory comment online because you felt heated in the moment, this may end up making you a less attractive candidate in some employers’ minds. Because online posts can never be completely deleted, it is important to make sure that each post is something you want to live with.

Protect yourself There are many ways to protect yourself online. For example, only accept friend requests from people you know. You may interact online with people you have never met in person. Use caution, find out as much as you can about the person, and tell a parent if you are considering meeting one of these people face to face. Additionally, while it is important to be yourself online, it is also important to remember not to post too many identifying details (such as where you live or your social security number) because revealing that information can be potentially dangerous or compromise your identity in some way. Do not share passwords with friends and be sure that the computers do not automatically save passwords. Always log off when you have finished using a site – do not just click out of the browser.

Adjust your privacy settings appropriately Privacy settings are automatically set by social media providers governing who can see your posts, how information is linked, and what data is available to the public. Each social media platform has different privacy setting defaults and some change those settings without making it obvious to you. As a user of social media, you should determine whether to change the default settings to make access to postings more or less private. For example, if you are creating a personal site to promote a social or political issue, you likely want to make that site open to everyone.


From June, all King’s Group staff have access to Synergyse from your Chrome browser. Synergyse uses interactive text and voice modules that are searchable via topic directly within Apps. The courses make heavy use of arrows highlighting UI elements and are always accessible thanks to a menu in Google Apps. Organizations that use the service report on average 35% higher adoption of Apps products and features. Founded in 2013 by ex-Googlers, Synergyse helps users keep up with the various updates that Google rolls out to their services on a nearly weekly basis. Leveraging the Google Cloud Platform, Synergyse training courses are always up-to-do date and are easily accessible via a Chrome extension. Google intends to make Synergyse “an integral part of the Google Apps offering later this year.” In the meantime, the training courses will continue to work for existing customers, while new customers will able to download the Chrome extension for free. Press HERE for a demo.

Simple, efficient, effective solution

Self-paced and on-demand training

Synergyse is the only training solution directly embedded inside Google Apps interface. No need to leave your workflow to get the specific training you need to continue your work. Interactive lessons are delivered with audio, text and visual cues to teach features as you use them in real time.

Synergyse is available anytime and anywhere you have access to Google Apps, so you can learn what you need at your own pace and on your own schedule. Easily track your training progress, and recommend specific lessons to your peers.

Automatic updates, forever Your Google Apps training materials will always be relevant. Synergyse provides a 14-day turnaround from when new features hit the Google Rapid Release track. All Synergyse users will automatically receive notifications and new lessons whenever new Google Apps features become available.


Learn, improve, or teach coding skills within a Chrome browser. Coding with Chrome is an experimental Google project to provide a programming platform within the Chrome browser that even works offline. Currently, students are able to create programs in Blockly, Coffeescript, HTML, Javascript with output to Logo Turtle and/or connected toys such as the Sphero and Lego Mindstorms. The app focuses on teaching students how to code via a visual interface, a long way from the dreary days where programmers had to learn from thick books and code via plain interfaces like Notepad or DOS. As the description notes, Coding with Chrome will be available for use offline so even if you don’t have an internet connection, your education can continue. The app is free for download so if you are interested in checking it out and what it has to offer, head on over to the Chrome Web Store for the download, or watch the video above to get an idea of what to expect. Please note that the project is a running experiment and they welcome your feedback.

Coding with Chrome is a free app available from the Chrome Web Store. It is currently in beta.


Would you like to become a Google Certified Educator? Google Apps for Education is playing a huge role in how teachers are changing their teaching methods and students their learning in schools all across the world. Students are replacing paper and pen with cloud-based learning with tons of information and tools at their fingertips, accessible at any time from wherever they are. For them, learning doesn’t end in the library. Innovation in education is removing boundaries for students and expanding their horizons. Many teachers have the desire to use technology in their classrooms but they don’t. The main reason is simply because they don’t know how. Take a moment and ask yourself what technologies you are comfortable with. Have you created a classroom blog? Do you use slides to support your lessons? Have you ever uploaded a video to YouTube? What other technologies are you using? Do your colleagues already use a technology that you would like to learn about?. Dedicated educators are also students and every minute an educator spends on training should have an impact in the classroom. If we are going to be teachers who use technology in our classrooms, we have to become proactive in learning these technologies. A really good starting point would be the Guided training paths just for educators from the Google Training Center. Here is how a Google Educator Certification Level 1 can train you and help you to get you closer to your professional goals right from the start, learning about: ►► ►► ►► ►► ►► ►► ►► ►► ►► ►► ►► ►► ►►

How technology can benefit teaching and learning Why and how technology can support the work you currently do How you can use technology to prepare for the future What tools are available in the Google Apps for Education suite How to pick the right tool for your objective How you can help your students behave responsibly online. What online resources are available for you to search for answers How to participate in online help forums to both find answers AND help others How to create a network of peers who you can reach out to when you need help How to contribute to a network of other Google for Education users How to join a Google Educator Group for networking, support, and fun How to find local experts when you need that extra bit of support And much more!

Sounds impressive, right? We would like to encourage you to sign up for the training course. Why not take advantage of the Summer to get certified? It will help you to improve your students’ learning, save time and develop yourself professionally. Remember we are here to help you and King’s College will cover the exam fees for the Certified Educator Level 1. If you are interested in becoming certified, click on the link and fill in the form:

Link to Form Have an enjoyable and profitable summer! Ruth Conde The eLearning Team


Google Docs – Translating a document Many people work in different languages and it’s useful to be able to translate texts quickly and also to be able to work in another language if you speak more than one. Here we’ll look at a quick way to translate a document and how to work in another language even though your account may be in English.

Translating a document Google Translate is pretty famous and it’s incorporated into Google Docs. It’s very quick to roughly translate a whole document and has about 100 languages (to be honest I didn’t count-but there are a lot!). Go to the “Tools” menu and select “Translate document”.

The Translate document dialogue box will open, asking you which language you want to translate into. Click on “Choose a language” and select one from the extensive range. This will create a new translated document in your My Drive, thus, not touching the original. It’ll be named “Translated copy of + original filename”. Here I’ve translated one from English to Spanish.

For those, who can speak Spanish fairly well, you’ll notice that the translation isn’t perfect. Just to show the point, here’s the Spanish text, translated back into English. I’ve highlighted the differences from the original. The yellow ones are differences but have a similar meaning. If you want to write in a different language then go to the “File” menu and select “Language”. Then select the language you want. The main benefit of this is that the spellchecker will change to the language you’ve chosen, so you can correct any mistakes in that language. It doesn’t change the menus and the language you set for your account.


Virtual Reality in the Primary Classroom to Inspire Writing King´s College Soto de Viñuelas By Luke Tamblyn Primary eLearning Coordinator When interactive boards were brought into schools many years ago, the classroom experience that children had transformed dramatically. Teachers could show their students images and videos about topics that were being studied in class. This extended the experience of the classroom to the wider world effectively, and allowed any teaching points to be illustrated by pictures and sound. As a group of schools, we have come a long way from that; integrating the experience of technology to mobile devices in the classroom. When before there was only one way of viewing something on a macro level using a large board, iPads allow us to have a far more personal and individual experience Youtube is one of the modern day teacher´s oldest classroom friends, but can now be used even more effectively using:

outube iPad App and the 360 camera Y video. Over the last year, there has been an abundance of Youtube videos posted, which have been filmed using a 360 camera. This allows the audience to move their device around whilst watching the video and explore 360 degrees inside the video. This enables a virtual reality style experience where the user can feel geographically inside what is happening, and have a much more enriching experience than just watching a video. It also encourages users to get out of their seats with the iPad and rotate around exploring the virtual world. These were the ideas that immediately came to me as a teacher, when I discovered the 360 Youtube video whilst at home. I thought to myself, what a great experience, how can I get this into the classroom?

they had a first hand experience of being in the cockpit with the actual pilot. The language I got out of it was excellent and the children really enjoyed it. The whole class had an iPad each, they were making notes and walking around engulfed in the experience of the lesson. The 10 minute use of the iPads at end of the 50 minute lesson really shows how eLearning can complement a lesson, and not just dominate it. From my assessment of their work, the use of the iPads really did stimulate more learning - and more fun!

The first opportunity that I saw using the 360 camera, was when planning a PSHE lesson within a unit on Journeys. We were looking at how, in life, you can set a goal to achieve. I used the story of the Blue Angels (Specialist Flight School, USA) and how they train to become one of the best pilots in the world. After learning about the many rigorous steps there are in achieving this goal, the children then had the opportunity to fly with the Blue Angels using the 360 camera, inside a jet fighter plane.

After discovering the effectivity of this resource, I decided to include it into my Junior Staff eLearning Training. I used a QR Code to direct the teachers to videos on Youtube and gave them specific things to look for, with the idea of stimulating writing. It was great to see all of the teachers out of their seats - just like the students were - enjoying the 360 virtual reality experience. Everyone agreed that this would be great to use as part of a lesson.

Their task was to note down all the skills they would need to have whilst flying in formations, and how they could acquire these skills on the journey through their career. As the video I selected took them on a flight,

Only a week after the training, I got to hear about the Year 4 team taking on the idea and using the 360 video to generate writing related the Jungle Book. As there is the blockbuster film on at the moment in the cinemas,


there are a wealth of 360 videos to go with it. Here the user can go inside the world of Jungle Book and walk alongside some of the characters that have inspired young people´s minds since the Rudyard Kipling book in 1884. Now, over 100 years later children can journey inside the book, just from using their iPad during an English lesson at King´s College.

Here is what the teacher said: The 360 videos are a fantastic resource! Firstly, they act as a brilliant hook, particularly for English. The children get very excited as they can explore a world independently, they really feel as though they are there in the moment. As a resource for writing, the 360 videos are very effective, offering more inspiration on some levels than a photo or picture. Not only are they an exciting hook into writing, they actually offer a level of experience that the children can then apply to their work. Not only can they look around and see a variety of items that make up the scene, they can hear and interact with the surroundings, including characters.

Here are some short quotes from some children in the class: I really liked the video because it wasn’t like a normal video, you could see it all around. It helped my writing because there were fantastic sounds and you can describe it in your book. It also helped my writing because you could see loads of things and it made it really easy to describe because it was really detailed. I loved it because it was incredibly detailed. Ivan, Year 4 The 360 videos were very interesting and they helped me loads with my work. I liked the fact that they were 3D. I found them very useful. The noises and colours and how things looked like inspired me in English lessons and made the lessons fun. Marta, Year 4

Finding meaningful places for iPads to enrich the curriculum is a journey that we are all on as Primary Teachers in King´s College. When we see the positive impact that eLearning can have on pupil enjoyment and attainment, we look forward to what iPads can bring the Primary schools, in the next academic year.


Virtual Reality in the Classroom Immersive Technologies- First steps King´s College Soto de Viñuelas By Martin Glynn Secondary eLearning Coordinator When interactive boards were brought into schools many years ago, the classroom experience that children had transformed dramatically. Teachers could show their students images and videos about topics that were being studied in class. This extended the experience of the classroom to the wider world effectively, and allowed any teaching points to be illustrated by pictures and sound. As a group of schools, we have come a long way from that; integrating the experience of technology to mobile devices in the classroom. When before there was only one way of viewing something on a macro level using a large board, iPads allow us to have a far more personal and individual experience Even though I am a technology teacher, I did teach science to KS3 and KS4 pupils many years ago. The opportunity to see a cell dividing by mitosis or viewing the universe and contemplating the creation of a black hole and the formation of an event horizon and accretion disk using the Samsung VR gear headset left me wanting more. I wish I had this type of technology when I was at school. Let’s be honest, when I was at school the pride of the Maths department was a Sharp Microcomputer Z80 jealously guarded by the head of Maths and was rolled out for view on special occasions. It even had its own air conditioned room. It took an hour to load the BASIC language onto RAM and another hour to load the drawing software which could draw a basic 3D wire framed shape on the screen from variables inputted by the user. We drooled at its 48k of RAM and were amazed at the velocity of its rendering ability. My first home computer was a ZX Spectrum 5k with 5KBs of RAM and was a birthday present for my 14th birthday. For those of you who do not remember the 1992 movie the Lawnmower Man (El Cortador de Césped), was one of the first movies I ever saw in the new MovieCD format using the MVI2 CODEC which came free as an optional CD with the December 1994 edition of PC magazine. If you are not familiar with this type of technology, it was one of the first CODEC formats where you could fit a full movie on a CD without having to buy a special graphics card for your computer. This was necessary to reproduce MPEG2 coded movies on your PC if you didn’t have an expensive DVD player with the MPEG 2 encoder chip installed. MPEG 2 is still used for digital TV broadcasts even today. Nowadays, when we stream a movie it is usually held in a container bitstream such as MP4, FLV or WebM and uses software CODECs so

no special hardware is needed and can be accessed from any device with the ability to reproduce streaming video. Lawnmower Man enters into the dark world of virtual reality where a mentally challenged individual is gifted with incredible intellectual abilities including the power of telepathy and telekinesis through the constant use of the VR headset. He uses his newly found powers to inflict all kinds of misfortune on its discoverer Pearse Brosnan and makes every landline phone in the world ring out at the same time. Due to the overuse of this VR technology he eventually becomes an integrated part of Cyberspace and disappears into oblivion or so we are led to believe. A great cliffhanger for a sequel which did appear four years later in cinemas in the form of Lawnmower Man 2 in 1996. As far as I know neither Google cardboard nor Samsung Gear VR boast this ability on their website.

Play Video


Google Cardboard Imagine an innocent piece of folded cardboard, complete with two biconvex lenses; a smartphone and a magnet select button which allows you access to the menu options on the Google cardboard VR apps by using the phone’s magnetic sensor. Amazingly only 5 million units have been shipped by Google since June 2014 which is all you need to immerse your pupils in a world of virtual reality. If you prefer, you can download instructions on how to build your own Google cardboard VR headsets. You can even buy the most expensive part of the kit which are the lenses on the Amazon Store if you wish.

Download Kit There are also many plastic versions of the Google cardboard which cost between 10 to 32 euros and closer to the 20 euro mark if the Bluetooth controller is part of the package. Give the Google VR cardboard headsets to a bunch of year 7 pupils and anarchy is sure to follow.

At least for Android, there is a wealth of VR apps on the Google Play store and even a dedicated store for the new Samsung VR Gear powered by Oculus. Most of the Google Cardboard apps are free to download even on the Apple iTunes store. One of the main benefits of this type of technology is that it allows teachers to use cheap headsets to take pupils on virtual field trips. One of the apps available for Google cardboard and Oculus headsets is the Titans of Space 2.0 which brings pupils on a guided tour of the planets, planetoids and moons of the solar system and to a few notable giants and supergiants stars in our galaxy in virtual reality.

Play Video


Another VR app I tried with A level students was an app called The Body VR which is built specifically for the Samsung VR Gear powered by Oculus and is available for free in the Oculus Google Play store. The Body VR is an educational virtual reality experience that takes the user inside the human body. You can travel through the bloodstream and discover how blood cells work to spread oxygen throughout the body. You can also enter one of the billions of living cells inside our body and learn how the organelles work together to fight deadly viruses.

Play Video Using the Street View VR app you can take your pupils where a school bus can’t go. Google have also released a version of their Street view app for education called Google Expeditions Virtual reality (VR) which is an engaging way for students to explore everything from historical landmarks and distant planets to oceanic locations and even the human body and is available through the Google Expeditions Pioneer Program.

Play Video Google Maps is one of the few apps that I really rely on as my sense of direction is abysmal. Imagine my surprise when I travelled to my hometown in Ireland using street view and there was my father sitting on a chair on the front lawn. By going that bit further and using the 360 degree viewing option on the Google cardboard app called Street View VR, I was able to stand in my own front garden and contemplate the flowers my mother had planted the month before.

Play Video

Virtual reality can be used in many areas of the curriculum. This includes Mathematics, English, Science, History, Geography and even languages. Some pupils may respond better to computer generated learning than traditional methods of teaching. In these cases virtual reality learning is an ideal way of engaging these pupils with a particular subject in a manner they are comfortable with. Learning by doing in these kinds of scenarios is sometimes easier than learning by listening.


Introducing Chromebooks to Parents at King´s College Alicante By Phil Wall Secondary eLearning Coordinator On Thursday 26th of May in Kings College Alicante we held the second Chromebook Meeting for parents of Y6 and Y10. The event is designed to inform parents of children who will have their own Chromebook next year about the Chromebooks. We brought in a specialist from ieducando Miguel Ujeda to give us the latest Chromebook information. There was also an opportunity for parents to ask questions and try out the Chromebooks for themselves. The event was well attended but not as busy as last year as now the Chromebooks are being accepted as part of the school equipment at King's College. There was a positive response from the parents and the meeting was judged to be a success by all. Many thanks to all those who attended, especially Carlos Lazaro, Jose Santamaria and Miguel Ujeda.

Earthquake Early Warning System for Chromebook This app shows earthquakes in real time as they happen around the globe. It will also alert you of new quakes as they happen and speak the data to you in both English and Japanese. It is very handy to have running in the background while doing other things or just running full screen on a computer somewhere at school or your home. If you do not have internet connection, the app will show offline mode which contains all of the stored quakes from your last online session.

You can access the Cromebook App here: https://chrome.google.com/websore/detail/earthquake-early-warning/eilknkcmgjjcdhihhhflhgocpigfkjph


eLearning at King´s College Alicante By Stephen Escott Primary eLearning Coordinator Since we had delivery of the 84 iPads in September last year the impact on learning has been tremendous. We have 28 in each charging trolley which enables each key stage to have one. This means that whole classes can use them at once as opposed to just group work. Year 3 recently used “PicCollage” to support their topic on Africa to wonderful effect. The children found the app easy to use and were able to create collages independently. The app allows children to search the web for images and simply import them to the page. They can then present them in a variety of ways to make collages which can be saved as photographs and printed.

The displays certainly brighten up the classroom and corridors. “Children are so proud of their work because they did it all themselves” –yr. 3 teacher

e-Safety Committee We have given all the year 5 and 6 children a Google drive account and several children raised concerns over internet safety. So we decided to form an e-Safety Committee. This is made up of 6 children from year 5 & 6 and the e-Learning coordinator. We meet once per month and discuss any risks to internet security that been discovered by them or their peers. The committee have designed posters to put around the school telling children how to keep themselves safe online. One of the most interesting things they did was to interview Carlos Lázaro (E-Learning coordinator for Kings Group) asking questions about his job and any e-Safety issues he was aware of. It was very informative and the committee members came back with lots of good advice to share with their classmates.


Smoovie Year 4 have just finished making stop-motion animation movies using the app “Smoovie�. This is an easy to use app that the children loved using. They planned their movie using storyboarding, built their characters using lego or plasticine and then filmed their Smoovie!. We found that we had to take about 300 photos for a 30 second film! It was a wonderfully cross-curricular project that was fun to do and produced remarkable results. Smoovie is the ideal tool for stop motion animation in the classroom. Simple and intuitive to use, it lets pupils be creative without having to struggle with complicated software. Smoovie just works! Stop motion animation is widely recognised as a innovative and valuable learning tool which can be used right across the curriculum. It gives pupils a fun and interesting way to explore and express their ideas on any subject; be it maths or music, science or social studies.

Deeper Learning Stop motion animation has been proven to encourage deeper learning, whatever the subject. The act of learning involves committing information to memory and this task is much more easily accomplished using animation and narration together rather than narration alone. Using stop motion animation in the classroom creates a truly dynamic learning environment in which pupils can express themselves at so many different levels, both independently and as a team. If you want to learn how Smoovie works, please watch the following video made from our Year 6 pupils.

Play Video


Interview with Carlos Lazaro by the Kings College Alicante Primary e-Safety committee Paula: Hello, we are going to ask you some questions about e-safety. Alba: Do you like your job? And why? Sr. Lázaro: I love my job!, It is great to see how pupils use technology in the classroom allowing them to learn and discover the world around them. The classroom doesn’t have four walls anymore and technology is bringing new opportunities for collaboration and sharing that we didn’t have a few years ago. Today you can take virtual tours of places around the world and children can work on activities with schools on the other side of the world bringing children together and breaking down social and cultural walls. We have also introduced iPads, Chromebooks and Google Apps for Education allowing pupils from Year 5 to 13 to have unlimited cloud storage! My job can be difficult sometimes because we have so many schools and pupils and everybody has different requirements. So it’s very challenging but I love it! Martina: Have you ever had any experience of cyberbullying? Sr. Lázaro: I never had any personal experience of cyberbullying but it is becoming a more serious and frequent concern with teenagers and children across the world. Cyberbullying occurs when a child, preteen, or teen is bullied by another child, preteen, or teen using the Internet, or any interactive digital technology. Pupils need to have the opportunity to discuss bullying. The class should come up with rules against bullying and involve everyone in determining that bullying behavior is unacceptable. Remember we have a zero-tolerance policy and bullying and if you or are friend is being bullied make sure you tell a grown-up immediately. Paula: What advice would you give to anyone who Is being cyber bullied? Sr. Lázaro: There are many pieces of advice I could give. I have some written down. Don’t respond. If someone bullies you, remember that your reaction is usually exactly what the bully wants. It gives him or her power over you. Who wants to empower a bully? Don’t retaliate. Getting back at the bully turns you into one and reinforces the bully’s behavior. Help avoid a whole cycle of aggression. Save the evidence. The only good news about digital bullying is that the harassing messages can usually be captured, saved, and shown to someone who can help. You need to do this even if it’s minor stuff, in case things escalate. Talk to a trusted adult. It’s always good to involve a parent but – if you can’t – a school teacher usually knows how to help. Sometimes both are needed. Don’t be a bully. How would you feel if someone harassed you? You know the old saying about walking a mile in someone’s shoes; even a few seconds of thinking about how another person might feel can put a big damper on aggression. Be a friend, not a bystander. Watching or forwarding mean messages empowers bullies and hurts victims even more. If you can, tell bullies to stop or let them know harassment makes people look stupid and mean. It’s time to let bullies know their behavior is unacceptable – cruel abuse of fellow human beings. If you can’t stop the bully, at least try to help the victim and report the behavior. Sr. Lázaro: Have you had any experiences of cyber bullying? Tatiana: Yes, one time. Some man tried to contact me but I blocked him. Sr. Lázaro: And you stopped talking to that person? Tatiana: He called me and he was an old man. It was in Russia, and my mother talked to him and we blocked him. Sr. Lázaro: So you talked to your parents, it’s very important that you talk to an adult before you do anything.


Nicolás: What kind of websites should we be aware of? Sr. Lázaro: I think you need to be very careful of going to any chat rooms or similar website - you need to ask permission from your parents or teachers because they can be very dangerous places and you can get into trouble. You shouldn’t be visiting websites that your parents or teachers be unhappy to find out you were visiting. New apps and websites are constantly being created. Being aware of the online tricks predators use will help you know what to look for. So here is a current list of some of the most dangerous apps: Whisper, YikYak, Kik, Snapchat, Vine, ChatRoulette, Omegle, Tinder and Poof. Sr. Lázaro: What kind of websites do you use? Do you go to sites that you want or do you do what your parents’ tell you to? Martina: I visit games sites or sites like “Anastasia”. Sr. Lázaro: And if you see something that is not appropriate for you what do you do? Martina: I close it. Sr. Lázaro: That’s very good, and do you do anything else? Nicolás: Normally what happens is like an advert appears like for example, “enter this website and you will win something!” I normally shut my computer down and go to my parents and they tell me don’t open it just ignore it. Sr. Lázaro: That’s very good, What about you? Paula: I clicked on something and it asked for information about my house and where I lived and I told my mum and she shut down the computer. Sr. Lázaro: That’s good so you closed everything and talked to your parents. That’s the best thing that you can do. Nicolás: What is the most dangerous website that you have ever visited? Sr. Lázaro: I don’t remember visiting dangerous websites, I always make sure I visit websites that I know or they have been recommended to me. But chat rooms are the most dangerous, you never know who is behind the computer – I think they are very dangerous places especially for young people like you! Sara: Do you know a game called “Talking Angela” or site “Kandi”? Sr. Lázaro: I know Talking Angela is a game but I don’t really approve of this game. I know it’s a little cat asking questions but one of the rules about keeping safe on the internet is never to give out information about yourself –I know it’s a little cat asking for your name, where you are from or your favourite colour but we never know if someone is behind that cat so we never give personal information even if we think it’s a game. I don’t think it’s a good game – I wouldn’t play any games that asks for personal information. That’s one of the golden rules. Tatiana: Is the internet a safe place? Sr. Lázaro: It is a safe place if you follow some basic rules like anywhere else. I’ll give you a poster with rules and you can share them with your class. You can read the 10 rules which I think are very important. Alba: Never give out personal information! Martina: Tell an adult if see something that’s not right! Paula: Never agree to meet people! Nicolás: Never send your picture! Sara: We never enter chat rooms without your parents authorisation! Tatiana: If someone says something mean online, tell a grown-up. Alba: Check before you download anything! Martina: Don’t give out your password to anyone! Paula: We are always polite and friendly when we talk to people on the internet! Nicolás: We only visit websites our parents or teachers have chosen! Sr. Lázaro: Do you think if you follow the rules you will be safe? All: Yes!


ScreenCastify By Javier López Secondary Mathematics Teacher King’s College Alicante

As a student I know that understanding a lesson is straightforward when the teacher is explaining it. As a teacher I also know that my students understand a lesson when I am taking the class. Later, at home, the situation could be very different. Besides, it is known that taking notes and understanding the lesson at the same time are difficult skills. In order to resolve these problems, we could record our lessons and share them with our students on Youtube so they can review them at home and make notes. However, we need a lot of time to do this and teachers are clearly too busy with reports, marking, planning, etc, to make this an option. I have been looking for good software to record my lessons live since I started using an interactive whiteboard and, finally, I have found it. It is a Chrome extension known as “Screencastify”. There are others tools that allow you to do the same thing but you have to pay for them in advance without knowing if they are appropriate. There are too many things that could go wrong. This is the first “Screencastify” advantage - it is free so you can try it and, if you don’t like it, you can simply delete it from your Chrome browser. I should point out that Screencastify is really easy to use. You just need to follow the steps below:

1. Install the chrome extension (you can find it in the webstore) and register. Its icon will appear next to the address bar in Chrome.


2. Push the “Start Recording” and choose “Internal Display”. Do not forget to activate the “Microphone” and the “System Audio”.

3. When you finish, click on the “Stop” switch. The programme opens the next window when you can download the video to your computer. You also have the option to save it on Google Drive.

Non-paying users can record 10-minute videos, if you want to record longer videos you will have to pay 20 euros. Based on my experience this is not a problem. I usually record a couple of resolved exercises per lesson and share them with my students. They can go over these exercises at home in case they have problems with their homework. It is also good for students who miss a lesson for any reason, so they can easily catch up before returning to school. Another great benefit is that “screencastify” can be used as an excellent teamwork tool as well.


eLearning at King´s College Murcia By Andrew Brett eLearning Coordinator It has been an exciting few months here at King’s College Murcia. Our students have been learning a lot from iPads and Chromebooks. Pre-nursery have been using the iPads to learn how to develop their fine motor skills. Miss Kirlew says: “The children in Pre-Nursery enjoy their weekly iPad sessions. They are able to navigate their way around the device, independently! We use the iPads to develop our fine motor skills, tracing over numbers and letters, with increasing precision. An application we find particularly useful is: 'Preschool and Kindergarten Early learning Games', which is developed by Kids Academy Co apps. This application provides opportunities to develop many skills, such as: reading, writing and mathematical skills, through animated games. There are motivational and encouraging prompts throughout the game. This encourages the children to persist when challenges may occur, whilst giving them a sense of pride in their achievements.”


Year 1 have been taking quizzes. Mrs Brett-Summers writes‌ The children loved competing in a special quiz today. They answered some multiple choice questions on the interactive whiteboard using their iPads! There were a mixture of Maths and Literacy questions to answer, and the children had 20 seconds for each question. There was a leaderboard so they could see who answered first and who had "the fastest finger first"! Special thanks to Mrs. Rozhdestvenskaya for showing us how to use the website!

Year 10 IGCSE geography students have been studying the distribution of landuse and ethnic groups in London, using the online UK census data. The UK census website uses GIS (Geographical Information Systems) and allows the students to see the patterns in the real data. As they head towards A-levels and University, this is a very important skill to learn. And finally, over the the last few weeks on a Wednesday afternoon, Mr Brett, our eLearning Coordinator, has been teaching the current Year 6s how to use the Chromebooks. The Year 6 year group will have chromebooks from September when they start back as Year 7’s. They have been taught the basics of logging in, accessing the internet, their school email, the google classroom and many other apps and uses.


create killing presentations with explain everything Explain Everything is a whiteboard and screencasting app that makes creating interactive lessons a simple proposition. Its full-featured editing options and its import/export functions allow it to stand apart from the other competitors I tested. Read on to find out why the Explain Everything app’s educational focus, adaptability, and user engagement make it the best its kind.

Explain Everything Review Background: According to MorrisCooke, the force behind Explain Everything, the app is a “unique interactive whiteboard and screencasting tool used by over 1.5 million students and educators.” The app’s tools allow users to create lessons, presentations, and tutorials to share in person or electronically. Users can annotate, narrate, and animate material, importing and exporting information to and from nearly everywhere. The app is recommended for grades 7-12, but teachers of lower grades may still benefit from the app by using it to liven up lessons. Explain Everything is available for the iPad, Android devices, and Windows devices. Methodology: I began the evaluation process by downloading several popular interactive whiteboard tools for tablets, including Explain Everything V. 2.55. I tested the apps on an iPad running iOS 8. For two weeks, I used the app to create lessons for my 7th-grade English classes. During the testing period, I also split one of my classes into groups, assigning each the task of creating a presentation on Explain Everything to share. Following their presentations, I asked the students to give me feedback on the app and the usefulness of creating a presentation to their learning experiences. I also assessed the app for its utility, user-friendliness, and effectiveness for educators

How Do You Use It?

When you open the Explain Everything app, you first tap “New Project” and choose a blank screen or import photos, documents, and other material from various sources. Teachers can import PDF, PPT, DOC, XLS, Keynote, and RTF files from Evernote, Dropbox, Box, Google Drive, WebDAV, email, and iTunes. Users can also export the final product as an MP4 movie, PDF file, PNG image, or XPL project file. On the left side of the screen, you’ll see a self-explanatory panel of tools, including a pointing device to highlight portions of each slide with an arrow or a red dot. Other options include the drawing tool, eraser, and text box. The white area of each slide allows for infinite presentation space, as all content can be scaled and cropped as needed. At the bottom of the screen is a record button that allows you to capture the slide creation process step by step, and you can narrate the content as it appears. You can also embed video from your device, YouTube, etc. to help explain the content. Alternatively, you can use the front camera of your device to record video of yourself unique to each slide.


Why Explain Everything is a “Must-Have” Explain Everything is a tool that can be used with any content area by virtually any grade level which makes it incredibly flexible. Teachers are able to use it to record lessons, create demonstrations, and export their videos to their blogs or Edmodo to support their instruction. They have also been able to use the videos that students create as an assessment tool. I’ve really liked the iPad apps – especially Explain Everything. The kids worked together to show solutions to problems solving activities in math, explain how to multiply, write story problems, etc. – Year 3 Teacher Explain Everything also integrates with virtually every major free cloud service. Projects, pictures, files, and videos can be uploaded to Dropbox, Google Drive, WebDav, and YouTube with the push of one button. The preferences panel makes it easy for teachers and students who share iPads to easily switch between accounts. This versatility has been incredibly valuable in an environment where classes share iPads and teachers do not have access to sync iPads with iTunes. So far, our teachers and students have enjoyed using Explain Everything on the iPads and I anticipate with the new update that even more will start to use Explain Everything in their classroom. To learn more about Explain Everything you can visit their website at http://www.explaineverything.com/ or download their free manual for iBooks.

Is It Useful for Teachers? Explain Everything’s utility is twofold. For teachers, its explanatory capability is invaluable. I used the app for one of my lessons on sentence diagramming, and I could animate each sentence with text and arrows that appear as I narrate. My students could literally see and hear my thought process as I identified the parts of speech. Additionally, I can send my presentations to DropBox and iTunes U. This was especially useful because a substitute teacher can then go into DropBox, access the lesson, and play it as an MP4 movie in my absence. Likewise, students who miss class can view the lessons later. This app appealed to me and my students by putting the fun back in presenting material. It allows for a rich multimedia experience that let me seamlessly embed fun videos and gifs into my lessons. For students, Explain Everything teaches important presentation and technological skills. My students thoroughly enjoyed creating presentations on the Greek mythology gods we’re studying. They amazed me with their creativity in using content from numerous unexpected sources, and they loved sharing their work on social media; in fact, we’re currently planning to set up a class Twitter account where we’ll eventually post these projects as well. Had I instead assigned them an essay on the material, I’m quite certain they wouldn’t


ipads Tips and Tricks Helping teachers’ understanding of the full educational potential of iPads is essential; this brief tutorial will explain a few tips and trick to improve your use of them in the classroom as well as your professional development.

Take a screenshot

To take a screenshot on your iPad just click on the the Home button followed immediately by clicking on the Sleep/Wake button. You will hear a click sound after the shot is taken. All the screenshots are saved in your iPad's Photo's Gallery. From there you can can email or share them on popular social media.

Copy/Paste

To copy and paste a portion of text on iPad, just tap and hold down and then select the text you want to copy then click on copy. To copy the whole paragraph, tap four times. To paste your text, just tap and hold down then click on paste. Check out more iPad technical tips from this page and this page.

Switching between apps Launching and closing apps

When you are on the Home Screen, you can simply tap on an app’s icon to launch the app on the device. Once an app is launched, all you need to do to exit the app is click the home button at the bottom of your device:Apps don’t completely close down when you move to the home screen. They also don’t “run” in the background unless you have Background App Refresh enabled for the app. An app will save its state and you can return to the app later. To completely close an app, double tap the home button and then swipe across to find the app you want to close. To close the app, swipe the app up and away.

Current versions of IOS allow for app switching which means that your apps will save their current state in memory and you can return to them. To switch to a recently opened app, double tap the home button to access the app switcher. Swipe left or right to view apps and tap to open.

Search – “Spotlight”

From your home page, swipe left to right Search built-in apps (Mail, Calendar, Music, Contacts, etc.) Open Apps.


Accessing the Notification Center

Many apps that you install will request permission to notify you with updates. For example, Facebook might want to notify you when someone has liked your status. The Mail app can notify you when you have new mail. There are three types of notifications in iOS 7: icon badges, alerts, and banners. Additionally, notifications can play a sound when received.

Creating folders for apps

To create a folder for your apps.Touch and hold icons until jiggling, then drag the app on top of another and a folder will be created to hold both of them. You can add more apps to this folder by dragging other apps to it. Give the folder a name the folder then click on the home button to save.

The Notification Center gives you a quick view of all recent banner notifications you have received. To access the Notification Center, swipe down from the top of the device.

Accessing the Control Center The control center is a new addition to iOS 7 which makes it very efficient to toggle on and off certain things. To activate and get into the Control Center, you swipe up from the bottom of the screen.

Rearrange Apps

Touch and hold icons until jiggling Drag icons to new pages, menu bar, or folder To create new folder, put one App on top of another Press Home button to save

From here you can quickly access settings including Airplane Mode, Toggle Wi-fi On/Off, Toggle Bluetooh On/Off, Do Not Disturb Mode, Rotation Lock (Or Mute), Volume, Screen Brightness, Camera, Timer/ Clock, AirDrop, and AirPlay

Downloading and Installing Apps Double Click the Home button

When you double click on the Home button you will be able to : View and launch recently used applications Lock screen orientation, adjust brightness, play media, and adjust media sound.

You can find and download new apps from the App store. To install a new app, open the App store and search for an app. For example, to install the iBooks app (Free), open the App store and tap on the search field at the top right and type in ibooks. Then tap Search on the keyboard.


King’s Group Carlos Lázaro Head of eLearning elearning@kingsgroup.org


Turn static files into dynamic content formats.

Create a flipbook
Issuu converts static files into: digital portfolios, online yearbooks, online catalogs, digital photo albums and more. Sign up and create your flipbook.