
OVERTO&PROJECTSIDEASTRY!!! 45 6 STUNNING PROJECTS TO MAKE WITH YOUR EXCLUSIVE GIFT! 20 COMPLIMENTARY DESIGNS HOW TO USE GLITTER TO EMBELLISH YOUR CARDS HOW TO CREATE WOOD GRAIN EFFECTS WITH INK PADS YOUR EXCLUSIVE SVG! INSPIRATION • INFORMATION • EDUCATION Issue DIGITAL20


CONTENTS in this issue’s... 4-12 EXCLUSIVE GIFT: GYM BAG 6 projects using your exclusive gym bag SVG & embossing folder. 14-17 PROJECTS: HUMBLE HERITAGE We showcase some of favourites from our Christmas collection. 18-19 SPECIAL FEATURE: SANTA’S WORKSHOP David Wait shows you how to make this amazing Santa workshop with moving parts! 20-21 SPECIAL FEATURE: CHRISTMAS BOX Vikki has made a great gift box for giving presents, and this is how she made it! 22-25 PROJECTS: CALYPSO CREAM So many florals and so much decoupage in this collection! 26-27 SPECIAL FEATURE: TROPICAL CALYPSO This special card features a good mix of the SVGs used in this magazine. Hi WellCrafters,afterhearing some of your feedback on our last issue, it seemed the Christmas issue went down well! So, we thought we’d give you a little bit more! We loved our Humble Heritage collection and we really wanted to give you those as SVG files so you’ll find four gorgeous card projects plus a great Christmas gift box! David Wait has made the most amazing Santa’s workshop project with craft lights and moving elves! It’s so easy, you need to check this out on pages 18-19! Along with the Humble Heritage collection we’re also featuring our Calypso Cream collection which has the most stunning hydrangea floral SVGs along with all the decoupage pieces to create the best centerpieces for cards. This issue is a bit of a hybrid because as well as bringing you more Christmas, we have some beautiful tropical collections for you! With flowers, leaves and birds you can create lovely summery cards too! Then, going in another direction, we have a fun dinosaur set and your exclusive SVG this month is a gym bag file! There really is something for everyone in this issue. We’ve given you some great How-To projects in this issue to help you firm up some of your crafting techniques, and we’ve even made you a cute little template project to try! Hope you enjoy it! ONTHECOVER! 2 | www.tatteredlace.co.uk


28-29 PROJECTS: TROPICAL FLOWERS These florals are so pretty and instantly make you feel summery! 30-34 PROJECTS: PREHISTORIC PREDATORS These cards are totally ROARsome! 36-37 PROJECTS: TROPICAL LEAVES These will work great with flowers and dinosaurs, but work just as good on their own! 38-41 PROJECTS: TROPICAL BIRDS Rounding up the tropical theme with some colourful birds! 42-43 INSPIRATION: SHIRT DESIGN Inspirational ideas on how to use your tropical and dinosaur SVGs with the Nested Shirts. 44-46 PROJECTS: NESTED SHIRT A great base card collection to use with all the other SVGs. 47 HOW TO: COLOUR IN A DRAW FILE How-To colour in your draw files on your machine. 48-49 HOW TO: CREATE A STENCILLED BACKGROUND A simple How-To showing you how you can use the machine to create a stencilled background. 50-51 SPECIAL FEATURE: SUMMER BEACH HOUSE TEMPLATE PROJECT Something a little different to make this month. 52 HOW TO: A WOVEN BACKGROUND A simple technique to create a different type of background. 54-55 INSPIRATION: 6 WAYS WITH GLITTER Some great ways to use glitter to add a little extra sparkle to your projects! 56-57 NANCY’S COLUMN Let’s see what Nancy has been up to lately! 58 HOW TO: CREATE A FAUX WOOD BACKGROUND Create a faux-wood effect using ink pads! MEL’S HINTS & TIPS! WHICH CARDSTOCK? Please use the guide below as an indication of which cardstock is best to use for each part of your card projects throughout this magazine. BASE CARD: 240-300GSM MAT LAYERS: 240GSM STASH FILES/CHARISMA: Now120-140GSMthatyou are familiar with your machine you will find that you need to unlock the aspect ratio on the rectangle / oval to cut the shapes required for some projects. All dimensions are included in mm to give you the perfect measurements. TATTEREDTEAMLACE Managing Editor Beckie Warburton Editorial Assistant Diane Peternel Consultant Editor Nancy Watt Craft Consultant Stephanie Weightman ConsultantDesignerProject Vikki Deakin Graphic Designers Jon SamPetersBruce Craft Experts StephanieAmandaMelanieWeightmanHeatonVikkiDeakinDavidWaitCarpenterKasiaChojnacka Media Manager Andrew Coates Web Developer Sean www.tatteredlace.co.ukPlatts | 3


BAGGYM your exclusive gift... 4 | www.tatteredlace.co.uk

INCLUDED WITH THIS ISSUE! www.tatteredlace.co.uk | 5


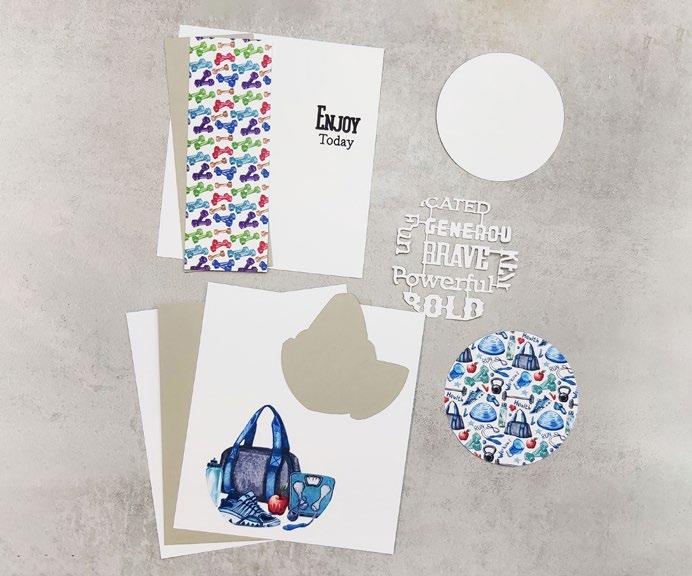
What you’ll need: • 01-01-Gym Bag SVG files • White cardstock • Grey cardstock Step bySteps 1 Cut all the pieces needed to create the project as listed below; From SVG downloads: • From white cardstock: - 1 x GB-1-Emboss • From grey cardstock: - 1 x GB-1-Gym Bag Outline • From charisma: - 1 x GB-1-Charisma From machine memory: • From white cardstock: - 2 x 160mm x 180mm -rectangle1x15cmx 17cm rectangle (with sentiment draw file) - 1 x 96mm circle • From grey cardstock: - 1 x 65mm x 170mm rectangle - 1 x 155mm x 175mm rectangle • From backing paper: - 1 x 60mm x 170mm rectangle -(dumbbells)1x101mmcircle (sports) 2 On one of the large white rectangles, measure in 10mm from the left and score and fold to create a tab. Attach to the other rectangle using the tab to create a card. Mat the sentiment rectangle onto the large grey rectangle with foam tape and mat onto the card. 3 Mat the thin dumbells rectangle onto the thin grey rectangle and mat onto the card. Mat the emboss cut onto the white circle and mat onto the dumbells circle. Mat onto the card with foam tape. 4 Mat the gym bag cut onto the gym bag outline cut and mat onto the card with foam tape. 31 42 ------------------------------------- EXCLUSIVE GIFT - GYM BAG -----------------------------------------CLICK HERE TO DOWNLOAD YOUR SVG CONTENT PROJECT 1 6 | www.tatteredlace.co.uk


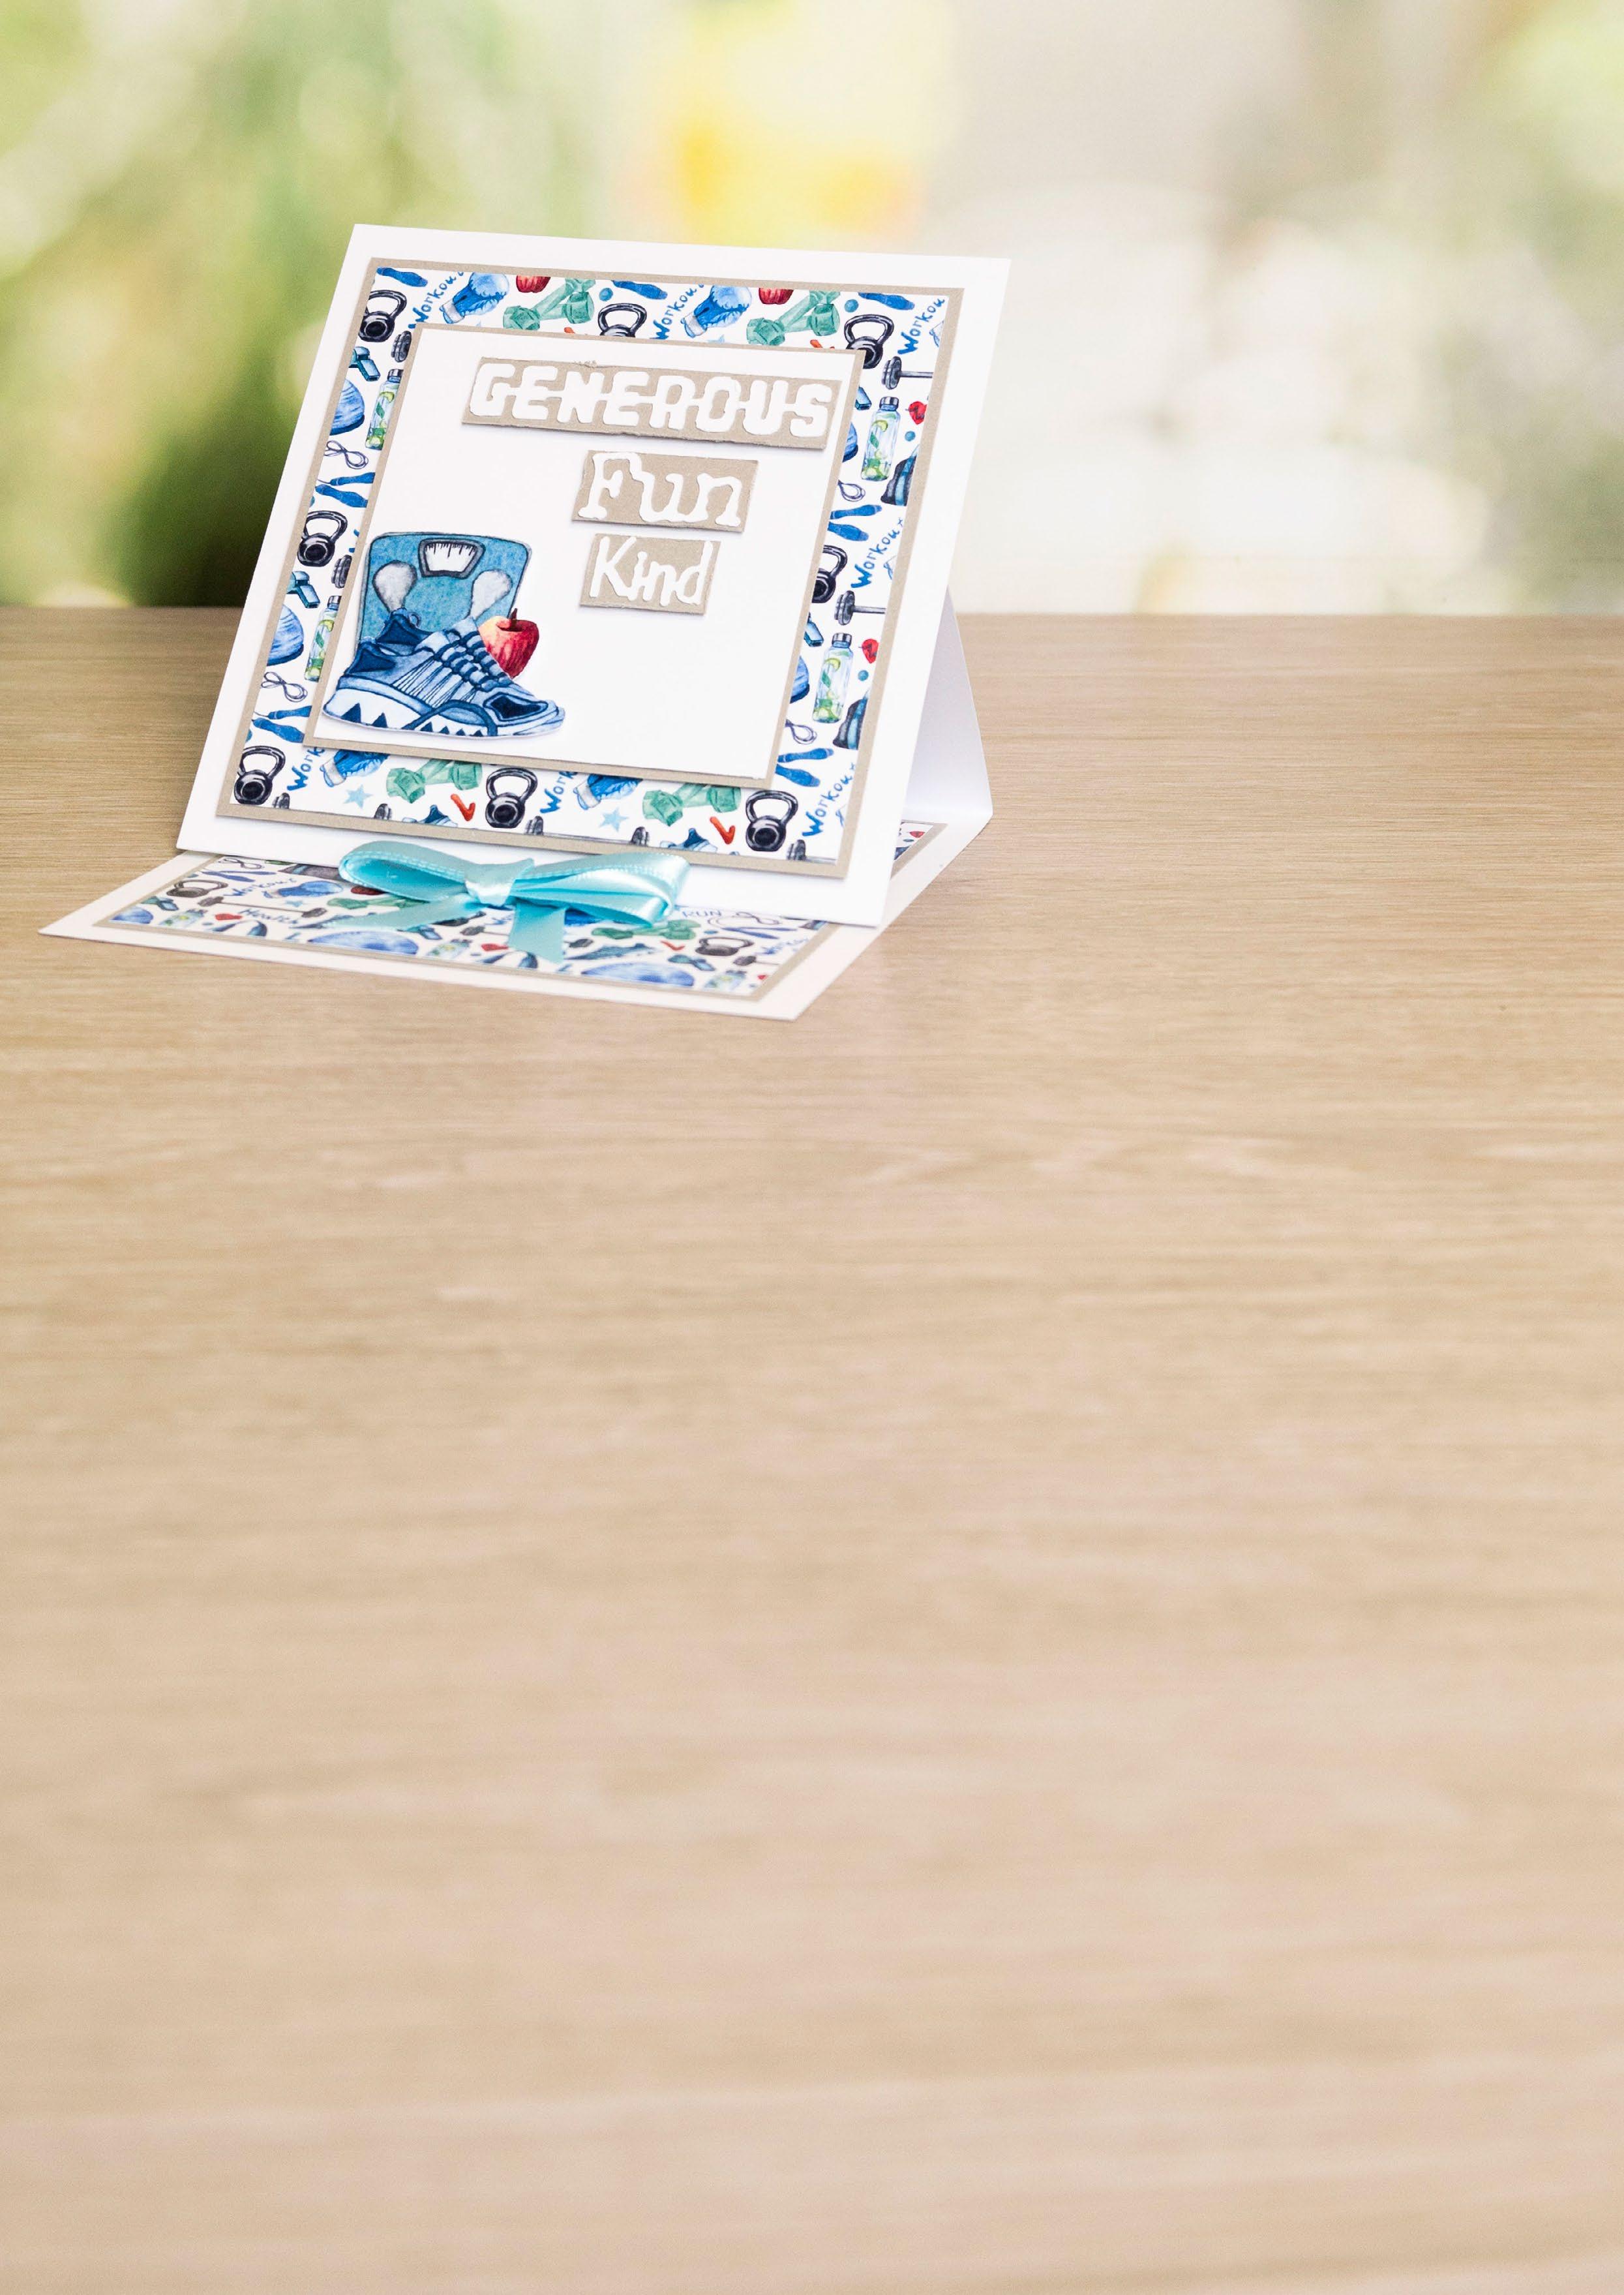
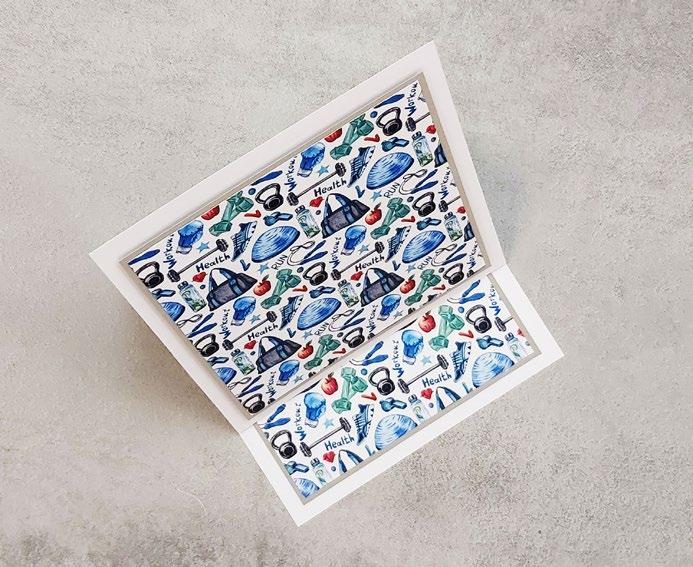
Step bySteps 543211 Cut all the pieces needed to create the project as listed below; From SVG downloads: • From white cardstock: - 1 x GB-2-Emboss • From charisma: - 1 x GB-2-Charisma From machine memory: • From white cardstock: - 1 x 140mm x 280mm rectangle - 1 x 140mm square - 1 x 90mm square • From grey cardstock: - 2 x 125mm square - 1 x 95mm square - 1 x 75mm x 15mm rectangle - 1 x 35mm x 15mm rectangle - 1 x 25mm x 15mm rectangle • From backing paper: - 2 x 120mm square (sports) 2 On the large white rectangle, score and fold in half horizontally to create a tent card. On the card front, score and fold in half horizontally to create an easel. Mat the large white square onto the card front. Mat the sports squares onto the large grey squares. Mat one onto the base of the card and the other onto the card front with foam tape. 3 Mat the smaller white square onto the smaller grey square and mat onto the card front with foam tape. 4 From the emboss cut, trim to leave the words Generous, Fun and Kind. Mat the words onto the small grey rectangles and distress the edges with scissors. Mat onto the card front with foam tape. 5 Cut into the gym bag cut to leave just scales, trainers and apple. Mat the cuts together and onto the card front with foam tape. Tie a multiloop bow from blue ribbon and mat onto the base of the card to create a stopper. What you’ll need: • 02-02-Gym Bag SVG files • White cardstock • Grey cardstock • Blue ribbon ------------------------------------- EXCLUSIVE GIFT - GYM BAG -----------------------------------------CLICK HERE TO DOWNLOAD YOUR SVG CONTENT PROJECT 2 www.tatteredlace.co.uk | 7


What you’ll need: • 03-03-Gym Bag SVG files • White cardstock • Grey cardstock ------------------------------------- EXCLUSIVE GIFT - GYM BAG -----------------------------------------8 | www.tatteredlace.co.uk

1 Cut all the pieces needed to create the project as listed below; Step bySteps 1 3254 6 ------------------------------------- EXCLUSIVE GIFT - GYM BAG -----------------------------------------From SVG downloads: • From white cardstock: - 1 x GB-3-Emboss A - 1 x GB-3-Emboss B - 1 x GB-3-Card Base • From backing paper: - 1 x GB-3-Mat 1 (gym) - 1 x GB-3-Mat 2 (gym) • From charisma: - 1 x GB-3-Charisma From machine memory: • From white cardstock: - 1 x 137mm x 84mm rectangle • From grey cardstock: - 1 x 174mm x 124mm rectangle - 1 x 140mm x 87mm rectangle - 1 x 80mm x 16mm rectangle • From backing paper: - 1 x 169mm x 119mm rectangle -(gym)1x150mm x 10mm rectangle (gym) 2 Fold on the score lines of the card base to create the card. Mat the large gym rectangle onto the large grey pearlescent rectangle and mat onto the inside of the card. 3 Fold the card front down. Mat the next large grey pearlescent rectangle onto the middle panel of the card. Mat the gym mat 1 and mat 2 onto the outer panels of the card. 4 Mat the emboss A cut onto the white rectangle and trim off the excess. Mat the emboss B cut onto the small grey rectangle. Distress the edges of the grey rectangle with scissors and mat onto the white rectangle with foam tape. Mat onto the middle panel of the card. 5 Trim into the gym bag cuts as shown in the image. 6 Shape the cuts, build up the decoupage and mat together with foam tape. Mat onto the middle panel of the card with foam tape. Mat the thin gym strip onto the inside of the card to create a stopper. CLICK HERE TO DOWNLOAD YOUR SVG CONTENT PROJECT 3 www.tatteredlace.co.uk | 9


What you’ll need: • 04-04-Gym Bag SVG files • White cardstock • Grey cardstock • Distress ink pad - Tumbled Glass • Blue ribbon • Diamante gems Step bySteps 1 Cut all the pieces needed to create the project as listed below; From SVG downloads: • From white cardstock: - 1 x GB-4-Card Base - 1 x GB-4-Gym Bag Outline - 1 x GB-4-Stencil • From pearlescent cardstock: - 1 x GB-4-Mat 1 - 1 x GB-4-Mat 2 - 1 x GB-4-Mat 3 - 1 x GB-4-Mat 4 • From backing paper: - 1 x GB-4-Mat 5 (dumbbells) - 1 x GB-4-Mat 6 (dumbbells) - 1 x GB-4-Mat 7 (dumbbells) - 1 x GB-4-Mat 8 (dumbbells) • From charisma: - 1 x GB-4-Charisma From machine memory: • From white cardstock: - 1 x 82mm x 127mm rectangle • From grey cardstock: - 1 x 86mm x 131mm rectangle 2 Fold on the score lines to create the card base. Mat the dumbbell mats onto the grey mats and mat onto the side panels of the card. Using the stencil cut, ink the white rectangle with the ink pad and mat onto the grey rectangle. Mat onto the middle panel of the card. 3 Trim into the gym bag cuts as shown in the image. 4 Shape the cuts, build up the decoupage and mat together with foam tape. Mat onto the outline and mat onto the left panel of the card. Tie a multi-loop bow from blue ribbon and mat onto the card. Finish by adding diamante gems. 31 42 ------------------------------------- EXCLUSIVE GIFT - GYM BAG -----------------------------------------CLICK HERE TO DOWNLOAD YOUR SVG CONTENT PROJECT 4 10 | www.tatteredlace.co.uk


Step bySteps 543211 Cut all the pieces needed to create the project as listed below; From SVG downloads: • From white cardstock: - 1 x GB-5-Gym Bag Outline • From charisma: - 1 x GB-5-Charisma From machine memory: • From white cardstock: - 1 x 270mm x 175mm rectangle - 1 x 51mm x 165mm rectangle (with sentiment draw file) - 1 x 208mm x 25mm rectangle • From grey cardstock: - 2 x 30mm x 170mm rectangle - 1 x 65mm x 170mm rectangle - 2 x 57mm x 170mm rectangle • From backing paper: - 2 x 24mm x 164mm rectangle (sports) - 1 x 59mm x 164mm rectangle -(sports)1x51mm x 164mm rectangle (sports) 2 On the large white rectangle, from the left edge, score and fold at 3.5cm, 7cm, 14cm and 20.5cm. Mat the sports rectangles and sentiment rectangle onto the grey rectangles and mat onto the panels of the card. 3 Using one of the gym bag cuts, trim the cut to leave just the trainers and bottle and mat onto the right panel of the card. 4 Mat the other gym bag cut onto the gym bag outline cut and mat onto the white strip. 5 Fold up the card. Wrap the belly band around the card and secure closed with tape. What you’ll need: • 05-05-Gym Bag SVG files • White cardstock • Grey cardstock ------------------------------------- EXCLUSIVE GIFT - GYM BAG -----------------------------------------CLICK HERE TO DOWNLOAD YOUR SVG CONTENT PROJECT 5 www.tatteredlace.co.uk | 11


Step bySteps 543211 Cut all the pieces needed to create the project as listed below; From SVG downloads: • From white cardstock: - 1 x GB-6-Card Base - 1 x GB-6-Mat 2 (with sentiment draw file) • From grey cardstock: - 1 x GB-6-Mat 1 - 2 x GB-6-Mat 3 • From backing paper: - 2 x GB-6-Mat 4 (gym) • From charisma: - 1 x GB-6-Charisma From machine memory: • From grey cardstock: - 2 x 35mm x 140mm rectangle - 4 x 28mm x 32mm rectangle - 2 x 28mm x 75mm rectangle • From backing paper: - 2 x 30mm x 135mm rectangle (gym) - 4 x 23mm x 27mm rectangle -(gym)2x23mm x 70mm rectangle (gym) 2 Fold on the score lines to create the card base. Mat the gym rectangles onto the grey rectangles and mat onto the side, top and bottom panels of the card. 3 Mat the gym mat 4 cuts onto the grey mat 3 cuts and mat onto the half hexagon panels on the card. Mat the sentiment hexagon mat onto the grey hexagon and mat onto the hexagon panel of the card. 4 Trim into the gym bag cuts as shown in the image. 5 Shape the cuts, build up the decoupage and mat together with foam tape. Mat onto the middle hexagon panel of the card. Finish by adding diamante gems in the top left and bottom right corners. What you’ll need: • 06-06-Gym Bag SVG files • White cardstock • Grey cardstock • Diamante gems ------------------------------------- EXCLUSIVE GIFT - GYM BAG -----------------------------------------CLICK HERE TO DOWNLOAD YOUR SVG CONTENT PROJECT 6 12 | www.tatteredlace.co.uk


www.tatteredlace.co.uk IS NOW A WEBSITE!!!RETAIL AND SO MUCH MORE AVAILABLE TO BUY NOW AT WWW.TATTEREDLACE.CO.UK MAGAZINES DIE RANGES PAPER PACKS & KITS STAMPS TOOLS & ACCESSORIES


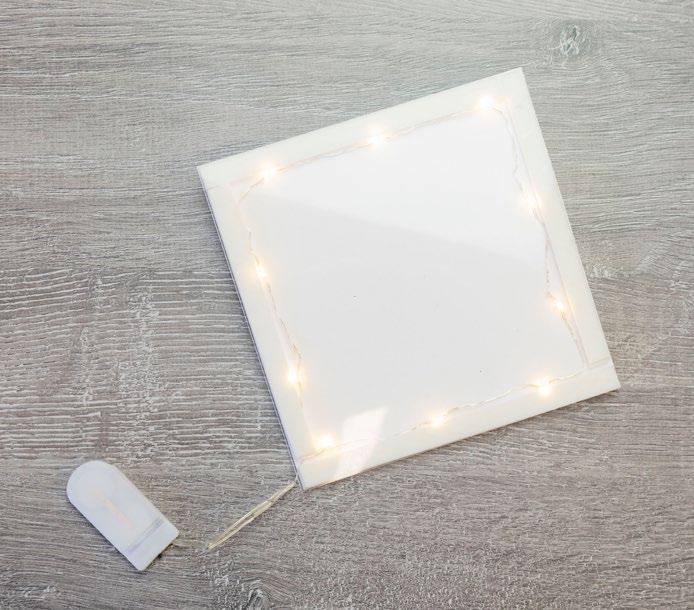
---------------------------------------- HUMBLE HERITAGE --------------------------------------------What you’ll need: • 07-01-Humble Heritage SVG files • Gold mirror cardstock • Red ribbon • Red gems • Ink Lily marker - BG1 1 Cut all the pieces needed to create the project as listed below; From SVG downloads: • From white cardstock: - 1 x HH-1-Roof Pop Up • From charisma: - 1 x HH-1-Charisma From machine memory: • From white cardstock: - 1 x 176mm x 186mm rectangle - 1 x 176mm square - 2 x 176mm x 86mm rectangle • From gold mirror cardstock: - 1 x 171mm square - 2 x 81mm x 170mm rectangle • From backing paper: - 1 x 167mm square (holly) - 1 x 200mm x 176mm rectangle (snow scene) - 2 x 77mm x 166mm rectangle (snow scene) (cut one with sentiment draw file) 2 On the white rectangle, measure in 10mm from the left edge, score and fold to create a tab. Attach to the white square using the tab to create a card. Mat the holly square onto the gold square and mat onto the card front. 3 Score and fold the large snow scene rectangle in half vertically and mat onto the inside of the card, matching up the folds. 4 On the roof pop up cut, using the chimney and legs cuts as a guide, colour the left of the aperture with the pens. Mat the roof, chimney and legs cuts onto the pop up. Attach the smaller white rectangles to either side of the pop up. 5 Mat the pop up piece onto the inside of the card. Mat the snow scene rectangles onto the remaining gold rectangles, mat onto either side of the pop up. 6 Finish by adding a triple-loop bow to the outside of the card and gems to the bottom right of the inside of the card. 41 52 63 Humble Heritage CLICK HERE TO DOWNLOAD YOUR SVG CONTENT PROJECT 7 14 | www.tatteredlace.co.uk


41 52 63 CLICK HERE TO DOWNLOAD YOUR SVG CONTENT PROJECT 8 www.tatteredlace.co.uk | 15
4 Mat the acetate square behind the window and mat onto the card with thick foam tape. Mat the remaining elf onto the window with foam tape. Mat the roof onto the roof outline. Using the white gesso, add snow to the roof and while wet add glitter. Mat the roof onto the card with foam tape. Add extra white gesso around the feet of the elf. Mat the sentiment rectangle onto the small holly rectangle and mat onto the card with foam tape.
What you’ll need: • 08-02-Humble Heritage SVG files • White cardstock • Brown cardstock • Gold mirror cardstock • Acetate • Cadence White Gesso • Glitter 1 Cut all the pieces needed to create the project as listed below; From SVG downloads: • From white cardstock: - 1 x HH-2-Window • From brown cardstock: - 1 x HH-2-Roof Outline • From charisma: - 1 x HH-2-Charisma From machine memory: • From white cardstock: - 2 x 200mm square - 1 x 69mm x 26mm rectangle (with sentiment draw file) • From gold mirror cardstock: - 1 x 193mm square - 1 x 179mm square • From backing paper: - 1 x 189mm square (holly) - 1 x 175mm square (snow scene) - 1 x 150mm square (stripy) - 1 x 73mm x 30mm rectangle (holly) • From acetate: - 1 x 155mm square 2 On one of the white squares, from the left edge measure in 10mm ---------------------------------------- HUMBLE HERITAGE --------------------------------------------and score and fold to create a tab. Attach to the other white square using the tab to create a tent card. Mat the holly square onto the large gold square and mat onto the card with foam tape. Mat the snow scene square onto the smaller gold square and mat onto the card. 3 Mat the stripy square onto the card. Trim the right edge from the fireplace. Mat the stocking onto the fireplace and mat onto the card. Mat the two smaller elves onto the card with foam tape.
6
5


3 Mat the stripy sentiment rectangle onto the next large gold rectangle and mat onto the remaining white rectangle. Attach the card front to the rectangles using the tab to create a tent card.
2
What you’ll need: • 09-03-Humble Heritage SVG files • White cardstock • Gold mirror cardstock • Red ribbon • Red gems 1 Cut all the pieces needed to create the project as listed below; From SVG downloads: • From white cardstock: - 1 x HH-3-Card Front • From charisma: - 1 x HH-3-Charisma From machine memory: • From white cardstock: - 1 x 280mm x 165mm rectangle - 1 x 148mm x 150mm rectangle - 1 x 69mm x 14mm rectangle (with sentiment draw file) • From gold mirror cardstock: - 1 x 156mm x 161mm rectangle - 2 x 56mm x 165mm rectangle - 1 x 145mm x 147mm rectangle - 1 x 85mm x 2mm strip - 1 x 70mm x 165mm rectangle - 1 x 72mm x 17mm rectangle • From backing paper: - 1 x 152mm x 157mm rectangle (snow scene) - 2 x 52mm x 157mm rectangle -(stripy)1x142mm x 144mm rectangle (stripy) (with sentiment draw file) - 1 x 142mm x 10mm strip (holly) - 1 x 67mm x 165mm rectangle (holly) ---------------------------------------- HUMBLE HERITAGE ---------------------------------------------
4 Mat the holly strip and gold strip onto the bottom of the inside of the card.
Trim the fireplace and wreath cuts to fit with the cut out on the card front. Mat these cuts and the present onto the inside of the card. Mat the stocking and deer onto the fireplace.
5 Mat the holly rectangle onto the last large gold rectangle and mat onto the card front. Mat the Christmas tree onto the card with foam tape and the train around the bottom the tree with foam tape.
6 Mat the sentiment rectangle onto the small gold rectangle and mat onto the tent card. Mat the tent card onto the back panel of the folded card. Tie a triple-loop bow from red ribbon and mat onto the front fold of the card. Finish by adding red gems.
On the large white rectangle, from the left edge, measure at 6cm and 12cm, score and fold. Mat the snow scene rectangle onto the large gold rectangle and mat onto the back panel of the card. Mat the thin stripy rectangles onto the thin gold rectangles and mat onto the folds of the card front.
41 52 63 CLICK HERE TO DOWNLOAD YOUR SVG CONTENT PROJECT 9 16 | www.tatteredlace.co.uk


4 Using the large black rectangle, from the top edge, measure at 1cm, 3.5cm, 8.5cm and 11cm and score and fold. Mat onto the card by attaching the end tabs to the inside top so it sits on the base of the card to create a pop up.
---------------------------------------- HUMBLE HERITAGE --------------------------------------------What you’ll need: • 10-04-Humble Heritage SVG files • White cardstock • Black cardstock • Gold mirror cardstock • Red diamanté gems 1 Cut all the pieces needed to create the project as listed below; From SVG downloads: • From gold mirror cardstock: - 2 x HH-4-Wreath • From charisma: - 1 x HH-4-Charisma From machine memory: • From white cardstock: - 1 x 140mm x 175mm rectangle - 1 x 140mm x 160mm rectangle - 1 x 53mm circle (with sentiment draw file) • From gold mirror cardstock: - 3 x 136mm x 156mm rectangle - 1 x 58mm circle • From black cardstock: - 1 x 80mm x 120mm rectangle - 1 x 13mm x 55mm strip • From backing paper: - 2 x 132mm x 152mm rectangle -(stripy)1x132mm x 152mm rectangle (holly) 2 On the large white rectangle, from the top edge measure down 10mm and score and fold to create a tab. Attach to the other white rectangle to create a tent card. Mat one of the stripy rectangles onto one of the gold rectangles and mat onto the front of the card. 3 Mat the remaining stripy rectangle and the holly rectangle onto the remaining gold rectangles and mat onto the inside of the card.
5 Mat the stockings onto the fireplace and the deer onto the mantlepiece. Mat the fireplace onto the pop up. Mat the charisma garland onto the gold garland and mat onto the inside top of the card. Mat the lanterns under each end of the garland.
41 52 63 CLICK HERE TO DOWNLOAD YOUR SVG CONTENT PROJECT 10 www.tatteredlace.co.uk | 17
6 Using the small black strip, from the top edge, measure at 1cm, 2cm, 3.5cm and 4.5cm and score and fold. Mat onto the card by attaching the end tabs to the fireplace and base of the card to create a pop up. Mat the elf onto the pop up. Mat the sentiment circle onto the gold circle and mat onto the inside base of the card. Finish by adding gems.


card PROJECT 11 18 | www.tatteredlace.co.uk
9 Snip into one of the tree cuts to create a smaller tree. Add glitter to the roof and tree cuts.
10Mat the roof and chimney onto the card. Fold the small acetate strip in half and mat behind the sleigh. Mat the sleigh onto the roof. Mat the trees onto the card with foam tape. Mat the wreath onto the bottom of the roof.
1 Cut all the pieces needed to create the project as listed below; What you’ll need: • 11-01-David’s Santa Workshop • White cardstock • Brown cardstock • Vellum • Construction acetate • Split pins • Kit n Caboodle Craft Lights (set of 10) • Glitter Santa WorkshopDavid’s ---------------------------------------- SANTA WORKSHOP --------------------------------------------From SVG downloads: • From black cardstock: - 1 x DSW-1-Elves • From brown cardstock: - 1 x DSW-1-Window • From charisma: - 1 x DSW-1-Charisma A - 1 x DSW-1-Charisma B From machine memory: • From white cardstock: - 2 x 150mm square • From acetate:construction - 1 x 150mm square - 1 x 150mm x 50mm -strip1x205mm x 25mm -strip1x50mm x 10mm strip • From vellum: - 1 x 150mm square 2 On one of the white squares, measure in 10mm from the left edge and score and fold to create a tab. Attach to the other white square using the tab to create a card. Add two layers of foam tape around edges of the card. Add a strip of craft lights onto the inside of the foam tape and feed the battery pack through a join in the tape. 3 Mat the acetate onto the card to create a lit window. 4 Pierce a hole into the top and bottom of each elf. Place the thicker acetate strip along the back of the bottom of the elves, pierce through the holes again going through the acetate and secure with split pins. Repeat at the top of the elves with the thinner acetate strip making sure this strip is on top of the elves.
11Secure the battery pack onto the back of the
8 Mat the window panel onto the card.
5 Mat foam tape onto the bottom right and left side of the card and mat the elves to the card using just the bottom acetate strip. Add a strip of foam to the top edge and top corners. Make sure to leave the middle of the acetate open so the elves can move.
6 Add a small piece of foam tape in between each elf along the bottom of the card.
7 Mat the vellum square onto the window panel.

10741 11 852 963 David will be showing you how to make this project in a Zoom workshop. For details on how you can watch this please go to www.tatteredlace.co.uk/santaworkshop to register your interest! ---------------------------------------- SANTA WORKSHOP --------------------------------------------CLICK HERE TO DOWNLOAD YOUR SVG CONTENT www.tatteredlace.co.uk | 19


Christmas BoxVikki’s What you’ll need: • 12-01-Vikki's Christmas Box SVG files • Red pearl cardstock • White cardstock • Gold mirror cardstock • Gold ribbon ------------------------------------------ CHRISTMAS BOX --------------------------------------------PROJECT 12 20 | www.tatteredlace.co.uk


97531 108642 To Make The Gift Box 1 Cut all the pieces needed to create the project as listed below; From SVG downloads: • From red pearl cardstock: - 2 x VCB-1-Box Base • From white cardstock: - 1 x VCB-1-Tag Card - 1 x VCB-1-Stocking Outline 1 - 1 x VCB-1-Stocking Outline 2 • From charisma: - 1 x VCB-1-Charisma From machine memory: • From gold mirror cardstock: - 8 x 44mm x 90mm rectangles • From red pearl cardstock: - 2 x 120mm circle • From backing paper: - 4 x 40mm x 86mm rectangles -(holly)4x40mm x 86mm rectangles (stripe) 2 Fold on the score lines of the box base pieces. Mat the backing paper rectangles onto the gold rectangles and mat onto the middle panels of the box base. 3 Start to make up the box by attaching the side tab of the first base piece to the other side of second base piece and vice versa to create a cylinder. 4 Fold down the bottom flaps gluing them in place one by one to form the shape of the gift box. 5 Mat one of the red pearl circles onto the inside of the box and the other onto the base of the box to hide the flaps. 6 Fold in the top of the box and thread a length of ribbon through the holes. Pull to close and tie in a bow. To Make The Gift Tag 7 Mat the stocking outline 1 cut onto the tag card. 8 Trim the stocking cuts as shown. 9 Shape the cuts, build up the decoupage and mat together with foam tape. Mat onto the tag card. 10Add a loop of ribbon to the back of the tag card and mat the stocking outline 2 cut over the top. Add the gift tag to the box to finish the project! ------------------------------------------ CHRISTMAS BOX --------------------------------------------CLICK HERE TO DOWNLOAD YOUR SVG CONTENT www.tatteredlace.co.uk | 21


What you’ll need: • 13-01-Calypso Cream SVG files • White cardstock • Green cardstock 1 Cut all the pieces needed to create the project as listed below; From SVG downloads: • From white cardstock: - 1 x CC-1-Card Front (with sentiment draw file) • From charisma: - 1 x CC-1-Charisma A - 1 x CC-1-Charisma B From machine memory: • From white cardstock: - 2 x 200mm square • From green cardstock: - 1 x 190mm square • From backing paper: - 1 x 185mm square (hydrangea) 2 On one of the white squares, measure in 10mm from the left edge and score and fold to create a tab. Attach to the other square using the tab to create a card. Mat the hydrangea square onto the green square and mat onto the card with foam tape. 3 Mat the card front onto the card with thick foam tape. 4 Shape the floral and foliage cuts, build up the decoupage and mat together with foam tape. Mat the bouquet onto the card. ----------------------------------------- CALYPSO CREAM ---------------------------------------------31 42top tip... Mat your decoupage cuts onto a small piece of acetate to give you something solid to glue to. This also gives you a flat base to mat the cuts onto your projects. Calypso Cream CLICK HERE TO DOWNLOAD YOUR SVG CONTENT PROJECT 13 22 | www.tatteredlace.co.uk


What you’ll need: • 14-02-Calypso Cream SVG files • White cardstock 1 Cut all the pieces needed to create the project as listed below; From SVG downloads: • From white cardstock: - 2 x CC-2-Card Base - 3 x CC-2-Card Mat 3 - 1 x CC-2-Card Mat 5 (with sentiment draw file) • From green cardstock: - 3 x CC-2-Card Mat 1 - 3 x CC-2-Card Mat 4 • From backing paper: - 1 x CC-2-Card Mat 2 (hydrangea) - 1 x CC-2-Card Mat 2 (leaves) - 1 x CC-2-Card Mat 2 (floral outline) - 1 x CC-2-Card Mat 5 (floral outline) - 1 x CC-2-Card Mat 5 (hydrangea) - 1 x CC-2-Butterfly (leaves) • From charisma: - 1 x CC-2-Charisma A - 1 x CC-2-Charisma B ----------------------------------------- CALYPSO CREAM ---------------------------------------------2 Using the card bases, mat two sides of each card together to create a Z-fold card. Mat the green card mat 1s onto each panel of the card. Mat the backing paper card mat 2s onto each panel of the card. 3 Mat the backing paper card mat 5s onto the green card mat 4s and mat onto the card, matting the sentiment one in the middle with foam tape. 4 Shape the floral and foliage cuts, build up the decoupage and mat together with foam tape. 5 Mat the florals onto the right panel of the card. Mat the butterfly onto the left panel of the card. Tie a triple-loop bow from pink ribbon and mat onto the left panel of the card. 54321 • Green cardstock • Pink ribbon CLICK HERE TO DOWNLOAD YOUR SVG CONTENT PROJECT 14 www.tatteredlace.co.uk | 23


What you’ll need: • 15-03-Calypso Cream SVG files • White cardstock • Green cardstock • Blue ribbon 1 Cut all the pieces needed to create the project as listed below; From SVG downloads: • From white cardstock: - 1 x CC-3-Card Front • From charisma: - 1 x CC-3-Charisma From machine memory: • From white cardstock: - 2 x 138mm x 160mm rectangle - 1 x 138mm x 175mm rectangle - 1 x 60mm x 20mm rectangle (with sentiment draw file) • From green cardstock: - 2 x 132mm x 154mm rectangle - 1 x 63mm x 23mm rectangle • From backing paper: - 1 x 128mm x 150mm rectangle -(leaves)1x128mm x 150mm rectangle (floral outline) - 1 x 128mm x 21mm strip (leaves) 2 On the larger white rectangle, measure down 15mm from the top edge and score and fold to create a tab. Attach to one of the other white rectangles to create a tent card. Fold the card front in half horizontally to create an easel card. Mat the remaining white rectangle onto the front of the card. 3 Mat one green rectangle onto the base of the card and the other green rectangle onto the card front with foam tape. 4 Mat the card front pieces onto either side of the back of the floral outline rectangle. Mat onto the card front and mat the leaves rectangle onto the card base. 5 Shape the floral and foliage cuts, build up the decoupage and mat together with foam tape. 6 Mat the florals onto the card. Mat the sentiment rectangle onto the small green rectangle and mat onto the card. Mat the leaves strip onto the base of the card to create a stopper. Tie a triple-loop bow from blue ribbon and mat onto the card. 41 52 63 ----------------------------------------- CALYPSO CREAM ---------------------------------------------CLICK HERE TO DOWNLOAD YOUR SVG CONTENT PROJECT 15 24 | www.tatteredlace.co.uk


41 52 63 ----------------------------------------- CALYPSO CREAM ---------------------------------------------CLICK HERE TO DOWNLOAD YOUR SVG CONTENT PROJECT 16 www.tatteredlace.co.uk | 25
5 Mat the sentiment card mat onto the floral outline card mat 3 and mat onto the card with foam tape. Shape the floral and foliage cuts, build up the decoupage and mat together with foam tape. Mat the florals onto the card front. Tie a triple-loop bow and mat onto the base of the card as a stopper.
6
What you’ll need: • 16-04-Calypso Cream SVG files • White cardstock • Green cardstock • Blue ribbon 1 Cut all the pieces needed to create the project as listed below; From SVG downloads: • From white cardstock: - 1 x CC-4-Card Mat 1 - 1 x CC-4-Card Mat 4 (with sentiment draw file) • From green cardstock: - 2 x CC-4-Triangle Mats 1 - 1 x CC-4-Card Mat 2 • From backing paper: - 2 x CC-4-Triangle Mats 2 (leaves) - 1 x CC-4-Card Mat 3 • From charisma: - 1 x CC-4-Charisma From machine memory: • From white cardstock: - 1 x 165mm x 140mm rectangle - 1 x 180mm x 140mm rectangle • From green cardstock: - 1 x 160mm x 135mm rectangle • From backing paper: - 1 x 155mm x 130mm rectangle (floral outline) 2 On the larger white rectangle, from the right edge measure in at 15mm and score and fold to create a tab. Attach to the other white rectangle using the tab to create a card. On the card front, score and fold diagonally from the top right corner to the bottom left corner to create a twisted easel card. 3 Mat the floral outline rectangle onto the green rectangle and mat onto the base of the easel card. 4 Mat the leaves triangle mats onto the green triangle mats and mat onto the front folds of the card. Mat the green card mat 2 onto the white card mat 1 and mat onto the bottom fold of the card front with foam tape.


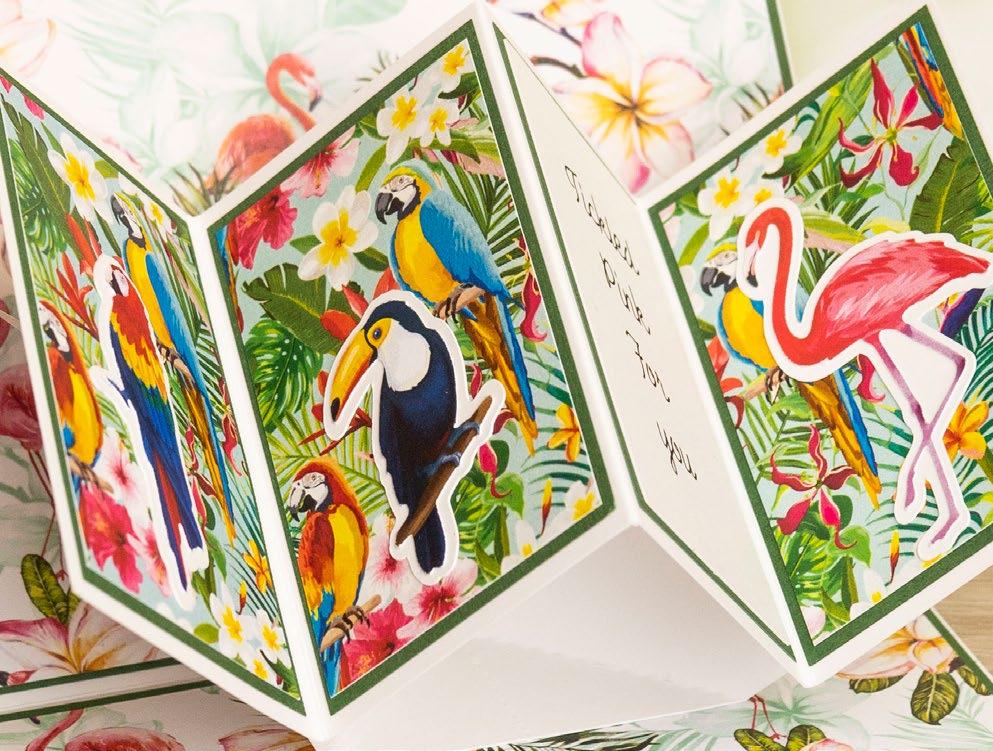
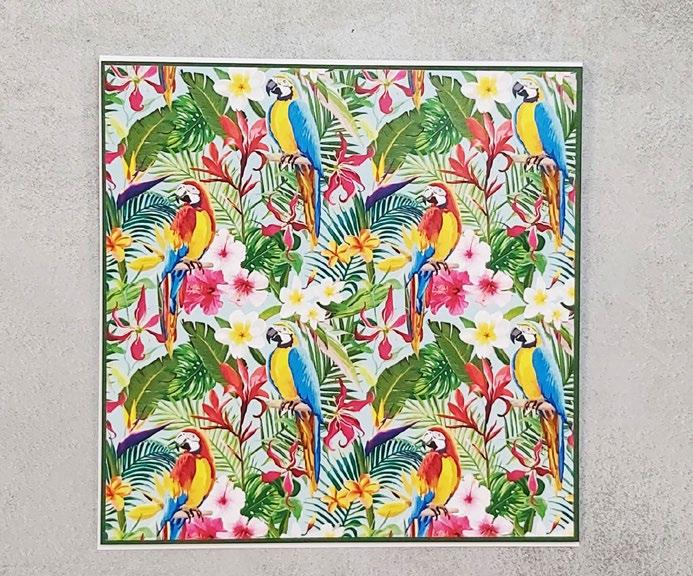
Tropical CalypsoVikki’s What you’ll need: • 17-01-Tropical Calypso SVG files • White cardstock • Green cardstock • Pink ribbon • Sparkler gem • Diamanté gems ----------------------------------------- TROPICAL CALYPSO -------------------------------------------PROJECT 17 26 | www.tatteredlace.co.uk


CLICK HERE TO DOWNLOAD YOUR SVG CONTENT www.tatteredlace.co.uk | 27
6 Shape the florals, build up the decoupage and mat together with foam tape. Tuck the leaves into the arrangement and mat onto the left panel of the folded rectangle. Tuck the Parrott behind the flowers with foam tape.
----------------------------------------- TROPICAL CALYPSO --------------------------------------------
7 Attach the folded rectangle onto the base card attaching it to the end tabs on the arms.
4 On the remaining large white rectangle, score and fold in half vertically. Mat the white rectangles to the remaining green rectangles and mat onto either side of the folded rectangle.
7531 642 1 Cut all the pieces needed to create the project as listed below; From SVG downloads: • From charisma: - 1 x TC-1-Charisma From machine memory: • From white cardstock: - 1 x 195mm square - 2 x 160mm x 60mm rectangle - 1 x 140mm x 195mm rectangle - 2 x 61mm x 186mm rectangle (one with sentiment draw file) • From green cardstock: - 2 x 55mm x 190mm rectangle - 8 x 55mm square - 1 x 76mm x 190mm rectangle - 2 x 65mm x 190mm rectangle • From backing paper: - 2 x 51mm x 186mm rectangle -(hydrangea)4x51mmsquare (green leaves) - 4 x 51mm square (hydrangea) - 1 x 72mm x 186mm rectangle (green leaves) - 2 x 33mm x 186mm strip (green -leaves)2x33mm x 186mm strip (hydrangea) 2 Mat the hydrangea rectangles onto the thin green rectangles and mat onto either side of the white square. 3 On the long white rectangles, from the left edge, measure in at 2cm, 8cm and 14cm and score and fold. Mat the backing paper squares on to the green squares and mat onto the middle panels on either side of the folded rectangles. Mat the remaining green leaves rectangle to the larger remaining green rectangle. Attach the folded rectangles to the large rectangle using the tabs and mat onto the middle of the square card base.
8 Tie a triple-loop bow from pink ribbon and mat onto the front of the card. Add a sparkler gem into the middle of the bow. Finish by adding diamante gems.
5 Tear down both sides of the backing paper strips and mat onto either side of the folded rectangle.


----------------------------------------- TROPICAL FLOWERS -------------------------------------------Tropical Flowers ON YOUR BIRTHDAY YOU DESERVE IT What you’ll need: • 20-03-Tropical Flowers SVG files • White cardstock • Green cardstock • Pink ribbon What you’ll need: • 18-01-Tropical Flowers SVG files • White cardstock • Green cardstock • Green pearls 1 Cut all the pieces needed to create the project as listed below; From SVG downloads: • From white cardstock: - 1 x TF-1-Freeform Pop Up • From green cardstock: - 1 x TF-1-Mat 1 - 1 x TF-1-Mat 2 • From backing paper: - 1 x TF-1-Mat 3 (pink floral) - 1 x TF-1-Mat 4 (pink floral) • From charisma: - 1 x TF-1-Charisma From machine memory: • From white cardstock: - 2 x 115mm x 195mm rectangle - 2 x 59mm x 129mm rectangle (with sentiment draw files) • From green cardstock: - 4 x 110mm x 190mm rectangle - 2 x 65mm x 135mm rectangle • From backing paper: - 4 x 105mm x 185mm rectangle (pink floral) 2 Mat the pink floral rectangles onto the large green rectangles and mat onto either side of the large white rectangles. 3 Fold on the score lines of the freeform pop up. Mat the pink floral mats onto the green mats and mat onto the outer panels of the pop up. 4 Mat the sentiment rectangles onto the smaller green rectangles and mat onto the inner panels of the pop up. Mat the outer panels of the pop up onto the rectangles from Step 1 to create the card. 5 Shape the floral cuts and mat together on the card with foam tape onto the inner left panel of the pop up. Mat the toucan cut onto the inner right panel of the pop up. Finish by adding green pearls in the bottom right corner of the card. 1 Cut all the pieces needed to create the project as listed below; From SVG downloads: • From charisma: - 1 x TF-3-Charisma From machine memory: • From white cardstock: - 2 x 170mm square • From green cardstock: - 1 x 164mm square - 1 x 124mm square - 1 x 104cm square • From backing paper: - 1 x 160mm (pink floral) - 1 x 120mm (pink floral) - 1 x 10cm (sentimentsquaredownload) CLICK HERE TO DOWNLOAD YOUR SVG CONTENT PROJECT 18 PROJECT 20 28 | www.tatteredlace.co.uk

2
3 Mat the remaining pink floral square onto the next largest green square and mat onto the card with foam tape. Mat the sentiment square onto the remaining green square and mat onto the card with foam tape.
2
3
On the large white rectangle, from the top edge, score and fold at 1.5cm and 9.5cm. Mat the small pink floral rectangle onto the small green rectangle and mat onto the bottom panel of the folded rectangle. Attach the folded rectangle onto the inside front of the tent card using the tab.
----------------------------------------- TROPICAL FLOWERS -------------------------------------------MISSING YOU What you’ll need: • 19-02-Tropical Flowers SVG files • White cardstock • Green cardstock • Pink ribbon • Purple pearls 1 Cut all the pieces needed to create the project as listed below; From SVG downloads: • From cardstock:white - 1 x TF-2-Tag (with sentiment draw file) • From charisma: - 1 x TF-2-Charisma From machine memory: • From cardstock:white - 2 x 110mm x 145mm -rectangle1x110mm x 175mm rectangle • From cardstock:green - 1 x 105mm x 140mm rectangle - 1 x 105mm x 75mm rectangle • From backing paper: - 1 x 101mm x 136mm rectangle (pink -floral)1x101mm x 71mm (pink floral)
5 Shape the floral cuts and mat together onto the tag with foam tape. Tie a multi loop bow from pink ribbon and mat onto the card. Finish by adding pink pearls.
On one of the white squares, measure in 10mm from the left edge and score and fold to create a tab. Attach to the other square to create a card. Mat the large pink floral square onto the large green square and mat onto the card.
4 Shape the floral cuts and mat together onto the card with foam tape. Tie a triple loop bow from pink ribbon and mat onto the card.
On one of the smaller white rectangles, measure down 10mm from the top edge and score and fold to create a tab. Attach to the other small white rectangle to create a tent card. Mat the large pink floral rectangle onto the large green rectangle and mat onto the front of the card.
4 Mat the sentiment tag onto the front fold of the card with foam tape.
CLICK HERE TO DOWNLOAD YOUR SVG CONTENT CLICK HERE TO DOWNLOAD YOUR SVG CONTENT PROJECT 19 www.tatteredlace.co.uk | 29


What you’ll need: • 21-01-Prehistoric Predators SVG files • White cardstock • Brown cardstock • Acetate -------------------------------------- PREHISTORIC PREDATORS ----------------------------------------30 | www.tatteredlace.co.uk

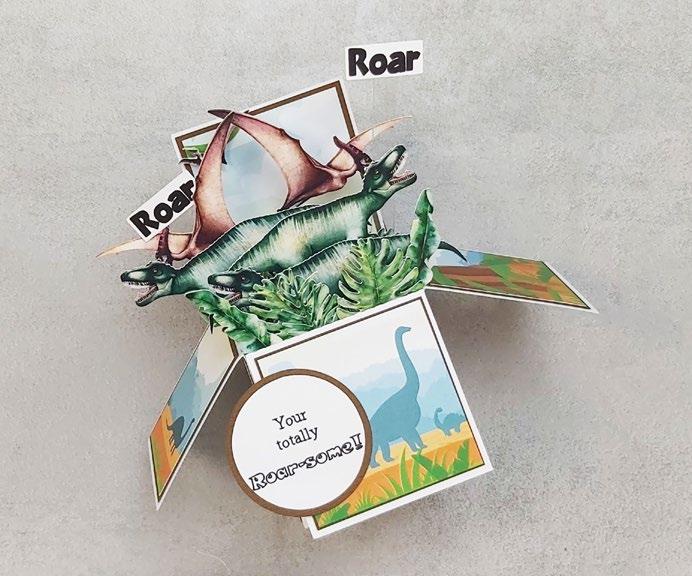
1 Cut all the pieces needed to create the project as listed below; Step bySteps 1 3254 6 -------------------------------------- PREHISTORIC PREDATORS ----------------------------------------From SVG downloads: • From white cardstock: - 1 x PP-1-Pop Up Box • From charisma: - 1 x PP-1-Charisma A - 1 x PP-1-Charisma B From machine memory: • From white cardstock: - 1 x 48mm circle (with sentiment draw file) - 2 x 30mm x 12mm rectangle (with sentiment draw file) • From brown cardstock: - 1 x 66mm x 146mm rectangle - 2 x 51mm x 66mm rectangle - 1 x 66mm square - 2 x 51mm x 76mm rectangle - 1 x 66mm x 76mm rectangle - 3 x 100mm x 50mm rectangle - 1 x 53mm circle • From backing paper: - 1 x 63mm x 140mm rectangle (dino scene) - 2 x 48mm x 63mm rectangle (dino scene) - 1 x 63mm square (dino scene) - 2 x 48mm x 73mm rectangle (dinosaur) - 1 x 63mm x 73mm rectangle (dinosaur) • From acetate: - 5 x 5mm x desired length 2 Mat the large dino scene rectangle onto the large brown rectangle and mat onto the back panel of the pop up box. Mat the dino scene rectangles and square onto the brown rectangles and square and mat onto the top flaps of the pop up box. 3 Turn the pop up box over. Mat the dinosaur rectangles onto the brown rectangles and mat onto the bottom panels of the card. 4 Fold up the box and close using the tab. On the three remaining brown rectangles, measure in 15mm from each edge and score and fold. Mat within the box evenly spaced about 10mm down from the top. 5 Mat a selection of the mirrored charisma leaves to the inside of the front of the box. Mat a selection of the charisma leaves to the back two inner panels. 6 Attach the dinosaurs to the acetate strips, cut to the desired length and mat into the box. Mat the small sentiments onto the acetate strips and mat into the box. Mat the sentiment circle onto the brown circle and mat onto the front flap of the pop up box. CLICK HERE TO DOWNLOAD YOUR SVG CONTENT PROJECT 21 www.tatteredlace.co.uk | 31


What you’ll need: • 22-02-Prehistoric Predators SVG files • White cardstock • Brown cardstock • Acetate • Light green moss -------------------------------------- PREHISTORIC PREDATORS ----------------------------------------32 | www.tatteredlace.co.uk


1 Cut all the pieces needed to create the project as listed below; From SVG downloads: • From white cardstock: - 1 x PP-2-Box Base - 1 x PP-2-Box Base Lid • From brown cardstock: - 1 x PP-2-Pterodactyl Outline • From charisma: - 1 x PP-2-Charisma From machine memory: • From white cardstock: - 1 x 60mm circle (with sentiment draw file) • From brown cardstock: - 10 x 86mm square - 2 x 13mm x 40mm strip - 1 x 63mm circle • From backing paper: - 6 x 82mm square (dinosaur) - 4 x 82mm square (dino scene) • From acetate: - 1 x 5mm x 36mm strip - 1 x 5mm x 46mm strip 2 Mat all backing paper squares onto the brown squares and mat the dinosaur squares onto the outside panels of the box base. 3 Mat the two remaining dinosaur squares and three of the scene squares onto the inside panels of the box base. Using the small brown strips, from one end measure in at 10mm and score and fold to create tabs. Mat together onto the middle of the box base to create a stand. 4 Mat one large Pterodactyl and one small Pterodactyl onto the long acetate strip. Mat the mirror charisma onto the other side. Mat the smaller Pterodactyl onto the smaller acetate strip and mat the mirror charisma onto the other side. Sandwich the acetate between a charisma and mirror charisma Rex. 5 Mat the dinosaurs onto the stand. Mat another T-Rex cut onto the dinosaurs with foam tape. 6 Add light green moss to hide the stand and add a selection of leaves to the moss. Step bySteps 51 628473 -------------------------------------- PREHISTORIC PREDATORS ----------------------------------------www.tatteredlace.co.uk | 33 7 Mat the sentiment circle onto the brown circle and mat onto one of the inner box sides. 8 Mat the remaining scene backing paper square to the box lid and make up the lid using the tabs. Mat a Pterodactyl cut onto the outline cut and mat onto the box lid with foam tape. CLICK HERE TO DOWNLOAD YOUR SVG CONTENT PROJECT 22


Step bySteps 543211 Cut all the pieces needed to create the project as listed below; From SVG downloads: • From charisma: - 1 x PP-3-Charisma From machine memory: • From white cardstock: - 2 x 190mm square - 1 x 48mm circle (with sentiment draw file) • From brown cardstock: - 1 x 184mm square - 1 x 150mm square • From backing paper: - 1 x 180mm square (dinosaur) - 1 x 140mm square (dino scene) - 1 x 140mm x 17mm strip (dino scene) - 1 x 140mm x 23mm strip (dino -scene)1x53mm circle • From acetate: - 1 x 140mm x 180mm rectangle 2 On one of the white squares, measure in 10mm from the left edge and score and fold to create a tab. Attach to the other square to create a card. Mat the dinosaur square onto the large brown square and mat onto the card with foam tape. 3 Mat the T-Rex and small Pterodactyl onto the dino scene square. Score and fold 15mm in from the top and bottom edge of the acetate rectangle to create tabs and attach to the backing paper square to create a domed shape. Mat the dino scene strips to the top and bottom of the acetate. 4 Mat the acetate topper onto the smaller brown square and onto the card with foam tape. Mat the remaining dinosaurs onto the acetate. 5 Mat the sentiment circle onto the brown circle and mat onto the card. What you’ll need: • 23-03-Prehistoric Predators SVG files • White cardstock • Brown cardstock • Acetate -------------------------------------- PREHISTORIC PREDATORS ----------------------------------------34 | www.tatteredlace.co.uk CLICK HERE TO DOWNLOAD YOUR SVG CONTENT PROJECT 23


www.tatteredlace.co.uk | 35


----------------------------------------- TROPICAL FLOWERS -------------------------------------------Tropical Leaves LET’S CELEBRATE YOU ONE DEFINING MOMENT What you’ll need: • 26-03-Tropical Leaves SVG files • White cardstock • Dark green cardstock • Craft foam • Distress Oxides - Peeled Paint, Memento, Cottage Ivy and New Sprout • Twine What you’ll need: • 24-01-Tropical Leaves SVG files • White cardstock • Dark green cardstock 1 Cut all the pieces needed to create the project as listed below; From SVG downloads: • From white cardstock: - 2 x TL-1-Card Base - 1 x TL-1-Mat 4 (with sentiment draw file) • From green cardstock: - 1 x TL-1-Mat 1 - 1 x TL-1-Mat 3 • From backing paper: - 1 x TL-1-Mat 2 (multi-colour leaves) • From charisma: - 1 x TL-1-Charisma 2 On one of the card base cuts, fold in half horizontally and trim a straight edge across the back. Mat the other card base onto the front of the folded cut to create the card. 3 Mat the multi colour leaves mat onto the large green mat and mat onto the card with foam tape. Mat the sentiment mat onto the small green mat and mat onto the card with foam tape. 4 Shape the leaf and flower cuts and mat together onto the card with foam tape. 1 Cut all the pieces needed to create the project as listed below; From SVG downloads: • From craft foam: - 1 x TL-3-Stamp • From charisma: - 1 x TL-3-Charisma 36 | www.tatteredlace.co.uk From machine memory: • From white cardstock: - 2 x 195mm x 130mm rectangle - 1 x 165mm x 100mm rectangle (with sentiment draw file) • From dark green cardstock: - 1 x 189mm x 124mm rectangle - 1 x 169mm x 104mm rectangle • From backing paper: - 1 x 180mm x 120mm rectangle (green leaves) CLICK HERE TO DOWNLOAD YOUR SVG CONTENT PROJECT 24 PROJECT 26


----------------------------------------- TROPICAL FLOWERS -------------------------------------------THANKS SO MUCH What you’ll need: • 25-02-Tropical Leaves SVG files • White cardstock • Dark green cardstock 1 Cut all the pieces needed to create the project as listed below; TOP TIP... Creating positve and negative cuts like this is a great way to make your craft stash go further! Save them in themed sets, for example flowers, foliage etc... From SVG downloads: • From white cardstock: - 1 x TL-2-Leaf Mats From machine memory: • From white cardstock: - 2 x 90mm x 200mm -rectangle1x45mm x 15mm rectangle (with sentiment draw file) • From dark green cardstock: - 1 x 84mm x 194mm rectangle - 1 x 70mm x 180mm rectangle • From backing paper: - 1 x 80mm x 190mm rectangle (multi-colour leaves) - 1 x 65mm x 175mm rectangle (green leaves) 2 On one of the white rectangles, measure in 10mm from the left edge and score and fold to create a tab. Attach to the other rectangle to create a card. Mat the multi-colour leaves rectangle onto the large dark green rectangle and mat onto the card. 3 Mat the green leaves rectangle and the smaller green rectangle and mat onto the card with foam tape. 4 Mat the leaf mats onto the card with foam tape. Mat the sentiment rectangle onto the card with foam tape. 2 On one of the white rectangles, measure in 10mm from the left edge and score and fold to create a tab. Attach to the other rectangle to create a card. Mat the green leaves rectangle onto the large green rectangle and mat onto the card with foam tape. 3 Stick the craft foam leaves to a stamping block and stamp around the edge of the sentiment rectangle using the inks. Mat the stamped rectangle onto the small green rectangle and mat onto the card with foam tape. 4 Mat the leaves together onto the card with foam tape. Tie a triple loop bow from twine and mat onto the card. CLICK HERE TO DOWNLOAD YOUR SVG CONTENT CLICK HERE TO DOWNLOAD YOUR SVG CONTENT PROJECT 25 www.tatteredlace.co.uk | 37


Step bySteps 543211 Cut all the pieces needed to create the project as listed below; From SVG downloads: • From white cardstock: - 1 x TB-1-Card Mat (with sentiment draw file) • From craft foam: - 1 x TB-1-Stamp • From charisma: - 1 x TB-1-Charisma From machine memory: • From white cardstock: - 2 x 238mm x 190mm rectangle - 1 x 131mm x 176mm rectangle • From green cardstock: - 2 x 76mm x 186mm rectangle - 1 x 128mm x 173mm rectangle • From backing paper: - 2 x 72mm x 182mm rectangle -(birds)1x124mm x 169mm rectangle (birds) 2 On one of the large white rectangles, from the left edge measure in at 8cm and score and fold. Repeat on the other rectangle from the right edge. Mat the card back of each rectangle together to create a gatefold card. Mat the thin bird rectangles onto the thin green rectangles and mat onto the front folds of the card. 3 Mat the large bird rectangle onto the large green rectangle and mat onto the remaining white rectangle with foam tape. Mat onto the left fold of the card. 4 Stick the craft foam leaves onto a stamping block. Stamp leaves down the right side of the card mat using the inks. Brush on extra ink with a brush and mat onto the card with foam tape. 5 Mat the bird cut onto the card with foam tape so it sits within the middle circle aperture. What you’ll need: • 27-01-Tropical Birds SVG files • White cardstock • Green cardstock • Distress Oxides – Peeled Paint, Memento, New Sprout and Cottage Ivy ------------------------------------------- TROPICAL BIRDS ---------------------------------------------CLICK HERE TO DOWNLOAD YOUR SVG CONTENT PROJECT 27 38 | www.tatteredlace.co.uk


What you’ll need: • 28-02-Tropical Birds SVG files • White cardstock • Green cardstock • Orange pearls Step bySteps 1 Cut all the pieces needed to create the project as listed below; From SVG downloads: • From charisma: - 1 x TB-2-Charisma From machine memory: • From white cardstock: - 2 x 140mm x 190mm rectangle • From green cardstock: - 1 x 134mm x 184mm rectangle - 1 x 104mm x 154mm rectangle - 1 x 74mm x 144mm rectangle - 1 x 99mm x 114mm rectangle • From backing paper: - 1 x 130mm x 180mm rectangle -(flamingo)1x100mm x 150mm rectangle -(birds)1x70mm x 140mm rectangle -(flamingo)1x95mm x 110mm rectangle (sentiment background) 2 On one of the white rectangles, measure in 10mm from the top edge and score and fold to create a tab. Attach to the other white rectangle to create a tent card. Mat the large flamingo rectangle to the large green rectangle and mat onto the card with foam tape. 3 Mat the birds rectangle onto the next largest green rectangle and mat onto the card. Mat the remaining flamingo rectangle onto the thin green rectangle and mat onto the card. Mat the sentiment rectangle onto the remaining green rectangle and mat onto the card with foam tape. 4 Shape the floral cuts and mat together with the leaves onto the card with foam tape. Mat the flamingos onto the card with foam tape. Finish by adding orange pearls into the top left corner of the card. 31 42 ------------------------------------------- TROPICAL BIRDS ---------------------------------------------CLICK HERE TO DOWNLOAD YOUR SVG CONTENT PROJECT 28 www.tatteredlace.co.uk | 39


What you’ll need: • 29-03-Tropical Birds SVG files ------------------------------------------- TROPICAL BIRDS ---------------------------------------------• White cardstock • Green cardstock • Orange pearls 40 | www.tatteredlace.co.uk


6 Fold on the score lines of the pop up mechanism and mat behind the folded rectangle attaching it to the outer panels only. On the left side, only attach to the top part of the pop up mechanism and on the right only attach the bottom part.
CLICK HERE TO DOWNLOAD YOUR SVG CONTENT PROJECT 29 www.tatteredlace.co.uk | 41
8 Mat the sentiment circle onto the green circle and mat onto the card front with foam tape. Shape the floral cuts and mat together with the leaves onto the circle with foam tape. Finish by matting the remaining parrot cuts onto the circle with foam tape.
Mat the folded rectangle with the card matting the triangle sections to the top and bottom of the inside of the card.
5 Mat the parrot, flamingo and toucan cuts onto the outlines and mat onto the panels of the folded rectangle.
------------------------------------------- TROPICAL BIRDS ---------------------------------------------1 Cut all the pieces needed to create the project as listed below; From SVG downloads: • From white cardstock: - 1 x TB-3-Pop Up Mechanism - 1 x TB-3-Parrot Outline - 1 x TB-3-Flamingo Outline - 1 x TB-3-Toucan Outline • From charisma: - 1 x TB-3-Charisma From machine memory: • From white cardstock: - 1 x 170mm x 185mm rectangle - 1 x 170mm square - 1 x 260mm x 100mm rectangle - 1 x 56mm x 90mm rectangle (with sentiment draw file) - 1 x 87mm circle (with sentiment draw file) • From green cardstock: - 3 x 166mm square - 4 x 60mm x 94mm rectangle - 1 x 92mm circle • From backing paper: - 1 x 162mm square (birds) - 2 x 162mm square (flamingo) - 3 x 56mm x 90mm rectangle (birds) 2 On the large white rectangle, measure down 15mm from the top edge and score and fold to create a tab. Attach to the back of the white square to create a tent card. Mat the bird square onto one of the green squares and mat onto the front of the card with foam tape. 3 Mat the flamingo squares onto the other two green squares and mat onto the inside of the card. 4 On the long white rectangle, from the left edge, measure in at 6.5cm, 13cm and 19.5cm and score and fold. Mat the three bird rectangles and the sentiment rectangle onto the four small green rectangles and mat onto the panels of the folded rectangle.
Step bySteps
51 6284737


42 | www.tatteredlace.co.uk


The Nested Shirt set is the perfect base card to work with the other exclusive designs from this issue. Whether you are wanting to create a tropical holiday shirt or a roarsome dinosaur shirt there is so much you can do with this collection. Not only do the designs work great on their own but they all complement each other so you can mix and match them. Use the textured backing papers as a base card and see what fun shirt designs you can come up with! The below shirts have been made with die cuts but the same can be replicated with your SVG cuts. www.tatteredlace.co.uk | 43


What you’ll need: • 30-01-Nested Shirt SVG files White cardstock Black cardstock Step bySteps 1 Cut all the pieces needed to create the project as listed below; From SVG downloads: • From white cardstock: - 1 x NS-1-Shirt 1 - 1 x NS-1-Shirt 1 (with sentiment draw file) - 1 x NS-1-Shirt 3 (with sentiment draw file) • From black cardstock: - 1 x NS-1-Shirt Detail • From backing paper: - 1 x NS-1-Shirt 2 (grunge) 2 On the plain shirt 1 cut, measure down 10mm from the top edge and score and fold to create a tab. Trim a straight edge across the bottom. Attach to the plain shirt 1 cut to create a tent card. 3 Mat the black shirt detail cuts onto the shirts as shown. 4 Mat the medium shirt onto the card and then the small shirt onto the card with foam tape. 31 42 ------------------------------------------- NESTED SHIRT ---------------------------------------------CLICK HERE TO DOWNLOAD YOUR SVG CONTENT PROJECT 30 44 | www.tatteredlace.co.uk


What you’ll need: • 31-02-Nested Shirt SVG files White cardstock Black DiamantéPaperInkPalePaleGreencardstockcardstockgreencardstockpinkcardstockLilyGoldSparklepenflowersgems Step bySteps 1 Cut all the pieces needed to create the project as listed below; From SVG downloads: • From green cardstock: - 1 x NS-2-Shirt Detail • From pink cardstock: - 1 x NS-2-Pocket Detail • From black cardstock - 1 x NS-2-Shirt 1 • From backing paper: - 1 x NS-2-Shirt 2 (ombre) From machine memory: • From white cardstock: - 2 x 190mm x 160mm -rectangle1x170mm x 140mm rectangle (with sentiment draw file) • From black cardstock: - 1 x 179mm x 149mm rectangle • From backing paper: - 1 x 175mm x 145mm rectangle (grunge) 2 On one of the large white rectangles, measure in 10mm from the left edge and score and fold to create a tab. Attach to the other white rectangle using the tab to create a card. Mat the sentiment rectangle onto the grunge backing paper and black rectangle and mat onto the card with foam tape. 3 Colour the collar, cuff and pocket cuts with the shimmer pen and add faux stitching detail with the fine liner. Mat the detail cuts onto the backing paper shirt. 4 Mat the detail shirt onto the black shirt with foam tape. Mat the shirts onto the card with foam tape. Add a selection of paper flowers to the top right corner of the card and finish with diamante gems in the bottom left corner. 31 42 ------------------------------------------- NESTED SHIRT ---------------------------------------------CLICK HERE TO DOWNLOAD YOUR SVG CONTENT PROJECT 31 www.tatteredlace.co.uk | 45


Step bySteps 543211 Cut all the pieces needed to create the project as listed below; From SVG downloads: • From white cardstock: - 10 x NS-3-Hexagon - 1 x NS-3-Shirt 3 (with sentiment draw file) • From black cardstock: - 7 x NS-3-Hexagon - 1 x NS-3-Shirt 2 - 1 X NS-3-Shirt Collar • From backing paper: - 1 x NS-3-Shirt 1 From machine memory: • From white cardstock: - 2 x 144mm circle - 1 x 39mm circle (with sentiment draw file) • From backing paper: - 1 x 139mm circle (grunge) • From hexagon background (step 3) - 1 x 135mm circle 2 On one of the large white circles, measure down 10mm from the top edge and score and fold to create a tab. Cut a straight edge across the bottom. Attach to the other circle using the tab to create a tent card. Mat the grunge circle onto card with foam tape. 3 Using the white and black hexagon cuts, mat the hexagons onto a piece of paper in a football pattern and cut out a 135mm circle. Mat onto the card with foam tape. 4 Add faux stitching with the fine liner to the sentiment shirt cut. Add faux stitching with the white pen to the collar cut and mat onto the shirt. Mat the white shirt onto the black with foam tape, then onto the grunge shirt with foam tape. Mat onto the card with foam tape. 5 Add faux stitching around the edge of the small sentiment circle and mat onto the card with foam tape. What you’ll need: • 32-03-Nested Shirt SVG files • White cardstock • Black cardstock • Black fine liner • White gel pen ------------------------------------------- NESTED SHIRT ---------------------------------------------46 | www.tatteredlace.co.uk CLICK HERE TO DOWNLOAD YOUR SVG CONTENT PROJECT 32


1Open up the draw files on your machine. Add your cut files to the cutting mat and place over your draw files and save the file to the machine. Delete the cut files. 2 Select the draw file you want to colour in then select the "Access All Areas" button. 3 With the draw file still selected, select the "Colour In" button. This will change your draw image from an outline to a solid. 4 Repeat this for any other sentiments that you want to colour in. ----------------------------------- HOW TO - COLOUR IN A DRAW FILE ----------------------------------HOW TO... 1 25 36 47 8 COLOUR IN A DRAW FILE Did you know that you can colour in the draw sentiments on your Here'smachines?howyou do it! 5 Press ok to go back to the main screen and press ok again. 6 Select the "Draw" button to draw the sentiments. 7 The machine will now draw and colour in the sentiments that have been changed to colour in and just draw the ones that have been left. 8 Open up the saved file from step one but this time delete the draw files and keep the cut files. Cut the files to cut out the sentiments. www.tatteredlace.co.uk | 47


741 852 963 1 Open up the Dinosaur charisma file on your machine. 2 Select the outline and delete from the cutting mat so you are left with just the dinosaurs. 3 Start to spread the dinosaurs out across the mat. Select the "Access All Areas" button and randomly change the sizes of the dinosaurs. 4 Duplicate some of the dinosaurs to fill up the cutting mat. 5 Press the "Select All" button and move you files into the middle of the mat. 6 Once you are happy with the layout of your dinosaurs, select "OK" and "Cut." 7 Place the stencil onto your cardstock and start to ink with your chosen colour. 8 Continue until you have inked all areas of the stencil. 9 Remove the stencil to reveal your inked background design. HOW TO... CREATE A STENCILLED 48 | www.tatteredlace.co.uk


161310 171411 181512 10 Open up your chosen draw files on your machine. 11 Select each sentiment individually and increase the number to duplicate them. 12 Start to spread out the sentiments and rotate some using the 90° button. 13 Randomly angle other sentiments using the 10° button. 14 Zoom in to the mat to make sure the sentiments are evenly spaced. 15 Once you are happy with the layout of your dinosaurs, select "OK." 16 Select the "Draw" button to draw the sentiments. 17 You will notice the sentiments on the machine turn blue, and then press the play button. 18 Remove the mat from the machine to reveal your background design. DINOSAUR BACKGROUND www.tatteredlace.co.uk | 49


Summer ----------------------------------------- TEMPLATE PROJECT -------------------------------------------CLICK HERE TO DOWNLOAD YOUR SVG CONTENT PROJECT 33 50 | www.tatteredlace.co.uk
Beach House


97531 1086421 Cut all the pieces needed to create the project as listed below; From SVG downloads: •From beige cardstock: - 1 x SBH-Roof Pieces - 1 x SBH-Roof Trim • From brown cardstock: - 1 x SBH-Window Sill • From blue cardstock: - 1 x SBH-Door • From silver mirror cardstock: - 1 x SBH-Windows • From backing paper: - 1 x SBH-Box Base 1 - 1 x SBH-Box Base 2 • From charisma: - 1 x Charisma 2 Fold on the score lines of the box base pieces and attach the two pieces together using the tab. 3 Glue the folds of the box as shown in the image to create the roof overhang. 4 Fold up the box and secure together using the tab. Close up the roof and secure together using the tab. 5 Start to layer up five of the roof pieces onto one side of the roof. Put a strip of foam tape towards the bottom of the roof piece to raise it up. 6 Continue until you get to the top and then repeat the same on the other side of the roof. 7 Fold the roof piece in half and mat onto the top of the roof to hide the join. 8 Mat the window and window sills onto either side of house. 9 Add a split pin as a door knob. Mat the door onto the front of the house. Add foam tape under one side so it looks like the door is ajar. 10Using the Tropical Leaves and Flowers, decorate the house as desired. Fill the box with treats and give as a gift! What you’ll need: • 33-01-Summer Beach House SVG files • Beige cardstock • Brown cardstock • Blue cardstock • Silver mirror cardstock • Split pin ----------------------------------------- TEMPLATE PROJECT -------------------------------------------www.tatteredlace.co.uk | 51


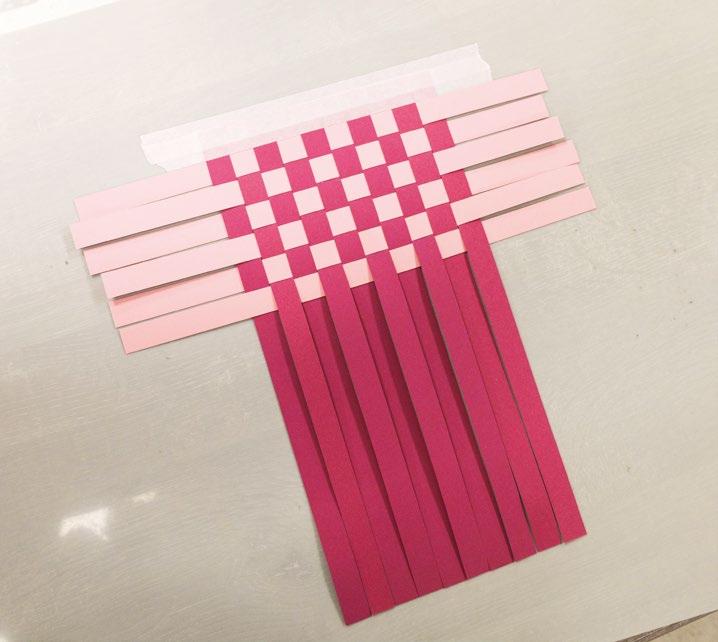
----------------------------- HOW TO - STAMP WITH EMBOSSING POWDER -------------------------------1 Cut strips of your chosen cardstock. You can use the same colour cardstock or different colours. This How-To use strips that are 1.5cm wide. 2 Lay your strips onto your work surface and secure along the top with low-tack tape. Continue until you reach the desired length of your background. 3 Start to weave your other cardstock strips through the vertical strips going under one and over the other. 4 Continue with your strips making sure to push the strips up as close you can to the strip above. HOW TO... 741 2 3 85 96 CREATE A BACKGROUNDWOVEN 5 Repeat until you have weaved as many strips as you used vertically if you are wanting a square background. 6 Secure the strips in place with tape before removing the tape securing it to your work surface. 7 Trim off the excess from the end of the strips to complete the mat. 8 Try this effect with printed backgrounds by printing one in colour and one in black and white. 9 Repeat the steps to create a woven checkerboard effect. 52 | www.tatteredlace.co.uk


Glitter Border WAYS WITH...
6
To create glitter cardstock simply cut your cardstock to size, cover the cardstock with spray adhesive and place face down in a tray of glitter. This is a cheaper alternative to buying glitter cardstock. After cutting your cardstock to size, start placing strips of red liner tape horizontally across the cardstock. It helps the plaid effect if you use different thicknesses of tape. Remove the tape backing before placing strips of tape vertically across the cardstock. Remove the tape backing and place face down in a tray of glitter. Turn over and shake off any excess. If you are going to layer another piece of cardstock onto your glittered cardstock you could save on glitter by just glittering the edges. Place red liner tape along the edges of the cardstock. Remove the backing and place face down in a tray of glitter. Turn over and shake off any excess.
54 | www.tatteredlace.co.uk
Full PlaidGlitterGlitter


Using a Circle basic shape, cut circles into a piece of cardstock bigger than the one you want to glitter. Place the stencil over your cardstock. Spray adhesive over the stencil. Remove the stencil to reveal glue in the uncovered areas. Place face down into a tray of glitter. Turn over and shake off any excess. Try this with other basic shapes. Using white glue, squeeze wiggly lines onto your cardstock or cuts. Place the cardstock on a large piece of card to collect the glitter, and cover the glue areas with glitter. Use plenty as you can tip what doesn’t stick back into the tray. Pick up the cardstock to shake of the excess glitter. Leave to dry. is a great way of embellishing your projects in an easy and simple way. Here are six ideas for you to try!
www.tatteredlace.co.uk | 55
Using a glue pen, write your chosen wording onto your cardstock. While the glue looks clear it is still tacky but work as quick as you can. Place face down in a tray of glitter. Turn over to reveal your glittered words.
Glitter Snow Glitter Glitter!
Glitter
Glitter StencillingWritingwith


COLUMN The team over at Tattered Lace HQ have given me a page to keep you up to date with me and my crafty antics. So keep an eye out and I’ll be here for a general chit chat, to answer any questions you might have or to share any projects with you that I’ve been working on! Hi HopeCrafters,you’ve all been enjoying the warm weather we continue to be having. I’ve been enjoying time in the garden and fitting in crafting where I can but, I have been a little distracted! As you can see from my photo in this issue, I am now Nanny Nancy! My daughter Cat and her husband Dave welcomed a perfect little boy called Noah. I am overjoyed at last to be a Nanny and my little grandson is amazing, beautiful and everything I hoped for! Mummy and Daddy are coping really well with parenthood and Mummy is glowing. On another note, back to crafting! When I saw the new dies for this issue I coudn’t resist these gorgeous flowers, they’re so summery! • 34-01-Nancy’s Project SVG files • White cardstock 1 Cut all the pieces needed to create the project as listed below; This is me in the hospital meeting my baby Grandson for the very first time! Such a special magical moment! Dave, Cat, Noah &Guard Dog Bella! • Green cardstock • Blue cardstockFloral Frame From SVG downloads: • From green cardstock: - 1 x NP-1-Frame 1 • From backing paper: - 1 x NP-1-Frame 2 (floral download) • From charisma: - 1 x NP-1-Charisma From machine memory: • From white cardstock: - 2 x 160mm square • From green cardstock: - 1 x 150mm square • From blue cardstock: - 1 x 140mm square 2 On one of the white squares, measure in 10mm from the edge and score and fold to create a tab. Attach to the other square using the tab to create a tent card. Mat the blue square onto the green square and mat onto the card. 3 Mat the green frame behind the floral frame and mat onto the card with foam tape. 4 Shape the floral and leaf cuts and mat onto the card around and into the frame with foam tape. CLICK HERE TO DOWNLOAD YOUR SVG CONTENT PROJECT 34 56 | www.tatteredlace.co.uk


CLICK HERE TO DOWNLOAD YOUR SVG CLICKCONTENT HERE TO DOWNLOAD YOUR SVG CONTENT PROJECT 35 PROJECT 36 www.tatteredlace.co.uk | 57
1 Cut all the pieces needed to create the project as listed below; • 35-02-Nancy’s Project SVG files • 36-03-Nancy’s Project SVG files Hope you all enjoyed hearing what I have been getting up to lately. If there are any questions you have, send an email to info@tatteredlace.co.uk and we might get them answered in the next issue! Until next time!• White cardstock • Green cardstock • White cardstock • Green cardstockJust For You Thanks A Bunch From SVG downloads: • From charisma: - 1 x NP-2-Charisma From machine memory: • From white cardstock: - 2 x 120mm x 140mm -rectangle1x110mm x 55mm rectangle - 1 x 29mm circle (with sentiment draw file) • From green cardstock: - 1 x 115mm x 135mm -rectangle1x34mm circle • From backing paper: - 1 x 110mm x 130mm rectangle (leaf download) 2 On one of the large white rectangles, measure down 10mm from the top edge and score and fold to create a tab. Attach to the other rectangle using the tab to create a tent card. 3 Mat the leaf rectangle onto the green rectangle and mat onto the card with foam tape. Mat the small white rectangle onto the card with foam tape. 4 Shape the floral and leaf cuts and mat onto the card with foam tape. 5 Mat the sentiment circle onto the green circle and mat onto the card with foam tape. 1 Cut all the pieces needed to create the project as listed below; From SVG downloads: • From charisma: - 1 x NP-3-Charisma From machine memory: • From white cardstock: - 2 x 120mm x 155mm -rectangle1x48mm circle (with sentiment draw file) • From green cardstock: - 1 x 297mm x 115mm -rectangle1x53mm circle • From backing paper: - 1 x 110mm x 140mm rectangle (leaf download) - 1 x 110mm x 67mm rectangle (leaf download) 2
3
4
On one of the white rectangles, measure down 10mm from the top edge and score and fold to create a tab. Attach to the other rectangle using the tab to create a tent card. On the large green rectangle, from the bottom edge, measure up at 7.3cm and 14.7cm and score and fold. Mat the larger leaf rectangle onto the back of the folded rectangle and the smaller leaf rectangle onto the front fold. Mat the folded rectangle onto the front of the card. Mat the sentiment circle onto the green circle and mat onto the card with foam tape. Shape the floral and leaf cuts and mat onto the card with foam tape.
5
6


ink pad. 6
powder. 7
will
9
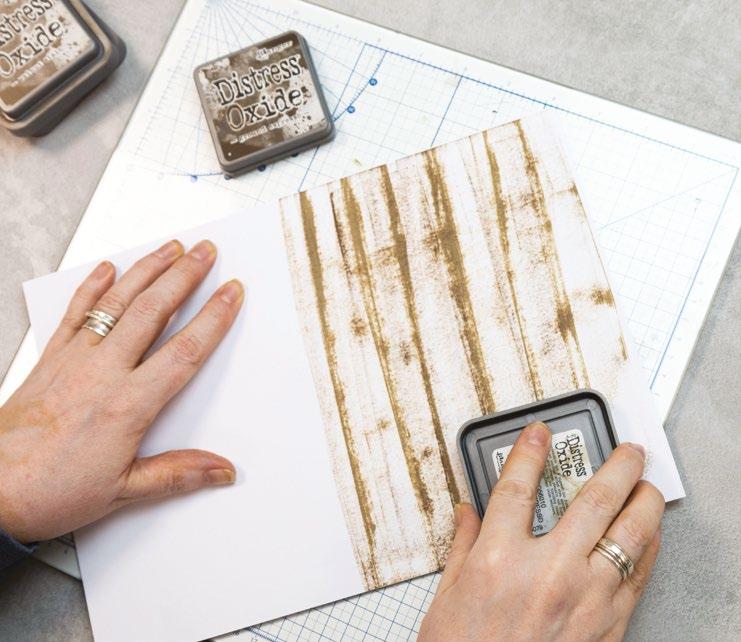
----------------------------- HOW TO - STAMP WITH EMBOSSING POWDER -------------------------------1 Using a Frayed Burlap Ink pad, drag the ink pad from the top of the cardstock to the bottom without pressing on too hard. 2 Repeat the same step with Ground Espresso. By not pressing too hard you are just letting the ink transfer where it touches. 3 Continue the process with Walnut Stain making sure to drag from the top to the bottom. 4 Finish off the technique with Brushed Corduroy. This can now be trimmed to size and used a faux wood grain background. HOW TO... 741 2 3 85 96 CREATE A FAUX WOOD GRAIN BACKGROUND
cardstock
pad. 8
Another technique is too drag down your with a sticky Cover the cardstock with gold metallic embossing Shake off the excess powder and then what is left stick to the sticky ink Using a heat gun, warm up the heat gun before taking it to the paper. Heat the embossing powder until completely melted and glossy. This can now be trimmed to size and used a
5
backing paper. 58 | www.tatteredlace.co.uk


£100 MYSTERY BOX CANVAS WORKSPACE £50 VOUCHER 1 LUCKY WINNER WILL WIN £50 TO SPEND ON ANY PRODUCT WWW.TATTEREDLACE.COMAT 2 X WINNERS OF MYSTERY BOX WORTH £100 10 X WINNERS OF CANVASPACE VOL.1 WITHHEATONMEL 2 LUCKY WINNERS WILL WIN A MYSTERY BOX FILLED WITH CRAFTY ITEMS AND PRODUCTS FROM A VARIETY OF BRANDS! CONTENTS OF EACH BOX WILL VARY! Please visit www.tatteredlace.co.uk, click MAGAZINE GIVEAWAY and follow the instructions. Please use code CANVAS20 to enter the competition online. HOW TO ENTER CLOSING DATE: Entries from Issue 19 will end on 31/12/22. The winners will be contacted by phone/email and will also be announced on Tattered Lace® Facebook and Tattered Lace® website the following week. Join Mel as she teaches everythingyoushehaslearnedsofarinthewebappversionofCanvasWorkspace.


