







PROJECTS & IDEAS TO TRY!!! OVER YOUR EXCLUSIVE GIFT! 40 6 STUNNING PROJECTS TO MAKE WITH YOUR EXCLUSIVE GIFT! 20 COMPLIMENTARY DESIGNS INSPIRATION...CREATING BACKGROUND WITH INK PADS TOP TIPS FOR USING DECOUPAGE ENAMEL & GLAZE DROPS INSPIRATION • INFORMATION • EDUCATION Issue 23 DIGITAL
Hi Crafters,
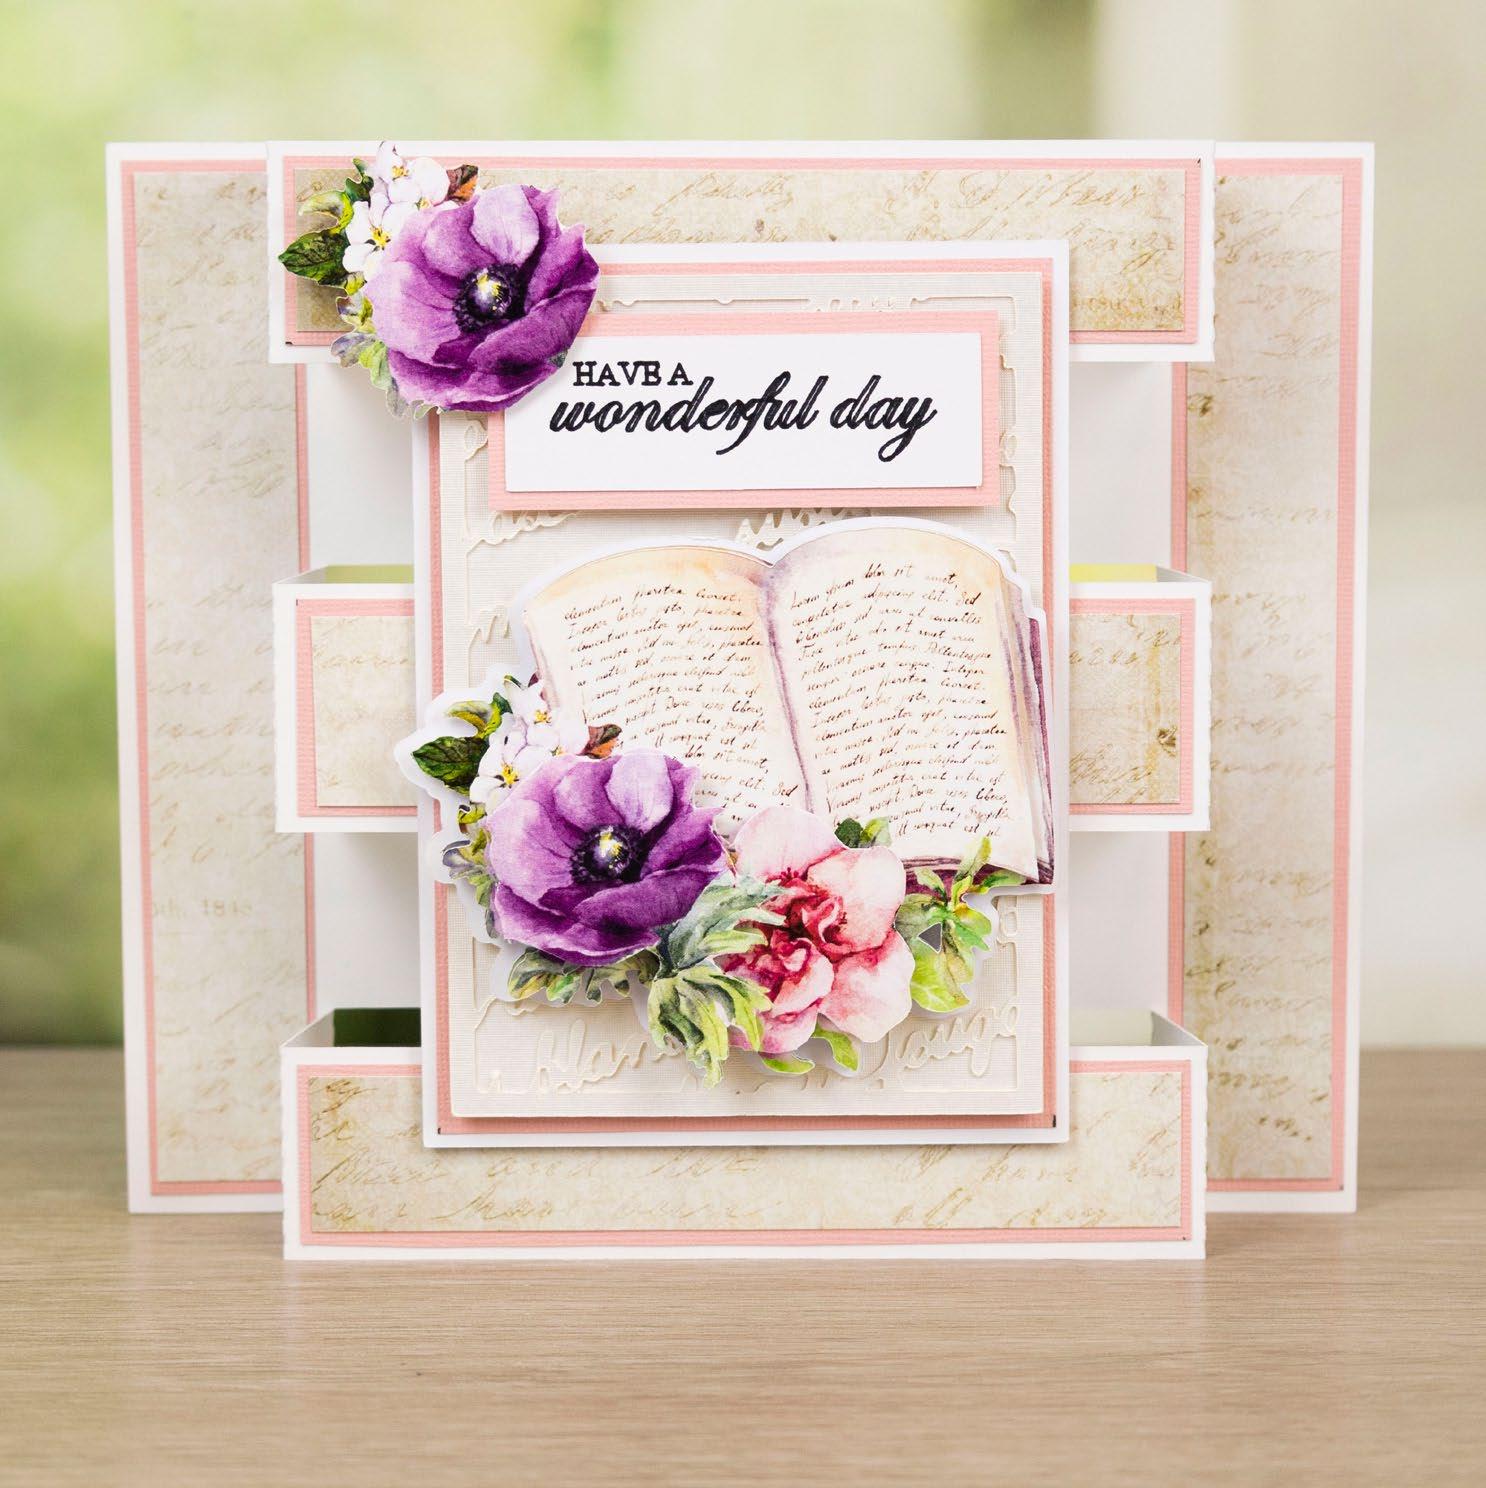
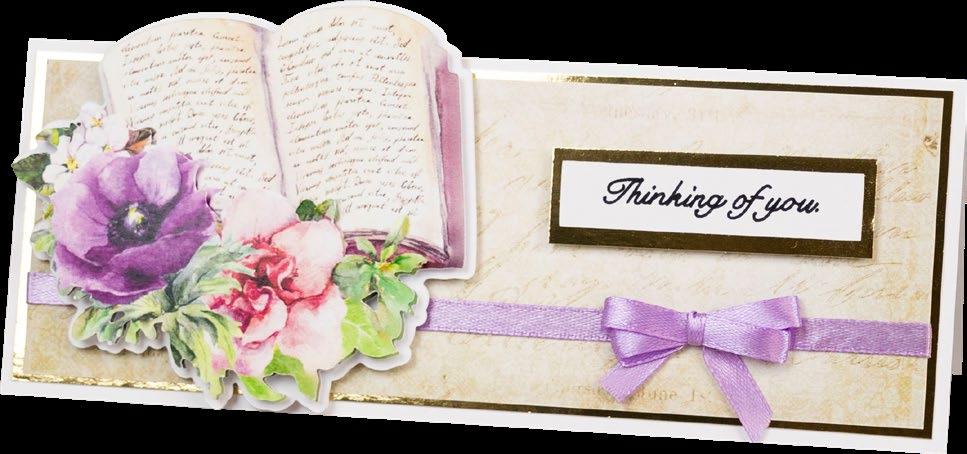
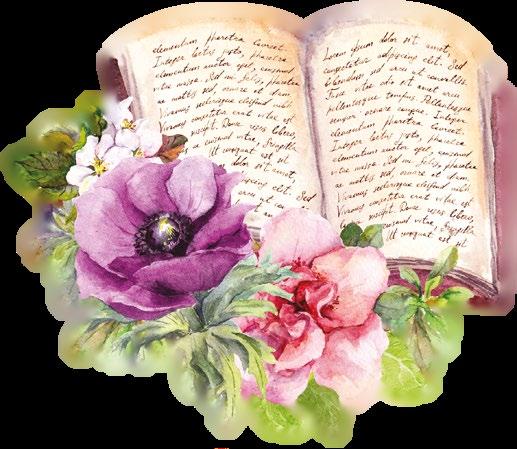
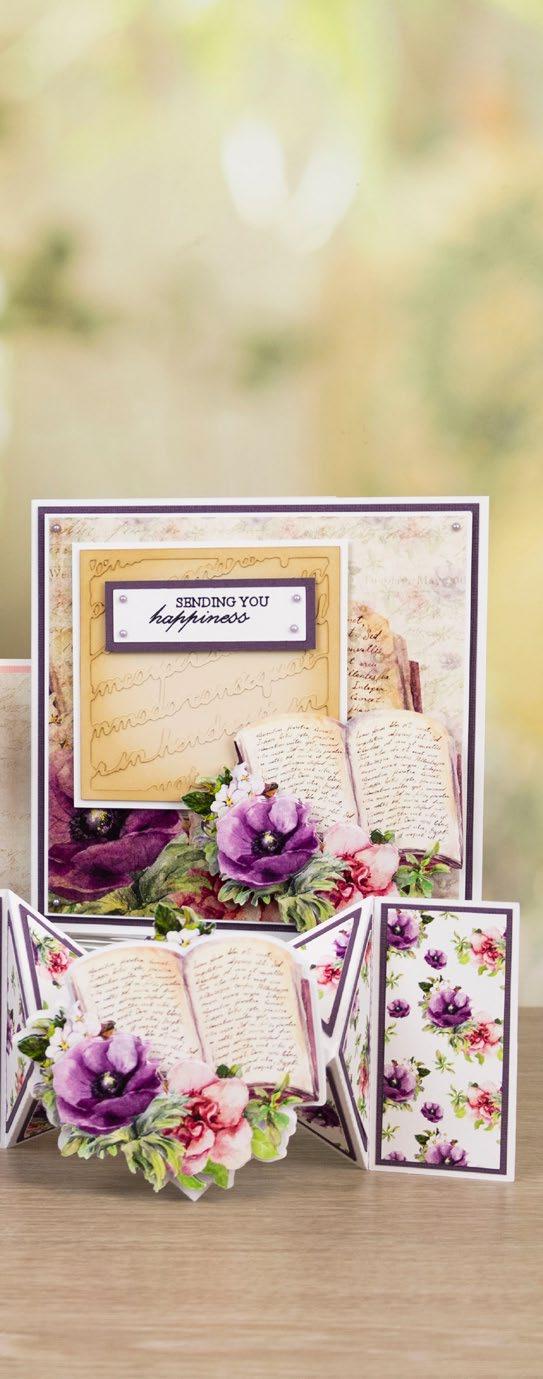
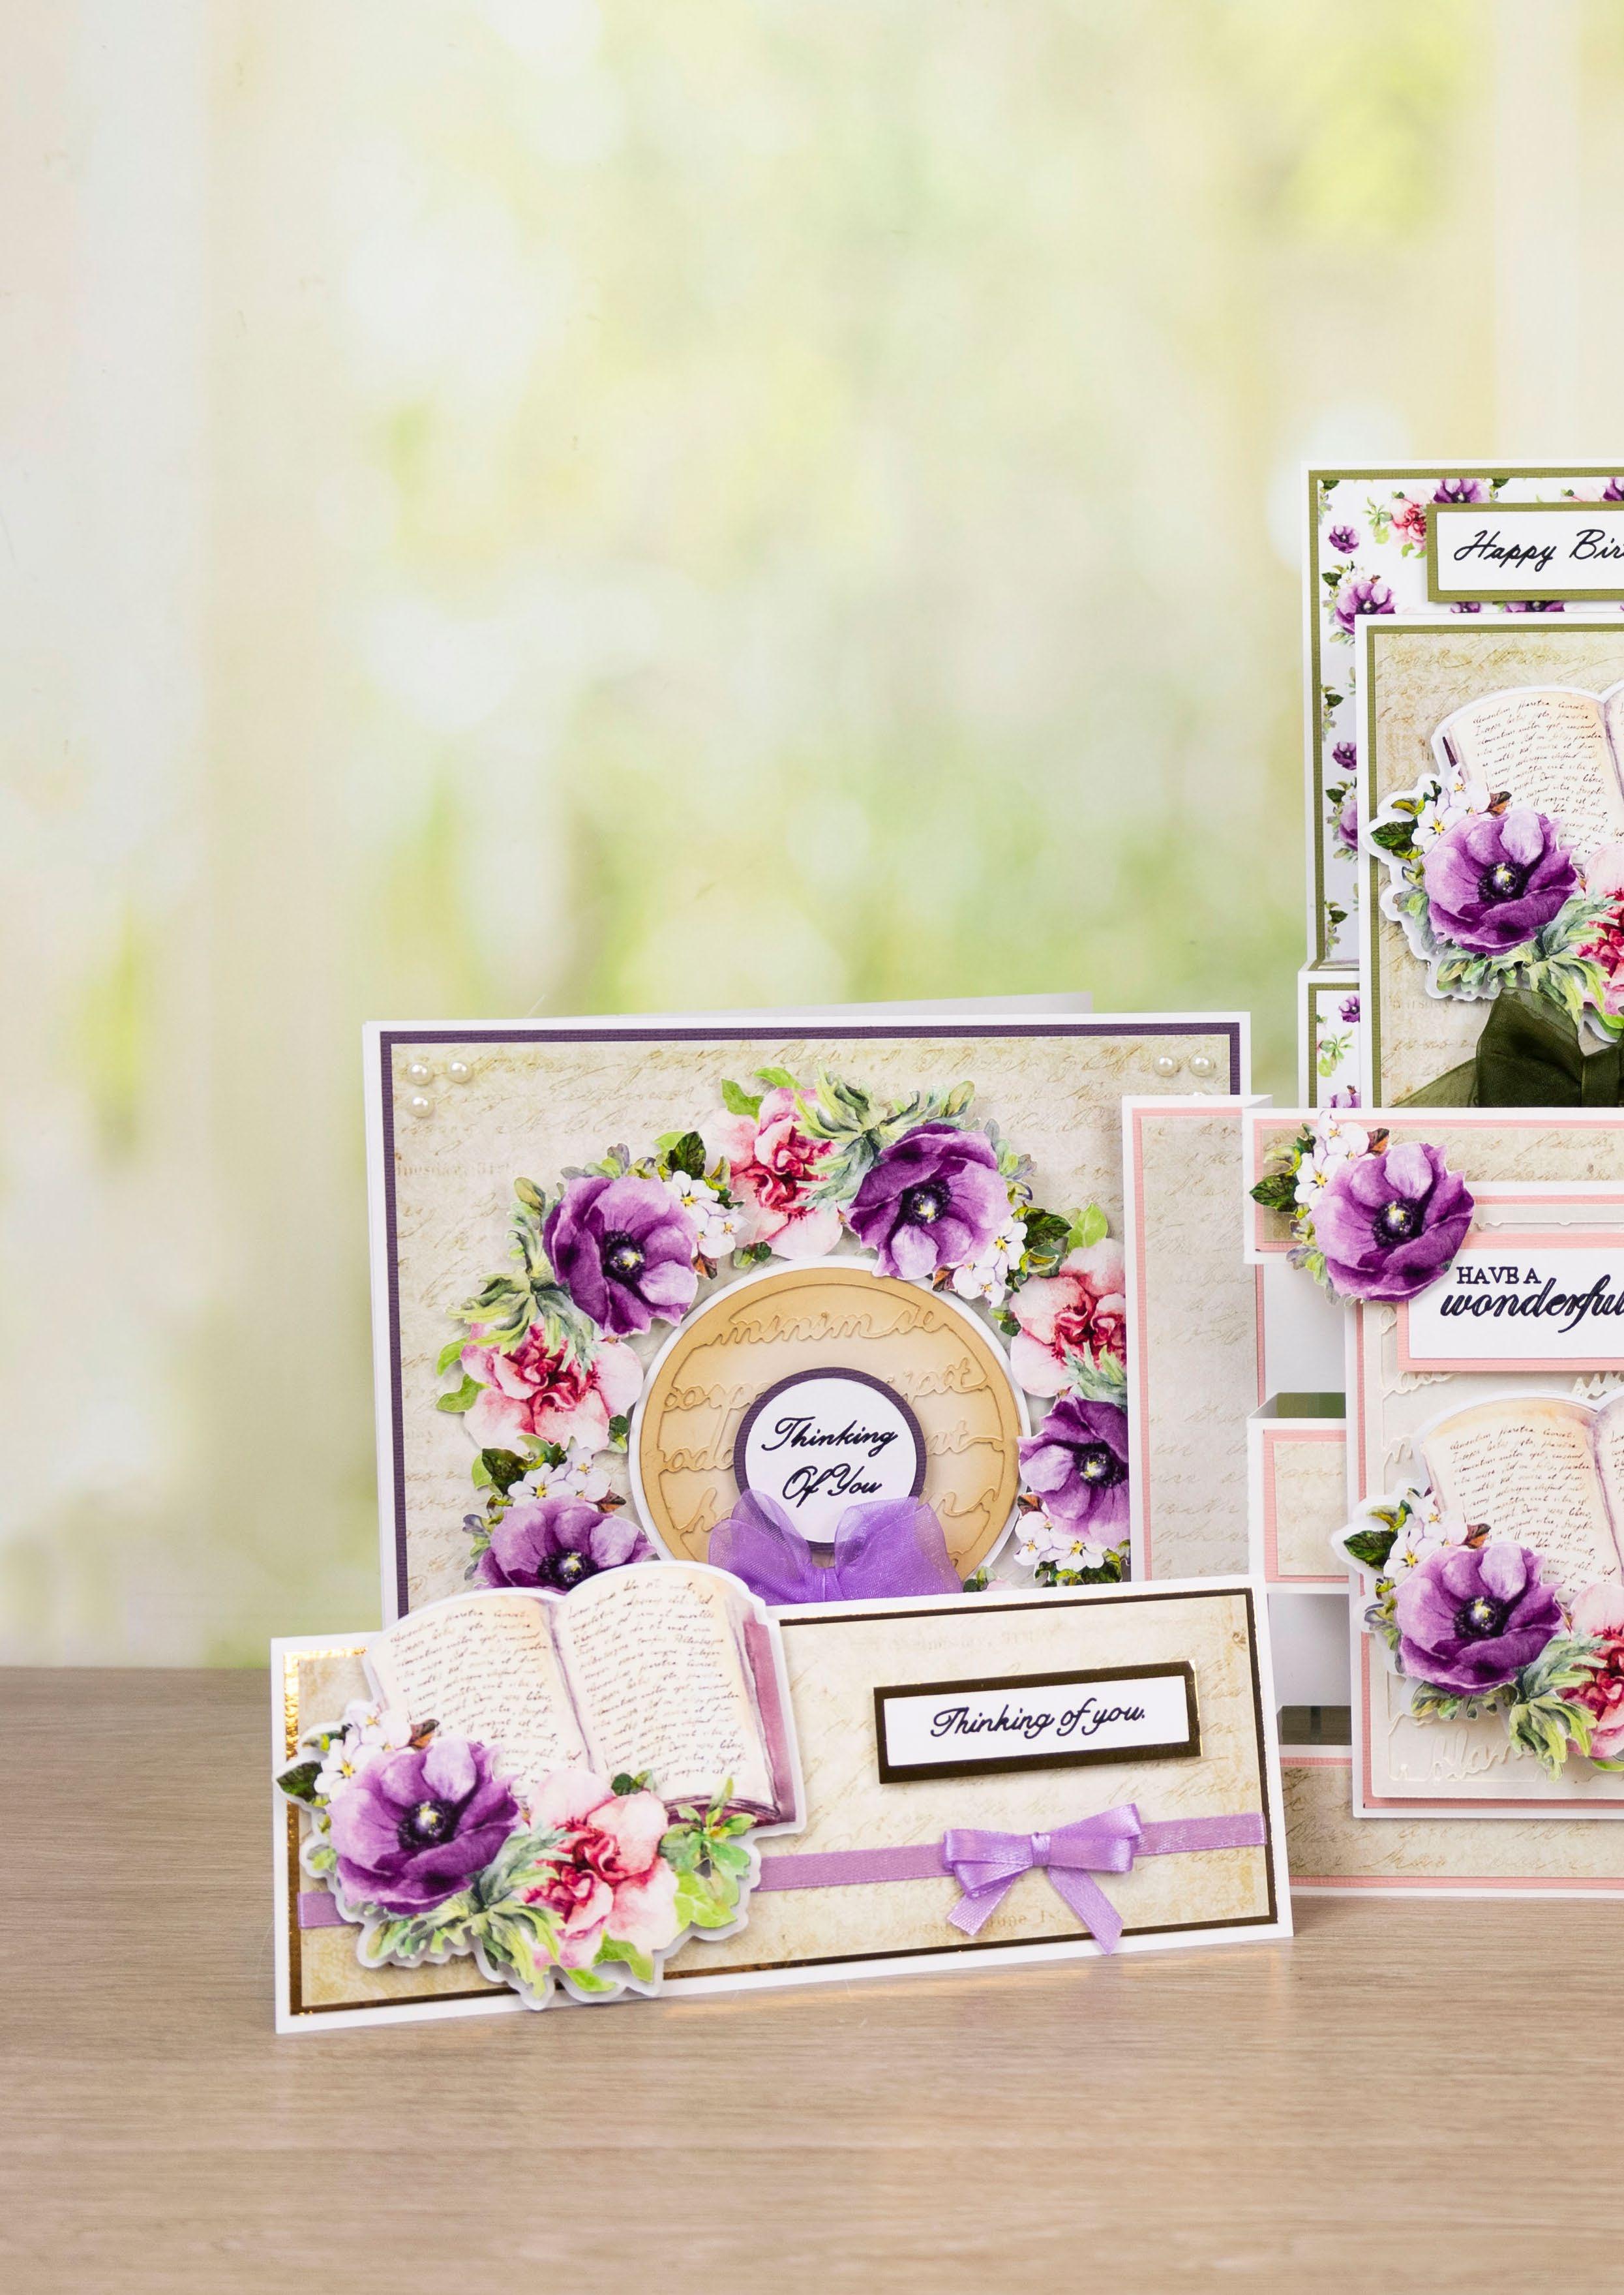
Welcome to another brilliant issue of Tattered Lace. We start this issue off with the beautiful Floral Book SVG and Script stencil. This SVG and stencil work perfectly together to create toppers for greetings cards for the book lovers in your life.
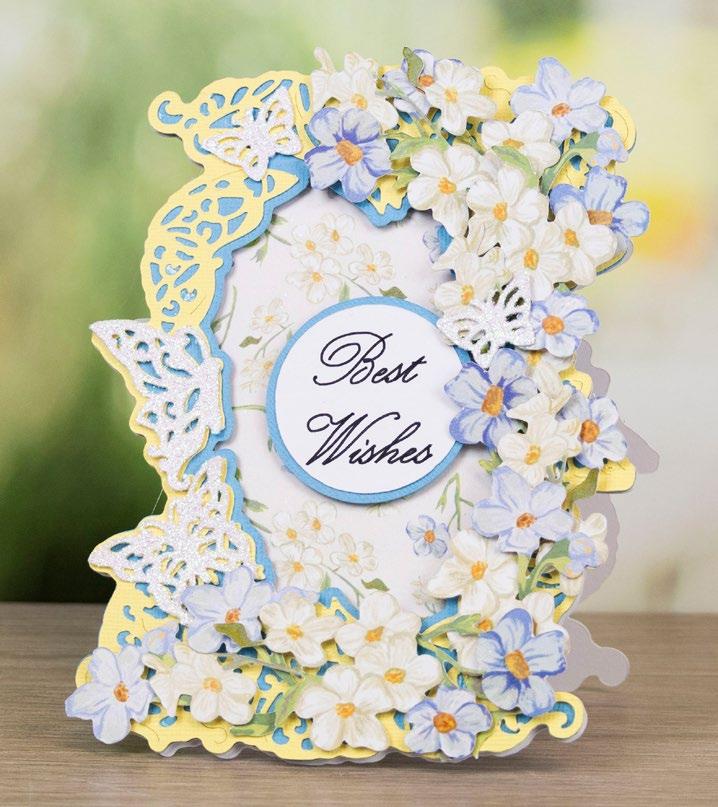
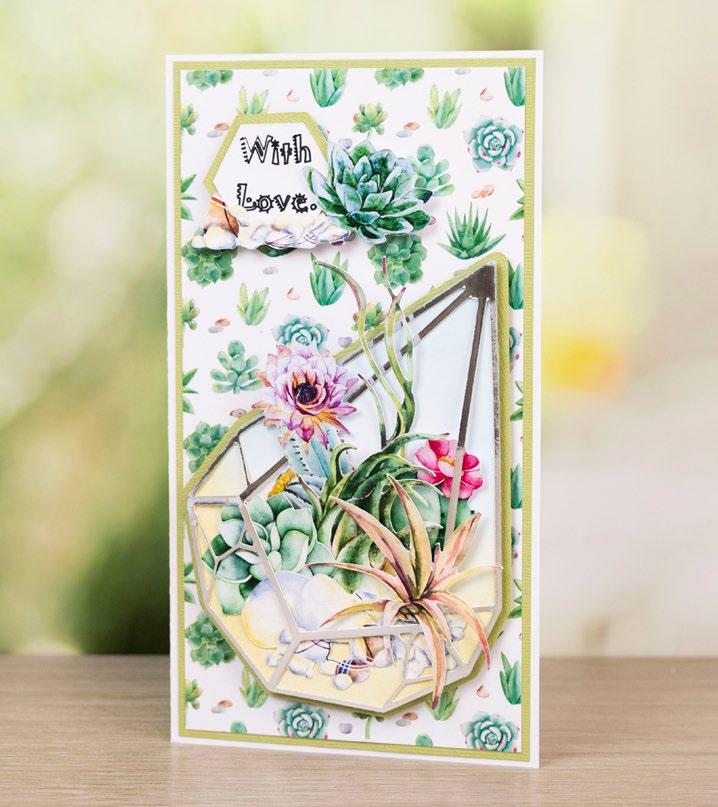
In this issue we're featuring the Butterfly Bliss collection. With pretty florals and butterfly frames, there's all the elements you need to create stunning cards. Also you'll find the Everlasting Tranquillity collection, full of the most colourful succulents. This is a bit of a twist on your standard Tattered Lace collection but there is so much you can do with these SVG sets.
David Wait has taken the Terrarium SVG and shown you a way to make it 3D so you can really build up those layers.
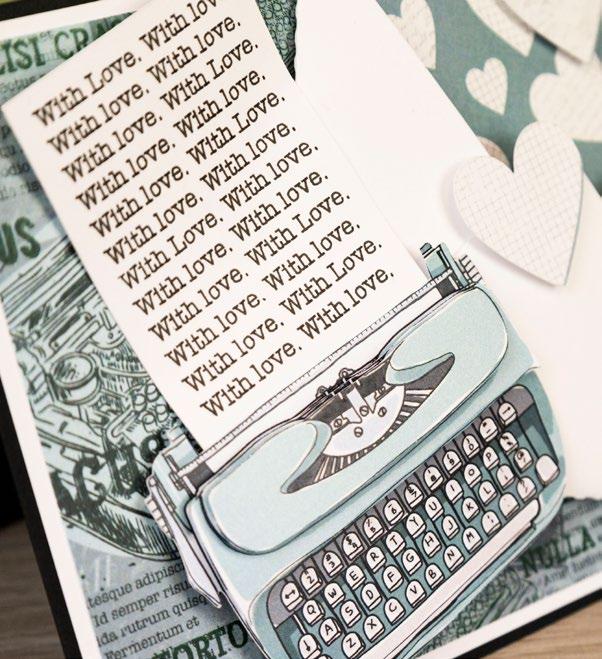
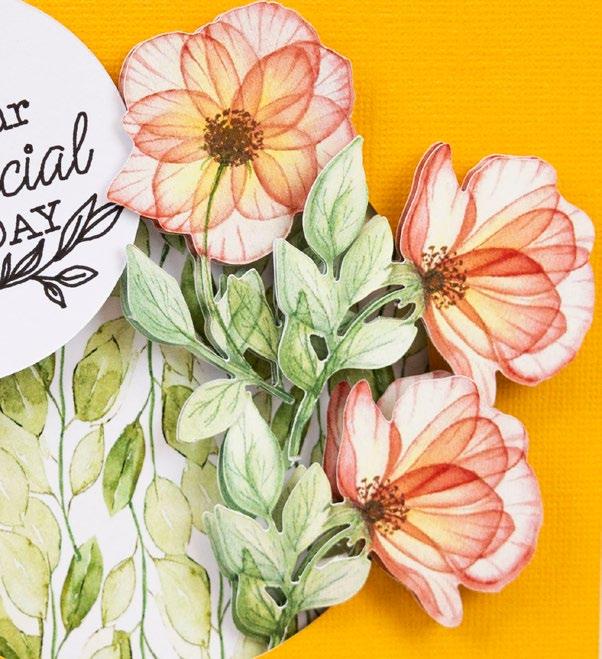
For your exclusive SVGs for issue 23 we have included a great selection of versatile designs that are perfect for all occasions, including a Pressed Flower SVG set, a Beautiful Accents feather SVG, a fabulous hot air balloon; Enjoy The Ride, a Quirky Typewriter, AND we've got our gorgeous Dainty Mouse! She's the perfect companion for our Dapper Mouse from issue 17! There's also some great card shapes used in these cards.
We're inspiring you with ink pads and Glaze Drops in this issue, showing you some of our easiest ideas and tips for how to create backgrounds and embellish your projects. I'll leave you to get cracking!
4-13
EXCLUSIVE GIFT: FLORAL BOOK
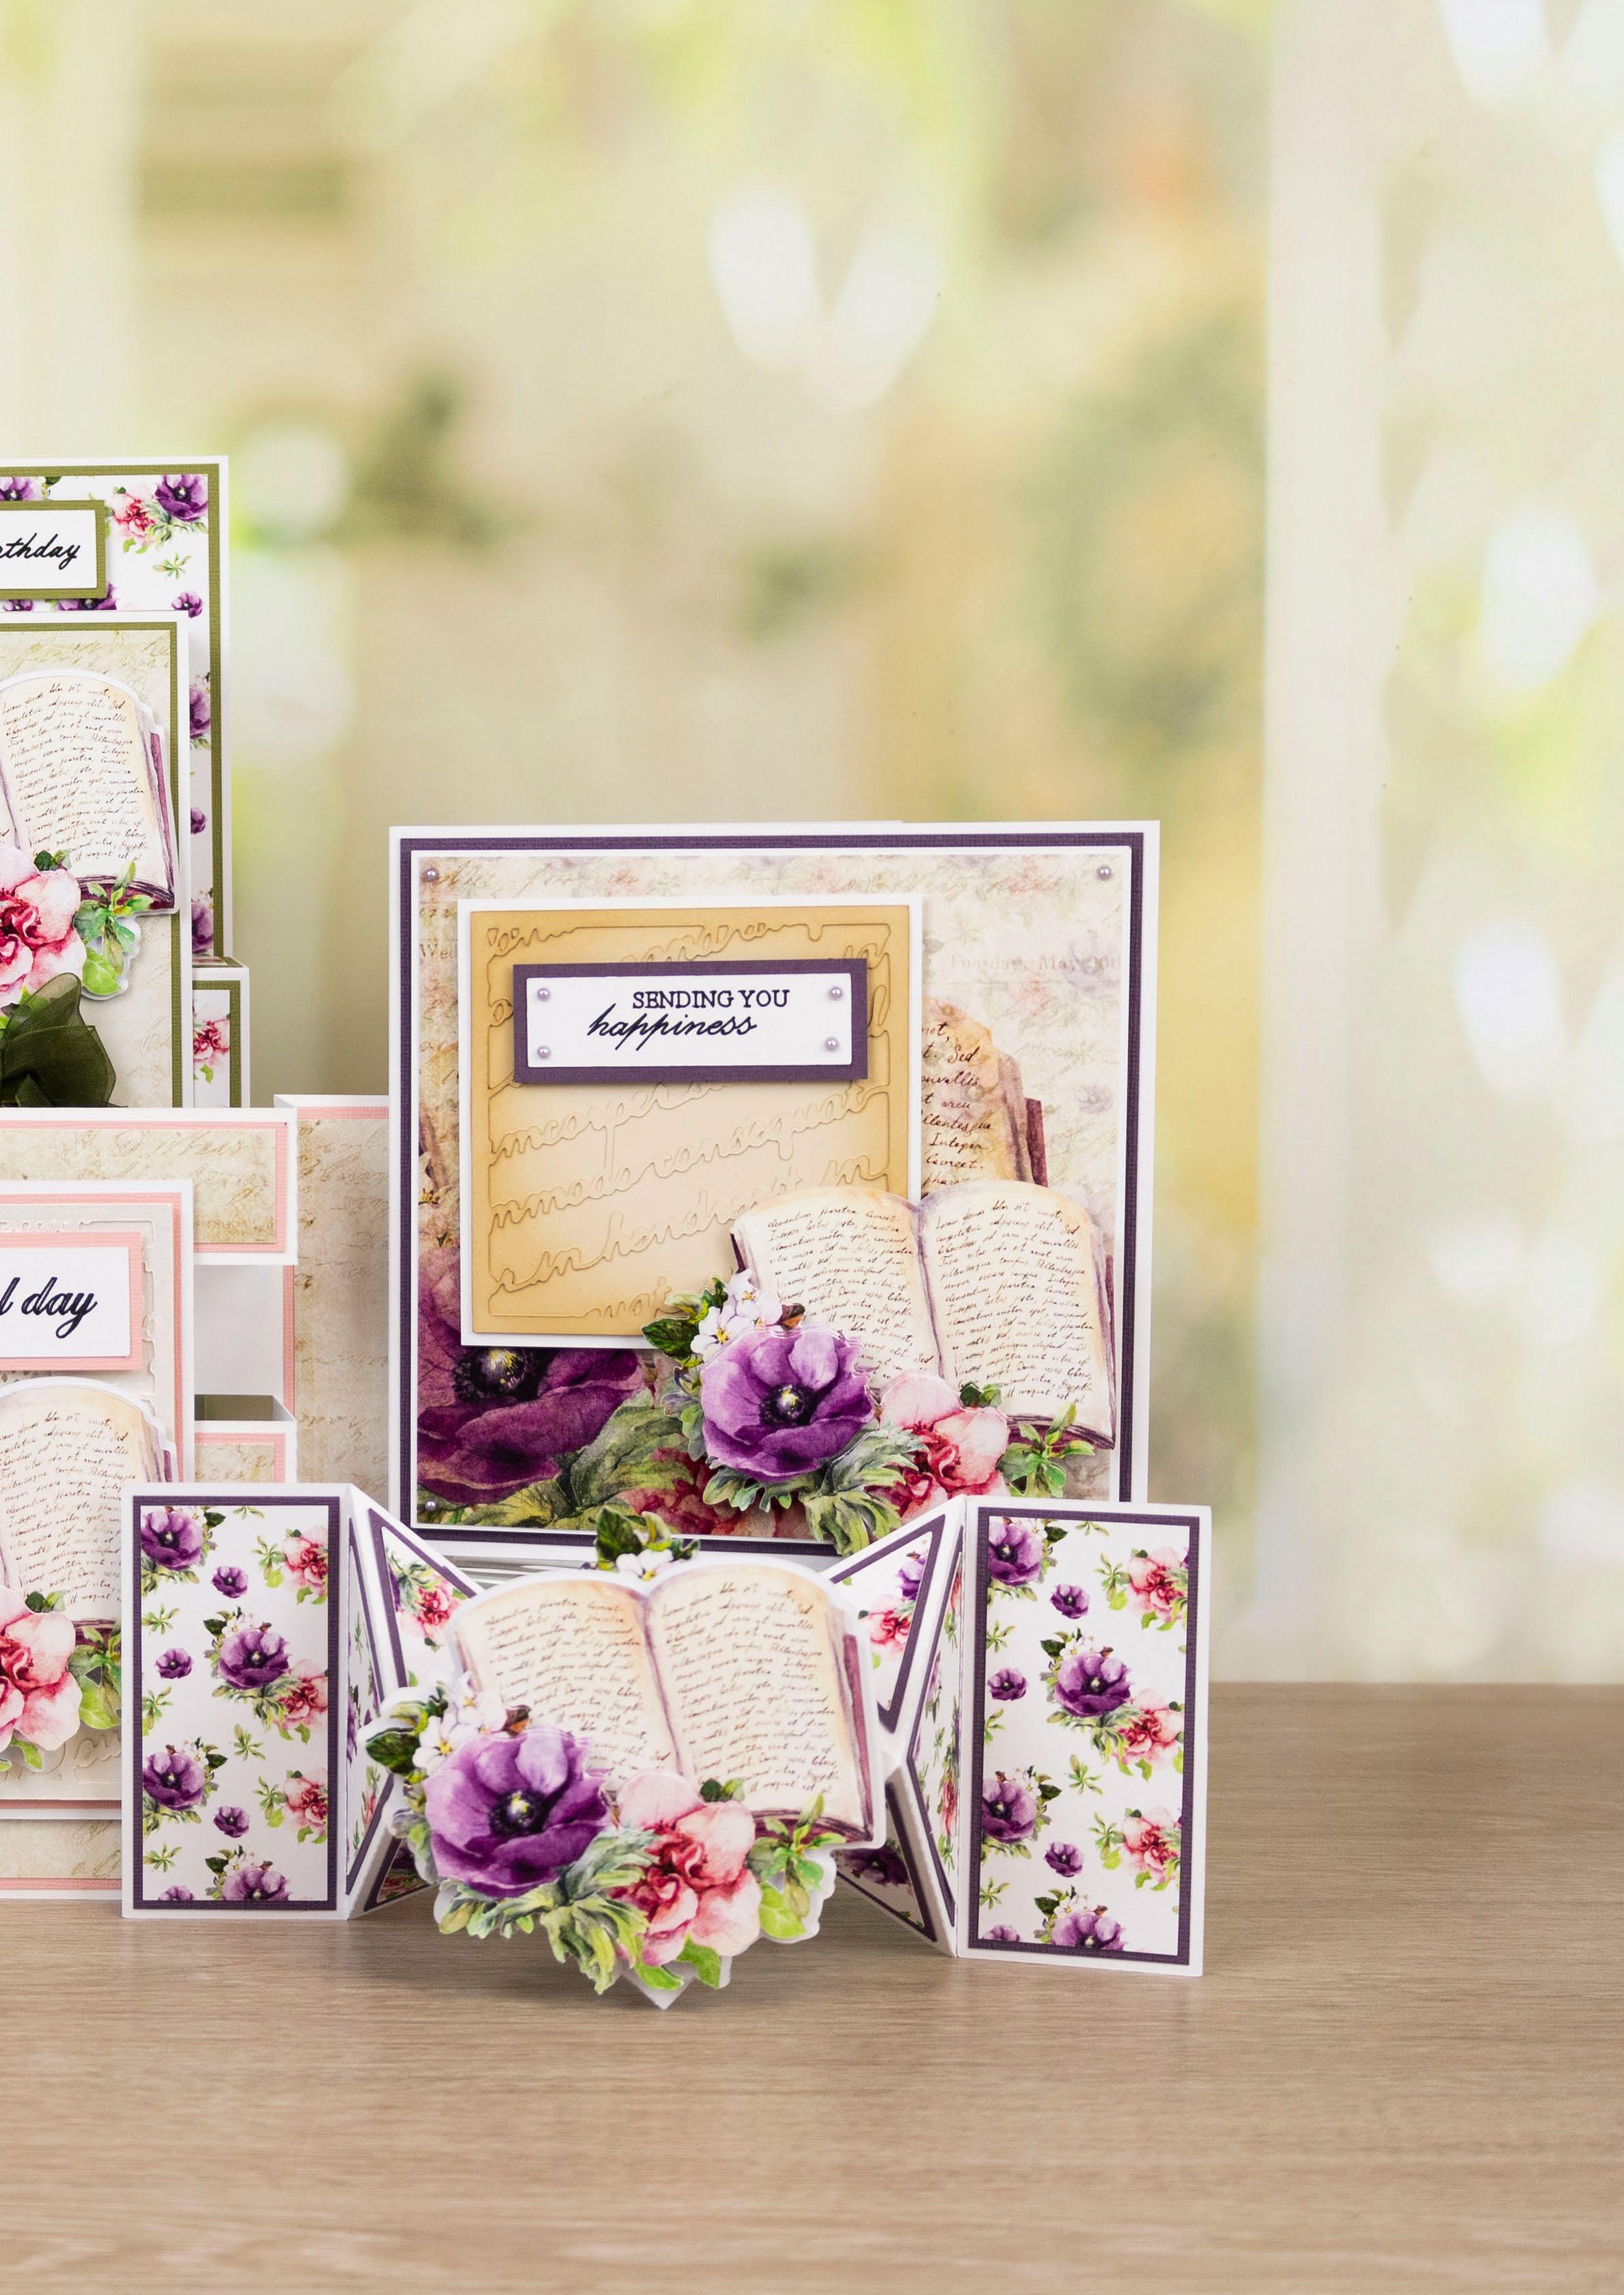
6 projects using your exclusive Floral Book SVG & stencil.
14-17 PROJECTS: BUTTERFLY
BLISS

Beautiful florals and butterfly cards inspired by a TL web exclusive.

18-19 SPECIAL FEATURE: DAVID'S TERRARIUM
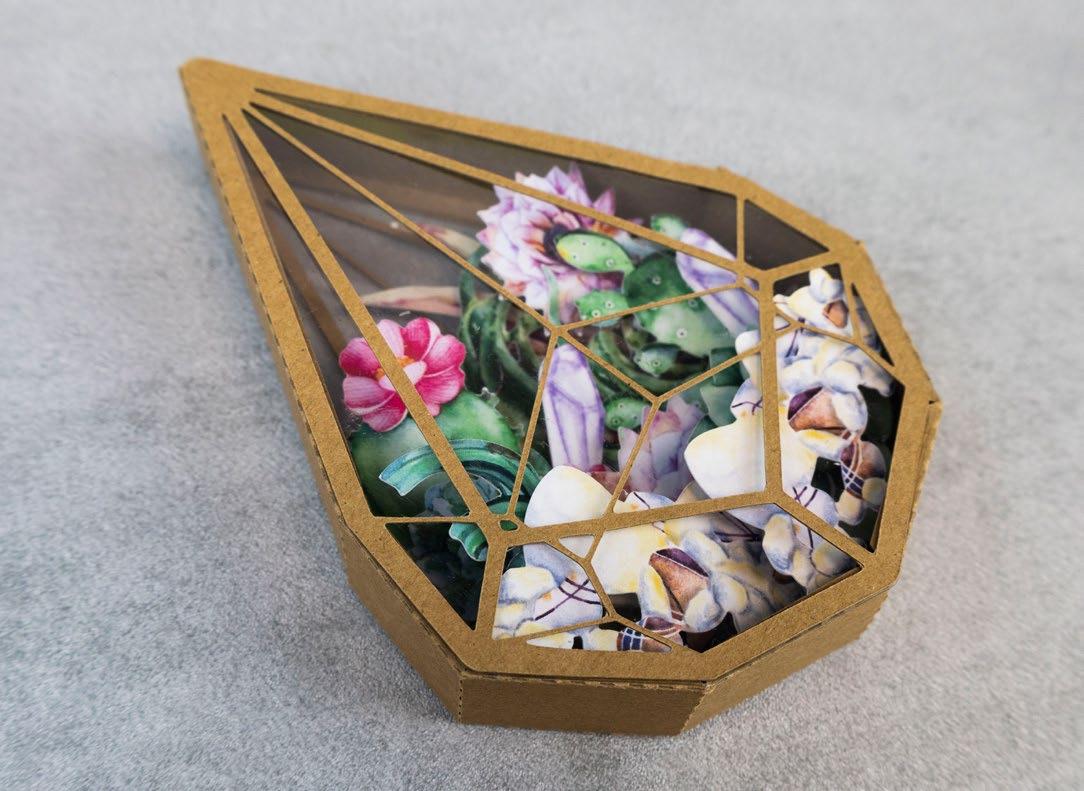
David Wait shows you how to make a 3D terrarium with the Everlasting Tranquillity collection.
20-21 SPECIAL FEATURE: LOUISE'S
22-25
GIFT BOX
Louise has made a great gift box using a simple template.
PROJECTS: EVERLASTING TRANQUILLITY
A beautifully, vibrant collection great for layering up and building dimension.
CONTENTS in this issue’s...
2 | www.tatteredlace.co.uk
ONTHE COVER!

26-27 SPECIAL
BUTTERFLY
This special card features
collections
28-29 PROJECTS: PRESSED FLOWERS Simple but stunning floral SVG files. 30-33 INSPIRATION: INKING INSPIRATION Some easy ideas and tips for creating backgrounds with ink pads. 34-38 PROJECTS: ENJOY THE RIDE The cute SVG set is perfect for new baby or baby shower cards. 40-41 PROJECTS:
A colourful feather
lovely
any card. 42-46 PROJECTS: DAINTY MOUSE Remember Dapper Mouse? Well we've made him a friend! 47-51 PROJECTS: QUIRKY TYPEWRITER A lovely little SVG for sending notes of love. 52-54 INSPIRATION: INKING INSPIRATION Top tips for using Decouapge Enamel and Glaze Drops. 56-57 NANCY’S COLUMN Let’s see what Nancy has been up to lately! 58 PROJECTS: ENJOY THE RIDE A cute little hanging decoration! TATTERED LACE TEAM Managing Editor Beckie Warburton Editorial Assistant Diane Peternel Consultant Editor Nancy Watt Craft Consultant Stephanie Weightman Consultant Project Designers Louise Patten Graphic Designers Jon Peters Sam Bruce Craft Experts Stephanie Weightman Melanie Heaton David Wait Amanda Carpenter Media Manager Andrew Coates Web Developer Sean Platts MEL’S HINTS & TIPS! WHICH CARDSTOCK? Please use the guide below as an indication of which cardstock is best to use for each part of your card projects throughout this magazine. BASE CARD: 240-300GSM MAT LAYERS: 240GSM STASH FILES/CHARISMA: 120-140GSM Now that you are familiar with your machine you will find that you need to unlock the aspect ratio on the rectangle / oval to cut the shapes required for some projects. All dimensions are included in mm to give you the perfect measurements. www.tatteredlace.co.uk | 3
FEATURE:
EASEL
a good mix of the SVG
used in this magazine.
BEAUTIFUL ACCENTS
which is a
addition to
FLORAL BOOK your exclusive gift... 4 | www.tatteredlace.co.uk
INCLUDED WITH THIS ISSUE! www.tatteredlace.co.uk | 5

What you’ll need: • 01-01-Floral Book SVG files • White cardstock • Green cardstock • Construction acetate • Green ribbon ----------------------------------- EXCLUSIVE GIFT - FLORAL BOOK ---------------------------------------6 | www.tatteredlace.co.uk
1
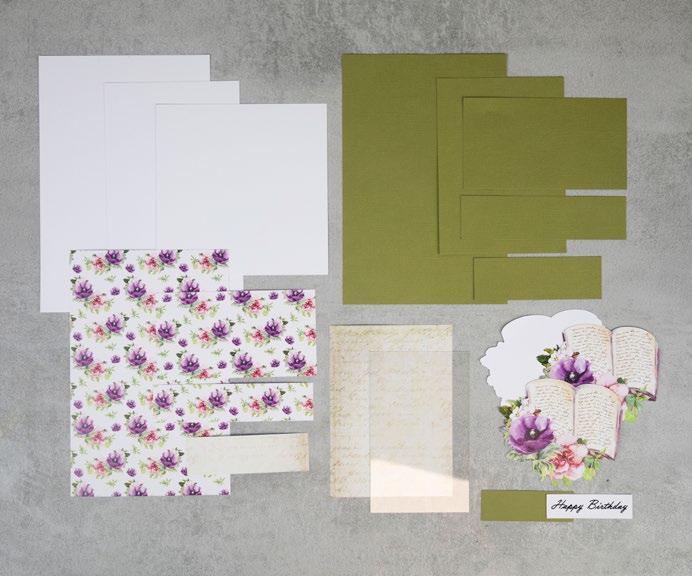
Cut all the pieces needed to create the project as listed below;
From SVG downloads:
• From white cardstock: - 1 x FB-1-Outline
• From charisma: - 1 x FB-1-Charisma
From machine memory:
• From white cardstock:
- 1 x 140mm x 210mm rectangle
- 1 x 140mm square
- 1 x 110mm x 210mm rectangle
- 1 x 70mm x 20mm rectangle (with sentiment draw file)

• From green cardstock:
- 1 x 135mm x 205mm rectangle
- 1 x 135mm x 75mm rectangle
- 1 x 135mm x 35mm rectangle
- 1 x 105mm x 35mm rectangle
- 1 x 105mm x 145mm rectangle
- 1 x 75mm x 25mm rectangle
• From backing paper: - 1 x 130mm x 200mm rectangle (flowers)
- 1 x 130mm x 70mm rectangle (flowers)

- 1 x 130mm x 30mm rectangle (flowers)
- 1 x 100mm x 30mm rectangle (script)
- 1 x 100mm x 140mm rectangle (script)
• From construction acetate: - 1 x 130mm x 80mm rectangle
Step bySteps
2
Mat the 130mm x 200mm flowers rectangle onto the 135mm x 205mm green rectangle and mat onto the 140mm x 210mm white rectangle. This is the card back.
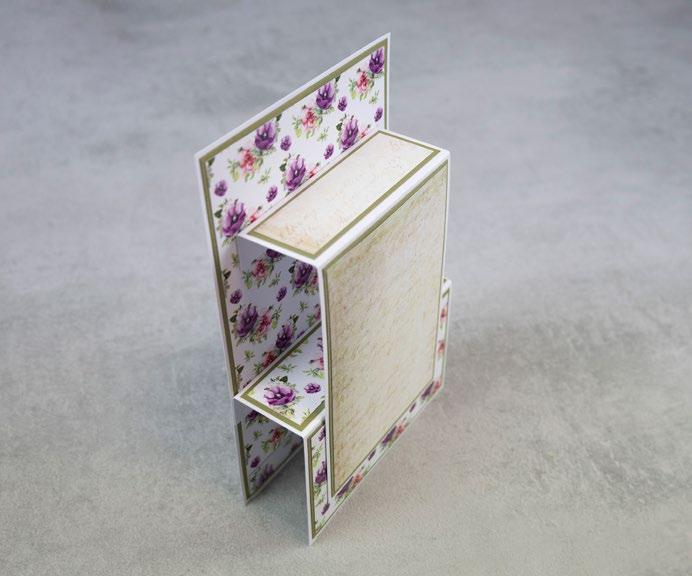
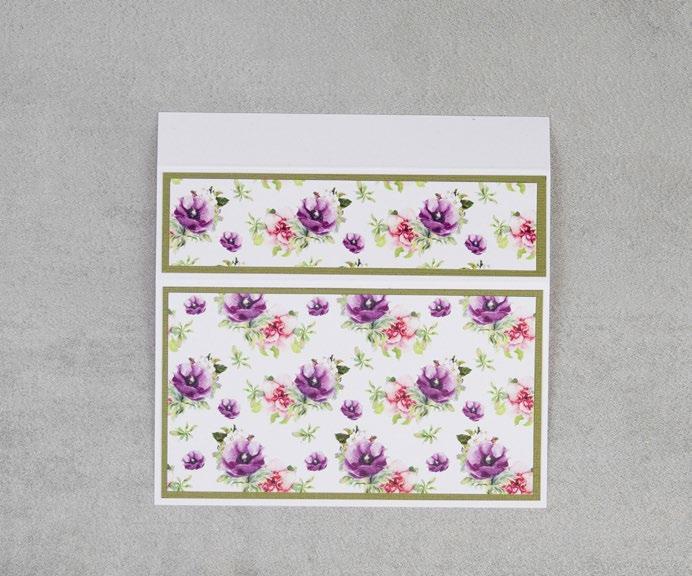
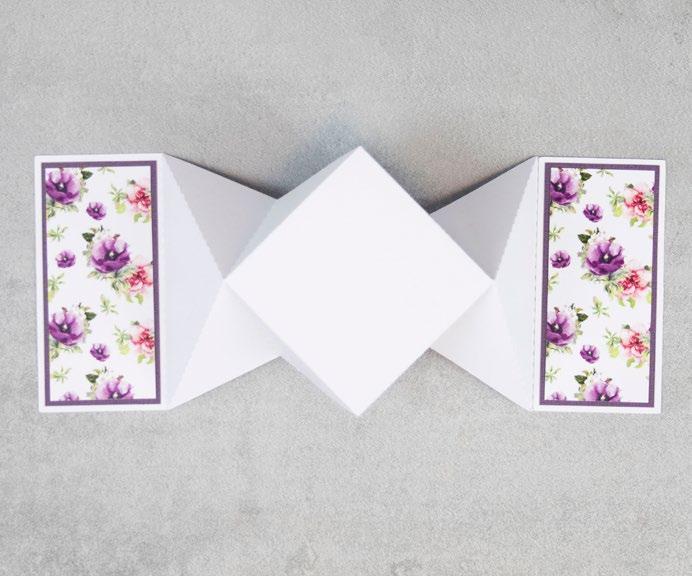
On the 140mm white square, from the bottom edge, measure up at 80mm and 120mm and score and fold. Mat the two 130mm width flowers rectangles onto the two 135mm width green rectangles and mat onto the folded panels of the white rectangles.
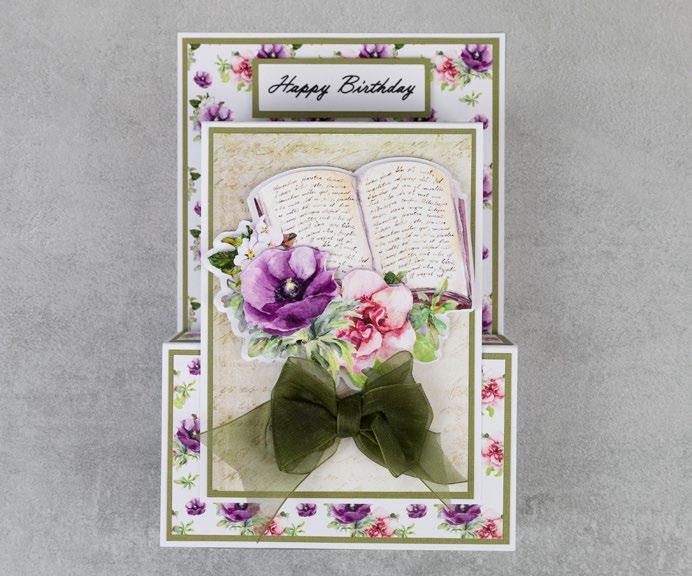
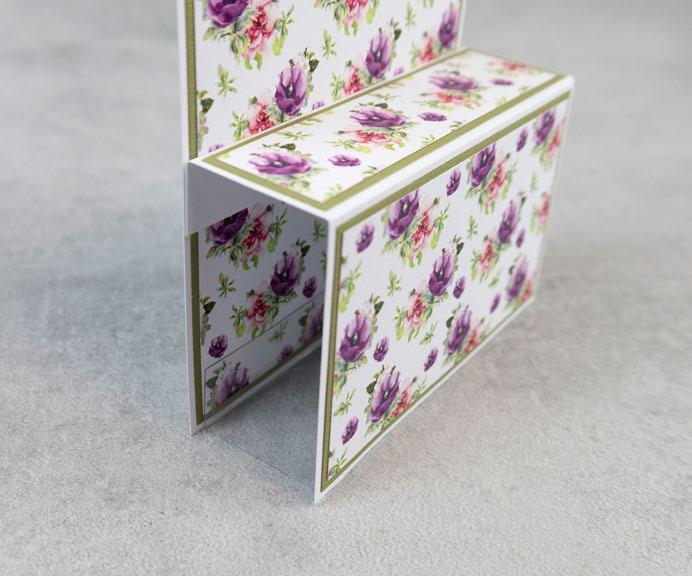
On the acetate rectangle, from the top and bottom edges, measure in 20mm and score and fold. Attach to the bottom of the back of the white rectangle from Step 2. Attach the folded white rectangle to the bottom of the card back using the card tab and acetate tab to create a box.
On the 110mm x 210mm white rectangle, from the bottom edge, measure up at 15cm and 19cm and score and fold. Mat the 100mm width scripts rectangles, onto the 105mm width rectangles and mat onto the folded panels of the white rectangle.
Attach the folded white rectangle onto the card by sticking the tab to the card back, and the lower folded panel to the box.
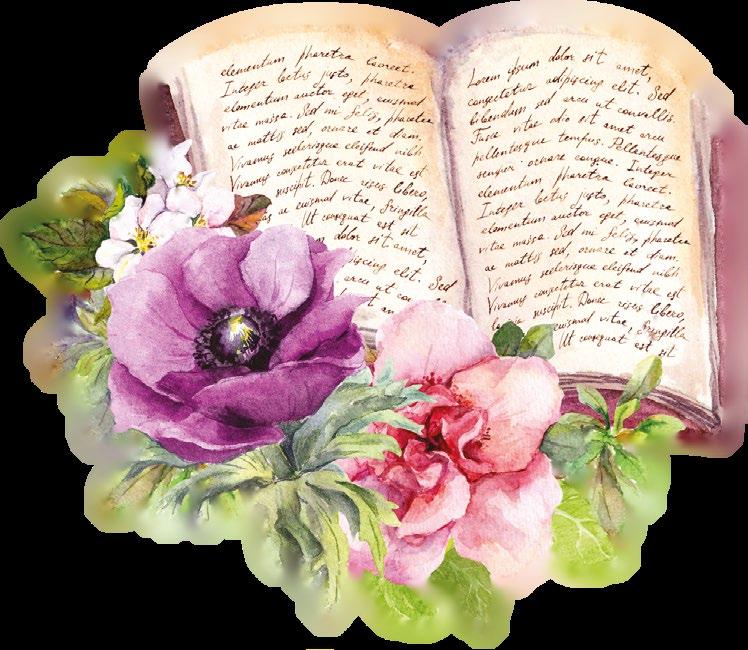
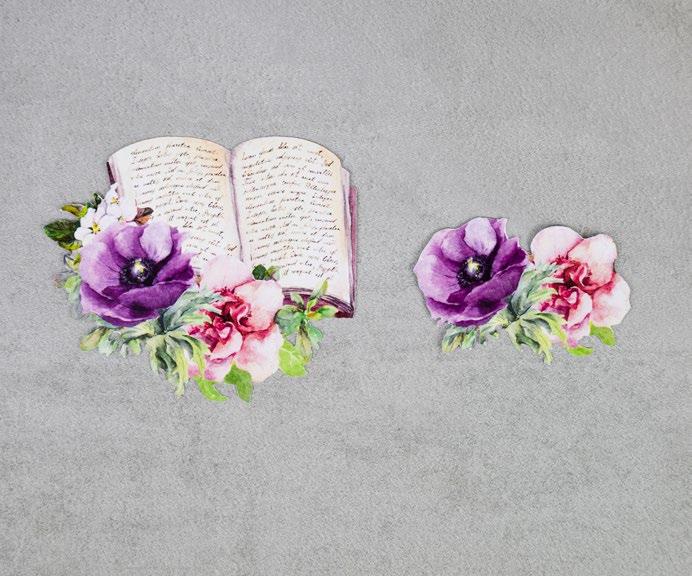
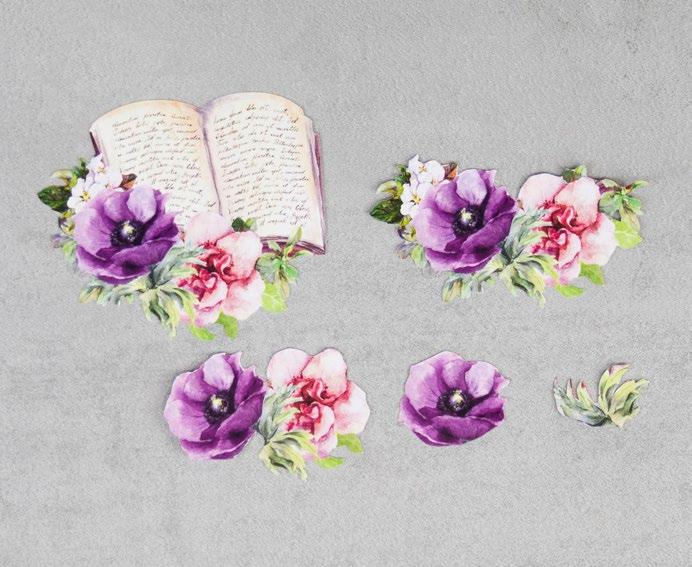
Trim the floral book-cuts, as shown in the image.
Build up the book decoupage, and mat together with foam tape. Mat onto the outline with foam tape, and mat onto the front of the card with foam tape. Mat the sentiment rectangle onto the last small green rectangle, and mat onto the card with foam tape. Finish by adding a double-loop bow tied from green ribbon.
----------------------------------- EXCLUSIVE GIFT - FLORAL BOOK ---------------------------------------www.tatteredlace.co.uk | 7
3
4
5
1 5 4 8 2 6 3 7 6
7
8
CLICK HERE TO DOWNLOAD YOUR SVG CONTENT PROJECT 1
What you’ll need:
• 02-02-Floral Book SVG files

• White cardstock
• Purple cardstock

• Cream cardstock
• Distress Ink – Vintage Photo
• Purple ribbon
• Pearl gems
Step bySteps
1
Cut all the pieces needed to create the project as listed below;
From SVG downloads:
• From cream cardstock: - 1 x FB-2-Emboss
• From charisma: - 1 x FB-2-Charisma A - 1 x FB-2-Charisma B
From machine memory:
• From white cardstock: - 2 x 200mm square - 1 x 92mm circle - 1 x 39mm circle (with sentiment draw file)
• From purple cardstock: - 1 x 195mm square - 1 x 44mm circle
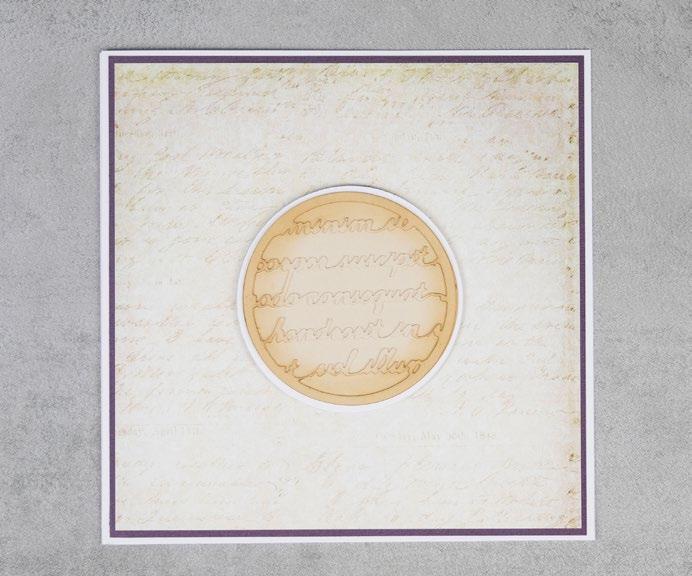
• From backing paper: - 1 x 190mm square (script)
• From cream cardstock: - 1 x 87mm circle 2
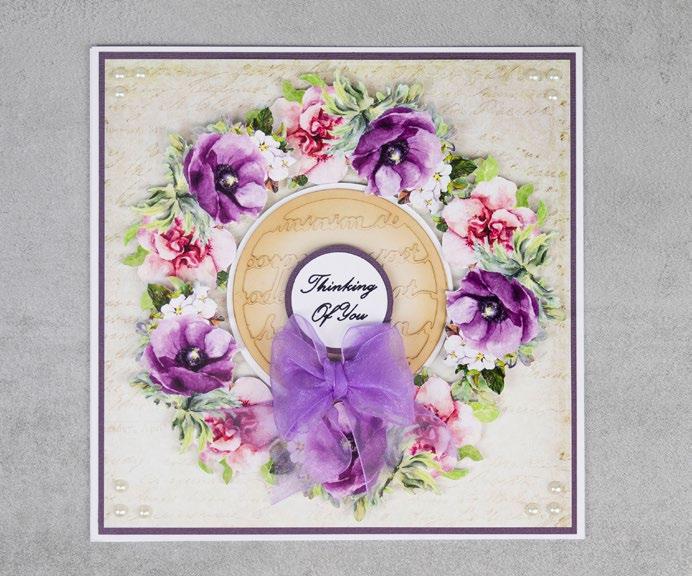
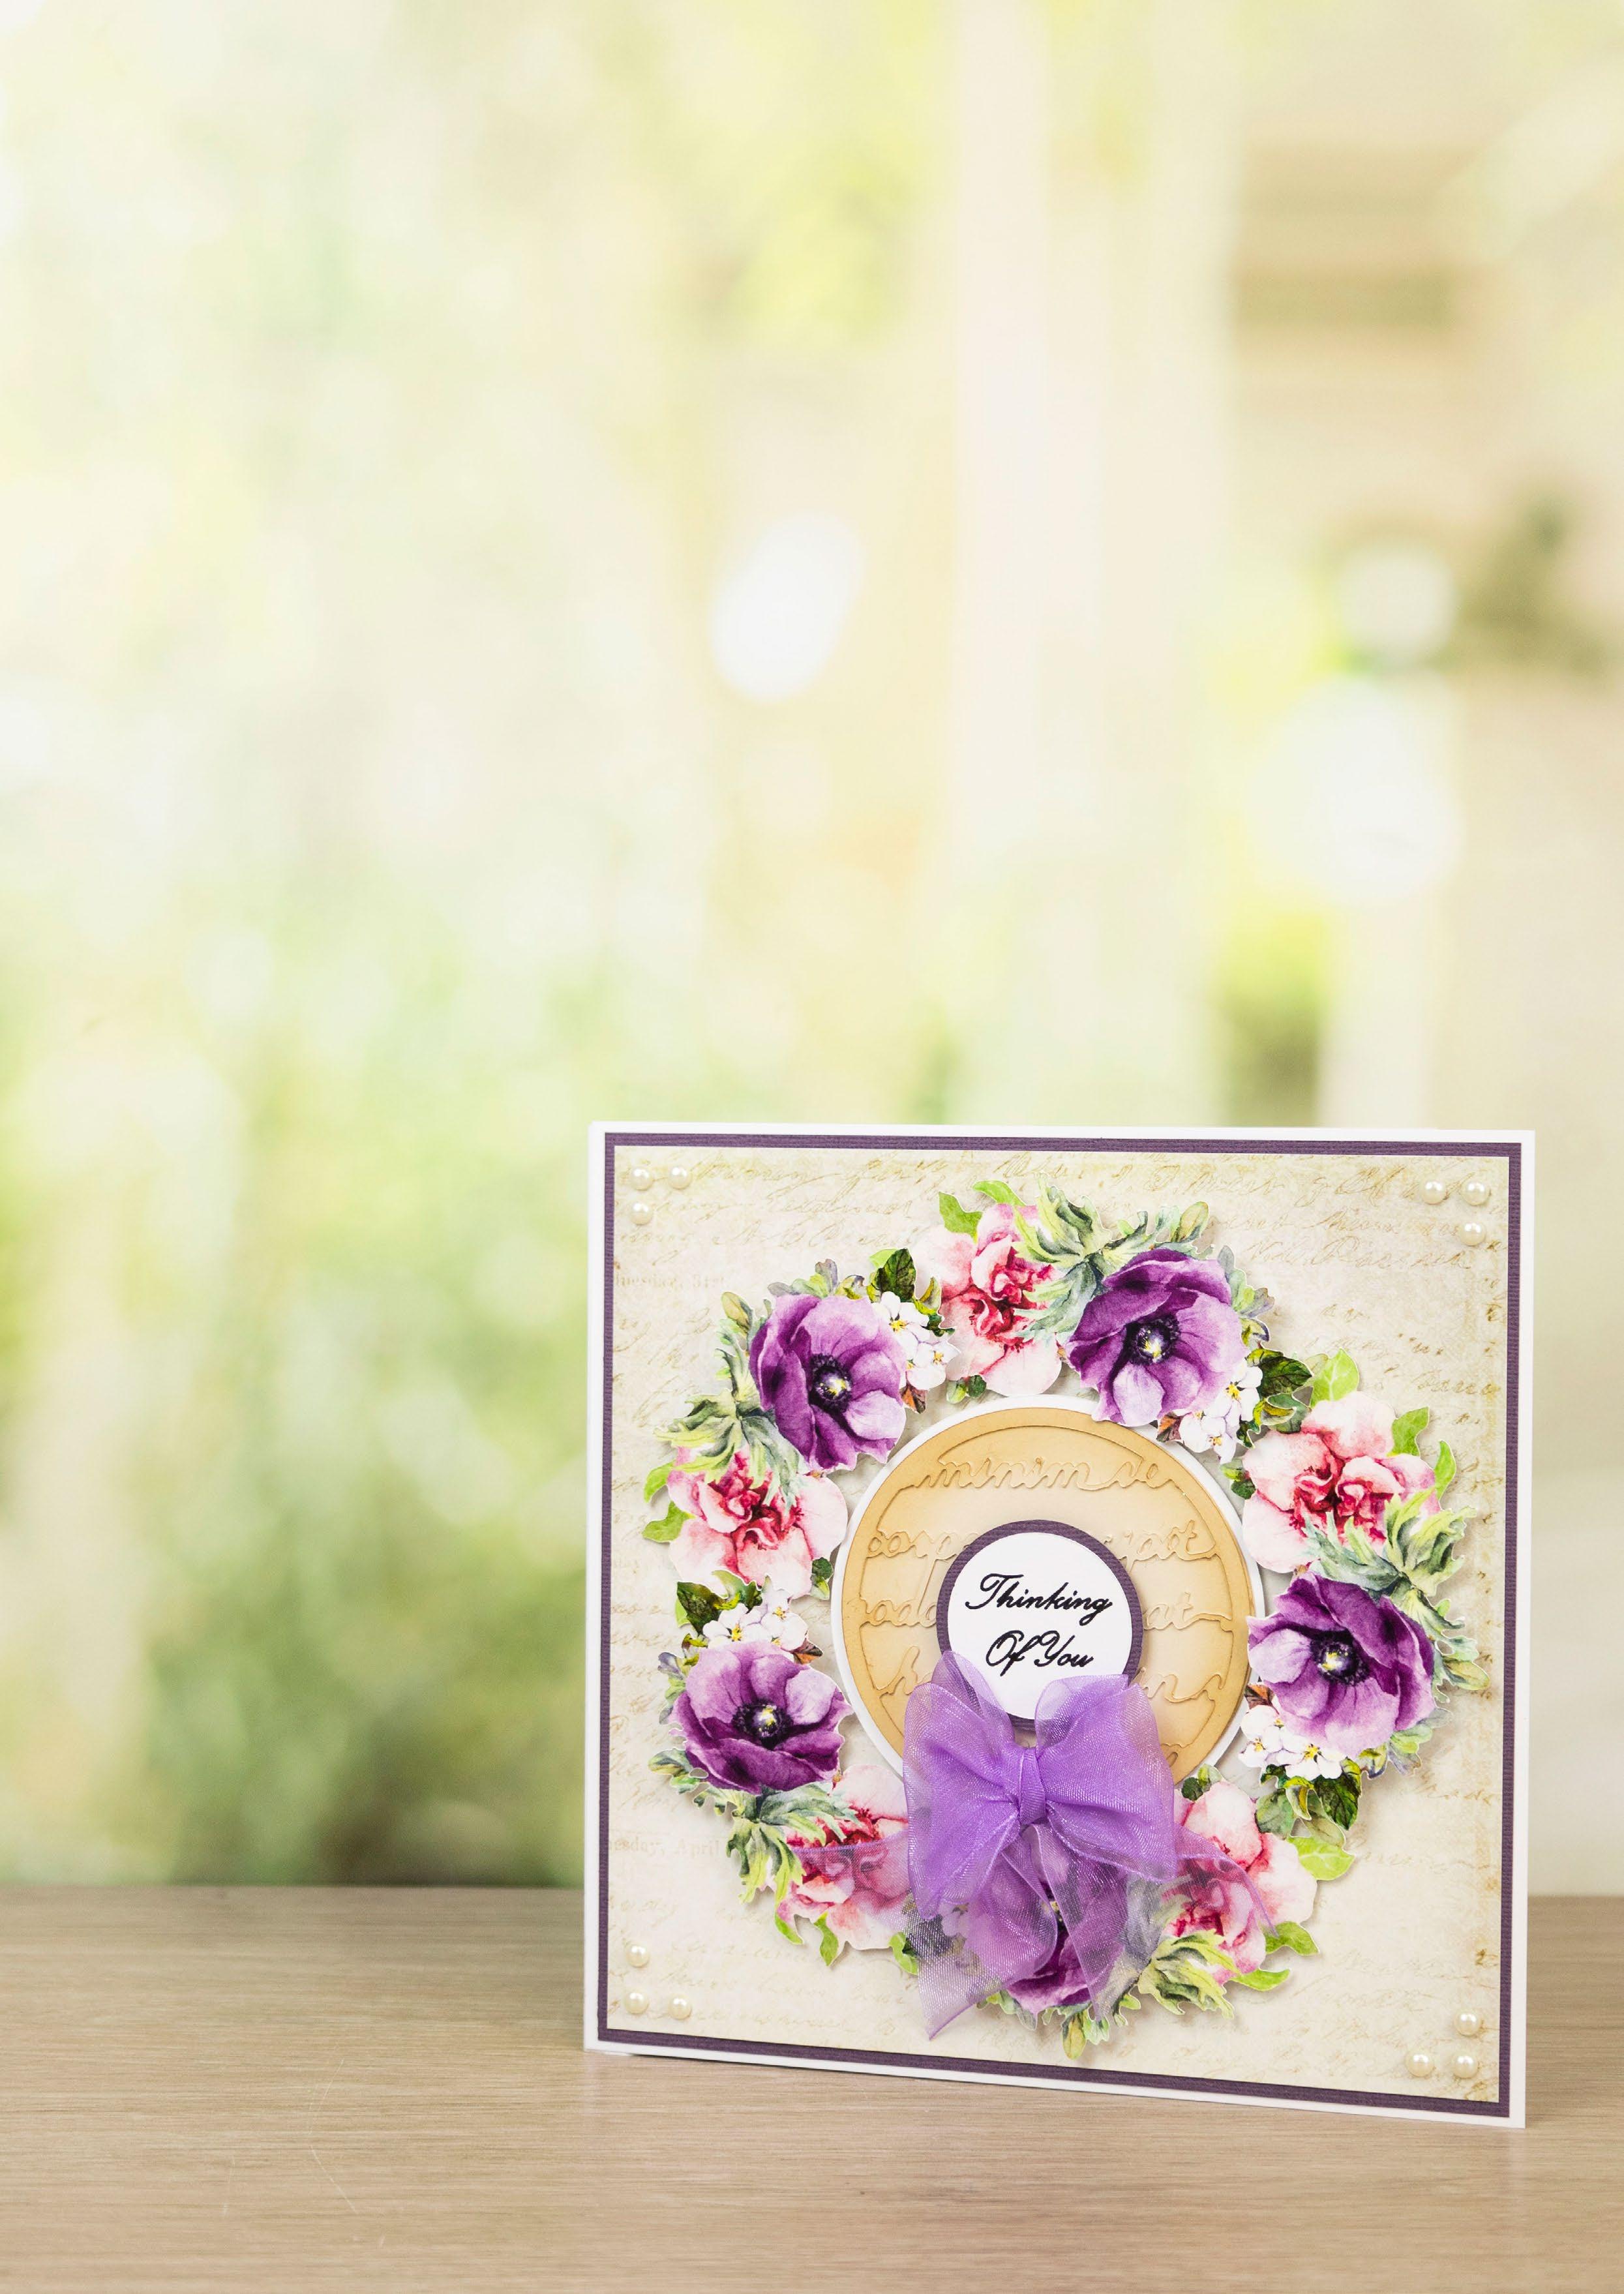
On one of the large white rectangles, measure in 10mm from the left edge, and score down to create a tab. Attach to the other white square to create a card. Mat the script square onto the purple square, and mat onto the card. Mat the emboss cut onto the cream circle, and ink around the edges. Mat onto the white circle, and mat onto the card with foam tape. 3
Trim the floral-cuts as shown in the image. 4
Mat the trimmed cuts around the circle with foam tape. Mat the sentiment circle onto the purple circle, and mat onto the card with foam tape. Tie a doubleloop bow from purple ribbon and mat onto the card. Finish by adding pearl gems into the corners of the card.
1 3
----------------------------------- EXCLUSIVE GIFT - FLORAL BOOK ---------------------------------------CLICK HERE TO DOWNLOAD YOUR SVG CONTENT PROJECT 2 8 | www.tatteredlace.co.uk
2 4
What you’ll need:
• 03-03-Floral Book SVG files

• White cardstock
• Gold mirror cardstock
• Lilac ribbon
Cut all the pieces needed to create the project as listed below;
From SVG downloads:
• From white cardstock: - 1 x FB-3-Outline
• From charisma: - 1 x FB-3-Charisma
From machine memory:
• From white cardstock: - 1 x 160mm x 210mm rectangle - 1 x 65mm x 15mm rectangle (with sentiment draw file)
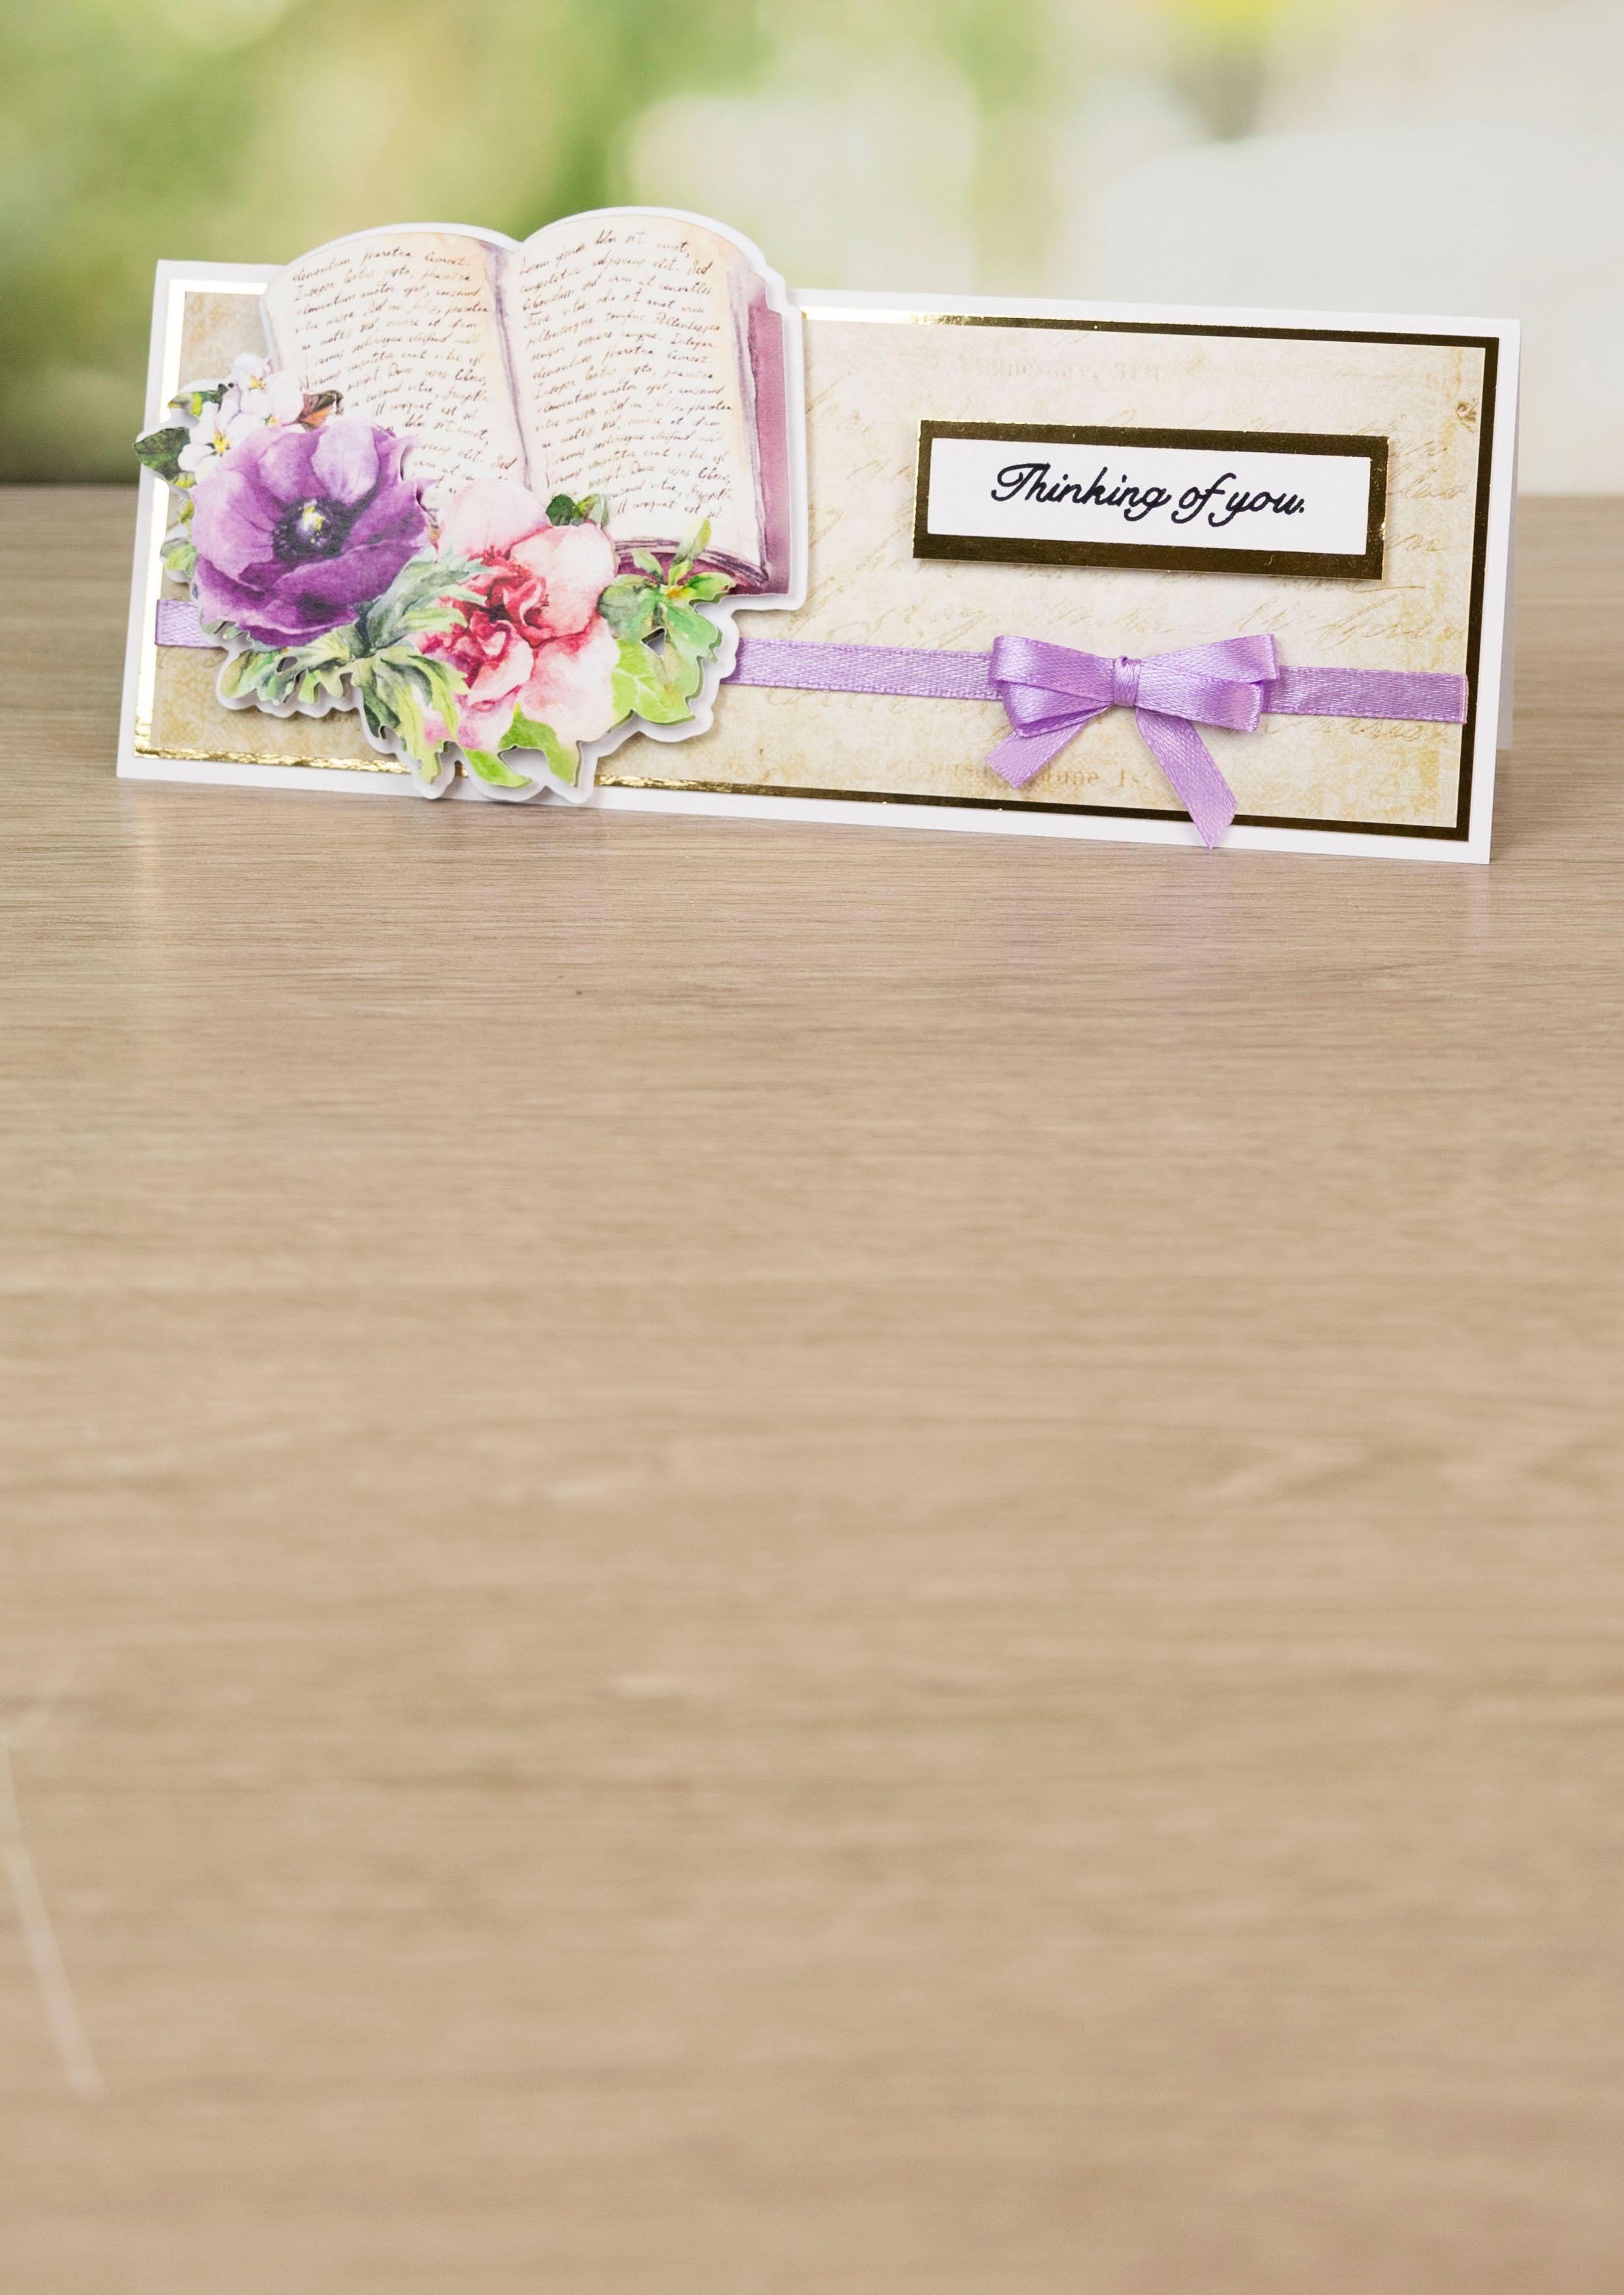

• From gold mirror cardstock: - 1 x 205mm x 75mm rectangle - 1 x 70mm x 20mm rectangle
• From backing paper: - 1 x 200mm x 70mm rectangle (script)
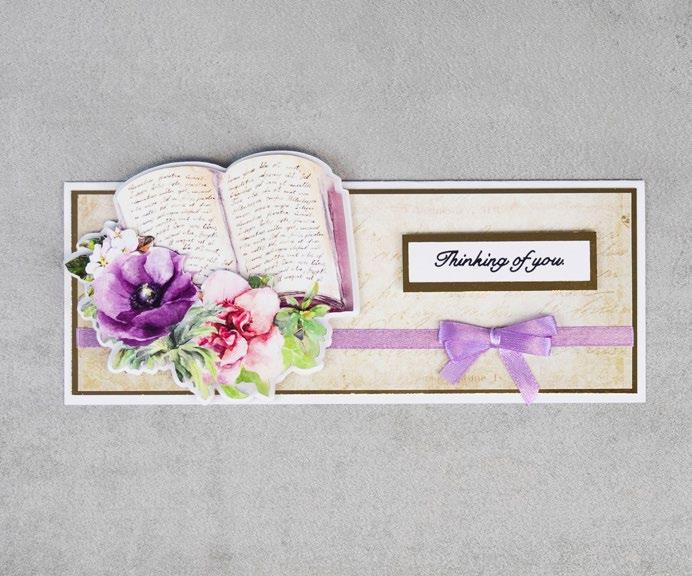
On the large white rectangle, score and fold in half horizontally to create a tent card. Mat the large gold rectangle onto the front of the card. Wrap a length of ribbon around the lower half of the script rectangle, and mat onto the card.

1
Step bySteps
2
1 3 2 4 ----------------------------------- EXCLUSIVE GIFT - FLORAL BOOK ---------------------------------------3 Trim the floral book-cuts, as shown in the image. 4 Build up the book decoupage, and mat together with
the outline with foam tape, and mat the card
sentiment rectangle onto the
foam tape. Tie a double-loop bow
the
CLICK HERE TO DOWNLOAD YOUR SVG CONTENT PROJECT 3 www.tatteredlace.co.uk | 9
foam tape. Mat onto
with foam tape. Mat the
small gold rectangle, and mat onto the card with
from lilac ribbon, and mat onto the ribbon on
card.
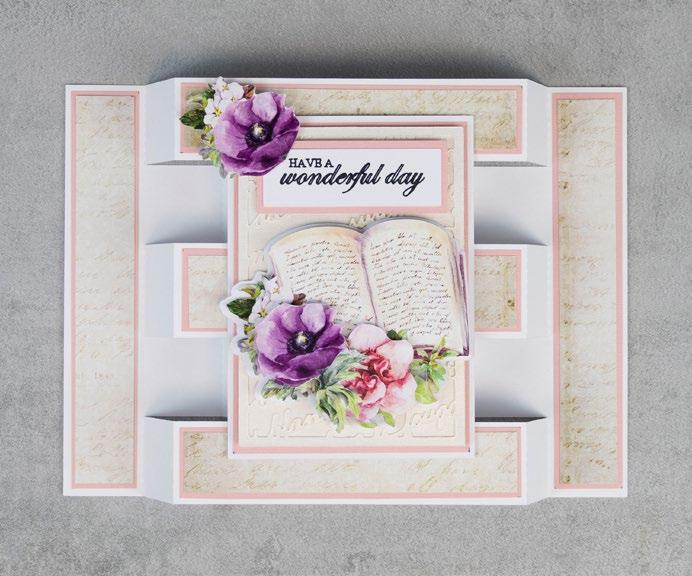
What you’ll need: • 04-04-Floral Book SVG files • White cardstock • Pink cardstock • Cream pearlescent cardstock ----------------------------------- EXCLUSIVE GIFT - FLORAL BOOK ---------------------------------------10 | www.tatteredlace.co.uk
Step bySteps
Cut all the pieces needed to create the project as listed below;
From SVG downloads:
• From white cardstock: - 1 x FB-4-Card Base - 1 x FB-4-Outline
• From cream pearlescent cardstock: - 1 x FB-4-Emboss
• From charisma: - 1 x FB-4-Charisma
From machine memory:
• From pink cardstock:

- 2 x 30mm x 175mm rectangle
- 2 x 145mm x 30mm rectangle
- 1 x 145mm x 35mm rectangle
- 1 x 100mm x 140mm rectangle
- 1 x 80mm x 30mm rectangle
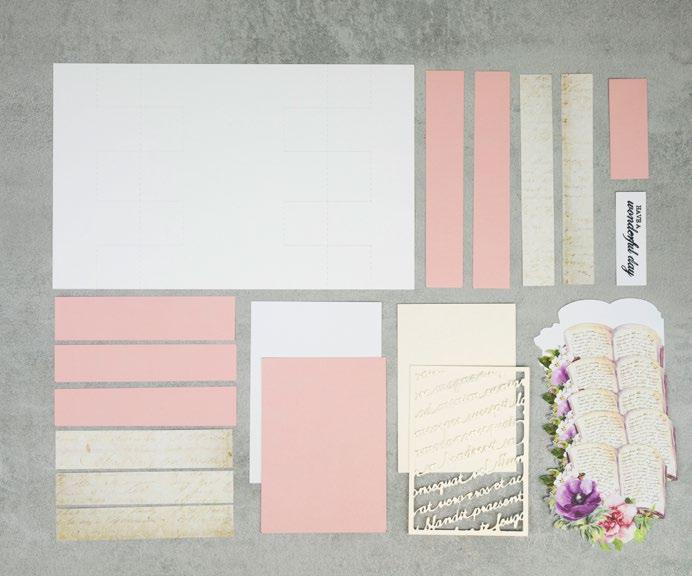
• From backing paper: - 2 x 25mm x 170mm rectangle (script) - 2 x 140mm x 25mm rectangle (script) - 1 x 140mm x 30mm rectangle (script)


• From white cardstock: - 1 x 105mm x 145mm rectangle - 1 x 75mm x 25mm rectangle (with sentiment draw file)
• From cream pearlescent cardstock: - 1 x 95mm x 135mm rectangle
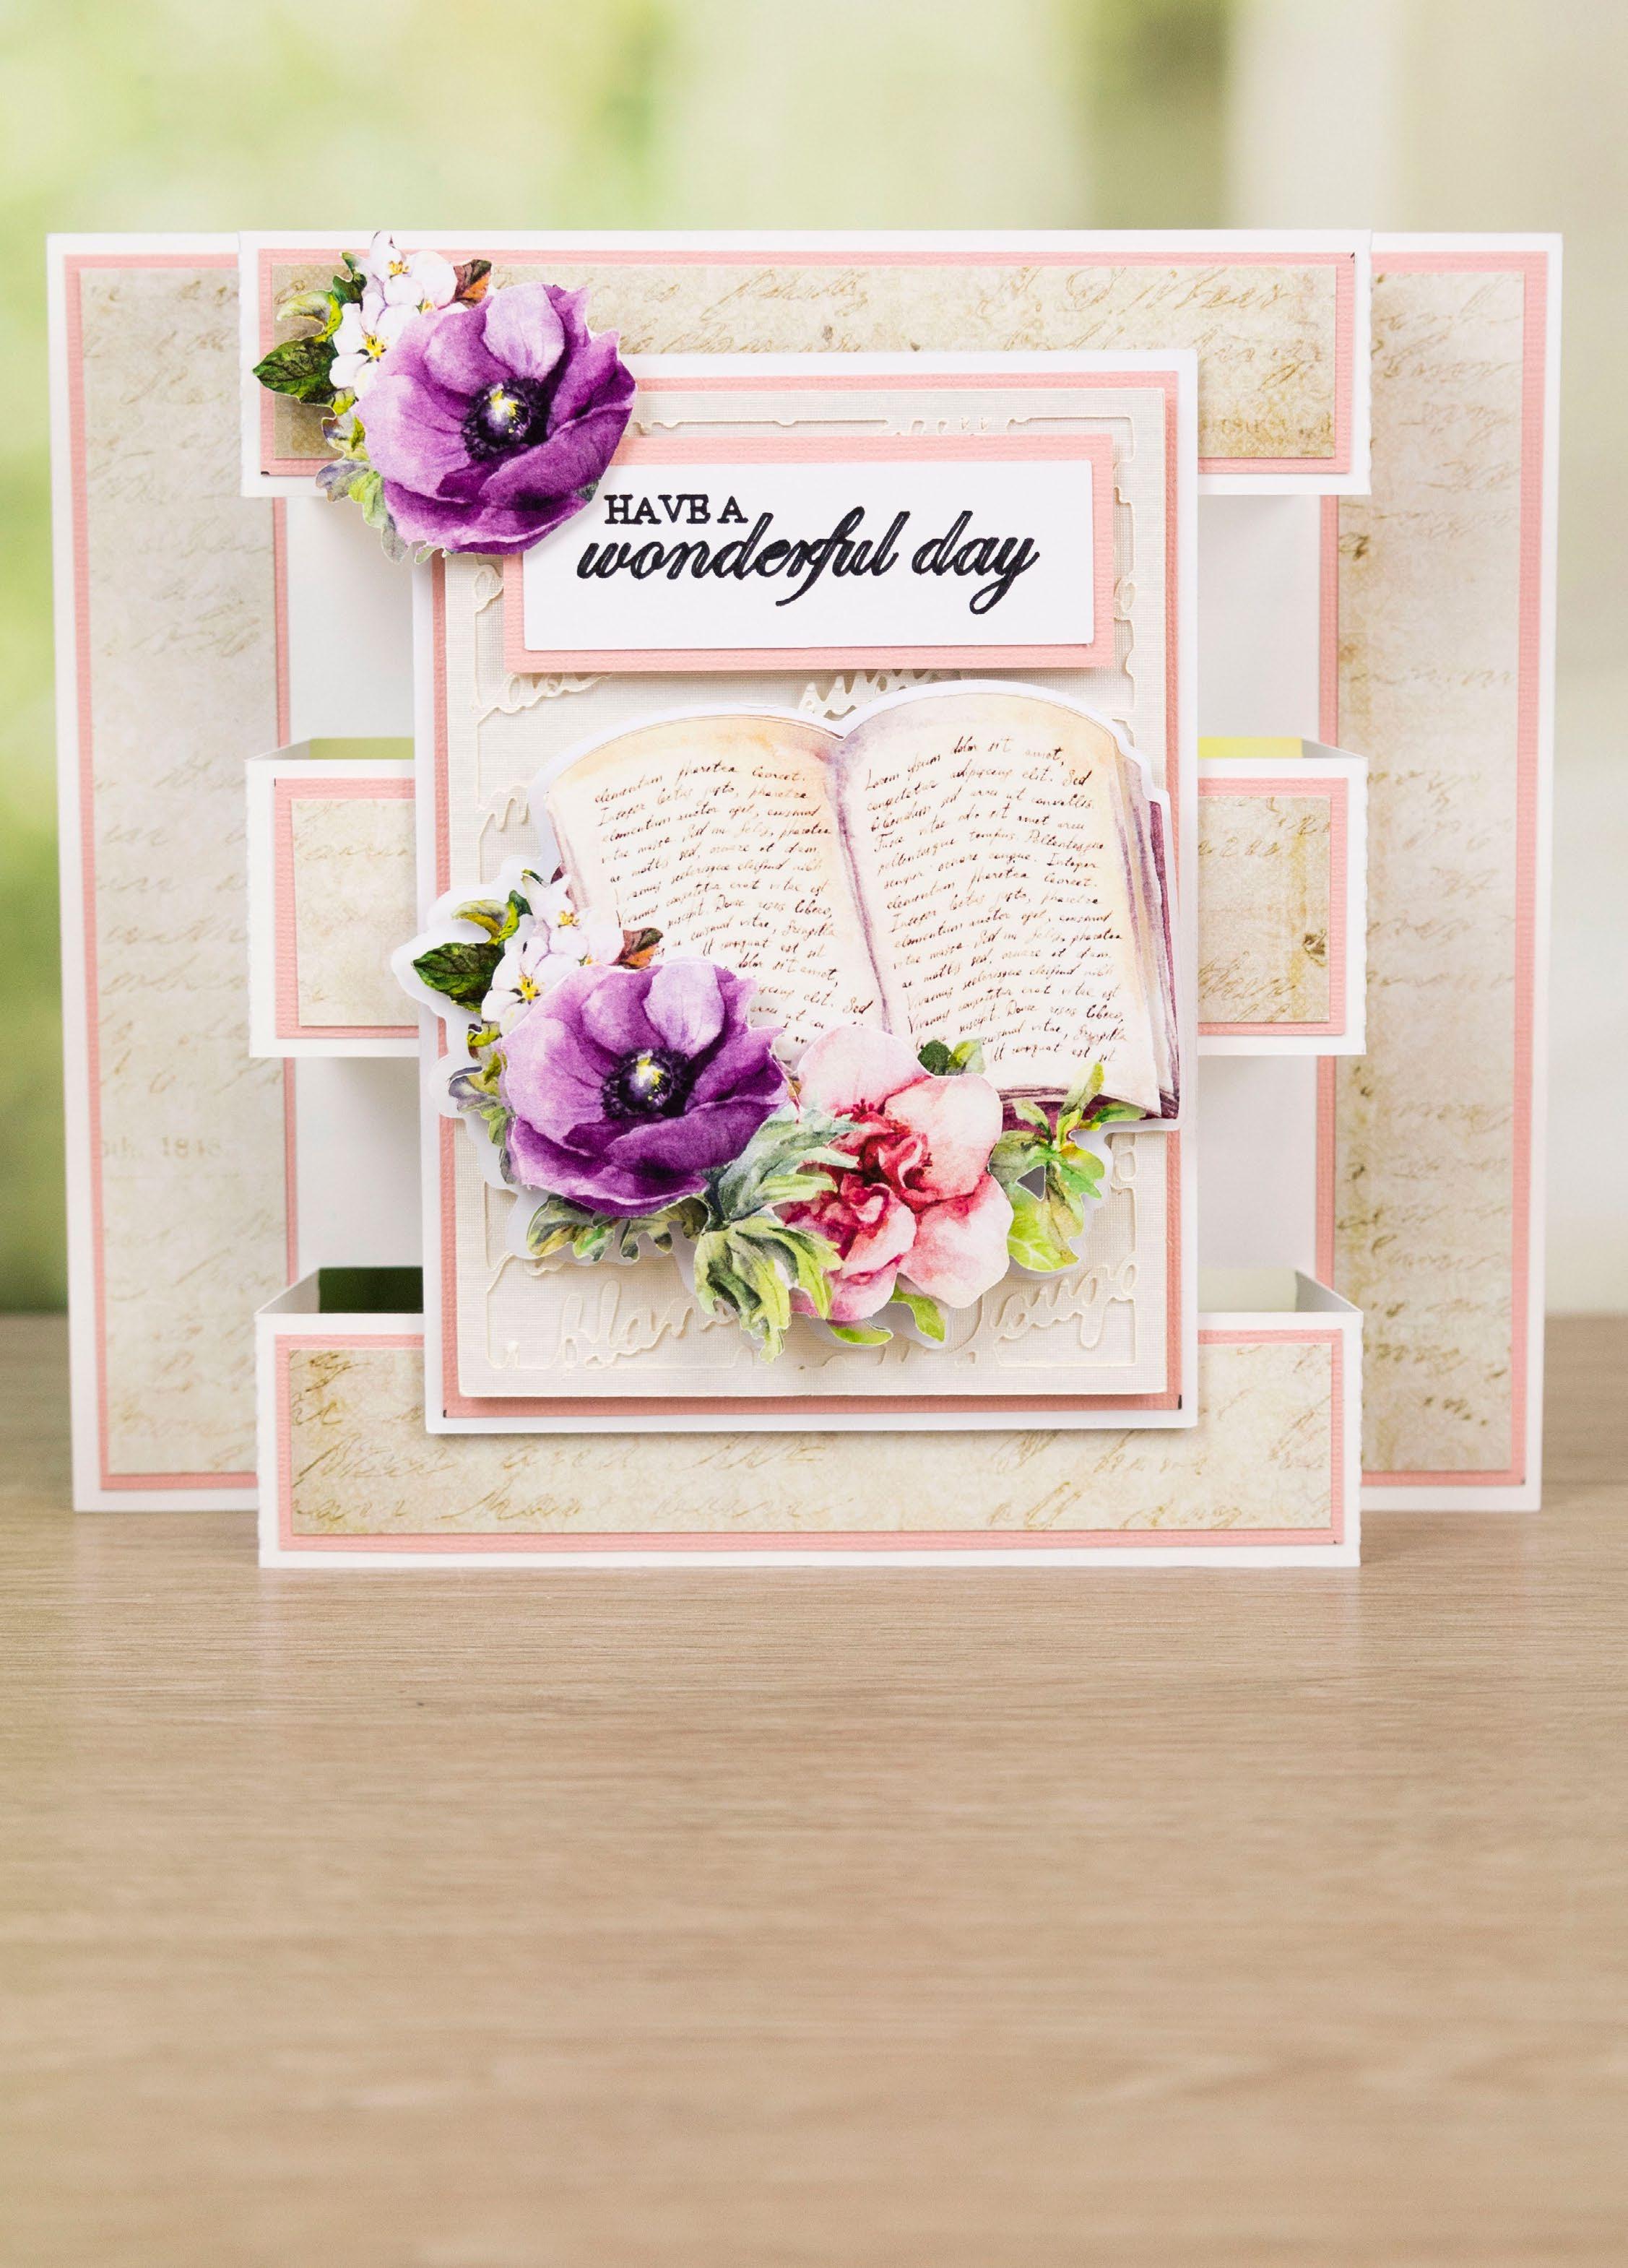
Fold on the score lines of the card base to create the card. Mat the two 25mm width script rectangles onto the two 30mm width pink rectangles, and mat onto the outer panels of the card.
Mat the 140mm width script rectangles onto the 145mm width pink rectangles, and mat onto the top, middle and bottom of the front of the card.
Mat the 100mm width pink rectangle onto the 105mm width white rectangle, and mat onto the front of the card with foam tape. Mat the emboss cut onto the cream pearlescent rectangle, and mat onto the front of the card with foam tape.
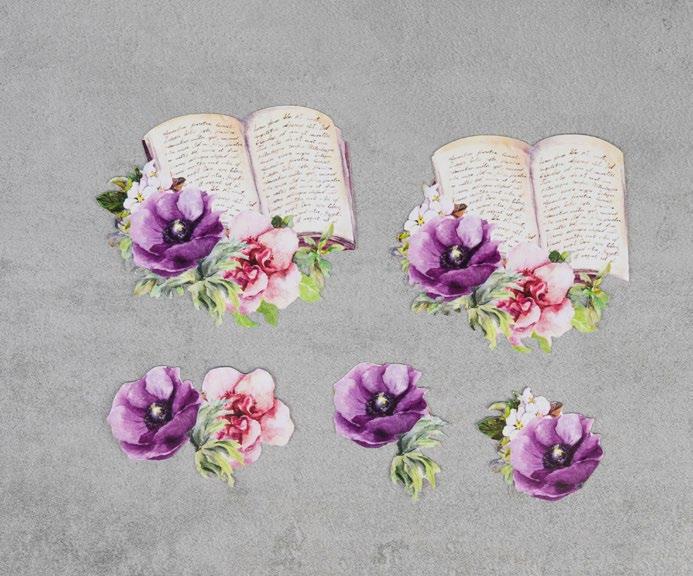
Trim the floral book-cuts, as shown in the image.
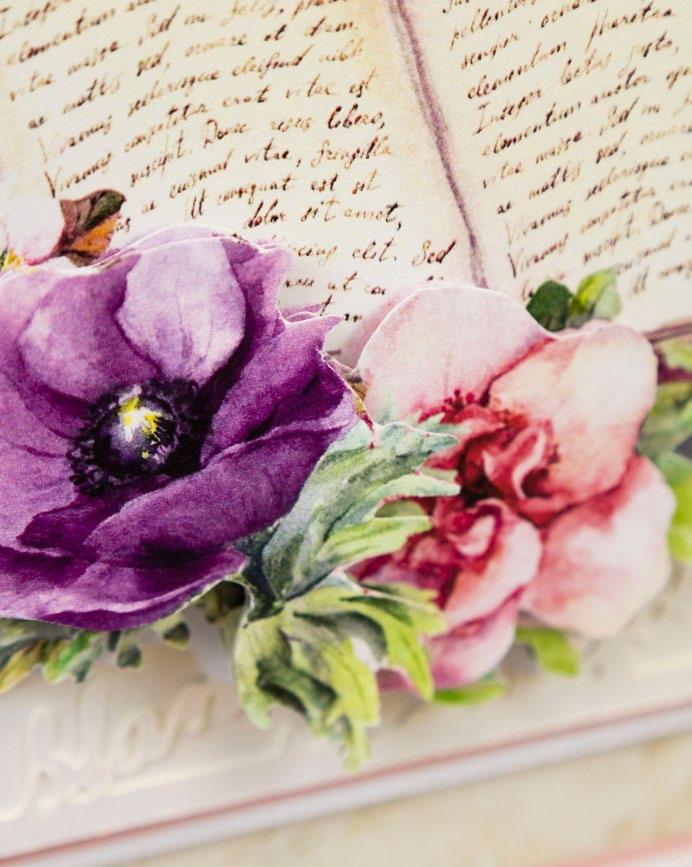
Build up the book decoupage, and mat together with foam tape. Keep one purple flower to the side. Mat onto the outline with foam tape, and mat the template with foam tape. Mat the sentiment rectangle onto the small pink rectangle, and mat onto the card with foam tape. Mat the remaining flower-cut onto the sentiment with foam tape.
----------------------------------- EXCLUSIVE GIFT - FLORAL BOOK ---------------------------------------www.tatteredlace.co.uk | 11 1
1
3 5 2 4 6
2
3
4
5
6
CLICK HERE TO DOWNLOAD YOUR SVG CONTENT PROJECT 4

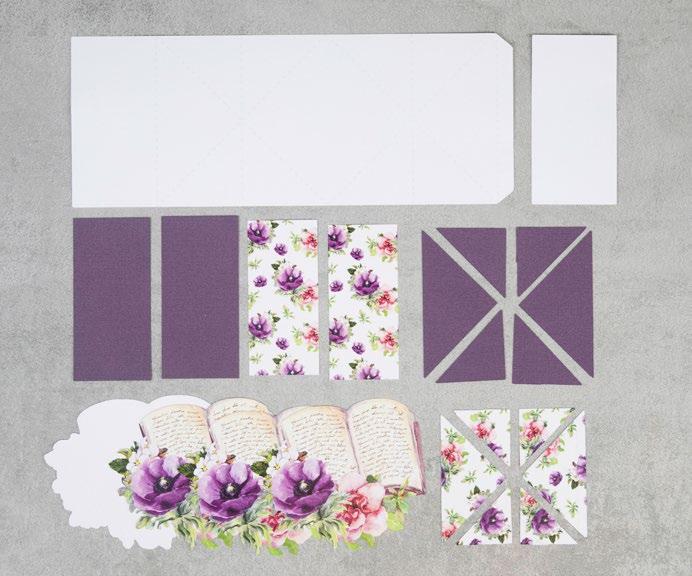


1 Cut all the pieces needed to create the project as listed below; From SVG downloads: • From
-
x
-
x
• From
-
Mats
-
What you’ll need: • 05-05-Floral Book SVG files • White
• Purple cardstock ----------------------------------- EXCLUSIVE GIFT - FLORAL BOOK ---------------------------------------Step bySteps 2 4 1 3 5 • From
- 1 x FB-5-Charisma From
• From purple
- 2 x 45mm x 95mm rectangle • From
- 2
2 Using the tab, mat
Card
pieces together. Fold on the score lines of the card
to
the card. Mat the flowers rectangles onto the
and mat onto the outer
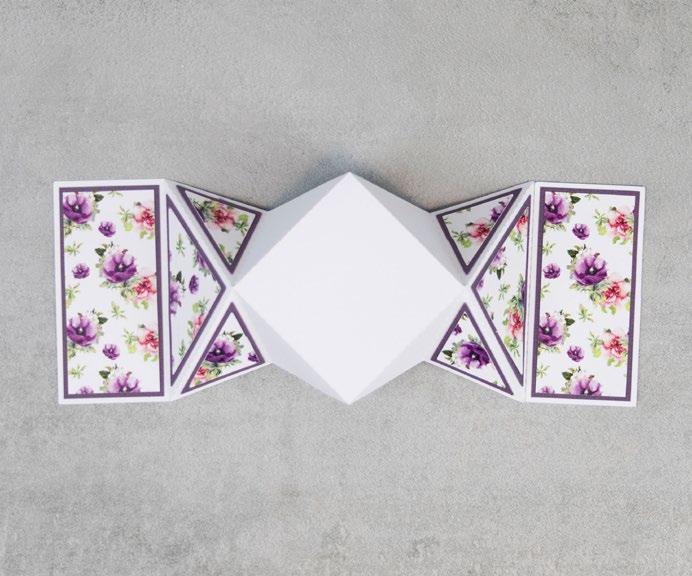
of the card. 3 Mat the inner
mats
the
triangle mats, and mat onto the folded
of the card. 4 Trim the floral book-cuts, as
the
5 Build up the book
and mat
foam tape. Mat
and mat onto the
tape. CLICK HERE TO DOWNLOAD YOUR SVG CONTENT PROJECT 5 12 | www.tatteredlace.co.uk
white cardstock:
1
FB-5-Card Base
1
FB-5-Outline
purple cardstock:
1 x FB-5-Outer Triangle
• From backing paper:
1 x FB-5-Inner Triangle Mats (flowers)
cardstock
charisma:
machine memory:
cardstock:
backing paper:
x 40mm x 90mm rectangle (flowers)
the
Base
base
create
purple rectangles,
panels
triangle
onto
purple outer
triangle panels
shown in
image.
decoupage
together with
onto the outline with foam tape,
middle panel of the card with foam
What you’ll need:
• 06-06-Floral Book SVG files
• White cardstock
• Purple cardstock
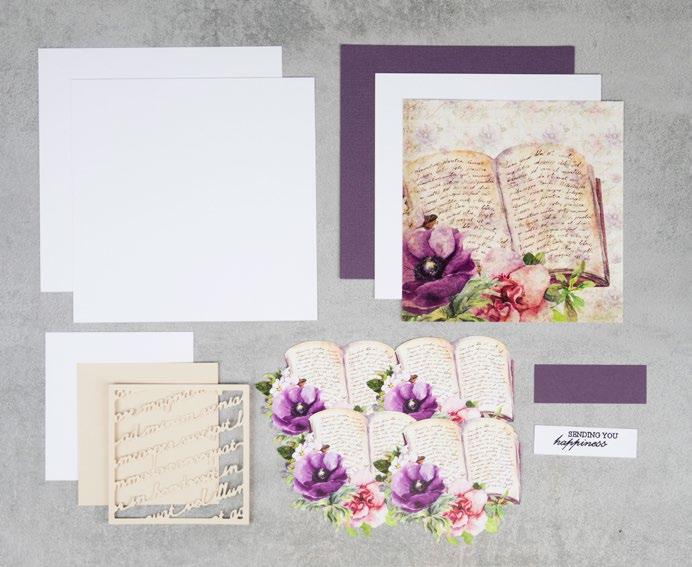
1 Cut all the pieces needed to create the project as listed below;
From SVG downloads:
• From white cardstock: - 1 x FB-6-Emboss
• From charisma: - 1 x FB-6-Charisma
From machine memory:
• From white cardstock: - 2 x 165mm square - 1 x 155mm square - 1 x 100mm square - 1 x 70mm x 20mm rectangle (with sentiment draw file)
• From purple cardstock: - 1 x 160mm square - 1 x 75mm x 25mm rectangle
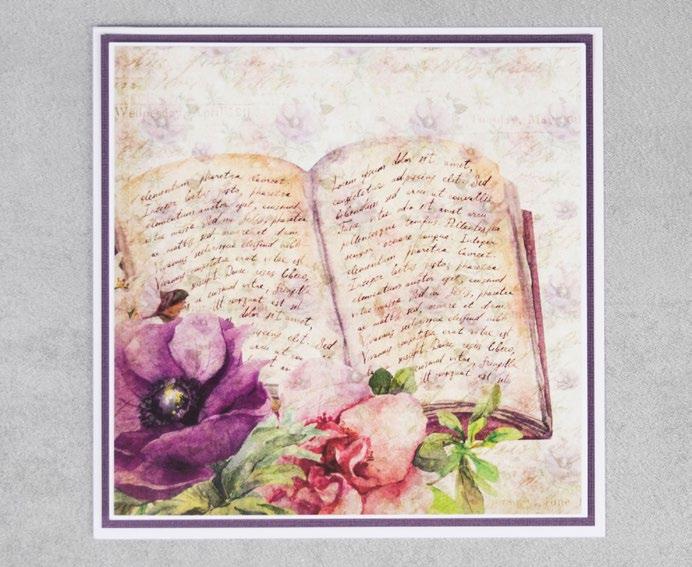
• From backing paper: - 1 x 150mm square (book)
• From cream cardstock: - 1 x 95mm square
• Cream cardstock
PROJECT 6
• Distress Ink – Vintage Photo
• Purple pearl gems
Step bySteps

2
On one of the large white squares, measure in 10mm from the left edge, and score down to create a tab. Attach to the other white square to create a card. Mat the purple square onto the card. Mat the book square onto the 155mm width white square, and mat onto the card with foam tape. 3
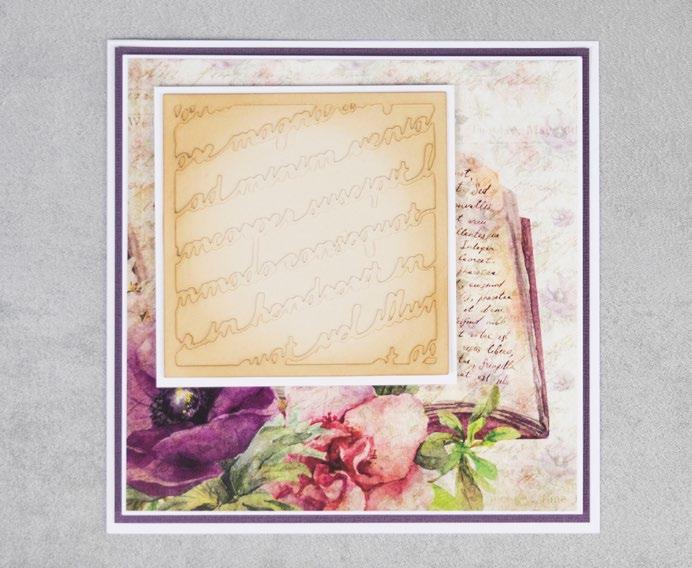
Mat the emboss cut onto the cream square, and ink around the edges. Mat onto the 100mm width white square, and mat onto the card with foam tape. 4
Trim the floral book-cuts, as shown in the image. 5
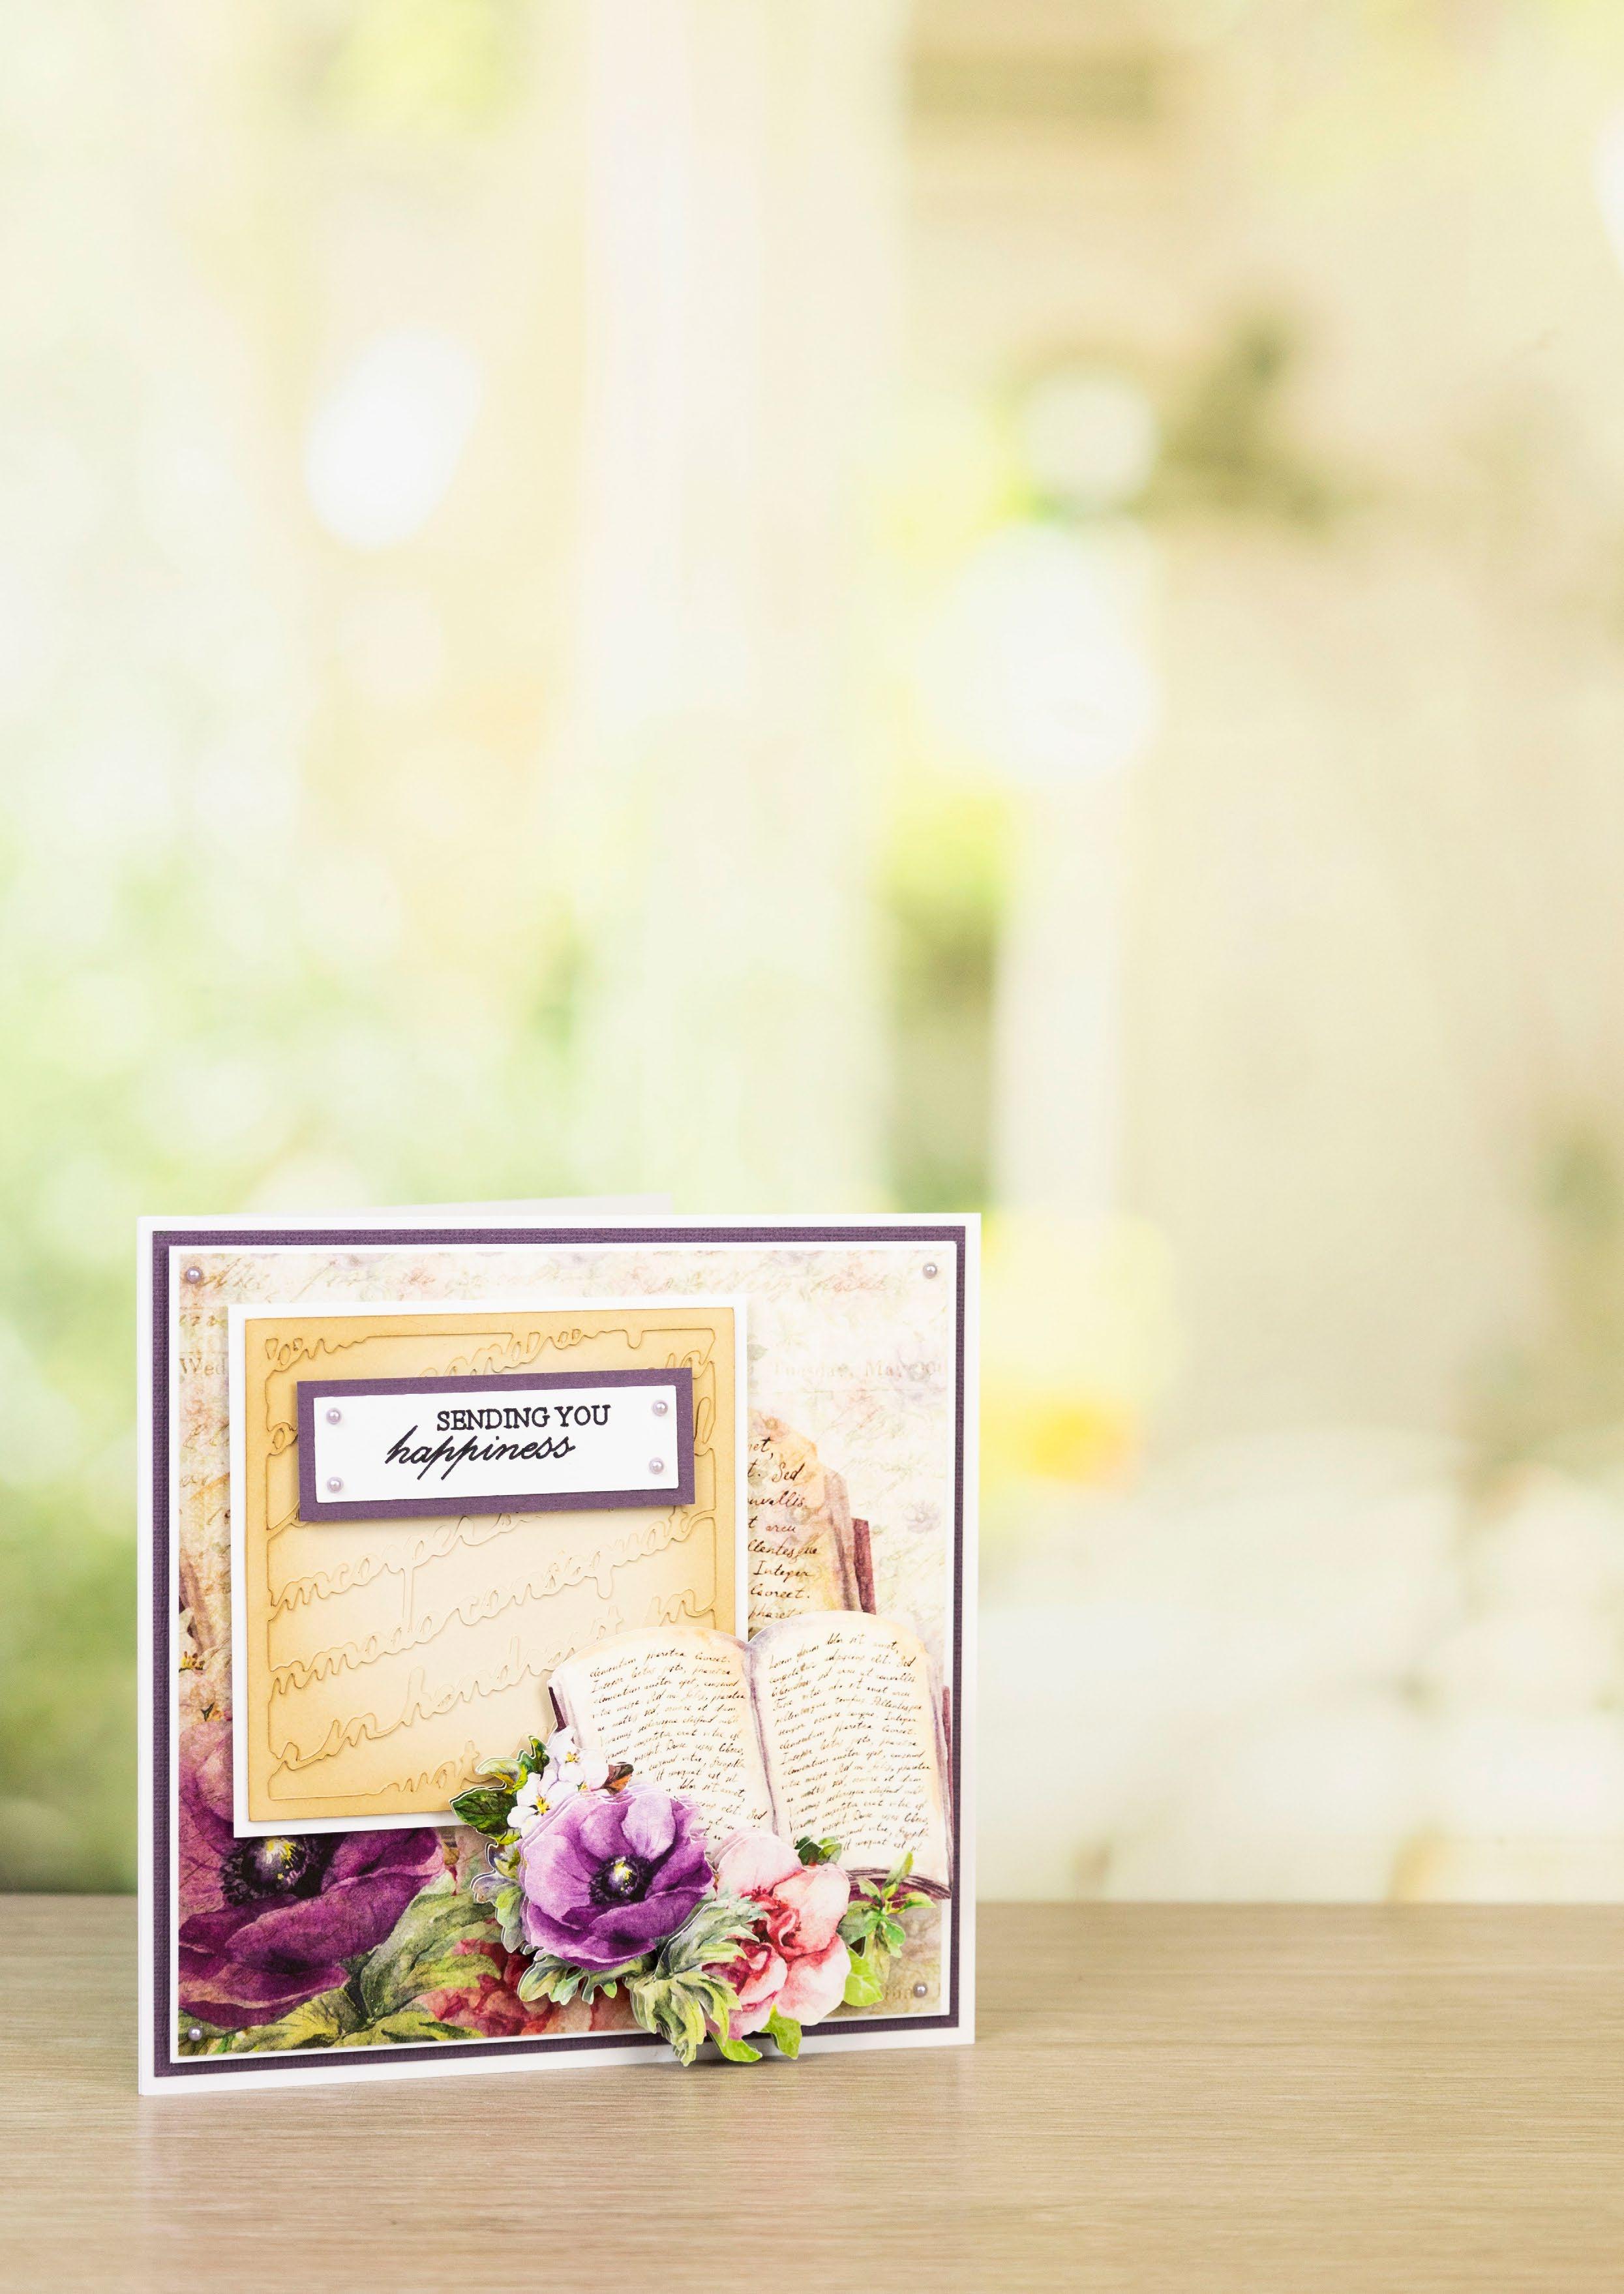
Build up the book decoupage, and mat together with foam tape. Mat onto the card with foam tape. Mat the sentiment rectangle onto the purple rectangle, and mat onto the card with foam tape. Finish by adding pearl gems.
5
1 2 3 4
----------------------------------- EXCLUSIVE GIFT - FLORAL BOOK ---------------------------------------CLICK HERE TO DOWNLOAD YOUR SVG CONTENT
www.tatteredlace.co.uk | 13
Butterfly Bliss
What you’ll need:
• 07-01-Butterfly Bliss SVG files
• White cardstock • Lilac cardstock
• Construction acetate • Vellum
1
Cut all the pieces needed to create the project as listed below;
From SVG downloads:
• From lilac cardstock: - 1 x BB-1-Butterfly Outline 1
• From vellum: - 1 x BB-1-Butterfly Outline 2
• From white cardstock: - 1 x BB-1-Butterfly - 1 x BB-1-Small Butterflies
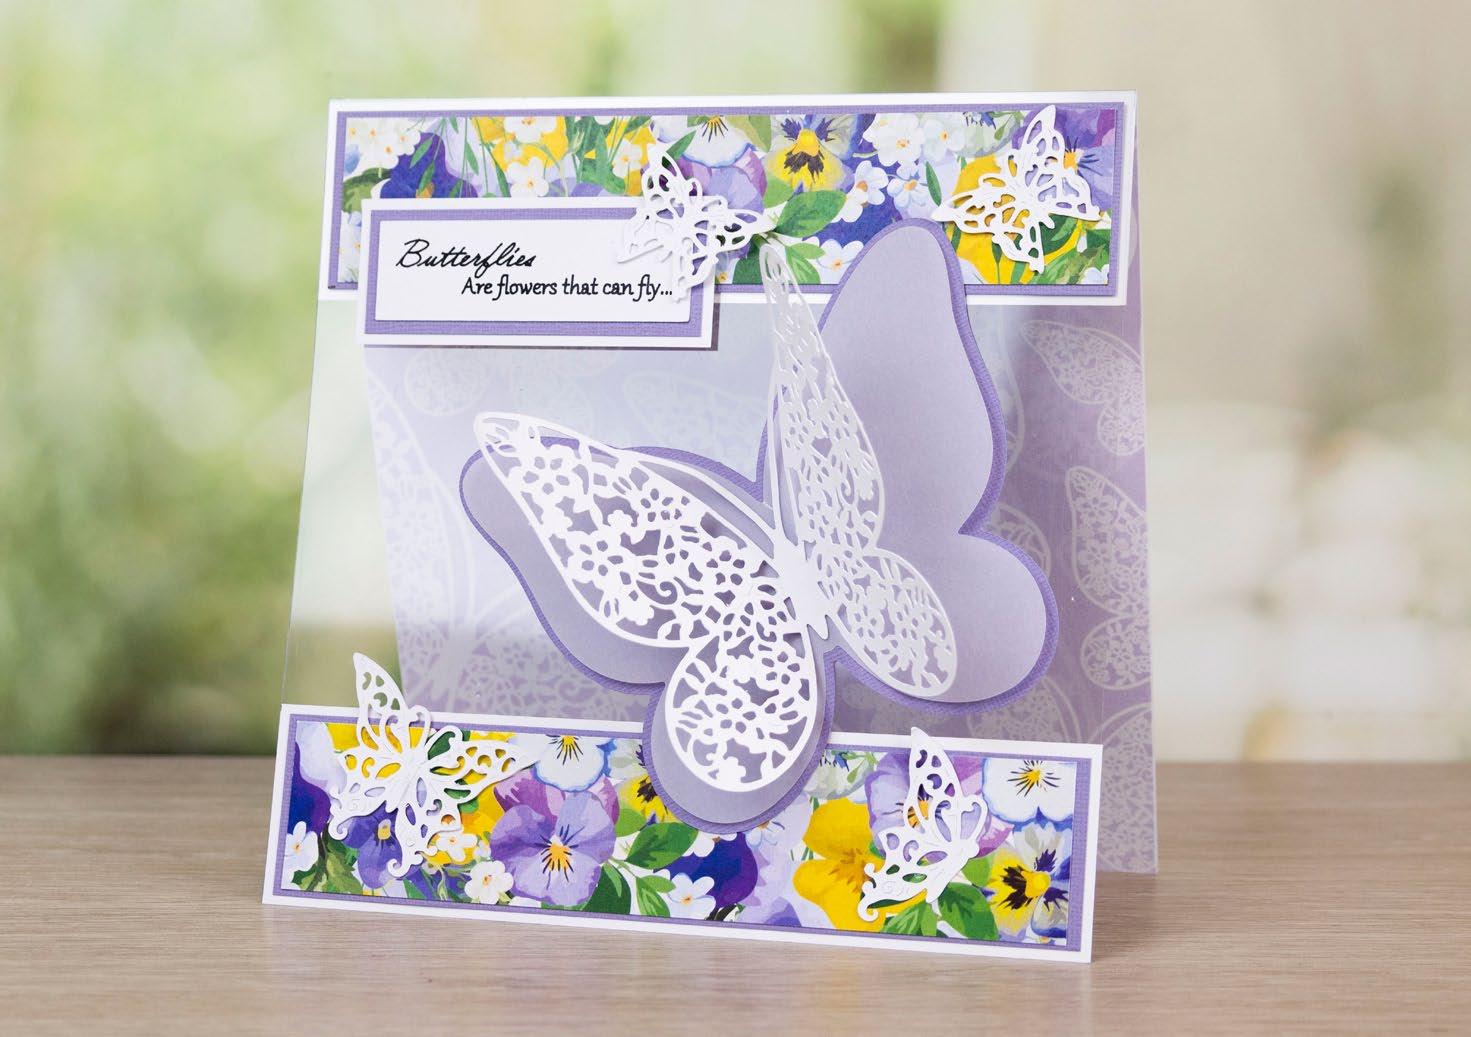
From machine memory:
• From white cardstock:
- 1 x 200mm x 250mm rectangle - 1 x 200mm x 50mm rectangle - 1 x 90mm x 35mm rectangle - 1 x 80mm x 25mm rectangle (with sentiment draw file)
• From backing paper: - 1 x 200mm square (butterflies) - 2 x 190mm x 40mm rectangle (pansies)

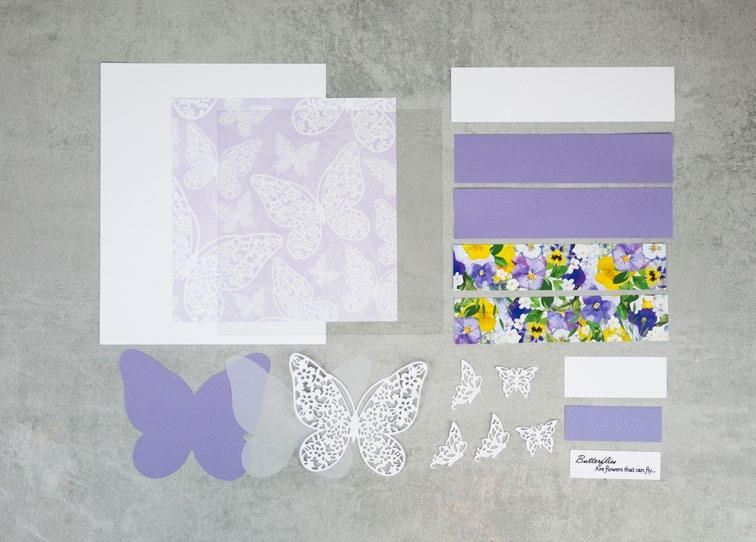
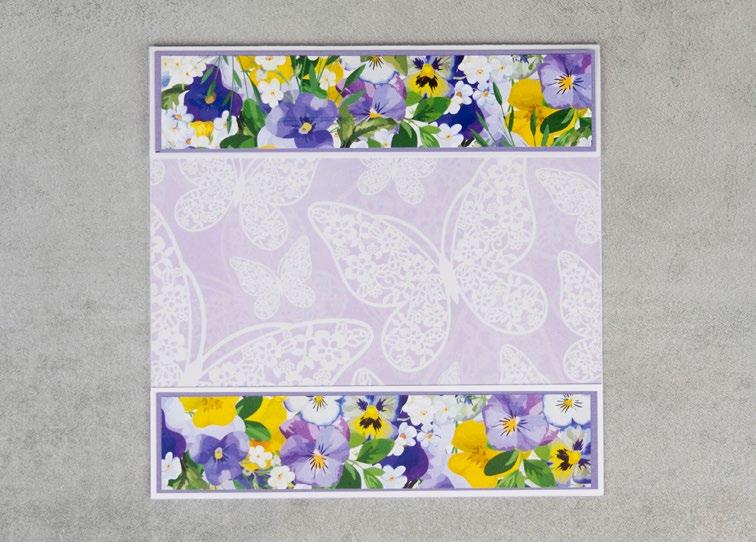
• From construction acetate: - 1 x 200mm square
• From lilac cardstock: - 2 x 195mm x 45mm rectangle - 1 x 85mm x 30mm rectangle
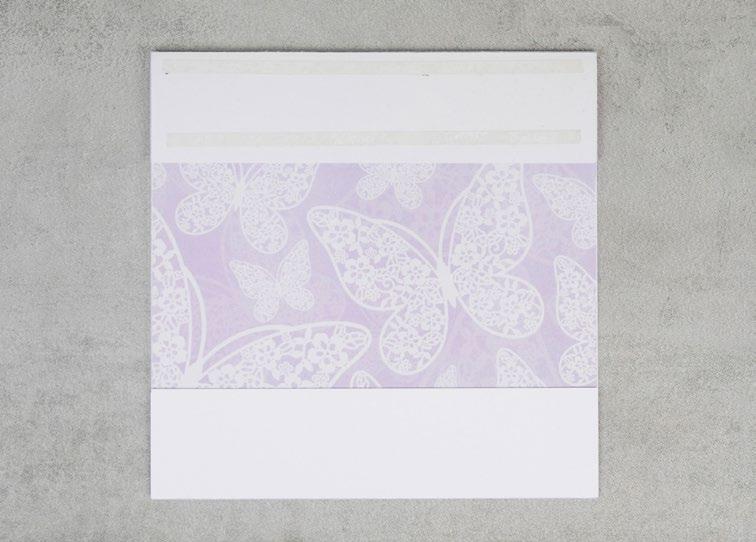
On the large white rectangle, measure down 50mm from the top
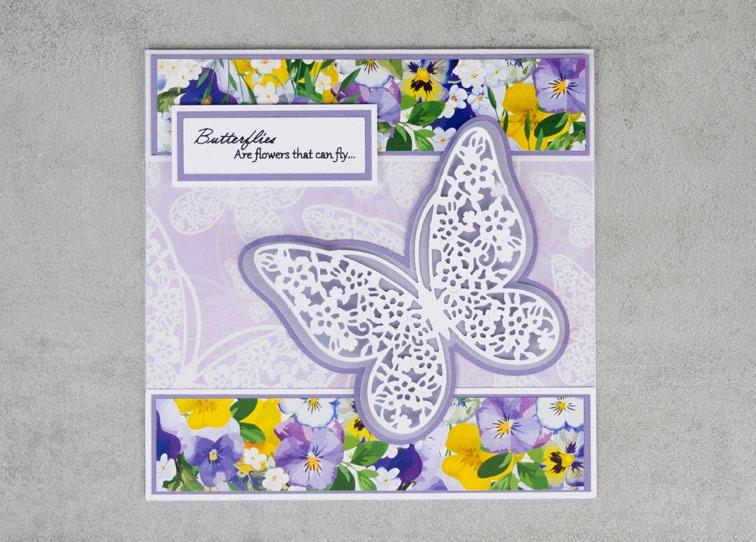
edge, and score and fold to create the top of the card front. Mat the butterflies square onto the inside back of the card. Mat the acetate square onto the top of the card front. Mat the 200mm x 50mm width white rectangle onto bottom of the acetate. 3
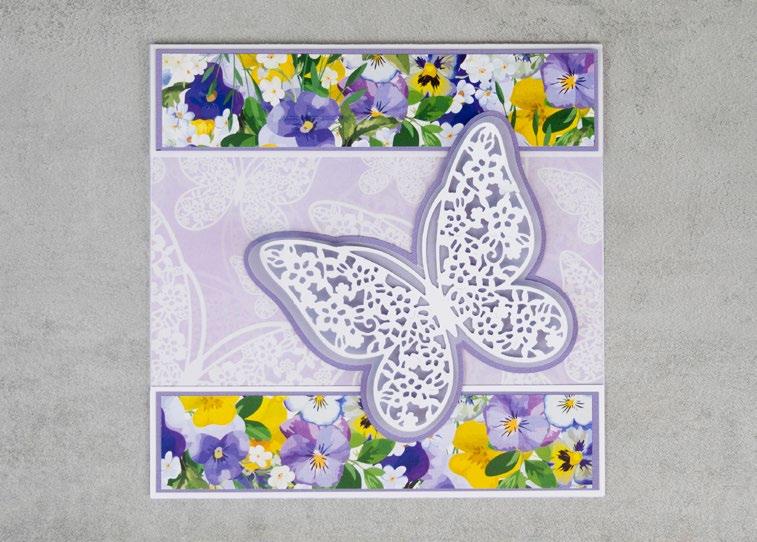
the cardstock, not the acetate. Mat the white butterfly cut onto the vellum outline, and mat onto the lilac butterfly, only sticking the bodies and leaving the wings unstuck. 5
Mat the sentiment rectangle onto the lilac rectangle, and onto the remaining white rectangle. Mat onto the card with foam tape. 6
Mat the lilac butterfly outline onto the card front, only sticking it to
Mat the two pansies rectangles onto the two 195mm x 45mm width lilac rectangles, and mat onto the top and bottom of the card front. 4
Mat two of the half butterflies together to create a full butterfly, and mat the butterflies onto the top and bottom of the card front.
----------------------------------------- BUTTERFLY BLISS ----------------------------------------------
2
1 4 2 5 3 6
CLICK HERE TO DOWNLOAD YOUR SVG CONTENT PROJECT 7 14 | www.tatteredlace.co.uk
What you’ll need:
• 08-02-Butterfly Bliss SVG files
• White cardstock
• Lilac cardstock
1 Cut all the pieces needed to create the project as listed below;
From SVG downloads:
• From white cardstock: - 1 x BB-2-Card Base
- 1 x BB-2-Butterfly Outline 1 - 1 x BB-2-Butterfly - 1 x BB-2-Small Butterflies
• From lilac cardstock: - 1 x BB-2-Butterfly Outline 2

• From vellum: - 1 x BB-2-Butterfly Outline 3
From machine memory:
• From lilac cardstock:
- 1 x 120mm x 135mm rectangle

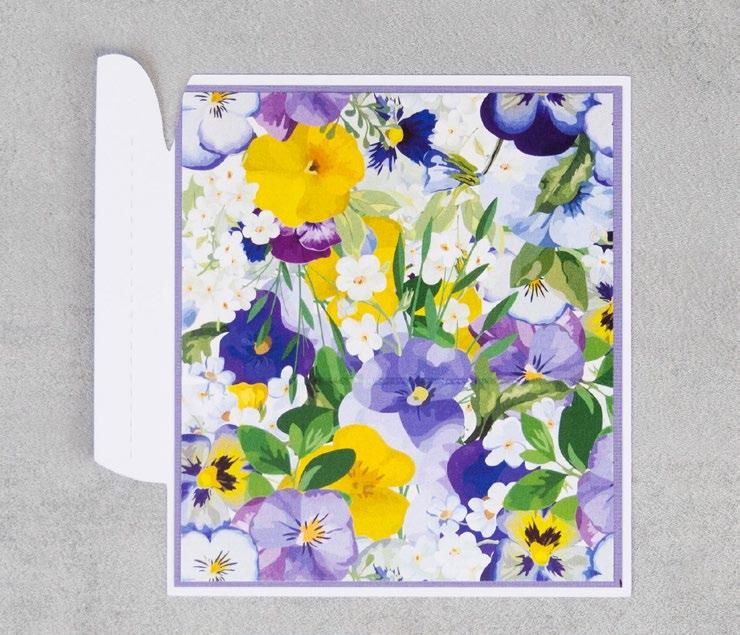
• From backing paper: - 1 x 115mm x 130mm rectangle (pansies)
• Construction acetate
• Vellum 2
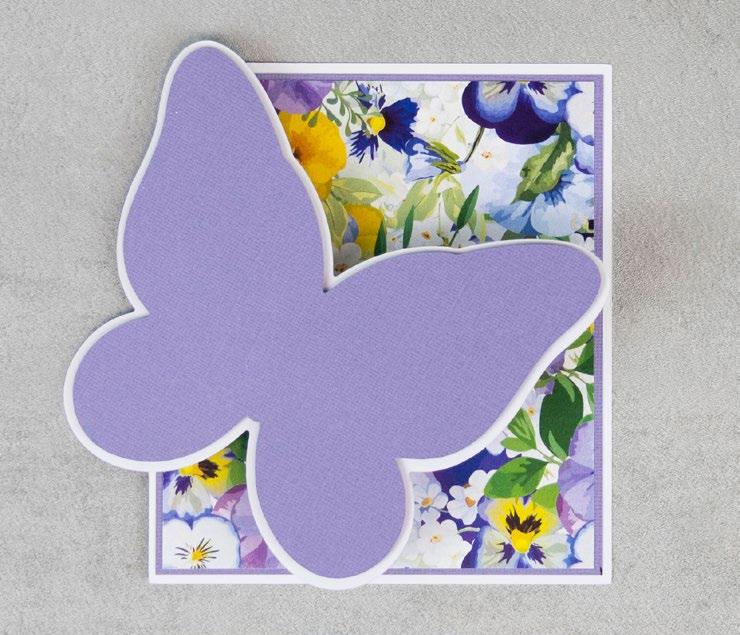
Mat the pansies rectangle onto the lilac rectangle, and mat onto the inside back of the card base. Trim to the top-left corner if needed. 3
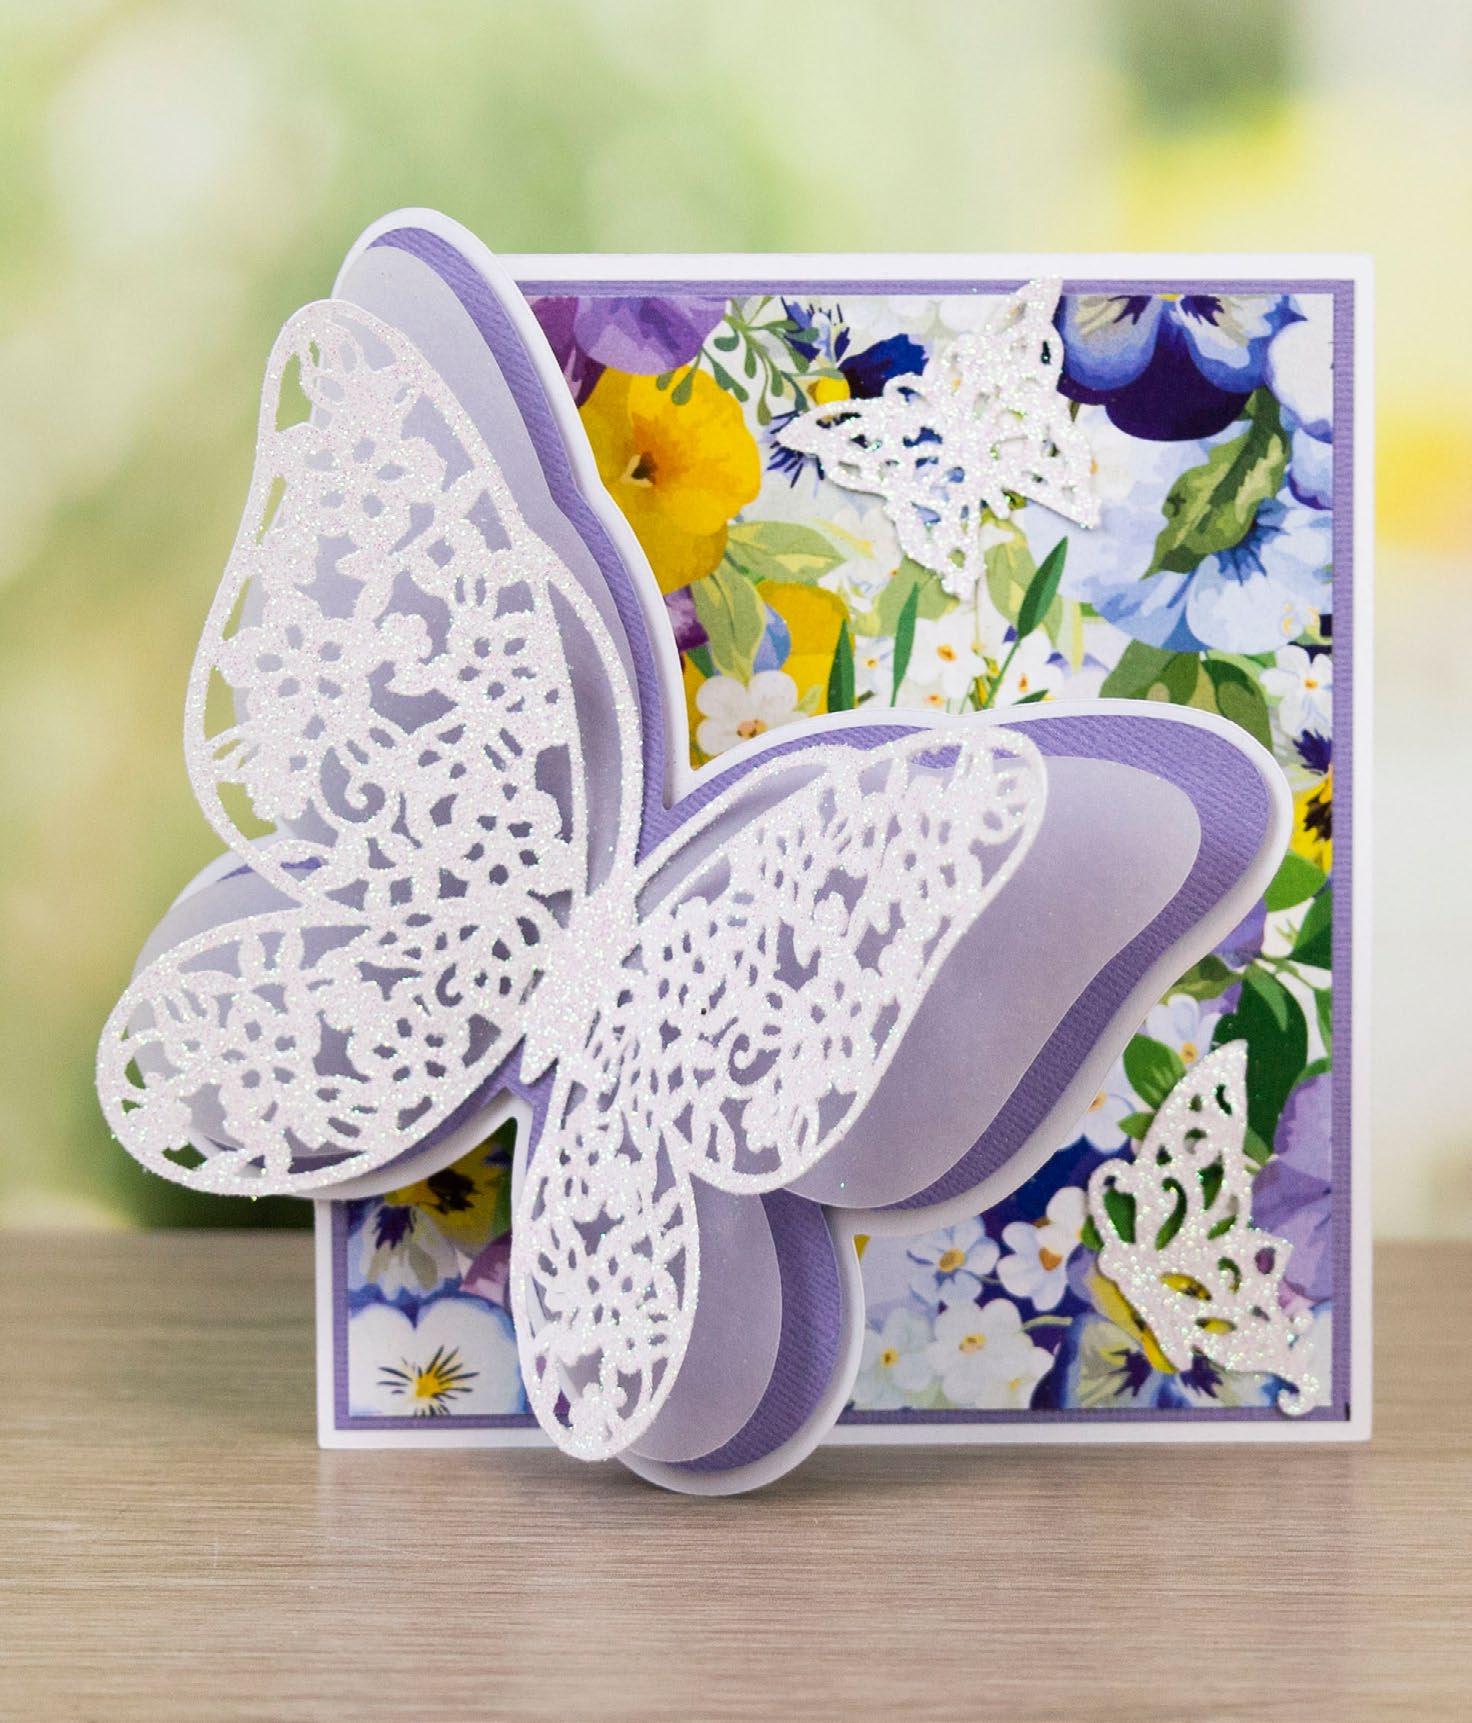
Mat the white butterfly outline 1 onto the card base tab to create the card front. Mat the lilac butterfly outline 2 onto the card front with foam tape. 4
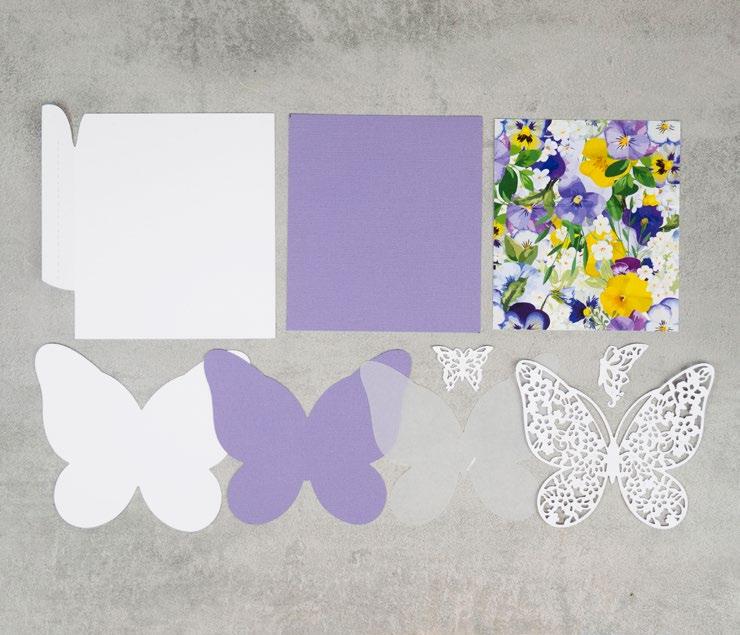
Mat the butterfly cut onto the vellum outline 3, and mat onto the card front, only sticking their bodies and leaving the wings unstuck. 5
Add glitter to the small butterflies, and mat onto the inside back of the card.
5
1 2 3 4
----------------------------------------- BUTTERFLY BLISS ---------------------------------------------CLICK HERE TO DOWNLOAD YOUR SVG CONTENT PROJECT 8 www.tatteredlace.co.uk | 15
What you’ll need:
• 09-03-Butterfly Bliss SVG files
• White cardstock
• Blue cardstock
1 Cut all the pieces needed to create the project as listed below;
From SVG downloads:
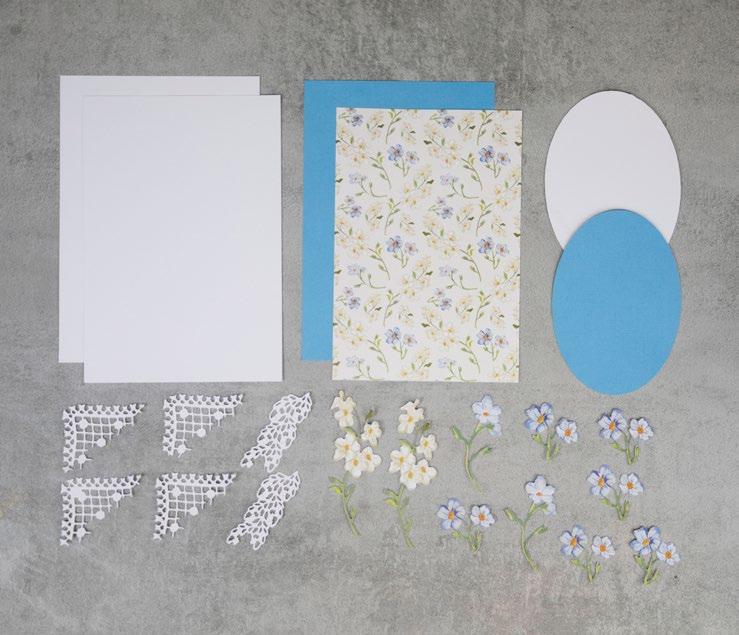
• From white cardstock: - 4 x BB-3-Lace Corner - 2 x BB-3-Lace Leaf
• From charisma: - 1 x BB-3-Charisma
From machine memory:
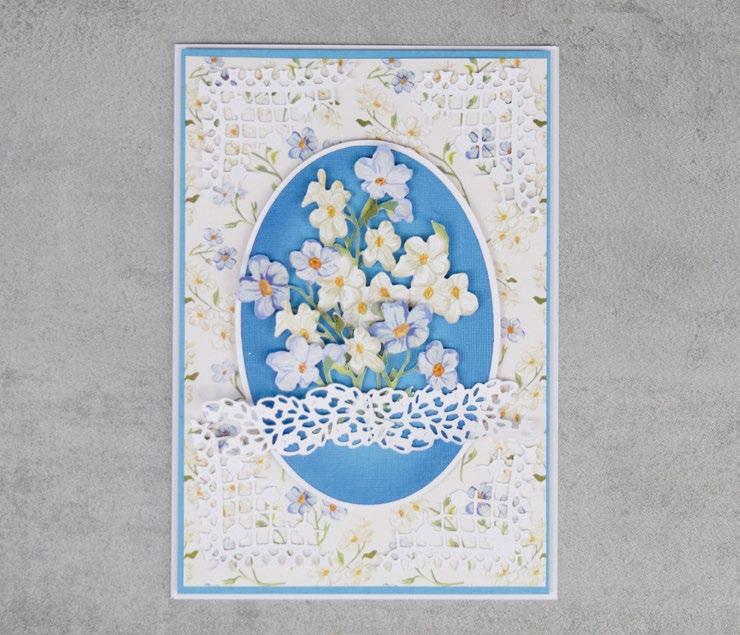
• From white cardstock: - 2 x 145mm x 210mm rectangle - 1 x 100mm x 140mm oval
• From blue cardstock: - 1 x 140mm x 205mm rectangle - 1 x 95mm x 136mm oval

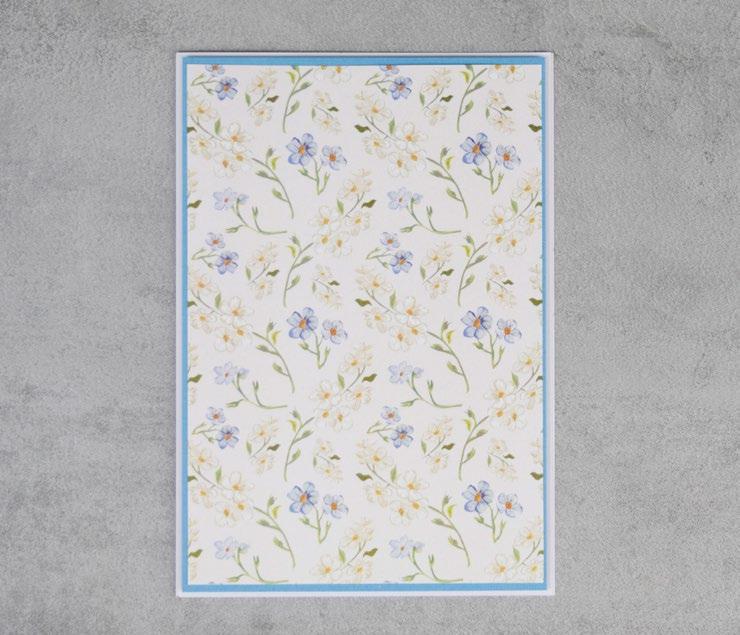
• From backing paper: - 1 x 135mm x 200mm rectangle (spring flowers) 2
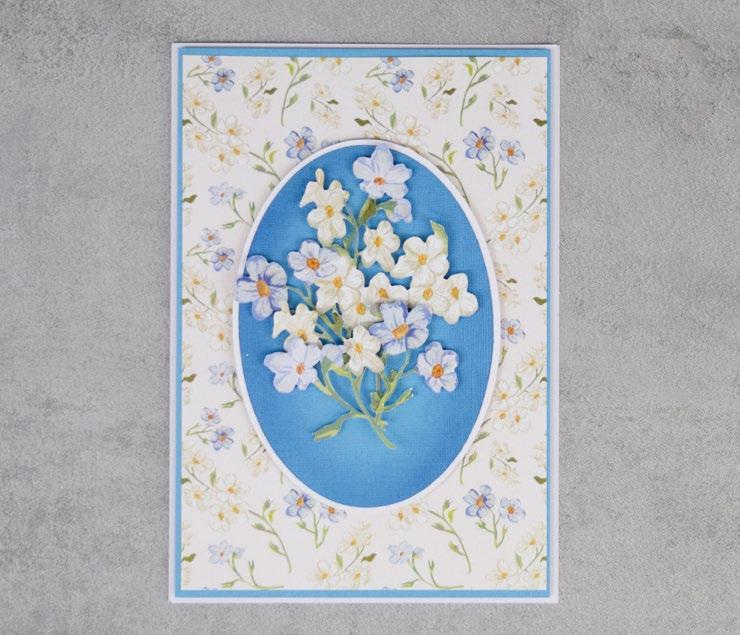
On one of the large white rectangles, measure in 10mm from the left, and score and fold to create
• Distress Ink – Chipped Sapphire
• White ribbon
a tab. Attach to the other white rectangle to create a card. Mat the spring flowers rectangles onto the blue rectangle, and mat onto the card with foam tape.
3
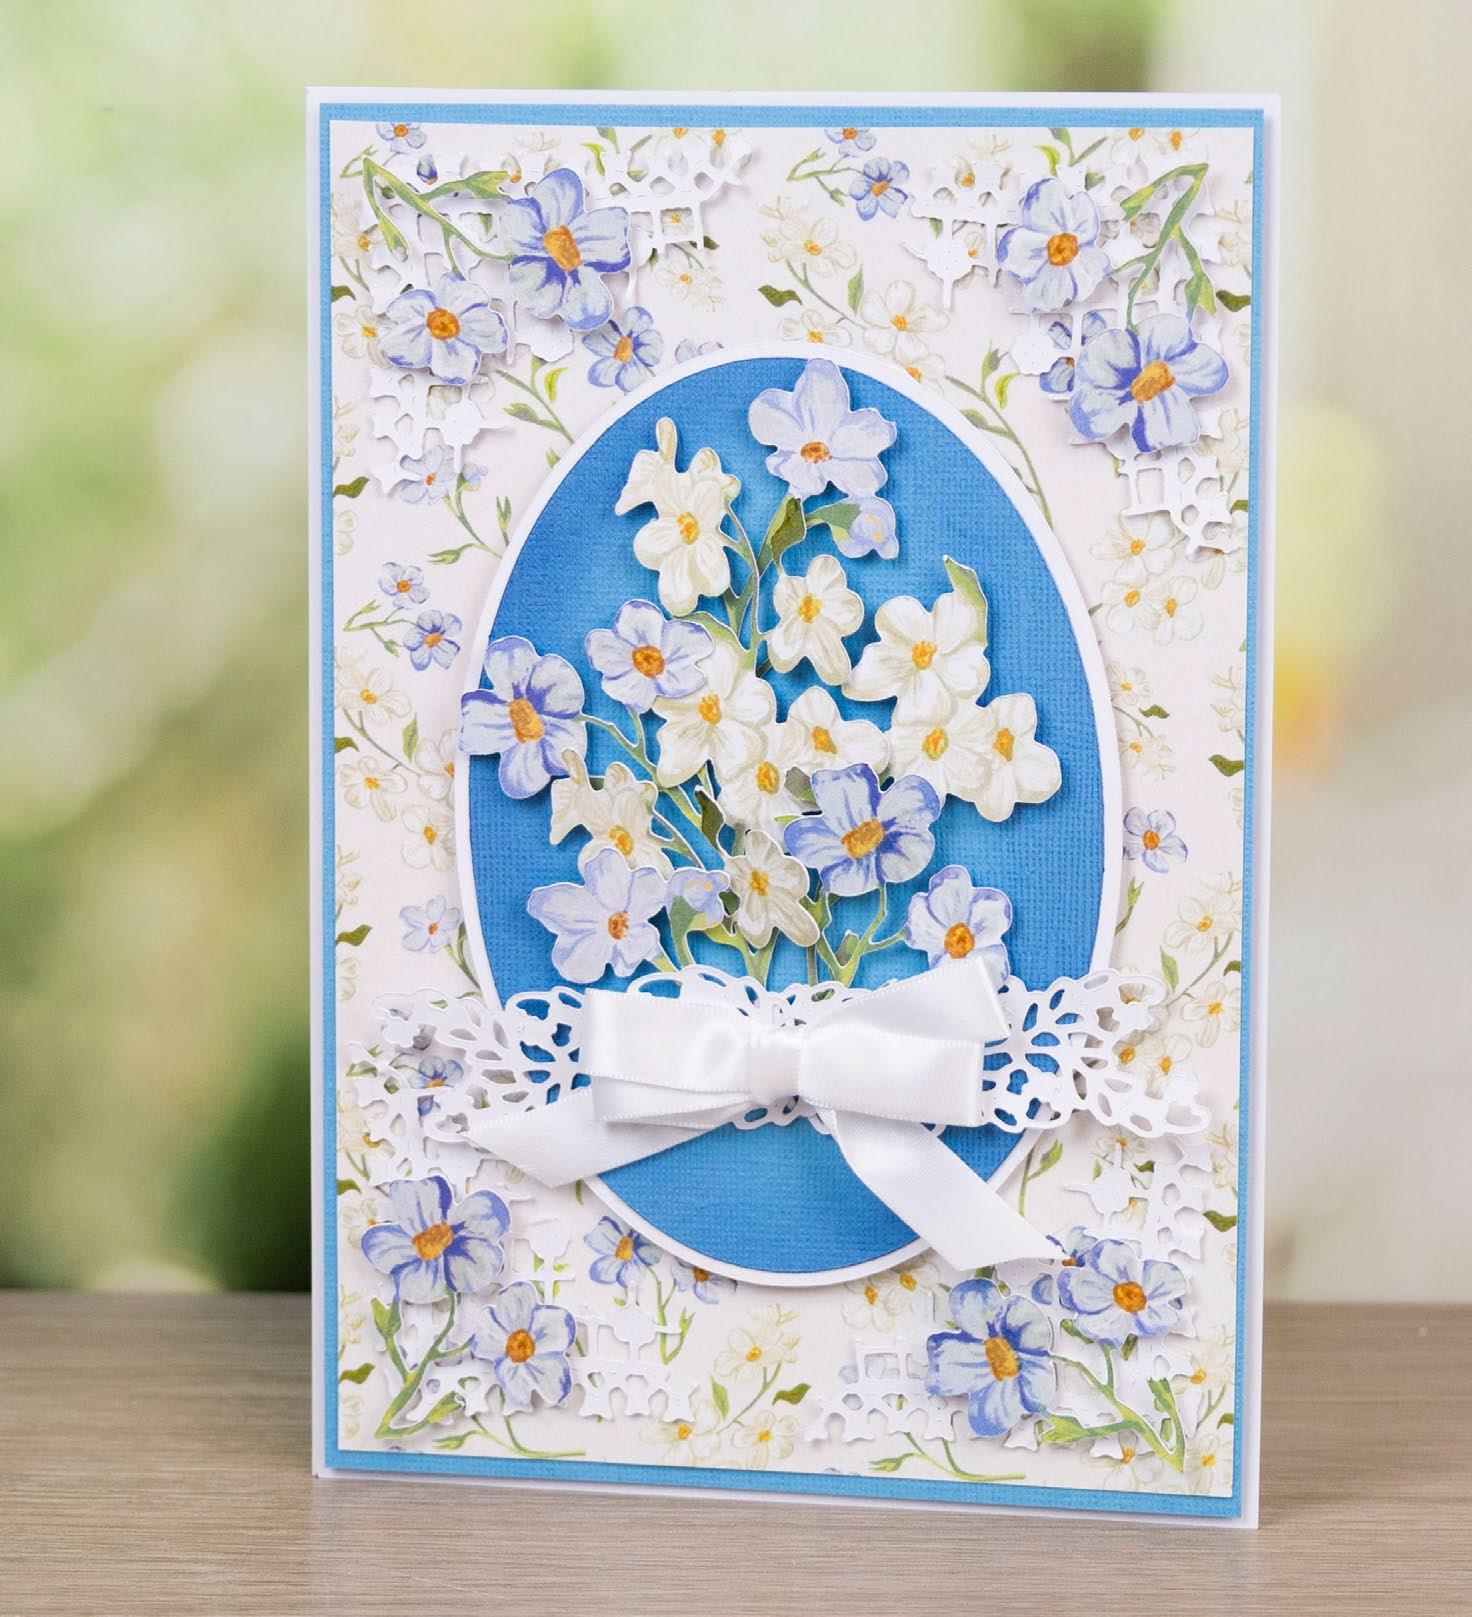
Ink the edges of the blue ovals, and mat onto the white oval. Mat onto the card with foam tape. Put four of the small blue floral-cuts to the side, and arrange and mat the rest of the floral-cuts onto the oval with foam tape.
4
Mat the white lace corners into the four corners of the card. Mat the lace leaf cuts across the bottom of the floral bouquet.
5 Mat the remaining floral-cuts onto the lace corners, raising the flowers with foam tape. Tie a tripleloop bow from white ribbon and mat onto the card.
5
1 2 3 4
----------------------------------------- BUTTERFLY BLISS ---------------------------------------------CLICK HERE TO DOWNLOAD YOUR SVG CONTENT PROJECT 9 16 | www.tatteredlace.co.uk
What you’ll need:
• 10-04-Butterfly Bliss SVG files
• White cardstock
• Blue cardstock
1 Cut all the pieces needed to create the project as listed below;
From SVG downloads:
• From white cardstock: - 2 x BB-4-Card Base - 1 x BB-4-Butterflies
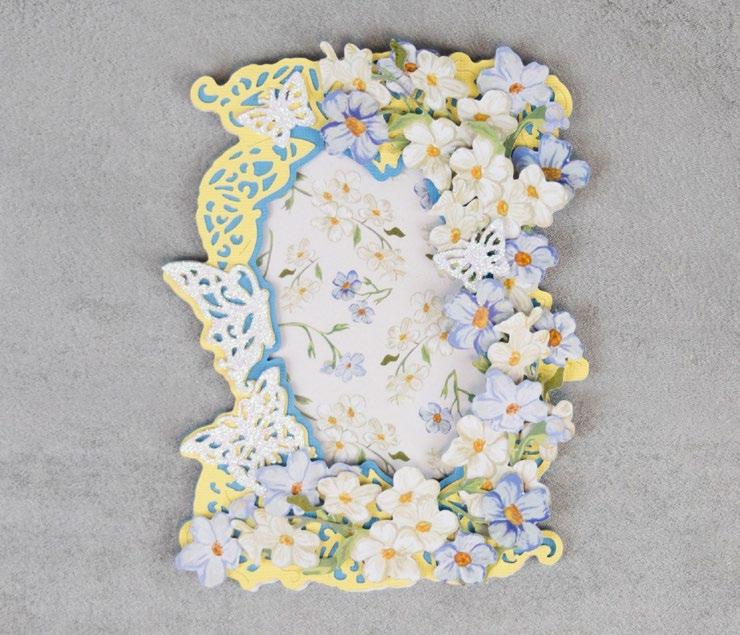
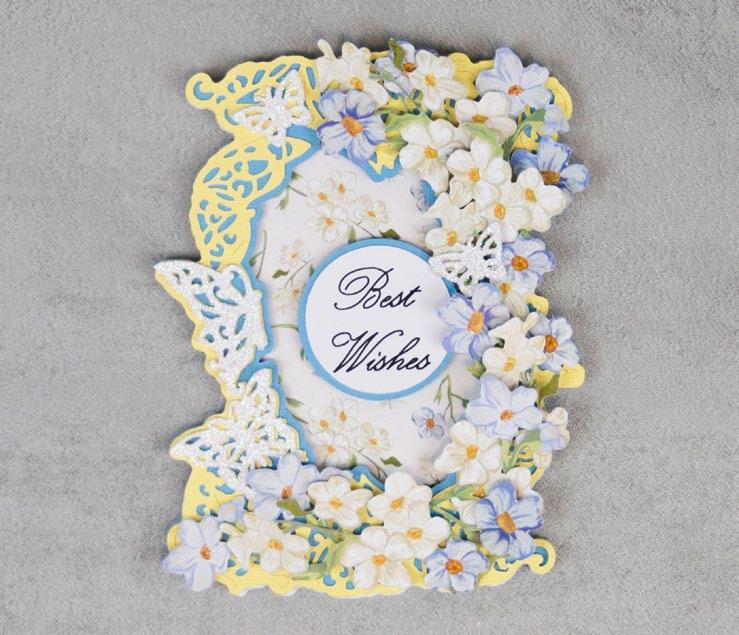
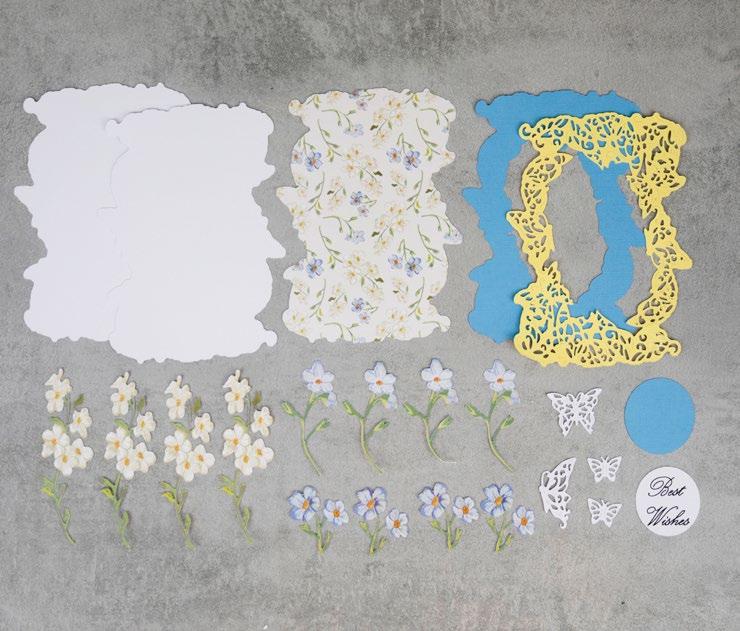
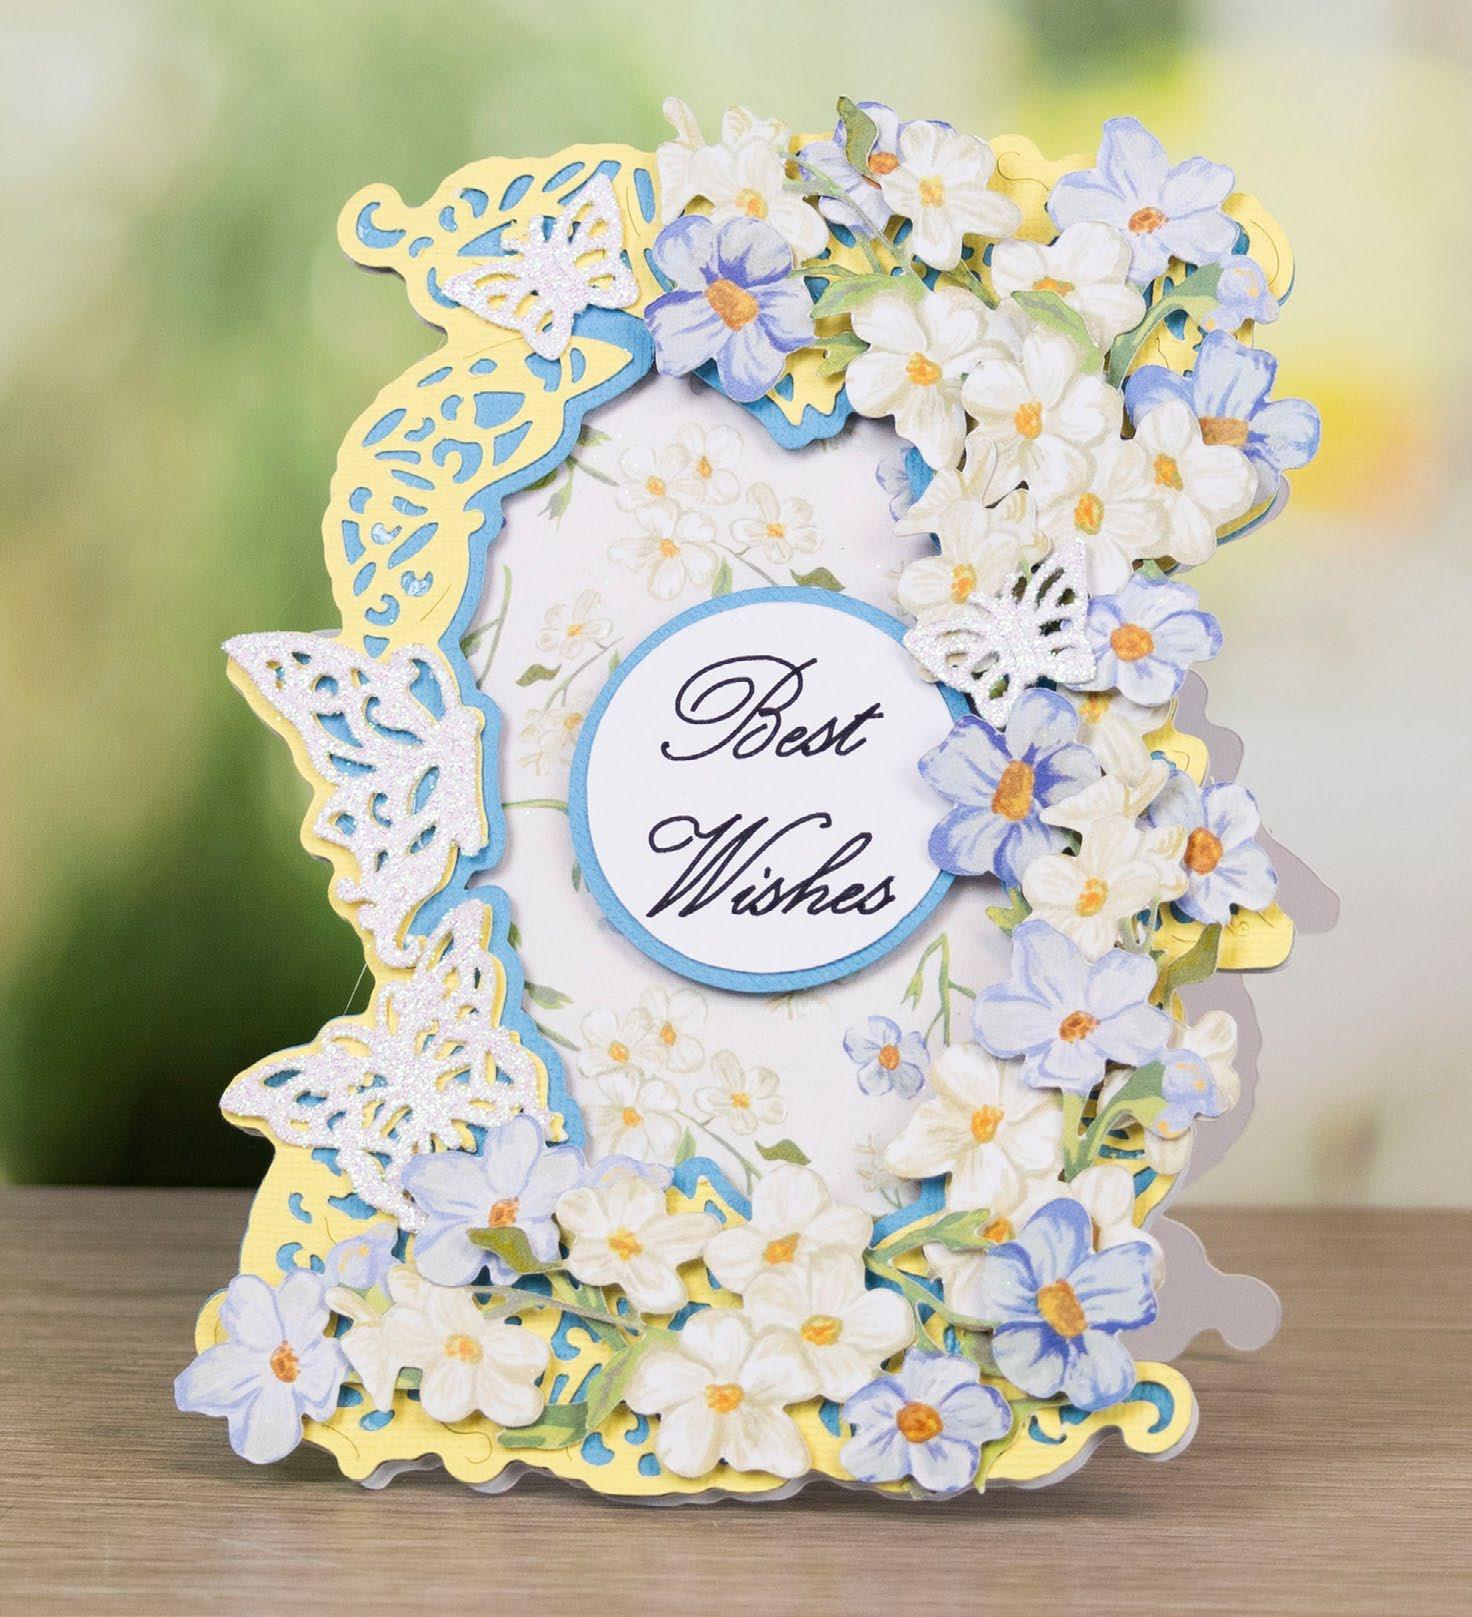
• From backing paper: - 1 x BB-4-Card Base (spring flowers)
• From blue cardstock: - 1 x BB-4-Frame Mat
• From pale yellow cardstock: - 1 x BB-4-Frame
• From charisma: - 1 x BB-4-Charisma
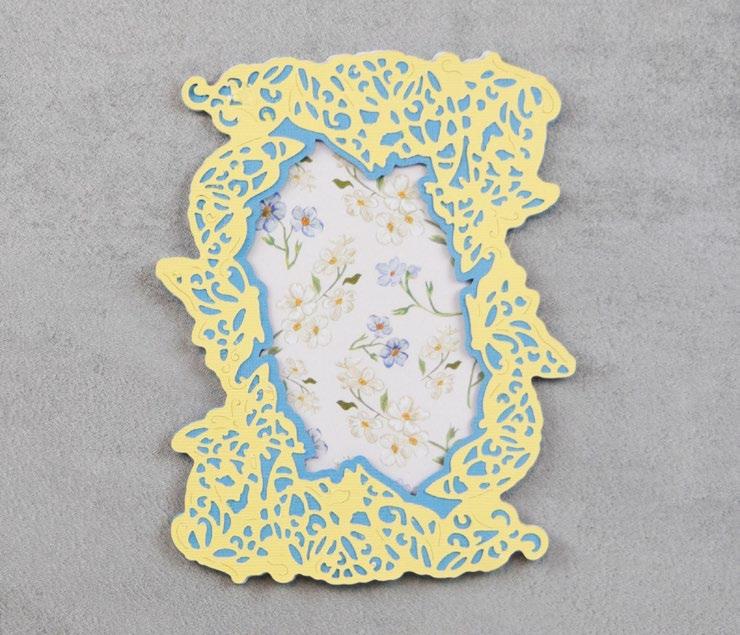
From machine memory:
• From white cardstock: - 1 x 44mm circle (with sentiment draw file)
• From blue cardstock: - 1 x 48mm circle
• Pale yellow cardstock
• Glitter 2
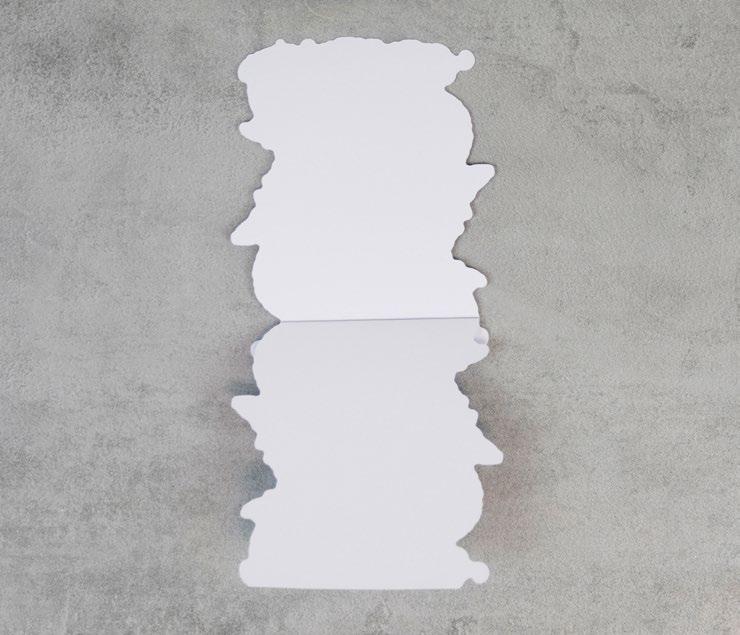
On one of the white card base cuts, measure down 25mm from the top edge, and score and fold across to create a tab. Trim a straight edge across the bottom. 3
Mat the spring flowers card base cut onto the front of the card. Mat the pale yellow frame onto the blue frame mat, and mat onto the front of the card with foam tape. 4
Mat the flower cuts to the frame with foam tape, as desired. Glitter the butterflies and mat onto the frame.
5
Mat the sentiment circle onto the blue circle, and mat inside the frame with foam tape.
5
1 2 3 4
----------------------------------------- BUTTERFLY BLISS ---------------------------------------------CLICK HERE TO DOWNLOAD YOUR SVG CONTENT PROJECT
www.tatteredlace.co.uk | 17
10
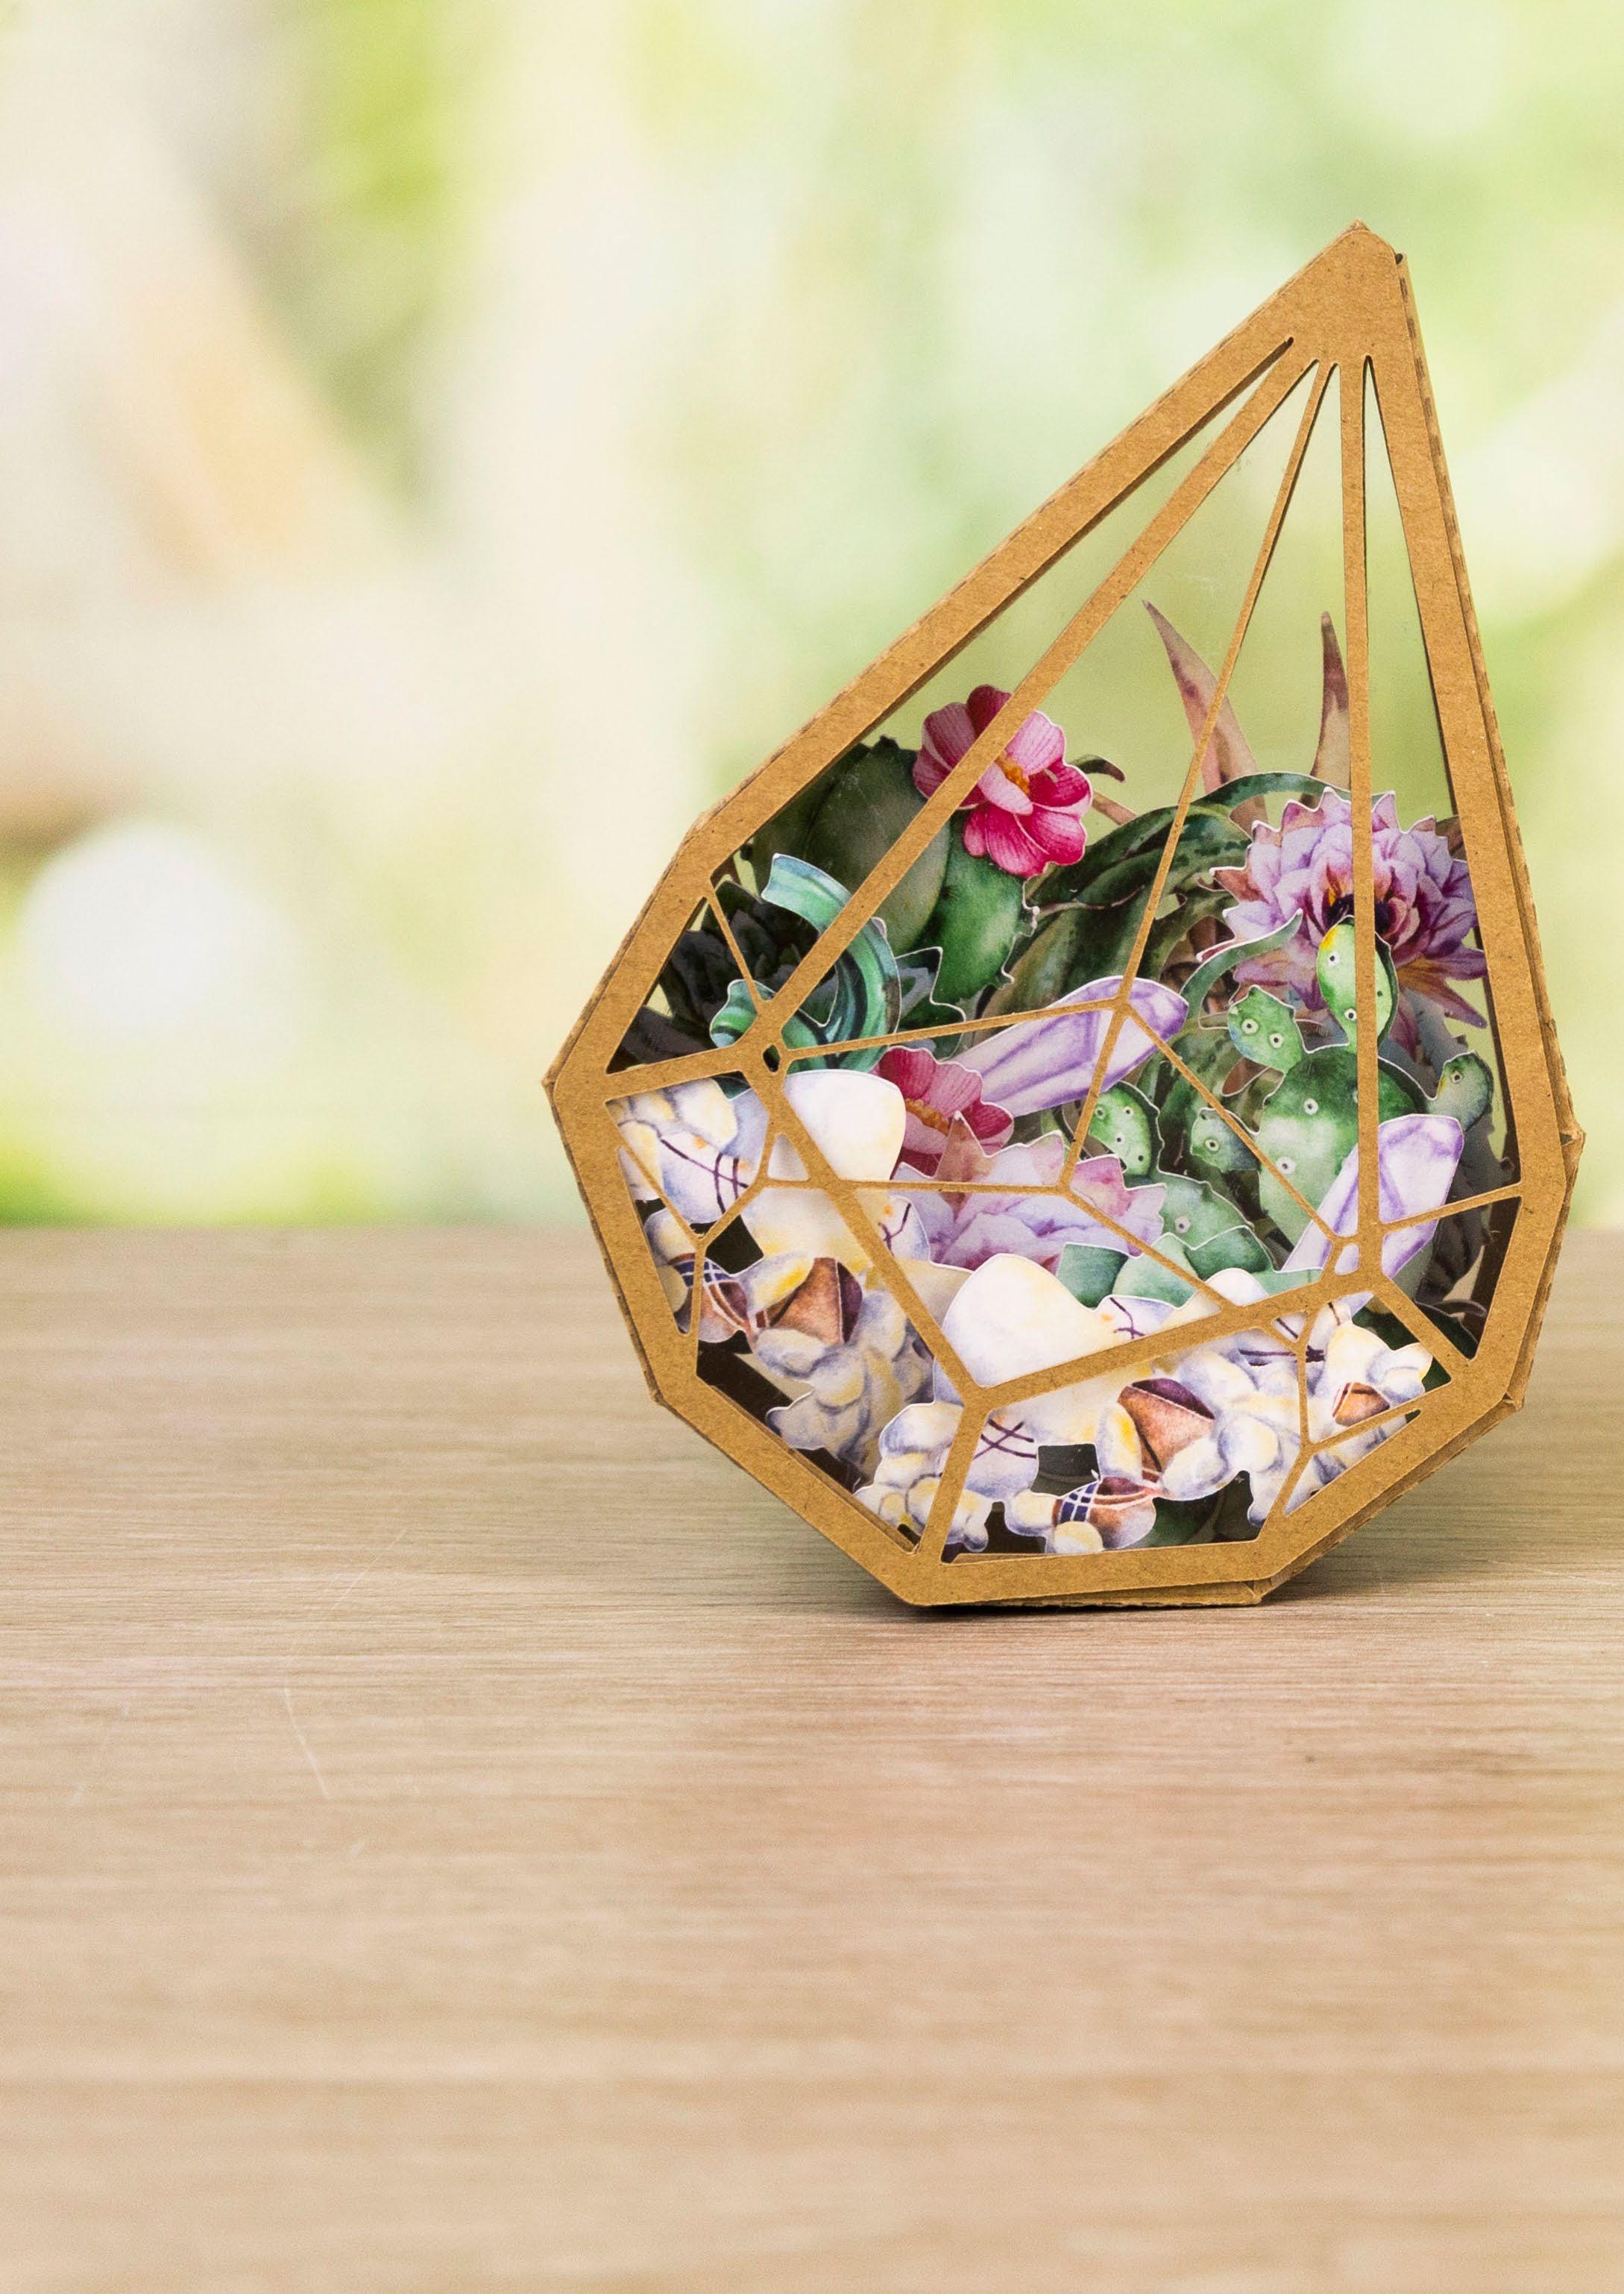
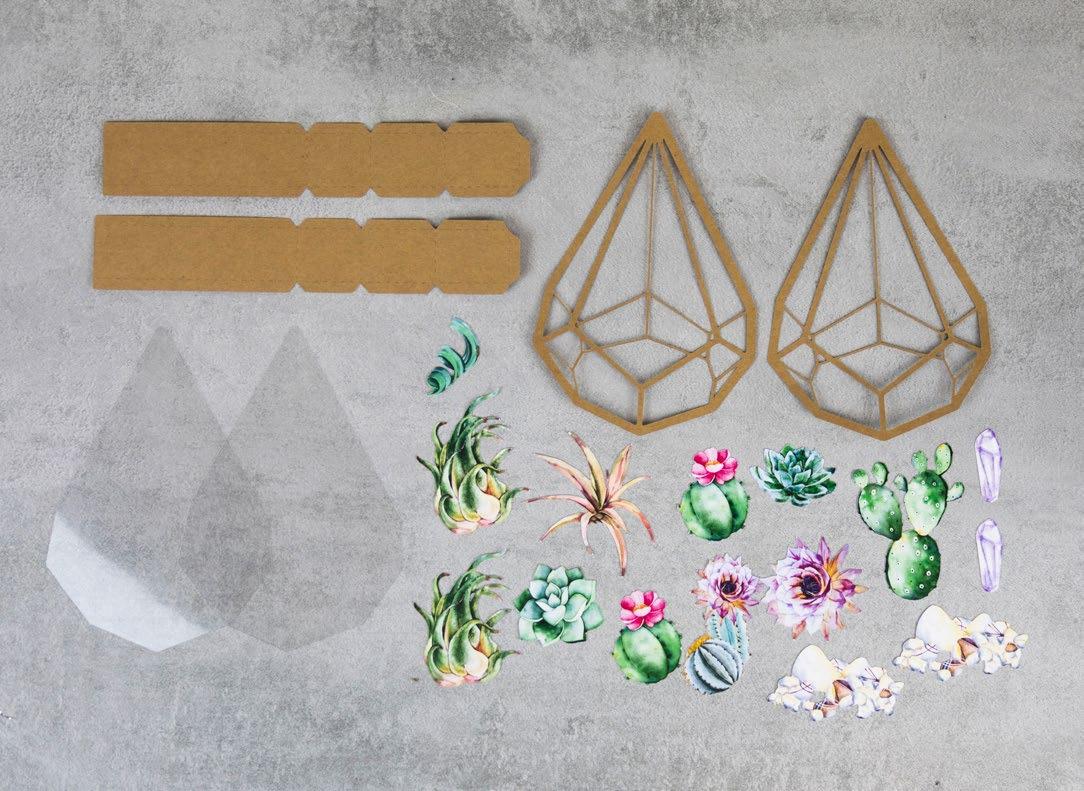
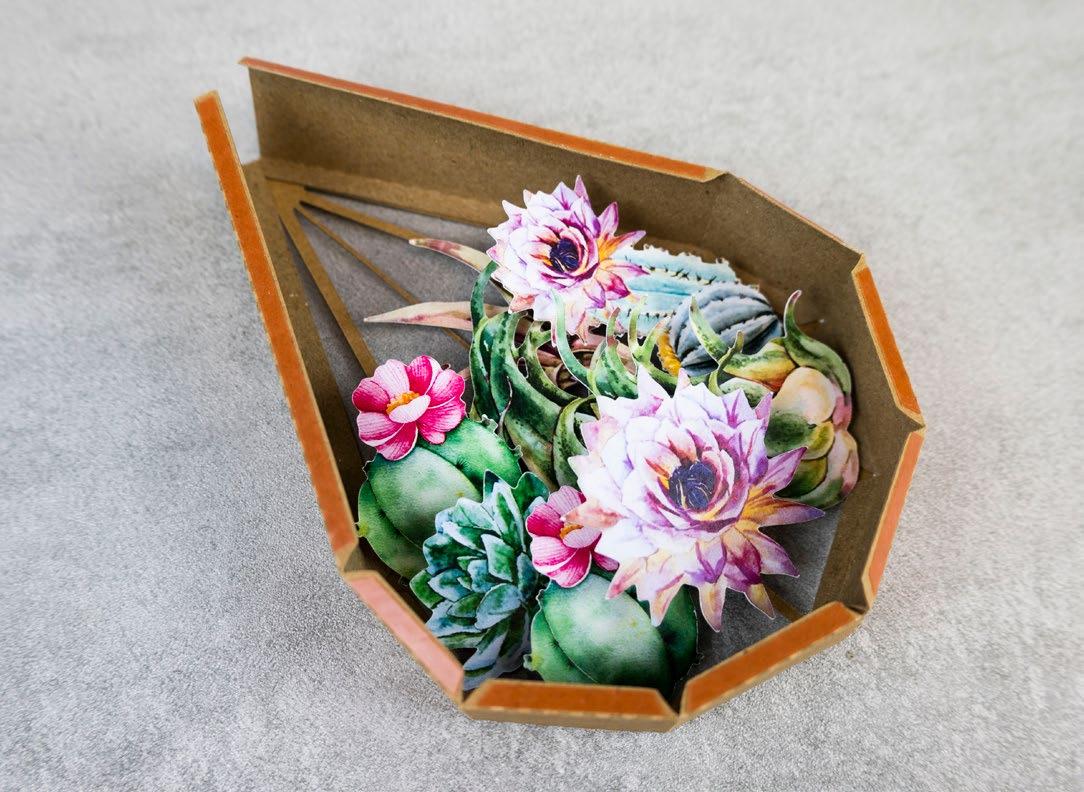
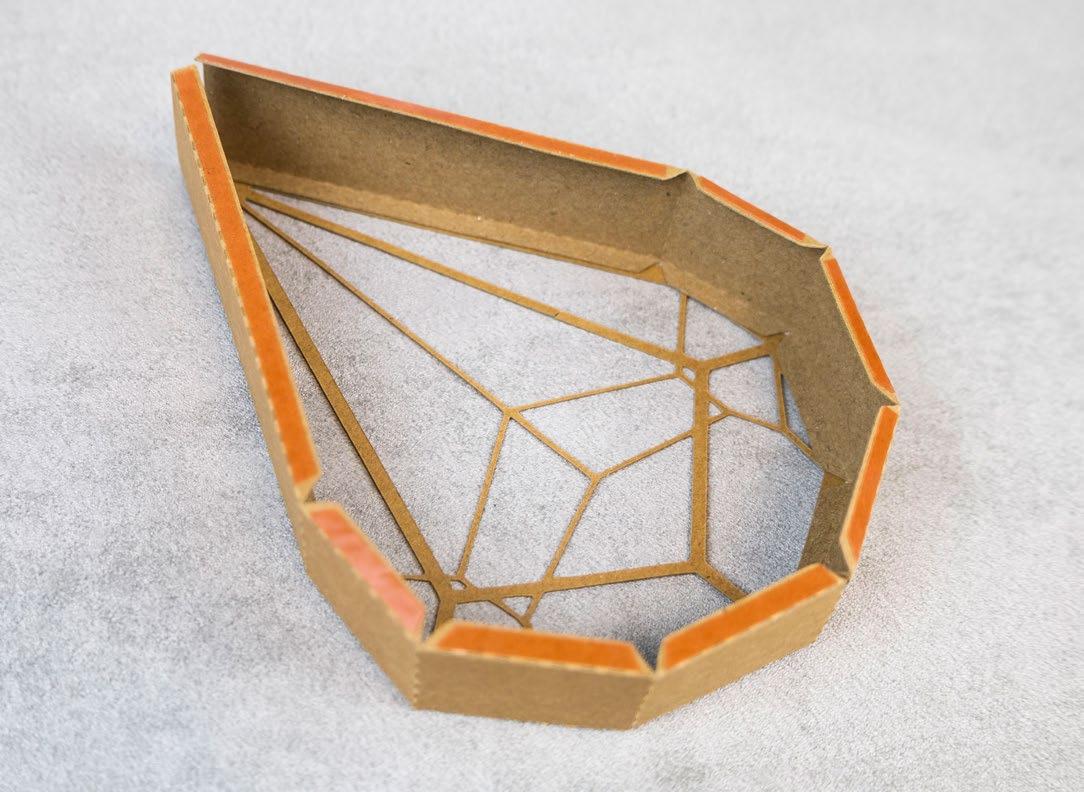
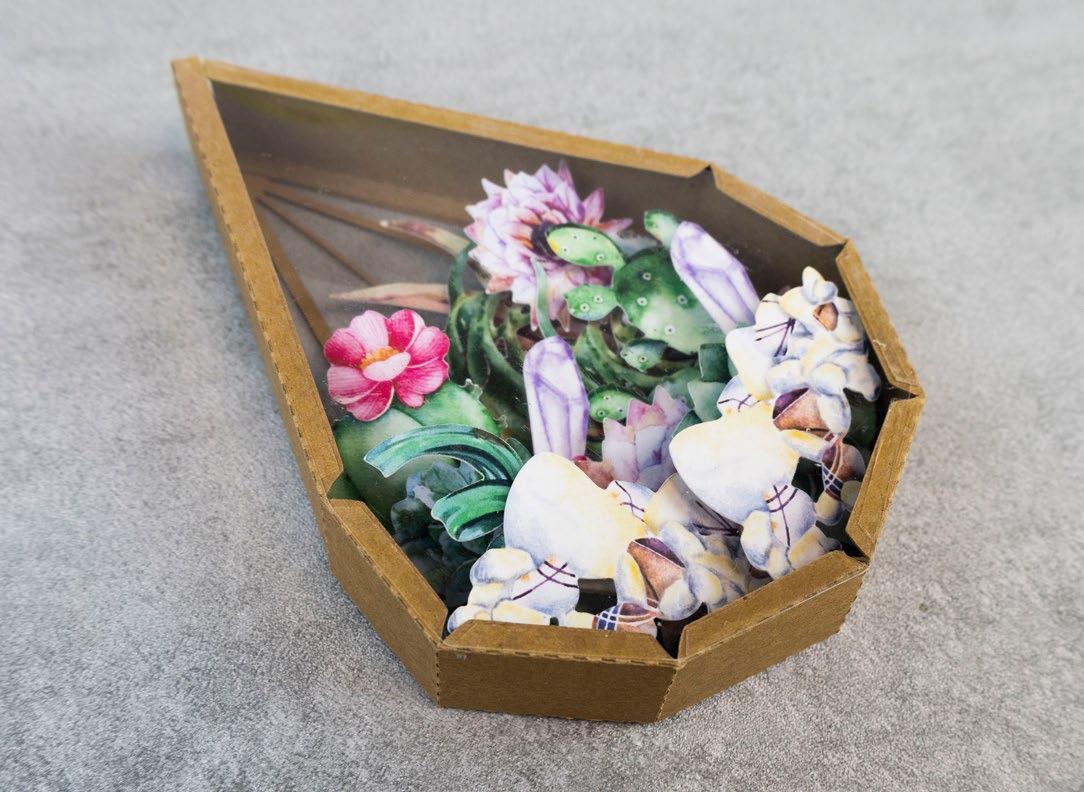
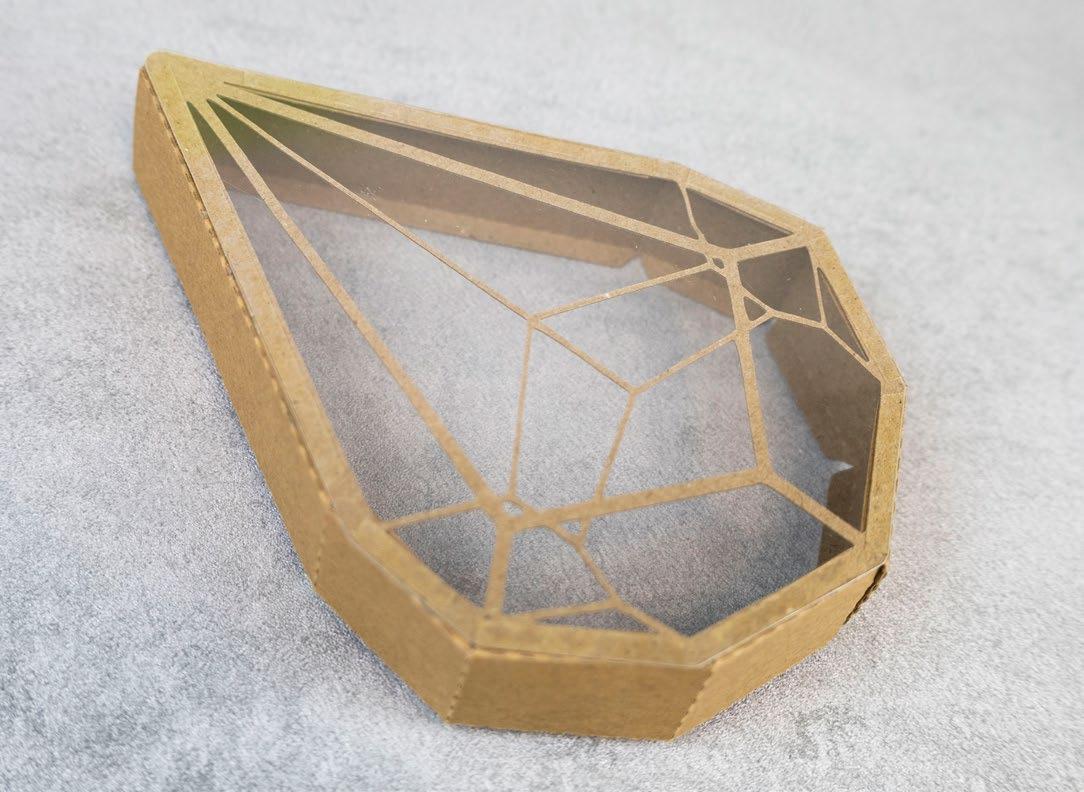
1 Cut all the pieces needed to create the project as listed below; From SVG downloads: • From kraft cardstock: - 2 x DT-1-Terrarium - 2 x DT-1-Terrarium Side • From acetate: - 2 x DT-1-Terrarium Outline • From charisma: - 1 x DT-1-Charisma 2 Fold on the score lines of the terrarium sides. Attach one of the sides down the side of one of the terrarium-cuts by attaching the tabs to the back of the cut. 3 Repeat with the terrarium side, and secure the two sides together at the bottom with glue. 4 Mat one of the acetate terrarium outlines onto the back of the terrarium. 5 Start to build up the charisma cuts inside the terrarium with different thickness of foam tape. 6 Continue adding your charisma cuts until you are happy with your arrangement. Add the prisms in behind the foliage sticking them with glue. 7 Mat the remaining acetate terrarium onto the side tabs to close the terrarium. 8 Mat the remaining terrarium cut onto the terrarium to finish. What you’ll need: • 11-01-David’s Terrarium SVG files • Kraft cardstock • Construction acetate Terrarium David’s ---------------------------------------- DAVID'S TERRARIUM --------------------------------------------top tip... There is no set way to build up your foliage inside the terrarium. Add as little or as much as you want! CLICK HERE TO DOWNLOAD YOUR SVG CONTENT PROJECT 11 18 | www.tatteredlace.co.uk



---------------------------------------- DAVID'S TERRARIUM --------------------------------------------1 5 3 7 2 6 4 8 www.tatteredlace.co.uk | 19
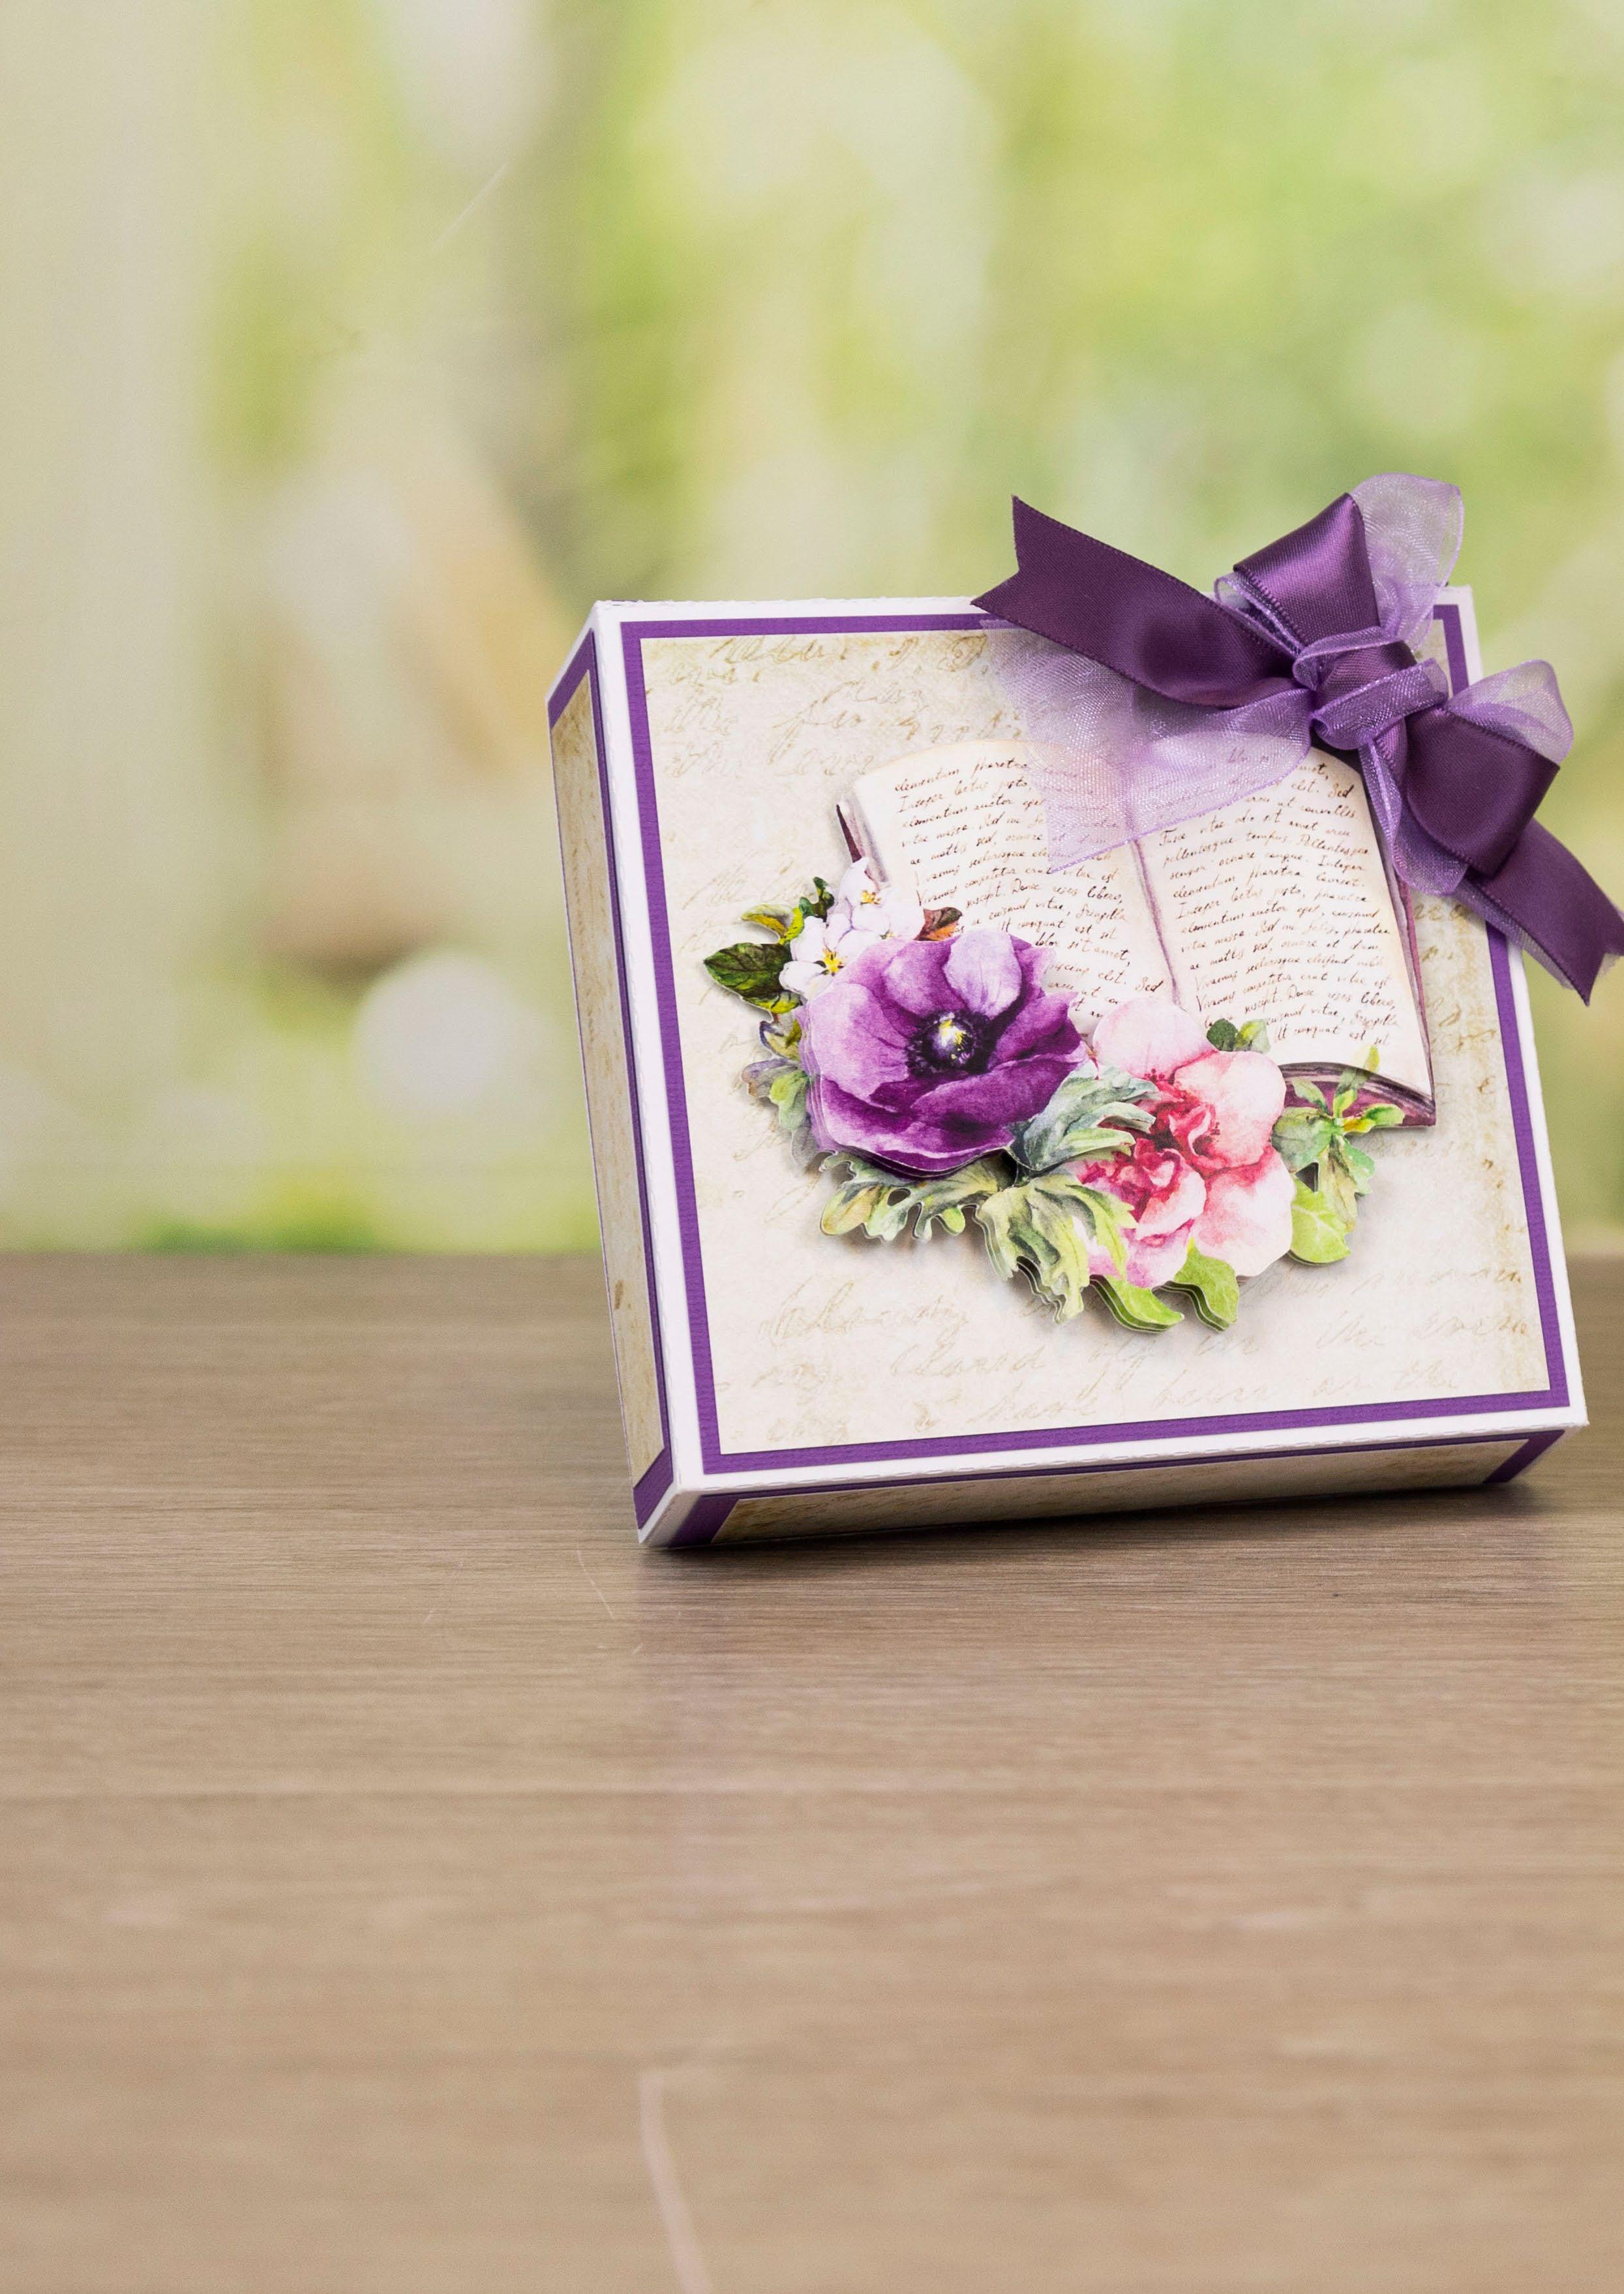
Gift BoxLouise’s What you’ll need: • 12-01-Louise’s Gift Box SVG files • White cardstock • Purple cardstock • Purple ribbon ---------------------------------------------- GIFT BOX ------------------------------------------------1 Cut all the pieces needed to create the project as listed below; From SVG downloads: • From white
-
x
Base 1 -
Base 2 •
-
From machine
•
purple cardstock: -
square -
rectangle • From
-
-
rectangle (script) 2 Attach the two box base pieces together matting the side panel of one to the other to create the
box
Mat
script square onto one
squares and mat
square panel of the box base. 3 Mat the four script rectangles onto four of the purple rectangles, and mat onto the outer panels of the right-hand side of the box base. 4 Turn the box base over, and build the bottom of the box and the box lid by attaching the small tabs to the box sides. 5 Mat the remaining purple squares onto the inside base and inside lid of the box. 6 Mat four of the purple rectangles onto the inside sides of the box base. Cut a length of ribbon, approximately 130mm long, and fold in half to form a loop. Mat onto the inside of the front side of the box, and mat the remaining rectangle on top of the ribbon loop. 7 Trim the charisma cuts, as shown in the image. 8 Build up the decoupage and mat together with foam tape. Mat onto the top of the box lid with foam tape. Tie a bow from two lengths of purple ribbon, and attach to the box lid, as shown. CLICK HERE TO DOWNLOAD YOUR SVG CONTENT PROJECT 12 20 | www.tatteredlace.co.uk
cardstock:
1
LGB-1-Box
1 x LGB-1-Box
From charisma:
1 x LGB-1-Charisma
memory:
From
3 x 120mm
9 x 120mm x 30mm
backing paper:
1 x 115mm square (script)
4 x 115mm x 25mm
whole
base.
the
of the purple
onto the right-hand

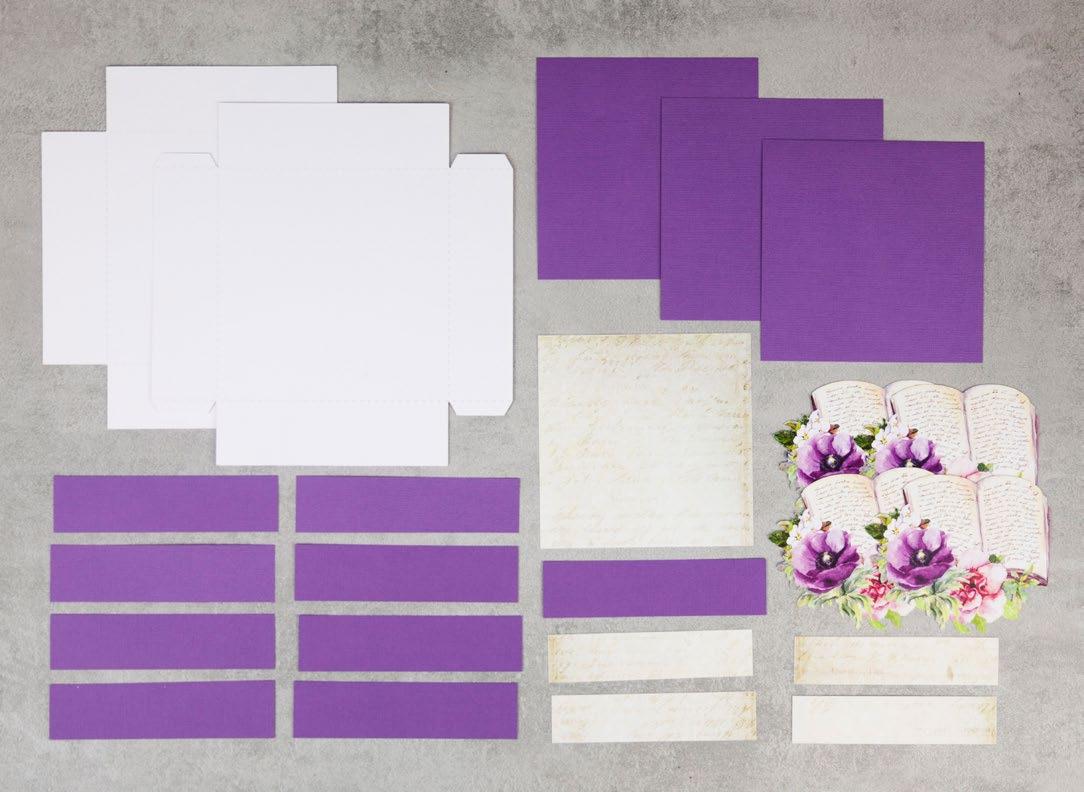
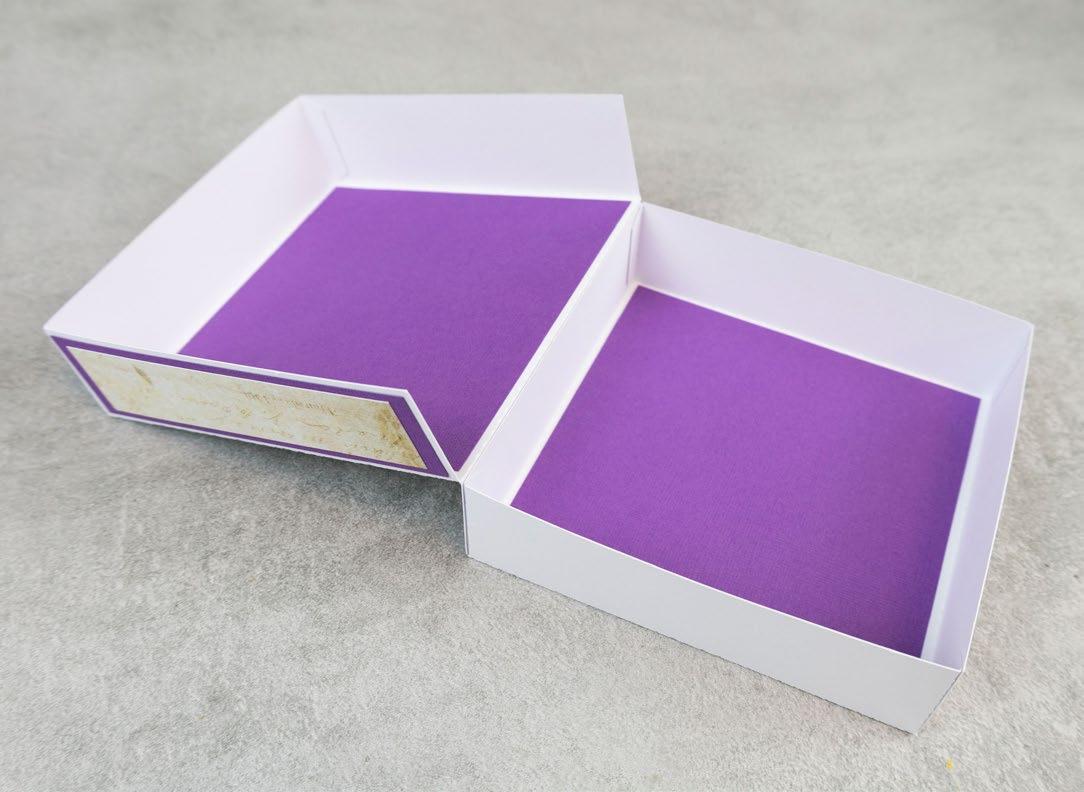
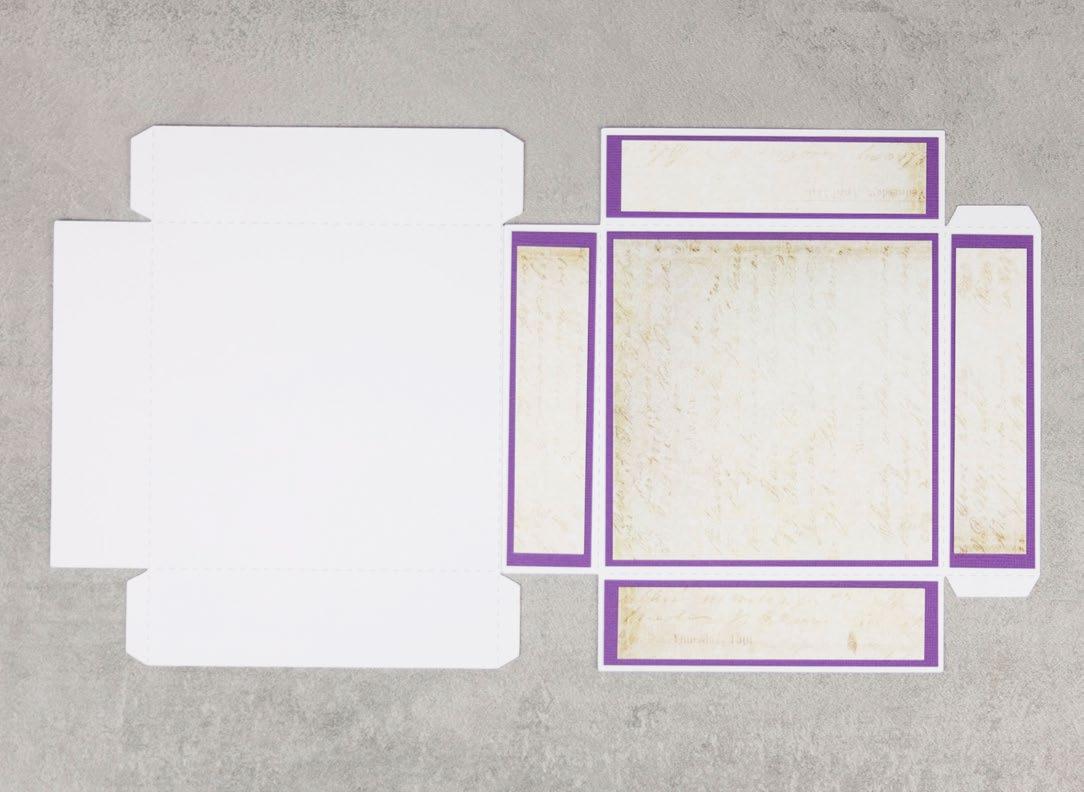
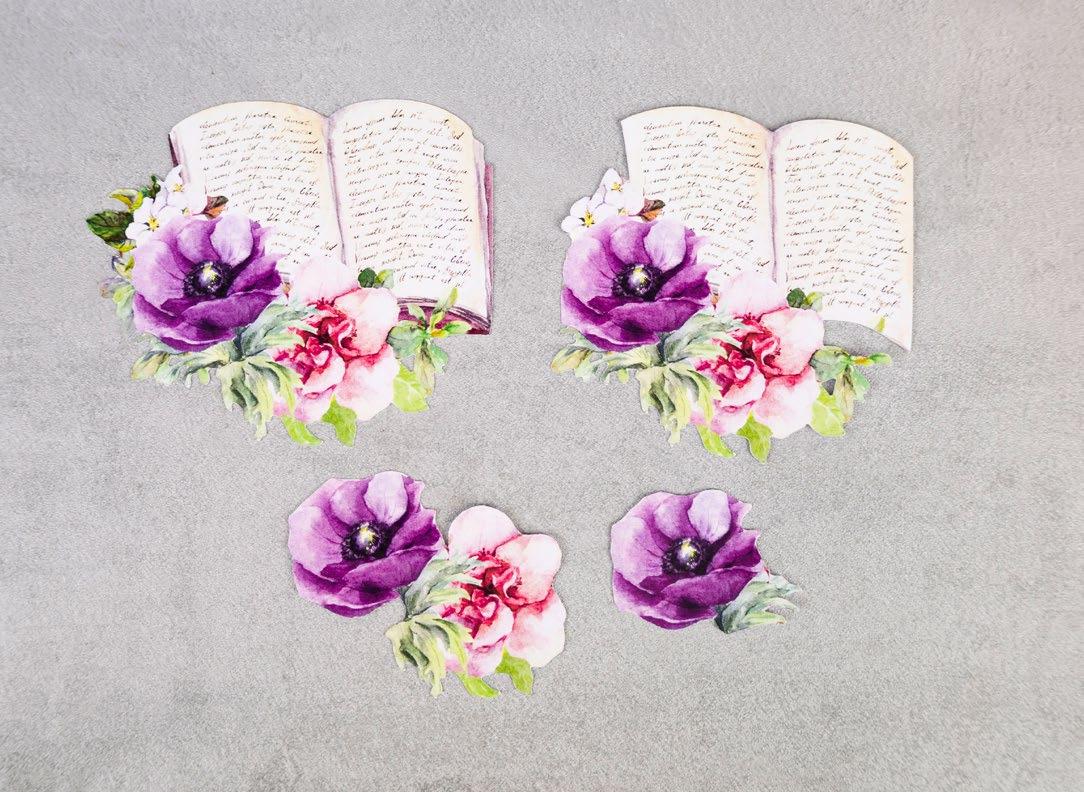
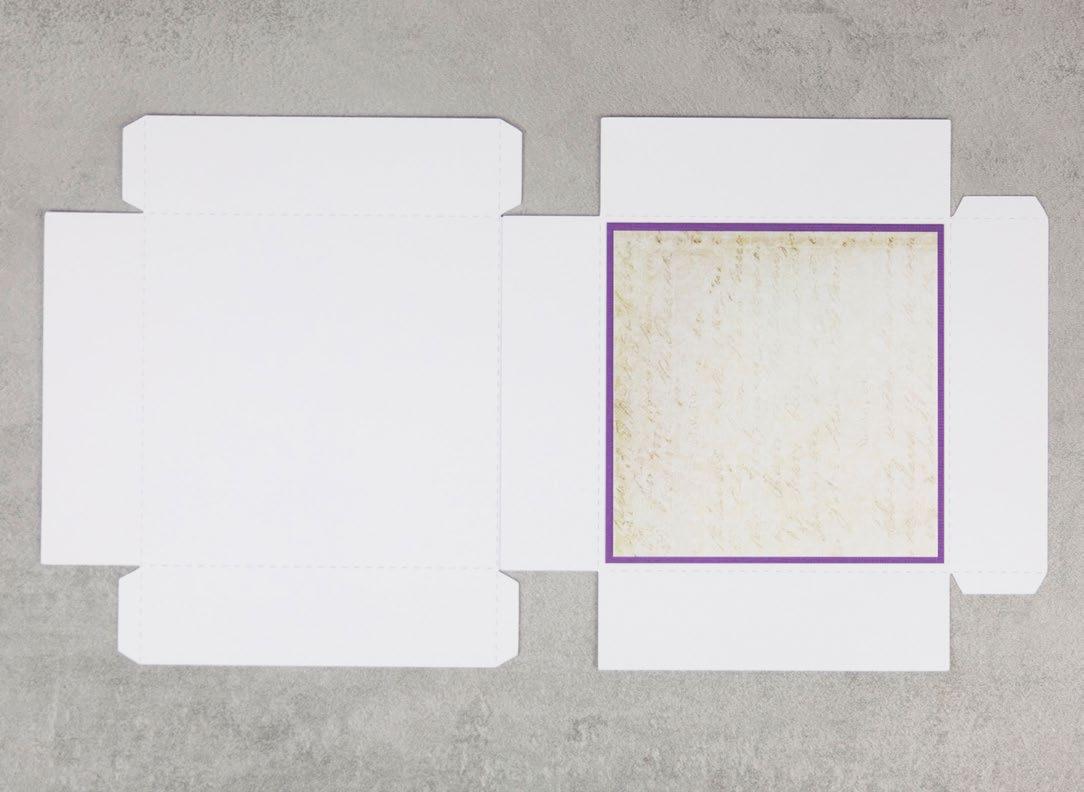


---------------------------------------------- GIFT BOX ------------------------------------------------1 5 3 7 2 6 4 8 www.tatteredlace.co.uk | 21
Everlasting Tranquillity
What you’ll need:
• 13-01-Everlasting Tranquillity SVG files
• Black cardstock • White cardstock
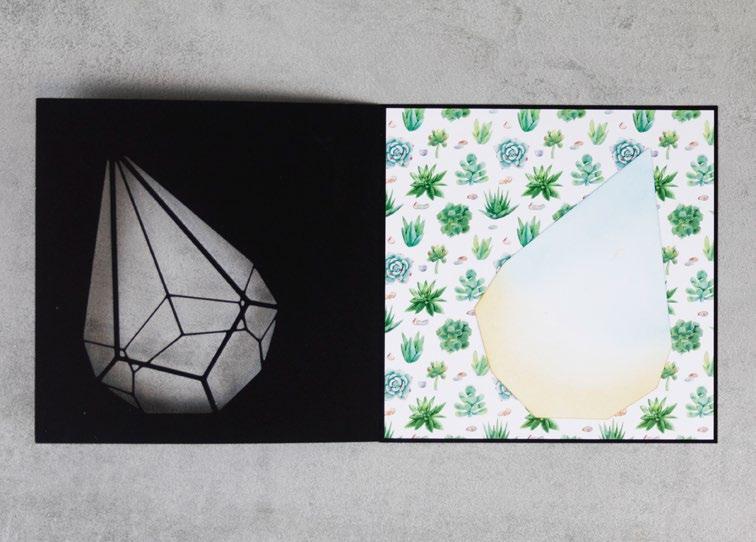
• Green cardstock
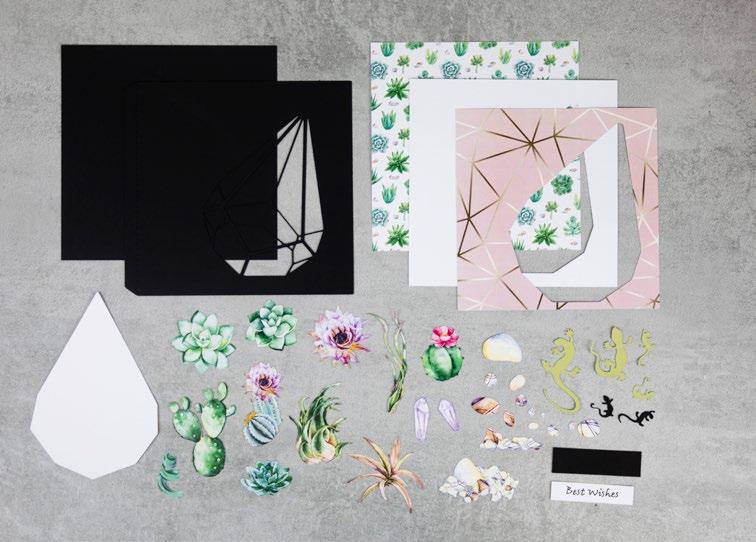
• Distress ink – Tea Dye & Tumbled Glass
1 Cut all the pieces needed to create the project as listed below;
From SVG downloads:
• From black cardstock: - 1 x ET-1-Card Front - 2 x ET-1-Small Lizard
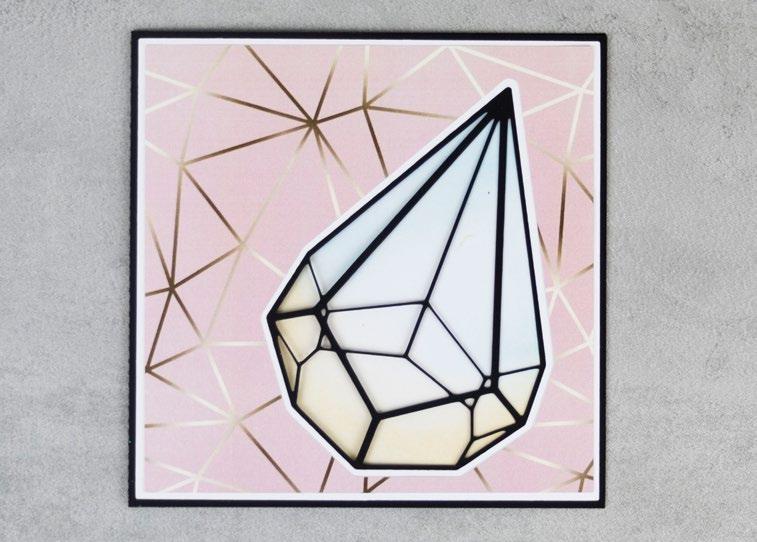
• From white cardstock: - 1 x ET-1-Terrarium Outline - 1 x ET-1-Card Mat 1

• From backing paper: - 1 x ET-1-Card Mat 2 (gold line)
• From green cardstock: - 1 x ET-1-Lizards - 2 x ET-1-Small Lizard
• From charisma: - 1 x ET-1-Charisma
From machine memory:
• From black cardstock: - 1 x 170mm square - 1 x 70mm x 20mm rectangle
• From backing paper: - 1 x 165mm square (watercolour succulents)
• From white cardstock: - 1 x 65mm x 15mm rectangle (with sentiment draw file)
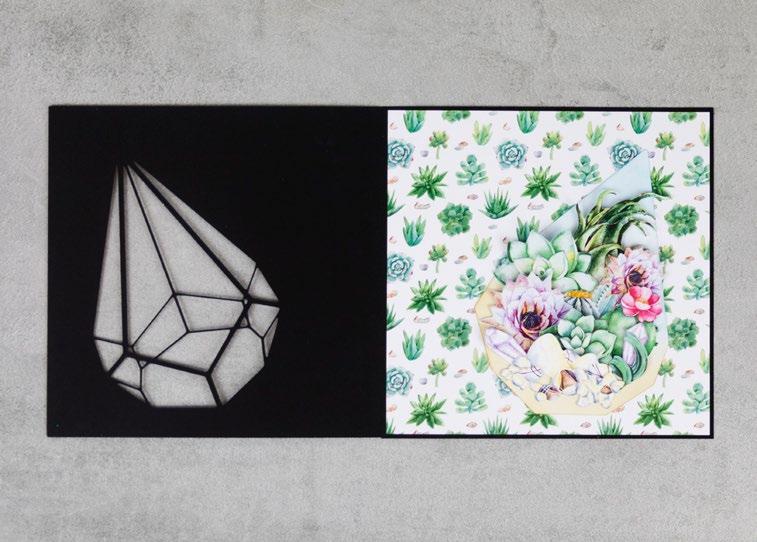
2
Attach to the black card front the black square using the tab to create the card. Mat the succulents square onto the inside back of the card. Ink the white terrarium outline, and mat onto the inside-back of the card (in line with the cut-out on the card front).
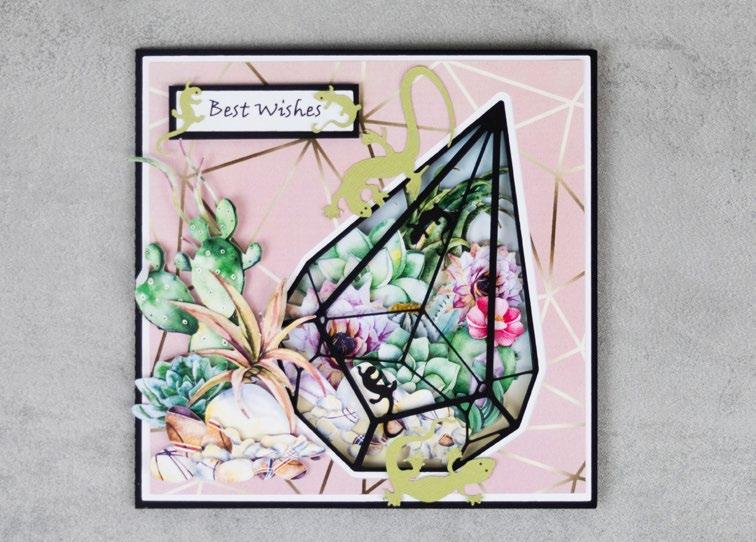
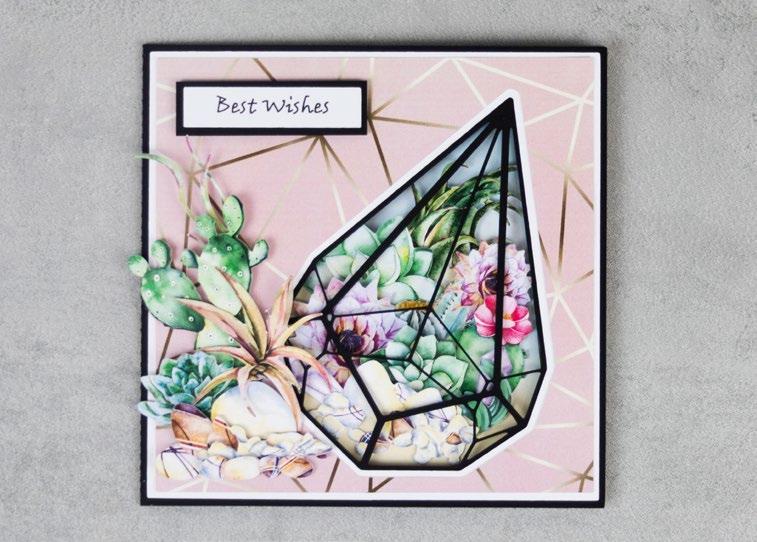
3
Mat the gold line card mat 2 onto the white card mat 1, and mat onto the front of the card.
4
Mat a selection of the charisma cuts onto the terrarium on the inside-back of the card.
5
Mat the sentiment rectangle onto the black rectangle, and mat onto the front of the card with foam tape. Mat the remaining charisma cuts onto the front of the card with foam tape.
6
Using a pen, add dots for eyes to the green lizards, and mat onto the front of the card. Mat the small black lizards onto the inside of the card.
------------------------------------ EVERLASTING TRANQUILITY -----------------------------------------
1 4 2 5 3 6
22 | www.tatteredlace.co.uk CLICK HERE TO DOWNLOAD YOUR SVG CONTENT PROJECT 13
What you’ll need:
• 14-02-Everlasting Tranquillity SVG files
• White cardstock
• Silver mirror cardstock

1
Cut all the pieces needed to create the project as listed below;
From SVG downloads:
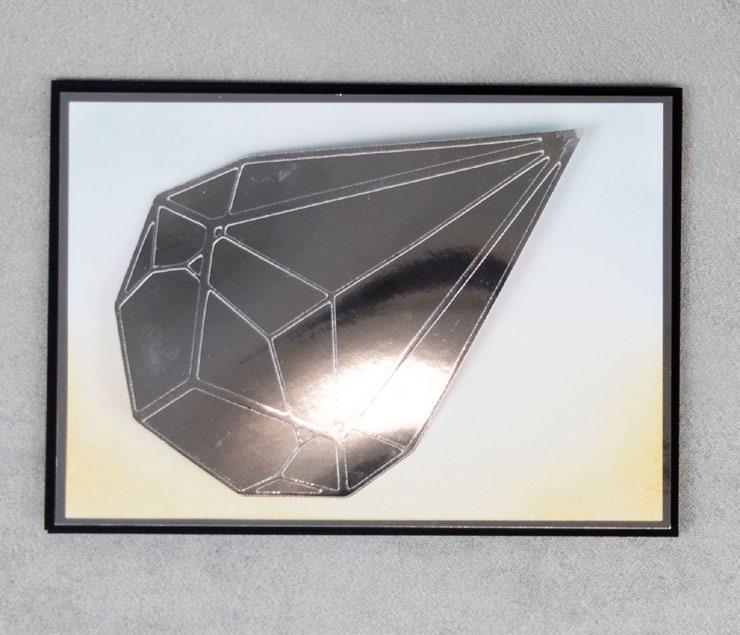
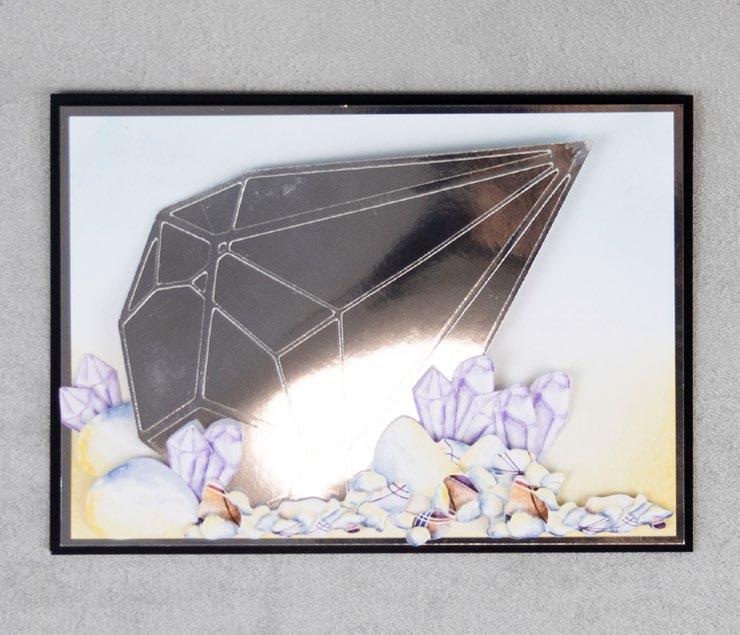
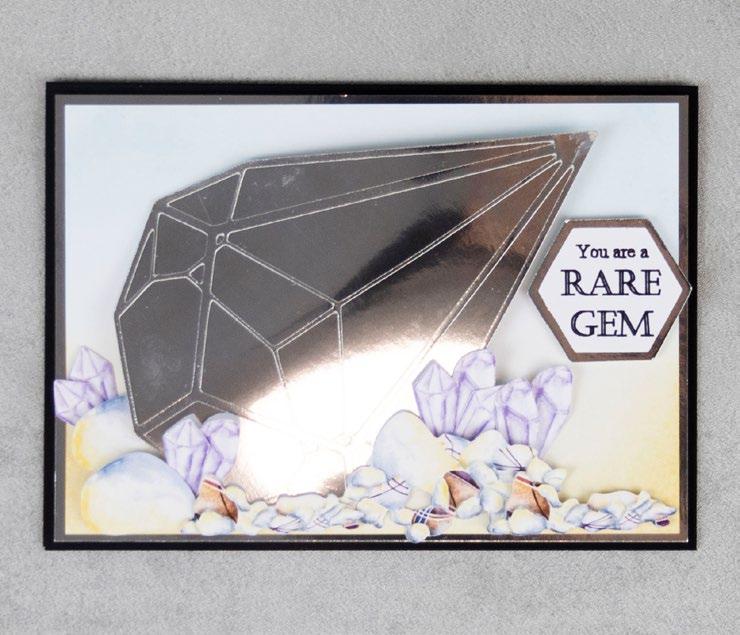
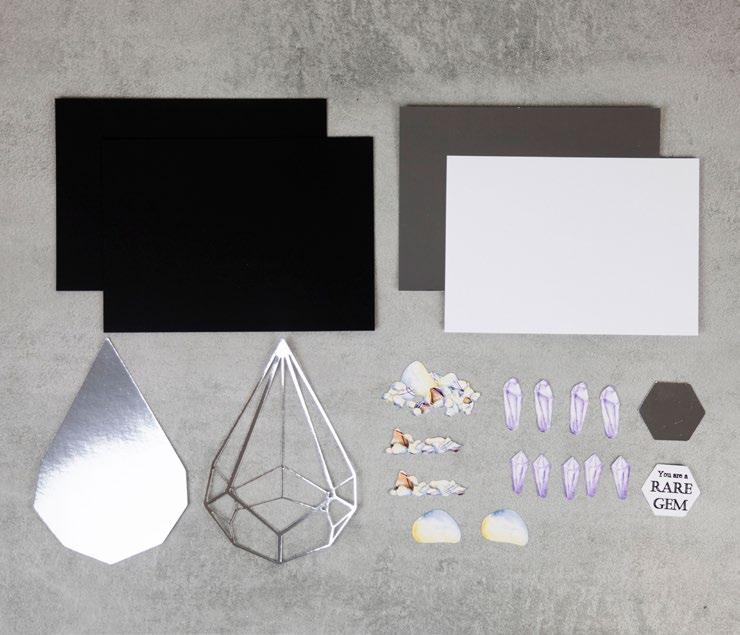
• From silver holographic cardstock: - 1 x ET-2-Terrarium Outline - 1 x ET-2-Terrarium

• From charisma: - 1 x ET-2-Charisma
From machine memory:
• From black cardstock: - 2 x 175mm x 125mm rectangle
• From silver mirror cardstock: - 1 x 170mm x 120mm rectangle
- 1 x 39mm x 45mm hexagon
• From white cardstock: - 1 x 165mm x 115mm rectangle - 1 x 34mm x 39mm hexagon (with sentiment draw file)
• Silver holographic cardstock
• Distress ink – Tea Dye & Tumbled Glass 2
On one of the black rectangles, from the top edge, measure down 10mm from the top edge and score and fold to create a tab. Attach to the other black rectangles to create a tent card. Mat the silver rectangle onto the card with foam tape. Ink the white rectangle, and mat onto the card. 3
Mat the terrarium cut onto the terrarium outline cut, and mat onto the card sticking the edges flat and adding double thickness foam tape into the middle. 4
Mat the pebble and prism charisma cuts around the bottom of the terrarium with foam tape.
5
Mat the sentiment hexagon onto the silver hexagon, and mat onto the card with foam tape.
www.tatteredlace.co.uk | 23
4 5
1 2 3
------------------------------------ EVERLASTING TRANQUILITY ----------------------------------------CLICK HERE TO DOWNLOAD YOUR SVG CONTENT PROJECT 14
What you’ll need:
• 15-03-Everlasting Tranquillity SVG files
• White cardstock
• Green cardstock
1 Cut all the pieces needed to create the project as listed below;
From SVG downloads:
• From green cardstock: - 1 x ET-3-Terrarium Outline 1
• From white cardstock: - 1 x ET-3-Terrarium Outline 2
• From silver mirror cardstock: - 1 x ET-3-Terrarium
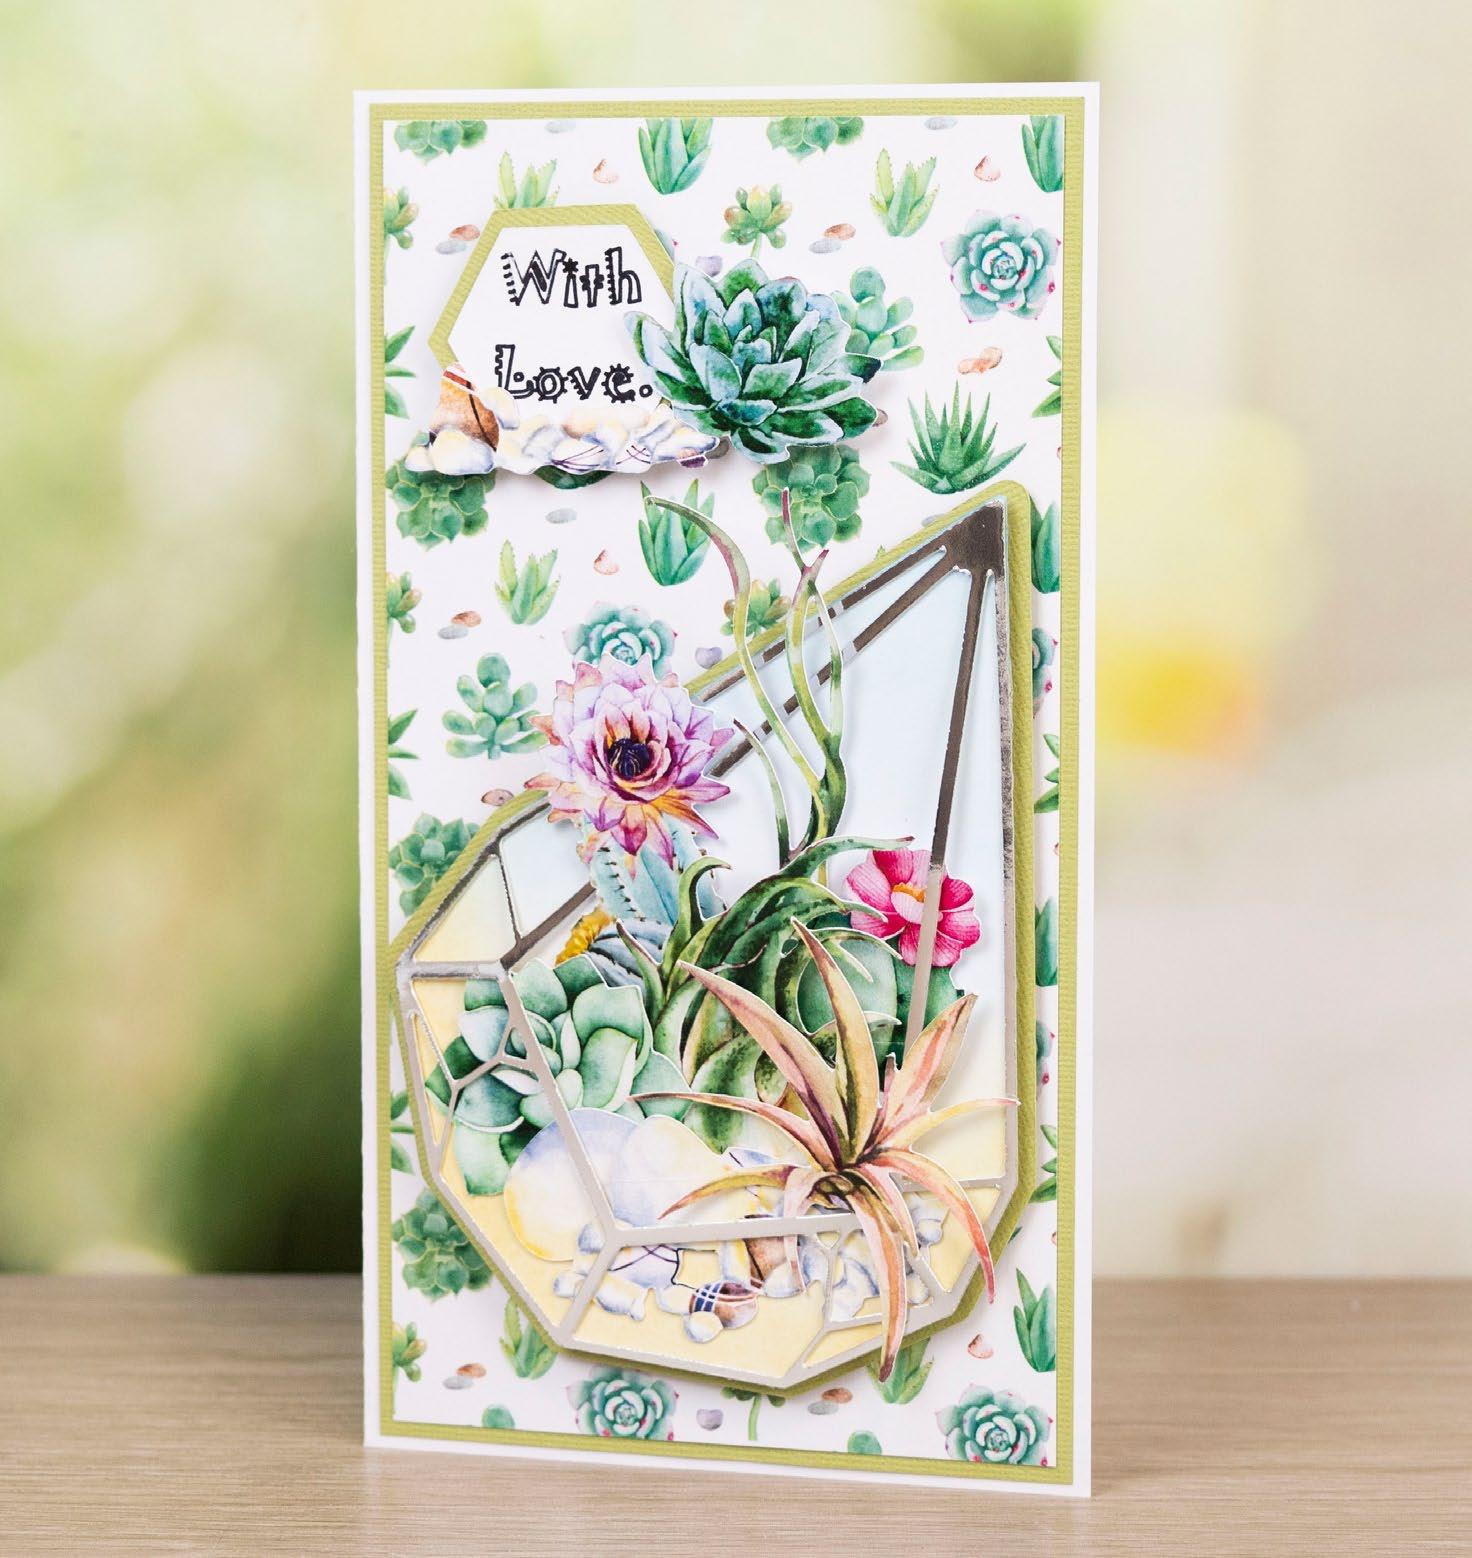
• From charisma: - 1 x ET-3-Charisma
From machine memory:
• From white cardstock: - 1 x 230mm x 210mm rectangle - 1 x 34mm x 39mm hexagon (with sentiment draw file)
• From green cardstock: - 1 x 110mm x 205mm rectangle - 1 x 39mm x 45mm hexagon
• From backing paper: - 1 x 105mm x 200mm rectangle (watercolour succulents)

• Silver mirror cardstock
• Distress ink – Tea Dye & Tumbled Glass 2
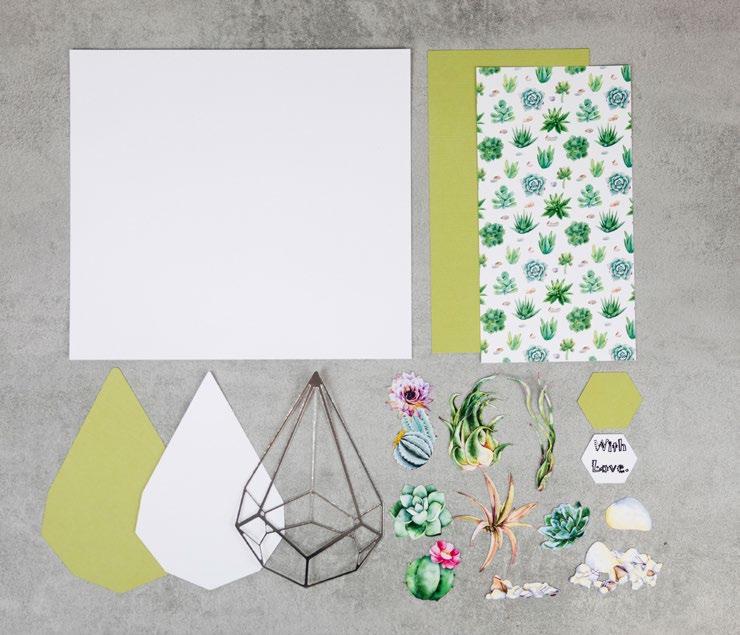
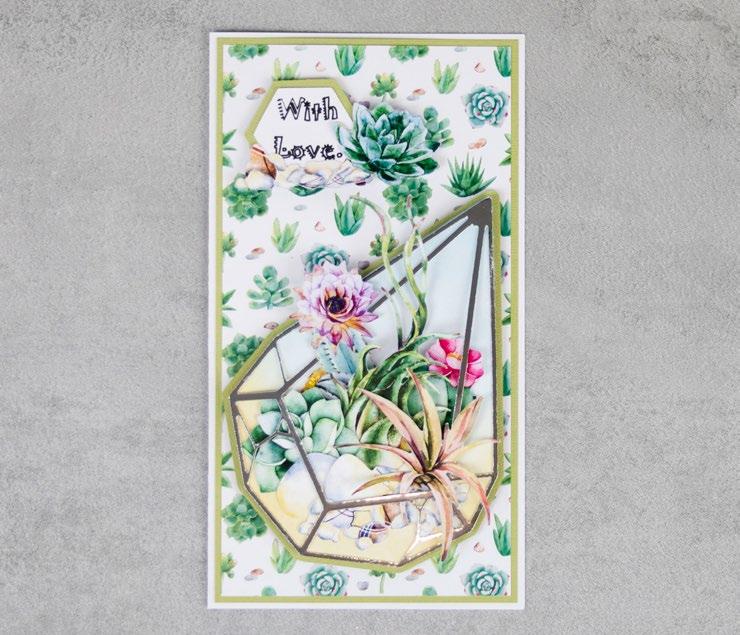
Score and fold the large white rectangle in half, vertically, to create a card. Mat the succulents rectangle onto the green rectangle, and mat onto the front of the card. 3
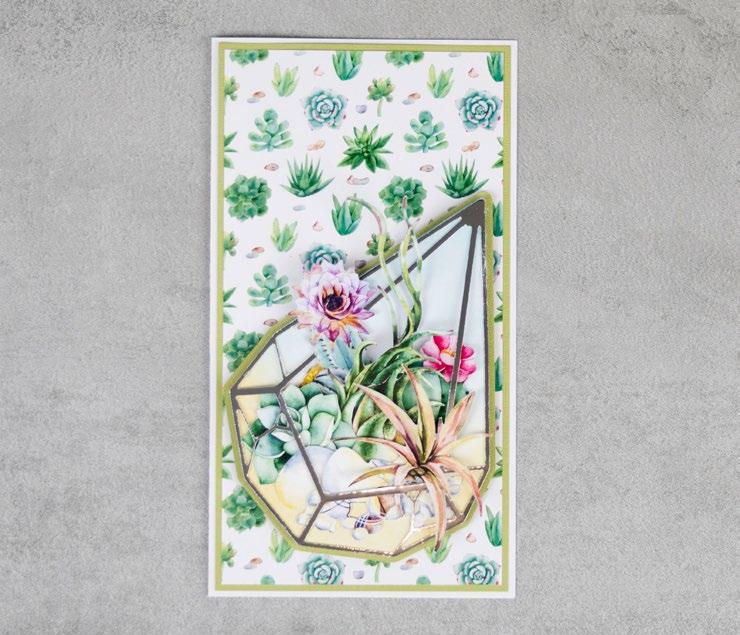
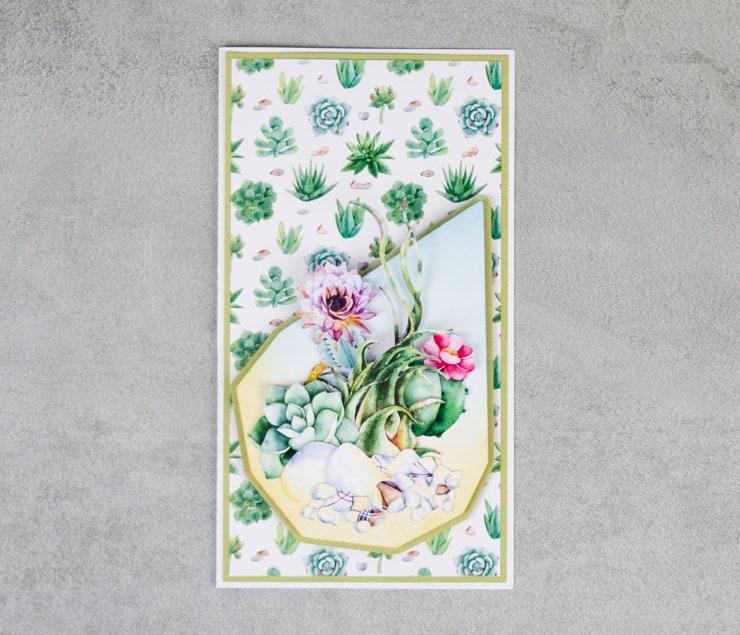
Ink the white terrarium outline 2, and mat onto the green terrarium outline 1 with foam tape. Mat onto the card with foam tape. Mat a select of the charisma cuts onto the card. Leave some pebbles and a couple of foliage cuts for later steps.
4
Trim the middle bars from the silver terrarium, and mat onto the card, pulling some of the foliage through the terrarium.
5
Mat the sentiment hexagon onto the green hexagon, and mat onto the card with foam tape. Mat the remaining charisma cuts onto the sentiment and the terrarium with foam tape.
1 2 3 4
24 | www.tatteredlace.co.uk www.tatteredlace.co.uk | 24
5
------------------------------------ EVERLASTING TRANQUILITY ----------------------------------------CLICK HERE TO DOWNLOAD YOUR SVG CONTENT PROJECT 15
What you’ll need:
• 16-04-Everlasting Tranquillity SVG files
• White cardstock
• Green cardstock
1
Cut all the pieces needed to create the project as listed below;
From SVG downloads:
• From white cardstock: - 1 x ET-4-Card Base
• From charisma: - 1 x ET-4-Charisma
From machine memory:
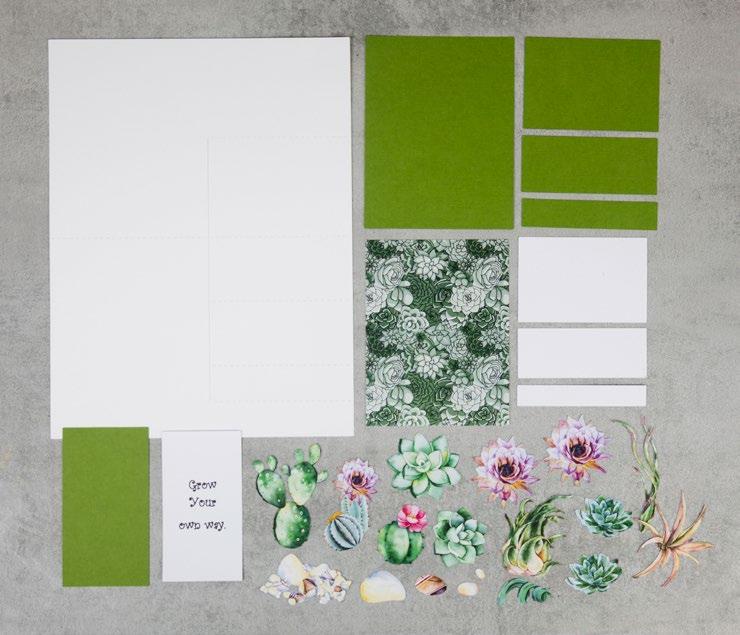
• From green cardstock:
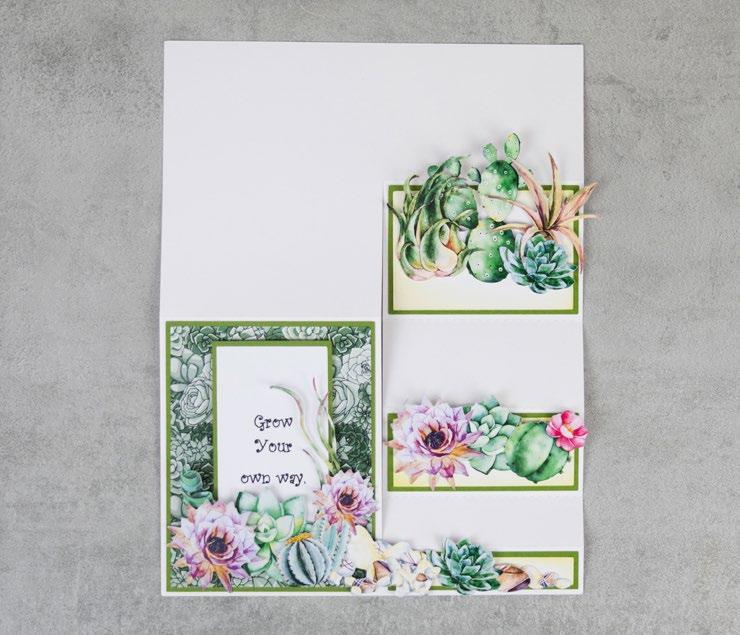
- 1 x 95mm x 65mm rectangle
- 1 x 95mm x 40mm rectangle
- 1 x 95mm x 20mm rectangle
- 1 x 105mm x 135mm rectangle
- 1 x 60mm x 110mm rectangle
• From white cardstock:
- 1 x 90mm x 60mm rectangle
- 1 x 90mm x 35mm rectangle
- 1 x 90mm x 15mm rectangle
- 1 x 55mm x 105mm rectangle (with sentiment draw file)
• Complimentary backing paper
• Distress Ink – Shabby Shutters
• From backing paper: - 1 x 130mm x 100mm rectangle (succulents)
2
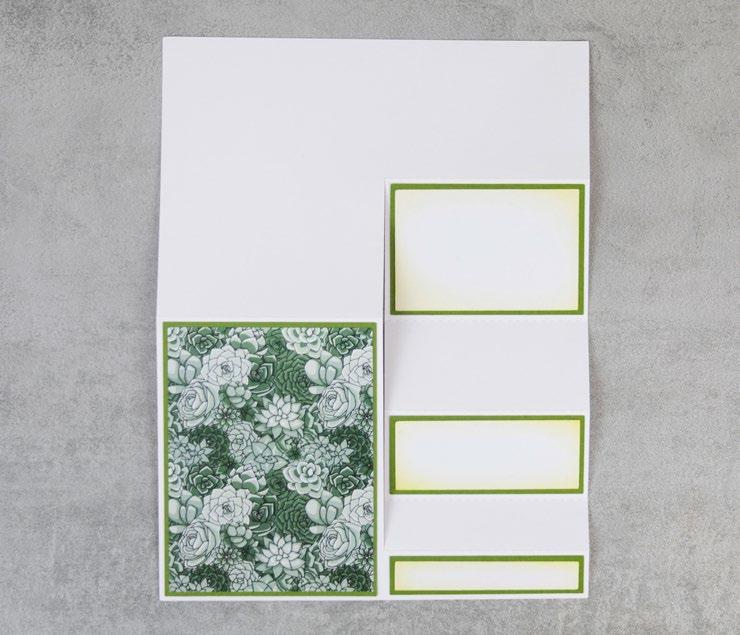
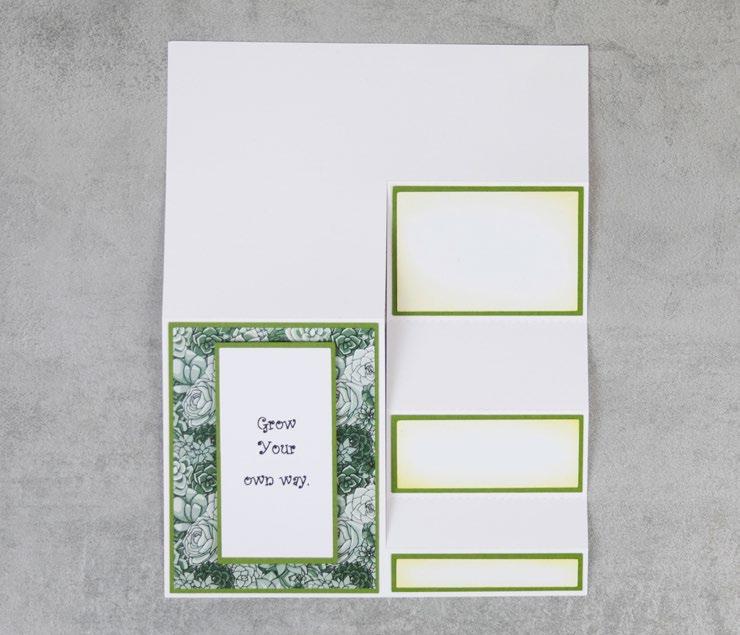
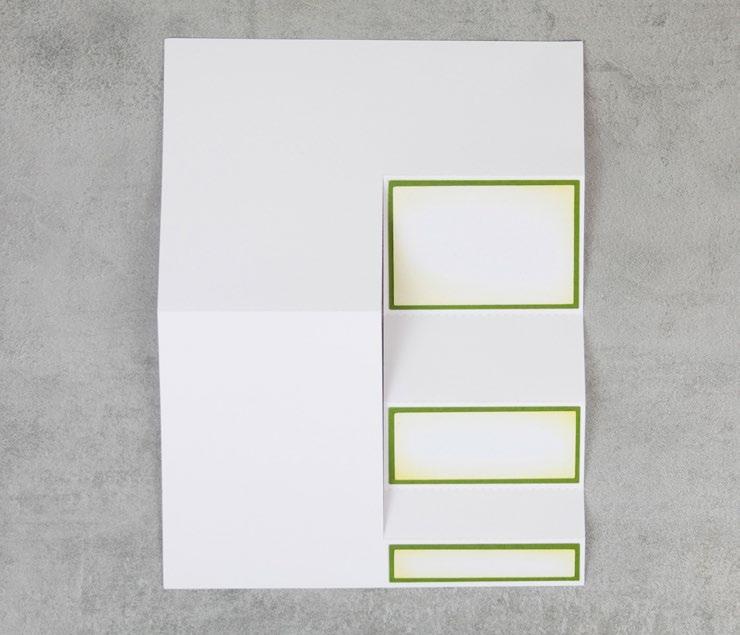
Fold on the score lines to create the card base. Ink around the edges of the 90mm width white rectangles, and mat onto the 95mm width green rectangles. Mat onto the side steps of the card. 3
Mat the succulents rectangle onto the 105mm width green rectangle, and mat onto the card. 4
Mat the sentiment rectangle onto the remaining green rectangle, and mat onto the card with foam tape. 5
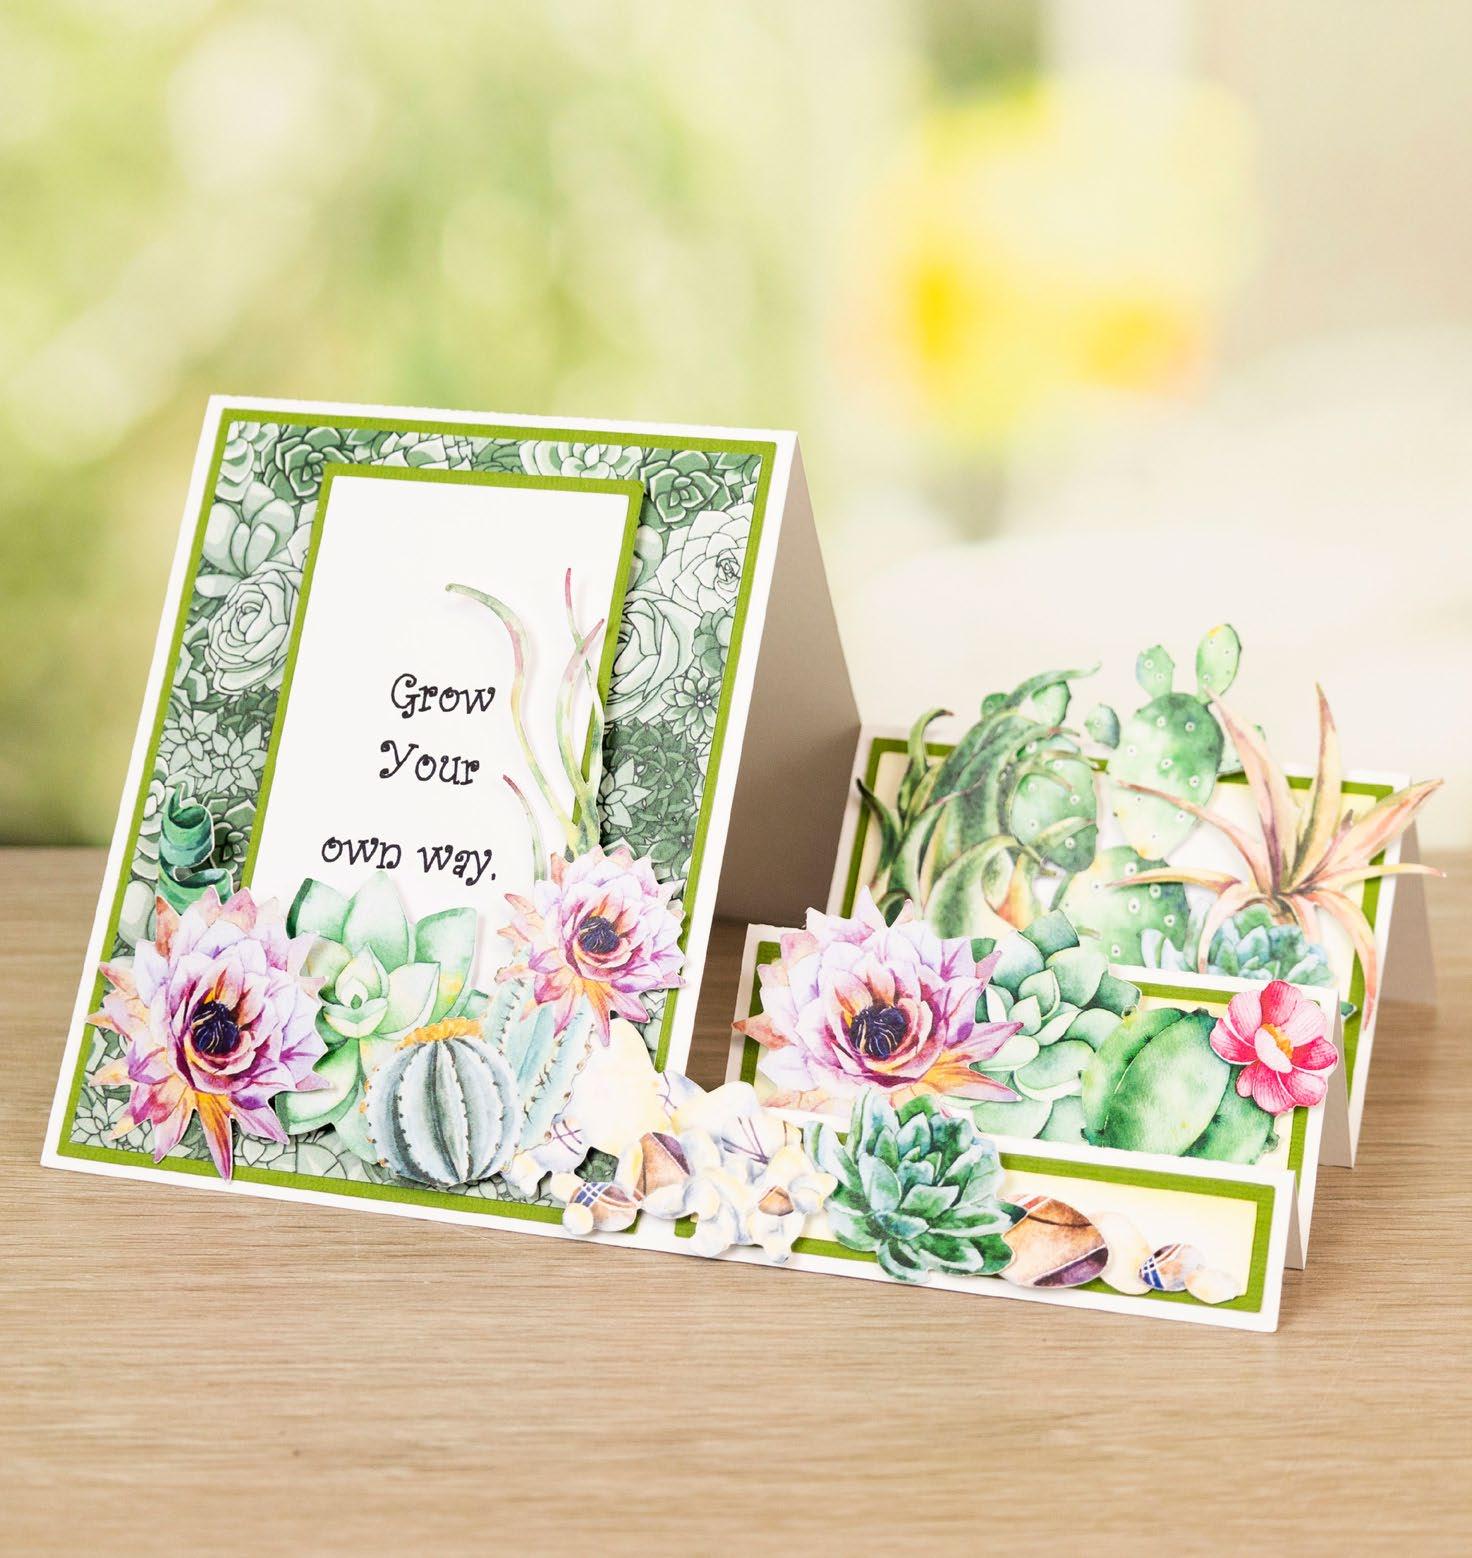
Mat the charisma cuts onto the card with foam tape, matting them onto the steps and left-hand panel of the card.
www.tatteredlace.co.uk | 25
5
1 2 3 4
------------------------------------ EVERLASTING TRANQUILITY ----------------------------------------CLICK HERE TO DOWNLOAD YOUR SVG CONTENT PROJECT 16
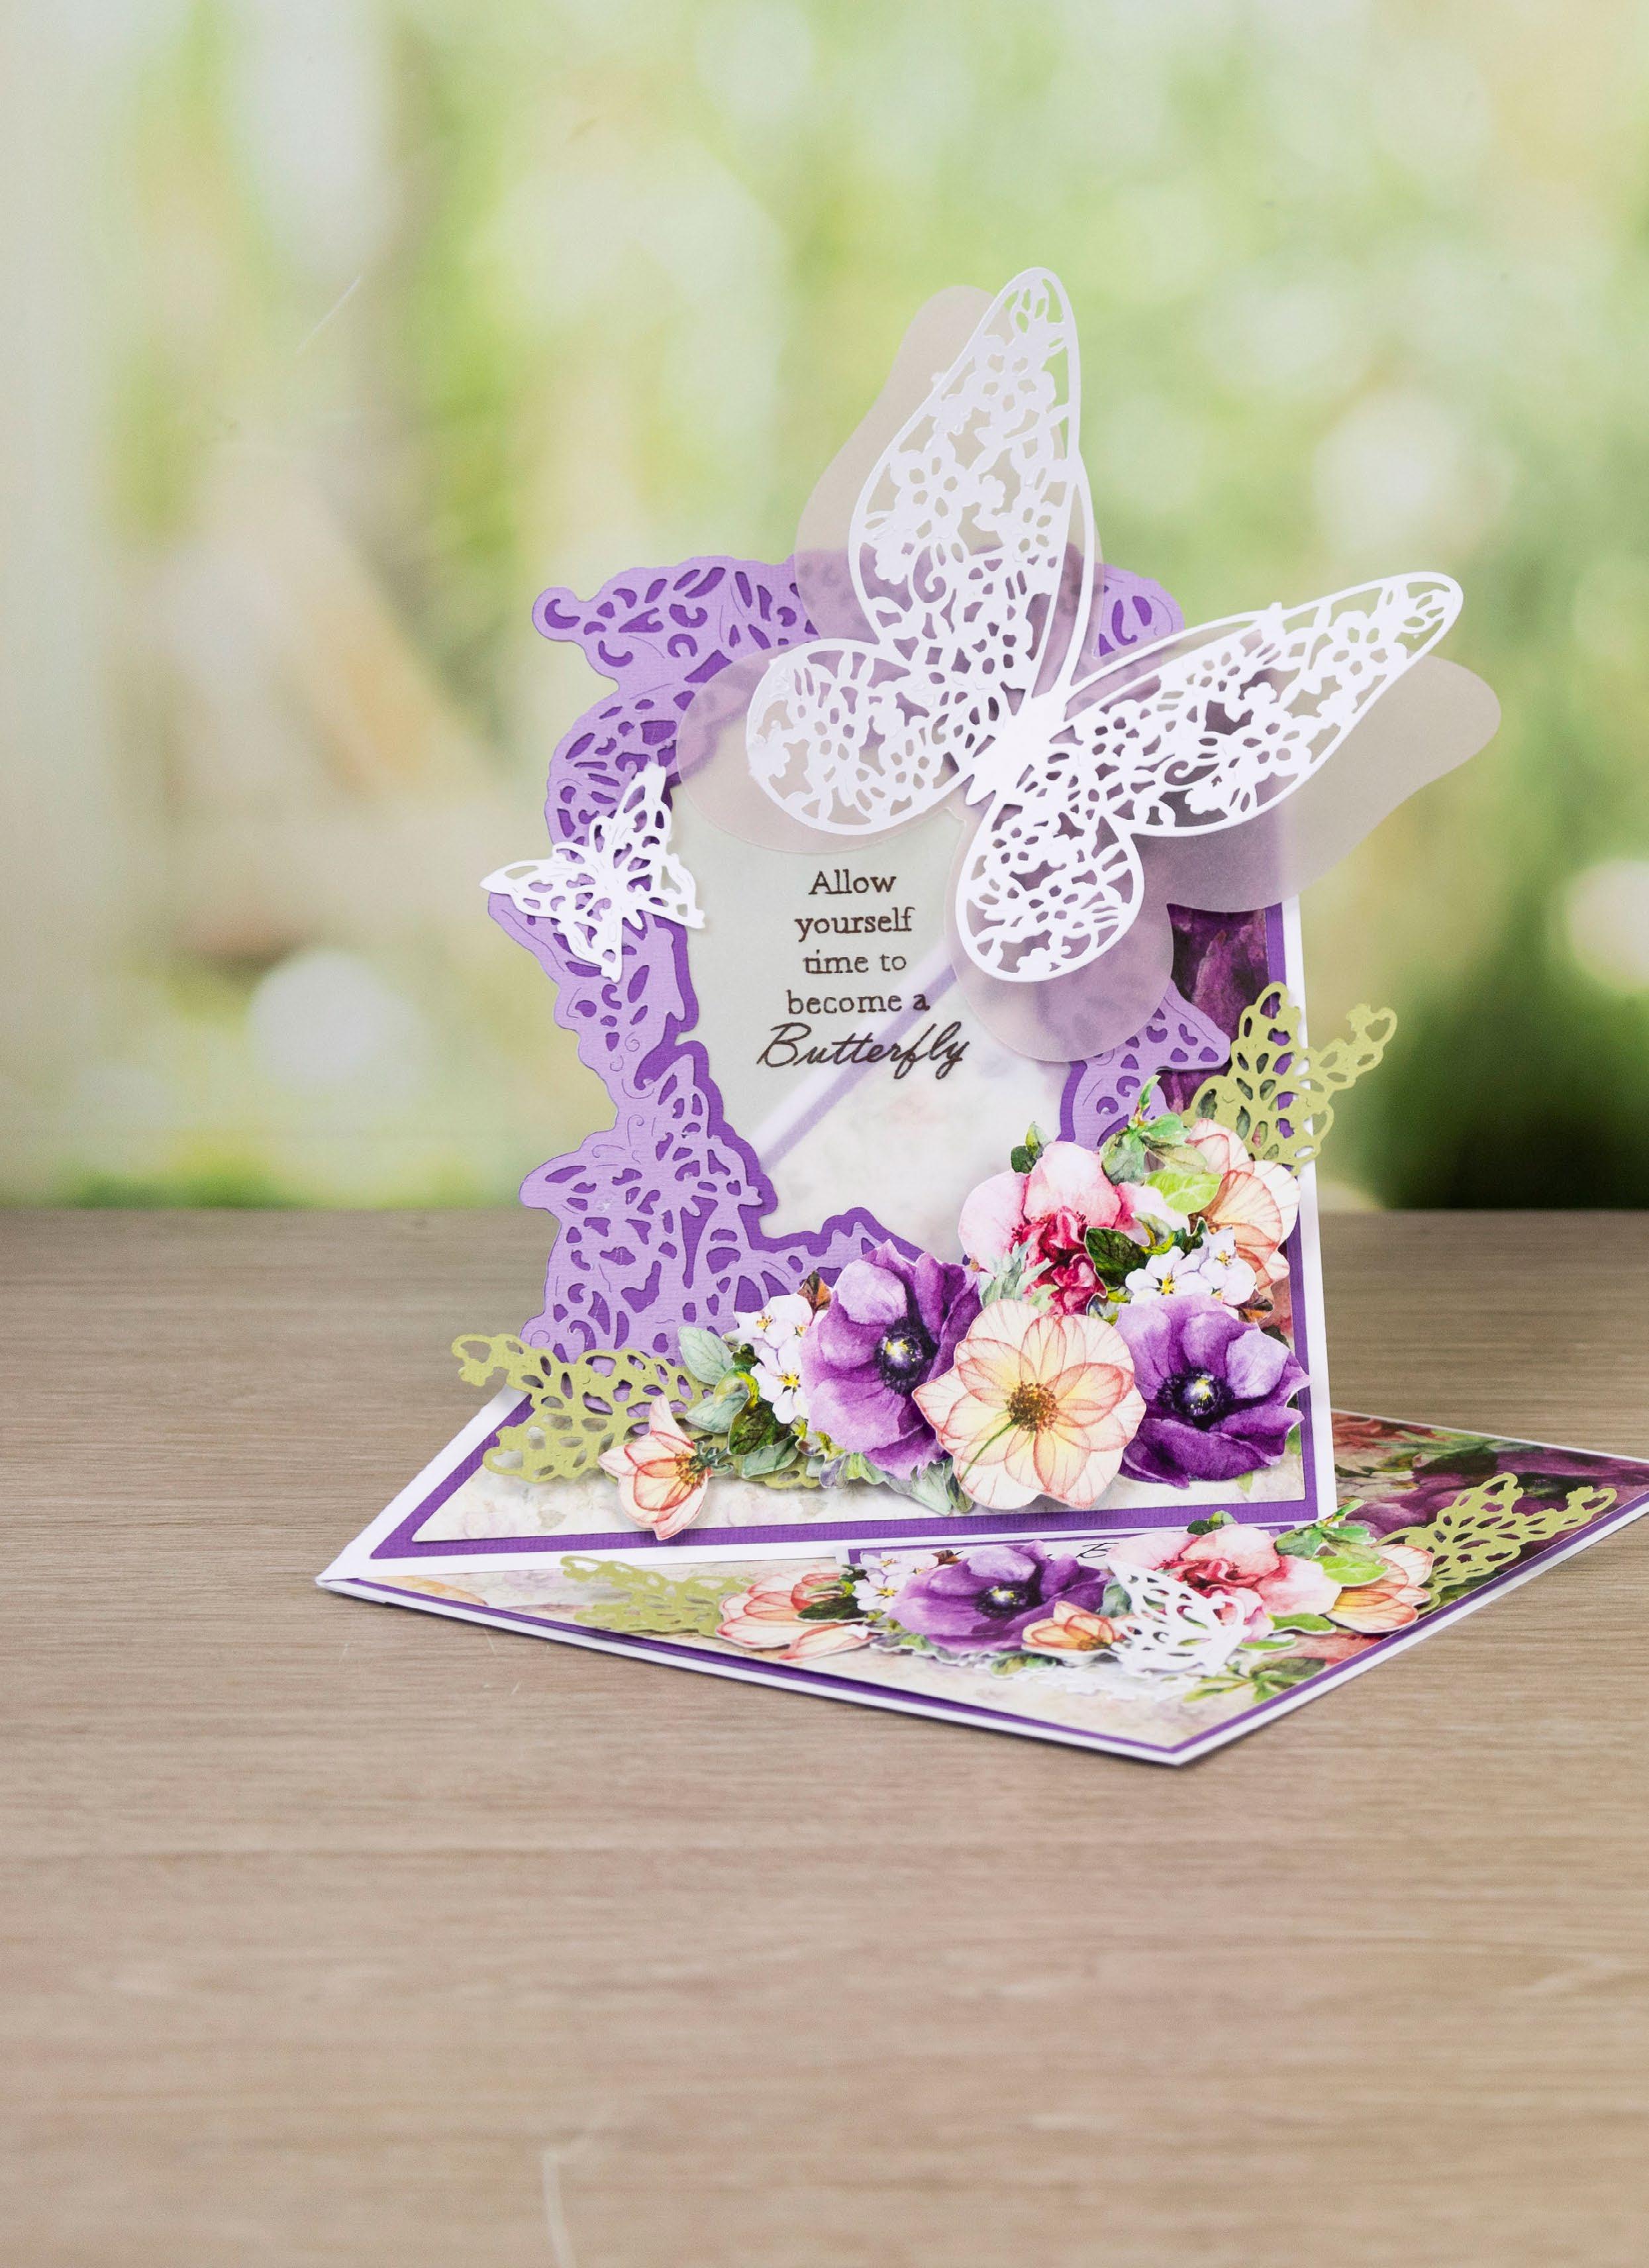
Butterfly Easel Louise’s What you’ll need: • 17-01-Louise’s Butterfly Easel SVG files • White cardstock • Purple cardstock • Lilac cardstock • Vellum • Pink vellum ------------------------------------------ BUTTERFLY EASEL --------------------------------------------1 Cut all the pieces needed to create the project as listed below; From SVG downloads: • From purple cardstock: - 1 x LBE-1-Butterfly Frame - 1 x LBE-1-Triangle Mat 1 • From backing paper: - 1 x LBE-1-Triangle Mat 2 (book) • From lilac cardstock: - 1 x LBE-1-Detail Frame • From white cardstock: - 1 x LBE-1-Butterfly Frame - 1 x LBE-1-Butterfly - 1 x LBE-1-Lace Corner - 1 x LBE-1-Small Butterflies •From green cardstock - 4 x LBE-1-Lace Leaf • From vellum: - 1 x LBE-1-Frame Outline (with sentiment draw file) • From pink vellum: - 1 x LBE-1-Butterfly Outline PROJECT 17 26 | www.tatteredlace.co.uk
• From charisma: - 1 x LBE-1-Charisma A - 1 x LBE-1-Charisma B
From machine memory: • From white cardstock: - 1 x 185mm x 170mm rectangle - 1 x 170mm square - 1 x 80mm x 30mm rectangle - 1 x 65mm x 15mm rectangle (with sentiment draw file) • From purple cardstock: - 1 x 165mm square - 1 x 75mm x 25mm rectangle
• From backing paper: - 1 x 160mm square (book) • From lilac cardstock: - 1 x 70mm x 20mm rectangle
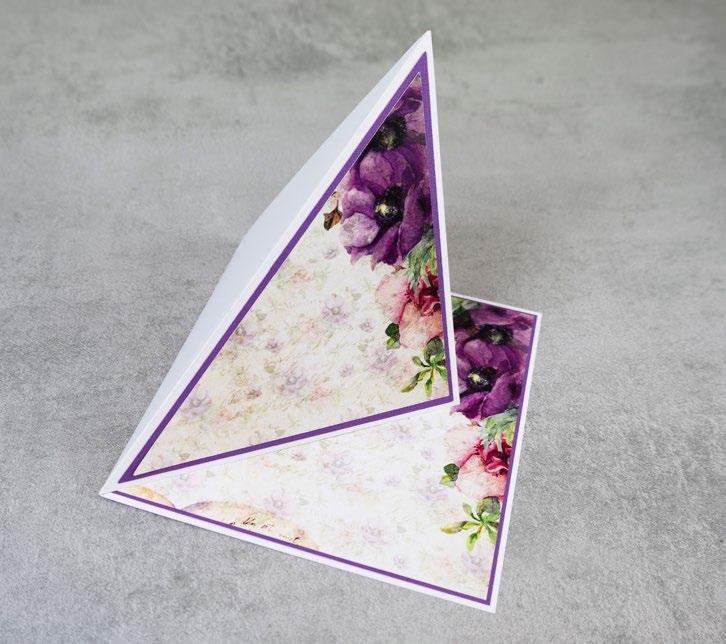
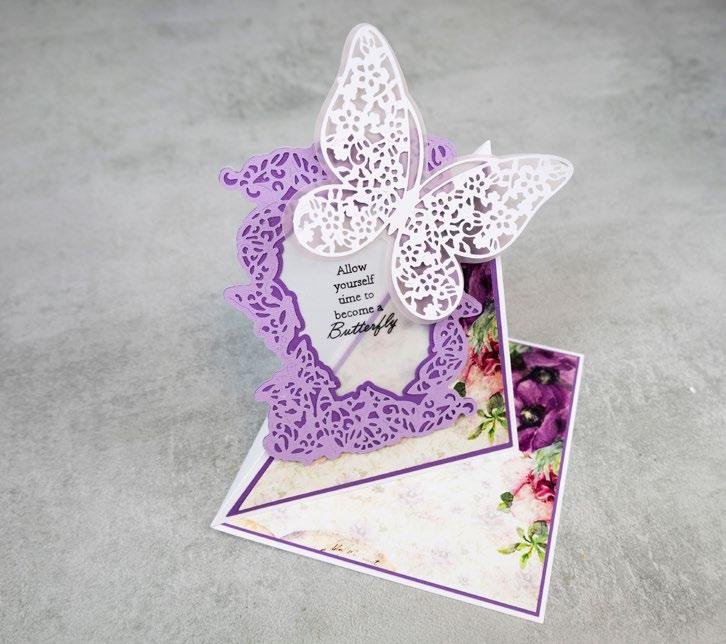
On the large white rectangle, measure in 15mm from the right edge and score and fold to create a tab. Attach to the white square to create a card. On the card front, score and fold diagonally from the top-right corner to the bottom-left corner to create a twisted-easel card. Mat the book square onto the purple square, and mat onto the base of the easel.

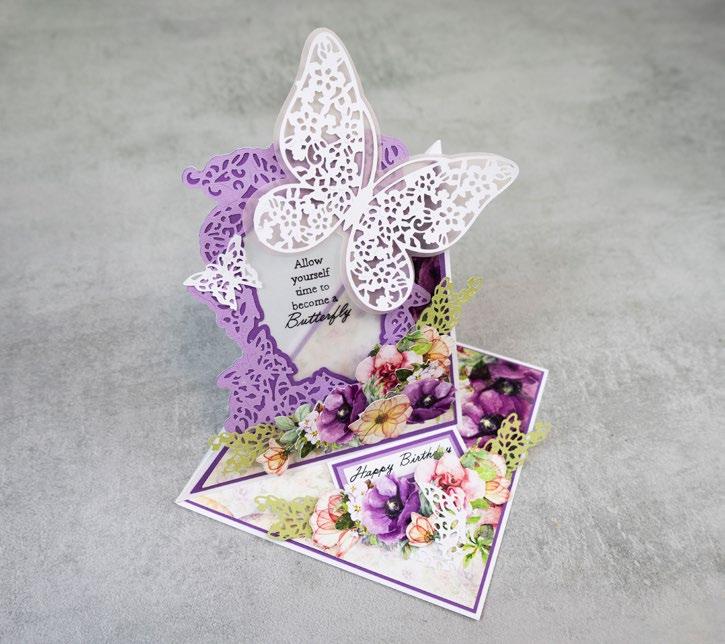


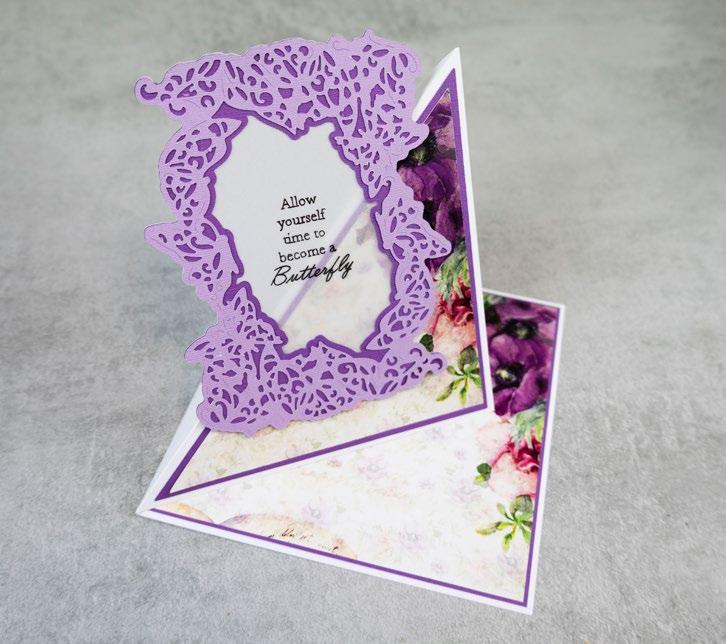
the book triangle mat 2 and the purple triangle mat 1, and mat onto the front of the easel.
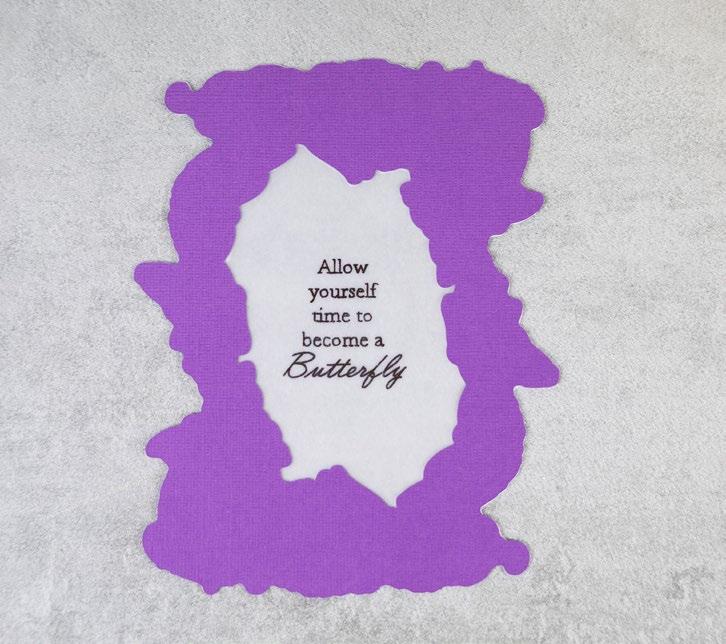
the vellum frame outline between the purple butterfly frame, and the white butterfly frame.
the lilac detail frame onto the frame from the previous step, and mat onto the front of the easel.
the white butterfly onto the pink vellum butterfly outline, only sticking the bodies together and mat onto the card.
Mat the sentiment rectangle, onto the lilac rectangle, then onto the purple rectangle, and then onto the white rectangle. Mat onto the base of the easel with foam tape as a stopper.
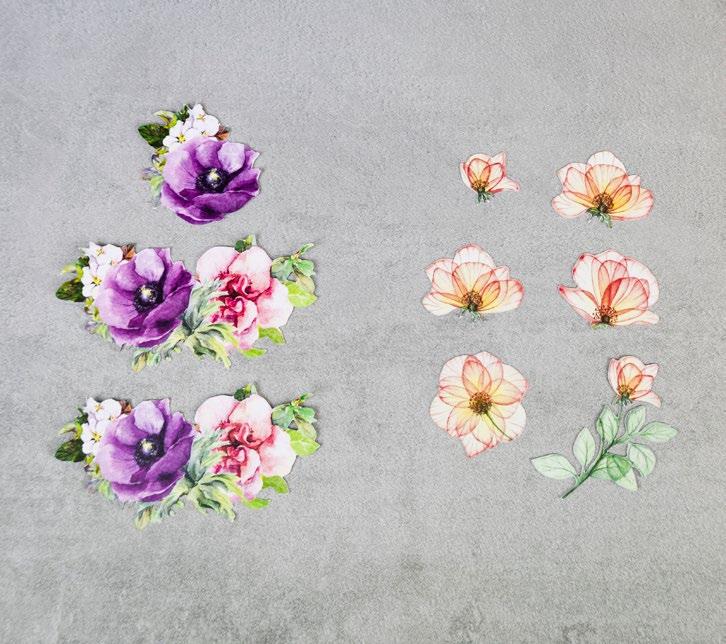
Trim the charisma cuts, as shown in the image.
Mat the white lace corner onto the base of the card. Arrange and mat the lace leaf and floral charisma cuts onto the front and base of the easel. Mat the small butterflies onto the card.
------------------------------------------ BUTTERFLY EASEL --------------------------------------------1 4 7 2 5 8 3 6 9
2
3
4
5
6
7
8
9
CLICK HERE TO DOWNLOAD YOUR SVG CONTENT www.tatteredlace.co.uk | 27
Mat
Mat
Mat
Mat
Pressed Flowers
WITH LOVE
What you’ll need:
• 18-01-Pressed Flowers SVG files
• White cardstock
• Cream pearlescent cardstock
• Construction acetate • Vellum
• Distress ink – Vintage Photo
• Brown pen • Brown ribbon
Cut all the pieces needed to create the project as listed below;
From SVG downloads:
• From brown cardstock: - 1 x PF-1-Frame
• From charisma: - 2 x PF-1-Charisma (print one onto the vellum)
From machine memory:
• From white cardstock: - 2 x 200mm square
• From brown cardstock: - 1 x 195mm square
• From cream pearlescent cardstock: - 1 x 190mm square - 1 x 120mm square
YOUR SVG CONTENT PROJECT 18
CLICK HERE TO DOWNLOAD
• From backing paper: - 1 x 185mm square (orange flowers)
• From construction acetate: - 1 x 110mm square 2
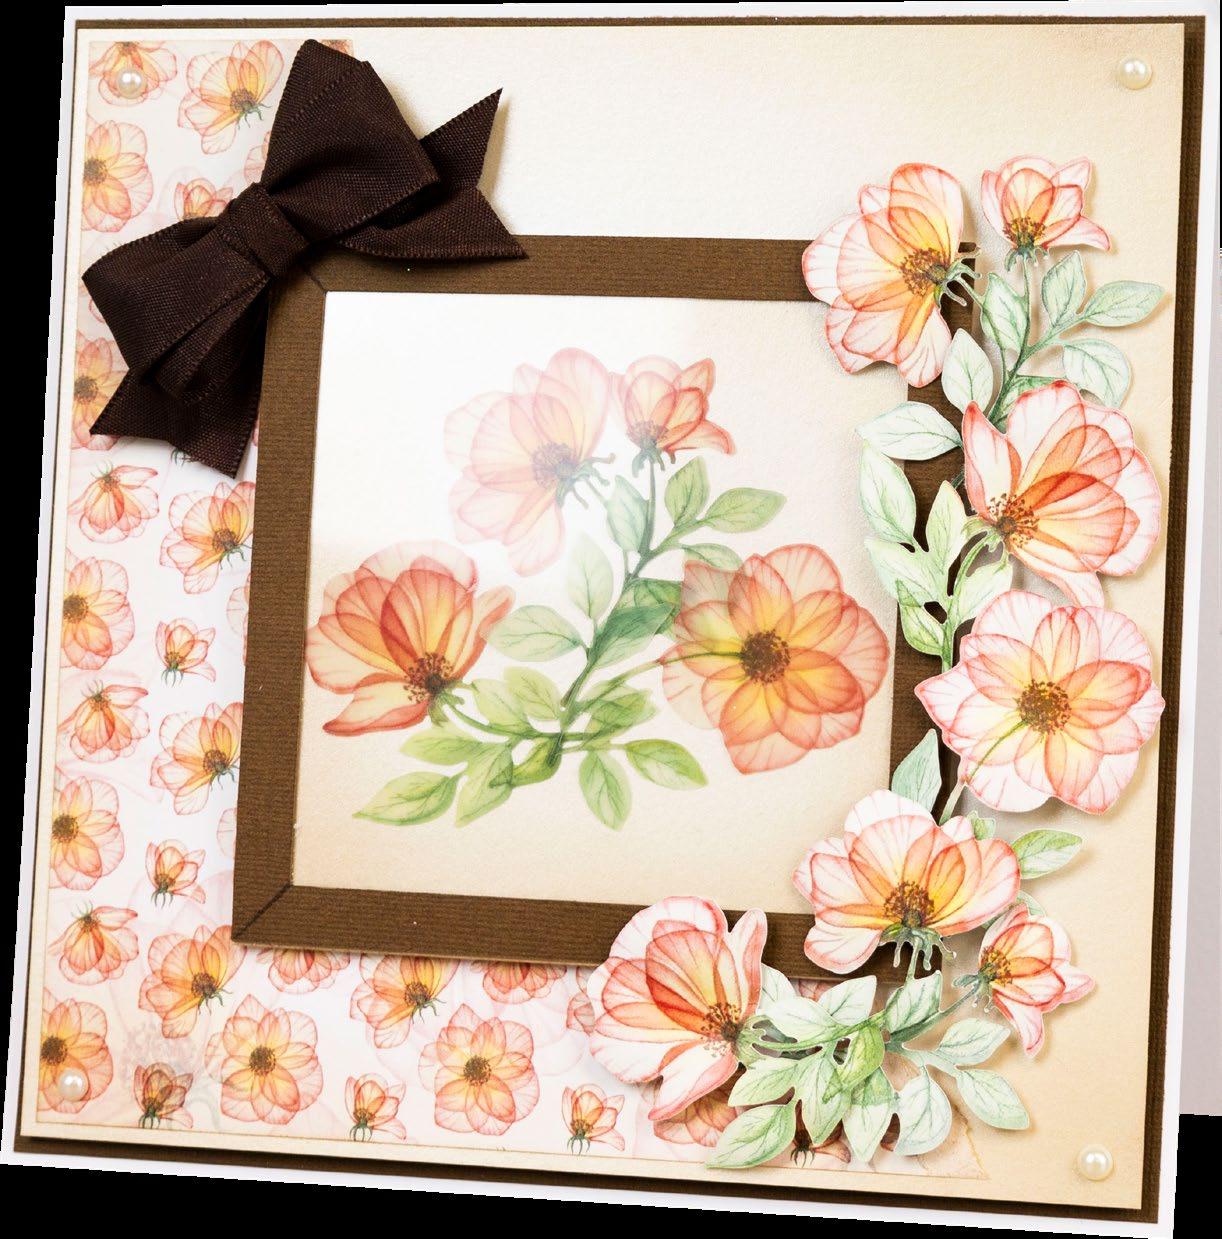
On one of the large white squares, measure down 10mm from the top edge and score and fold to create tab. Attach to the other white square to create a tent card. Mat the brown square onto the card.
Ink around the edges of the large cream square ,and mat onto the card with foam tape. Tear the orange flowers square in half ,diagonally and ink around the edges. Mat onto the card. 4
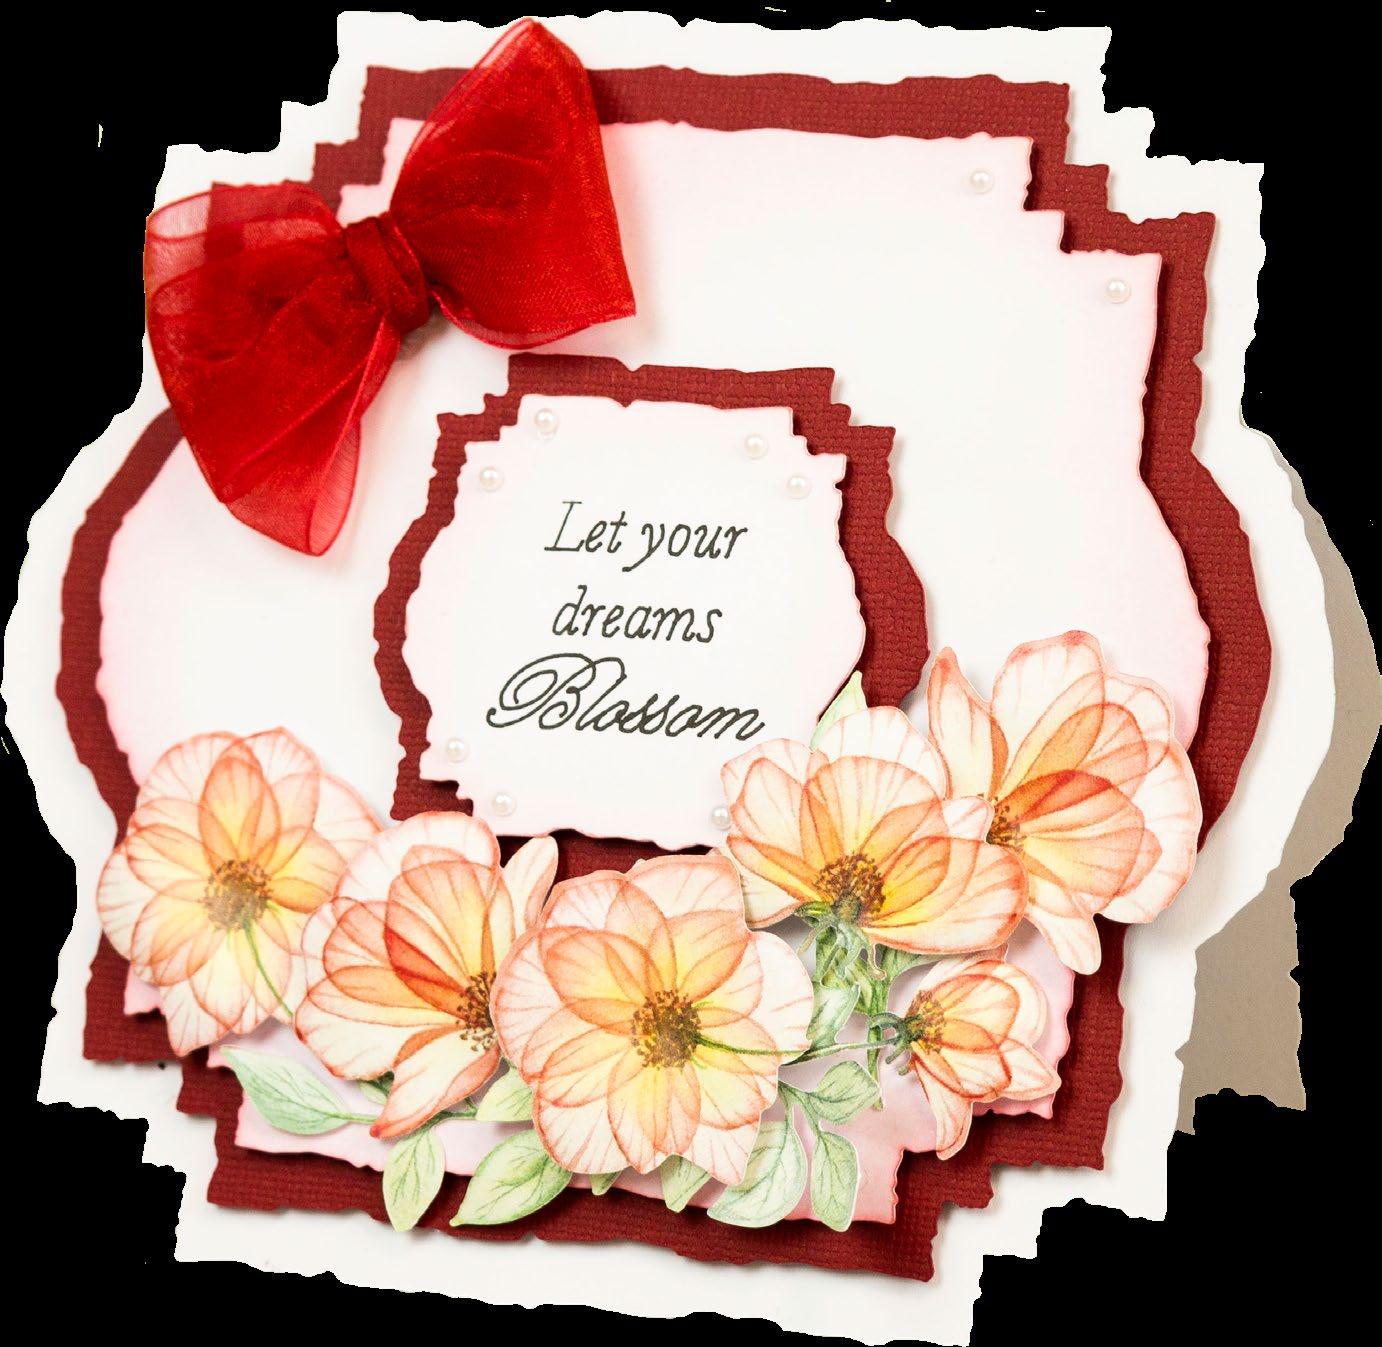
Ink around the edges of the small cream square. Mat the set of vellum flowers onto the square, and mat the acetate square on top. Using the brown pen, add lines on the brown frame, from corner to corner, to create the illusion of a frame. Mat the frame onto the acetate, and mat onto the card with foam tape. 5 Mat the remaining flowers around the frame with foam tape. Finish by adding a double-loop bow tied from brown ribbon and pearl gems to the card.
What you’ll need:
Cut all the pieces needed to create the project as listed below;
From SVG downloads:
• From white cardstock: - 1 x PF-3-Card Base - 1 x PF-3-Card Mat 2 - 1 x PF-3-Sentiment (with sentiment draw file)
• From red cardstock:
- 1 x PF-3-Card Mat 1 - 1 x PF-3-Card Mat 3
• From charisma: - 1 x PF-3-Charisma
On one of the card bases, measure down 40mm and score and fold to create a tab. Attach to the other card to create a tent card.
----------------------------------------- PRESSED FLOWERS --------------------------------------------
• 20-03-Pressed Flowers SVG files • White cardstock • Red cardstock • Distress ink – Worn Lipstick • Red ribbon • Pearl gems
• Brown cardstock
• Pearl gems 1
3
1
LET YOUR DREAMS BLOSSOM
2
3
PROJECT
Mat the red card mat 1 onto the card with foam tape. Ink around the edges of the white card mat 2, and mat onto the card with foam tape. 28 | www.tatteredlace.co.uk
20
WITH LOVE
What you’ll need:
• 19-02-Pressed Flowers SVG files • White cardstock
• Pink cardstock • Glitter
1
From SVG downloads:
• From pink cardstock: - 1 x PF-2-Card Mat 1
• From backing paper: - 1 x PF-2-Card Mat 2 (leaves)
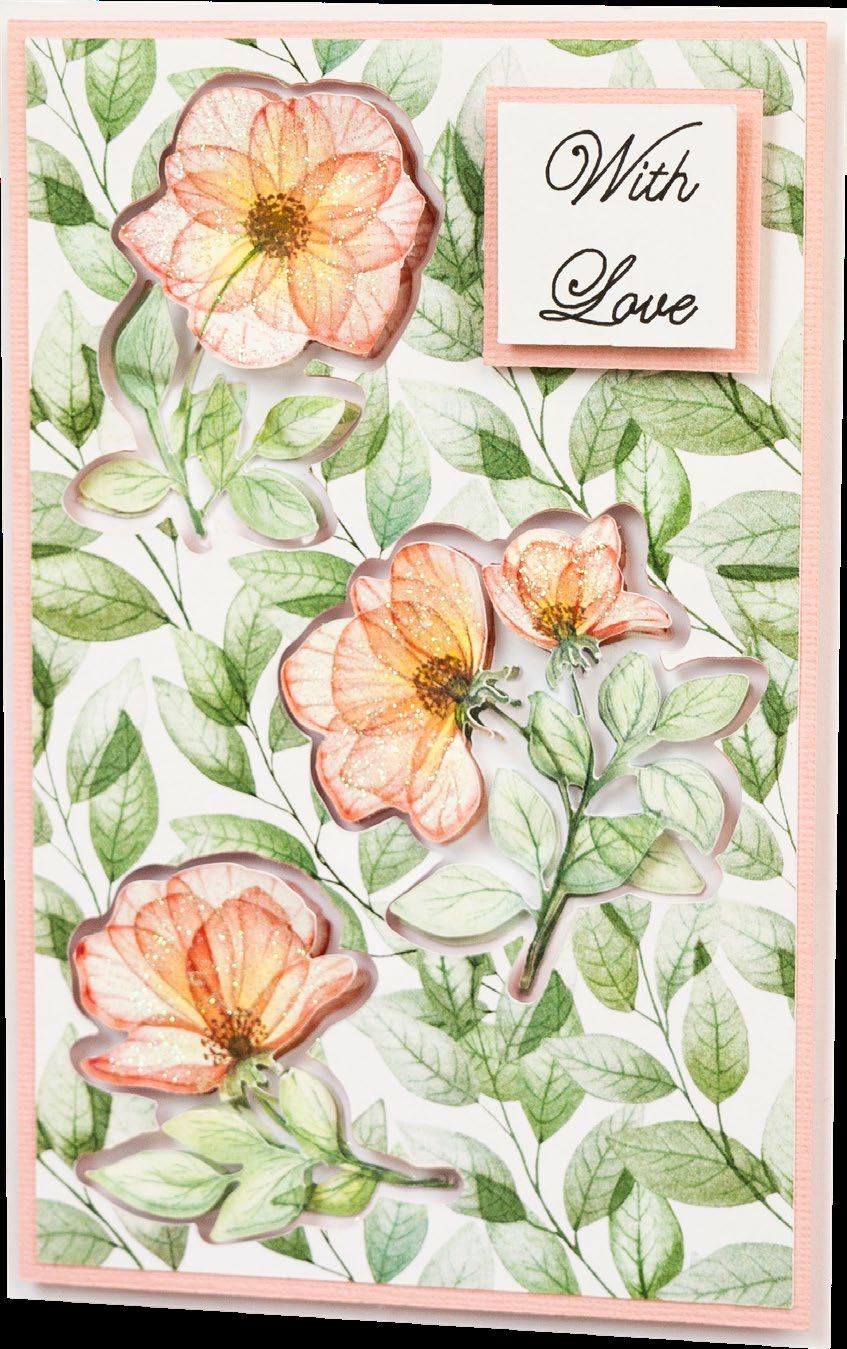
• From charisma: - 1 x PF-2-Charisma
From machine memory:
• From white cardstock: - 2 x 110mm x 170mm rectangle - 1 x 30mm square (with sentiment draw file)
• From pink cardstock: - 1 x 35mm square 2
On one of the white rectangles, measure in 10mm from the left edge, and score and fold to create a tab. Attach to the other white rectangle to create a card. Mat the leaves card mat 2 onto the pink card mat 1, and mat onto the card with foam tape. 3
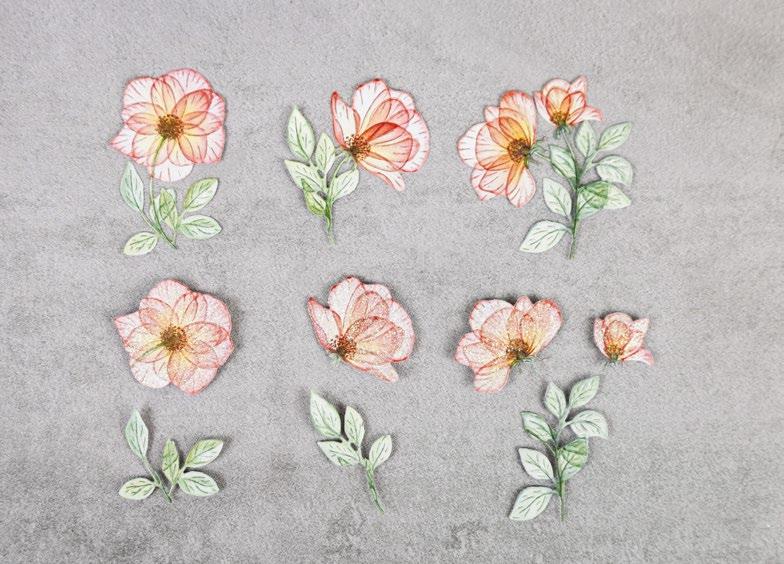
Trim the charisma cuts as shown in the image. Glitter the flower heads and build up the decoupage of each flower with foam tape. 4
Cut all the pieces needed to create the project as listed below; 4
Mat the red card mat 3 onto the card with foam tape. Ink around the edges of the sentiment, and mat onto the card with foam tape. 5 Mat the charisma flowers onto the card with foam tape. Finish by adding a doubleloop bow, tied from red ribbon, and pearl gems to the card.
Mat the flowers onto the card within the flower apertures. Mat the sentiment square onto the pink square with foam tape, and mat onto the card with foam tape.
----------------------------------------- PRESSED FLOWERS --------------------------------------------
CLICK HERE TO DOWNLOAD YOUR SVG CONTENT
www.tatteredlace.co.uk | 29
CLICK HERE TO DOWNLOAD YOUR SVG CONTENT PROJECT 19
INKING
Inspiration
Place your ink pad directly onto the edge of your cardstock and run straight down the edge. This will give a thin colour edge to your mats. This is a great technique for coloured cardstock that has a white core.



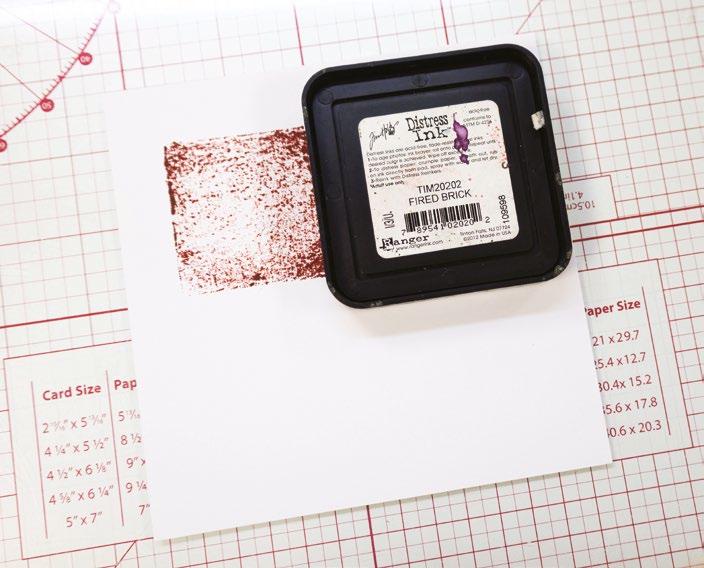
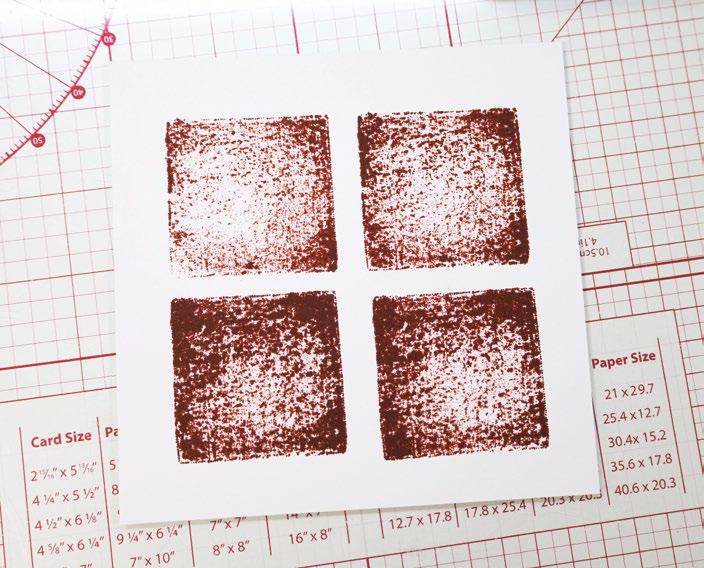
Lots of ink pads when stamped like this transfer a fabric like texture. It gives the impression of fabric patches. Stamp your chosen ink colours and then use a pen to add some faux stitching detail to the stamped design.
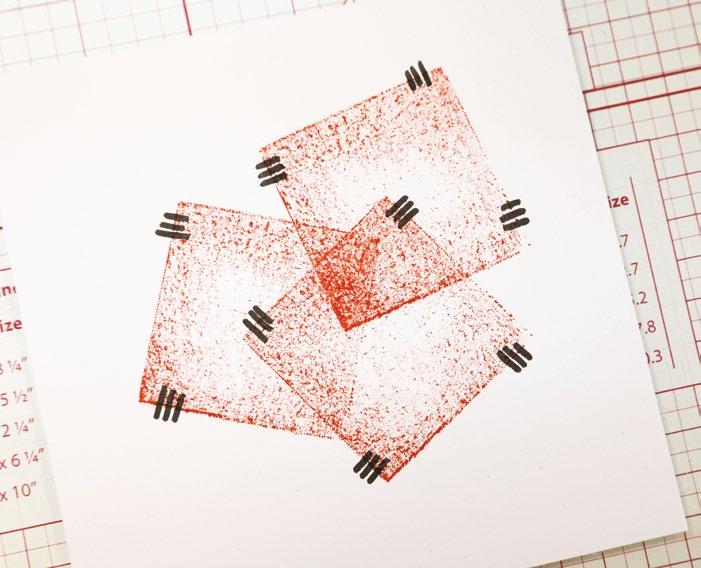

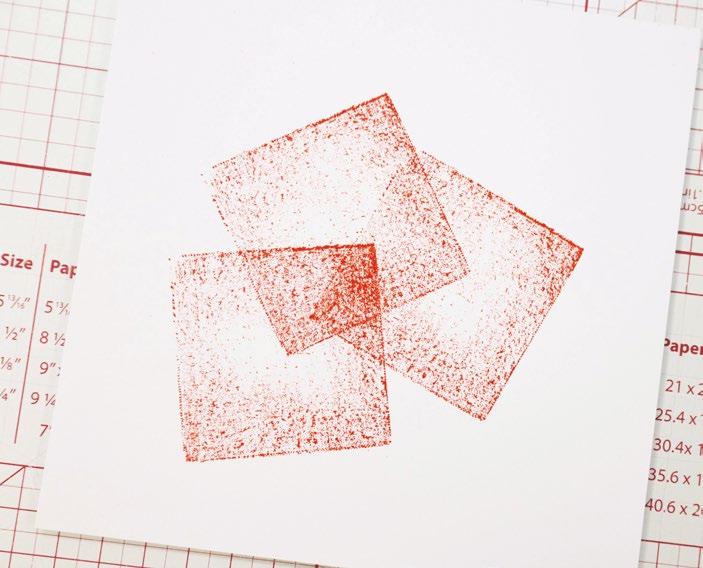
Why not simply use your ink pad as a stamp itself? A square ink pad stamped evenly on a piece of cardstock can be used to create a great and simple pattern to use as a background. Press lighty or hard to increase the intensity of the ink that is transfered to the cardstock. Try creating different patterns with using different colours and overlapping your stamped designs.
30 | www.tatteredlace.co.uk
Inking is a great way of creating simple and effective background patterns to use in your card projects. Here are some easy ideas to get you started with ink pads!

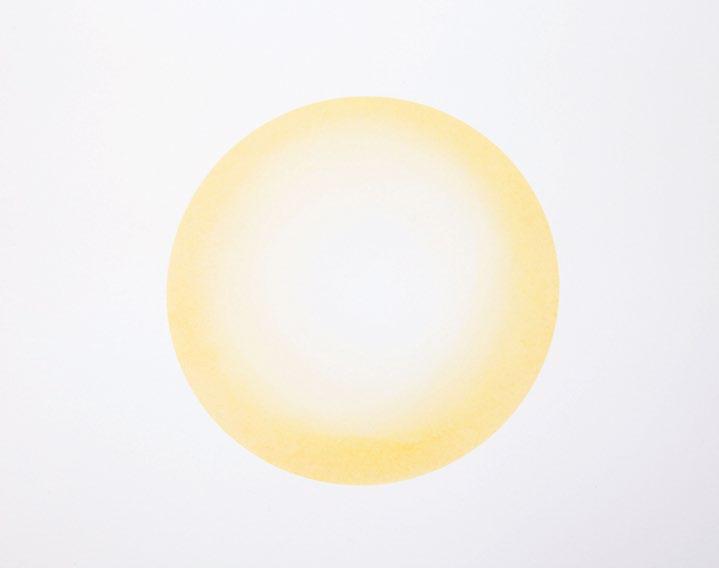
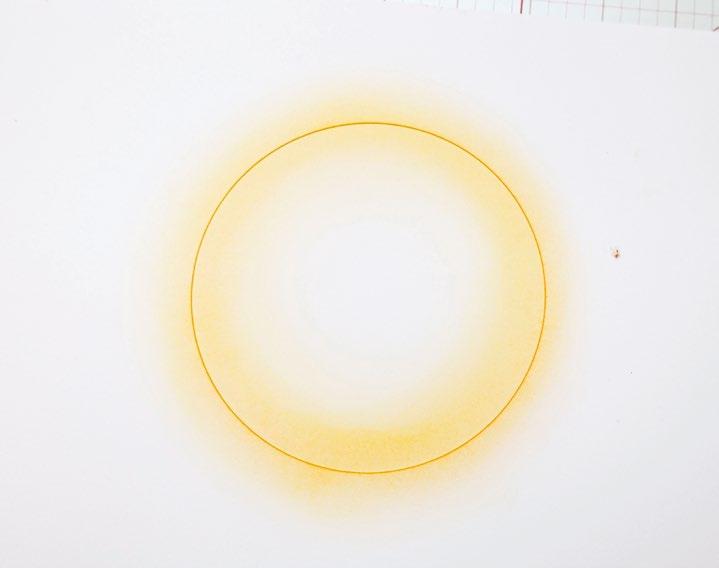





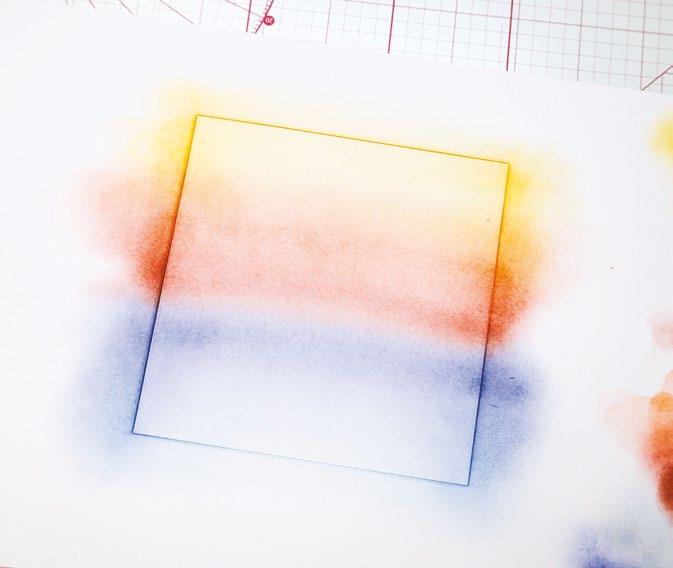

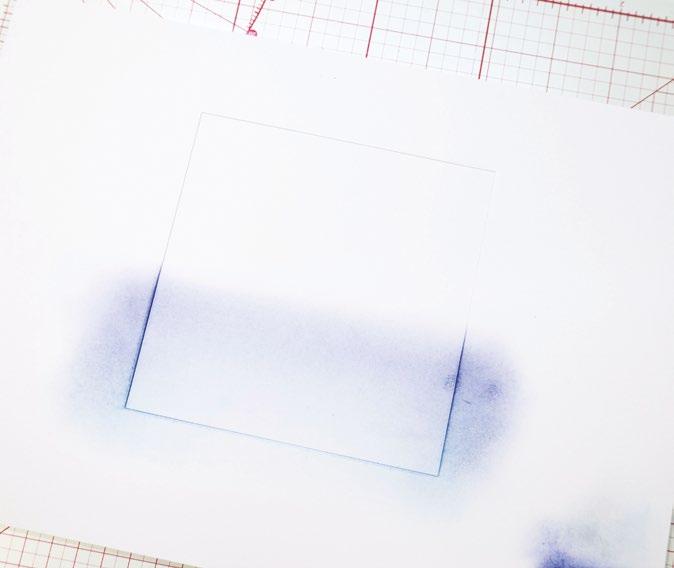
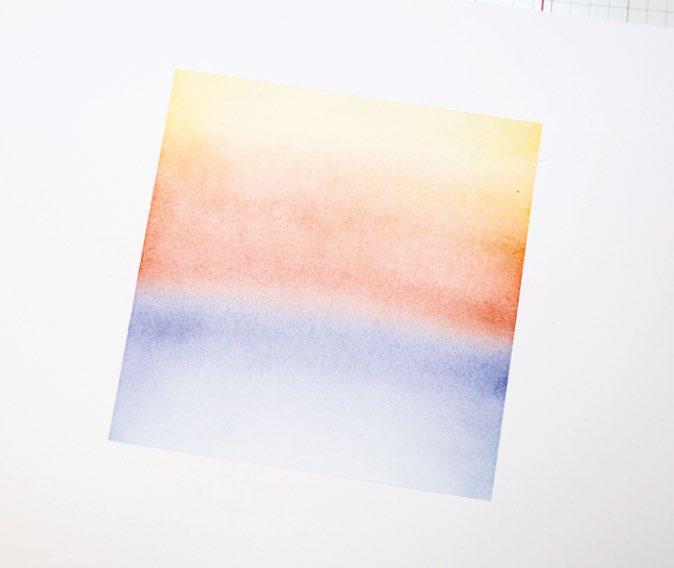
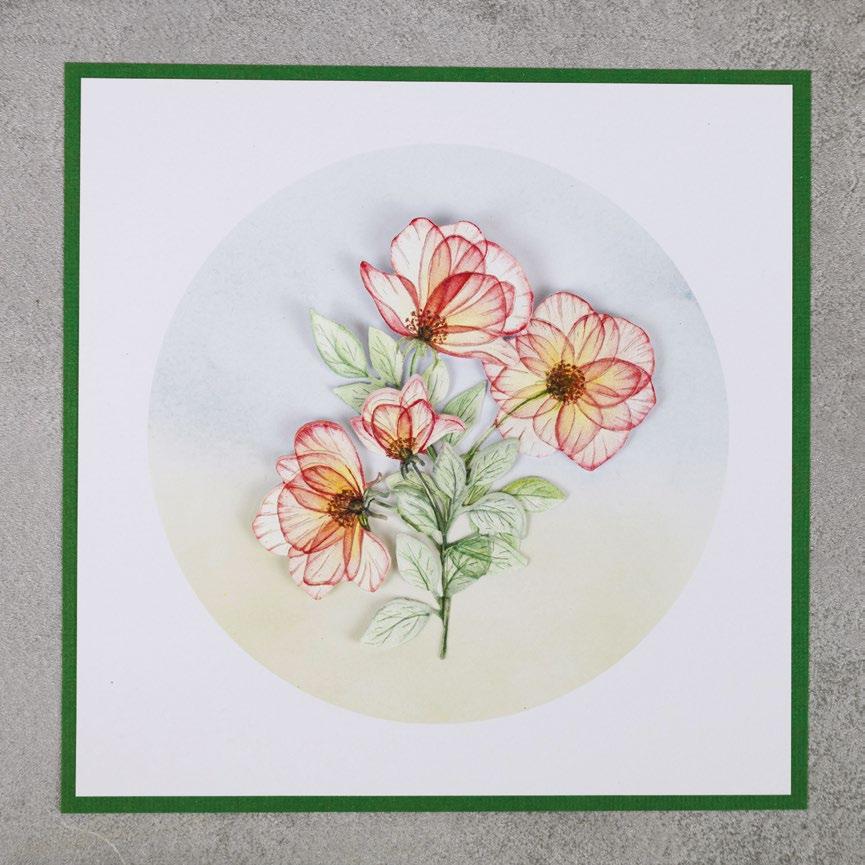
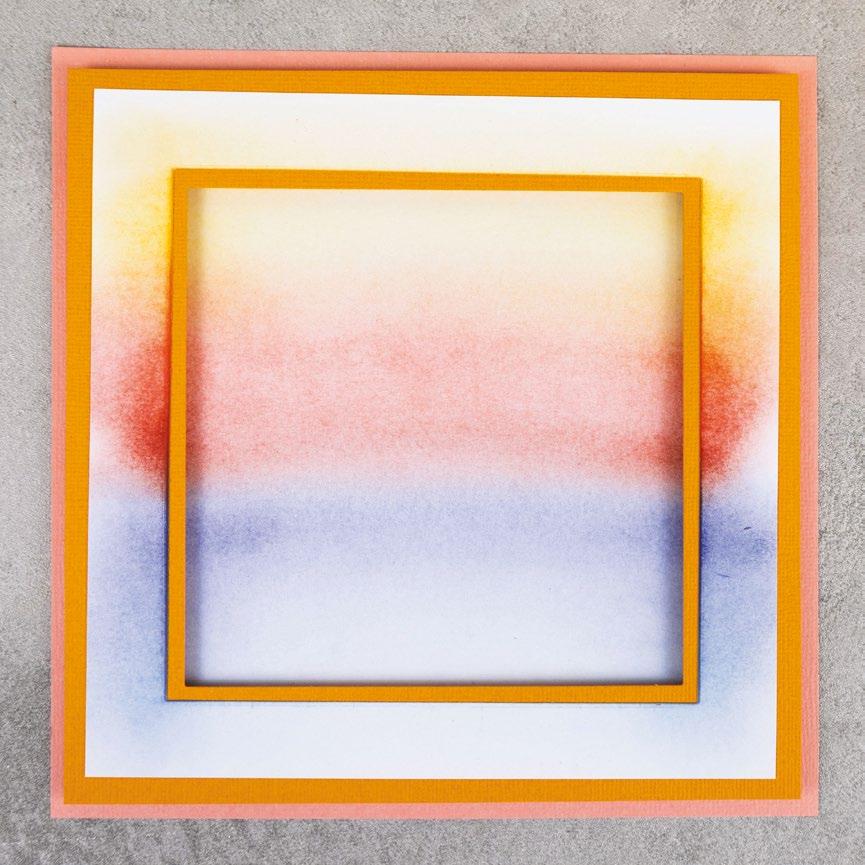
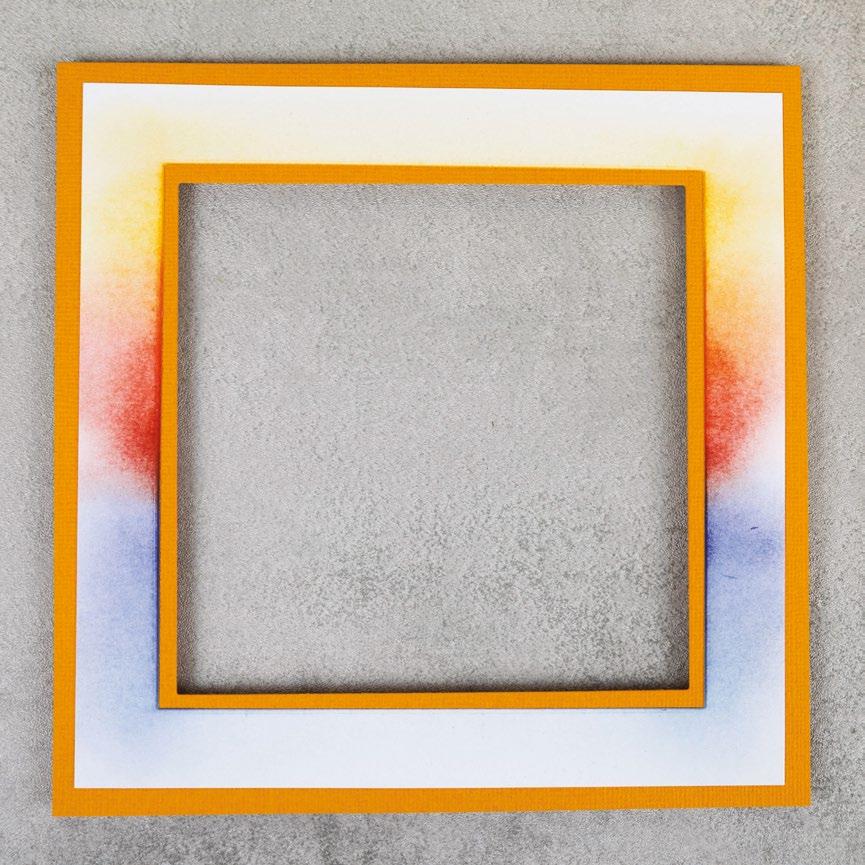
A simple ombré is an easy way to create a background to make an SVG stand out. Cut a circle from a sheet of cardstock to create a stencil, and place it over the cardstock you wish to be inked. If you wish, you can secure this in place with stencil glue. Start with your first ink colour, and gently brush from side to side from the bottom of the stencil into the middle. Add more colour to the bottom of the stencil. Swap to your other colour and repeat from the top into the middle. Once you are happy, remove the stencil to reveal your design.
Try with more colours to create a sunset ombré background. Always make sure to start inking on the stencil before bringing the brush onto inked cardstock.
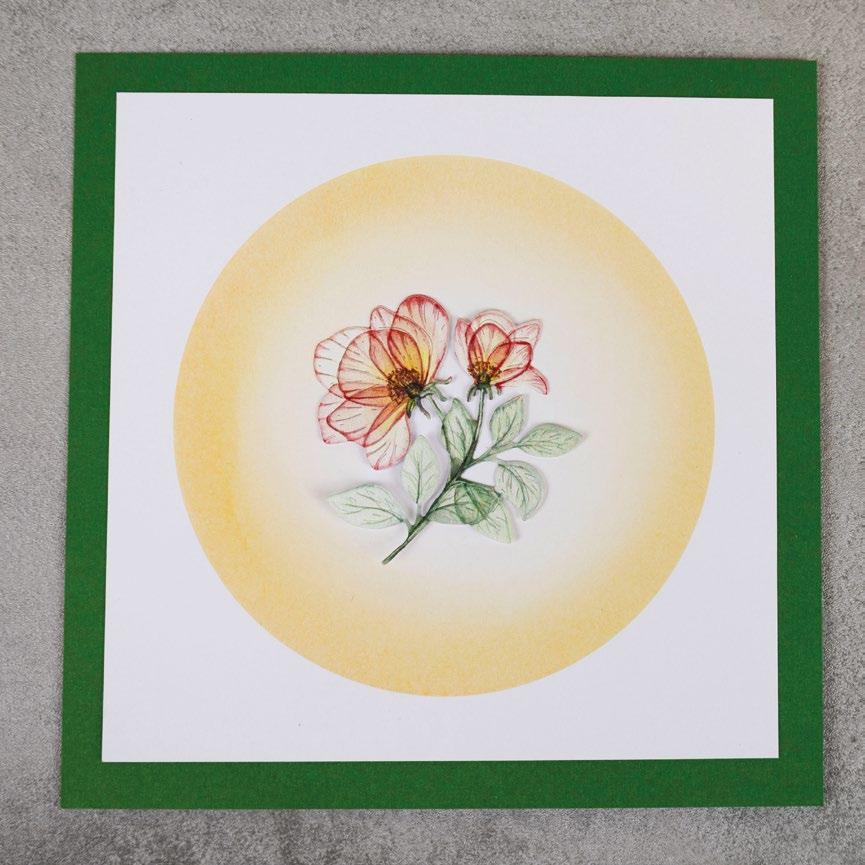
Adding a vignette to a background can help draw interest to the main focal point of the card. You can do this with a stencil or without. Starting on the outer edge of the cardstock or stencil, load up your brush and start to brush in circular motions into the middle of the cardstock. As the ink comes off your brush you will naturally create the lighter colour as you move into the middle. Continue brushing from the outside in until you are happy with the vignette.
www.tatteredlace.co.uk | 31
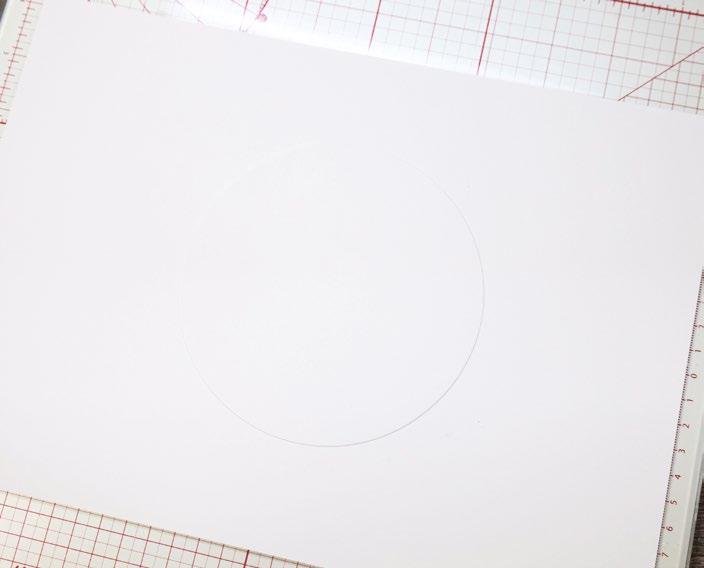
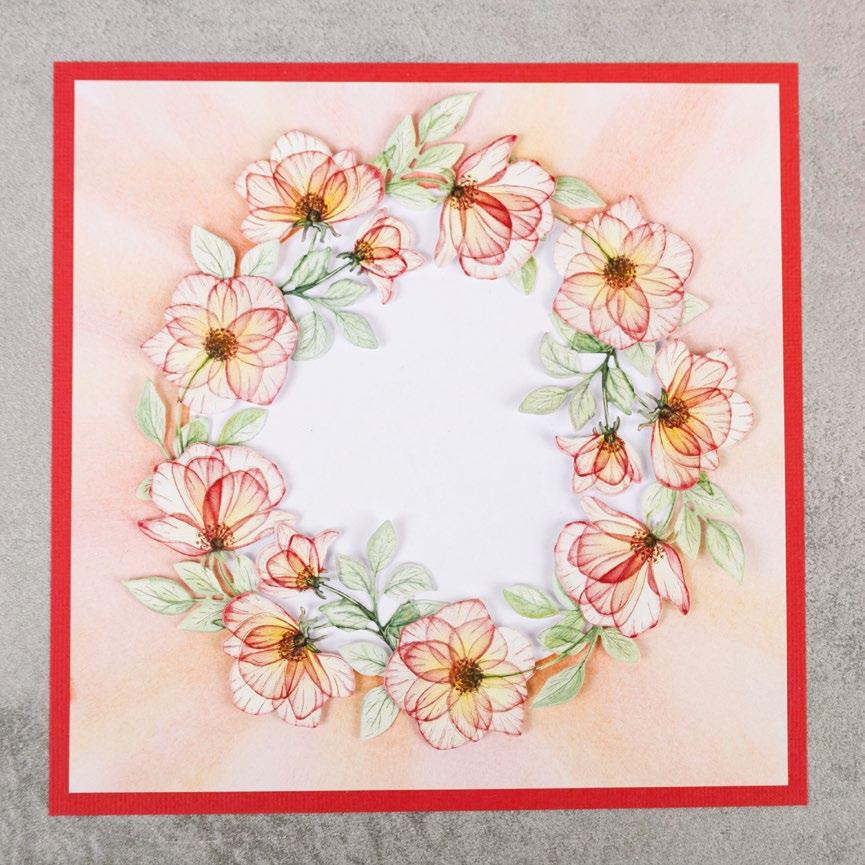
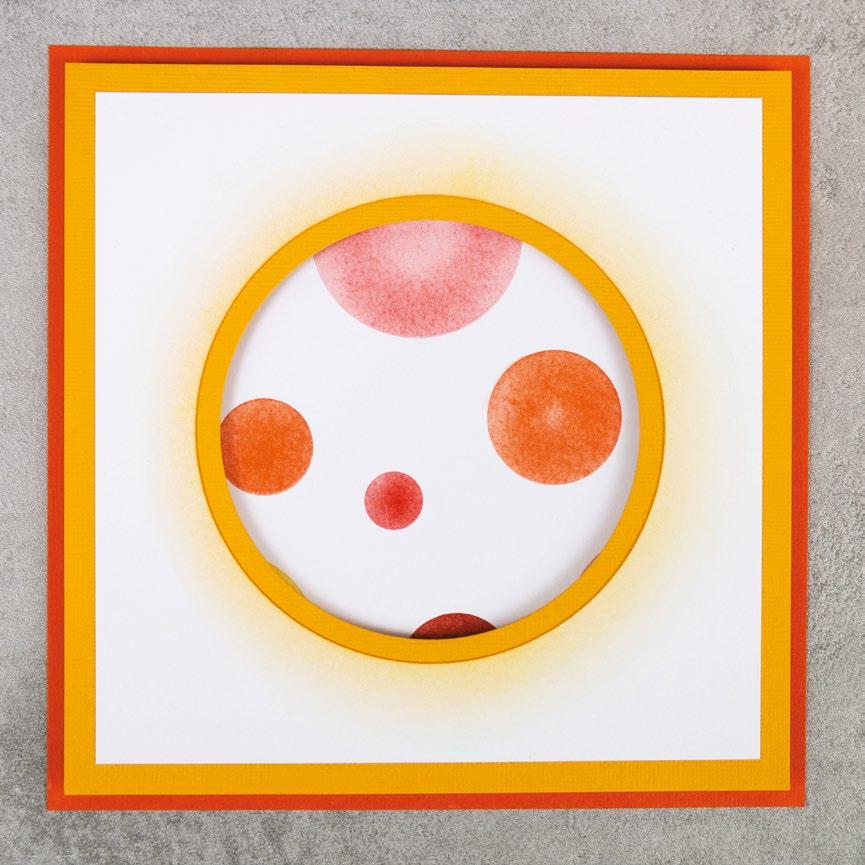
As well as just inking within a stencil, why not trying inking around a stencil as well? Use the drop-out from a previous circle stencil and place it onto your chosen cardstock. Load up your brush with your chosen ink and, starting on the circle, brush outwards onto the cardstock.


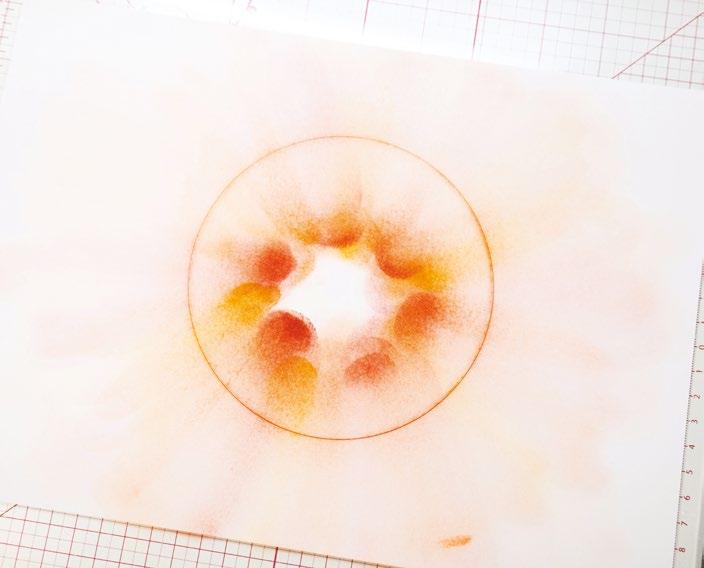



Try using different colours to create a sunburst effect. Start with the lighter colours so the darker colours don't transfer onto your lighter ink colour brushes.
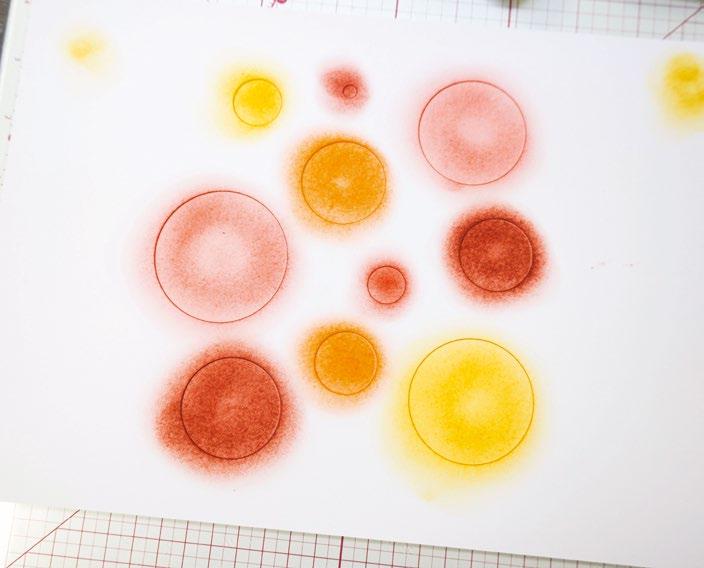
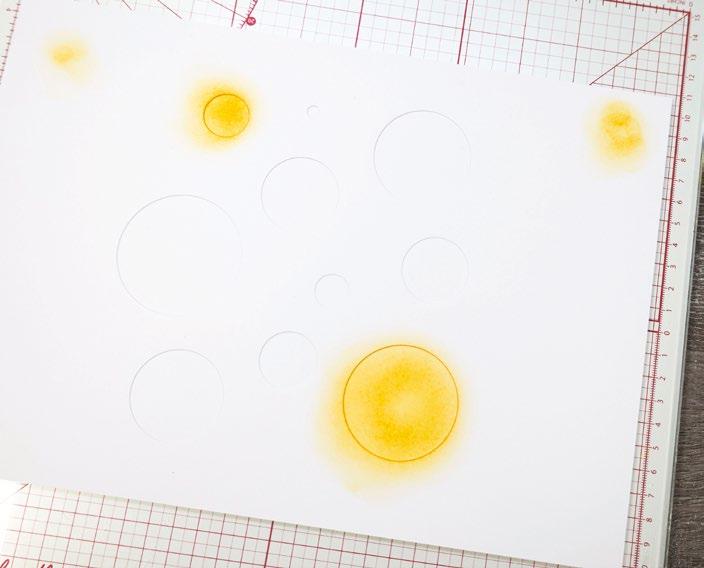
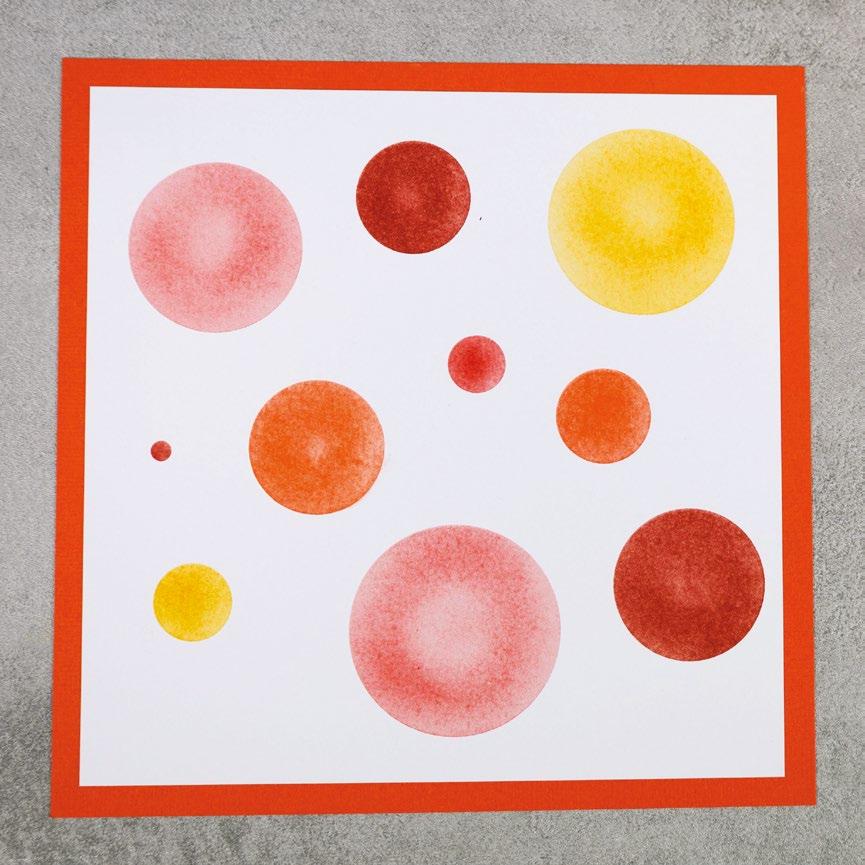
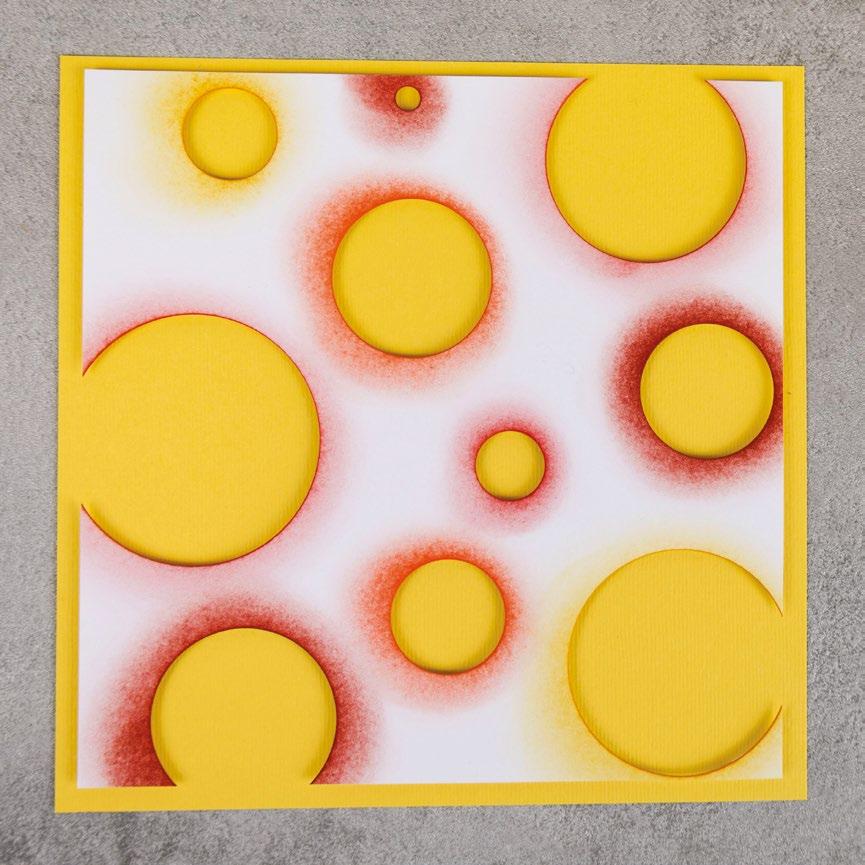
Once you are confident inking through stencils, have a go at creating some fun stencils with the basic shapes on your machine. Cut into cardstock with the different sized shapes to create random spotty patterns or uniformed square patterns.
With your stencil designs, place onto your chosen cardstock and ink different colours within each apeture. Make sure to not spill the ink over into another aperture if you are using different colours!
Once you have created all your inked background they are then ready to be matted and layered onto cardstock to use in your papercraft projects. But, don't discard those stencils either, trim them down to size and use them as frames on your projects too! Nothing has to go to waste when it comes to inking!
32 | www.tatteredlace.co.uk



www.tatteredlace.co.uk | 33
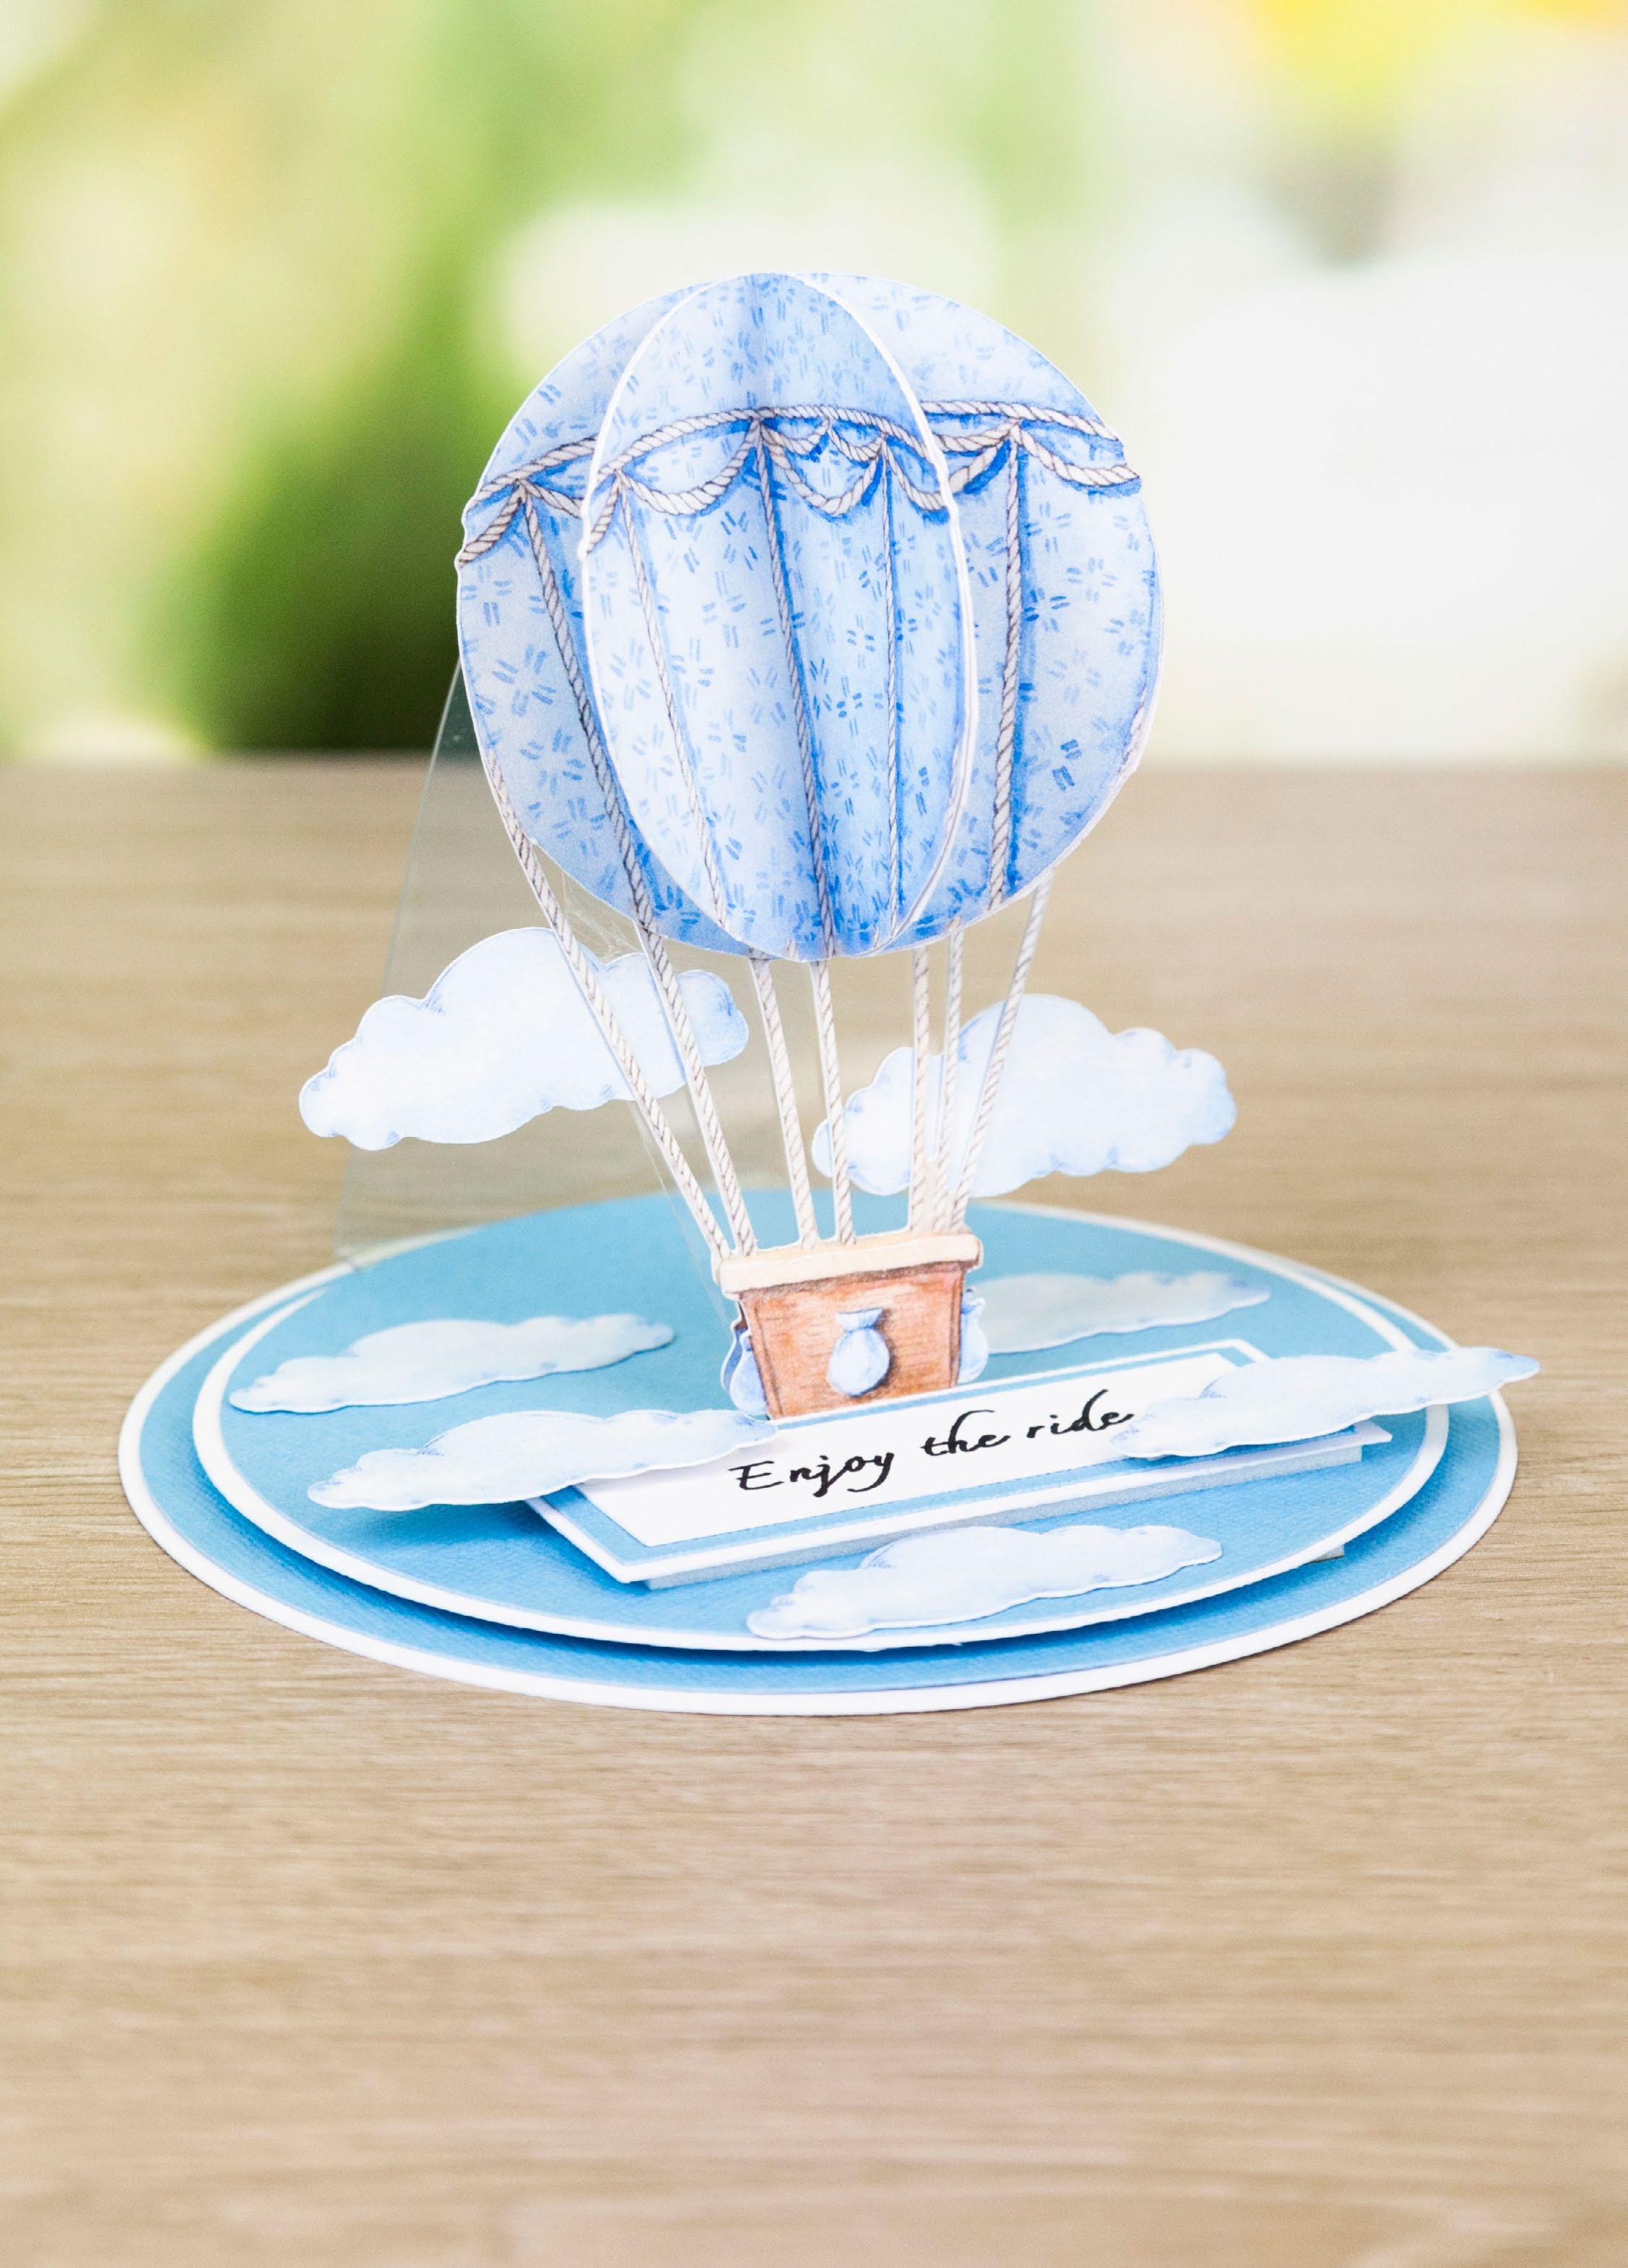
What you’ll need: • 21-01-Enjoy The Ride SVG files • White cardstock • Blue cardstock • Construction acetate ------------------------------------------- ENJOY THE RIDE ---------------------------------------------34 | www.tatteredlace.co.uk
Step bySteps
2 4 6
3 5
Cut all the pieces needed to create the project as listed below;
From SVG downloads:
• From charisma: - 1 x ETR-1-Charisma A - 1 x ETR-1-Charisma B
From machine memory:
• From white cardstock: - 1 x 135mm circle - 1 x 120mm circle
- 1 x 80mm x 30mm rectangle - 1 x 70mm x 20m rectangle (with sentiment draw file)
• From blue cardstock: - 1 x 130mm circle - 1 x 116mm circle - 1 x 75mm x 25mm rectangle


• From construction acetate: - 1 x 50mm x 210mm rectangle
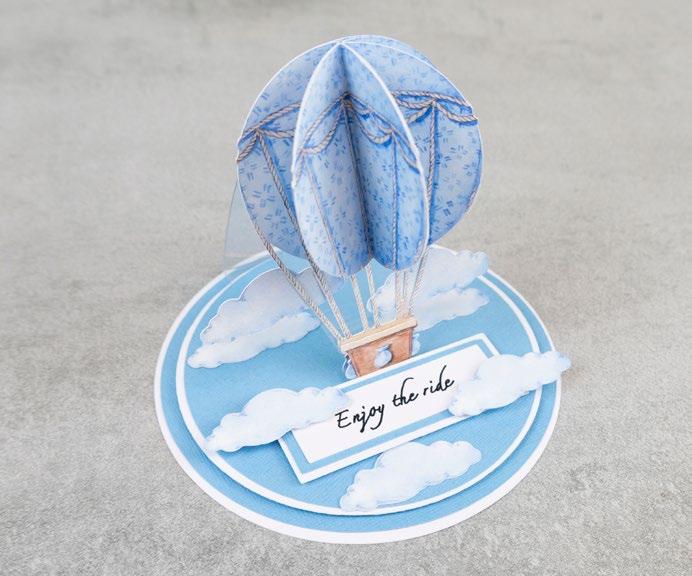
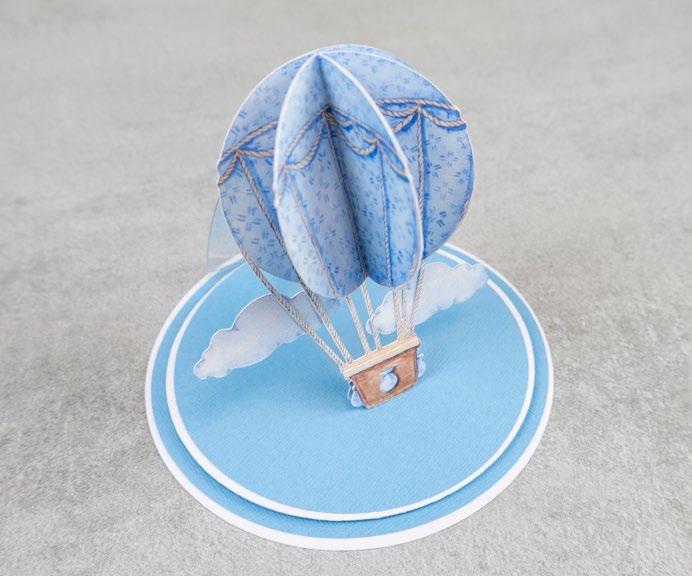
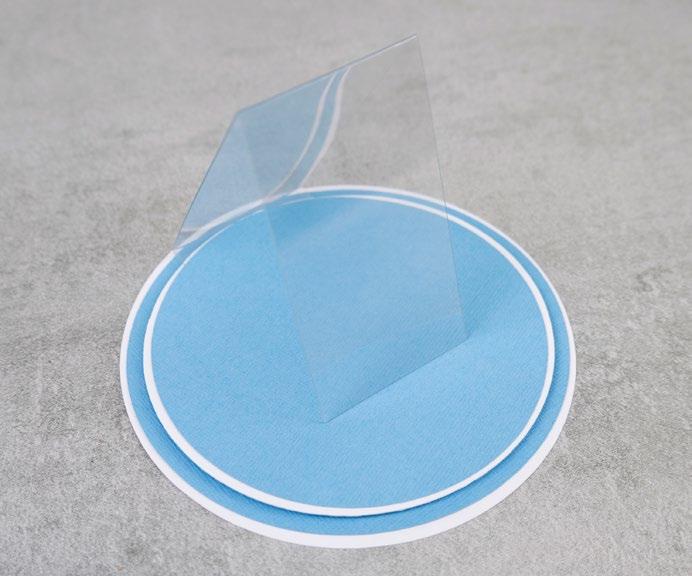
Mat the large blue circle onto the large white circle. This will be the card base. On the acetate rectangle, from the top of the rectangle, measure down at 9cm and 19cm, and score and fold. Mat the small tab onto the smaller white circle, and mat the smaller blue circle on top. Mat onto the card base with foam tape.
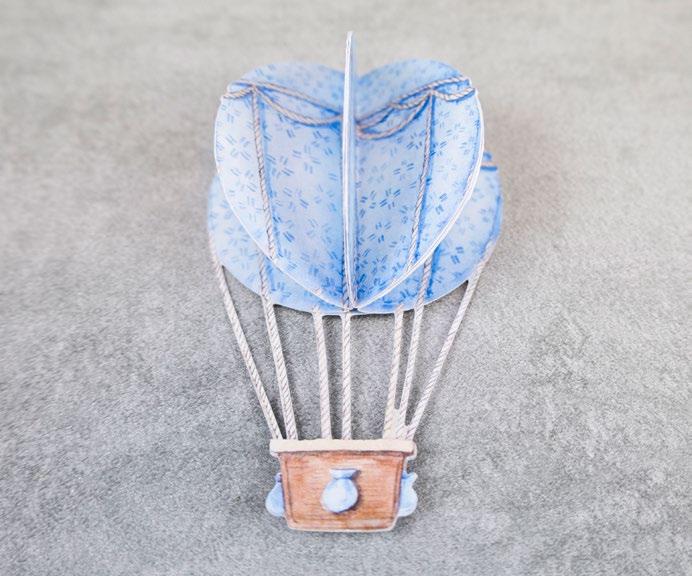
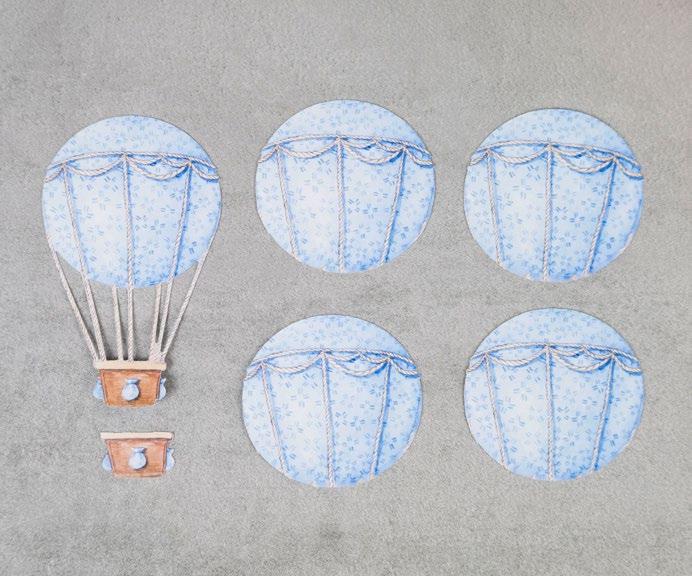
Trim the balloon charisma cuts, as shown in the image.
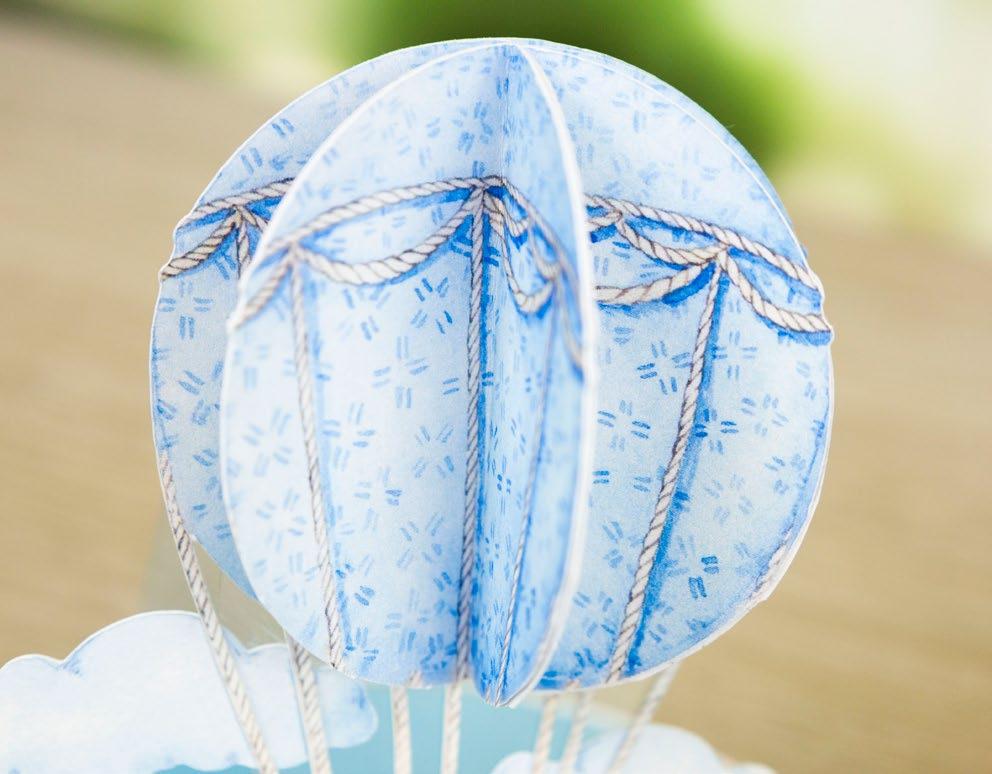
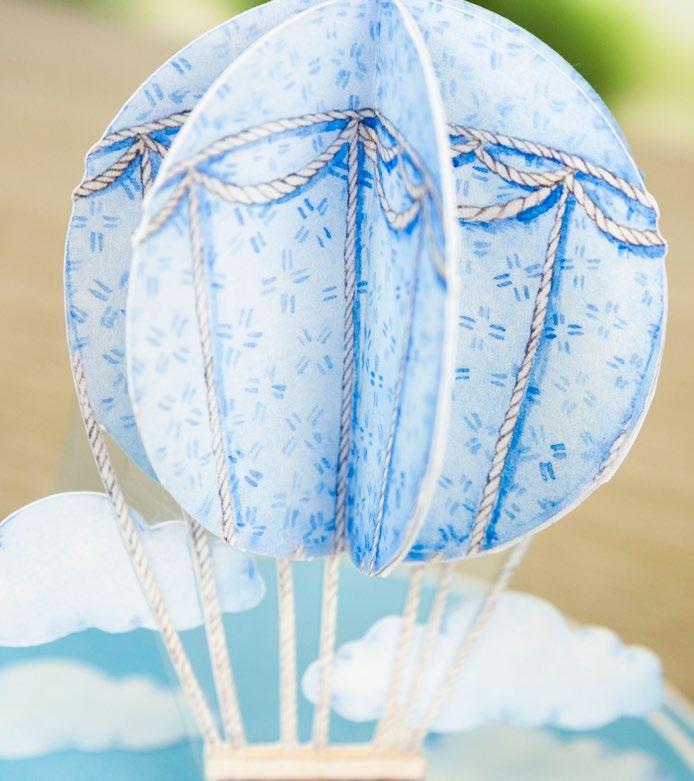
Fold the trimmed balloon cuts in half. Mat each half of the balloon to another half until you have joined all the folded pieces. Mat onto the whole cut to create a fanned effect. Mat the basket onto the bottom of the whole cut with foam tape.
Trim the bottom fold of the acetate to fit the balloon. Mat two of the cloud cuts onto the acetate, and mat the balloon on top.
Mat the sentiment rectangle onto the blue rectangle, then onto the remaining white rectangle. Mat onto the card base with foam tape to use as a stopper. Mat the remaining clouds onto the card base.
------------------------------------------- ENJOY THE RIDE ----------------------------------------------
1
1
2
3
4
5
6
CLICK HERE TO DOWNLOAD YOUR SVG CONTENT PROJECT 21 www.tatteredlace.co.uk | 35
------------------------------------------- ENJOY THE RIDE ---------------------------------------------What you’ll need: • 22-02-Enjoy The Ride SVG files • White cardstock • Blue cardstock • Construction acetate • Distress ink – Vintage Photo & Stormy Sky 36 | www.tatteredlace.co.uk
1 Cut all the pieces needed to create the project as listed below;
From SVG downloads:
• From white cardstock: - 1 x ETR-2-Card Front - 3 x ETR-2-Cloud (with sentiment draw files)
- 2 x ETR-2-Cloud - 4 x ETR-2-Cloud (flipped)

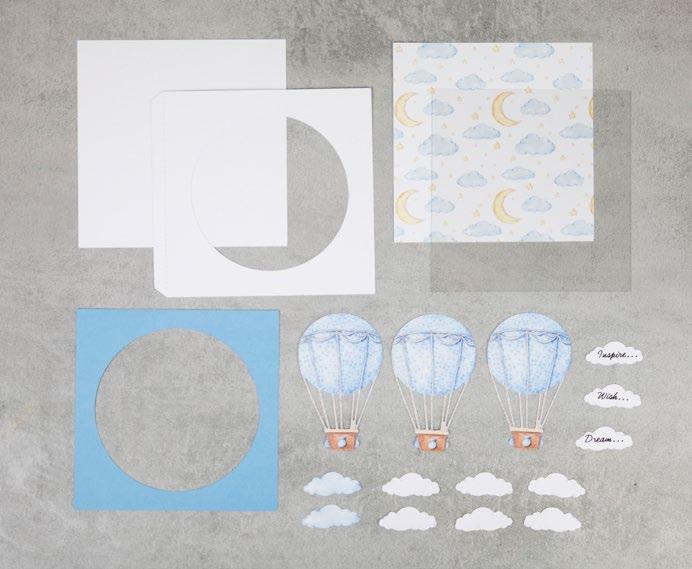
• From blue cardstock: - 1 x ETR-2-Card Front Mat
• From charisma: - 1 x ETR-2-Charisma
From machine memory:
• From white cardstock: - 1 x 165mm square

• From backing paper: - 1 x 160mm square (clouds)
• From construction acetate: - 1 x 155mm square 2

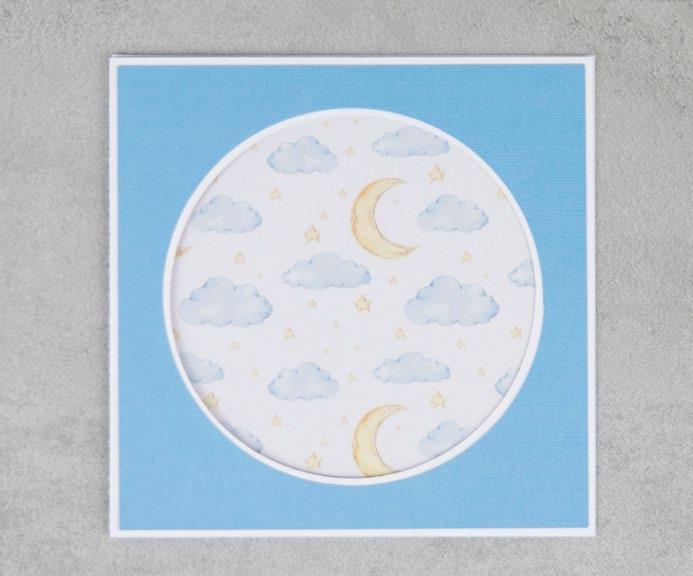
Attach the white card front the white square using the tab to create the card. Mat the clouds square onto the inside back of the card, and the acetate square onto the inside front of the card.
Mat the blue card front mat onto the front of the card.

Trim the balloon-cuts, as shown in the image.

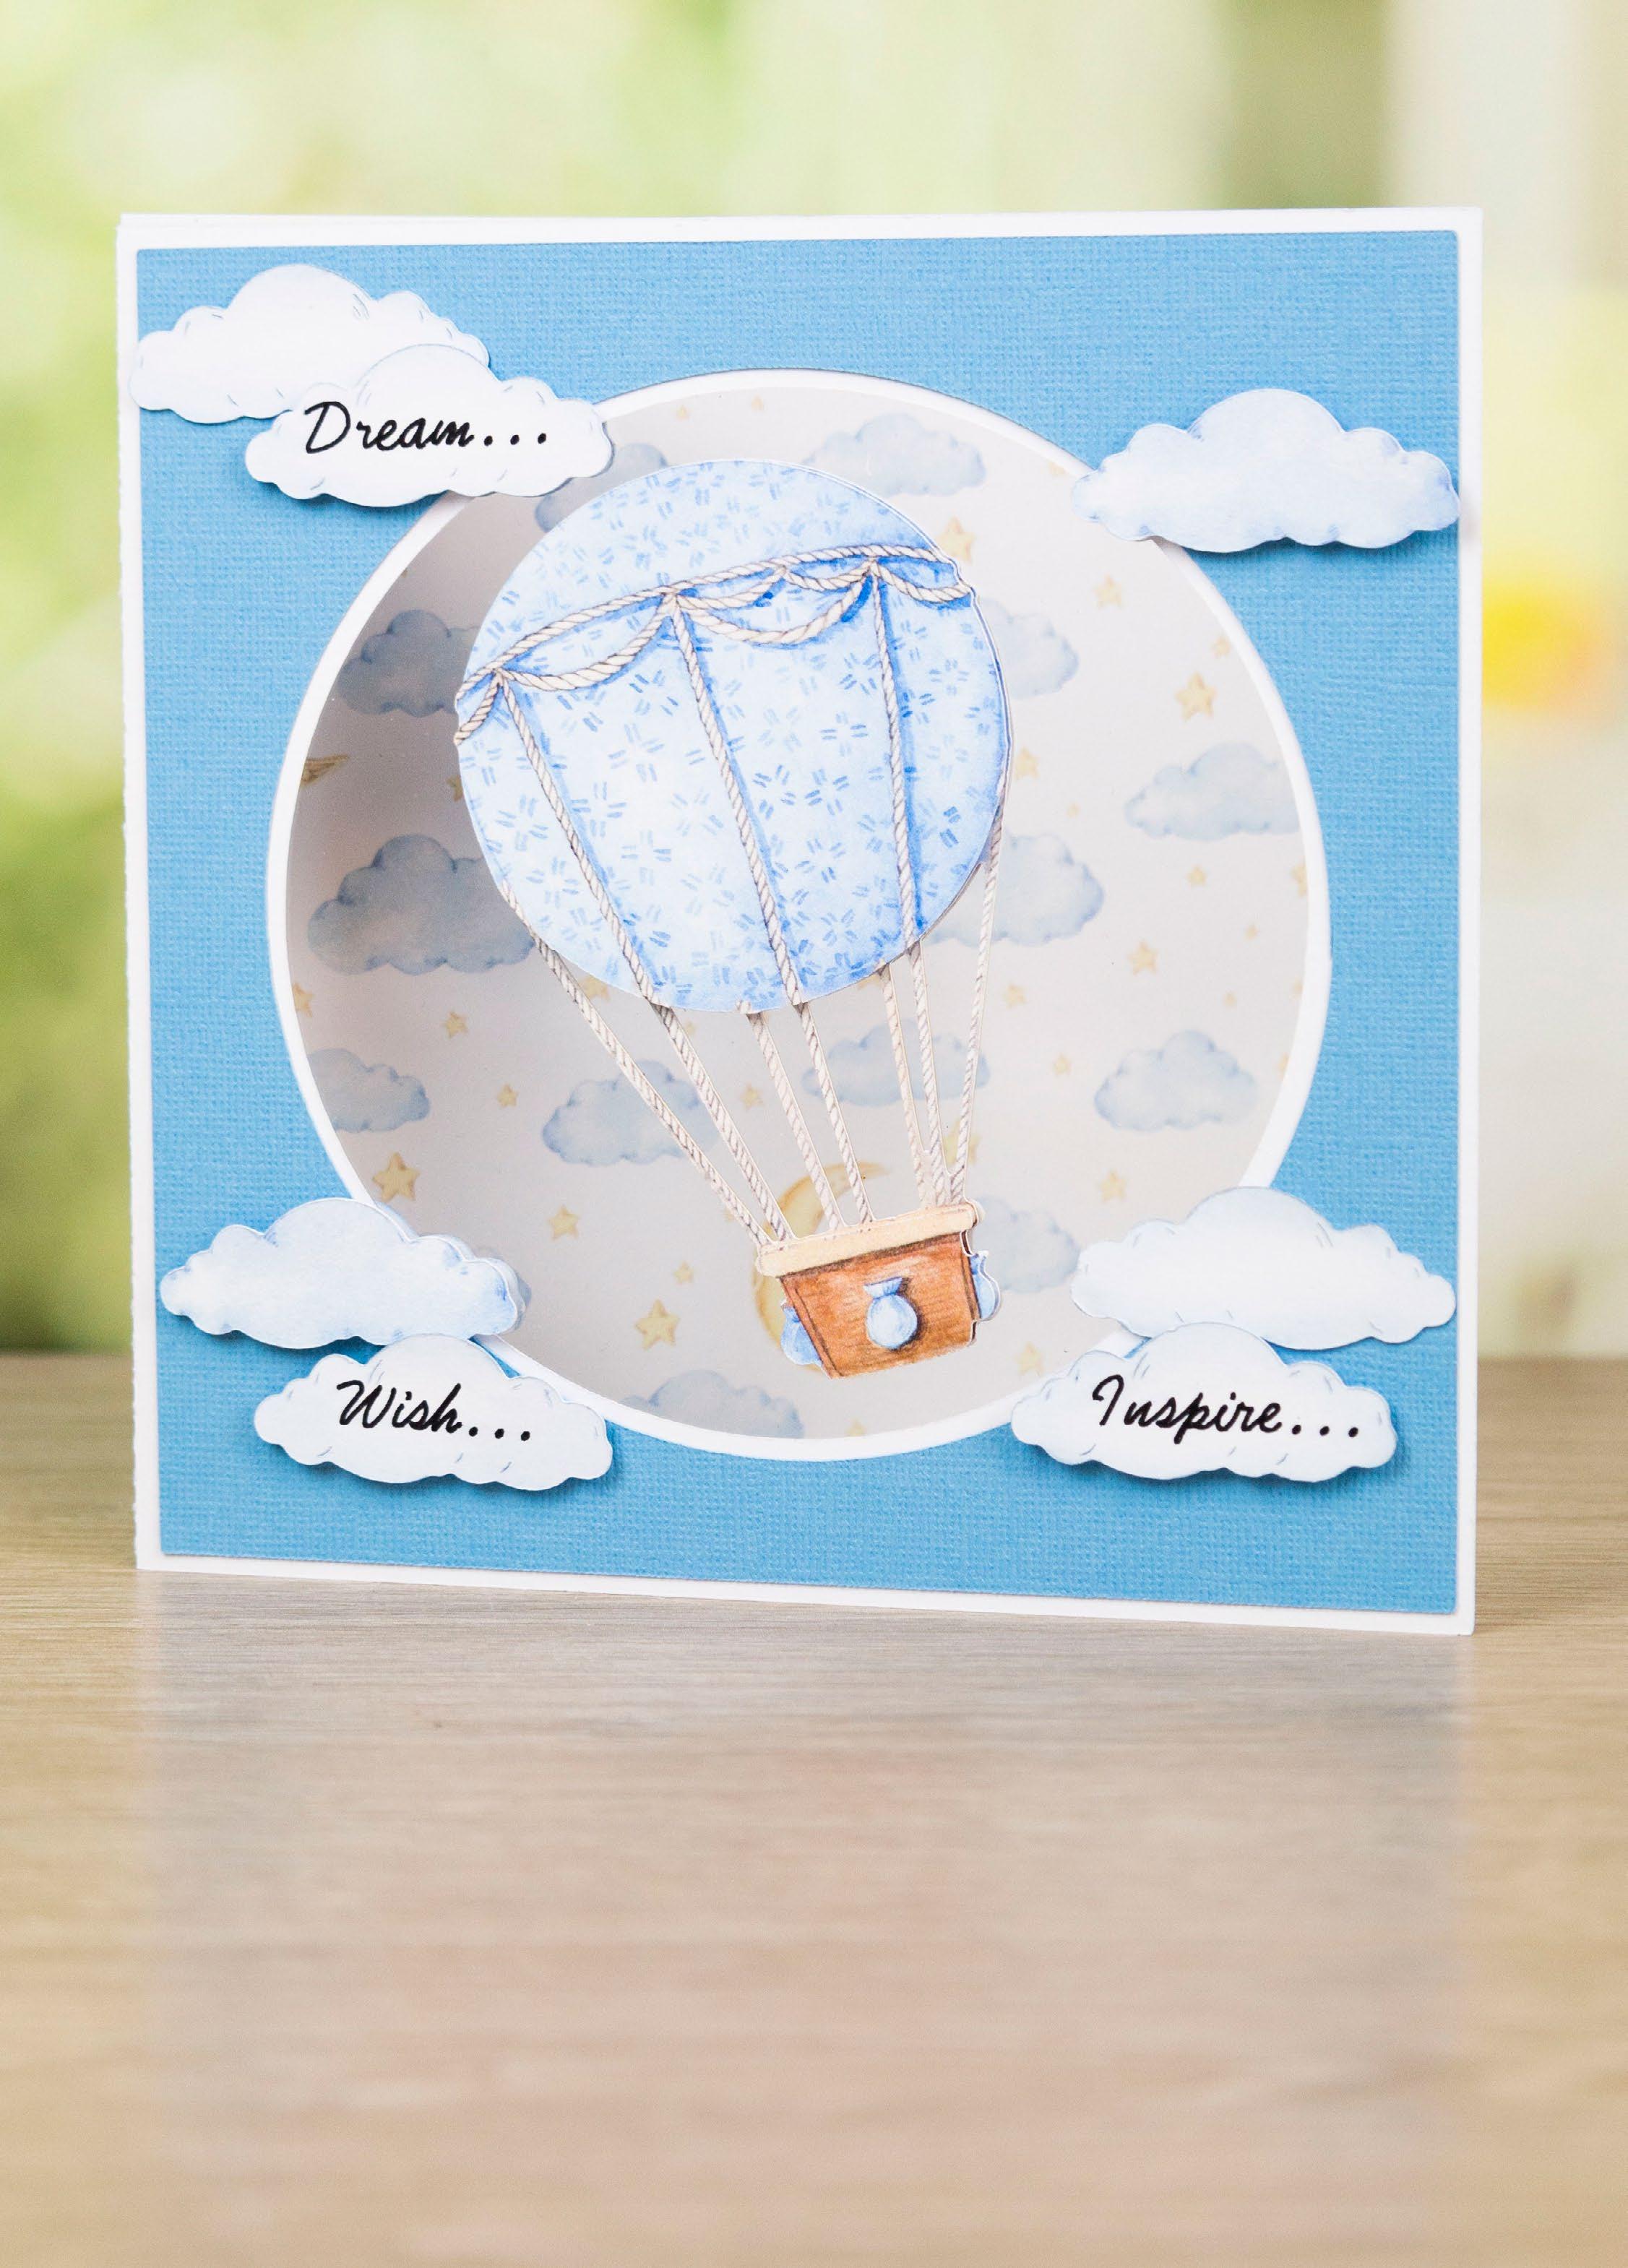
Ink on the reverse of the strings on the whole cut as these will be seen through the acetate. Mat one of the trimmed balloons and baskets onto the whole cut with foam tape and mat the balloon onto the front of the card.
Ink around the edges of the sentiment clouds and the white cardstock clouds.
Mat the sentiment clouds, charisma clouds and the two inked white clouds onto the front of the card.
Mat the remaining balloon and basket-cut onto the inside front of the card so they match up with the reverse of the balloon on the front of the acetate. Mat the remaining flipped inked clouds onto the inside front of the card.

Step bySteps
------------------------------------------- ENJOY THE RIDE ----------------------------------------------
3
4
5
6
7
8
1 5 4 8 2 6 3 7 CLICK HERE TO DOWNLOAD YOUR SVG CONTENT PROJECT 22 www.tatteredlace.co.uk | 37
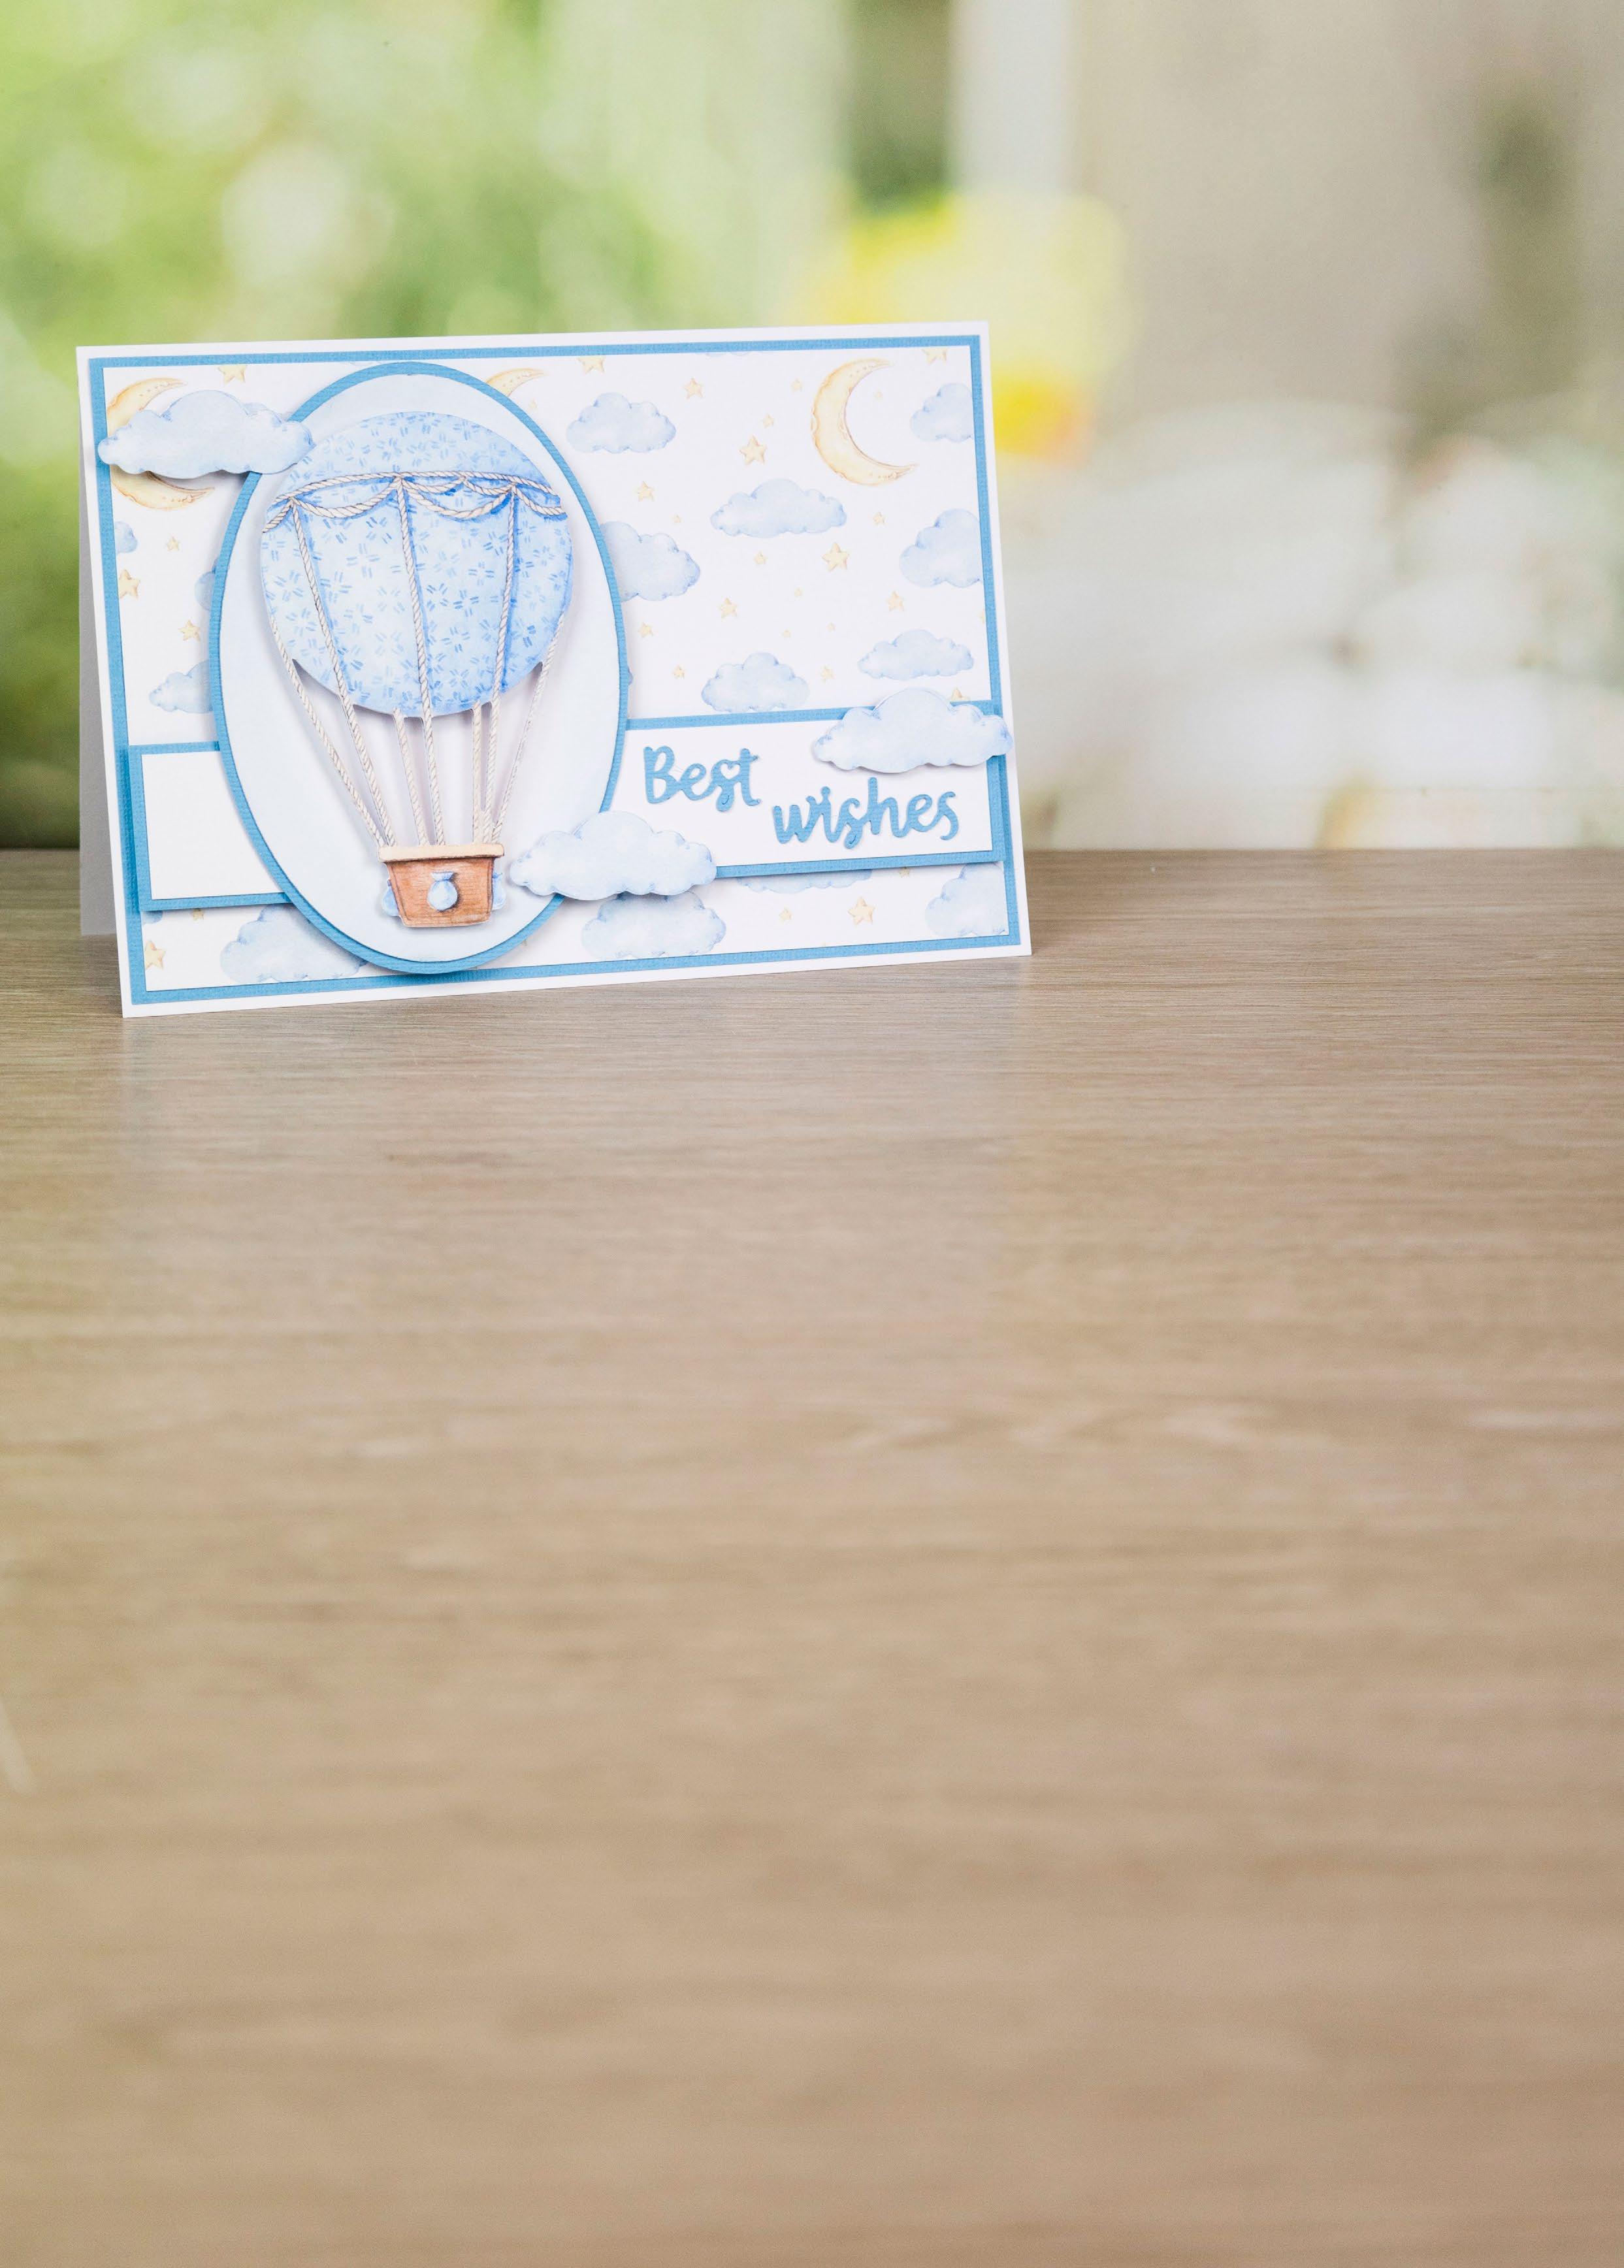
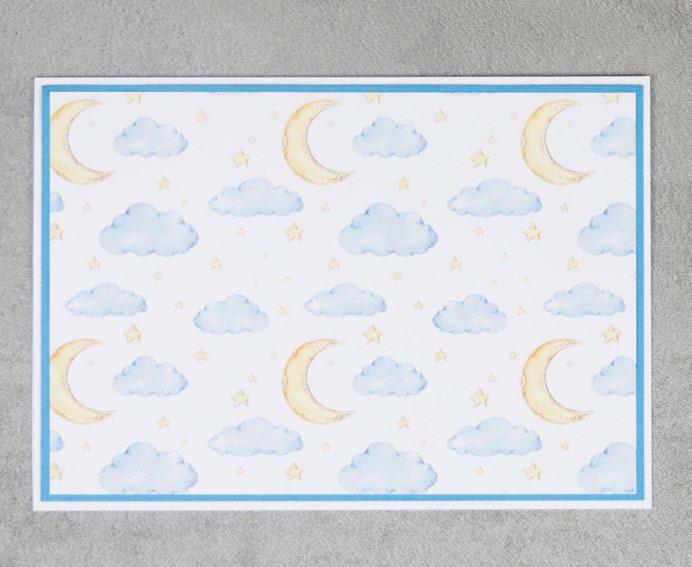
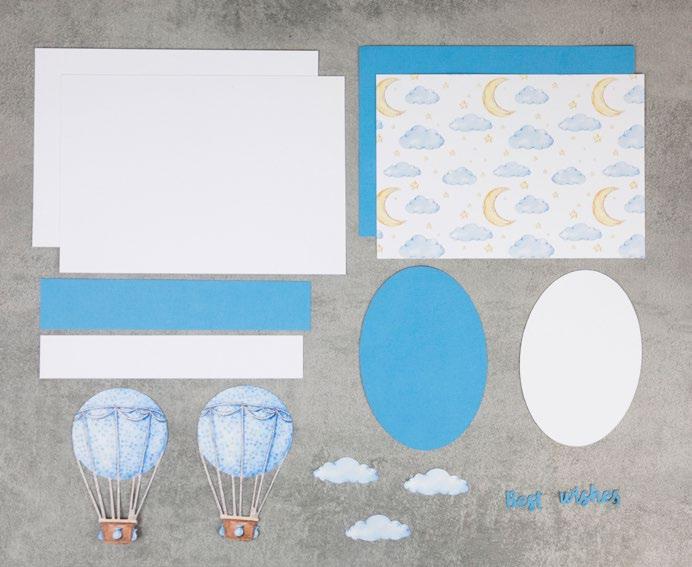
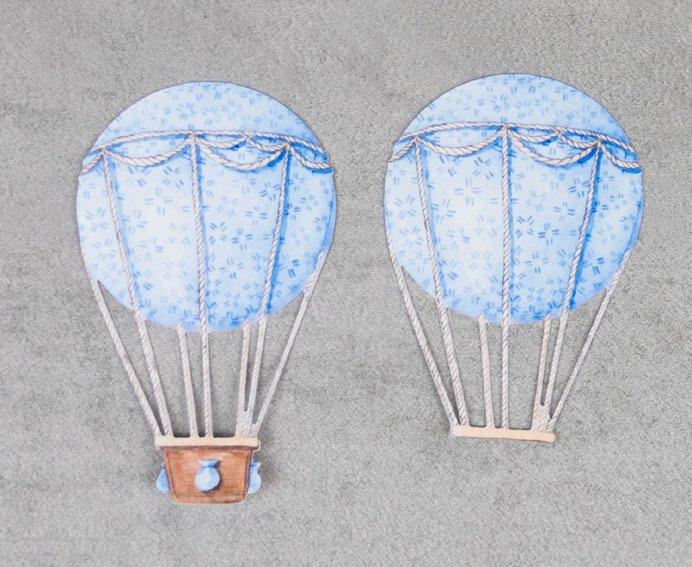

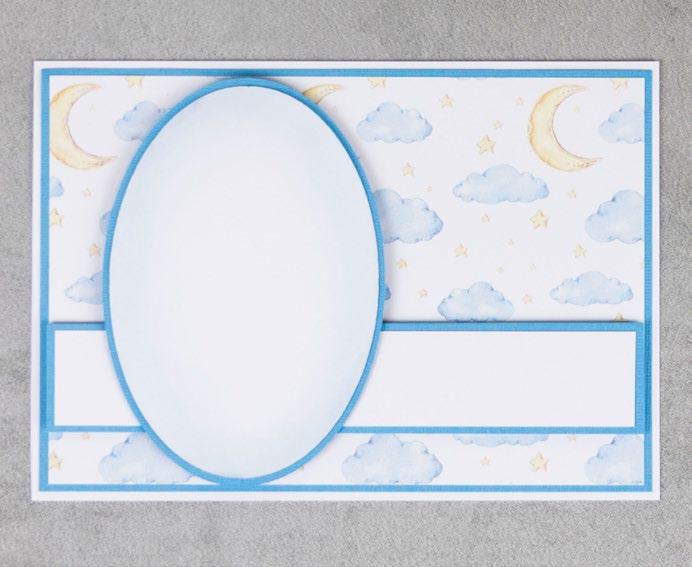
Step bySteps 1 2 3 4 5 1 Cut all the pieces needed to create the project as listed below; From SVG downloads: • From blue cardstock: - 1 x ETR-3-Best Wishes • From charisma: - 1 x ETR-3-Charisma From machine memory: • From white cardstock: - 2 x 200mm x 140mm rectangle - 1 x 185mm x 30mm rectangle - 1 x 86mm x 126mm oval • From blue cardstock: - 1 x 195mm x 135mm rectangle - 1 x 190mm x 35mm rectangle - 1 x 90mm x 131mm oval • From backing paper: - 1 x 190mm x 130mm rectangle 2 On one of the large white rectangles, measure down 10mm from the top edge, and score and fold across to create a tab. Attach to the other white rectangle to create a tent card. Mat the clouds rectangle onto the large blue rectangle, and mat onto the card. 3 Mat the small white rectangle onto the small blue rectangle, and mat onto the card with foam tape. Ink the white oval, and mat onto the blue oval. Mat onto the card with foam tape. 4 Trim the balloon-cuts, as shown in the image. 5 Build up the decoupage of the balloon, and mat together with foam tape. Mat onto the card with foam tape. Mat the clouds onto the card with foam tape. Attach the sentiment onto the to card, as shown. What you’ll need: • 23-03-Enjoy The Ride SVG files • White cardstock • Blue cardstock • Distress ink – Stormy Sky ------------------------------------------- ENJOY THE RIDE ---------------------------------------------38 | www.tatteredlace.co.uk CLICK HERE TO DOWNLOAD YOUR SVG CONTENT PROJECT 23
Beautiful Accents
SHABBY FEATHERS
What you’ll need:
• 24-01-Beautiful Accents SVG files
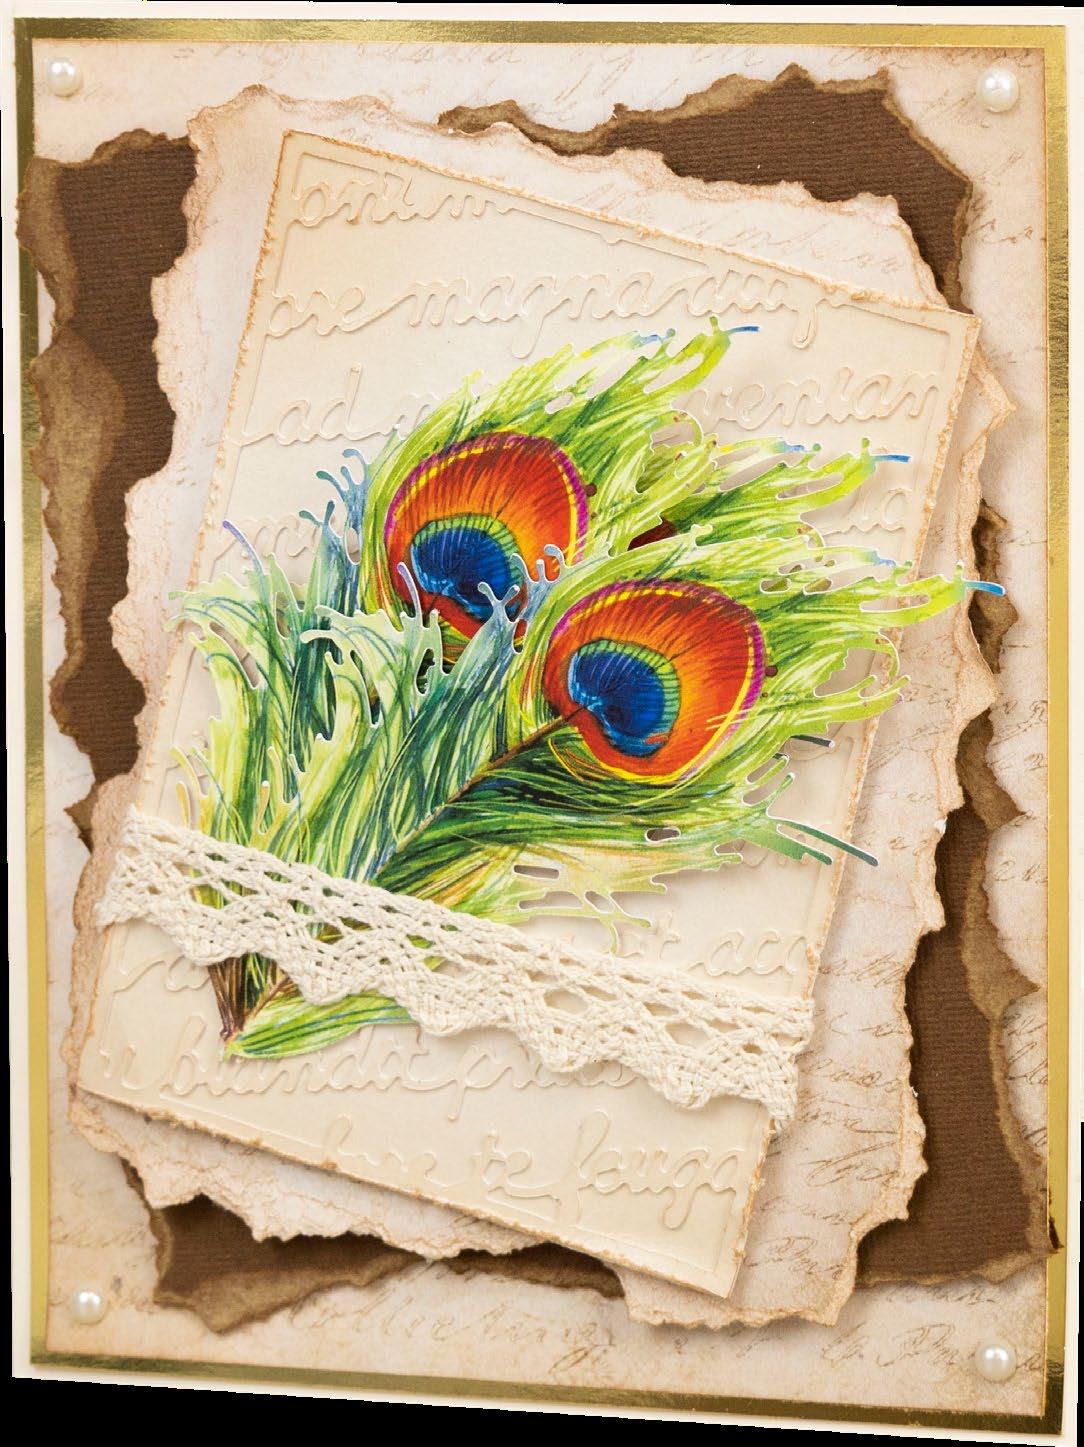
• Cream cardstock • Brown cardstock
• Cream pearlescent cardstock
• Gold mirror cardstock
• Distress ink – Vintage Photo
• Cream lace ribbon • Pearl gems
1
Cut all the pieces needed to create the project as listed below;
From SVG downloads:
• From cream pearlescent cardstock: - 1 x BA-1-Emboss
• From charisma: - 1 x BA-1-Charisma
From machine memory:
• From cream cardstock: - 2 x 150mm x 190mm rectangle
• From gold mirror cardstock: - 1 x 145mm x 185mm rectangle
• From backing paper: - 1 x 140mm x 180mm rectangle (script) - 1 x 125mm x 160mm rectangle (script)
• From brown cardstock: - 1 x 140mm x 170mm rectangle
• From cream pearlescent cardstock: - 1 x 95mm x 135mm rectangle
WITH LOVE
PROJECT 26
2
On one of the large cream rectangles, measure in 10mm from the left edge, and score and fold to create a tab. Attach to the other cream rectangle to create card. Ink the edges of the large script rectangle, and mat onto the gold rectangle. Mat onto the card.
What you’ll need:
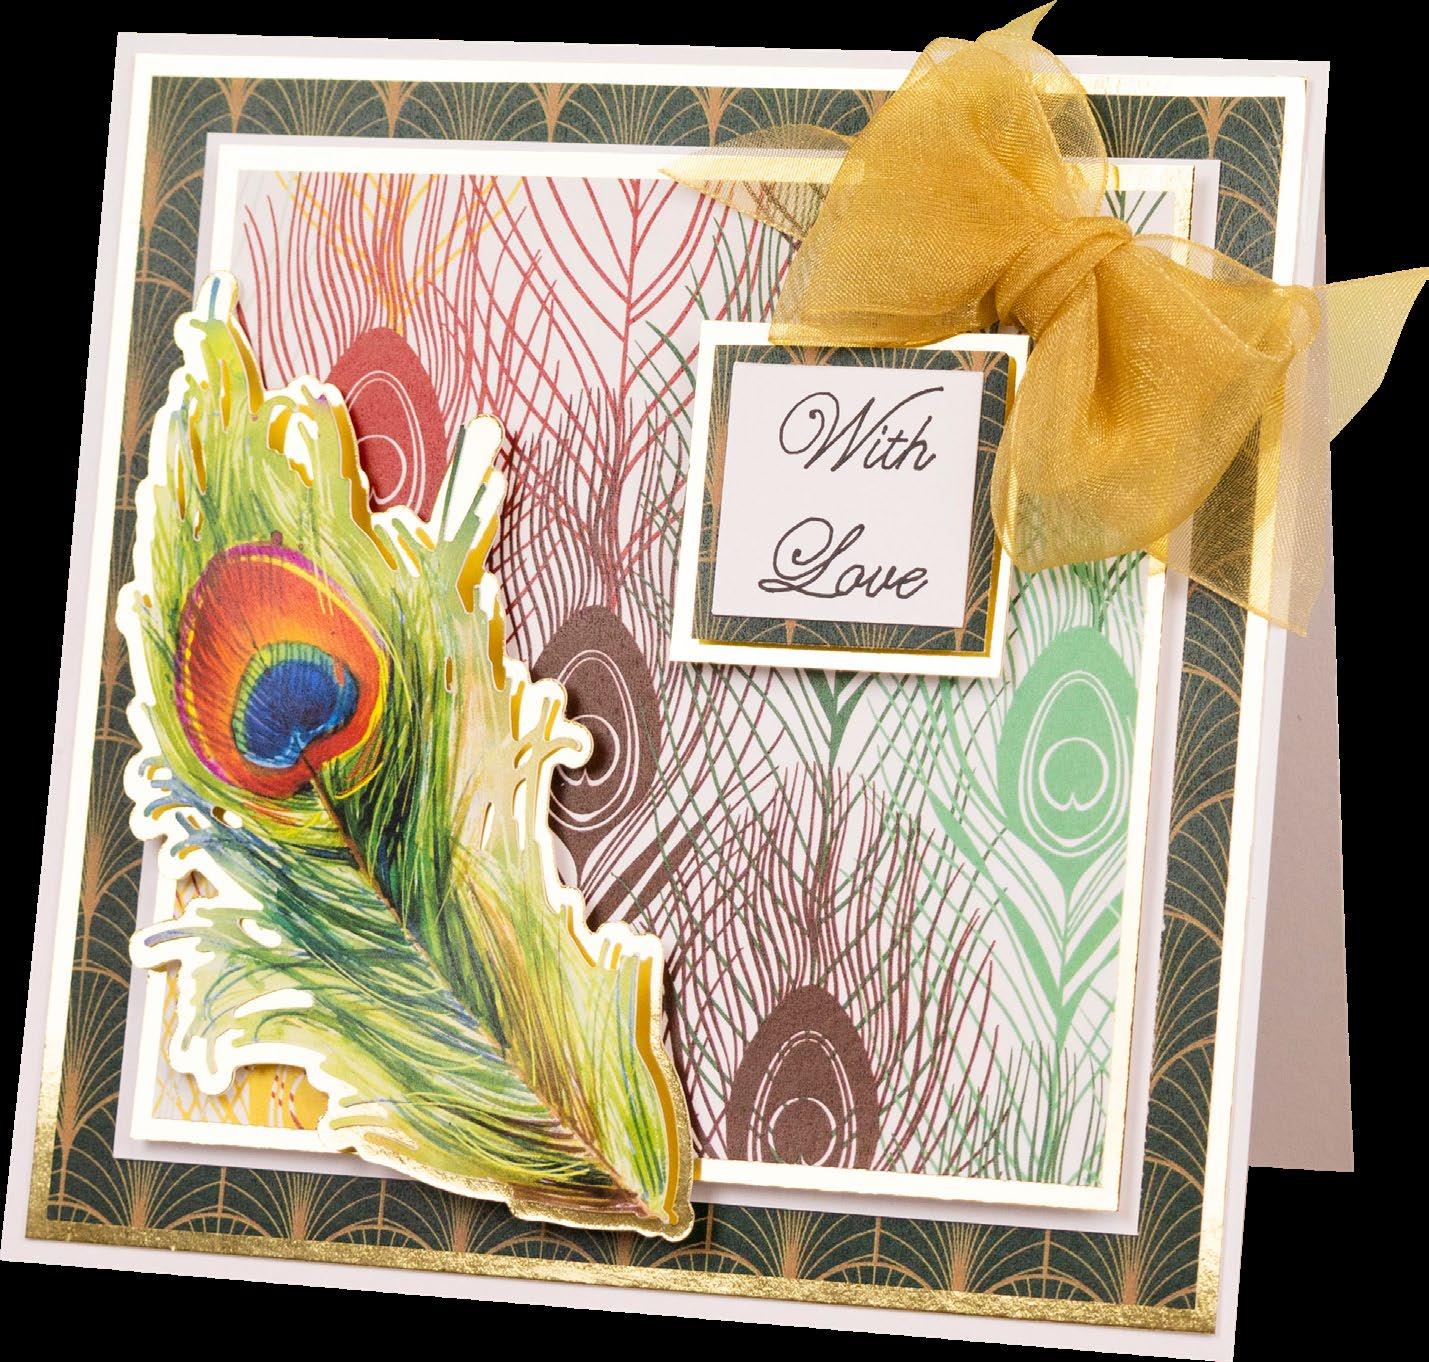
• 26-03-Beautiful Accents SVG files • White cardstock
• Gold mirror cardstock • Gold ribbon
3
Tear around the edges of the brown rectangle, and the remaining script rectangle. Ink around the edges and mat together with foam tape. Mat onto the card with foam tape.
1
Cut all the pieces needed to create the project as listed below;
From SVG downloads:
• From gold mirror cardstock: - 1 x BA-3-Feather Outline
• From gold mirror cardstock:
4
Mat the emboss cut onto the cream pearlescent rectangle. Distress the edges and ink. Mat the charisma feathers onto the rectangle. Wrap a length of ribbon around the rectangle, and mat onto the card with foam tape. Finish by adding pearl gems.
• From charisma: - 1 x BA-3-Charisma
From machine memory:
• From white cardstock:
- 2 x 150mm square
- 1 x 125mm square - 1 x 30mm square (with sentiment draw file)
- 1 x 145mm square - 1 x 120mm square - 1 x 40mm square
• From backing paper: - 1 x 140mm square (deco) - 1 x 115mm square (feathers) - 1 x 35mm square (deco)
----------------------------------------- BEAUTIFUL ACCENTS --------------------------------------------
40 | www.tatteredlace.co.uk
CLICK HERE TO DOWNLOAD YOUR SVG CONTENT
PROJECT 24
BE-YOU-TIFUL
What you’ll need:
• 25-02-Beautiful Accents SVG files
• White cardstock • Turquoise cardstock
• Green cardstock • Construction acetate
• Charisma
1 Cut all the pieces needed to create the project as listed below;
From SVG downloads:
• From charisma: - 2 x BA-2-Charisma
From machine memory:
• From construction acetate: - 1 x 135mm x 170mm rectangle
• From white cardstock: - 1 x 144mm circle - 1 x 58mm circle - 1 x 48mm circle (with sentiment draw file)
• From turquoise cardstock: - 1 x 63mm circle
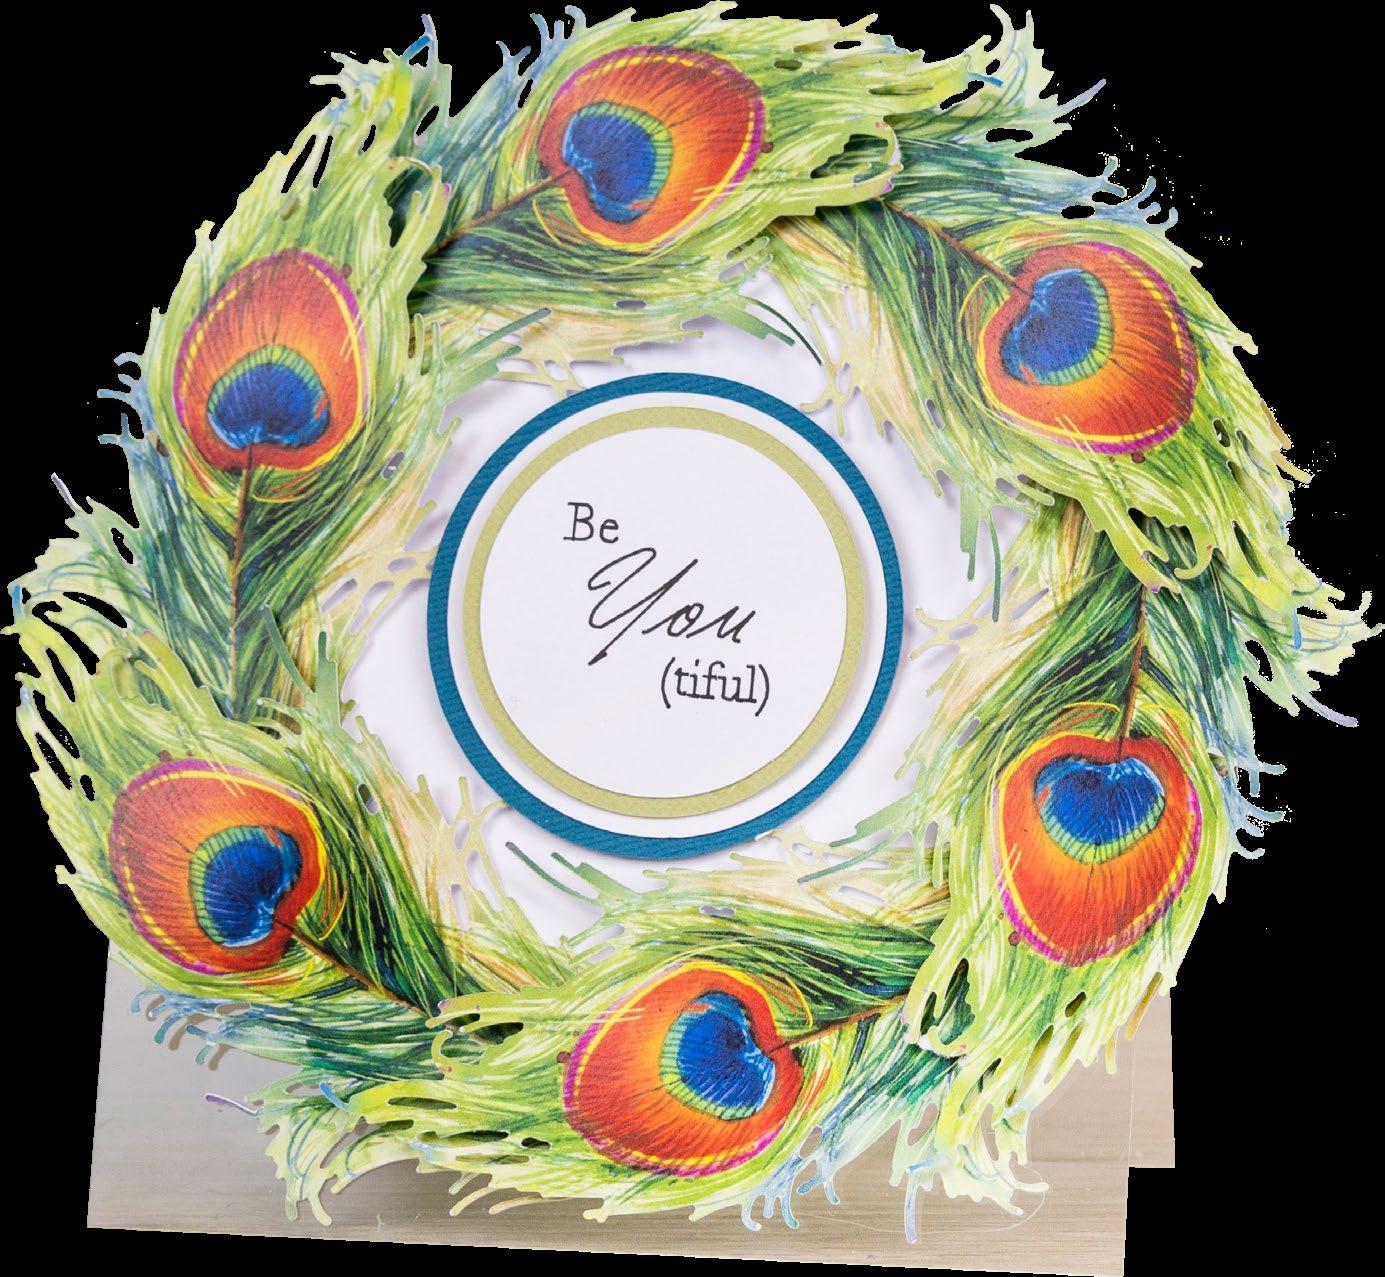
• From green cardstock: - 1 x 53mm circle
3
Mat the charisma feathers around the edge of the circle, raising the top part of the feathers with foam tape.
Score and fold the acetate rectangle in half, horizontally, to create a tent card. Mat the large white circle onto the front of the card.
2
4
CLICK HERE TO DOWNLOAD YOUR SVG CONTENT
2
On one of the large white squares, measure down 10mm from the top edge, and score and fold to create a tab. Attach to the other white square to create a tent card. Mat the large deco square onto the large gold square, and mat onto the card.
3
Mat the 125mm white square onto card. Mat the feathers square onto the 120mm gold square, and mat onto the card with foam tape. Mat the feather charisma onto the outline, raising parts with foam tape, and mat onto the card with foam tape. 4
Mat the small sentiment square onto the small deco square. Mat onto small gold square with foam tape, and mat onto the card with foam tape. Finish by adding a double-loop bow tied from gold ribbon.
Mat the 58mm circle onto the turquoise circle. Mat the sentiment circle onto the green circle, and mat together with foam tape. Mat into the middle of the feathers with foam tape. CLICK
----------------------------------------- BEAUTIFUL ACCENTS --------------------------------------------
YOUR
CONTENT
HERE TO DOWNLOAD
SVG
www.tatteredlace.co.uk | 41
PROJECT 25
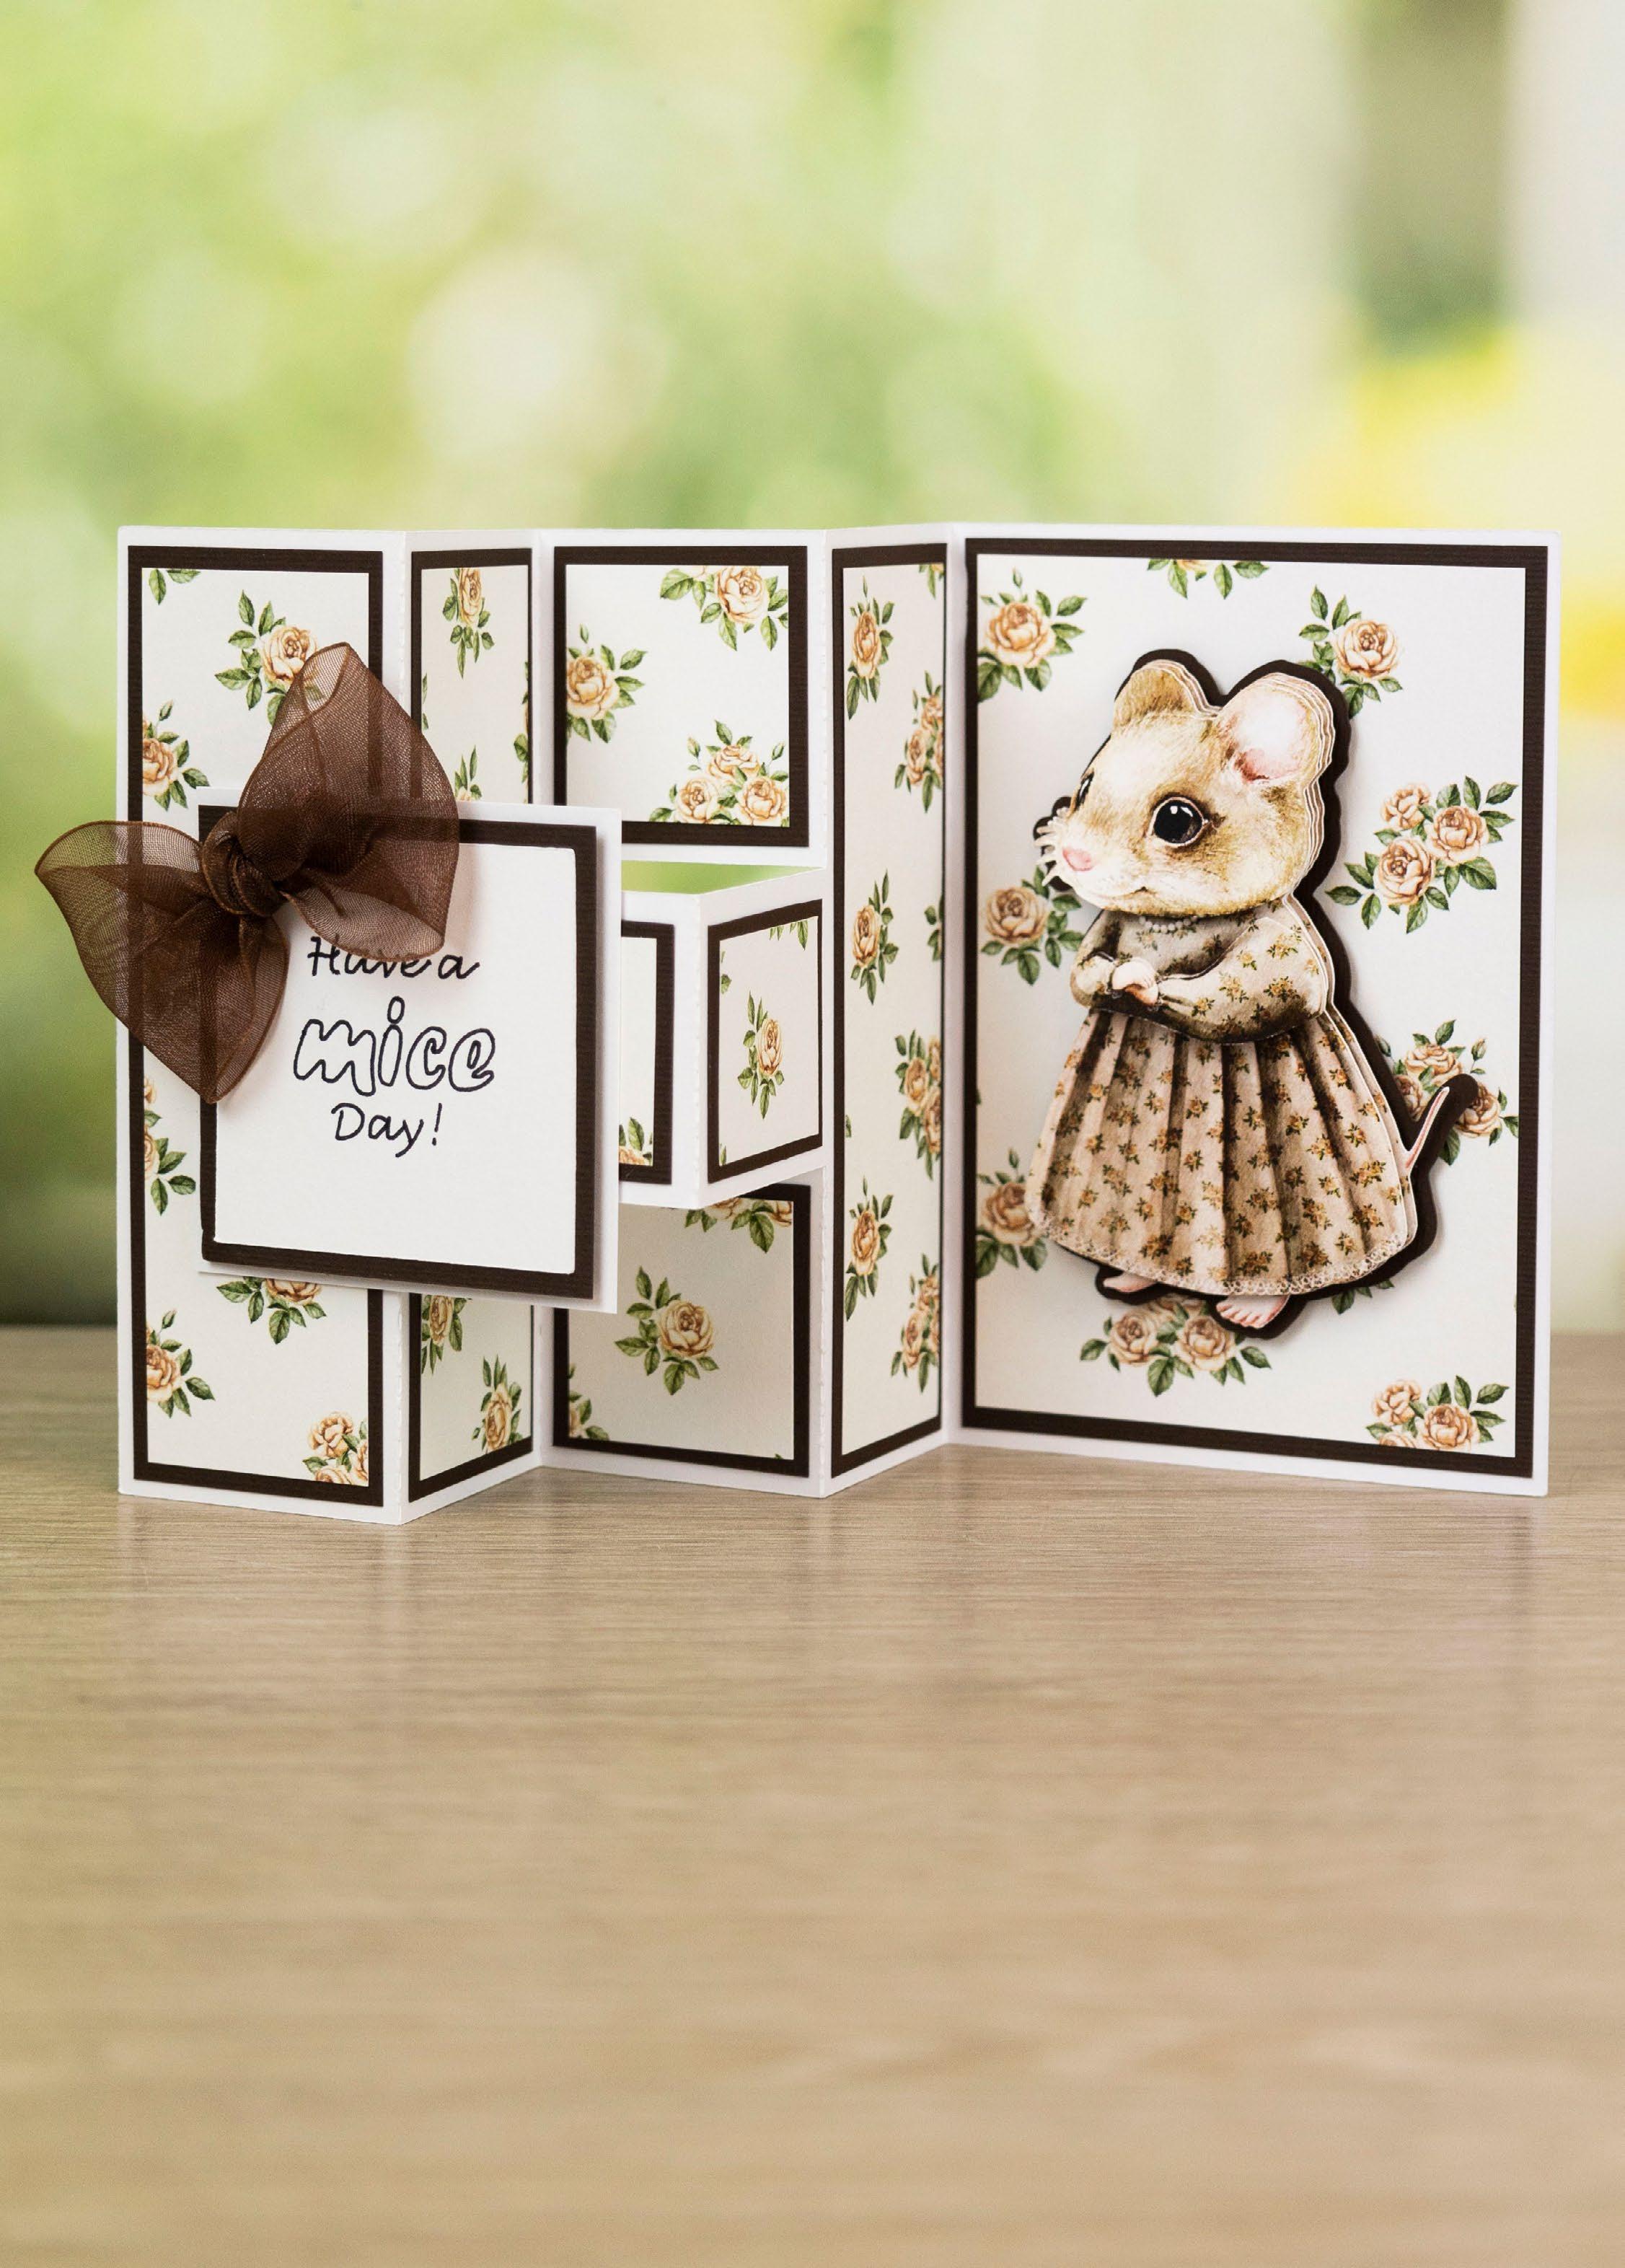
What you’ll need: • 27-01-Dainty Mouse SVG files • White cardstock • Brown cardstock • Brown ribbon ------------------------------------------ DAINTY MOUSE ----------------------------------------------PROJECT 27 42 | www.tatteredlace.co.uk
Cut all the pieces needed to create the project as listed below;
From SVG downloads:
• From white cardstock: - 1 x DM-1-Card Base
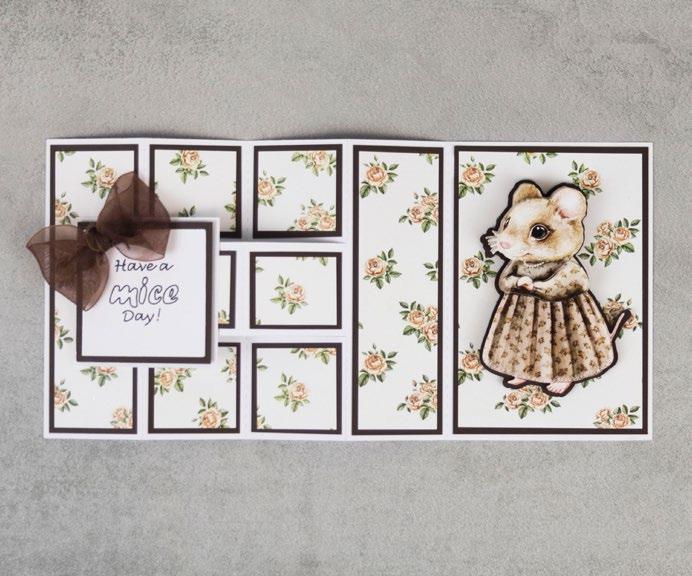
• From brown cardstock: - 1 x DM-1-Mouse Outline
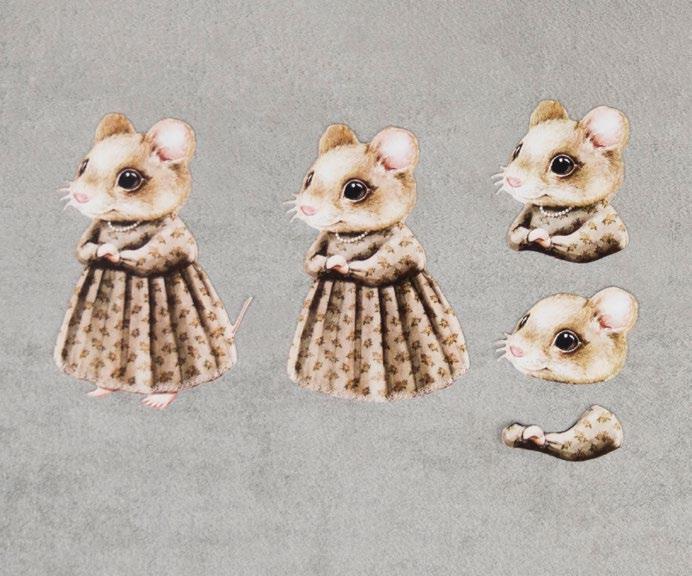
• From charisma: - 1 x DM-1-Charisma
From machine memory:
• From backing paper: - 2 x 35mm x 120mm rectangle (ditsy floral)
- 4 x 35mm square (ditsy floral) - 2 x 35mm x 30mm rectangle (ditsy floral)
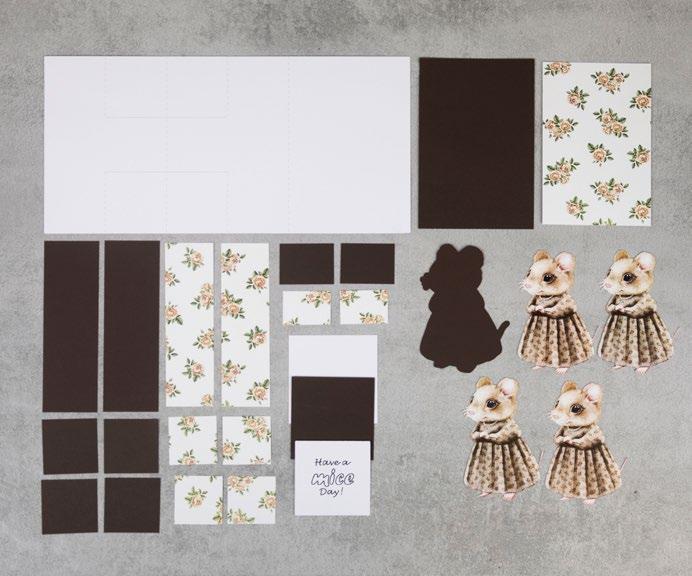


- 1 x 80mm x 120mm rectangle (ditsy floral)
• From brown cardstock:
- 2 x 40mm x 125mm rectangle
- 4 x 40mm square
- 2 x 40mm x 35mm rectangle
- 1 x 85mm x 125mm rectangle
- 1 x 60mm square
• From white cardstock: - 1 x 65mm square - 1 x 55mm square (with sentiment draw file) 2
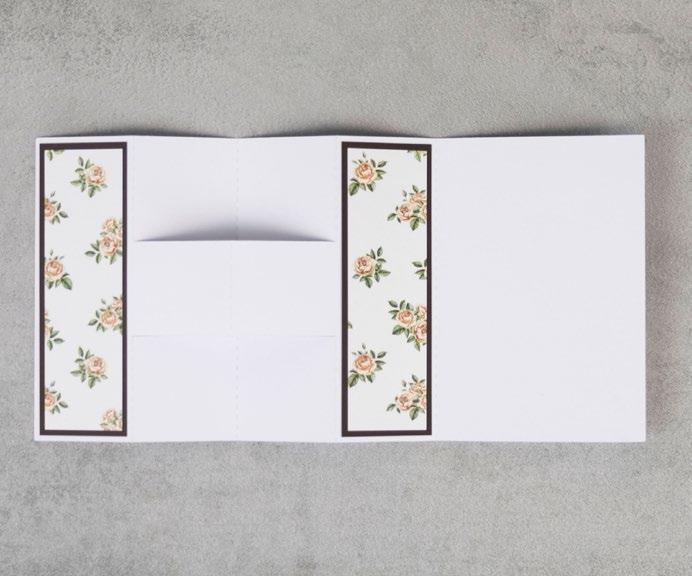
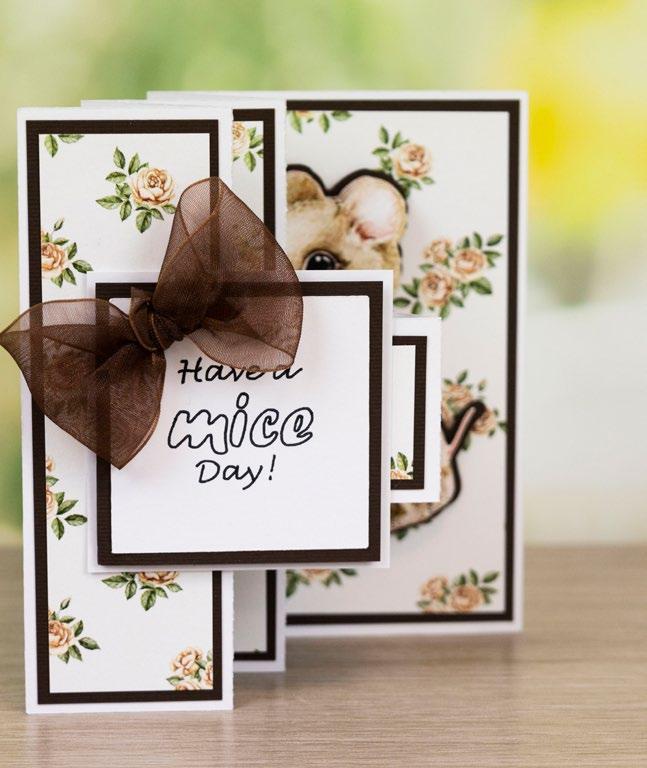
Mat the two 35mm x 120mm ditsy floral rectangles onto the two 40mm x 125mm brown rectangles. Mat onto the folded panels of the card base, as shown. 3
Mat the four ditsy floral squares onto the four brown squares. Mat the two 35mm x 30mm ditsy rectangles onto the two 40mm x 35mm brown rectangles. Mat onto the folded panels of the card base, as shown.
Mat the 80mm x 120mm ditsy floral rectangle onto the 85mm x 125mm brown rectangle, and mat onto the remaining folded panel of the card base.
Trim the charisma cuts, as shown in the image. 6
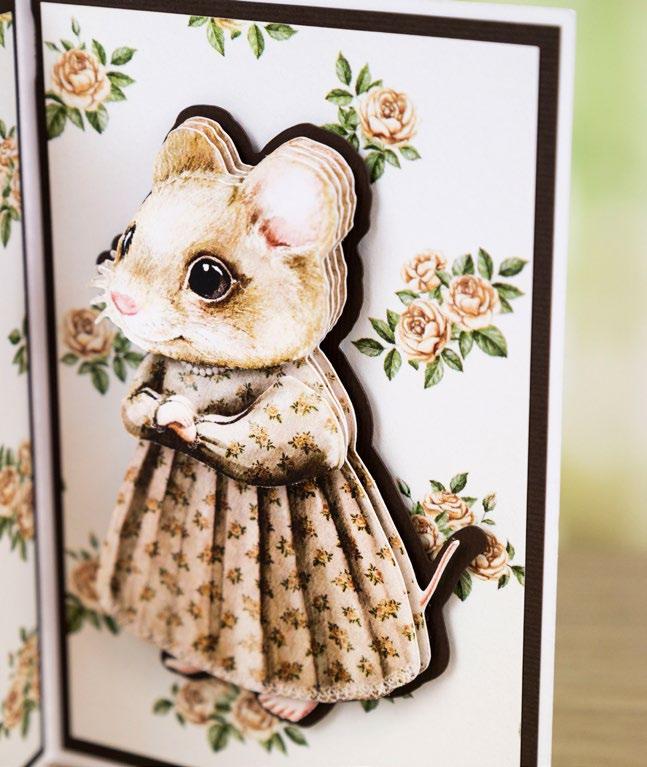
Build up the decoupage, and mat together with foam tape. Mat onto the outline, and mat onto the card with foam tape. Mat the sentiment square onto the 60mm brown square, and mat onto the white square with foam tape. Mat onto the card. Finish by adding a double-loop bow tied from brown ribbon to the card.
Step bySteps
1
1 3 5 2 4 6 ------------------------------------------ DAINTY MOUSE -----------------------------------------------
4
5
CLICK HERE TO DOWNLOAD YOUR SVG CONTENT www.tatteredlace.co.uk | 43
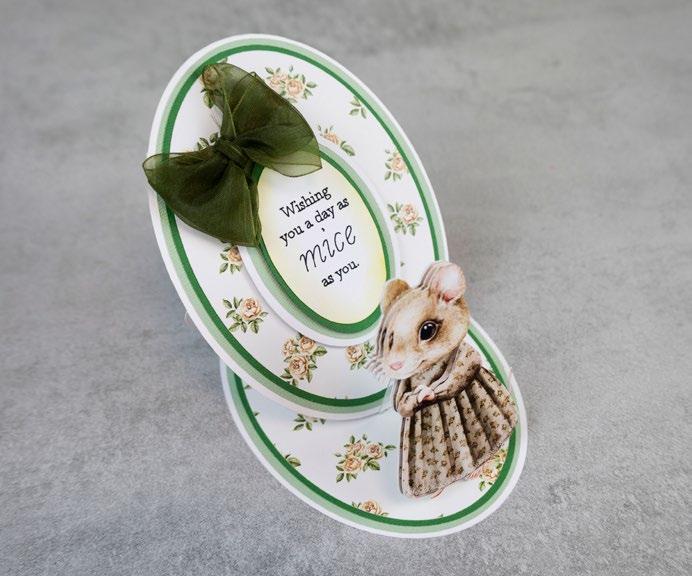
What you’ll need: • 28-02-Dainty Mouse SVG files • White cardstock • Light green cardstock • Dark green cardstock • Construction acetate • Distress ink – Shabby Shutters • Green ribbon ------------------------------------------ DAINTY MOUSE ----------------------------------------------44 | www.tatteredlace.co.uk
Step bySteps
From SVG downloads:
• From white cardstock: - 1 x DM-2-Dainty Mouse

• From charisma: - 1 x DM-2-Charisma
From machine memory:
• From white cardstock: - 3 x 114mm x 155mm oval - 1 x 63mm x 89mm oval - 1 x 46mm x 71mm oval (with sentiment draw file)
• From light green cardstock: - 2 x 110mm x 150mm oval - 1 x 57mm x 83mm oval
• From dark green cardstock: - 2 x 105mm x 145mm oval - 1 x 51mm x 77mm oval
• From backing paper: - 2 x 100mm x 140mm oval (ditsy floral)
• From construction acetate: - 1 x 20mm x 140mm rectangle
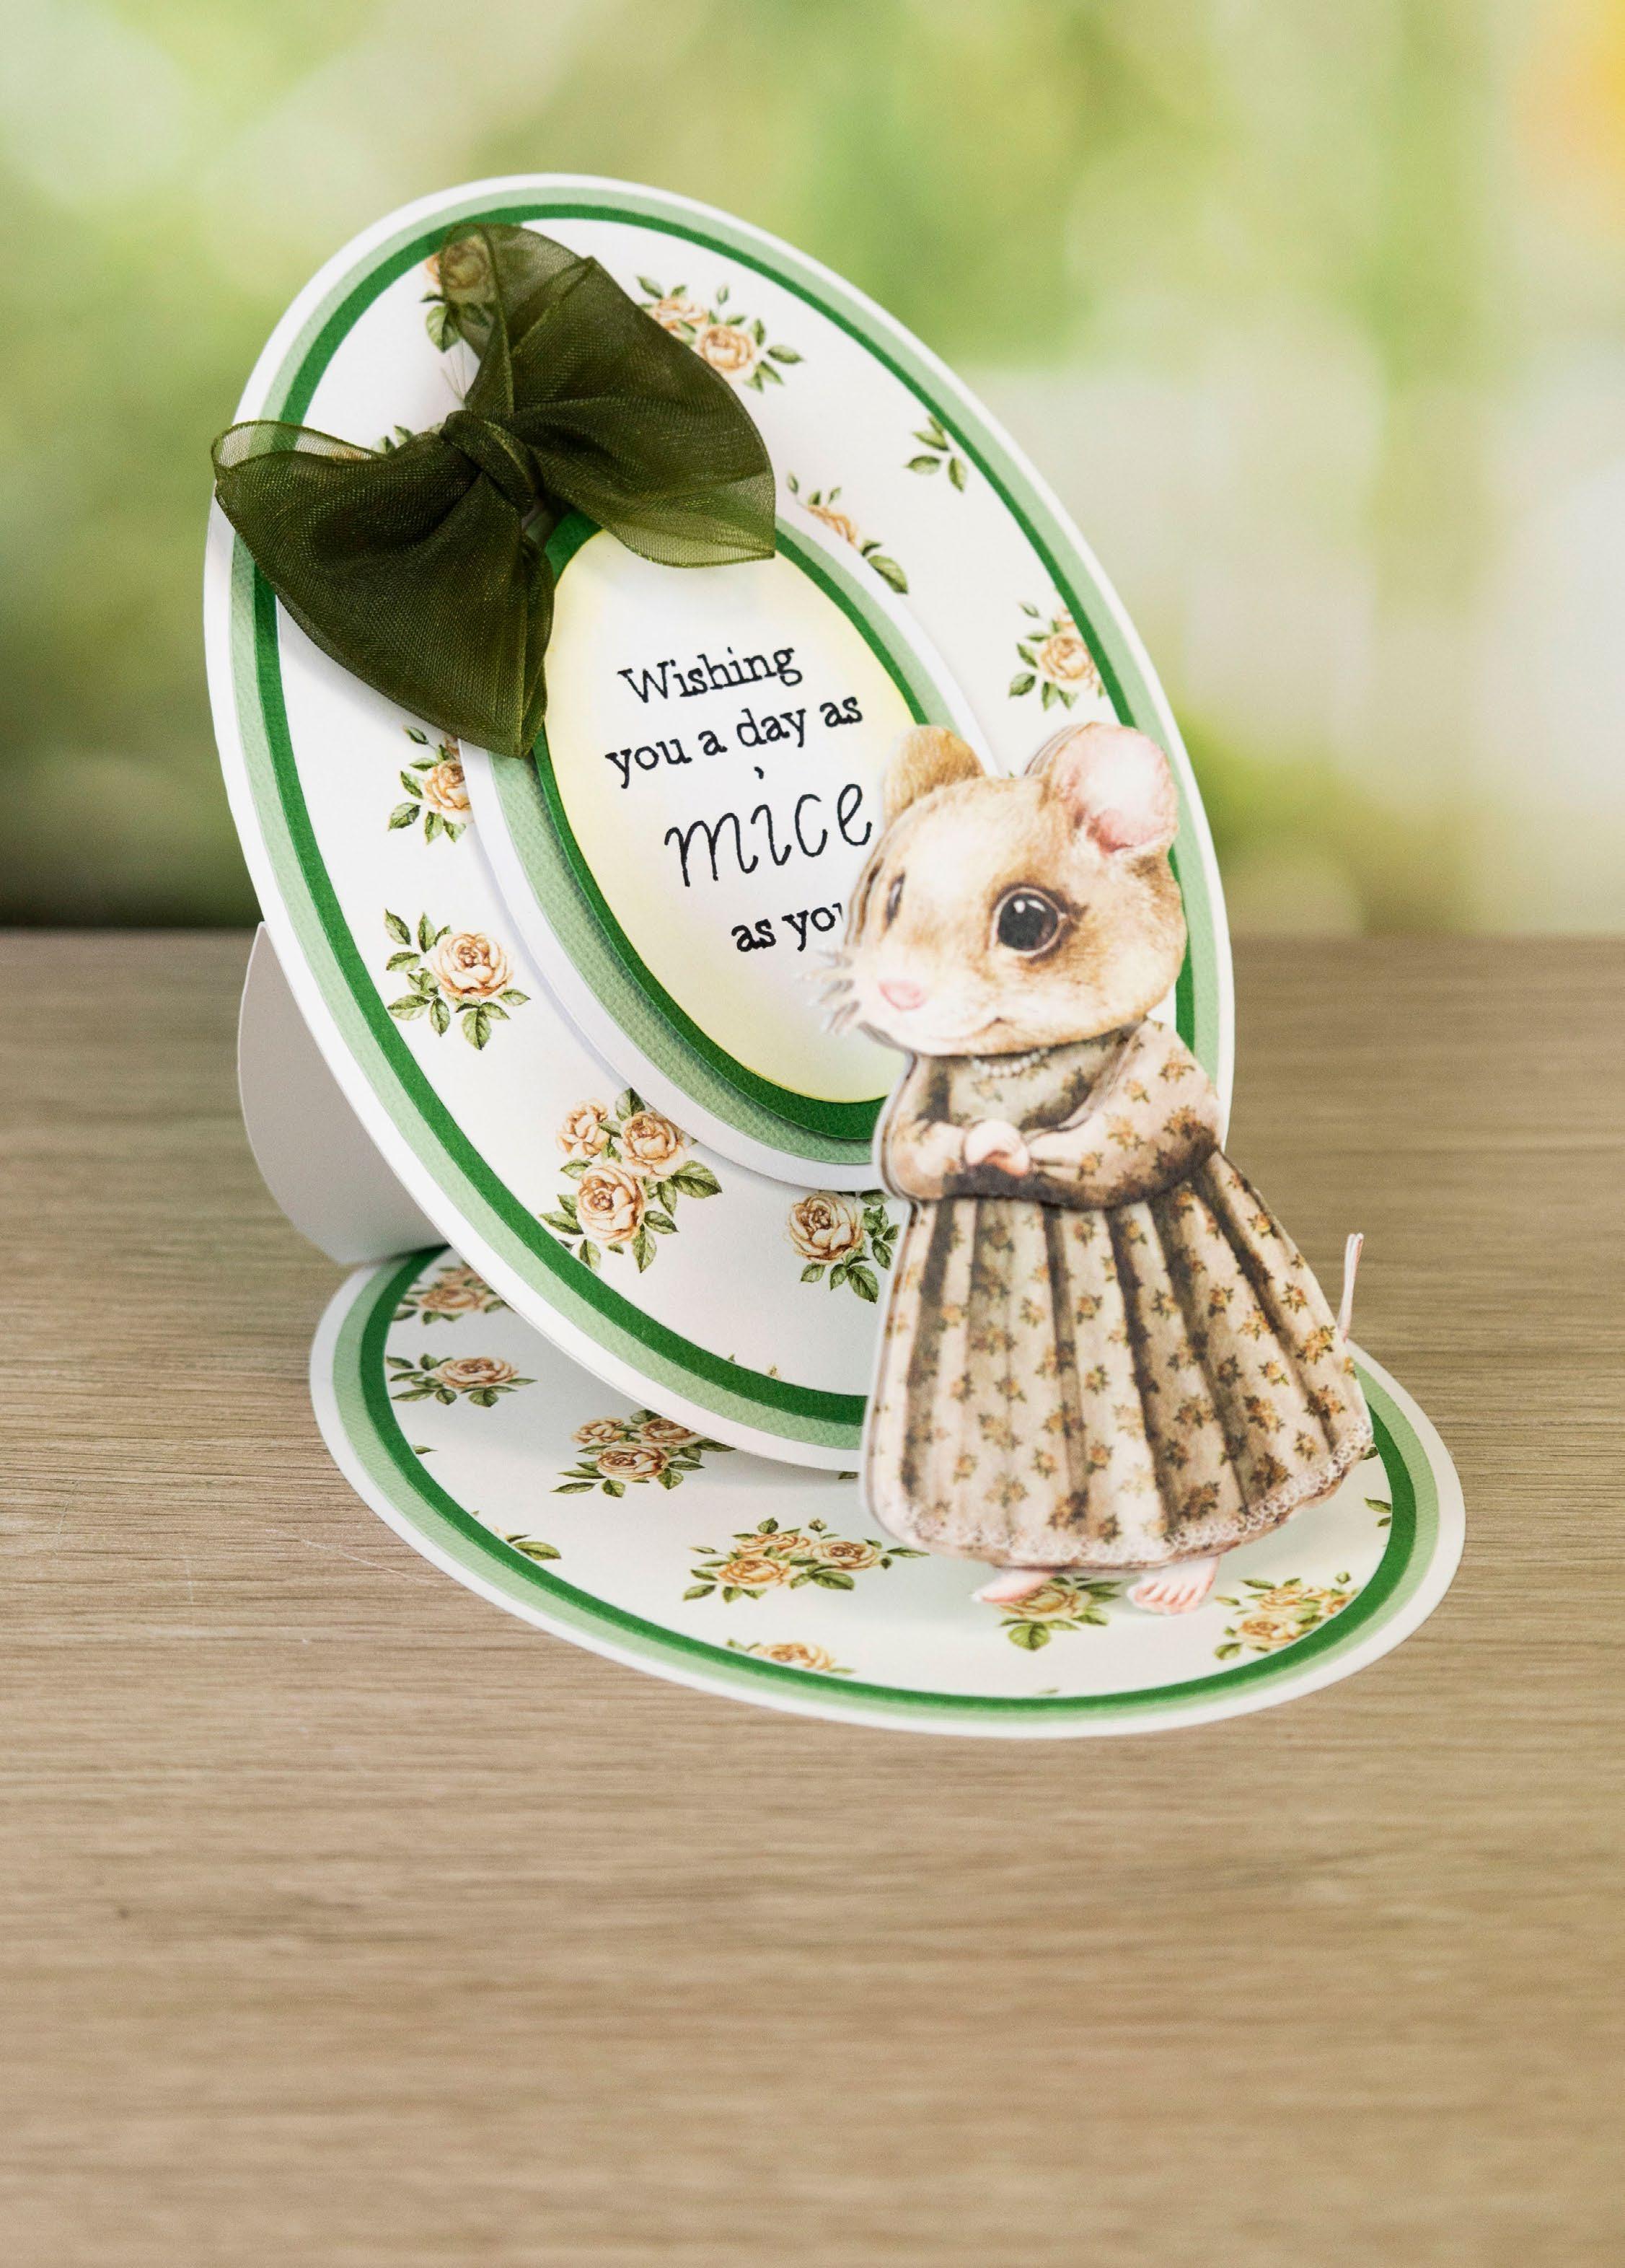
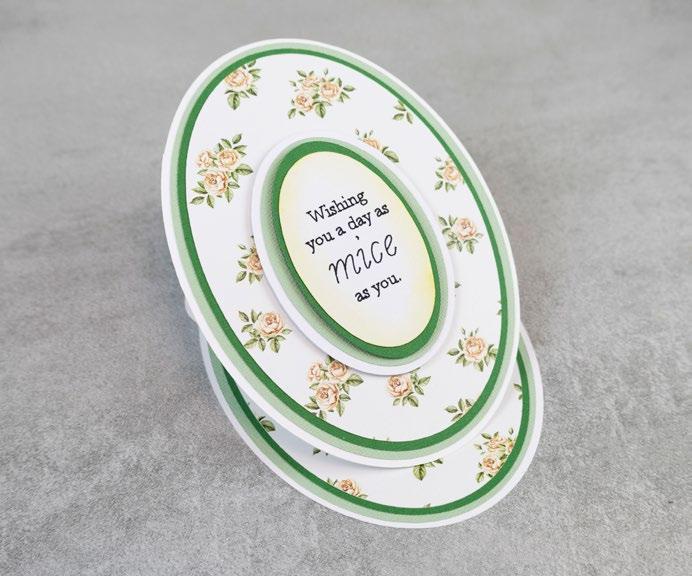
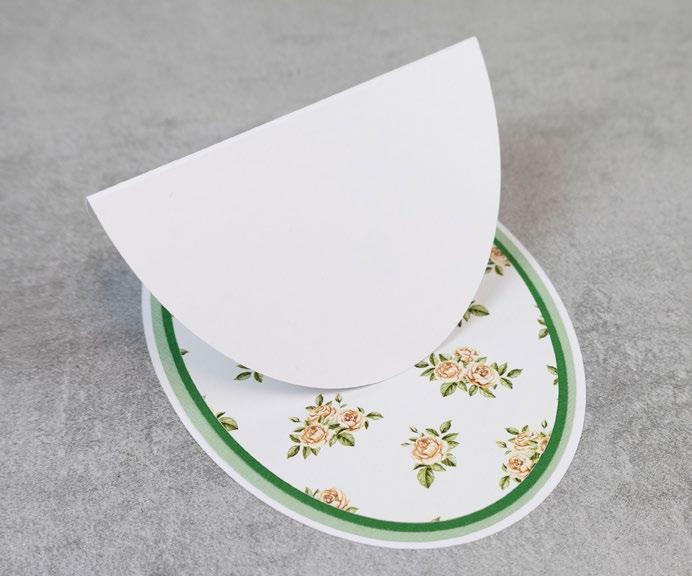
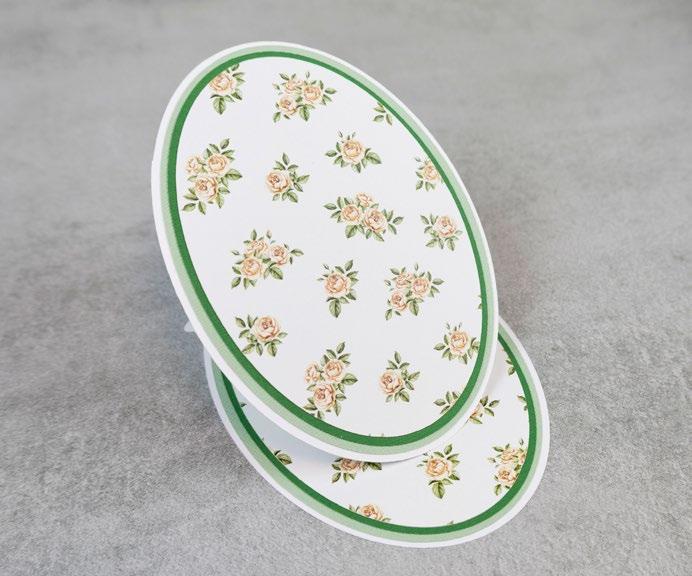
Take one of each of the large white ovals, large light green ovals, large dark green ovals, and large ditsy floral ovals. Mat the ovals together to create the card base. On one of the remaining white ovals, measure down 15mm from the top edge, and score and fold to create a tab. Fold the oval in half, horizontally, and attach to the card base using the tab to create an easel card.
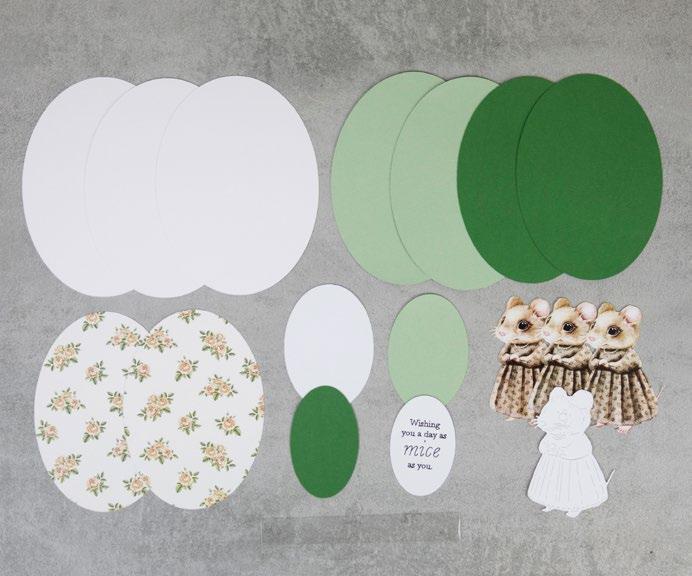
Mat the remaining ovals together, and mat onto the front of the easel.
Mat the smaller light green oval, onto the smaller white oval. Ink around the edges of the sentiment oval and mat onto the smaller dark green circle. Mat together with foam tape and onto the front of the easel with foam tape.
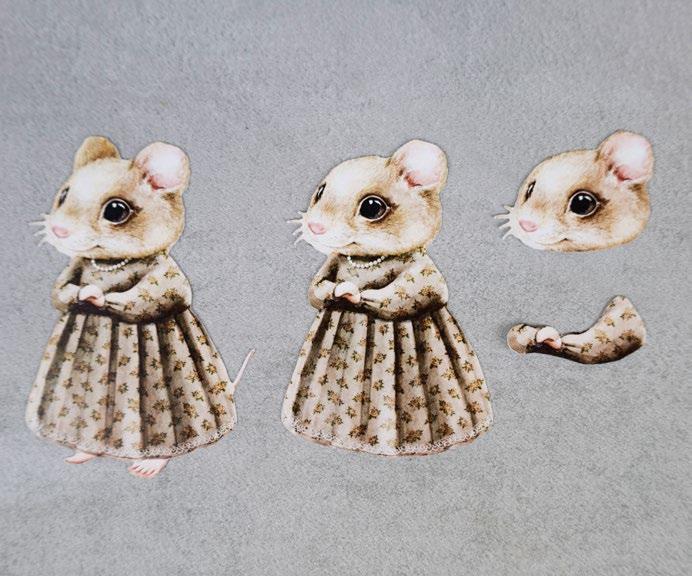
Trim the mouse charisma cuts, as shown in the image.
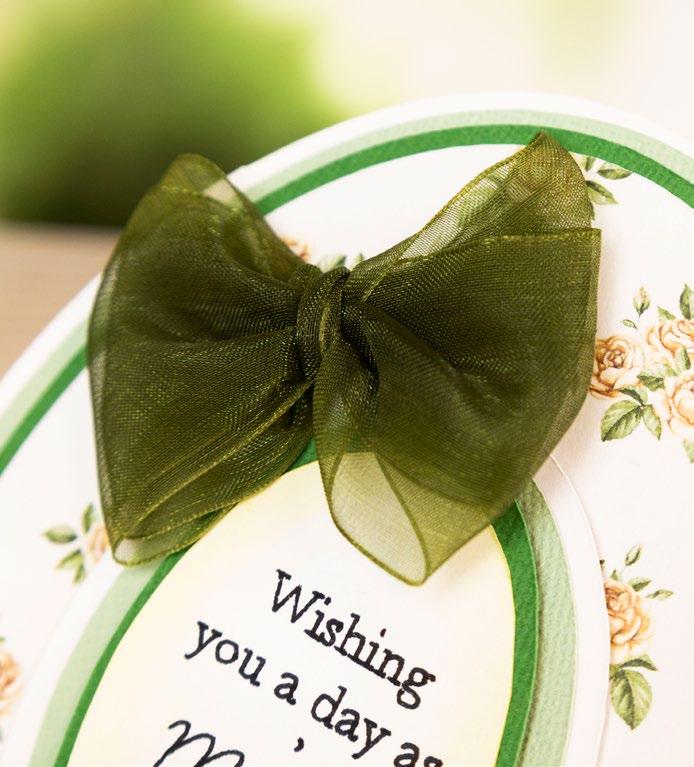
Build up the decoupage, and mat together with foam tape. Mat onto the white mouse-cut to strengthen. On the acetate rectangle, from the top edge, measure down at 20mm and 80mm, and score and fold. Mat the large tab onto the back of the mouse, and the small tab onto the base of the easel to create a stopper. Finish by adding a double-loop bow tied from green ribbon to the card.
1 Cut all the pieces needed to create the project as listed below;
1
------------------------------------------ DAINTY MOUSE -----------------------------------------------
3 5 2 4 6
2
3
4
5
6
CLICK HERE TO DOWNLOAD YOUR SVG CONTENT PROJECT 28 www.tatteredlace.co.uk | 45
What you’ll need:
• 29-03-Dainty Mouse SVG files
• White cardstock

• Cream pearlescent cardstock
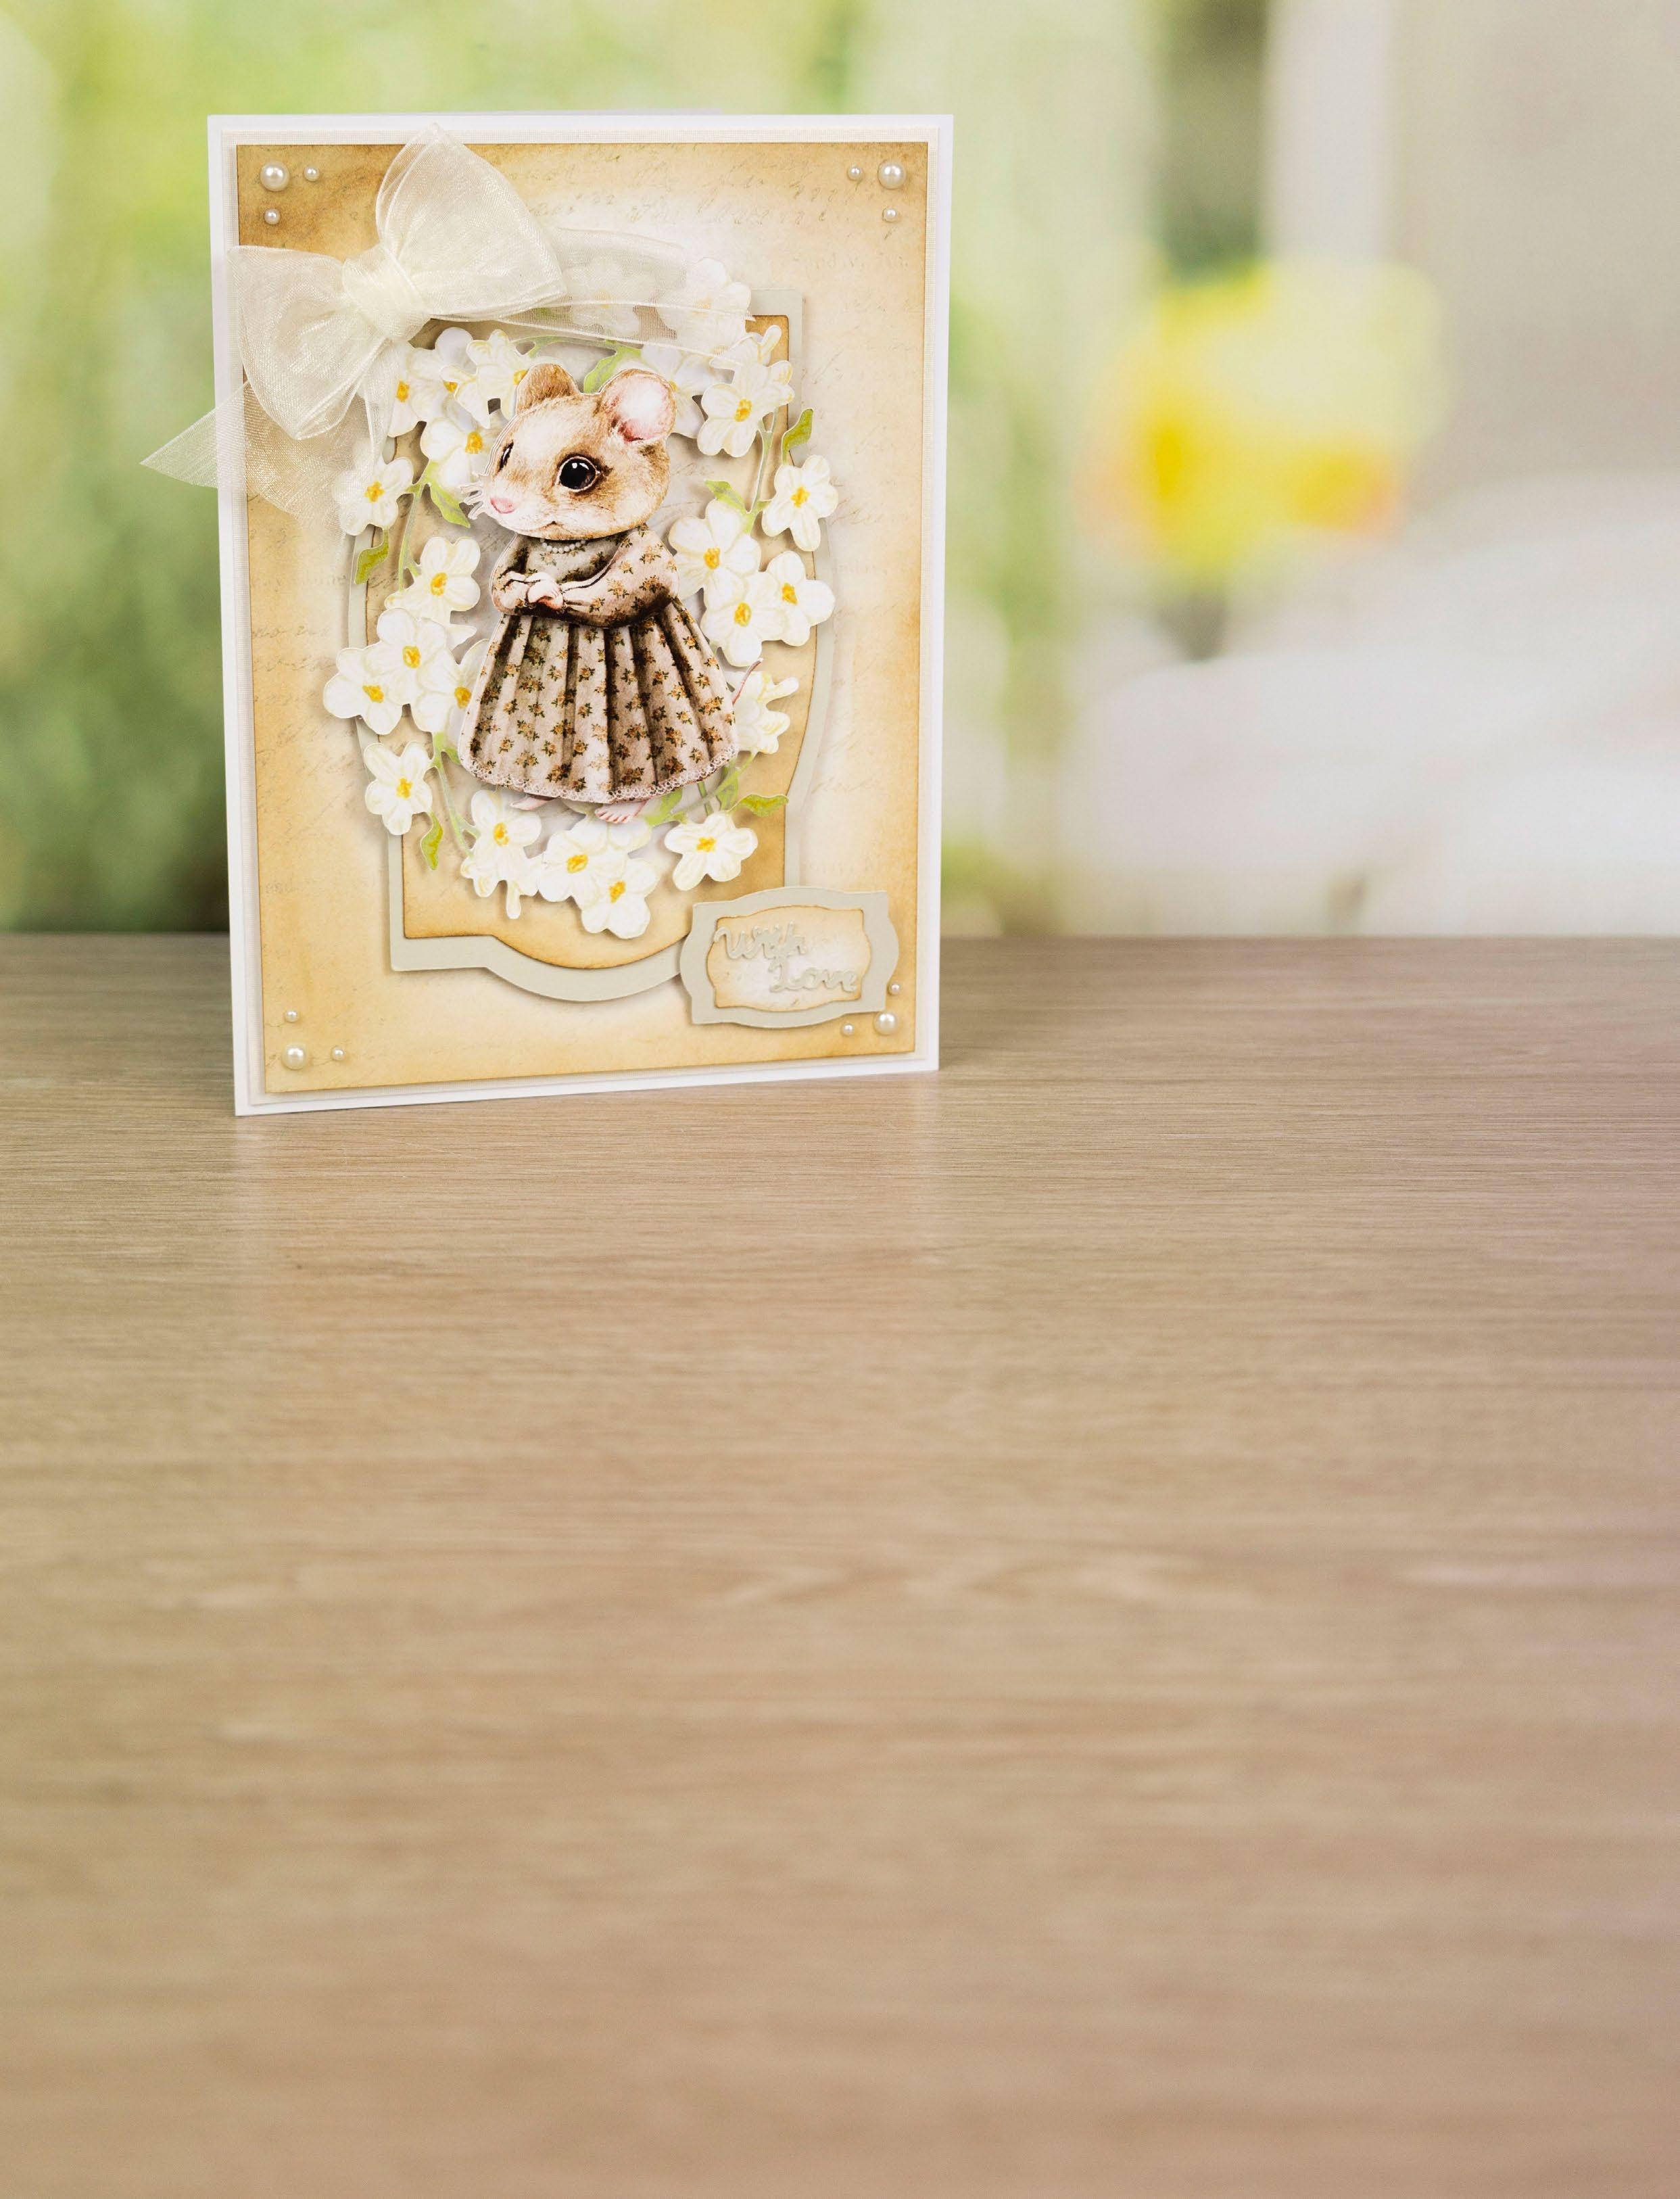
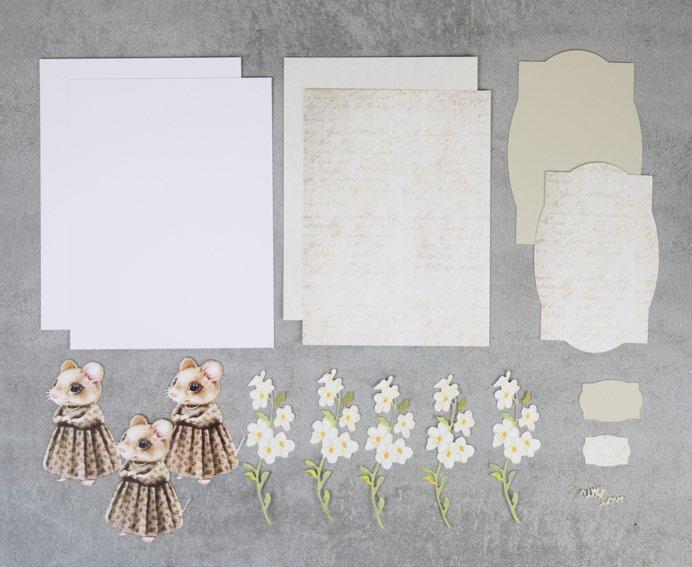
Cut all the pieces needed to create the project as listed below; From SVG downloads: • From cream cardstock: - 1 x DM-3-Plaque 1 - 1 x DM-3-Plaque 3 - 1 x DM-3-Sentiment • From backing paper: - 1 x DM-3-Plaque 2 (script) - 1 x DM-3-Plaque 4 (script) • From charisma: - 1 x DM-3-Charisma
From machine memory: • From white cardstock: - 2 x 145mm x 195mm rectangle • From cream pearlescent cardstock: - 1 x 140mm x 190mm rectangle • From backing paper: - 1 x 135mm x 185mm rectangle (script)
On one of the white rectangles, measure in 10mm from the left edge, and score and fold to create a
• Distress Ink - Vintage Photo
• Cream ribbon
• Pearl gems
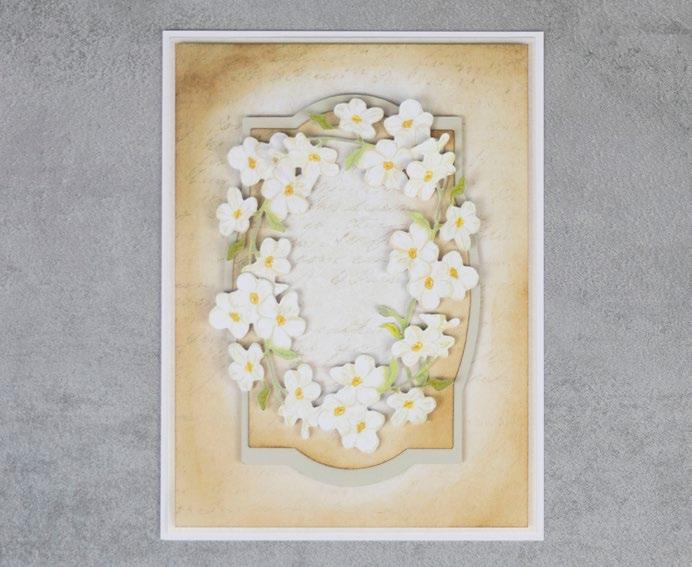
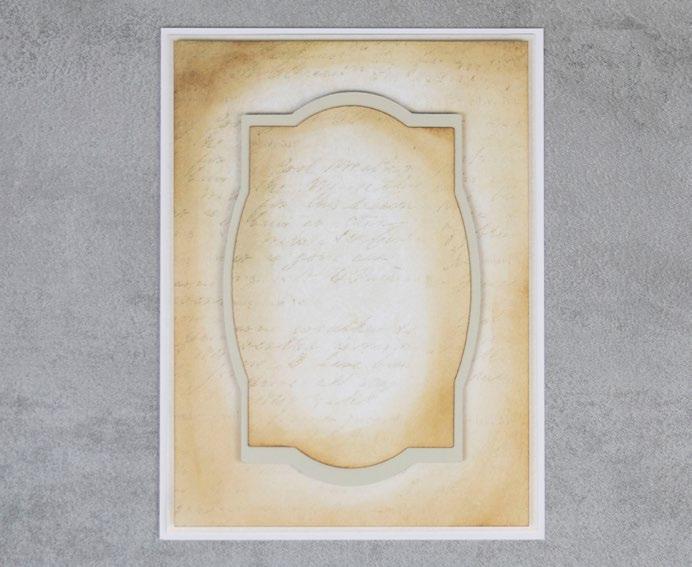
tab. Attach to the other rectangle to create a card. Mat the cream pearlescent rectangle onto the card. Ink around the edges of the backing paper rectangle, and mat onto the card with foam tape. Ink around the edges of the script plaque 2, and mat onto the cream plaque 1. Mat onto the card with foam tape.
Mat the charisma flowers onto the card, raising some of the flowers with foam tape.
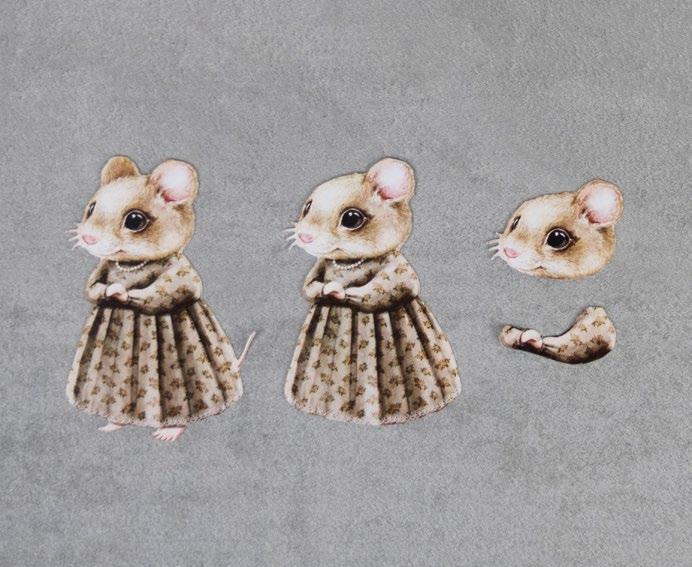
Trim the charisma mouse-cuts as shown in the image.
Build up the decoupage, and mat together with foam tape. Mat onto the card with foam tape. Ink around the edges of the script plaque 4, and mat onto the cream plaque 3. Mat the sentiment onto the plaques, and mat onto the card with foam tape. Finish by adding a doubleloop bow, tied from cream ribbon, and pearl gems to the card.
1 2 3 4 5
Step bySteps
1
2
3
4
5
------------------------------------------ DAINTY MOUSE ----------------------------------------------CLICK HERE TO DOWNLOAD YOUR SVG CONTENT PROJECT
46 | www.tatteredlace.co.uk
29
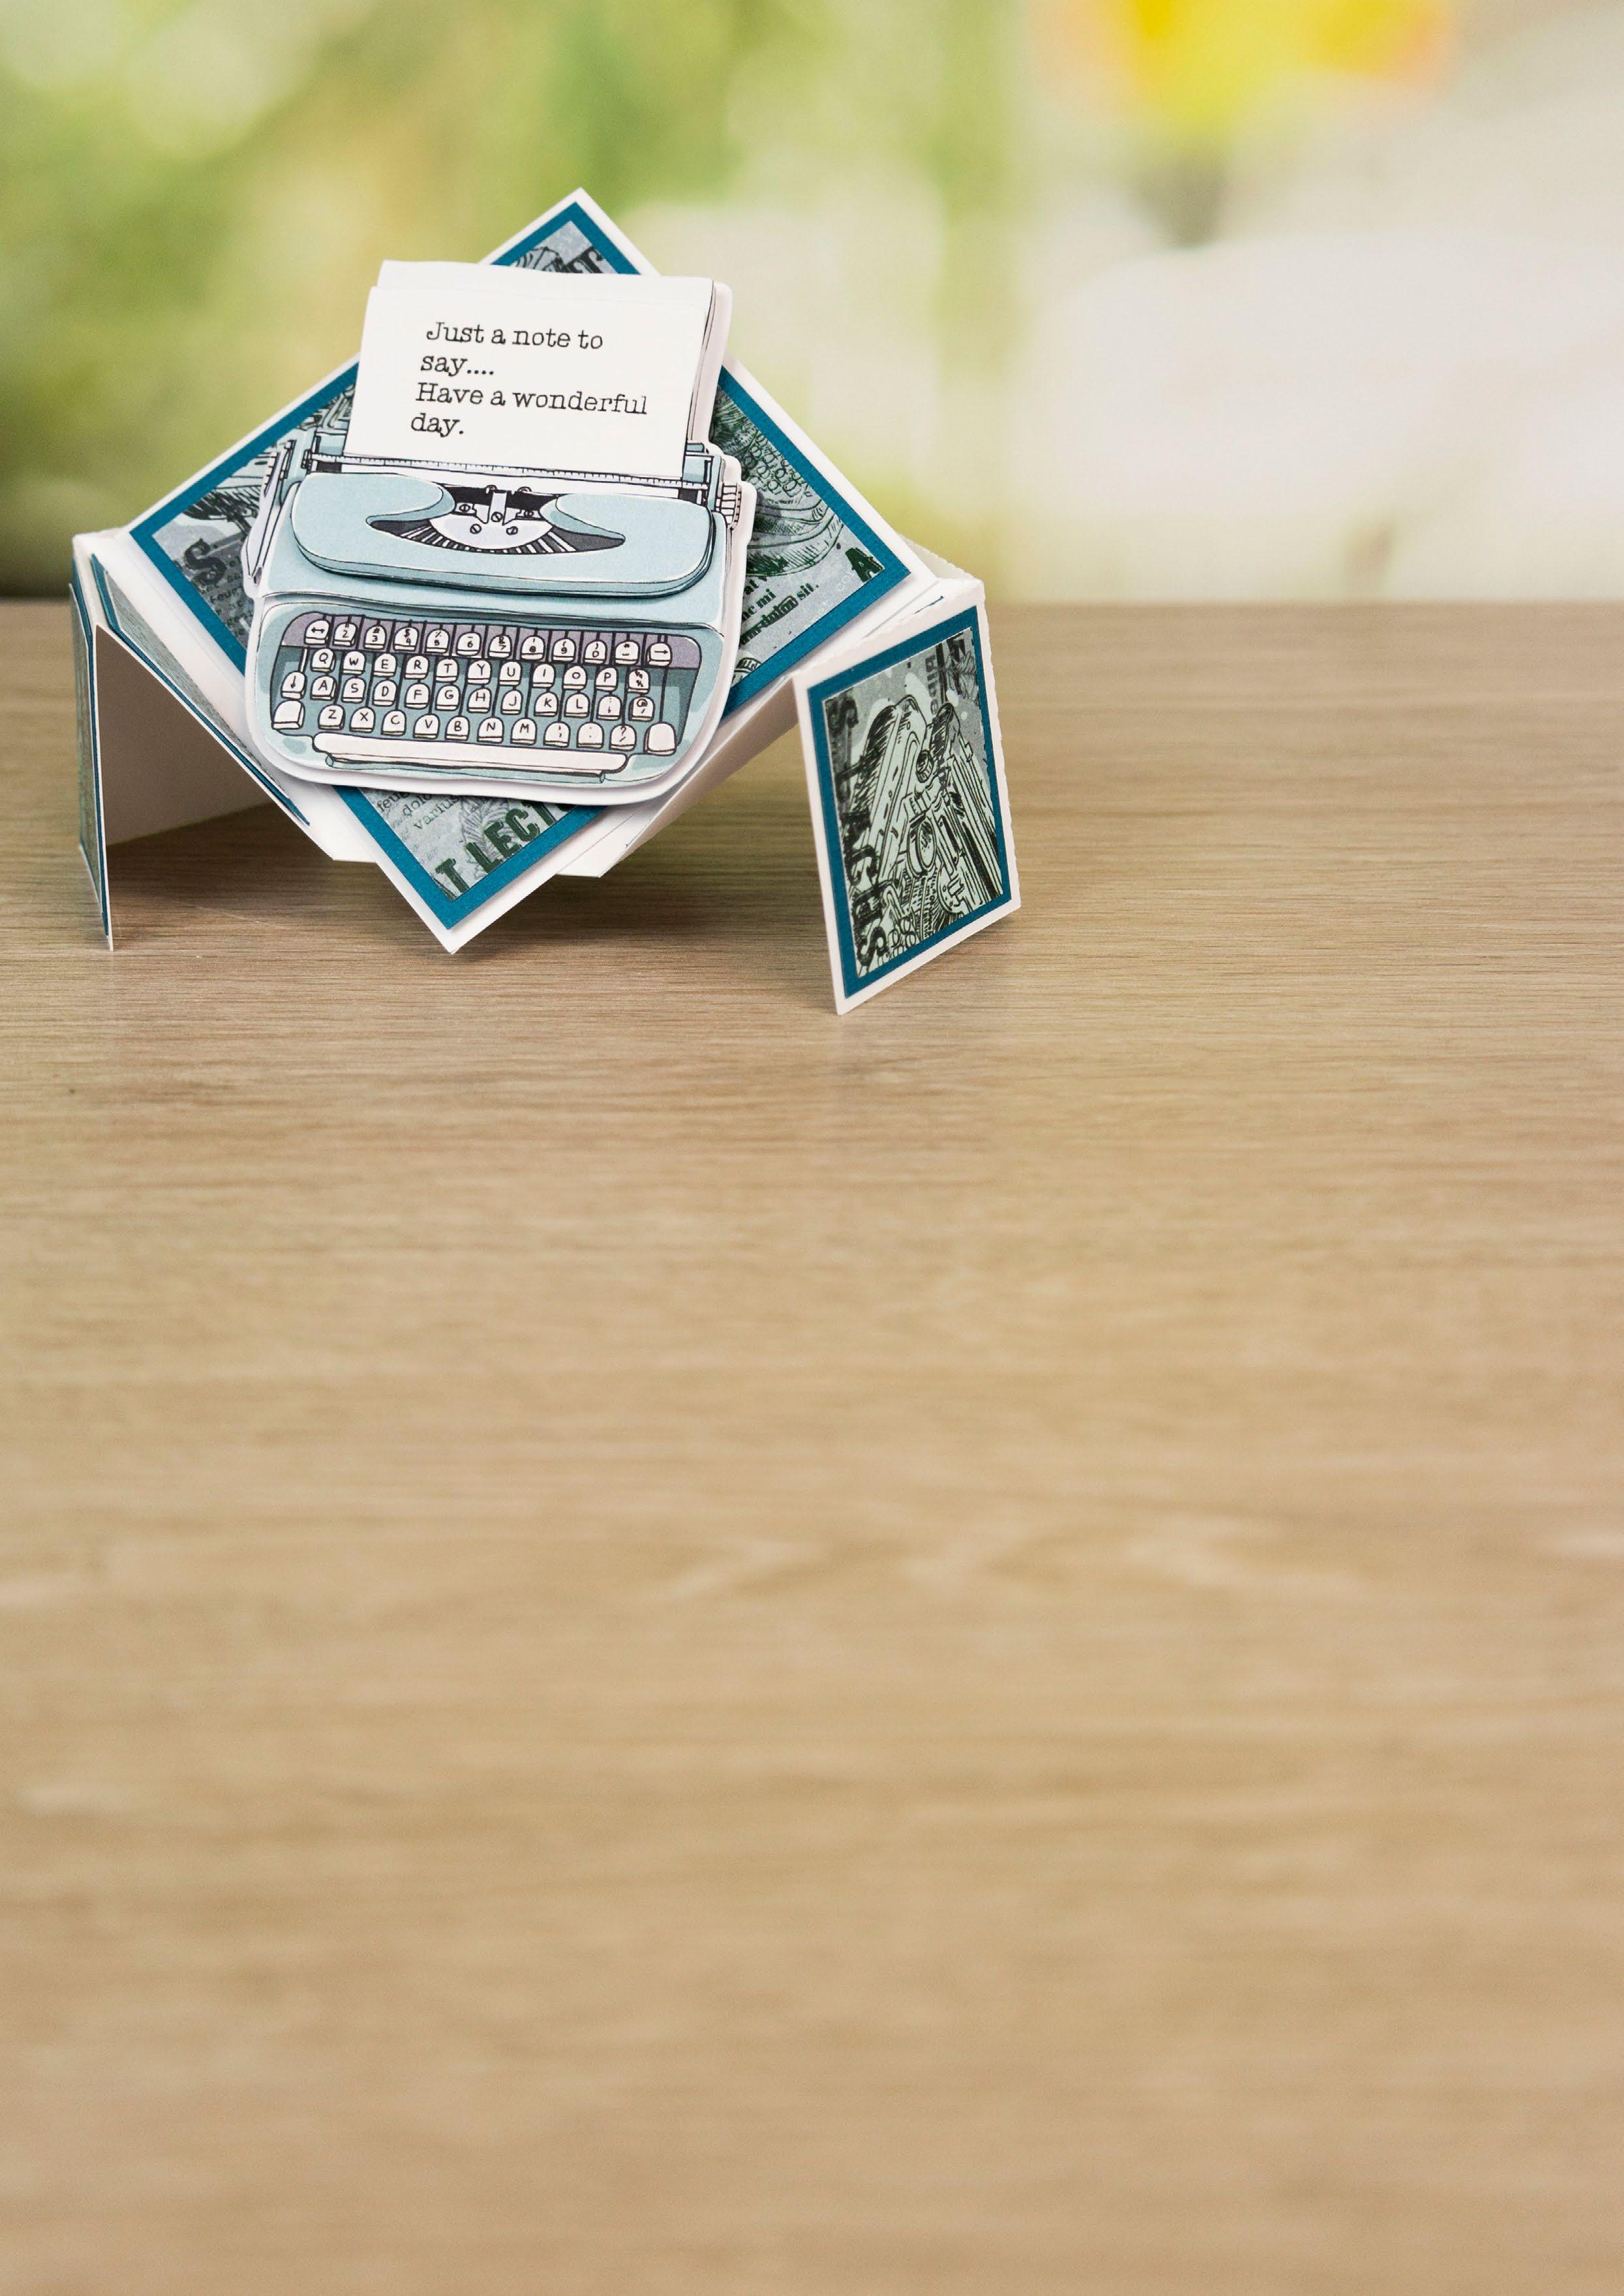
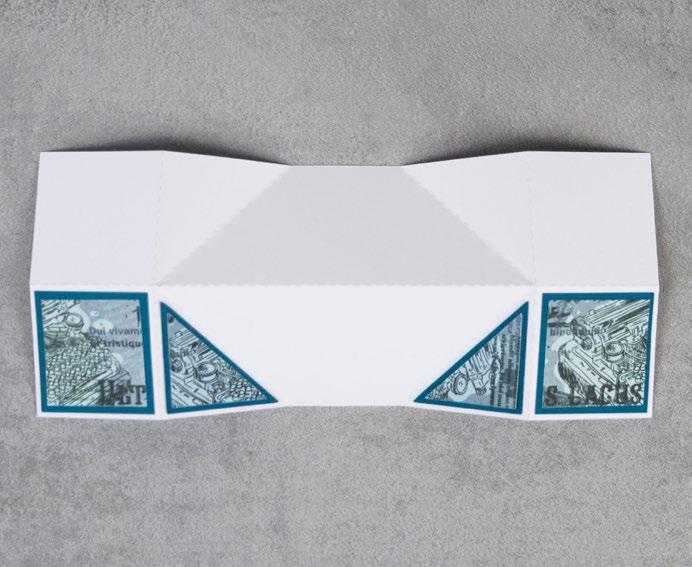
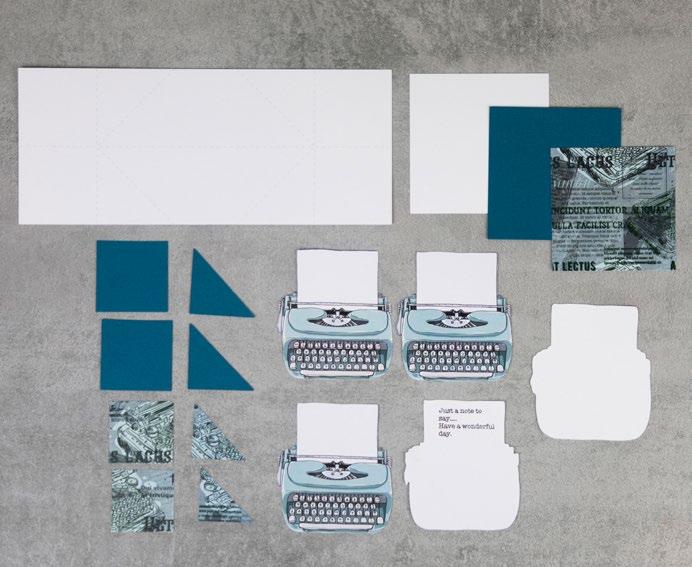
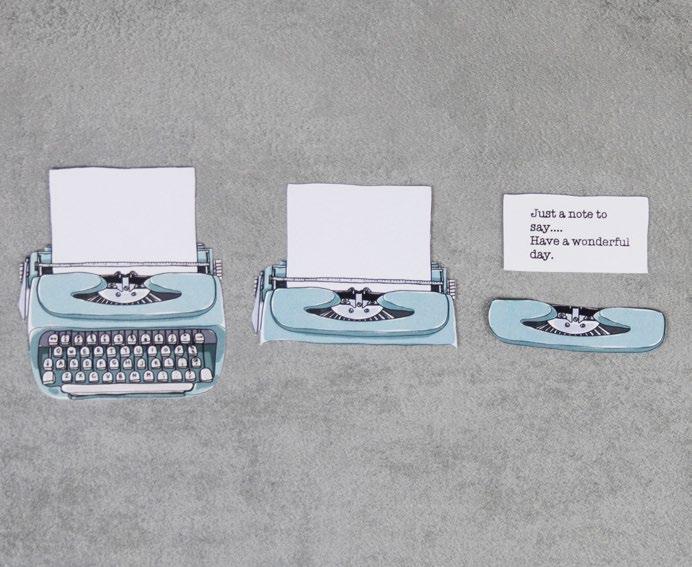
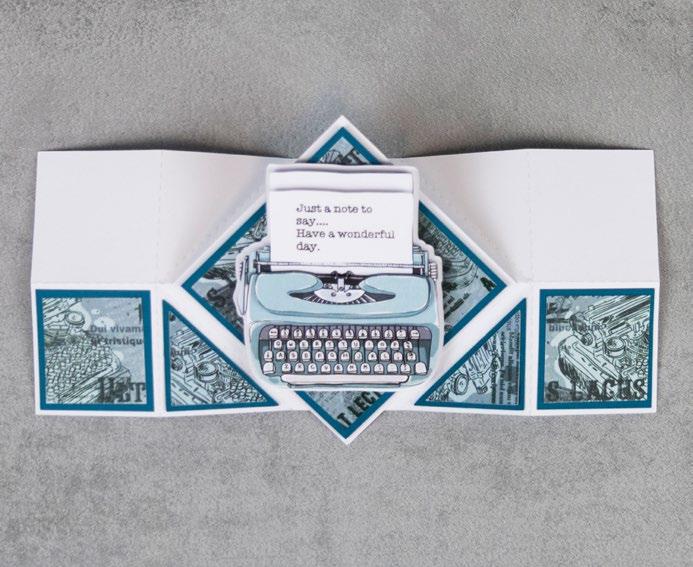
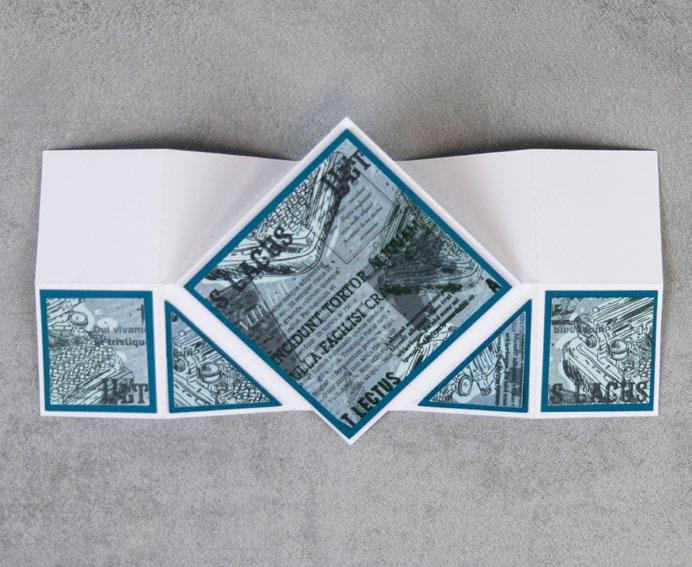
---------------------------------------- QUIRKY TYPEWRITER --------------------------------------------Step bySteps 1 2 3 4 5 1 Cut all the pieces needed to create the project as listed below; From SVG downloads: • From white cardstock: - 1 x QT-1-Card Base - 1 x QT-1-Typewriter Outline - 1 x QT-1-Typewriter (with sentiment draw file) • From turquoise cardstock: - 2 x QT-1-Triangle Mat 1 • From backing paper: - 2 x QT-1-Triangle Mat 2 (typewriters) • From charisma: - 1 x QT-1-Charisma From machine memory: • From turquoise cardstock: - 2 x 45mm square - 1 x 85mm square • From backing paper: - 2 x 40mm square (typewriters) - 1 x 80mm square (typewriters) • From white cardstock: - 1 x 90mm square 2 Fold on the score lines of the card
to create the card. Mat the 40mm
squares onto the 45mm
squares, and mat onto the bottom
panels
the card. Mat the
triangle
onto the turquoise
mats, and mat onto the bottom
panels
the card. 3 Mat the
square onto the
turquoise
and mat onto the white square with foam tape. Mat onto the middle
of the card. 4 Trim the charisma and sentiment typewriter-cuts, as shown
the image. 5 Build up the decoupage of the typewriter, and mat together with foam tape. Mat onto the outline, and mat onto the middle of the card with foam tape. What you’ll need: • 30-01-Quirky Typewriter SVG files • White cardstock • Turquoise cardstock CLICK HERE TO DOWNLOAD YOUR SVG CONTENT PROJECT 30 www.tatteredlace.co.uk | 47 www.tatteredlace.co.uk | 47
base
typewriter
turquoise
square
of
typewriter
mats
triangle
triangle
of
80mm typewriter
85mm
square,
panel
in
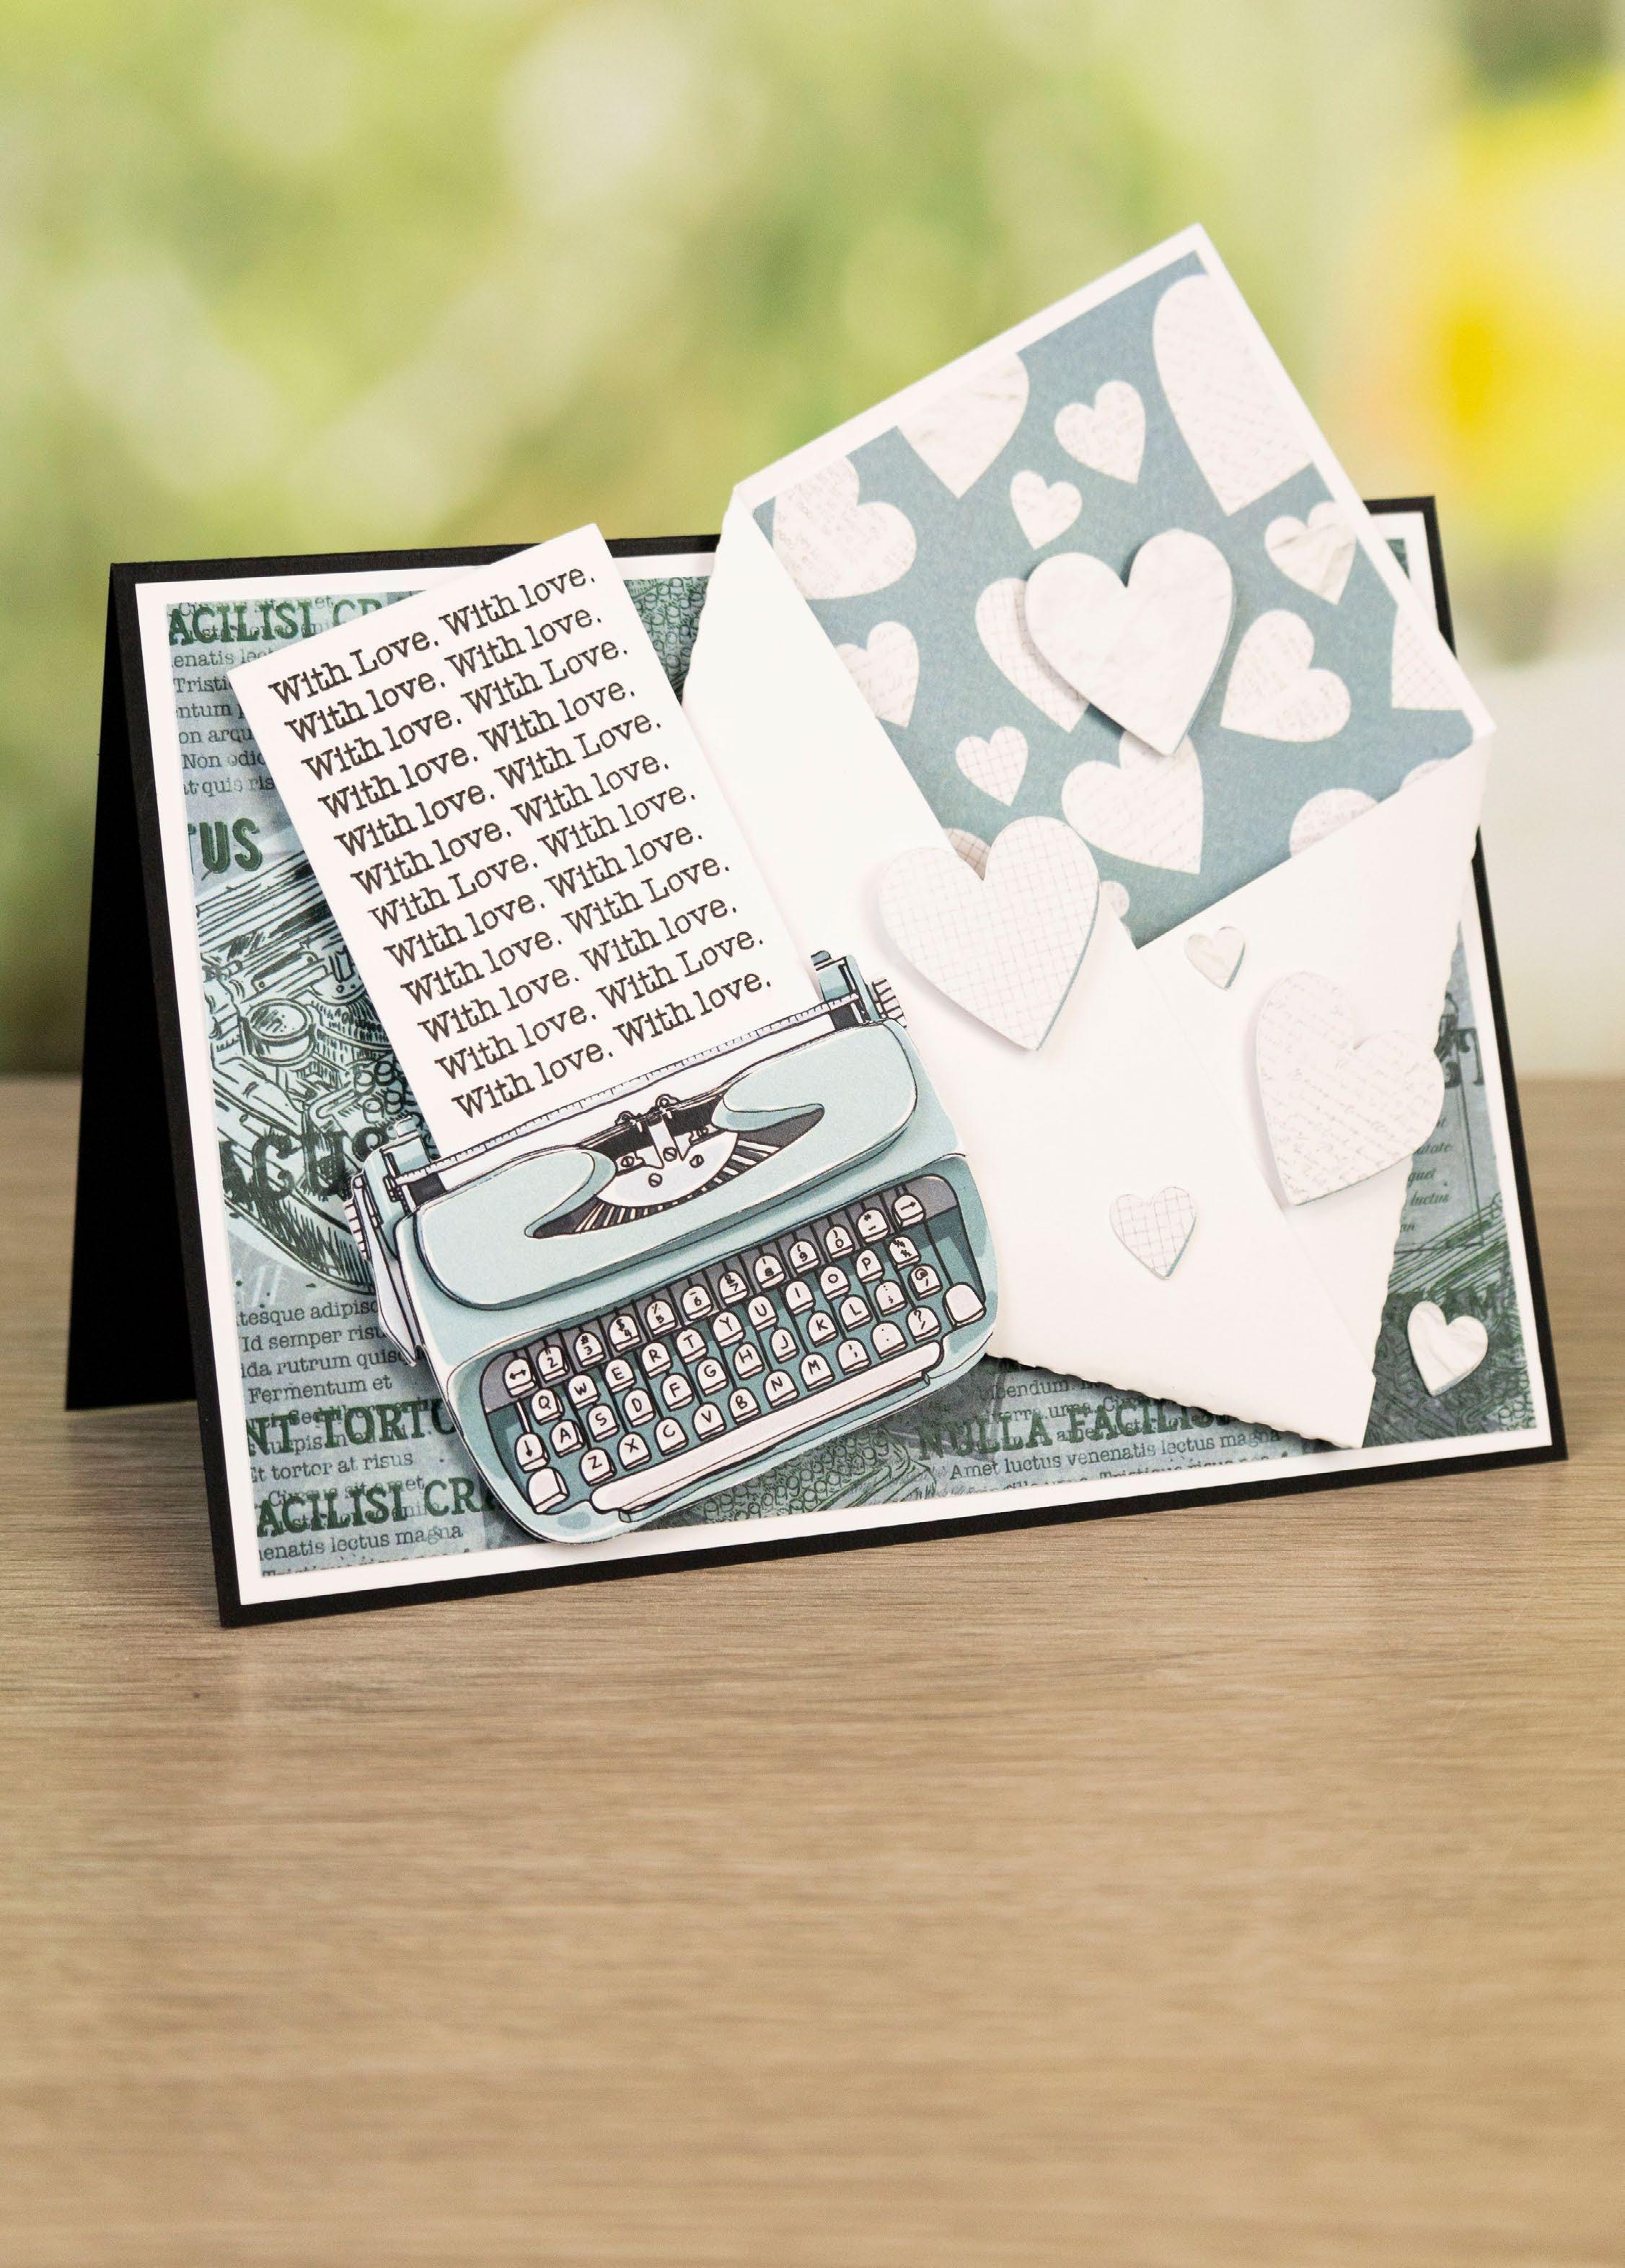
What you’ll need: • 31-02-Quirky Typewriter SVG files • Black cardstock • White cardstock ---------------------------------------- QUIRKY TYPEWRITER --------------------------------------------PROJECT 31 48 | www.tatteredlace.co.uk
From SVG downloads:
• From white cardstock: - 1 x QT-2-Envelope
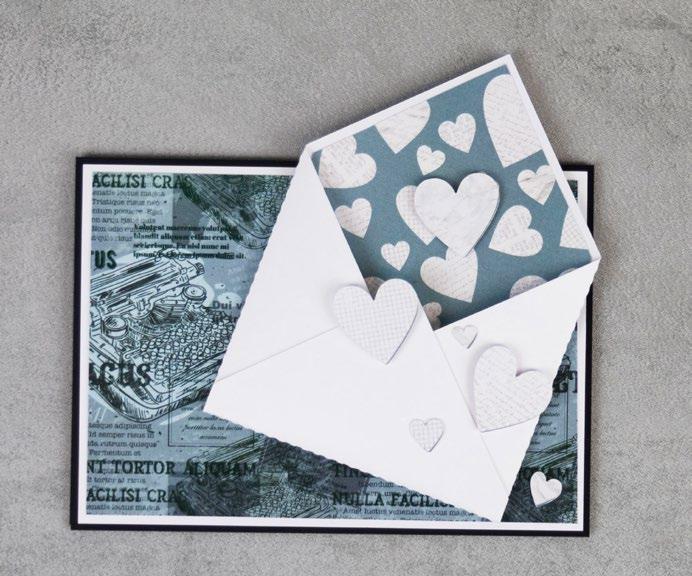
• From backing paper: - 1 x QT-2-Envelope Mat (hearts)
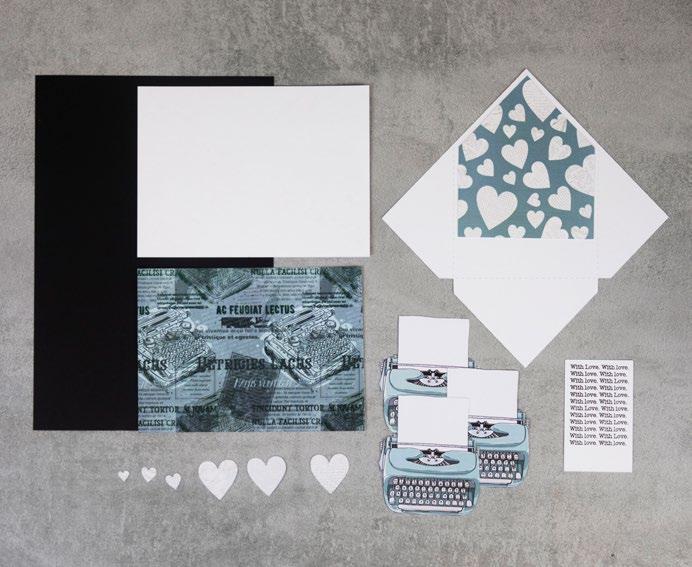

• From charisma: - 1 x QT-2-Charisma

From machine memory:
• From black cardstock: - 1 x 175mm x 250mm rectangle
• From white cardstock: - 1 x 170mm x 120mm rectangle - 1 x 50mm x 80mm rectangle (with sentiment draw file)
• From backing paper: - 1 x 165mm x 115mm rectangle (typewriters) 2
On the large black rectangle, score and fold in half, horizontally, to create a tent card. Mat the typewriter rectangle onto the large white rectangle and mat onto the card.
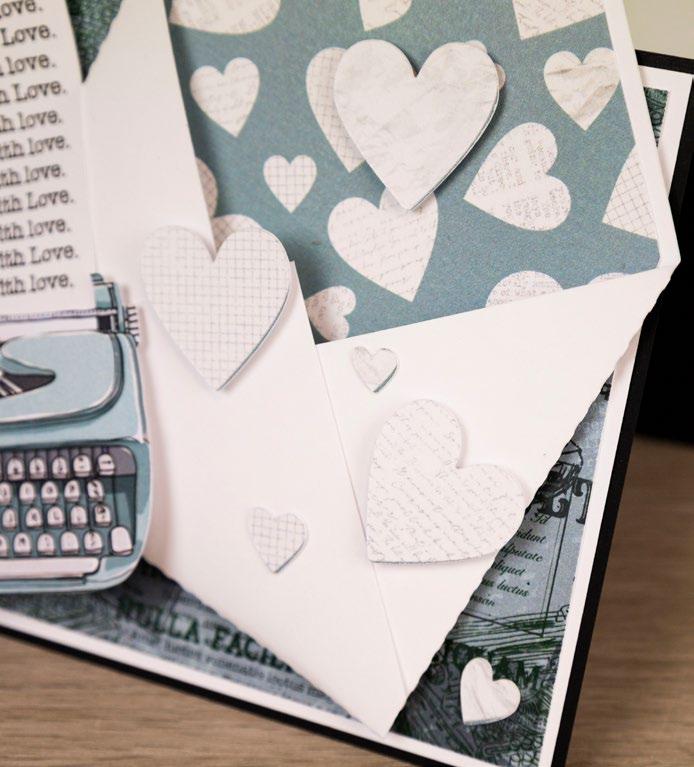
Mat the envelope mat onto the inside of the envelope. Fold on the score lines of the envelope, fold in the sides of the envelope, then the bottom, and tape together to secure. Mat the envelope onto the card with foam tape.

Mat the hearts onto the card, matting some of the hearts with foam tape. 5
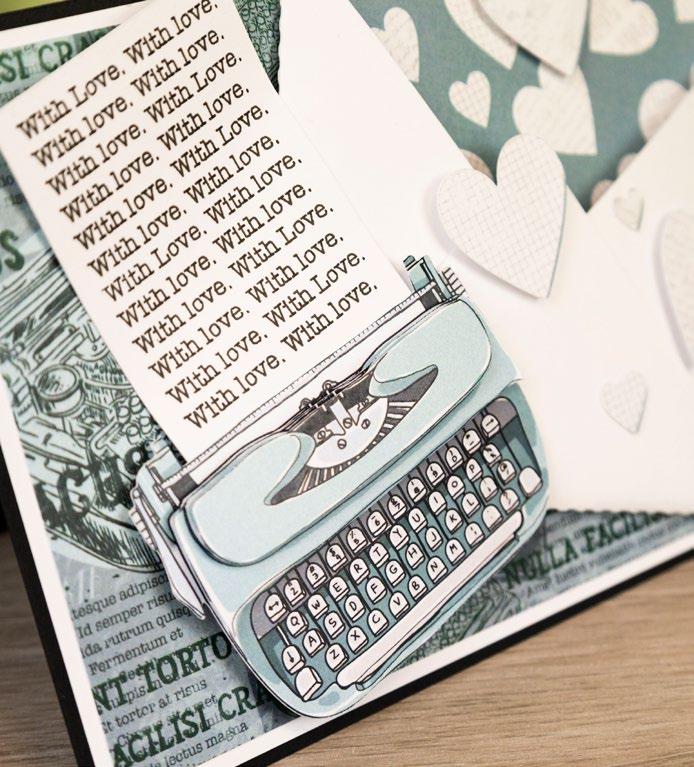
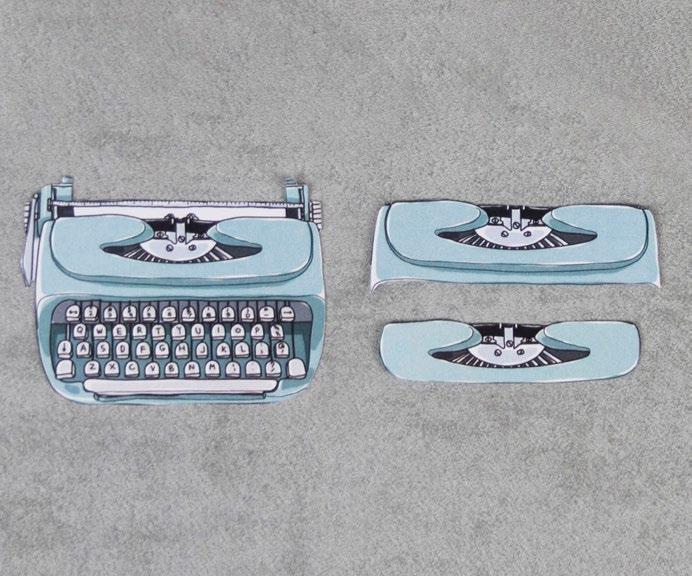
Trim the typewriter-cuts, as shown in the image. 6
Build up the decoupage of the typewriter, and mat together with foam tape. Make sure the sentiment rectangle is behind the typewriter. Mat onto the card with foam tape.
Cut all the pieces needed to create the project as listed below; Step bySteps
1
1 3 5 2 4 6 ---------------------------------------- QUIRKY TYPEWRITER ---------------------------------------------
3
4
CLICK HERE TO DOWNLOAD YOUR SVG CONTENT www.tatteredlace.co.uk | 49
What you’ll need: • 32-03-Quirky Typewriter SVG files • Black cardstock • White cardstock • Turquoise cardstock ---------------------------------------- QUIRKY TYPEWRITER --------------------------------------------50 | www.tatteredlace.co.uk
Step bySteps
1
Cut all the pieces needed to create the project as listed below;
From SVG downloads:
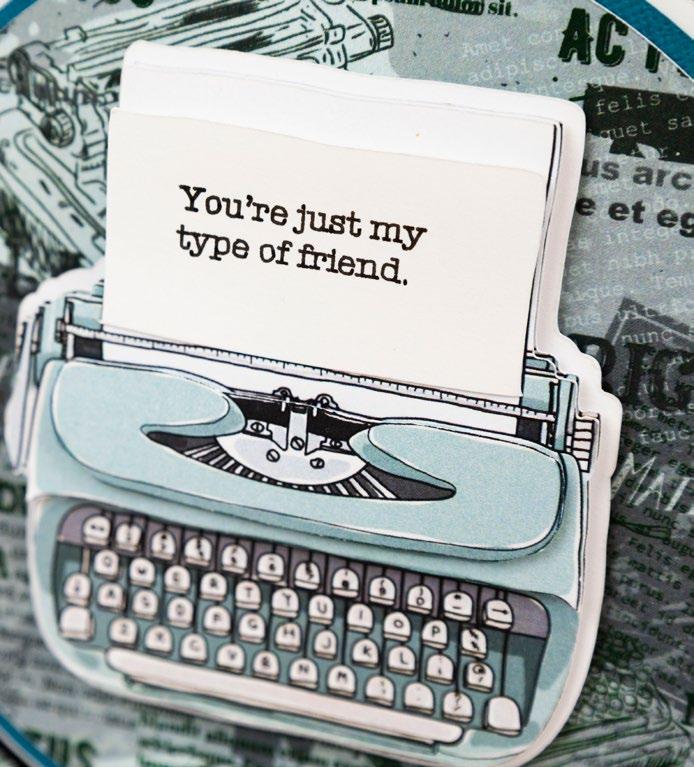
• From white cardstock: - 1 x QT-3-Typewriter Outline 1 x QT-3-Typewriter (with sentiment draw file)
• From charisma: - 1 x QT-3-Charisma
From machine memory:
• From black cardstock: - 1 x 220mm x 170mm rectangle - 1 x 140mm circle
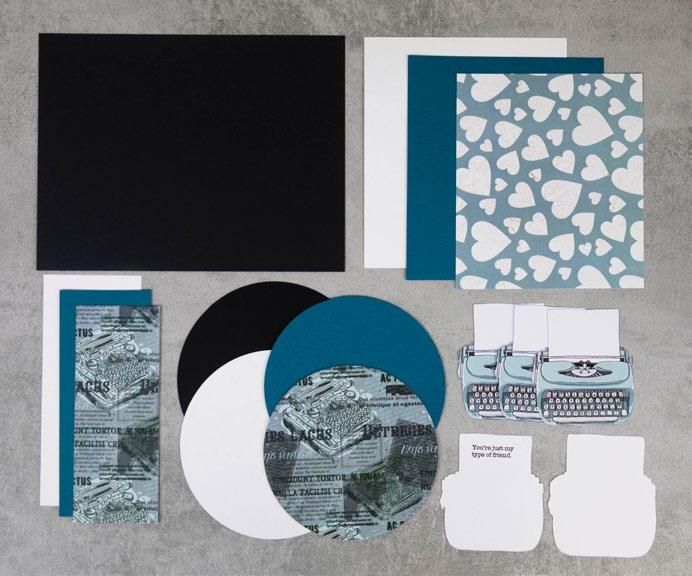
• From white cardstock: - 1 x 140mm x 165mm rectangle - 1 x 75mm x 165mm rectangle - 1 x 135mm circle
• From turquoise cardstock: - 1 x 135mm x 160mm rectangle - 1 x 65mm x 160mm rectangle - 1 x 130mm circle

• From backing paper: - 1 x 130mm x 155mm rectangle (hearts) - 1 x 60mm x 155mm rectangle (typewriters) - 1 x 125mm circle (typewriters)
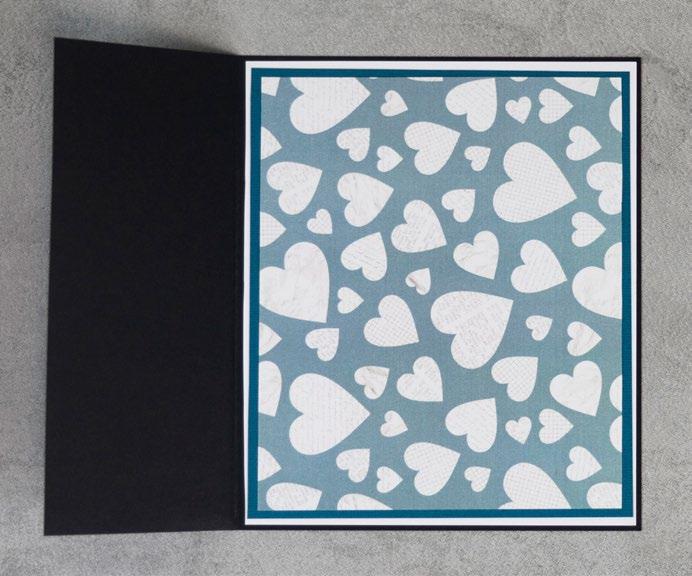
On the black rectangle, from the left edge, measure in at 7.5cm, and score and fold to create the card front. Mat the hearts rectangle onto the large turquoise rectangle, then onto the large white rectangle. Mat onto the inside back of the card.

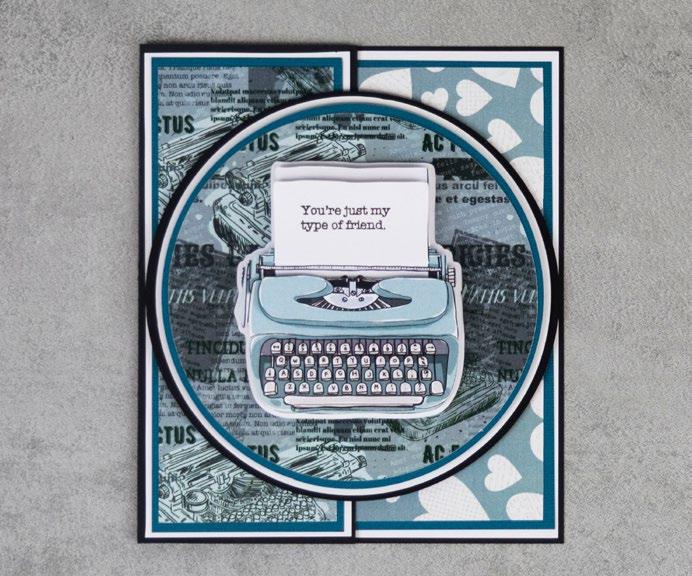
Mat the small typewriter rectangle onto the small turquoise rectangle, then onto the small white rectangle. Mat onto the card front.

Mat the white circle onto the black circle, and mat onto the card front. Mat the typewriter circle onto the turquoise circle and mat onto the card front with foam tape.
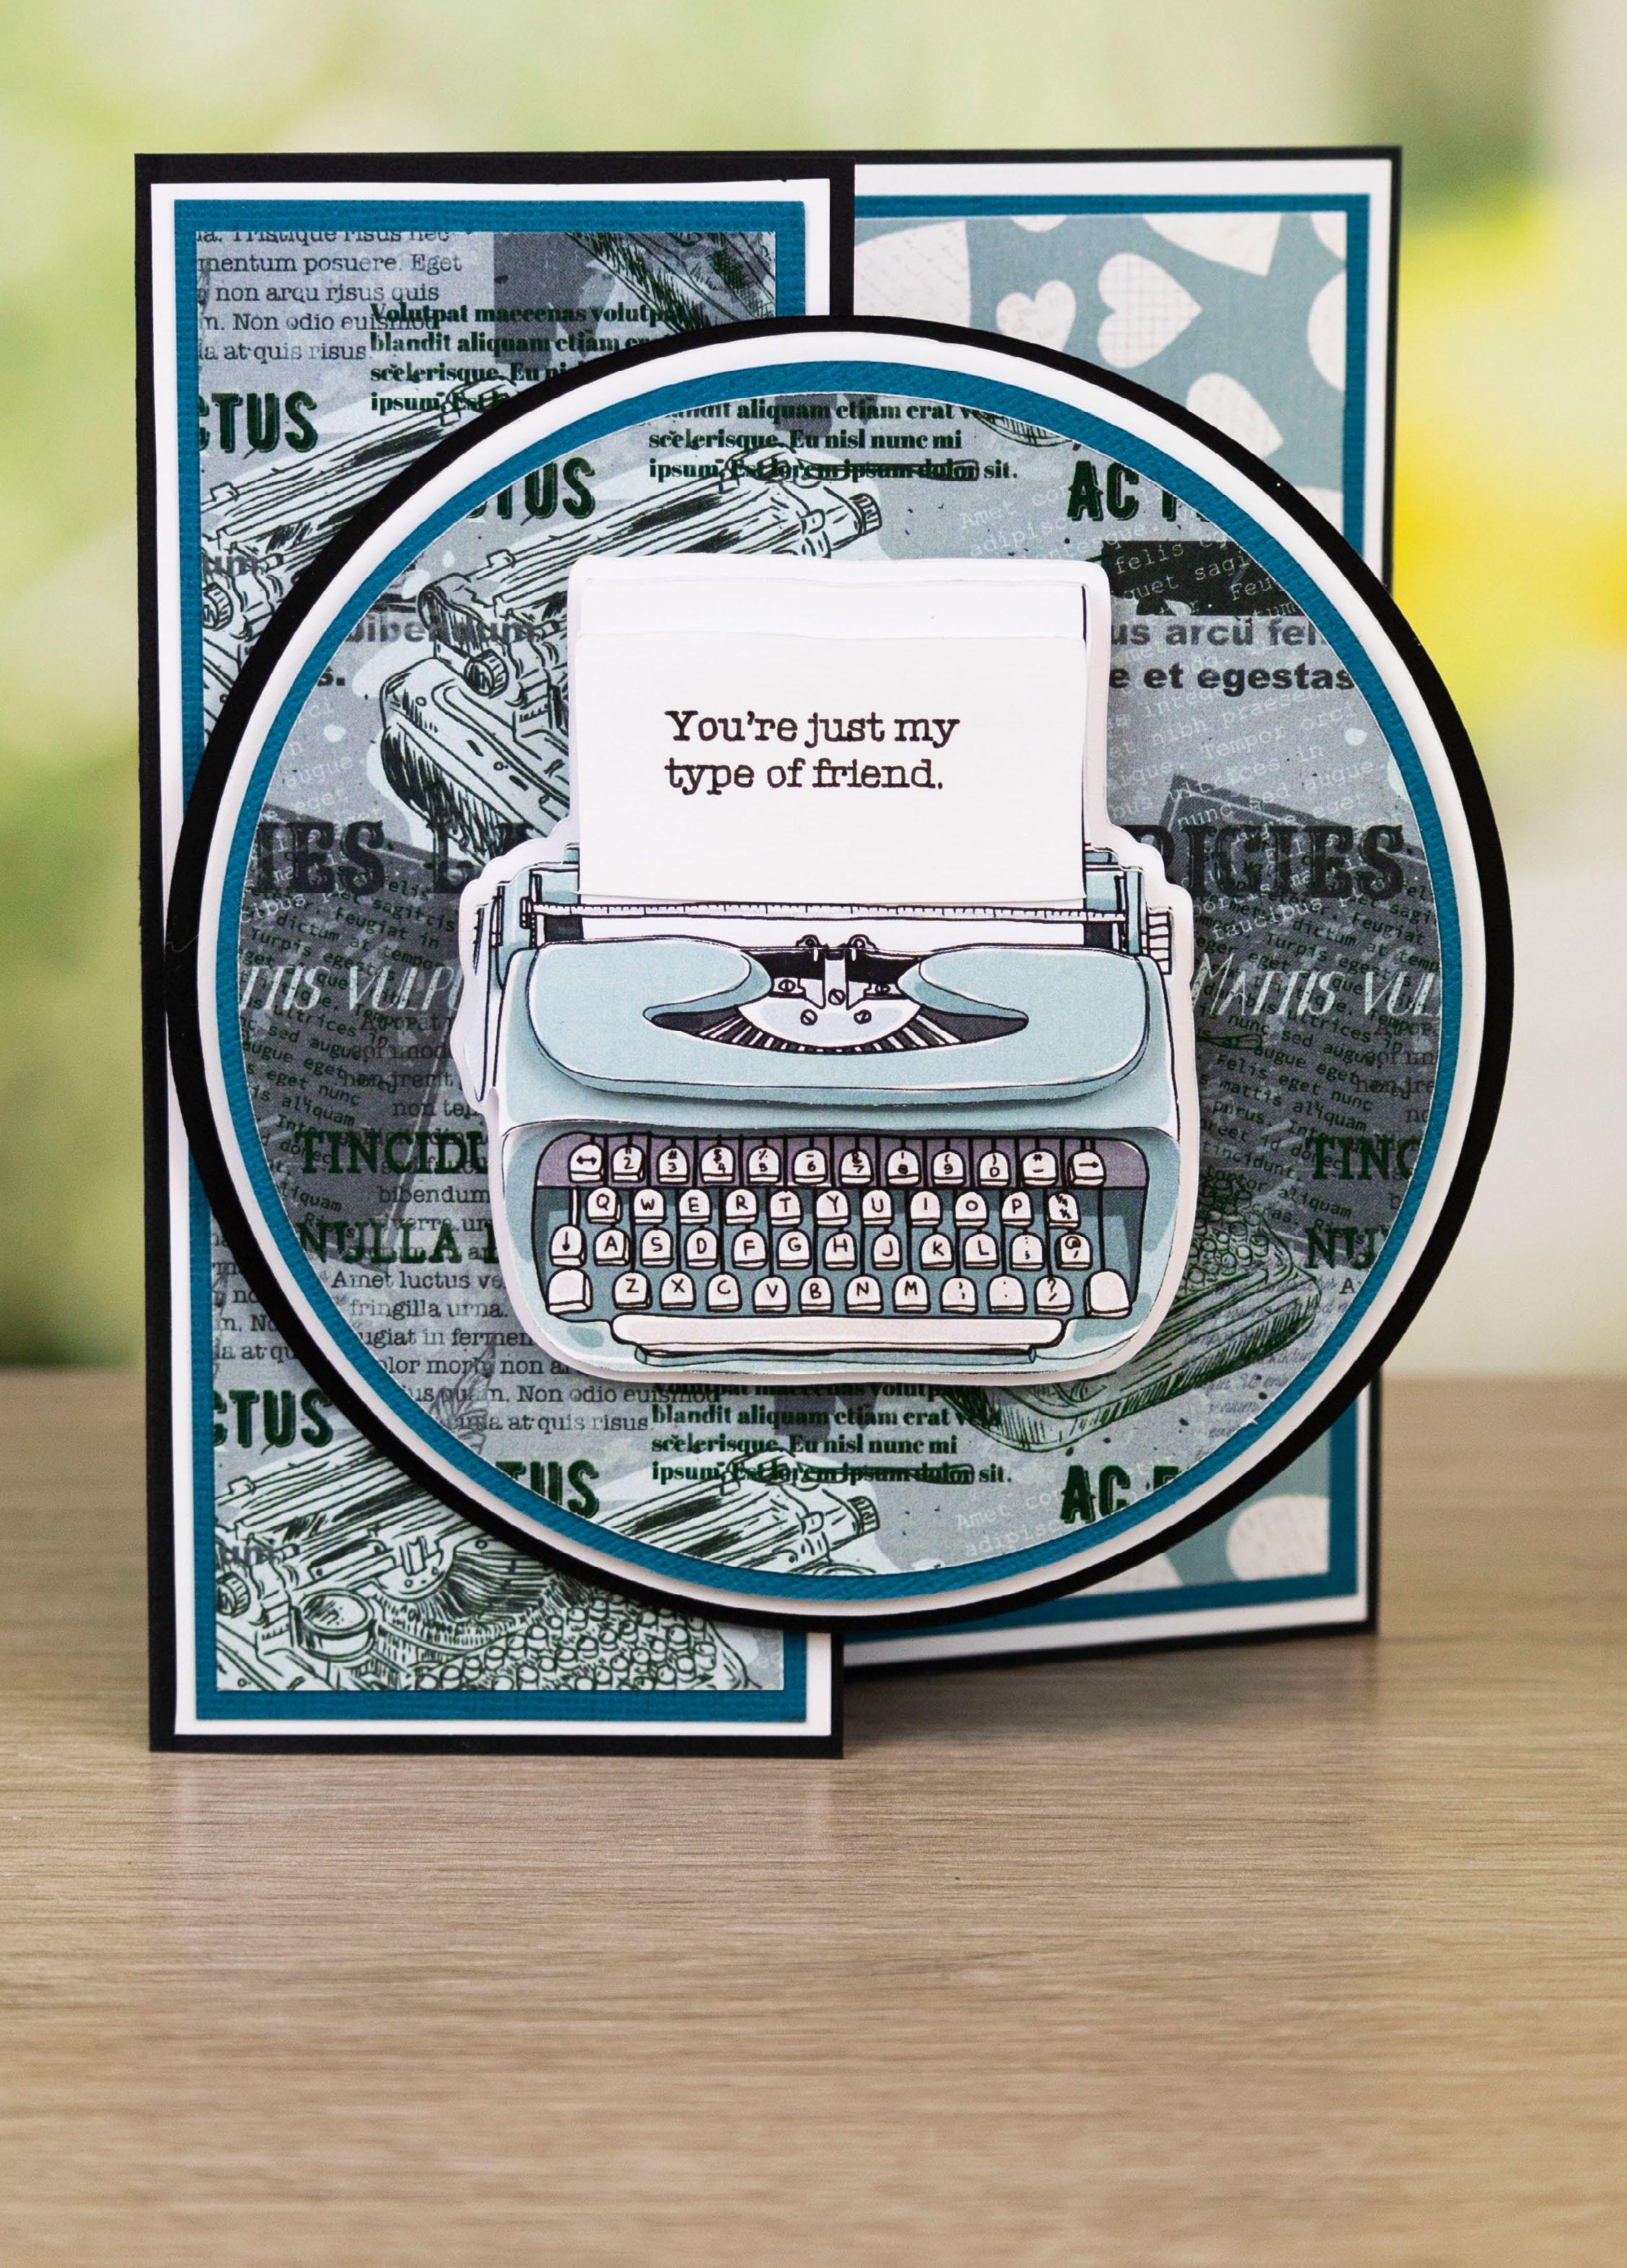
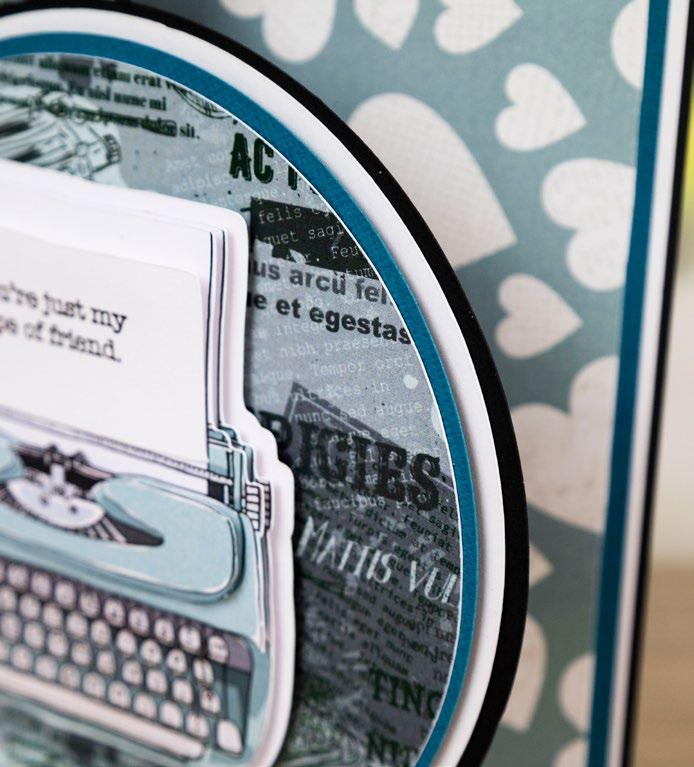
Trim the charisma and sentiment typewriter-cuts, as shown in the image. 6
Build up the decoupage of the typewriter, and mat together with foam tape. Mat onto the outline, and mat onto the middle of the card front with foam tape.
---------------------------------------- QUIRKY TYPEWRITER ---------------------------------------------
1 3 5 2 4 6
2
3
4
5
CLICK HERE TO DOWNLOAD YOUR SVG CONTENT PROJECT 32 www.tatteredlace.co.uk | 51
Glaze Drops: TOP TIPS AND INSPIRATION
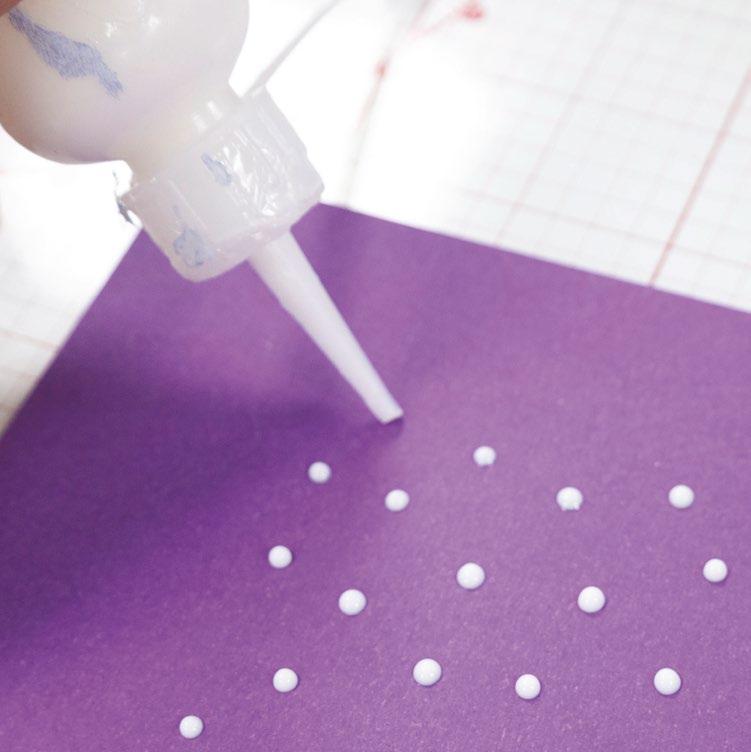
Glaze Drops can be applied to your craft projects straight from the bottle. If you are working with a new bottle make sure when you snip the end of the nozzle you don't snip too far down so you can be more precise with your application.
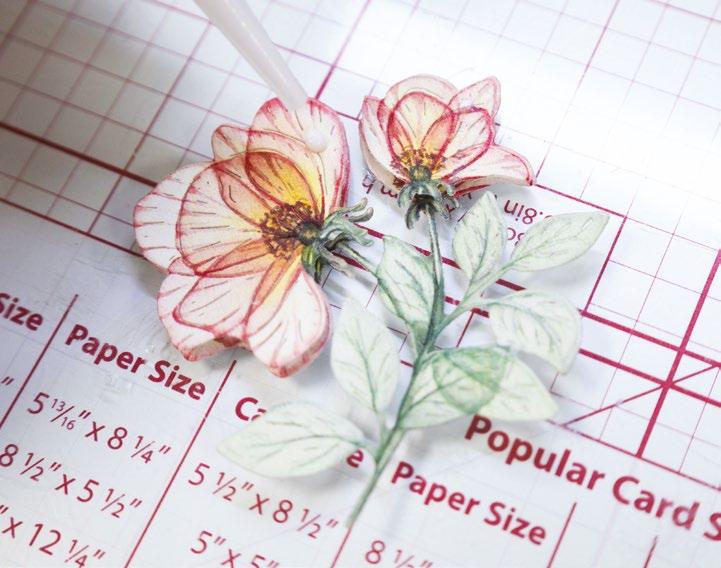
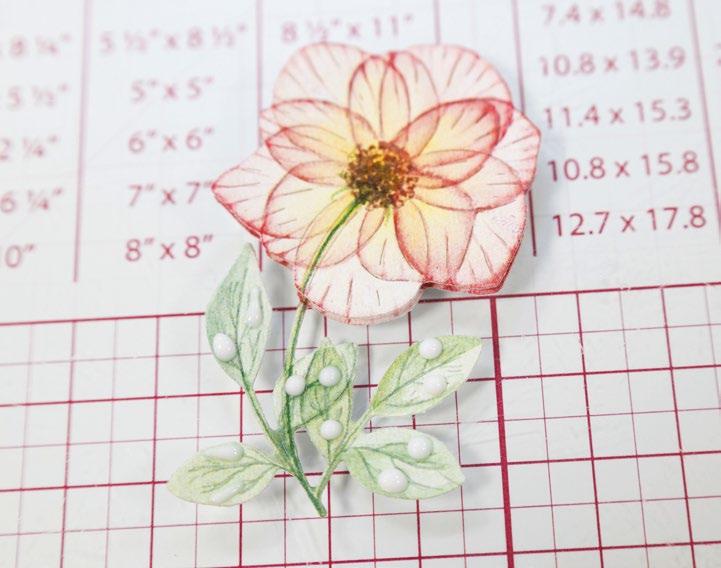
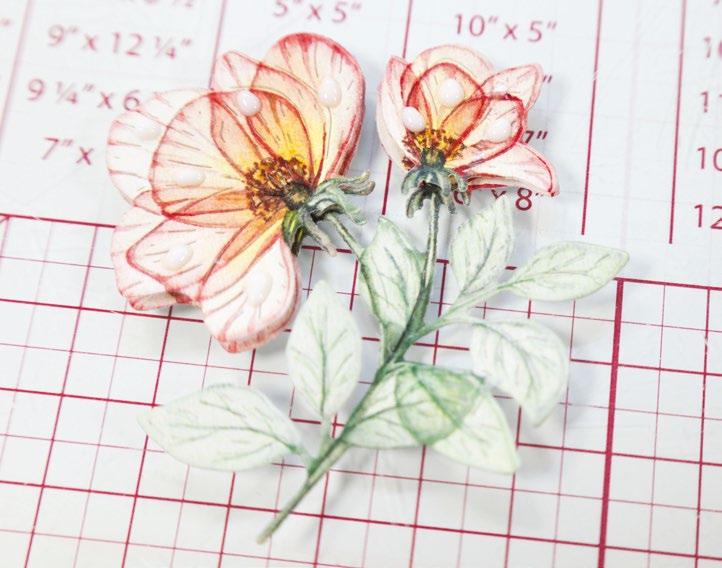
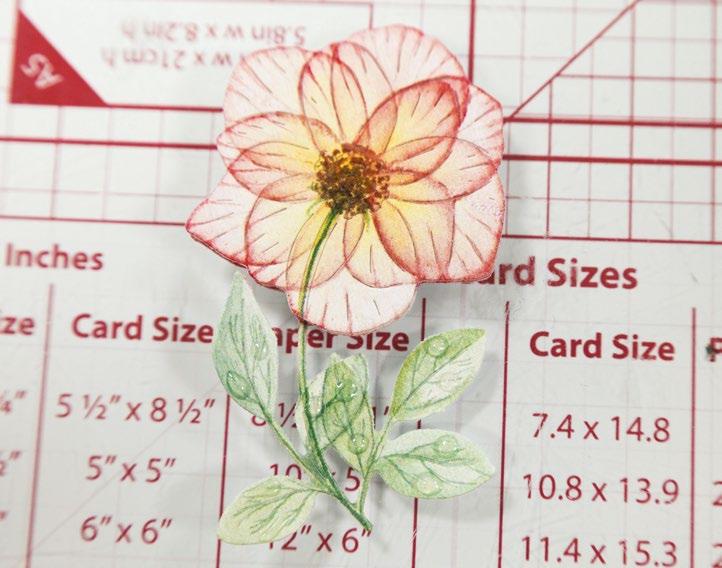
Glaze Drops are great for adding glossy details to flower SVG cuts, whether it is adding water droplets to the flower heads, to the leaves or the globule of rainwater that collects in the middle of a flower.
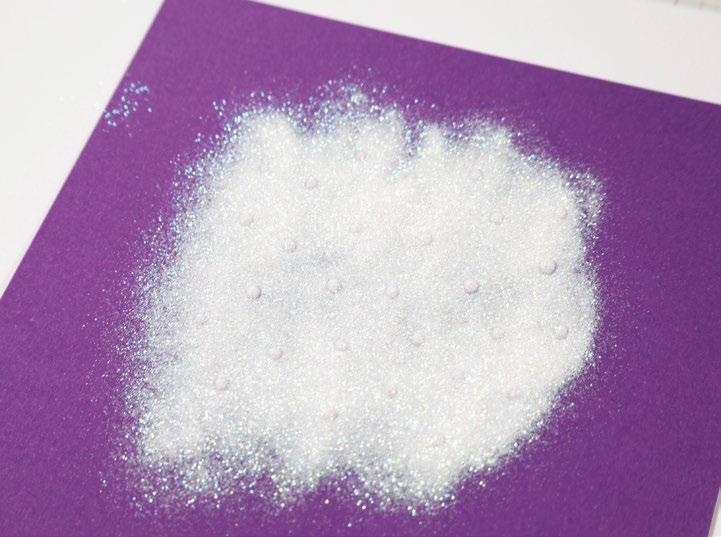


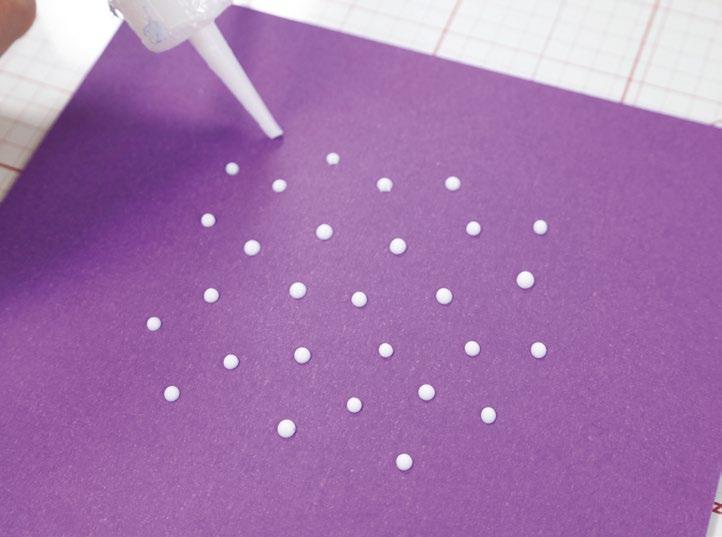
Glaze Drops and glitter are a simple and effective way to add snow to your backgrounds. Squeezing straight from the bottle, apply small drops to your chosen cardstock. Top tip, if when you have removed the bottle from the drop you are left with a "peak" use a pin to just gently tweak your drop and smooth out the peak. When you are happy with the amount of drops, cover with glitter and then tip off the excess. Don't shake, as this could disturb your drops. Leave to dry until you are left with crystalised glittered snow drops.
------------------------------------------- INSPIRATION -----------------------------------------------52 | www.tatteredlace.co.uk
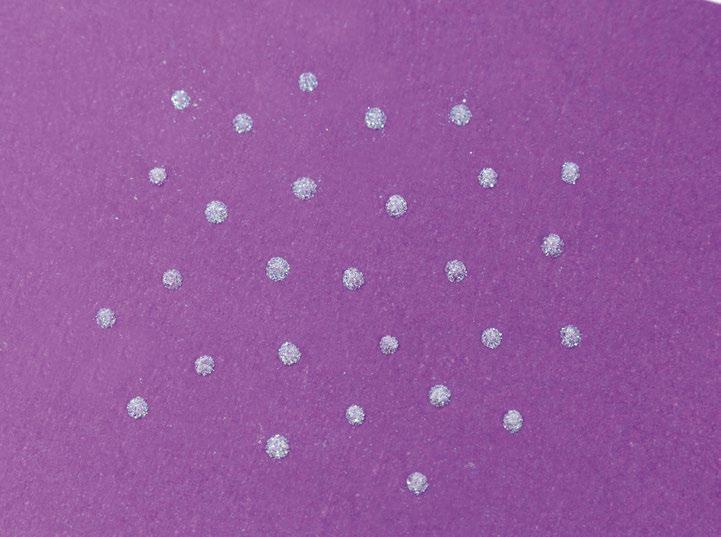
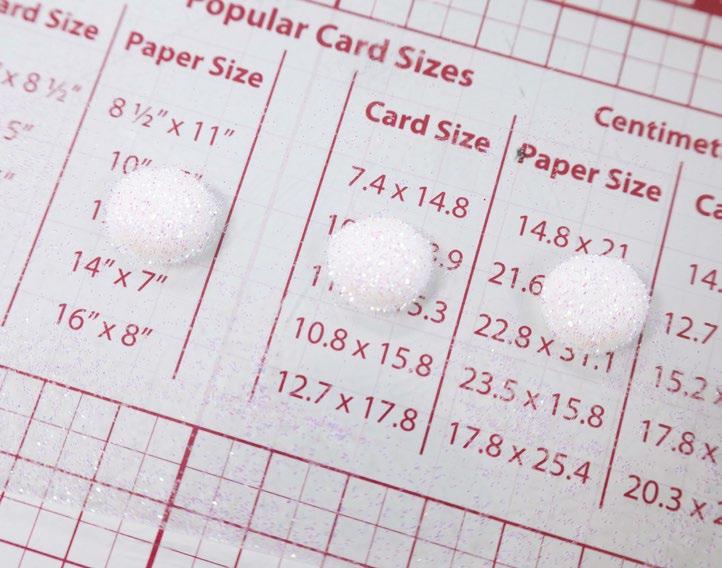
Glaze Drops can be used in a simple and effective way to make your own sparkle gems. Squeeze the drops on to a plastic backing (we used a cello bag). You can do these whatever size you wish but just be mindful that the bigger they are the longer they will take to dry. Top tip, if you are wanting to make your own gems to use in your projects, make them the day before so they have plenty of time to dry overnight.
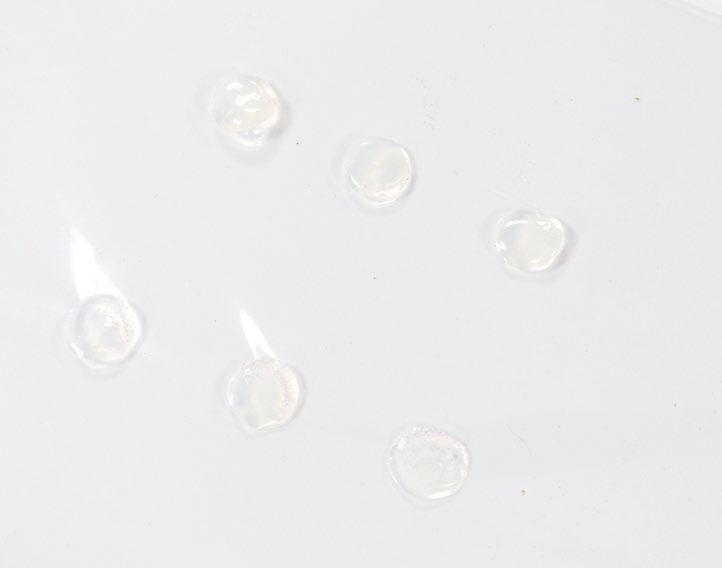
Once you have your desired number of drops, cover with glitter and gently tip off the excess, remember not to shake it off! When the glaze has dried with the glitter, the gems will be hard enough to peel off the plastic backing and use on your craft projects.
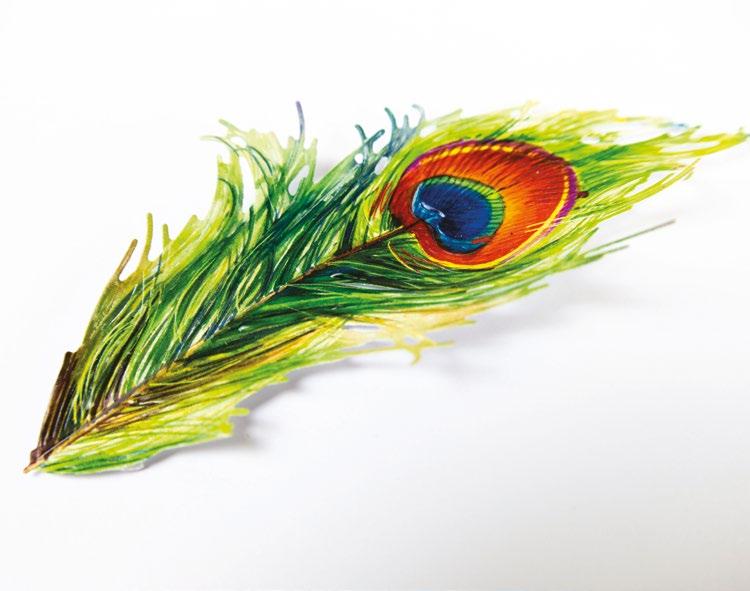
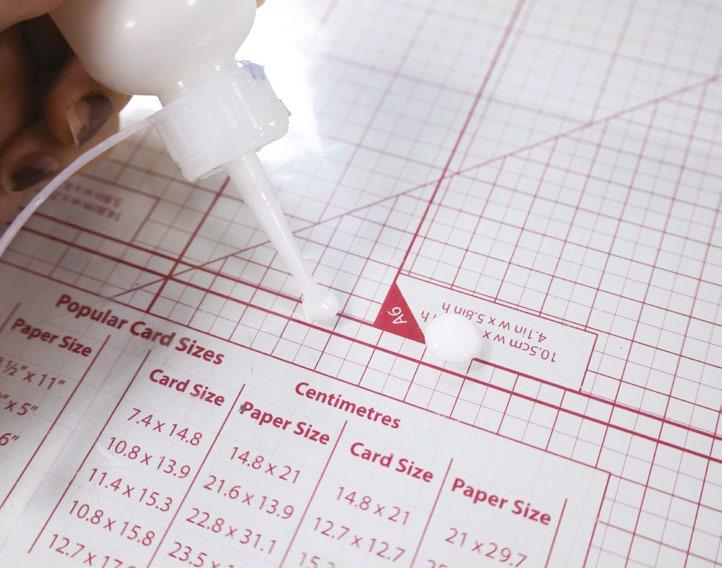
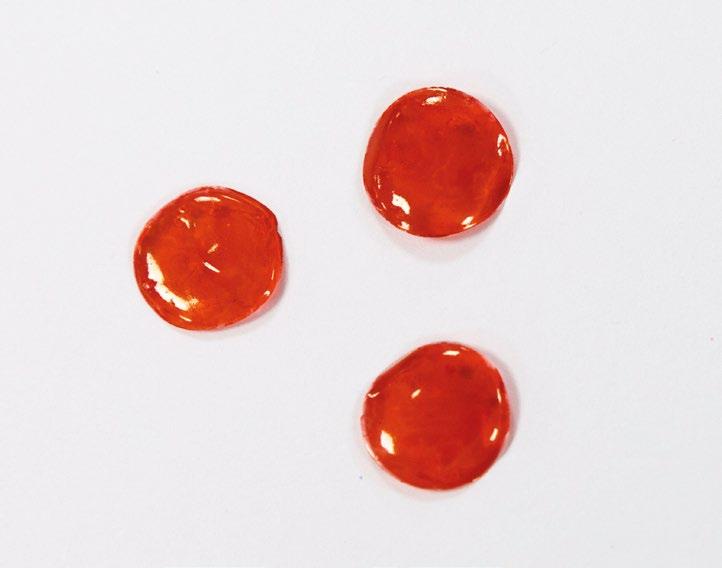
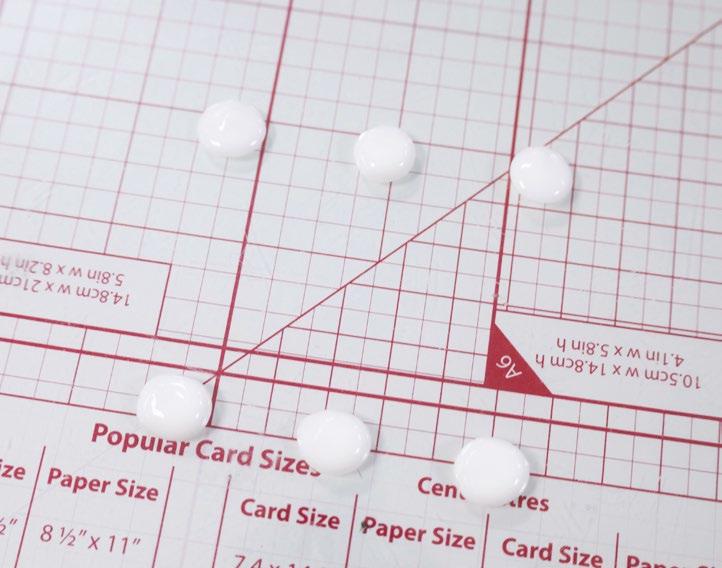

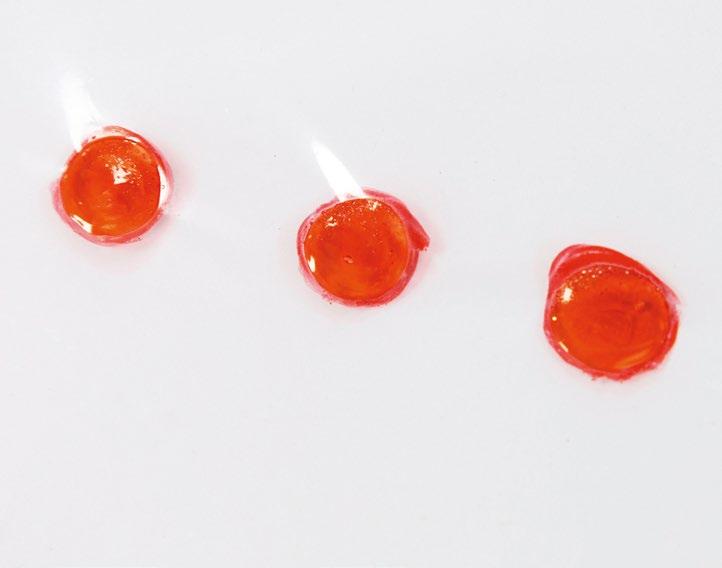
In a similar way to the sparkle gems, you can make coloured gems. Instead of covering the drops in glitter, leave them to dry completely until they go clear. Once they are clear, colour the drops using alcohol markers. You may wish to go over them a couple of times. Again, leave to dry, and then peel them off the plastic backing and use on your craft projects.
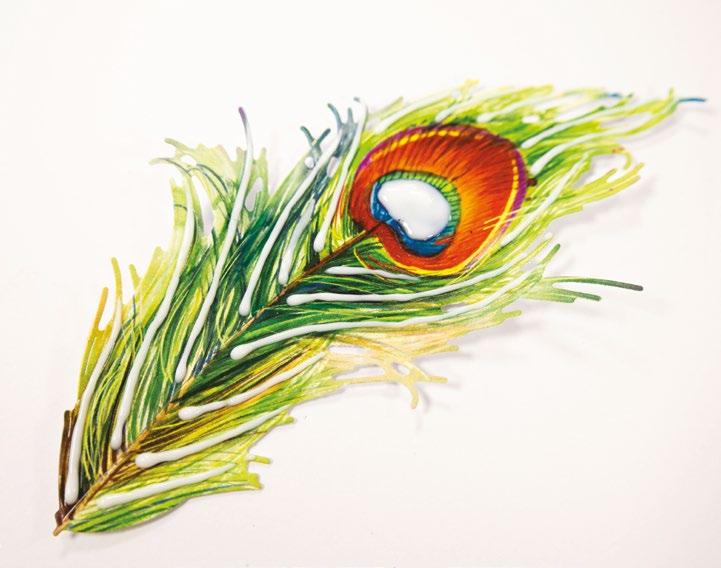
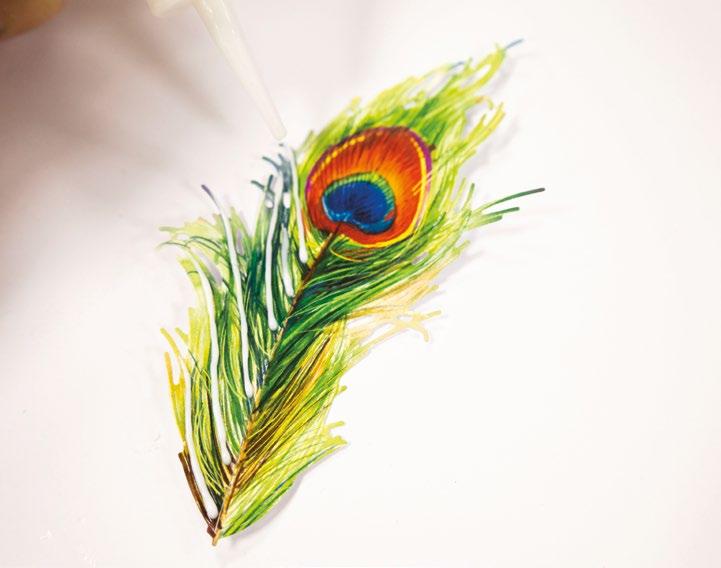
Use the Glaze Drops to highlight certain elements of SVG cuts by drawing along the some of the detail that is already there. Using the Glaze Drops in this way will leave a thick raised glossy shine to the SVG cuts on your projects.
------------------------------------------- INSPIRATION -----------------------------------------------www.tatteredlace.co.uk | 53
Decoupage Enamel USING


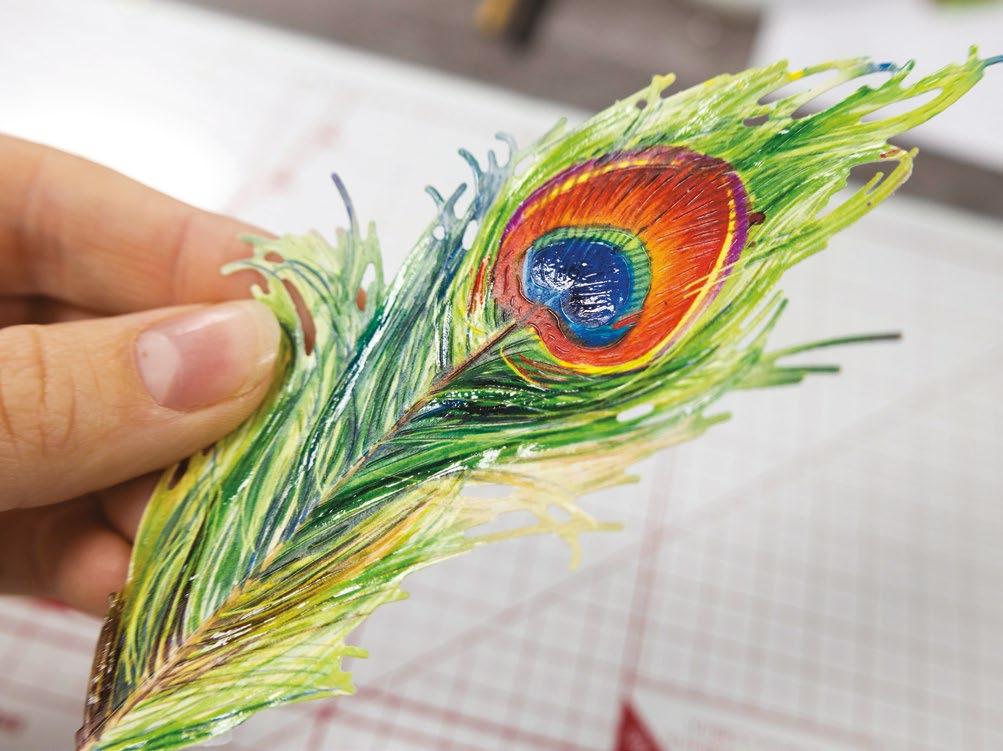
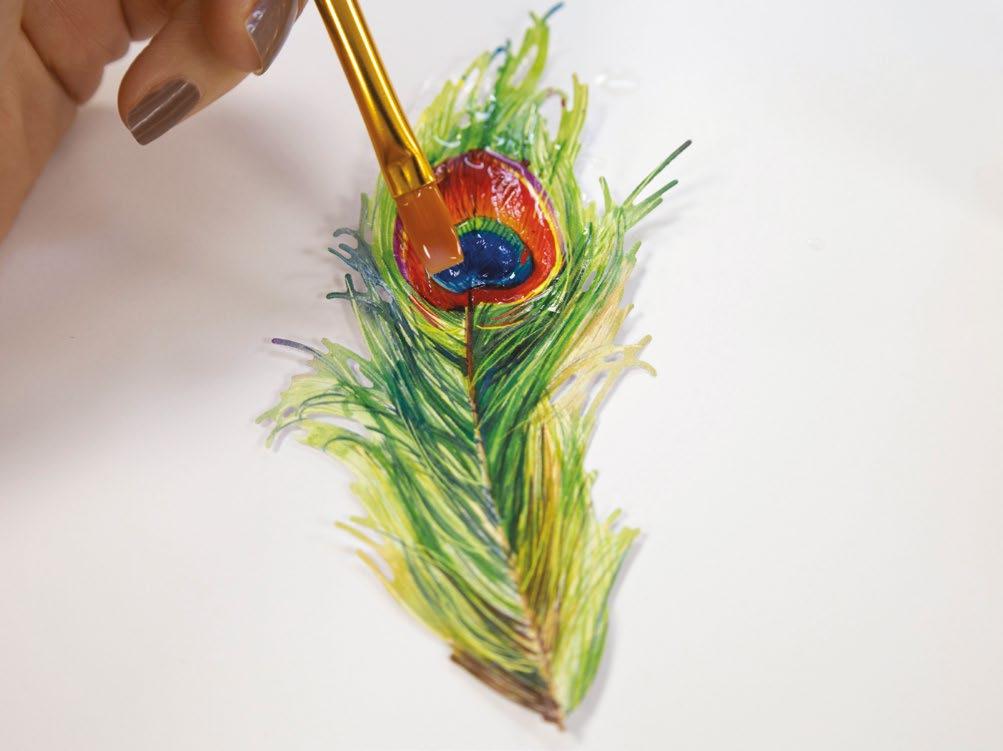
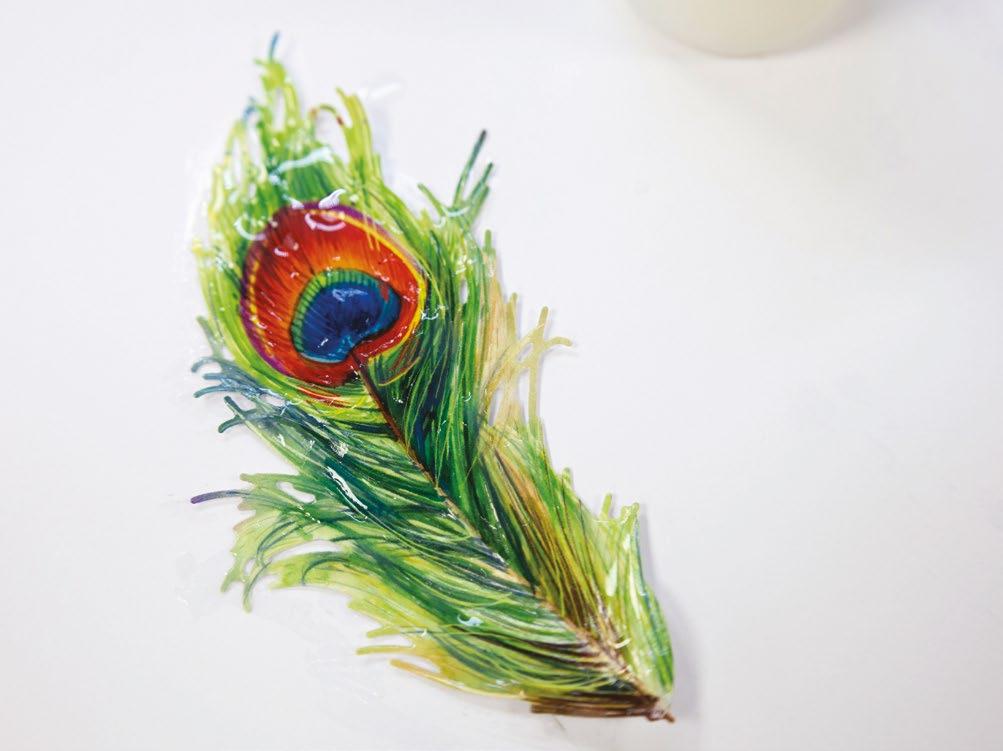
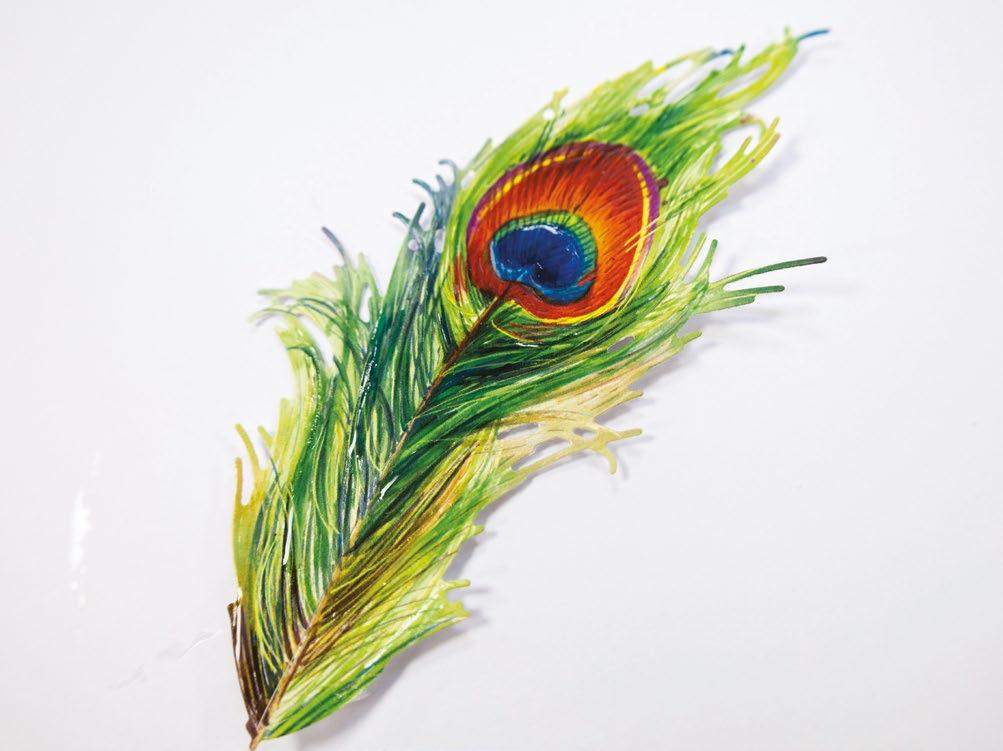
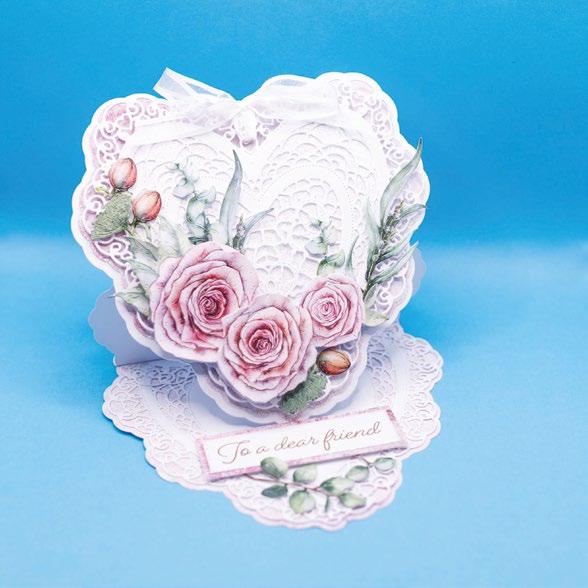
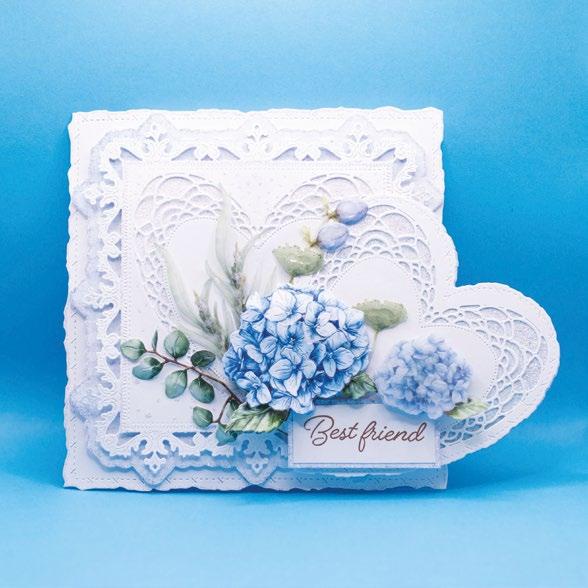
The best way of applying Decoupage Enamel is with a brush. If you wish to completely cover your SVG cuts, it is best to cut your charisma from a thicker weight of paper so you can lay it on quite thickly. If you are only wanting to highlight certain elements, then use a thin brush to go over this detail. It's a good idea to leave SVG cuts to dry on a surface like a glass mat to avoid them getting stuck to paper. Make sure to wash the Decoupage Glaze out of your brushes as soon as you are done with them!
------------------------------------------- INSPIRATION -----------------------------------------------54 | www.tatteredlace.co.uk









www.tatteredlace.co.uk IS NOW A RETAIL WEBSITE!!! AND SO MUCH MORE AVAILABLE TO BUY NOW AT WWW.TATTEREDLACE.CO.UK MAGAZINES DIE RANGES PAPER PACKS & KITS STAMPS TOOLS & ACCESSORIES
COLUMN
The team over at Tattered Lace HQ have given me a page to keep you up to date with me and my crafty antics. So keep an eye out and I’ll be here for a general chit chat, to answer any questions you might have or to share any projects with you that I’ve been working on!
Hi Crafters, Hope we're all doing well and starting to enjoy these cosy nights in! These dark nights are just a great excuse to stay in and get crafting aren't they!

We've been quite busy over the last few weeks. I decided to enter a baking competition, and I came in third! I was quite proud of myself for that, you'll see me on Bake Off next year!
Me and Gordon were with Stephanie and Karl again, recently. We went out to a dinner dance, it was a lot of fun but my feet are still throbbing so you might not see me on Strictly! Then, me and Gordon are going to see Much Ado About Nothing soon, I absolutely love Shakespeare, but I know Gordon will be snoring!
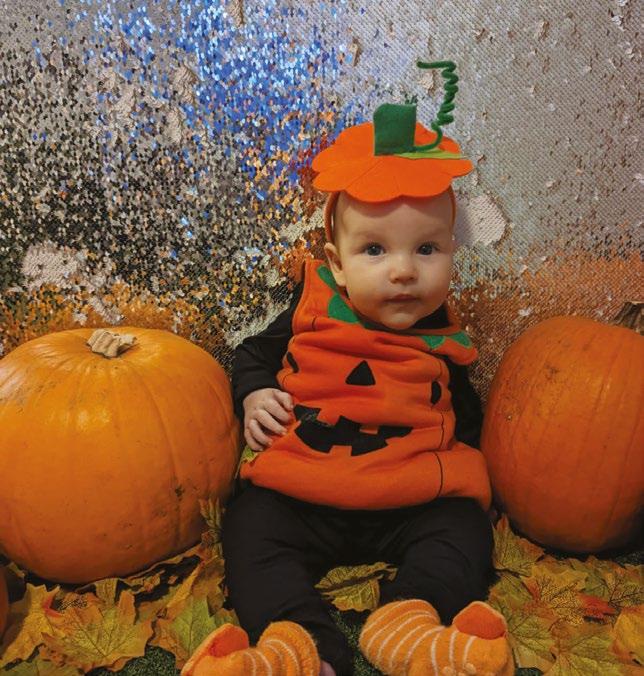
• 33-01-Nancy’s Project SVG files 1 Cut all the pieces needed to create the project as listed below; • White cardstock • Orange cardstock Special Florals Perfect Pumpkin! Check out my gorgeous Noah dressed up as a pumpkin for Halloween, he really was the cutest pumpkin in the patch, in my eyes! From SVG downloads: •From orange cardstock: - 1 x NP-1-Sentiment •From charisma: - 1 x NP-1-Charisma From machine memory: •From white cardstock: - 2 x 140mm square - 1 x 72mm circle •From orange cardstock: - 1 x 135mm square - 1 x 87mm circle •From backing paper: - 1 x 130mm square (leaves) 2 On one of the white squares, measure down 10mm from the top edge, and score across to create a tab. Attach to the other white square to create a tent card. Mat the leaves square onto the orange square with foam tape, and mat onto the card with foam tape. 3 Mat the white circle onto the orange circle, and mat onto the card with foam tape. Mat the sentiment cut onto the circle. 4 Trim the floral cuts, as desired, and mat together onto the card with foam tape. CLICK HERE TO DOWNLOAD YOUR SVG CONTENT PROJECT 33 56 | www.tatteredlace.co.uk
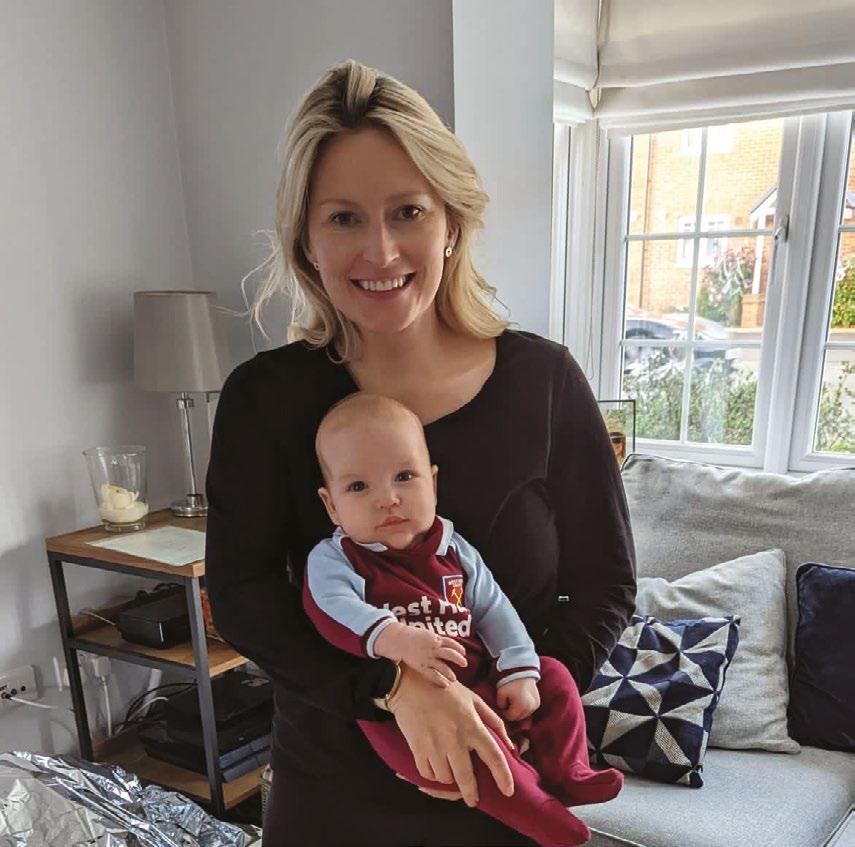
My grandson has no choice but to be a West Ham supporter!
Floral Frame
• White cardstock
From SVG downloads:
•From white cardstock: - 1 x NP-2-Frame
From charisma: - 1 x NP-1-Charisma
2
3
• Orange cardstock Special Day •
From machine memory:
•From white cardstock: - 2 x 170mm square
•From orange cardstock: - 1 x 155mm square
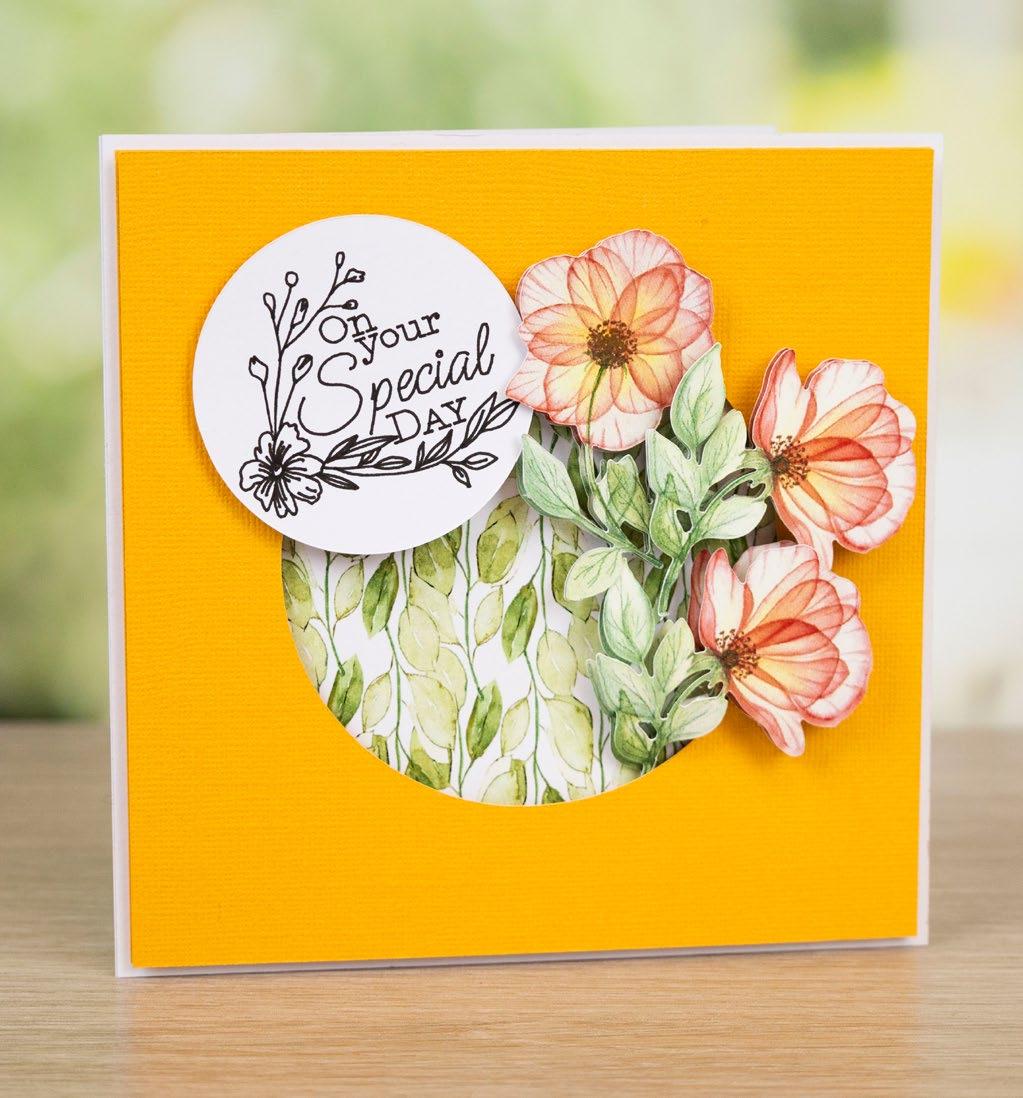
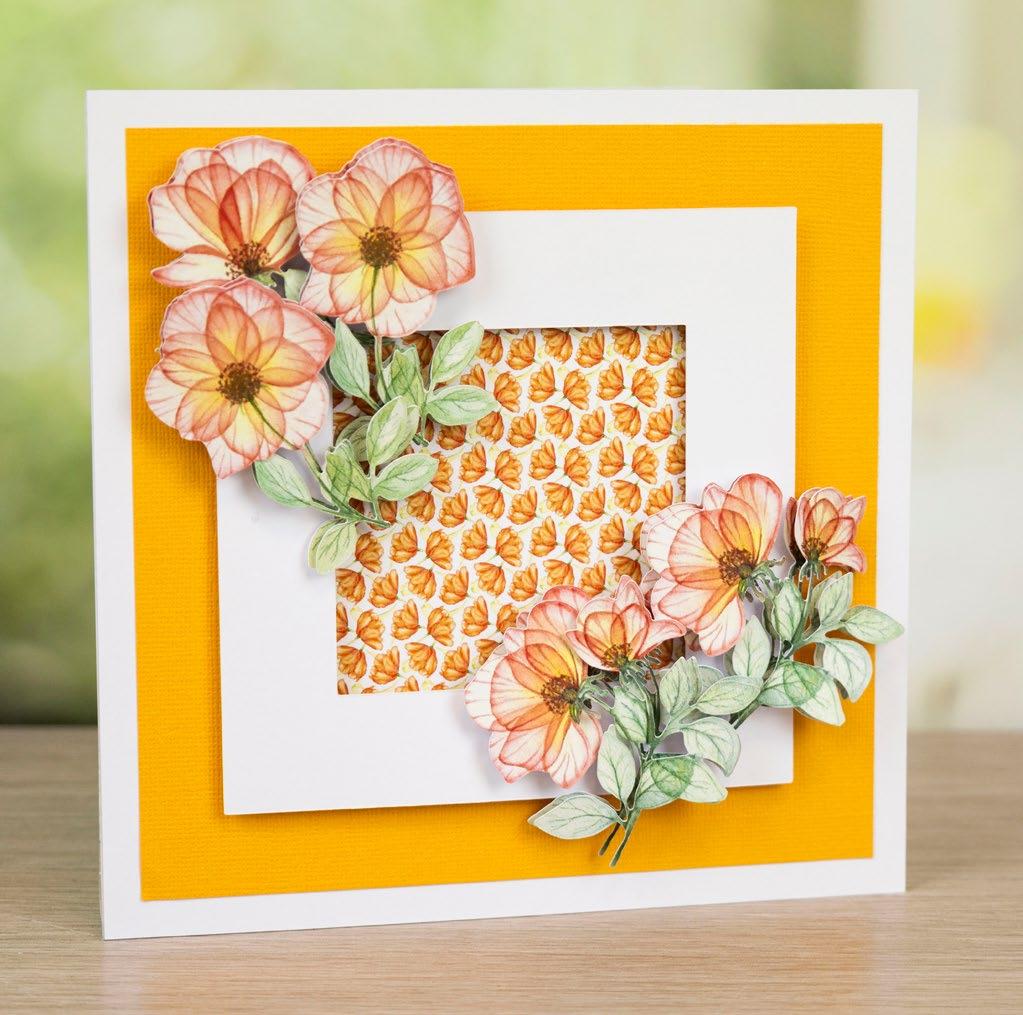
4
HERE TO DOWNLOAD YOUR SVG CONTENT
•From orange cardstock: - 1 x NP-3-Frame
•From charisma: - 1 x NP-3-Charisma
From machine memory:
•From white cardstock: - 2 x 145mm square
2
- 1 x 58mm circle (with sentiment draw file)
•From orange cardstock: - 1 x 140mm square
•From backing paper: - 1 x 130mm square (leaves)
3
Mat the orange square to the card. Mat the leaves square onto the card, and mat the orange frame on top with foam tape.
CLICK HERE TO DOWNLOAD YOUR SVG CONTENT PROJECT 34 PROJECT 35 www.tatteredlace.co.uk | 57
SVG files 1
1
• 34-02-Nancy’s Project
Cut all the pieces needed to create the project as listed below;
Cut all the pieces needed to create the project as listed below;
35-03-Nancy’s
SVG files •
Hope you all enjoyed hearing what I have been getting up to lately. If there are any questions you have, send an email to info@tatteredlace.co.uk and we'd love to answer them for you! Until next time! •
Project
White cardstock
Orange cardstock
From SVG downloads:
•From backing paper: - 1 x 100mm square (flowers)
4
On one of the white squares, measure down 10mm from the top edge, and score across to create a tab. Attach to the other white square to create a card.
Mat two of each flower together with foam tape, and mat onto the card within the aperture. Mat the sentiment circle onto the card with foam tape.
On one of the white squares, measure down 10mm from the top edge and score across to create a tab. Attach to the other white square to create a tent card.
Mat the flowers square onto the orange square, and mat onto the card. Mat the white frame onto the card with foam tape.
Mat two of each flower together with foam tape, and mat onto the frame as desired. CLICK

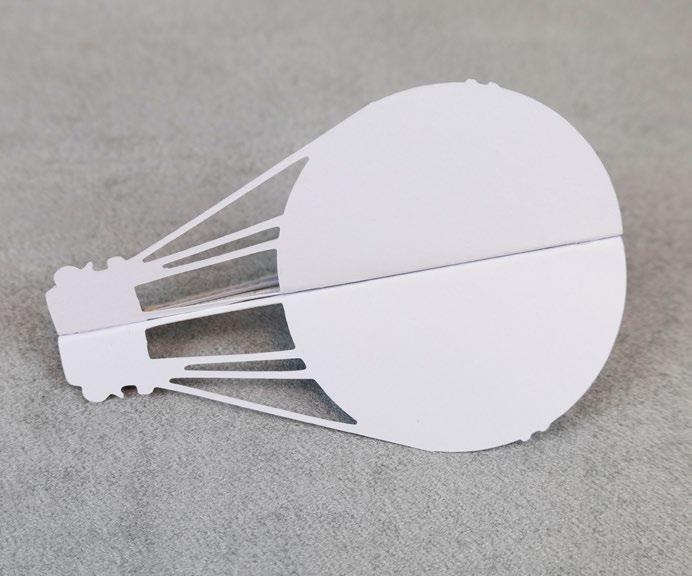


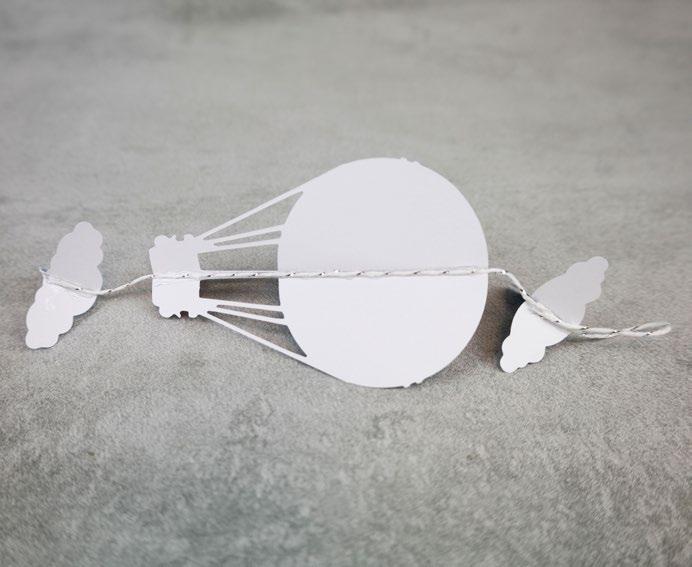
What you’ll need: • 36-01-Enjoy The Ride SVG files • String Step bySteps 1 Cut all the pieces needed to create the project as listed below; From SVG downloads: • From charisma: - 1 x ETR-1-Charisma Score and fold the balloons in half vertically, scoring two of them on the front side and the other two on the reverse. Score and fold four clouds in half on the front side, and the other four on the reverse. 2 Mat two of the balloons together, making sure the ropes match up perfectly. 3 Glue a length of string to the middle of the joined balloon-cuts. Make sure there is enough string at the top of the balloon to add clouds and form a loop for hanging. Attach two clouds together, and glue to the bottom of the string. Attach another two clouds together and add to the top of the string. Loop the string around so the end is within the cloud. 4 Mat the remaining balloon-cuts and cloud-cuts together and mat onto the previous ones to hide and seal the string inside. 1 3 2 4 ------------------------------------------ ENJOY THE RIDE ----------------------------------------------CLICK HERE TO DOWNLOAD YOUR SVG CONTENT PROJECT 36 58 | www.tatteredlace.co.uk



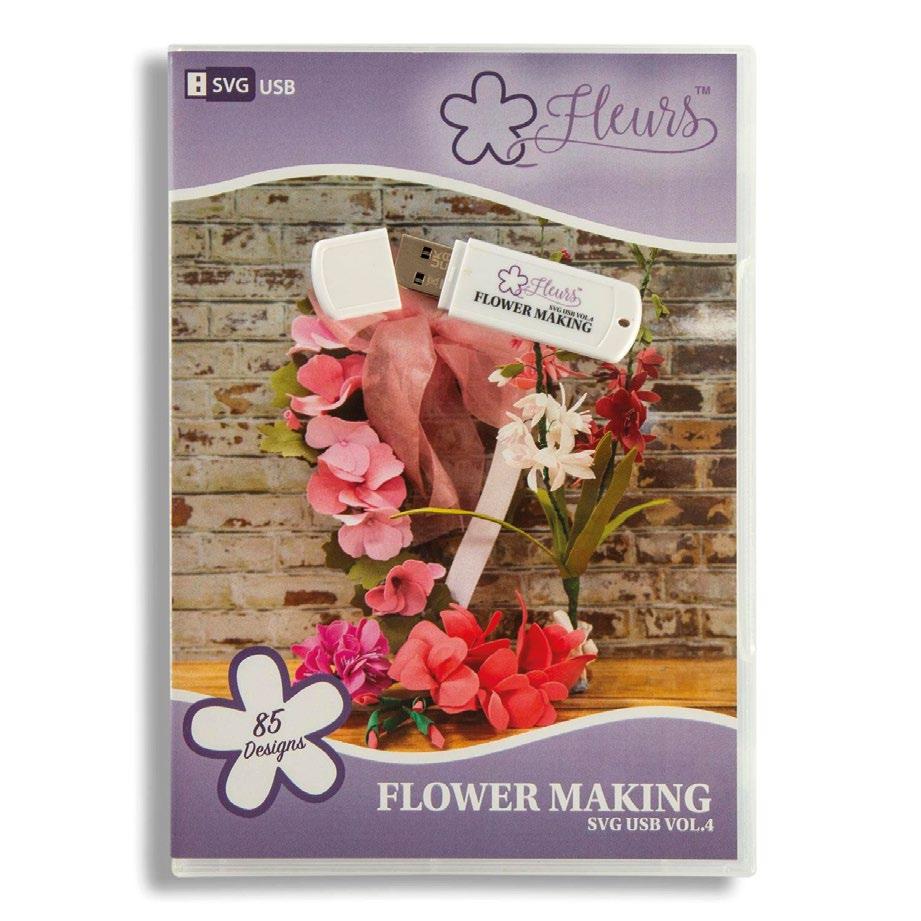
FLEURS FLOWER MAKING MYSTERY BOX £50 VOUCHER 1 LUCKY WINNER WILL WIN £50 TO SPEND ON ANY PRODUCT AT WWW.TATTEREDLACE.COM 1 X WINNER OF MYSTERY BOX WORTH £50 CREATE BEAUTIFUL ASTER, DAFFODILS, GLADIOLUS, HONEYSUCKLE, ROSES AND MANY MORE 3D FLOWERS AND ACCENT WITH THE FOLIAGE AND LEAVES. ADD THE FINISHING TOUCH TO ANY PAPERCRAFT OR HOME DÉCOR PROJECT. 1 LUCKY WINNER WILL WIN A MYSTERY BOX FILLED WITH CRAFTY ITEMS AND PRODUCTS FROM A VARIETY OF BRANDS! 8 X WINNERS OF FLEURS FLOWERS MAKING SVG USB VOL.4 Please visit www.tatteredlace.co.uk, click MAGAZINE GIVEAWAY and follow the instructions. Please use code FLEURS23 to enter the competition online. HOW TO ENTER CLOSING
Entries from Issue 22 will end on 28/02/23. The winners will be contacted by phone/email and will also be announced on Tattered Lace® Facebook and Tattered Lace® website the following week.
DATE:
