2 minute read
Making the Projects


Software
Before connecting boards to your micro:bit install the program for the project onto the micro:bit. This makes sure that pins are correctly configured as inputs and outputs before you connect up the electronics. This code for this kit uses the Makecode blocks editor. As well as programming by plugging together blocks, you can also view and edit the resulting code as Python or Javascript. The Blocks editor program allows you to program your micro:bit directly from the browser on your computer. Each program has a web address and clicking on the link in these instructions will open it in your browser so that you can then install it on your micro:bit.
Alligator/Crocodile Clips
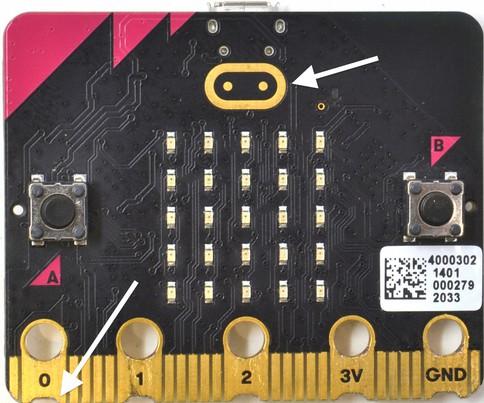
The projects in this kit are assembled by connecting your micro:bit to one or more of the MonkMakes boards using alligator clips. You have to be a bit careful how you connect the clips at the micro:bit end. The correct way is to connect the clips vertically as shown below.
Connecting the alligator clips like this prevents any accidental connections between the large connectors with the holes in and the much smaller connectors (gold lines in the photo above)
Page 4
The Motor
To stop the motor falling over, connect the alligator clips as shown below.

Building a Project
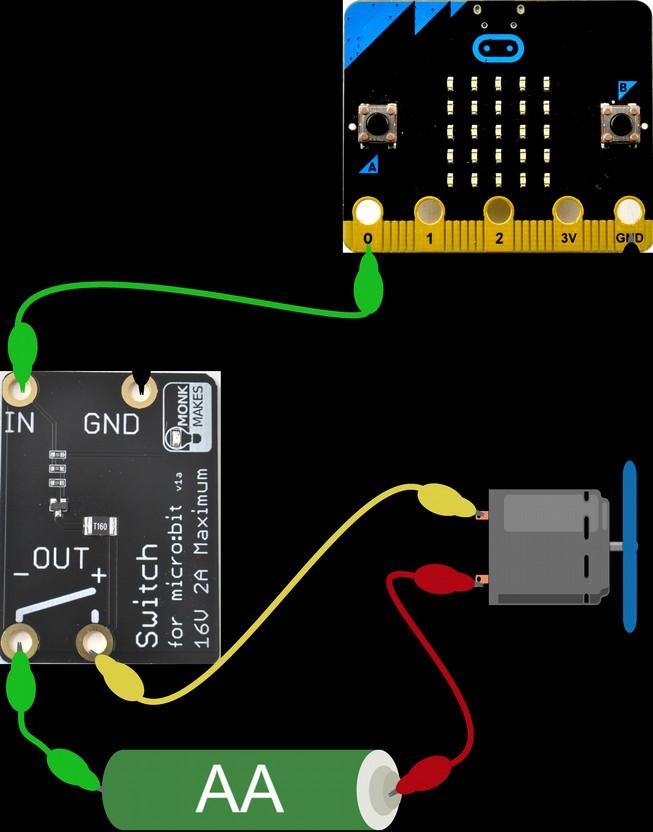
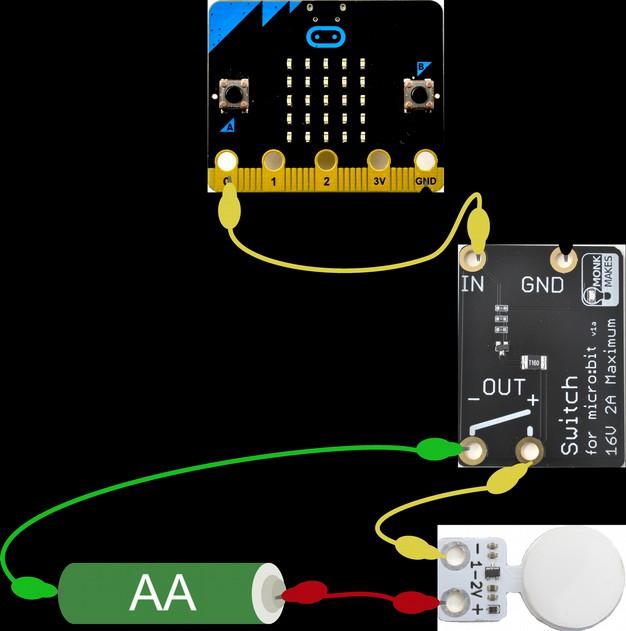
The micro:bit and the MonkMakes boards are pretty robust when it comes to connecting things up the wrong way around, but it's a good idea to unplug your micro:bit from your computer while you are wiring things up. Then check it over carefully before connecting your micro:bit to your computer. Each project includes a wiring diagram, like the one below. This shows you what needs to be connected to what. It suggests the colors of lead to be used for each connection. The project will still work just fine, whatever color of lead you use, but it makes it easier to see what's going on if you stick to the color scheme, especially using red for 3V power connections and black for ground connections. If your kit came with a Relay for micro:bit, rather than a Switch for micro:bit, wire it up as if the diagrams showed a Relay, using the same connection positions. The Relay works just like the Switch, except the Relay does not distinguish between + and -, whereas for the Switches OUT connections it does matter which is + and which is -.

Page 5