





Since 1999, Quality Horticulture has grown and expanded as one of the leading horticultural wholesalers in Canada...


Quality Horticulture is home to a growing catalog of respected brands and innovative products handselected by our experienced and knowledgeable team. Contact us today and Join the World of Quality.


E W !










Summer is in full swing, and so are your outdoor gardens. For many of us, gardening is so much more than a hobby. It’s an addiction, a passion, something we can’t live without. Even at the commercial level, there is so much pride in being able to produce top-quality products. I hope some of the articles in this edition inspire you to try something different and push your creative and technical boundaries.
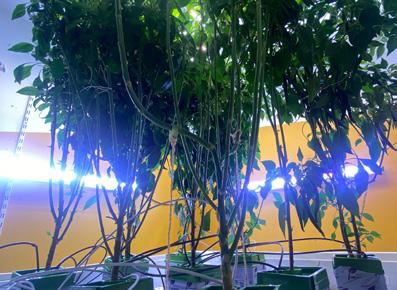
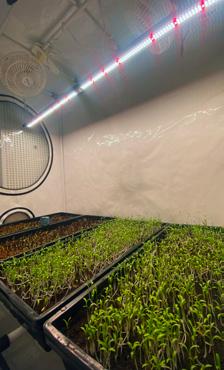
This edition has so much to offer, and Garden Culture is lucky to have so many great gardeners sharing their wisdom. Everest Fernandez shares his insights in the articles “Side Lighting—Do or Die?” and “How To Grow Micro-Cilantro.” In “How The Pros Handle Pest Control,” Andrea Keddy shares invaluable advice and tips on how to avoid pest problems in the garden.
One of the biggest challenges for all gardeners is getting the water schedule just right. In “Watering (is not) for Dummies,” Av Singh walks us through some of the fundamentals of water and gives some great tips on better understanding water’s importance in your success.
When growing outdoors, it is harder to control the rain we get. And when we inevitably get those big storms, it is better to be prepared. In “Small & Mighty: The Impact of Ground Covers in the Garden,” Jennifer Cole talks to author and gardening expert Gary Lewis about his book, “The Complete Book of Ground Covers.” All gardeners can benefit from reading about keeping their soil covered.
If you use an AC, remember to take care of it this summer. At Stratus Design, Adam Clarke installs air-handling equipment and is familiar with mechanical problems. In “Equipment Maintenance: Why Bother?” he reminds you to maintain your equipment (unless you want problems!).
If you are gardening outdoors, I hope the sun shines bright. For those growing in greenhouses and indoors, I hope your equipment never fails you!
Special thanks to:
Adam Clarke, Alex Field, Andrea Keddy, Anne Gibson, Av Singh, Catherine Sherriffs, Dustan McLean, Everest Fernandez, Gareth Hill, Jennifer Cole, Judy Nauseef, Keaton Haines, Luke Sumpter, and Xavi Kief.
PRESIDENT
Eric Coulombe eric@gardenculturemagazine.com +1-514-233-1539
EXECUTIVE EDITOR
Celia Sayers celia@gardenculturemagazine.com +1-514-754-1539
EDITOR
Catherine Sherriffs cat@gardenculturemagazine.com
DESIGN
Job Hugenholtz job@gardenculturemagazine.com
DIGITAL & SOCIAL MARKETING social@gardenculturemagazine.com
ADVERTISING ads@gardenculturemagazine.com
PUBLISHER
325 Media INC
44 Hyde Rd, Mille-Isles QC, Canada J0R 1A0 GardenCultureMagazine.com

ISSN 2562-3567 (Print) · ISSN 2562-3575 (Online)

Garden Culture is published six times a year, both in print and online.

@GardenCulture @GardenCulture

@GardenCultureMagazine @Garden_Culture

DISTRIBUTION PARTNERS
Hydrofarm HortUS pHive.8
Central Coast Garden Products
• Biofloral
• Autopot USA
• Hydrofarm Canada
• Quality Wholesale
• Left Coast Wholesale
All rights reserved. No part of this publication may be reproduced, stored in a retrieval system or transmitted in any form or by any means, electronic, electrostatic, magnetic tape, mechanical, photocopying or otherwise, without prior permission in writing from 325 Media Inc.

Now proudly unified under the AGTIV® co-brand to showcase their distinctive qualities, our proprietary technologies, BACILLUS and MYCORRHIZAE, remain unchanged.


If this edition is about how the pros grow, we couldn’t help but shine the spotlight again on Dr. Av Singh, one of our resident growing experts. Av has offered Garden Culture readers a wealth of excellent growing advice over the years, but his contributions to the world of agriculture far extend the pages of this magazine. Av is a proponent of regenerative growing techniques, has authored over 200 peer-reviewed papers, and has been invited to speak at hundreds of workshops, conferences, and university lectures worldwide. Although he’d never admit it, he’s kind of a big deal, and we’re honored to deliver his words of wisdom to you via our magazine.
Why did you make plants such a big part of your life?
As part of my doctorate research, I developed visual models of the regrowth of alfalfa under grazing. Making daily observations/ measurements of a plant gets pretty intimate, and that was the start of recognizing just how amazing the world of plants is.
How did you get your start in teaching Ag?
In my grad studies, I filled in as a lecturer for a diploma course on forages, with the majority of students being farmers. I fell in love with applied teaching and the notion that what the students were learning would be put into practice. Because forages and grazing management are not ‘Big Ag’ realms, the notion of farmer-led knowledge dissemination was quite popular, and that fueled my interest in pursuing a career in extension.
Are you currently growing any new and exciting plants in your garden?
Like most folks who like sweet cherry tomatoes, I fell in love with CV. ‘Sun Gold’, so now I am trying some heirloom varieties like Amy’s Apricot, Honey Drop, and Sunrise Bumblebee.
Where would you like to travel next?
I travel to India annually to teach Regenerative Organic Agriculture at Navdanya (Vandana Shiva’s Earth University). I want to travel to Iberia and Scotland soon with my family to enjoy the food and culture of Spain and Portugal and the whisky from Scotland.
If you could offer a beginner grower one golden piece of advice, what would it be?
Just Grow! There are some amazing books that I recommend reading, and I encourage visiting and volunteering on farms and gardens, but there is nothing better than getting out and putting in sweat equity and growing yourself. The old adage “Good judgment comes from experience, and experience comes from Bad judgment” applies to what we all do as farmers and gardeners.3
...there is nothing better than getting out and putting in sweat equity and growing yourself.

Are you interested in writing for Garden Culture Magazine?
We’d love to hear from you! Send us an email introducing yourself with a sample of your work editor@gardenculturemagazine.com


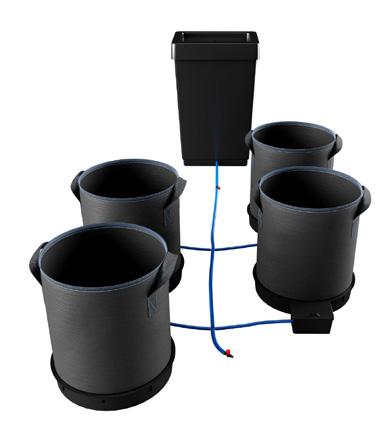
Introducing the 4 Pot XXL System, an innovative upgrade of our popular XL System. The XXL System boosts our largest pot sizes yet, a 9-gallon or 13-gallon fabric pot (13 gal pots pictured). Offering unmatched flexibility with its adaptive collar,The XXL System allows easy switching between pot sizes while using the same tray.
Crafted with organic living soil growers in mind, the XXL System features BPAfree, lead-free fabric FlexiPots, ensuring a safe and sustainable growing experience. Whether you need to upscale or diversify, the 4 Pot XXL System is designed with your needs in mind.
Go to AutoPot-usa.com to learn more about all of their systems.
Give your seedlings and cuttings the Mondi Advantage with the Mondi Mini GreenhouseTM. Available in 7- and 4-inch sizes, the patented Mondi Mini Greenhouse is the ultimate humidity dome, ensuring the highest success rates during plant propagation.The Perfect Fit system means both sizes will fit tightly on standard 1020 trays, and the Perfect 2 Finger Easy Vent allows for greater control of humidity levels for optimal environmental conditions. With the most space, your seeds, cuttings, and plants have more room to develop.The thick, heavy-duty, high-grade plastic maximizes light penetration and allows repeated use. Also available without vents. Ask for Mondi Products at your local grow shop. Available commercially from Quality Horticulture.
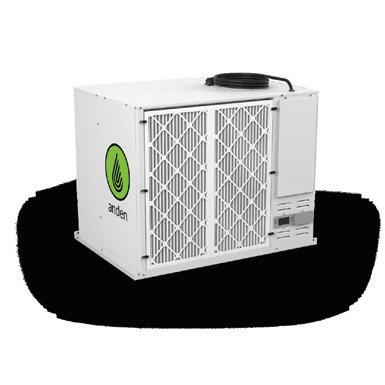
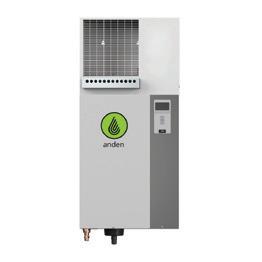
Designed and built for cultivation, the Anden A210V Dehumidifier is an industrial grow room dehumidifier that removes up to 210 pints of moisture daily, circulating air within your cultivation space to create a healthy, grow-optimized environment. Easy to set up, humidity is constantly controlled to help prevent crop disease and pests, whether starting seedlings, rooting cuttings, or drying. Humidity control is critical, and Anden helps create an environment that drives transpiration at an optimal rate.
Ready to get serious? Visit Anden.com
If you’re looking to stimulate the final stages of flowering and get a hard er, shinier crop, then Rokzbastic is for you! This award-winning flowering product is the ultimate cocktail of minerals and organic compounds for rock-solid, frosty results.


Visit Qualityhort.com for a range of products ideal for any grow.


Its unique PK of 10-20 and high potassium concentration ensure heavy and compact flowers and fruits. Enriched with 1% iron and essential elements, Rokzbastic supports vital plant processes for an abundant crop. Suitable for hydroponics, coco, and soil, Rokzbastic is also highly concentrated with a dosage of only 0.5-1 ml/L!
Order Rokzbas tic now at your local retailer and boost your crop!
Find out more: ATAMI.com

The first biostimulant solution developed at MIIM Horticulture, MIICROBIAL MASS PRO uses specific, functionally targeted beneficial bacteria to enhance plant success at every growth stage, from rooting to flowering. MIICROBIAL MASS PRO is compatible with all management practices, providing excellent results in synthetic and organic cultivation programs. This versatile product runs clean and will never lead to biofilm buildup, providing an excellent option for commercial cultivators who utilizQe automated fertigation systems. MIICROBIAL MASS PRO is a simple, compatible, and effective solution to improve overall plant health, plant quality, AND plant yield by an average of 15%. Find out why MIICROBIAL MASS PRO is North America’s #1 microbe product. Ask for MIIM Horticulture products at your local grow shop. Available commercially from Quality Horticulture.

Spidex (Phytoseiulus persimilis), Spical (Neoseiulus californicus), or a combination of the two, are highly versatile and effective in almost all situations. Phytoseiulus persimilis, found in Spidex Vital, Spidex Red, and Spidex Boost, is a type 1 specialized predator mite particularly adapted to hunting in heavy webbing. It also has the highest numeric response to spider mites. Unlike other predatory mites, the Phytoseiulus persimilis does not require specialized plant hairs to lay eggs, so it is better able to reproduce on plants lacking these hairs, such as cannabis or many ornamentals.
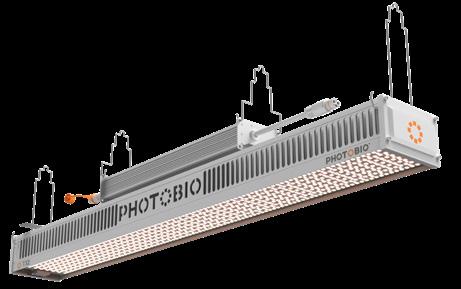
The latest innovation from PHOTOBIO, PHOTOBIO•TX2, is designed to revolutionize your growing experience.This cutting-edge lighting solution maximizes energy efficiency and cost-effectiveness, helping growers achieve unparalleled production potential. With 800 watts of power and a new S5 spectrum, the TX2 Top Light offers advanced technology and practical


Check out Koppert.ca to learn how to choose the right predator for your plants
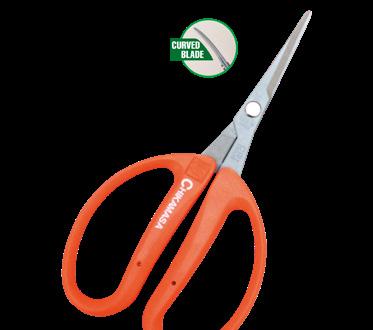
Made from the highest-quality stainless steel, the CRI550 shears by Chikamasa provide ergonomic comfort with a true curved blade. This curved blade design allows for more efficient and precise cuts, making them ideal for trimming and pruning plants. The innovative sap-resistant fluorine coating prevents buildup on the scissor blades, allowing for longer use between cleanings and more proficiency for even the most elite user. Ask for Chikamasa at your local grow shop.They are available commercially in Canada through Quality Horticulture.
Go to QualityHort.com to find the right shears for you.

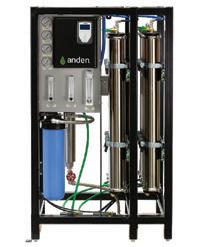
3,000–19,000 GPD


From the makers of TerpLoc®, ExIce prevents condensation build-up and freezer burn on fresh frozen flowers. It is UV-resistant, antimicrobial, antistatic, and fully water-soluble.

Your volatile aromatics remain safe from damage by preventing freezer burn and condensation build-up. Protection from static also means fewer delicate heads lost in storage.
• Extra durable
• Marine-safe water soluble
• Rapidly compostable

• MUST store in a cool, dry environment
• DO NOT handle with wet hands or store in humid conditions
• Suitable for cold-chain processing
The Eazy Block is the second step in the groundbreaking Eazy Plug Full Cycle system. Seedlings and clones propagated with Eazy Plugs can be transplanted directly into the Eazy Block to seamlessly continue growing through the vegetative stage. From its predeter mined and buffered pH and EC values to its self-regulating air-to-water ratio, the Eazy Block offers all the advantages of the famous Eazy Plug throughout the entire grow cycle.

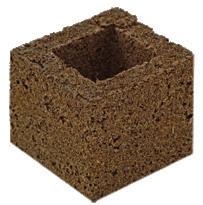
Ask for Eazy Block at your local grow shop. Available commercially from Quality Horticulture.
Visit Qualityhort.com for a range of products ideal for any grow.
Laboratory-formulated, handcrafted, and field-proven, HEAVY 16 Professional Plant Nutrients are the preferred choice for elite growers throughout the country. Powerful and practical, HEAVY 16 excels through the simple application of complex products to produce commercial yields of artisan-quality crops.
HEAVY 16 is designed for use in any media and environment. Superior ingredients, fewer bottles, and easy reservoir maintenance are the regimen’s hallmarks. Quality is the signature of the HEAVY 16 grower.


Zip Zag Ziplock bags offer ex tended freshness with airtight seals, preserving flavors and aromas in BPA-free, food-grade plastic. These reusable and dishwasher-safe bags pro vide sustainable storage for leftovers, meats, herbs, and snacks, keeping them microwave and freezer-safe. Designed for versatility, they protect against air and moisture, ensuring items stay fresh longer while containing odors. Manufactured in North America, Zip Zag prioritizes quality and durability, guaranteeing leak-proof storage through rigorous testing. Zip Zag bags set a new standard in storage excellence with their innovative design and reliable performance.
Available in black and transparent plastic.
Visit Biofloral.com for more info.
Learn more at Heavy16.com
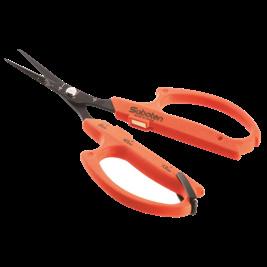
Experience unparalleled precision and comfort with Saboten Scissors, the ultimate tool for trimming and pruning that feature high-quality Japanese stainless steel blades and provide a razor-sharp finish and exceptional durability. The ergonomic design ensures natural hand movement, reducing fatigue during extended use.The fluorine coating prevents sticking and resin buildup, making them ideal for delicate tasks, and the innovative magnet repulsion mechanism in select models further enhances ease of use.
Available in various colors and styles, including round or angled slim tips, Saboten Scissors are perfect for professional and home gardeners seeking top-tier performance and reliability.
Available in Canada from Biofloral.
Visit Biofloral.com for more great gardening products.
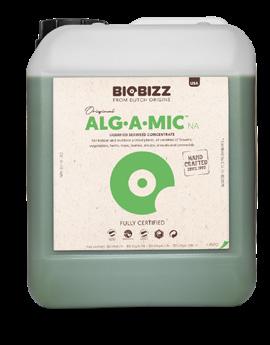
Developed with over 30 years of rigorous research and expertise from biologists, agronomists, and soil health specialists, DYNOMYCO™ ensures reliable performance. This concentrated formula, with 900 propagules per gram, improves nutrient uptake, resulting in healthier, more resilient plants and higher yields. It enhances stress tolerance for optimal growth in challenging conditions. Backed by proven scientific results, this inoculant can produce stronger root systems and up to 45% higher yields compared to controls.
Transform your gardening with this live, potent mycorrhizal inoculant, which surpasses standard products and delivers vibrant and thriving plants with every application. The concentrated formula is available in Canada from Biofloral.
Find out more: Biofloral.com


Symbiosis between fungi (myco-) and plant roots (-rhiza)
Assists 90% of plant species
Exists for 400 million years, known for 150 years, extensive research over 50 years
Effectively extends (10-100X) plant root system
Obligate mycotroph plants, require mycorrhizae to grow optimally
Rarely found in commercial growing media


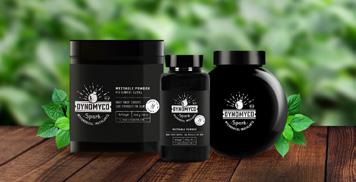
a unique blend of mycorrhizae, Mycorrhizae Helper Bacteria (MHB), and biostimulants - supports plants throughout the entire growth cycle. With mycorrhizae underpinning your rhizosphere, beneficial bacteria availing nutrients for your plants, and bio-stimulants enhancing growth, DYNOMYCO Spark gives your plants a head start with ongoing benefits.
HIGH CONCENTRATION = FASTER INOCULATION AND POTENCY
3600 endomycorrhizal propagules/g
Beneficial bacteria including Mycorrhizae Helper Bacteria (MHB)
Growth enhancers & biostimulants
THE DYNOMYCO® DIFFERENCE
BEST OF BREED


World's leader in Mycorrhizal production
Decades of R&D

DYNOMYCO Spark's unique wettable powder formula is easy to use. It is designed for use as a drench or in irrigation systems with a filter size greater than 250μm (less than 60 mesh).
BY DUSTAN MCLEAN

ver the past 30 years, I’ve seen many products come and go, with many that overpromised and underdelivered. These experiences have made me and other cultivators wary of the new ‘toys’ that come on the market—you know, the ones that entice growers with all the latest bells and whistles but fall short when it’s time to deliver results.
I’ve been disappointed more often than not, so I was very skeptical when a Neatleaf Spyder was installed in one of our rooms. Before I even began to learn how to use it, I had excuses for why it wouldn’t work. I’ve been down that road too many times.
Boy, was I wrong.

As I began to work with the Spyder unit and the Neatleaf team, I soon discovered how impactful this technology would be for current and future crops.
The Neatleaf Spyder helps my team remotely monitor and optimize each plant’s growing environment. It helps us understand our room’s environmental conditions from every angle. For room and crop management, we rely on the automatically collected data, which includes plant growth and health metrics, to make our decisions.
The user-friendly dashboard shows my team the zone status at a glance — summarizes the room conditions, and shows us the trends occurring, which helps us direct our attention to where it’s needed most. I no longer have to have a body in the room collecting the data manually — that valuable time can be spent doing other cultivation activities. Having multiple data points throughout the day is incredibly valuable — and not having myself or a staff member doing that work allows us to put those resources into other areas of the operation.
The AI component is also fantastic — instantly giving insights based on data that would normally take time to collect and extrapolate.
By automatically identifying plant stress multiple times a day across the complete canopy, we get a strong idea of overall plant health and trends in our room. With constant monitoring, hot spots and systematic issues become immediately apparent, allowing us to respond quickly by sending room alerts to our phones and emails if problems arise.
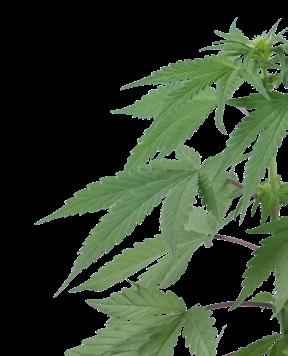
With 30 years of cannabis cultivation experience, Dustan has dedicated a good portion of his life to medicinal plants. He was a founding partner and Head of Cultivation/Master Grower for Parkland Flower Inc. He is now the Head of Cultivation and Master Grower for Big League Cultivation in Alberta, Canada. He provides incredible genetics to Canadian producers and selected flower and concentrates for the international market. In 2024, Dustan was named one of Canada’s Top 50 Cannabis Leaders. He is also a cultivation consultant with Chief Grow Officer Consulting. He is currently working on several projects, including developing a cultivar to help with opioid addiction and a drought-resistant variety.

The biggest advantage of Spyder is the imaging maps, which show air temperature, relative humidity, leaf VPD, air VPD, CO2 distribution, PPFD, and leaf temperature. This data helped us solve some challenging issues in one of our rooms. Without the visual data, it would’ve taken much longer to correct our problems.
Neatleaf was founded in 2020 to enable cultivators to grow their crops efficiently and sustainably. With offices in the San Francisco Bay Area and Munich, Germany, it brings together a multidisciplinary and diverse group of world-class professionals. Their talent comes from some of the world’s leading technology companies and research institutions. Neatleaf is committed to connecting people with plants and data and positively impacting our planet.

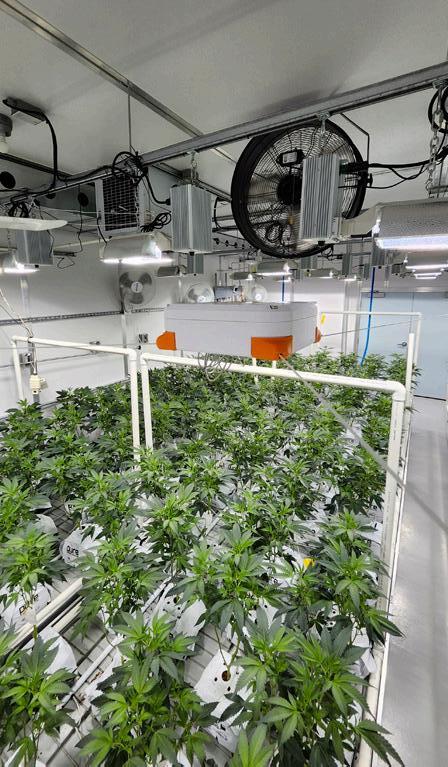

It helps us understand our room’s environmental conditions from every angle

cannabis offers more than buds
Microgreens are skyrocketing in popularity because of their nutritional status, rapid turnaround, and simplicity
What do you think of when you read the word “cannabis”? Most of us likely visualize large, mature plants with branches bending under the weight of resinous colas. After all, most growers cultivate the plant for female flowers that ooze cannabinoids and terpenes. But as one of the most versatile species on the planet, and one that humans have used for thousands of years for a long list of purposes, cannabis offers more than buds.
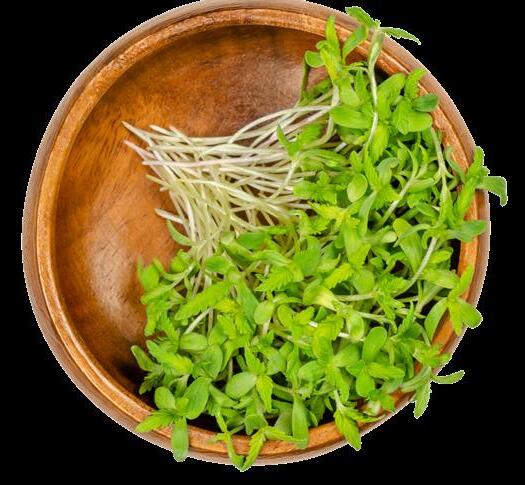
Cannabis seedlings are often viewed as a means to an end. Watching baby plants emerge from seeds is exciting, but they’re rarely seen as botanical products. The concept of microgreens might change how we view these small green shoots. Microgreens are skyrocketing in popularity because of their nutritional status, rapid turnaround, and simplicity. Broccoli, radish, sunflower, and pea are amongst the most popular microgreen options, but cannabis offers something that these flavourful species don’t: small concentrations of cannabinoid acids and flavonoids seldom found elsewhere. Below, you’ll discover precisely what microgreens are, what makes them unique, and how to grow them at home in approximately ten days, from seed to harvest.
They don’t require pesticides or fertilizers, demand much less water, and are ready to harvest far sooner
than their mature counterparts (1) For example, cilantro microgreens contain three times the beta-carotene content of older plants. Red cabbage microgreens offer 28-fold higher concentrations of lutein and zeaxanthin—two plant pigments that protect eye health—than mature plants. Carotenoids aside, several microgreen species also outperform older plants regarding minerals; broccoli microgreens house over twice the mineral content, including phosphorus, magnesium, and zinc. Because microgreens pump out such high levels of beneficial bioactive molecules, researchers are currently exploring how they might influence inflammation, immunity, and the microbiome.
Microgreens are seedlings. They differ from other stages of plant development based on harvest time. They’re older than sprouts, a product harvested a matter of days following germination, yet younger than baby greens, plants that possess more true leaves and are ready to pick and process around four weeks post-germination. Microgreens occupy the middle ground between these growth stages. By definition, they stand between 1–3 inches and feature three main components: a stem, a set of cotyledon leaves, and a set of first true leaves.
More than just an aesthetic garnish used in restaurants, microgreens have surged in popularity because of their long list of impressive traits. Studies show many microgreen species offer more significant quantities of beneficial bioactive molecules

Not only do microgreens offer superior nutritional value in many cases, but they take less of an environmental toll. They don’t require pesticides or fertilizers, demand much less water, and are ready to harvest far sooner. For example, broccoli microgreens take 93–95% less time to grow than mature plants and require approximately 200 times less water.
Does cannabis have a place as a leafy green alongside lettuce, spinach, and kale? Much like cannabis, all three of these species eventually go to flower. However, we use them for their nutrient-packed foliage during the microgreen and vegetative phases. While most cannabis growers dedicate their seeds to cultivating mature flower-bearing plants, the microgreen format also boasts some attractive properties.
you have likely noticed a sparkling frosty layer on the exterior. These translucent structures are known as glandular trichomes and appear in various forms, including the iconic mushroom-shaped capitate stalked trichomes. During the growing cycle, trichomes manufacture an array of secondary metabolites, including terpenes and cannabinoid acids. These molecules fulfill several essential functions, such as defending against predation and UV rays.
Does cannabis have a place as a leafy green alongside lettuce, spinach, and kale?
Alongside cannabinoids, cannabis also produces flavonoids—phenolic compounds known for their antioxidant effects. In addition to making common flavonoids such as kaempferol and quercetin, cannabis also assembles rare flavonoids known as cannflavins (4) that appear as early as the seedling stage. These molecules have demonstrated various beneficial effects in early studies, including anti-inflammatory activity 30 times that of aspirin (5)

Trichomes are most abundant in cannabis flowers but also occur early on in the growing cycle on the surfaces of cotyledons and first true leaves, meaning microgreens also offer the secondary metabolites produced by these structures. Research conducted by Louisianna State University (2) found cannabis microgreens possess an average cannabinoid content of around 1%. In raw cannabis, the cannabinoids most of us are familiar with, including THC, CBD, and CBG, exist in their acidic forms, THCA, CBDA, and CBGA, respectively. While all three of these cannabinoid acids have a low affinity to the receptors that make up the endocannabi noid system—the universal regulator of the human body—stud ies show that they activate receptors that belong to the expanded endocannabinoid system, known as the endocannabinoidome (eCBome). For example, THCA, CBDA, and CBGA bind to eCBome receptors known as PPARs, reducing insulin resistance and exerting neuroprotective effects produce anti-inflammatory effects by inhibiting the enzyme COX2, the same protein targeted by non-steroidal anti-inflammatory drugs. While cannabis microgreens contain only trace quantities of these compounds, how these concentrations tweak the eCBome in humans remains unknown.
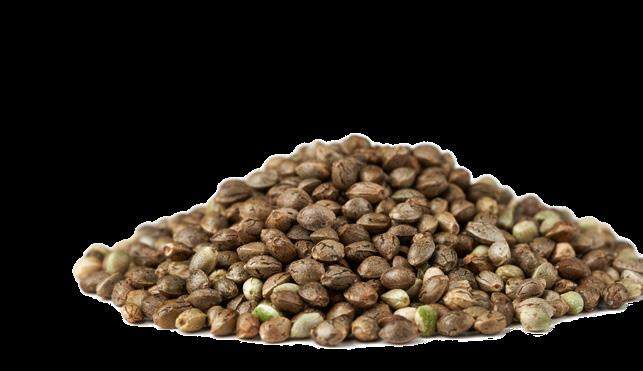
Now that you’re aware of the potential benefits of cannabis microgreens, it’s time to learn how to grow them. If you’ve ever purchased cannabis seeds, you’ll know they can be expensive. Hemp seeds are a much cheaper option. “Cannabis” and “hemp” are two names for the same species. “Cannabis” often refers to selectively bred drug-type cultivars that produce high concentrations of cannabinoids and terpenes.
You can eat cannabis microgreens straight, but they go down much better as a salad garnish or in a fruit smoothie

Before we get into the essential details, you’ll need the following to grow your cannabis microgreens:
• 100g non-sterilized hemp seeds
• Bowl or jar
• Sieve
• Seed tray with drainage holes
Alongside cannabinoids, cannabis also produces flavonoids—phenolic compounds known for their antioxidant effects
• Collection tray
• Soil
• Mister
To grow cannabis microgreens, purchase non-sterilized hemp seeds. Some manufacturers heat-treat seeds to prevent germination at the consumer end. Once purchased, measure 100g, pour them into a bowl, and soak them in non-chlorinated water. Chlorine exerts an anti-bacterial effect. Hemp seeds possess endophytic bacteria that help in the formation of root hairs. If using tap water, let it sit for 24 hours to allow the chlorine to off-gas. Leave the hemp seeds to soak overnight.

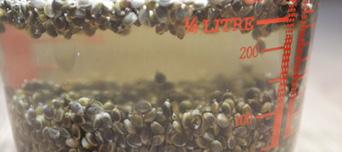
Pour the hemp seeds into a sieve to strain the water the next day. Fill a shallow seed tray with 2–3 inches of soil (a fine potting mix will allow the taproots to gain a quick foothold). Spread the soaked seeds as evenly as possible on the surface and gently firm them down with the back of your hand. Give them a mist to moisten the soil and place the seed tray on top of a collection tray to contain leaks. Place the trays outdoors in the garden or under grow lights indoors.
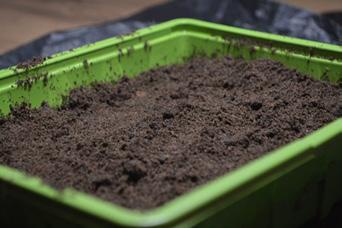


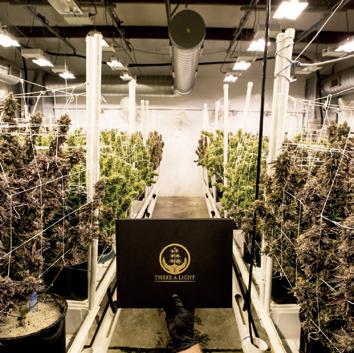



Young plants require at least eight hours of direct light daily for fast and healthy growth. Increased light exposure will also help to maximize cannabinoid acid content. Keep the trays in a sunny spot in the garden. The heat of a greenhouse will help to speed up germination. If growing indoors, aim to keep the trays under grow lights for up to 18 hours each day to prevent leggy seedlings. When the soil appears visibly dry, water from below using the collection tray to avoid getting foliage wet, which can increase the chances of damping off.

Get ready to harvest the crop approximately ten days after germination. You’ll know they’re ready to chop when the second set of true leaves is barely visible. Use a pair of scissors to cut them just above the soil surface. Keep your remaining microgreens in the soil as a living storage and use them on-demand.
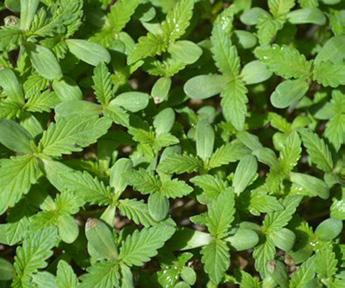

Healthy things typically share a common trait: they don’t satisfy the modern sugar-centric palate. You can eat cannabis microgreens straight, but they go down much better as a salad garnish or in a fruit smoothie. Enjoy every bite or sip, knowing you’re stimulating your eCBome with cannabinoid acids and nourishing your body with potent cannabis-derived flavonoids. 3
Sources:
1. The Science behind Microgreens as an Exciting New Food for the 21st Century. Uyory Choe, Liangli Lucy Yu, and Thomas T. Y. Wang (pubs. acs.org/doi/abs/10.1021/acs.jafc.8b03096)
2. Hemp Microgreen Mineral Content, Cannabinoids, Total Phenolics, and Antioxidants Schayot, Cheston Tyler. Louisiana State University and Agricultural & Mechanical College ProQuest Dissertations & Theses, 2021. 29111234. (rebrand.ly/88efe0)
3. Minor Cannabinoids: Biosynthesis, Molecular Pharmacology and Potential Therapeutic Uses Kenneth B. Walsh, Amanda E. McKinney, Andrea E. Holmes (rebrand.ly/unfnpcz)
4. Flavonoids in Cannabis sativa: Biosynthesis, Bioactivities, and Biotechnology Johanna L. Bautista, Shu Yu, and Li Tian. (ncbi.nlm.nih.gov/pmc/ articles/PMC7931196)
5. Biosynthesis of cannflavins A and B from Cannabis sativa L Kevin A Rea, José A. Casaretto, M. Sameer Al-Abdul-Wahid, Arjun Sukumaran, Jennifer Geddes-McAlister, Steven J. Rothstein, Tariq A. Akhtar (sciencedirect.com/science/article/pii/S0031942218303819)
BIO Luke has been a horticulture writer for over 10 years, covering soil science, cultivation, plant nutrition, integrated pest management, and organic practices. Fascinated by natural processes, he spends much of his time reading the latest scientific research on how microbes can help humanity grow better food without using chemicals. He’s growing produce in the north of England using a no-dig approach and homemade organic inputs.
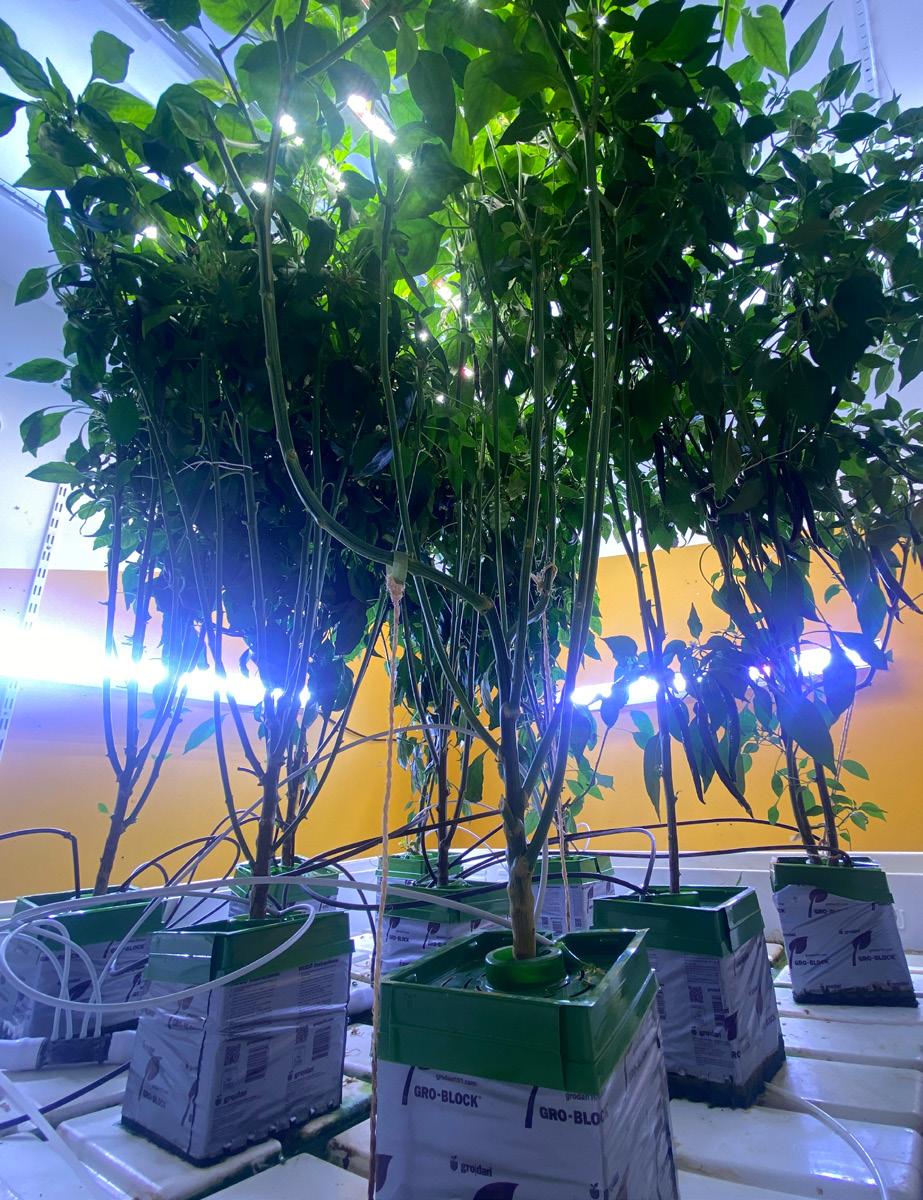
Side lighting complements top lighting. Additional lighting fixtures emit their light laterally (rather than downwards), so the sides of your plants benefit the most
Side lighting complements top lighting. Additional lighting fixtures emit their light laterally (rather than downwards), so the sides of your plants benefit the most. To fully understand why side lights are finding their niche, we must first understand the limitations of multi-array LED top lights.

Limitations? Don’t get me wrong. Indoor growers prize multi-ar ray LED fixtures for several good reasons:
• full spectrum output
• higher uniformity over the footprint
• incredible photon efficacy
• the ability to dim output without adversely affecting spec tral quality.
Sometimes, the diodes are controllable across multiple channels, allowing an adjustable spectrum. Multi-array LED fixtures can also be placed closer to the plant canopy than their legacy coun terparts, High Pressure Sodium (HPS). The light from the diodes on LED fixtures is highly directional, meaning no reflectors are required to bounce light towards the plant canopy.

Indoor cultivators using multi-array LEDs understand all too well the ‘canopy shading effect.’ Illuminating plants using the composite light produced from thousands of tiny, highly directional diodes positioned a few inches above the canopy results in significant shading. The source light is spread over a large spatial area, so any photon that finds its way through a crack in the canopy isn’t joined by many others (relative to the light’s total output), hence the huge drop off in measurable PPFD when a PAR meter sensor is held just a few inches below the canopy.
Of course, there are workarounds and mitigation strategies. On the light manufacturing side, some LED fixture designs condense the photonic output into one or two light bars rather than spreading it out over eight or ten light bars, as with multi-array. However, these commercial-style LED fixtures (e.g., Fluence Vypr & Vypr Duo, PHOTOBIO TXR) necessitate a greater distance from the canopy. Some manufacturers try to achieve a closer placement by using secondary optics (SANLight EVO) to broaden the spread of the fixture’s output.
Meanwhile, indoor growers have adapted their cultivation tech niques to suit the characteristics of multi-array LEDs. Some cultivators choose to grow a larger number of smaller plants using shorter veg periods (even with smaller plants, heavy pruning is still required early on). From hobby growers to commercial indoor farmers, it’s now relatively common practice for cultivators to strip away stems, leaves and growth tips that languish beneath the light-hogging canopy. However, defoliation is time-consuming and laborious, even within a relatively small indoor garden, often generating multiple trash bags full of discarded foliage. Essentially, all plant matter below the canopy is removed, save the main stems, leaving just bare stems beneath a full canopy—a process sometimes referred to as ‘lollipopping’. Not only is it highly inefficient for all this foliage to end up on the compost pile, but growers are effectively removing valuable carbon stores from the plant.
Increasingly, growers are looking to side lighting as a possible solution to the canopy shading problem. The goal is to reduce the reliance on time-consuming defoliation techniques, boost overall production, and increase crop homogeneity. Side lighting solutions can take various forms, from single LED light bars fixed on walls to multi-array, remotely-ballasted LED fixtures hung from their sides. In any case, more and more indoor cultivators are supplementing the output from their top lights with side lighting. So—is side lighting the future or just a fad? And if you decide to jump on board, what side lighting works best?
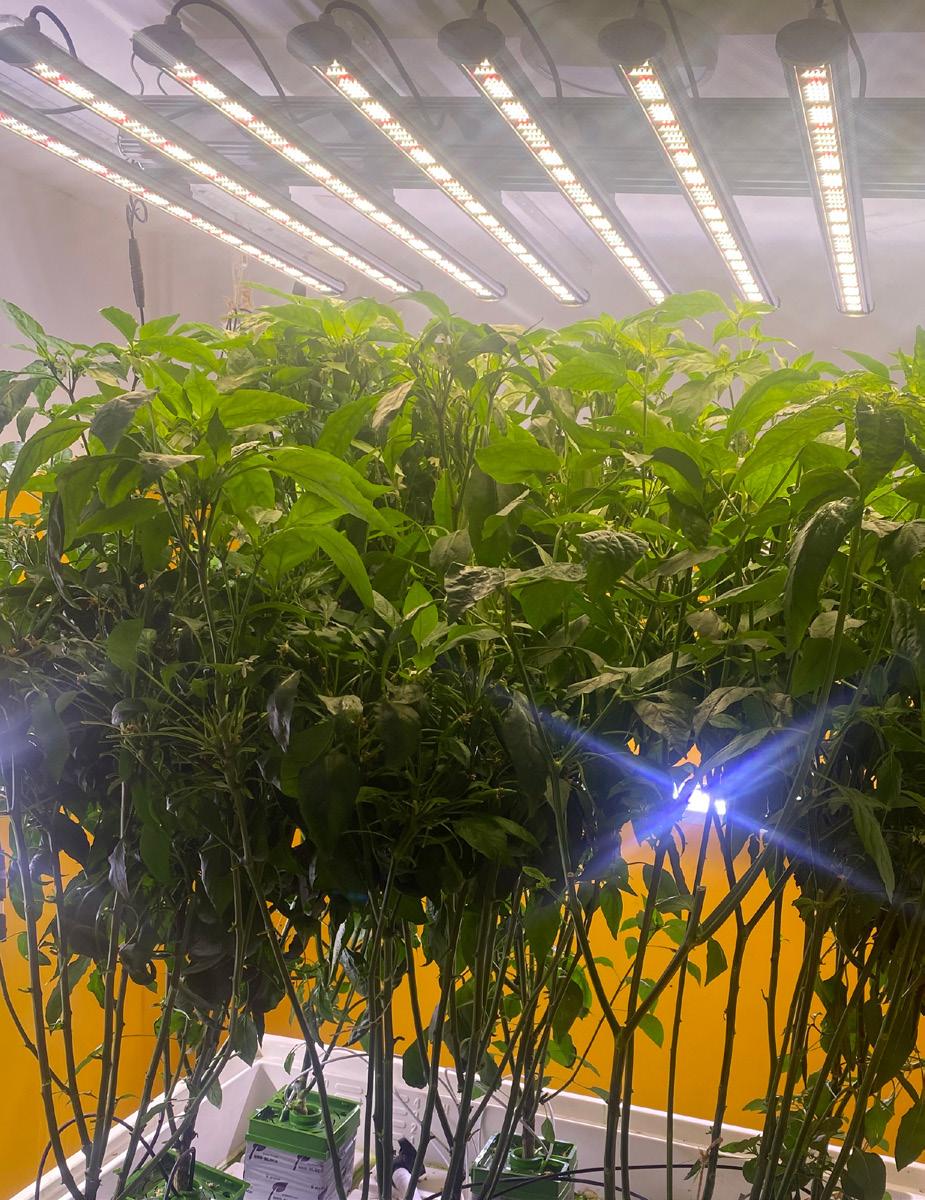
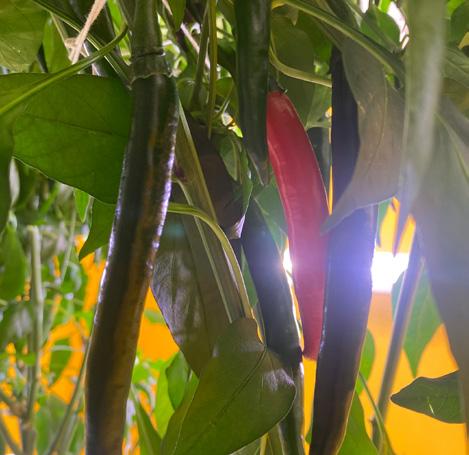
The light from the diodes on LED fixtures is highly directional, meaning no reflectors are required to bounce light towards the plant canopy
From hobby growers to commercial indoor farmers, it’s now relatively common practice for cultivators to strip away stems, leaves and growth tips that languish beneath the light-hogging canopy
1. Choose full-spectrum LED light bars that deliver a spectrum close to or identical to your top lights to ensure healthy and robust plant development.
2. Avoid ‘Notional’ Side Lights. Many ‘side lighting solutions’ touted online are underpowered and notional. Aim for a minimum of 150W of total LED side lighting power per 1.2 meters of garden ‘side’. Those 22W or 44W LED tubes should stay in your propagation chamber—they won’t carry enough oomph for side lighting applications for flowering plants.
3. Proximity is Everything. Position your side lights as close as possible to your plants, ideally between 30 to 50 cm, depending on power. This proximity helps maximize light absorption without overwhelming your plants with excessive heat or intensity.
4. Incorporate Early: Switch on side lighting as soon as your plants are tall enough to justify it, typically at the end of veg or the start of transition. This helps plants to acclimate and respond better to the enhanced lighting conditions, promoting balanced growth and mitigating the risk of light burn on leaves and fruits.
5. Adjust for Heat and Transpiration: Side lighting can elevate room temperatures, which can be good if you rely on heaters to keep your room warm enough. Note that your plants will drink more with side lighting, and you must step up irrigation frequency accordingly.
6. Ensure Safety and Efficiency: Side lights are arguably more prone to damage, so select robust, IP65 (or higher) rated fixtures to prevent damage and accidents.
7. Thermal Management is Key! Light bars should only be fixed to walls when there is sufficient air gap left
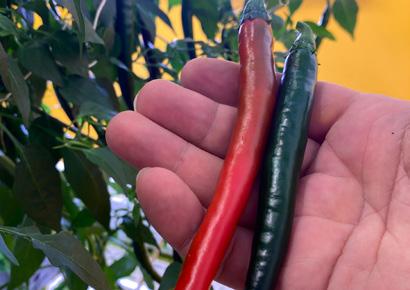
1. Don’t Skimp on Quality: Avoid settling for underpowered or poorly constructed LED solutions. Quality ensures adequate side lighting without the risk of system failures or inadequate light coverage.
2. Don’t Overlook Installation Angles: Incorrect positioning can lead to uneven growth or burnt foliage. Ensure your lights are evenly spaced and angled correctly to cover the intended area without direct hotspots on the plants. I position my side lights perpendicular to the top light.
3. Don’t Miss Plant Response: Watch for signs of light stress, scorched leaves, or wilting. If your plants show adverse reactions, adjust the light intensity, distance, or duration. If your plants’ leaves turn dark green, increase irrigation frequency or lower nutrient solution conductivity slightly.
4. Don’t Forget to Dim: Use dimmable LED fixtures to gradually increase light intensity, especially if, counter to my advice, you’re introducing side lighting to more mature plants. This prevents shock and allows for a smooth transition to new light conditions.
5. Don’t Neglect Regular Maintenance: Clean and inspect your LED fixtures regularly to maintain optimal performance. Dust and debris can reduce efficiency.
6. Don’t Underestimate Light Penetration and Defoliation Needs: Remember that different plant species have unique lighting requirements. Plants will often produce an abundance of side foliage in response to additional side light. If you are growing species that produce photosensitive flowers (those which benefit from direct light), you may still need to tactically remove foliage to increase penetration from side lights.
7. Be Careful using Side Lighting in Grow Tents: While some grow tent manufacturers have started offering (typically underpowered) clip-on light bars as accessories, they invariably don’t pack enough punch for the intended application. Powerful LED light bars build up heat, especially at the back of the light bar. Avoid contact between the light bar and the grow tent material. Remember, thermal management is critical for preserving the lifespan of your diodes.
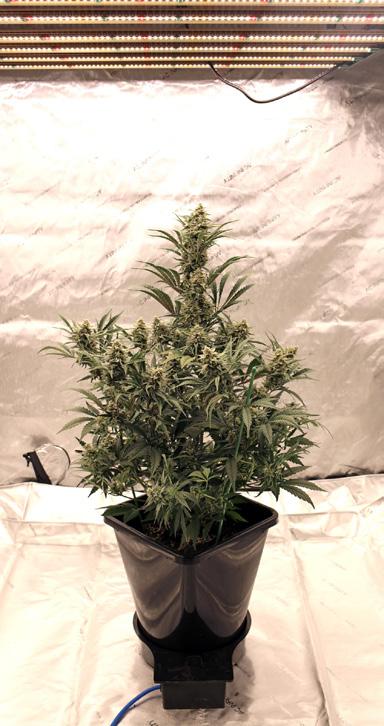


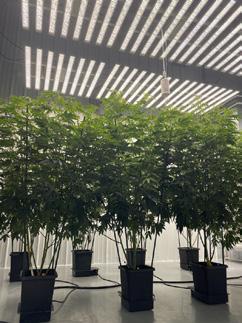
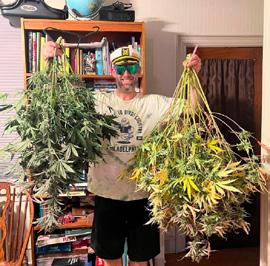
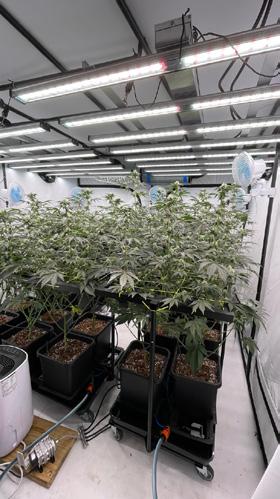

Embracing side lighting can significantly enhance your indoor garden’s productivity and crop homogeneity. You will notice that the qualitative difference between flowers and fruits at the top and bottom of the plant is markedly reduced. Sure, the top is always the top, but side lighting can give you more marketable produce—around 20% to 50%—and reduce your labor overheads. What’s not to love about that?
As a general rule of thumb, allocate 100W of side lighting power per 45cm (18 “) x 120 cm (4’) of ‘side’. So, if you’re growing plants that are 90 cm (36”) high, you should consider 2 x 100W light bars (arranged in an ‘equals sign’ formation).
Incidentally, the most side lighting power I’ve experienced was produced by ‘repurposed’ 660W twin bar fixtures (330W each light bar) with wide 140-degree optics. These worked best when dimmed down to around 50 to 60% power.
UK lighting manufacturer Maxibright has just released their second generation light bar with spectrum output, remote driver, and dimming capability. The fixture doesn’t come with side lighting fixings but can be easily adapted for side lighting. LUMLED white (3.0 μmol/J) and Osram red (4.15 μmol/J) diodes. 3-year warranty. IP65. (Driver IP40.) Claimed PPF: 280 μmol/s.
Very similar to the Maxibright offering. 5-year warranty. Claimed PPF: 295 μmol/s.
Available from April 2024, this light bar offers high light intensity, great coverage, RJ ports and onboard dimming control, along with a 3-year warranty. Samsung Mint White EVO + High Efficacy diodes. 100 - 277v. Samsung LM301B diodes. Far red diodes. No PPF claims.
Simple daisy-chaining installation supporting mounted, hanging, or inter-lighting configurations. Thin, narrow profile and full spectrum output. 3-year warranty. Claimed PPF: 255 μmol/s.
Everest Fernandez is a well-respected industry educator, veteran hydroponic grower and grow light enthusiast, based in France. He works primarily as a marketing and cultivation consultant and was the founding editor of Urban Garden Magazine in the UK, US and Canada. He also writes and researches for the popular hobby horticulturalist YouTube channel, Just4Growers. Bio
Side lighting has been found to significantly enhance plant growth, improve the internal structure and arrangement of chloroplasts in leaves, induce smaller stomata with higher density, promote stomatal opening, and improve photosynthetic efficiency, leading to enhanced branching and flowering in plants such as chrysanthemum. (Yang & Jeong, 2021).
mdpi.com/1422-0067/22/21/12019
Lighting from both the top and side can enhance photosynthesis and plant performance by improving light usage efficiency. This results in better branch formation and earlier flowering, suggesting that the optimal combination of various lighting directions can positively influence plant morphophysiology. (Yang, Song, & Jeong, 2022).
mdpi.com/1422-0067/23/5/2448
Polychromatic supplemental lighting underneath the canopy can enhance tomato plant development by improving leaf photosynthesis and stomatal regulation, demonstrating that proper light orientation and spectrum can significantly impact plant growth and development. (Song, Jiang, & Gao, 2016).
rebrand.ly/vgxwftp 3


INTRODUCING

home growers.
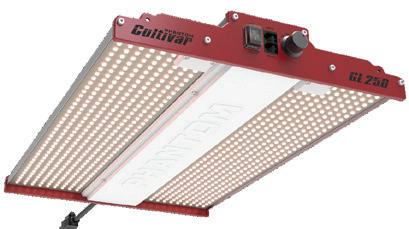
• Consistently Run 10C Cooler than Leading Brands
• Switch Between Veg and Flower Spectrum
• Daisy-Chain up to 4 Units Together (Cables Included)
•
• 5-year Warranty Supported by American Team
tent designed to grow plants anywhere indoors year-round.
• 200 lbs max weight capacity
• All-Steel Design and Framework
• 1680D Light-Proof Oxford Fabric
•


There is a
common misconception that you buy something once, and it should run perfectly forever without any
time, money or effort
It always amazes me when I arrive on a client’s job site to find they have not done any maintenance on their equipment, either preventative or because something needs repairing. There is a common misconception that you buy something once, and it should run perfectly forever without any time, money or effort. The reality is all equipment needs preventative maintenance and regular changes and replacements. I have opened a client’s air handling door many times and found it looks like the air filters are original to the building. Finding a layer of dust and mold caked to the filters is not all that uncommon in my experience.
There is an increased risk of equipment and crop failure without proper gear maintenance. While I understand most of these decisions are money-based, growers must realize that the first mechanical issue from lack of maintenance will cost more in crop losses than just fixing the problem in advance.
I recently worked with a client who had great and unfortunate luck with their air-handling equipment. They got the equipment for a deal, but for some reason, the unit or the power feeding the unit isn’t right, causing compressor failures sooner than most people would expect. Unfortunately, compressor failures seem to be a regular occurrence with multiple vendors. In this client’s case, a compressor had failed, but they decided to ignore the issue as it was only one of four. Recently, they lost another compressor, and then what seems to be a power issue killed the others. The real problem is
that the client did not fix the original compressor, so they had no redundancy when the other compressors failed. This client is now in week seven of flower with no active cooling, and they’re hoping the outside conditions stay cold so the crop doesn’t mold. On the flip side, another client had an equipment failure and replaced their unit. When another circuit broke, they didn’t lose a single penny in crop revenue.
Growers must remember to change filters, belts, oil and grease bearings. The consumerist frenzy is dictated by a use/ abuse/replace market, but industrial equipment in manufacturing and growing is generally not meant for single use. Continued maintenance and repairs to your facility equipment will result in years of repeated operation and bountiful crops. Without regular maintenance, it’s not if you have a problem; it is merely when 3
Without regular maintenance, it’s not if you have a problem; it is merely when.

Adam has provided planning and design services for cannabis and hemp cultivation and processing facilities over the last seven years with Stratus. His projects involve outdoor cultivation, indoor cultivation, drying, processing, extraction, storage, bottling and packaging, and more. Living on a hobby farm, Adam loves all plants, including flowers, vegetables, and microgreens, but is most passionate about hemp and is in awe of the fast-growing plant and all of the benefits it offers to humans and the environment alike.
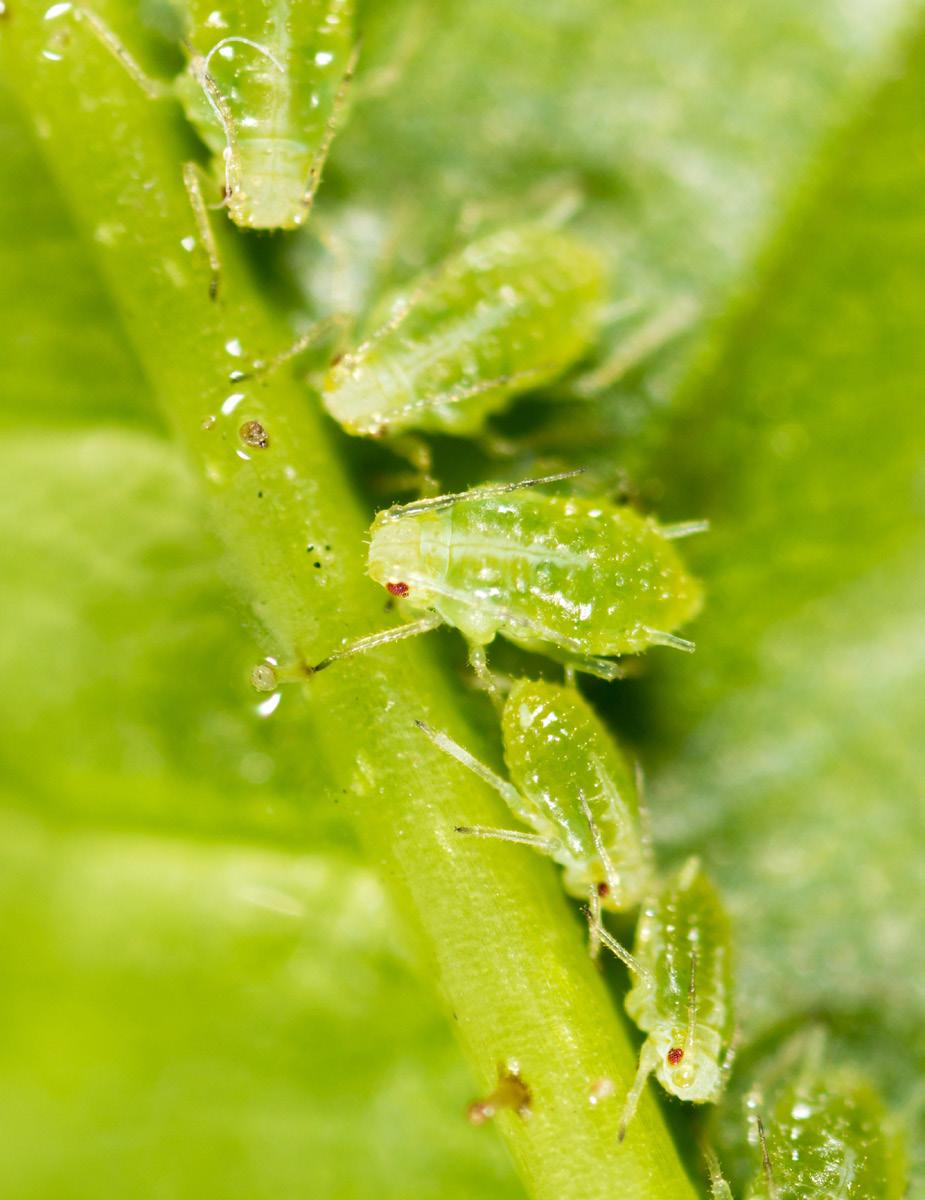
Pests in the garden are a headache, even for the pros

Pests in the garden are a headache, even for the pros. Walking into the garden to find an outbreak of insects, or worse, plants devasted beyond recovery, is a grower’s nightmare. We pour so much time and energy into propagating and growing the best plants we can; to lose a crop before a harvest is not an option for the professional grower.
Before a seed is placed in soil or a coveted clone is traded with friends, the professional grower has researched and used past experiences to guide their goals for the upcoming crop. Experienced growers know the nutritional and environmental needs of the crop and take it to the next level. Dialing in the nutrition program to avoid excess nitrogen leading to insect invasions, providing beneficial fungi and bacteria to the rootzone to outcompete root pathogens, or applying beneficial insects at the right crop stage to avoid outbreaks are all second nature to the professional. Recognizing the pests that want a piece of your garden, creating a preventative approach, and having a fallback plan for when those pests do show up is critical for a successful harvest.
Professional growers will often have the entire crop cycle planned out before planting. Anticipating the challenges and planning for when things go wrong sets the pro apart from the weekend gardener. This goes together with knowing the crop to predict where the challenges will appear. If spider mites are a constant issue for the crop, plans for managing them must be in place. A solid plan will have multiple options a grower can take, depending on the severity of the pest issue. This often includes a prevention plan and options for control when the issue comes up to minimize the damage. Lack of planning leads to reactive and poor decision-making from a panicked situation.
Pests in the garden are never a question of if they show up, but always when. Prepare for their arrival, even when it takes extra time and effort. When things are going well, these extra little things may seem like time wasted, but when I think back to some of the worst crop failures I have seen, they all could have been prevented with better planning and effort. Sometimes budgets are tight, but when it comes to minimizing pest problems, an ounce of prevention is worth a pound of cure.
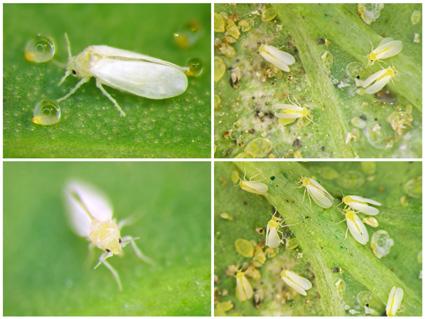
Don’t spend time and money trying to solve a fungus gnat problem in your soils only to find out weeks later you have root aphids that were misidentified
“I’ve been growing since before you were born” is a phrase I have heard all too often and usually in response to constructive criticism when dealing with a problem. Although sometimes true (there will always be someone who has been doing it longer), the phrase makes me cringe because that person is often unwilling to adapt to new challenges. Adaptability is a critical trait in many successful people, growers included. Whether it’s hemp russet mites spreading across the country or the emergence of Hops Latent Viroid in your mother stock plants, the professional grower adapts to the challenge and learns all along the way.
Having the right people to help out when a new challenge you haven’t dealt with before will keep you on track to finding the right solution. Use the experiences and challenges of others to guide you and ensure those people also have a solid knowledge base. Don’t spend time and money trying to solve a fungus gnat problem in your soils only to find out weeks later you have root aphids that were misidentified.
The growers who practice these traits and continuously learn from every crop will see success and have plants to be proud of. They recognize the limitations of their knowledge and experiences and search for insights from others. Everyone starts somewhere, and no one has all the answers. The professional understands this and becomes great at what they grow. 3
BIO Andrea has worked in the horticulture industry for over 20 years and specializes in using beneficial insects as the primary defense against pests. As a technical consultant with Koppert Canada, she works with growers advising on pest management strategies in crops such as greenhouse-grown vegetables and ornamentals. Andrea loves being in nature and is passionate about growing various food crops while supporting a biodiverse regenerative ecosystem.

Joni Mitchell wrote the song “Big Yellow Taxi” in 1970, which includes the famous lyric, “They paved paradise to put up a parking lot.” She later goes on to sing, “Don’t it always seem to go that you don’t know what you got ‘til it’s gone?”
There is so much truth to the melody, especially today as we battle the effects of climate change. But there is hope for us yet as people in cities worldwide tap into the importance of adding more green to their immediate surroundings. In some places, they even reverse Joni’s song lyrics and are depaving parking lots to create a little piece of paradise.
In some places, they even reverse Joni’s song lyrics and are depaving parking lots to create a little piece of paradise
Last year in Sherbrooke, QC, REVE Nourricier gathered community volunteers and partners, including Green Communities Canada (GCC), to dig up 105 square meters of asphalt to plant a mini-forest. Also known as microforests, tiny forests, and little forests, these spaces consist of a community of native trees and shrubs planted densely together following the Miyawaki method. Akira Miyawaki was a Japanese botanist who developed the micro-forest concept in the 1970s. His research discovered that these small-scale plantings grew very fast, often reaching “climax forest” status (the final stage of growth for major tree species) within about ten years, decades sooner than traditional forests.
“When you do the planting, it is with densely packed, mature forest species,” explains Jenn McCallum, Green Infrastructure Project lead at Green Communities Canada. “Usually three to five stems of trees and shrubs per meter squared.”
The selected trees and shrubs must be native to the area to give the micro-planting the best shot at survival. In North America, a tiny forest can include species like American beech, Bitternut hickory, oaks, and maples. Understory shrubs like Viburnums and Nannyberry are also excellent choices. Of course, site selection and preparation are critical for a thriving mini-forest.


Volunteers depaved the lot by hand and planted a Miyawaki mini-forest, bioretention ponds, and pollinator gardens featuring 400 native trees, shrubs, wildflowers, and grasses, all within a 200m2 area
“If the soil is relatively healthy, the site preparation can be as easy as laying down some cardboard or newspaper and adding some compost or mulch on top and letting that sit for a usually one season,” McCallum says. “So, if you were going to install the mini forest in the spring, you would usually do the site prep in the previous fall, or if you were going to install the mini forest in the fall, you would usually prep the site in the spring or summer.”
GCC typically recommends planting tiny forests in an area of at least 100m 2 but has also witnessed successful plantings in small backyards, underutilized corners of pocket parks, and ditches. The Sherbrooke group selected a planting site at the Conseil Sports Loisirs de L’Estrie (CSLE), a community hub and sports complex. The complex was once a hotel and medical clinic, and the old parking lot desperately needed rejuvenation. Volunteers depaved the lot by hand and planted a Miyawaki mini-forest, bioretention ponds, and pollinator gardens featuring 400 native trees, shrubs, wildflowers, and grasses, all within a 200m 2 area.
A relatively new concept in North America, Green Communities Canada has been working tirelessly with its partners to introduce micro-forests to urban communities

nationwide to help mitigate the effects of climate change. Part of a collaborative called the Network of Nature, the organization applied to Natural Resources of Canada for funding. It successfully ran a pilot project in 2023 and planted 16 mini-forests containing 6,000 urban trees in five Canadian provinces. The pilot project is over, but GCC continues supporting the micro plantings and is involved in 17 projects this year that adhere to the organization’s three pillars of green infrastructure planning: abundant, equitable, and thriving. Many of the mini-forests are being planted in areas where there isn’t already a lot of tree cover, where there might be some environmental contamination, or in BIPOC communities.
“What’s cool about the mini-forest method is because these trees are planted so densely together, they have a relationship with each other,” McCallum says. “Their roots go down into the soil, overlap, and we know there are relationships with fungal species. So, these plants can communicate with each other, share resources, and function as a community.”
After planting, the mini-forest requires three years of maintenance, including regular watering and weeding. Expect losses; not all the plants will survive. Once the three years of maintenance are complete, the mini-forest is selfsufficient.

Mini Forest Project in the Fundy Biosphere Region

Reve Nourricier Mini-Forest Little Forests Project
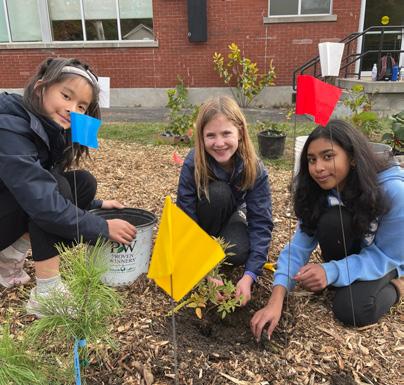
Reve Nourricier Mini-Forest in Sherbrooke, QC

Would you like to plant a micro-forest in a space near you?
Green Communities Canada offers a free online mini-forest course to help you every step of the way (no matter where you live!): green-communities-canada. thinkific.com/collections
These resources have been developed through the Network of Nature collaborative.
Once the three years of maintenance are complete, the mini-forest is self-sufficient
Hundreds of these micro-forests exist worldwide, and the research is promising. Evidence shows that dense plantings improve soil health compared to conventional tree plantings, likely due to the site preparation. Mini-forests are also believed to sequester carbon faster than traditional forests because their vertical growth is rapid. They help reduce the urban heat island effect and provide shade, and, of course, they offer opportunities for the community to enjoy the health benefits of spending time in nature.
GCC is currently working on a mini-forest project on an unused patch of lawn beside the parking lot of a high school in Peterborough, ON. The students help with site preparation, planting, and maintenance. They are learning essential gardening skills and how to cope with our problems of climate change, biodiversity loss, and eco-anxiety.
“Eco-anxiety [is when] people, especially youth, feel like they can’t make a difference and that climate change and biodiversity loss is a lost cause,” McCallum explains. “But, by contrast, mini-forests and other planting events give the opportunity for everyone to get their hands in the soil and make a real difference.”
The world needs more forests, and planting one might seem overwhelming, but micro-plantings bring the task down to a scale that feels within reach. Many resources exist to help interested folks throughout their planting ventures, including free online tutorials and planting kits.
At the end of my interview with McCallum, she shared a quote by Diana Beresford-Kroeger, the author of the book To Speak for the Trees: My Life’s Journey from Ancient Celtic Wisdom to a Healing Vision of the Forest:
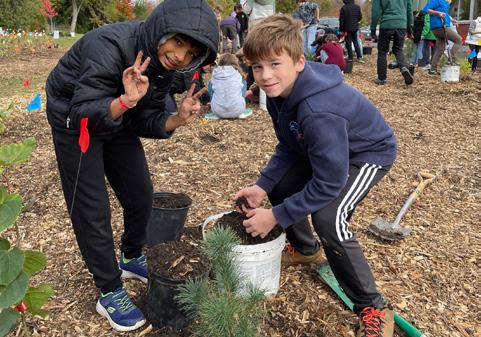

“If every person on Earth planted one tree per year for the next six years, we would stop climate change in its tracks.”
- Diana Beresford-Kroeger
This quote has impacted McCallum and should resonate with us all.
“For anyone feeling overwhelmed, we must do something,” she says. “We have to stay hopeful, and planting trees and mini-forests is a part of that.” 3
Catherine is a Canadian award-winning journalist who worked as a reporter and news anchor in Montreal’s radio and television scene for 10 years. A graduate of Concordia University, she left the hustle and bustle of the business after starting a family. Now, she’s the editor and a writer for Garden Culture Magazine while also enjoying being a mom to her three young kids. Her interests include great food, gardening, fitness, animals, and anything outdoors. Bio

BY JENNIFER COLE
Creating a bird-friendly garden can help birds be more resilient to the ongoing effects of climate change.

Most mornings, I wake up to a choir of swallows, chickadees, and the fluted tones of a wood thrush. They remind me of how essential their well-being is for the garden. Birds keep weeds in check, hunt insects such as snails or slugs, pollinate plants, and disperse seeds. A swallow, for example, can consume hundreds of flying bugs an hour, including aphids and white flies. Without birds, the garden suffers; and birds suffer without bird-friendly gardens.
An estimated 3 billion birds have disappeared in North America since 1970 [1] . Urban development has destroyed natural habitats, and agricultural pesticide and herbicide use has reduced food supplies. The biggest threat, however, may be climate change. The Audubon Society reports that our changing climate could affect two-thirds of North American birds [2]
“The steepest declines in bird populations are aerial foragers who rely on flying insects,” says Gregor Beck, senior strategist with Birds Canada and co-creator of the organization’s Gardening for Birds Initiative [3]
Birds are triggered to migrate due to warming or cooling temperatures in spring or fall, the availability of food, changing daylight hours, and genetic predisposition. They’ve honed their timing to match the hatching of insects and the greening up of foliage in spring. Those insects are also triggered by warming weather. If there is an early spring, those warm temperatures may cause an early hatch of insect larvae consumed by non-migratory species, leaving nothing for late arrivals to feed themselves or their young.
Researchers say that this unpredictability in weather patterns will continue for decades [4] . A bird-friendly garden will help our flying friends through these challenging times.
“You might think birds are getting most of their food from feeders,” Beck says. “But they are foraging far more diversely than you might think.”
Beck recommends thinking seasonally about planting. Birds love berries, so planting various berry bushes that produce fruit in different seasons provides a year-round food supply. Pinecones are full of seeds and offer delicious snacks for birds. Plant a conifer in the garden for structure. Instead
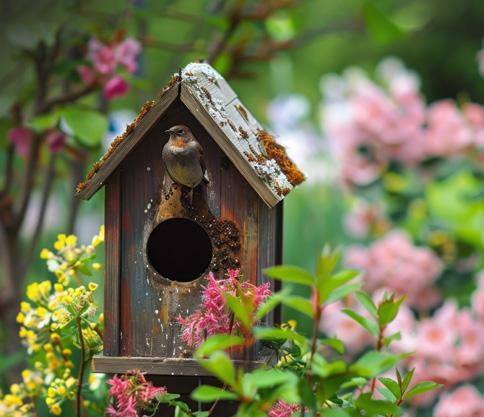

of cleaning up the garden in the fall, leave the drying stems and seed heads of plants standing. Even the stems of spent flowers can serve as hotels for insects and a food source for birds.
When designing a bird garden, choose perennial plants native to your region. Over successive generations, these plants have adapted to the soil and are better equipped to tolerate shifts in temperature and weather extremes caused by climate change. They’ve co-evolved to be habitats for the local insect populations that many birds rely on for food. They’re also the plants that birds in your region are the most familiar with and will look for first as a food source. Good choices are those that bloom on an upright stalk because their seeds are more accessible. Sunflowers are a prime example. Plant pollinator or wildflower gardens that attract insects, moths, and butterflies, and the birds will follow.
A bird bath or small fountain available year-round is a great addition to a bird-friendly garden. Birds need water for hydration and to wash their feathers (which helps them stay insulated). Even just a clean bowl or garbage lid filled with water is enough. Change the water every few days and keep warm water close by for non-migratory birds in the winter.
Birds seek habitats and nesting areas best suited to their individual needs. Since each species is different, create many different zones and options.


When
the time came to sell the house, he had logged over 80 different species regularly visiting the garden
“A corner with conifers offers places for smaller birds to roost overnight,” Beck says.
A brush pile in the back corner of the garden is a safe place for sparrows. The bird’s coloring blends in with the brush as camouflage. As long as they are not dangerous, let dead trees stand. They give cavity-nesting birds a home. Thorny brambles and prickly rose hedges are safe havens and secluded nesting spots.
When designing a bird garden, think vertically. Small changes in the landscape, such as a rock wall, create hiding places and habitats. Some birds prefer to forage in the trees, while others, like chickadees, like to observe what’s going on from the tops of small evergreen shrubs or trellises. Some birds prefer their feet firmly planted on the ground. Birdhouses at varying heights throughout the garden are great nesting places for finches and thrushes. And, of course, Beck is adamant about the importance of keeping cats inside.
When Beck bought his first home in Toronto, the yard was small, only 24 feet wide.
“There was nothing but lawn and a couple of ornamental trees,” he says. “In eight years, I turned it into a naturalized habitat for birds.”
As he slowly changed the urban landscape, birds began to show up. When the time came to sell the house, he had logged over 80 different species regularly visiting the garden.

A bird-friendly garden is a haven for birds and an interconnected ecosystem that benefits the native foliage and insects that call it home. As Beck writes in the Ontario Field Ornithologist newsletter, “the beneficial impacts continue to grow, and birds and other wildlife benefit further [5] .” 3
To learn more, go to birdscanada.ca . An interactive map helps you choose the right plants to attract birds in your region.
Footnotes:
1. Decline of the North American avifauna - PubMed (nih.gov)
2. Survival by Degrees: 389 Bird Species on the Brink | Audubon
3. Home - Birds Canada | Oiseaux Canada
4. Climate-driven changes in the predictability of seasonal precipitation (nature.com)
5. OFO News 42-1 2024.qxp
Additional Sources:
• Gardening for the Birds | Almanac.com
• What Do Swallows Eat? (Complete Guide) | Birdfact
• Migratory songbirds’ travels disrupted by earlier springs | UCLA
• Migratory strategy drives species-level variation in bird sensitivity to vegetation greenup | Nature Ecology & Evolution
BIO Jennifer Cole is a writer and garden enthusiast with a bachelor’s degree focused on history from Simon Fraser University, and a freelance writing career spanning two and half decades. Jennifer lives in Vancouver British Columbia. Her by-lines have regularly appeared in the opinion section of the Toronto Star and her portfolio includes articles in various newspapers, magazines, and websites across Canada. When not writing her own blog or visiting local garden centers, you can find her puttering, planting, and nourishing her own urban garden oasis.

While some cannabis farmers are content to sit back and ‘watch their plants grow,’ the top tier of commercial cannabis cultivators are not nearly so passive in their approach.
After all, premium-grade cannabis doesn’t secure its place on the top shelf by chance—it’s the result of high-quality cannabis plant genetics being ‘driven’ to produce the best stand-out cannabis flower available on the market.

Think of crop steering as a mixture of art and science. The ‘skill’ of observation comes from intuition borne of observation skills and cultivation experience; the ‘science’ is derived from data measured from environmental and rootzone sensors, as well as stability and consistency in other areas, including the volume of growing media per plant, light uniformity, and air circulation. In other words, crop steering is a ‘feedback loop’ of observation, experience, data, and action. The goal of cannabis crop steering is to exert the maximum granularity of control over your plants’ development every step of the way!
Every indoor cannabis grower already knows at least one basic crop steering technique: adjusting the photoperiod. Except for autoflower cannabis varieties (which commence flowering regardless of day length), cannabis plants will only
Think
of crop steering as a mixture of art and science
start the transition from vegetative to generative production once they consistently receive at least twelve hours of uninterrupted darkness each night.
Relatively few cannabis growers, however, fully appreciate that there are other ‘dials’ in addition to photoperiods that can be turned up and down during the cannabis life-cycle. By adjusting factors like irrigation frequency and shot size, nutrient solution composition and strength, lighting intensity and spectrum, as well as daytime and nighttime air temperatures and relative humidity, cannabis cultivators can induce flower development more rapidly, boost the production of terpenes and essential oils, and encourage ripening.

Substrate-based hydroponics is undoubtedly the way to go for the widest availability of crop steering tools
Substrate-based hydroponics is undoubtedly the way to go for the widest availability of crop steering tools. Growing without soil, where all nutrients are supplied in dissolved mineral form, confers the most control to the cannabis cultivator. Growers can not only precisely adjust the composition and concentration of supplied nutrients as their plants develop but also enjoy a high level of moisture control in the root zone.
Example: Allowing the growing media to dry back and create slight drought stress can help expedite the transition from vegetative growth to flowering. The ‘double signals’ of a reduced photoperiod combined with a drier root zone can be handy when taming cannabis varieties known for their tendency to stretch during transition.
Cannabis growers are not short on choice when it comes to hydroponic growing media, but one option truly stands out when it comes to maximizing plant health and crop steering potential: stone wool. Created from heat-expanded basaltic rock spun like cotton candy, no other soilless medium offers the same water and nutrient delivery control.

Unlike peat and coco-based potting mixes, stone wool is inert, meaning it doesn’t chemically interact with your nutrient solution. Stone wool won’t absorb nitrogen and calcium or interfere with your nutrient balance or pH in any way. The nutrients you mix up are the nutrients your plants receive. This special trait allows growers to recirculate their nutrient solutions, unlocking huge savings on fresh water and mineral nutrient usage. Additionally, stone wool doesn’t produce loose particles that require filtering and doesn’t contain tannins that can reduce the efficacy of UV sterilization, making it easier to maintain nutrient solution quality.
Pre-formed stone wool grow blocks offer a perfectly consistent canvas, with each plant enjoying the exact same volume of growing media. Root zone moisture levels can be precisely managed and replicated across the entire crop, leading to more uniform canopies that are easier and more efficient to illuminate.
This is just a tiny taster of the benefits of crop steering with stone wool. If you’d like to know more, sign up for our email newsletter, follow us on Instagram, Facebook, and LinkedIn, or don’t hesitate to contact us directly if you have any questions about leveling up your cannabis cultivation. 3
I’ve learned to garden with fundamental principles for plant and human health


Since studying biological farming, sustainable agriculture and the science of gardening, I’ve learned to garden with fundamental principles for plant and human health. Navigating challenging climate conditions can make it harder to grow healthy plants and get a decent food harvest. It is essential to plan and make decisions based on sound practices. These are some ‘ground rules’ I apply to swing success in my favor and garden sustainably.
We can never add too much organic matter!
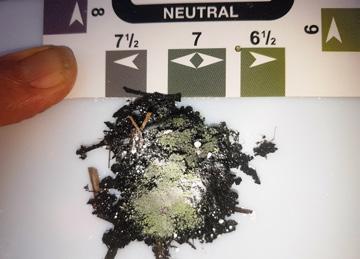
My priority is ‘Healthy soil = nutrient-dense plants + healthy people.’ Biologically active, fully mineralized soil is the basis for growing pest and disease-resistant plants, especially crops. All plants need access to 17 macro and micronutrients to reach their full potential. These mineral elements may already be in most soils but not all accessible due to soil pH, nutrient imbalances, moisture levels, soil type or structure. The optimum nutrient uptake of all these minerals is pH-dependent. I aim for a 6.4 soil pH to maximize mineral nutrition.
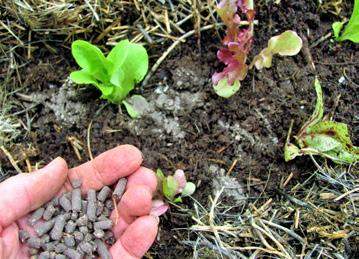
I add these nutrients as a balanced rock mineral blend when starting a new garden bed or container. This is like an insurance policy to ensure the full complement of minerals is present so the food I grow is fully mineralized. I top up with compost and organic slow-release pelletized nutrients throughout the growing season. I top-dress with nutrients in already established gardens at least every 6-12 months. This provides a soil ‘pantry’ for them to draw on.
I think of this process as creating a soil’ bank account’. I make nutrient ‘deposits’ into my soil that build a little nest egg or ‘investment’ so plants can self-serve minerals as needed. When I want to make a ‘withdrawal’ or harvest, I reap the rewards. If I don’t make new deposits, the nutrients run out, and the soil ‘account’ will be empty.
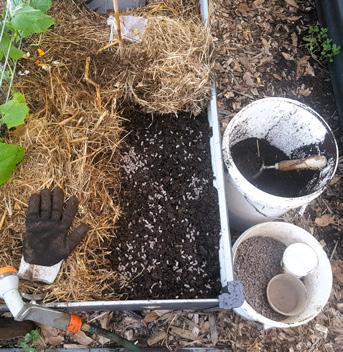
soil
I’ve noticed plants in neglected soil suffer from nutrient deficiencies, pest and disease attacks, and poor harvests. Moist living soil with good structure, drainage and balanced nutrition produces resilient, highly productive plants.
I ‘unlock’ the soil pantry and replenish the ‘account’ by following the 4 M’s.
1. Moisture – A healthy soil structure can hold 40-70% water and has good drainage and air pockets (oxygen) for roots to access between soil particles. The quickest way to improve moisture-holding capacity is to increase humus levels. I add organic matter like compost or well-aged manures, kitchen scraps and green garden waste. Worms and soil invertebrates turn this into water-retentive, nutrient-rich humus for roots to access. Plants’ drink’ nutrients in a soluble form, so the soil should feel like a moist sponge, aerated and fluffy but not waterlogged.
2. Minerals/Organic Matter – Remineralizing soil is vital for nutritious, flavorsome food. I liquid fertilize the soil and foliar spray leaves with diluted seaweed, comfrey or stinging nettle ‘tea’, worm leachate or fish emulsion regularly. This boosts macro and micronutrients for healthy growth. I also apply worm castings to the potting mix and seed-raising medium to inoculate the soil with microbes and minerals.
3. Microbes —Soil microorganisms are friends with benefits. They have a mutually beneficial relationship with plants and feed each other. Moist, aerated, covered soil provides the perfect habitat for them to move in. Bacteria love simple carbohydrates, so I water in diluted molasses to boost populations. Fungi promote plant immunity, protect them from disease, help build a crumb soil structure and deliver nutrients. They are worth pampering! Liquid kelp or seaweed feeds them and provides a rich source of minerals.
4. Mulch —I always layer mulch around every plant to protect the soil, add organic matter, provide a habitat for microbes, and lock in soil moisture. It’s the ‘icing’ on the soil’s cake.’ I use soft bacterial-dominant grassy mulches like sugarcane for vegetables and herbs and apply forest mulch around woody perennials to support the fungi community.
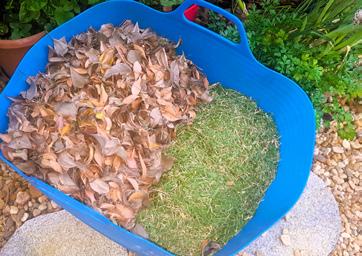
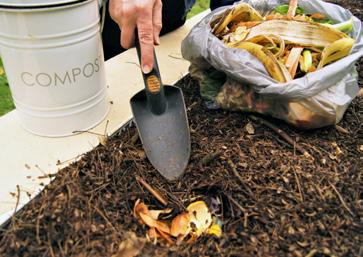
Nothing goes to waste in my garden. Nature doesn’t have a garbage dump! Recycling nutrients from the kitchen to the garden in a closed-loop cycle is cost-effective, sustainable, and energy-efficient. Compost helps increase the diversity of soil microorganisms, feeding our plants.
Raw ingredients that build organic matter include grass clippings, vegetable scraps, fallen leaves, twigs, decaying plant matter and shredded paper. Compost systems and worm farms improve soil. We can never add too much organic matter!
I aim to replicate natural ecosystems to sustain plant health and life. These are a few examples.
• Cover the soil. Dead and decaying plants and animals start building healthy, living soil on a forest floor, recycling nutrients back to the earth. A thick layer of leaf litter gives way to seeds germinating in the sunlight, and new life starts again. Easy ways to cover the ground include adding a layer of mulch, growing living ground covers, and planting closely to reduce weed competition.
• Create an environment to optimize soil life. In our native garden soil, there is a vast population of free laborers heading off to ‘work’ each day. The “Soil Food Web” members, bacteria, fungi, protozoa, nematodes and arthropods
are soldiers - tirelessly toiling in our soil. Their ‘job descriptions’ include turning organic matter, nutrients, minerals and moisture into plant-available food and detoxifying pollutants. Best of all, these ‘free workers’ have the potential to help us grow abundant, nutrient-rich food.
I don’t thank them for donating their time to improve my soil for free, but I still let them know I care. I encourage healthy, diverse microorganism populations by:
• Minimizing soil disturbance or digging.
• Growing as many different kinds of plants as sustainable to provide a diverse banquet of food for microbes.
• Make sure soil is always covered to provide habitat and shelter.
• Avoiding chemicals of any kind.
• Create a healthy ecosystem for easy pest management. Insect pests are only a problem when their numbers get out of hand. So, I encourage predatory insects to visit my garden and naturally control pest populations. It’s as simple as planting diverse flowering species, a chemical-free environment for habitat, and fresh water. However, it also means having a tolerance for ‘some’ level of pest insects. As these are a food source for the beneficial creatures, I can’t have a ‘zero tolerance’ pest policy, or the good guys will never arrive. I tolerate some damage because the principle is give and take

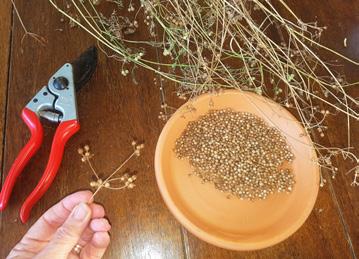
Saving coriander seeds from my garden

First quarter prolific growth moon cycle

The “Soil Food Web” members, bacteria, fungi, protozoa, nematodes and arthropods are soldiers - tirelessly toiling in our soil
• Optimize biodiversity. I recognize my garden is an ecosystem that is part of the neighborhood. Birds, insects and animals don’t recognize boundary ‘fences’! They are an integral part of a healthy garden. Growing diverse varieties of trees, shrubs, flowers, and edible plants encourages greater biodiversity and species richness. Many insects and birds provide beneficial ecosystem services like pollination and pest management. I provide habitat, water and year-round flowers for shelter and food. Pollinators, predatory insects, frogs, skinks and insectivore bird species are now abundant, reducing my workload.
I also practice biodiversity by interplanting rather than growing the same plant in rows. When do we see ‘rows’ or straight lines in Nature? Resilient ecosystems have diverse plant species from different plant families. Ground covers, shrubs, and trees of various heights contribute to biodiversity. Crop rotation of annual edibles also encourages biodiverse microorganisms, breaking the life cycle of soil-borne pathogens and pests. I’ve found these strategies minimize pest and disease problems.
Good hygiene practices include:
• Avoid bringing any diseased plants into the garden.
• Removing and destroying diseased plant material promptly.
• Cleaning secateurs and garden equipment to avoid spreading pests or diseases.
I never use:
• Synthetic fertilizers or non-certified organic products.
• Chemical pesticides, herbicides or fungicides.
• GMO or treated seeds.
• Chemically treated wood, PVC plastic and other garden supplies that may leach toxic substances into the soil.
Math was not my favorite subject at school. I was more of an artsy, creative writer. I loved Biology, Art, and English. I wanted to explore colors and textures, play outdoors, and write in my diary or journal.


Our solution for fresh frozen has a new name, and revolutionary new technology.
ExIce prevents condensation build-up and freezer burn. It’s also UV-resistant, antimicrobial, anti-static, and fully soluble in water.

LEARN MORE
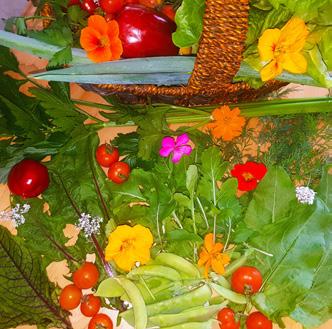
Healthy vegetables herbs and flowers in my raised beds in the kitchen garden
I give my garden time, energy and resources and enjoy the rewards
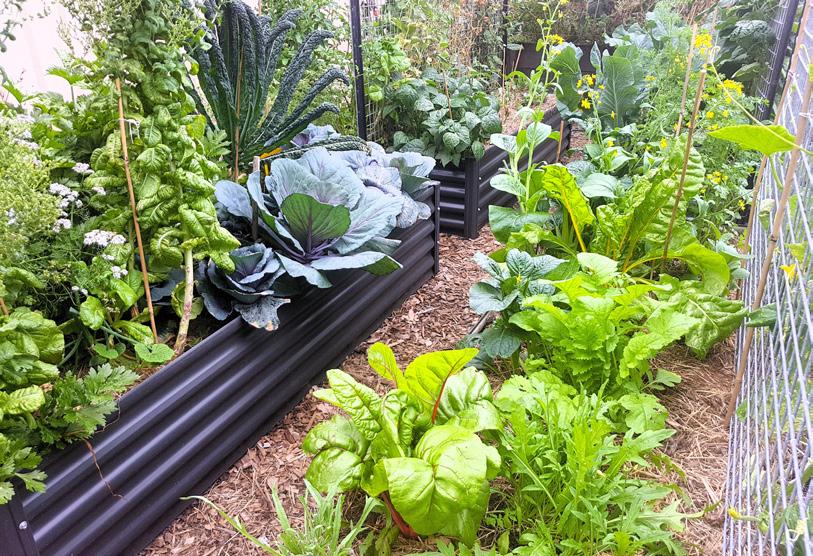
However, I understand one equation well in real-world math. If you keep taking from your soil, sooner or later, you won’t have anything left to withdraw from this wealthy reserve of nutrients. I practice the Law of Reciprocity in the context of ‘what we sow, we reap’. I give my garden time, energy and resources and enjoy the rewards. I have realistic expectations and don’t expect my soil to produce abundant, nutritious food continually.
I grow seasonal varieties suited to my climate. SE Queensland, Australia has five seasons, each with unique weather patterns, temperatures and challenges. I select species that grow well here. I also follow the monthly moon phases to fine-tune planting, fertilizing, pruning and propagating. I work in harmony with the moon’s gravitational influence over the rise and fall of water on Earth in plant sap, the water table and soil. By ‘moon gardening’ I can:

• Speed up seed germination.
• Get higher yields and faster harvests.
• Encourage or discourage plant growth, which is especially useful for lawn mowing and hedging in summer.
• Fertilize for faster uptake.
• Take cuttings when they have the most nutrients for quick root development.
My final principle is to save seeds and take cuttings from the best-producing plants. I select those with valuable characteristics. Plants that are high-yielding, pest- and disease-free, flavorsome, and colorful and produce early or late harvests are at the top of the list. Plants adapted to my garden soil and microclimates will also be far more resilient than new seeds that may have been grown in an entirely different location or conditions. Growing plants for free is not only sustainable but incredibly rewarding. With these principles in mind, gardening is more often a joy than hard work. I can sustain my garden, and in turn, it sustains me. 3
Anne Gibson, The Micro Gardener, is an author, speaker and urban garden community educator on the Sunshine Coast, in Queensland, Australia. Anne is passionate about inspiring people to improve health and wellbeing, by growing nutrient-dense food gardens in creative containers and small spaces. Anne regularly presents workshops, speaks at sustainable living events, coaches private clients and teaches community education classes about organic gardening and ways to live sustainably. She has authored several eBooks and gardening guides. Anne shares organic gardening tips and tutorials to save time, money and energy on her popular website - TheMicroGardener.com
Garden Culture Magazine talks to author and gardening expert Gary Lewis about his book, “The Complete Book of Ground Covers.”
Author Gary Lewis has done an about-face regarding low-growing plants. “Ground covers, to me, seemed mundane,” he admits.
But with a master’s degree in botany, a love for research, and his experience as the owner of the retail and mail-order nursery Phoenix Perennials in Richmond, B.C., the book publisher Timber Press pegged Lewis as the right person to tackle the topic [1] During the writing process, Lewis developed an appreciation for ground covers as being the unsung heroes of the garden.
“The more thinking and researching I did, the more I realized that [ground covers are] a fantastic group of plants,” he says.

Ground covers keep weeds in check and act as sponges, sequestering carbon and producing oxygen

The “Complete Book of Ground Covers: 4000 Plants that Reduce Maintenance, Control Erosion, and Beautify the Landscape” was published in 2022 [2]. In 2023, it won a Golden Laurel Award from Garden Communications International and was re-published in Japan this past spring. It took Lewis nine years to write a book he initially thought would only take two or three years to assemble. Running a busy nursery meant he could only research and write during the winter months.
“If you say you want an encyclopedia, I will give you an encyclopedia,” Lewis says.
Lewis describes ground covers as incredibly diverse and having tons of variety. He touts them as one of the most sustainable elements you can add to any garden, and from a visual point of view, very aesthetically pleasing. They are low maintenance, require less water than other garden plants, and are great for large or small spaces. They will even find a place in the heart of a container gardener.
“Most are small and can be tucked into a container and don’t require a lot of soil volume,” Lewis says.
Their shallow roots mean they do not compete for nutrients or water with already established container plants. No matter where they are planted, ground covers provide various ecological services. They create habitats for garden wildlife and beneficial insects, something Lewis points out that turf lawns cannot do.

During the writing process, Lewis developed an appreciation for ground covers as being the unsung heroes of the garden





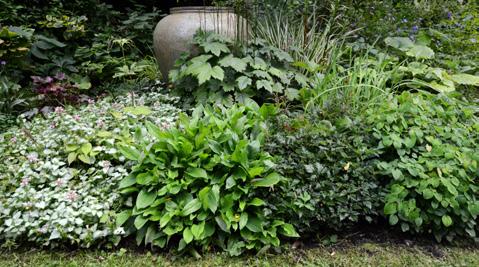

Layer them into perennial borders, plant them between cracks and crevices or under the canopy layer to add warmth and magic to the space
Perfect for the regenerative garden, ground covers, especially evergreen varieties, act as permanent mulches, shielding and protecting the soil during the heat of summer and the cold of winter. Both extremes can suck moisture out of the earth, leaving it dry and void of nutrients and microbial life, affecting the health of all plants. Ground covers keep weeds in check and act as sponges, sequestering carbon and producing oxygen.
Many consider creeping thyme, garden phlox, and moss typical ground covers. But there’s so much more available to gardeners. Lewis has visited gardens worldwide and has seen firsthand the multifaceted use of plants as ground covers. Hundreds of hosta planted close together to form a carpet was not unexpected. However, Lewis was surprised after walking into a New Zealand garden and seeing a climbing hydrangea with nowhere to climb. Instead, it sprawled 2030 feet along the ground and about a foot and a half high, forming a billowing white ground cover.
Choosing which plants to include and exclude from the book was difficult. As a general rule, Lewis tried to keep the included plants under two feet tall. The plants featured in the book are all geared toward the temperate climate zones of North America, Europe, New Zealand, parts of Australia and Asia. However, Lewis suggests researching what will work in your garden based on your soil type, climate zone, and light requirements before planting. Some ground covers, like sedums, can tolerate full sun, while others prefer shady conditions.
He advises against buying 100 pots of sweet woodruff or creeping juniper to replace a turf lawn. Instead, buy three or four different types of ground covers, dig up a patch of grass, and see how they react over a season before making a final decision. For other garden areas, Lewis suggests using ground covers as finishing touches to the landscape, like a throw cushion in your living room.
“When I give garden talks about the book, I like to use the analogy of interior design in how to apply and use ground covers,” Lewis says.
For example, the larger lamps and shelves are trees and shrubs, the paintings on the walls are vines, and at the end of all the decorating, there are ground covers. Layer them into perennial borders, plant them between cracks and crevices or under the canopy layer to add warmth and magic to the space.
Does he have favorites? Lewis says Sedum tetractinum “Coral Reef” or Sedum forsterianum ‘Antique Grill’ rank high on the list, but please don’t hold him to that [3][4]
“It’s kind of like wine. People ask what your favorite wine is, and it depends on what you are eating and pairing it with your food,” Lewis explains. “Ground covers are similar; it depends on the situation”.
Without any shadow of a doubt, Lewis has proved that ground covers are anything but mundane, a sentiment echoed by horticultural expert and author Brian Minter, who writes in the Vancouver Sun.
“Lewis’s attention to detail and the introduction of many wonderful ground-cover plants that we can use to enrich our gardens is a significant contribution to our knowledge of the world of plants [5] ”. 3
Footnotes:
1. Nursery & Garden Center | Nursery Richmond, BC | Garden Center Richmond | Phoenix Perennials (phoenixperennials.com)
2. Complete Book of Ground Covers - Phoenix Perennials and Specialty Plants (phoenixperennials.com/complete-book-ofground-covers)
3. Sedum tetractinum’ Coral Reef’ - World of Succulents (worldofsucculents.com)
4. Sedum forsterianum ‘Antique Grill’ Outdoor Succulent | Baker City, Oregon — The Succulent Hub (the succulenthub. com)
5. I bet your favorite gardener would love copy of new ground-cover book | Vancouver Sun (rebrand.ly/d69e13)

visit www.grow-genius.com or Instagram.com/grow_genius for more on the most concentrated AND best value mono-silicic you can get
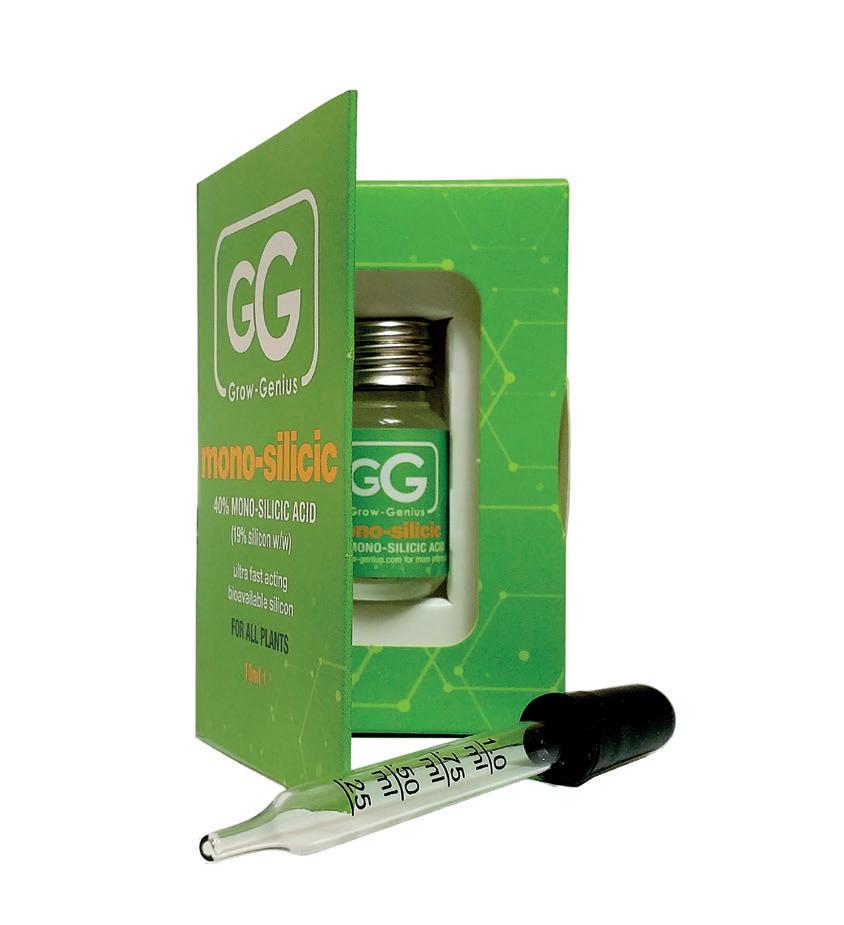


Farmers and gardeners are notorious for not recognizing their wisdom and intuition

not)
Farmers and gardeners are notorious for not recognizing their wisdom and intuition. All too often, they delegate “simple” tasks to less seasoned employees who unknowingly perform their responsibilities without the care and attention required. In farming and gardening, no task is more complex than watering, and unequivocally, it is the task that is done most poorly and leads to subsequent plant health issues. In controlled environment agriculture (CEA), the most common questions asked are, “How much water do I give and how frequently should I water?” and as any good consultant would respond, my answer is, “Well, it depends,” reminding them that watering is not for dummies!
Water is the universal solvent; we are about 60% water; plants are about 80% water; water is life, and the fun facts are endless, but when farmers water their crops, they should think about creating the right environment for their plant’s roots. Other than anchorage and energy storage, the primary function of roots is to facilitate water and nutrient uptake while maintaining the ability for gas exchange. In organic systems, nutrient availability is facilitated by microbes within the rhizosphere, allowing elements and molecules to enter the plant passively via osmosis in water or actively pumped across channels and membranes. The energy required to do so comes from respiration, where the plant root takes in oxygen to reduce carbohydrates like glucose (the end product of photosynthesis). Soil biology and soil chemistry take much of the glory regarding soil health. However, soil physics is mainly responsible for creating a root-friendly environment, which includes ample air pockets for gas exchange. Water with adequate dissolved oxygen (5 to 10 ppm) will help ensure the proper microbial populations and provide the necessary oxygen for respiration and nutrient uptake. Some common overwatering symptoms include leaf curl (low turgor pressure) and leaf yellowing (lack of nitrogen) triggered by anaerobic conditions hampering nutrient uptake.
Understanding your soil type and plant’s needs will help determine the amount and frequency of watering required for your crop
The most significant influence on your watering regime will be your crop choice and the media in which you choose to grow it. Ideally, you have selected a crop suited best for your environment in terms of temperature, photoperiod, and humidity but have also considered soil type. Some plants can tolerate “wet feet,” meaning they can survive and even thrive in saturated soils or poor drainage. In contrast, most plants prefer welldrained soils, and once again, this primarily draws on soil biology and physics. Understanding your soil type and plant’s needs will help determine the amount and frequency of watering required for your crop. Most plant roots require 100% humidity at all times, or the root tips may die back. The vast majority of water and nutrients are taken up at the root tip, and if they die, a root must regenerate a new root tip before growing forward. A media designed to allow for depletion zones is always best to stimulate advanced root growth. Once a root has absorbed all the water and minerals in a particular zone, it will extend itself in search of more, thus creating a more robust root system with increased surface area.
Often overlooked, water temperature significantly impacts plant growth and vigor. Plant roots cannot regulate their temperature, and once temperatures in the soil or media go outside the Goldilocks zone (for most plants, root zone temperature of 15°C to 24°C), plants will go dormant as a result of limited root system functionality, such as slowing down enzymatic reactions or altering microbial populations. Drastic fluctuations in root temperature can cause significant stresses in a root system, increasing the plant’s susceptibility to pests and pathogens. For most of the growing season, especially in controlled environment agriculture, water temperatures will range between 16°C and 20°C. Water temperatures exceeding this point will create a more hospitable environment for pathogens like Pythium or fusarium and, therefore, should be avoided.
A technique employed by many growers is called dry back. Commonly used as a crop steering practice, dry backs cause a depletion of available water and create a zone with higher nutrient concentrations, mimicking what happens in summer months. More commonly used by growers using stone wool or coco, carefully managed living soil systems can benefit from dry backs if the soil has ample wetting agent to allow the media to re-saturate. Whether watering by hand or using automated watering via emitters, many gardeners follow two fundamental rules:
1. Transpiration before irrigation - meaning they will get into a routine of having the first watering event at least an hour after sunrise (or lights on).
2. The last irrigation event will be at least a couple of hours before sundown (lights off).


Commonly used as a crop steering practice, dry backs cause a depletion of available water and create a zone with higher nutrient concentrations, mimicking what happens in summer months

These two principles help ensure a dry back, allowing air pockets to recharge. It is important to note that the language used is “routine” and not “recipe.” Watering should be done around the same time every day as a routine, but the grower ultimately has to decide whether the plant needs watering.
For too long, watering has been viewed as an afterthought, a less important variable than lighting or nutrients
Although not ideal for efficiency, hand-watering with the proper nozzle can be the best irrigation method. The best hand waterers are patient because watering should mimic gentle rain, not tidal waves.
The next most important influence on your watering routine is the environment. Farm laborers are often blamed for overwatering or underwatering a crop when the real culprit is an unstable environment. Fluctuations in temperature or humidity will have concomitant effects on water uptake (and, by association, nutrient uptake). High temperatures coupled with lower humidity will cause excessive water loss, and plants may wilt from drought, while the opposite is true for low temperatures and high humidity.
In this situation, transpiration is reduced, and water is not being taken up as readily. If your watering routine is not modified, you will create a saturated soil with plants exhibiting symptoms of stress. In CEA, the perfect storm for molds and mildews arises from an environment inhibiting water uptake, which would limit calcium uptake, resulting in weaker cell walls, and presto, a fungal germination tube can more readily penetrate the leaf surface and infect the plant. Once again, Nature can be a great reminder of the difference between routine and recipe. Cloudy days and days with high humidity must be met with changes in irrigation amounts and frequency to prevent overwatering.
For too long, watering has been viewed as an afterthought, a less important variable than lighting or nutrients (and this article does not even address the importance of water quality). More recently, there has been an increased emphasis on root zone manipulation, and companies are creating sensors that measure soil moisture and dissolved oxygen in soil water, etc. These tools will undoubtedly help in the future, but farmers must continue to hone their intuition on what a healthy plant looks like and place greater value on the role of watering. 3
Water is the lifeblood of agriculture. As a critical member of the garden’s holy trinity, water is a thirstquencher and carries essential nutrients vital to your garden’s development. The quality of water used in irrigation can profoundly affect the quality and yield of the produce; but how deep does that rabbit hole actually go?
Water quality refers to water’s chemical, physical, and biological characteristics, which determine its suitability for various uses, including irrigation. Key players in the gardening context include nutrients, metals, hydrocarbons, industrial chemicals, and conventional variables like pH, total dissolved solids (TDS), conductivity, and suspended sediment.
Imbalances in these factors and contaminants like lead, arsenic, or microbial pathogens can wreak havoc on plant health and pose significant risks to human health when eaten, especially raw.
As a critical member of the garden’s holy trinity, water is a thirst-quencher and carries essential nutrients vital to your garden’s development
• Tap Water: Pulled from the municipal water supplies of localities. It may contain chlorine and other disinfectants that can harm some plants and beneficial soil microbes; it is highly unpredictable as it varies geographically. Letting tap water sit in an open container for a day can help dissipate some chemicals.
• Soft Water: Water with a very low mineral content. It is good as a baseline but needs nutrient supplementation to avoid malnourished plants.
• Hard Water: Predominantly found in groundwater and may be found in municipal water supplies and wells. Packed with high calcium, magnesium, and sodium levels due to percolation through limestone, chalk, or gypsum deposits. Some plants tolerate it; others might not.
• Rainwater: Great for healthy plants and happy budgets, but may need nutrient supplementation. Depending on its collection method, it could become contaminated, as runoff from roof tiles and gutters can carry many chemicals.

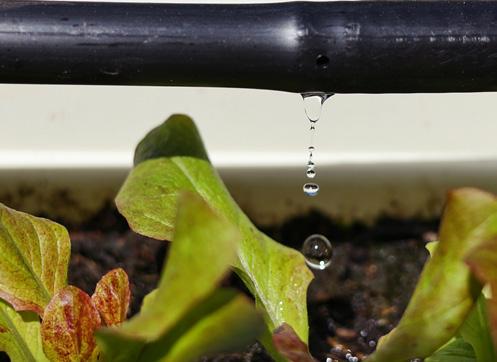
• Distilled Water: Made from vaporizing water and cooling it down, relatively free of salts and most contaminants. Needs supplementation with nutrients.
• Reverse Osmosis (RO) Water: Made from pushing water with great pressure through a semi-permeable membrane. It’s ideal for most plants as it’s almost entirely free of salts and contaminants, but it needs nutrient supplementation.
• Recycled Water: Highly filtered and disinfected wastewater. Use with caution.
• Grey Water: Untreated household wastewater from showers and washing machines. Best for non-edible plants due to the risk of bacteria and viruses.
• Well Water: Untreated and may contain harmful bacteria and hard water, which can stress plants. Test it before you use it.

Water is so much more than an afterthought in your gardening efforts; it’s a key piece of the foundation for a thriving, healthy garden
Gardeners can adopt various strategies to mitigate the effects of poor water quality on their plants:

Water quality affects plant health in several critical ways. Clean water promotes efficient nutrient uptake, vital for photosynthesis and plant growth. In contrast, water with imbalanced pH levels or high contaminant concentrations can inhibit nutrient absorption and disrupt metabolic processes, leading to stunted growth and poor yields. Harmful pathogens in irrigation water can also introduce plant diseases, further compromising their health and productivity.
Different types of fruits and vegetables respond uniquely to variations in water quality, too. Leafy greens, such as lettuce and spinach, are particularly sensitive to contaminants and imbalanced pH levels, which can cause leaf discoloration, reduced growth, and increased susceptibility to diseases. Root vegetables like carrots and potatoes can absorb heavy metals from contaminated water, leading to growth issues and potential health risks for consumers.
If irrigated with suboptimal water, fruits such as tomatoes and strawberries may suffer from poor flavor, texture, and nutritional quality.
Water quality affects plants and is crucial for soil health. Highquality water helps maintain optimal soil pH and ensures the availability of essential nutrients.
Conversely, poor-quality water can alter soil pH and introduce harmful substances that disrupt the balance of soil nutrients and hinder healthy microbial activity, vital for nutrient cycling and plant health. For instance, excessive salts in irrigation water can lead to soil salinization, reducing soil fertility and crop productivity.
Curious about what’s in your water? A water quality analysis might be in order. Depending on your budget, you can consider a basic testing kit; these commonly consist of small color-changing strips used for detecting common contaminants, such as nitrates, lead, and copper. If you want to get down and dirty, you can order a comprehensive DIY lab test: collect a sample, send it to a lab, and receive a detailed report.
1. Water Treatment Solutions: Filtration can improve water quality before it reaches the garden box.
2. Regular Monitoring: Checking water sources and soil conditions to detect and address quality issues promptly.
3. Best Practices: Implementing crop rotation, organic fertilizers, and integrated pest management can help mitigate adverse effects.
4. Eat Clean: Always wash any produce with clean water before eating!
Gardening is all about balance, and water quality is no exception. It can lead to healthier plants, which means higher yields and superior produce with improved flavor, texture, and nutritional value. Healthy plants are also more resistant to pests and diseases, reducing the need for chemical interventions and promoting more sustainable farming practices by supporting healthy soil ecosystems.
Water is so much more than an afterthought in your gardening efforts; it’s a key piece of the foundation for a thriving, healthy garden. By understanding and improving the water you use, you’re nurturing your plants and fostering a sustainable and bountiful ecosystem; keep this in mind next time you reach for the tap! 3

BIO Raised with an emphasis on the importance of clean water, Keaton Haines brings a unique blend of expertise to the world of gardening through his copywriting background. A keen eye for detail and passion for verdant landscapes drive him to explore water challenges and solutions in the grow industry. With water quality concerns on the rise, Keaton is committed to empowering gardeners with the knowledge to foster clean and contaminant-free gardens. When he’s not writing, Keaton can be found lifting weights, hiking outdoors, or cultivating his cactus collection — all while listening to new classes and podcasts.
BY GARETH HILL

he intensity of light at the canopy level driving your plant’s growth is intrinsically linked to the amount of CO2 in its surrounding environment. If you give a lot of one without giving a lot of the other, you could miss out on some potential untapped yield.
Brace yourself for some science. Don’t be scared.
Photosynthesis is a process in which plants create energy. They do this by turning CO2 from a gas into a solid. The gaseous CO2 is taken in by the plant and converted into a solid sugar used as energy for growth.
The whole process is simplified and explained with the following equation:
Water + Carbon Dioxide Sugar + Oxygen (H2O) (CO2) (C6H12O6) (O2)
This is a straightforward process, right? Unfortunately, it’s not quite so simple. It results from two processes inside a chloroplast (a cell in the plant) where the ultimate goal is to be as efficient as possible in energy production as a whole system.
Each stage is individually responsible for breaking down the primary inputs, water and carbon dioxide, to create energy (sugar). The only actual ‘waste’ of this process is oxygen, which humans, fortunately, use to breathe.
The two processes are typically represented in the following diagram:
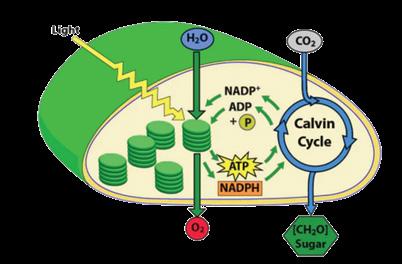
Photosynthesis happens in two stages. One depends on light levels, the other on CO2 levels.
By using water (H2O) and capturing and converting the energy from photons of light, ATP (Adenosine Triphosphate) and NADPH (Nicotinamide Adenine Dinucleotide Phosphate) are produced. These are essential base ingredients to complete sugar production in the next stage.
This stage of photosynthesis does not need energy from light and is responsible for turning the once-gaseous carbon dioxide into sugar/energy. Once the sugar is made, the remaining stages of the Calvin cycle produce all the components needed to begin the whole process again.
As the light-independent cycle does not need light to continue its function, the production of energy (sugar) is only limited by the amount of ‘ingredients’ produced in the light cycle during the day (or the general metabolism of the plant due to temperature at the time—but that is beside the point for now).
Therefore, the more ‘ingredients’ (ATP and NADPH) you can get your plant to make in the first stage (light-dependent) of photosynthesis, the more energy (sugar) your plant can make for itself in the second stage (Calvin Cycle). The more energy a plant can make for itself, the more energy it has to put into growth, ultimately leading to a more productive harvest.
If you give a lot of one without giving a lot of the other, you could miss out on some potential untapped yield

You can’t just ramp up your light levels (PPFD) at the canopy without an adequate and relative rise in your CO2 levels
Look at it like a production line with two guys trying to make something. The first guy makes an ingredient for the second guy to make the final thing. There’s no point in the first guy making too many ingredients if the second guy needs more final material to process it all. Vice-versa, there is no point having loads of finishing material for the second guy if that lazy bastard first guy doesn’t make enough base ingredients for the second to use. They both need to work at a rate relative to each other.
You can’t just ramp up your light levels (PPFD) at the canopy without an adequate and relative rise in your CO2 levels. Well, you can, but you won’t have enough CO2 even to process all that lovely extra light, and you will also likely end up with a bunch of knockon environmental impacts that result in symptoms of a deficiency if you did. In other words, you may waste all that extra light that you spent all your birthday and Christmas money on.
Suppose you use premium LED light technology (like the super awesome DIOTECH lights) and the equivalent amount of wattage in an area you previously used with HPS. In that case, you are in this exact scenario.
Premium LED lighting technology will give 3.0umol/W, whereas HPS gave roughly 2.0umol/W. That’s half the light again for the same amount of wattage.
If you took your old 600W HPS light out of your tent and rammed in a swanky 600W LED equivalent, you would probably have about 150% of the light you’re used to. That’s a lot more light for the plant to deal with, and ensuring that the plant can handle everything would be nice.
If you are at elevated light levels, you must elevate your CO2 level. It’s that simple.
The amount you raise your CO2 levels depends on how much you have elevated your light levels. This can be done at a basic level with a calculation of your fixture’s total Light output (PPF) compared to your floor space, although getting equipment to measure is much better (further details of how to measure and control PPFD accurately can be found in future articles).
The following graph represents the rise in CO2 you will need depending on the CO2 you deliver. Although anecdotally, there have been instances of people using higher light levels than this with LED lights. The following provides at least a foundation on which to start with.

Yes, it involves buying some new kit. Fortunately for you, there are many ways to skin a cat.
Compressed CO2 bottles have longevity but mean awkward and frequent cylinder replacement. Gas burners often provide unwanted heat and can be a source of carbon monoxide. Fortunately, here at Greenspirit, we have formulated the perfect solution for a hobby grower to brew their CO2 in the comfort of their own home, negating many of the cons of other CO2 options.
With dedicated controllers that dose the exact amount you set, all you need to do is refill the canister as required, and your plants will finally use every extra photon you can throw at them! 3
BIO Gareth Hill is an International Purchasing Manager with over 20 years of experience in the hydroponic industry. Specializing in strategic sourcing and product development, Gareth has successfully navigated complex international markets to find and develop hydroponic equipment.


Carbon is the fundamental material of all living organisms. Plants absorb carbon through photosynthesis, store it in all parts, and use it for plant growth. Soils in our gardens store carbon in organic matter and remove human-caused emissions from the atmosphere.
Gardening is an excellent way to help slow climate change. We can help reduce damage caused by drought, flooding, wildfires, and other severe weather events by growing shade gardens, which conserve soil and water, absorb carbon dioxide, offer windbreak, and help regulate temperatures. Choosing resilient plants that prefer partial to full shade is essential. Add plants on the north side of homes or fences or in the shade of trees. When making a shade garden, assess your landscape, as you would for any garden: soils, sun exposure, moisture, hardiness zone, and existing plants.
These gardens include a tree canopy, a mid-level (understory) composed of smaller trees and shrubs, and a ground level of perennials and grasses
Protect the soil from damage during droughts and floods. In times of drought, have a plan for watering the trees, even the mature ones. Cover the ground with plants and use mulch on paths to help the soil retain moisture and lower temperatures.
Trees play a prominent role due to their size and foliage. Prune trees to open canopies and let in scattered light, allowing a greater range of shade plants to thrive in the ground layer. This process reduces
the number of branches that hold snow and are most likely to break during storms. Prune out weak and dead wood.
Choose fast-growing trees. Look for ones that are known for standing up to strong winds. Trees with smaller leaves may have less damage during storms. Conifers, on the other hand, have more damage in tornados and other windstorms when branches with dense needles catch the wind and break.
A middle layer of smaller trees and shrubs will protect people and wildlife from wind and sun. Consider using various plants and resist cleaning the garden in the fall and raking off all leaf litter so native insects can take refuge in the winter. The soil’s texture, fertility, and water-storing capacity improve as the garden litter decomposes. Soil cared for in this way is less likely to wash or blow away.
Plan a shade habitat garden where wildlife will thrive with plants that fill birds’ and butterflies’ food and shelter needs on each level. These gardens include a tree canopy, a mid-level (understory) composed of smaller trees and shrubs, and a ground level of perennials and grasses.
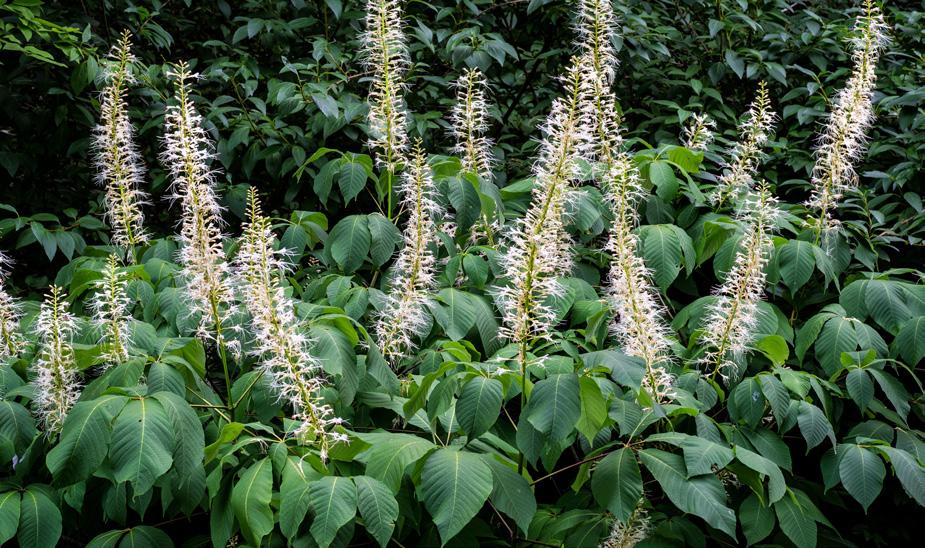
tree, Liriodendron tulipifera

Native plants exhibit resiliency, toughness, and habitat support. Planting under mature trees requires a close examination of the root zone. Depending on the characteristics of the different trees, their root structures may make your tasks more complicated, such as trees with roots that grow close to the surface. Avoid cutting tree roots while planting. Oaks grow throughout the North American continent; choose the one most adapted to your climate. Other suggestions for the tree canopy include:
• Honeylocust, Gleditsia triacanthos sp.
• Northern Red Oak, Quercus rubra
• Tulip tree, Liriodendron tulipifera
Medium-height trees can serve as canopy trees in newer gardens and small spaces. Group the smaller ones together to create a shady space for favorite perennials. Many of these trees have colorful blooms in the spring. Like oaks, some grow in several zones, but each area has unique choices for various light conditions.
• American Hornbeam, Carpinus carolinia
• Serviceberry, Amelanchier sp.
• Eastern Redbud, Cercis canadensis
• Pagoda Dogwood, Cornus alternifolia
• Magnolia, Magnolia sp.
We can help reduce damage caused by drought, flooding, wildfires, and other severe weather events by growing shade gardens, which conserve soil and water, absorb carbon dioxide, offer windbreak, and help regulate temperatures.
Bottlebrush Buckeye, Aesculus parviflora
The mid-layer includes large and medium-sized shrubs. Some of these plants have colorful blooms or variegated leaves. They help fill in the garden, creating dense spaces that add a sense of enclosure. These plants are havens for birds who feed and nest in them or nearby trees.
• Bottlebrush Buckeye, Aesculus parviflora
• Serviceberry, Amelanchier sp.
• Chokeberry, Aronia sp.
• Witch hazel, Hamamelis sp.
• Winterberry, Ilex verticillata
• Viburnum, Viburnum sp.
The shade created by trees gives gardeners endless possibilities for planting the ground layer with desired perennials. Find plants that meet your garden’s growing conditions.
• Anenome sp.
• Wild Ginger, Asarum canadense
• Ferns
• Wild Geranium, Geranium maculatum
• Woodland Phlox, Phlox divaricata
Your Garden
• Jacob’s Ladder, Polemonium reptans
• Smooth Solomon’s Seal, Polygonatum biflorum
• Foamflower, Tiarella cordifollia
• Sedges, Carex sp.
Be sure to add seating for the gardener and friends and include paths that lead through the garden. Add ornaments along the trails to enhance your gardening experience and visitors’ enjoyment. Finally, be proud that you have created a garden for our time of climate change. 3
BIO Judy Nauseef is a freelance writer, landscape designer, and speaker specializing in sustainability and gardening with climate change. She writes about native plants, habitat gardens, prairie designs, stormwater management, and travel. She is the author of the book Gardening with Native Plants in the Upper Midwest: Bringing the Tallgrass Prairie Home. Her blog and newsletters can be found at judynauseef.com





HIGH CONCENTRATION = FASTER INOCULATION AND POTENCY
3600 endomycorrhizal propagules/g
Beneficial bacteria including Mycorrhizae Helper Bacteria (MHB)
Growth enhancers & biostimulants


A SERIES BY XAVI KIEF


Nematodes are crucial and fascinating microbial multi-hyphenates in the world’s nutrient cycles. They perform varied roles in the exchanges and conversions of minerals, plants, and animals into available food for other life forms.
Western science recognizes the official discovery of plant parasitic nematodes in the 18th century, but some evidence suggests they were possibly identified as infesting soybean roots in China by 235 BCE. Once the connection was made between major crop losses and these practically invisible critters, industrialists deployed a lot of money and chemicals to combat their effects on agricultural commodities. Modern nematology has brought increasing attention to the merits and economic value of actively releasing certain species against plant pests.
Nematodes are also known as roundworms. Unlike red wigglers and other common earthworms, their bodies are unsegmented, and most are too small to be seen by the unaided human eye. Depending on the species, a nematode may feed on bacteria, fungi, other nematodes, insects, or animals. As adults, they range in length from 1/300th of an inch to nearly 9 feet!
Despite not being talked about much, nematodes are the most abundant animal on Earth. If you could remove everything else, an observer in space could still see the hazy shape of the planet made solely of nematodes!
Unlike red wigglers and other common earthworms, their bodies are unsegmented, and most are too small to be seen by the unaided human eye
You can count on finding nematodes anywhere there’s other life, especially in soil. They need water to live and can be parasitic in animals, including humans; pinworm is an example of this unpleasant infestation.
Yet, not all nematodes are problematic. Although it might feel gross to think about worms living inside us, most often, they are present because of a long-evolved relationship that doesn’t harm our or our plants’ bodies. Like certain bacteria and fungi, many beneficial nematodes are part of microbiomes that regulate immune systems and help maintain health.
Focusing on threats is an evolutionary survival mechanism. For that reason, until recently, more attention has been paid to limiting damage from nematodes than to how they can be good partners in cultivation.

For growers, the most economically significant nematodes are the ones that live in, on and around plants, particularly in the rhizosphere. Meloidogyne species are known as Root Knot Nematodes because they enter roots, causing highly destructive deformities and reducing the quantity and quality of yields. Similarly, Heterodera and Globodera species cause root cysts.
None of these nematodes are picky about which plants they infect, so they’re everywhere. To make matters worse, although they’re not incredibly mobile on their own, they’re spread incredibly quickly by water runoff, animals, and even trace amounts of soil on farm equipment.
Where food and medicinal plant production concentrates in various forms of intensive, controlled environment cultivation systems, these steady climates and capital-driven monocropping also maintains ideal conditions for plant-parasitic nematodes to thrive.
Despite these factors, observant agriculturalists and soil scientists have developed numerous ways to reduce losses linked to the most ubiquitous types of plant-parasitic nematodes (PPNs).
One of the most effective ways to prevent PPN populations from booming is to work with or mimic natural seasonal fluctuations in temperature and plant species succession.
Temperature Meloidogyne nematodes tend to be less active in cooler temperatures, with each subspecies adapted to its

local region. Meloidogyne incognito, the Southern Root Knot Nematode, is generally inactive until soil temperatures rise above 60°F, so cool-weather plantings suffer much less damage. By contrast, Meloidogyne hapla, the Northern Root Knot Nematode, can survive temperatures as low as -18°C in its egg stage and develop in roots once conditions rise to 9°C.
Autoclaving substrates is one way to destroy microbial life, including nematodes, but is impractical for most large-scale cultivation. Some growers employ solarization, and by building up and retaining heat above 38°C for many hours at a time, the top 30cm/12 inches of soil may be eradicated of live PPNs. For the time it takes and the requirement to leave the space out of active production, the effectiveness and applicability of such high-temperature techniques alone is not reasonable for many growers.
Without living host plants to feed on, active PPN populations drop very quickly. Small grains like sorghum and marigolds are good choices. Cannabis is not known as a favorable host for cyst nematodes and may be a good partner with affected crops like soybeans, beets, and potatoes. Using succession plantings that rotate between more and less susceptible plant types is a time-proven way to promote balance.


Root Knot nematode cysts on red skinned potato
Since the late 1900s, trends away from chemical insecticides incentivized breeders to develop nematode-resistant varietals of some commercially important and highly vulnerable crops like tomatoes. The resistance is often the result of hybrid vigor and, in some cases, genetic modification, so many of the available seeds listed for this quality are F1s. Seeds saved from those plants won’t grow “true” and are unlikely to be as robust in the presence of Meloidogyne nematodes (see sidebar).
Naturally occurring defence chemicals made by plants are often concentrated into teas and applied for organic pest and disease management. In Pakistan, an investigation found the possible use of water extracts made from the leaves of local cannabis and zanthoxylum varieties against Southern Root Knot nematodes. They concluded that roots dipped in these extracts had a much lower infection rate by PPNs, and using the solutions as soil drenches was also highly effective in reducing the Meloidogyne population. Although the exact reason for this effect is yet to be identified, a growing body of research supports the use of water-based cannabis leaf extract as a non-chemical control for Meloidogyne incognito.
In Nematodes Part II, we’ll get familiar with some of the nematodes that are the enemies of our enemies — partners in keeping plant pests at bay!

Root-knot disease caused by nematodes
Tomatoes are one of the most popular home-grown food plants, but are a common host for PPNs. If you’re trying to keep root knot nematode populations down, and you want to save seeds (or try your hands at making your own F1, nematode-resistant crosses) the following non-hybrid tomato varieties claim resistance:
Amai, Barbarian, Carina, Cherokee Purple, Chocostar, Cordova, Crimson Star, Davinci, Ella Bella, Fonzi’s Pinky, Grandeur, Katya, Marzito, Mistral, Moni, Myrtelle, Pamella, Park’s Legacy, Rossini, Roma, Rozestar, and Sunfresh.
A list of other Root-Knot Nematode-resistant vegetable varieties can be found here: content.ces.ncsu.edu/control-of-root-knotnematodes-in-the-home-vegetable-garden.
For more information, check out: rebrand.ly/em6ejiv and tomatogrowing.co.uk/make-your-own-hybrid-tomato.
Always remember to source seeds grown as locally as possible to maximize microbial harmony and preserve diversity.

Also known as beneficial or predator nematodes, entomogenous (“reproducing within insects”) nematodes (ENs) consume and reduce populations of several types of insects that cause damage to plants.
ENs are a safe alternative to chemical insecticides. They are specialists and have no known negative effects on amphibians, birds, fish, mammals, plants, or reptiles. Members of the Heterorhabditis and Steinernema species groups host insect-killing bacteria in their guts. When the nematodes enter the bodies of their target hosts, they release these strains, which, beyond poisoning them, have a temporary embalming effect.
The ENs eat up the remaining bacteria and the bodies of the prey, reproducing over one or two generations in 5 to 15 days. Depending on the species, tens of thousands of young and hungry nematodes may emerge from a single insect corpse. ENs are best known for saving lawns and other turf from destruction by beetle grubs (and, by extension, the larger animals that tear up the grass to feed on them). Thanks to the movement away from large-scale soil fumigation for control against crop plant pests, more farmers are exploring the ecological and economic benefits of using ENs in agriculture.
When soil conditions are favorable, they’re highly effective against many other plant predators that go through a larval stage in soil, like borers, caterpillars, cutworms, fungus gnats, onion flies, thrips, and weevils.
ENs are a safe alternative to chemical insecticides. They are specialists and have no known negative effects on amphibians, birds, fish, mammals, plants, or reptiles
Where soils retain moisture year-round and are not subject to tilling, native species of helpful nematodes are probably already present. Conservation of these existing populations of microbes should always be the first consideration for growers.
In the event of an imbalance that favors plant-destructive insects, you can purchase various commercial mixtures containing live nematodes from biocontrol companies.
Different EN products are recommended depending on the intended host because Heterorhabditis subtypes are less mobile in soils than Steinernema.
ENs should generally be directed at the root zone to get between the destructive insects and their target plants. Mix them into water solutions for the most effective dispersal and apply using hose-end sprayers, sprinkler systems, or other irrigation systems. You may need to remove filters, adjust pressure, and, in large volumes, use an airstone or other means of continuous mixing so that the nematodes disperse evenly.

You might need multiple rounds of EN inoculation to protect your garden from the rotating cast of destructive insects. Interrupting their life cycles keeps populations down, but like in all human-stewarded cultivation, environments optimized for plants can also provide ideal conditions for their natural enemies.

Thousands of infective juveniles of the entomopathogenic nematode Steinernema carpocapsae

As with beneficial bacteria and fungi, working with nematodes as microbiological co-conspirators in cultivation deepens your relationship with the land. Healthy harvests reflect a harmonious habitat, so aim for balance, diversity, and regeneration.
• Dendrivorous nematodes form part of the community of microbes that help break down decaying material, freeing nitrogen to be absorbed by plants. As part of the food web, they are a nutrition source for some fungi species. Oyster mushrooms are known for feeding on nematodes, concentrating their bodies into a valuable, efficient protein source for humans.
• Other than protecting your veggie patch, as a bonus, ENs can also be used as a control for fleas and ticks. 3

• Respect use-by dates and storage instructions. With no insects to feed on, ENs have a relatively short lifespan.
• Source beneficial nematodes as locally as possible for maximum compatibility with insects in your area.
• Consider learning natural farming techniques to collect and multiply Indigenous microbes.
• Forget that ENs bought from a store or website are alive when they’re shipped but vulnerable to extremes in temperature. Don’t leave them out in the mailbox to get frozen or cooked!
• Be shy about consulting with entomology experts at biocontrol companies: get the answers you need, or look elsewhere.
Part I: Introduction to Plant-Parasitic Nem atodes: rebrand.ly/070b97
Soil Solarization Resource: vric.ucdavis.edu/pdf/soil_solarization.pdf
NC State Extension: Control of Root-Knot Nematodes in the Home Vegetable Garden: rebrand.ly/74a400
Bernard, E. C., Chaffin, A. G., & Gwinn, K. D. (2022). Review of nematode interactions with hemp (Cannabis sativa). DOAJ (DOAJ: Directory of Open Access Journals), 54. doi.org/10.21307/jofnem-2022-002
Boerma, H. R., & Hussey, R. S. (1992). Breeding plants for resistance to nematodes. PubMed. Mukhtar, T., Kayani, M. Z., & Hussain, M. A. (2013). Nematicidal activities of Cannabis sativa L. and Zanthoxylum alatum Roxb. against Meloidogyne incognita. Industrial Crops and Products, 42, 447–453. doi.org/10.1016/j.indcrop.2012.06.027
Part II:
okstate.edu - Detection, Conservation, and Augmentation of Naturally Occurring Beneficial Nematodes for Natural Pest Suppression: rebrand.ly/qnjqxgc extension.colostate.edu/topic-areas/insects/insect-parasitic-nematodes-5-573 cals.cornell.edu/new-york-state-integrated-pest-management/eco-resilience/biocontrol/ biocontrol-biology/insect-killing-nematodes extension.psu.edu/insect-parasitic-nematodes-for-the-management-of-soil-dwelling-insects
BY EVEREST FERNANDEZ
Micro-cilantro was my first microgreen crop. The pitiful quality of the locally available (regular) cilantro drove me to it.
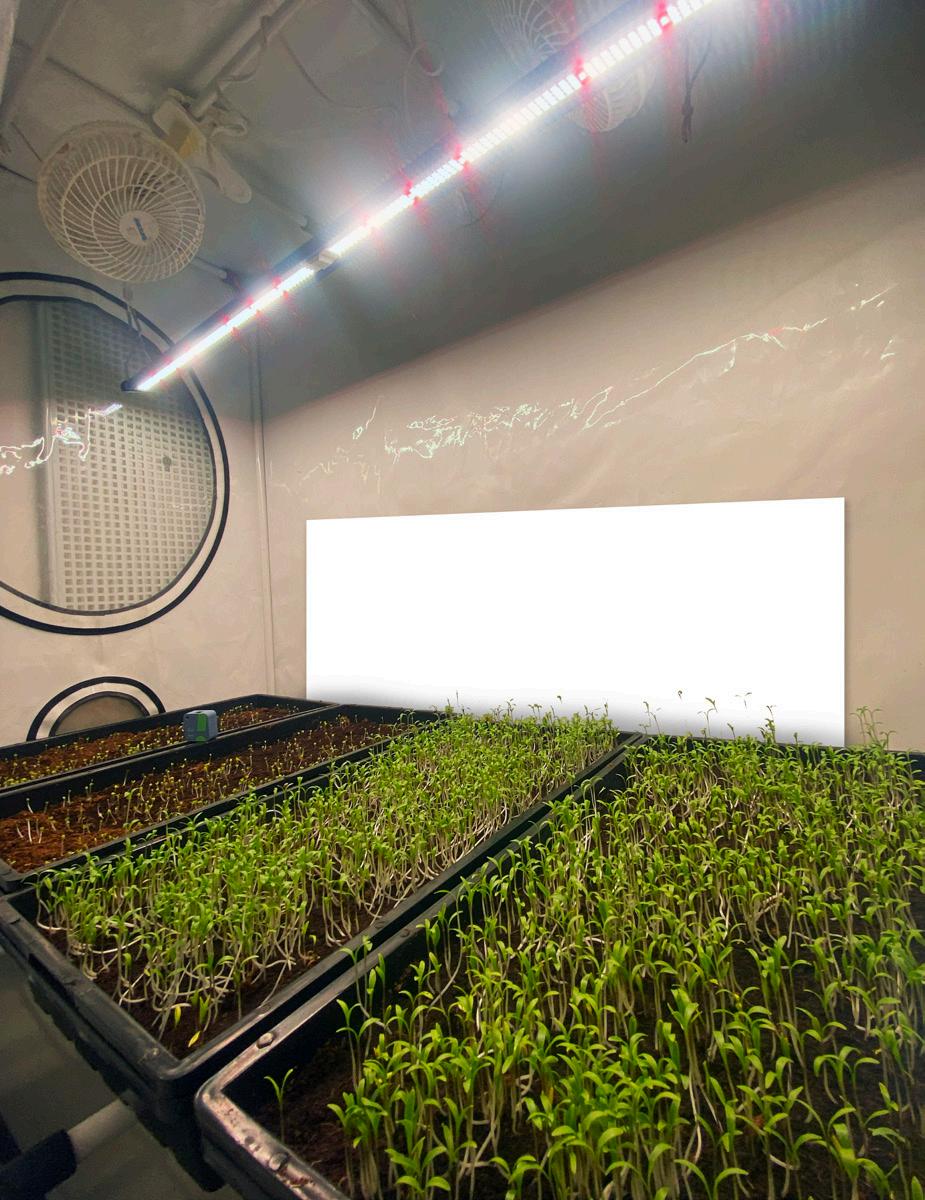
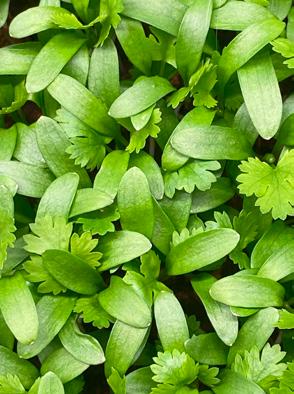

Micro-cilantro was my first microgreen crop. The pitiful quality of the locally available (regular) cilantro drove me to it. Admittedly, there is hardly a thriving market for cilantro (let alone
‘micro-cilantro’) here in southern France, as the folks around these parts overwhelmingly prefer parsley. Perhaps coincidentally, the locally available cilantro didn’t taste much different. I suspected its blandness was due to the grower fertilizing her crop with excessive chicken manure—an abundant and free local resource. It’s a common mistake to over-fertilize cilantro and many other herbs, causing them to produce an abundance of lush-looking but tasteless foliage. In any case, something had to be done.
Beyond the necessity of having flavorful cilantro to garnish my fish tacos and beef massamans, I was drawn to this particular microgreen crop because, relatively speaking, it takes a while! Depending on how far you want to take it, you can get from seed to harvest in around 16–21 days. This is much longer than other popular microgreen crops like mustard (6–10 days), radish (7–10 days), arugula (10–14 days), or broccoli (8–12 days). Micro-cilantro is a cool season crop, and germination takes a while. And, unlike quicker microgreens, it’s grown until the first true leaves are showing. The longer duration of micro-cilantro was appealing because it gave me ample time and opportunity to pamper it—not too much, but I became fascinated with what gives cilantro its characteristic flavor and how I could best promote it using environmental and nutritional cues. I went to YouTube for knowledge and inspiration, but most were blithely using tap water, guessing about lighting, and applying nutrition remedially rather than proactively. In most cases, I couldn’t help thinking that most were more concerned with promoting their fledgling microgreens businesses rather than sharing decent practical information.
With this in mind, I’ll try to condense as much info and lessons learned as humanly possible into the following paragraphs:
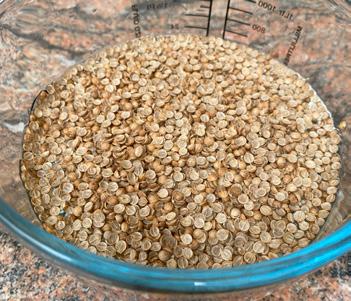
Choose split seeds over whole seeds because they germinate faster, and only one seedling emerges from a split seed rather than two.
Soak seeds for at least eight hours in a cool, dark place. Twelve hours is the sweet spot. Use clean, non-chlorinated water. To one quart of reverse osmosis water, I add:
• 2 ml liquid seaweed extract
• 1 ml humic acid solution
• 1 ml calcium/magnesium supplement
• 1 ml GH micro
• 0.5 ml GH grow
• 0.5 ml GH bloom
• 1 ml food-grade hydrogen peroxide (3%)
Adjust pH to 6.0 if necessary.
I soak 13g of split cilantro seeds per full-sized flat. Once they’re ready, I pour the seed soak solution through a sieve to isolate the seeds.
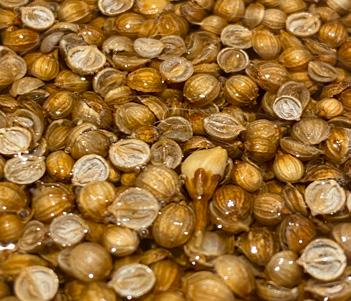


Use grow trays with a perforated bottom that will sit inside a slightly larger tray. Sterilize in a mild bleach solution. Add about 2/3 inch depth of high-quality coco coir potting mix to the inner tray. (Pure buffered hydroponics grade coco coir, not 70/30 coco/

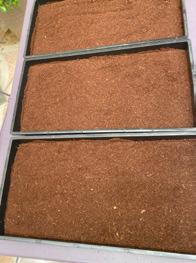
Now make up the following solution (quantities per liter of reverse osmosis water):
• 1 ml potassium silicate supplement
• 1 ml liquid seaweed extract
• 1 ml humic acid solution
• 1 ml calcium/magnesium supplement
• 1 ml coco A (your preferred two-part coco nutrient)
• 1 ml coco B
• 1 ml L-amino acid liquid supplement
• 1g Trichoderma
• 1ml Ecothrive Trace
Adjust the pH to 6.0 if necessary. EC should be around 1.0 to 1.2 mS.
Using a rose sprinkler, apply the solution gradually to the coco coir. Sit the inner tray on a drainage counter so any leachate drains away. It’s recommended to create a 20 – 30% run-off. Discard the run-off.
Distribute the soaked seeds evenly across the wetted surface of the coco coir. Now add another half-inch depth of coco coir on top of the seeds. Water through again with the above solution. Some growers prefer to hydrate and fluff their coco coir in a separate container and then add it to the tray.
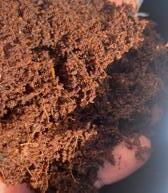

Once drained, place the inner tray into the outer tray. Then, sit a spare outer tray on top and weigh down with around 15 lbs of weight (around 7 kg). I use some big cookery books or a bag of rice. Place in a dark room for up to eight days. Ideal daytime temperature range: 7075°F (21-24°C). Ideal nighttime temperature range: 65-70°F (18-21°C).
Placing a weighted tray on top of the coco coir helps mitigate evaporative moisture loss, promote even germination, and protect from pests. Crucially, the weight forces the young cilantro seedlings to discard their husks as they push through the substrate (It’s a taxing job to remove them manually!).
When you remove the weighted tray, you might be surprised to discover a bunch of flattened yellow seedlings. Don’t worry. After twelve hours of light, they’ll be transformed. I positioned a 100W full-spectrum LED bar in my Clonebox grow tent and set it to 50% via a dimmer. Modern full-spectrum LEDs provide an intense but ‘cool’ light that’s ideal for cilantro. Aim for an initial PPFD of 150 – 200 μmol/m2/s. My LED bar is around 18 or 19 inches (50 cm) above the seedlings. Photoperiod is long: 16 hours on, 8 hours off. Target daytime temperature: 70-75°F (21-24°C), nighttime: 65-70°F (18-21°C). The ideal relative humidity is 50 – 60%.

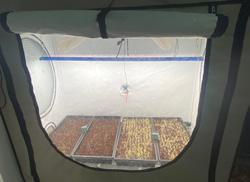
Micro-cilantro growers often recommend lower-wattage LED propagation tubes (typically 2 x 20W over a 4’ x 2’ area), but the lights must be very close to the seedlings, risking localized heat issues. They also don’t produce adequate light to sufficiently stimulate the phenylpropanoid pathway—a crucial process that is part of the production of many secondary metabolites. This is why I prefer to use a more powerful light positioned a little further away. It also produces very even growth.
I ventilate the Clonebox grow tent with a 6” inline fan, dimmed down to minimum speed.
Do not water your micro-cilantro from the top. You’ll risk damaging the young seedlings and encouraging fungal problems. Instead, add around 100 - 150 ml of nutrient solution (same recipe as the one used to initially moisten the coco coir) to the bottom tray and let the seedlings wick it up. Pay close attention to the trays being level, and remember, the media at the sides and edges of the tray will dry out first. Don’t let the medium dry out. Keep it constantly moist but not soggy.
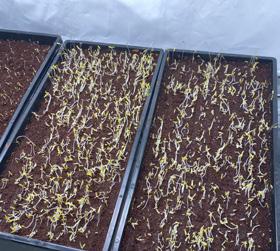


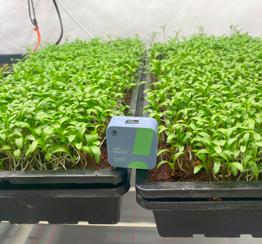
Increase light intensity. After a few days under the lights, increase the light intensity to 200 – 250 μmol/m2/s. I achieve this by turning my dimmer up to 75%. For the final few days before harvest, I go to 100%—taking my PPFD to 300 – 350 mol/m2/s. I also add UV-B light for 5 – 10 minutes each day in the middle of the light cycle. Pay particular attention to moisture levels, as trays can dry out quickly at this stage. Try to keep seedlings just moist enough. A bit of drought stress can help boost flavors—but never let your seedlings even think about wilting!
These terpenes are all based on the precursor, Geranyl pyrophosphate (GPP), which depends on the availability of sufficient phosphorus.
• Linalool
• Geraniol
• Borneol

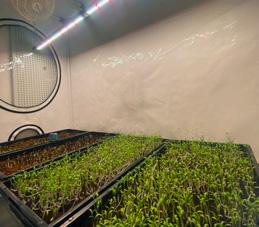

Healthy and tasty!
These flavonoids are largely based on phenylalanine, an essential amino acid that is a starting point for flavonoid biosynthesis.
• Quercetin
• Kaempferol
• Rutin
• Apigenin
• Luteolin
Secondary Metabolites in Micro-Cilantro
• Caffeic Acid
• Chlorogenic Acid
• Ferulic Acid
• Coumarins (such as umbelliferone and scopoletin)
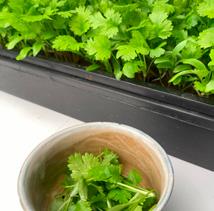
• Camphor
• α-Pinene

• Phthalides (such as butylphthalide)
Irrigate with plain reverse osmosis water for the last day or two before harvest. You can harvest as micro-cilantro when true leaves are fully formed. Or keep growing for up to a week longer to enjoy as baby-leaf.
You can grow stand-out micro-cilantro by optimizing pre-soak solutions and maintaining ideal environmental conditions. The key is not skimping on the light intensity, using the purest water you can access, high-quality hydroponics-grade coco coir, and careful environmental monitoring and management. 3


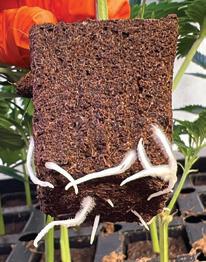
At Altacan, the values of environmental sustainability and regenerative agriculture are core to our mission. We grow in living soil beds using organic inputs. We build soil life with worms, microbes and fungi to replicate nature indoors and to be able to recycle the same soil over as many production cycles as possible. All of our wastewater is captured and filtered so that no fertilizer runoff from the grow rooms or waste water from our hash-making operation enters the environment. This approach has always worked really well for me. Not only does living soil growing align with my personal values, but in my experience, this is the best way to produce high-quality cannabis flower and high-terpene solventless extracts.
Historically I have always relied heavily on aerated compost teas as an important part of my program to boost the soil life at certain key moments of the cycle. After all, having the right biology is the key to success in any living soil garden. One of the challenges that we have faced at Altacan is that many of the compost products available in our region tend to be high in sodium. We’ve managed to build really high-qual ity soils that are working well for our production, but we have to be very careful not to drive up the EC and sodium content of our soil any higher than it already is or we could see signs of toxicity in our plants. Compost teas are a great way to add beneficial microbes, but every tea recipe I have used in the past also brings a nutrient charge that I cannot always afford depending on our soil analysis results. I knew I needed to find a different option to counter that problem.
This is why I started experimenting with MIICROBIAL MASS PRO. I knew I needed a solution that would give me the beneficial microbes I need, without driving up my soil EC over time and save me some man hours cleaning dirty reservoirs.


By Max-Émile Petitclerc Head Grower at Altacan
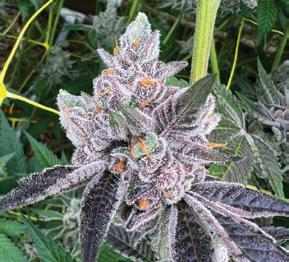
MIICROBIAL MASS PRO is clean, consistent, and highly effective. And the results I have seen are extremely positive. I ran a preliminary grow trial and one of our cultivars, Point Break, saw a 25.9% increase in dry weight yield. I wouldn’t have thought it was possible to increase yield so dramatically by adding just one product, but I ran the tests and the data is clear. The other strain we tested showed a more modest increase, indicating that there may be an interesting genetic component at play when it comes to the effects of different microbial communities on cannabis crops. This is why I always recommend to run tests on each cultivar before going full scale with a new product. Nevertheless, both strains we tested saw significant increases in yield.
MIICROBIAL MASS PRO is also a very important part of our cloning SOP, allowing us to produce fully rooted, ready-for-transplant clones in just seven days. As a living soil grower, I find that it is an optimal way to introduce microbial life to the roots right from day one. As a business operator, the ROI on this product is clear. It saves time and reduces labour costs, and it maximizes yield and product quality. MIICROBIAL MASS PRO does not cost our company money. It makes money.


Altacan is a Micro Licensed Producer in St-tite-des Caps, Quebec. We are focused on bringing to market unique genetics which we phenohunt in-house, and making them shine through our single-sourced solventless extraction products. Our carts and rosin will be available this summer under our brand, Rosin des Caps. Check them out!


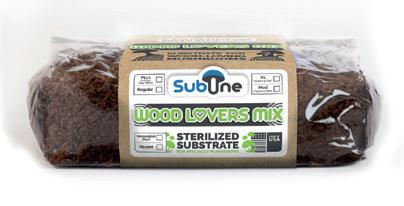
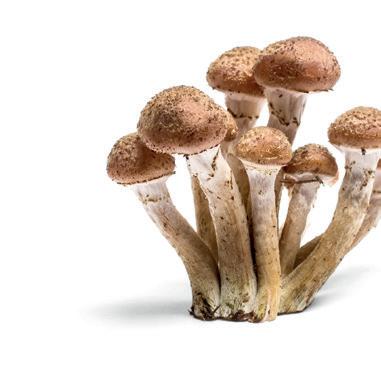
Over 35 years of large scale mushroom cultivation experience
Do you daydream about starting a mushroom business? You are not alone. The global mushroom market was valued at USD 55 billion in 2023 and is projected to double by 2031*. It’s understandable, then, that many people want a piece of the action.
Mushrooms have become the “superfood” of modern times –helped in part by movies like “Fantastic Fungi” and mushroom superstars like Paul Stamets. There’s a demand for fresh mushrooms, dried mushrooms, powders and tinctures, and kits to help others who grow.
Let’s examine what a new mushroom business could look like. We’ll explore what you could sell and some realities to consider. As a disclaimer, I am a mushroom educator and do not sell mushroom products for business. These are my two cents from what I’ve seen as an urban farmer, teacher, and consultant. Always do your research before you start a new business.
The most obvious business idea and the object of many fantasies is to build a mushroom farm and sell fresh produce to local or national markets. A farm can be a fruitful endeavor, but not without hard work or relatively high setup costs.
While it is true that you can grow mushrooms easily at home, doing so at scale requires a fair amount of equipment to maintain consistent conditions and prevent contaminating your crop. You will need a ‘lab’ space, an incubation chamber, a fruiting chamber, and equipment to sterilize substrates and grain. If you can afford the setup costs, you will be ready to grow many mushrooms in a basement unit, shipping container or other small space.
A business like this could be fantastic if there is high demand and low competition for gourmet mushrooms in your area. Do your market research, and remember that working with fresh produce is hard physical work. The shelf-life of fresh mushrooms is relatively short – so you need to get good routes to market to sell your produce fast.

Lion’s Mane Latte, anyone? Or Reishi
Tincture to heal your life?
Lion’s Mane Latte, anyone? Or Reishi Tincture to heal your life? Marketers are pushing mushroom products hard, and some are doing very well for themselves. But don’t believe all the hype. The fungi market is very unregulated; make sure you’re buying quality stuff.
Processed mushroom products can be a good add-on for people who are already cultivating – as leftover fresh produce can be dried and processed to turn the surplus output into extra income. If you go down this route, go the extra mile to make your products extra special. There’s a lot of competition out there (not to mention a huge industry in China), so differentiating yourself with quality and care could be an excellent idea.
There are many different types of mushroom grow kits. Pre-made ‘blocks’ come ready in plastic bags - just cut them open, and the mushrooms will come. Pre-inoculated logs are a popular choice, particularly at Christmas markets. My favorites are the do-it-yourself kits that help customers learn how mushrooms grow by guiding them to do the hard work themselves.
This can be another good add-on to a pre-existing cultivation setup. It can also work as a standalone business – but be aware that some gourmet mushrooms are fussy to grow, requiring sterilization equipment and complicated substrates and conditions. A great way to make kits on the cheap is to create do-it-yourself oyster mushroom kits. These kits include a bag of straw, a small amount of grain spawn (mushroom ‘seeds’), and instructions. If you’re interested, I recommend setting up a kit to see what it entails.
Once
you have the initial equipment and skills, making liquid cultures and spore syringes has pretty low overheads—and they can sell for a reasonable price if you can find a market that wants them
This is my favorite idea. The cultivation market is booming, and mushroom cultures form the genesis for any grow. Once you have the initial equipment and skills, making liquid cultures and spore syringes has pretty low overheads—and they can sell for a reasonable price if you can find a market that wants them.
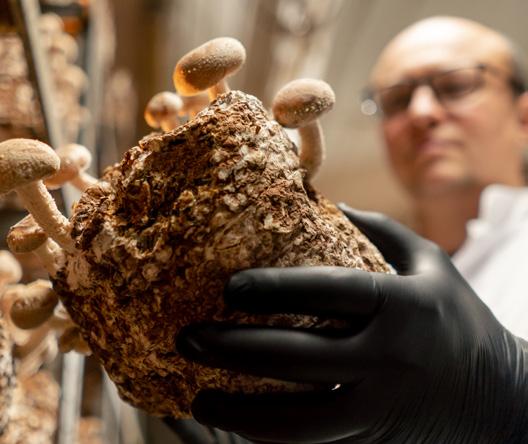
The
A decent kit is a must, the most notable being a laminar flow hood (an extremely good air filter to prevent contamination) and a stainless steel workspace. Growing cultures on Petri dishes is essential to selecting good genetics and checking your products for contamination. This is lots of fun and not massively complicated. You must also grow mushrooms to ensure you sell something that works well.
Countless other opportunities are opening up – particularly as psychedelic mushrooms become decriminalized in many countries. Psychedelic therapists, ceremony leaders and microdosing coaches are getting stuck in as society opens up to the healing powers of mushrooms. If you choose this route, be aware that it’s a Wild West out there. Have fun, go slow and only offer what you can hold.
It is easy for aspiring growers to forget about the “sales” element of running a business. Making a great product is part of the journey – convincing people to buy it is another game. Be prepared to learn new skills, and take time to build your business. Start small – in your home if you can – so you can keep overheads low until you’ve got a reliable customer base. 3
*Source - skyquestt.com/report/mushroom-market
global mushroom market was valued at USD 55 billion in 2023 and is projected to double by 2031




Understanding how to achieve a professional’s approach to keeping gardens organized and harvests clean can be helpful in a home grow
Having SOPs on hand (or on your phone) is like having an instruction manual or recipe book customized to your taste and style
Licensed growers and collectors of beneficial plants and fungi, like food and drug producers, must follow quality assurance and control guidelines. They must meet minimum standards set by regulations and are monitored and certified by third-party bodies to protect the public from contamination and incorrect labeling that could lead to harm.
Understanding how to achieve a professional’s approach to keeping gardens organized and harvests clean can be helpful in a home grow.
What are the GACP, GPP, and GMP?
The World Health Organization developed Guidelines for Good Agricultural and Collection Practices (GACP) over twenty years ago. These guidelines lay the foundation for Good Manufacturing Processes (GMP), the gold standard for medicinal plants, fungi, and their derivatives.
A less rigorous standard, the GPP (Good Production Practices), is more broadly applied for non-prescription plant products. Big companies that plan to export their products or those in countries with only stringent access to certain medicines make the extra investment needed to meet GMP.
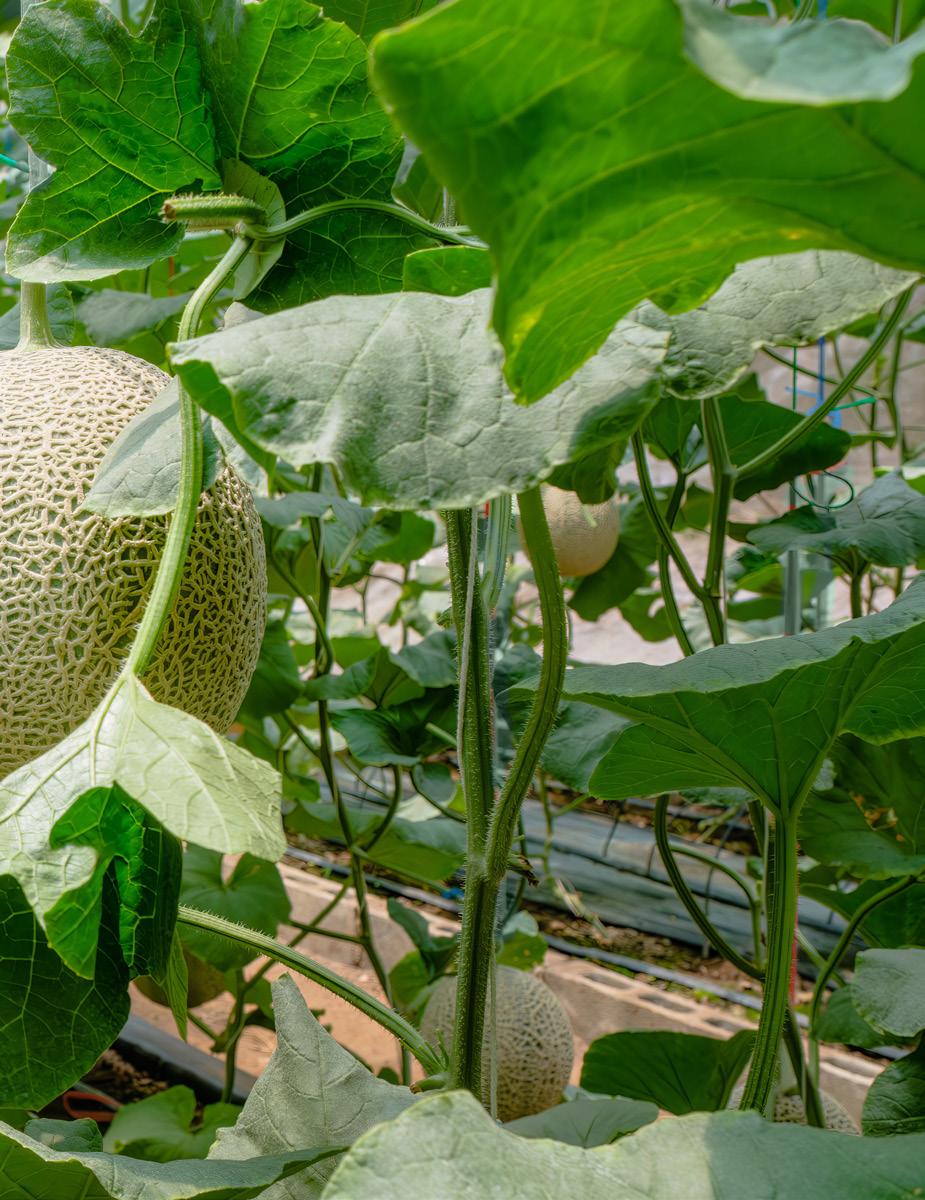
Jargon for “what you do”, an SOP takes the guesswork and haphazardness out of getting a job done correctly. When you’re in charge, the best SOPs evolve with your experience but remain grounded in proven methods. Having SOPs on hand (or on your phone) is like having an instruction manual or recipe book customized to your taste and style.
An SOP for wildcrafting might include the sustainability-related standards you adhere to when collecting food or medicine in nature
Without a federal program in place, this doesn’t apply in the USA; each state regulates and monitors medicinal plant products in its own way. Proactive producers recognize that designing their business for GMP-level output reduces the chances of recall and reinforces consumer trust.
That ethic of accountability, more than specific thresholds, technologies, and testing, should steer your actions.
Consider writing SOPs like training yourself as your own apprentice. Thinking about the essentials of a task and writing them down in a user-friendly way can reveal opportunities to simplify and make the work more efficient and pleasurable. For example, seeing the words “Spray shears with an isopropyl alcohol solution, wait 30 seconds, wipe dry with a clean cloth, and return them to their hook on the wall” at the end of an SOP on pruning means you’re more likely to do this and not have to wonder ‘where those darn things have gotten to’ the next time you want to use them.
In general, design, hygiene and maintenance relating to “3 P’s ” are foundational to a GACP/GMP-adherent program.


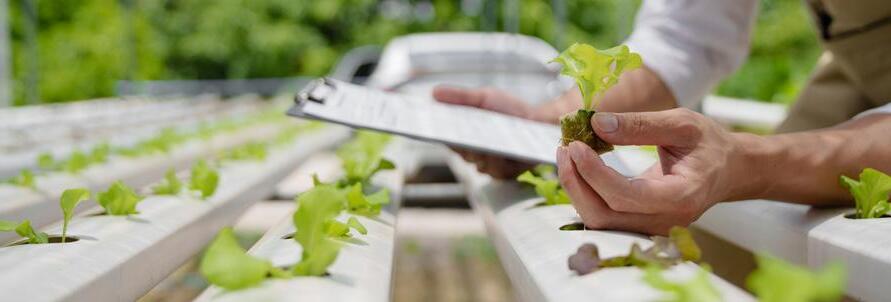
Keep the 3 P’s in mind as you go about designing your plans as a grower or wildcrafter:
Plants (and Fungi) must be appropriately identified throughout your journey. It starts with knowing the source. Your SOP for Identification defines what tools or prior knowledge you use to ensure it’s indeed the species or cultivar you meant to grow or collect. For example, did you acquire source material that came in wellmarked packaging from someone you trust? Did you verify a wild specimen with a good field guide you feel confident using?
“Record-keeping can be as simple as you like or include more creative elements — it might be a plain binder full of checklists or a lush collection of photographs with accompanying journal entries
Also under Plants, you would include SOPs relating to the unique characteristics of a specific crop’s cultivation steps. An SOP on feeding could be as simple as “Follow the nutrient company’s recommended schedule, starting on {Insert Date}” or “Apply soil drench of nettle tea every Saturday”. An SOP for wildcrafting might include the sustainability-related standards you adhere to when collecting food or medicine in nature.
People can be quite the variable to control. You might think this area isn’t too complicated when it’s only you working in the garden, and you could be right. But certainly, we’re not all at peak performance every day, and our feelings and physicalities can impact the outcomes of our activities.
SOPs relating to People include those that cover health, safety, and security. For example, you could have an SOP for tool maintenance (part of injury prevention, reducing cross-contamination, and cutting down on repair and replacement costs). You could also use one to show how often you take breaks and one to make sure someone will come looking for you if you don’t return from seeking mushrooms in a nearby forest.
Having People-related SOPs and following them, even if you’re setting them only for yourself, underscores your self-value and keeps stress management in the frame and your ego in check. They are a line of defence against self-doubt and can dissuade you from skipping steps that may lead to injuries or contamination (which, aside from bodily harm, also often have a negative downstream effect on yields).
Places where supplies and tools are kept, and important activities occur should be designed for easy and effective use and routinely maintained. At its most basic, a place for everything and everything in its place!
Of course, it’s fun to take pictures of boastable finds and harvests, and when we’re excited, writing about what we’re doing and how great it’s going reinforces that buoyant mood!
One of the most important things about documentation is that it’s consistent. Nobody likes to keep track of their shortcomings, but it’s a lot easier to recognize and trace problems back to their sources when reports are Regular and Retained.
Regular reports don’t have to be a drain on time and energy. You need to pick a system that works for you and stick to it. People use apps or journals for this purpose, and the best ones take the redundancy out of the process. Something that automatically keeps your entries ordered by date and consists mainly of check-boxes with room for additional comments keeps the task light and manageable. Did you do each of the daily jobs? At the end of the week, is there anything you noted for carry-forward, or is it now complete? Feel free to give yourself gold stars or other rewards if that motivates you to make reporting a ritual.
Retained documentation is handy for recall (our memories are imperfect!) and responsibility. Being able to quickly revisit the time and place when some action was performed, or in some cases, was not performed, can be very helpful in tracing the root cause of an issue.
The flip side is these retained records are also proof of your efforts, reinforcing the value of your work and dedication to your goals. They offer an opportunity to reflect on how much you have developed throughout a growing season or several. Record-keeping can be as simple as you like or include more creative elements — it might be a plain binder full of checklists or a lush collection of photographs with accompanying journal entries.
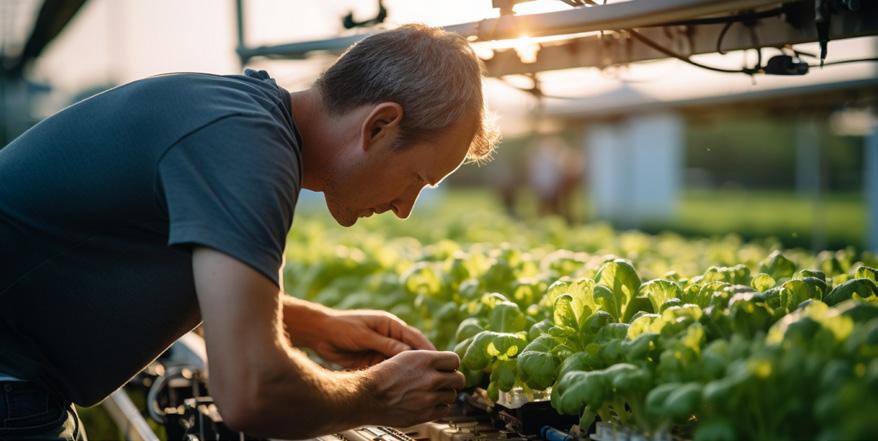
thinking and acting like a professional who does work similar to your own can be an excellent way to find structure and provide resilience
Depending on the industry, GMP requires records to be retained for a defined period before they can be deleted or destroyed. If you choose to use a digital records system, automated back-ups to the cloud or local hard drive perform this admin for you, freeing up time and allowing faster searches for old info. Wouldn’t it be nice to know precisely where you recorded the name and source of that wonderful seed you used five years ago?
When you’re not trying to meet the demands of an external audit, and often even when you are, it’s fine to use your best judgement to occasionally act outside of “the rules”.
Life happens, and necessity is the mother of invention — keep track! Deviation reports are simple notes on when and why something wasn’t done as it usually is. If the outcome isn’t ideal, at least you’ll know what to work on to prevent it from happening again. If something good comes out of it, you can improve your SOP!
Knowledge siloing is when a person or group hoards information. Sometimes, we can fall prey to doing this without meaning to, having a sense that “if I want something done right, I have to do it myself”. However, a pro grower knows that anything could happen and takes steps to make repair and recovery as frictionless as possible.
If you find yourself in a sudden need to step away from cultivating or collecting due to circumstances beyond your control — you get sick or injured, some unplanned life event required your urgent attention — wouldn’t it be so much better if you didn’t have to stress about explaining what and how to do everything to keep things on track until you could return?
It’s easier to ask for (and get) help when you’ve already mitigated that burden.
The rigorous specifics of GACP/GPP/GMP are not necessarily practical or applicable to non-commercial activities. Instead, thinking and acting like a professional who does work similar to your own can be an excellent way to find structure and provide resilience.
Whether it’s only you or an extended network, the intended end-user(s) deserve(s) the best —show up with love in your actions and attitudes toward quality assurance. 3
To access the WHO guidelines on GACP for medicinal plants, visit: who.int/publications/i/item/9241546271.
Xavi Kief is a writer, researcher, and lifelong learner with their hands in the dirt and their imagination traversing the universe. Seeking always to deepen and integrate their connection with the living planet and its diverse inhabitants, Xavi finds joy by infusing their practical and playful approach to cultivation with a healthy dose of science. They grow food and medicine for their family and community on their NorthEast Coast homestead.


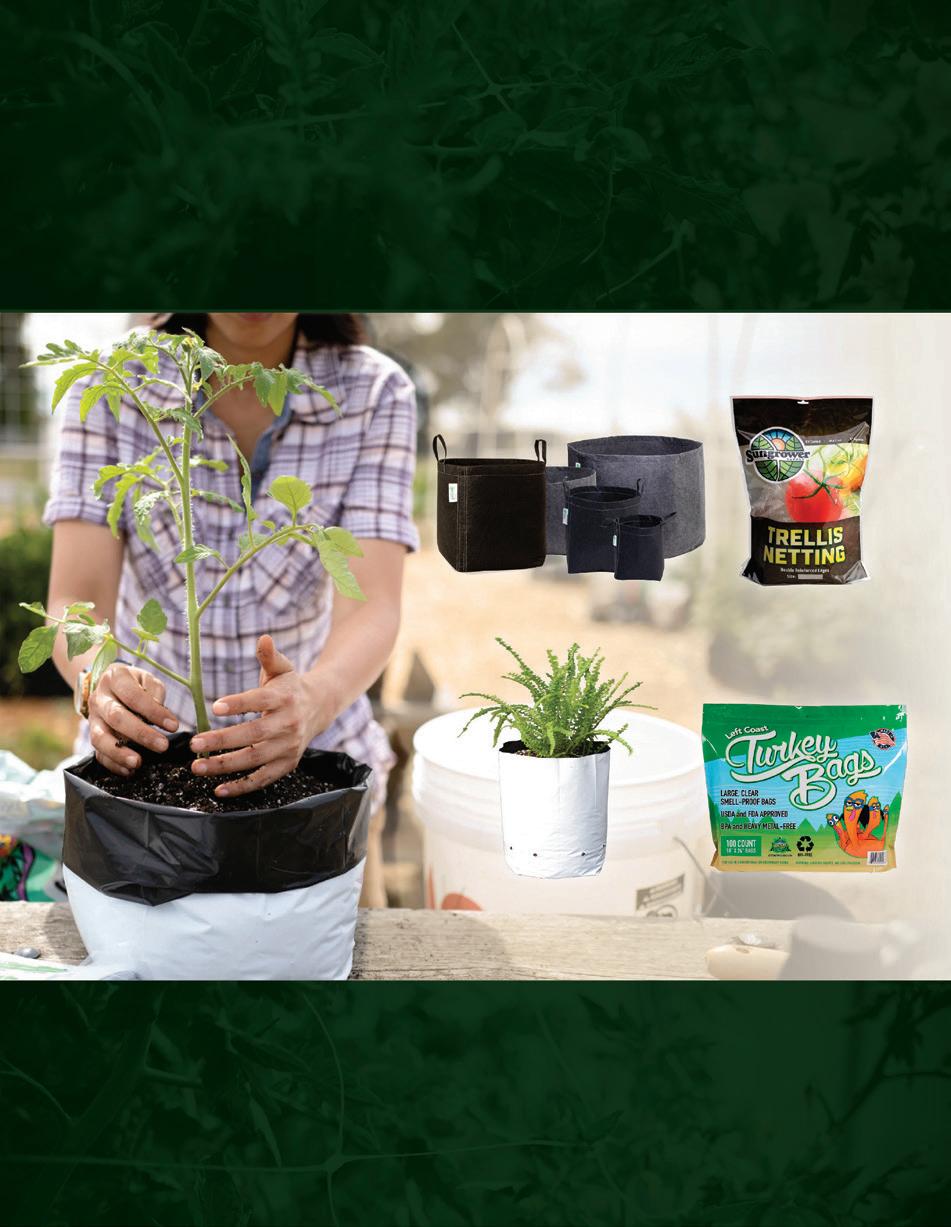
DLI UV 150W DE

Only 4 hours a day!
1 UV : 4 fixtures (HPS or LED)
More terpenes &
Cannabinoids
Healthier plants &
Pest-control


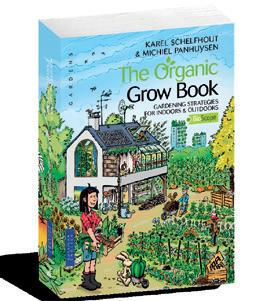




central coast grown 2.0 (40% and easy): this is why I use this product man

and

craftcannabisohio Love the product hands down the best, Si doesn't hold a matchstick to the double G as we call it round here


michigannja Multiply everything by 40....

talesofchronica I bought a bottle of GG Mono months ago and I still have about 10% left Great stuff I even went heavy with it at times!

4twentygrow ! Want your babies to super grow? BUY THIS PRODUCT!!! I use it in all my projects!

ROGUE_VALLEY_FARMS_OMMP Absolutely love this stuff!

canberracrops Definitely one of the best products I've ever used


Did you know that you can eat specialty mushrooms raw but that cooking them helps break down their cell walls so you can properly digest them and reap all their nutritional benefits? This is just one of the many tidbits The Caring Mushroom Co. shares with its customers so they can get the most out of their meals. Eric Cyr-Smith is passionate about growing gourmet mushrooms – anything from savory oysters and brain-boosting lion’s mane to shiitake, chestnut, and the immune-supporting reishi.
But more than growing, Eric desires to enrich lives and care for the planet. It’s a long checklist, but he’s been able to tackle all of the above and has turned some heads in the process. In 2023, The Caring Mushroom Co. was recognized for its hard work and dedication to the community, receiving the New Business of the Year Award from the Kitchener-Waterloo Chamber of Commerce.
It’s not surprising that so many in the community love The Caring Mushroom Co. The company lives and breathes sustainable, organic practices that benefit people and the environment. Embracing the Kaizen philosophy, the team is dedicated to continuously improving its products, practices, and community impact. Although not yet certified organic, all the mushrooms are grown using organic grain spawn mixed with hardwood sawdust and supplemented with wheat bran or soybean hulls. Once the mushroom blocks are colonized, they’re moved to the indoor fruiting area for production. The Caring Mushroom Co. strives for a low carbon footprint and aims to achieve net-zero emissions; energy-efficient cultivation methods and emission-free deliveries are a great start! Eco-friendly materials are used for packaging to help reduce waste and support responsible production. The company doesn’t use pesticides, chemicals, or fertilizers, and the spent mushroom substrate is typically donated to local farmers to use as compost for vegetable growing or as a soil conditioner to improve drainage in clay soils. The Caring Mushroom Co. also actively participates in the local community by planting trees and offering food donations at various times of the year.


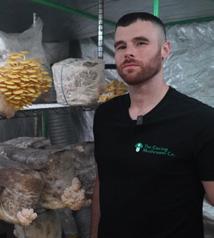


Customers can count on a consistent supply of grow-to-order mushrooms to meet their culinary needs. All they have to do is email The Caring Mushroom Co. with the type of mushroom they’d like and the quantity. Always evolving, the business is revamping its model this year to offer local subscription boxes to the surrounding community, making it even easier to enjoy delicious, sustainable mushrooms.
A quote from Mahatma Gandhi on The Caring Mushroom’s website embodies the philosophy behind everything this company does: “Be the Change You Want to See in the World.”
Learn more: thecaringmushroom.ca facebook.com/TheCaringMushroom thecaringmushroom


Would you like to be featured as one of our local growers? If you’ve got a garden, grow room, or farm and have a story to share, contact us at growers@gardenculturemagazine.com.
Zack Woods Herb Farm is a place fairytales are made of. Located on the unceded territory of the Wabanaki in the heart of the green mountains of north-central Vermont, the farm features majestic views, pristine forests, streams, and fresh air. In 1999, well before it was trendy to do so, Jeff and Melanie Carpenter began living and farming sustainably to provide people with the finest quality medicinal herbs. Their mission was as clear in ‘99 as today: to be good stewards of the land while producing clean botanical medicine for the local community and beyond.
Jeff is a lifelong Vermont resident and a descendant of generations of farmers. Before founding Zack Woods Herb Farm with Melanie, he deepened his relationship with plants through an apprenticeship with Rosemary Gladstar, an author and educator known as the godmother of modern herbalism. Melanie is Gladstar’s stepdaughter, and she credits her with helping create a profound passion for the world of medicinal herbs. Melanie has worked as a farmer, community herbalist, and educator for many years, believing that the most profound healings come from working with the land and plants.
When food is medicine, you must treat the soil like gold to ensure the plants get nutrients. Jeff and Melanie work tirelessly in the fields, building soil with minerals and organic matter. All the herbs at Zack Woods Herb Farm are certified organically grown or ethically wild-harvested. They are picked at their peak potency and dried in a batch dryer where light, humidity, and temperature levels are controlled. The herbs are minimally processed and packaged by hand.
Quality and integrity are the farm’s guiding principles, and Jeff and Melanie constantly strive to learn. They collaborate with other fine herbalists, farmers, and researchers worldwide. Zack Woods Herb Farm participates in research studies and hosts educational tours, workshops, and classes about cultivating and preserving medicinal


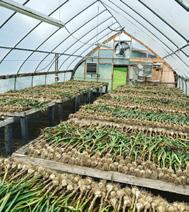
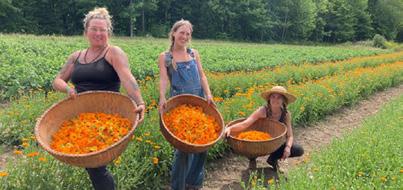
plant populations. Jeff and Melanie have also coauthored The Organic Medicinal Herb Farmer to help others with their homegrowing ventures, and Jeff consults on medicinal herb production for other farms.
The tea blends and dried herbs grown and harvested at Zack Woods Herb Farm (and Jeff and Melanie’s book!) are available for purchase online and ship across the United States.
Learn more: zackwoodsherbs.com facebook.com/zackwoodsherbs @zackwoodsherbfarm


This edition of Garden Culture Magazine is all about how the pros grow, and we are lucky to have more than a few expert gardeners on our team of writers. Their articles have already offered insight into what makes their gardens tick, but we’d like to leave you with some final words of wisdom to help you boost your growing game! Enjoy our list of 5 Cool Ways To Grow Like A Pro
“In controlled environment agriculture, proper watering is often overlooked,” says Garden Culture’s Av Singh, PhD, and regenerative gardening advocate. “Whether growing in coco, stone wool, or living soil, watering is critical for proper gas exchange at the roots, nutrient uptake, and microbial life.” What’s the answer to consistent and uniform re-saturation? An irrigation system! Growers can adjust flood heights and drip times to apply the appropriate amount of water as they steer their plants through all growth phases. Hand watering is also possible, but inconsistencies throughout the crop are more likely. Researching the ins and outs of proper irrigation is critical. “The use of wetting agents, good quality water at the right temperature and adequate dissolved oxygen goes a long way in the health of your plants,” Av explains.

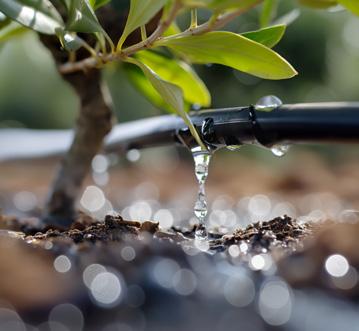


Everything begins with the soil; if your dirt isn’t in top shape, your plants will never reach their full potential. “My number one growing rule is “Soil health = plant + human health,” says our long-time contributor and gardening pro Anne Gibson. “Biologically active, fully mineralized soil is the basis for growing pest and diseaseresistant plants, especially edibles.” We recommend building a living organic soil, beginning with ingredients like peat moss, coconut coir, leaf mold, or partially composted pine bark as a base. The base accounts for one-third of the mix. Next, select a blend of perlite, rice hulls, or volcanic rocks for aeration and moisture retention.The final third of the soil mix should be excellent quality, well-rotted compost. Additional organic amendments and minerals will further enrich the soil and help balance pH; consider alfalfa, hemp, barley, guano, blood and bone meal, kelp, or crushed oyster shells. “Even if your soil has all 17 elements for healthy growth, optimum nutrient uptake is pH-dependent,” Anne says. “I aim for a 6.4 soil pH to maximize mineral nutrition.”
“Environment, environment, environment! If your room isn’t maintaining conditions, you will never grow your crop to its potential,” explains our friend, writer, and grow room consultant Adam Clarke. Ensuring your room has quality and adequately maintained HVAC equipment is crucial. Think of the HVAC system as the heart of your grow room; the quality of the air and general environmental conditions depend on this machine. Unfortunately, Adam says most growers don’t sanitize or service their equipment, which can lead to mold and other diseases that result in crop death. Most air handlers, mini splits, or other HVAC systems come with factory-equipped filters that need constant maintenance. Inspect your filters every month; most of the room’s air runs through these units, so that’s where you’ll find any bugs, mold, or particulates. If you do find some problems while inspecting the filters, don’t stress.“Most issues can be fixed and paid for in a single crop, assuming the HVAC isn’t complete junk,” reassures Adam.

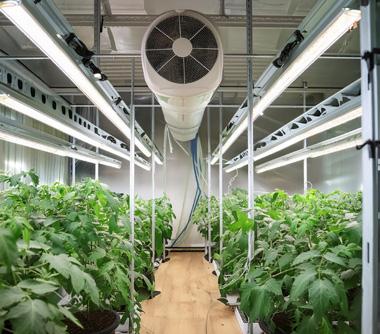

Whether growing in soil, peat, or coco, the function of any substrate is to allow plants to put down some roots and support growth. It’s common for new gardeners to be intimidated by growing media other than soil. However, Garden Culture contributor and seasoned grower Everest Fernandez encourages people to try other growing methods. “Beginners often oversimplify organic growing and overcomplicate hydroponics/ soilless,” he says. “I’d encourage beginners to embrace soilless potting mixes first. If you run into difficulties (e.g. low humidity), you can plug in a humidifier—but what if your humidifier breaks or you don’t have one? Soil growers are stuck with dimming lights as their only real option, whereas soilless folks can reduce the concentration of their nutrients.” Soilless media retains moisture and lets the gardener control nutrients and fertilizing for optimal plant growth. Modern farming practices have tapped into the benefits of using inert, soilless media to allow for more crop precision. It’s worth a try at home, too!

There are so many relationships at play when growing plants; recognizing and appreciating every one of them can make gardening much more meaningful and almost spiritual! Our Xavi Kief grows food and medicine for their family and community while striving to deepen their connection with the living planet and all of its inhabitants.
“Always Be Collaborating,” Xavi says. “You’re never cultivating in a vacuum, so whether combining experience and resources with other growers or celebrating community with microbial, plant, and animal companions, honor the uncountable generations that persisted to bring you all together in the present moment. Share the struggles and the successes!” It’s spiritual, and we dig it. 3




Che LeBlanc Founder, Rosebud Cannabis Farms and The Unicorn Music Festival
We have been in love with MIICROBIAL MASS PRO for several years now. We see significant increases in plant and root mass, better bud density, and bigger juicer trichomes year after year. It is a great alternative to brewing teas on-site, and so much more convenient! Best of all, it runs clean through our drippers and is easy to navigate with government regulators. We won’t grow without it!

Che LeBlanc is a certified permaculturist with three decades of experience in the cannabis industry. He is founder and director of Rosebud Cannabis Farms, The Unicorn Music Festival, and The Rosebud Bowl. He is also a co-founder of Antidote Processing. Through his work, Che is dedicated to demonstrating a better way to live – in harmony with our planet and community while creating space for cannabis culture to once again thrive in the Kootenays and beyond.

Rosebud is a regenerative cannabis farm situated in the renowned Kootenay region of British Columbia, the heart of Canadian cannabis culture. Visit rosebudcannabisfarms.ca to learn more.


The Unicorn is more than a music festival, it is a transformative experience where attendees can escape the ordinary, embrace their true selves, and create lasting memories in a breathtaking alpine setting. Visit theunicornmf.ca. to learn more.
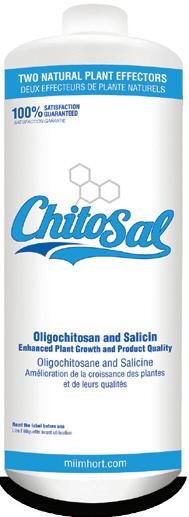
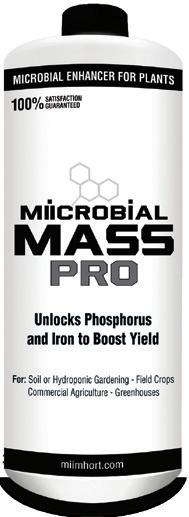
We’re committed to helping cultivators grow the healthiest, heaviest and highest potency crops possible.


