


Turn your home equity into the dream space you’ve always wanted. Access funds at lower interest rates than personal loans or credit cards, making large projects more affordable!

As the leaves turn golden and the air fills with the crisp scent of fall, there’s no better time to pause and appreciate the world around us. For me, this season feels like a warm hug, inviting us to slow down and reconnect—not just with our homes, but with the beauty of nature itself. Fall is a season that transforms everything, wrapping us in a cozy embrace and offering a sense of belonging that’s hard to find any other time of year.
In this issue, we invite you to step into Nature’s Neighborhood, where the world around us puts on its most beautiful display. Whether it’s the vibrant hues of the trees, the festive fall gatherings, or simply the quiet moments at home, there’s magic in the air. We’ve gathered tips to help you make the most of this enchanting season—from outdoor adventures to transforming your space into a fall sanctuary.
Let this season remind us all to feel one with the earth beneath our feet, to savor the beauty of a crisp morning, and to find warmth in the little things. Whether you're cozying up inside or venturing out to explore, fall is here to invite us to appreciate the world in all its natural glory.
Here’s to a season filled with connection, comfort, and the joy of being truly present.

Cierra Dootson Geneva Financial Executive Director Of Marketing
Managing Editor Home By Geneva
by GENEVA HOME
Geneva Financial 180 S. Arizona Ave Ste 310 Chandler, AZ 85225 www.GenevaFi.com
EDITOR-IN-CHIEF
James Polinori
MANAGING EDITOR
Cierra Dootson
ART DIRECTOR
Jacque Huerta
CONTRIBUTING WRITERS
Bryce Freshour
Chris Green

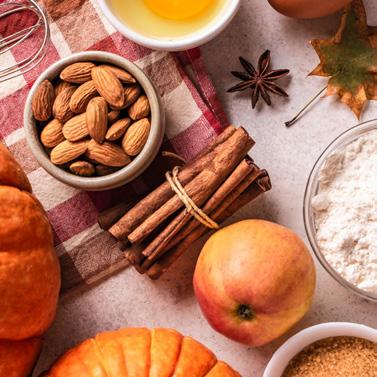


Autumn offers a stunning palette of colors and textures, making it a prime season for capturing breathtaking photographs. To make the most of fall’s beauty and share it effectively on Instagram and other social media, here are some tips to enhance your autumn photography.
Start by embracing the rich and varied colors of the season. The vibrant reds, oranges, and yellows of fall foliage can create striking contrasts and beautiful compositions. Look for scenes where these colors are prominent, and consider capturing the interplay of light and shadow to highlight the depth and texture of the leaves.
The golden hour, which occurs shortly after sunrise and before sunset, provides soft, warm lighting that enhances the fall colors. This natural light creates a magical atmosphere and adds a golden glow to your photos. Plan your shoots around these times to take advantage of the best lighting conditions.
Incorporate autumn elements such as pumpkins, apples, and cozy scarves into your compositions. These seasonal props can add interest and context to your photos, making them more relatable and engaging for your audience. Experiment with arranging these elements in a way that complements the natural beauty of the fall landscape.
Consider capturing the crispness of autumn air by photographing scenes that convey a sense of freshness and vitality. Dew on spider webs, frosted grass, or the mist rising from a cool morning can evoke the essence of fall. These details help to convey the season’s atmosphere and enhance the overall mood of your images.
Play with different angles and perspectives to capture unique views of autumn scenery. Shooting from low angles can highlight the textures of fallen leaves while looking up through tree branches can emphasize the canopy of fall colors. Creative compositions and varied perspectives will make your photos stand out and draw viewers in.
When posting on social media, use relevant hashtags to reach a wider audience. Hashtags like #FallPhotography, #AutumnColors, and #FallVibes can help your photos get noticed by those interested in seasonal content. Pair your images with thoughtful captions that reflect the beauty and spirit of autumn to engage your audience further.
Lastly, edit your photos to enhance the natural beauty of fall. Adjustments to brightness, contrast, and saturation can help bring out the rich colors of the season. Be mindful not to overedit; aim to enhance the image while preserving its authentic fall charm.
By following these tips, you can capture and share the enchanting beauty of autumn with your social media followers. Embrace the season’s colors, textures, and light to create stunning images that celebrate the magic of fall.
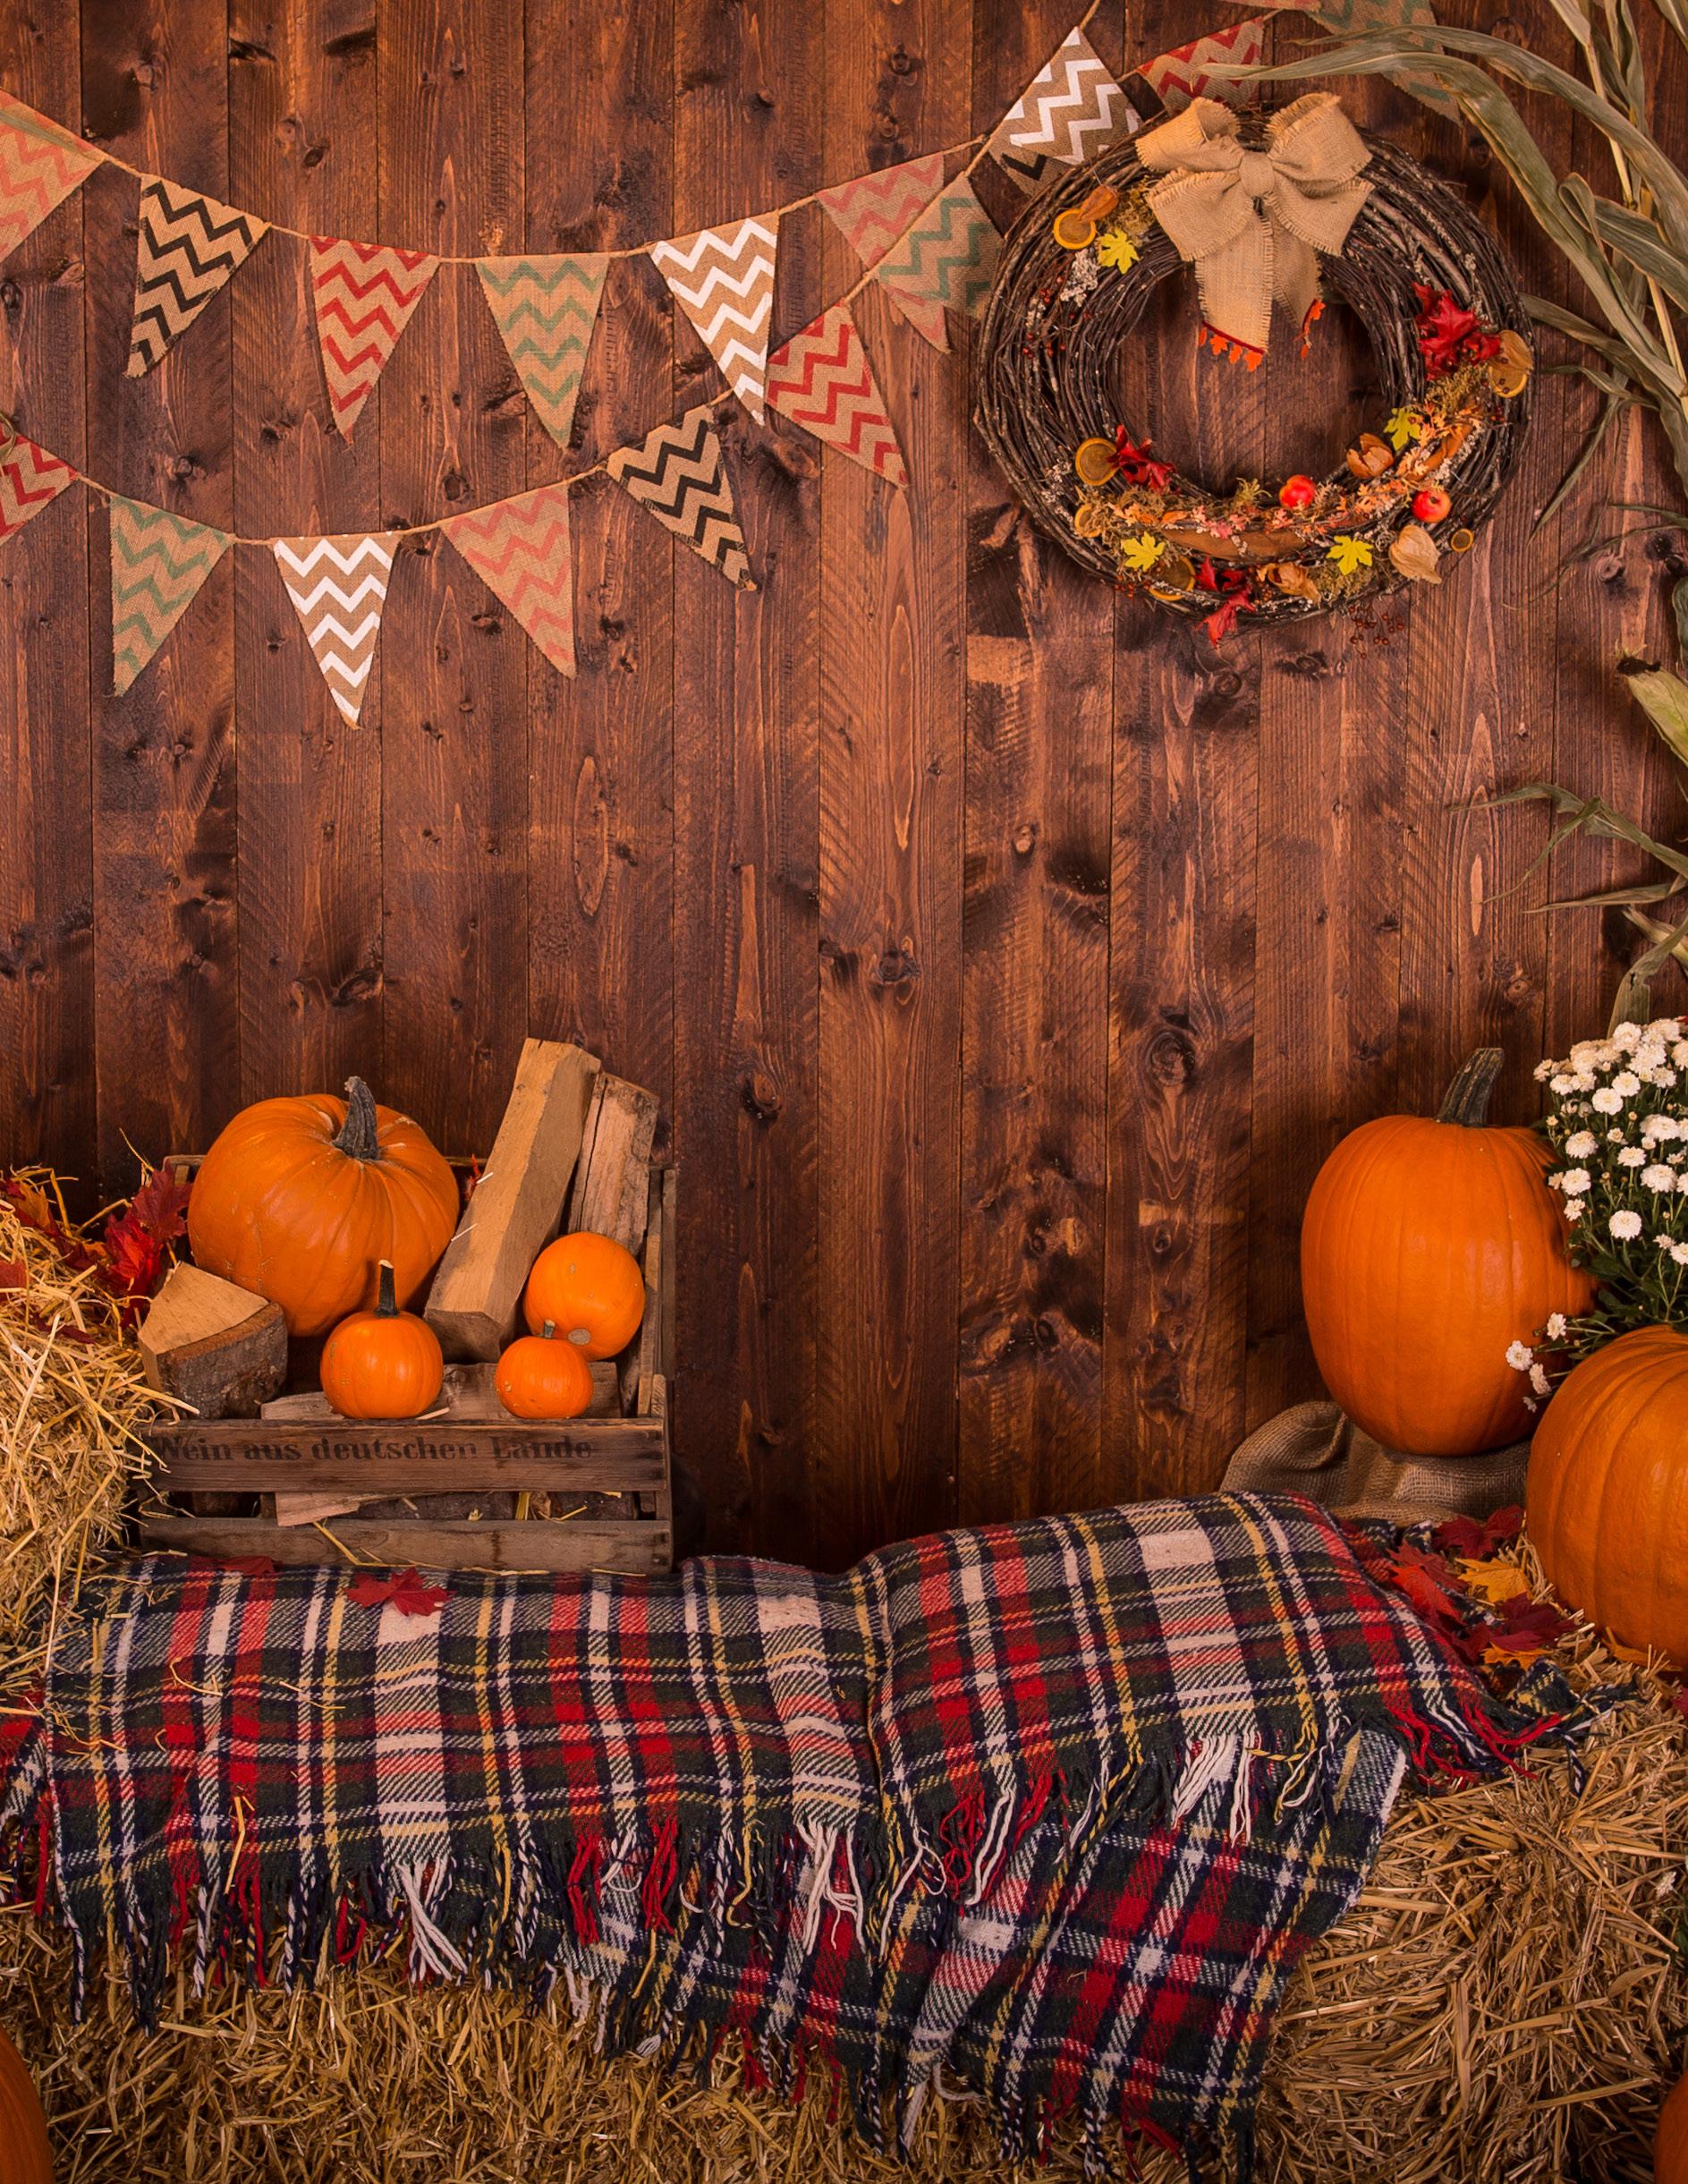
Fall isn’t just about trick or treating, apple picking, and baking. With cooler weather comes fun opportunities to go outside and experience the many seasonal activities offered. Whether you want to spend a relaxing day outside or want more excitement where you can run around and spend time around others with common interests, fall has you covered!


Most states hold their annual state fair beginning in late August or early September and will typically run through the end of October. State fairs are a fun tradition with plenty of food, games, and carnival rides for the kids to enjoy! Where else can you enjoy a deep fried Oreo covered in powdered sugar, ride a ferris wheel, and see a Vanilla Ice in concert all in one day? Food and prizes aren’t the only incentive to go, you will also get plenty of steps in and move around for some great exercise! The fair is truly a one-of-a-kind” experience that brings plenty of fun for the whole family!
Various festivals are held when the leaves start to fall. Music festivals for all genres are held across the United States and your favorite genre is sure to be represented. So far, none have the pedigree of Lollapalooza or Coachella but that doesn’t mean they won’t be just as fun! One major festival to keep an eye on is the When We Were Young festival held in Las Vegas featuring over 50 punk and alt rock

music artists! Relive the early 2000’s by listening to My Chemical Romance, Simple Plan and Jimmy Eat World!
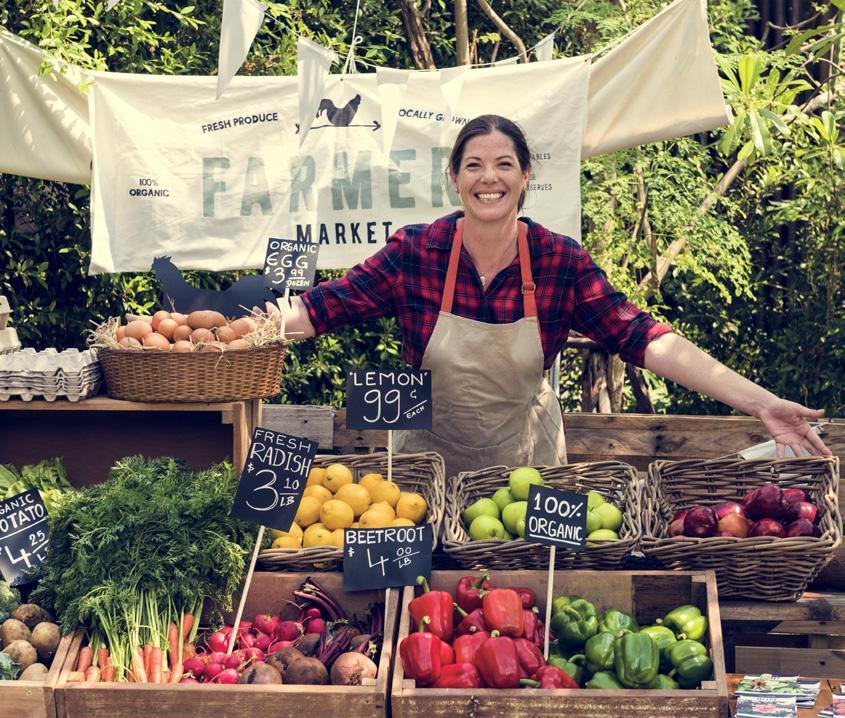
At a farmers market, you can purchase freshly picked fruits and vegetables as well as other fun food and home decor accessories. Visiting the farmers market is a fantastic way to support small businesses while discovering delicious foods from local spots you may not have tried yet! You will find home made crafts to decorate your home with from local artists. This is also a great way to go outside and walk around for some exercise. Since the weather is nice, it’s perfect for bringing the dog along!
Individual towns and cities can have their own unique activities you can participate in during the fall months. As the calendar gets closer to Halloween you will see pumpkin patches and local events pop up to ring in the holiday, each with its own individual spin to represent the town. If you’re looking for something extra scary this year, try visiting a haunted house! Haunted houses vary from town to town and often incorporate your town's history into it. No haunted house will be like the last!
Hopefully this helps you find something fun you can experience and gets you outside to enjoy the fall weather! Every town has their own unique events and attractions you can check out for a one of a kind experience right in your own backyard!

LIFESTYLE
As the leaves turn and the air grows crisp, there's no better time to explore the unique charm of small businesses. Shopping locally not only supports the community's economy but also offers a more personalized and meaningful shopping experience. Whether you're looking for cozy fall essentials, unique holiday gifts, or delicious seasonal foods, local stores have something special to offer. Here's a guide to some must-visit small businesses this fall and winter.
As the temperature drops, bundle up in style with fashion finds from local boutiques. From chunky knit sweaters to handmade scarves and hats, these shops offer unique and high-quality pieces that will keep you warm and in fashion all season. Don't miss out on exclusive fall collections that you won't find in big-box stores!
Are you looking for one-of-a-kind gifts for the upcoming holiday season? Local artisans and crafters offer a wide range of handmade products, from jewelry and pottery to candles and home decor. Shopping for handcrafted items not only supports local talent but also provides thoughtful, unique gifts that loved ones will treasure.
Embrace the flavors of fall and winter with a visit to local cafés and bakeries. Indulge in seasonal treats like pumpkin spice lattes, spiced apple cider, and freshly baked pies. Many of these establishments use locally sourced seasonal ingredients, ensuring the freshest and most delicious products. Plus, it's a great way to warm up after a brisk walk through town!
Transform your home into a cozy haven with decor from local home goods stores. From rustic fall decorations to festive winter accents, these shops offer pieces to suit any taste. Find unique items that add warmth and character to your space, making it the perfect place to snuggle up during the colder months.




Farmers' markets and local pop-up events are vibrant hubs of community activity. Here, you can find everything from fresh produce and handmade crafts to seasonal flowers and delicious foods. These events are not only great for shopping but also for connecting with local farmers, artisans, and neighbors. Keep an eye out for holiday markets and special events in your city or surrounding area throughout the fall and winter seasons.
Shopping local has a significant positive impact on the community. When you buy from small businesses, you're helping to support local jobs, reduce environmental impact, and foster a unique sense of place and identity. This fall and winter, consider making a conscious effort to shop small and support the hardworking entrepreneurs who make communities vibrant and unique.
In addition to shopping, consider giving back to the community this season. Many local businesses partner with charities and community initiatives to support those in need. Whether it's through a food drive, a donation campaign, or volunteering your time, there are many ways to make a positive impact. Check with your favorite local shops to see how you can get involved.
If you discover a new favorite shop or product, don't keep it to yourself! Share your finds with friends and family and encourage them to explore the local scene. Word-of-mouth is a powerful tool for supporting small businesses, and your recommendations can make a big difference.
This fall and winter let's come together as a community to celebrate and support the wonderful small businesses that make our towns unique. Whether you're shopping for yourself or finding the perfect gift for a loved one, you'll find joy and satisfaction in knowing that you're making a positive impact. Happy shopping!

The holidays can be stressful with all the planning, traveling, and prepping involved While we can’t fully take away some of the stresses the holiday season brings, we aim to help alleviate some of it for you. Here are some fun tips and tricks on how to salvage your sanity and have your holidays be as stress-free as possible!

Mark your calendar and set deadlines for when you want certain tasks done. If you plan ahead, you can monitor what you have accomplished and plan ahead for what needs extra planning. This helps you avoid that panic of wrapping all your gifts on Christmas eve and buying all your party essentials the day of.
Wrap all the gifts you purchase as the holidays go along instead of doing them all at once. Waiting to complete this task in one sitting adds extra stress and anxiety from seeing the unwrapped gifts pile up. Instead, wrap your gifts within 24 hours of getting them or plan one evening each week to wrap gifts and set them out of sight for peace of mind.
We get it, you don’t want anything to go awry with any of your holiday planning. While it’s good to set a high standard for yourself and have strong expectations it’s not likely going to happen. Don’t have the perception that everything will go perfectly and be ok with it. When something unexpected pops up, go with it and try not to get too hung up on it! Expecting perfection is a fast track to being set up for disappointment!

Don’t get too extravagant when planning your holiday activities. Start simple and add things as you move along in the process. That will be the ideal time to gauge where you’re at with what time you have to get it done. This helps you keep a steady pace and not get overrun with small tasks that take more of your time.
Whether planning what gifts you need to get, traveling to visit your family, or the party all of your friends are going to, it’s easy to get caught up in the planning. The holidays are for spending time with loved ones, be sure to set aside plenty of time where you can enjoy fun events with yours. Don’t end the holiday season regretting not spending more time with your loved ones and plan time to spend with them instead!
While the holidays can be one of the more stressful times of the year, the real purpose of them is to be grateful for what you have and the people you have in your life. Don’t let your holiday season be taken over by stress and use the tips to make it as stress-free as possible!

As the vibrant hues of autumn start to color the landscape, we are reminded of the simple pleasures that nature and community bring into our lives. In the midst of our fast-paced routines and constant digital distractions, it’s crucial to take a moment to reconnect—with the earth beneath our feet and the people around us. We invite you to explore the ways we can find deeper connection and peace this fall through the beauty of the season and the warmth of our communities.

Fall is a season rich with traditions, and nothing embodies this more than the array of local festivals, state fairs, and farmers' markets that pop up during this time. These events are more than just a fun way to spend a weekend; they are a celebration of local culture and community. When you attend a fall festival, you're not just enjoying the food, crafts, and entertainment; you're supporting small businesses and local artisans who pour their hearts into their work. Visiting your local farmers' market, for example, isn’t just about buying fresh produce; it's about connecting with the people who grow your food, learning their stories, and contributing to the local economy. (PAGE 8)
Nature has long been a source of healing and tranquility, and fall is the perfect time to tap into these benefits. Journaling outdoors, for instance, allows you to combine the mindfulness of writing with the calming effects of nature. Whether you’re capturing your thoughts beneath the changing leaves or sketching out your goals for the coming year, being in nature can enhance the reflective experience.

Supporting small businesses during the fall season goes beyond shopping at fairs and markets. It’s about making intentional choices to buy local whenever possible. Whether it’s picking up a handmade candle from a local shop or ordering holiday gifts from a nearby artisan, every purchase helps build a stronger, more vibrant community. Small businesses are the backbone of our neighborhoods, and by choosing to support them, we invest in the future of our communities.

As we transition into the colder months, our homes become the center of our lives. This makes fall the perfect time to prepare for the holidays, both practically and spiritually. Start by bringing the warmth of the season indoors with fall-themed decorations. (Page 14)These elements don’t just enhance your home’s aesthetic; they create an atmosphere of warmth and welcome, setting the stage for meaningful gatherings with family and friends.
Getting a head start on holiday preparations can alleviate the stress that often accompanies the season. Simple, enjoyable activities like making your own cider or knitting a scarf can help you slow down and savor the moment. These DIY projects not only add a personal touch to your holiday decor but also provide a creative outlet that can be incredibly grounding during a busy time of year. Additionally, planning your meals in advance with cozy crock-pot recipes or exploring new fall drink recipes, like whiskey-based cocktails, can make your holiday entertaining effortless and enjoyable. (Page 18)
For those looking to stay active, running offers a great way to enjoy the cooler weather while improving your physical health. Starting a run club with friends or joining an existing one can provide motivation and a sense of community. If you’re new to running, fall is an ideal season to begin; the cooler temperatures make outdoor exercise more comfortable, and the changing scenery adds an element of beauty to your routine. And for those who prefer a slower pace, hiking offers a wonderful alternative. Remember to follow trail etiquette to ensure that everyone has an enjoyable experience, and take advantage of the peacefulness that comes with walking through nature’s autumnal display. (PAGE 46)
If the approaching winter has you concerned about staying healthy, consider planning a winter wellness retreat. These getaways are designed to help you recharge, offering a variety of treatments and activities focused on mental and physical well-being. From yoga and meditation to spa treatments and nature walks, a wellness retreat can provide the perfect reset before the holiday season kicks into high gear. (PAGE 50)

This fall, let "Nature’s Neighborhood" inspire you to step outside, connect with your community, and find joy in the simple pleasures of the season. Whether it’s through attending local festivals, preparing your home for the holidays, or exploring the great outdoors, there are countless ways to reconnect with what truly matters. In a world that often feels overwhelming, grounding ourselves in nature and community offers a path to peace, well-being, and a renewed sense of purpose. So take a deep breath, embrace the beauty around you, and let this season be one of connection and renewal.


The holidays bring fun decorations in the home, yard, and everything in between. Each holiday brings common decorations such as bright lights and inflatable yard pieces. This may be fine for some but others want their home to be unique. With a few distinct decorations you can turn your home from standard holiday decor to one with personality, character, and give it an identity that encapsulates you and your home. With that being said, here are two unique decoration ideas for Halloween, Thanksgiving, and Christmas you can use this year!
You want your home to be spooky for Halloween and the traditional carved pumpkin isn’t gonna cut it. With a few DIY projects and a trip to your local craft store, you can reimagine your home and make it frighteningly terrific this Halloween! These are perfect to scare away trick or treaters and save you some extra candy for yourself!
1. Spooky Entryway: Change up your entryway and turn it into something more sinister. Adorn your front door and patio area in cobwebs, headstones, and creepy skeletons. This sets the tone for your home and will have party guests wondering if they should have ignored the RSVP for your Halloween party!

2. DIY Potion Bottles: Now that the exterior of your home is ready for Halloween, it’s time to prepare the interior. Set up a potion table in your home using nothing but water, food coloring, and old glass bottles. Reuse old pasta jars, alcohol containers, and mason jars all varying in size and shape for a better effect. This makes it appear as if you spent the day brewing up a concoction crazy enough to make the Sanderson sisters jealous!

Thanksgiving is all about bringing your close ones together to cherish one another and honor the past year. Take advantage of seasonal delicacies and use them to create a welcoming environment for your guests. These decor ideas are sure to be the talk of the table while everyone is enjoying their meal!
1.Cranberry Garland: Leave the canned cranberries off your grocery list this year. Instead, buy a package of artificial cranberries and string them along your entryway or table! The touch of red around the home will look great next to the browns and oranges often used for decorating Thanksgiving with, and your guests will love the look of it!
2.DIY Wreath: Take a classic wreath and turn it into something all your own this Thanksgiving. Using corn husks, ribbon, and pine cones, you can create a wonderful wreath for your entryway. Wreaths you find at the store are all similar in style, making your own lets you customize it as you see fit!
Make your home vibrant and colorful this Christmas by crafting your own decorations! You can utilize the traditional colors of green and red but we also suggest mixing in other warm colors such as pink, yellow, and orange. These decor ideas will have your home feeling festive and inviting for Santa and his reindeer!
1.Ornament Tree: Instead of adorning a pine tree with ornaments, make the ornaments the centerpiece themselves! Ornament trees are good for offices and bedrooms around the home, but you can also use it to replace the traditional tree and use your ornament to stash all your presents! Classic ball ornaments come in many colors and shapes, making this versatile and fun to design!
2.Tinsel: Tinsel used to be a staple at Christmas time where trees, banisters, and fireplaces were often covered with it. Finally coming back in style, this holiday classic adds more sparkle and shine to your home, so use plenty of it this holiday season! Keep it colorful or go with a traditional white for a fun icicle effect!

These decoration ideas are a great way to honor these holiday traditions but add a modern spin to them. With enough creativity, you can decorate your home and turn it into something individual and unique!

Thanksgiving is a celebration of gratitude, togetherness, and cherished moments with loved ones. It’s a celebration of shared memories made around the table. One of the best ways to enhance this experience is through thoughtful table settings and decor, which set the mood for the occasion.

Your Thanksgiving table is the centerpiece of the celebration, symbolizing hospitality and connection. Crafting the perfect setting can elevate the entire experience, making guests feel welcome and appreciated.
1. Choose a Theme or Color Palette
Begin by selecting a color palette that reflects the warmth of autumn. Earthy tones like deep oranges, rich browns, and golden yellows create a cozy atmosphere. You can complement these shades with rustic accents like wooden chargers or metallic touches, such as copper flatware or brass candleholders, to bring a refined touch.
2. Layering with Linens
Start with the foundation of your table—linens. A tablecloth or runner provides texture and helps define your theme. For a more relaxed, farmhouse look, consider a simple, neutral linen tablecloth, or for an elegant affair, try a richly patterned runner. Linen napkins in coordinating colors add a tactile element that your guests will appreciate.
3. The Power of Centerpieces
Your centerpiece is the visual focal point of the table. Opt for natural elements like a harvest-inspired floral arrangement, garlands of eucalyptus, or clusters of faux pumpkins. Add height and dimension with candleholders
4. Thoughtful Tableware
Your dinnerware should reflect the essence of the celebration. Consider using plates with subtle seasonal patterns, such as autumnal leaves or classic whiteware accented with a pop of color through salad plates or bowls.
5. Personal Touches
Place cards or hand-written notes for each guest can add a personal and intimate touch to your gathering. These small gestures help guests feel special and create an even more welcoming atmosphere.
6. Festive Drinkware
Complement your table setting with elegant glassware, whether for a special wine toast or simply serving cider. Opt for goblets or glass tumblers that feature intricate designs or autumn colors to tie everything together.
The table isn’t just about looks—it sets the tone for the entire event. Soft lighting from candles, twinkling string lights overhead, or even a fireplace crackling nearby can create the cozy and intimate mood that Thanksgiving embodies. A playlist of soft, instrumental music in the background can enhance the ambiance without overpowering the conversation.
At the heart of Thanksgiving is the gathering of loved ones, and your table should reflect that spirit of unity and warmth. By carefully selecting your table settings and decor, you’re not just creating a beautiful space—you’re crafting an experience that helps to foster conversation, laughter, and lasting memories.


Give your home a fall inspired makeover this year! Using materials created directly by Mother Earth, your home can now have natural colors and schemes, perfect for the autumn season. With enough creativity, your home will give off vibes straight from the pumpkin patch and welcome all of your guests in style! Here are some fun home decor projects you can create using items only found in nature!

Take your standard carved pumpkins and give them some shine this year! You will need to spray paint leaves silver and glue them on to your pumpkin. Fake or real leaves can be used for this but the real thing will have a much better effect overall.
Stack 3 or more pumpkins varying in size and adorn them with moss, vines, and small pine cones for a natural topiary! This will look great on your entryway and is a warm welcome for guests and trick or treaters alike!
Create a fall inspired checker board by painting squares on a plank of wood and adorning it with mini pumpkins, 12 orange and 12 white. We recommend using fall colors for the board like orange, brown, and red!
Using a mason jar, a small candle, and leaves, you can make a beautiful lantern that screams autumn. With a bottle of Mod Podge, you can brush on a layer of glue to hold fallen leaves that glow with a candle's light. These mason jars create a wonderful fall ambiance and set the mood for a nice, relaxing evening watching your favorite Hallmark movies!
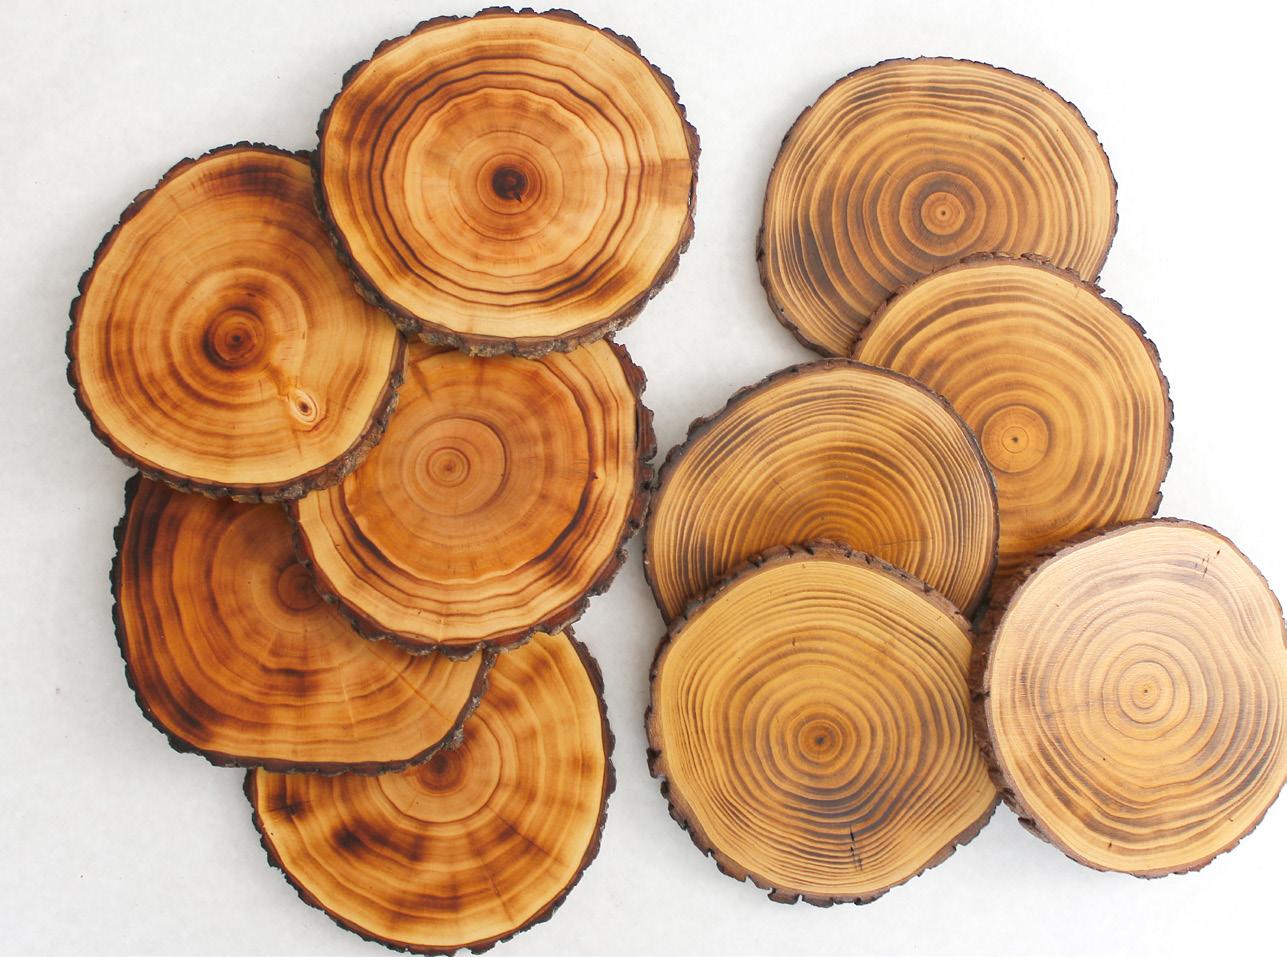
If you recently had to trim down a tree in your yard you can use pieces of the trunk as coasters on your coffee table! This reuses parts of the tree that would otherwise be thrown away and gives your home a natural, Earthy undertone. All you need to do is cut the wood and stain the wood to protect it!
A great crafting exercise for the kids, pine cone owls are adorable and make for an easy project for a lazy afternoon! You will only need pine cones, glue, cotton balls, and googly eyes to make these cute knick knacks. These also make for great office decor and will undoubtedly give you a smile during those busy days at work.
Commemorate fun fall memories by putting your pumpkin patch snapshots in a photo frame adorned with acorns! For this, you will need to purchase a photo frame, hot glue gun, burlap, and some acorns from your front yard! This will make for a cute decorative piece that showcases all the fun you had this fall!
These DIY projects will make your home pop this fall and make your neighbors jealous! With a little bit of time and energy, you can make your home fun and give it a natural aura perfect for the season!



There's just something incredibly satisfying about crafting cider from scratch. Whether you're interested in fermentation or just love the taste of fresh, homemade cider, making your own cider is a fun and rewarding process. We’ve put together a guide that will walk you through each step, from selecting apples to bottling your finished product.
Wash your apples thoroughly to remove any pesticides or residues. Peel and core the apples— this step is optional but helps prevent added bitterness from the seeds and skin. Cut the apples into smaller pieces to make them easier to process.
If you have a juice extractor, feed the apple pieces into it and collect the juice. If you don't have a juicer, use a blender to blend the apple pieces until smooth. Strain the blended mixture through a fine mesh sieve or cheesecloth to separate the juice from the pulp.
Measure the juice and pour it into a large pot. Add sugar to the juice — this step is optional but can enhance the sweetness and increase the alcohol content. Heat the juice to dissolve the sugar, but do not bring it to a boil. Allow it to cool to room temperature.
5 to 6 lbs. of apples, ideally a mixture of sweet and tart varieties as this combination makes for the best cider
1 cup of sugar
1 packet of cider yeast or champagne yeast.
Water on hand is also advisable, just in case you need it
A juice extractor or blender,
Fine mesh sieve or cheesecloth
Large pot
Fermentation vessel with an airlock
Bottles
Siphon or funnel
Sanitizing solution
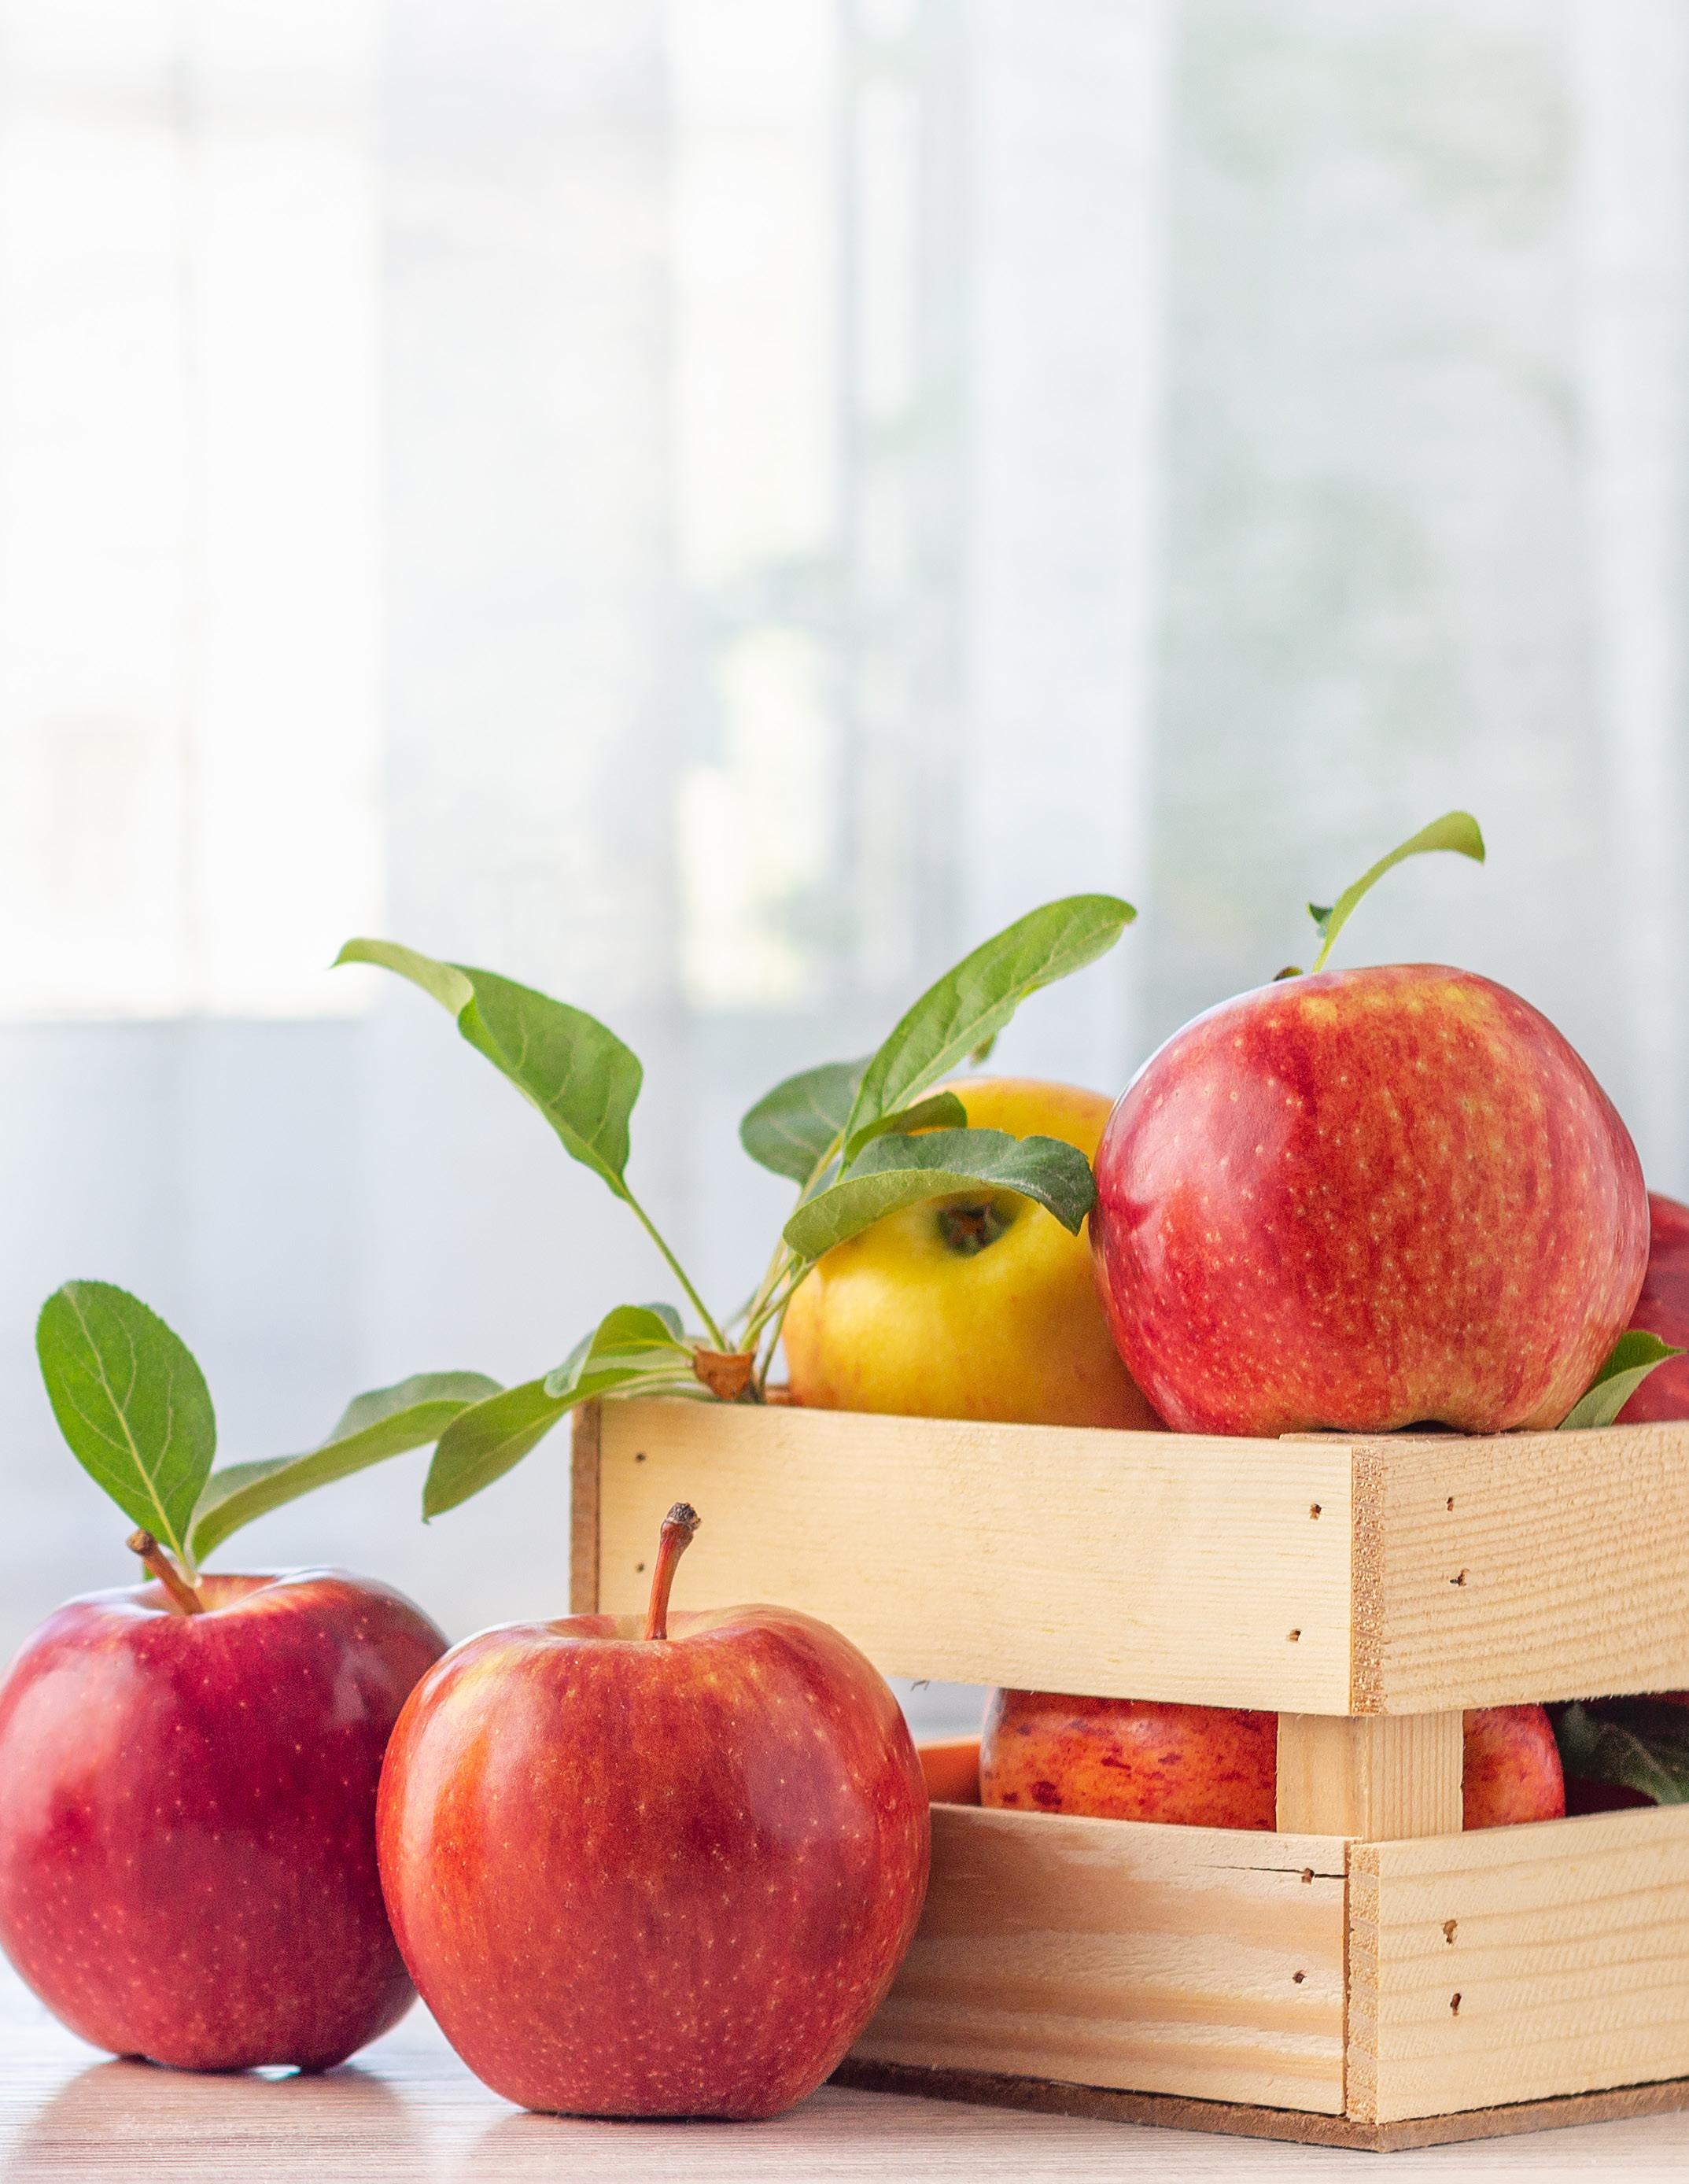
For the best flavor, choose a mix of apple varieties. Sweet apples like Fuji or Gala add a pleasant sweetness, while tart apples like Granny Smith and Yellow Transparent provide a nice balance. Aim for about 5 to 6 pounds of apples to yield roughly one gallon of cider.
Making cider is a gratifying experience that allows you to enjoy a unique and personalized beverage. With just a bit of patience and the right ingredients, you'll have a delicious homemade cider to savor and share. Cheers to your cider-making adventure! Are you thinking of starting this process yourself? Make sure to Tag @HomeByGeneva on Instagram to share your progress!
Fermentation
Sanitize all equipment to prevent contamination. Pour the cooled juice into the fermentation vessel, leaving some space at the top. Add the yeast. You can use cider yeast or champagne yeast, depending on your preference. Seal your fermentation vessel with an airlock to allow gases to escape while preventing outside air from entering. Store the vessel in a cool, dark place. Fermentation will typically take 1 to 2 weeks. 5
Store the bottled cider in a cool, dark place. Allow it to age for at least 2 to 4 weeks to develop its flavors. Although you may want to enjoy your cider right after bottling, always remember that the longer you age it, the better the flavor becomes!
After waiting 1-2 weeks, you’ll want to check the cider to ensure fermentation has stopped. The cider should be clear, and the bubbling should have ceased. Sanitize bottles and caps. Transfer the cider into bottles using a siphon or funnel. Leave some headspace at the top of each bottle. Seal the bottles with caps. 6

Area Manager | NMLS #338525

Throughout constant changes in a turbulent industry, Geneva Financial Area Manager Sean Uyehara has maintained his social media presence through a determination and drive to create more business in a way that breaks the typical mold. This change started in 2017 when Sean saw other Loan Officers and Realtors using online platforms to garner business. Before this observation, Sean used the traditional model of cold-calling leads and trying to build a customer relationship over the phone. When he realized that most leads only wanted information and didn’t produce much business, Sean decided to take more control of the situation.
Sean started filming quick 10-15-second videos for Facebook ads, later expanding to Instagram, LinkedIn, and TikTok. Taking inspiration from popular reality shows like Million Dollar Listing, Sean began filming vlog-style video content, showing viewers the mortgage world from a lender's perspective. He took his entire budget for gathering leads and used it to hire a videographer to film and edit videos. Focusing on his home in Las Vegas, the team around him, and the company he worked for, believing the all-encompassing team around him was what made the videos special, not the product he was selling. This genuineness has increased his business and generated more genuine leads.

As view counts and followers began racking up, Sean became more comfortable on screen. Choosing to be himself, Sean stopped wearing a suit in his videos and decided to go for a more casual attire, saying, “People don’t care about what you dress or look like, sometimes you need to, but the world is changing. No more suit and tie, once you get to the point where the content is working, nobody cares.” This change made his content appear more relatable and authentic, showing Sean’s true personality. If your clients are expecting the same person they saw on video and are met with someone completely different, a disconnect can happen.
In his videos, he sits down, does screen shares, and “gets to the point”. You won’t see Sean dancing or doing silly skits, that’s not him.
Sean looks at market trends and current mortgage news, sharing his honest opinions on the industry and what he believes people should do. He looks at Google search trends to see what people are trying to learn and turns that into his content.
It’s also important to know what’s trending on each platform and to use it in your content. Spending just a few minutes on each platform daily will give you a good idea of what others are doing. Sean suggests following other influencers from similar industries, dissecting what they talk about to decide if it’s a topic he’s interested in making content for.
push it aside. Don’t focus on making high-production videos, shooting on your phone in the car does the trick. Platforms like TikTok and Instagram even push “lower quality” videos, which often get more traction than ones shot with professional equipment.
Prioritizing a platform is a challenging feat. Sean has had the most success on YouTube and prefers the flexibility of shooting long-form content, often cutting clips from his longer videos that he then uploads as shorts on other platforms. This is fluid from one creator to the next and largely depends on who watches your videos. For Sean, he found that his target demographic prefers to watch videos on YouTube and he tailored what he makes just for the platform.
Measuring the success of videos can often be difficult for content creators. Sean tries to avoid looking at metrics, instead focusing on how it affects his audience. Knowing that his work can have an impact on someone's life is what Sean cares about. Whether that means more business for him or simply teaching someone something new about the industry, there is value in information.

Sean goes to creator conferences to learn more about the process of content creation and mingles with other influencers. This has helped him “think bigger” and introduced him to a new world he never knew existed. Covering all topics, some are more interesting than others. Understanding that the mortgage isn’t the most glamorous subject, Sean emphasizes the importance of trying to make your videos interesting. Finding inspiration in other fields helps to stay on top of what you talk about and gets the creative juices flowing. As you produce more content, you’ll find your voice and the videos you prefer to make. It’s a tough road for many at first but once you find your niche and know what you like to make, it becomes much easier.
To stay on top of his shooting schedule, Sean films content first thing in the morning before daily distractions get in the way. If you have errands to run, need to pick up the kids, or have a meeting to attend, Sean states “You will always choose the path of least resistance” and
Sean noticed that his profiles popped off when COVID hit with “a little bit of dumb luck” as more people moved to the Las Vegas market. He would create videos on life in the city, talking about what people would ask him in the comments of other videos.
As parting words for anyone looking to begin their endeavor in the content creation world, Sean recommends sticking with it and having a genuine belief in what you are doing. This process isn’t easy but if you give it your best effort you will be rewarded.
At the time of the interview, Sean has no immediate plans to change what kind of content he produces, but ramping his YouTube channel back up is at the top of his list. We know that Sean will put his best foot forward in whatever he decides to, and we can’t wait to watch it.


INGREDIENTS: RECIPES
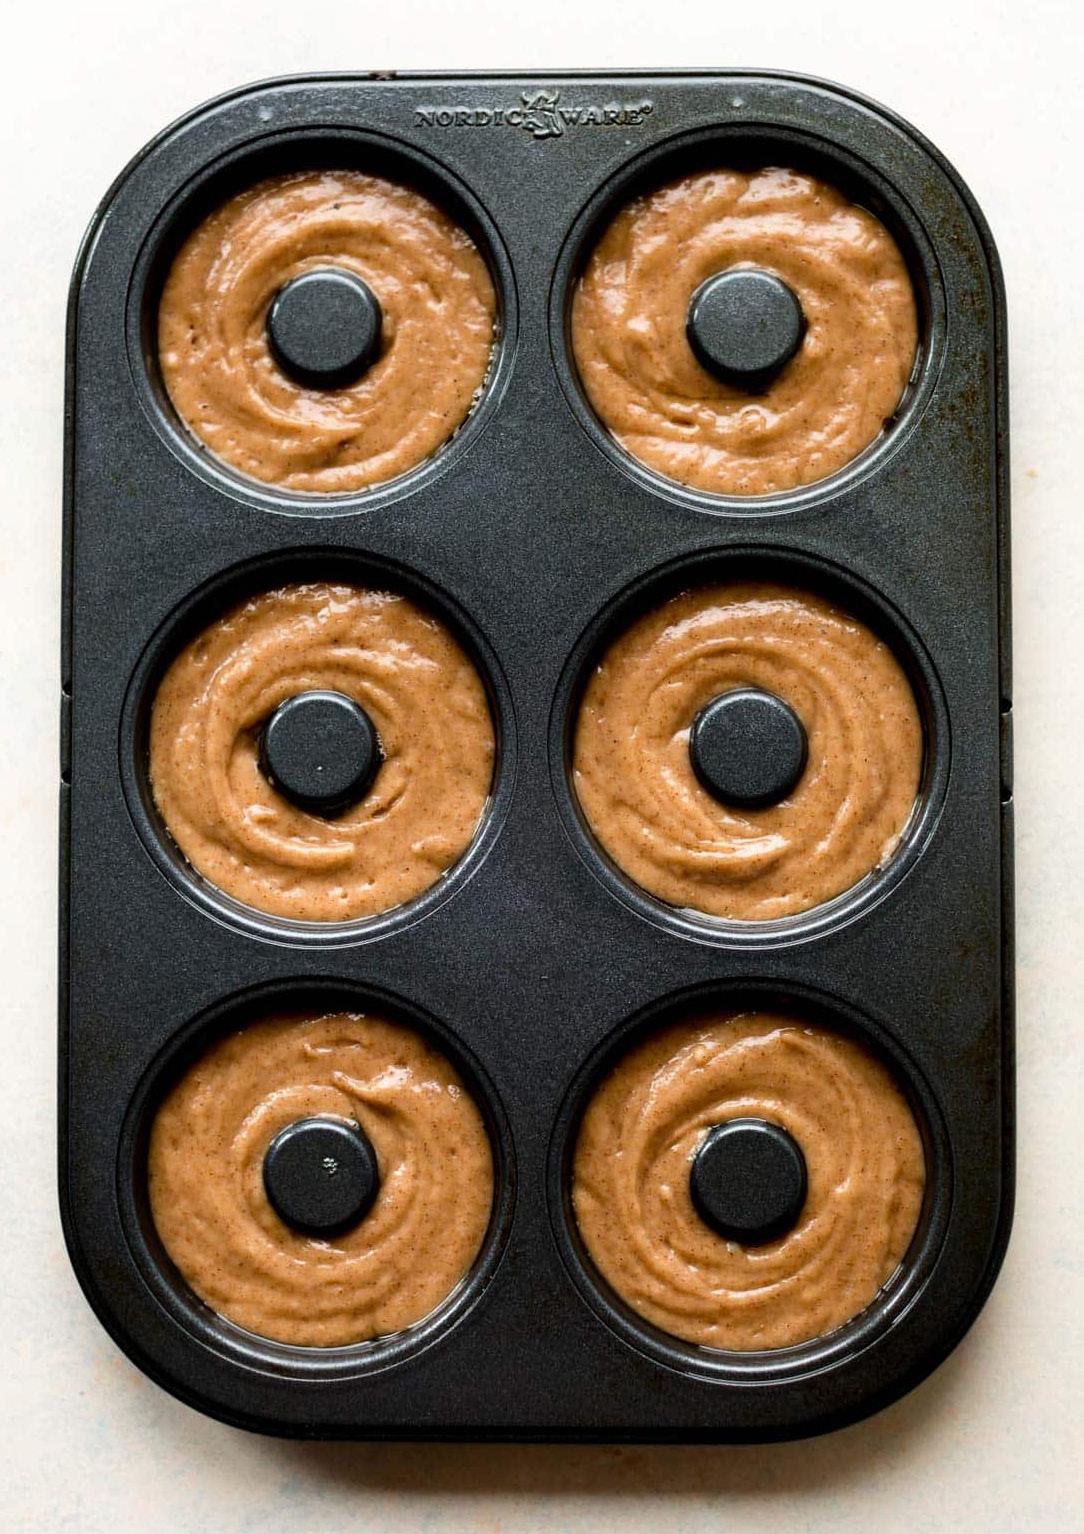
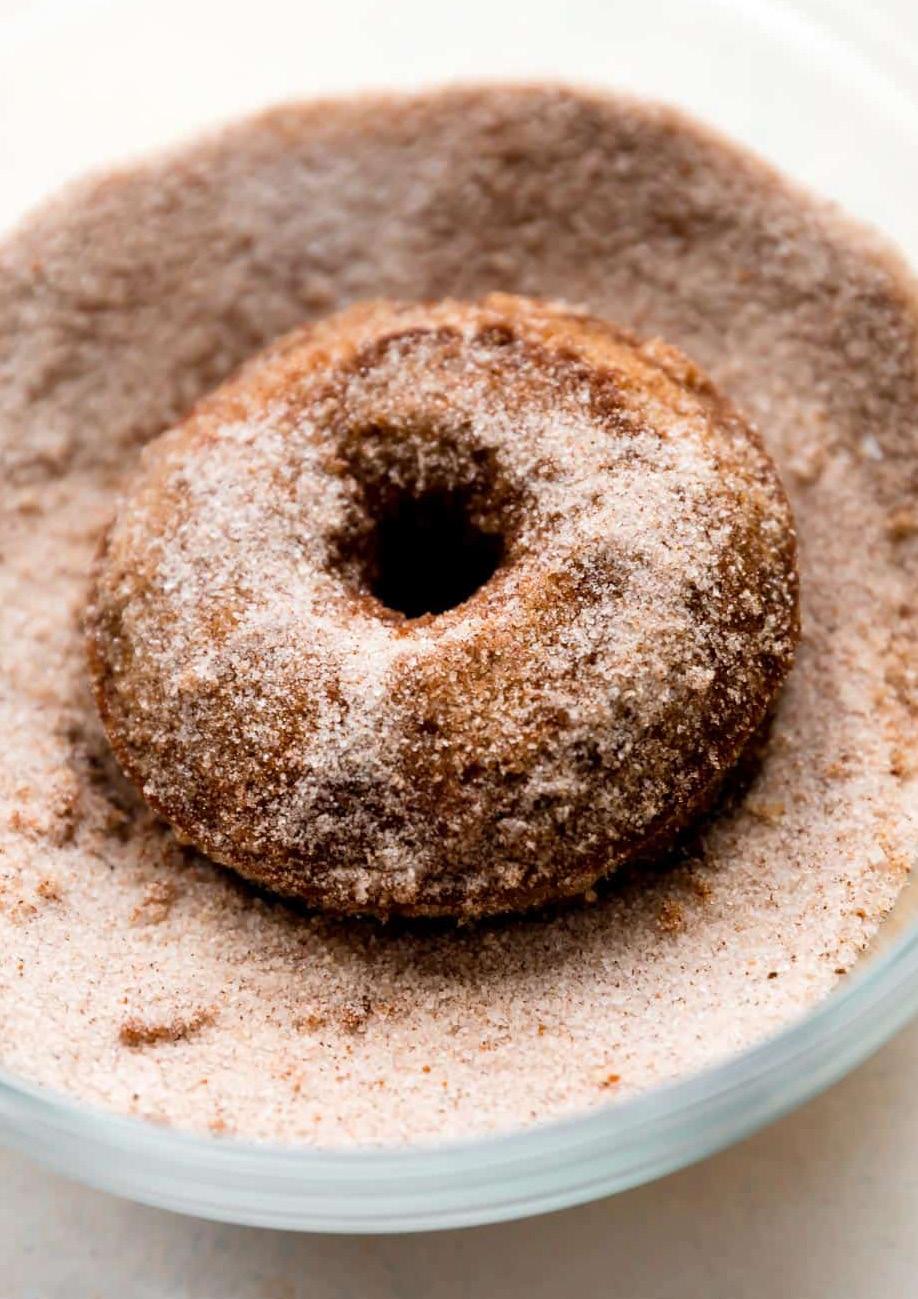
https://sallysbakingaddiction.com
Serves 12- 14
1 & 1/2 c. apple cider
2 c.all-purpose flour (leveled)
1 tsp. baking soda
3/4 tsp. baking powder
1 tsp. ground cinnamon
1 tsp. apple pie spice*
1/4 tsp. salt
2 tbsp. unsalted butter, melted
1 large egg, at room temperature
1/2 c. packed light or dark brown sugar
1/2 c. granulated sugar
1/2 c. milk, at room temperature
1 teaspoon pure vanilla extract
TOPPING:
1 c. granulated sugar
3/4 tsp. ground cinnamon
3/4 tsp. apple pie spice*
6 tbsp. unsalted butter
Method Oven
DIRECTIONS:
REDUCE THE APPLE CIDER:
minutes
Stirring occasionally, simmer the apple cider in a small saucepan over low heat until you’re left with about 1/2 cup. Start checking at 10 minutes, 15 minutes, 20 minutes, etc until you have 1/2 cup (120ml). Mine takes about 20 minutes. If there are any spices or solids on top of your reduced apple cider, leave them. Set aside to cool for 10 minutes.
Preheat oven to 350°F (177°C). Spray donut pan with non-stick spray. Set aside.
MAKE THE DONUTS:
Whisk the flour, baking soda, baking powder, cinnamon, apple pie spice, and salt together in a large bowl. Set aside.
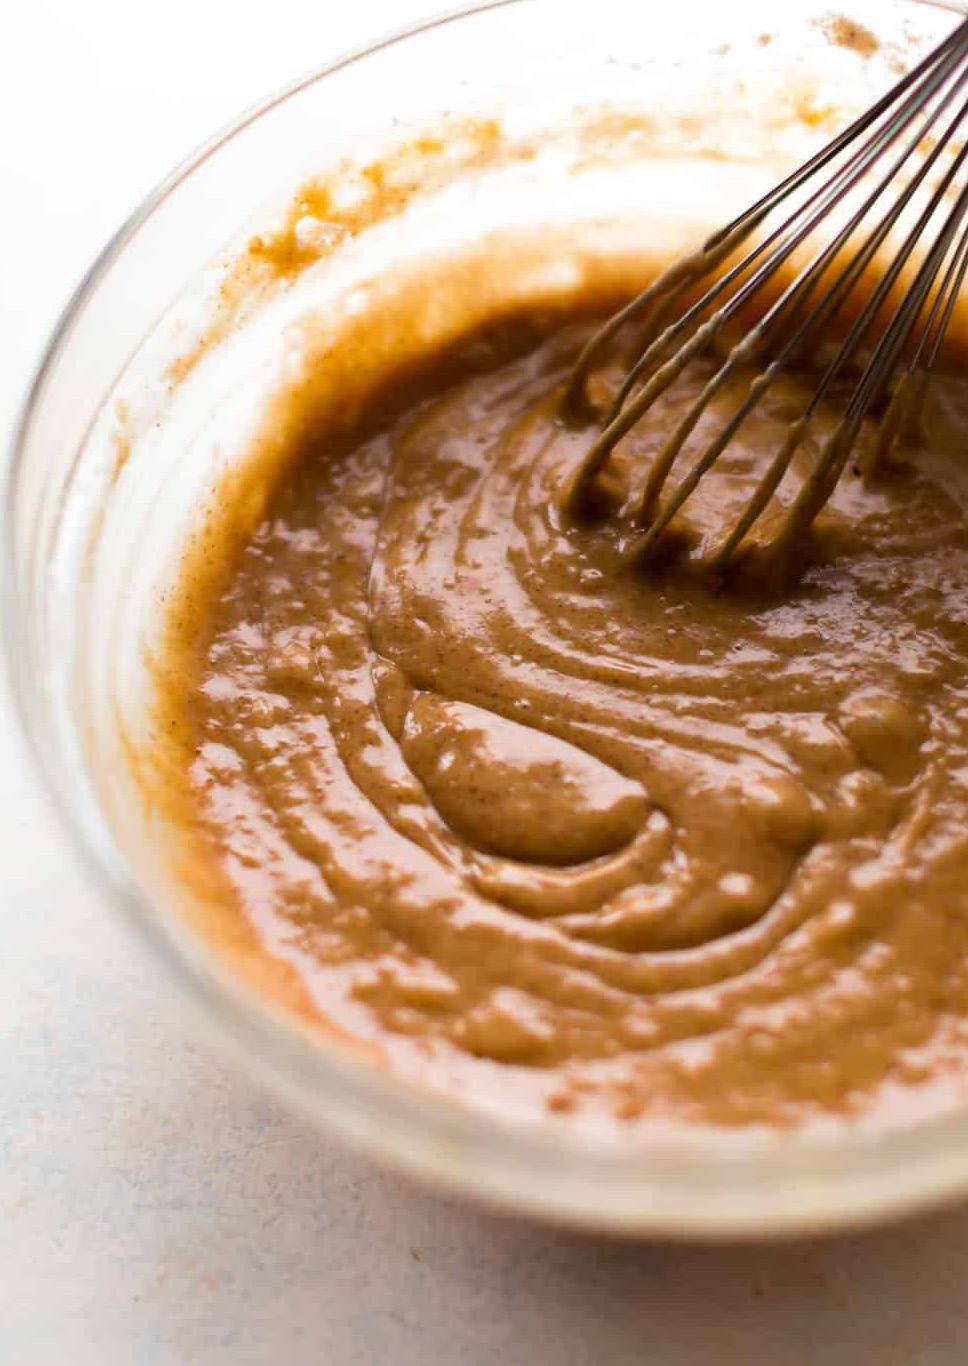
Whisk the melted butter, egg, brown sugar, granulated sugar, milk, and vanilla extract together. Pour into the dry ingredients, add the reduced apple cider, and whisk everything together until smooth and combined. Batter will be slightly thick.
Spoon the batter into the donut cavities—for ease, I highly recommend using a large zipped-top bag. Cut a corner off the bottom of the bag and pipe the batter into each donut cup, filling about halfway.
Bake for 10-11 minutes or until the edges and tops are lightly browned. To test, poke your finger into the top of the donut. If the donut bounces back, they’re done. Cool donuts for 2 minutes then transfer to a wire rack. Re-grease the pan and bake the remaining donut batter.
COAT THE DONUTS:
Combine the granulated sugar, cinnamon, and apple pie spice together in a medium bowl. Once cool enough to handle, dunk both sides of each donut in the melted butter, then generously in the apple spice topping. Donuts are best served immediately.
INGREDIENTS:
PANCAKES:
2 1/2 c. organic all-purpose flour
2 tsps. baking powder
1 c. organic 100% pumpkin puree
1 & 1/2 tsp. apple spice blend
Pinch of sea salt
2 large eggs, at room temp
1 c. Almond milk, unsweetened
1/2 c. apple cider
1 tsp. vanilla extract
3 tbsp. pure maple syrup
2 tbsp. canola oil
Unsalted butter, for cooking
CRANBERRY TOPPING:
1 c. organic cranberries, fresh or frozen
1/4 c. organic cane sugar
1/4 c. water
1/2 tsp. freshly-squeezed lemon juice

Serves 12 Method Stove Top 30 Minutes
DIRECTIONS:
TO MAKE THE PANCAKE BATTER:
In a large bowl, add the flour, baking powder, apple spice, and salt together and whisk until combined.
Make a small well in the middle of the dry ingredients and add in the milk, eggs, pumpkin puree, apple cider, maple syrup, vanilla, and oil, stirring gently (using a spatula) until just combined. DO NOT OVERMIX! NOTE: If the batter is way too thick and hard to stir, add additional milk, 1 tablespoon at a time until more smooth, yet still thick enough.
COOK THE PANCAKES:
Add 1 tablespoon of unsalted butter to a heated skillet over medium-high heat and wait until fully melted. Pour ½-3/4 cup of pancake batter unto the surface of the skillet and cook for about 1-2 minutes (until batter begins to bubble) and gently flip pancake to it’s opposite side, cooking another 1-2 minutes.
Once cooked and lightly brown on both sides, remove pancake from heat and repeat steps until all batter is used. NOTE: You should have about 12 pancakes.
TO MAKE THE CRANBERRY TOPPING:
In a saucepan, add together all ingredients over medium-high heat, stirring until combined. Once cranberries begin to pop, continue stirring until mixture begins to thicken a bit and cranberries are broken down, about 4-5 minutes. Remove from heat.
INGREDIENTS:
FOR THE FRENCH TOAST:
Butter or nonstick spray
1 loaf French bread, about 18" long
8 large eggs
1 c. whole milk
1 c. heavy cream
1/4 c. light brown sugar
2 tbsp. granulated sugar
1 tsp. cinnamon
1 tbsp. vanilla extract
FOR THE PECAN PIE TOPPING:
1 & 1/2 c. pecans
1 stick salted butter (1/2 cup)
1/2 c. packed light brown sugar
1/2 c. light corn syrup
1/3 c. maple syrup

Serves 8 Method Oven 1 HR 10 MIN
DIRECTIONS:
Preheat the oven to 350°F.
For the french toast: Grease a 9-by-13-inch baking dish with butter or nonstick spray. Cut the bread into 16 slices, about 1-inch thick.
In a large bowl, mix together the eggs, milk, cream, brown and granulated sugars, cinnamon and vanilla. Dip slices of bread, four at a time, in the egg mixture. Let each slice rest in the mixture for 1 minute per side (2 minutes total).
Once soaked, place the slices in the baking dish, shingling them slightly. Continue until all of the bread has been soaked. Pour any remaining egg mixture over top of the bread and let it rest while you make the topping.
For the topping: Roughly chop the pecans, leaving some whole. Combine the butter, brown sugar, corn syrup and maple syrup in a medium pan. Cook over medium heat, whisking frequently, until the butter is melted and the sugar is dissolved, 5-8 minutes. Remove from the heat and stir in the pecans.
Place spoonfuls of the mixture all over the top of the bread. Cover and bake for 20 minutes. Uncover and continue baking for 25-30 more minutes, until the egg custard is set and the topping is golden brown. Let rest for 10 minutes before serving.
Cut into squares and serve with a drizzle of syrup from the bottom of the pan.

RECIPES
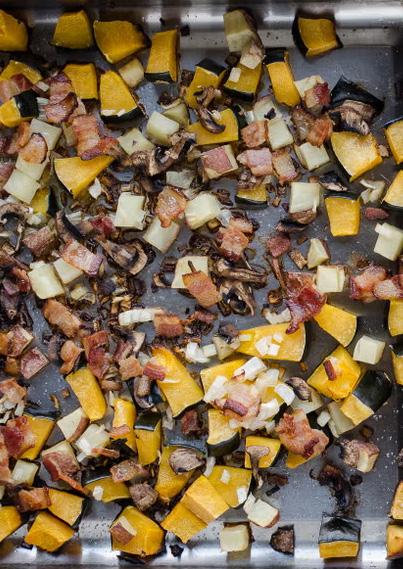

https://www.thepioneerwoman.com
INGREDIENTS:
1 medium acorn squash, remove seeds, cut into 3/4-inch cubes
2 medium red potatoes, cut Into 1/2-inch cubes
1/2 yellow onion, finely diced
4 oz. weight baby bella mushrooms, sliced
Salt and pepper, to taste
8 oz. weight thin-cut bacon, chopped into medium pieces
Butter, for frying and serving
DIRECTIONS:
Preheat oven to 425ºF.
Divide squash, potatoes, onion, and mushrooms evenly onto 2 rimmed baking sheets. Sprinkle with salt and pepper to taste. Sprinkle bacon pieces evenly over the top.
Bake in preheated oven until veggies are tender and bacon is getting crispy, about 45–50 minutes. Remove from oven, cool, and store in an airtight container in the refrigerator.
To serve, heat a good amount of butter in a cast iron skillet over medium heat. Add desired amount of roasted veggies and cook until hot and beginning to crisp up. Serve with a fried egg and extra butter.
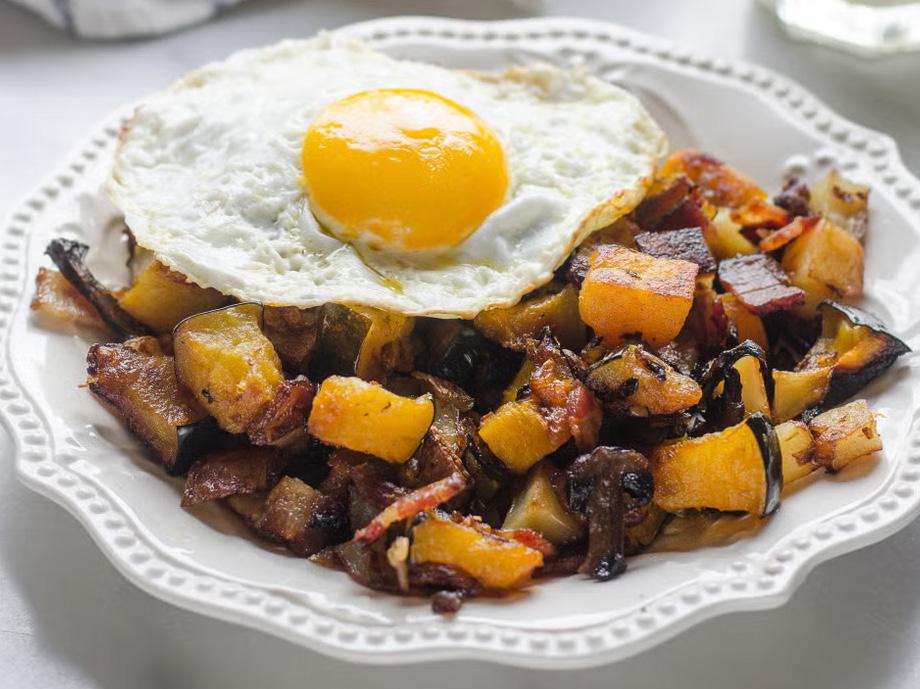
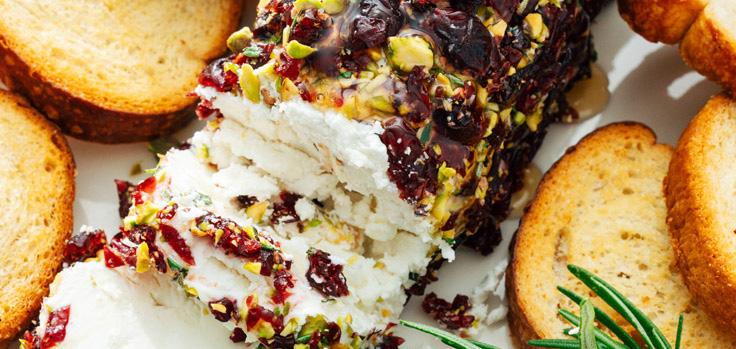
RECIPES
https://www.acouplecooks.com
INGREDIENTS:
10 oz goat cheese log
Serves 8
1/2 c. finely chopped dried sweetened cranberries (aka craisins)
1/4 c. finely chopped pistachios
1 tbsp. finely chopped fresh rosemary
1/4 tsp. salt, plus a sprinkle for serving
2 tbsp. honey, for serving
Method None 15 minutes
DIRECTIONS:
Allow the goat cheese to come to room temperature, which is important because it makes it easy to spread. (Leave it at room temperature for 1 hour or speed up the process, place it on a plate and microwave for about 10 seconds on one side, then 5 on the other.).
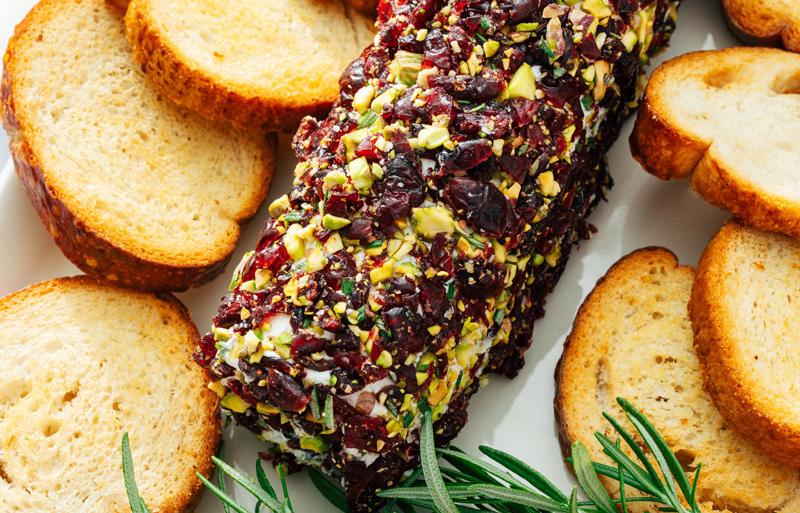
Place the chopped cranberries, pistachios, rosemary and salt on a plate and mix to combine. Roll the goat cheese in the mixture and use your hands to coat each side, re-forming it as necessary so that every surface is covered (even the bottom). Sprinkle a bit of salt on the top.
Place the log on a plate and drizzle generously with honey. Serve immediately with crackers or crostini.
INGREDIENTS:
1 1/2 cups whole berry cranberry sauce
2 puff pastry sheets, thawed
1 brie triangle, chilled (about 8 ounces)
1/4 cup chopped pistachios, for garnish

DIRECTIONS: Serves 12 Method Oven 20 Minutes
Preheat the oven to 375 degrees F.
Cut puff pastry sheets into approximately 3 inch squares and place into mini muffin tins, pressing them into the shape of the muffin tin.
Place a 1-inch slice of brie in the center of each pastry and top with 1 tablespoon cranberry sauce.
Bake 10 minutes, or until pastry corners are toasted light brown. Let cool 5 minutes before serving.
Garnish with pistachios just before serving, if desired.
4 c. peeled and cubed butternut squash
1 & 1/4 c. vegetable broth or chicken broth
1 & 1/4 c. milk
3 cloves garlic, minced
1 lb. uncooked small/medium pasta shells
1–2 c. roughly chopped kale, stems discarded (optional)
1/3 c. plain Greek yogurt
1 tsp. salt
1/2 tsp. freshly ground black pepper
Small pinch ground nutmeg
2 c. shredded cheese
Optional topping: 1/3 c. breadcrumbs
Optional topping: fresh thyme leaves and/or extra freshly ground black pepper
Serves 10 Method Stove Top 1 HR 10 MIN
DIRECTIONS:
Preheat oven to 375°F (191°C)
Combine the squash, broth, milk, and garlic in a medium saucepan over medium-high heat. Bring to a boil, then reduce heat to medium-low and allow to simmer for 20 minutes. (Feel free to start the pasta, next step, during this time.) You want the squash very tender after simmering, so pierce it with a fork to make sure it’s quite soft. Set aside.
Boil enough water for your pasta (check the package directions). Cook the pasta just until al dente, or when the pasta is still a little firm. Add the kale, if using, and boil for another 1-2 minutes. (If you aren’t using kale, boil the pasta 1-2 minutes past al dente.) Drain the pasta and kale. Set aside.
Pour the warm butternut squash mixture (squash + all the liquid) into a blender or food processor. Add the yogurt, salt, pepper, and nutmeg. Secure the lid and blend until smooth. Pour into a very large bowl and stir in the cheese until combined. It’s ok if the cheese does not fully melt. Taste the sauce, if you’d like more salt/ pepper/nutmeg, add more.
Add the pasta and kale to the sauce and stir until combined. It may seem like a lot of liquid, but the pasta will soak it up. Pour everything into an ungreased 9×13inch baking pan, 12-inch oven safe skillet, or any 3 to 4 quart baking dish. Top with breadcrumbs and an extra sprinkle of cheese, if desired.
Bake, covered with aluminum foil, for 20 minutes. Remove aluminum foil and bake for another 5 minutes, or until bubbly on the sides.
Remove from the oven and serve with an extra sprinkle of cheese and/or a sprinkle of fresh thyme leaves and/ or freshly ground black pepper on top.


RECIPES
https://www.acouplecooks.com
INGREDIENTS:
1 medium butternut squash
1 tbsp. olive oil
Serves 4 Method Oven
Kosher salt and fresh ground pepper
2 tbsp. butter, cut into cubes
1/4 tsp. dried sage
1/4 c. shredded Parmesan cheese
Minutes
DIRECTIONS:
Preheat oven to 400°F
ROAST:
Using a large chef’s knife, carefully slice the squash in half. Use a spoon to scoop out the seeds. Brush the cut sides with the olive oil and sprinkle with kosher salt and pepper. Line a baking sheet with parchment paper, then place the halves cut side down.
Bake the squash until tender when a fork is inserted into the thickest portion, about 45 minutes for a 3-pound squash and up to 15 minutes more for a larger squash.
Carefully scrape the squash flesh from the skin using a fork. Try to scape off any stringy very bright orange from the top before using.
Place the warm squash in a large bowl with the butter, dried sage and Parmesan cheese. Mash with a potato masher until smooth. Alternatively, you can place it in a food processor and puree until smooth, about 30 seconds to 1 minute (to make Butternut Squash Puree). Taste and add additional salt if necessary.


RECIPES
INGREDIENTS: PHOTO: MIKE GARTEN | https://www.goodhousekeeping.com/
1 - 4 to 4 & 1/2 lb. whole chicken, cut into 10 pieces
4 rosemary sprigs, halved crosswise
8 cloves garlic, unpeeled
2 lemons, thinly sliced
3 tbsp. olive oil, divided Kosher salt and pepper
2 small delicata squash, seeded and sliced into 1/2-inch-thick half-moons
DIRECTIONS:
Arrange racks in bottom and top thirds of oven, then heat oven to 450°F. Place chicken, rosemary, and garlic on rimmed baking sheet, then add lemons to center of sheet. Brush chicken with 11/2 tablespoons oil and sprinkle with 3/4 teaspoon each salt and pepper; roast in top third of oven until golden brown and instant-read thermometer registers 160°F, 35 to 38 minutes.
Meanwhile, on second rimmed baking sheet, toss squash and apples with remaining 1 & 1/2 tablespoons oil and 1/4 teaspoon each salt and pepper; arrange cut sides down. Roast on lower oven rack 15 minutes.
Flip and continue roasting until golden brown and tender, 5 to 10 minutes. Sprinkle with parsley and serve with lemony chicken. Serves 6
2 small Gala apples, cored and cut into 1/2-inch-thick wedges
2 tbsp. parsley leaves
2 tbsp. olive oil
2 lbs. top sirloin steak, diced
Kosher salt and freshly ground black pepper, to taste
1 medium sweet onion, diced
1 medium carrot, peeled and diced
2 celery ribs, diced
3 cloves garlic, minced
8 oz. cremini mushrooms, quartered
1/4 c. all-purpose flour
2 tbsp. tomato paste
1/2 c. dry red wine
4 c. beef stock
4 sprigs fresh thyme
2 bay leaves
1 large sweet potato, about 1 1/2 pounds, peeled and cut in 1/2-inch chunks
2 tbsp. chopped fresh parsley leaves

Serves 6 Method Stove Top 1 HR 10 MIN
DIRECTIONS:
Heat olive oil in a large stockpot or Dutch oven over medium heat. Season steak with salt and pepper, to taste. Working in batches, add steak to the stockpot and cook, stirring occasionally, until evenly browned, about 6-8 minutes; set aside.
Add onion, carrot and celery. Cook, stirring occasionally, until tender, about 3-4 minutes.
Add garlic and mushrooms, and cook, stirring occasionally, until tender and browned, about 3-4 minutes.
Whisk in flour and tomato paste until lightly browned, about 1 minute.
Stir in wine, scraping any browned bits from the bottom of the stockpot.
Stir in beef stock, thyme, bay leaves and steak. Bring to a boil; reduce heat and simmer until beef is very tender, about 30 minutes.
Stir in sweet potatoes; simmer until potatoes are just tender and stew has thickened, about 20 minutes. Remove and discard thyme sprigs and bay leaves. Stir in parsley; season with salt and pepper, to taste.*
Serve immediately.

Serves 6
INGREDIENTS:
8 c. low-sodium chicken or vegetable broth
3 tbsp. unsalted butter, divided
1 medium butternut squash, peeled and cut into 1/2-inch pieces (about 4 cups)
1 & 1/2 tbsp. chopped fresh sage leaves
1 tsp. kosher salt, divided
1/2 tsp. ground black pepper, divided
1 large shallot, finely chopped
2 c. arborio, carnaroli, or vialone nano rice
1/2 c. dry white wine
1 cup finely grated Parmesan cheese, plus more for serving
Method Stove Top 55 Minutes
DIRECTIONS:
Place the broth in a medium saucepan over low heat and keep it at a very low simmer.
Melt 1 tablespoon of butter over medium heat in a large, high-sided sauté pan or Dutch oven. Add the butternut squash, sage, 1/2 teaspoon of the salt, and 1/4 teaspoon of the pepper, and cook until the squash is lightly caramelized and tender, 10 to 12 minutes. Transfer the squash to a plate and set aside. Melt another 1 tablespoon of butter in the pan. Add the shallots and sauté until fragrant and beginning to soften, about 4 minutes.
Add the rice and cook, stirring until the edges have turned translucent but the center is still opaque, about 2 minutes. You should also be able to smell the aroma of toasted rice. Add the wine and simmer, stirring constantly, until the wine has completely reduced and the pan is nearly dry, about 3 minutes.
Begin incrementally adding the broth one ladle at a time, stirring constantly. Wait until the liquid has been almost completely absorbed by the rice before adding another ladle. After about 12 minutes, stir in the remaining 1/2 teaspoon salt and 1/4 teaspoon pepper and begin tasting the rice to gauge how far it has cooked.
Continue adding broth until the rice is al dente (still has a bit of chew), the broth is creamy, and the dish has the consistency of thick porridge, 20 to 30 minutes total (you might not use up all of the broth). If you run your spatula through the risotto, the risotto should flow slowly to fill in the space. Remove the pan from the heat. Stir in the reserved squash, Parmesan, and remaining 1 tablespoon butter until melted. Taste and season with salt as needed. Serve immediately, garnishing each bowl with additional Parmesan cheese.
5 lb. pork butt, fat cap trimmed, cut into 6 pieces (3 to 4 inch each)
1 tbsp. chili powder
1 tsp. hot paprika
Kosher salt and pepper
2 tbsp. canola oil, divided
2 medium red onions, thinly sliced
2 cloves garlic, thinly sliced
1 c. dry hard cider
1 & 1/2 c. homemade applesauce or store-bought applesauce
1 c. apple cider
4 sprigs fresh thyme
2 bay leaves
5 tbsp. apple cider vinegar, divided
1/4 green cabbage, cored and thinly sliced
2 Granny Smith apples, quartered, cored, and thinly sliced crosswise
8 challah buns, split
Bread and butter pickles, for serving
Serves 8 Method Oven 3 HR 20 MIN
DIRECTIONS:
Heat oven to 325°F.
Season pork with chili powder, paprika, and 1 teaspoon salt.
Heat 1 1/2 tablespoon oil in large Dutch oven on medium-high. Cook pork in batches until browned, 3 to 4 minutes per side; transfer to plate. Wipe out pot.
Heat remaining 1/2 tablespoon oil in Dutch oven on medium. Add half of onions and cook, stirring occasionally, until tender, 4 to 5 minutes. Stir in garlic and cook 1 minute. Add hard cider and simmer until reduced by half, 4 to 5 minutes. Stir in applesauce, cider, thyme, bay leaves, and 1 teaspoon salt, then return pork and any juices to pot. Bring to a simmer, cover, and bake 2 hours.
Uncover and bake until pork can be easily shredded, 30 minutes to 1 hour. Transfer pork to large bowl; discard thyme and bay leaves. Shred pork using 2 forks. Skim fat from cooking juices; stir in 2 tablespoons vinegar, then add to pork and gently toss to combine.
Meanwhile, in bowl, toss cabbage, apples, remaining onion, 3 tablespoons vinegar, and 1/2 teaspoon each salt and pepper. Refrigerate until ready to serve.
Serve pork in buns with slaw and pickles if desired.

https://www.goodhousekeeping.com/ food-recipes/a44952786/applesaucepulled-pork-sandwiches-recipe/
INGREDIENTS:
8–9 cold apples
1 & 3/4 c. heavy cream
1 c. light corn syrup
2 c. packed light or dark brown sugar
1/4 c. unsalted butter, at room temperature
1/2 tsp. salt
1/2 tsp. pure vanilla extract

DIRECTIONS:
PREP THE APPLES: Rinse the apples with water, then wipe completely dry. Removing the slippery waxy coating will help the caramel seal to the apple. Remove the apple stem and insert a caramel apple stick about 3/4 down into the apple.
Line a large baking sheet with a silicone baking mat (preferred) or grease the pan with butter. Caramel usually sticks to parchment or wax paper.
MAKE THE CARAMEL: Combine the heavy cream, corn syrup, brown sugar, butter, and salt in a 3-quart heavy-duty saucepan over medium heat. Do not turn the temperature up or down— keep at medium the entire time the caramel cooks. Stir constantly with a wooden spoon until the butter is melted. Once melted, brush down the sides of the pan with a water-moistened pastry brush and attach a candy thermometer to the pan, making sure the bulb is not touching the bottom of the pan (as you’ll get an inaccurate reading).
Without stirring, let the mixture cook and bubble until it reaches 235°F (113°C). Reaching this temperature should take about 15–20 minutes, though don’t use time as your guide because it depends on your stove. The temperature will heat up slowly, then move quickly, so keep your eye on the pot. Once at 235°F – 240°F, remove caramel from heat and stir in the vanilla. Avoid over-stirring which can create air bubbles in the caramel (and then on the apple). Allow caramel to cool for 10-15 minutes until slightly thickened. If caramel is too thin to coat apples, let it cool and thicken for 5-10 minutes longer.
DIP THE APPLES: Holding the caramel apple stick, dip the apple into the warm caramel, tilting the pot as needed to coat all sides of the apple. Lift the apple up and swirl it around or gently tap it against the side of the pot to let excess caramel drip off. Place coated apple on prepared pan. Repeat with remaining apples. Enjoy immediately or allow caramel to set, about 45-60 minutes.

RECIPES
https://sallysbakingaddiction.com
Serves 18
INGREDIENTS:
1/2 c. unsalted butter, melted & slightly cooled
1/4 c. packed light or dark brown sugar
1/2 c. granulated sugar
1 tsp. pure vanilla extract
6 tbsp. pumpkin puree (see note)*
1 & 1/2 c. all-purpose flour (spooned & leveled)
1/4 tsp. salt
1/4 tsp. baking powder
1/4 tsp. baking soda
1 & 1/2 tsp. ground cinnamon
1 tsp. store-bought or homemade pumpkin pie spice
1/2 c. semi-sweet chocolate chips, plus a few extra for the tops
DIRECTIONS:
Whisk the melted butter, brown sugar, and granulated sugar together in a medium bowl until no brown sugar lumps remain. Whisk in the vanilla and blotted pumpkin until smooth. Set aside.
Whisk the flour, salt, baking powder, baking soda, cinnamon, and pumpkin pie spice together in a large bowl. Pour the wet ingredients into the dry ingredients and mix together with a large spoon or rubber spatula. The dough will be very soft. Fold in 1/2 cup semi-sweet chocolate chips. The chips may not stick to the dough because of the melted butter, but do your best to combine.
Cover the dough and chill for 30 minutes or up to 3 days. Chilling the dough is imperative for this recipe.
Remove dough from the refrigerator. Preheat oven to 350°F (177°C). Line two large baking sheets with parchment paper or silicone baking mats.
Scoop the dough, about 1.5 Tablespoons of dough per cookie, and roll each into balls. Arrange cookie dough balls 3 inches apart on the prepared baking sheets. Using the back of a spoon or the bottom of a cup/measuring cup, slightly flatten the tops of the dough balls. (Without doing so, the cookies may not spread.)
Bake for 11-12 minutes or until the edges appear set. The cookies will look very soft in the center. Remove from the oven. If you find that your cookies didn’t spread much at all, flatten them out with the back of a spoon when you take them out of the oven. If desired, press a few chocolate chips into the tops of the warm cookies. This is only for looks.
Cool cookies on the baking sheets for at least 10 minutes before transferring to a wire rack to cool completely. The longer the cookies cool, the even better they taste!
*NOTE: Squeeze as much of the moisture out of the pumpkin puree as you can before adding it to the cookie dough. I simply squeeze the puree with paper towels. This will help produce a less cakey cookie. Less moisture is a good thing here! Measure 6 Tablespoons AFTER the pumpkin has been squeezed/blotted. Do not use pumpkin pie filling.
RECIPES
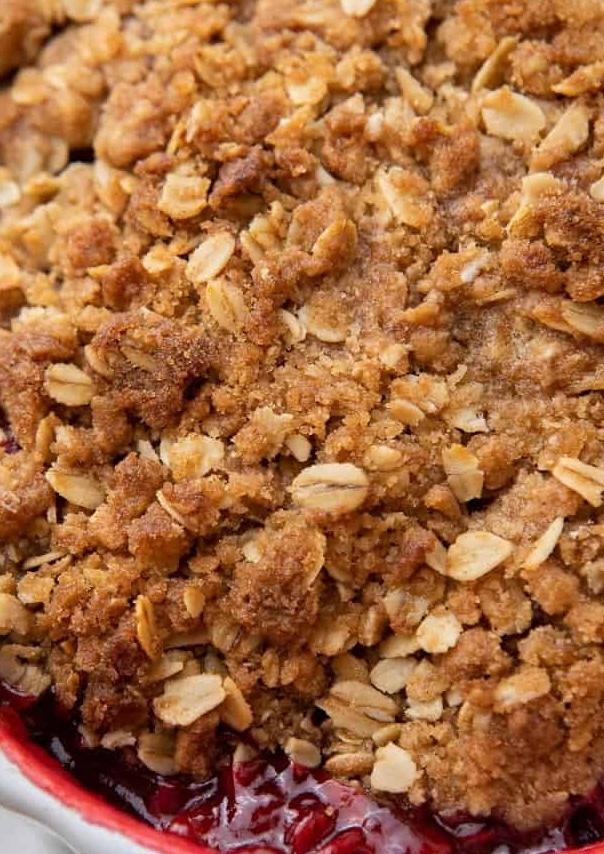
https://lifestyleofafoodie.com
Serves 8
INGREDIENTS:
FOR THE TOPPING
2/3 c. flour
3/4 c. oats
2/3 c. brown sugar
1/2 tsp. cinnamon
1/2 tsp. salt
1 tsp. vanilla extract
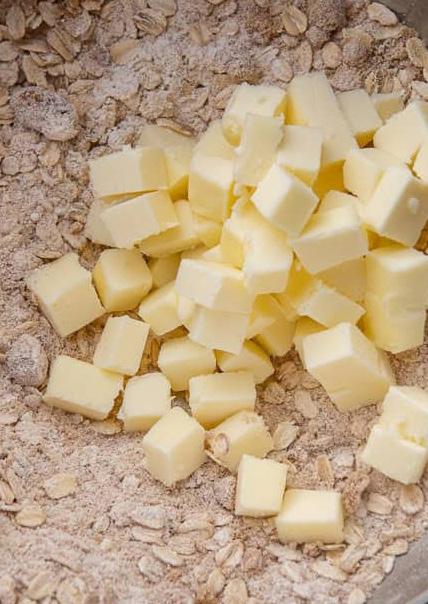
1/2 c. butter cold, cut into cubes
CRANBERRY APPLE FILLING
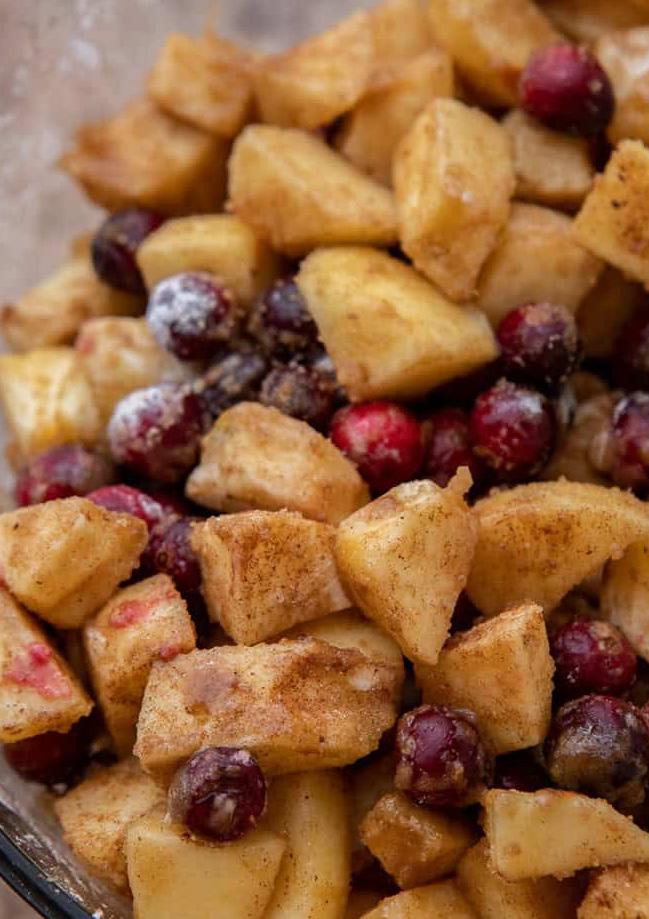
3 large honey crisp apples
1 & 1/2 c. cranberries fresh or frozen
1/2 c. brown sugar
3 tbsp. corn starch
1 tsp. cinnamon
1/4 tsp. nutmeg
1 tsp. vanilla extract
Method Oven 1 HR 5 MIIN
DIRECTIONS:
Preheat the oven to 350F.
Peel and chop the apples, and them to a large bowl with the cranberries, sugar, cinnamon, corn starch and nutmeg, and mix to combine. Pour into a 9-inch pie place or an 8×8-inch square pan.
3 large honey crisp apples,1 & ½ cup cranberries,½ cup brown sugar,1 teaspoon cinnamon,¼ teaspoon nutmeg,1 teaspoon vanilla extract,3 tablespoon corn starch
In a separate large bowl mix the flour, oats, brown sugar, cinnamon, and salt. Add the cold cubed butter and vanilla extract to the mixture and mix with a pastry cutter or clean hands. You'll know it's ready when the mixture is crumbly and looks like small peas.
Pour the dry mixture evenly on top of the cranberry-apple mixture and bake in the oven for 55 minutes. Make sure to place your dish on a baking sheet because it might leak.
Let the cranberry apple crisp rest for 5-10 minutes to set before serving it with ice cream.
INGREDIENTS:
1 c. unsalted butter, softened to room temperature
1 c. packed light or dark brown sugar
1/4 c. granulated sugar
2 large eggs
1 tbsp. pure vanilla extract
1 tbsp. unsulphured or dark molasses (do not use blackstrap)
1 & 2/3 c. all-purpose flour (spooned & leveled)
1 teaspoon baking soda
1 & 1/2 tsp. ground cinnamon
1/2 tsp. salt
3 c. old-fashioned whole rolled oats
1 c. raisins
Optional: 1/2 c. chopped toasted walnuts
Serves 26 Method Oven 1 Hour
DIRECTIONS:
Using a hand mixer or a stand mixer fitted with paddle attachment, cream the softened butter and both sugars together on medium speed until smooth, about 2 minutes. Add the eggs and mix on high until combined, about 1 minute. Scrape down the sides and bottom of the bowl as needed. Add the vanilla and molasses and mix on high until combined. Set aside.
In a separate bowl, whisk the flour, baking soda, cinnamon, and salt together. Add to the wet ingredients and mix on low until combined. Beat in the oats, raisins, and walnuts (if using) on low speed. Dough will be thick, yet very sticky.
Chill the dough for 30-60 minutes in the refrigerator (do the full hour if you’re afraid of the cookies spreading too much). If chilling for longer (up to 2 days), allow to sit at room temperature for at least 30 minutes before rolling and baking.
Preheat oven to 350°F (177°C). Line two large baking sheets with parchment paper or silicone baking mats. Set aside.
Roll balls of dough (about 2 tablespoons of dough per cookie) and place 2 inches apart on the baking sheets. Bake for 12-14 minutes until lightly browned on the sides. The centers will look very soft and under-baked.
Remove from the oven and let cool on baking sheet for 5 minutes before transferring to a wire rack to cool completely.

1 & 1/2 oz. tequila reposado or blanco
2 oz. apple cider
3/4 oz. Triple Sec or Cointreau
3/4 oz. fresh lime juice
Cinnamon and sugar, for the rim
Ice, for serving (try clear ice!)
Star anise and cinnamon stick, for garnish (optional)

Serves 1 Method N/A 5 Minutes
DIRECTIONS:
Cut a notch in a lime wedge, then run the lime around the rim of a glass. Dip the edge of the rim into a plate of cinnamon and sugar.
SINGLE DRINK:
Place all ingredients in a cocktail shaker and fill it with ice. Shake until cold. Strain the margarita into the glass with the sugar rim. Fill the glass with ice and serve.
PITCHER (8 SERVINGS):
Place 1 ½ cups tequila, 2 cups apple cider, ¾ cup Triple Sec or Cointreau, and ¾ cup lime juice in a pitcher. Add 3 handfuls ice and stir until cold. Prepare the glasses separately, then add 2/3 cup to each glass and garnish with ice.

RECIPES
https://www.acouplecooks.com
Serves 10
INGREDIENTS:
1 apple
1 pear
1/2 orange
2 tbsp. sugar
1/2 tsp. cinnamon
1 - 750 ml bottle dry red wine
1 - 750 ml bottle sparkling cider or apple cider
Optional garnishes: Cinnamon stick, rosemary sprig, remaining orange slices
Method N/A 1 HR 10 MIN
DIRECTIONS:
Thinly slice the apple, pear, and orange. Place them into a medium bowl and stir in the sugar and cinnamon.
Transfer to a large pitcher. Allow to stand for 1 hour to allow the flavors to meld. After 1 hour, pour in the red wine. You can use it immediately, or chill for up to 3 hours.
To serve, fill a glass with ice. Fill halfway with sparkling apple cider, then halfway with red wine mixture. Garnish with cinnamon stick, rosemary or orange slices. When you’ve polished off the sangria, you can snack on the sweetened fruit.


Running is one of the most accessible forms of exercise, requiring minimal equipment and offering numerous health benefits. But for some, going on a run can be daunting and impossible. Just because it doesn’t seem possible now doesn’t mean it’s impossible! With a structured approach, you can gradually build your stamina and confidence while breaking out of your comfort zone and pushing yourself to new heights! We’ve put together a guide to help you transition from the couch to completing your first 5K run while having fun, and maybe even meeting new people!

Running offers physical and mental benefits that can completely transform your health and wellness journey. Physically, it improves cardiovascular health by strengthening the heart and increasing lung capacity. The activity engages multiple muscle groups, particularly in the legs and core, leading to muscle strengthening across your whole body. Additionally, running is an effective way to manage weight as it burns calories and can aid in weight loss and maintenance.
Mentally, running can significantly reduce stress by releasing endorphins, often referred to as the "runner's high." This natural mood enhancer can assist in alleviating symptoms of depression and anxiety. Regular running also boosts self-esteem as achieving running milestones builds confidence and provides a sense of accomplishment. Beyond personal benefits, running can be a social activity that fosters community engagement, offering opportunities to meet new people through running groups or events.
To begin your running journey, you’ll first want to set a clear and achievable goal for yourself. Choose a 5K event date that is at least 8-12 weeks away to allow ample training time. Establishing realistic objectives, such as completing the run or achieving a specific time ensures to keep you focused and motivated.
Next, investing in the right gear is essential for performance and comfortability. A good pair of running shoes is crucial; visit a specialty store to get fitted for shoes that match your foot type and running style. Proper footwear can prevent injuries and enhance comfort. Next, opt for light, comfortable clothing made from moisture-wicking materials that will keep you dry during runs. For colder runs in the fall and winter, consider investing in a half-zip top, or training sweatshirt.
Creating a training plan is the next step. Follow a structured plan like the “Couch to 5K” (C25K) program, which gradually increases running intervals over time. Consistency is key, so plan to run three to four times a week, incorporating rest days to allow your body to recover.
Start each session with a 5-minute warm-up, such as brisk walking or dynamic stretches, to prepare your muscles. After your workout the interval for the day, take 5 minutes to cool down, making sure to include static stretches to improve flexibility and reduce soreness. Begin with intervals of running and walking. For example, run for one minute, then walk for two minutes. Gradually increase the running time while decreasing the walking breaks, and avoid starting too fast. Aim for a conversational pace during your runs to prevent burning out.
Consistency is vital to building endurance, so make sure to stick to your schedule and avoid skipping sessions. Pay attention to any pain or discomfort; rest if needed and consult a professional if you experience persistent pain. Avoid overtraining by gradually increasing your distance and interval time. Stay hydrated by drinking plenty of water, especially before and after runs. Consider sports drinks for longer sessions to replenish electrolytes. Eat a balanced diet, packed full of carbohydrates, proteins, and healthy fats to support your training.
One of the most effective ways to stay motivated and encouraged throughout your running journey is by joining a running club or social club. Running clubs offer a supportive environment where you can meet other runners, share experiences, and push each other toward the common goal of wellness. Being part of a group can make your runs more enjoyable and provide a sense of camaraderie. Many running clubs organize group runs, which can help you stay committed to your training schedule. They also offer structured training programs, tips from experienced runners, and the opportunity to participate in races together as a group.
Social clubs that focus on fitness activities, including running, can also be a great way to stay motivated. These clubs often have diverse activities and events, making it easy to integrate running into your social life. Being part of a club means you have a network of people who can offer encouragement, share their running stories, and celebrate your milestones with you. It’s an excellent way to make new friends who share your interest in running and fitness.
Joining a club can also provide additional accountability. Knowing that others are expecting you to show up for group runs can be a powerful motivator, especially on days when you might feel like skipping your workout. Plus, running with others can push you to improve your pace and endurance as you try to keep up with more experienced runners.
As race day approaches, taper your training by reducing your training intensity in the week leading up to the race to allow your body to rest and recover. Plan your race day carefully by laying out your gear the night before, including shoes, clothes, race bib, and any other essentials. Have a light breakfast two to three hours before the race to fuel your run.
On race day, start at a comfortable pace and avoid the temptation to sprint at the beginning. Focus on finishing and enjoy the atmosphere of the race. Cheer on fellow runners and soak in the support from spectators. Completing a 5K is a rewarding achievement, especially for beginners. With dedication, proper training, and the right mindset, you can transition from the couch to crossing the finish line.
Remember, the journey is just as important as the destination. Lace-up your running shoes, take the first step, and embrace the joy of running. And don't forget to have fun and make new friends along the way!

Hiking is one of the best ways to get outside and exercise in this wonderful fall weather! The cardio workout is great on your lungs and proves to lower blood pressure, strengthen bone health, and has many additional mental health benefits. Hiking involves more than just getting up and going. You need to prepare and follow these simple do’s and don’ts to ensure you have a good time and enjoy everything in the best possible manner!

TELL SOMEONE WHERE YOU’LL BE
Informing a close friend or family member that you are going hiking ensures your safety.. Let them know where you’re going and when you expect to be back. This is a good backup plan in case anything goes wrong, someone will be able to get you the help you may need.
It sounds simple but bringing the proper supplies with you is vital to a successful hike. Do your research ahead of time on the weather and terrain so you can adequately prepare your backpack with what you’ll need. Most importantly, bring plenty of water and snacks that are high in protein to get you through the hike along with an extra pair of socks and sun protection.
You won’t be the only person hiking so please be courteous of the other hikers around you. If you plan to play music through a speaker, keep it at a reasonable volume so as to not disturb those around you and the wildlife. You should also dispose of any and all trash properly and leave nothing behind.


With these helpful do’s and don’ts you should now be ready for your hike! We also suggest that you do your research on the trail and properly prepare for your specific situation.
You will be a guest to nature on your hike. Avoid disturbing any plants, animals, and monuments on the trail, the only thing you should be taking is pictures and the only thing you should be leaving are footprints. Don’t feed any animals your food, take any of them home, or pick any of them up. They aren’t used to humans and it is unpredictable with how they are going to react to you.
Hiking paths have designated trails for a reason. Wandering off can lead to dangers in nature such as wildlife, plants, and terrain that you were not meant to interact with and prevents you from getting lost. Staying on the path also keeps you close to other hikers, if you wander off you may become separated and away from earshot should anything go wrong.
Make sure all of your equipment is properly worn in and ready to go. Any experienced hiker will tell you that the shoes you wear should be worn in and comfortable to walk in. Do not hike in brand new boots. This could cause your feet to blister and can lead to serious foot pain. You won’t be immediately near any sort of urgent care or hospital making treatment a longer, tougher process than it needs to be.


As the days grow shorter and the air turns crisp, fall and winter offer the perfect backdrop for self-care and reflection. Journaling during these seasons can be especially soothing, providing a warm, reflective space away from the cold.
The change in seasons is a natural time to set new intentions. Consider what you want to focus on during these months—whether it’s managing seasonal stress, cultivating gratitude, or simply staying connected with your emotions. Clarifying your purpose will bring depth to your journaling practice.
The cozy ambiance of fall and winter can also inspire your journaling environment. Light a candle, brew a hot drink, and wrap yourself in a blanket to create a comforting space that invites the flow of ideas. Embrace the slower pace of these seasons by allowing your journaling to be unhurried and gentle.
Reflecting on the changes around you can deepen your journaling experience. Observe the shift in nature, the holiday gatherings, and the quiet moments at home. Writing about these seasonal experiences can enhance your awareness and connection to the present moment, helping you to appreciate the unique beauty of fall, turning into winter.


Remember, journaling is a personal practice, and there's no right or wrong way to do it. Let your journaling evolve naturally, and allow it to become a cherished part of your fall and winter wellness routine.
By embracing the rhythm of fall and winter in your journaling, you can create a practice that not only supports your wellness but also enriches your connection to these transformative seasons!


Your health is important and needs to be nurtured on occasion. There’s never a bad time for a getaway with the intention of restoring your mind and body by going on a much needed vacation. There are plenty of locations across the country that are perfect for a health reset! So, take some extra time for yourself this winter and cash in on your paid time off by going on a health reset to one of these fabulous destinations!

This quaint mountain town in northern Arizona has a majestic backdrop of the red rock mountains. Here you can go hiking and take in one of the many spiritual experiences the town has to offer. With beautiful sunrises and sunsets, Sedona is a peaceful town with natural landscapes that are sure to help you rest your mind, body, and spirit!

Up the northern coast of California near Monterey lies the town of Carmel-by-the-Sea, more commonly referred to simply as Caramel. This waterfront town is known for its village-like layout with fairytale cottage houses and scenic views of the water. Enjoy strolling around one of its many museums or indulge in the wine tasting options this wonderful little town has to offer!

Spend some time enjoying a peaceful vacation at a resort in Sun Valley, Idaho! Up in the mountains, you can spend your time skiing, enjoying the art museum, or simply enjoying the winter wonderland this town becomes once the snow begins to fall. If you want a more affordable alternative to Colorado, the ski resorts of Sun Valley are perfect for you!

Topsail Island is a relaxing beach front town off the coast of North Carolina. Spend a few days relaxing with your feet in the sand listening to the waves crash against the shore. With golf courses aplenty, this town is great for any golf enthusiast who wants to cap off a fun day out on the course by enjoying a relaxing Piña Colada on the beach!

The Pocono Mountains are a collection of mountains located in eastern Pennsylvania, just north of Allentown. With plenty of resorts to stay at, this is a great spot for any family vacation or winter getaway! You can spend your time skiing, at an indoor water park, or enjoying outdoor time relaxing at one of the many lakes and lodges there.
These destination spots are sure to give you a relaxing end to the year! With everything from snow capped mountains to sandy beaches, there’s a little bit for everyone no matter what they are looking for!

As winter arrives, falling temperatures and humidity can wreak havoc on your skin, leaving it dry and sensitive. But, with the right moisturizers and treatments, you can protect your skin from the harsh winter elements and keep it looking healthy and radiant all season long. Here’s a comprehensive guide to the best skincare products and treatments to keep your skin nourished during the colder months!
During winter, it’s essential to switch to a heavier, more hydrating moisturizer that can lock in moisture and provide a protective barrier against the elements. CeraVe Moisturizing Cream is a great option, known for its ceramide-rich formula that provides long-lasting hydration without clogging pores. For very dry skin, La Roche-Posay Lipikar Balm AP+ offers intensive relief from irritation and itchiness. Another excellent choice is Eucerin Advanced Repair Cream, perfect for tackling rough, dry patches.
In addition to a good moisturizer, incorporating a hydrating serum into your routine can make a significant difference. Serums penetrate deep into your skin where it’s needed most. The Ordinary Hyaluronic Acid 2% + B5 is a budget-friendly yet highly effective option. Hyaluronic acid, a powerful humectant, attracts moisture to the skin, providing an extra boost of hydration. Drunk Elephant B-Hydra Intensive Hydration Serum is another great choice, packed with pro-vitamin B5 and ceramides to keep your skin plump and hydrated, even when temperatures are low.

Facial oils can also be incredibly beneficial during the winter months. They provide a layer of protection and nourishment, helping to seal in moisture and restore the skin’s natural lipid barrier. Kiehl’s Midnight Recovery Concentrate, a blend of botanical oils, will nourish and repair the skin overnight, leaving it soft and supple by morning. For a more affordable option, The Ordinary 100% Organic Cold-Pressed Rose Hip Seed Oil is rich in essential fatty acids, helping to reduce redness and protect the skin’s barrier.
Exfoliation is key to maintaining smooth, glowing skin during winter, but it’s important to avoid exfoliating the essential moisture from your skin. Paula’s Choice Skin Perfecting 2% BHA Liquid Exfoliant is a gentle option that removes dead skin cells, unclogs pores, and improves skin texture, all while maintaining hydration. Another option is L’Oréal Paris Pure-Sugar Scrub, a sugar-based scrub that gently exfoliates without being too abrasive, leaving your skin soft and radiant.


Incorporating a soothing mask into your weekly routine can also help keep your skin hydrated and calm all season long. Fresh Rose Face Mask, infused with real rose petals, hydrates and tones the skin, leaving it refreshed and dewy. Another excellent option is Laneige Water Sleeping Mask, an overnight treatment that provides intense hydration, helping to repair the skin barrier while you sleep.
Finally, don’t forget to give extra attention to your lips and hands, which can become particularly dry and chapped in cold weather. Aquaphor Healing Ointment is a versatile product that works wonders on chapped lips and dry hands, making it a winter staple for many. Burt’s Bees Beeswax Lip Balm is another great choice for long-lasting moisture throughout the year, but especially in this case for protection against the cold.
Winter doesn’t have to mean sacrificing your skin’s health and glow. With the right products and a consistent skincare routine, you can keep your skin hydrated, protected, and radiant all season long. Remember to adjust your skincare routine to meet your skin’s changing needs during the colder months, and your skin will thank you for it.
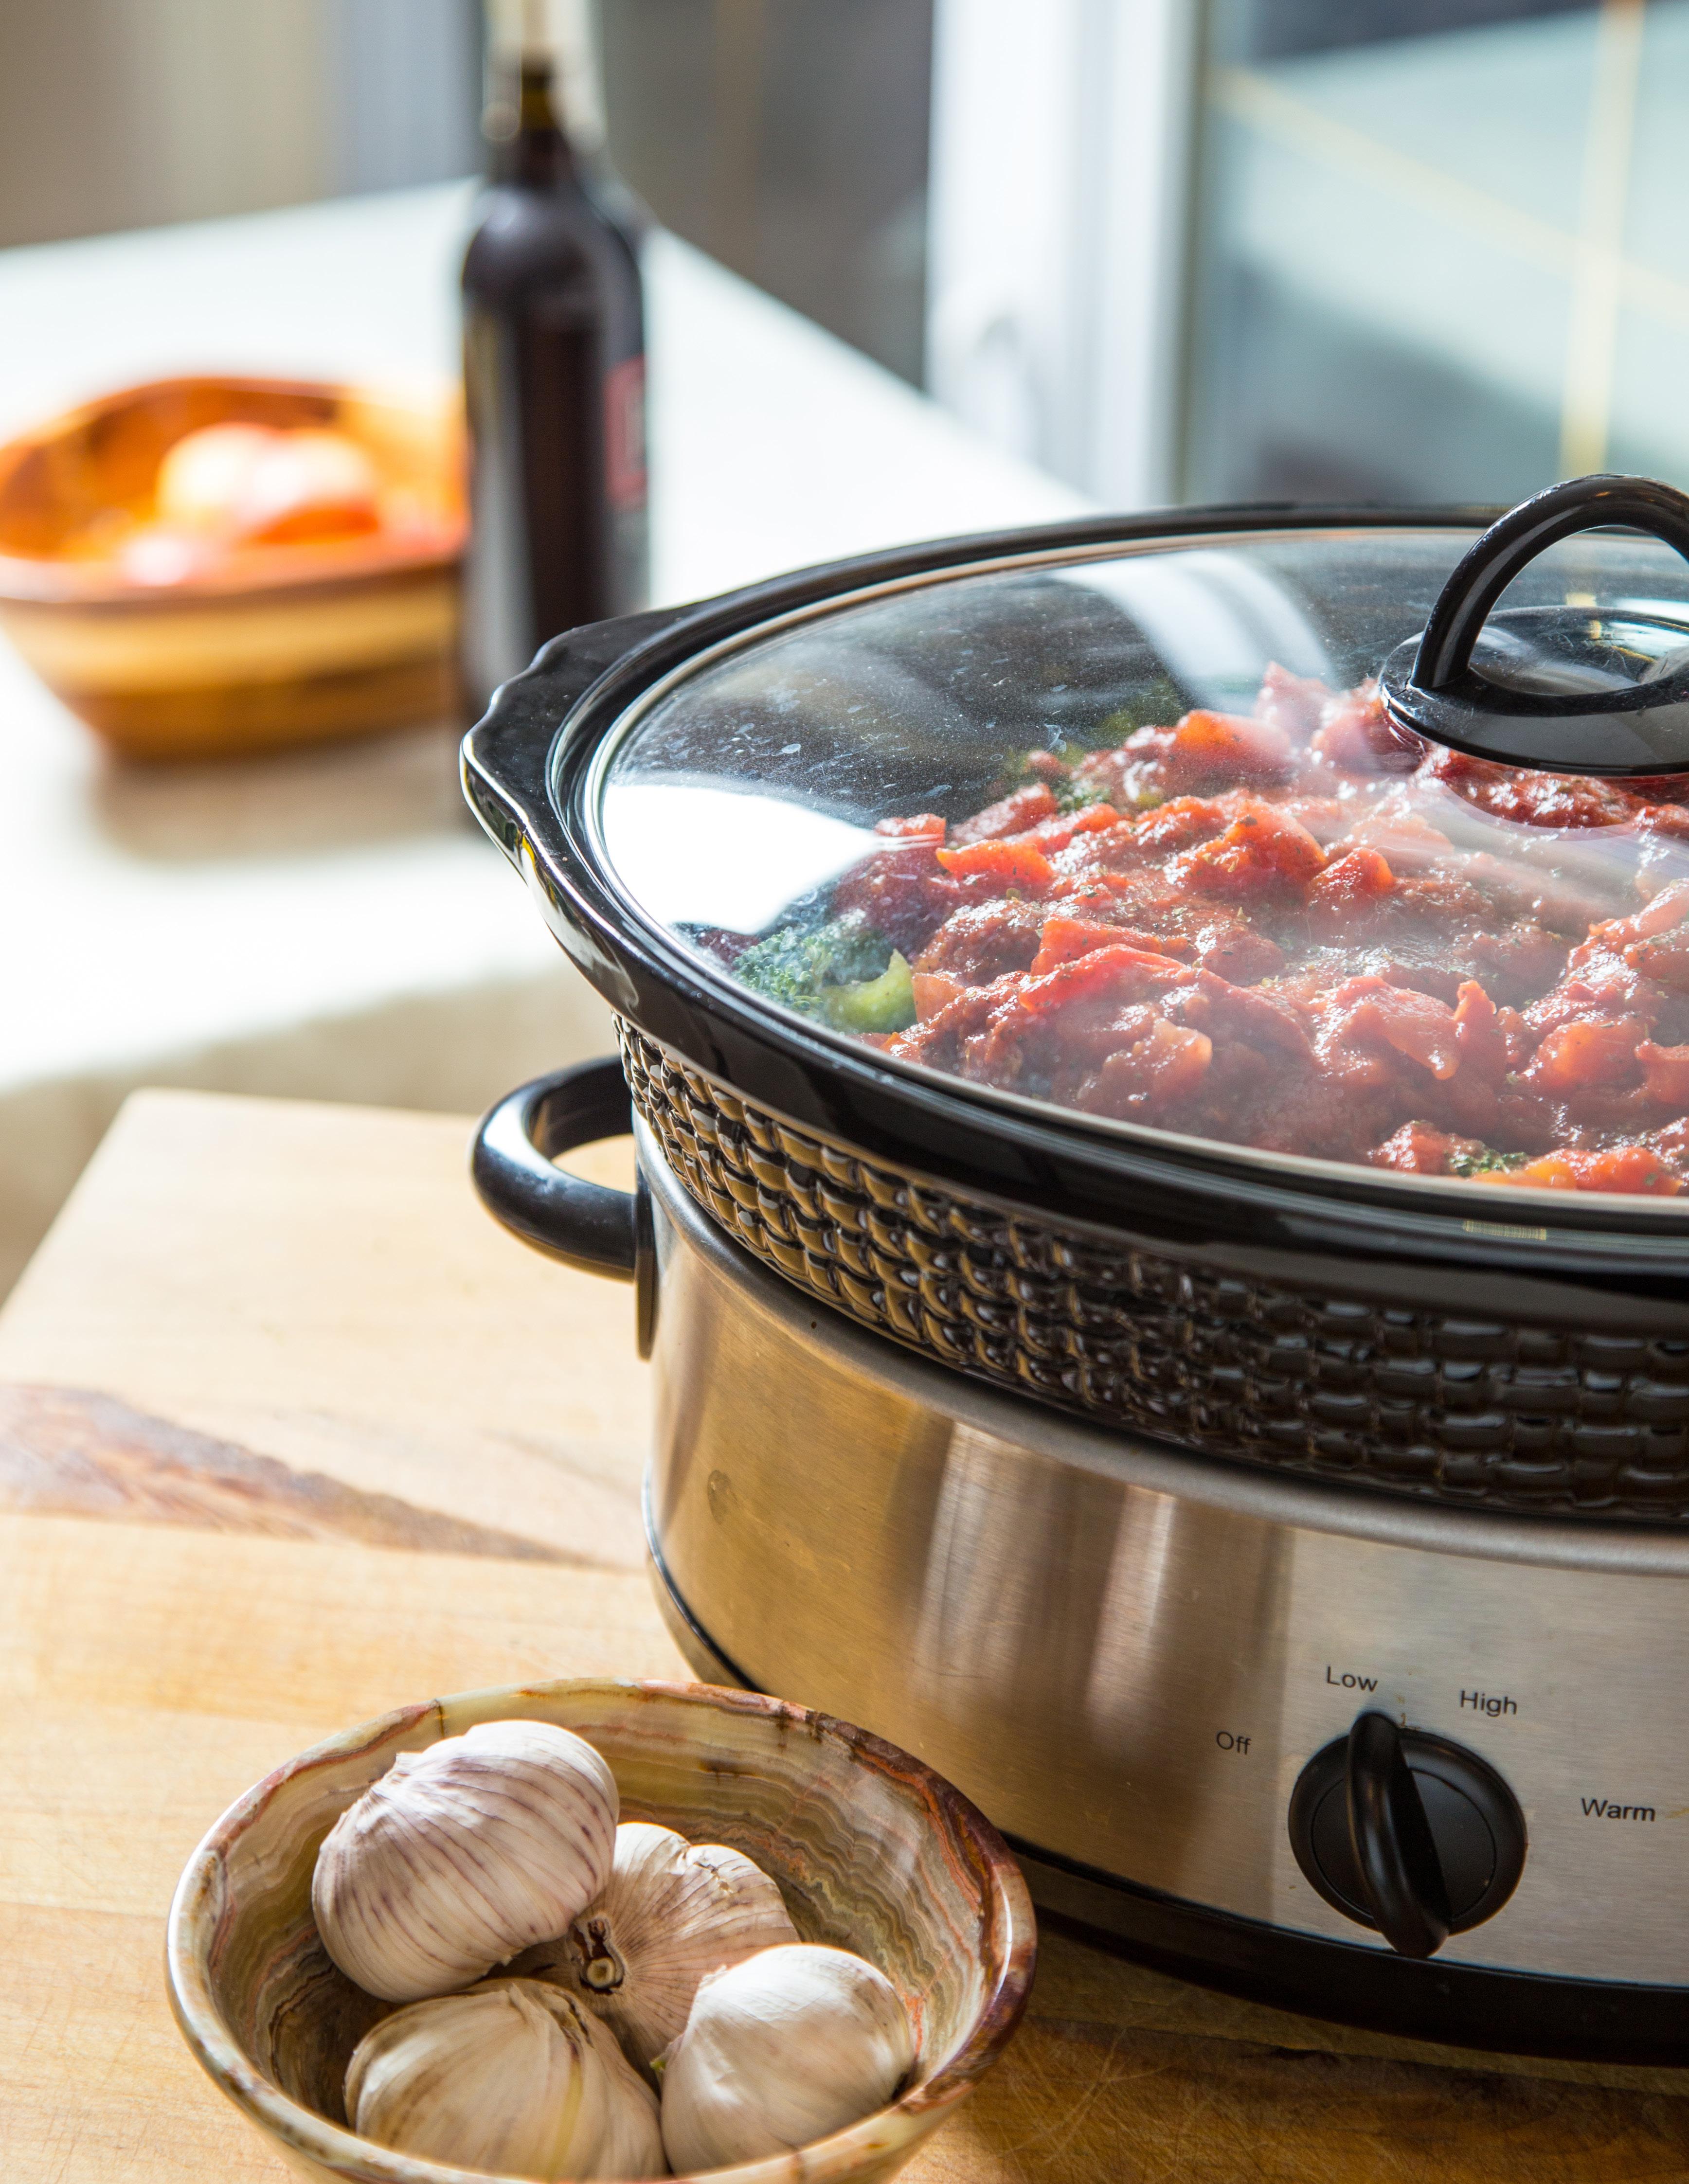
As temperatures drop and days grow shorter, there's nothing more inviting than the warm, comforting aromas of a slowcooked meal. The Crock-Pot, a staple in many kitchens, offers an effortless way to create hearty, warming dishes that bring a sense of coziness to any chilly day without having to put in much effort. Here are some ideas to inspire your next Crock-Pot culinary adventure, designed to keep you warm and satisfied all season long.
There's a reason soup is synonymous with comfort. Think beyond the basics with inventive combinations of seasonal vegetables, tender meats, and flavorful broths. A rich beef stew with root vegetables, creamy potato, leek soup, or a spicy black bean and chorizo chili can be the perfect antidote to chilly weather. Let your Crock-Pot work its magic overnight or while at work, so you come home to a pot of ready-to-eat warmth.
When it comes to convenience and flavor, one-pot meals are unbeatable. Imagine slow-cooked lasagna with layers of pasta, rich tomato sauce, and gooey cheese. If you aren't feeling Italian food, opt for a comforting chicken and wild rice casserole, chicken enchilada bake, or get creative with a casserole of your own imagination! These dishes not only warm you up but also simplify meal prep and clean-up, leaving you more time to relax by the fire.
Take a culinary trip around the world without leaving your kitchen. Use your Crock-Pot to explore comfort foods from different cultures, such as delicious Indian butter chicken or tikka masala, a robust French coq au vin or French onion chicken, or a vibrant spicy Mexican pozole or nacho bake! These dishes are perfect for broadening your palate while enjoying the slow-cooked flavors that make them so comforting.
Delicious Crock-Pot comfort food isn't just for meat-eaters; there are plenty of vegetarian options that can be just as satisfying. Consider a hearty lentil and vegetable stew, a creamy mushroom risotto, or a spicy Thai green curry with tofu. The slow cooking process enhances the flavors of the vegetables and legumes, making for a deeply satisfying meal.
Start your chilly mornings with a warm and hearty breakfast straight from your Crock-Pot. Imagine waking up to the smell of cinnamon-spiced oatmeal, a savory breakfast casserole with eggs, cheese, and vegetables, or a sweet and sticky apple French toast bake. These make-ahead meals can transform your mornings, making it easier to get out of bed on those cold, dark days.
End your day on a sweet note with slow-cooked desserts that are as comforting as they are delicious. Think warm bread pudding with caramel sauce, rich and gooey chocolate lava cake, or a classic apple crisp with a crunchy oat topping. The Crock-Pot's gentle heat ensures that these treats are perfectly cooked and ready to enjoy with very minimal effort!
For those who like to plan, the Crock-Pot is a meal prep hero. Batch cook hearty soups, stews, and casseroles that can be portioned out and frozen for future meals. This not only saves time during busy weeks but also ensures you have a comforting meal ready to go at all times, no matter how hectic life gets.
The beauty of Crock-Pot cooking is its simplicity and the way it allows you to savor the moments that truly matter. As you gather with loved ones around the dinner table, let the warmth and comfort of these slow-cooked meals fill your home and your heart. Embrace the cozy season with these hearty, wholesome dishes that make every chilly day a little more bearable.
Have a Crock-Pot creation you are proud of, and want to show off? Tag @ HomeByGeneva on Instagram to show off your favorite or see inspiration for your next culinary adventure!

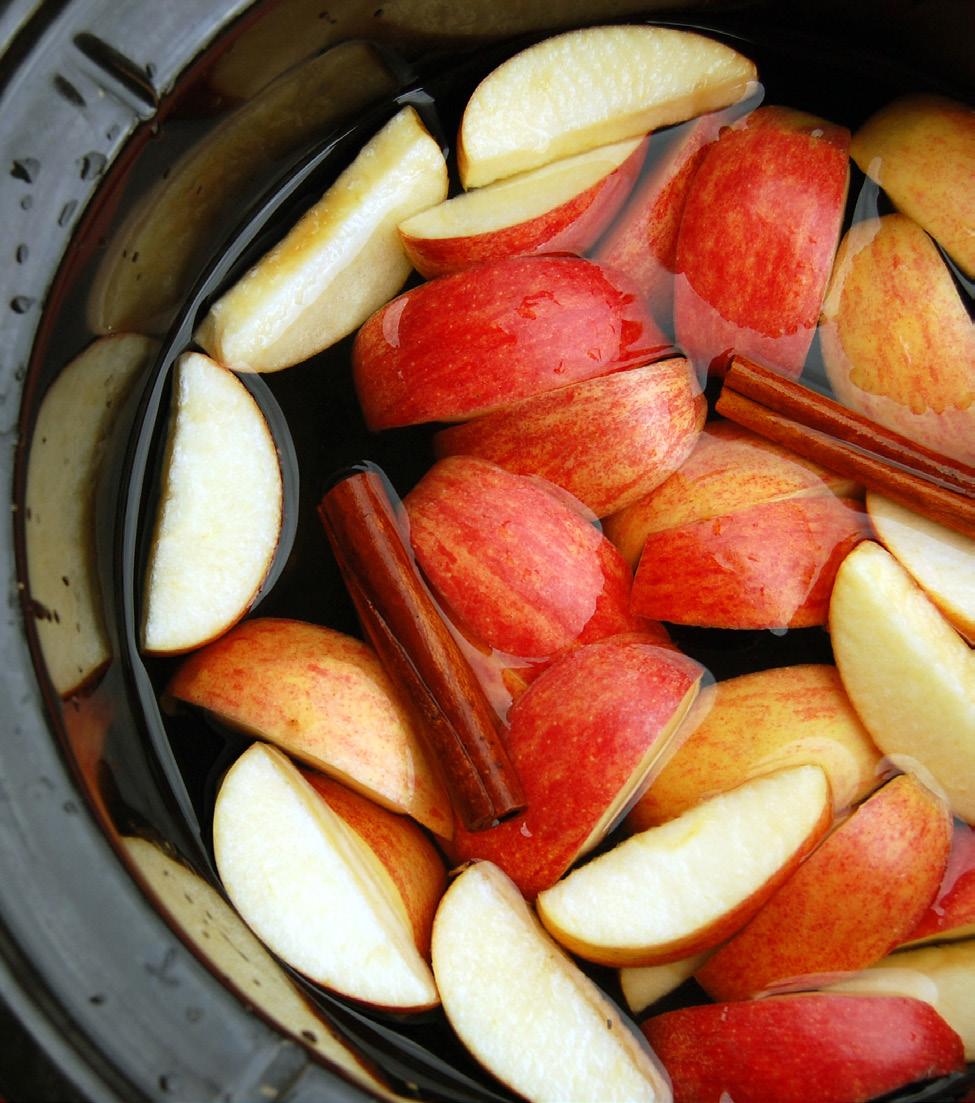


We’re at that point in the year where the leaves are starting to fall and the temperature is finally beginning to drop. While pumpkin spice runs the world during this time of year we can’t forget about our favorite cocktail mixture, whiskey. A versatile drink, whiskey can be combined with both sweet and sour, creating its own unique flavor with its smokey taste. Here are some fun and delicious whiskey recipes covering any occasion this fall!


No beverage represents fall like apple cider. With apple picking in full effect, cider is one of the most popular recipes to make with the apples. If you want to add a little zest try adding smoked bourbon to it to give your traditional cider a bit of a twist! Since apple cider is such a classic drink, this goes great with almost any fall activity or occasion, making this the ultimate fall seasonal cocktail!
A cinnamon whiskey mule is a refreshing taste on the classic Moscow mule, substituting the vodka with Jack Daniel’s cinnamon whiskey. The fresh mint, cranberries, lime, and ginger beer make this a light, refreshing drink great for cookouts and barbeques!
Eggnog is a holiday staple more commonly made around Christmas. However, we think it’s perfect for watching the leaves fall in October and the turkey cook in November just as much as seeing the snowfall in December. Eggnog contains eggs, whiskey, cognac, milk, heavy cream, and spices like nutmeg and cinnamon, creating a sweet concoction with no bite to it! You can make this at home or buy premade eggnog at the store and add your own ingredients to it!
A chai hot toddy has lemon and honey which helps soothe throat soreness and loosens congestion brought on by winter colds, making this surprisingly good for cold symptom relief. Give yourself a break from DayQuil and try a beverage with some pizazz to it. The hot chai and spice of the cinnamon will perk you up and help push you through the day. If you like chai latte’s, this is the drink for you!
A modern twist on a classic cocktail, a cinnamon whisky sour is a mixture of bourbon, lemon juice, a pinch of ground cinnamon, and maple syrup to sweeten it. This recipe goes great residing next to the fireplace in the warmth of your home. The sweet maple paired with the zest of the lemon juice touches every one of your tastebuds, covering the entirety of the flavor palette along the way.
Irish coffee is a simple yet tasty cocktail beloved by many. Containing only a few ingredients, this has little opportunity for error and is easy enough for even the beginner bartender to whip up. To make this, you will need Irish whiskey, brown sugar, and hot coffee topped off with a heavy cream for added texture. This drink is perfect for brisk mornings and late nights outside. If you prefer, Bailey’s or flavored eggnog make great substitutions for heavy cream!
Whiskey is a great base for drinks in the cold months of the year. The smokey flavor and warm taste work with many cocktail recipes and is great for any occasion! Whether at the pumpkin patch, apple picking, or hanging out by the fireplace with friends and family, you’re sure to find at least one recipe you’ll love containing whiskey!

For many, the aroma of freshly brewed coffee signals the start of a new day, and drinking it gives them the energy and drive to carry them throughout the day. However, whether due to health concerns, caffeine sensitivity, or a simple desire for variety, more people are seeking alternatives to their beloved morning cup of joe. Luckily, the world of hot beverages (or iced if you prefer) offers various delicious and refreshing options that can easily replace your regular coffee. Let’s dive into some enticing coffee alternatives that can bring a fresh twist to your daily routine.
Matcha, a finely ground powder of specially grown green tea leaves, offers a vibrant and slightly sweet alternative to coffee. This traditional Japanese beverage provides a mild caffeine boost combined with the calming effects of the amino acid L-theanine, promoting both relaxation and mental clarity. Matcha is also loaded with antioxidants, particularly EGCG, known for its cancer-fighting properties. Enjoy it whisked with hot water for a traditional tea or blended with milk for a creamy matcha latte. If you like your drinks cold, opt for an iced matcha latte with lavender, horchata, or strawberry; the possibilities are endless!

Golden milk, or a turmeric latte, is a soothing drink made from turmeric, milk (dairy or plant-based), black pepper, ginger, and cinnamon. This vibrant yellow beverage is celebrated for its antiinflammatory properties thanks to curcumin, the active ingredient in turmeric, which also supports the immune system. Golden milk is not only comforting but also nourishing, making it an ideal caffeine-free option for any time of the day. Simply simmer the ingredients together, strain, and enjoy warm. Golden milk can be an acquired taste due to the turmeric and ginger, so make sure to ease your way in with those ingredients to prevent spooking yourself out.
Yerba Mate, a traditional South American drink made from the leaves of the Ilex paraguariensis plant, offers a balanced caffeine boost. Known for providing smooth, sustained energy without the jitters, yerba mate is rich in vitamins, minerals, and antioxidants. This nutrient-dense beverage is traditionally enjoyed from a gourd with a metal straw, but it can also be brewed in a French press or tea infuser. Yerba Mate is a fantastic alternative for those looking to maintain their caffeine intake in a more balanced manner.
Tea, a staple beverage worldwide, offers a vast array of flavors and benefits, making it an excellent alternative to coffee. Whether black, green, white, or herbal, tea can cater to various tastes and health needs. Black tea provides a moderate caffeine boost, perfect for those seeking energy without the intensity of coffee. Green tea is renowned for its high antioxidant content, promoting heart health and weight loss. Herbal teas, like chamomile and peppermint, are caffeine-free and can offer soothing, digestive benefits. With endless varieties, these teas can provide a versatile and enjoyable way to diversify your daily beverage routine.
Chicory root has long served as a coffee substitute, especially popular in New Orleans. When roasted, chicory root mimics the rich, slightly bitter flavor of coffee, without the caffeine. It is a great option for those looking to reduce their caffeine intake without completely transforming their routine and morning brew. Additionally, chicory root is rich in inulin, a prebiotic fiber that supports gut health, and packed with antioxidants that help reduce inflammation. Simply brew it as you would regular coffee for a comforting, earthy beverage.
Exploring coffee alternatives can open up a world of new flavors and health benefits. Whether you’re looking to cut down on caffeine, try something new, or reap the health benefits of different plants and herbs, these interesting coffee substitutes can offer you a delicious and satisfying way to start your day. The next time you’re craving a hot beverage, think about some of these alternatives, reach beyond the brew, and discover your new favorite drink!

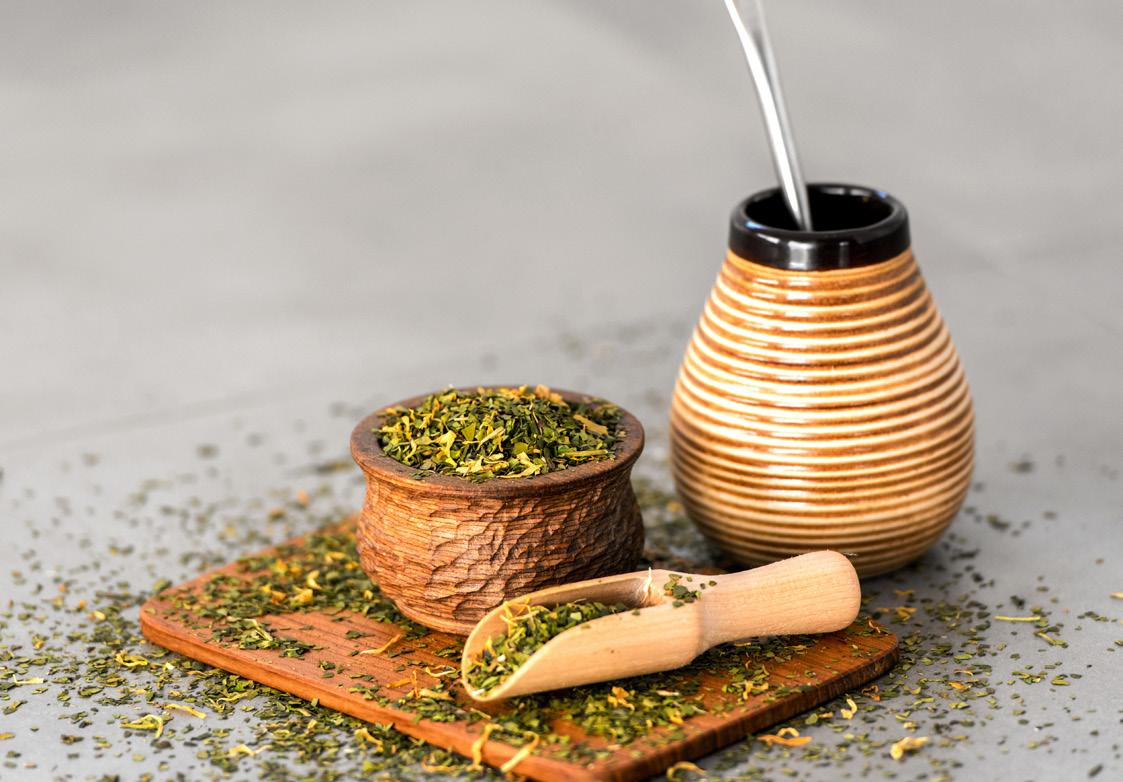


As we enter the fall season, there’s no better time to reflect on the incredible financial opportunities that lie within your home. For many American homeowners, the equity in their home has grown substantially over the past year, creating a valuable resource that can open doors to new possibilities. With U.S. homeowners seeing an impressive $1.5 trillion increase in equity in just the past year, it’s clear that tapping into this wealth can provide a significant financial advantage.


Home equity is the difference between your home’s current market value and the balance remaining on your mortgage. Think of it as the portion of your home that you truly own—free and clear. For example, if your home is valued at $500,000 and you owe $200,000 on your mortgage, your equity amounts to $300,000. This equity isn’t just a number on paper; it’s a powerful financial tool that can be leveraged in various ways to enhance your financial security and achieve your goals.
In 2024, the average American homeowner with a mortgage has about $299,000 in equity, with roughly $193,000 of that being tappable. This growing equity, fueled by rising home values, is more than just a statistic—it’s an opportunity waiting to be explored. Whether you’re looking to consolidate debt, fund a renovation, or even invest in new opportunities, your home equity could be the key to unlocking these possibilities.
Top Strategies for Tapping into Your Equity
Here’s how you can turn your home equity into a resource that works for you:
1. Debt Consolidation:
High-interest debts like credit cards can weigh you down. By tapping into your home equity, you can consolidate these debts into a single, lower-interest payment, helping you get back on track financially.
3. Emergency Fund:
Life is unpredictable, and having a financial safety net is crucial. Tapping into your equity can provide you with the funds you need to cover unexpected expenses, giving you peace of mind.
5. Educational Expenses:
Whether it’s paying for your child’s college tuition or going back to school yourself, using your home equity can help cover these significant costs without taking on additional high-interest loans.
While tapping into your home equity offers numerous benefits, it’s essential to approach this decision thoughtfully. Every homeowner’s situation is unique, and understanding the potential risks and rewards is crucial. Consulting with a licensed Geneva loan officer can help you determine the best strategy for your needs, ensuring that you make the most informed decision possible.
2. Home Improvements:
Whether it’s updating your kitchen, adding a new room, or making energy-efficient upgrades, using your equity for home improvements can increase your home’s value even further.
4. Investment Opportunities:
Have you ever wanted to start a business or invest in the stock market? Your home equity can provide the capital you need to pursue these ventures.
When you’re ready to tap into your equity, several options are available:
• Home Equity Loan: Ideal for large, one-time expenses, this loan provides a lump sum with a fixed interest rate.
• HELOC (Home Equity Line of Credit): Perfect for ongoing projects or expenses, a HELOC offers a revolving line of credit with variable interest rates.
• Cash-Out Refinance: Refinance your existing mortgage for more than you owe and take the difference in cash—a popular option for those looking to access substantial funds.
Your home equity is more than just a number—it’s a significant asset that can enhance your financial well-being. By staying informed about market trends and understanding your options, you can unlock the full potential of this valuable resource.

The holiday season is a time of joy, family gatherings, and, often, a little too much spending. It’s easy to get carried away with the festive spirit, leading to holiday debt that lingers well into the new year. If you find yourself facing a mountain of bills after the holidays, a cash-out refinance could be the financial reset you need.
On average, Americans spend over $1,200 on holiday-related expenses each year, with many relying on high-interest credit cards to cover gifts, travel, and festivities (FinMasters). This often results in a pile-up of debt that’s difficult to pay off, especially when interest starts accruing at rates of 15-20% or more.
For many, managing this debt becomes a stressful burden, overshadowing the joy of the holiday season and straining finances long after the decorations are put away.
A cash-out refinance allows you to tap into your home’s equity by replacing your existing mortgage with a new, larger one. The difference between the new loan amount and what you owe on your home is given to you in cash. This cash can be used to pay off high-interest debt, including those credit card bills that stack up during the holidays.
Here’s why a cash-out refinance is an effective strategy for post-holiday debt relief:
1.
2. 3.
4.
Lower Interest Rates:
Mortgage rates are generally much lower than credit card rates. By consolidating your holiday debt into your mortgage, you can significantly reduce the interest you pay, saving you money in the long run (Business Insider).
Instead of juggling multiple credit card payments with varying due dates and interest rates, a cashout refinance simplifies your finances by consolidating debt into one monthly mortgage payment.
With the cash from a refinance, you can start the new year debt-free, or at least with a more manageable financial plan. This allows you to focus on your long-term financial goals rather than being bogged down by short-term debt.
By reducing your interest payments and consolidating debt, you can free up cash flow that can be used for other important financial priorities, like building an emergency fund, investing, or saving for future holidays.
While a cash-out refinance can be a powerful tool for managing post-holiday debt, it’s important to weigh the pros and cons. Refinancing your mortgage means taking on a new loan, potentially with a higher balance, which could extend your mortgage term or increase your monthly payment. Additionally, there are closing costs to consider.
The holidays should be a time of happiness, not financial stress. By using a cash-out refinance to take care of postholiday debt, you can start the new year on solid financial ground, with a clear path forward.
Ready to explore your options? Connect with a Geneva Financial loan officer today and discover how a cash-out refinance can help you regain control of your finances.


