WINTER COLLABORATIVE PROGRAM 2015
About The Book “Building Dreams in Mud” was basically a hands-on workshop organized to understand a specific building material - Mud. This book describes the workshop in detail so as to take the reader through the journey just as the participants of the workshop did. The book was divided into two basic parts, of which one of them was conducted at Wardha, Maharashtra and the other one was conducted at Indus university campus, Ahmedabad, Gujarat. The workshop started with a session conducted at Indus university explaining the aspects of brick-concrete construction. The session explained the parameters of a framed structural systems and the techniques used for the construction of the same. The participants then visited Wardha and explored the town under the guidance of Professor Ajay Thomare along with the team of faculties from the Indus University. In Wardha the participants stayed at the Center of Science for Villages (CSV) and explored the Wardha house designed and developed by CSV. The second part of the book describes the construction process that went into the making of the Wardha house at the Indus University campus.
BUILDING DREAMS IN MUD WINTER COLLABORATIVE PROGRAM 2015
Copyright © 2015 by Indus University All rights reserved. No part of this publication may be reproduced, distributed, or transmitted in any form or by any means, including photocopying, recording, or other electronic or mechanical methods, without the prior written permission of the publisher, except in the case of brief quotations embodied in critical reviews and certain other noncommercial uses permitted by copyright law. For permission requests, write to the publisher, at the address below. IDEA Research Cell, Institute of Design, Environment and Architecture, Indus University Rancharda, Via : Thaltej, Ahmedabad - 382 115. Gujarat, India. email: info.idea@indusuni.ac.in website: http://idea.indusuni.ac.in/#home/1 Printed in Ahmedabad, India.
BUILDING DREAMS IN MUD WINTER COLLABORATIVE PROGRAM 2015
Author:
Participating students
Co-authors: Parag Rawool
Mangesh Belsare Bhanupratap Sharma
Editors:
Ishita Jain Vivek Sheth Atreya Bhattacharyya Paresh Gandhi Bhanupratap Sharma
In collaboration with: Expert:
Prof. Ajay Thomare
Artisans:
Subhashbhai Pradipbhai
Acknowledgement At the onset, we wish to acknowledge Professor Ajay Thomare, along with Anjali Verma, Mangesh Belsare and Parag Rawool,who were pivotal to the conduction and execution of the workshop. Prof. Thomare was present in person with the participants and helped them with his experience, as he offered explanations and reasons for each and every aspect of the workshop at Wardha. He headed all technical sessions at Wardha which enabled the students to learn the construction process in detail. He was also there on site to help initialize the construction and explain the process in practice. All students performed very well during the construction of the prototype at Indus University Campus. Two artisans from Wardha were brought down and they helped in the construction actively by guiding the students at all times, leaving no margin for any error owing to the new construction method that students were learning. Along with the artisans, students contributed in bringing the structure to life. Some labourers were appointed to give a final finishing touch to the structure. We would also like to thank Bhagyashree Construction for funding the construction of the prototype.
csv
Overview Of Workshop The workshop was organized to provide a base of strong conceptual understanding for the students to realize the ease of repetition, adaptability, economy and low maintenance aspect of a technique in mud construction. It was initiated by IDEA, Indus University in collaboration with Prof. Ajay Thomare, Nagpur and CSV, Wardha as a part of winter collaborative programs. The hands-on workshop was conducted to help participants become aware of the importance of low-cost housing and explore other building materials rather than limiting them-selves to just brick and concrete. The workshop aimed at participants’ developing an eye towards specific concepts incorporated in designing of a low-cost house. Several aspects of designing such as planning, different construction techniques, selection of suitable materials, etc., were discussed in the workshop. Participants understood the thought process that goes into designing a low-cost house specifically for a hot-dry climate, keeping in mind the design parameters discussed. The workshop guided students to think sensibly towards the needs of the economically backward section of society.
WARDHA VISIT Center of Science for Villages(CSV)
01
Places Visited
06
Technical session
15
SITE OVERVIEW & DESIGN PROPOSAL
18
EXECUTION OF WARDHA HOUSE 01 - Excavation 02 - Foundation 03 - Plinth 04 - Concrete Block 05 - Brick Pier 06 - Lintel 07 - Masonry Chair 08 - Centering of Vault 09 - Guna Tiles 10 - Laying of Mortar 11 - Gutter 12 - Removing of Temporary Supports 13 - Making of Face Tiles 14 - Making of Mud Bricks 15 - Mud Wall 16 - Guna Tile Jali 17 - Wooden Window 18 - Finish 19 - Brick Jali 20 - Ramp 21 - Steps 22 - Floor
21 22 23 25 27 28 30 31 35 40 44 45 47 49 53 54 55 59 62 63 64 65
1| Building Dreams In Mud
Abundance of mud Skilled labour and artisans S T Weak houses Barren land Bad hygienic conditions
SWOT Diagram
Deforestation not allowed Climatic conditions Financial condition of villagers W O Center Of Science For Villages(CSV) Need for strong house Potters New construction and sanitaton techniques
01
Wardha: Need For Intervention |2
Center Of Science for Villages (CSV)
01
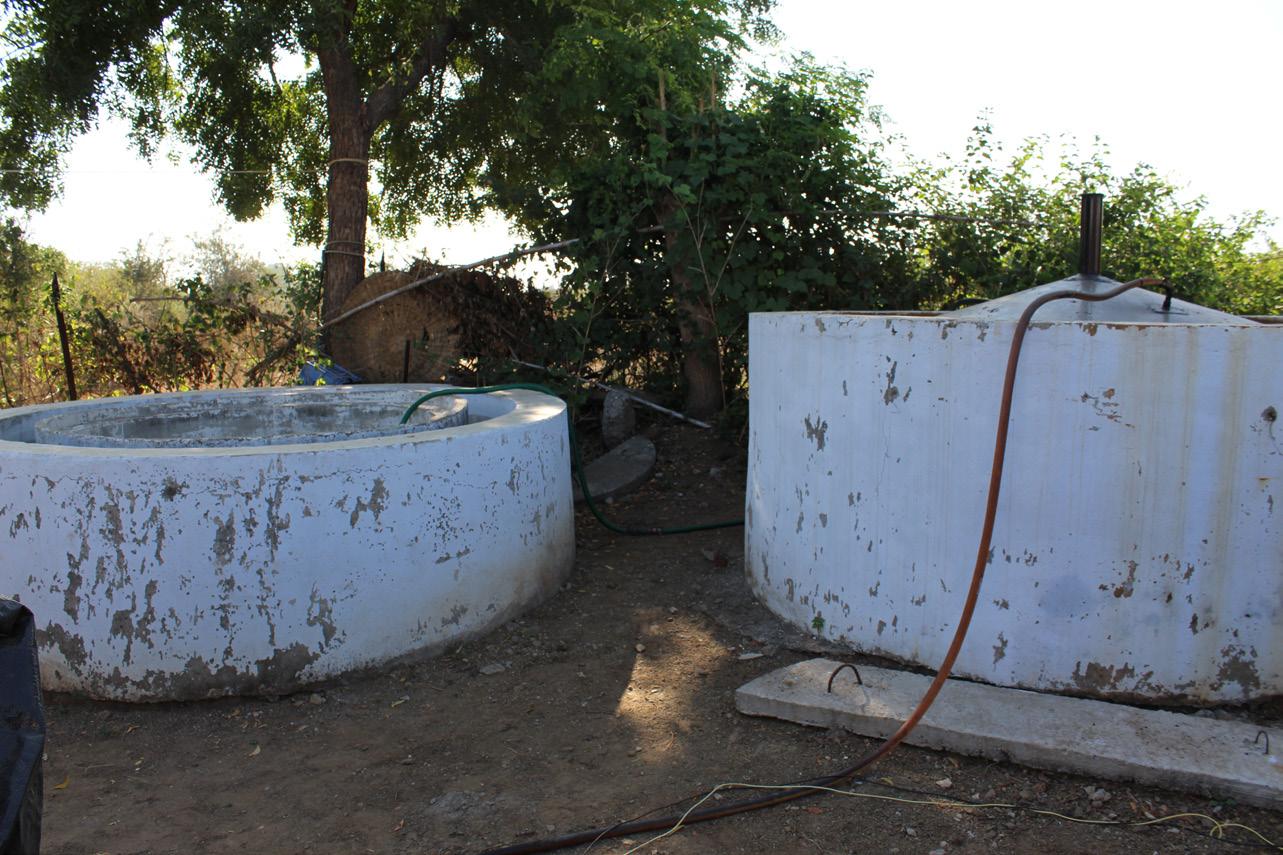
Birth of an Institution The Center of Science For Villages (CSV), Wardha, has spent the last four decades on innovating and perfecting several scientific techniques specific to the rural setting. Their objective is to work towards the holistic development of small communities based on decentralized village economy. This has resulted in the emergence of several sustainable techniques for rural India which are ecologically sound, economically viable and socially just. The main area of focus being rural housing, the organization has continuously worked towards sheltering the homeless. They came up with a design solution that served the purpose at a lower cost, comprised of materials available in abundance in the local surroundings only like soil and water. CSV initially struggled to bring in a solution for the villagers which would be feasible both economically and ecologically. It was first decided that they would use only locally sourced materials for construction. They found bamboo, grass and wood available in abundance in the local forests. However, laws applicable for deforestation prevented them from using those materials. Use of bricks was minimised so that the cultivable land is not wasted, as previously in making burnt bricks, the people eroded about one metre of fertile top soil, rendering the land useless for farming. Soil from the barren land was available in plenty and hence became the material of choice in the local context. Because of this, the potter became the fulcrum in the construction process, as it was the potter who knew how to work with the soil. Guna Tiles and Face Tiles were made as the main elements of construction in a Wardha house and are made solWely out of clay. The potters in the villages nearby were employed to make these guna tiles in large quantities as one vault of size 3m x 4.5m would require approximately 2000 Guna Tiles. This also ensured employment to the widely existing potter community. The technique of construction of the Wardha house was quite simple for a layman to understand. Since the villagers couldn’t afford labour to build their houses, they themselves learnt and participated in the construction activity. The technique was developed keeping this fact in mind. As a result, both men and women in the family got involved in the construction of their house. In this way, the expenses were reduced by a great extent making it affordable for the poor. CSV also helped develop and improve upon some specific sanitation methods where in bio-gas, manual could be produced out of the kitchen waste. This helped the villagers eliminating wood fuel for cooking as bio-gas was made available in plenty and made the villagers independent. CSV also developed some specific designs for cooking utensils to use less fuel. The organization has truly worked holistically to improve a poor man’s life right from his shelter to his food.
1|Building Dreams In Mud
Multipurpose hall, CSV, Wardha.
Stack of Face Tile
Stack of Guna Tile
Wardha: Need For Intervention|2
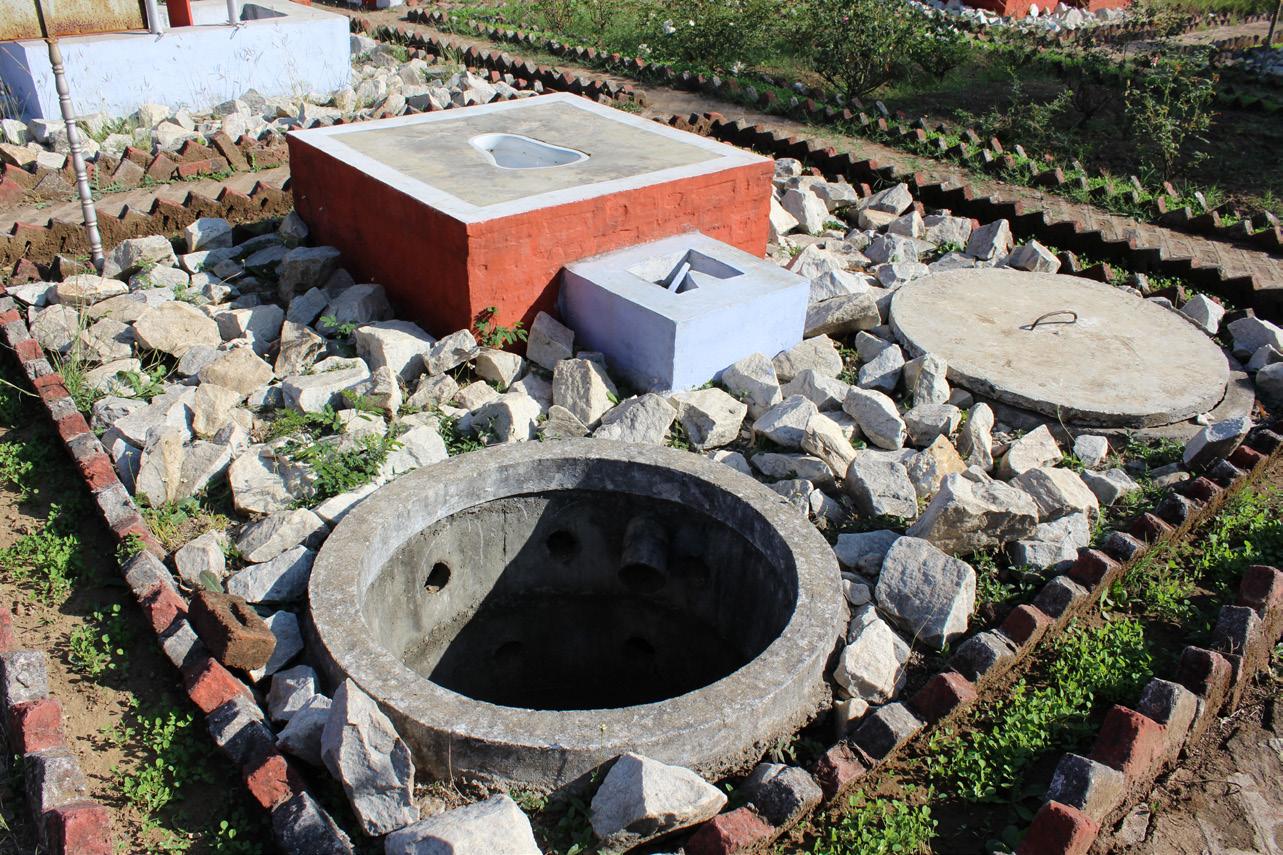
CSV has developed different sanitation techniques where in water is used negligibly and waste is collected in a pit in the ground. This waste eventually decomposes and produces manure.
Pit for collecting sanitation waste
Wardha Dry-pit Latrine
3| Building Dreams In Mud
The bio-gas plant shown here is developed by CSV. The chamber to the left is the collection pit of the kitchen waste, and to the right is the bio-gas collection unit. The bio-gas is sent to the kitchen through the pipeline.
Bio-gas Plant
CSV also helped improve the cooking conditions of villagers through developing utensils requiring less fuel for cooking. They also designed vessels and containers for clean and hygienic storage of food items. This kitchen-ware was both economical and ecological in nature as it was made out of the naturally available material, like mud.
Utensils designed and developed by CSV for villagers
Wardha: Need For Intervention|4
5|Building Dreams In Mud
Places Visited 2.1 2.2 2.3 2.4
02
Magan Sangrahalaya Bamboo House CSV, Dattapur Sevagram
Wardha: Need For Intervention|6
2.1
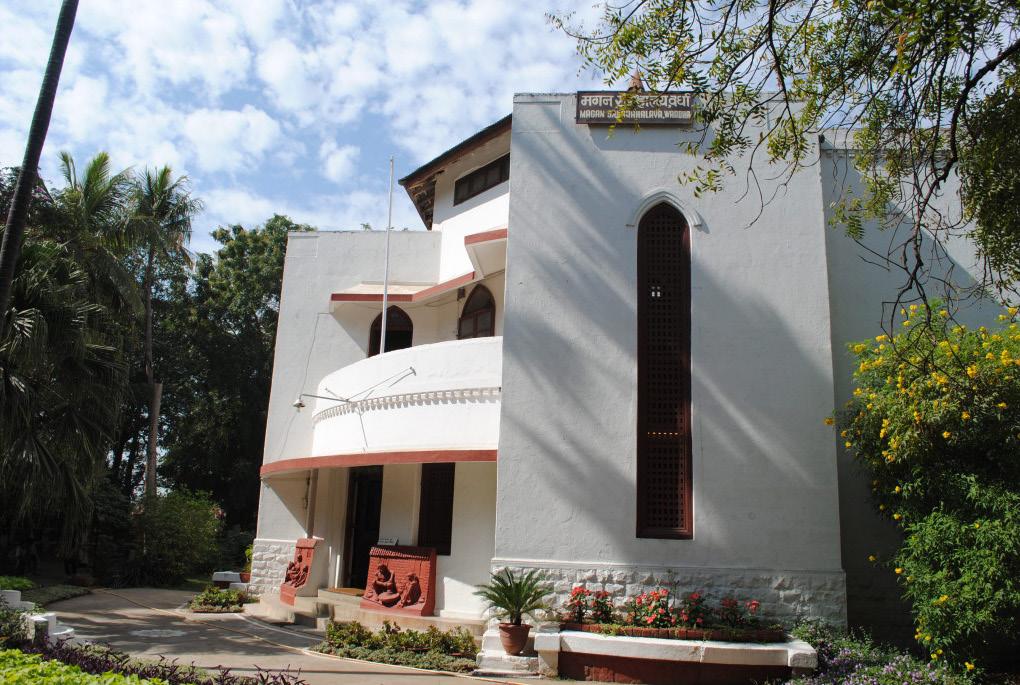
Magan Sangrahalaya
Magan Sangrahalaya located in Maganwadi, Wardha was inaugurated by Mohandas Karamchand Gandhi himself in 1938. “How man cultivated his hands towards different art techniques and how he used it to progress his habitat and lifestyle” is what is very well exhibited in Magan Sangrahalaya. Some of the unique techniques and technologies that originated in India that include cloth making, stone carving, irrigation technologies, medicine, brass and copper articles, the evolution of Indian flag, have been exhibited there.
Magan Sangrahalaya, Maganwadi, Wardha
Charkha(spinning wheel) and its evolution since inception, falls amongst the many important things exhibited. The picture here is of a Charkha kept in Kumarappa’s residence.
Charkha in Kumarappa’s residence
7|Building Dreams In Mud
Beside the Magan Sangrahalaya, a composite structure consisting of brick and bamboo was made. The structural system of this place consists of a brick masonry. The flooring here consists of bamboo tied together, which then borrowed its support from the internal bamboo structure and brick wall.
Brick-Bamboo composite structure
Bamboo used as structural material
Wardha: Need For Intervention |8
2.2
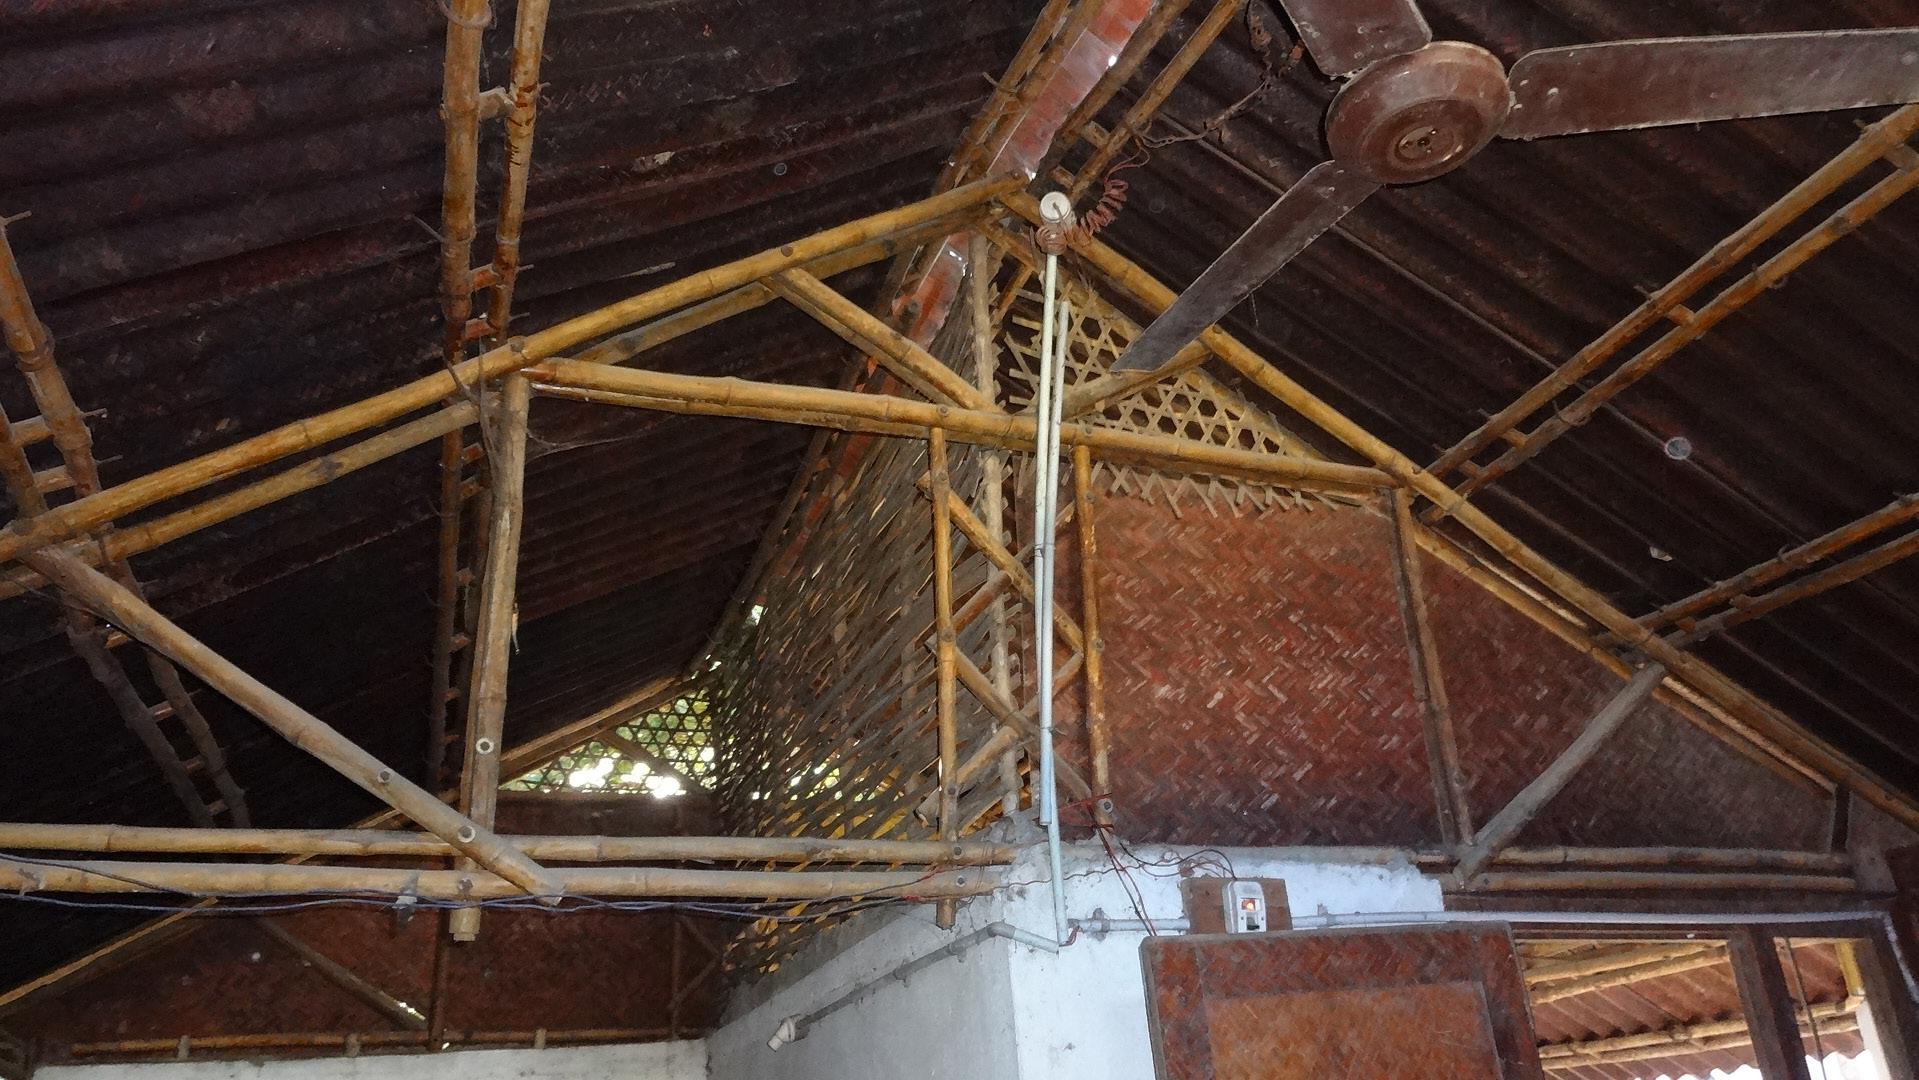
Bamboo House
The house served as a playground for experimentation and perfecting of techniques that are used in bamboo construction today. The house was initially constructed to demonstrate that bamboo itself is sufficient for construction without any other supporting material.
Bamboo used to support sloping roof
The house is a perfect example of a synthetic system as one single material is being used at the junction, in all aspects. It incorporates the use of bamboo in all the ways, from structure to the facade of the house.
Junction details
9| Building Dreams In Mud
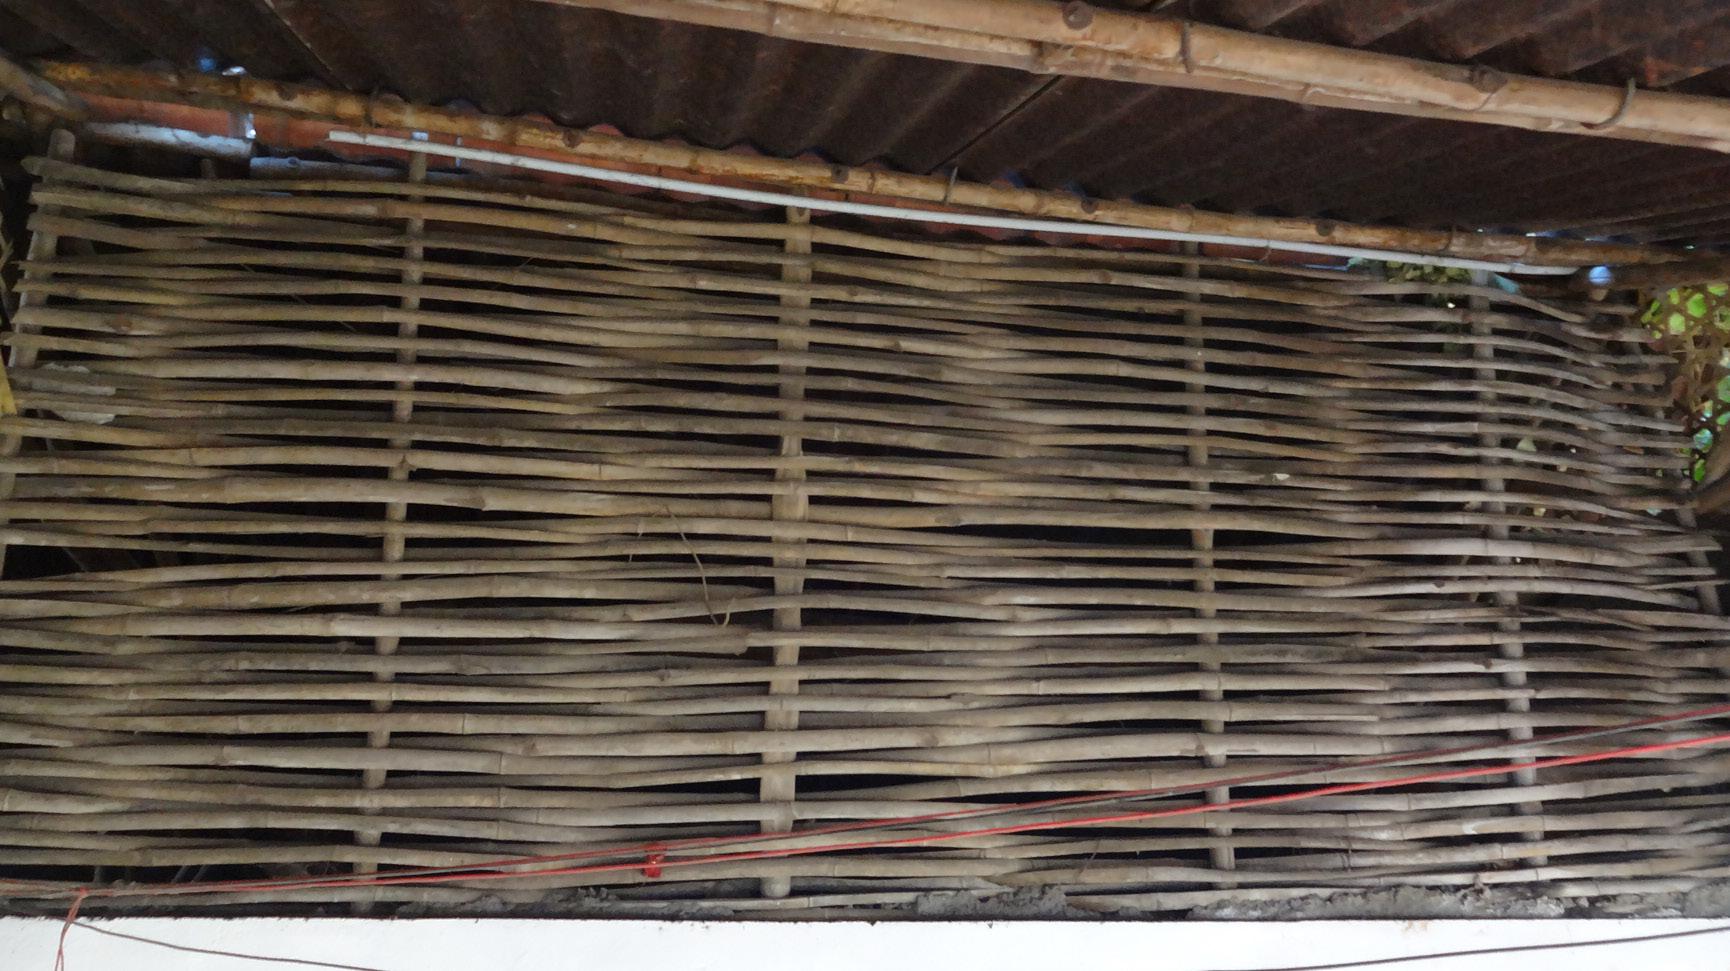
Here the partitions in the interiors of the house are made using split bamboo.
Partition made out of Split Bamboo
Bamboo Mat Corrugated Sheet is used as sloping roof for this Bamboo House. This mat is screwed to the internal bamboo members supporting the roof.
Bamboo Mat Corrugated Sheet
Wardha: Need For Intervention|10
2.3
CSV Dattapur
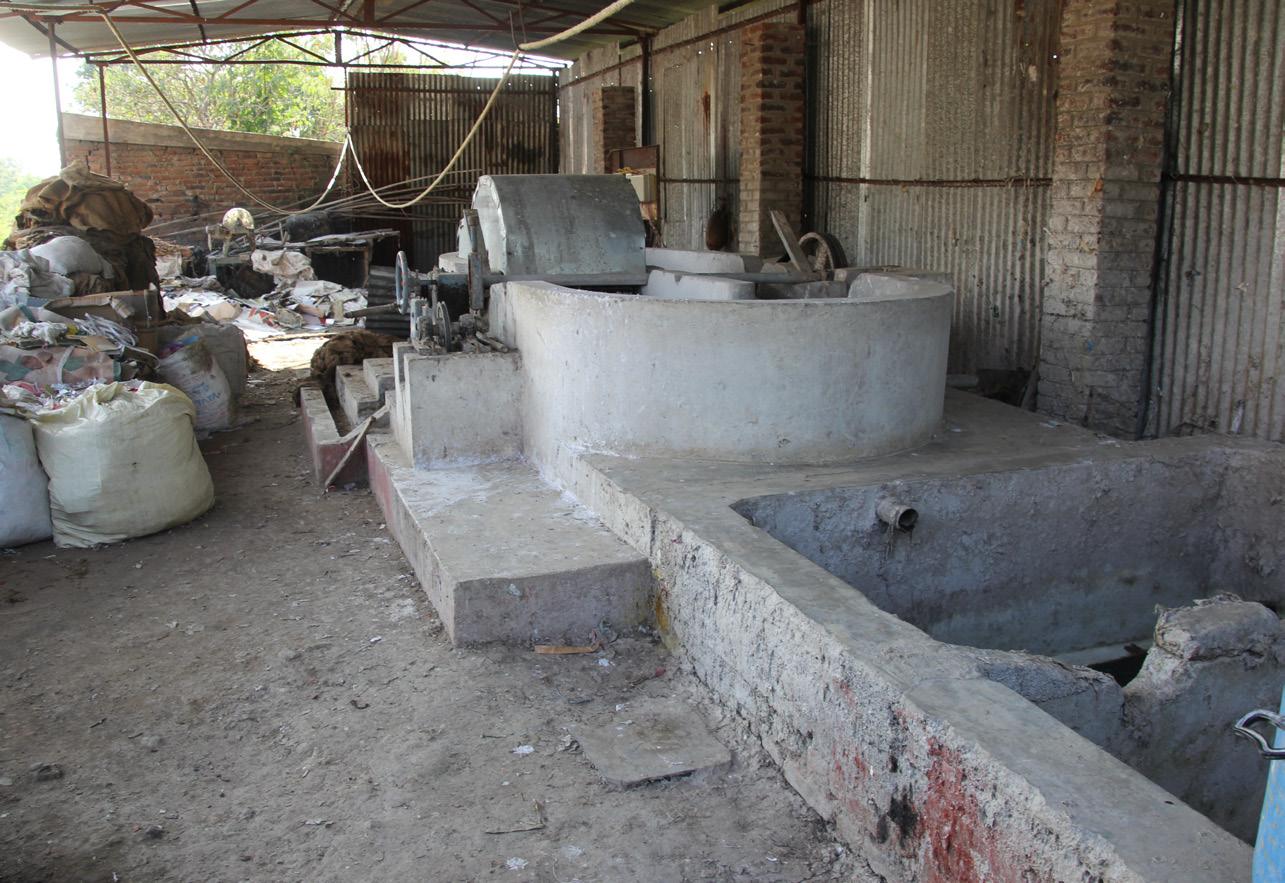
Apart from the contribution towards the rural development, CSV also looks at renewable resources and their recycling processes. The picture here shows a paper recycling unit.
Paper recycling unit
Light weight filling material is used widely as in-fill material in sunk-slab and roofing for insulation.
Infill material used in roofing for insulation
11| Building Dreams In Mud
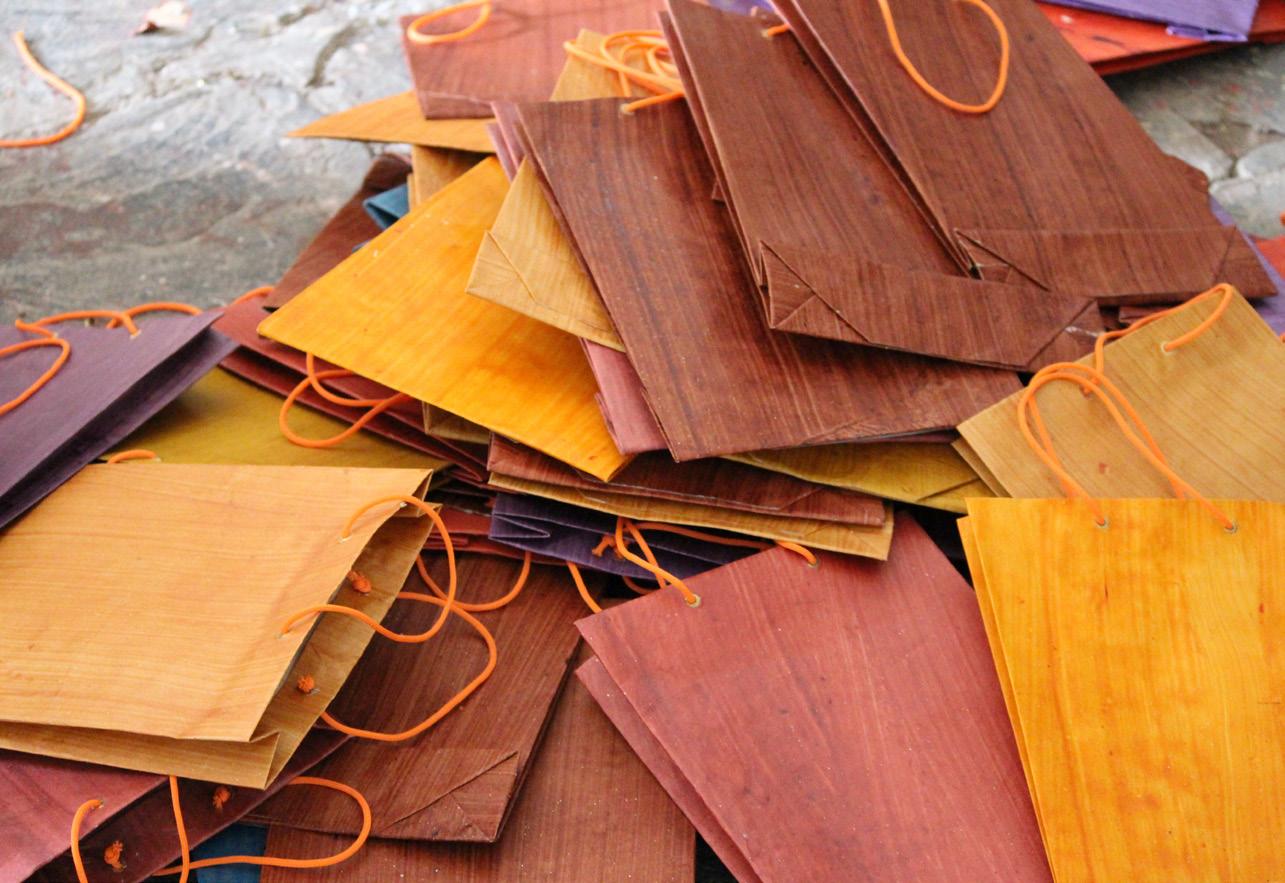
They have incorporated some methods where they make multiple things by recycling waste paper into items such as hand-made paper bags, notebooks, craft papers.
Recycled paper bags
This is the Warehouse at CSV, Dattapur. The products shown are developed here using the recycled paper from the recycling unit.
Warehouse, CSV, Dattapur
Wardha: Need For Intervention|12
2.4
Sevagram
It is a small village in Maharashtra. In 1930 when Gandhiji left the Sabarmati Ashram to proceed to Dandi for the Salt Satyaghrah, he decided to not go back to Sabarmati Ashram till India became independent. He stayed in Sevagram in a small cottage for the while. Sevagram was designed by an Italian lady, Ms. Madeleine Slade also called as ‘Meeraben’ by Indians. But apart from its historical importance, the place has a lot of learning to offer in terms of its construction techniques used to build this place.
Cottage where Gandhiji resided
Wood is the major construction material used. It is interesting to note how the sloping roof is resting on the wooden column. The wooden column is supporting the capital, which is further supporting the beams that are connected by the lap joint. At the end the roof is borrowing support from these columns.
Structural members made of wood
13| Building Dreams In Mud
The window openings are designed in such a way that they can be easily operated from inside and also do not need a shading device. The shutter itself works as a shading device as it opens upwards and not sideways. The small wooden member (holding the shutter can be rotated and pulled back to close the shutter.
Flap also acting as a sun-shade
The wooden column is resting on a grooved stone. Here stone is not flushed into flooring but instead, it is resting on floor so that the column gets lifted and water does not directly flow into the grove.
wooden column on grooved stone
Wardha: Need For Intervention |14
Technical Sessions
03
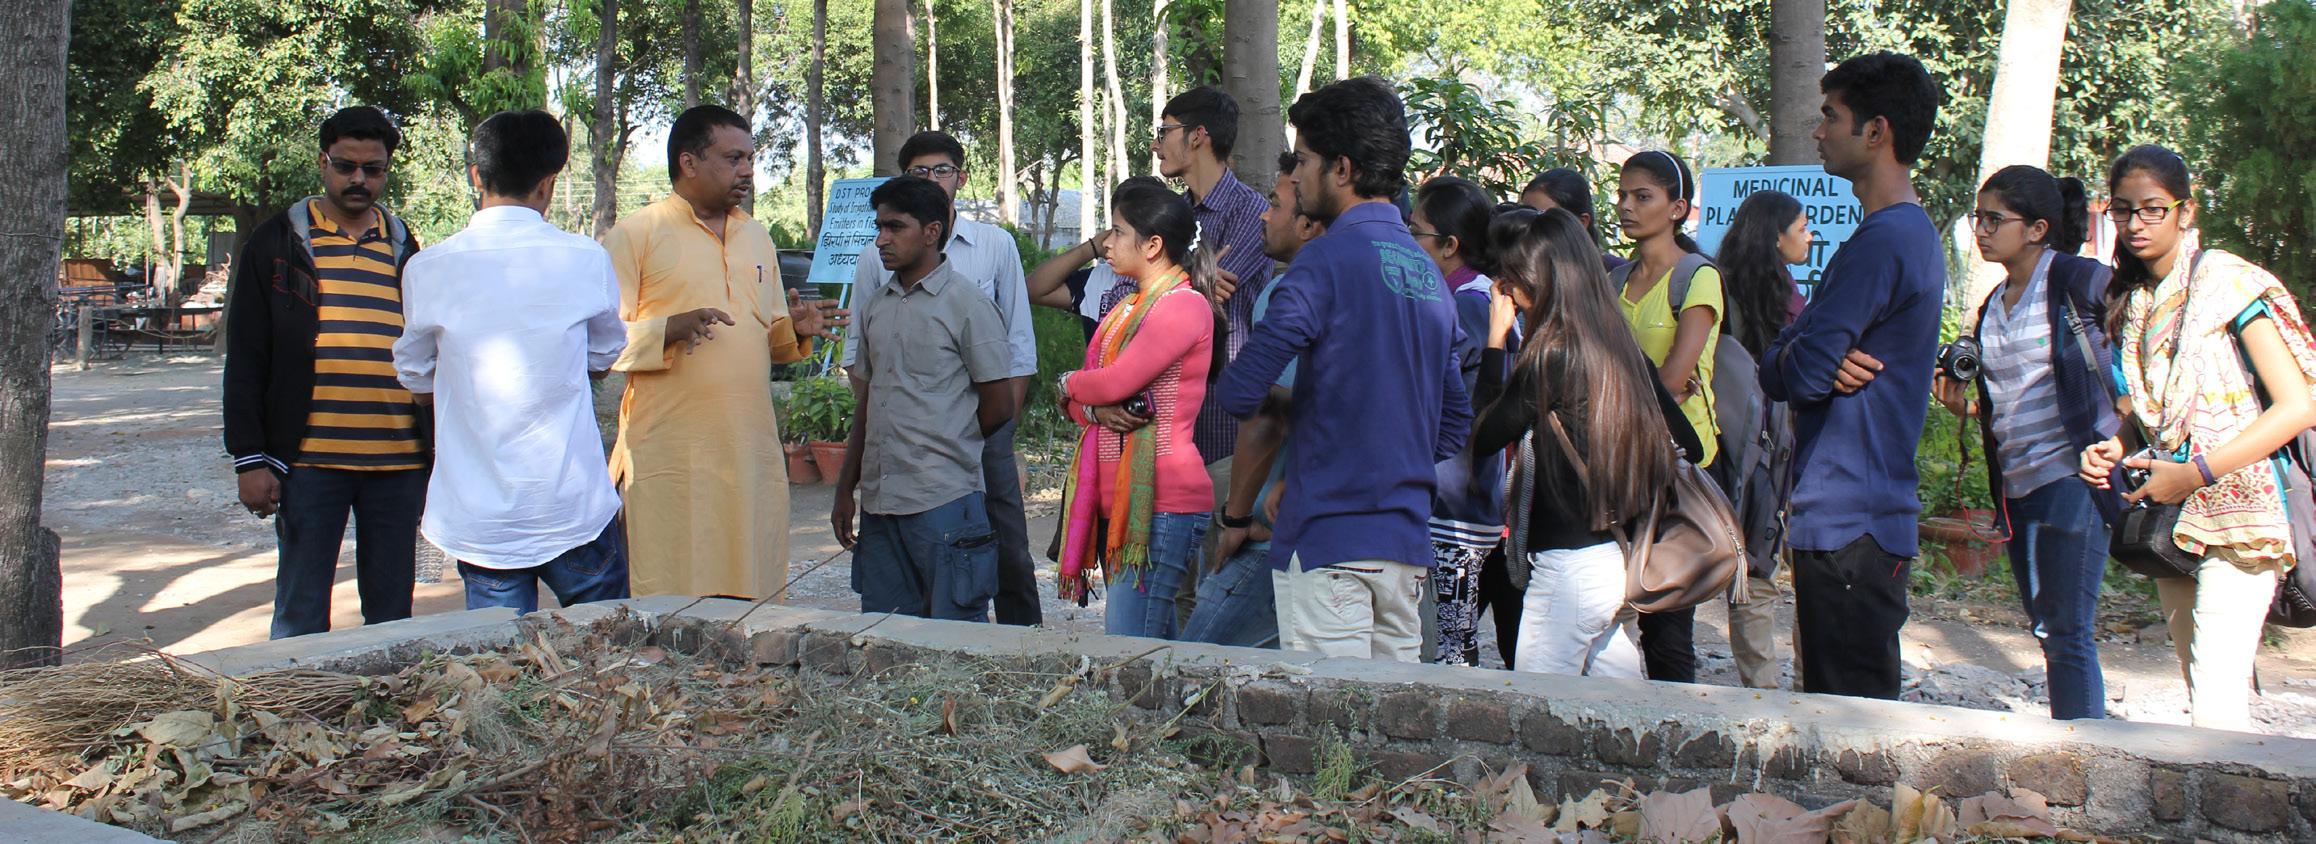
Techniques developed at CSV The session started with interesting discussions on the basic building components such as roof, enclosure and several other elements. Further on, there was a detailed discussion on “why not to use concrete”, and instead look to explore the use of natural materials as much as possible. A comparison between brick-concrete and natural building materials was made keeping in mind their advantages, disadvantages and overall effect on the surrounding context. W Participants were also taught how to minimise the use of material and make a building eco-friendly. The techniques used to build the vault structure were also explained in good detail. The construction sequence of the Wardha house was illustrated in detail through sketches and a documentary. To conclude the discussion, a presentation was shown in which the following aspects were explained: - How the organization helped in the progress of the rural areas in many parts of India. - How they helped each and every farmer to live his life on his own without being dependent on anybody.
Participants interacting with prof. Ajay Thomare
15|Building Dreams In Mud
4.1
Take Aways from Wardha
The construction technique involves the use of materials that are manufactured by the resource abundantly available natively, i.e mud. The structure, named ‘Wardha house’, is a vaulted structure spanning 3 meters. The only structural members are the burnt brick piers and RCC lintels. The walls are made up of mud bricks which are cast on site using prefabricated moulds of predefined sizes. In the process, potter-made Face Tiles are used on the external surfaces of the walls providing a terracotta skin to the mud walls. These tiles are cast on site and dried under sunlight. They are then fired in a kiln to give them strength to withstand the climatic conditions. The vault is made up of terracotta tumblers called the Guna Tiles. Guna tiles are manufactured by potters using locally excavated mud. They are stacked one inside the other to achieve the catenary curve of the vault. Prefabricated trusses are placed at equal intervals for the centring of the vault. The Guna tiles are laid in rows and each row is called a ‘Bow’. After the laying of these tiles, a layer of cement mortar is applied over it. It is allowed to settle for a day. The next day, the centring is removed and a finishing layer of cement mortar is done. The external most layer has china mosaic to avoid water from seeping in and to trap less heat. The voids in the Guna tiles trap air and insulate the space below. The openings can be designed accordingly based on the user’s needs. This technique cannot be used to build multiple storeys. The construction of the structure involves simple techniques making it easier for a layman to understand and build. The overall cost of one vaulted enclosed space is 40,000 INR. The controlled use of materials and local labours makes it affordable for the residents of rural India. There is another aspect of such construction - the temperature inside the structure gets reduced by about 5 degrees. The learning from this workshop will subsequently help the students in taking certain design decisions in future as a responsible practitioner.
Wardha: Need For Intervention|16
Exploded View of Structure
China Mosaic
Mortar Layer
Guna Tile
18mm Dia 3000mm long GI Pipe Centering Truss 100mm Thick RCC lintel 230*355mm Brick Pier 230*230*150mm Concrete Block 230*230mm Brick Pier 230*355*150 inch L-ShapedBrick Pier IPS Flooring
17|Building Dreams In Mud
Site Overview & Design Proposal
Overview Of Site The site is located within the premises of Indus University, Ahmedabad. It was chosen considering the existing site context that the structure would have to respond to. The main entrance to the site is from the west. The site consist of a Neem tree in the south and a six meter tall structure that blocks the south sun to a considerable extent. Hence, the sitting spaces were placed to the south under the tree’s canopy as it remains shaded throughout the day. To increase the space outside and to maintain the distance between the tree and the building, the semi open spaces in the centre were staggered proportionately. To the north, this semi-open vaulted space extends upto the canopy of a bamboo structure. To the east of the building, stands a dead wall, that marks boundary of the campus.
On Site Execution |18
Conceptual sketch
19| Building Dreams In Mud
Plan
Brick Pier Mud Brick
Wooden Window
Steps
N Ramp
Section On Site Execution |20
Excavation plan A
01 B
C
D
E
1
1
2
2
3
3
4
4
5
5
6
6
A
B
C
D
E
Excavation plan showing centre line
The ground was dug up approximately 1.5 metre deep, to lay the 3 brick deep foundation. The ground was excavated roughly to accommodate 9 brick courses.
Excavation on site 21| Building Dreams In Mud
Foundation
02
100mm PCC
3 Brick Thick Course Queen Closer
100MM PCC
Natural Earth
Isometric sketch of foundation
The above foundation detail consists of a 100mm thick P.C.C (Plain Concrete Cement) layer at the bottom. After which a 3 brick thick foundation, up to 9 courses is made.
Execution of wardha house |22
Plinth
03
Plinth construction on site
Till the Natural Ground Level(NGL) the foundation is kept 3 brick thick. Then 5 courses(2 brick thick) are laid above the NGL, above which the 100 MM thick P.C.C bed is laid.
23| Building Dreams In Mud
3.1 Back Filling After the P.C.C bed, the remaining plinth was filled by the excavated sand. Once the plinth was filled, water was poured over the backfilled sand to allow it to settle.
Back filling at the plinth Execution of wardha house |24
Concrete block
04
Concrete Block
Concrete block in brick pier
Exploded sketch of concrete block
The pre-cast concrete block shown in the above picture is used to hinge the door to the brick piers. Each of the pier consists of 2 concrete blocks. These blocks are only placed in the piers where the doors are to be hinged.
25| Building Dreams In Mud
4.1
Making Of Concrete Block
Initially 4 bricks were kept in the formation as shown in the picture which served as a form-work to cast the block. The bricks were kept up to 1 course. Concrete (1:3:3) was poured in the void created in between. The dimensions of the block were governed by the size of the pier. Thus, the block was cast on site using the local bricks, so that variations in the sizes of the brick would not affect the precision required.
1
Before the concrete set, a metal clamp, with a hole towards one end, was to be placed such that the hole doesn’t get covered and protrudes out of the block. After placing it, another layer of concrete was to be poured for which the shuttering had to be extended upwards. One course of bricks were placed above the previous ones and concrete was poured in similar manner.
2
Each pier that had a door to be fixed, required two concrete blocks, one close to the floor and other at the top. One block was kept after 3 courses from the bottom in the brick pier and the second was placed after the 19thcourse in the brick pier.
3 Execution of wardha house |26
Brick Piers
05
Positioning the first course of brick pier
In some brick piers, where the doors were then to be hinged, the concrete blocks were placed. Brick piers were kept up to just 7 courses on the first day in order to let the mortar set and bind the walls well. Therefore the remaining pier was completed on the next day.
Brick-piers being erected 27| Building Dreams In Mud
Lintel
06
Once the brick piers were erected, the shuttering for the casting of lintel beam was set-up. The reinforcement for the lintel beam was prepared during construction of brick piers itself. The thickness of lintel beam was kept 200mm. * Curing time for brick piers is supposed to be more but owing to time constraints we started after one day
Centering at the lintel beam
Once the centering was complete ,the reinforcement was laid in. The steel bars with 12mm diameter were used as a reinforcement. After the completion of shuttering and checking the junctions of reinforcement, concreting of the lintel beam was done.
Reinforcement of the lintel beam Execution of wardha house |28
6.1
Casting of Lintel
The picture here shows the supports given to the shuttering for the lintel beam.
Support given to centering
In this structure the roofing system consists of a vault. The vault needs a base point to start from. As a result the Brick Chair is made and the first Guna tile of every course rests on this Brick Chair, which helps in achieving the curve for the vault.
Guna tile resting on brick chair 29| Building Dreams In Mud
Masonry Chair
Sketch of reinforcement in lintel beam
07
Roof Truss supported by wooden member
The sketches here shows the details of the Brick Chair that is set on to the lintel beam. Brick masonry chair is placed at the springing points for placing Wardha tumbler bow. Concrete mix (1:2:4) is placed at an angle so that the tumbler bow rests properly on the chair.
Execution of wardha house |30
08
Roof - Centering Of Vault
The steel frame forming an arch here is called the Roof Truss. The purpose of the roof truss is to give a support to Guna Tile courses until the roof can take its self-load and also to help achieve the curve. The further pictures also describe the removal of this Roof Truss and how the roof becomes self-dependent.
Fixing of roof Truss
The truss is designed in such a way that it can be easily removed once its purpose is fulfilled. The truss is supported by the wooden member shown in the picture. So, once the wooden member is removed the truss can be easily pulled out from its place.
Wooden support given to roof truss
31| Building Dreams In Mud
Trusses being placed at regular interval
The first and the last truss of every vault borrows its support from the ground, so that it does not get inclined while laying of the Guna Tiles. The trusses in between are connected to either first or the last truss. These trusses are connected by bamboo.
Ground support
Execution of wardha house |32
The arch of these trusses have small voids at regular intervals, through which the GI pipes are passed. These GI pipes are connected by the GI couplers. These pipes act as supporting member to the Guna tiles, as the course of Guna tiles cannot take the load of itself.
Inserting G.I. pipe into roof truss
33| Building Dreams In Mud
Connecting G.I. pipe by G.I. couplers
The voids through which these pipes are passed are wider than the external circumference of the pipe, as a result the pipes remain loose. A small piece of bamboo is used as a spacer, to keep the pipe intact with the arch and ensures its firm position when it has to bear the load of the roof.
Wooden piece for fixing the G.I. pipe
Roof truss supported by Bamboo and connected by G.I. pipes
Execution of wardha house |34
Guna Tile
09
These Guna Tiles are manufactured by the potters using the locally excavated mud. Potter then makes small cylindrical lumps after out of the potter clay.
Making of cylindrical lumps
These cylindrical lumps are then given shape and made hollow from one side, which leaves them closed from the other side. But still these are very wet to be further worked on. Therefore these objects are kept for drying for some time.
Making cylindrical lumps hollow from one side
35| Building Dreams In Mud
After gaining some basic strength, these objects are again kept on the wheel and are made hollow from the other side. This final product obtained is called a Wardha tumbler(Guna Tile).
Making cylindrical lumps hollow from second side
Dimensions of a Guna Tile.
Dimensions of Guna Tile
Execution of wardha house |36
9.1
Laying of Guna Tile
The picture here shows the laying of first bow of Guna Tiles for the roof. It also shows the truss and GI pipes being used as a to support the Guna Tiles.
Laying of first bow (at Guna Tile)
The picture shows artisan showing students laying of last guna tile on brick chair.
Guna Tile course resting on Brick Chair 37| Building Dreams In Mud
After the first course of Guna Tiles is laid, GI pipes and the Guna Tiles are tied with a thin wire so that the course does not move from its place, as remaining courses of Guna Tiles are laid considering the first course as a reference.
First course tied to G.I. pipe
Once the first 4 Guna Tiles courses are laid, they are tied to each other using the same thin wire.
First four courses tied to G.I. pipe Execution of wardha house |38
After every Guna Tile course, the course adjacent to it is kept in the opposite direction so that the void space being created can be reduced.
Each course is arranged in opposite direction
Each of the Vault consists of 50-55 courses of Guna tiles, this number depends on the length of the vault to be achieved.
Laying of Guna Tiles 39| Building Dreams In Mud
Laying Of Mortar
10
Once the whole vault is complete, water is sprayed throughout the vault. This is done to prevent the water content in the mortar to be absorbed by the Guna Tiles.
Watering on Guna Tiles (vault)
After the vault becomes wet enough, cement mortar is applied to the vault. The ratio of the mortar is 1(cement):2(sand)
Applying cement mortar on Guna Tiles Execution of wardha house |40
Once the 12 MM thick mortar bed is applied above the layer of Guna Tiles, it kept for curing for a single day. Because the Guna Tiles are laid in opposite direction, the mortar does not fall down.
Completetion of first layer of mortar bed
After the first layer of mortar second layer is applied after 24hours.
Giving finishing touch to mortar bed 41| Building Dreams In Mud
10.1 Laying Of China Mosaic
After the second layer of mortar china mosaic tiles are laid on top surface of vault to make this structure water proof.
Laying of China mosaic
Completion of China Mosaic of vaults.
Completed China mosaic Execution of wardha house |42
10.2 Section Of Roof
Section without China mosaic
Section after applying China mosaic
china mosaic layer
50mm thick cement motar layer Guan Tile Masonery chair 200mm thick lintel brick peirs
Section from one end of the vault 43| Building Dreams In Mud
Gutter
11
Drainage pipe
Gutter between two vault
This slope is then connected to the pipe which drains the water out of the structure.
The gutter helps in draining out all the rain water being collected between the 2 vaults.
Execution of wardha house |44
Removal of Temporary Supports
Removing the wooden member supporting the truss
45| Building Dreams In Mud
12
After the construction of roof is complete, it is capable to take its own load without any support. Therefore, the trusses and the G.I pipes are removed from their place and fixed in another place so that they can be used to make another vault.
Seperating the G.I. pipes (opening G.I. couplers)
Firstly, the GI couplers are released from the GI pipes and then, these pipes are taken out of the truss. After that the support to the trusses are removed, these trusses are taken down from their respective positions. It takes three days in the construction of one complete vault, which involves the fixing all the temporary supports like truss, pipes, laying Guna tiles, applying china mosaic and then the removal of all the temporary supports.
Removing the G.I. pipes
Execution of wardha house |46
13
Wall - Making Of Face Tile
Initially two wooden pieces are shaped according to the dimensions shown in the sketch. Then these two pieces are arranged in the mould. A fine powder of burnt bricks(made by crushing the bricks) is sprinkled on in this mould.
Dimention of wooden piece
Dimension of mould for Face Tile
Once the powder is sprinkled, the remaining space of the mould is then stuffed with the potter’s clay (same clay used for making of Guna Tile). The powder is sprinkled so that the wood does not absorb the moisture from clay and does not stick to it. Also this will stop the wood from expanding and the dimensions of the all the face tiles made from each mould will be same. Potters clay stuffed in mould 47| Building Dreams In Mud
The clay is tightly stuffed inside the mold so that there are no air pockets in the Face Tile, once it dries. Then the remaining clay coming out of the mold is removed by a straight thin wire to give it a even surface.
Removing the extra clay
The mould is then inverted upside down. Then with the help of two fingers the wooden pieces are pushed out of the mould. Then the same mould is used to make other Face Tiles.
Emptying the mould
Once a Face Tile is removed from the mould, it is then kept in a kiln for firing it. This way the Face Tile becomes baked and is then further used as a component in the making of Mud Bricks.
Baked Face Tile
Execution of wardha house |48
14
Making Of Mud Bricks
The process that goes into the making of Mud Bricks has majority of similarities to the that of Face Tiles. Soil is kept in ample amount in which a pit is made where water is poured. Later hay(dry grass) is added which acts as a binding agent in Mud Bricks and prevents cracking. All these elements are then pugged until a fine and very thick paste of the mixture is achieved. There are 6 main steps involve in the making of Mud Brick, which are as follows:
Pugging
1
2
At first the mould is washed and is kept wet so that, at the time of removing it, the brick does not get deformed.
Then a Face Tile is placed on one of the faces of the mould, as shown in the picture.
49| Building Dreams In Mud
3
4
The mould is then stuffed with the paste prepared earlier, till there is no air gap and the wet paste firmly holds the Face Tile from its extruded surface.
Then the mould is very carefully removed from the Mud Brick leaving one of the surface of the Face Tile exposed.
5
6
The exposed part of the face tile is going to face all the natural forces such as wind, rain water, etc.
The Mud Brick is left in open so that the brick dries itself under the sunlight. It takes approximately three days in drying of a Mud Brick.
Execution of wardha house |50
14.1 Drying Of Mud Block
Approximately, 250 Mud Bricks can be prepared by a single person and kept for drying in one day.
Mud blocks being placed for drying
The Mud Bricks were then kept for drying for next 2 days, after which they were further used in the making of wall of the Wardha House.
Dried Mud Blocks 51| Building Dreams In Mud
14.2 Mud Mortar
The Mud Bricks are bonded to each other by Mud Mortar which is prepared by the composition of soil, cement and water. Firstly, the soil is sieved with a dense wire mesh, so that no rocks or other unwanted elements go in the making of Mud Mortar.
Sieving the soil for Mud-Mortar
The Mud Mortar is done, which is then used as component of wall.
Mixing of Mud Mortar Execution of wardha house |52
15
Mud Wall
Building and alignment of Mud Bricks with the plinth and wall
Building and alignment of Mud Bricks with the plinth and wall
The first course above the plinth level is done using the normal brick, then the remaining courses are made out of Mud Bricks using the Mud Mortar.
Single brick used to complete the Mud Brick course
53| Building Dreams In Mud
Jali Of Guna Tile
Broken Gun-a tiles being cut
16
Broken Guna tiles being cut
The Guna Tiles which were broken during transportation, were used to make openings. The broken part of Guna Tiles were cut using a grinder, and the remaining part of the tile was used to make the opening. These Guna Tiles were then staked upon each other and bonded using mud mortar. The direction of each Guna Tile was opposite to its adjacent Guna Tile.
Making of Guna Jali out of cut Guna Tiles
Making of Guna Jali out of cut Guna Tiles
Execution of wardha site |54
Wooden Window
17
The design of the wooden window includes four wooden member coming together to form a frame and thin bamboo sticks were used to enclose the window.
Making of two horizintal logs
The vertical wooden members are nailed to the horizontal wooden members of the frame. Hold-fasts were then attached to the vertical members of the frame.
Nailing vertical wooden members to horizontal one 55| Building Dreams In Mud
The bamboo sticks were then fit into the dead hole and tightened with a little pressure.
Fixing the bamboo sticks
Then the second horizontal member was nailed to the two fixed vertical members.
Nailing the horizontal member to the vertical one Execution of wardha house |56
17.1 Fixing the Window
A concrete band, was cast at the Sill level for giving an even base to the window and aligning it properly without any inclination.
Casting of concrete band
The wooden window was placed above the concrete band at Sill level.
Placing the wooden window 57| Building Dreams In Mud
The wall on both the sides of the window were made with brick masonry in order to strengthen the connection between window and wall.
Securing the anchor-fastner
After reaching the lintel level, a Kota stone of 18mm thickness was placed.
Stone jamb being placed Execution of wardha house |58
Finish
18.1 Internal finish
The closed spaces are internally finished with Mud Plaster, in order to keep it as natural and simple as possible.
59| Building Dreams In Mud
18
18.2 Pointing
Pointing done on the external facade
In order to prevent rain water to enter the gaps between mud bricks pointing was done on external surfaces of wall.
Execution of wardha house |60
18.3 Cement Plaster
All the elements of the semi-open spaces are finished with cement plaster, so it can withstand against rain water.
Cement plaster applied to all the structural members
61| Building Dreams In Mud
Brick Jali
19
Brick jali
The brick jali was used to close the vault from both the sides in the closed spaces. The main reason behind having the small opening and not closing the whole space was to let the natural light come in. Execution of wardha house |62
Ramp
20
The ramp was placed at the entrance of the structure instead of steps. Ramp allows easier access. Construction details are shown below.
Ramp created at the entrance
25mm Thick Cement Mortar layer 100mm thick Pcc 450*300*150mm thick stone retaining wall
Isometric detail of the ramp
63| Building Dreams In Mud
Steps
21
The steps were made at the back of the structure, which in return also worked as an exit. The steps are built in brick masonry and plastered with cement mortar for finishing.
Steps created at the exit
300mm down
One Brick Brick 25mm Thick 150mm riser and Thick courses Cement 300mm trade Course Plaster
Brick masonry used to make steps
Execution of wardha house |64
Flooring
22
35mm Thick IPS Flooring
100mm PCC
100mm BBCC
Compacted Earth
IPS flooring
65| Building Dreams In Mud
On Site Execution |66
67|