P H O T O I N S I G H T S
April 2023
Photo Sharing
Tweaking exposure on the fly
Equidistance and telephoto lenses
Photography quiz
Photo tours
Ask Jim Student Showcase
Back issues
Jim Zuckerman’s
Table of Contents
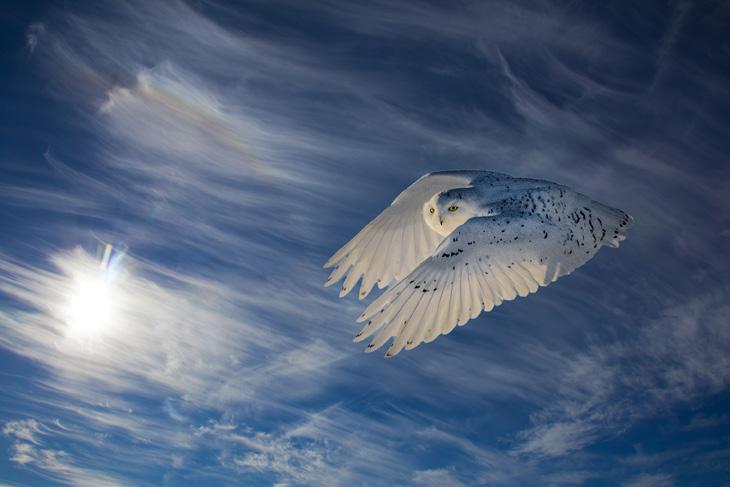
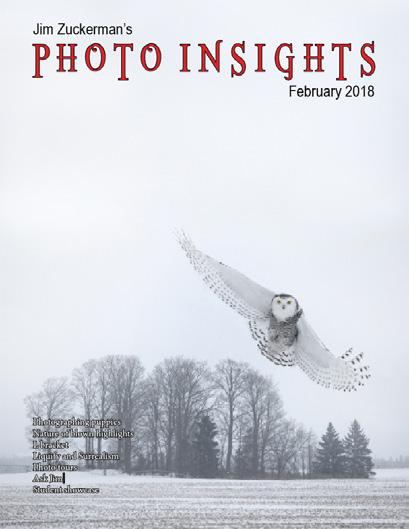
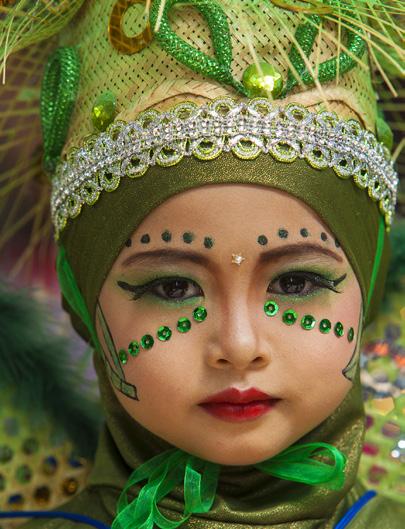
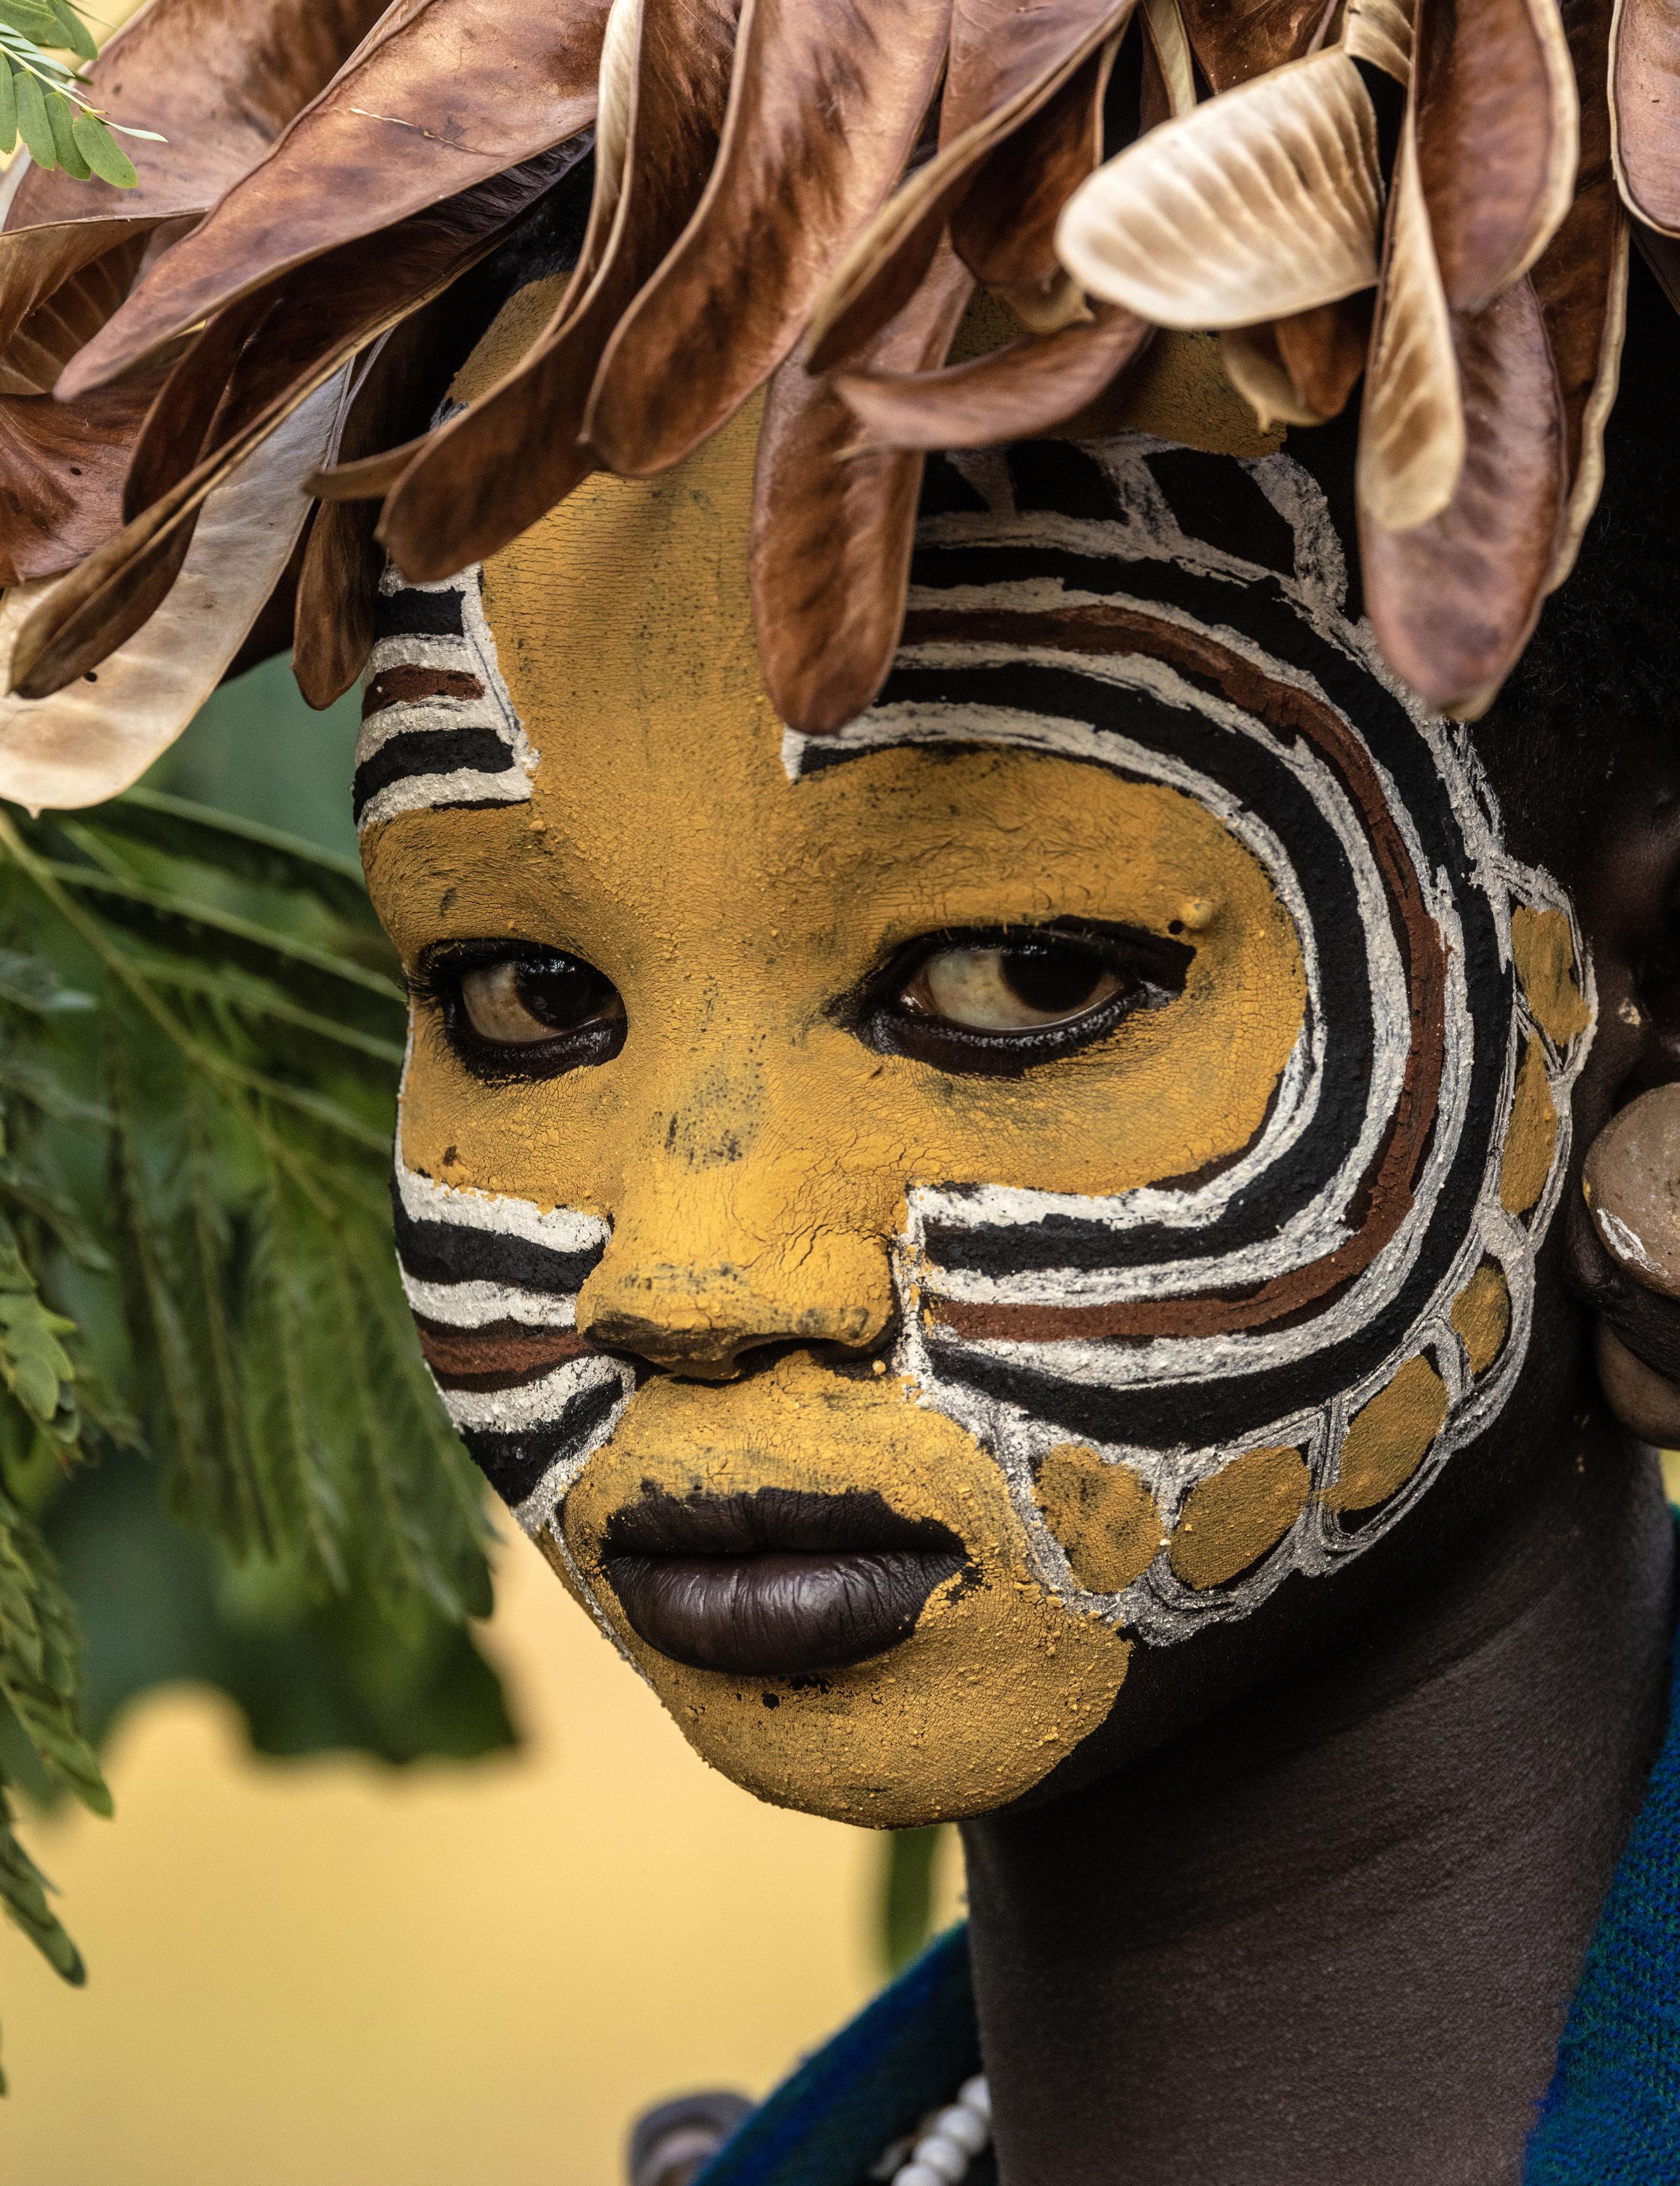
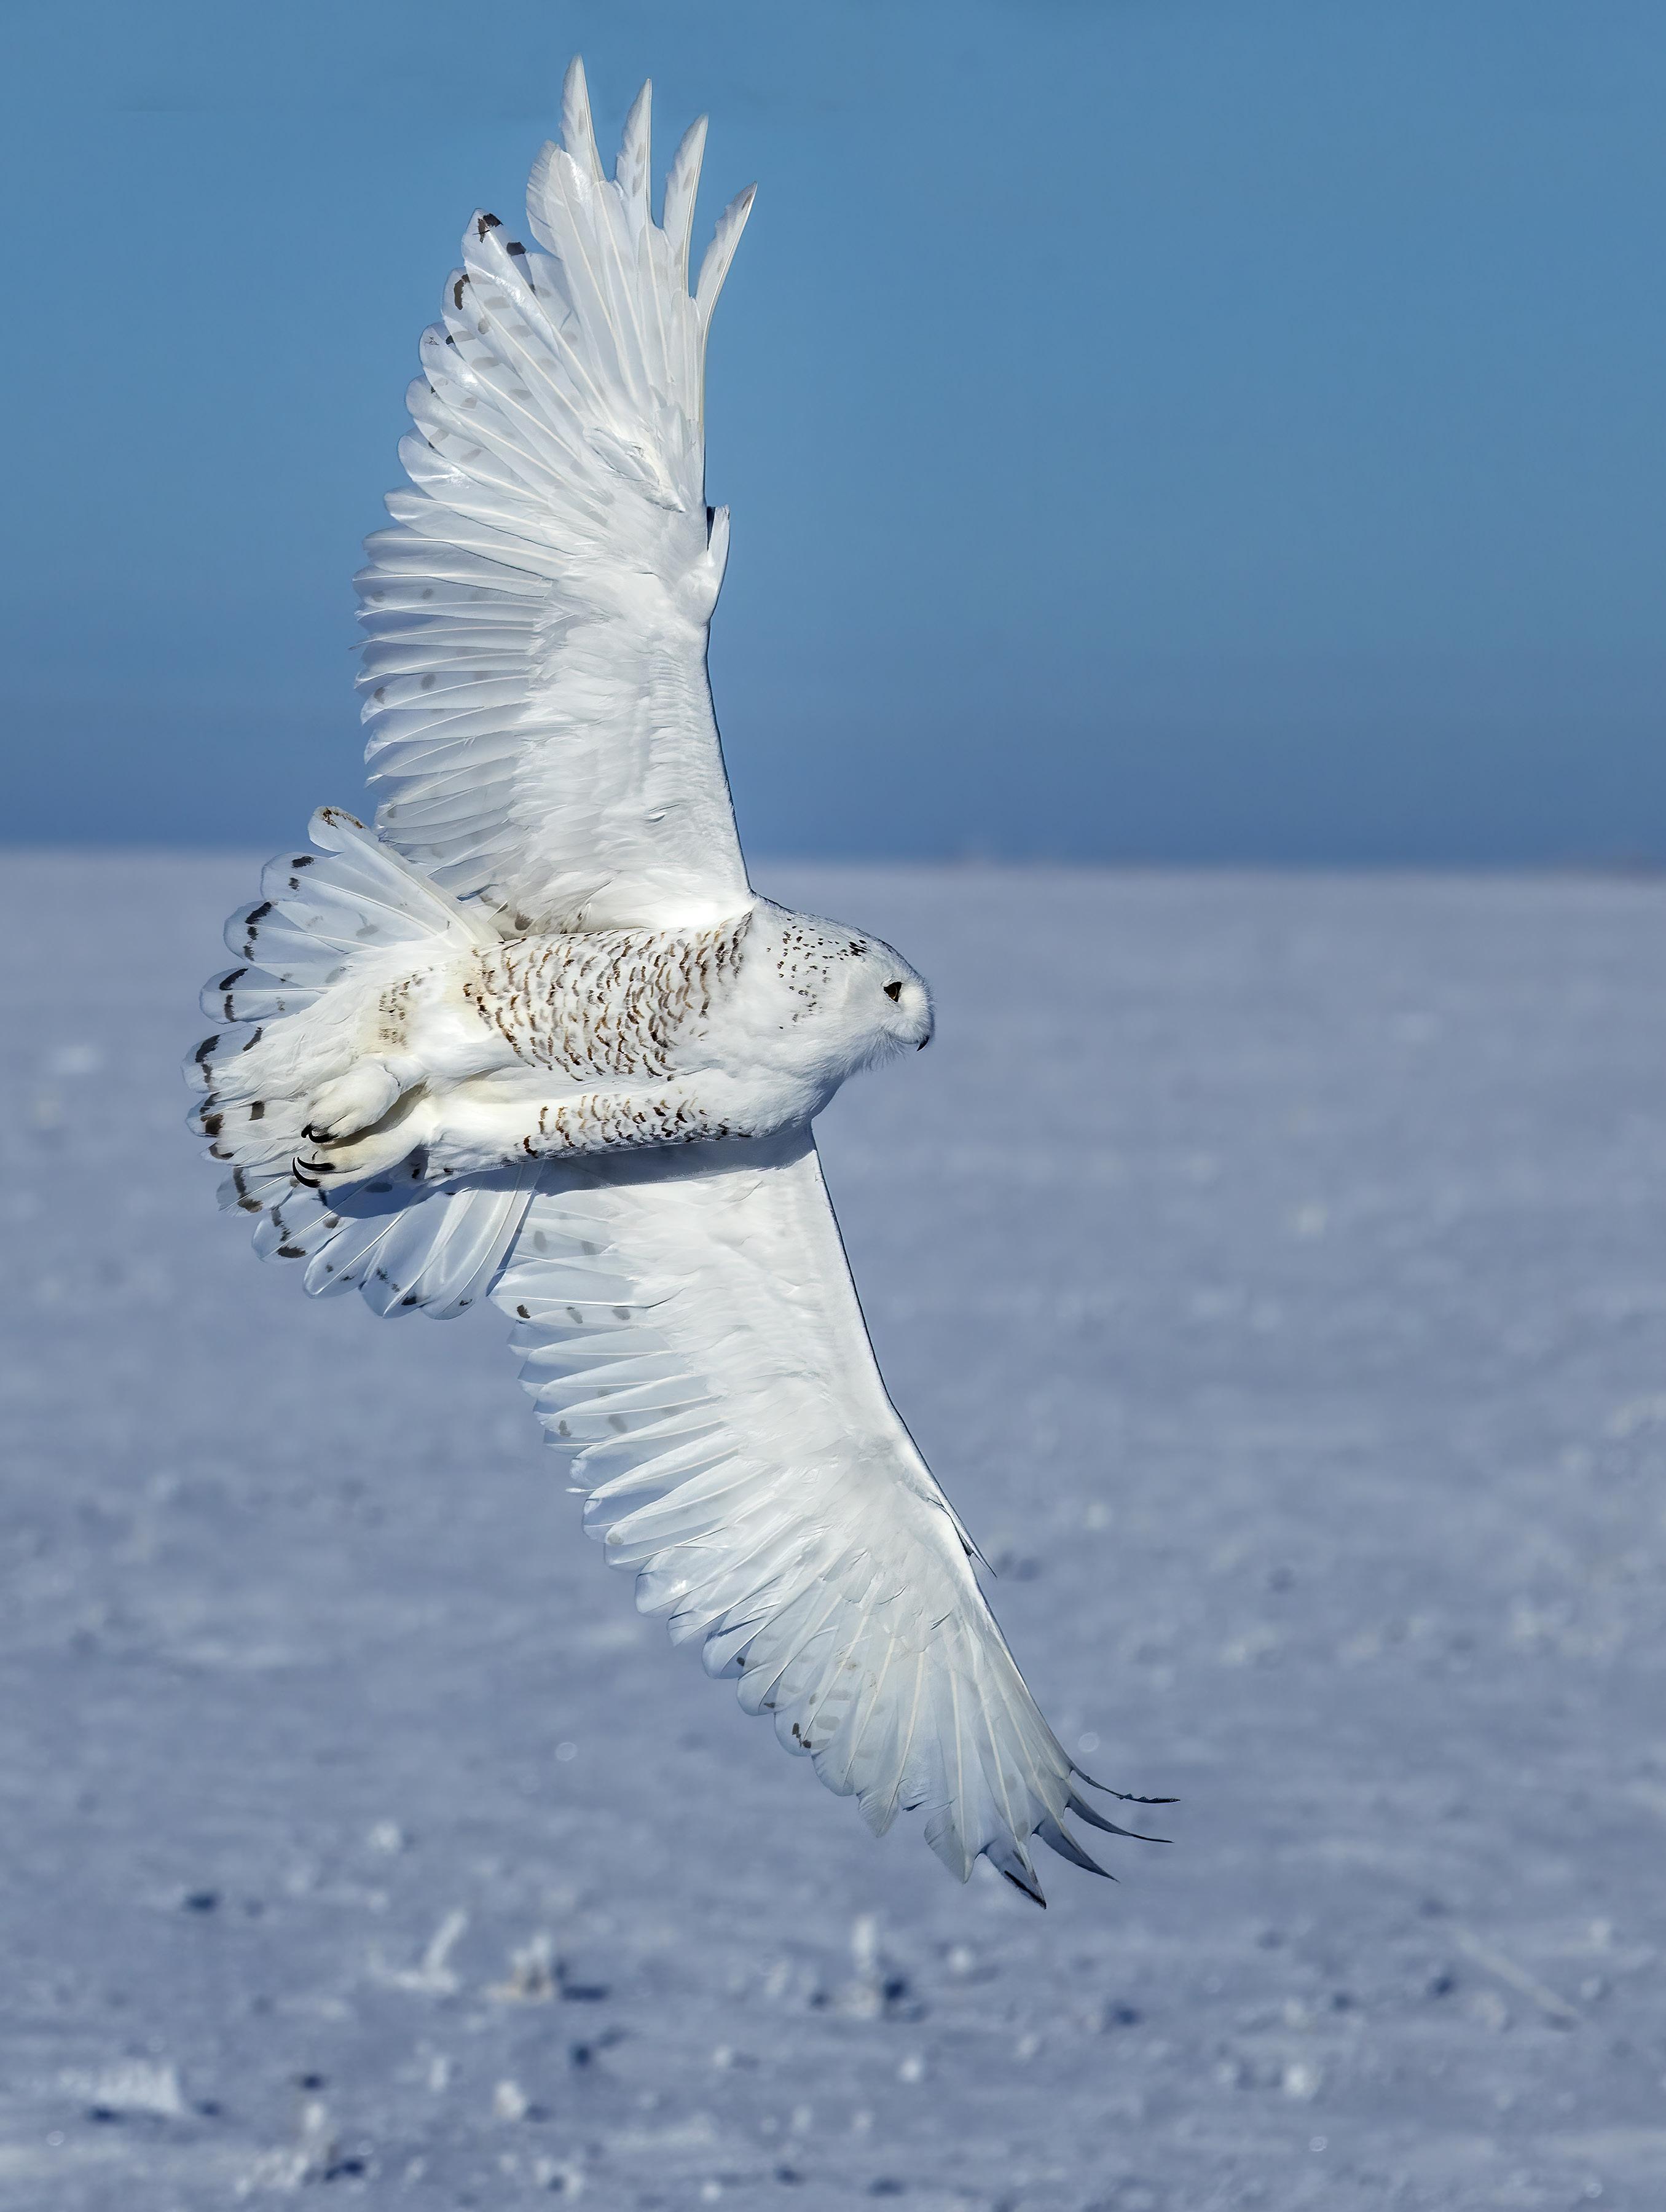
On the cover: A young girl of the Surma tribe in the Omo River Valley, Ethiopia This page: A snowy owl in flight, Saskatchewan, Canada.
2
26.
29
31. Student
37. Past issues 44 Subject index
4. Photo Sharing 11. Tweaking Exposure on the Fly 15. Equidistance and telephoto lenses 19. Photography quiz 21. Jim’s eBooks 24. What’s wrong with this picture?
Short and sweet 28. Ask Jim
Photography tours
Showcase
Ithink a lot of great photographs happen because the photographer placed him- or herself in the situation to get the picture. In other words, if you had gone to the trouble and expense of putting yourself in the same situation, you would have gotten the same excellent pictures.
A case in point is my rcent photography tour I led to Ethiopia. The pictures of the primitive tribes, especially, are simply amazing, but in order to get there we had to travel halfway around the world, take a charter flight to a small town in the south of the country, and then drive four hours to the middle of nowhere and camp out because there are no hotels in the tribal area. Had any of you beening willing and able to do this, you would have taken the same amazing pictures we did.
This is true of all kinds of situations. Sure, photography skills come into play with respect to lens choice, depth of field considerations, composition, exposure, and choice of subject matter. Not all faces, for example, make great pictures. Some are more photogenic than others, and your selection process is a large part of being creative. Nevertheless, if you don’t put yourself in situations and environments where you can take great images, you’ll be missing out.
Those situations, of course, don’t have to be in distant and exotic countries. They can be in your backyard. You can set up a bird feeder or butterfly garden, for example. Or you can go on an architectural tour of your city and discover historical buildings that are exceptionally photogenic. It all comes down to extending yourself to seek out great photographic subjects.
Jim Zuckerman
 photos@jimzuckerman.com www.jimzuckerman.com
3
Photo Sharing
We photographers frequently like to share our pictures with others, and we use Facebook, Instagram, Flickr, Snapchat, Google photos, YouPic and other online platforms to do that. But all of these are Web based. What if you aren’t online? Losing reception is a common problem for all of us, and that means the photo collection you are proud to share is suddenly unavailable.
The solution is to create a photo library on your smart phone in which the images are stored on the hard drive inside the phone instead of in the cloud or on a Web based social media site. I have about 9000 images on my iPhone (and iPad) that are always accessible with or without an Internet connection, and I can find any picture I want in seconds. Here is how I do that.
1. On both Mac computers and PC’s, there is a Photos app. When this is opened, go to the lefthand column and click ‘Albums’ and then ‘My albums’ in the submenu (red arrows, right). Then, in the menu bar at the top of your screen use the pulldown menu command, File > New album. Give the album a name.

Here is where you must think carefully about when organizing your photographs. I strongly recommend you don’t organize them by date. After time passes, you won’t remember, or care, whether a picture was taken in 2013 or 2014. You can always find out exactly when a picture was taken by looking at the metadata, but for organizational purposes – and for quickly finding a particular image – setting up subject categories is the best strategy for laying out your
photo library. The album names will depend on what you shoot. For example, if you have a few shots you like from various cities in the United States, you could create an album titled, American Cities. But if you have dozens of great shots of New York you’re proud of, you would make an album titled New York. If architecture is one of your main interests, you may add albums like Chicago, New Orleans, Los Angeles, Denver, etc., instead of just having one catchall album for city architecture.
4
In my list of albums, I have titles like American Wildlife, African Wildlife, Birds, Ethiopia, Iceland, Pantanal, Patagonia, Frogs, F/X, Polar Bears, Puppies, Snowy Owls, and a lot more. Note that I don’t put my snowy owl pictures in my Birds album because I have so many shots of the snowys (as a result of conducting a photo tour to photograph the owls for many years) that they get their own album. If you put hundreds of images, such as birds, in one album, it will be hard to find a particular shot you’re looking for. For the same reason, I don’t put my shots of snub-nosed monkeys in the China album, even though that’s where I photographed them. They get a separate album because I have so many pictures of them.

The subject categories help you find pictures quickly and efficiently; think carefully about what you shoot and how you’ll look for your images. The image below -- does it go in the album New York, Cities, or architecture?

5
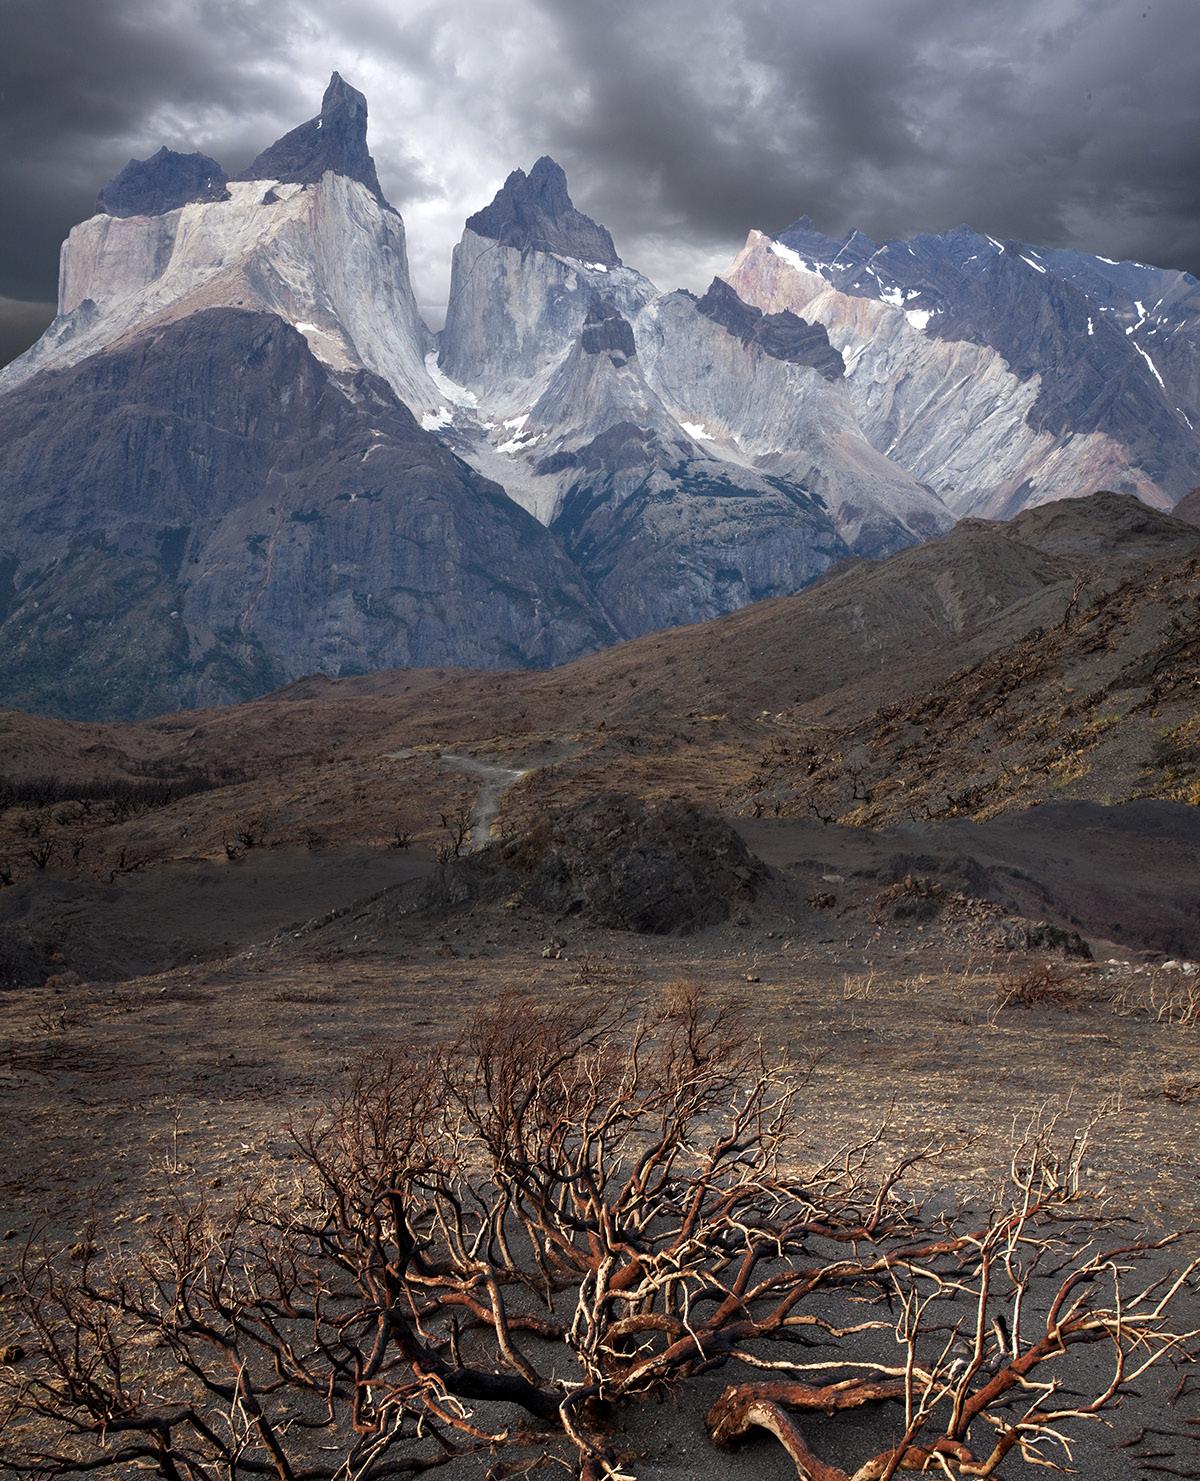
My landscape shots from Patagonia go to into the album Patagonia, not in a general landscape album because I’d never find an individual picture there since I have so many landscape shots.
2. Once you’ve clicked File > New Album, you’ll see a blank page into which you’ll drag the images that belong to that album. You’ll want to size the images so they don’t take up too much space.
Smart phones and tablets have a finite amount of storage, and that means you don’t want to copy hi res images onto them or else you’ll run out of capacity very quickly. I reduce all of my images to approximately 8.4 megabytes, and the dimensions are 4.6 x 7 inches at 300 dpi. For one image at a time, this is done in Photoshop in the Image > image size dialog box. After some experimenting, I determined this is the size that looks good on an iPad while conserving storage capacity. Pictures used only on smart phones can be smaller –about 3 megabytes – but I just make one reduction in size for both my iPad and iPhone.
If you are starting from scratch and creating
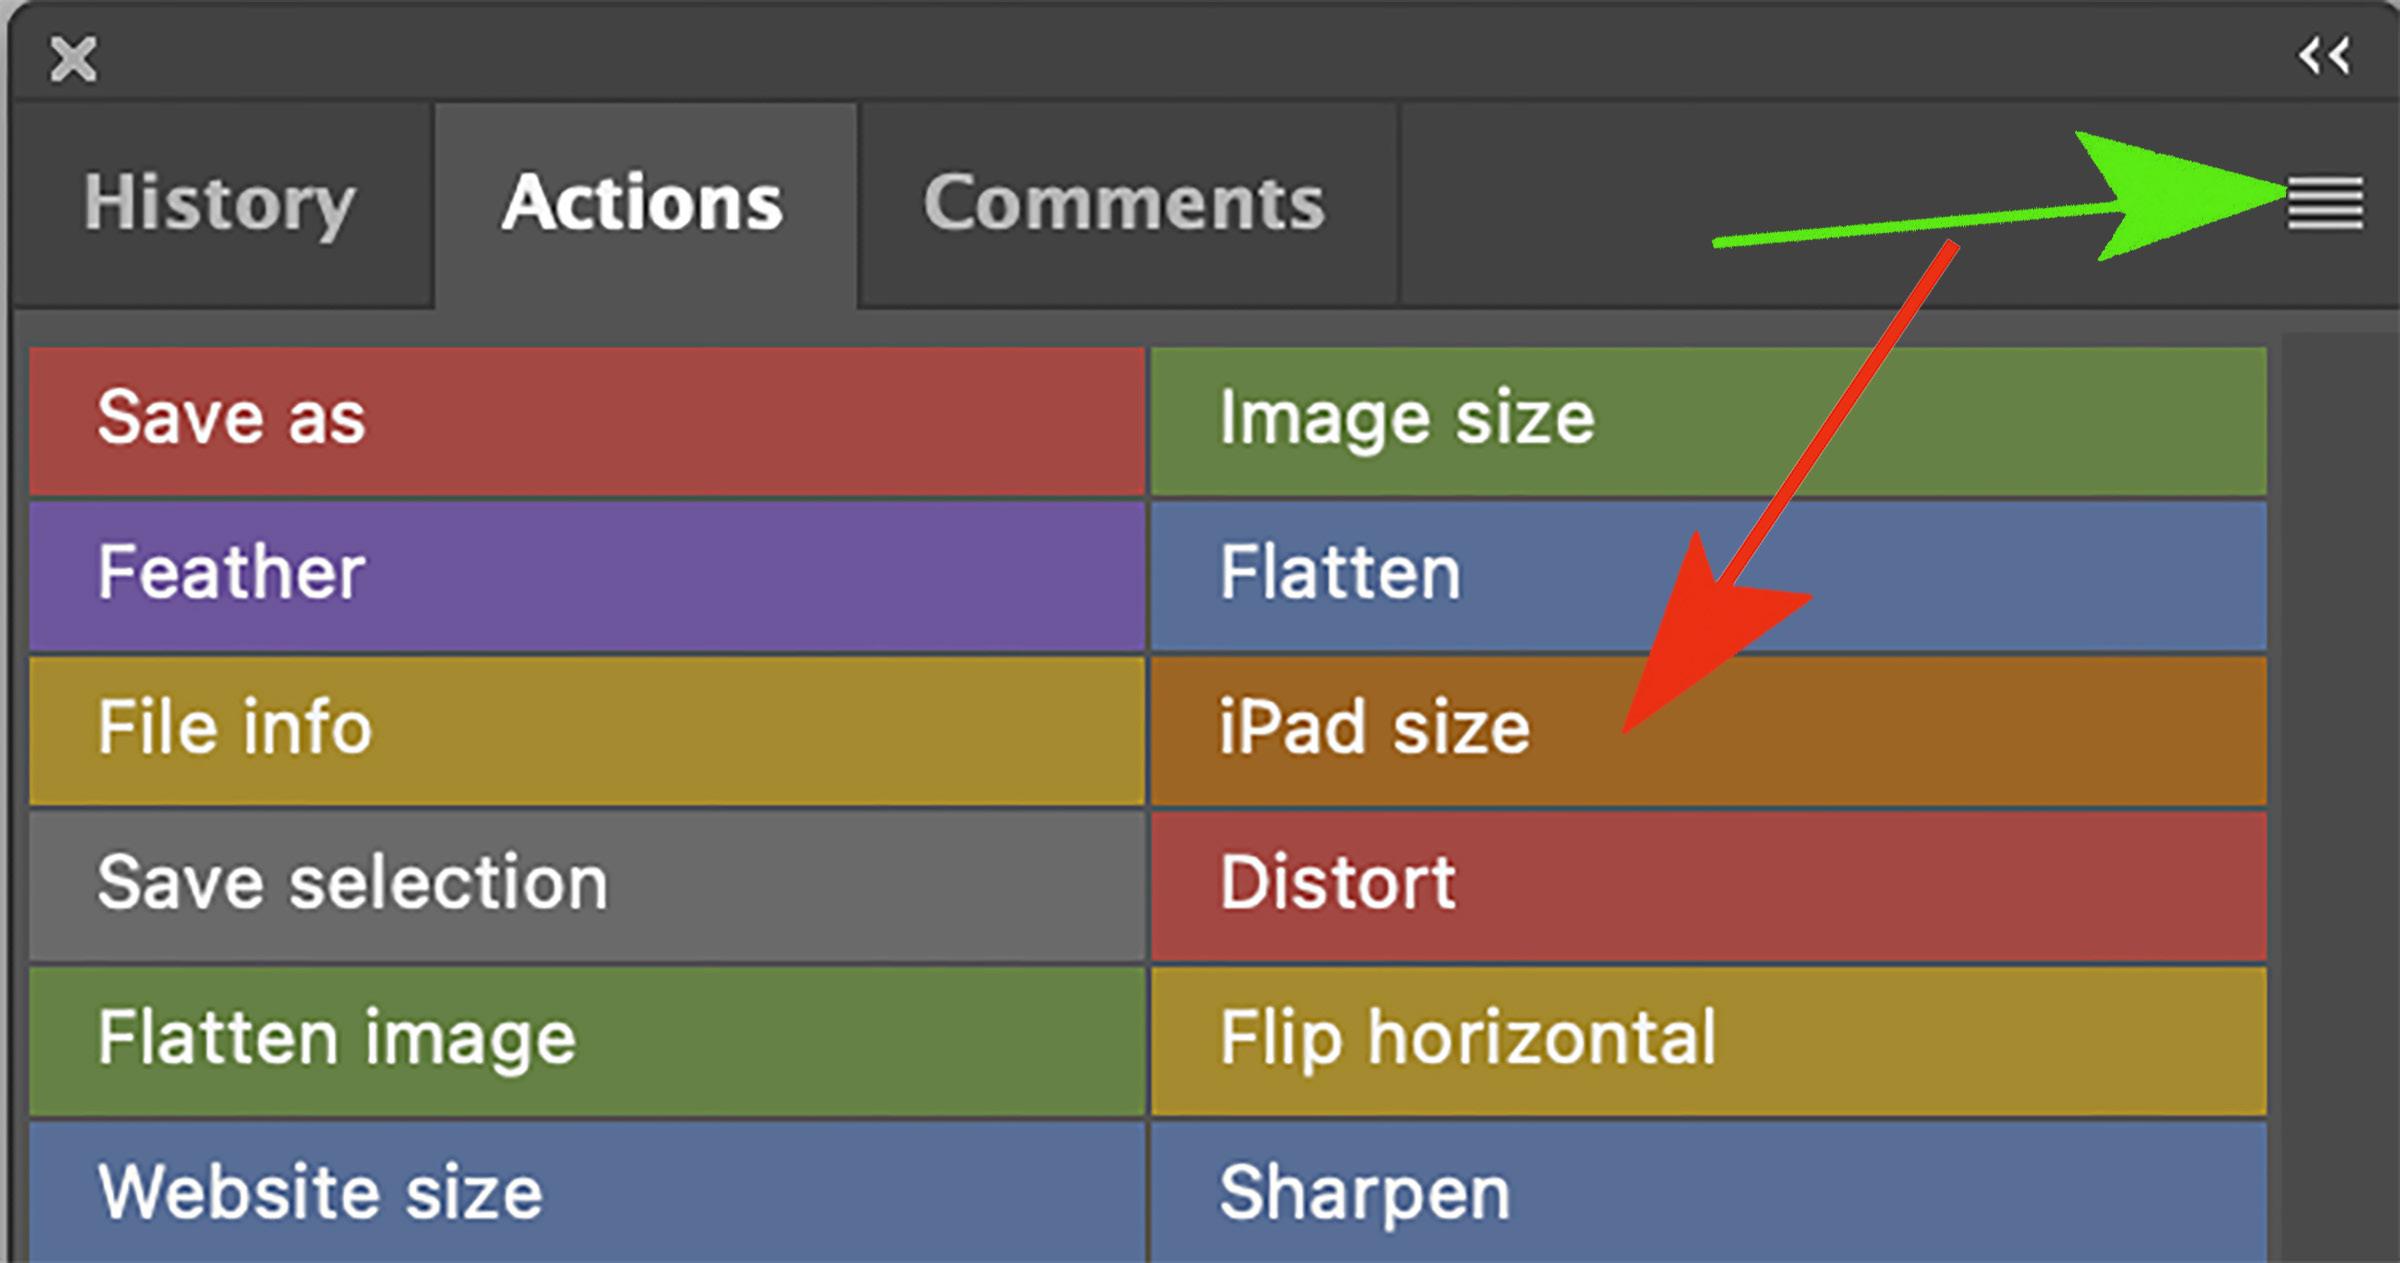
multiple albums with hundreds or thousands of pictures, it will get very laborious to resize all those shots. Therefore, it makes sense to create a shortcut in the Actions palette within Photoshop so you can resize the images correctly with the push of a button. The red arrow above indicates the action I created to size photos specifically for the iPad and iPhone.
CREATING AN ACTION:
If the actions palette isn’t open on your desktop, go to Window > actions. If you’ve never used this before, I would clear all the actions that Adobe automatically provides because they will be irrelevant to you. To do that, click the small icon (indicated by the green arrow) in the upper right corner of the actions palette to access the submenu, and choose ‘Clear all actions.’ Now you’ll be working with a clean slate.
To create an action to automatically resize your

6
This is a screen capture of my actions palette with a red arrow pointing to the action, or short cut, I use to reduce photos in size so they don’t overwhelm the capacity of my iPhone and iPad. Your action palette will look different because the short cuts you need will probably not be the same ones I chose.
Morocco Photo Tour

August 29 - September 10, 2023

7
images, with both a horizontal and vertical orientation, and to save the pictures on your desktop in jpeg format, use this procedure:

a. Open a photo
b. Click on the small icon in the upper right corner of the dialog box (green arrow on previous page) and choose Button mode.
c. Now click again on the small icon in the upper right corner of the dialog box and choose New action.
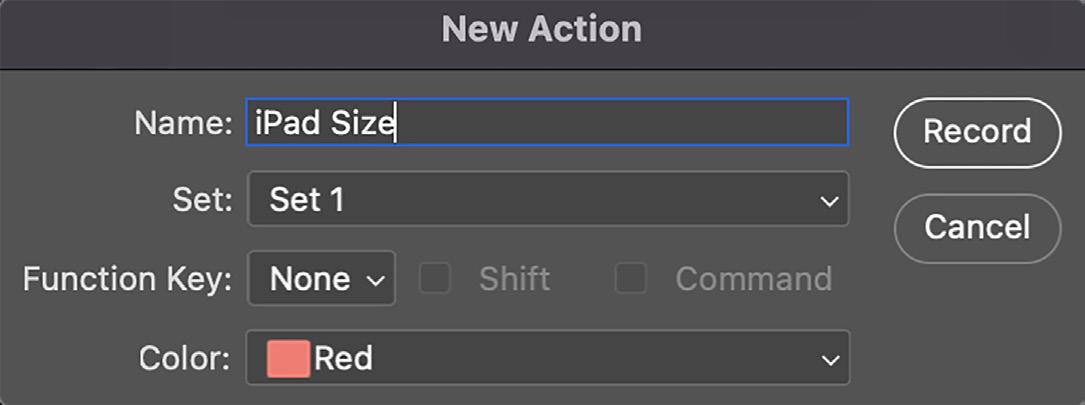
d. In the dialog box that opens (below), give the action a name such as ‘iPad size’. Choose a color if you want and, if you use function keys, you can assign a key for this particular shortcut. I don’t -- I just use the Actions palette. Then hit Record. Photoshop is now recording your next steps.
g. Choose the pulldown menu command, File > close.
h. Click on the small icon in the upper right corner of the actions palette dialog box again and choose Stop recording.

i. Click on the small icon in the upper right corner of the dialog box again and choose Button mode. You should now see the action you’ve created in the Actions palette. If you open any picture and then click the action, the image will go through all those steps and place the reduced resolution image on the desktop so you can find it easily. It is this file that you drag into the new album you created in the Photos app.
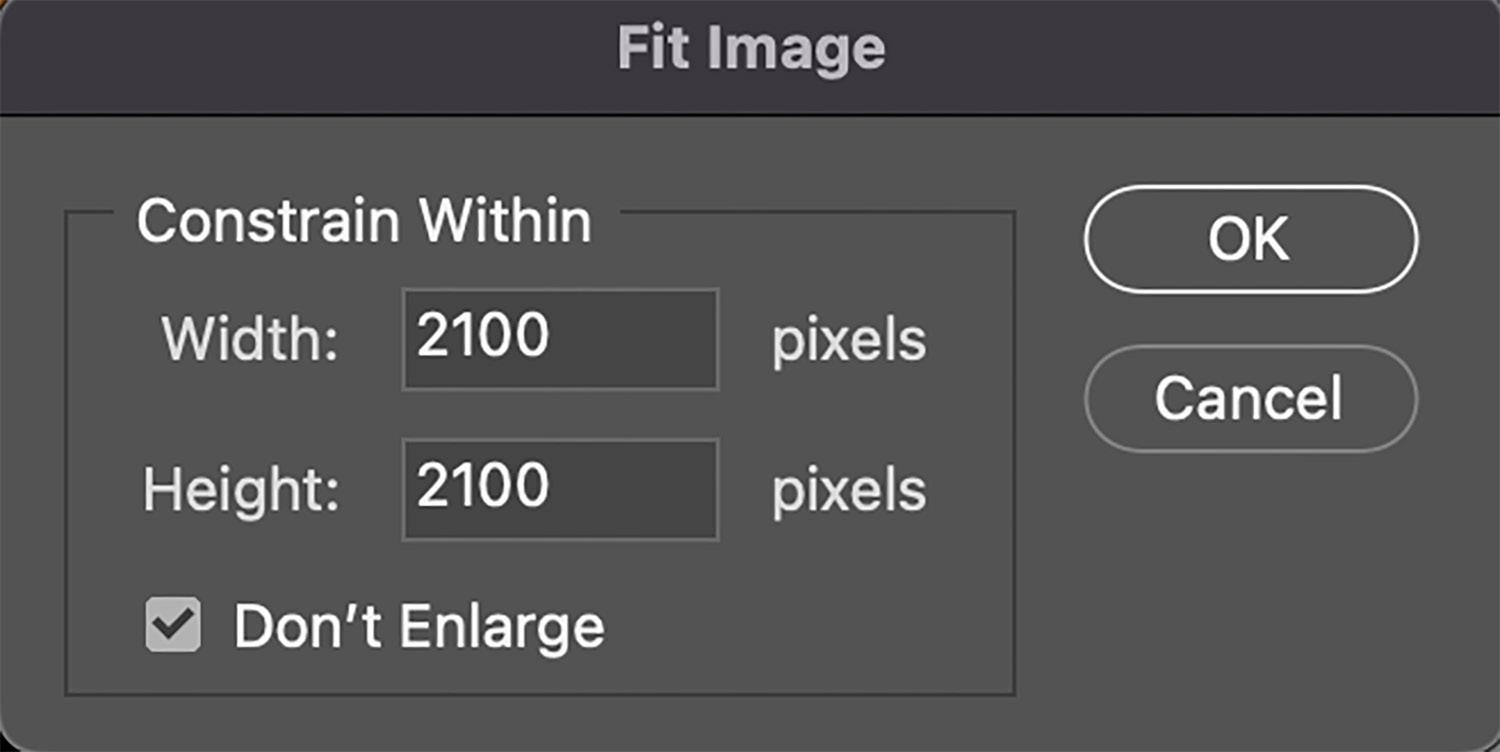
e. Choose the pulldown menu command, File > automate > fit image. In this dialog box (upper right), type in 2100 pixels for both width and height. This is how you can resize both horizontal images and vertical images so they have the same dimensions. Also in this dialog box, check ‘don’t enlarlge’. This gives you 300 dpi so your images look good as they are displayed on both the iPhone and iPad (or Android, etc.). Click OK.
f. Choose the pulldown menu command, File > save as. In the ‘where’ field, select Desktop. In the ‘format’ field, select jpeg. Click Save.
[One caveat: If your image has layers or channels, the automated image reduction process will be halted until you flatten the image and/ or drag the channel to the trash.]
3. Create more albums by using the File > new album command in the Photos app. There is no limit to how many albums you can create (I’ve got about 100) or how many photos you can add to each album.
4. FOR MAC USERS: Now you need to sync all of the albums you just created in the Photos app on your computer to your iPad or iPhone. The procedure has changed somewhat in the
8
last year or two, so the information I’m describing here applies to the latest operating system.
a. Plug your device into the computer

b. Click on the finder icon at the far left side of the dock.
c. In the finder dialog box, in the left column under ‘Locations’, you should see your device listed as shown at right.
d. Click on the device (such as iPhone (44) and a new dialog box opens shown below.
e. In the horizontal line of tabs across the top, click Photos (red arrow, below).
f. You will now see the list of albums you created. Check all of them, and then hit Sync.

9
All of the albums you created should automatically sync with your device. When completed, they will be visible by accessing the Photos app on your phone or tablet.
5. FOR PC USERS: I don’t have a PC, and I haven’t gone through these steps. This procedure comes directly from Microsoft.
a. Use a USB cable to connect your device to the PC
b. In the search box on the taskbar, type ‘photos’ and then select the Photos app from the results.

c. Select ‘import’ from the app bar.
d. Your device will automatically show under import.
e. Choose your device from the list of connected devices.
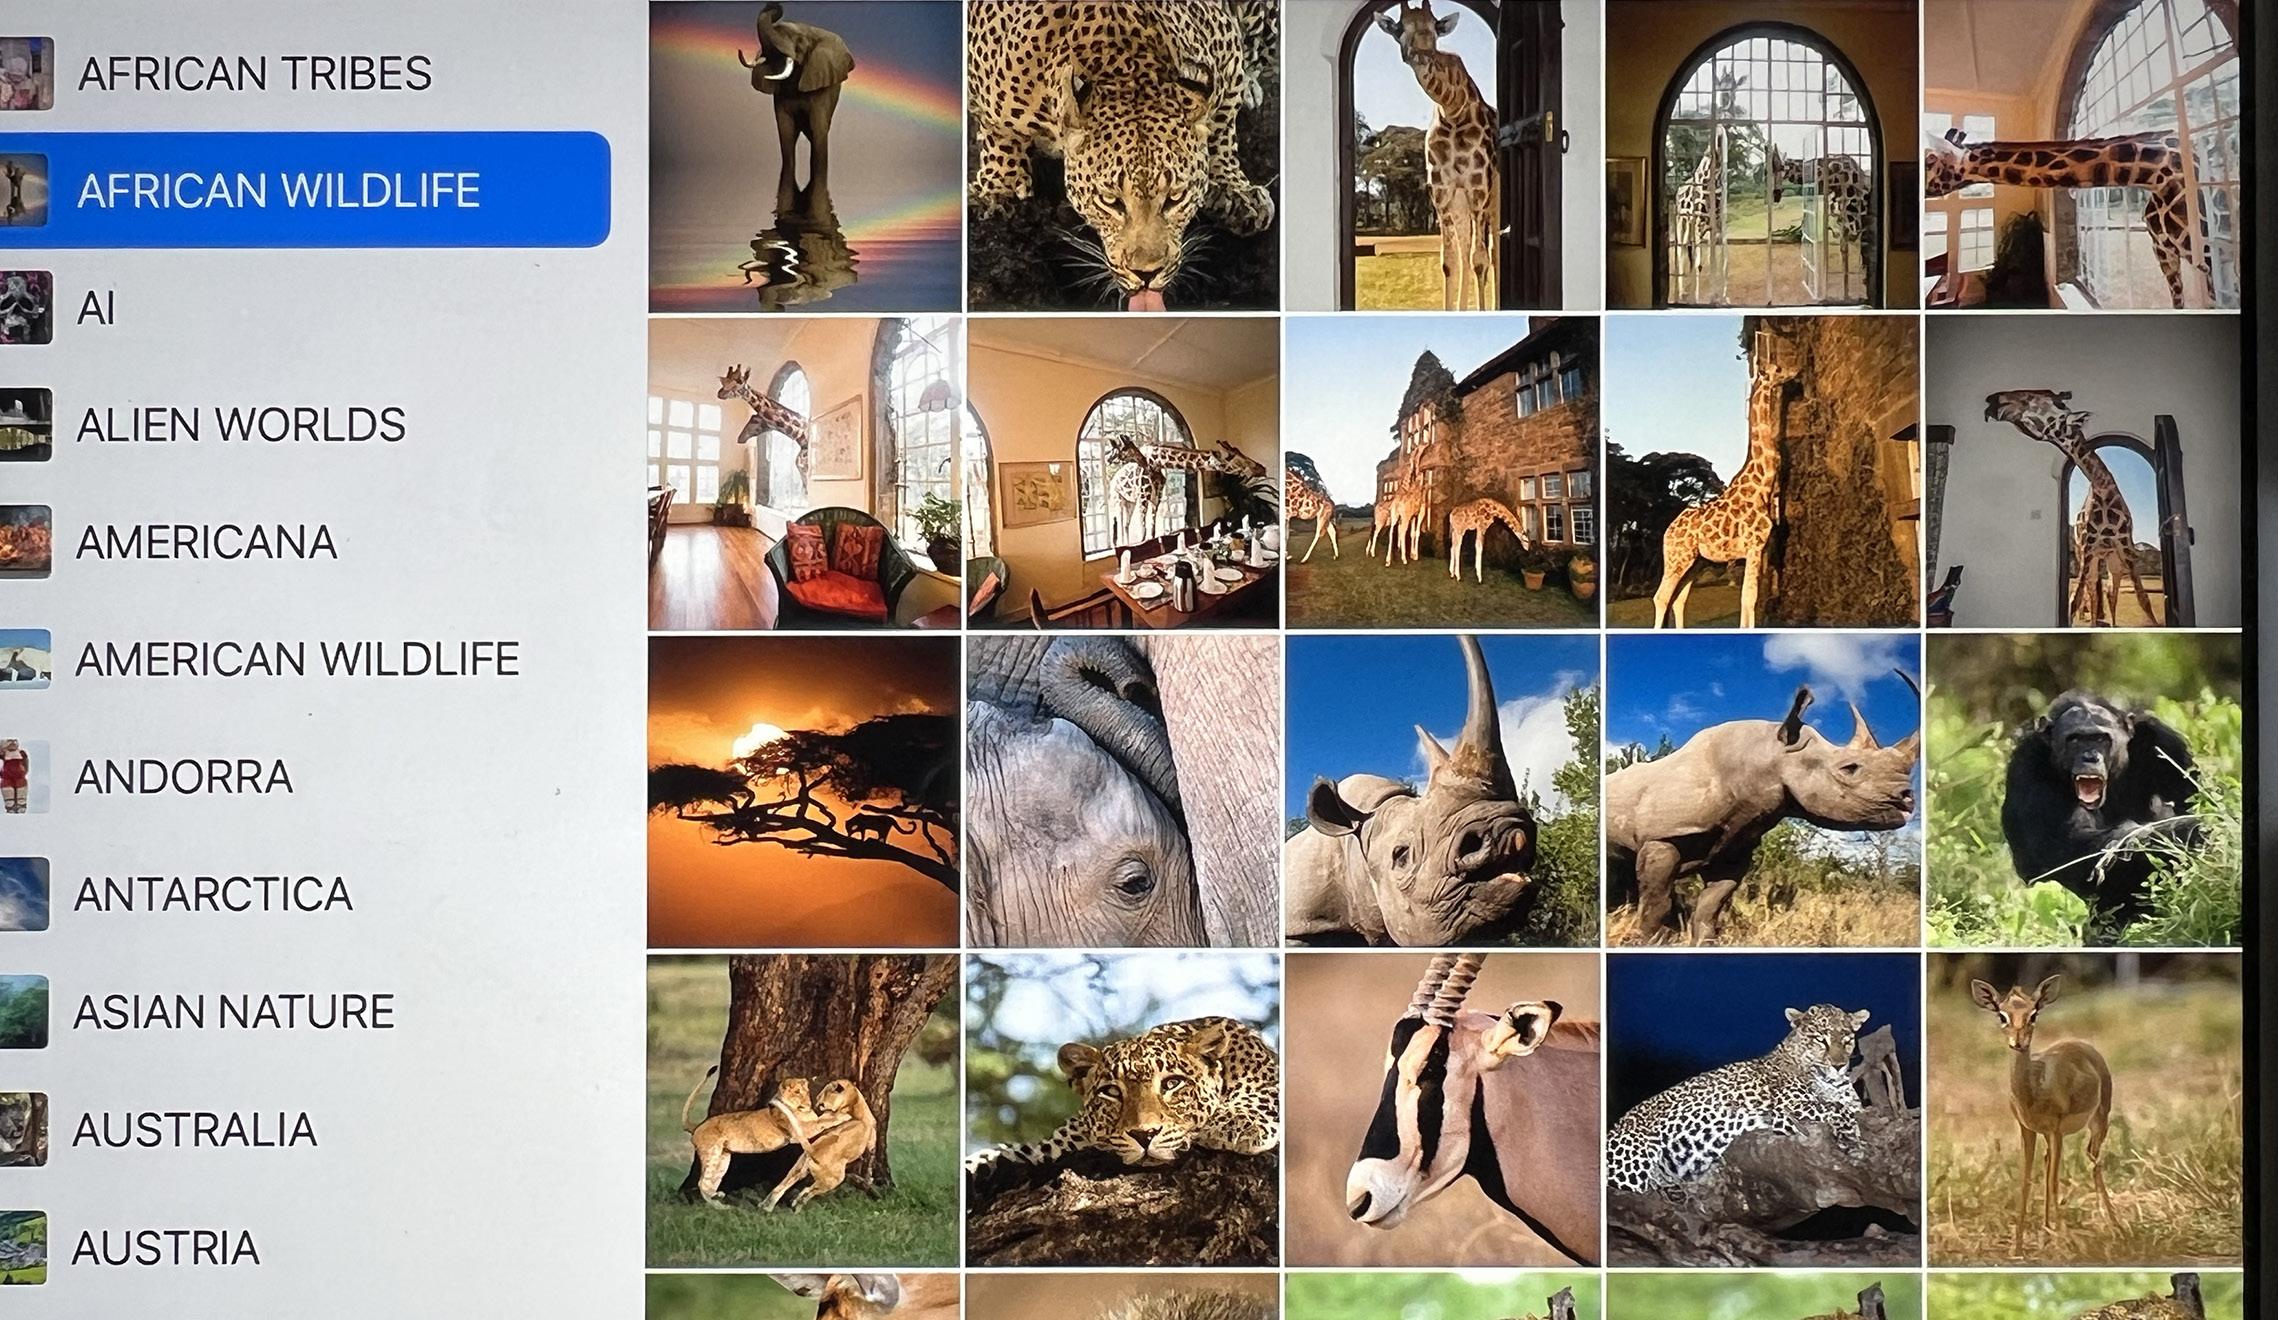
Below is a photo of my iPad showing the partial list of albums on the left side and some of the pictures in my ‘African Wildlife’ album. The images show as squares and they are often cropped badly, but when you click on them and they open on your device, they are rectangular or as you might have cropped them for compositional purposes.
If you want to add or delete images from any of the albums, you have to do that in the Photos app on your computer. You’d then have to go through the syncing process again to have those changes take effect on your tablet or smart phone.
With Apple computers, you can only sync the albums to your devices from one computer. If you try to sync from another computer, all of the previous albums will be overwritten -i.e. deleted. I’m not sure if this is true in the PC world. §
10
Many times on my photography tours, a client will come over to me to say their pictures are too dark, or too light, and they don’t know what camera settings to change to make the exposures correct. To many of you who read this eMagazine, this is fundamental. But to a lot of other people, all the numbers that determine exposure are confusing. It can be challenging to choose the right pathway to a good exposure because there are several factors involved.
The number one consideration in taking a photograph is: It must be sharp. Notwithstanding purposely blurring an image for artistic interpretation, like softening falling wa-

ter, if a shot isn’t sharp, it fails. It doesn’t matter how much depth of field you have or how high the ISO is. If the image isn’t sharp, it’s destined for the trash can.
That means, then, that the first consideration in taking a picture is choosing the speed of the shutter. Depth of field and ISO are secondary and tertiary considerations. So, let’s say you are shooting in aperture priority as most photographers do. This is the exposure mode in which you select the f/stop and the meter automatically chooses the shutter speed based on the aperture you chose, the ISO, and the light conditions that are present. Let’s assume your shutter is 1/60th of a second and you’re shooting with a 50mm
11
Ethiopia Photo Tour

Jan, 21 - Feb. 3, 2025

12
lens. If the pictures are too dark and you want to address that issue by using the exposure compensation feature on the camera, a one f/ stop change -- +1 on the exposure compensation scale – would mean the shutter would then be 1/30th. Remember, with aperture priority it’s the shutter that varies according to the light. This shutter speed is too slow for hand holding the camera, so if you didn’t have a tripod, the picture would most likely be blurred to some degree.
If your shutter was 1/500th, then a one f/stop adjustment with the exposure compensation feature to lighten the image would give you 1/250. That would be fine – unless you are shooting with a long telephoto lens. If you’re photographing wildlife with a 600mm, for example, a shutter speed of 1/250 isn’t fast enough. The general rule for choosing shutter speeds

with long lenses is the speed of the shutter should be the reciprocal of the focal length of the lens, or faster. In other words, if the lens is 600mm, the shutter should be 1/600th of a second or faster to insure sharp pictures.
I’m giving these examples because lightening an exposure isn’t simple and straight forward. You must think about what you’re doing. It’s so easy (and seductive) to rely on automatic metering modes like aperture priority, shutter priority, and program mode because you think they can make the exposure decisions for you. They do, but what they command the camera to do may not be what you want or need.
Some photographers think they can adjust exposure simply by changing the ISO and nothing else. This is not correct. Changing
13
the ISO manually will only cause the shutter speed and/or the f/stop to change such that you end up with the same exact exposure. This assumes you are using one of the automatic exposure modes.
If you are shooting on manual exposure mode, as I do now, then you can manually choose the shutter speed and the lens aperture, and changing the ISO in this case will, in fact, change the exposure. This is how I now tweak my exposures. I dedicated the dial on the back of my camera to alter the ISO, and I can do so quickly and easily with my thumb. This way I can change the exposure while still retaining the shutter speed and f/stop I want.
In the past when we all shot film, and in the early days of digital cameras, high ISO numbers meant too much grain, or noise, and this seriously degraded image quality. We never dreamed we’d be able to take pictures at 3200 ISO and even higher and still have high quality images. This advancement in technology has changed the way I shoot now. I no longer fear high ISO settings. I’m comfortable up to 12,800 ISO because I know post-processing software like Topaz DeNoise is such a life saver when it comes to image quality. That means I can simply adjust the ISO dial on the back of my camera to correct my exposures without worrying about degrading photographs with too much noise. §
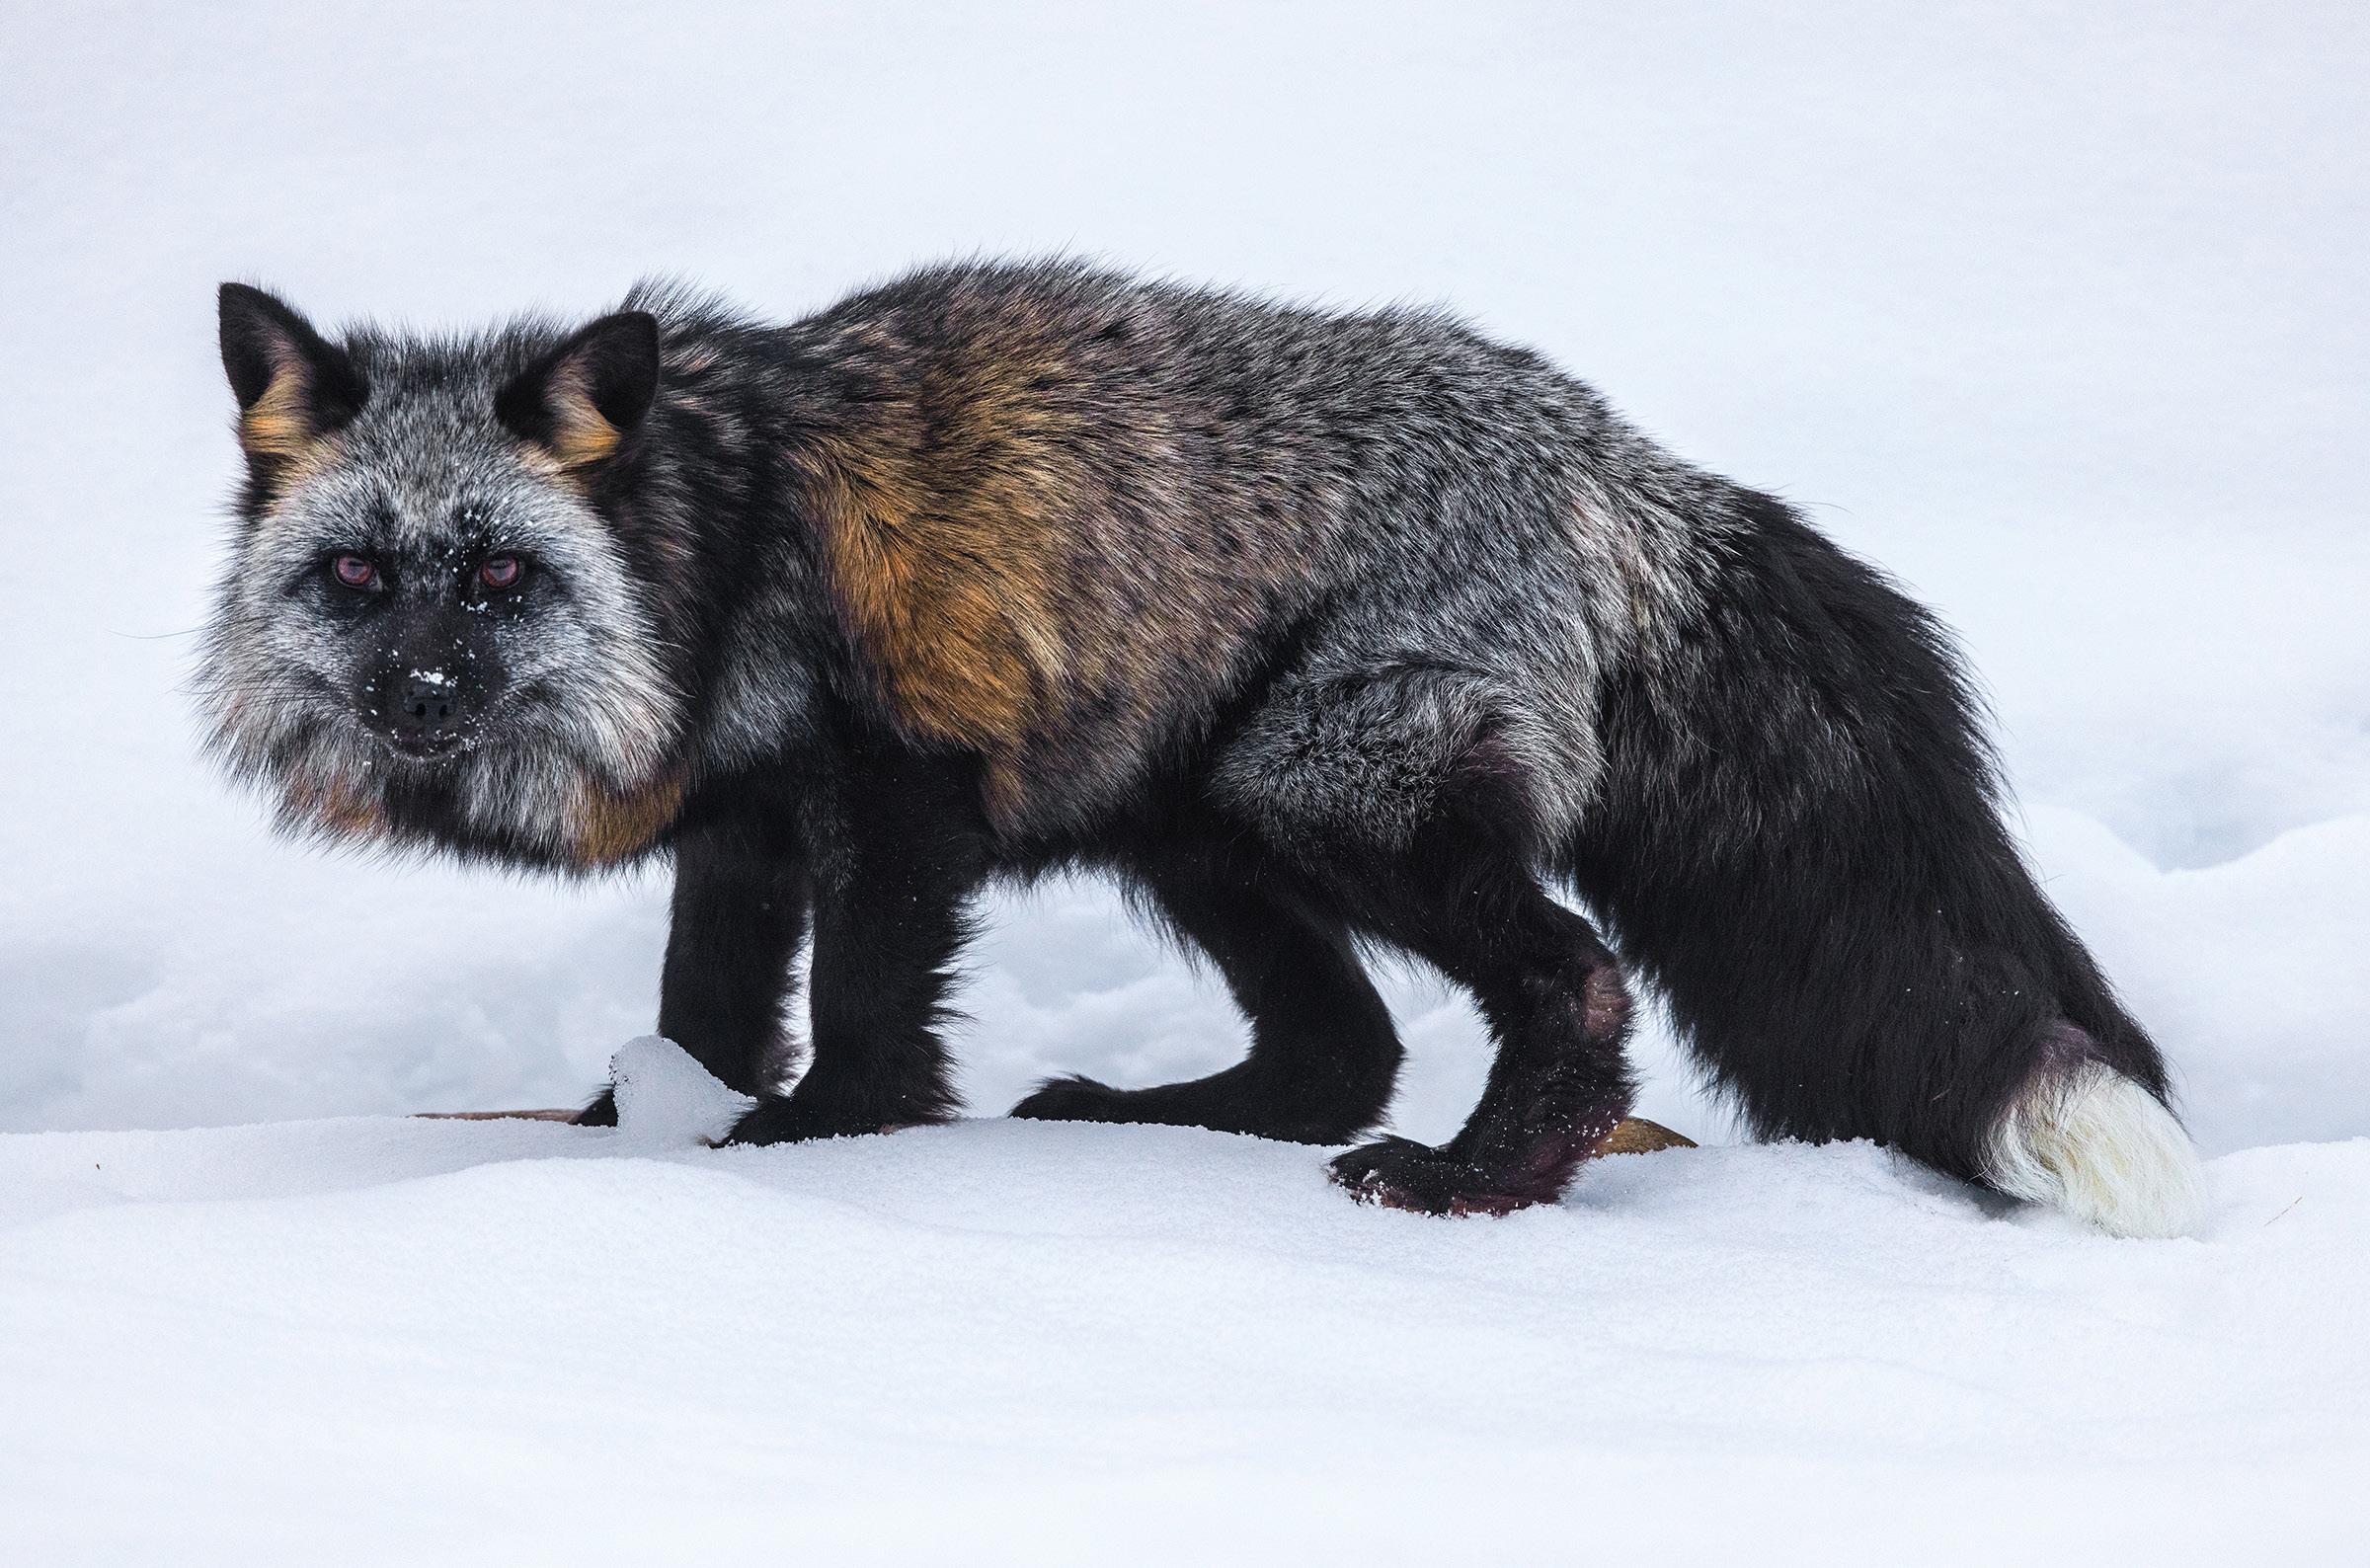
Pictures like the arctic fox, above, and the silver fox on the previous page are problematic with regard to exposure. You may not want to compromise on the speed of the shutter or the lens aperture, so the only other variable is ISO. Shooting on manual exposure mode means the shutter and f/stop won’t vary -- unless you change them -- thus you can tweak the exposure to make it lighter or darker simply by changing the ISO.

14
Equidistance and Telephoto Lenses
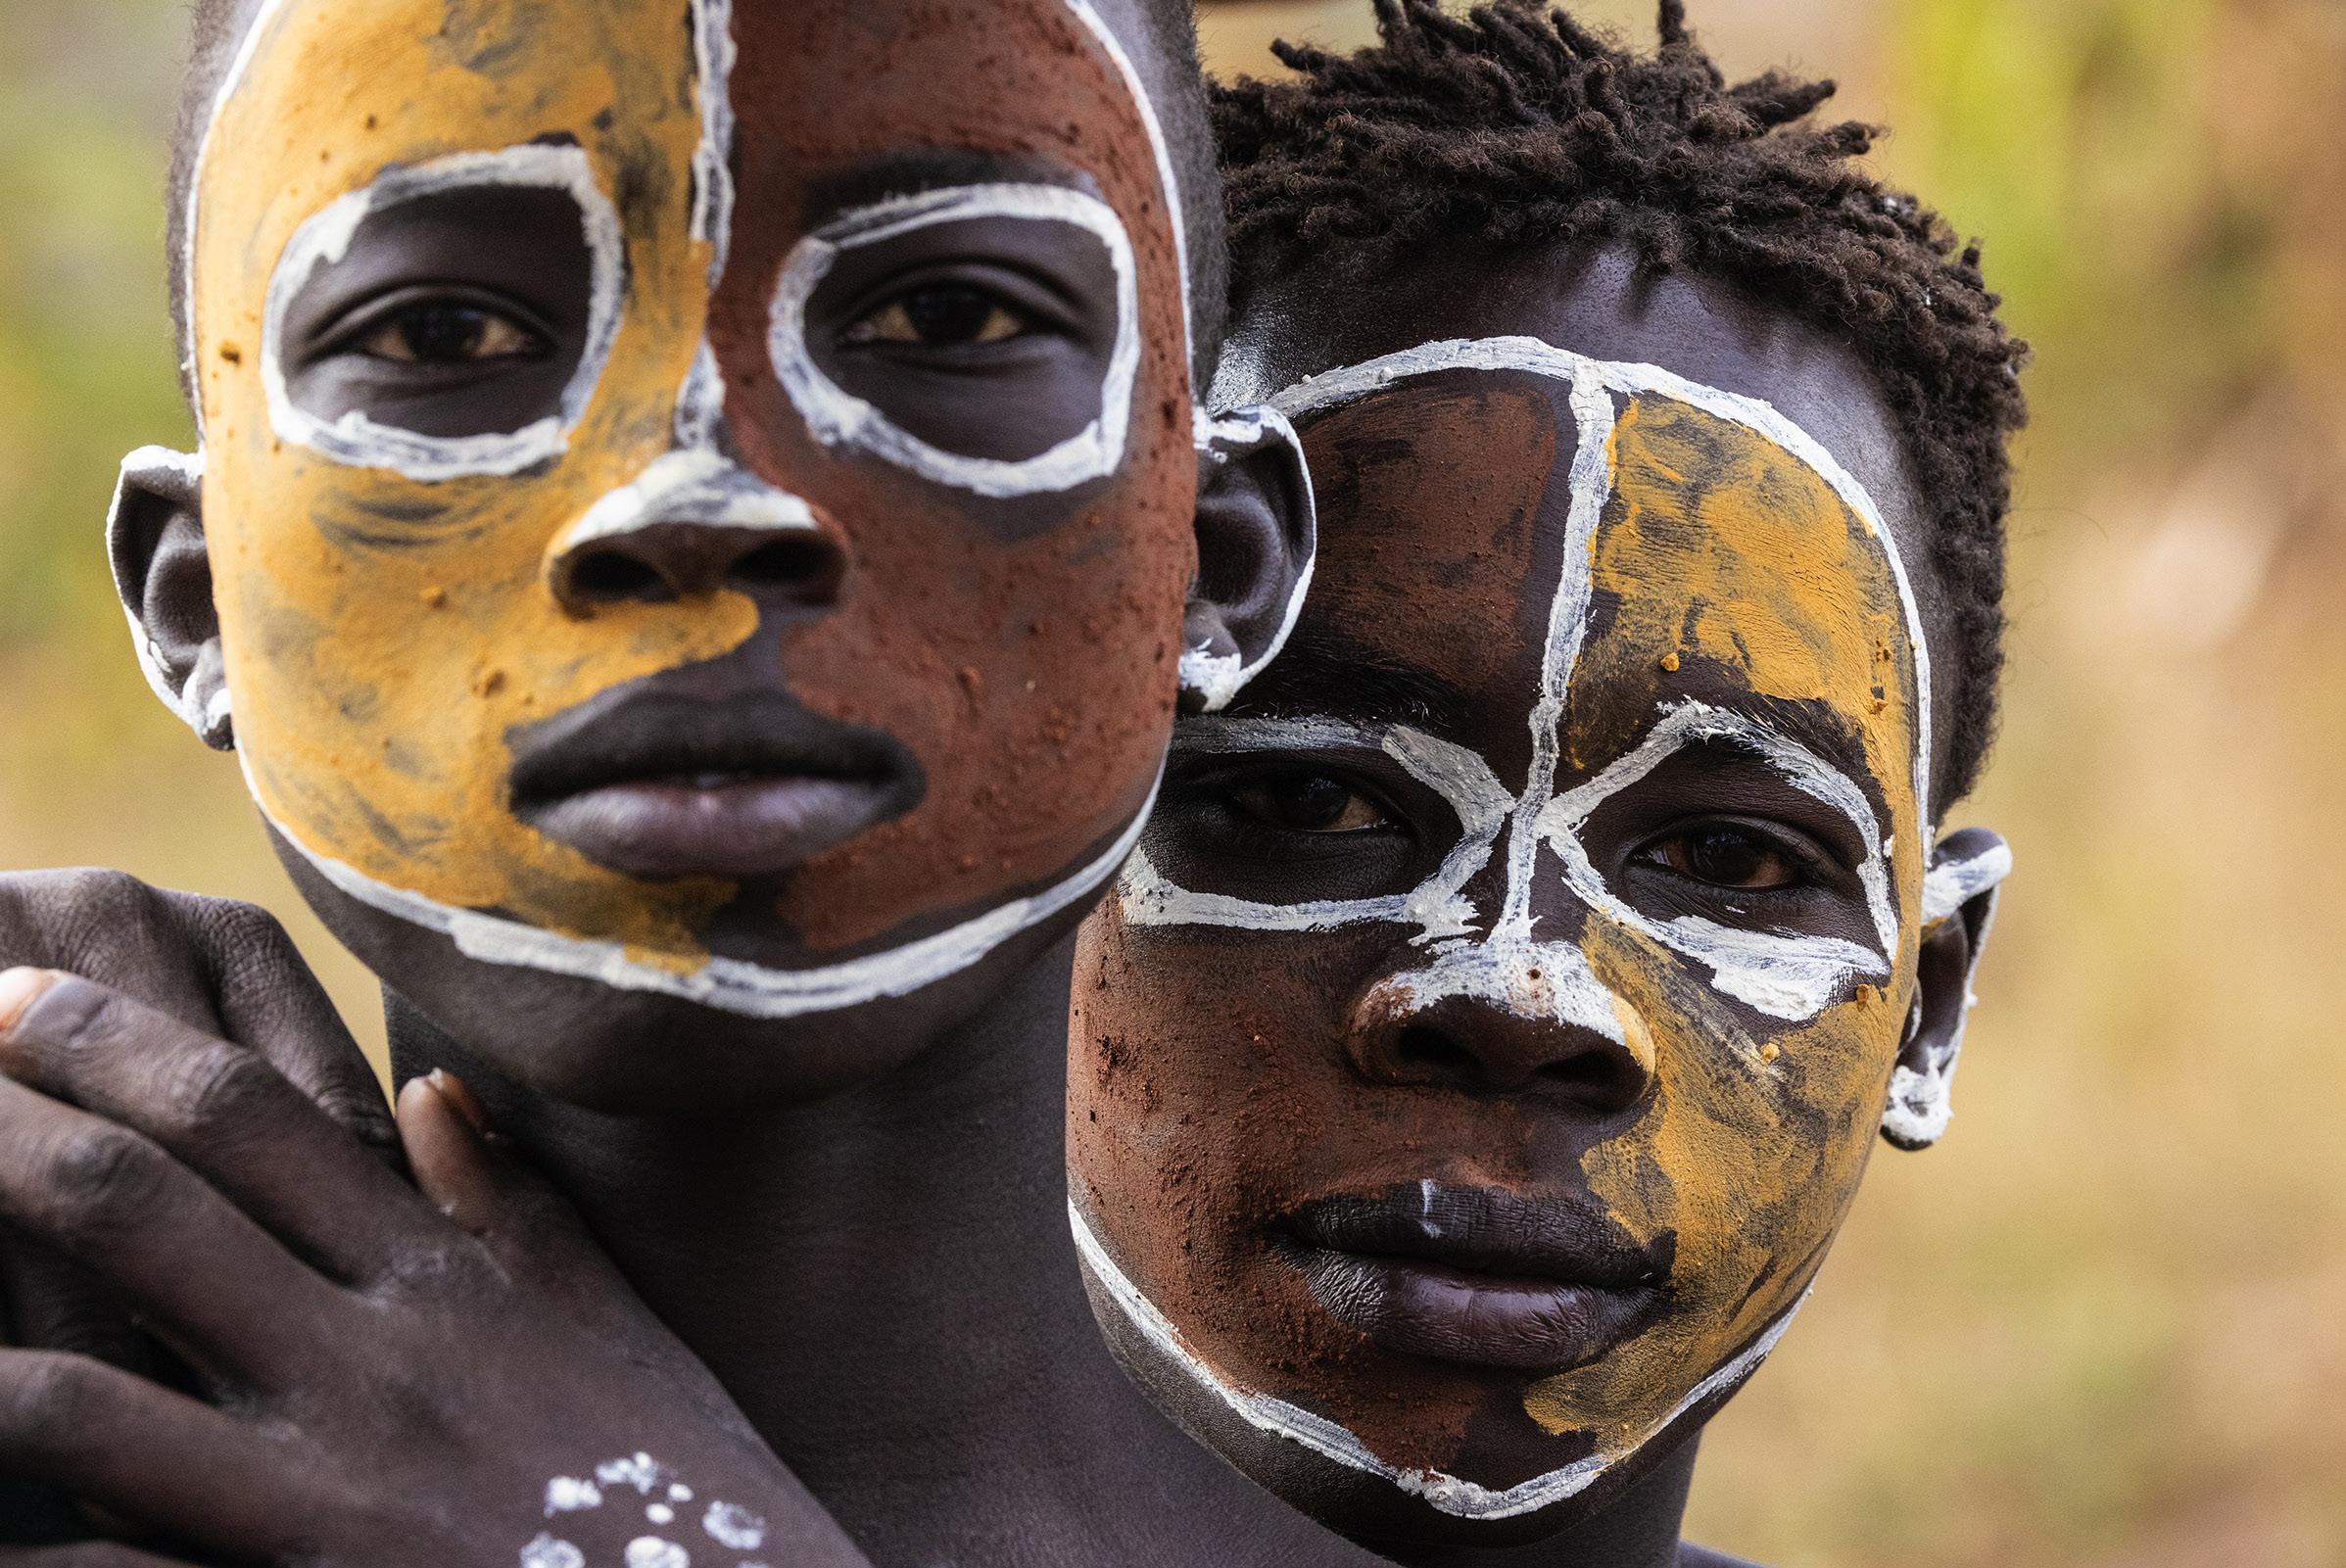
Telephoto lenses have shallow depth of field. We all know that. And part of the depth of field consideration is the distance from the subject(s) to the camera. As you move closer, depth of field decreases. This is great for blurring a background, as in the shot of four kids of the Surma tribe in southern Ethiopia, below. As the subject-lens distance decreases, though, and there are multiple subjects in your composition, you have to pay special attention to the exact positioning of each subject.

For example, the boy on the left is about four or five inches closer to the camera than his friends. I used a 220mm focal length for this shot, and
the lens aperture was f/5.6 to blur the background. Due to the shallow DOF, the boy on the left was slightly soft. I used sharpening software in post-processing to correct that. Sometimes, though, an element can be just out of focus enough so it can’t be corrected.
The point is that when you have multiple subjects in a shot, they should be as equidistant as possible to the camera.
The picture on the next page shows what happens in this kind of scenario in which one subject is too forward relative to the other subject. The boy on the left is not sharp. I
15
used the same camera settings -- 220mm focal length and f/5.6 aperture -- but in this case there was too much separation between subjects to get them both sharp. There are four possble solutions to solve this problem:
1. Ask the subjects to adjust their position so they are both equidistant to the camera. This immediately addresses the issue, but you run the risk of a change in the subjects’ body language, pose, and mood.
2. Move further back from the subjects. As the subject-camera distance increases, you gain depth of field. If you choose this solution, you may have to crop the image to create the type of composition you wanted in the first place.
3. Use a smaller lens aperture. This will decrease the light entering the camera, of course, and it will make the background more defined, but the depth of field will increase. In this situation, to render both faces of the
Surma tribal boys in focus, I would choose at least f/11, although f/16 would be better for increased depth of field.

4. Use a wider angle lens. Going from 220mm to, say, 150mm would make a big difference. That changes the composition, but it’s a viable solution to the depth of field issue. You could then crop the image to create the framing you wanted originally.
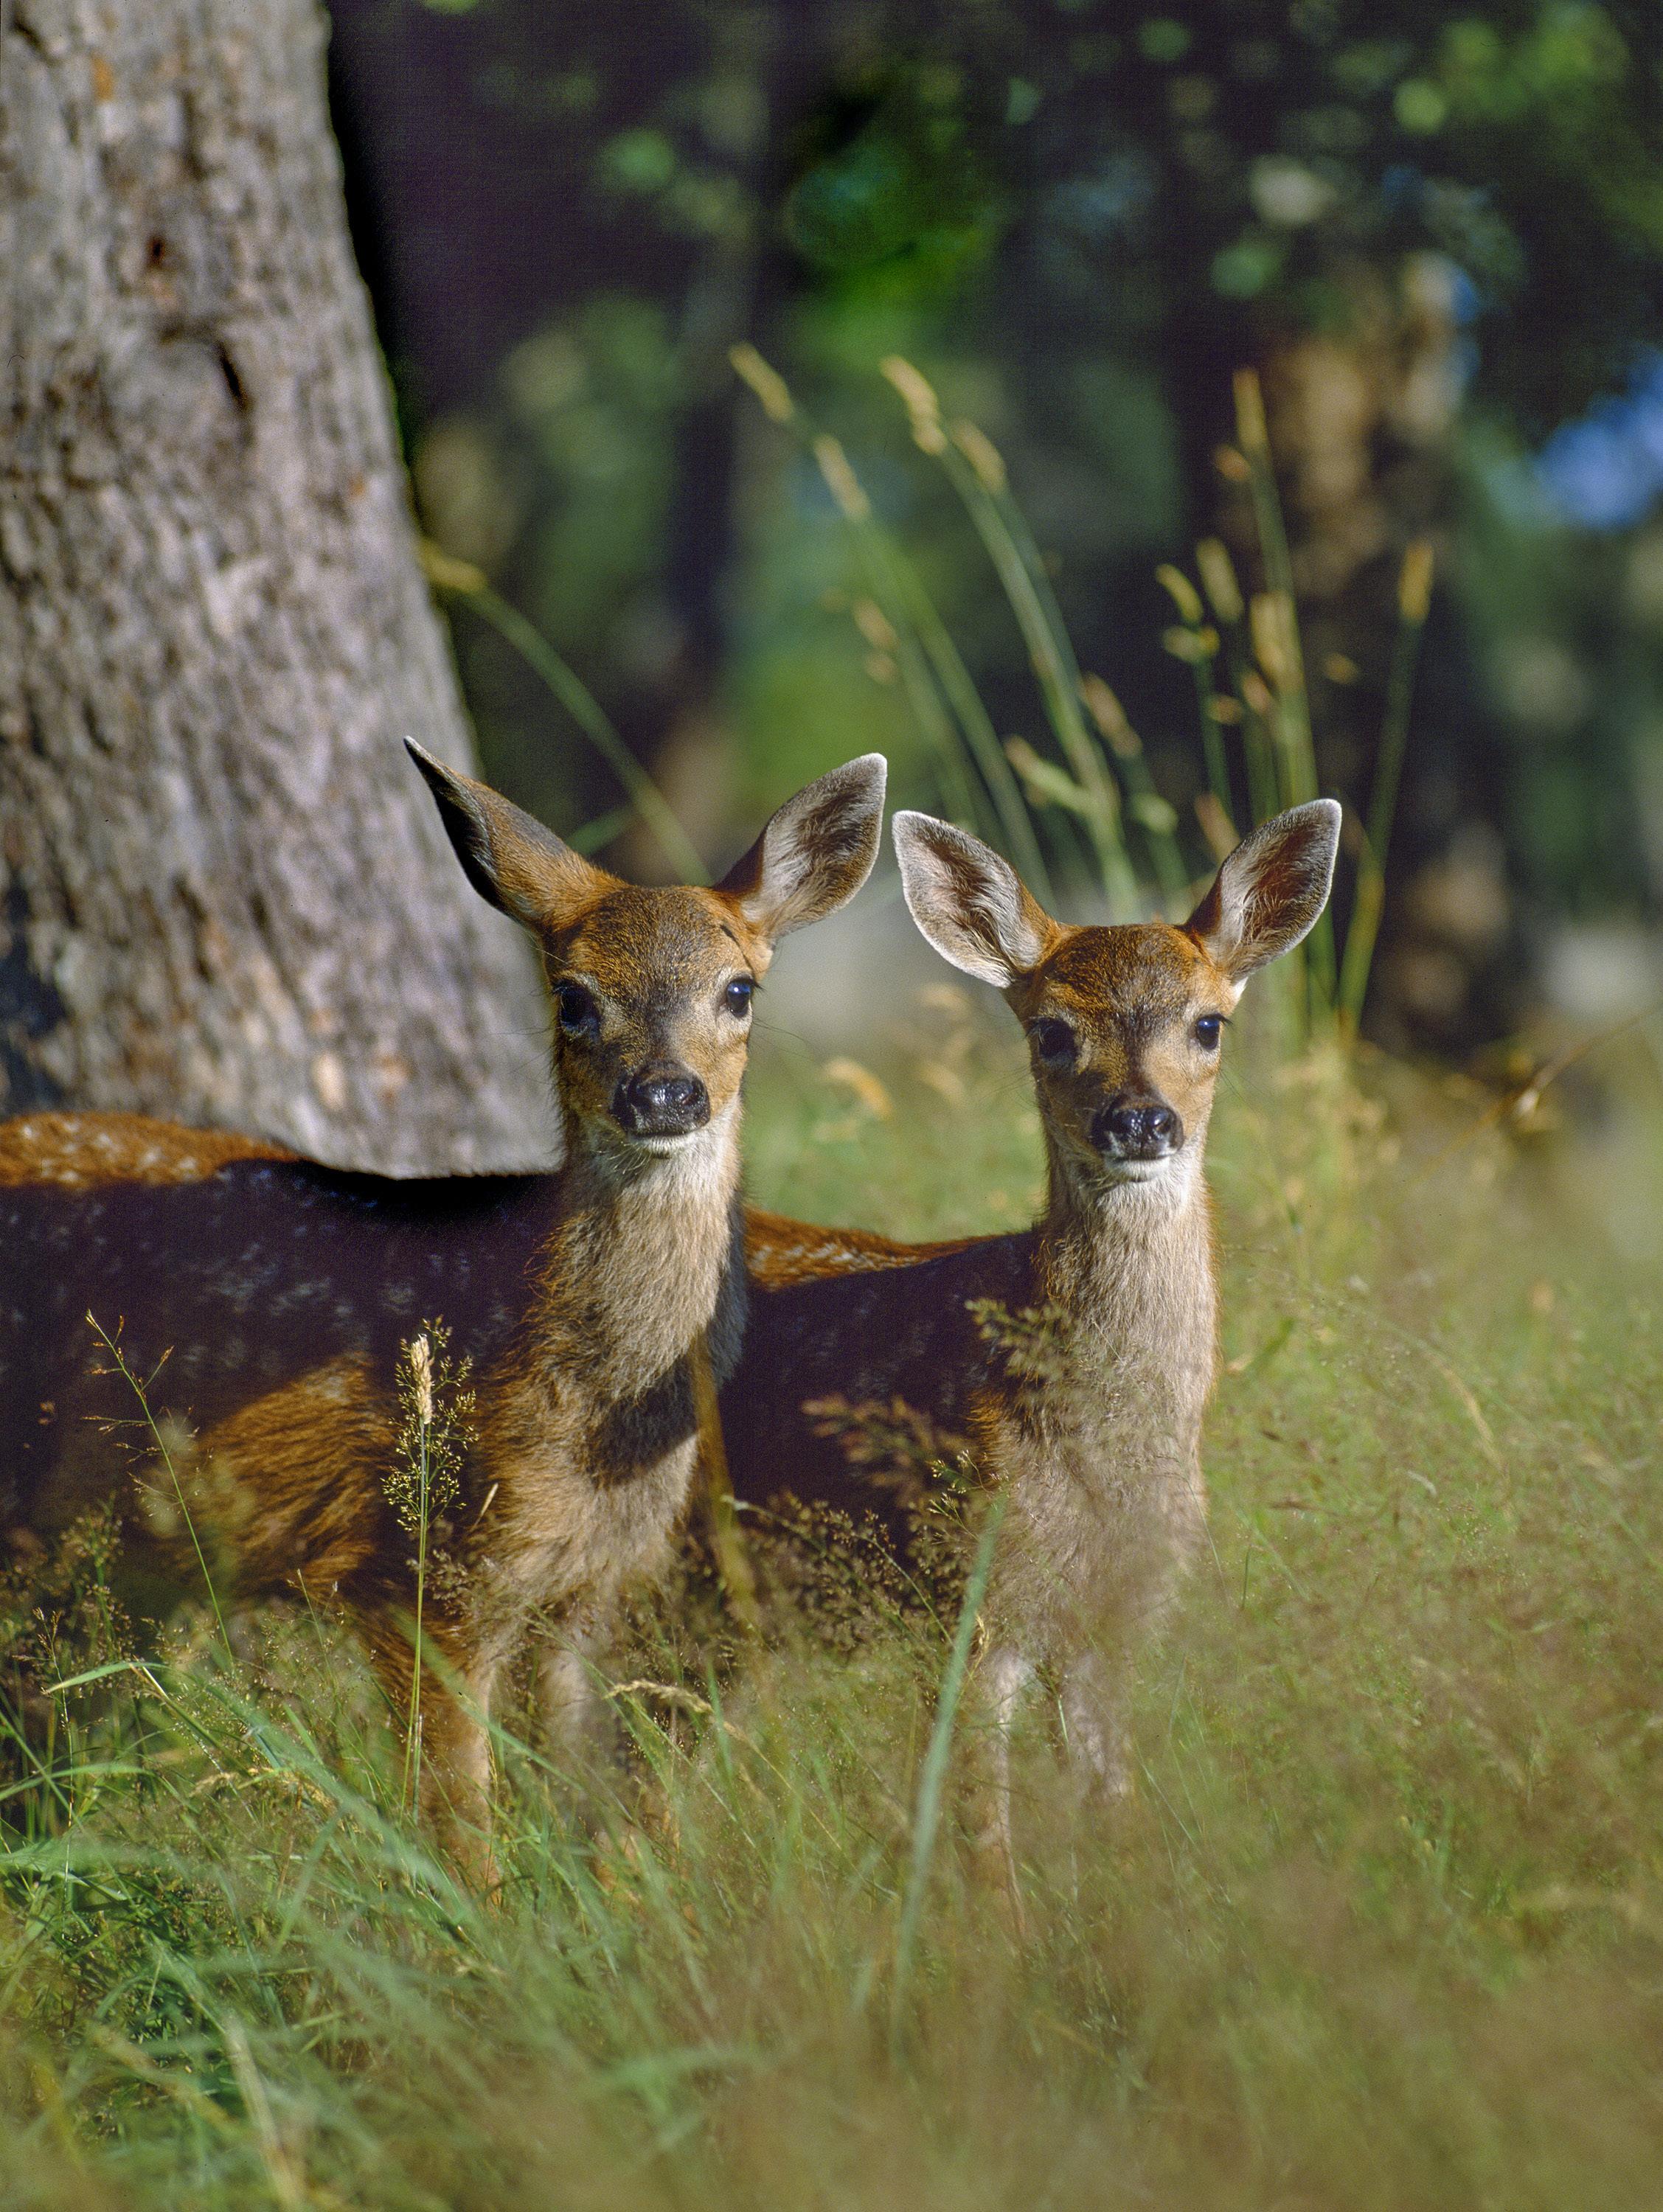
This applies to all subjects, not just with people. The picture on the next page of black-tailed deer fawns on Vancouver Island, British Columbia, Canada, is a case in point. I shot this with a medium format film camera in the 80’s, and because I used a 350mm lens in this format, the depth of field was extremely shallow. It was critical that both animals were sharp, so I waited and hoped at some point the two fawns would position themselves equidistant to the camera. It happened for one moment only, and I grabbed the shot at f/5.6. §
16

17
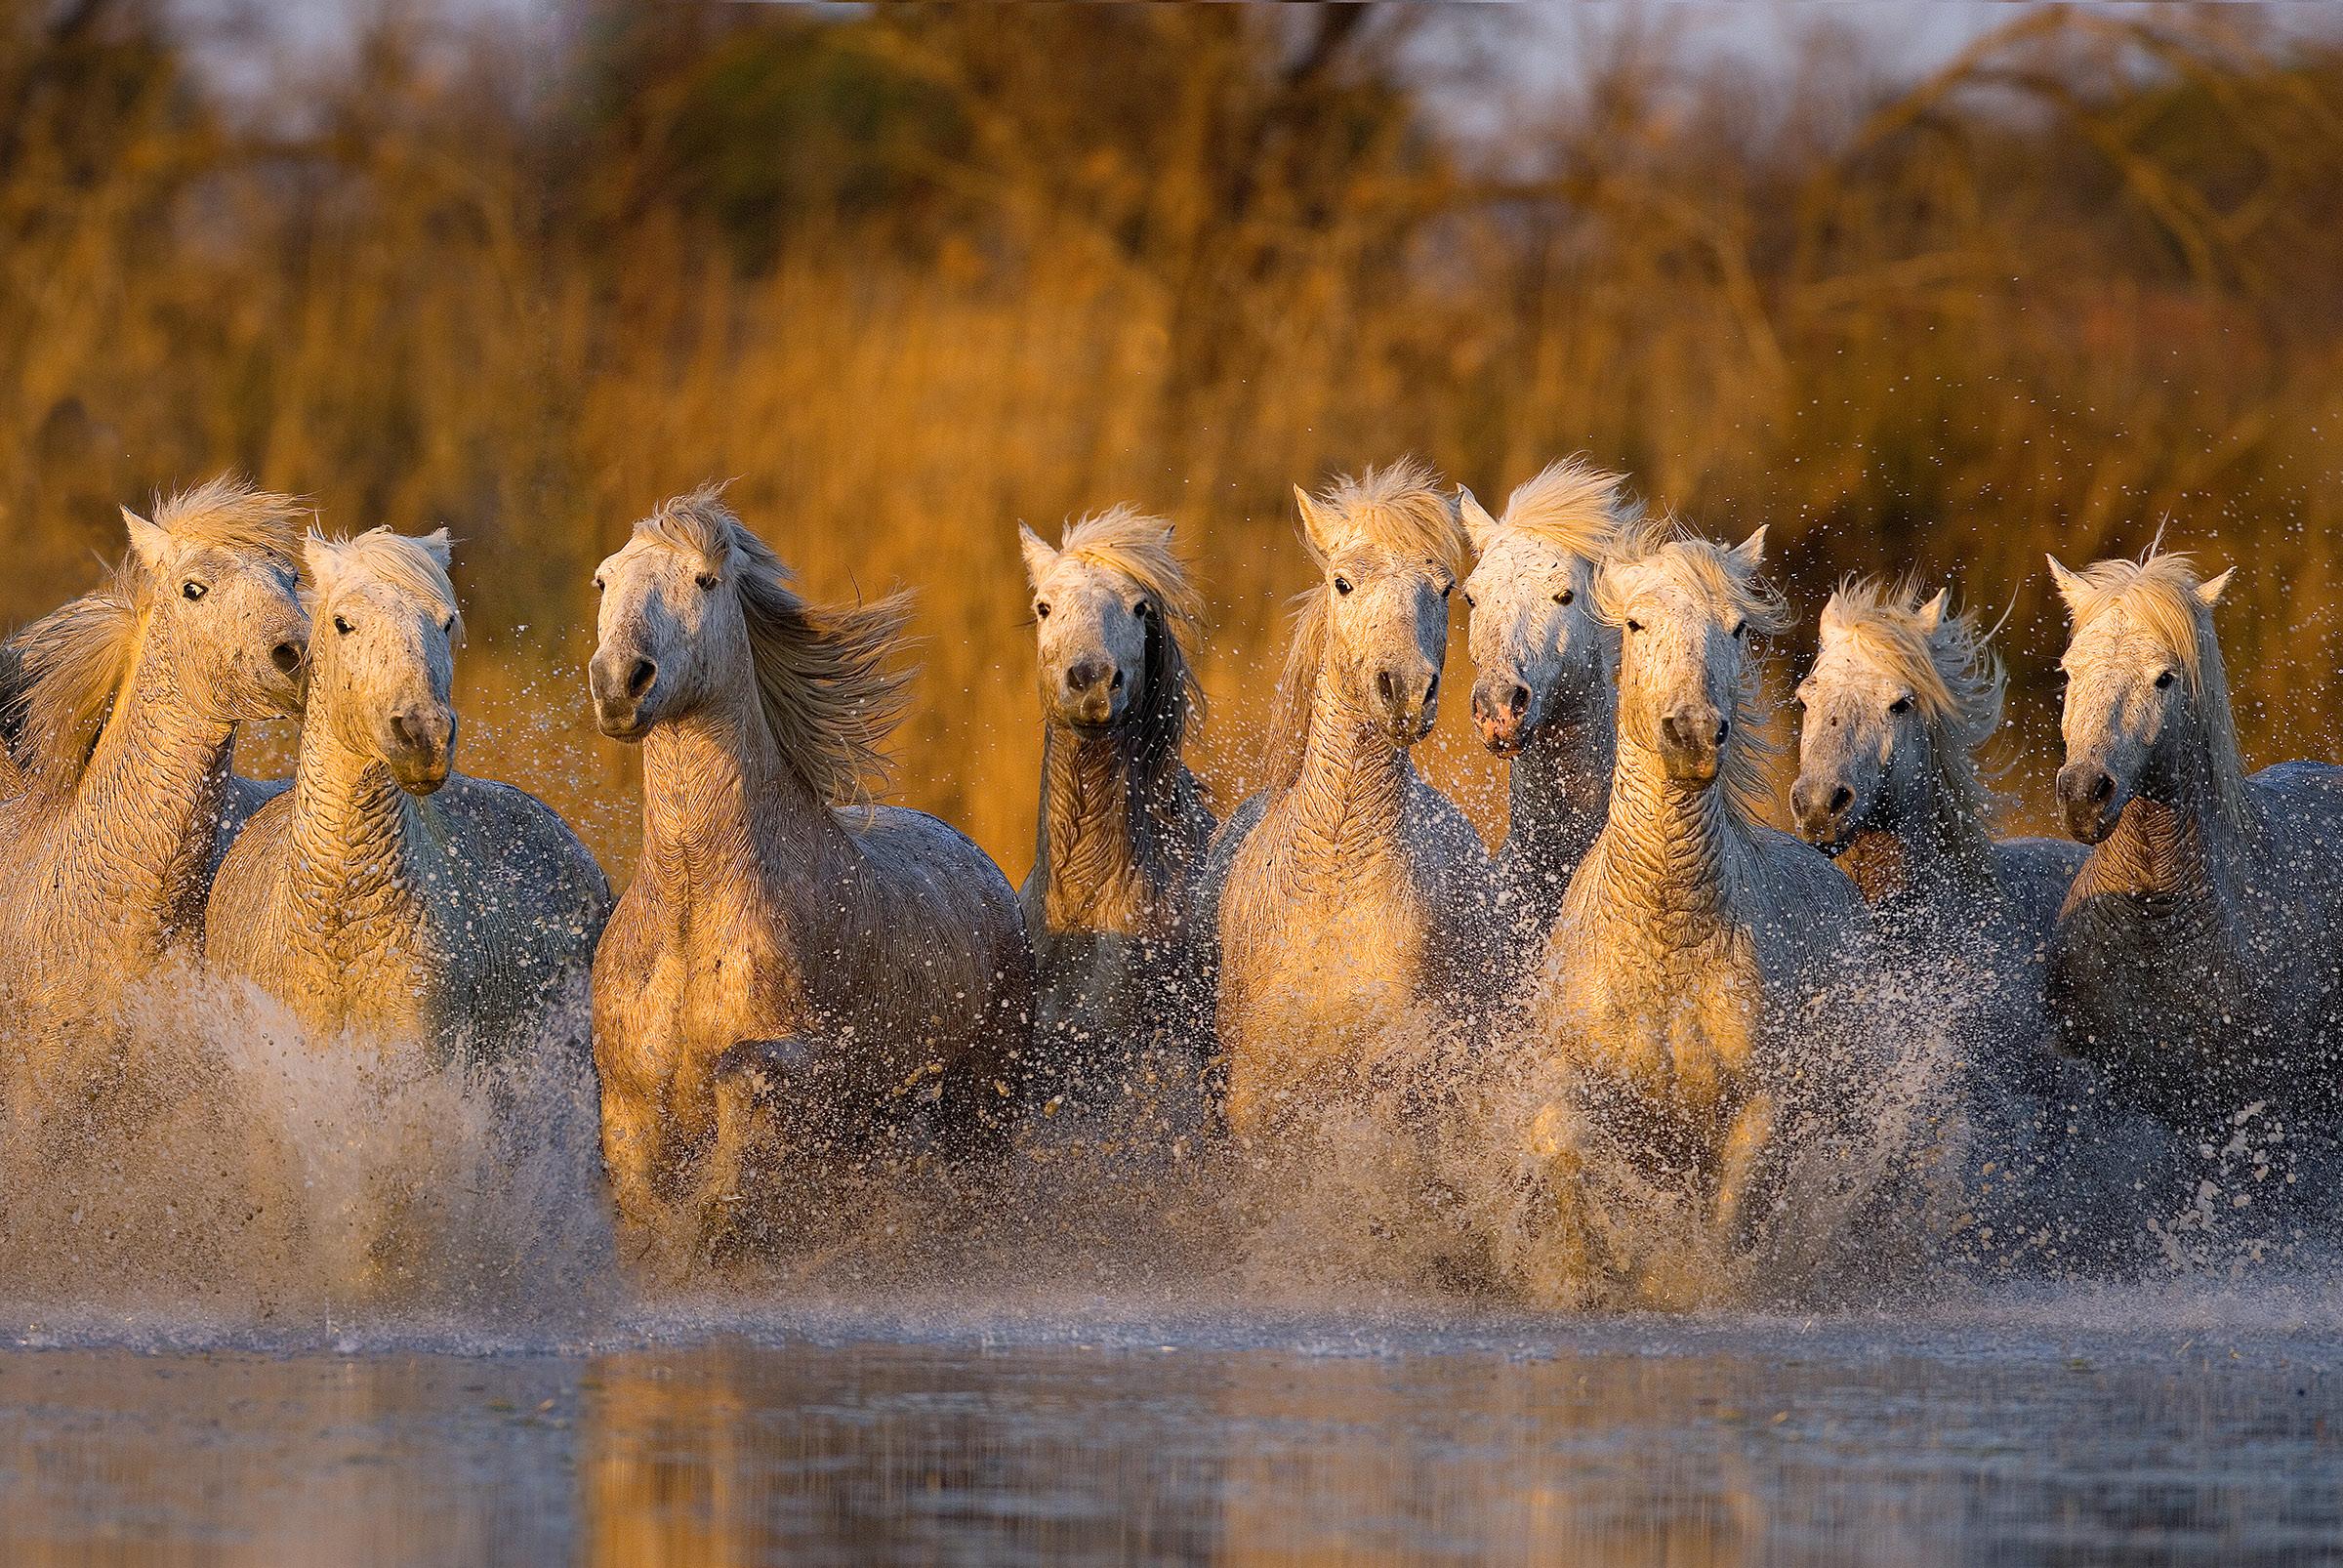
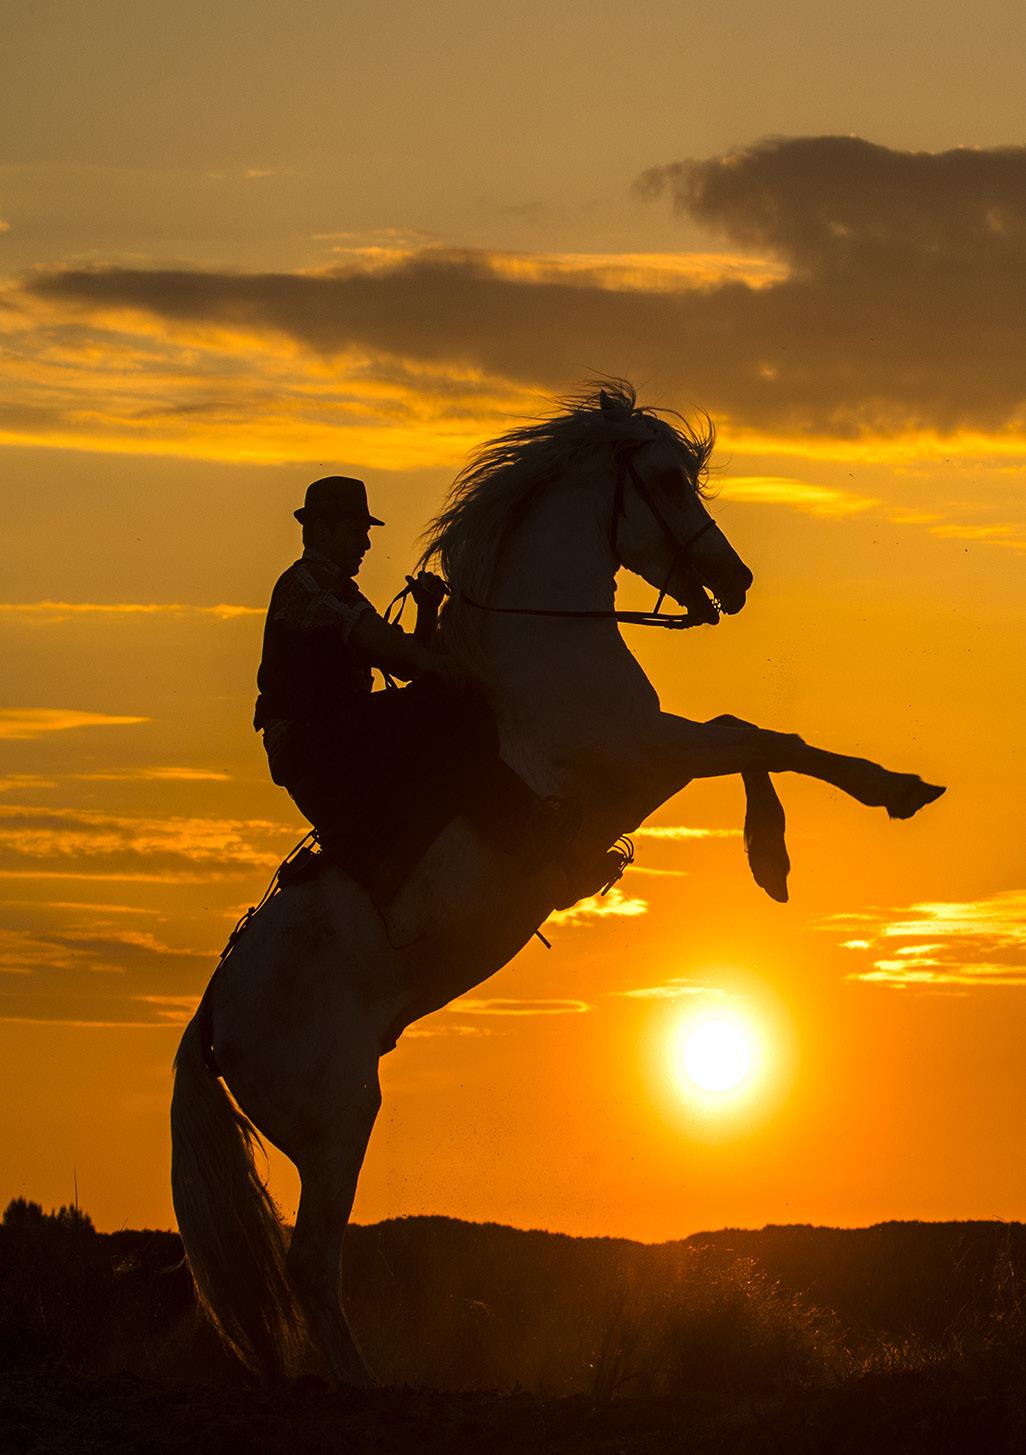
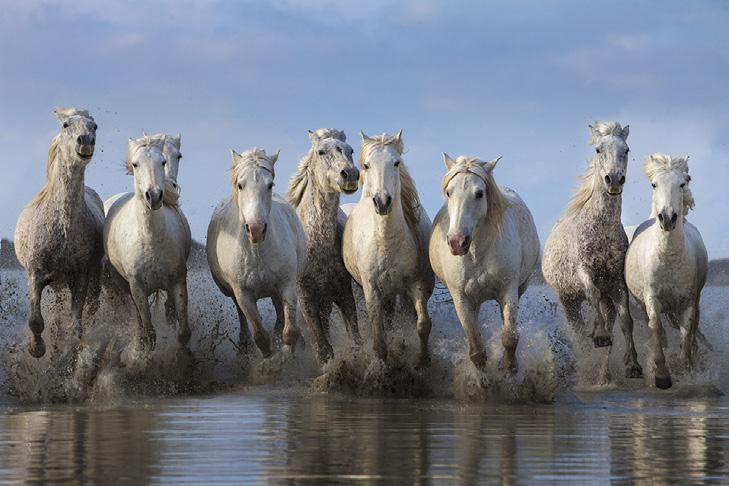
WHITE HORSES of the CAMARGUE


Spectacular photo opportunities of horses in action
May 8- 13, 2023

18
Photography Quiz
1. The background behind a subject is:
a. Not that important and can be ignored
b. Virtually as important as the subject and must be carefully considered
c. Best to be rendered with complete depth of field all the time
d. Best to be rendered with shallow depth of field all the time.
2. High res jpeg mode gives you the same quality as RAW.
a. True
b. False
3. When shooting doors and windows, to emphasize symmetry the shooting position should be
a. Dead center
b. Slightly off-center
c. At a 45 degree angle
4. The two most important aspects of fine art photography are
a. Depth of field and shutter speeds
b. Fill flash and Aperture priority
c. Aperture priority and Shutter priority metering
d. Graphic design and lighting
5. When you shoot at twilight or night and your subject is a city skyline, you should use a tripod and
a. ISO 100
b. ISO 400
c. ISO 800
d. ISO 1600
6. The primary enemy of macro photography is
a. Depth of field
b. Wind
c. Tripods
d. Wide angle lenses
7. Outdoor portraits look best (you may choose more than one)
a. When the sun is at your back
b. At noon
c. At sunrise or sunset
d. On a cloudy day
8. Most landscape photographs should
a. Have complete depth of field
b. Be taken on a bright sunny day
c. Be taken without a tripod
d. Be taken with a high ISO
9. Converting color to black and white with digital technology (or film) always causes
a. An increase in noise
b. A gain of contrast
c. A loss of contrast
d. A loss of sharpness
10. In your camera menu, the option ‘sRGB’ gives you the most extensive color gamut
a. True
b. False
19 Answers on page 47
UPCOMING PHOTO WORKSHOPS
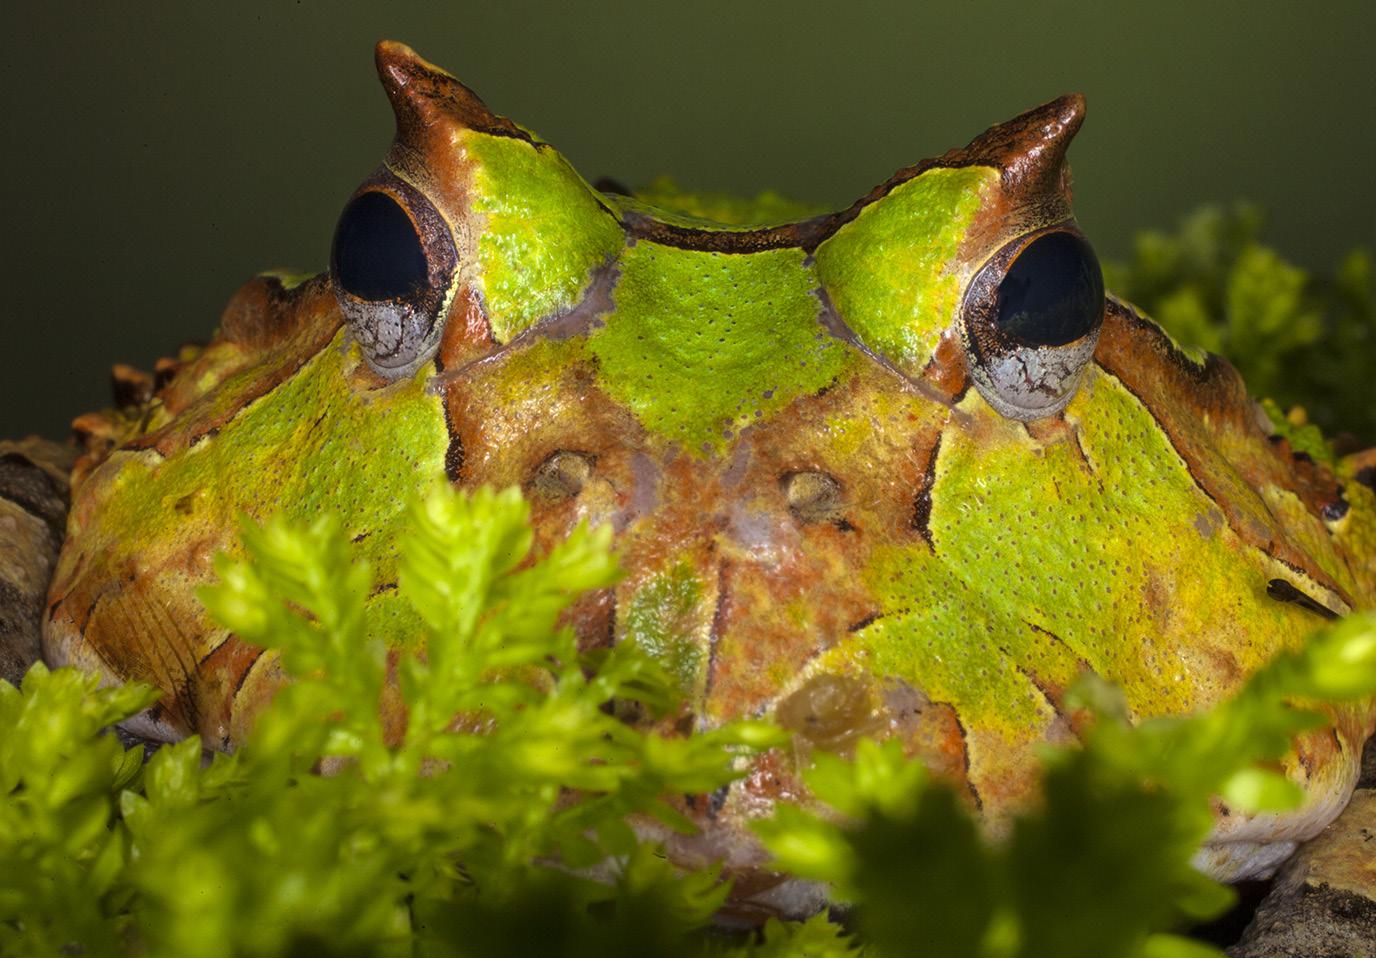
Frog and Reptile Workshop

This is a macro workshop where you will have up close and personal encounters with exotic poison dart frogs and primitive looking reptiles. Jim will explain how to use a ring flash to simulate difused daylight, and he will talk a lot about depth of field as it relates to macro work. This workshop takes place in Kansas city.
August 19 - 20, 2023
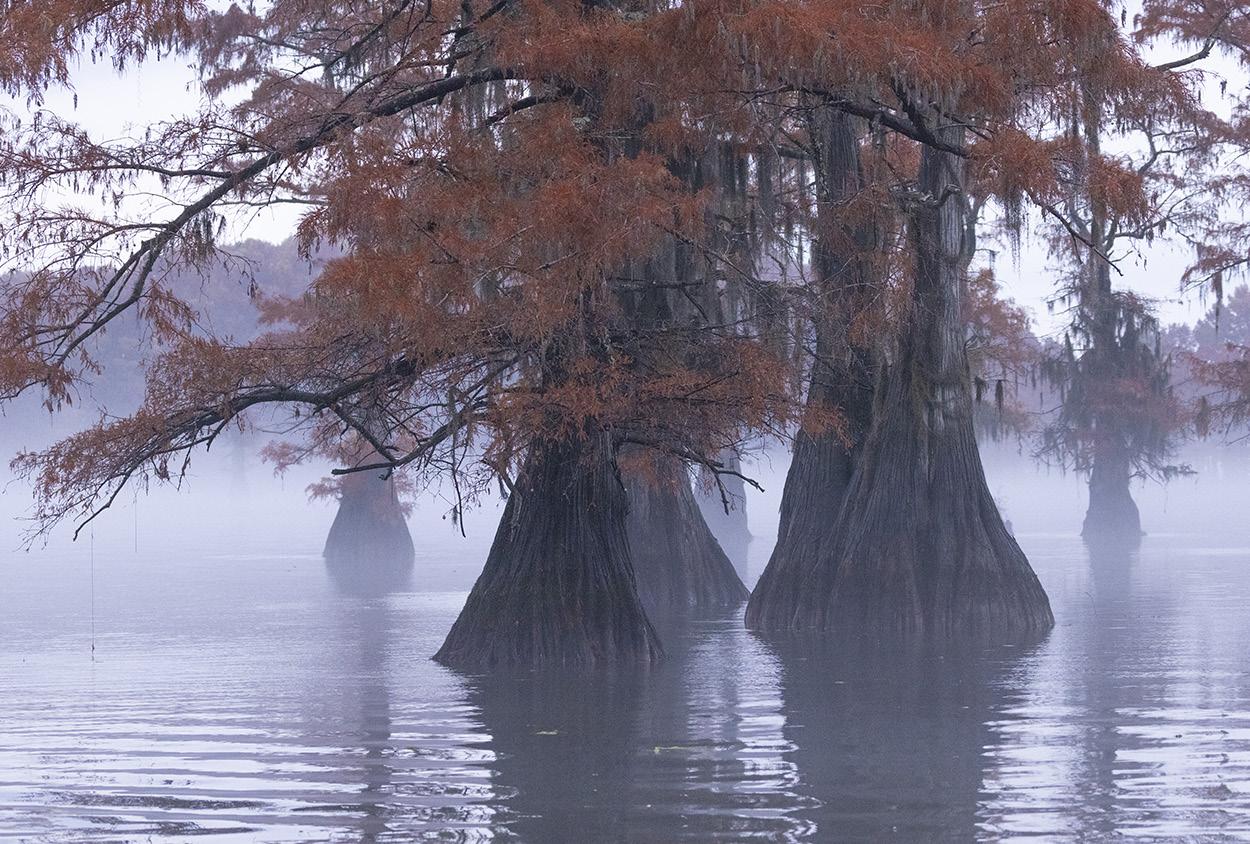
Mystical Swamps of Louisiana

Autumn in the swamps of Louisiana (and Texas) is spectacular. The mix of orange and green leaves is beautiful, and at this time of year we have the best chance of photographing fog. There are egrets, herons, and osprey to photograph as well as alligators in this primeval and mystical environment.
October 21 - 25, 2023
Winter Wildlife Workshop
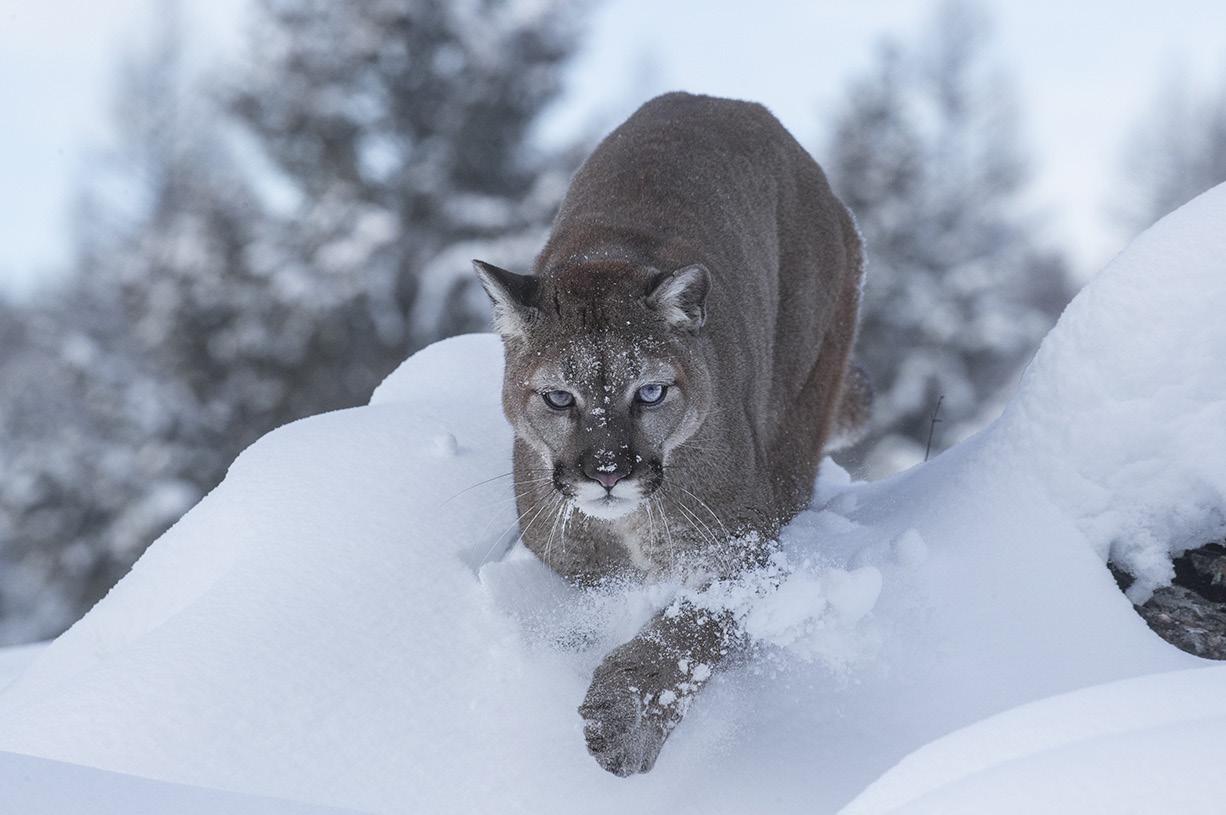
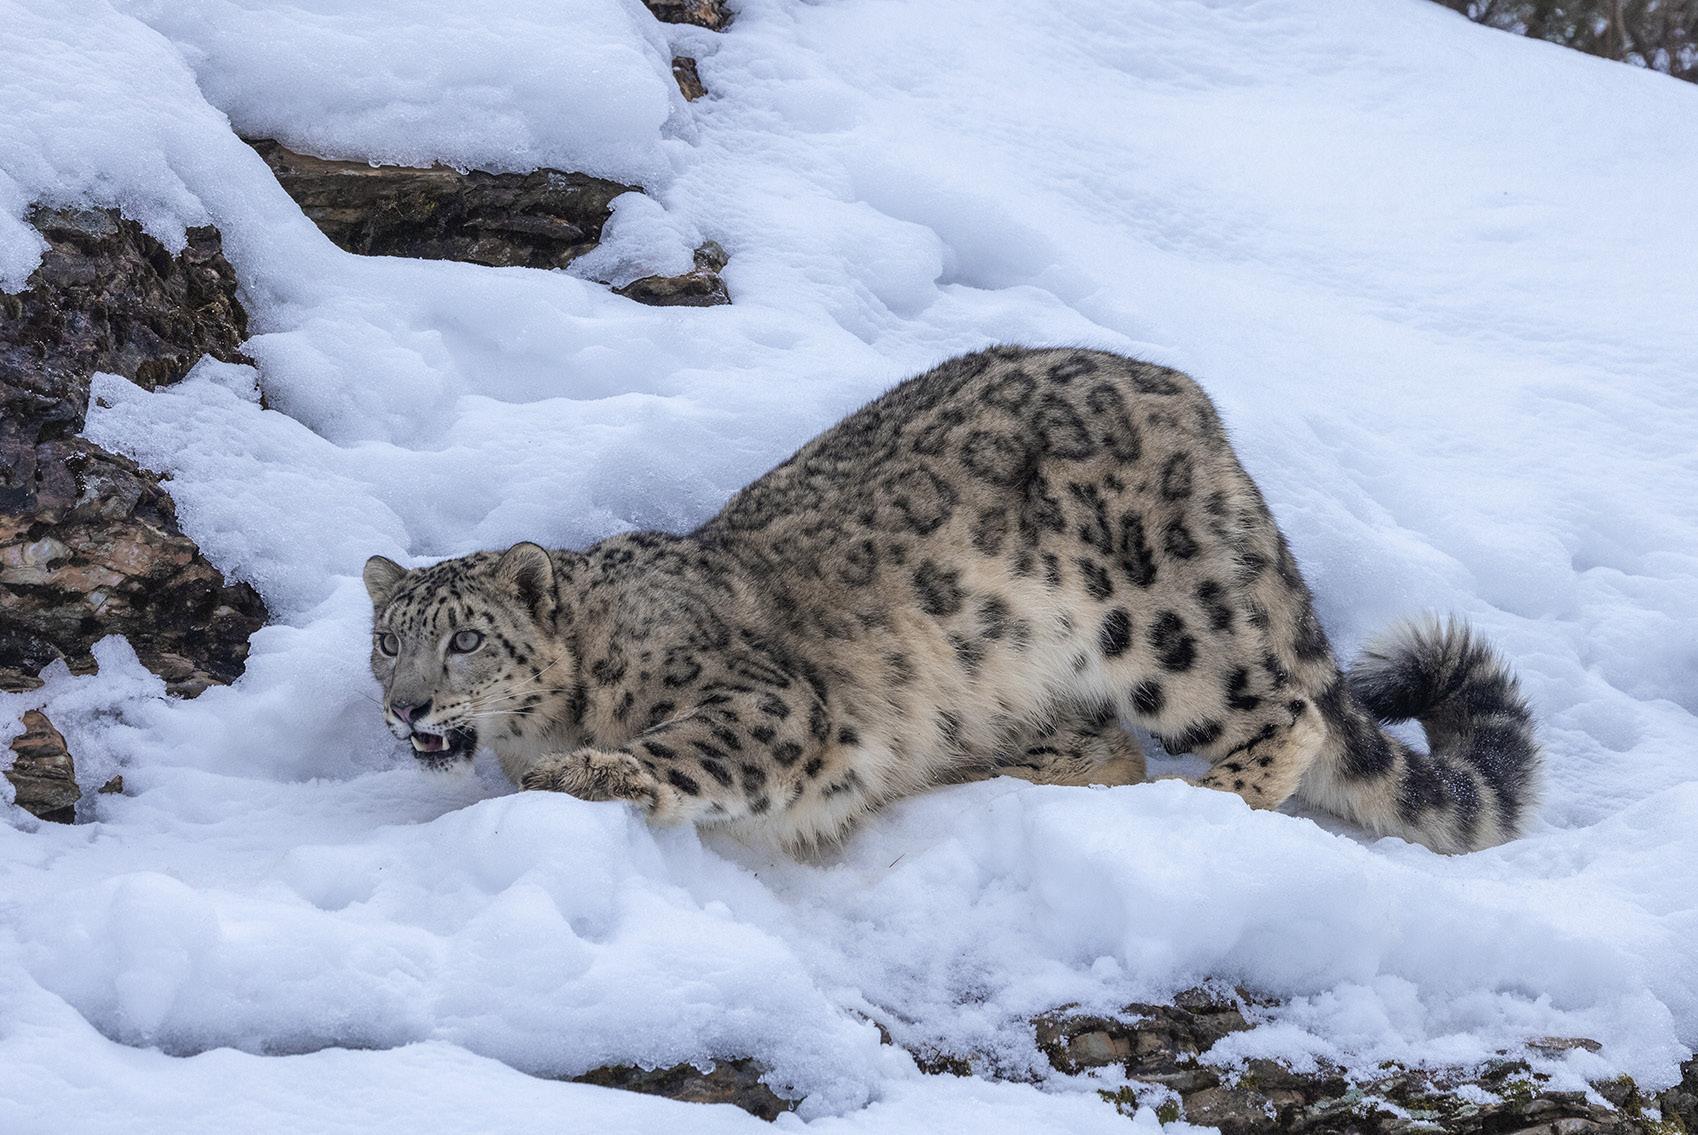
Photograph beautiful North American mammals plus a snow leopard in natural environments. Mountain lions, red foxes, arctic foxes, bobcats, lynx, wolves and more are in their full winter coats. This is a very special workshop.
January 5 - 10, 2024

1919 10 w
20


18 Expand your photographic artistry with eBooks
on any ebook to see inside 21
Click


2321 212123 21 1919
continued Click on any ebook to see inside 22
eBooks
WINTER WILDLIFE WORKSHOP

January 5 -10, 2024

23
23
What’s wrong with this picture?
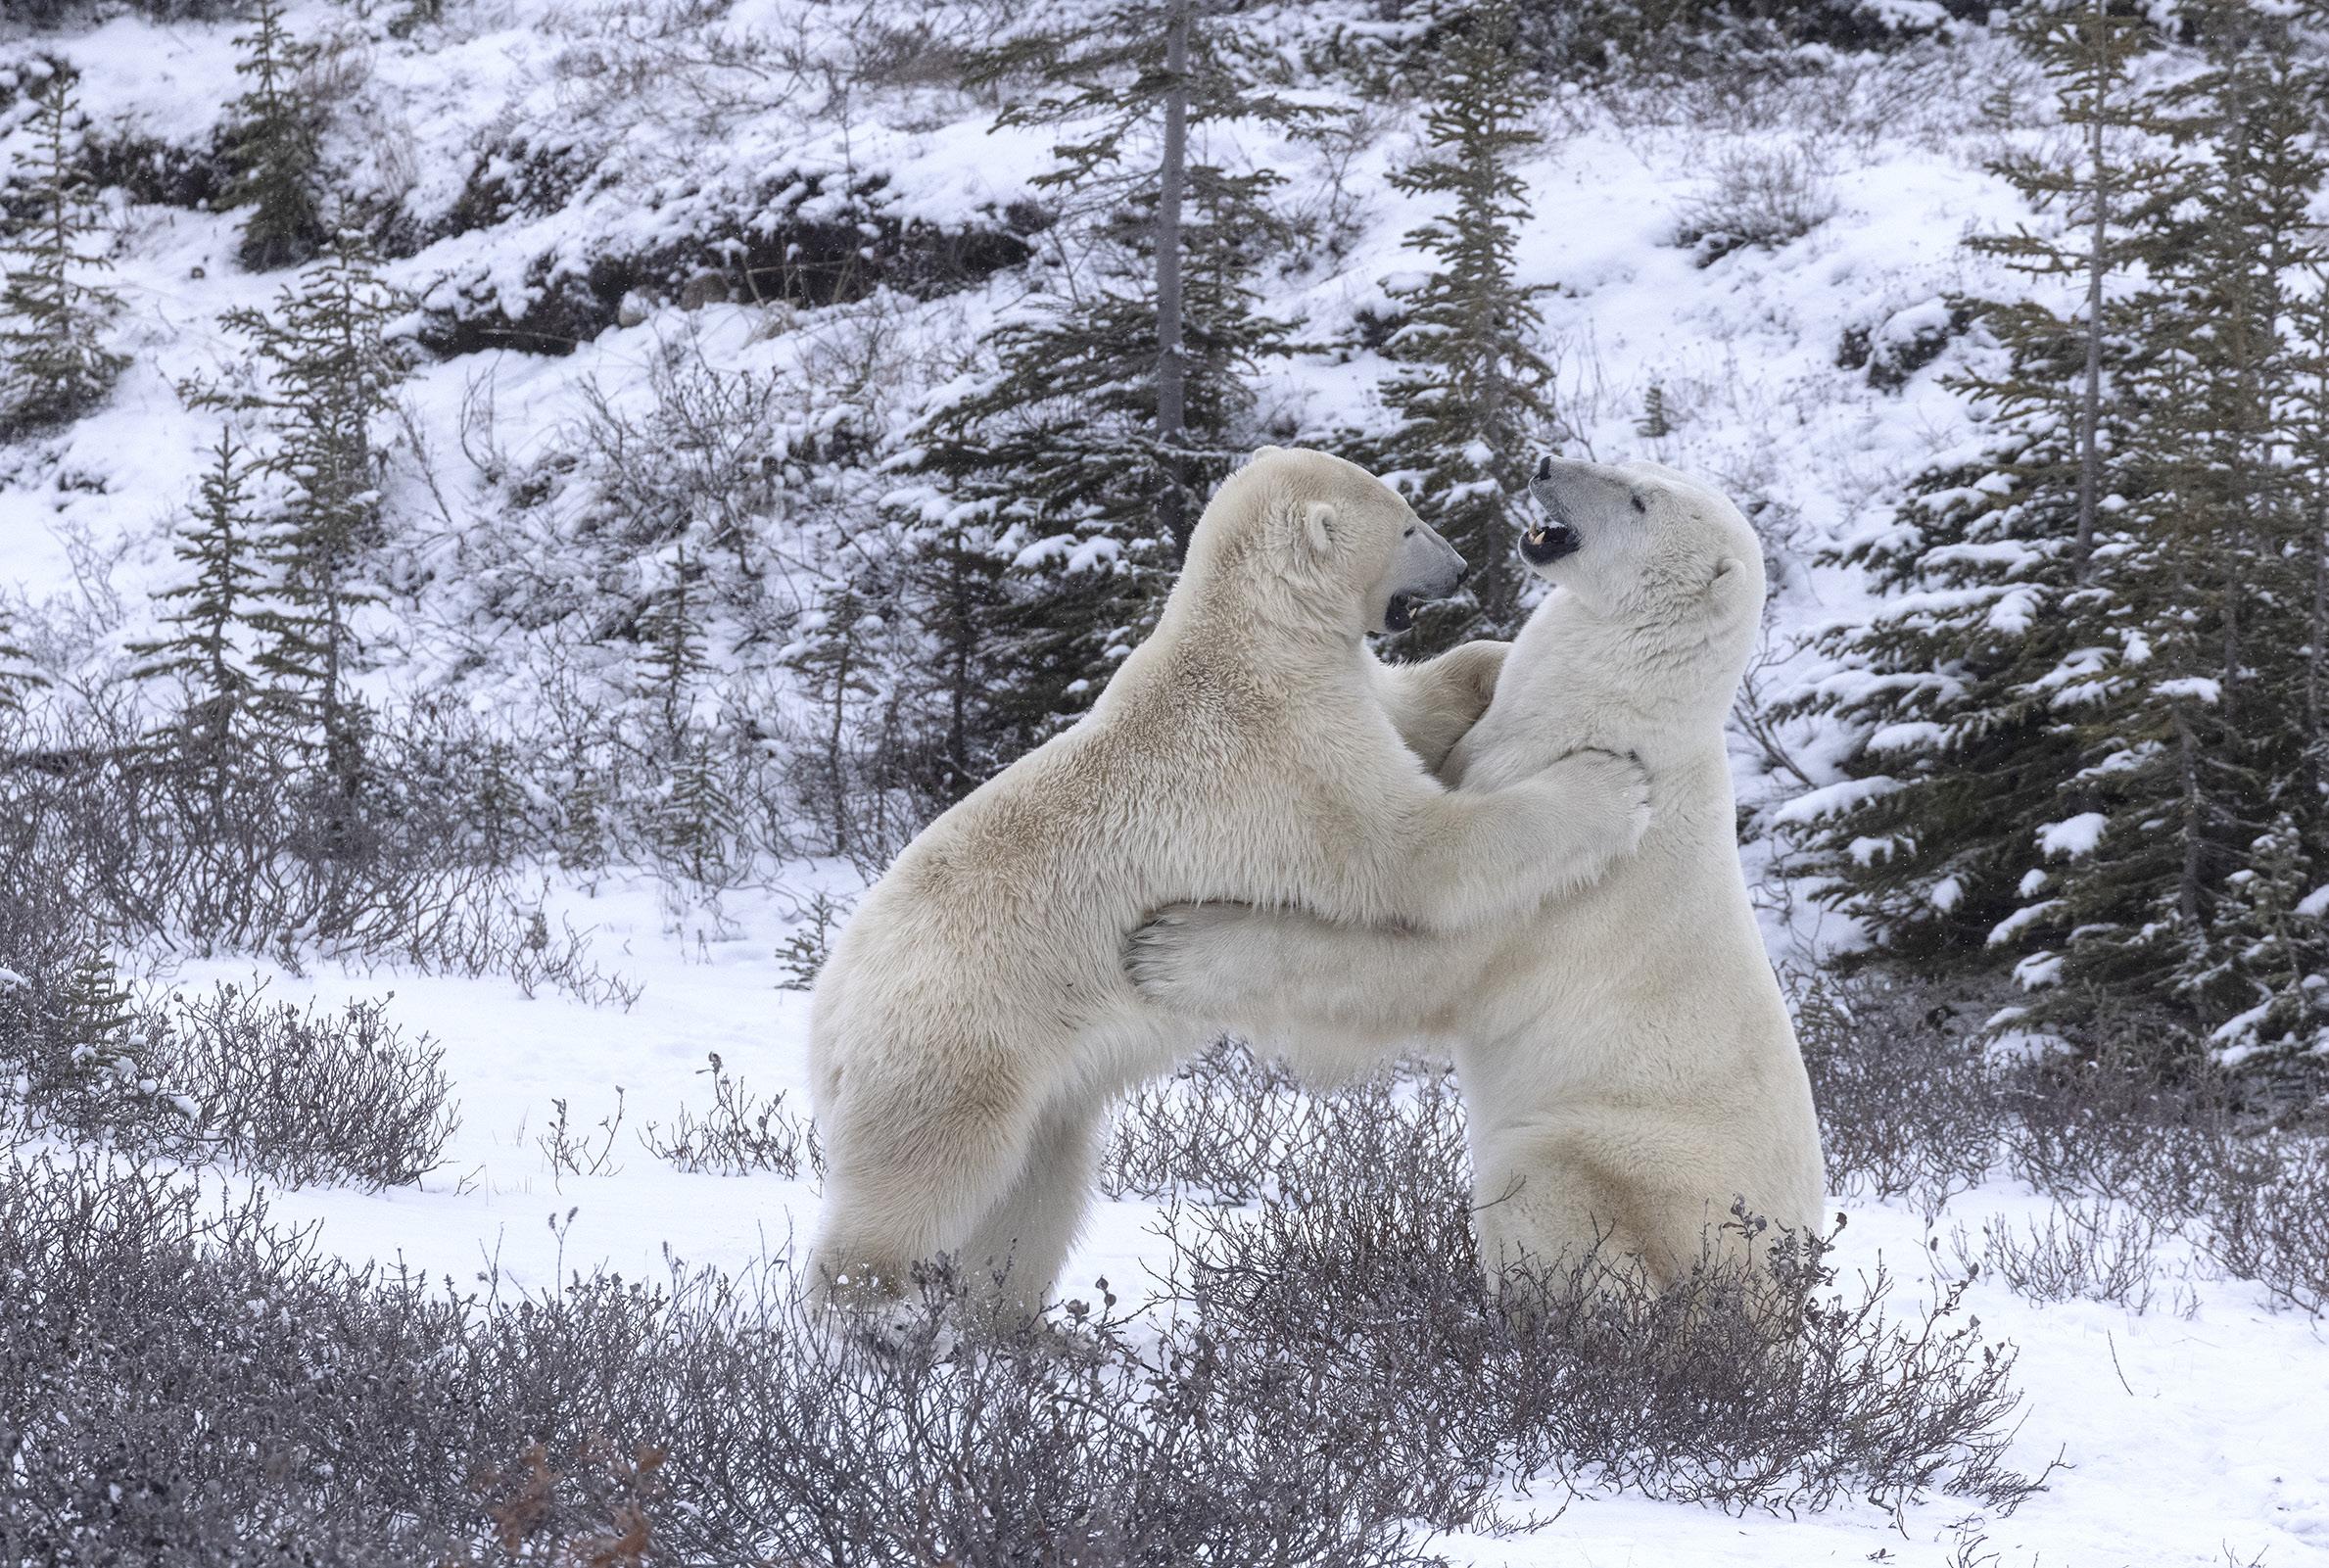
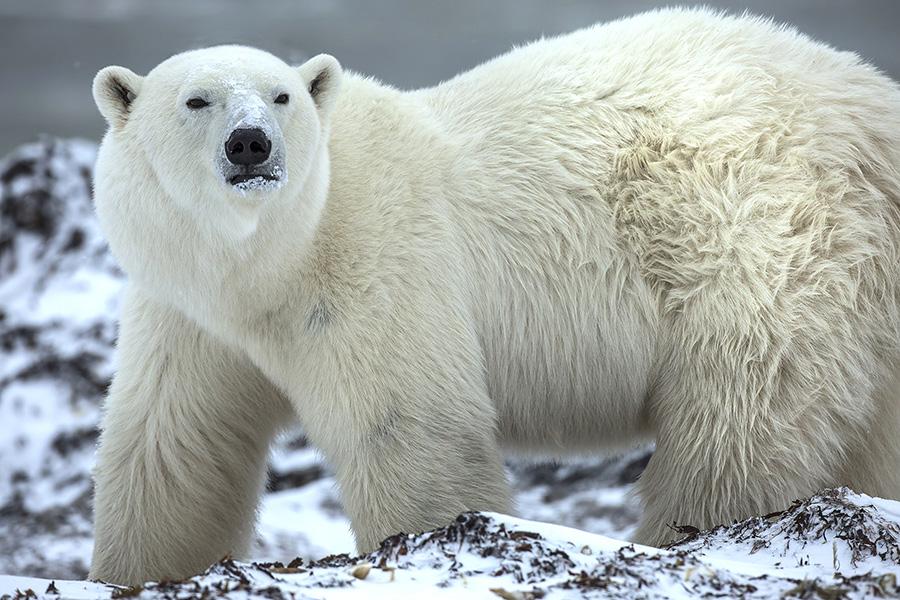
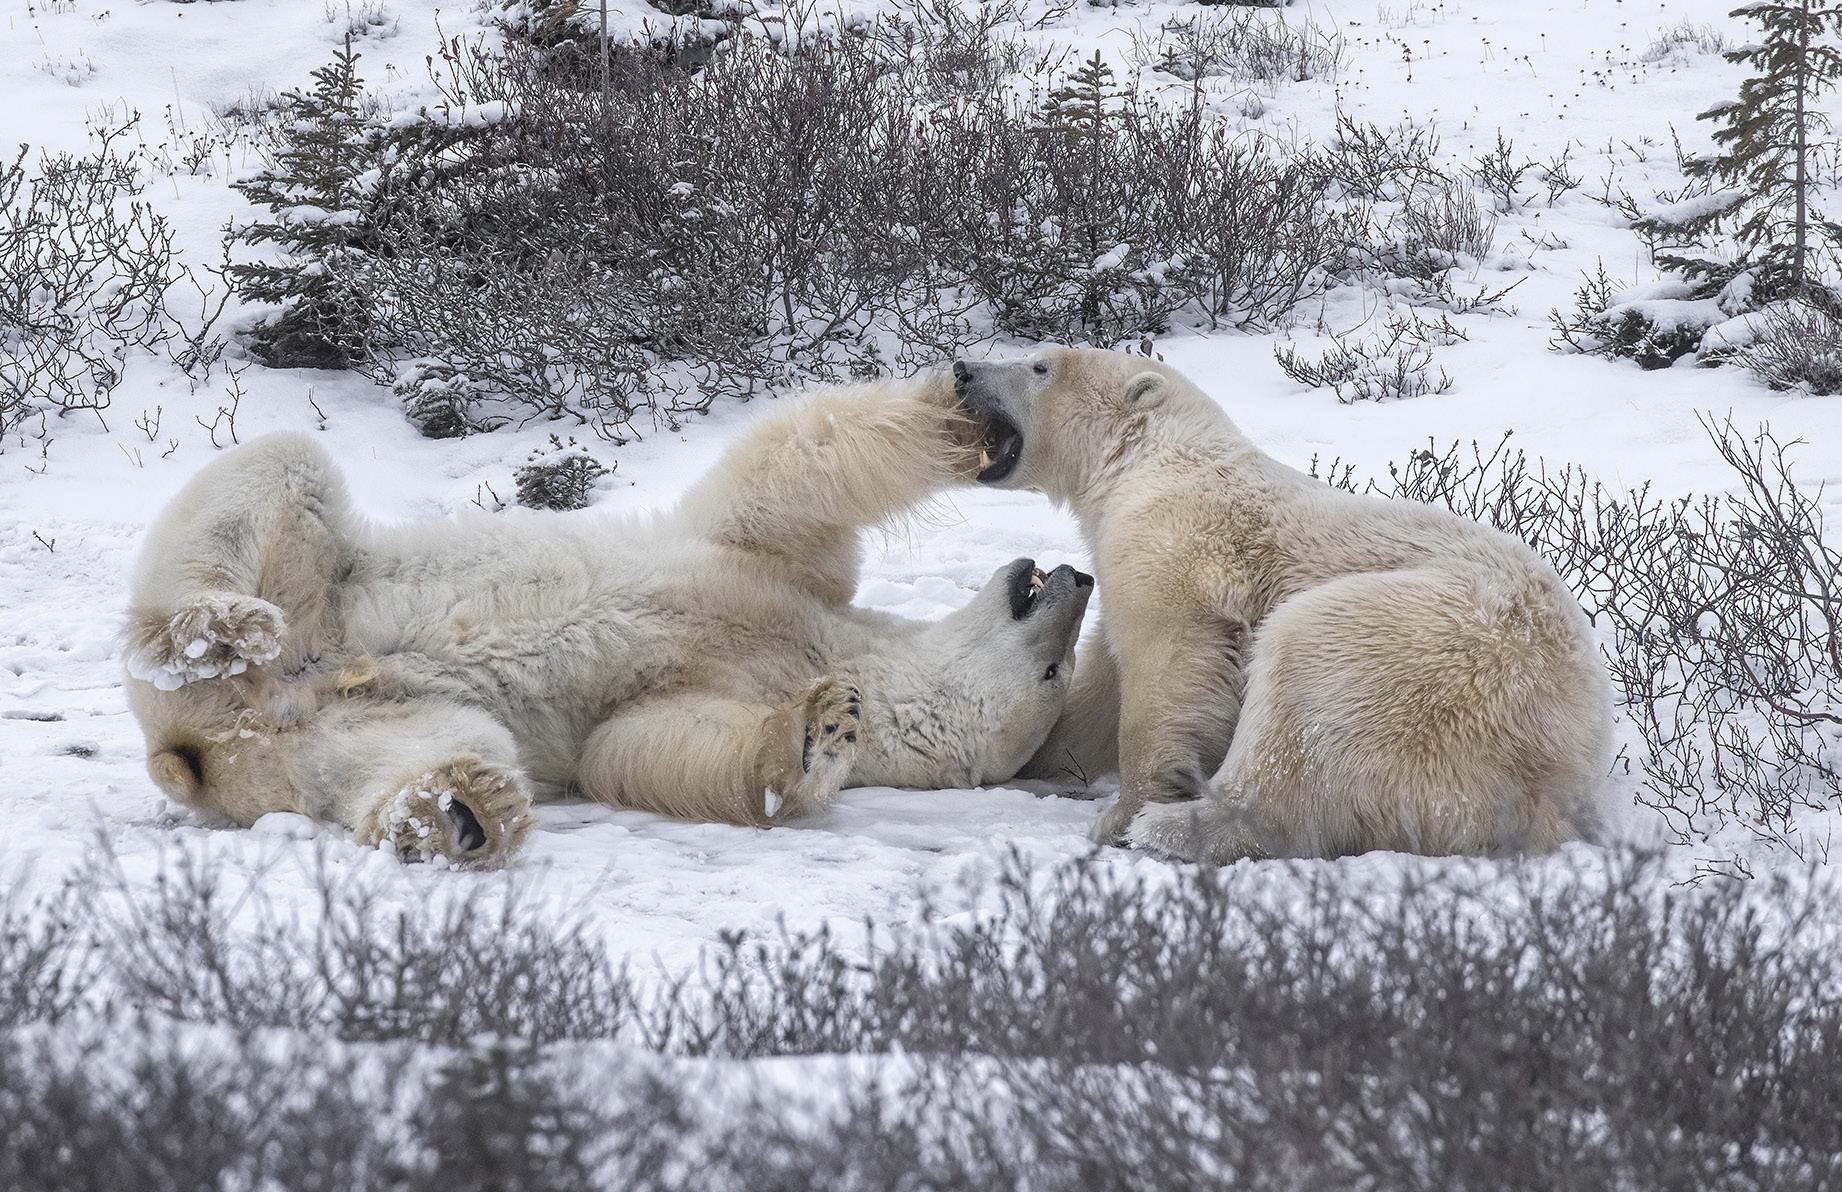
It’s a great thing to see polar bears sparing. On my last photo tour to the bears in Churchill, Canada, my group had a total of about two hours of watching these huge predators interact in the most amazing ways. It was wonderful . . . except for one thing.
We spotted the bears from a road above a shallow ravine, and the two bears were below us. That meant we were shooting down on them, and even though we were out of our vehicles, the downward angle bothered me a lot. This is why I avoid those horrible, monster tundra buggies for my tours. They are so high above the ground that you are forced to shoot at a downward angle, and this diminishes the bears. Seen from ground level, they are incredibly impressive. But photographing from an elevated perspective, their bulk and power seem to be compromised.

24
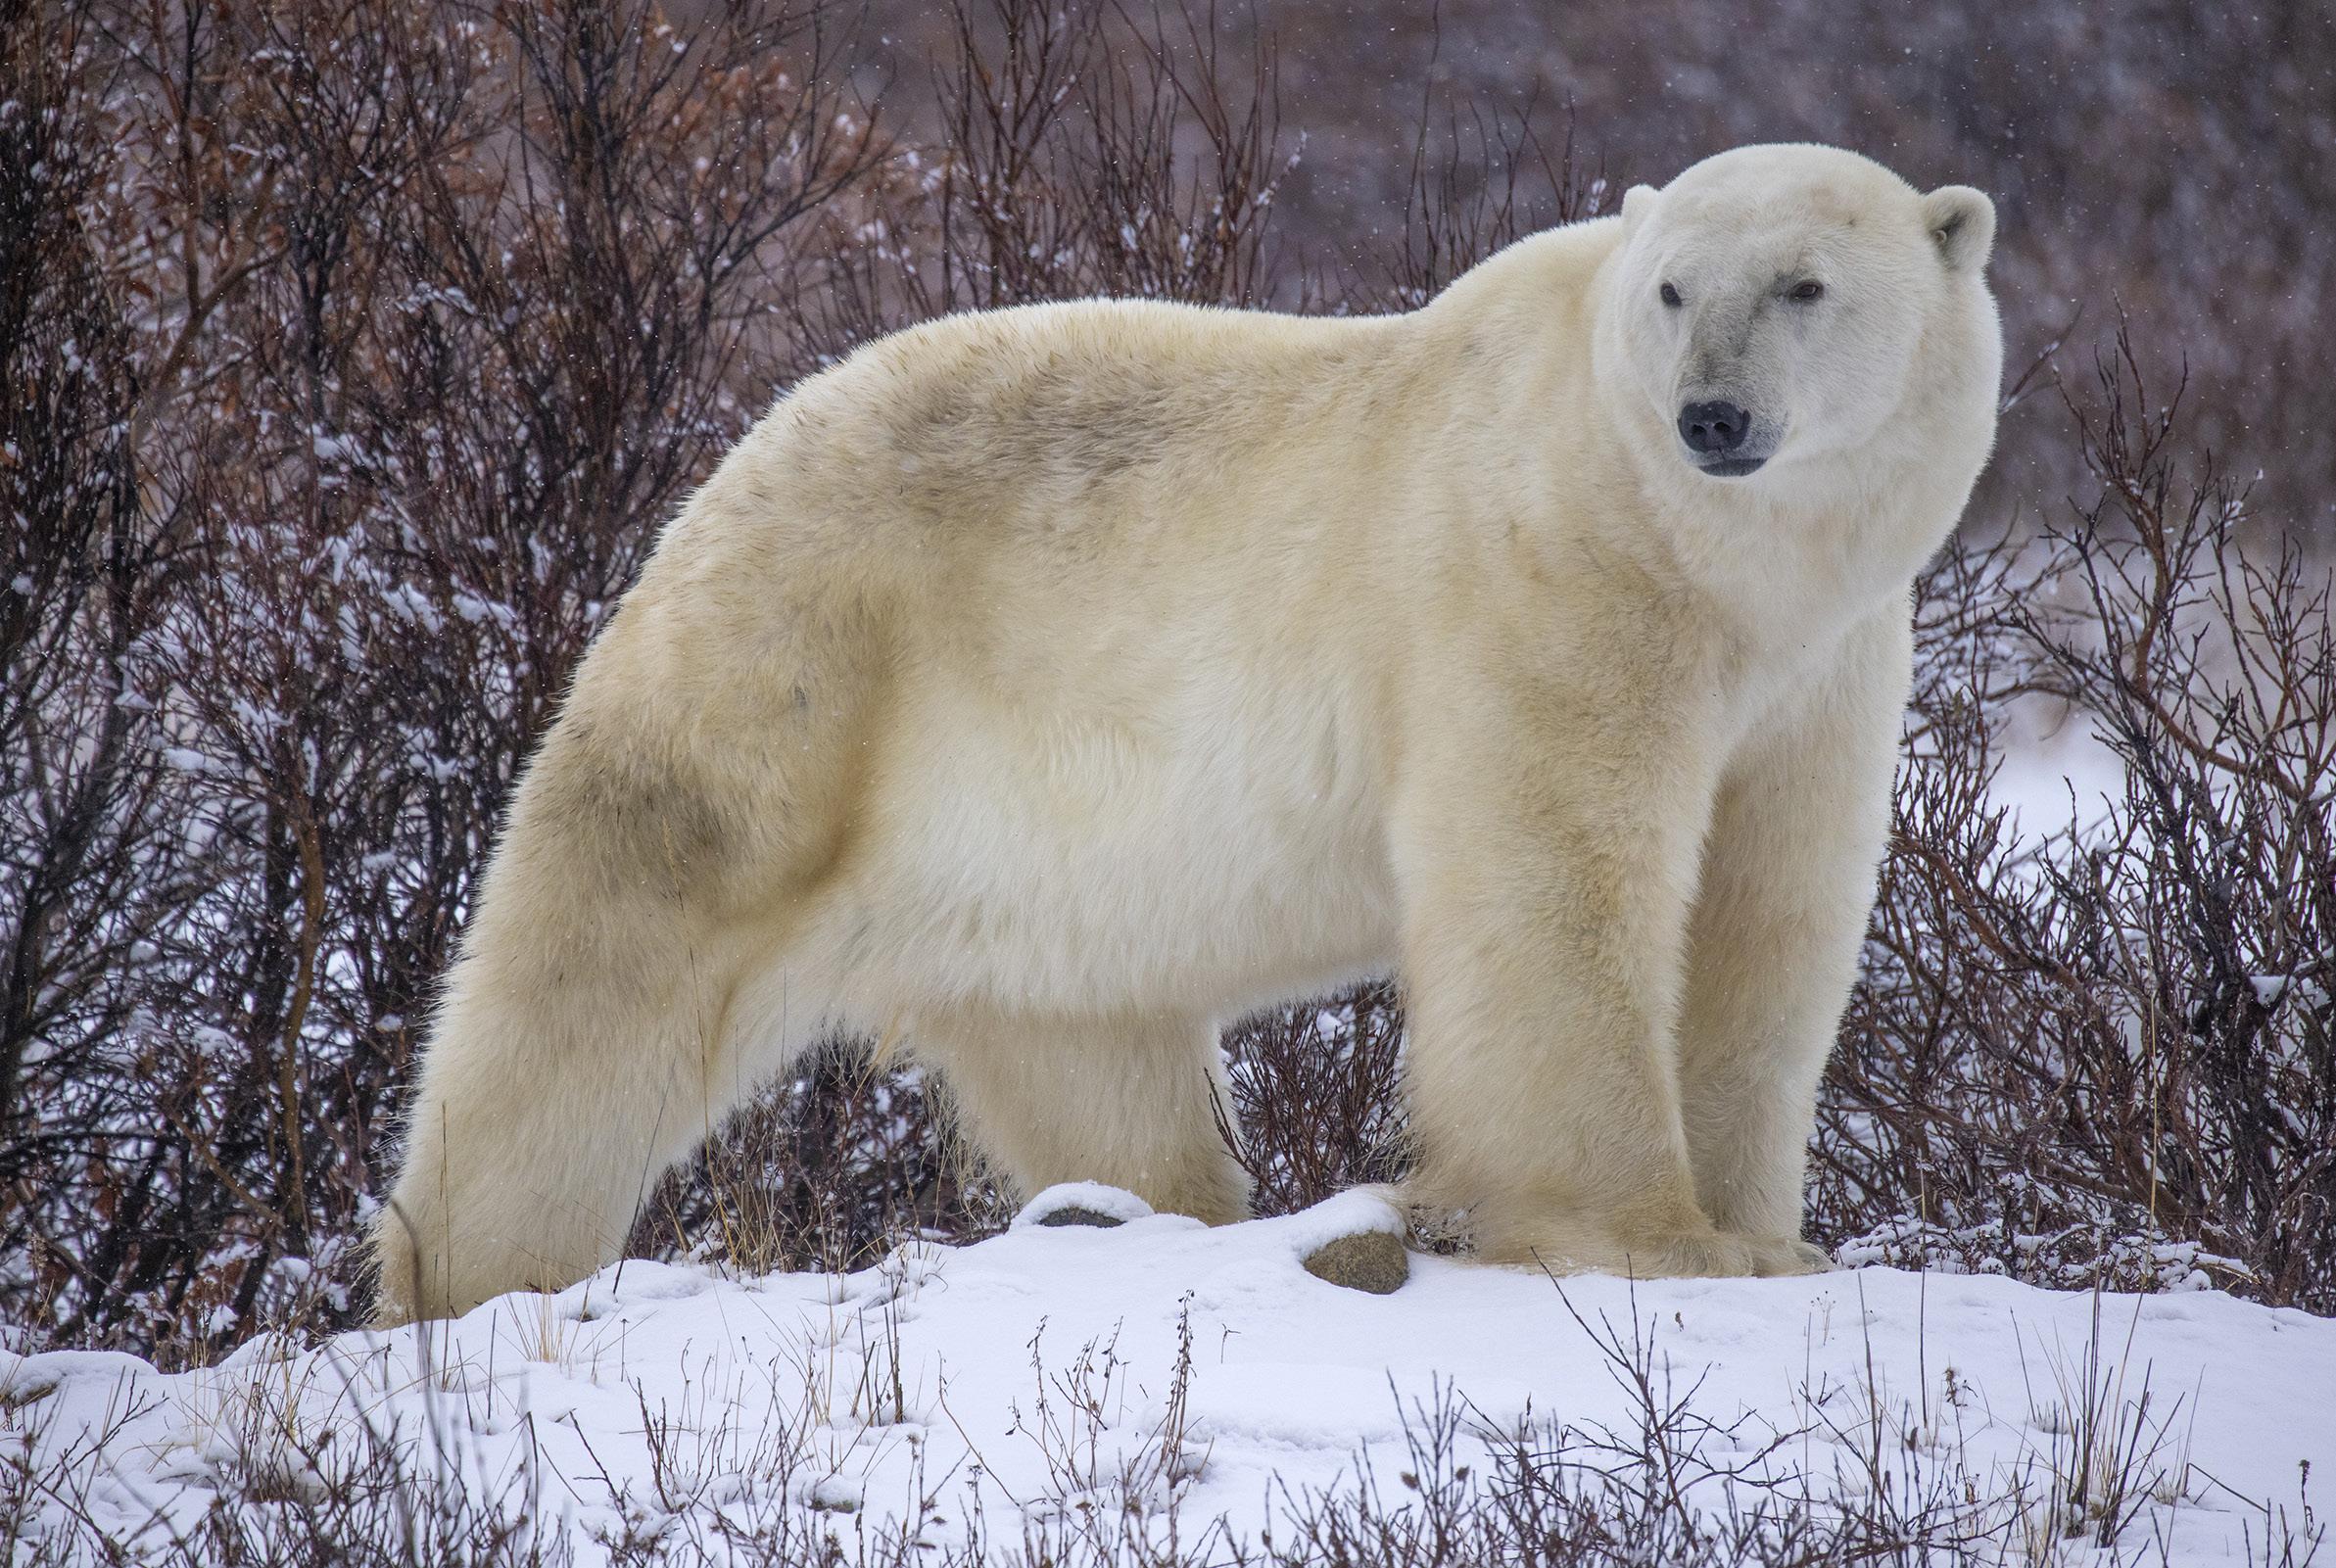
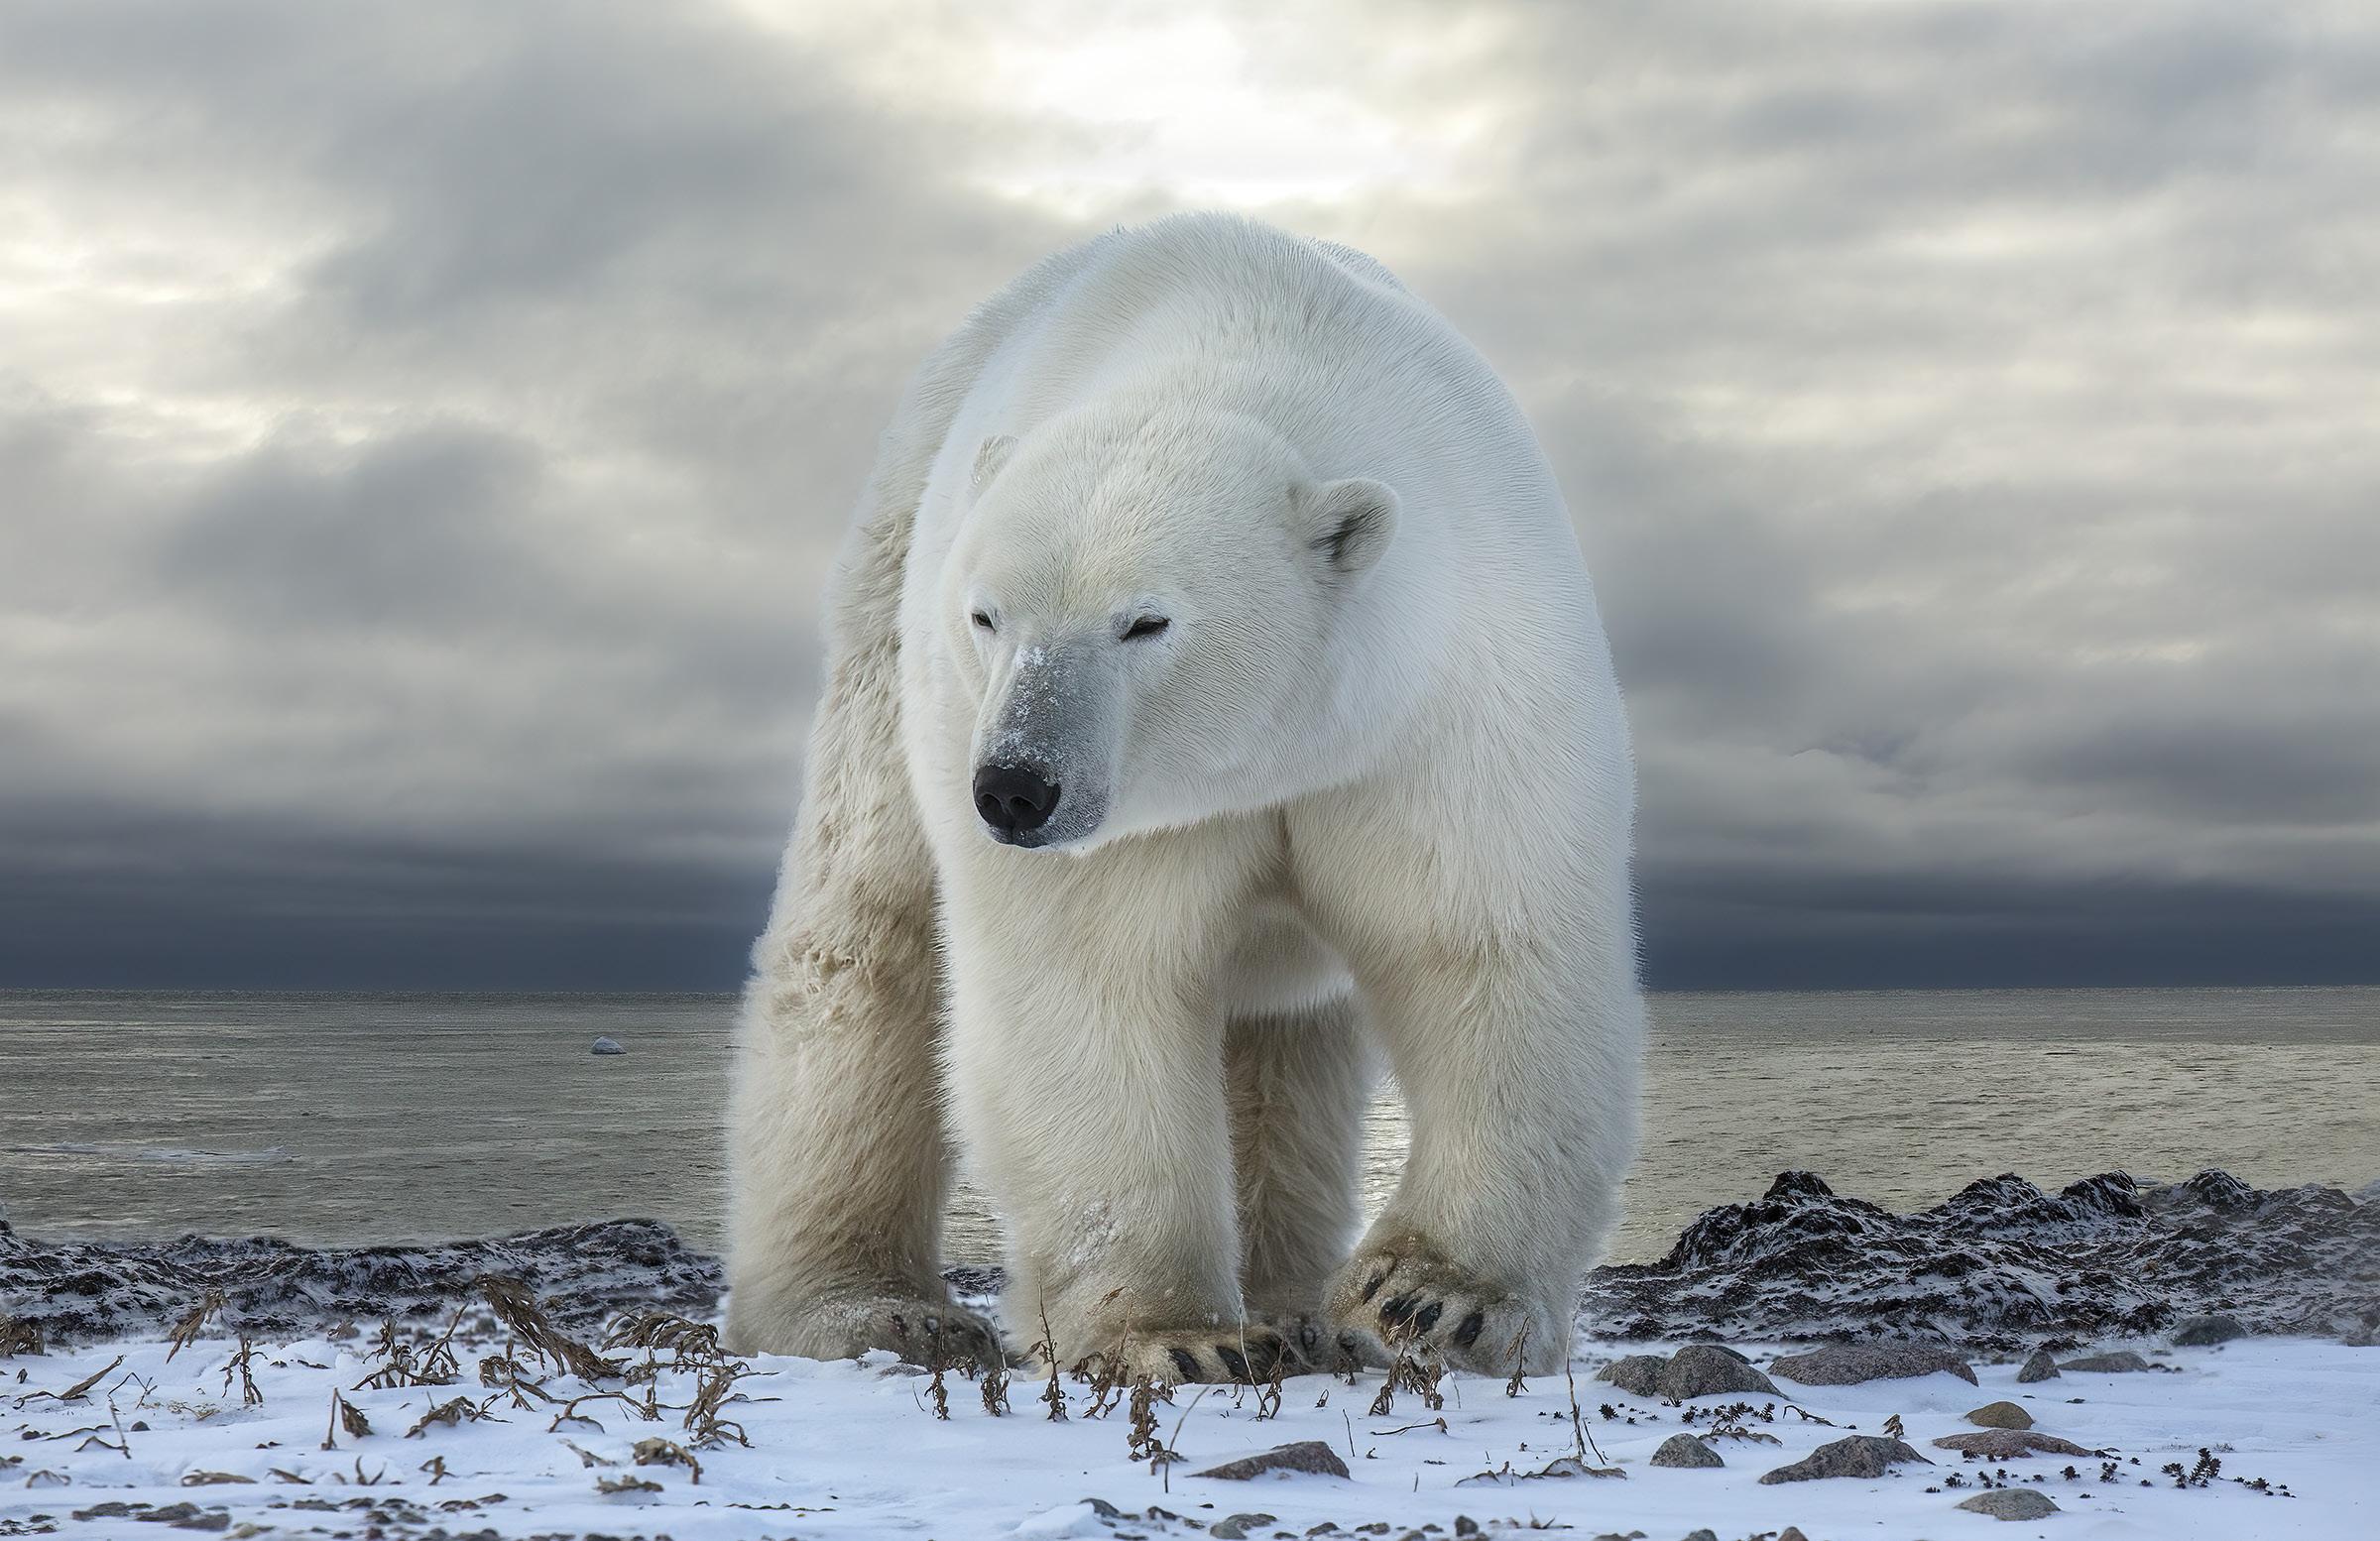
There was nothing I could do in this situation except take pictures and hope for the best. I don’t have any low angled comparison shots of the sparing bears to show you, but look at a portrait of a bear taken from a little below eye level, above. This shows how impressive these huge animals are when seen from an ideal perspective.
Eye-level perspectives are always great, but when the bear (or any animal) is on a small hill or some kind of rise, it is even more impressive. The animal seems to have greater stature, and that makes for sensational pictures.
My next polar bear photo tour is in November, and as always, the most exciting shots are the action pictures. That’s what we look for constantly. Both of these polar bear shots were taken with a 100-400mm lens with a 1.4x teleconverter. §

25
SHORT AND SWEET
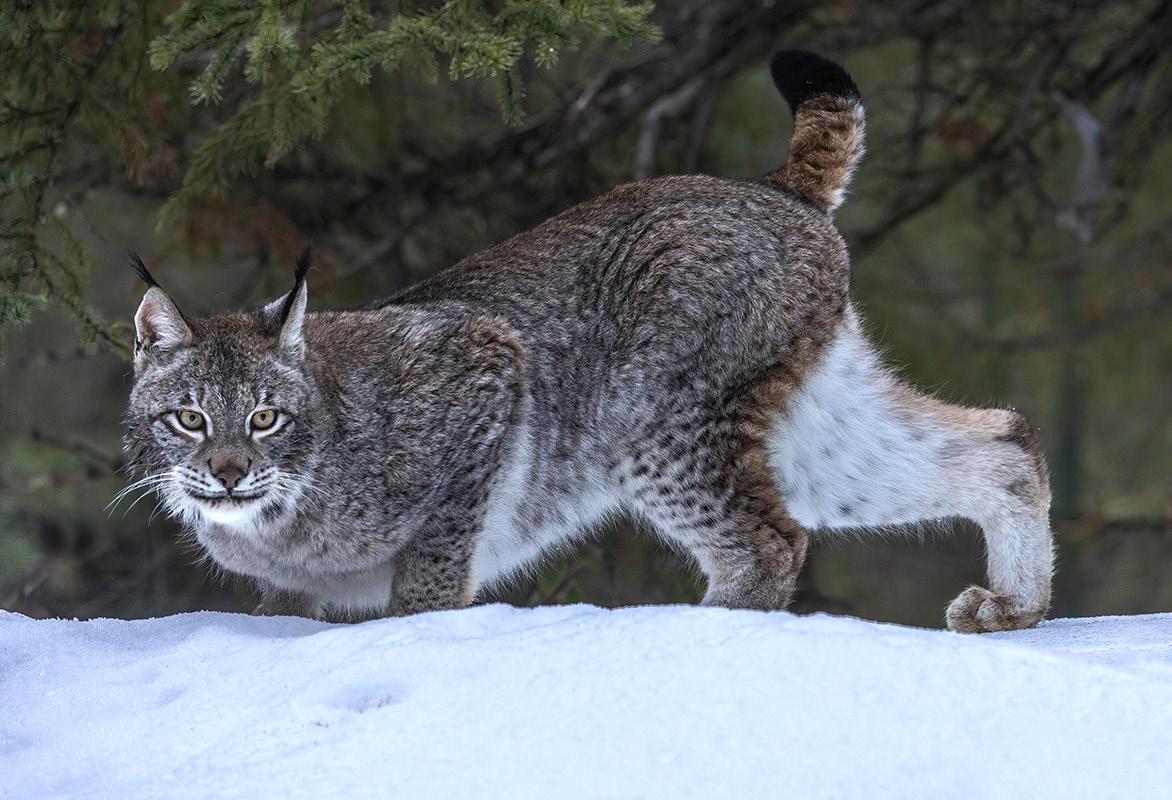
1. Besides attractive lighting, the success of a wildlife image often comes down to the body language of the animal. Crouching, head up and alert, legs positioned well -- these things are what you should look for when photographing wildlife. This Siberian lynx was photographed in my Winter Wildlife Workshop.

2. When shooting macro photography, depth of field is lost due to increased magnification. You can recover some of the lost DOF by making the back of the camera, i.e. the plane of the digital sensor, as parallel as possible to the subject as I did with this Sumatra python taken in my Frog and Reptile workshop.

3. Always pay attention to how your subject is being illuminated. Low angled sunlight is usually a great time to photograph outdoors because the angle is low and subjects are complimented by the light. This Icelandic horse had just turned toward the sunlight when I took the picture. The soft sidelighting is perfect.

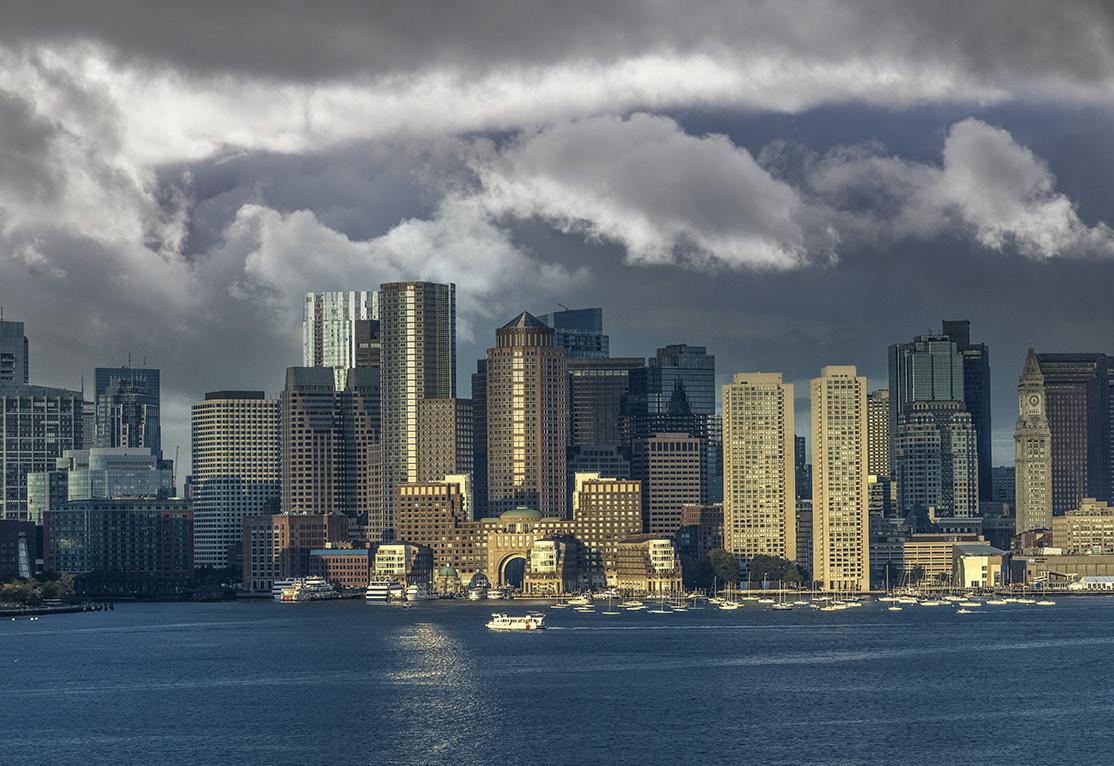
4. Shooting through clean glass doesn’t degrade images so that you’d notice the difference. This is the Boston skyline; I photographed it through the window of a Hyatt Regency, and when I enlarge it I can’t discern any loss of resolution. This was taken from the eighth floor, a shot I never could have taken from the ground. §

26
Coast of France

April 4 - 13, 2024

27
ASK JIM
Every month, Jim will answer a question from his online students, from people who participate in his tours and workshops, or from subscribers to this magazine. If you have a question you’d like Jim to answer, please drop him a note at photos@jimzuckerman.com.
Q: Jim . . . In your last issue you wrote about artificial intelligence imagery. As you stated, it’s not photography. Do you think this technology will ever replace actual picture taking? Aaron Kaplan, White Plains, New York
A: No, I don’t think it will. Cars didn’t replace horseback riding and photography didn’t replace artists who still enjoy applying oil to canvas. AI is just another creative tool we now have at our disposal. The response to AI, in my opinion, shouldn’t be fear or disdain. It should be intrigue, curiosity, and something to have fun with. §

28
Partial List of Photography Tours 2022 - 2024
WHITE HORSES, FRANCE

May 2023
MOROCCO

Aug/Sep 2023
ENGLAND and WALES

Sep 2023
HUDSON RIVER VALLEY
Oct 2023
POLAR BEARS/Canada

Nov 2023
WINTER WILDLIFE

Jan 2024
SNOWY OWLS

Jan 2024
CARNIVAL in VENICE

Feb. 2024
ABANDONED in GEORGIA

March 2024
HOLLAND & BELGIUM

Apr/May 2024
INDONESIA

Jul/Aug 2024
ICELAND DRONE TOUR

Aug 2024
For a complete list of all the photo tours/workshops Jim conducts, go to his website: www.jimzuckerman.com.

29
Polar Bears from Ground Level


November 9 - 16, 2023
Based in Churchill, Canada
30
j
Student Showcase
Each month, Jim features one student who took beautiful and inspiring images on one or more of his photography tours or workshops. It’s really fascinating how photographers see and compose such different images even though we may go to the same places. Everyone gets great photographs on Jim’s trips.


31 27 27
31
Bob Specker, Wildwood, Missouri Venice photo workshop, Holland and Belgium photo tour


32 33 31 29 29
32
Student Showcase, continued


3533 29 293129 31 33 35 33 37
33
Student Showcase, continued


33 33 31 31 33 34
34
Student Showcase, continued
ENGLAND & WALES PHOTO TOUR


Medieval ruins Quaint villages
Awesome architecture
September 12 - 22, 2023
35
HOLLAND & BELGIUM
April 24 to May 2, 2024

36


37 Nov. ‘12 Dec. ‘12 Jan. ‘13
on the past issues of P H O T O I N S I G H T S you would like to read. Feb. ‘13 Mar. ‘13 Apr. ‘13 May. ‘13 Jun. ‘13 Jul. 13 Aug. ‘13 Sept. ‘13 Feb. ‘14 Mar. ‘14 Apr. ‘14 May ‘14 Jun.‘14 Oct. ‘13 Nov. ‘13 Dec. ‘13 Jan. ‘14
Click


Sept. ‘14 Oct. ‘14 Nov. ‘14 Dec. ‘14 May ‘15 Jun ‘15 Jul.‘15 Aug.‘15 Sept.‘15 Oct.‘15 Nov. ‘15 Dec. ‘15 Jan. ‘16 Feb. ‘16 Jan. ‘15 Feb. ‘15 Mar. ‘15 Apr. ‘15 38
Click on the past issues of P H O T O I N S I G H T S you would like to read.


39 Mar. ‘16 Aug. ‘16 Jan. ‘17 Feb. ‘17 Mar. ‘17 Apr. ‘17 May ‘17 Jun ‘17 Jul. ‘17 Aug. ‘17 Sept. ‘17 Sept. ‘16 Oct. ‘16 Nov. ‘16 Dec. ‘16 Apr. ‘16 May ‘16 Jun ‘16 Jul. ‘16 Click on the past issues of P H O T O I N S I G H T S you would like to read. Oct. ‘17


O T O I N
I
Nov. ‘17 Dec. ‘17 Jan. ‘18 Feb. ‘18 Mar. ‘18 Apr. ‘18 May ‘18 Jun ‘18 Jul ‘18 Aug ‘18 Sept. ‘18 Oct. ‘18 Nov. ‘18 Dec. ‘18 Jan. ‘19 Feb. ‘19 Mar. ‘19 Apr. ‘19 May ‘19 Jun ‘19 40
Click on the past issues of P H
S
G H T S you would like to read.


41
O
O
Jul. ‘19 Jan. ‘20 Jun. ‘20 July ‘20 Aug. ‘20 Sept. ‘20 Oct. ‘20 Nov. ‘20 Dec. ‘20 Jan.. ‘21 Feb.. ‘21 Mar.. ‘21 Feb. ‘20 Mar. ‘20 Apr. ‘20 May ‘20 Aug. ‘19 Nov. ‘19 Dec. ‘19 Sept/Oct. ‘19
Click on the past issues of P H
T
I N S I G H T S you would like to read.


Apr.. ‘21 May ‘21 Jun.‘21 Jul.‘21 Aug.‘21 Sept. ‘21 Feb. ‘22 Mar. ‘22 Jul. ‘22 Aug. ‘22 Sept. ‘22 Oct. ‘22 Nov. ‘22 Apr. ‘22 May ‘22 Jun. ‘22 Oct. ‘21 Nov. ‘21 Dec. ‘21 Jan. ‘22 42


43 Dec. ‘22 Jan. ‘23 Feb. ‘23 Mar. ‘23 Apr. ‘23
1/3 focus law
Subject index for past Photo Insight issues
‘15
3D sphere Mar. ‘16
90 degree finder Mar. ‘13
Abstracts in soap Feb. ‘15
Abstracts, Shooting Mar ‘19
Aerial photography Jun. ‘13
Aerial photography
‘21
African safari May ‘16
Airplane windows
Alien landscapes
Anatomy of 8 photographs
Angled perspectives
Aperture vs. shutter speed
Aperture priority
Aurora Borealis
Auto white balance
Autofocus, when it fails
Autofocus failure
Autofocus failure
Autofocus challenges
Auto ISO
Auto White Balance
Autumn Foliage
Autumn Color
Autumn foliage photography
Back button focus
Backgrounds, wild
Backgrounds, busy
Backlighting
Backlighting
Birds in flight
Birds in flight
‘16
‘13
‘16
‘19
‘14
‘17
‘13
‘15
‘15
‘17
‘18
‘17
‘21
‘18
‘21
‘18
‘12
‘13
‘16
‘22
‘13
‘14
Birefringence May ‘18
Birds in flight Mar. ‘16
Birds in flight, camera settings
Bird Photography
Blacklight photography
Black velvet
Black and white conversions
Black and white solarization
Black and white with color
Black and white plus color
Blown highlights
Blue monochromes
‘23
‘19
‘21
‘14
Mar. ‘17
Sep. ‘17
Jan. ‘20
Mar. ‘23
Feb. ‘18
Jan. ‘22
Black Plexy Aug. ‘22
Blur, field
Blur technique
Bokeh
Nov. ‘18
Oct. ‘17
Jun. ‘15
Botanical gardens, shooting Apr. ‘22
Butterfly photography Jul. ‘14
Camera buying guidelines
Camera settings for landscapes
Dec. 21
Feb. ‘23
Camera setting priorities Jun. ‘17
Canon R5 Mar. ‘21
Capturing lightning Jun. ‘13
Capturing what you don’t see May ‘21
Catchlights Jul. ‘16
Changing perspective May ‘21
Cheap flash stand Apr. ‘13
Children photography Jun. ‘14
Choosing a telephoto lens Dec. ‘20
Chromatic aberration May ‘13
Chrome Dec. ‘18
Cityscapes Aug. ‘14
Cityscapes May ‘16
Clone tool, fixing an issue Sep. ‘17
Clone tool technique Jul. ‘20
Composites and Light Dec. ‘17
Compositing images Apr. ‘19
Compositing, 7 steps Jan. 22
Composition, different approach Jan. ‘15
Content-aware, New Aug. ‘20
Content aware move tool Jan. ‘23
Contrast vs. exposure Jul. ‘15
Converting to black and white Mar. ‘22
Correcting keystoning Jun. ‘21
Creating a star field Jan. ‘14
Creating Art out of Motion May ‘22
Creating a Sketch
Creative blurs
Dec. ‘17
Jan. ‘14
Dark backgrounds Nov. ‘19
Dawn photography
Jan. ‘17
Dawn photography Feb. ‘17
Dead center Jan. ‘13
Dealing with smog Oct. ‘16
Decay photography Sep. ‘15
Define Pattern Sep. ‘18
Depth of field Aug. ‘16
Depth of field confusion Jan. ‘20
Depth of field and distance Dec. ‘18
Depth of field and obliqueness May ‘21
Depth of field, shallow Apr. ‘20
Depth of field vs. sharpness Nov. ‘20
Double takes Apr. ‘20
Drone photography Mar. ‘23
Drop shadows Apr. ‘19
Dust, Minimizing Aug. ‘19
eBook, how to make Jan. ‘13
Eliminating people from photos Jun. ‘22
Embedded in Ice Oct. 17
Energy saving bulbs Sep. ‘14
Equidistance and telephoto lenses Apri. ‘23
Exploring the power visuals of AI Mar. ‘23
Exposing for the sun Sep. ‘16
Exposure, the sun Jul. ‘13
Exposure technique Sep. ‘13
Exposure, snow Jan. ‘14
Exposure triangle Nov. ‘14
Exposure, to the right Apr. ‘15
Exposure compensation Sep. ‘16
Exposure compensation Mar. ‘21
Extension tubes Dec. ‘13
Face sculpting Apr. ‘21
Face sculpting Feb. ‘22
Festival photography Sep. ‘20
Fill flash Sep. ‘13
Filter forge Feb. ‘13
Fireworks Jul. ‘13
Fireworks, Compositing Jun ‘20
Fisheye lenses May ‘13
Fisheye lenses Feb. ‘15
Fisheye fantasies Oct. 21
Flash backlighting May ‘15
Flash, balancing exposure Oct. ‘15
Flash, balancing off-camera Dec. ‘18
Flat art Sep. ‘16
Flexify 2 Mar. ‘20
Flood fixes problems Nov. ‘19
Jul.
Jan.
Mar.
Jan.
Jan.
Jan.
May ‘14
Sept.
Apr.
Dec.
Apr.
Aug.
Jan.
Apr.
Nov
Mar’
Sep.
Sep. ‘20
Oct.
Oct.
Nov.
Apr.
Apr.
Oct.
Aug.
Jan.
Jan.
Jun
Feb.
Mar.
44
Floral Portraits, Indoors
Subject index for past Photo Insight issues
‘21
Flowers May ‘15
Flower photography
Flowers in harsh light
Focus on the eyes
Focus points
Focus points
Focus stacking
Focus stacking
Focusing in the dark
Foreign Dancers, Photographing
Foreign models
Fractals, generating
Fractals
Framing
Freezing ultra action
From Terrible to Beautiful
Fun with paint
Fundamental ingredients
Fundamentals That Make Great Photos
Fun With Christmas Lights
Fun with Food
Graphic Design
Garish imagery
Getting money for used gear
Great subjects
Great ceilings & HDR Panos
Green screen
Ground level shooting
Grunge technique
Heavy Lens Debate, The
HDR, one photo
HDR at twilight
HDR, realistic
HDR, hand held
HDR, hand held
HDR, hand held
HDR panoramas
HDR, choosing the number of frames
‘21
‘16
‘20
‘15
‘20
‘17
‘19
‘16
17
‘13
‘13
‘19
‘17
‘17
‘19
‘16
‘13
‘19
‘21
‘20
Keystoning, correcting Aug. ‘15
L Bracket Feb. ‘18
L Bracket
Landscape photography
Landscape photography
Landscape photography
Feb. ‘21
Dec. ‘12
Apr. ‘14
Nov. ‘16
Layer Masks, The Power of Feb. ‘22
Light fall-off
Light painting
Lighting a face
Lightning photography
Liquify
Liquify Distortions
Feb. ‘14
Dec. ‘21
Oct. ‘13
May ‘20
Feb. ‘18
Sept/Oct. ‘19
Long lens portraits Oct. ‘18
Long Lenses for Flowers Jul. ‘20
Low light photography May ‘15
Luminar 4
Macro flash
Macro flash
Jan. ‘20
Nov. ‘12
Sep. ‘14
Macro flash Aug. ‘15
Macro flash
Macro photography and DOF
‘15
22
‘15
‘19
‘13
‘22
‘13
‘23
‘13
‘13
‘15
‘16
‘17
‘18
‘16
‘22
High wind Apr. ‘17
Highlights Apr. ‘14
Highlights, overexposed
Histograms, Why I Don’t Use
‘15
‘19
Histogram problems Apr. ‘20
Hotels with a view
Humidity
Hummingbird photography
Hyperfocal distance
Image resizing
‘20
‘13
‘13
‘13
‘18
Implying motion Sept.‘14
Impossible DOF Feb. ‘16
Impossible DOF Jan. ‘17
Indestructible camera bag
Infrared photography
Insane ISO settings
Interiors
iPad: Loading photos
iPhone photography, pros and cons
Jungle photography
Kaleidoscopic images
Kaleidoscopis images
‘14
‘14
‘22
‘15
‘22
Macro trick
Aug. ‘22
Feb. ‘22
May ‘19
Managing soft focus Jul. ‘21
Mannequin heads
Metering modes
Meters, How They Work
Apr. ‘16
Nov. ‘16
Jul. ‘18
Meters, when they fail Dec. ‘16
Metering situations, Impossible Jul. ‘19
Middle gray
Nov. ‘15
Minimizing dust on the sensor Nov. ‘21
Mirrors
Model shoot
Moon glow
Mosaics
Mundane to Ideal
Museum photography
Natural Light Portraits
Negative space
Jan. ‘19
Jan. ‘17
Oct. ‘16
Jun. ‘17
Nov. ‘19
Mar. ‘13
Aug. ‘21
Jan. ‘16
Neon edges on black Aug. ‘14
Neutral Density filters
Neutral Density filters and water
Night photography
Night Safaris
Night to Twilight
Noise reduction
Jun. ‘18
Mar. ‘22
Feb. ‘14
Jun. ‘18
Dec. ‘17
Feb. ‘17
Oil and water May ‘20
Optical infinity
Jun. ‘16
Organization of photos Mar. ‘18
Out of focus foregrounds Jan. ‘20
Paint abstracts
Paint abstracts
May ‘13
Aug. ‘21
Painting with light Sep. ‘15
Panning motion
Pano-Mirrors with a twist
Parades
Parallelism
Parallelism and DOF
Dec. ‘16
Jan. ‘18
Sep. ‘13
Nov. ‘19
Feb. ‘21
Perspective, Super Exaggeration of Dec. ‘21
Photo shsaring Apr. ‘23
45
Aug.
Apr
Jul.
Dec.
Mar.
Sep.
Mar.
Aug.
Oct.
Nov’
Jun.
Sep.
Jul.
May
May
Aug.
Oct.
Apr.
Jan.
Jan.
Jul.
Dec.
Jan.
Apr.
Jul.
Mar.
Oct.
Feb.
Feb.
Apr.
May
Jun.
Dec.
Nov
Jul.
Jun.
Jun.
Feb.
Jun
Mar.
Oct.
Apr.
Jul.
Aug.
Dec.
Jul.
Dec.
Oct.
Aug.‘17
Apr.
Dec. ‘14
Jan. ‘15
Aug. ‘20
Subject index for past Photo Insight issues
Photo terms Nov. ‘22
Photography to Art Dec. ‘17
Photography solutions Jan. ‘18
Photoshop, content Aware Nov. ‘12
Photoshop, sketch technique Apr. ‘13
Photoshop, replace background Apr. ‘13
Photoshop, actions palette Dec. ‘13
Photoshop, layer masks Feb. ‘13
Photoshop, the clone tool May ‘13
Photoshop, soft foliage Oct. ‘13
Photoshop, mixer brush tool Sept. ‘14
Photoshop, b & w with color Jun. ‘14
Photoshop, drop shadows Jul. ‘14
Photoshop, creating texture Feb. ‘14
Photoshop, face mirrors Feb. ‘14
Photoshop, liquify Mar. ‘14
Photoshop, face mirrors Aug. ‘14
Photoshop, digital spotlight Sep. ‘14
Photoshop, enlarge eyes Nov. ‘14
Photoshop, darken the periphery Dec. ‘14
Photoshop, mirror images Dec. ‘14
Photoshop, beam of light Apr. ‘15
Photoshop, polar coordinates Mar. ‘15
Photoshop, chrome May ‘15
Photoshop, actions palette Nov. ‘15
Photoshop, cut and paste Nov. ‘15
Photoshop, geometrics Oct. ‘15
Photoshop, plugins Oct. ‘15
Photoshop, multiple selections Apr. ‘16
Photoshop, sharpening Apr. ‘16
Photoshop, Flood plugin Apr. ‘16
Photoshop, Desaturation Aug. ‘16
Photoshop, making a composite Aug. ‘16
Photoshop new tool May ‘20
Photoshop, place one element behind Aug. ‘18
Photoshop, the pen tool Feb. ‘16
Photoshop, canvas size Jan. ‘16
Photoshop, using the earth Jun. ‘16
Photoshop, define patterns May ‘16
Photoshop, paste into Nov. ‘16
Photoshop, b & w with color Feb. ‘17
Photoshop, open a closed door Apr. ‘17
Photoshop, palettes May ‘17
Photoshop, My favorite plugins Jan. ‘20
Portrait options Jan. ‘19
Portrait techniques Nov. ‘15
Portraits Mar. ‘13
Portraits, mixed lighting Aug. ‘14
Portrait Professional Nov. ‘19
Portraits, Lens choice Sept/Oct. ‘19
Portraits, side lighting Sep. ‘17
Portraits, window light Mar. ‘15
Portraits, outdoors May ‘17
Post-processing checklist Dec. ‘13
Post-processing: Contrast Aug. ’17
Practicing graphic design, Part I Dec. ‘22
Practicing graphic design, Park II Jan. ‘23
Practicing graphic design, Part III Feb. ‘23
Predictive Focus Sep. ‘18
Problem/solution Apr. ‘17
Problem Solving in Photoshop May ‘22
Problem with cruises Jan. ‘18
Protecting extremeities from the cold Dec. ‘22
Protecting highlights
Dec. ‘12
Puppies Jan. ‘15
Puppy photography Feb. ’18
Reflections
Reshaping faces
Feb. ‘13
Oct. ‘22
Restoring old photos Jun ‘20
Ring flash, advantages Jul. ‘21
Ring flash versatility Oct. ‘21
Rule of Odds
May ‘22
Safari May ‘13
Safari strategies Jul. ‘15
Seeing as the lens does
Seeking Cool Snow Photos
Selective filtering
Selective focus
Self-critiques
Self-critiques
Self-critiques
Sensor cleaning
Nov. ‘14
Jan. ‘21
Mar. ‘18
Jun. ‘15
Jul. ‘13
Oct. ‘13
Nov. ‘20
Jun. ‘18
Sepia and dark contrast Jun. ‘15
Shade May ‘14
Shady side
Jun. ‘18
Shadows, Paying Attention to Mar. ‘18
Sharpness problems
Mar. ‘14
Shooting in Inclement Weather Nov. ‘22
Shooting through wire mesh
Sept. ‘14
Shooting into the light Jun ‘20
Silhouettes
Jun. ‘13
Silhouettes, How to make Apr. ‘22
Silhouettes, Exposing for Sept/Oct. ‘19
Silvered landscapes Mar. ‘20
Sketch, How to Make
Jun ‘19
Skies make or break a picture Aug. ‘21
Sky replacement
Nov. ‘20
Sky replacement strategies Aug. ‘22
Snow exposure
Snow exposure
Soft light
Nov ‘17
Nov. ‘19
Jan. ‘13
Smart phone photography May ‘19
Stained glass Mar. ‘17
Star photography Jul. ‘16
Star photography and noise Jan. ‘18
Stock photography Sep. ‘14
Sunrise & sunset Jan. ‘19
Tamron 150-600mm Apr. ‘14
Ten reasons photos are not sharp Jan. ‘19
Texture, Adding Mar ‘19
Texture Mapping in 3D Jul. ‘21
Topaz AI Gigapixel Mar ‘19
Topaz glow Jan. ‘15
Topaz glow Sep. ‘17
Topaz Impression Sep. ‘15
Topaz Remask 5 Oct. ‘17
Topaz Simplify 4 Dec. ‘12
Topaz simplify 4 Jun. ‘14
Topaz Studio Apr. ‘18
46
Subject index for past Photo Insight issues
Translucency & backlighting
Travel photography
Travel portraits
Travel tips
Travel photographer’s guide
Tweaking exposure on the fly
Twilight photography in the rain
Tripods
Two subject sharp rule
Two subject focus rule
Two subject focus rule
Urban heights
Ultra distortion
Unusual Panos
Upside Down Reflections
Warm fingers in winter
Water drop collisions
‘13
‘17
‘23
What NOT to do in photography
White on White
White vignette
White balance
White balance, custom
Wide angle conundrum
Wide angle lenses
Wide angle portraits
Wide angle lenses
Wide angle lenses: Outside the Box
Wide angle keystoning
Wildlife photos with wide angles
Window light
Window light portraits
Window frames
Winter photography
‘21
‘18 When You Needed a Zoom
‘15
Quiz answers
90% - 100%: You could have been a pro
80%: Your glasses probably need a new prescription
70%: Don’t quit your day job
60%: You should really be using an iPhone
47
Nov.
‘18
Feb.
Mar. ‘14
Apr. ‘14
Jun.
Apr.
Apr.
‘19
Mar.
‘18
May
‘14
Jan.
‘20
Jun.
‘21
Jun.
‘21
May
‘18
Nov.
‘22w
Aug.
‘21
Nov.
‘15
May
‘18
Aug.
Apr.
Dec. ‘20
Aug.
Feb.
‘15
Mar.
‘16
May
‘19
Mar.
‘13
Nov.
‘14
Jun.
‘17
Jun.
‘22w
Nov
‘17
Mar.
‘15
Dec.
‘15
Aug.
‘18
Feb.
‘16
Dec.
May
‘12 Winter bones
‘13
Dec. ‘15
Nov. ‘18
Jul. ‘18 Workflow May ‘13
Winter photography
Winter photography
Wire Mesh, Shooting Through
1. b 2. b 3. a 4. d 5. a 6. b 7. c & d 8. a 9. b 10. b
Your score
PHOTO INSIGHTS®
published by Jim Zuckerman
All rights reserved
© Jim Zuckerman 2023
email: photos@jimzuckerman.com
Edited
by:
Donald Moore
This page: Carnival in Venice -- in front of the Bridge of Sighs.

48


 photos@jimzuckerman.com www.jimzuckerman.com


