19 minute read
Feature
Non-Destructive Testing
NDT has been a catalyst in the progress of industry. It can be applied at all stages of material, equipment and plant lifecycle, from construction, through to operation and maintenance.
Non-Destructive Testing (NDT) is the practice of examining, testing and analysing materials, equipment or plants using methods which do not disrupt or alter the function of the object undergoing testing. As such, NDT enables the testing of the usefulness, compliance, safety and efficiency of an object while still allowing it to operate.
NDT is applicable to all stages of material, equipment, and plant lifecycle, including its construction, operation and maintenance. Because of this, NDT has been a catalyst of progress to countless sectors and industries
Capabilities of NDT
The capabilities of NDT are primarily its ability to detect differences and discontinuities in the characteristics of materials, equipment, components and plants. While destructive testing is able to test ductility, yield, fatigue strength and ultimate fatigue strength, it is not able to identify discontinuities and differences.
Furthermore, NDT is able to test the joining and bonding of material during the construction and start-up phases, which destructive testing is simply unable to do.
Benefits of NDT
There are numerous benefits of NDT, but the most obvious is its efficiency and cost-effectiveness. Not only is this because the equipment, material or plant does not have to be destroyed – and therefore does not have to be replaced – but also because NDT can often detect and identify inefficiencies in industrial equipment and problems before they worsen.
Furthermore, NDT allows comprehensive testing, in that it is able to test the entire scope of the materials, equipment or plant rather than just a batch or sample.
Further benefits of NDT include: - Increased reliability of performance - Compliance with technical requirements and protocols - Complete control throughout the manufacturing process - Increased time efficiency through the ability to set up preventative maintenance schedules - Maintenance of consistent levels of quality are maintained - Ensured safety is ensured through wide-scale testing ability
Methods of NDT
profilometry, and laser shearography. The first method, holographic testing, uses a laser to detect changes in the surface of a material which has been exposed to heat, pressure or vibration. These results are compared to an undamaged surface in order to detect defects.
Laser profilometry, on the other hand, uses a highspeed rotating laser light source and miniature optics to detect erosion, corrosion, pitting and cracks, by producing a 3D image which is able to identify changes.
Finally, laser shearography uses laser light to create images of before and after a surface is exposed to stress. These images are then compared to detect any defects or damage.
Other methods of NDT include: - Acoustic emission testing - Electromagnetic testing - Guided wave testing - Leak testing - Magnetic flux leakage - Magnetic particle testing - Radiographic testing - Ultrasonic testing - Vibration analysis - Visual testing
Examples of NDT
NDT is used in countless sectors and industries. One example of its real-life application is in a manufacturing plant that has storage tanks or pressure vessels. It is likely that this kind of plant, would regularly undergo NDT in order to ensure there are no leaks, corrosion or any possibility of explosion.
In this scenario, NDT can be performed by quickly altering the pressure inside the vessel or applying heat, as probes would be able to detect sounds which indicate erosion or any leaks. The computer attached to the probes would pinpoint the location of any leaks or corrosion, and a technician would then be able to evaluate whether it is a minor or major problem.
A Brief History of NDT
The precise beginnings of NDT are unknown; however, it has certainly been around, in some form, for thousands of years. Records detailing early uses of NDT date as far back as the ancient Romans, who used flour and oil to detect cracks in marble slabs. Furthermore, early blacksmiths and bell-makers also used a primitive form of NDT when listening to the ringing sound metals would make when being hammered into shape.
A more modern form of NDT was recorded in 1868 when S.H. Saxby, an Englishman, used the magnetic characteristics of a compass to locate cracks in gun barrels.
that the application of NDT in the industrial sector became widespread. X-rays were first invented by a German physicist in 1895 – an invention which won him the first ever Nobel Prize. While X-rays were widely used in medicine from their inception, it was not until the 1930s that they were applied industrially. This was thanks to Richard Seifert, who developed higher energy medical equipment, expanding its use with the cooperation of welding institutes.
Magnetic particle crack detection was introduced into the industrial sector by Alfred Victor de Forest and Foster Baird Doane in 1929. In 1934 they began Magnaflux, a company that manufactured NDT products, and which still exists today.
World War II was a major catalyst in the recognition of NDT as a significant emerging technology. In 1941, the American Radium and X-Ray Society was formed – known today as ASNT – which helped to increase the visibility of NDT in the industrial sector.
From the 1950s onwards, there has been an explosion of developments in the NDT industry, and the benefits of NDT are now widely recognised. As its applications and methods continue to develop, it will undoubtedly continue to benefit a wide range of industries.
The Outlook for the NDT Industry
According to Mordor Intelligence, the NDT market was valued at AU$24.6 billion in 2019 and is expected to reach a value of AU$36.3 billion by 2025, at a Compound Annual Growth Rate (CAGR) of 6.7% during the forecast period 2020-2025.
For instance, according to the British Institute of Non-Destructive Testing, every day more than 25,000 inspections are carried out in factories and on-site, in the UK, to detect defects and damage in a huge range of products, plant, and structures; it is estimated that there are more than 120,000 inspectors operating worldwide.
With the increase in automation in the industrial manufacturing and

infrastructure sectors, there has been a substantial hike in the demand for flaw detection related to cracks, porosity, manufacturing disorders, and so on. Therefore, adherence to industrial safety norms is a significant factor behind the growth of the NDT market.
Moreover, several governmental agencies and regional bodies, such as the American Society of Mechanical Engineers (ASME) and the International Organisation for Standardisation (ISO), have been instituted across the world to take stringent measures for assuring the safety of instruments and overseeing of engineering services testing. This is important for gaining clearances and certificates from concerned authorities. This creates a positive impact on the NDT market globally.
In addition, the market is witnessing a growing demand for NDT inspection services from the power generation industry, high growth in emerging countries, and technological improvement is creating new application areas for NDT equipment.
Major Players in the NDT Industry
Advanced Technology Testing and Research (ATTAR)

ATTAR was founded in 1986 in order to conduct materials testing and research, using the most advanced techniques available, and to provide NDT training to industry throughout Australia. Since its inception, ATTAR’s expertise has grown to encompass an expansive array of nondestructive testing, failure analysis and forensic engineering, risk assessment services, specialist testing of structures and vessels, and the provision of expert witness services.
ATTAR is committed to providing the highest standard of excellence in NDT training. As such, it is an Authorised Qualifying Body (AQB) for AINDT and BINDT and an industry leader, providing expert NDT training, such as the provision of private and customised courses, as well as consulting, auditing and specialised Level 3 services. Level 3 services can help to ensure compliance with national and international Standards, and guarantees techniques, methods and procedures are current, reliable, efficient and best practice.
The NDT courses offered by ATTAR include: Eddy current; In-service inspection of air receivers; In-service inspection of pressure vessels; Introduction to NDT techniques; Liquid penetration; Magnetic flux leakage; Materials technology; Phased array ultrasonics; Post weld heat treatment; Radiography; Radiation safety; and Visual and optical inspection.
Laboratories for Materials Advanced Testing Services (LMATS)
LMATS offer advanced NDT methods and provide customers with an extensive range of methods for an array of applications including weld inspections, the detection of hidden cracks, voids and porosity, as well as internal irregularities in metals, composites, plastics and ceramics. These techniques are fast, accurate and traceable. Accredited in accordance with ISO/IEC 17025 by NATA, Australia, LMATS is comprised of an exceptionally experienced team of metallurgists, engineers, inspectors and NDT personnel. The combination of these professionals’ skills and knowledge allows their clients to benefit from a cost-effective inspection regime that complies with regulatory requirements.
LMATS uses complementing NDT technology and methods to overcome the limitations of using a single NDT technology. This contributes to the increased life of existing assets and helps to avoid the use of new replacement parts.
The unique benefits of the techniques offered by LMATS include: - Accurate defect sizing in three dimensions - Inspection of components with complex geometry - Allowing permanent traceable records for future monitoring - Ease of data review of complex inspections - Analysis of complex evaluation and monitoring
LMATS is able to service a wide variety of industries, including, but not limited to: petro- chemical, gas, oil, energy generation, transport, aerospace, marine, manufacturing and print.
LMATS processes and techniques include: - Visual inspection and boroscopy - Radiographic testing - Ultrasonic testing - Eddy current testing - Magnetic particle testing - Dye penetrant testing - Ferrite measurement - Leak testing - Heat exchanger tube leakage testing - Vacuum box testing - Hardness testing - Material identification - Contamination testing - Concrete slab inspection - Anchors load testing - Phased array ultrasonic testing - Time of flight diffraction - Internal rotary inspection system
Stork
Among the vast capabilities of Stork, they are able to offer reliable NDT services. With an extensive and global track record, across multiple onshore and offshore sectors, their industry experts use their experience and knowledge to ensure that clients’ assets are in compliance with all applicable standards and regulations.
Using state-of-the-art equipment and proven techniques, Stork’s highly competent and qualified pool of technicians provide a high level of asset integrity assurance, efficiently and accurately. As well as carrying out inspection work, they are also able to provide technical and advisory support to maximise the integrity and maintenance programs of a client’s assets.
The NDT techniques and services offered by Stork include: - Visual inspection and metrology - Magnetic particle inspection - Dye penetration inspection - Ultrasonic testing - Eddy current inspection - Radiography (digital, computed and conventional) - Positive material identification testing and holiday testing
Additionally, Stork offer advanced techniques using leading technology to enhance their already-extensive conventional NDT services. These advanced inspection capabilities are able to deliver next-level technical solutions for accurate and repeatable detection of manufacturing and in-service defects.
These advanced inspection techniques include: - Automated ultrasonic testing - Multi-SKIP - Phased array inspection (weldments and corrosion mapping) - Time of flight diffraction - Internal rotary inspection system - Remote field eddy current - Pulsed eddy current testing
First founded in 1963, AINDT is a leading Australian technological society with over 1,000 members.
It has achieved international recognition, and has obtained third-party JAS-ANZ accreditation, for its certification scheme that meets the requirements of ISO 17024 Conformity assessment — General requirements for bodies operating certification of persons.
As such, AINDT is the national certification body for NDT personnel, providing certification in accordance with AS 3998 and ISO 9712 Non-destructive testing - Qualification and certification of personnel, as well as ISO 18436 Condition monitoring and diagnostics of machines — Requirements for qualification and assessment of personnel.
Moreover, AINDT has played a significant role in the harmonisation of NDT personnel certification schemes, in the southeast Asian region, through the International Atomic Energy Agency’s Regional Cooperation Agreement (RCA).
Furthermore, AINDT plays a major role in the development and updating of NDT Standards through its representation on relevant Australian Standards industry panels.

Sonomatic
Sonomatic’s expertise lies in ultrasonic inspection, design development and application, and is applied to a vast array of industries including defence, power generation, and oil and gas. Sonomatic has become a leader in this specialised field, thanks to its capabilities of developing software, equipment, scanners and bespoke developments, combined with its engineers’ expertise.
Sonomatic is a world leader in certain NDT techniques, such as time of flight diffraction (TOFD), and continues to design and develop innovative inspection techniques which can then be put into practice by a team of experienced field engineers.
As a member of the Industrial Rope Access Training Association (IRATA), Sonomatic is able to offer both conventional and advanced NDT techniques, utilising the company’s professional and experienced inspection personnel.
Australian Lab Services (ALS)
ALS began as a small geochemistry lab in 1976, in Brisbane, but has since expanded to offer a wide array of services, including NDT. ALS’s broad capabilities regarding NDT techniques, which are newly researched, acquired and implemented on a regular basis, ensures the efficacy of their service. Furthermore, their quality is maintained through independently certified compliance with ISO 9001, ISO 17025 and NATA.
Through the combination of ALS’s NDT expertise and modern access solutions, such as rope access and remote pilot aircraft, they are able to guarantee efficient and effective inspections.
The advanced NDT techniques offered by ALS include: - Digital radiography - Phased array - Time and flight diffraction - Electromagnetic acoustic transducers - Long range ultrasonic testing - Short range guided wave - Internal rotating inspection systems - RFT bracelet corrosion detection - Pulsed eddy current - Saturated low frequency eddy current
NDT Equipment Suppliers AXT AXT is a leading Australian supplier of high technology scientific equipment for sample preparation and analysis. Used for both academic and industrial applications, AXT supplies internationally renowned brands and is able to offer complete and comprehensive solution packages from their product portfolios.
Russell Fraser Sales Russel Fraser Sales (RFS) has been serving Australia’s NDT industry since 1993. They have established their position as a trusted supplier by staying up to date with the changing needs within the industry, as well as offering their customers the opportunity to see and try new NDT technologies before committing to a sale.
NDT Equipment Sales
Having been in business for over 26 years, NDT Equipment Sales has built strong and lasting relationships with clients and suppliers, which has led to the introduction of innovative NDT products. Their extensive range of supplies and equipment include: gamma equipment, accessories and isotopes; ultrasonic, X-ray and eddy current equipment; and magnetic particle and dye penetrant testing equipment.
IMPROVE YOUR SURFACES’ PERFORMANCE WITH MICRO COMBI TESTER MCT 3

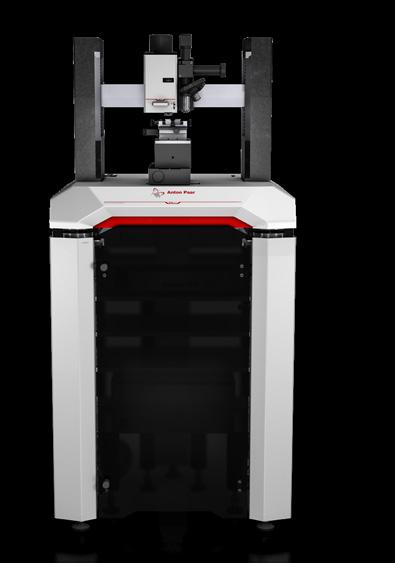
- Three mechanical surface testing techniques in one device: microindentation, micro scratch, and micro wear
- Highly affordable all-round instrument
Ready for fast measurements and high throughput
Positive Metals Identification PMI – XRF vs LIBS Source: Dr. Cameron Chai, and Peter Airey, AXT Pty Ltd
Handheld XRFs have been a mainstay in the PMI sector for a long time. In recent years, increases in performance have extended the reach of these instruments, while handheld LIBS analysers have also raised their heads and demonstrated that they have a place in the industry. Handheld instruments have become very popular due to their small form factor, portability and ability to rapidly identify materials non-destructively, without dragging them back to the lab.
PMI is a critical aspect of asset management in an array of industries, such as oil and gas refining, chemical processing, power generation, aerospace and marine. PMI is also used in manufacturing, to ensure the right alloy stock is being used for the application in question.
The question is often asked, which technique is better? In this article we will look at both technologies and instruments to see how they best fit your application.
Handheld XRF
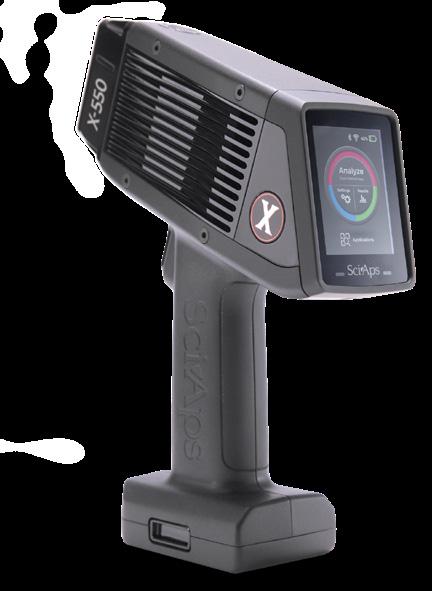
The first commercially available handheld XRF’s became available in 1994, freeing technicians and geologists from the confines of their labs, which housed larger benchtop and floor standing systems. Since then, the systems have become smaller, lighter, faster, with longer battery life and new capabilities adding to their usability. There are now a vast number of manufacturers of these instruments. The newest system on the market is the SciAps X-550, which continues to raise the bar in terms of performance and features, as well as having a slim form factor so it can access tighter spaces.
Handheld XRFs work in a similar way to their larger brethren, exposing samples to a high energy X-ray beam which ionises the sample by dislodging electrons from low energy orbitals, (typically K and L orbitals). These vacancies are filled by electrons from higher energy outer orbitals. This movement results in the release of X-rays of a given wavelength, which are characteristic of the element and atom affected. Thus, analysis of the resultant spectrum, by an energy dispersive X-ray spectrometer, enables the identification of the elements present. The intensity of the resultant peaks is proportional to their abundance, making quantitative analyses possible and hence identification of the alloy in question.

These instruments can effectively measure all elements from magnesium to uranium. They have deservedly grown a reputation for being able to accurately analyse most metals and alloys, especially those containing high levels of alloying transition metals or refractory metals e.g. stainless steel, titanium, nickel, cobalt based alloys, as well as special alloys based on zirconium, tungsten or tantalum. More recent systems, such as the X-550, are now able to quickly and accurately analyse aluminium and magnesium alloys, where older systems struggled to analyse such alloys in reasonable timeframes.
Light elements have been traditionally difficult to measure using XRF, and more so, portable XRF. This is because the fluorescent X-rays, generated by said light elements, have such low energy that they struggle to travel through the air and reach the detector. The development of the silicon drift detector (SDD) has alleviated this limitation. However, elements lighter than magnesium are still beyond the capabilities of handheld XRFs.
Handheld LIBS
While the LIBS (Laser Induced Breakdown Spectroscopy) phenomena was discovered in the 1960’s shortly after lasers were invented, the first (bulky) commercial system came into being in the 1990’s. Handheld devices however, have only entered the market in recent years.
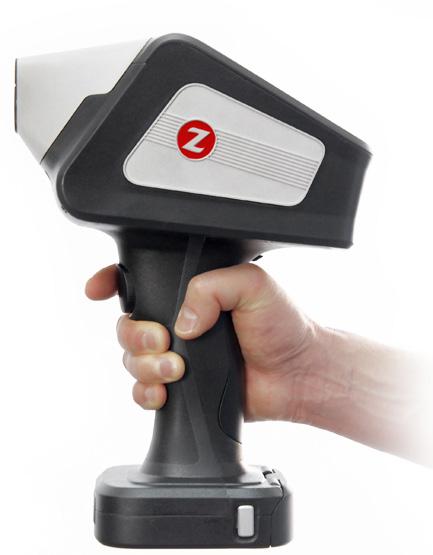
The physics of LIBS analysis is similar to more traditional spark OES. In both cases a tiny amount of material is vapourised
from the surface using a high energy source (electrical spark or pulsed laser). In the case of LIBS, a tiny plasma plume is generated. As the resultant ions decay back to their ground state, they emit light of a characteristic wavelength. This light interacts with a diffraction grating that splits it into its component wavelengths, which are then analysed by a spectrometer. Given that each element has its own characteristic wavelength, the composition of the sample can be quantified.
The use of a laser was key to the miniaturisation of the technology due to its energy efficient nature, which can be powered by a battery. Generating an electrical spark on the other hand requires a lot of energy. The laser spot size is also much smaller than the spark site, requiring far less (approx. 1000x less) argon. So, where a spark OES might require an argon gas bottle, handheld LIBS can be served by a tiny cannister, akin to those used in soda siphons. Another contributing factor was the miniaturisation of the detector. Despite their diminutive size, side-by-side tests have shown that both techniques produce the same results.
The argon gas used in systems like the SciAps Z200 C+ purges the measurement region ensuring any extraneous atmospheric species are excluded from the analysis. These systems also typically analyse multiple spots in a single measurement to guarantee accuracy.
This type of instrument has really come to the fore in the last few years as it has the ability to accurately measure carbon content, something which XRF is not able to do. The most sensitive instruments are able to distinguish L, H and standard grades of stainless steels (e.g. 316L with less than 0.03% carbon, 316 and 316H) and other carbon steels. Furthermore, inbuilt algorithms allow technicians to determine carbon equivalents (CE) which is important for in-field asset management where weld repairs are required e.g. pipeline maintenance.

Handheld LIBS instruments also excel at measuring alloying elements present in low concentrations. This includes elements such as nickel, chromium and copper which are used in small quantities in carbon steels for petrochemical and nuclear power plants.
LIBS has the advantage over XRF in that it is able to measure light elements as well as carbon, so the analysis of alloys containing lithium, beryllium and boron is now possible.
LIBS is also the ideal solution for analysing sulfidic corrosion in refineries, where it can measure silicon contents below 0.02% in less than 3 seconds. It is also perfect for determining Flow Accelerated Corrosion (FAC), requiring measurement of chromium at levels less than 0.03% in just seconds with no need for X-ray radiation.
Although a relative newcomer to the market, the handheld LIBS technique has been recognised as an accepted method, by the American Petroleum Institute, for measuring carbon and other alloying elements in steels and stainless steels in accordance with API Recommended Practice 578 (3rd Edition). In this application, carbon content and carbon equivalents are measured in preparation for weld repairs. Closer to home, First Gas (NZ) has also developed their own workflow using handheld LIBS for the same purpose, prior to affecting weld repairs and hot taps to their gas pipeline, negating the time-consuming need to send samples back to the lab.
Concluding Remarks
In both cases, the instruments have in-built libraries and databases allowing instantaneous metal and alloy identifications to be made. Some instruments also feature cameras so specific regions can be targeted for analysis and the recording of images, and also include GPS so that measurements can be matched back to specific locations. For convenience, some also include WiFi and Bluetooth communication so measurements can be transferred, in real-time, back to another PC or central lab. Other features that may be of use are customised automated reports, automated backup of data to the cloud and merging of data from multiple instruments, including XRF or LIBS, even of different manufacturers.
Both techniques have relative strengths and weaknesses, making them more complimentary than competitive. So it comes down to what you are needing to analyse. In short, if you need to measure alloys containing carbon and low alloys steels, in particular if you need to differentiate L and H grade stainless steels, LIBS is for you. For pretty much everything else, XRF is the better choice. If you do not know what you are dealing with, you are best off taking both instruments into the field and using something like the “one box solution”.
