


Full-arch dentistry Bart Knellinger, CEO and Founder of Progressive Dental and The Closing Institute PROMOTING EXCELLENCE IN IMPLANTOLOGY Exotic Implants n 4 CE Credits Available in This Issue* Summer 2023 Vol 16 No 2 implantpracticeus.com Pterygoid implant survival rates with full-arch immediateloading protocols Dr. Dan Holtzclaw, et al. The importance of suturing in dental implant surgery Dr. Steven Vorholt The MI (R)evolution: A novel approach to fasten an implant to bone Dr. Charles D. Schlesinger
I chose to affiliate with Affordable Care’s Advanced Dental Implant Center network because they listened to what I was trying to accomplish in the sale of my two practices. With their reputation, proven expertise and expansive network, I was confident in my decision to join their supported community of implant doctors. This is an exciting time and place to be.


Scan the QR code or call us at: (888) 537-2801 to learn about affiliation opportunities
- Dr. Raouf Hanna Hanna Dental Implant Center and Comprehensive Dental Group of Houston
serve DSO for ADVANCED DENTAL IMPLANT CENTER AN INVITATION for general dentists with extensive implant experience, oral surgeons, periodontists and prosthodontists Proud to serve as the DSO for the Advanced Dental Implant Center network NOW IS THE TIME TO JOIN OUR FAST GROWING NETWORK OF ADVANCED DENTAL IMPLANT PROVIDERS
Summer 2023 n Volume 16 Number 2
Editorial Advisors
Jeffrey Ganeles, DMD, FACD
Gregori M. Kurtzman, DDS
Jonathan Lack, DDS, CertPerio, FCDS
Samuel Lee, DDS
David Little, DDS
Brian McGue, DDS

Ara Nazarian, DDS
Jay B. Reznick, DMD, MD
Steven Vorholt, DDS, FAAID, DABOI
Brian T. Young, DDS, MS
CE Quality Assurance Board
Bradford N. Edgren, DDS, MS, FACD

Fred Stewart Feld, DMD
Gregori M. Kurtzman, DDS, MAGD, FPFA, FACD, FADI, DICOI, DADIA
Justin D. Moody, DDS, DABOI, DICOI
Lisa Moler (Publisher)
Mali Schantz-Feld, MA, CDE (Managing Editor)
Lou Shuman, DMD, CAGS
Implant options for all
As a general dentist practicing in Harrisonburg, Virginia, I had noticed that local specialists were placing conventional dental implants, but the price was out of reach for many. I started reading about mini dental implants and looked for training options. In 2009, I started placing mini dental implants in the anterior mandible for denture stabilization and since then have used mini dental implants and conventional dental implants on a routine basis. Here are four things I have learned: Take advantage of technology. Once I began placing implants, I was uncomfortable treating patients with a two-dimensional X-ray. At the time, a CBCT machine was a 6-figure investment. I was able to finance the CBCT and have never regretted this investment. I purchased a new CBCT machine in 2019 for about ½ the price of my first CBCT. Having an in-office CBCT made it easier to provide surgical guides. At a recent meeting of the Academy of Osseointegration, the best dental implant specialists in the world advocated using the best technology.
Look out for trends supported by research. Dr. Craig Misch, one of the most experienced dental surgeons, an amazing lecturer, and expert on intraoral bone grafting, recently published an article advocating the use of smaller dental implants to reduce the need for bone grafting.1 Numerous articles discuss the efficacy of very short and small diameter implants. Listen to academic speakers, read peer-reviewed journals, and stay informed.
Consider the middle market. Even in my rural community, some dentists are dedicated to providing “All-on-4” restorations. An All-on-4 case for the upper and lower arch can cost about $50,000 in our community. This is out of reach for many patients. My practice offers mini dental implants supporting upper and lower overdentures for a more affordable $16,000. We offer a denture buyback program for a patient who wishes to upgrade to a higher level of care. In this way, we are working with the middle of the denture market.
Be curious: Too many implant providers are using dental implant product lines they were introduced to during their training. However there are other products on the market with features not available in all implants. The largest implant manufacturers have been sluggish to adopt mini-implants, ultra-short implants, and platform-shifting designs. Check the research, and form your own opinion. At a recent discussion about materials for restoring implant-retained restorations, I asked the speaker why zirconia was so popular. His answer: “I do not know.” He predicted other materials, such as carbon fiber materials, will soon surpass zirconia for dental restorations. Learning about dental implants has allowed me to give some wonderful patients confidence and comfort. After 40 years, my practice still makes me smile.
© MedMark, LLC 2023. All rights reserved. The publisher’s written consent must be obtained before any part of this publication may be reproduced in any form whatsoever, including photocopies and information retrieval systems. While every care has been taken in the preparation of this magazine, the publisher cannot be held responsible for the accuracy of the information printed herein, or in any consequence arising from it. The views expressed herein are those of the author(s) and not necessarily the opinion of either Endodontic Practice US or the publisher.
ISSN number 2372-6245
Douglas Wright, DDS, graduated from the University of Maryland Pharmacy School in 1981 and earned his Doctor of Dental Surgery degree from the University of Maryland in 1985. While in school, he completed externship training at Johns Hopkins Hospital, the University of Maryland Hospital, and the National Institutes of Health, Baltimore Cancer Research Center. After graduation, Dr. Wright joined the US Navy, where he received advanced training in subjects including oral diagnosis, periodontics (gum disease), endodontics (root canals), oral surgery, surgical anesthesia, advanced cardiac life support, and advanced traumatic life support. He served in combat on a U.S. Navy warship in the Persian Gulf in 1988. Dr. Wright’s military decorations include two Navy Commendation Medals, two Navy Achievement medals, the Combat Action Ribbon, and the Armed Forces Expeditionary Medal. After 4 years of active duty, he continued to serve in the Naval Reserves for an additional 17 years, often providing care at Bethesda Naval Hospital. After working in a private practice for 10 years, Dr. Wright accepted a position at the Veterans Administration Medical Center in Washington, D.C. In addition to treating dental patients, he served on the hospital’s Infection Control Committee and was a member of the Medical Center’s Chemical and Biological Decontamination team.
1 implantpracticeus.com Volume 16 Number 2 INTRODUCTION
1. Misch CM, Polido WD. A “Graft Less” Approach for Dental Implant Placement in Posterior Edentulous Sites. Int J Periodontics Restorative Dent. 2019 Nov/Dec;39(6):771-779.
Dr.


2 Implant Practice US Volume 16 Number 2 TABLE OF CONTENTS
MI (R)evolution: A novel approach to fasten an implant to bone
CLINICAL The
D. Schlesinger discusses the science behind the Unifi MI implant PUBLISHER’S PERSPECTIVE Be the lotus Lisa Moler, Founder/CEO, MedMark Media 6 EDUCATION SPOTLIGHT ZestMasters Full-Arch Education Multidimensional learning with practice-changing results ......................................................... 17 CONTINUING EDUCATION The importance of suturing in dental implant surgery Dr. Steven Vorholt explores the many aspects of suturing for implant procedures ................... 20 8 12 COVER STORY
Dr. Charles
Marko Kamel
from 0
55-plus arches per month
—
to
Cover image of Bart Knellinger courtesy of Progressive Dental.
You handle the teeth.
At HighFive Healthcare, we’re passionate about the business of oral surgery. That’s why we partner with oral surgeons who are equally passionate about helping their patients. Our family of experts handle just about everything outside of dental implants, so you can focus on what you love and create your own tomorrow.

Learn more at high5health.com
Drs. Dan Holtzclaw, Juan Gonzalez, Aldo Espinosa, Sam Sauza, Raouf Hanna, Peyman Raissi, Chris Epperson, Cory Ryan, Nirjal Patel, Amel Hassan, Peter Fereg, Jumoke Adedoyin, and Dan Fenton report on


4 Implant Practice US Volume 16 Number 2 TABLE OF CONTENTS SERVICE PROFILE The Advanced Dental Implant Center Network builds momentum 32 GOING VIRAL Is social media placing your personal privacy or your small business at risk? Mark Pribish offers guidance on minimizing risks of social media 34 PRODUCT PROFILE Diet, nutrition, and the implant patient Dr. Thomas J. Balshi discusses how key nutrients affect implant success ............................................. 36 PRODUCT PROFILE Cool Jaw® hot/cold therapy ....................................... 38 PRODUCT PROFILE The OsteoGen® Plug: one-step bone grafting solution for socket preservation without a membrane! ............................. 40 Connect. Be Seen. Grow. Succeed. | www.medmarkmedia.com READ the latest industry news and business WATCH DocTalk Dental video interviews with KOLs LEARN through live and archived webinars RECEIVE news and event updates in your inbox by registering for our eNewsletter CONNECT with us on social media www.implantpracticeus.com 26 CONTINUING EDUCATION Pterygoid implant survival rates with full-arch immediate-loading protocols
survival rates and
pertinent data *Paid subscribers can earn 4 continuing education credits per issue by passing the 2 CE article quizzes online at https://implantpracticeus.com/category/continuing-education/
other
Be the lotus
In an array of colors, blue, white, purple, red, or pink, lotuses are touted as symbols of peace, beauty, and longevity. I love lotus flowers. Earth.com describes them as extremely strong with the first one estimated to have sprouted millions of years ago. For all of its breathtaking beauty, the lotus flower grows out of the mud, rising above the water. As a result, it also has gained a reputation as a symbol of persistence. What does this flower have to do with anything dental, anyway? Well, like the lotus flower, on our professional and personal journeys, we may have to find the strength to grow out of somewhat messy circumstances or humble beginnings. How do we do it? Persistence, innovation, and constantly reaching for a higher standard.
One way to get out of our rut when we are stuck in the mud is by purging – getting rid of old perceptions, equipment, or materials that hold us back from growing. After freeing up some space, invite future growth by researching and adding new things that can improve life around your office and for your patients. Imaging, 3D printing, AI software, instrumentation – you name it – dental visionaries and entrepreneurs are introducing amazing inventions every day. You just have to find the ones that fit your own space and needs, and maybe even help you grow outside your comfort zone. We hope to be able to help you on your journey.
We have lots of ideas in this issue to help you expand your mind and office. In our Cover Story, Dr. Marko Kamel talks about how he transforms patients’ lives through implant dentistry, with some help from Progressive Dental’s Closing Institute Boot Camps. For Continuing Education, Dr. Dan Holtzclaw and colleagues report on a study of pterygoid dental implants in immediately loaded fixed-arch procedures. In his CE, Dr. Steven Vorholt provides an overview of suturing techniques and illustrates a case where all three types of sutures are used. In our Clinical column, Dr. Charles S. Schesinger explores a novel approach to fasten an implant to bone with the Unifi MI. Check out the revolutionary thread design!
At MedMark, we don’t want your practices to be stuck in the mud of mediocrity. Ora Nadrich, life coach and mindfulness teacher said, “On the path of self-realization, there is no one big awakening, but many along the way of varying degrees: some small, some big; and each one of them is like the lotus flower, which grows out of muddy waters.” So my message this issue is: No matter how small or big your practice, be a lotus; keep growing, changing, and reaching for whatever it takes to make you blossom.
To your best success,
Lisa Moler Founder/Publisher MedMark Media

Published by
Publisher
Lisa Moler lmoler@medmarkmedia.com
Managing Editor Mali Schantz-Feld, MA, CDE mali@medmarkmedia.com
Tel: (727) 515-5118
National Account Manager Adrienne Good agood@medmarkmedia.com
Tel: (623) 340-4373
Sales Assistant & Client Services Melissa Minnick melissa@medmarkmedia.com
Creative Director/Production Manager Amanda Culver amanda@medmarkmedia.com
Marketing & Digital Strategy Amzi Koury amzi@medmarkmedia.com
eMedia Coordinator
Michelle Britzius emedia@medmarkmedia.com
Social Media Manager April Gutierrez socialmedia@medmarkmedia.com
Digital Marketing Assistant Hana Kahn support@medmarkmedia.com
Website Support
Eileen Kane webmaster@medmarkmedia.com
MedMark, LLC

15720 N. Greenway-Hayden Loop #9 Scottsdale, AZ 85260
Tel: (480) 621-8955
Toll-free: (866) 579-9496 www.medmarkmedia.com
www.implantpracticeus.com
Subscription Rate
1 year (4 issues) $149
https://implantpracticeus.com/subscribe/
6 Implant Practice US Volume 16 Number 2 PUBLISHER’S PERSPECTIVE
Lisa Moler Founder/Publisher, MedMark Media
How to submit an article to Implant Practice US
Implant Practice US is a peer-reviewed, quarterly publication containing articles by leading authors from around the world. Implant Practice US is designed to be read by specialists in Periodontics, Oral Surgery, and Prosthodontics.
Submitting articles
Implant Practice US requires original, unpublished article submissions on implant topics, multidisciplinary dentistry, clinical cases, practice management, technology, clinical updates, literature reviews, and continuing education.
Typically, clinical articles and case studies range between 1,500 and 2,400 words. Authors can include up to 15 illustrations. Manuscripts should be double-spaced, and all pages should be numbered. Implant Practice US reserves the right to edit articles for clarity and style as well as for the limitations of space available.
Articles are classified as either clinical, continuing education, technology, or research reports. Clinical articles and continuing education articles typically include case presentations, technique reports, or literature reviews on a clinical topic. Research reports state the problem and the objective, describe the materials and methods (so they can be duplicated and their validity judged), report the results accurately and concisely, provide discussion of the findings, and offer conclusions that can be drawn from the research. Under a separate heading, research reports provide a statement of the research’s clinical implications and relevance to implant dentistry. Clinical and continuing education articles include an abstract of up to 250 words. Continuing education articles also include three to four educational aims and objectives, a short “expected outcomes” paragraph, and a 10-question, multiple-choice quiz with the correct answers indicated. Questions and answers should be in the order of appearance in the text, and verbatim. Product trade names cited in the text must be accompanied by a generic term and include the manufacturer, city, and country in parentheses.
Additional items to include:
• Include full name, academic degrees, and institutional affiliations and locations
• If presented as part of a meeting, please state the name, date, and location of the meeting
• Sources of support in the form of grants, equipment, products, or drugs must be disclosed
• Full contact details for the corresponding author must be included
• Short author bio
• Author headshot
Pictures/images
Illustrations should be clearly identified, numbered in sequential order, and accompanied by a caption. Digital images must be high resolution, 300 dpi minimum, and at least 90 mm wide. We can accept digital images in all image formats (preferring .tif or jpeg).
Tables
Ensure that each table is cited in the text. Number tables consecutively, and provide a brief title and caption (if appropriate) for each.
References
References must appear in the text as numbered superscripts (not footnotes) and should be listed at the end of the article in their order of appear-
ance in the text. The majority of references should be less than 10 years old. Provide inclusive page numbers, volume and issue numbers, date of publication, and all authors’ names. References should be submitted in American Medical Association style. For example:
Journals:
(Print)
White LW. Pearls from Dr. Larry White. Int J Orthod Milwaukee. 2016;27(1):7-8.
(Online)
Author(s). Article title. Journal Name. Year; vol(issue#):inclusive pages. URL. Accessed [date].
Or in the case of a book: Pedetta F. New Straight Wire. Quintessence Publishing; 2017.
Website:
Author or name of organization if no author is listed. Title or name of the organization if no title is provided. Name of website. URL. Accessed Month Day, Year. Example of Date: Accessed June 12, 2011.
Author’s name: (Single) (Multiple)
Doe JF Doe JF, Roe JP
Permissions
Written permission must be obtained by the author for material that has been published in copyrighted material; this includes tables, figures, pictures, and quoted text that exceeds 150 words. Signed release forms are required for photographs of identifiable persons.
Disclosure of financial interest
Authors must disclose any financial interest they (or family members) have in products mentioned in their articles. They must also disclose any developmental or research relationships with companies that manufacture products by signing a “Conflict of Interest Declaration” form after their article is accepted. Any commercial or financial interest will be acknowledged in the article.
Manuscript review
All clinical and continuing education manuscripts are peer-reviewed and accepted, accepted with modification, or rejected at the discretion of the editorial review board. Authors are responsible for meeting review board requirements for final approval and publication of manuscripts.
Proofing
Page proofs will be supplied to authors for corrections and/or final sign off. Changes should be limited to those that are essential for correctness and clarity.
Articles should be submitted to:
Mali Schantz-Feld, managing editor, at mali@medmarkmedia.com
Reprints/Extra issues
If reprints or additional issues are desired, they must be ordered from the publisher when the page proofs are reviewed by the authors. The publisher does not stock reprints; however, back issues can be purchased.
7 implantpracticeus.com Volume 16 Number 2 AUTHOR GUIDELINES
Dr. Marko Kamel — from 0 to 55-plus arches per month
“Progressive Dental has transformed my life, my practice, my family’s life, my team’s lives, and has helped me transform thousands of patients’ lives with full-arch dentistry! As dental practice owners, we must ensure three foundational principles are in place to scale in full-arch dentistry: marketing and sales, workflows, and investing in learning. You will see that you can set yourself up with all of these principles by attending one of Progressive Dental’s Closing Institute Boot Camps!” says Dr. Marko Kamel from Woodbury Dental Arts.
Tell us about yourself.
My name is Dr. Marko Kamel. I have dedicated my professional career to providing patients with comprehensive restorative, surgical, and reconstructive dental services. I earned my dental degree from Cairo’s AinShams University in 2000 and received my DDS in Minnesota in 2006. In 2012, after successfully building several dental practices throughout Minnesota, I opened Woodbury Dental Arts, a state-of-the-art dental clinic that is dedicated to total patient wellbeing, offering comprehensive preventative, restorative, and implant services.
How did you turn your GP practice into an implant center?
At Woodbury Dental Arts, we took a leap of faith when investing in our business venture — failure simply wasn’t an option. To ensure success, we sought out innovative solutions and found the answer with Progressive Dental Marketing. Through their guidance and support, our practice transitioned from providing general dental services to becoming a premier dental implant center. This transition was only possible thanks to Progressive Dental’s expertise. From merely doing two arches per year in 2016, we ultimately increased to over 55 full-arch cases monthly. Our sales more than doubled annually ever since we partnered with Progressive.
What’s the secret?
As dental practice owners, we must ensure three foundational principles are in place: marketing and sales, workflows, and continuously investing in learning. Our advertising should demonstrate our expertise with full-arch dentistry in order to attract leads seeking the same treatment solution. Furthermore, this competitive market makes it a requirement to have a sales process that will help patients confidently move forward with treatment. By putting these pieces of the puzzle together — plus forming an educational commitment for ourselves — we will be on track towards providing worthwhile All-on-X cases for
each patient. The second principle is workflows. In order to do full-arch cases in volume, you need an efficient and profitable workflow to accommodate as many patients as possible, while providing the highest standard of care. Lastly, never stop investing in learning, and get yourself mentors. This is crucial, both for yourself as a clinician and for your team. If you invest in your team, your practice will grow while their careers grow. I have always invested in extensive continuing education courses, seminars, and advanced training from the best to learn from leaders who are already doing this successfully. I have completed extensive continuing education courses, seminars, and advanced training in dental soft tissue grafting, zygomatic and pterygoid implant placement, and much more.
8 Implant Practice US Volume 16 Number 2 COVER STORY
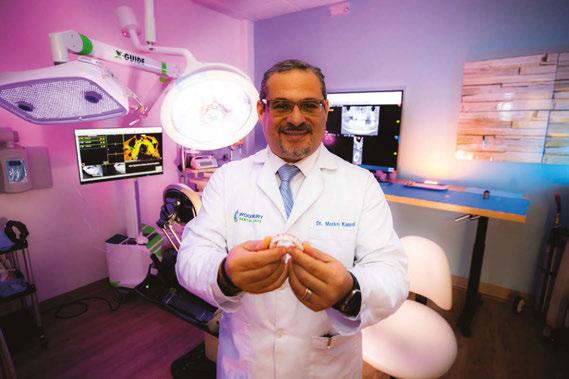
Dr. Marko Kamel mainly focuses on full-arch dentistry because it is the type of treatment that makes the most impact in a patient’s life
Dr. Kamel is passionate about sharing his secrets, so he can inspire others with his journey
What was different about working with Progressive versus other marketing companies?
In 2016, I began collaborating with Progressive Dental Marketing — a dental practice growth consulting agency. Not only are they experienced in helping doctors expand services to include full-arch dentistry, they also specialize in creating individualized strategies for each of their clients. Our first conversation revolved around all aspects and objectives specific to my dental practice. Compared to other marketing firms, the team at Progressive Dental had an edge. By bringing together meaningful visuals, like videos and images, into one unified plan tailored perfectly for our needs — from website design to advertising campaigns — we quickly transformed my business goals into a reality. Progressive’s expert videographers flew in and captured genuine footage of our services. By truly telling the story of our practice and our patients through our marketing, we were able to not just position ourselves as implant experts, we were also able to build an emotional connection with potential patients, resulting in a dramatic increase in our leads. Every 6 months, I have their videographers come out to capture fresh new content of our patient’s stories to share through our marketing.

Why do you invest in your team?
Just like I invest in my career, I also make sure to invest in my team’s career. Not only did Progressive Dental help me increase leads, they also continually train my team. Progressive Dental created The Closing Institute to train doctors and their team to close full-arch cases in volume through a sales process that works. These events and their mentorship program have helped me with hiring the right team members, training them to handle the leads, answering the phone, scheduling the patients, following up with the patients, presenting financing options, and closing the cases. At The Closing Institute, attendees learn a sales process that is lacking in many dental practices.
Best advice on how to keep growing?
You’re just one person on your team. The reality is that you cannot do it all on your own. Everybody on your team has the
potential to change a patient’s life, simply by doing their job and perfecting it. Your team is your biggest asset. How is a perfect team built? You have to hire the right people, train them well, and provide continuous coaching. The Closing Institute provides my team with continual training every week. They listen to incoming phone calls from leads and coach my team on how to improve their consultations, address objections, and ultimately close the case. Our Dental Practice Growth Consultants at Progressive Dental join me for a weekly call where we track metrics and assess whether my team is performing up to standard. Every 6 months, we reassess our goals and come up with new ones. Our goal for this past year was 500 arches, and our target for 2023 is 750 arches. We keep surpassing our goals, as is evident in our progress and commitment to accountability. Because of our team’s efforts, our practice has skyrocketed in both patient satisfaction and overall success since 2016 — a trend that is still holding strong today!
How do you fit so many cases into the schedule as a sole provider?
My number one priority is to provide the best care for my patients. In order to accommodate all your patients and keep increasing your All-on-X cases, you need to engineer a digital workflow that can increase your efficiency and profitability. Practice makes perfect, so I commit myself to practicing every single day to bettering our practice. Developing new workflows has been a fun challenge. To help me keep scaling up, I’m consistently networking with doctors who do these cases in volume, attend Institutes that focus on optimized workflows, and consistently research new technologies. The Closing Institute events have helped me connect with hundreds of doctors and resources in this field in order to do this successfully.
9 implantpracticeus.com Volume 16 Number 2 COVER STORY
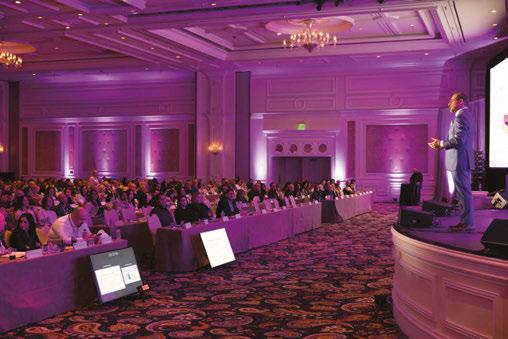
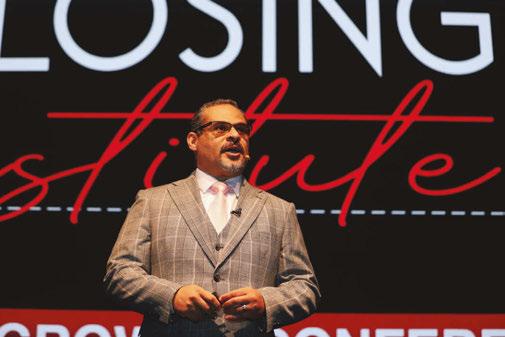
Dr. Marko Kamel speaks at The Closing Institute to teach his secrets on how to predictably scale with full-arch dentistry
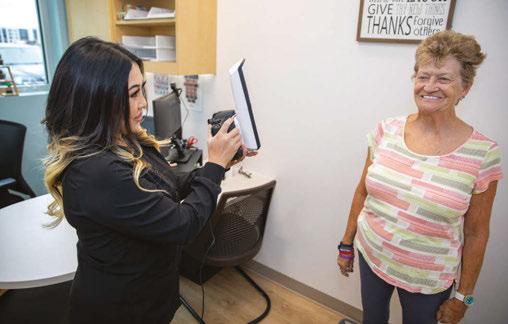
Dr. Marko Kamel showing a patient a better version of themselves. Woodbury Dental Arts doesn’t sell implants; they sell clinical outcomes
Compared to other marketing firms, the team at Progressive Dental had an edge.
Why and where do you share your secrets?
After years of dedication, I have developed a passionate commitment to mentoring and aiding other clinicians with their development. Following in the footsteps of my mentors, I am eager to make an impact on this industry by teaching doctors how to scale their All-on-X cases. I truly get inspired by others and their stories. Now I speak at conferences, hoping to inspire others with my story. Each quarter, I enjoy speaking at Progressive Dental Marketing’s The Closing Institute Symposium — an honor that puts me in front of more than 700 attendees. It’s inspiring to remember that we all start from somewhere — but it gets even better when I learn something new every time I go! Surrounding myself with top implant clinicians, leading dental companies, and motivated individuals helps me challenge myself to push further for success. I always remind myself to never settle, always stay hungry, invest on my own, be open to any change, be extremely adaptable, and most importantly, to always stay humble.

Was there a point you believed you had plateaued?
I was convinced I had plateaued when I hit 23 arches per month. I remember addressing this to my team at Progressive Dental because I am someone who always stays ambitious about continually growing. When I addressed this to Progressive, they quickly reminded me of my goals and that our consistency and determination had been the main factors in Woodbury Dental Arts’ growth. So, we buckled down and perfected all three factors I keep mentioning — marketing and sales, workflows, and continuing education. Our team increased their closing percentage, I found new and improved workflows, and I kept investing in our learning. Now that I have hit 55-plus arches per month, I am dedicated to sharing my blueprint for success. I am also almost ready to hire associate doctors so they can also do over 55-plus arches per month at my practice. This way I can keep balancing surgery and mentoring other clinicians.
What next steps would you recommend for other clinicians?
I strongly recommend that you attend one of Progressive Dental’s events — The Closing Institute Boot Camp is the perfect opportunity to meet them in person and learn all their tips and tricks! You won’t regret it! Progressive Dental is constantly innovating their services with a client-centered approach. Thanks to them, I have been able to live the life I have always aspired to. Their experienced account managers are there every step of the way with you. With Progressive Dental, you will be connected with the best marketing and dental practice growth company in the world. They give you the capability to reach millions of
people in your community. More than that, they enable you to connect with patients on a deeper level. If you cannot close cases, then you can’t transform lives. The Closing Institute team not only assists with your marketing efforts, they also equip you with all the skills necessary for running a business and closing cases successfully. Other marketing companies may just sell you zip codes, views, and clicks, but they cannot guarantee an exact dollar figure, which measures your return on investment. Progressive Dental is transparent and straightforward when it comes to results. Not only do they show you where the leads are coming from and what stage of the sales cycle the patient is in, their analytics will highlight an exact dollar figure that accurately tracks your ROI. Bart Knellinger, CEO of Progressive Dental, and Gerritt Cora, Vice President at Progressive Dental, have become like family members to me — as has everyone else on their team!
Progressive Dental has transformed my life, my practice, my family’s life, my team’s lives, and they have helped me transform thousands of patients’ lives with full-arch dentistry! As dental practice owners, we must ensure three foundational principles are in place: marketing and sales, workflows, and investing in learning. You will see that you can set yourself up with all of these by attending one of Progressive Dental’s Closing Institute Boot Camps! IP

10 Implant Practice US Volume 16 Number 2 COVER STORY
The treatment coordinator is a big asset. Treatment coordinators are in the consultations, address all objections, and ultimately close the cases (left). Bart Knellinger, CEO and Founder of Progressive Dental and The Closing Institute (right)
Optimized digital workflows increase predictability and efficiency, while decreasing overhead and the number of appointments required for fullarch dentistry
This team event presents a rare opportunity to learn from top industry speakers about growing & streamlining your full-arch business, enabling you to dominate your market in any economy.


LEARN PROVEN TECHNIQUES TO:
• Acquire more leads and manage them effectively
• Implement a sales process that will result in a massive increase in closing percentage and empower your Treatment Coordinator to improve drastically


• Quickly pre-qualify and triage patients that are financially unqualified
• Implement efficient, vertically integrated workflows based on your current volume and projected volume of cases

• Present creative financing options to get patients with low credit scores qualified for funding
• Dominate the 2nd opinion market

PROGRESSIVE DENTAL'S: DRAMATICALLY INCREASE YOUR FULL-ARCH
DliNTAl IMPLANT PRODUCTION 20+ ARCHES MONTHLY
DAVE ROEHR, CEO Cutting-Edge Financial Funding ART MIRELEZ, DDS BART KNELLINGER, CEO Seamless Digital Workflows llf DOCTORS llf OFFICE MANAGERS [lf TREATMENT COORDINATORS Founder& Keynote Speaker [l[ PATIENT ADVOCATES [l[ RECEPTIONISTS
GERRIT CORA, VP Strategic Growth & Team MotivationMARKO KAMEL, DDS From Oto 55+ Arches Monthly PUBLIO SILFA, DDS Smile Visualization & Patient Motivation LAS VEGAS, NV REGISTER NOW! Visit TheClosinglnstitute.com or scan QR code to learn more Tuition ranges from $600 to $1,500. Cancellations received up to 60 days before the event are fully refundable. After that, cancellations are subject to the entire registration fee or may be transferred to a future event. J'Zlprogress/ve d e n t ., I� 0 727.888.6043 0 TheClosinglnstitute.com P'Ac E Progressive Dental LLC. Nationally Approved PACE Program Provider for FAGO/MAGO credit ��:fil':.1fENTISTirf Approval does not imply acceptance by any PROGRAM APPROVAL regulatory authority or AGO endorsemen1 rnegs.�J�UING 11/112020 to 10/30/2024. Provider ID# 366269 13 CE CREDITS ADA C•E•R•P® Continu ing Education Recognit,on Program Progressive Dental is an ADA CERP Recognized Provider AOA CERP is a seMce of the American DentalAssociati ontous;st d""talprofessionals inidenti fyi ngquali typ,ovidl!fsofcon ti nui ng dental..ducation. ADA CERPdoes not approveor endorseindividual courses orinstructors, nor don itimplyacceptanceofcr edithoursbyboardsofdenti stry.ProgrnsiveDentaldesignat n thlsacilvity for13cont1nuln gedueationc11N:1,1s
The MI (R)evolution: A novel approach to fasten an implant to bone
Dr. Charles D. Schlesinger discusses the science behind the Unifi MI implant

Why are we continuing to use dental implants that rely upon a wedging mechanism to gain primary stability? Though dental implants have an extremely high success rate and are a predictable treatment modality, is it possible that it could be improved upon?
I would like to elaborate upon a new treatment modality that is not only a revolutionary way to fixate an implant to bone, but an evolution of the dental implant itself.
The basic macro structure of modern dental implant has not changed much since its inception. The implant that Brånemark first placed in his patients in 1965 when the original Brånemark implant was created was cylindrical; later on tapered forms appeared.1 We have seen the use of different thread designs with the top three today being V-threads, square threads, and reverse buttress styles. To address the ever-present issue of crestal bone loss, implants have evolved by moving the connection from an external position to internal, moving the platform emergence from the outside of the implant circumference to inside it by platform switching. A host of collar designs – smooth, polished, machined, micro-threaded, tissue level, and bone level have all been utilized. All this being said, the macro structure of these implants all function as a compression, friction-fit screw in the osteotomy to achieve primary stability at placement. This type of compression stability results in detrimental short-term sequalae that are not overcome until osseointegration is completed.
With its origins in heavy industry, a unique thread design is able to achieve the union of two pieces of metal without any damage to each piece. In a nutshell, it has the ability to “stitch” two pieces into one with an incredibly strong union. In 2015, Osteocentric Technologies (Austin, TX) was founded, and the concept of Unifi MI was born. This unique and revolutionary thread design was first utilized for fixation devices in orthopedics. Following the success in that field, the patented thread
design was introduced into adjacent verticals including trauma, recon, limb salvage, spinal, and veterinary. Today, over 55,000 Unifi MI devices have been placed at over 80 Level 1 teaching centers across the United States. Today, we are on the verge of having this incredible technology introduced in the world of dental implants.
Traditional implants
Charles D. Schlesinger DDS, FICOI, has been placing implants for the past 27 years and has been an implant educator for the last 17 years. After his residency programs at the VAMC San Diego and Los Angeles, he had a thriving private practice in San Diego for 14 years. In 2012, he relocated to New Mexico to become the Head of Education and Clinical Affairs and then Chief Operating Officer of a dental implant manufacturer. In 2016, he re-entered private practice where he treats patients in Albuquerque, New Mexico and continues to teach worldwide. He is the COO of Comfortable Dentistry 4U and a KOL for multiple companies.
To understand how the Unifi MI works, you must first understand how traditional implant and thread designs work. A traditional implant, for the past 50 years, whether a tapered body or parallel walled implant, relies upon wedging forces to achieve primary stability, essentially the same wedging mechanism that occurs when you put a screw into a piece of wood. This wedging facilitates what is called a friction fit. This friction fit occurs as the result of the osteotomy drill producing an osteotomy that is not only smaller than the major diameter of the implant, but also smaller than the minor diameter. Add to this the fact that many of the implants available today are tapered in their design. The implant plows its way through bone, trapping bone fragments and creating not only compressive forces, but micro-fractures2 as it travels down the osteotomy and settles into its final position with a high torque value and a perceived high primary stability.
A high insertion torque equates to a high compression of the bone, and bone is not wood — it is a living vital tissue that responds negatively to high compressive pressure, as seen during orthodontic movement.3 Massive remodeling occurs in response to the trauma incurred.
The most popular thread designs used today fall into the three categories mentioned above: V-threads, square threads, and reverse buttress threads. When an implant is first placed, all of its stability is achieved by the aforementioned wedging and

12 Implant Practice US Volume 16 Number 2 CLINICAL
Disclosure: Dr. Schlesinger is on the design team for Osteocentric Technologies.
Figure 1: Forces generated by the three major thread designs
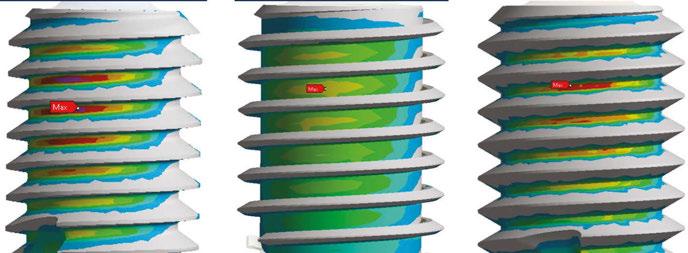
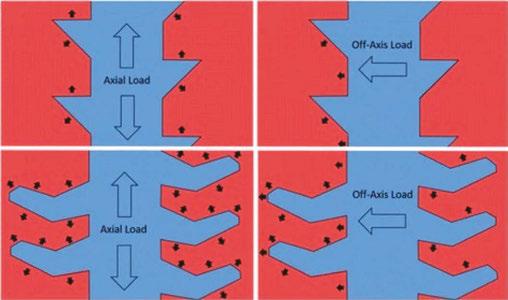
the action of the threads engaging bone around the perimeter of the osteotomy. The forces these threads create as they are driven through the bone are focused in a perpendicular fashion from the face of the thread and are compressive (Figure 1). Under immediate load, prior to osseointegration, these threads produce compressive forces on the compression side and lose engagement on the side 180º from this compression side. This is more evident in soft bone scenarios and in immediate placement situations where engagement of an implant may only be at the apex and against one wall of a socket. Since P=F/A, the small areas of force concentration result in very high localized pressure points that produce high pressure and eventually resorption of bone.

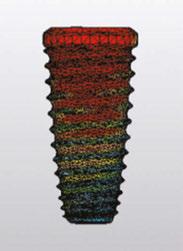
Once the implant is integrated, axial and off-axis forces are distributed to the bone by these very threads and the portions of the implant body between these threads. The majority of these forces are confined to the crestal 5 mm of the implant. Numerous studies have backed up this concept through finite element analysis and photoelastic experiments; research has shown that the stress distribution within a bone-to-titanium implant relationship is concentrated in the implant’s crestal region4 (Figure 2).
Rieger, et al.,5 and Inou, et al.,6 based on previously published physiologic thresholds, reported that in their experiments bone resorption occurred in regions where the stress concentration was under or over the physiologic limits. In regions where the stress was within those limits, the bone maintained its morphology.
How Unifi MI is different
Unifi MI stands for Unifi Mechanical Integration. The Unifi threads interlock a flank of bone between them and not only reduces the movement of the implant (Figure 3), but also distributes forces in a very different way than traditional threads or implants. Let me make this clear; this is not a replacement for the development of osseointegration or secondary implant healing. This is a way to achieve outstanding primary stability, resistance to micro-motion, and better stress distribution in the peri-implant bone not only at the early phases of treatment, but also for the entire life of the implant in function.

The development of Unifi MI for dentistry
Taking cues from the tremendous successes in the medical field, a project started a few of years back with idea to apply this technology to dental implants. The forces the implant will be exposed to are similar to those in medicine with regard to toggling forces, but would differ in axial forces. In dentistry, these forces would be exerted in a compressive fashion down the implant body as opposed to the screws used in the other medical disciplines which are subjected instead to massive pull-out forces. Due to this fundamental difference, the usually “upward” facing Unifi threads were flipped into a downward facing position. To assure there would not be any mechanical disadvantage or change in stress distribution, finite element analysis (FEA) was conducted (Figure 4).
The configuration of the implant progressed through a series of macro configurations starting with a design very close to the design used in orthopedics. The implant developed over time through testing to the current design (Figure 5). The prototype implants are in the following sizes: 3.7 mm, 4.2 mm, and 5.5
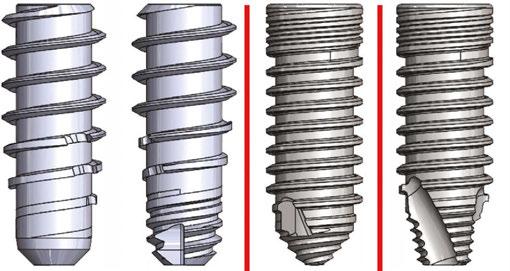
mm diameters with lengths ranging from 8 mm-12 mm in length (Figure 6). Likely by the time this article is published, FDA clearance will be completed.
The osteotomy
Implant systems on the market today, by design, prepare an osteotomy that is smaller than or equal to the minor diameter of the implant in order to maximize not only thread contact, but allow the implant body to compress the adjacent bone for increased stability. This increased stability comes at a price — The greater the geometrical differences between the implant the greater the geometrical differences between the implant and bone cavity, the greater the bone area that would be compressed, and the greater the stress generated. Duyck, et al., stated that the difference in size between the implant collar and the prepared cavity plays an important role in bone strains and stresses when an implant is inserted.7
13 implantpracticeus.com Volume 16 Number 2 CLINICAL
Figure 4: Comparison of standard versus inverted Unifi
Figure 2: FEA of forces distributed to bone Figure 3: Unifi threads
Figure 5: Implant evolution from orthopedic-style screw to dental design
As seen in the implant collar areas in Models 1 and bone cavity, the greater the bone area that would be compressed, and the greater the stress generated8 (Figure 7).
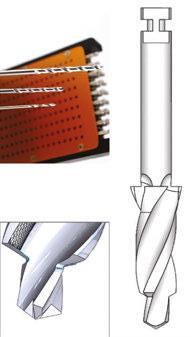
The Osteocentric osteotomy formers are a direct evolution of the proprietary Osteoguard drills used in orthopedic bone preparation (Figure 8). These drills are designed in such a way that they have shown to produce less heat generation, clear debris efficiently, and have precise drilling with better tracking.9 We can deduce from this that less injury to the bone is produced when creating the osteotomy.
When preparing the dental osteotomy, the drill will “overdrill” by approximately .1 mm larger than the minor diameter on all sides, thereby eliminating any compression by the implant body when inserting and seating in final position within the alveolus (Figure 9). The implant body will travel down the osteotomy aggressively loading the bone between the threads instead of radially. This type of loading produces much higher stability without the side effect of negative compressive forces.


By inserting the implant in this fashion, it is only the self-tapping Unifi threads that cut or tap their way into the bone. This is designed to prevent radial compressive forces which can cause necrosis and remodeling of the bone around the implant during healing. This remodeling is the major contributor to the dip in stability that occurs around 3-5 weeks after placement of an implant (Figure 10).10
FEA testing head-to-head with traditional implant design
Finite Element Analysis (FEA) is the use of calculations, models, and simulations to predict and understand how an object might behave under various physical conditions. Engineers use FEA to find vulnerabilities in their design prototypes, and this type of testing is used extensively these days in dental implant design and research.
Overall stress distribution was looked at under axial and lateral loading scenarios. It has been widely accepted and proven out that the majority of Von Mises stresses are confined to the top 5 mm of a dental implant even after osseointegration. When Las Casas studied multiple types of implants in both vertical and angled placement, implants presented low stress on the medullary bone area, indicating that the major concentration was actually in the cortical layer, which agrees with previous results.11

When comparing both a reverse buttress and V-threaded implant against an implant with Unfi threads, we can see that the traditional implant thread designs confirm the location of stresses reported in the literature. The Unifi threaded implant is designed to distribute the stress down the long axis of the whole implant, thereby dissipating forces over a much broader area resulting in a minimal concentration of forces at the crestal region (Figure 11).

This distribution is facilitated by the ability of the threads to not only lock the bone to the implant body, but also change
14 Implant Practice US Volume 16 Number 2 CLINICAL
Figure 6: Prototype implants
3.7 4.2 5.5
Figure 7: Typical drill to implant dimensions Figure 8: Osteoguard drills
Figure 9: Non-compressive osteotomy
Figure 10: Primary versus secondary healing
the forces that the individual threads produce. The force vectors between traditional and Unifi threads are very different. As stated earlier, with all three types of traditional threads, the forces are directed perpendicularly into the bone, where the Unifi threads use what is called “force vectoring” to have a very different stress pattern (Figure 12).
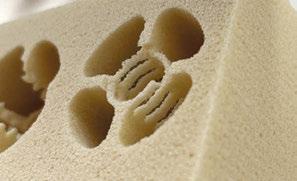
The overall resistance to movement was tested in 15 PFC Sawbones (Sawbones Pacific Research, Vashon, Washington) which simulates D3 bone type. The ability to interlock with healthy bone circumferentially around the implant allows the threads to stabilize the implant from every direction and ultimately resist displacement (Figure 13). When cycled 100,000 times with a 30º off-axis load, the results were dramatic (Figure 14).


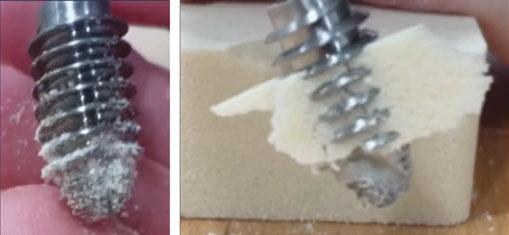
When comparing implant designs using 2:1 implant analogs (for 5.5 mm diameter implants), this interlocked bone can be seen when backing an implant out of a Sawbones demo block (Figure 15). These “spirals” of bone demonstrate the bone preservation rather than crushing which is typically produced by an implant with a reverse buttress thread (Figure 16).

Different thread designs were compared to evaluate the amount of movement an implant has when subjected to lateral loads. Again, when compared to conventionally designed implants, the FEA showed that the Unifi threaded implant had less overall movement at abutment level (Figure 17).


Implants fail when the bony support around them cannot withstand the repeated forces generated by mastication. As the implant loses stability, and bone continues to resorb, the implant moves resulting in crestal bone loss. As crestal bone recedes, it changes the physics of the system. As the pivot point moves apically, the moment arm above the pivot point gets longer. This lengthening will produce higher loads, or a vertical cantilever, ultimately accelerating the bone loss until the implant is lost.
15 implantpracticeus.com Volume 16 Number 2 CLINICAL
Figures 15 and 16: 15. Spirals of preserved bone (left). 16. Crushed Sawbones analog with a reverse buttress threaded implant (right)
Figure 17: Resistance to movement
Figure 12: Stress pattern comparison
Figure 13: Comparison of movement vectors
Figure 11: Stress distribution
A.
C.
B.
D.
Reverse Buttress
Unifi
V-thread
Reverse Buttress
Unifi
V-thread
Stability After Cycling an Off-Axis Load
Figure 14: Lack of stability drop demonstrating mechanical integration
In 15PCF Sawbones blocks, there is a dramatic difference when comparing implant tracking and the force it takes to laterally displace the implant head-to-head against a reverse buttress style implant (Figures 18 and 19).

Cadaveric studies
In cadaveric studies, the results attained during FEA testing held true when observing the way these implants performed. The two-step drilling protocol to create the osteotomy was very precise. The length specific final drill followed the path of the pilot without wandering and with little resistance. If the bone quality was of the D1 kind, then intermediately sized drills were utilized in progression.
As an implant practitioner, I was trained to look for high torque when placing an implant. The amount of torque that occurs when placing an implant with Unifi threads is literally a fraction of those I normally see when placing implants that are on the market today. Lower insertion torques yield favorable survival rates with optimal marginal bone levels compared with the accepted norm.12
The insertion of the implants required very little torque, yet the stability was outstanding when tested with an Osstell Beacon (Osstell, Goteborg, Sweden) RFA device. This supported what was seen in testing with lower insertion torques and equal to higher ISQ values when compared to a reverse buttress-style tapered implant.
When conducting trials in extraction/immediate placement scenarios, the tracking of the drills and the Unifi threads prevented the implant from “wandering” out of the osteotomy or intended position. This type of displacement is prevalent in immediate placement as a traditional implant is pushed out of the path by anatomy. Overall, the results of these limited studies showed outstanding clinical performance during the surgical phase.
Discussion
Mechanical Integration is possible today, and its advantages span from placement through early healing — ultimately an advantage in the long term for implant success. Is it possible that for years we have been chasing a unicorn with regard to crestal bone loss? Or has the answer always been there, but was not obvious because the solution did not exist until now?
Might the answer to short term failure be the ability to mechanically integrate an implant to the bone and prevent forces from creating micromovement of greater than 150 microns during the remodeling phase and prevent soft tissue encapsulation and failure?
The loss of crestal bone or an implant, after loading prosthetically (assuming proper prosthetic restoration) could be prevented by the distribution of masticatory forces throughout the complete length of the implant rather than focusing it at the crest.
Current research is focusing on the role of bacteria in peri-implantitis. Ask yourself this: Why does a patient have one implant survive and one fail within the same oral environment? Could bacterial infiltration be an opportunistic infection which occurs when implant stress on the bone causes resorption? It is a true “chicken or the egg” scenario.
For 50 years, we have been looking for answers to explain crestal bone loss and failure. Why have we not looked at the fact that the root cause may be the very implant designs we utilize and the acceptance as doctrine, that the major forces on the implant-bone system must be focused at and just below the crest for the first 5mm?
REFERENCES
1. Abraham CM. A brief historical perspective on dental implants, their surface coatings and treatments. Open Dent J. 2014 May 16;8:50-55.
2. Kotsakis GA, Romanos GE. Biological mechanisms underlying complications related to implant site preparation. Periodontol 2000. 2022 Feb;88(1):52-63.
3. Norton M. Primary Stability: What Does it Mean? Implant Practice US. https://implantpracticeus.com/ce-articles/primary-stability-what-does-it-mean/. Accessed April 21, 2023.
4. Stanley R. The Five Thread Guideline: A New Guideline for Predicting Primary Stability With Dental Implants. J Oral Implantol. 2020 Feb 1;46(1):81-86.
5. Rieger MR, Adams WK, Kinzel GL. A finite element survey of eleven endosseous implants. J Prosthet Dent. 1990 Apr;63(4):457-65.
6. Inou N,Iioka Y,Fujiwara H,Maki K. Functional adaptation of mandibular bone. In: Hayashi K, Ishikawa H. Computational Biomechanics. Heidelberg, Germany: Springer-Verlag,1996:23-42.
7. Duyck J, Corpas L, Vermeiren S, Ogawa T, Quirynen M, Vandamme K, Jacobs R, Naert I. Histological, histomorphometrical, and radiological evaluation of an experimental implant design with a high insertion torque. Clin Oral Implants Res. 2010 Aug;21(8):877-884.
8. Udomsawat C, Rungsiyakull P, Rungsiyakull C, Khongkhunthian P. Comparative study of stress characteristics in surrounding bone during insertion of dental implants of three different thread designs: A three-dimensional dynamic finite element study. Clin Exp Dent Res. 2018 Dec 26;5(1):26-37.
9. Pye JL, Garcia TC, Kapatkin AS, Stover SM. Comparison of Drilling, Screw Insertion and Pullout Variables of Biaxial and Uniaxial Thread Self-Tapping 3.5 mm Cortical Bone Screws in Cadaveric Equine Third Metacarpal Bone. In: Proceedings from the Veterinary Orthopedic Society 2020 Conference; February 1-8,2020.
10. Schlesinger C. RFA and its Use in Implant Dentistry. Chapter in Current Concepts in Dental Implantology: From science to clinical care. IntechOpen. https://www.intechopen.com/ chapters/77842. Published August 2021. Accessed April 21, 2023.
11. Las Casas EB, Ferreira PC, Cimini CA Jr, Toledo EM, Barra LP, Cruz M. Comparative 3D finite element stress analysis of straight and angled wedge-shaped implant designs. Int J Oral Maxillofac Implants. 2008 Mar-Apr;23(2):215-225.
12. Norton MR. The Influence of Low Insertion Torque on Primary Stability, Implant Survival, and Maintenance of Marginal Bone Levels: A Closed-Cohort Prospective Study. Int J Oral Maxillofac Implants. 2017 Jul/Aug;32(4):849-857.
16 Implant Practice US Volume 16 Number 2 CLINICAL
IP
Figure 18: Tracking and preservation — Buttress (L), Unifi (R)
Figure 19: Capture of bone — Buttress (L), Unifi (R)
ZestMasters Full-Arch Education
Multidimensional learning with practice-changing results
Learning FIXED full-arch and removable overdenture treatments can grow your practice and change your patients’ lives by giving them their smiles back and restoring their confidence. The ZestMasters education program from Zest Dental Solutions gives clinicians like you the foundation to treat the under-served edentulous patient population.
ZestMasters is a comprehensive, 33 CEU credit, hybrid online and in-person curriculum, taught by world-class clinicians covering such topics as:
• Fundamentals of diagnosis and treatment planning for removable and fixed full-arch cases
• Fundamentals of surgical and restorative implantology
• Step-by-step clinical and laboratory workflows
Start your journey to becoming a ZestMaster in three simple steps
Step 1: Register for ZestMasters, and receive your course product and tool kit, which alone is worth over $3,000!
Step 2: Up to 20 hours of on-demand lecture and hands-on webinars available 24/7 including self-paced hands-on procedures
• 9 hours of on-demand overdenture and fixed edentulous solution training.
• 5 hours of self-paced, hands-on webinar training on overdenture implant placement and restorative techniques.
• 6 hours of restorative and surgical on-demand courses.
Step 3: Head to the Zest Global Education Center in Las Vegas for an immersive, 2-day event.
• 13 hours of in-person lectures and guided, hands-on instruction bringing together learning from your webinar lectures and hands-on webinar practice.
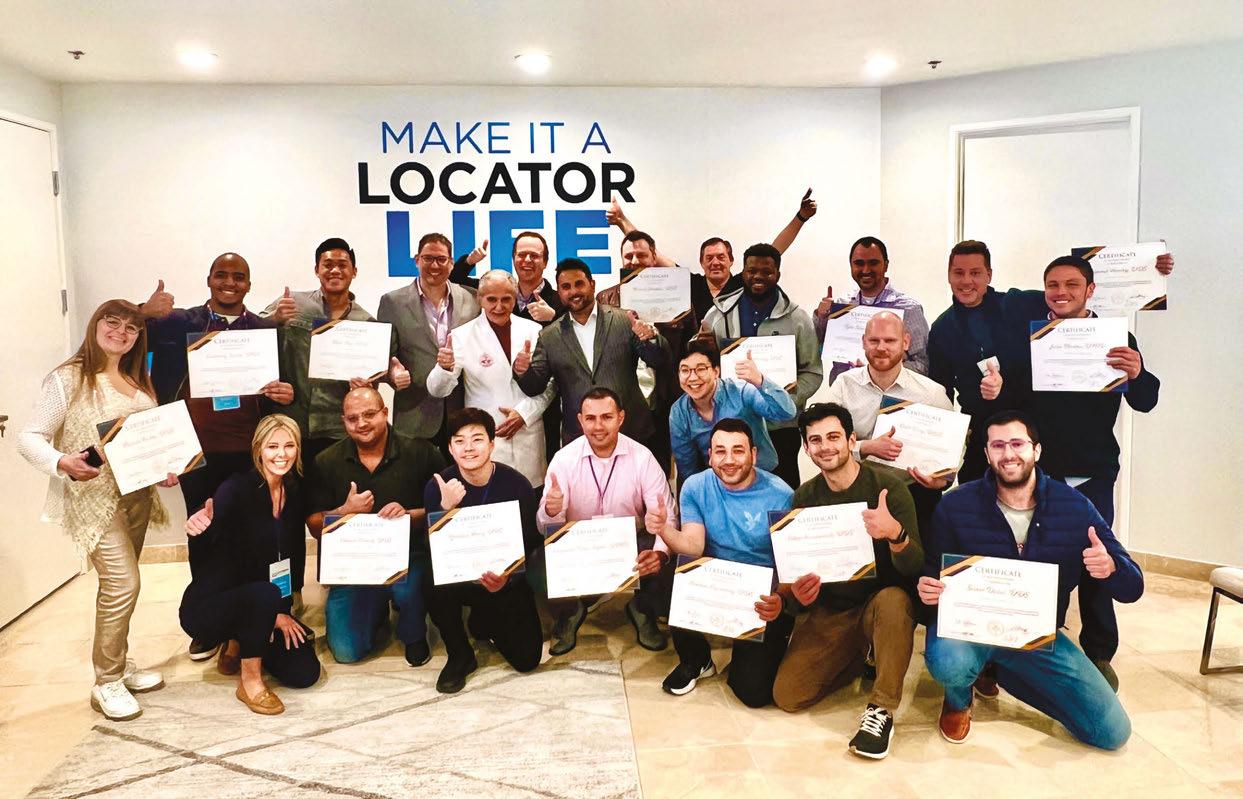
The program culminates in Las Vegas at the newly opened Zest Global Education Center where attendees gather for an interactive and engaging 2-day, in-person course that merges the prior on-demand learning into a live and comprehensive, fullarch educational experience.
17 implantpracticeus.com Volume 16 Number 2 EDUCATION SPOTLIGHT
“The beauty of ZestMasters is that it is multifaceted,” said Dr. Michael Scherer, Chief Clinical Officer with Zest Dental, ZestMasters instructor, and practicing prosthodontist. “Clinicians can get relevant didactic learning and hands-on training, both online and in-person, on practical topics like removable overdentures and FIXED full-arch solutions, chairside pick-up techniques, impression taking, and various restorative materials for optimum clinical outcomes. They also have the opportunity to share cases and solicit feedback from the word-class instructors as well as their peers.”
And of course, while ZestMasters participants work hard and learn a tremendous amount of valuable information and skills, they also have fun — it is Las Vegas, after all! In fact, a highlight of the 2-day in-person event is a team-building dinner event high above the Las Vegas Strip.
When all is said and done, the value of ZestMasters goes beyond this and does not end with the completion of the course. “With ZestMasters, our goal is to set attendees up for success and

give them skills and techniques that can grow their practice into a full-arch powerhouse,” explained Dr. Scherer. “We continue to build a community of ZestMasters graduates that serves as a valuable networking resource far into the future.”
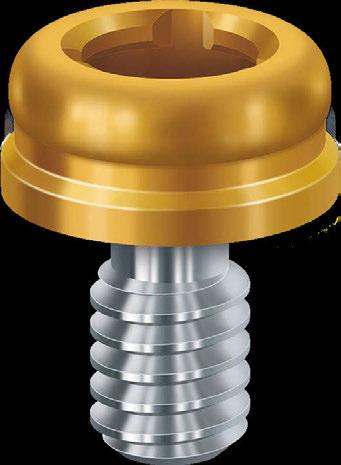
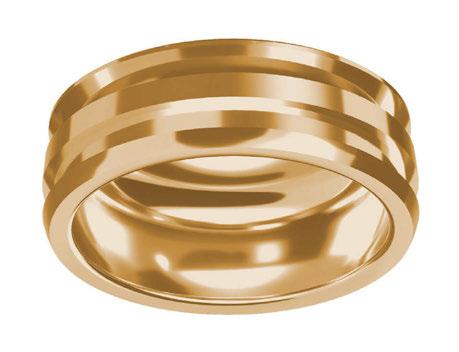
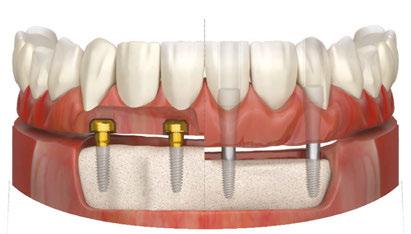
ZestMasters attendees now have the opportunity to learn how to convert removable LOCATOR® overdenture patients into LOCATOR FIXED™ patients simply by changing the inserts and housings, and modifying the prosthesis. This allows for seamless and affordable conversions and staged treatment planning or a FIXED full-arch treatment from the get-go. Learn more about LOCATOR FIXED at bit.ly/implantpractice_FIXED.


“The beauty of LOCATOR FIXED is that it uses the same abutments and workflow as the original LOCATOR to become a FIXED, full-arch solution that is removable by the clinician but not the patient,” said Dr. Scherer. “This is an affordable, simple, and less invasive way to deliver a FIXED full-arch option to an edentulous population that wants their smiles and confidence restored.”
To learn more about ZestMasters, go to bit.ly/ implantpractice_zestmasters.

18 Implant Practice US Volume 16 Number 2 EDUCATION SPOTLIGHT IP
This information was provided by Zest Dental Solutions.
The ZestMasters course is invaluable ... and made me a better dentist!” — Dr. Yvonne Kiernan
No New Abutment Required…
Now use LOCATOR Abutments for FIXED Full-Arch

Introducing a NEW flexible and accessible FIXED full-arch solution

LOCATOR Removable or FIXED... it's your choice.
Utilize patients' existing LOCATOR or newly placed abutments to transition from a removable overdenture to a FIXED, full-arch solution.
Offer staged treatment planning for your patients, removable today… FIXED tomorrow.

Give your patients the life they had with their permanent teeth with an affordable, permanent implant-secured solution.
A LOCATOR-proven alternative to the discomfort and pain associated with conventional dentures that feels more like permanent teeth.
Fixed Full Arch Choices
LOCATOR FIXED Conventional Fixed

Same Abutment, Reduced Chairtime, Less Bone Reduction… LOCATOR FIXED
bit.ly/ImplantPractice_LOCFXD
The importance of suturing in dental implant surgery
Dr. Steven Vorholt explores the many aspects of suturing for implant procedures
Suturing and incision design are the bookends to a successful implant surgery. With either of the bookends done poorly, the entire surgery is at risk. While surgical suturing may seem like a topic for beginners only, it is important to revisit and have a firm grasp so you can build on these basics for the benefit of your patients. The three suturing techniques discussed in depth in this continuing education article form the basis for all dental implant suturing. You must be a master of these techniques before you can adequately grow into the master implantologist.
There are several suturing techniques that can be used in dental procedures, each with its own advantages and disadvantages. In this article, we will discuss the benefits of the top three dental suturing techniques: simple interrupted sutures, interlocking continuous sutures, and horizontal mattress sutures and also discuss the types of dental sutures commonly used.
Suturing is the process of closing the wound after dental implant surgery. The sutures help to hold the gingiva in an ideal place, promote healing, and prevent infection. The proper technique and choice of suture material can significantly impact the success of the implant. Proper suturing is essential after dental implant surgery for the following reasons:
1. Promotes healing: Proper suturing helps to keep the implant in place and allow the surrounding tissues to heal properly.
2. Reduces the risk of infection: Suturing helps to close the wound and prevent bacteria from entering the surgical site, reducing the risk of infection. Proper suturing techniques and the use of sterile materials can help to minimize the risk of postoperative infection.
3. Minimizes discomfort and bleeding: Good suturing techniques can help to minimize postoperative discomfort and bleeding, which are common after dental implant surgery. Proper suturing can also reduce the need for pain medication and promote a faster recovery.
Choosing the right suture material
Choosing the right suture material is essential for the success of the implant. The ideal suture material should be strong, flexible, and biocompatible. There are several types of suture materials available, including:
Steven Vorholt, DDS, FAAID, DABOI, practices exclusively as a traveling dental implant surgeon in Phoenix and Tucson, Arizona. He has completed his Fellow in the AAID and earned his Diplomate in the ABOI. For more information on his lecturing and clinical practice, visit www.stevenvorholtdds. com. Dr. Vorholt also authored a guest chapter in a new book by Drs. Bart Silverman and Richard Miron called Modern Implant Dentistry, published summer 2023 by Quintessence Publishing. http://www.quintpub.com/
Educational aims and objectives
This self-instructional course for dentists aims to provide an overview of the benefits of the top three dental suturing techniques the types of dental sutures commonly used for implant procedures.
Expected outcomes
Implant Practice US subscribers can answer the CE questions by taking the quiz online at implantpracticeus.com to earn 2 hours of CE from reading this article. Correctly answering the questions will demonstrate the reader can:
• Identify why proper suturing is essential after dental implant surgery.
• Realize some characteristics of ideal suture material for certain types of procedures.
• Identify the armamentarium of instruments needed for suturing.
• Realize some techniques for suturing.
• Observe a patient case that uses the top three techniques.
2 CE CREDITS
1. Non-absorbable sutures: Non-absorbable sutures are made of materials that do not break down in the body and must be removed after the wound has healed. Examples of non-absorbable sutures include silk, nylon, and polypropylene.
2. Absorbable sutures: Absorbable sutures are made of materials that break down in the body over time and do not require removal. Examples of absorbable sutures include gut and polyglycolic acid.
3. Monofilament: Monofilament sutures have smooth microstructure and therefore prohibit or vastly lessen bacterial migration along the length of the suture.
4. Braided: Braided sutures are more apt to allow migration of bacteria and oral fluids and have a higher likelihood of infections. However, braided sutures are easier to throw secure knots and maintain knot stability.
The choice of suture material will depend on the location of the implant, the type of surgery performed, and the patient’s individual needs. It is essential to choose a suture material that is biocompatible and suitable for the specific procedure.1
Armamentarium
The armamentarium for suturing varies based on the surgeon’s preference and the type of suturing being attempted. Generally, it involves a needle holder, tissue forceps, and scis-
20 Implant Practice US Volume 16 Number 2 CONTINUING EDUCATION
sors. Each of these tools has several variations available to the implant surgeon.2


Needle Holders
Needle holders are instruments for gripping, driving, and grabbing suture needles. Not to be confused with hemostats which are generally more aggressively toothed instruments meant for hemostasis control, needle holders are often cross-hatched to allow gentle but firm control of the suture needle itself (Figure 1). The needle should be held ½-⅔ the way back towards the swage (the connection point on the suture and needle) on the body of the needle. Care should be taken to avoid grabbing the needle on the swage to avoid breaking the thread free, and care should be taken to avoid grabbing the needle by the point to avoid breaking, bending, or dulling the needle.
Insertion of the suture needle into the tissue should be perpendicular to the tissue for maximum cutting efficiency. Approaching the tissue at an acute angle can lead to shallow bites, torn tissue, and poor adaptation of the incision line. Needles should not be pushed through tissue but turned through with the wrist movement to allow for maximum cutting efficiency. When the needle exits the tissue, it should not be grabbed by just the tip of the needle; this may blunt or bend the needle tip leading to poor future bites and trauma to the tissue.3
Traditional needle holders have finger-ring handles and are available in differing lengths and tooth patterns. The needle holder is held in balance with the thumb and ring finger in the finger-rings and the middle and index finger stabilizing and guiding the passage of the needle through tissue.
Locking needle drivers come in two main varieties, the Mathieu (and variations) and the Castroviejo (Figure 2). Both needle drivers allow the surgeon to gently engage the auto-locking and unlocking portion of the instrument for better handling. The Mathieu-style needle holder is held in a palm grasp and is generally meant for use with thicker tissue and suture materials, while the Castroviejo is a more delicate instrument more widely used with finer suture materials 5-0 and thinner. The Castroviejo is held in a pen-grasp.
Tissue Forceps (Figure 3)


When engaging tissue margins for accurate suturing, the more mobile tissue should be engaged first, and the more secure tissue should be engaged second. A popular idiom to remember this is to “bring the ship to shore.” Bites should be equidistant depths from the incision line on either side of the incision to ensure equal pressure along the incision line. Tissue forceps can help stabilize mobile tissue for the initial bite and also help in retraction of more secure tissue.
Scissors
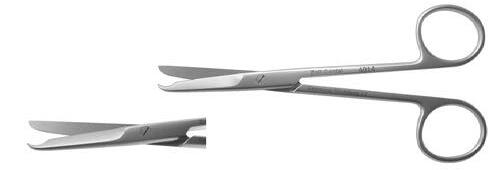
Any type of dental scissors can be used for suture removal and trimming, though several variations are available to help overcome common issues — longer scissors, angled cutting blades, hooked tips to facilitate embedding suture removal, etc. (Figure 4). Scissors should be maintained with adequate sharpness to avoid splitting or fraying sutures or accidentally pulling delicate sutures.


21 implantpracticeus.com Volume 16 Number 2 CONTINUING EDUCATION
Figure 1: Needle holders have cross-hatch patterns for grabbing needles, differing from hemostats which have aggressive teeth for clamping vessels, but are routinely incorrectly utilized for needle driving. The tool on the left is the hemostat
Figure 2: Locking needle drivers Castroviejo and Mathieu styles allow for more precise control with smaller diameter suture materials
Figure 4: Suture scissors have different angles for easy access to hard-toreach areas of the mouth. Hooked variations help to cut sutures at follow-up appointments by facilitating gently getting underneath the suture at the healed site. All intruments shown are from Zoll Dental
Figure 3: Tissue forceps have many varieties for different levels of access, tissue control, delicacy of the tissue being held, and features like suture slots
The length the suture “ears” should be cut is determined by the location, suture material, and surgical technique employed. Sutures with high shape memory should be cut longer to avoid irritation to the adjacent oral tissues and avoid early unraveling of the knots. Suture materials with low shape memory and braided materials can generally be cut shorter and maintain knot stability and low irritation. Approximately 3 mm to 5mm of ear length is acceptable and works well in most clinical situations.
Top three suture techniques
Simple Interrupted Sutures
Simple interrupted sutures are the most commonly used suturing technique in dental procedures (Figure 5). This technique involves placing individual sutures at regular intervals along the wound edge and tying each stitch separately. Simple interrupted sutures are easy to place and provide excellent wound closure.
Benefits of simple interrupted sutures
1. Precise wound closure: Simple interrupted sutures provide precise wound closure, ensuring that the edges of the incision are well approximated.
2. Reduced tension: These sutures help to distribute the tension evenly along the incision, reducing the risk of wound dehiscence and promoting faster healing.
3. Versatility: Simple interrupted sutures can be used in a variety of dental procedures, including extractions, flap surgeries, and implant placements.
Technique
1. Begin in the middle of the wound with the first stitch (bisecting incision technique) to ensure the wound margins are adapted correctly along the length of the incision.4
2. Take a 2 mm to 4 mm bite from the wound margin starting with the more mobile tissue (typically the buccal), and take another bite directly across the wound margin to the same depth as the first bite. This ensures equal tension on either side of the wound.


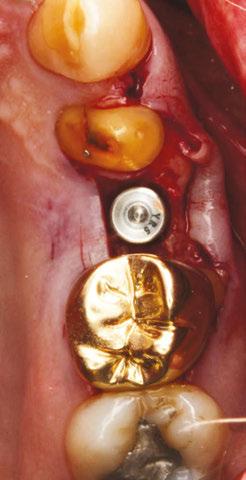
3. Begin the suture throw with a surgeon’s knot (2 forward, 1 backward) to cinch the knot and stabilize the suture. Add additional throws as necessary depending on the suture material chosen.5
4. Cut the ears of the suture 5 mm minimum to avoid early untying of the suture material. Stiffer suture material should have the ears trimmed longer to avoid causing the patient pain postoperatively.
5. Continue throwing simple interrupted sutures 3 mm to 5mm apart until the length of the incision is closed.
Interlocking continuous sutures
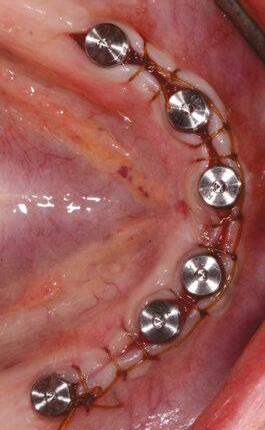
Interlocking continuous sutures are a variation of the continuous suturing technique (Figure 6). This technique involves placing a continuous suture along the wound edge and interlocking the stitches at regular intervals. Interlocking continuous sutures provide excellent wound closure and reduce the risk of suture failure.
Benefits of interlocking continuous sutures
1. Reduced risk of suture failure: Interlocking continuous sutures distribute tension more evenly along the incision, reducing the risk of suture failure and promoting faster healing.
2. Efficient placement: This technique is faster to place than simple interrupted sutures, reducing the time required for the suturing process.
3. Reduced trauma: Interlocking continuous sutures reduce trauma to the tissue by minimizing the number of times the needle passes through the tissue.
22 Implant Practice US Volume 16 Number 2 CONTINUING EDUCATION
Figures 5A and 5B: Simple interrupted sutures are the simplest and effective in quickly approximating tissue
Figures 6A and 6B: Examples of interlocking continuous sutures, convenient for longer span surgical sites for more efficient closure in time and suture material
Technique
1. Beginning at the most posterior segment of the incision, throw a simple ileave the knot placed buccal to the incision line.
2. Trim the tail only; do not cut the length with the suture needle.
3. Take an equal bite 3 mm to 5 mm more anterior to your initial bite.
4. Prior to cinching the loop, twist the loop 1 to 2 times (depending on suture material — sutures with less friction, i.e., PTFE, can be twisted more than braided sutures, i.e., PGA) and pass the needle through the loop.
5. Carefully cinch the new segment of suture material and align the interlocking knot buccal to the incision line.
6. Complete throws and interlocking loops along the length of the incision until reaching the end. Leave the loop long enough to tie to, and cut all 3 suture ears to appropriate length for suture security and patient comfort.
Horizontal mattress sutures
Horizontal mattress sutures are a technique used to close wounds under tension, such as those in the oral cavity. This technique involves placing stitches parallel to the incision, with each stitch passing through the tissue on either side of the incision (Figure 7). The mattress is typically the first suture throw to help close a wound, finished with either of the two previously dis-
cussed techniques. Its ability to reduce tension vectors across the incision line is key to its success in postoperative implant surgery.

Benefits of horizontal mattress sutures
1. Effective at closing wounds under tension.
2. Minimal tension on the wound edge.
3. Reduces the risk of wound dehiscence.

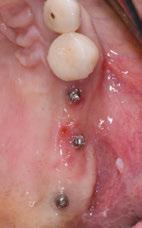
4. Helps to maintain downward pressure on a membrane and bone graft.
Technique
1. Begin with a bite 7 mm to 10 mm apical to the incision line (typically at the mucogingival junction) on the distal buccal of the incision.
2. With your next bite, exit the lingual tissue at similar depth to the initial buccal bite.

3. Re-bite the lingual tissue 5 mm to 10 mm mesial at the same depth.
4. Exit the buccal tissue perpendicular to the third bite — the four bites now forming a square with two threads crossing the crest/membrane.
5. Tie with a surgeon’s knot and any additional throws as needed depending on the suture material.
Building on the basics
Let’s review a recent case that showcases the rationale and techniques of the top three. It is common to utilize several suturing techniques in surgical closure, especially in larger grafting cases. In the following case, a lateral sinus lift was performed, and all three techniques were used to their full effect. Simple interrupted sutures are used to close small incisions and place tissue margins accurately back in place; horizontal mattress sutures are used to hold membranes in place and relieve tension over the incision line, and running interlocking continuous sutures are used to close longer incisions with watertight closure for maximum healing potential via primary closure.
A patient presented with a failing bridge on the upper left that is supported by three mini implants. The implants directly perforate the sinus and only ~2mm of residual bone height remains on the crest (Figure 8). The mini implants were removed, and a

23 implantpracticeus.com Volume 16 Number 2 CONTINUING EDUCATION
Figures 7A and 7B: Horizontal mattress sutures are useful for helping to secure membranes in grafting situations and relieving tension in longer span incisions
Figures 8A and 8B: The pre-op condition of the patient with mini implants engaging minimal bone and perforating the sinus. The patient’s implant supported bridge was loose and causing discomfort
Figure 9: A periosteal biting mattress engages only the periosteum in the buccal vestibule and exit and re-enters on the lingual tissue, helping to secure the membrane tightly over the window and crest
Figure 10: Simple interrupted, papilla sling, and horizontal mattresses can be seen to achieve primary closure without any sutures over the main body of the incision. Passive closure requires that closure is obtainable without tension directly over the incision line, as seen here
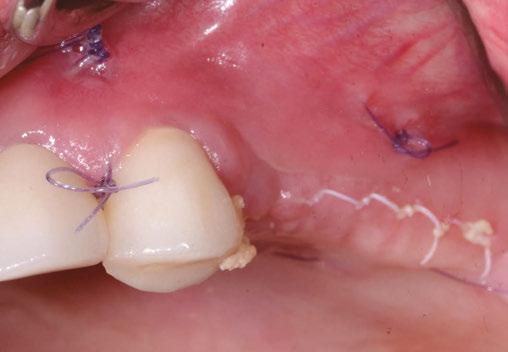

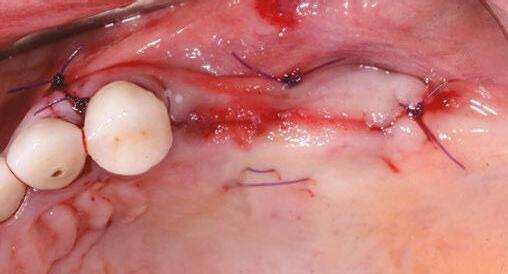
lateral window sinus lift was performed. Over the window and crest, a pericardium membrane was positioned to close all perforations into the sinus. Pericaridum membranes are resorbable membranes made from either human or porcine pericardium. The tissue that surrounds the heart is known to be extremely resistant to tearing (a leading reason for pericarditis being potentially fatal), and facilitates great handling properties as a dental material. It can be easily tacked or sutured, and maintains its shape memory for ease of placement over a defect. A periosteal-biting mattress suture is thrown first to help pin the membrane down on the buccal plate and crest (Figure 9). Next, simple interrupted sutures are used to put the vertical incision in the posterior back in position and the vertical incision in the anterior. Third, a papilla sling is used mesial to tooth No. 11 to tightly reposition the gingiva around the canine. A papilla sling suture functions by using a tooth as a pivot point to “sling” around and help reapproximate tissue. Only the buccal papilla are engaged, and the suture is passed underneath proximal contacts (if necessary) to facilitate wrapping around the lingual of the tooth. This suture is very useful for coronally advancing flaps or maintaining the coronal position of papillas after flap release. Fourth, a horizontal mattress suture is placed at the depth of the mucogingival junction to help approximate the flap margins, relieve tension at the incision line, and evert the tissue (Figure 10). Lastly, a PTFE running double-interlocking continuous suture is used to complete the final closure of the surgical site (Figure 11).
Two weeks post-op photos show great tissue response and health thanks in large part to meticulous suturing of the case (Figure 12).
Conclusion
Proper suturing technique is essential for successful dental procedures. By understanding the benefits and techniques of the top three dental suturing techniques, dentists can choose the appropriate technique for each procedure and promote faster healing, reduce the risk of infection, and minimize discomfort and bleeding for the patient.
REFERENCES
1. Moy RL, Waldman B, Hein DW. A review of sutures and suturing techniques. J Derma-
tol Surg Oncol. 1992 Sep;18(9):785-795. doi: 10.1111/j.1524-4725.1992.tb03036.x. PMID: 1512311.
2. Yag-Howard C. Sutures, needles, and tissue adhesives: a review for dermatologic surgery. Dermatol Surg. 2014 Sep;40 Suppl 9:S3-S15. doi: 10.1097/01.DSS. 0000452738.23278.2d. PMID: 25158874.
3. Moy RL, Lee A, Zalka A. Commonly used suturing techniques in skin surgery. Am Fam Physician. 1991 Nov;44(5):1625-34. PMID: 1950960.
4. Davis B, Smith KD. Oral Surgery Suturing. [Updated 2023 Jan 25]. In: StatPearls [Internet]. Treasure Island (FL): StatPearls Publishing; 2023 Jan-. Available from: https://www. ncbi.nlm.nih.gov/books/NBK572089/.
5. Romeo A, Rocha CL, Fernandes LF, Asencio FA, Zomer MT, Fujimoto C, Ussia A, Wattiez A, Koninckx PR, Kondo W. What is the Best Surgeon’s Knot? Evaluation of the Security of the Different Laparoscopic Knot Combinations. J Minim Invasive Gynecol. 2018 Jul-Aug;25(5):902-911. doi: 10.1016/j.jmig.2018.01.032. Epub 2018 Feb 5. PMID: 29421249.

24 Implant Practice US Volume 16 Number 2 CONTINUING EDUCATION
IP
Figure 11: Final closure finished with interlocking continuous PTFE sutures for watertight secure closure
Figures 12A and 12B: Two week post-op reveals minimal erythema and maintained tissue closure
Continuing Education Quiz
The importance of suturing in dental implant surgery
VORHOLT
1. Sutures help to _________.
a. hold the gingiva in an ideal place
b. promote healing
c. prevent infection
d. all of the above
2. The ideal suture material should be ________.
a. strong
b. flexible
c. biocompatible
d. all of the above
3. Monofilament sutures have and therefore prohibit or vastly lessen bacterial migration along the length of the suture.
a. smooth microstructure
b. rough microstructure
c. multiple filaments
d. braided structure
4. (Regarding insertion of the suture needle into the tissue) Approaching the tissue at ______ can lead to shallow bites, torn tissue, and poor adaptation of the incision line.
a. an acute angle
b. an obtuse angle
c. a right angle
d. reflex angle
5. The Castroviejo-style needle holder is held in a palm grasp and is generally meant for use with thicker tissue and suture materials, while the Mathieu is a more delicate instrument more widely used with finer suture materials 5-0 and thinner.
a. True
b. False
6. Sutures with _______ should be cut longer to avoid irritation to the adjacent oral tissues and avoid early unraveling of the knots.
a. a braided shape
b. low shape memory
c. high shape memory
d. a rougher texture
Each article is equivalent to two CE credits. Available only to paid subscribers. Free subscriptions do not qualify for the CE credits. Subscribe and receive up to 16 CE credits for only $149; call 866-579-9496, or visit https://implantpracticeus.com/ subscribe/ to subscribe today.
n To receive credit: Go online to https://implantpracticeus.com/continuingeducation/, click on the article, then click on the take quiz button, and enter your test answers.
AGD Code: 690
Date Published: May 15, 2023
Expiration Date: May 15, 2026
2 CE CREDITS
7. ________ help to distribute the tension evenly along the incision, reducing the risk of wound dehiscence and promoting faster healing.
a. Simple interrupted sutures
b. Interlocking continuous sutures
c. Horizontal mattress sutures
d. Purse-string sutures
8. With simple interrupted sutures, cut the ears of the suture 5 mm minimum to avoid early untying of the suture material.
a. True
b. False
9. __________ reduce trauma to the tissue by minimizing the number of times the needle passes through the tissue.
a. Simple interrupted sutures
b. Interlocking continuous sutures
c. Horizontal mattress sutures
d. Buried sutures
10. _________ help to maintain downward pressure on a membrane and bone graft.
a. Simple interrupted sutures
b. Interlocking continuous sutures
c. Horizontal mattress sutures
d. Subcutaneous sutures
To provide feedback on CE, please email us at education@medmarkmedia.com
Legal disclaimer: Course expires 3 years from date of publication. The CE provider uses reasonable care in selecting and providing accurate content. The CE provider, however, does not independently verify the content or materials. Any opinions expressed in the materials are those of the author and not the CE provider. The instructional materials are intended to supplement, but are not a substitute for, the knowledge, skills, expertise and judgement of a trained healthcare professional.
25 implantpracticeus.com Volume 16 Number 2 CONTINUING EDUCATION
Pterygoid implant survival rates with full-arch immediate-loading protocols
Drs. Dan Holtzclaw, Juan Gonzalez, Aldo Espinosa, Sam Sauza, Raouf Hanna, Peyman Raissi, Chris Epperson, Cory Ryan, Nirjal Patel, Amel Hassan, Peter Fereg, Jumoke Adedoyin, and Dan Fenton report on survival rates and other pertinent data
Abstract
Background
While contemporary root-form implants have been used in the pterygomaxillary region for over 30 years, few studies have evaluated immediate-loading protocols for these fixtures. The current study reports on the use of pterygoid implants in full arch immediate load protocols over an 8-year period.
Methods
A retrospective chart review was performed for all patients treated with immediately loaded fixed-arch protocols that involved pterygoid dental implants. Qualifying patients had data
Dan Holtzclaw, DDS, MS, is Chief Clinical Officer of the Advanced Dental Implant Center network and Director of Fixed Arch Services at Affordable Care LLC, Morrisville, North Carolina.
Juan Gonzalez, DMD, is an oral and maxillofacial surgeon at Advanced Dental Implant Center, Austin, Texas.
Aldo Espinosa, DDS, practices at Bonita Del Rey, Chula Vista, California, an Advanced Dental Implant Center affiliate.
Sam Sauza, DDS, practices at Advanced Dental Implant Center, San Diego, California.
Raouf Hanna, DDS, practices at Comprehensive Dental Group and Hanna Dental Implant Center, Houston, Texas, an Advanced Dental Implant Center affiliate.
Peyman Raissi, DDS, practices at My New Smile Dental, Nashville, Tennessee, an Advanced Dental Implant Center affiliate.
Chris Epperson, DMD, practices at Advanced Dental Implant Center, Phoenix, Arizona.
Cory Ryan, DDS, MD, is an oral maxillofacial surgeon at NuSet Dental Implants and Oral Surgery, Denver, Colorado, an Advanced Dental Implant Center affiliate.
Nirjal Patel, DMD, practices at Affordable Dentures & Implants, Kinston, North Carolina.
Amel Hassan, DDS, practices at Affordable Dentures & Implants, Winter Haven, Florida.
Peter Fereg, DDS, practices at Affordable Dentures & Implants, Orlando, Florida.
Jumoke Adedoyin, DDS, is Director of Clinical Relations, Affordable Care LLC, Morrisville, North Carolina.
Dan Fenton, DMD, is Director of Education & Clinical Training, Affordable Care LLC, Morrisville, North Carolina.
Educational aims and objectives
This self-instructional course for dentists aims to discuss survival rates for pterygoid dental implants in immediately loaded fixed-arch protocols.
Expected outcomes
Implant Practice US subscribers can answer the CE questions by taking the quiz online at implantpracticeus.com to earn 2 hours of CE from reading this article. Correctly answering the questions will demonstrate the reader can:
• Realize how to overcome some shortcomings of the posterior maxilla for implant placement.
• Be informed about a study where a total of 1,058 pterygoid dental implants were placed in 563 patients. Identify the pterygomaxillary complex and possible ways to maximize implant placement in that area.
• Realize survival rates and other pertinent data for dental implants placed in pterygoid region for full-arch immediately loaded procedures.
• Identify some history of pterygoid implants.
• Realize some unique implant insertion angles for this technique.
2 CE CREDITS
collected for age, sex, insertion torque, implant diameter, and length. Cone beam computed tomography scans were analyzed to confirm implant engagement into the pterygoid region, and CBCT angle measurement tools were used to determine both the anteroposterior and mediolateral inclinations of dental implants relative to the occlusal plane. All pterygoid implants in this study were loaded within 4 hours of placement using screw-retained transitional restorations. Definitive restorations were delivered an average of 8 months after implant placement and were followed annually at yearly maintenance appointments.
Results
A total of 1,058 pterygoid dental implants were placed in 563 patients with a mean survival rate of 98.02%. Mean follow-up time was 24.51 months (range 6-94 months). The mean anteroposterior implant insertion angle relative to the occlusal plane was 66.94 ± 8.82° while the mean mediolateral implant insertion angle relative to the occlusal plane was 57.66 ± 10.31°. Mean insertion torque value for pterygoid implants placed in this study was 50.38 ± 13.30 Ncm.
26 Implant Practice US Volume 16 Number 2 CONTINUING
EDUCATION
Conclusion
Pterygoid dental implants can achieve high survival rates in immediately loaded fixed-arch protocols with proper angulation placement.
Introduction
The posterior maxilla presents numerous challenges for dental implant treatment. When edentulous, pneumatization of the maxillary sinus reduces the amount of available bone for implant placement (Figure 1).1,2 When dentate, immediate implant placement following maxillary molar extraction is complicated by large diameter residual sockets, variable quantities of interradicular bone, and sinus floor proximity.3 Additionally, bone in the posterior maxilla is of poor density and provides minimal cortical anchorage for dental implant stability.4-6
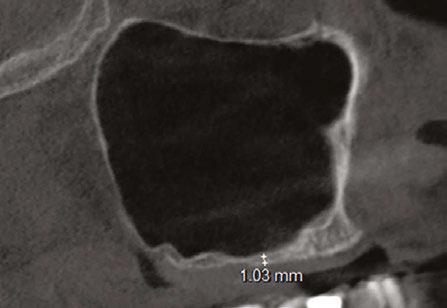
To overcome these shortcomings of the posterior maxilla for implant placement, a number of ancillary techniques have been employed including lateral window sinus lifts,7,8 crestal sinus lifts,9,10 bone condensation,11 short length-wide diameter dental implants,12 and offset placement of implants into the palatal root socket.13 Many of these procedures result in additional appointments, extended healing periods, supplementary expense, and increased patient morbidity.14

For full-arch immediate implant loading, the unique anatomic features of the posterior maxilla have influenced procedure designs. In the traditional All-On-4® full-arch immediate-loading protocol, the distal implants are angled up to 45° anteriorly in an effort to avoid the maxillary sinus, increase anterior-posterior (AP) spread, and anchor into the denser bone of the mid-maxilla versus the softer bone of the posterior maxilla (Figure 2).15-18 Occasionally, extensive pneumatization of the maxillary sinus results in anterior migration of the mesial sinus wall which can negatively affect placement of the angled implant for this procedure.1,2 In such situations, anterior placement of the distal angled implant leaves the undesirable choice of either a truncated restoration that may result in functional and esthetic issues, or an excessively long cantilevered restoration that may produce increased forces on the distal implant.19 For the experienced dental implant surgeon, the “pterygoid” dental implant affords an opportunity to overcome the shortcomings of the posterior maxilla while still allowing for immediate loading in most cases

(Figure 3). Use of the pterygoid region for dental implant treatment dates to the 1970s with subperiosteal techniques and the 1980s with more contemporary root-form fixtures.20-24 Although pterygoid implants have been reported in dental literature for nearly 50 years, very few studies have evaluated the use of these implants for immediately loaded full-arch procedures. Accordingly, the aim of this study is to report on survival rates and other pertinent data for dental implants placed in the pterygoid region for full-arch immediately loaded procedures.
Materials and methods
A retrospective chart review was performed in the offices of the authors for all patients treated with immediately loaded dental implants that were placed into the pterygoid region. To qualify as a “pterygoid” implant, fixtures were required to engage the pyramidal process of the palatine bone and/or the pterygoid lamellae of the sphenoid bone. Cone beam computed tomography (CBCT) scans were analyzed to confirm implant engagement into the pterygoid region, and CBCT angle measurement tools were used to determine both the anteroposterior and mediolateral inclinations of dental implants relative to the occlusal plane. Implant survival was defined according to criteria defined by Malo, et al.28 Basic data such as patient age, sex, implant diameter, and implant length were obtained from chart review. All pterygoid implants in this study were loaded within 4 hours of placement using screw-retained transitional restorations. Definitive restorations were delivered an average of
27 implantpracticeus.com Volume 16 Number 2 CONTINUING EDUCATION
Figure 1: CBCT (sagittal view) of pneumatized maxillary sinus
Figure 3: Panoramic radiograph of Pterygoid Fixated Arch Stabilization (PFAST) treatment
Figure 2: Panoramic radiograph of traditional All-On-4™-style treatment
8 months after implant placement and were followed annually at yearly maintenance appointments.
Results
A total of 1,058 pterygoid dental implants placed in 563 patients qualified as pterygoid implants for the purposes of this study. 306 patients were female and 257 were male with a mean age of 62.78 ± 12.04 years (range 31-92 years). Bilateral pterygoid implants were placed into 495 patients while 68 patients had pterygoid implants placed unilaterally. After a minimum follow-up time of 6 months and maximum time of 94 months (mean 24.51 months), 21 pterygoid implant failures were noted producing a survival rate of 98.02%. Complications were minimal and included the following: minor hemorrhaging during osteotomy creation, post-surgical trismus in 7 patients, and 1 patient could not tolerate the prosthesis extending back to the pterygoid implant. The mean anteroposterior implant insertion angle relative to the occlusal plane was 66.94 ± 8.82° (Figure 4), while the mean mediolateral implant insertion angle relative to the occlusal plane was 57.66 ± 10.31° (Figure 5). Mean insertion torque value for pterygoid implants placed in this study was 50.38 ± 13.30 Ncm (Figure 6).
Discussion
Full arch immediately loaded dental implants have become a proven treatment modality over the past 20 years following the introduction of the “All-On-4®” concept by Malo in 2003.15,16,18,2530 This treatment concept involves restoring an arch with at least four dental implants, the distal of which are tilted up to 45 degrees, and immediately loading the transitional prosthesis.15 In the maxilla specifically, angling the distal implants affords the benefit of avoiding the maxillary sinus and obviating the need for additional procedures such as sinus augmentation.27-29 As the anterior wall of the maxillary sinus determines the position of the distal angulated implant in All-On-4® style procedures, challenges can arise with extensive sinus pneumatization where the anterior wall of the maxillary sinus has migrated anteriorly. Studies by Khojastepour and Zhang show that the anterior wall of the maxillary sinus terminates at the first premolar or anteriorly in 93.67 - 98.60% of patients.57,58 Such situations restrict placement of the distal implant creating limitations on the A-P spread between implants. The restoring clinician is then faced with the prosthetic dilemma of excessive cantilever length that may compromise implant stability or prosthetic truncation which may create both functional and esthetic compromises for the patient.19 In such situations, use of pterygoid dental implants can help.14,19,31
In the 1970s, Linkow and others regularly employed the pterygoid region to provide support for full-arch subperiosteal implant restorations.20-24 Tulasne32 is generally credited as the first to describe use of root form dental implants in the pterygomaxillary complex with recommendations that “pterygoid” implants should cross the maxillary tuberosity to reach the dense cortical bone of the pterygomaxillary plate allowing sufficient anchorage

in the posterior maxilla in the absence of grafting materials.33 Early use of root-form machined surface dental implants in the pterygoid region during the late 1980s and 1990s achieved success rates of 86.3 – 89%.34-36 Pterygoid implant studies over the next 20 years attained improved success rates as they employed roughened surface treatments as opposed to the smooth surfaced implants of older studies, and new techniques were developed for their placement.14,37-42
Until recently, nearly all published pterygoid implant studies have focused on delayed loading techniques.14,43,44 Although some studies have reported isolated use of pterygoid implants for immediate loading,19,31,59 few studies have exclusively evaluated this technique in sufficient numbers to determine any definitive conclusions. The implant success rate of 98.02% reported in the present study of immediately loaded pterygoid dental implants is similar to the reported success rates of previously published pterygoid implant studies that employed delayed loading protocols.14,37-43 Reports of implant failures in previously published pterygoid implant studies typically occurred prior to prosthetic attachment during the unloaded healing phase.14,43,44 As these implants were not loaded and submerged during healing, failure to osseointegrate was likely due to misaligned insertion angles that caused inadequate engagement of the dental implant into


28 Implant Practice US Volume 16 Number 2 CONTINUING EDUCATION
Figures 4 and 5: 4. CBCT scan (coronal view) showing mediolateral pterygoid implant insertion angle relative to the occlusal plane (left). 5. CBCT scan (sagittal view) showing anteroposterior pterygoid implant insertion angle relative to the occlusal plane (right)
Figure 6: Intrasurgical photograph showing high insertion torque achieved with pterygoid dental implant placement
the dense bone of the pterygomaxillary complex. Vrielinck, et al.,45 confirmed as much when they reported most pterygoid implant failures in their study were due to “the apical part of the implant deviating in a more lateral position” to the initially intended drilling target of the pterygomaxillary bony complex. In the present study, all implant failures had similar findings to those of Vrielinck, et al.,45 with failed implants having excessive lateral or anterior placement relative to their intended target (Figure 7).
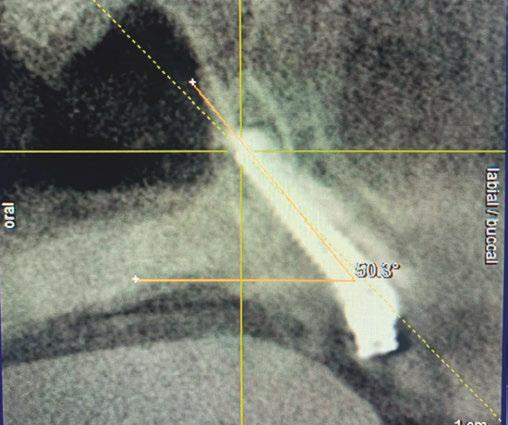

Anteroposterior implant insertion angles in the present study are similar to those of previously published studies. The 66.94º mean anteroposterior insertion angle of the current study falls between the 52.3º anterior insertion angle and 75.1º posterior insertion angle reported by Uchida, et al., in a computed tomography cadaveric study of potential pterygomaxillary implant insertion angles.46 A 2016 study by Rodriguez, et al., evaluating virtual planning of pterygoid implant insertion angles using CBCT scans had similar findings with a mean anteroposterior insertion angle of 74.19 degrees.47 In a 2014 study employing similar virtual planning methods, Rodriguez, et al., reported an average anteroposterior insertion angle of 72.5º and an average mediolateral angulation of 81.3º.48 The 57.66º mean mediolateral insertion angle of the current study is nearly 24 more medial to those reported by Rodriguez, et al., in their 2014 virtual planning study.48 The few studies that have analyzed the pterygoid implant failures cite excessive lateral implant insertion angles relative to the pterygomaxillary complex.14,45 Analyzed mediolateral relative to the occlusal plane, these “excessive lateral insertion angles” translate to an implant position that is too buccal with the implant essentially deflecting off the side of the pterygomaxillary complex. By angling an average of 24° more medial than the 2014 Rodriguez publication, the authors of the current study felt that they were able to engage the pyramidal process more consistently. The high mean insertion torque values reported in this study were likely a result of consistent engagement of the pyramidal process with this more medial angulation. Failure to engage the pterygomaxillary complex with pterygoid implants can result in severe complications. A 2013 case report by Nocini49 described displacement of a dental implant into the infratemporal fossa during computer guided placement of a pterygoid implant. Another study utilizing computer designed drill guides for pterygoid implant placement reported mean apical insertion deviation of 7.77 mm (range 1.1 – 16.1 mm) and mean insertion angle deviation of 10.18º (range 1.7 – 18.0º).45 Implant insertion deviations of this magnitude not only have the potential to completely miss engagement of the pterygomaxillary complex resulting in increased chances of implant failure, they also increase the potential of damaging adjacent vascular structures such as the pterygoid venous plexus and maxillary artery.19
The pterygomaxillary complex is composed of three distinct bony structures: the low density maxillary tuberosity, the high density pyramidal process of the palatine bone, and the high density pterygoid processes of the sphenoid bone (Figure 8).50 The dense bone of the pterygomaxillary pillar where the sphenoid and palatine bones meet is where pterygoid implants gain the majority of implant insertion torque as CBCT analysis of this area shows bone density 139.2% higher than that of the maxillary tuberosity.47 Failure to engage the dense bone of the pyramidal and/or pterygoid processes may lead to lower implant insertion torque and a higher chance of failure.19,51-54 Average insertion torque for the pterygoid implants in this study was 50.38 Ncm. CBCT analysis showed that nearly all implants in this retrospective study actively engaged the dense bone of the pyramidal process which likely accounts for the high insertion torque and low failure rate of implants in this study. When appropriately placed, pterygoid implants can engage up to 8 mm of dense Type I bone

29 implantpracticeus.com Volume 16 Number 2 CONTINUING EDUCATION
in the pyramidal process and pterygoid pillar (Figure
Figures 7 and 8: 7. CBCT scan (coronal view) showing a dental implant placed in the pterygomaxillary region that is lateral to the pyramidal process (left). 8. CBCT scan (coronal view) showing low density bone of the maxillary tuberosity (radiolucent) juxtaposed to high density bone of the pyramidal process and pterygoid pillar (radiopaque) (right)
Figure 9: CBCT scan (coronal view) showing pterygoid implant with 8+ mm of engagement in dense bone of the pyramidal process and pterygoid pillar
9).60,61 A study of edentulous dry skulls evaluating anatomical measurements of the pyramidal process found an average height of 13.1 mm (range 8.3 mm - 21.4 mm), mean anteroposterior width of 6.5 mm (range 3.3 mm - 9.7 mm), and mean mediolateral width of 9.5 mm (range 4.2 mm - 11.8 mm).55 Based on these measurements for this intended target area of pterygoid implants and respect for adjacent vascular structures, implant diameter recommendations of 3.5 mm - 4.3 mm have been proposed in various studies of pterygoid dental implants.14,19,31,37,40,42,56 In the current study, utilized implant diameters were 3.5 mm, 3.75 mm, 4.2 mm, and 4.3 mm with the majority of implants being either 3.75 mm or 4.2 mm in diameter. Dental implant lengths in the current study ranged from 13 mm to 25 mm. These implant lengths are consistent with previously published pterygoid implant studies and other studies evaluating anatomic features of the pterygomaxillary complex relative to implant length.14,19,31,37,40,42,56 A recent systematic review and meta-analysis of pterygoid dental implants by Araujo, et al.,14 established a minimum implant length of 13 mm for fixtures to be considered pterygoid implants due to the fact that implants of at least this length or longer would be necessary to engage the dense bone of the pyramidal process. In a retrospective evaluation of 992 dental implants placed into the pterygoid region over a 28-year period, Balshi, et al., reported that longer implant lengths up to 18 mm had higher survival rates
compared to shorter length implants, and these fixtures could be safely placed in this region without complication.37 Going even further in length, other studies have employed pterygoid implants with lengths up to 25 mm without complication.31,59 The results of the current study concur with these previous publications that implants up to 25 mm in length can be safely placed in the pterygoid region on a case by case basis.
Conclusion
The present study demonstrates that immediately loaded dental implants engaging the pterygomaxillary complex have survival rates comparable to delayed-loading protocols for pterygoid implants in previously published studies. To adequately engage the target area containing dense bone in the pterygomaxillary pillar, it is important to know the anatomic features of this region and unique implant insertion angles for this technique.
IP
3 REASONS TO SUBSCRIBE
• 16 CE credits available per year
• 1 subscription, 2 formats – print and digital
• 4 high-quality, clinically focused issues per year

1 year $149 / 1 year digital only $79
3 SIMPLE WAYS TO SUBSCRIBE
• Visit www.implantpracticeus.com

• Email subscriptions@medmarkmedia.com
• Call 1-866-579-9496
30 Implant Practice US Volume 16 Number 2 CONTINUING EDUCATION
References available online.
For the experienced dental implant surgeon, the “pterygoid” dental implant affords an opportunity to overcome the shortcomings of the posterior maxilla while still allowing for immediate loading in most cases.
Implant Practice US
Connect. Be Seen. Grow. Succeed. | www.medmarkmedia.com
Continuing Education Quiz
Pterygoid implant survival rates with full-arch immediate-loading protocols
HOLTZCLAW, ET AL.
1. When edentulous, pneumatization of the maxillary sinus _________ the amount of available bone for implant placement.
a. reduces
b. increases
c. has no effect on
d. none of the above
2. When dentate, immediate implant placement following maxillary molar extraction is complicated by ________.
a. large diameter residual sockets
b. variable quantities of interradicular bone
c. sinus floor proximity
d. all of the above
3. In the traditional All-On-4® full-arch immediate-loading protocol, the distal implants are angled up to ________ anteriorly in an effort to avoid the maxillary sinus, increase anterior-posterior (AP) spread, and anchor into the denser bone of the mid-maxilla versus the softer bone of the posterior maxilla.
a. 11°
b. 35°
c. 45°
d. 60°
4. Use of the pterygoid region for dental implant treatment dates to the 1970s with subperiosteal techniques and the 1980s with more contemporary root-form fixtures.
a. True
b. False
5. _________ is generally credited as the first to describe use of root form dental implants in the pterygomaxillary complex with recommendations that “pterygoid” implants should cross the maxillary tuberosity to reach the dense cortical bone of the pterygomaxillary plate allowing sufficient anchorage in the posterior maxilla in the absence of grafting materials.
a. Linkow
b. Tulasne
c. Zhang
d. Balshi
6. In the current study, the majority of implant diameters were ________.
a. 3.5 mm
b. 3.75 mm
c. 4.2 mm
d. both b and c
7. A recent systematic review and meta-analysis of pterygoid dental implants by Araujo, et al., established a minimum implant length of __________ for
Each article is equivalent to two CE credits. Available only to paid subscribers. Free subscriptions do not qualify for the CE credits. Subscribe and receive up to 16 CE credits for only $149; call 866-579-9496, or visit https://implantpracticeus.com/ subscribe/ to subscribe today.
n To receive credit: Go online to https://implantpracticeus.com/continuingeducation/, click on the article, then click on the take quiz button, and enter your test answers.
AGD Code: 690
Date Published: May 15, 2023
Expiration Date: May 15, 2026
2 CE CREDITS
fixtures to be considered pterygoid implants due to the fact that implants of at least this length or longer would be necessary to engage the dense bone of the pyramidal process.
a. 6 mm
b. 13 mm
c. 15 mm
d. 20 mm
8. In a retrospective evaluation of 992 dental implants placed into the pterygoid region over a 28-year period, Balshi, et al., reported that longer implant lengths up to _________ had higher survival rates compared to shorter length implants, and these fixtures could be safely placed in this region without complication.
a. 8 mm
b. 15 mm
c. 18 mm
d. 20 mm
9. The results of the current study concur with these previous publications that implants up to ______ in length can be safely placed in the pterygoid region on a case by case basis.
a. 18 mm
b. 20 mm
c. 25 mm
d. 30 mm
10. To adequately engage the target area containing dense bone in the pterygomaxillary pillar, it is important to know _______.
a. the anatomic features of this region
b. the unique implant insertion angles for this technique
c. the patient’s calcium levels
d. both a and b
To provide feedback on CE, please email us at
education@medmarkmedia.com
Legal disclaimer: Course expires 3 years from date of publication. The CE provider uses reasonable care in selecting and providing accurate content. The CE provider, however, does not independently verify the content or materials. Any opinions expressed in the materials are those of the author and not the CE provider. The instructional materials are intended to supplement, but are not a substitute for, the knowledge, skills, expertise and judgement of a trained healthcare professional.
31 implantpracticeus.com Volume 16 Number 2 CONTINUING EDUCATION
The Advanced Dental Implant Center Network builds momentum

As the nation’s largest Dental Support Organization (DSO) exclusively focused on tooth replacement solutions, Affordable Care recently expanded its support to a new fixed-arch dental brand: Advanced Dental Implant Center (ADIC). The ADIC network is dedicated to providing advanced tooth replacement services including fixed-arch care and exotic implants such as zygomatic and pterygoid implants.
“Affordable Care has a nearly 50-year history and proven track record in helping dental practices grow through our DSO support,” explains Gene Kirtser, Chief Executive Officer, Affordable Care, which provides business, operations, and clinical education services to more than 425 dental practices across 42 states. “We will continue to support the very best implant doctors by affiliating with their practices to help expand even more patient access to fixed-arch and specialized implant services.”
We are attracting general dentists with extensive implant experience, oral surgeons, periodontists, and prosthodontists who are helping us build something very special for patients and doctors in our industry. This is tremendous timing and an opportunity for fellow doctors to help lead and be at the forefront of advanced dental care in the U.S. By working together, the possibilities are endless with the Advanced Dental Implant Center network.”
— Dr. Dan Holtzclaw
The ADIC brand was officially launched after Affordable Care affiliated with Dr. Dan Holtzclaw’s Austin Dental Implant Center, an already successful and proven practice model that exclusively served fixed-arch patients and patients with severe bone loss. Dr. Holtzclaw is now Affordable Care’s Director of Fixed-Arch Services and Chief Clinical Officer for the ADIC network.
“I’m excited to lead the clinical team that is helping to grow our new Advanced Dental Implant Center network,” shares Dr. Holtzclaw, one of the most recognized fixed-arch doctors in the world, who recently published a 500-page textbook on highly advanced dental implant procedures including zygomatic, quad-zygo, transnasal, pterygoid, piriform and nasopalatine fixtures. “We are attracting general dentists with extensive implant experience, oral surgeons, periodontists, and prosthodontists who are helping us build something very special for patients and doctors in our industry. This is tremendous timing and an opportunity for fellow doctors to help lead and be at the forefront of advanced dental care in the U.S. By working together, the possibilities are endless with the Advanced Dental Implant Center network.”
The ADIC network is comprised of general dentists with extensive implant experience, oral surgeons, periodontists
and prosthodontists with high or growing volume of dental implant placement. These practices have either rebranded to the ADIC name or chosen to maintain their existing brand name following affiliation with Affordable Care.
Dr. Raouf Hanna, whose Hanna Dental Implant Center and Comprehensive Dental Group of Houston both continue to operate under their existing brand names, explains, “I chose to affiliate with Affordable Care because they listened to what I was trying to accomplish in the sale of my two practices. Combined with the financial and operational support provided to me, their reputation, deep talent, and expertise, along with the expansive scale of the Affordable Care network, I was confident in my decision to join their supported community of doctors to help my practices serve more patients. This is an exciting time and place to be.”
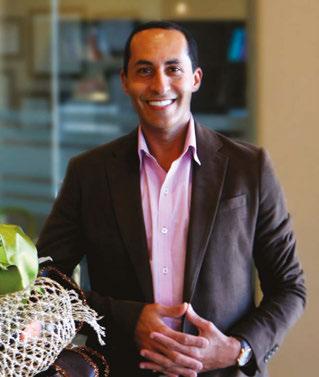
Scan the QR Code or call 888537-2801 to learn about affiliation opportunities.

32 Implant Practice US Volume 16 Number 2 SERVICE PROFILE
This information was provided by Affordable Care. IP
Dr. Raouf Hanna
Preorder now to save 20%!
Edited
by Bart Silverman
and
Richard J. Miron,


this book takes a comprehensive look at the state of implant dentistry today, equipping beginners and seasoned clinicians alike to improve their skills and practice implant dentistry safely and predictably.
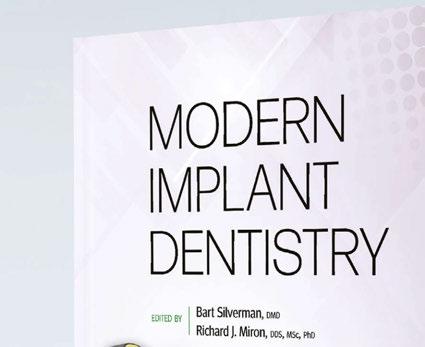
Authors include Mark Bishara, Matthew J. Fien, Shankar Iyer, Bach Le, Curry H. Leavitt, John C. Minichetti, Justin Moody, Jack Piermatti, Michael A. Pikos, Steven J. Vorholt, and David H. Wong, among many more!
472 pp; 663 illus; ©2023; ISBN 978-1-64724-160-5 (B1605);
Special prepub price US $182
For more on suturing
Periodontal and Peri-implant Plastic Microsurgery


Glécio Vaz de Campos and Cláudio Julio Lopes
Perform conservative, biologic, and predictable procedures with the greatest precision possible.
368 pp; 1,247 illus; ©2021; ISBN 978-0-86715-819-9 (B8199); US $262
The Art of Dental Suturing

A Clinical Guide


A. Burak Çankaya and Korkud Demirel
A complete guide to the various wound closure methods and techniques required in dental surgery.
112 pp; 141 illus; ©2021; ISBN 978-1-78698-103-5 (BG142); US $78

CALL: (800) 621-0387 (toll free within US & Canada) • (630) 736-3600 (elsewhere) 5/23 FAX: (630) 736-3633 EMAIL: service@quintbook.com WEB: www.quintpub.com Quintessence Publishing Co Inc, 411 N Raddant Rd, Batavia, IL 60510 To order, visit our website at www.quintpub.com Includes a chapter on suturing by
Steven J. Vorholt!
Is social media placing your personal privacy or your small business at risk?
Mark Pribish offers guidance on minimizing risks of social media

Some critics of social media say our addiction to apps in general and social media (in particular) open ourselves up to privacy risks. My question to app and social media users is, “When was the last time you read the terms and conditions or adjusted the privacy settings of your app or social media accounts?”
While apps and social media offer convenience, entertainment, and networking opportunities — cyber thieves and ID theft criminals are leveraging social networks and apps to do their dirty work.

According to the second quarter 2022 Brand Phishing Report from Check Point Research, which “highlights the brands that were most frequently imitated by cybercriminals in their attempts to steal individuals’ personally identifiable information (PII) or payment credentials over the quarter,” LinkedIn remains the most impersonated brand by phishing campaigns.1
As most know, LinkedIn is not only a social media site but also the world’s leading professional networking site. Hackers have imitated brands in business sectors such as social media (LinkedIn), technology (Microsoft), shipping/courier services (DHL), and online shopping (Amazon) and highlights the ongoing risks facing users of trusted business platforms.
I have listed below from the Check Point Research Brand Phishing Report the top-ranked brands by their overall appearance in brand phishing attempts.2
1. LinkedIn (45%)
These imitation phishing scams of leading brands are effective and lucrative for cyber thieves and ID theft criminals because both consumers and business executives are more likely to click on a well-known name/brand.
But sometimes it’s more than just the hacker you must worry about. Consumers and business executives need to know that apps and social media can track your search engine history, purchasing habits, geographical location, and even investigate your files and contact list — all without your knowledge and sometimes without your permission.
For example, when you install an app, most apps will require you to “accept” their terms and conditions — but did you read and really understand the type of information that is being collected and the kind of privacy threats you now are exposed to?
How bad can these “privacy threats” be? Just imagine an app vendor or third-party marketer collecting and selling your smartphone’s unique device ID, phone’s location, phone number, your age, gender, likes, dislikes, search engine habits, emails, usernames, and more to data brokers. And then imagine how these data brokers collect, analyze, and package your most sensitive personal information in a unique profile and sell it over and over again — without your knowledge.
But it gets worse as The Federal Bureau of Investigation (FBI) released its Internet Crime Complaint Center (IC3) 2021 Internet Crime Report and accompanying 2021 State Reports last March.3 The FBI reported 847,376 complaints of suspected Internet crime in 2021, a 7% increase from 2020 that resulted in losses exceeding $6.9 billion. This is happening even though small and big businesses along with state and Federal governments spend billions of dollars to fight daily cybersecurity attacks.
34 Implant Practice US Volume 16 Number 2 GOING VIRAL
2. Microsoft (13%)
3. DHL (12%)
4. Amazon (9%)
5. Apple (3%)
6. Adidas (2%)
7. Google (1%)
8. Netflix (1%)
9. Adobe (1%)
10. HSBC (1%)
Mark Pribish is the Practice Leader, Identity Theft and Data Breach Solutions at Scottsdale, Arizona-based Vero, LLC. He has authored hundreds of articles and is frequently interviewed by local and national media as an identity theft and data breach risk management expert. He is a member of the Identity Theft Resource Center Board of Directors and is a graduate of the University of Dayton.
Microsoft is an example of a large and sophisticated technology company with annual revenue of $168 billion that spends about $2 billion annually to respond to current and future cybersecurity challenges and threats. At the same time, hackers focusing on Microsoft vulnerabilities have successfully beached Microsoft 4 times, creating four significant data breach incidents that have exposed customer data and placed clients at risk during the last 12 months.4
In addition, the FBI Internet Crime Report stated that of the more than 30 crime types reported, the top three cybercrimes were phishing scams, non-payment/non-delivery scams and personal data breach, closely followed by identity theft and extortion.
The reality is that small- and mid-sized businesses such as dental and medical practices are viewed as easy targets because of limited resources and poor information security best practices.
The fact is that cyber thieves and ID theft criminals love the trail we leave on social media. Specific to individual consumers and small business employees, here are my five tips to help you minimize your social media privacy risks:
1. Limit and/or eliminate sharing your personal information online.
2. Increase your privacy awareness by reviewing and adjusting your privacy settings.
3. Be aware that some apps reset your privacy settings during major upgrades.
4. Learn more on how your personal information is used and for what purposes.
5. Consider using “privacy assistant or automation software” to help keep your privacy preferences current.
Specific to small (and big) businesses, no one company can ever prevent itself from ever experiencing a data breach event — especially with how apps and social media can place a small business at risk. Some of the most notable data breaches in 2021 and 2022 include CNA, Experian, Facebook, GEICO, Instagram, LinkedIn, Marriott, Microsoft, Tesla, and Twitter.
The irony to these data breaches is that these businesses pride themselves on safeguarding PII, and these businesses have more financial and information technology resources than most other business. Yet they still cannot prevent a data breach event from happening.
The reality of data breaches is that they occur almost every day — whether it is an accidental release (which is a polite phrase for carelessness or incompetence) or malicious intent (with the insider threat a common focal point, although the media heavily focuses on IT and hacking events).
The 2021 Verizon Data Breach Investigations Report can help both consumers and small businesses be proactive in mitigating their exposure to identity theft and data breaches. Last year’s Data Breach Investigations Report (DBIR) highlights the realty of data breaches that can support a cyber-risk management strategy for all businesses in general but small business in particular, including these findings.5
• Social engineering is the most successful attack.
• 85% of breaches involved a human element.
• Older vulnerabilities that haven’t been patched are being exploited by attackers.
• Credentials remain one of the most sought-after data types, followed by personal information.
• Employees continue to make mistakes that cause incidents and breaches.
• Business email compromises were the second most common form of social engineering.
• Most social engineering incidents were discovered externally.
This year’s 2022 Verizon Data Breach Investigations Report highlights “the importance of building a culture of cybersecurity vigilance,” including these findings.6
• There are four key paths leading to your estate: credentials, phishing, exploiting vulnerabilities, and botnets.
• All four are pervasive in all areas of the DBIR, and no organization is safe without a plan to handle each of them.
• This year ransomware has continued its upward trend with an almost 13% rise — an increase as big as the past 5 years combined.
• The human element continues to drive breaches. Whether it is the use of stolen credentials, phishing, or simply an error, people continue to play a large part in incidents and breaches alike.
• Error continues to be a dominant trend, and the fallibility of employees should not be discounted.
Whether you are an individual consumer, employee, or a small business owner, you need to be aware that social media can place your personal privacy and/or small business at risk. Be aware of the latest social engineering trends including apps and social media where hackers imitate leading business brands.
As for receiving links of well-known brands on social media, my recommendation on receiving notifications from LinkedIn, Facebook, or any other social media is to ignore the links or attachments. If a social media notification is legitimate, you will receive it again, and then you can go to the social media network login page to retrieve it directly.
REFERENCES
1. 2022 Brand Phishing Report from Check Point Research. LinkedIn remains the most impersonated brand by phishing campaigns. Accessed August 16, 2022.
2. 2022 Brand Phishing Report from Check Point Research. https://www.securitymagazine.com/articles/98046-linkedin-remains-most-impersonated-brand-by-phishing-campaigns#:~:text=Below%20are%20the%20top%20brands,DHL%20(12%25). Accessed August 16, 2022.
3. FBI Internet Crimes Report. https://www.ic3.gov/Media/PDF/AnnualReport/2021_ IC3Report.pdf. Accessed August 16, 2022.
4. Microsoft Data Breaches: Full Timeline Through 2022. https://firewalltimes.com/microsoft-data-breach-timeline/. Accessed August 16, 2022.
5. 2021 Verizon Data Breach Investigations Report. https://www.verizon.com/about/ news/verizon-2021-data-breach-investigations-report. Accessed August 16, 2022.
6. 2022 Verizon Data Breach Investigations Report. https://www.verizon.com/business/resources/reports/2022/dbir/2022-data-breach-investigations-report-dbir.pdf. Accessed August 16, 2022.
35 implantpracticeus.com Volume 16 Number 2 GOING VIRAL
IP
Diet, nutrition, and the implant patient
Dr. Thomas J. Balshi discusses how key nutrients affect implant success

Let’s face it, most Americans do not eat well. Even body builders, athletes, and models who look as if they are eating right, may not be getting all the nutrition that they need. What we do find is that unbalanced diets and subclinical deficiencies are very common. Poor nutrition has proven to be a significant risk factor for increasing the likelihood of oral diseases. A lack of certain key nutrients can become a factor in making the mouth more susceptible to infection and disease.
Implantologists must be aware of nutritional factors and deficiencies that can adversely affect implant sur gery and subsequent patient rehabilitation. There are many nutrients, vitamins, and minerals that may be useful and even necessary for the implant patient both before and after implant placement. Dental implants and implant-retained and/or supported prostheses are viable treatment options for all patients when nutri tional factors are considered.
The osseointegration and overall dental implant success can be dependent on the health and well-being of patients. Nutrition is a critical area to address with patients, as a balanced diet and supplementing with vitamins, minerals, and key nutrients can enhance healing, osseointegration, and overall implant success after a dental implant procedure.
Thomas Balshi, DDS, FACP, is a Board-certified prosthodontist and emeritus practitioner at Prosthodontics Intermedica (PI Dental Center) in Fort Washington, Pennsylvania, and emeritus director of the Institute For Facial Esthetics. A graduate of Temple University School of Dentistry, he received surgical and prosthetic training in the Brånemark System of Osseointegrated Implants at the University of Toronto and in Gothenburg, Sweden. A Diplomate of the American Board of Prosthodontics, he is a charter member and fellow of the Academy of Osseointegration, a fellow of the American College of Prosthodontists and the Academy of Implant Prosthodontics, and a founding member of the International College of Prosthodontists. Dr. Balshi is a member of the American Dental Association. He is a founding member and past president of the Pennsylvania Prosthodontic Association. He is also a distinguished practitioner in the National Academies of Practice. Dr. Balshi is the lead author for the comprehensive book: A Patient’s Guide For Dental Implants (Addicus Publishing). He also has published a comprehensive cookbook entitled From Soup To Nuts, designed for patients going through implant treatment.
A balanced diet helps to promote bone health, which is important because dental implants require a healthy jawbone to fuse with and provide a stable base for the implant. A balanced diet that is rich in bone-building vitamins, minerals, and other key nutrients can help maintain good bone health and density, reducing the risk of implant failure and help increase the longevity of your implants. Clinicians should consider recommending supplementation to patients with poor diets or underlying health issues in order to provide nutritional insurance before and after implant placement. BONE-TITE™, osseointegration support supplement, provides patients with nutritional insurance before/ after dental implant procedures. It contains key vitamins, minerals, and nutrients helpful for proper bone and soft tissue growth, repair, and overall health before, during, and after implant procedures.
For more information on BONE-TITE or to request samples and patient materials, please call 888-325-2395, visit https:// bonetite.com/contact-us/, or scan the QR code.

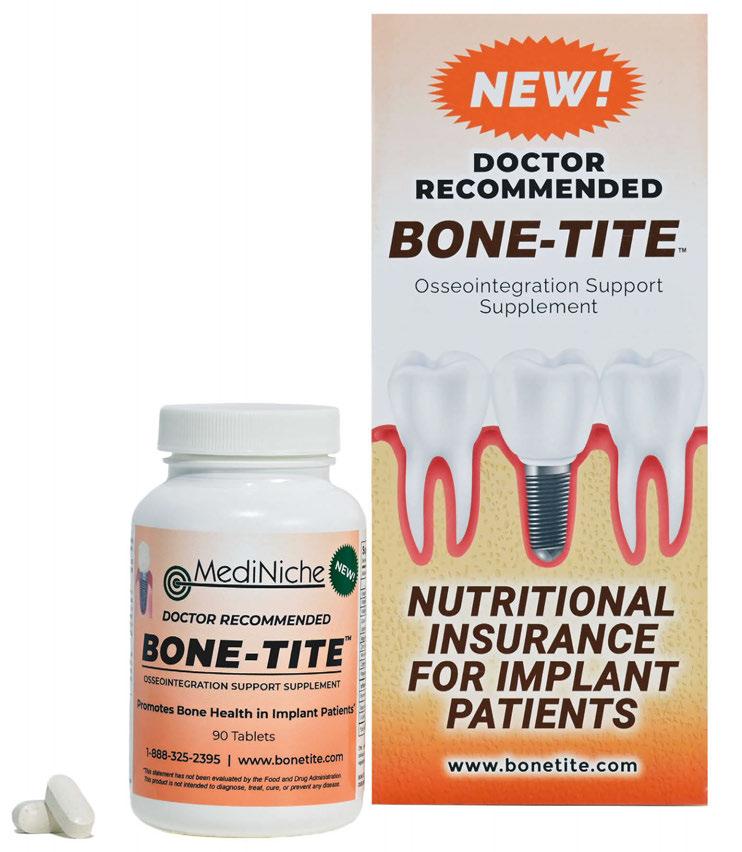
36 Implant Practice US Volume 16 Number 2 PRODUCT PROFILE
IP
• Osseo-specific formula; cortical bone building vitamins, minerals, and key nutrients

• Helps fortify bone and soft tissue in preparation for surgery
• Promotes soft tissue healing and osteogenesis (osteoblast formation) after surgery
• With continued use, supports overall osseointegration

• Developed with experts in bone metabolism and bone growth
• Formulated utilizing the purest, pharmaceutical grade raw materials


• Easy to swallow tablets with no solvents or chemicals
• For use before and after implant and bone grafting procedures
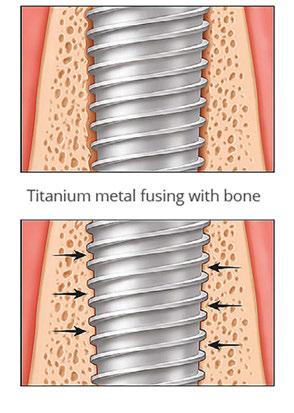
• Available for office dispensing and patient recommendation
• Reasonably priced

Implant Patient Benefits
Introducing... The First Supplement Developed Specifically for Dental Implant Patients Provides Nutritional Support for Healthy Osseointegration 1-888-325-2395 | www.bonetite.com www.mediniche.com NEW OSSEOINTEGRATION SUPPORT SUPPLEMENT Scan to Request Sample Nutritional Insurance for Your Implant Patients Scan for Special Offer
Bone fusing to titanium metal
Cool Jaw ® hot/cold therapy

In the early ‘90s, Medico International Inc. partnered with leading oral and maxillofacial surgeons to develop a new generation of hot/cold therapy. Cool Jaw® has paved the way to postoperative hot/cold therapy through the creation of our exclusive, hands-free wraps patented design. The hands-free Cool Jaw system reduces postoperative swelling and discomfort and allows patients to recover in a convenient manner. Choose from multiple styles of Cool Jaw facial wraps in several colors and varying compression levels. Combine with our extensive variety of hot/cold gel packs to create a post-op recovery solution that best suits your patients.
Our most popular wrap (T-800C) utilizes a unique, patented pocket design that allows patients to fulfil their postoperative care instructions easily without compromising compression. The wraps are fully adjustable ensuring a perfect fit for your patients. Simply slip your frozen or heated gel packs into the patented pocket design, and they remain in place over the recovery area. They also feature a built-in chin cup that helps maintain proper positioning and reduce slippage. All of our wraps are washable and feature Velcro® on top of the head for a fully adjustable fit. Cool Jaw’s hands-free hot/cold therapy system helps promote patient compliance and reduce post-op complications.
Our Clear Cold Gel Packs (T-400) are ideal for a variety of cold therapy applications. These sturdy reusable gel packs freeze solid and remain cold for extended periods of time — up to an hour!
All 3x6 Hot/Cold Gel Packs (T-420 & T-425) remain pliable when frozen, contour to the face, and provide patients with more post-op therapy options including heat. These reusable gel packs shape to the patient’s face, allowing for comfortable, continuous hot/cold therapy.
Cool Jaw’s reusable handsfree system arrives ready to hand out to your patients, including preprinted, patientfriendly instructions for added convenience. Each Cool Jaw system is packaged with your choice of either two or four gel packs. Ordering a wrap with four gel packs allows patients to alternate gel packs between freezings/heatings and ensures a seamless recovery period.
Our Soft-sided Round Gel packs are a convenient, post-op cold therapy option for after numerous procedures including implants and cosmetic injections such as Botox®. These packs come in a variety of color options to match your office or simply add an element of FUN to any procedure. Choose from bright solid colors as well as eye catching glitters. These reusable gel

packs are 4" in diameter and remain flexible when frozen, allowing for uniform cold therapy. They feature one soft-sided surface that shields the skin from direct contact with the frozen pack.
Customization is a subtle, yet effective way to promote your practice and enhance your professional image. Cool Jaw helps you to continue promoting your practice long after the surgery date. Cool Jaw’s designers work seamlessly with your staff to help you choose the best colors and layout to ensure your brand shines. Since our products are reusable, patients tend to save them “just in case.” As result, your information is easy to find, and referrals increase. All of our products can be customized with your practice logo and information for long lasting promotion. Let your practice speak for itself!
38 Implant Practice US Volume 16 Number 2 PRODUCT PROFILE
This information was provided by Cool Jaw®.
T-430 Soft-sided Round Gel Packs
IP
T-800 Cool Jaw Soft Stretch Wrap

The OsteoGen ® Plug: one-step bone grafting solution for socket preservation without a membrane!
Impladent Ltd.’s OsteoGen® Bone Grafting Plug combines OsteoGen® Bioactive Resorbable Calcium Apatite crystals with bovine Achilles tendon collagen for a one-step socket preservation solution without the need for a separate membrane. The bioactive calcium phosphate crystals and crystal clusters combined with collagen create a hydrophilic structure that mimics the composition of physiologic bone. The result is a bone graft combined with a collagen plug for ease of clinical delivery — all at less than $50 per extraction.
The OsteoGen® graft production process yields a resorbable bone graft with a unique calcium-to-phosphate ratio that is neither a ß-TCP, a non-resorbable dense ceramic HA, nor a biphasic mixture of the two. It is a unique low-density, calcium-phosphate graft that is resorbable. The Bovine Achilles Tendon collagen carries the bone graft for easy and efficient delivery to the site, eliminating the hassle and time spent mixing and packing particulate bone grafts while also eliminating the potential for graft wash out. The Type I collagen acts as a wound dressing not only to stabilize the clot, but also to absorb and deliver blood flow to the slowly resorbing graft, a feature critical for the initiation of bone formation and early angiogenesis.
The collagen found in the OsteoGen® Plug provides a scaffold for keratinized tissue to develop over the grafted site. To prepare the socket, entirely remove infected periodontal ligament, flush out, and repeat. Make holes or partially remove lamina dura to the alveolar process to initiate blood flow and trigger the regional acceleratory phenomenon. Taper the Plug apically, deliver dry into socket, and let it soak up blood. Compact the Plug to make a membrane, and condense to 1 millimeter below soft tissue crestally. Crisscross suture over top, not through Plug.
The low-density nature of the OsteoGen® graft means that the OsteoGen® Plug will show radiolucent on the day of placement and radiopaque in 4-5 months as the graft turns over, depending on the specific patient. This transition from radiolucent to radiopaque is a key indicator of bone turnover. At this point, the Plug has been replaced with host bone and is ready for implant.
Impladent Ltd. offers the OsteoGen® Plug in large, slim, and extra-large sizes. The large size is the most popular at 10 mm x 20 mm and can be cut if necessary to fit root morphology. The slim size (6 mm x 25 mm) is ideal for the anterior region, and
OsteoGen®
Non-Ceramic
Bioactive Crystal Bone Graft
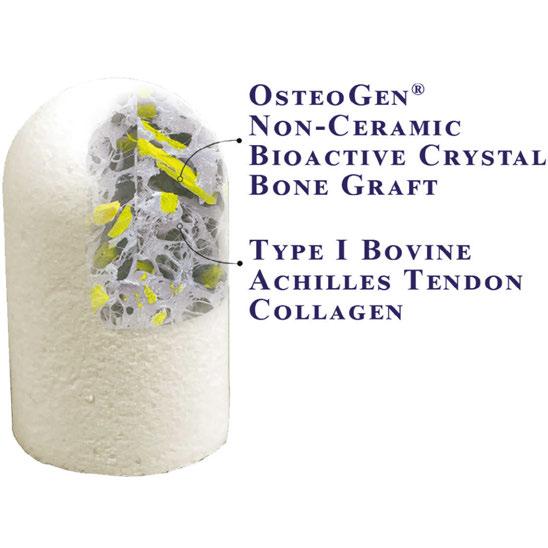
Type I Bovine
Achilles Tendon Collagen
the extra-large size should be used for the largest of molars. All Plugs can be trimmed using sharp scissors or a scalpel, or multiple Plugs can be used to fill the site. A box of 5 Plugs is $279 or box of 10 Plugs for $499.

Impladent Ltd. also offers the OsteoGen® Strips, which is a mineralized collagen strip that is used most often to fill the gaps around implants or for sinus lifts. The Strips are an easy-to-deliver solution that can be used anywhere particulate graft is used, without the worry of particulate migration or wash out.
For more information, call 800-526-9343, or visit www.impladentltd.com.
40 Implant Practice US Volume 16 Number 2 PRODUCT PROFILE
This information was provided by Impladent, Ltd. IP
The Impladent Ltd OsteoGen® Bone Grafting Strip infuses OsteoGen® bone graft crystals into a collagen sheet which eliminates issues associated with particulate migration. The OsteoGen® Strips are a predictable solution for grafting gaps around immediately placed implants and can be utilized in the sinus or anywhere particulates are typically used.


The OsteoGen® Strip is a hydrophilic material that can be hydrated with patients blood and substantially compressed to fill a variety of defects


OsteoGen® Strip can be folded after hydration and prior to or during placement with a blunt instrument for additional bone width and stability
OsteoGen® Strip is in place which reinforces the buccal wall while grafting the gaps between the buccal plate and the implant


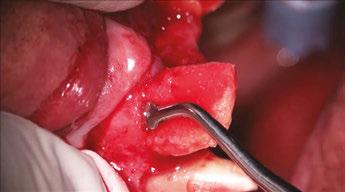

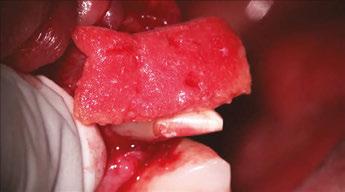

5


® BIOACTIVE RESORBABLE MINERALIZED COLLAGEN BONE GRAFTING STRIP Contact 800-526-9343 or Shop Online at www.impladentltd.com Contact 800-526-9343 or Shop Online at www.impladentltd.com CLINICAL CASE EXAMPLE Implant is placed lingually following extraction. OsteoGen® Strip will be used to fill gaps and to reinforce the buccal wall 1 2 3 OsteoGen® Strip is hydrated with patients blood from the surgical site and, if desired, autologous serum or other growth factors prior to delivery Buccal plate is reinforced by feeding the OsteoGen® Strip downwards in between the implant and the buccal wall Clinical images courtesy of Robert Miller, MA, DDS, FACD, DABOI 4
6
CALL TODAY OR SHOP ONLINE & USE CODE OGX808 O STEOG EN® B IOACTIVE R ESORBABLE C ALCIUM A PATITE C RYSTALS T YPE I B OVINE A CHILLES T ENDON C OLLAGEN & Scan for references


