3 minute read
Paint a still life in oil


D R AW I N G I N T O PA I N T I N G : 3 R D O F 3 DEMONSTRATION Shell with Manuscript
For each of the three oil studies made during this series, I used a gesso-prepared wood panel size 8311¾in (20330cm). This composition had become very familiar through the painting of the two earlier panels. As the paintings are all of the same size, measurements can be taken from the other studies to double-check the placing of the objects within the rectangle. Distances from the edge of the board to particular parts of the still life can be used to check that the resulting composition is the same as on the two earlier panels.
Advertisement
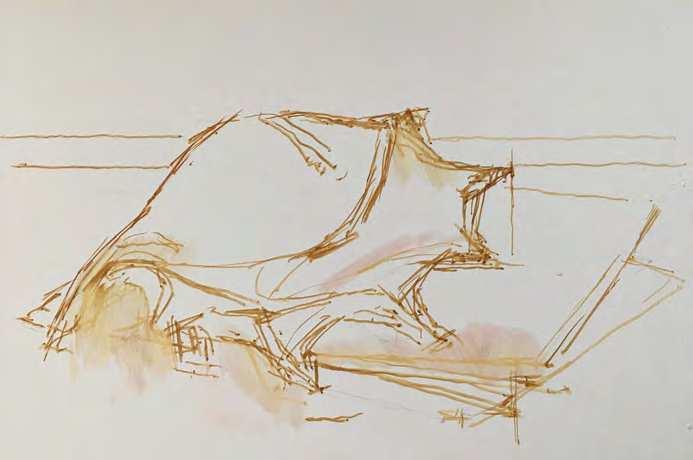
u STAGE ONE
I drew the composition directly with a rigger brush, using a mix of the three primary colours on the palette diluted with Sansodor: lemon yellow, alizarin crimson and ultramarine. This made a dark tone, something close to raw umber, an earth pigment that I would normally use for underdrawing when using the extended palette
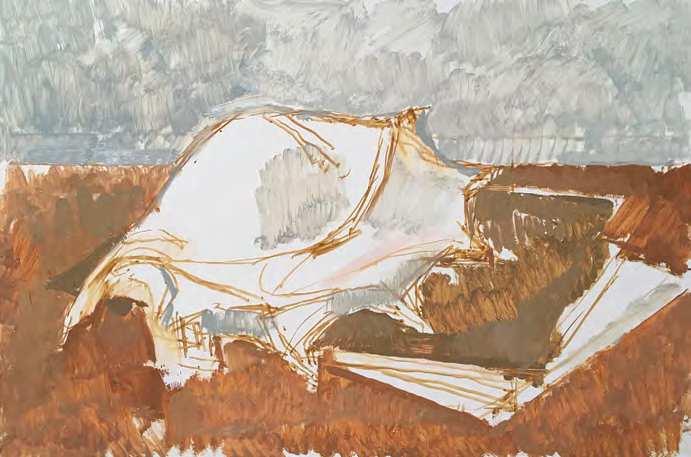
u STAGE T WO
Before beginning the process of looking closely at the more subtle colour mixes and tonality of the shell, the white of the surrounding areas was quickly covered to enable me to observe the lighter warm and cool colour contrasts within the shell. The darker warm surface on which the still life is placed was patched in, as well as the grey of the wall behind
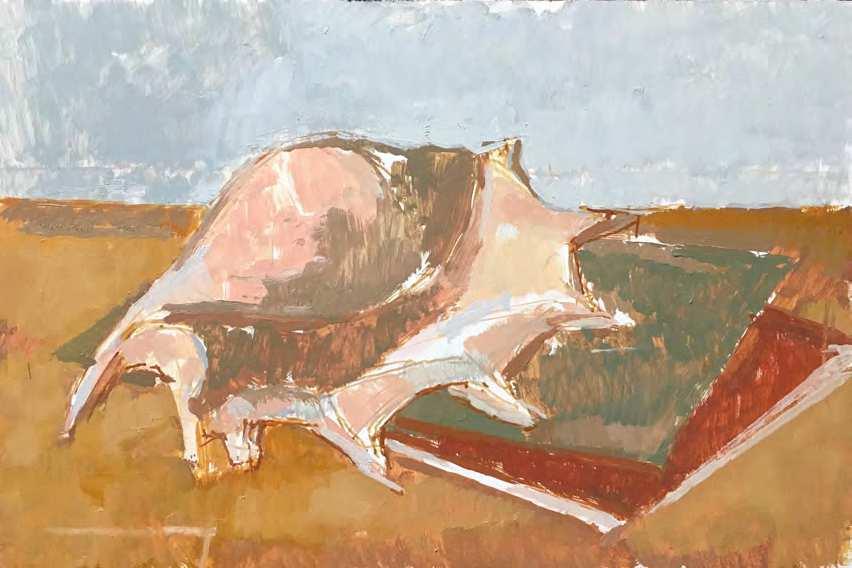
t STAGE THREE
Once the large areas of white surrounding the still life had been obliterated, I turned my attention to observing the colours found within the shell. During the process of painting the two studies, the lights and darks were explored, as were the warm-cool relationships within the composition. A cool and brighter mix was laid-down over the surface next to the shell, a little cadmium lemon was introduced into the mix. The first cool and warm pinks of the shell were added with minute amounts of alizarin crimson and cadmium red introduced in to the mixes on the palette, carefully adjusting their amounts for warm and cool. A rigger brush was used to pinpoint the outermost curves and angles along the edge of the shell
t
t STAGE FOUR
Before looking more closely at the variety of colours over the uppermost surface of the shell, the warm, darker tones within its depth were placed. Colours were also added for the covers of the manuscript, so the angles were checked and adjusted, with a lighter tone being used to clearly delineate the edges
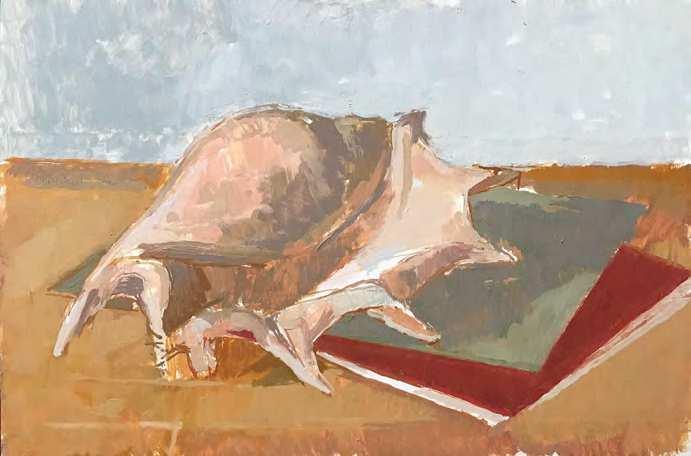
t STAGE FIVE
As the entire surface had now been covered with at least one, if not two layers of paint, I began to look more closely at the subtle temperature contrasts of colour overall; areas of colour were becoming smaller as colours were observed more closely. Against the warm darks within the shell, I began to pick out the darker blues and mauve that run along the top, above the gap. At this stage I was beginning to think more about the direction of the brushstrokes over the top curved surface of the shell to further introduce a sense of volume. The paint surface, particularly over the background and wooden tabletop, was applied more thickly and opaquely. Small adjustments were made to the shifts of warm and cool around and within the shell, with accents of warm being found in and underneath
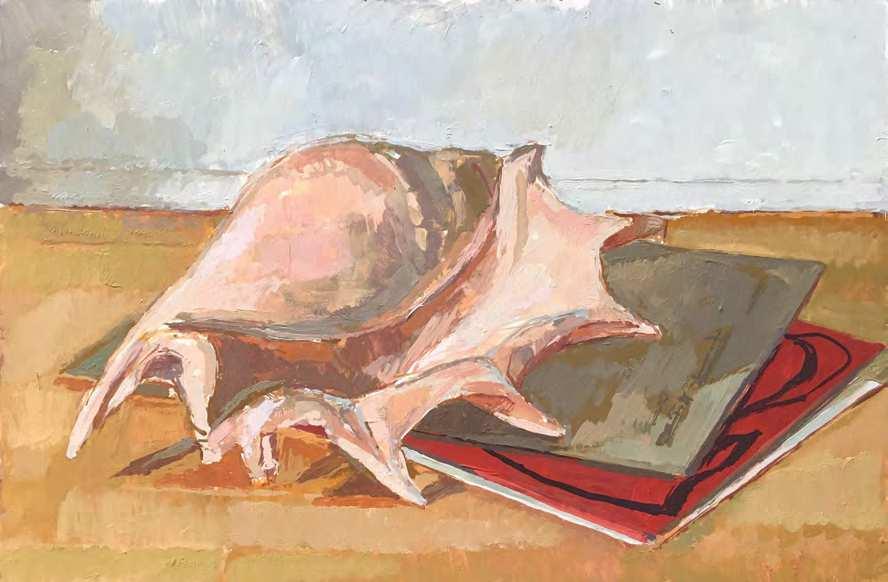
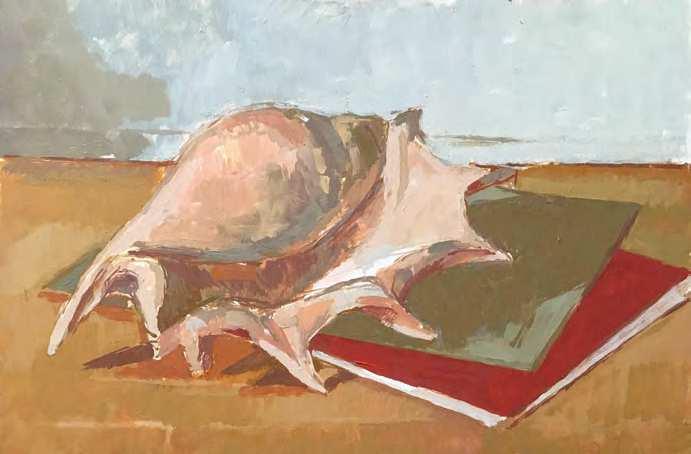
u FINISHED PAINTING
Shell with Manuscript, oil on gessoed panel, 83113/4in (20330cm). The final few linear touches were made to the cover of the manuscript. The dark curves were picked out with a rigger brush, while the suggestion of text on the uppermost surface was achieved by the addition of small areas of colour placed with rapid brushwork