


Seasonal tips, information & ads on pages 14A thru 32A


Homeowners’ fascination with a lush, green lawn is something that has developed over time and is still “growing” strong. According to a recent survey conducted on behalf of the National Association of Landscape Professionals, 81 percent of all Americans had lawns and 79 percent said a lawn is an important feature when buying or renting a property.
Even though lush lawns are still coveted, due to drought, the financial climate and even invading insect populations, many people are taking inventory of their landscapes and deciding if a lawn is a priority, even going so far as to reinvent their spaces with lawn alternatives. Still, there are ways to keep properties green no matter which route is taken. Here’s a look at some environmentally friendly ways to address a landscape.
Irrigate From Below
There are many ways to water landscapes, but homeowners may want to take their cues from the commercial farming industry. Drip irrigation systems utilize a
network of valves, pipes and tubing close to the roots of plants or under the soil. Such systems are more efficient than surface irrigation options, helping to save water and nutrients in the soil.
Water Early Scotts Lawn Care suggests watering a lawn in the morning before 10 a.m.

N. Reading Rd., Denver, PA SECOND LOCATION - 31 Lanchester Rd., Narvon, PA
when it is cooler and winds tend to be calmer. This ensures water can be absorbed into the soil and grass roots before evaporation occurs. Watering midday may cause the water droplets on the lawn blades to heat up and actually scorch the lawn.
Plant A New Grass Type Homeowners can experi-


grasses and may not require as much water nor ideal growing conditions.
Utilize Green Alternatives
Rather than focusing solely on grass, some homeowners are turning to alternatives like clover and even moss, particularly if their landscapes do not have the most pristine growing conditions. This may reduce the need for chemical fertilizers and herbicides. The result is still a green, inviting yard.
Watch The Lawn Height
Mowing too frequently or at too low a height may compromise the lawn’s ability to thrive. Grass cut to the proper height develops a deep root system to better locate water and nutrients in the soil. That means homeowners may not have to water as much or as
frequently. Taller lawns also shade the soil and the roots, reducing some evaporation. Compost
Leave the clippings on the lawn to break down and further feed nutrients to the lawn, helping it look greener and thrive. Furthermore, rely on supplementation with compost to reinforce the nutrient profile in the soil.
The National Resources Defense Council says composting is the natural process of recycling organic matter, such as leaves and food scraps, into a valuable fertilizer. It doesn’t take much to nurture compost in a yard.
Green landscapes are possible with a few tips that help conserve water and maximize natural resources.


Weed growth in a garden cannot only prove unsightly, but also ultimately harmful to other plants and. When weeds appear in a garden, they have already begun to steal nutrients and water from surrounding plants, and if allowed to grow, they can also block sunlight from reaching the plants.


Unfortunately, weeds can be resilient, and there is no way to guarantee they won’t grow. But gardeners can take several steps to limit the growth of weeds so the plants in their gardens can grow strong.
• Work the soil regularly. When weed roots are removed from the soil, weeds die. But just because you hoed or tilled the soil last month does not mean new weeds won’t grow in and start robbing your plants of essential nutrients and minerals this month. The garden should be cultivated
regularly, and you should pay particular attention to the soil after the garden has been watered. If weeds are allowed to go to seed, the garden can quickly be overwhelmed by them, as young weeds tend to grow in quickly and a little water might be all they need to sprout. So make a point to routinely cultivate the soil with a hoe or tiller, being careful when working on soil around growing plants.
• Lay down black plastic. Some gardeners may want to avoid laying black plastic down in their gardens for


fear that such a weed deterrent robs the garden of its natural beauty. While that might be true, the black plastic also robs many weeds of their ability to grow in. Some weeds may be especially stubborn and grow in under the plastic, forcing their way through the holes cut into the plastic for the plants to grow through. But laying black plastic covering over the garden before it’s planted is often an effective way to limit weed growth.
• Lay mulch in vegetable gardens. Mulch can serve


multiple benefits in a garden. Many people find mulch aesthetically appealing, but mulch serves more practical purposes as well. Mulch made of organic materials, such as bark chips or grass clippings, is often too heavy for weeds to push through, making it difficult, if not impossible, for weeds to sprout in the garden. But mulch also conserves moisture in the soil, strengthening plant roots as a result. Stronger roots can lead to a healthier garden.
• Cut down on plants’ elbow room. The more space between plants, the more room weeds have to grow.
So decreasing the space
between plants can limit weed growth. But spacing plants too closely together can make it difficult for vegetables to grow in as well. Spacing recommendations will likely be included on packaging when buying seeds, but reducing those recommendations by an inch or two may allow the plants to grow in strong while limiting weed growth at the same time.
Garden weeds can put plants in jeopardy and rob gardens of their beauty. But there are a handful of ways gardeners can limit weed growth without harming their plants.


Spring marks the return of many things. Trees and flowers begin to bloom again in spring, while warmer temperatures are welcomed back with open arms. Grass also begins to grow again in the spring. That means it’s not too long before homeowners have to dust off their lawn mowers and get to work. Those who don’t necessarily enjoy mowing the lawn may be tempted to cut their grass very low, as doing so can mean longer intervals between mowing


sessions. However, mowing grass too low can have a very adverse effect on a lawn.
• Cutting too low can injure the grass. Cutting grass too low can injure the grass, creating what’s essentially a domino effect of problems to come. Injured grass will focus on its recovery efforts, thereby making it vulnerable to other issues.


• Cutting too low promotes weed growth. Injured grass is vulnerable to invaders, including weeds and insects.
Weeds and insects can attack grass as it recovers from


injury, and before homeowners know it, their lawns are overcome with a host of problems.
• Cutting too low allows crabgrass to thrive. Crabgrass needs ample sunlight to grow. By cutting grass too low, homeowners may unknowingly be promoting crabgrass growth. Crabgrass is unsightly and can rob surrounding grass of the moisture it needs to grow. So lawns cut too low may not only lose their lush appeal
thanks to the unattractive appearance of crabgrass, but also because areas surrounding the crabgrass patches might turn brown due to lack of water.
• Cutting too low can stress the grass. Cutting too low also makes lawns vulnerable to summer heat. Without blades tall enough to block some of the summer sun, grass can quickly succumb to summer heat, leading to dried out, discolored lawns.


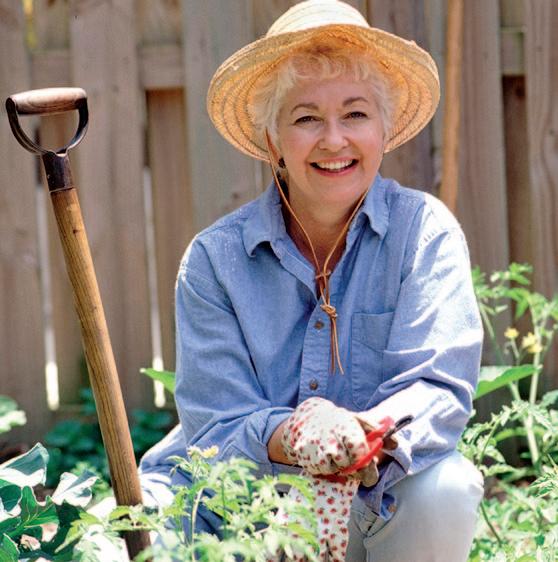
Gardening is a rewarding hobby that pays a host of significant dividends. Many people love gardening because it allows them to spend time outdoors, and that simple pleasure is indeed a notable benefit of working in a garden. But the National Initiative for Consumer Horticulture notes that gardening provides a host of additional benefits, including helping people get sufficient levels of exercise, reduce stress and improve mood.
With so much to gain from gardening, it’s no wonder people look forward to getting their hands dirty in the garden each spring. As the weather warms up, consider these tips to help bring a garden back to life.
• Discard the dead weight.

where the weather between December and early spring is not especially harsh. Discard dead plants that have lingered into spring and prune any perennials
that need it. Branches that fell during winter storms also should be removed at this point if they have not previously been discarded.
• Test the soil. Soil testing kits can be purchased at local garden centers and
home improvement retailers. Such tests are inexpensive and can reveal if the soil needs to be amended to help plants thrive in the months to come.
• Mulch garden beds. Mulching benefits a garden by helping soil retain moisture and preventing the growth of weeds. Various garden experts note that mulching in spring can prevent weed seeds from germinating over the course of spring and summer. That means plants won’t have to fight with weeds for water when the temperature warms up. It also means gardeners won’t have to spend time pulling weeds this summer.
• Inspect your irrigation system. Homeowners with in-ground irrigation systems or above-ground systems that utilize a drip or soaker function can inspect the systems before plants begin to bloom. Damaged sprinkler heads or torn lines can
deprive plants of water they will need to bloom and ultimately thrive once the weather warms up.
• Tune up your tools. Gardening tools have likely been sitting around gathering dust since fall. Serious gardeners know that tools can be expensive, so it pays to protect that investment by maintaining the tools. Sharpened pruners help make plants less vulnerable to infestation and infection. Well-maintained tools like shovels and hoes also make more demanding gardening jobs a little bit easier, so don’t forget to tune up your tools before the weather warms up.
It’s almost gardening season, which means gardeners can start on the necessary prep work to ensure their gardens grow in strong and beautiful this spring.


Each year, gardening enthusiasts anxiously await the arrival of spring. Spring is a great season to plant new flowers, plants, grasses, and trees, making it a popular time of year to spend sunny days out in the yard.
Veteran gardeners may know their landscapes well and be able to pick the right plants on their own. Novices may need a little help as they look to give their landscapes a whole new look. The following are some helpful tips to help homeowners pick the right plants for their landscapes.
• Conduct a site evaluation. A colorful landscape featuring an array of plants and flowers can be eye-catching and add curb appeal to a property. However, where plants will be planted is a significant variable that must be considered before homeowners choose what to plant. The Center for Agriculture, Food, and the Environment
at the University of Massachusetts Amherst notes that site evaluation is the first step when picking plants. A number of factors must be evaluated, including light availability; water availability; exposure to the elements, including wind and extreme temperatures; and competition from existing vegetation, among other things. Document these variables prior to picking plants. For example, take note of the area you plan to plant to see if it is full sun or partial shade, and then pick plants whose growing conditions align with those you observe.
• Look at more than looks. Aesthetic appeal might be what homeowners most desire from their landscapes, but that appeal is only achieved when the right plants are chosen for a space. If the wrong plants are chosen, they’re unlikely to thrive or they could threaten existing vegetation, thus compromising the overall appeal of the property.
Native plants can often handle local weather conditions, so prioritize natives over more exotic plants whose key attribute is aesthetic appeal. If jaw-


dropping aesthetic appeal is your top priority, speak with a local landscaping professional about which natives can provide that without compromising surrounding vegetation.
• Consider maintenance prior to planting. Maintenance is another variable gardeners must consider.
Newly planted trees may require substantial watering until they’ve fully established their roots, and some homeowners may not have time for that. In addition, certain plants may require a considerable amount of pruning in order to create and maintain the look homeowners desire. Individuals must be willing to invest the
time and effort necessary to maintain new plantings that require such diligence. If not, look for plants that don’t require much maintenance while keeping in mind that even low-maintenance plants still require some effort and attention.
• Consider local wildlife. If your lawn is routinely visited by local wildlife, then look for plants that won’t look like a meal to these welcome, if uninvited, guests. For example, if you routinely see deer lounging around in your backyard,
look for deer-resistant plants. This is a good way to protect your investment, of both time and money, and ensure minimal wildlife traffic through your newly landscaped yard.
Spring gardens are aweinspiring, especially when homeowners embrace various strategies for successful planting.


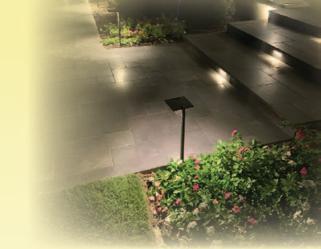
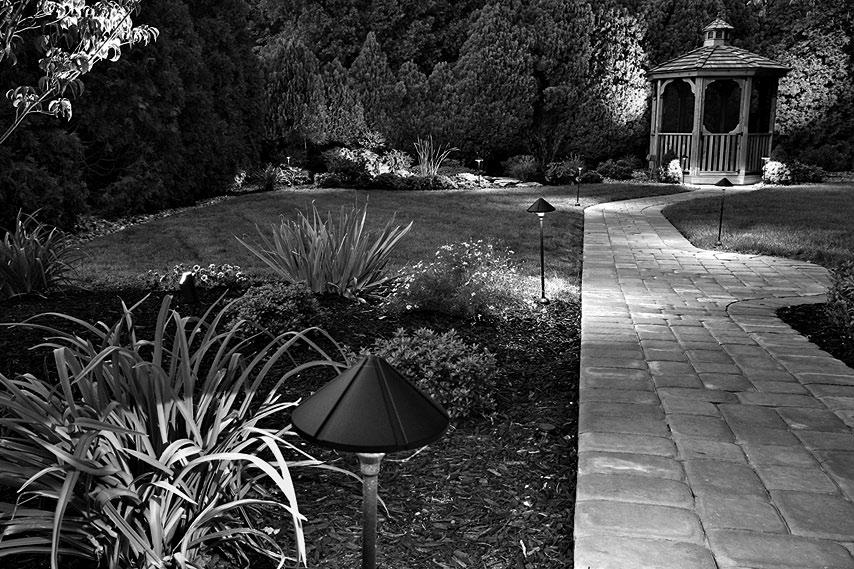
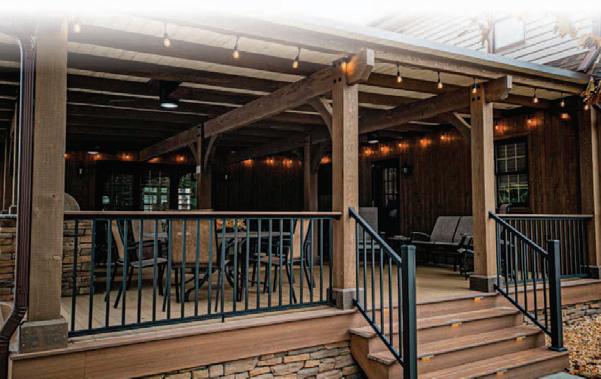
Home improvement trends come and go, and one trend that has become wildly popular in recent years is recognizable in yards every night. Landscape lighting has transformed how people see and enjoy their properties at night, making it one of the more soughtafter upgrades among modern homeowners.
Curb appeal is often seen through the lens of how homes appear during daylight hours, but landscape lighting can make homes look better and more modern, and potentially safer, after the sun goes down. With such potential, landscape lighting is worth exploring for homeowners looking to upgrade their properties.
Are there different types of landscape lighting?
When considering landscape lighting, homeowners should know that there are various options to consider. According to the lighting experts at Lumens, spotlights project a concentrated and narrow beam of light that’s usually around 45 degrees. Spotlights are often chosen to highlight specific features on a property, like a component
of the landscaping. Individuals who want to cast light over wider, more general areas may consider floodlights, which Lumens notes spread light up to 120 degrees.
Inground lighting is among the more sophisticated landscape lighting options. Lumens notes that
inground lighting illuminates the whole of a tree or structure, often creating a dramatic look. These circle-shaped lights also are great at illuminating walkways and driveways.
Post lights are another outdoor lighting option, and these are often used to light up long walkways and
pathways so it’s easier and safer to navigate dark areas at night.
Is landscape lighting a job a DIYer can handle?
Many homeowners consider a do-it-yourself approach when pondering a potential home renovation, and a landscape lighting project is likely to
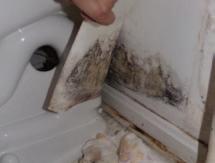
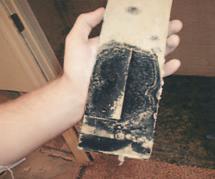
Unlike the other guys, we offer protective solutions that prevent the water from getting in your walls.


• Exterior grading and techniques are applied using special materials and equipment without disturbing inside your home.
• Keep your basement warm and dry.
• Usually costs less than quotes to do job from the inside.
• Keep your walls from pushing in over time.
• Eliminate mold and mustiness.
• No pushy sales tactics or gimmicks
• Honest, quality personal service.


inspire such curiosity as well. The home experts at HGTV note that the feasibility of DIY in regard to a landscape lighting project depends on the type of lighting homeowners want to install and where they want to install it. Replacing an existing electrical fixture may be well within the skill of a seasoned DIYer, but installing a new fixture is a job best left to the professionals. Homeowners whose homes currently have no or very little landscape lighting are
almost certainly better off working with a professional. Solar lighting that does not require any electrical work can be installed quickly and easily by anyone, but such options may not provide the look homeowners are aiming for.
How much lighting is necessary?
The amount of lighting homeowners want to install is up to them. If the home currently has little or no landscape lighting, a consultation with a professional can help to determine how much lighting to install and where to install it. When discussing landscape lighting, homeowners may want to inquire about dimmers. Dimmers can increase or decrease lighting depending on the situation. For example, homeowners may want a little extra light during a party, but less when relaxing alone outside at night. Dimmers allow homeowners to adjust as necessary.
Landscape lighting is a popular home renovation trend. Homeowners considering adding landscape lighting to their property are urged to work with a skilled professional to devise and install a set-up that makes their homes more appealing at night.


x 8” x 8’6” (Used-2/3 Sides)................
6” x 8” x 8’6” (USED-2/3 Sides) $10 - $15 Each
x 8” x 8’6” (Used 4 Good Sides)................$30 Each 7” x 9” x 8’6” (Used-2/3 Sides)................$20-$25 Each
6” x 8” x 8’6” (4 Good Sides) $25 Each
7” x 9” x 8’6” (Used 4 Good Sides).................$38 Each
7” x 9” x 8’6” (USED-2/3 Sides)
7” x 9” x 9’-16’ (Used 4 Good Sides)................$5.25/Ft.
x 9” x 8’6” (4 Good Sides)
7” x 9” x 3’6” (USED)....................................$12 Each
6” x 8” x 8’6” (NEW)...............................................$95
x 9” x 9’–16’ (4 Good Sides)


7” x 9” x 8’6” (NEW)..............................................$105 610-916-7645


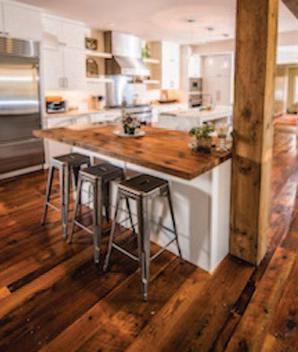
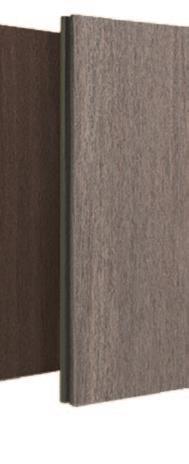
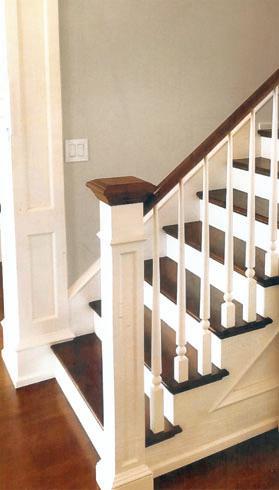
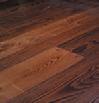
Recent years have played witness to the growing popularity of wood floors, which many people feel do a better job of creating a more classic and aesthetically appealing look in a home. When cared for properly, wood flooring can last for centuries.
As much as many homeowners want wood flooring, it’s wise to know some of the terminology before starting your search. While all wood is appealing, there are ups and downs.
• Solid wood flooring. Solid wood flooring is quite thick, allowing it to be sanded and refinished many times over the course of its life. That’s a valuable asset for parents of young children who might unknowingly scratch up the floor over the years. Once the kids get older and playtime no longer happens in the house, simply sanding or refinishing the floor will allow it to look brand new.
• Engineered wood flooring. Unlike solid wood flooring, engineered wood flooring is far less prone to expansion or contraction with humidity. That’s because engineered flooring is
made with up to five layers of hardwood, each stacked across the grain before being bonded together under heat and pressure.
• Prefinished wood flooring. This means you won’t need to sand the floor upon installation, saving you a big hassle. The finish is applied in a factory and you or an installation expert installs is the finished product. Sanding a floor can be a messy thing to undertake, so for those looking to avoid a hassle, a prefinished floor is likely your best bet.
• Unfinished wood flooring. Unfinished wood flooring is sanded when it arrives. Whereas prefinished floors often carry lengthy, detailed warranties, unfinished floors typically do not. In addition, the value of an unfinished floor rests a lot on how well it was installed, meaning a do-it-yourselfer might want to hire a professional with a good reputation.
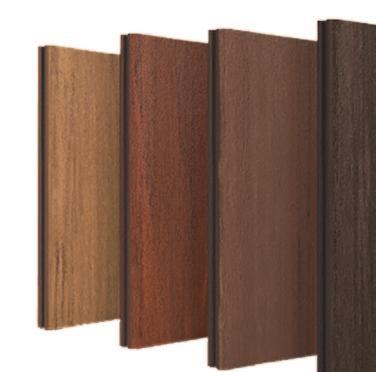
• Grades. A floor’s grade has nothing to do with its quality, simply its appearance. Grade 1 boasts a wider color variation and exhibits more of the wood’s natural characteristics. Select grade, however, is flooring of largely the same color with few or no knots, which are natural and often decorative spots on the wood where a branch might have grown out of when the floor was still a tree.
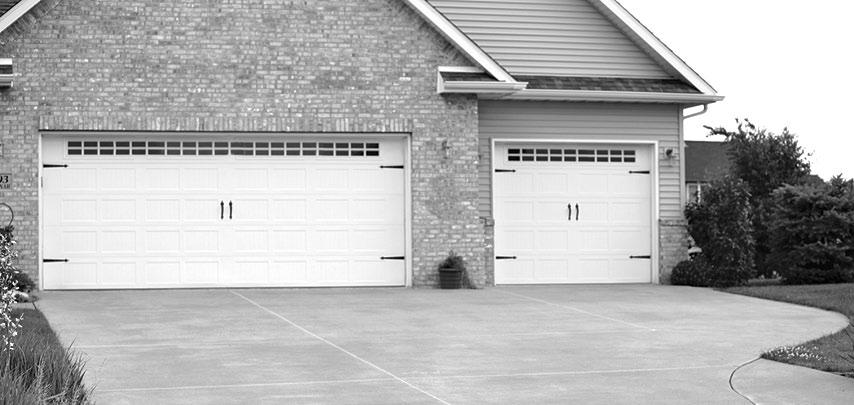
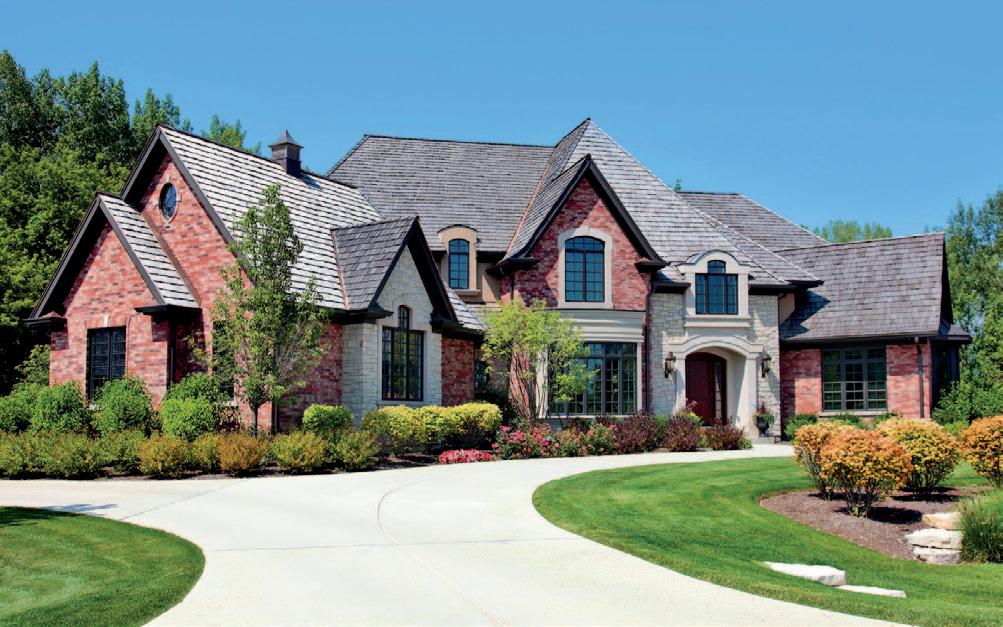
Remodeling with a return on investment (ROI) in mind can be a smart strategy for homeowners, whether one is thinking about moving in the next few months or further down the road. Though this approach is an inexact science, in many instances, it’s savvy for homeowners to consider what buyers may want when planning home improvements. Homeowners may be surprised to learn which renovations garner the best ROI at resale. The home loan and refinancing company RenoFi indicates that overall home improvement projects provide a 70 percent ROI on average. Many highROI projects add functional space and improvement. The following are some exterior renovations that help homeowners recoup the most money at resale, according to Remodeling magazine’s “2022 Cost vs. Value Report.”
1. Garage Door Replacement: 93.3 percent recouped of $4,041 cost
2. Manufactured Stone Veneer: 91.4 percent recouped of $11,066 cost
3. Siding replacement (Fiber Cement): 68.3 percent recouped of $22,093 cost
4. Window replacement (Vinyl): 67.5 percent recouped of $20,482 cost
5. Siding replacement (Vinyl): 67.2 percent recouped of $18,662 cost
6. Window replacement (Wood): 66.3 percent recouped of $24,388 cost
7. Deck addition (Wood): 64.8 percent recouped of $19,248 cost
8. Entry Door Replacement (Steel): 63.8 percent recouped of $2,206 cost
The majority of renovations on Remodeling magazine’s list of the best investments are exterior renovations, making this area of a home a particular point of interest for homeowners. The only interior project that cracked the Top 10 ROI for projects was a minor midrange kitchen remodel.
Exterior renovations per-
haps add the most bang for your buck because they’re not only functional, but also because they add immediate curb appeal. Much in the way it has been said people eat with their eyes first — which is why chefs spend so much time on elaborate plating — buyers will judge a property by how it looks when they arrive, even before they’ve stepped inside a home. In essence, home buyers often judge a book by its cover. A worn
exterior may indicate to potential buyers that the home was not maintained, however false that assumption may be. It’s important for homeowners to consider all factors before beginning a renovation. Certain projects offer a stronger return on investment than others, and that’s a significant consideration for homeowners thinking of selling their homes.


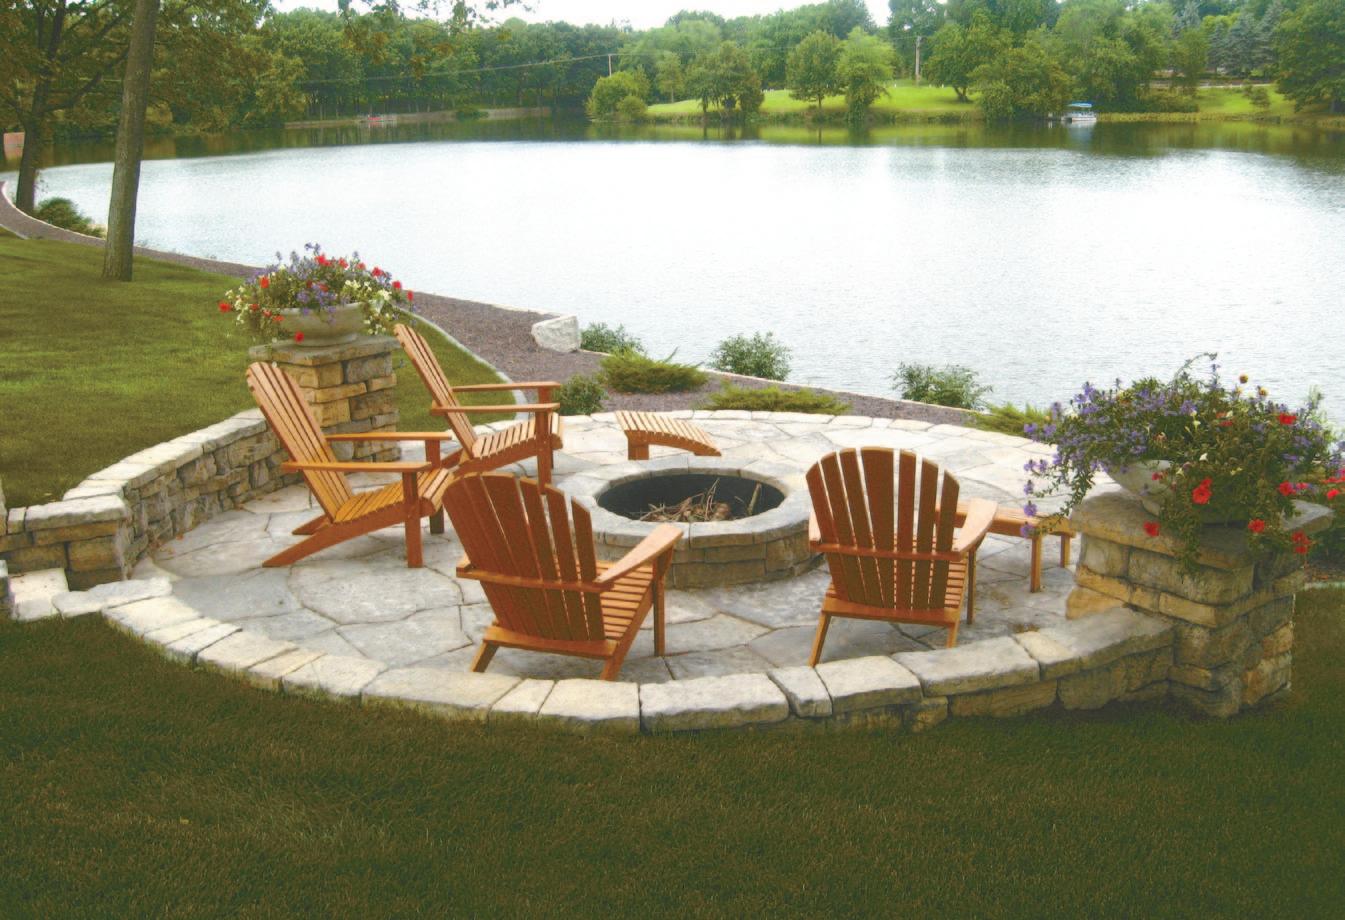
Spending time in the backyard can be restorative and relaxing. Is it any wonder why homeowners are increasingly improving their homes so that they can blur the lines between the indoors and outside and enjoy more recreational
moments in nature? Part of what makes a landscape inviting is the bevy of plants dotting suburban landscapes. Individuals may take painstaking pleasure in mapping out landscapes that are both functional and appealing. When selecting foliage, it’s wise for homeowners to familiarize themselves with certain plants that may not be very welcome in their entertaining areas — particularly those that are dangerous. Poison ivy, oak and sumac may be some of the betterknown poisonous plants,
but there are others that can prove problematic as well.
• Hogweed: This is an invasive plant that grows throughout North America but is particularly wellknown along the Atlantic coast. The sap in the leaves can cause phytophotodermatitis, which is a chemical reaction after exposure to sunlight. Painful, severe blisters can form on the skin wherever it touches, and hogweed sap may cause blindness if it gets into the eyes.
may cause a host of problems, including disorientation, vomiting, blurry vision, and rashes.
• Bleeding Heart: Native to woodlands, this perennial loves the shade. It produces unique flowers that resemble tiny pink or white hearts with drops of blood at the bottom. Roots and foliage of Bleeding Heart contain alkaloids that are toxic to animals if ingested in high quantities.
pink and white trumpet blooms in early summer. The whole plant is toxic if eaten, however. People who eat any part or attempt to make tea may find their heart rate slowing down or becoming irregular.


• Lily of the Valley: This plant is known for delicate, bell-shaped flowers and a sweet scent. While Lily of the Valley is not poisonous to touch, if ingested, toxic glycosides in the flowers, berries, leaves, and stems


• Stinging Nettle: Brushing up against Stinging Nettle can be a painful experience. The plant has tiny stinging hairs on its leaves and stems.
• Nerrium Oleander: All parts of this beautiful shrub are extremely poisonous. It should definitely be kept away from pets and treated with caution or avoided altogether.
• Foxgloves: Adored among pollinators, Foxgloves produce towering


• Wild Hemlock: This is a very poisonous member of the carrot family. If consumed, Wild Hemlock, which looks like parsley, can cause health problems. Toxins also can be absorbed through the skin.


• Deadly Nightshade (Belladonna): A beautiful plant that produces shiny, black cherry-like berries, this contains a poison that can paralyze the gastrointestinal muscles and eventually the heart. The Royal Horticultural Society says that even rubbing up against it can irritate the skin.

Many plants, however beautiful, can be dangerous if ingested or touched.


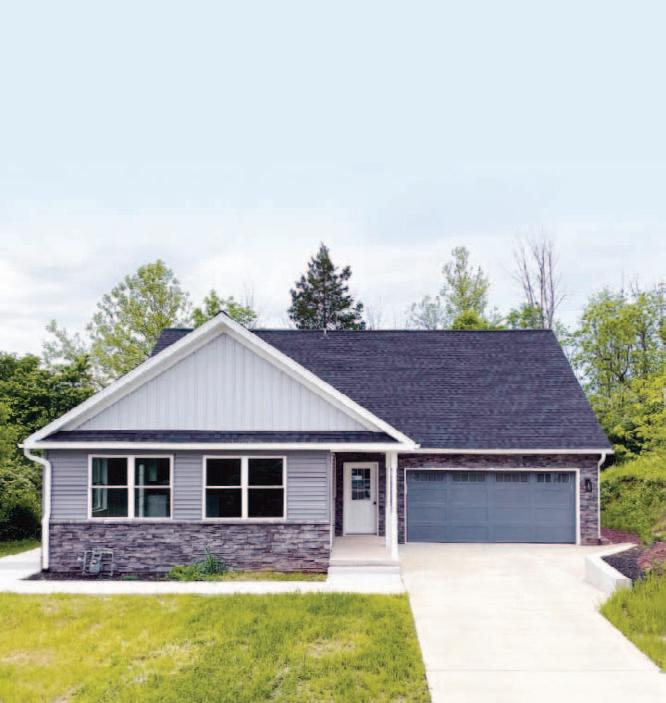
An assortment of variables will dictate just how long a home’s siding will last, including the amount of sun a home receives and the location of the home. The life expectancy of siding also will depend on the siding material. According to Sunshine Contracting, vinyl siding lasts between 20 and 40 years. It’s a popular choice because of how long it lasts and the minimal upkeep it requires. Wood siding, another traditional favorite, is more expensive, but it also boasts impressive longevity, according to BobVila.com. With proper maintenance, which includes cleaning and refinishing, wood siding may last for decades. The coating on aluminum siding typically begins to fade after about 15 years. Fiber cement siding is affordable, durable and low maintenance, and it may actually last as long as the home itself. It needs to be repainted occasionally. Sunshine Contracting says stone veneer siding will last between 20 and 75 years, depending on the stone that is used.


Whether you are looking to furnish a home or add some items to your existing décor, you will find a wide range of items to choose from. The shop is not only stocked with furniture, home goods and appliances, but also power tools, hand tools, paints and stains, building materials, hardware, electrical, plumbing accessories, lawn and garden items and automotive as well.
By offering gently used items, the store helps reduce the demands for new products and ultimately conserves natural resources and reduces waste.
ReClaim-It Home Center Thrift Shop is clean and organized and provides customers good prices all in a friendly atmosphere. So next time you’re in the area, be sure to stop in. Your wallet and the planet will thank you.
ReClaim-It


Homeowners renovate their homes for a variety of reasons. Renovations can increase the value of a property and make homes safer and more comfortable for their occupants. Improvements also can be made to stay current with the times or to give a home a new vibe.
Statista projected that $510 billion was going to be spent on home improvement projects in 2024. The home improvement market is generating significant revenue. In fact, nearly a quarter of Americans opting to renovate their homes will spend an average of $10,000 on their projects. According to a Home Stars Renovation report, 8 percent of Canadian homeowners who have renovated have spent more than $20,000 on a home improvement project.
Kitchens and bathrooms often get the most attention when it comes to home improvement. However, every room and space in a home may need a renovation at some point, and the following are five signs it’s time to renovate.
1. Age
The National Association of Home Builders states that 50 percent of U.S. homes are over the age of 40. That means that age alone could dictate a need to renovate, particularly if some materials are original to the home. For example, asphalt

roofs typically last 25 to 30 years, while window frames can last 20 to 50 years depending on how well they have been maintained.
2. Inconvenient layout
Some homeowners scratch their heads when faced with awkward floor plan layouts. While one may live with the inconvenience for some time, typically a floor plan that isn’t working for the homeowner is a major driver of renovations.
3. Outdated looks
A home can look dated even if it is a relatively recent build. That’s because trends change quickly. For example, dark, cherry cabinets that were popular just a little while ago have now been replaced by lighter
color palettes. Homeowners whose homes do not match the looks emulated in design magazines may consider a change, particularly if they’re planning to sell soon.
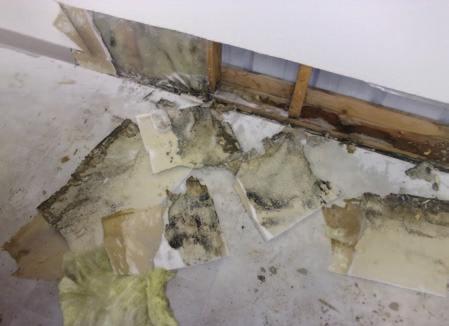
4. Deterioration
Signs of water, storm or structural damage should be addressed as soon as possible. Any deterioration should be a strong indicator that it’s time to renovate.
5. Efficiency
Escalating utility bills could be indicative of an inefficient home. Homeowners can conduct energy audits and then improve the areas where energy loss may be occurring, such as windows, doors, siding, and insulation.
Homeowners can renovate their homes when they see fit, but various signs may warn that it’s time consider updating or remodeling a home. Renovations can help increase the value of a home.
Growing a garden may seem like a daunting task, but more and more people are doing it every year. It is a simple and rewarding way to reduce some of your impact on the environment and make your life greener. You don’t have to be selfsufficient. You can make a difference by growing a small amount of your own food.
Food is the most essential element to life. In the modern world, it is also one of the biggest contributors to the degradation of the environment. Much food in the United States is grown far from where it’s consumed and requires a lot of energy to be distributed. These days, there is also the risk of additives and


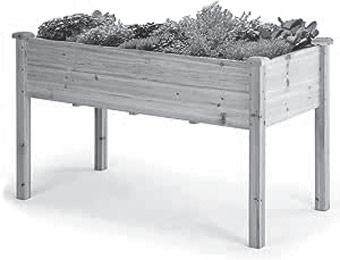
disease. Growing your own food will allow you to know exactly where your food is coming from, reduce your food budget each week and allow you to get a little closer to nature, even in the heart of a big city. You don’t need a ton of acreage to grow your own food. You just need a small yard, a deck or even a patio to put out your plants. To start a garden, pick a site that gets good sun. Usually, this means something on the south side of your home that isn’t shaded by a large tree. All you need is a little bit of dirt, and potted plants work great for those in apartments. If you have the inclination, try a raised bed, which helps the soil stay warmer and drain better, giving you better growing conditions. For more success your first year, use garden starts rather than seed. Starts do cost a little more, but they are already


(Continued On Page 25A)


Clutter has a way of taking over a home. As time goes by, items that are not stored or discarded when they’ve lost their utility can gradually take over a space, creating a claustrophobic, cluttered feeling that can affect how people feel in their homes.
Clutter is not something to be taken lightly. A recent study published in the journal Personality and Social Psychology Bulletin found that women who characterized their living spaces as cluttered or marked by unfinished projects were more likely to experience fatigue and depression than women who described their homes as restful and restorative. Though clutter is often discussed in terms of removing it, there’s also many ways to prevent it in the first place.

• Schedule weekly cleaning sessions. Cleaning is a chore few look forward to, and that reluctance may be a byproduct of infrequent cleanings. The less a home is
cleaned, the longer cleaning sessions take when individuals get around to it. Weekly cleaning sessions can help prevent items from stockpiling and creating a cluttered look.
• Discard items when they’re no longer used. Holding on to items you no longer use will eventually contribute to the buildup of clutter. That’s a lesson parents know well, as kids outgrow toys, which can then pile up and contribute to overcrowded toy chests and play rooms. Adults also have a hard time discarding their own toys, including old devices. As kids outgrow toys, let them choose which ones to discard before they’re replaced with new


items. The same goes for adults, who can wipe old devices like tablets, smartphones and laptops clean and discard them once they’ve purchased replacements.
• Make it easy to find stored items. Even the most well-organized person can fall victim to clutter if stored items prove difficult to find. When revamping storage systems, choose clear, stackable drawers so you won’t make a mess as you look for stored items you can’t find. Clear, stackable plastic bins and drawers make it easier to find what you’re looking for, reducing the likelihood that items will end up on the floor or strewn about. If you don’t want to replace existing storage bins, label them if they’re not clear to make it easier to identify what’s inside.
• Donate clothing. Much like kids’ toys and adults devices should be discarded when they’re no longer used, old clothes can be donated to create more storage space and prevent the buildup of clutter. Clutter is often described as something visible to the naked eye, but clutter can also build up in dresser drawers and behind closet doors. Periodically go through closets and dressers and remove items you no longer wear, donating them if they’re still in good shape and discarding them if they’re not.
Clutter can quickly take over a home. A proactive approach that emphasizes clutter prevention can make for a more relaxing and restful home.
Radon is a naturally occurring radioactive gas.
The United States Environmental Protection Agency notes that radon disperses rapidly outdoors, which makes it a generally innocuous gas. However, radon can become trapped indoors, and it’s in those instances when the gas poses a potentially significant threat.
How does radon get inside?
The EPA notes that radon can enter buildings through cracks and other holes in the foundation. When that occurs, radon can become trapped indoors.
Why is radon a threat to human health?
When exposed to radon over time, people’s risk for lung cancer increases. In fact, the EPA reports that radon exposure is the second leading cause of lung cancer in the United States. According to the Government of Canada, radon gas breaks down and forms radioactive elements, which can then be inhaled into the lungs. The breakdown of radon continues in the lungs, where radioactive particles release small bursts of energy. That energy is absorbed by lung tissue, contributing to damage in the cells of the lungs that can increase cancer risk.
How do I know if I’m being exposed to radon inside?
Home radon test kits can be very effective at determining if radon is entering a home. These tests are inexpensive, but individuals
who want a second opinion also can hire a certified radon measurement firm to test their properties. If levels are determined to be high, contact a radon remediation expert to address the issue. Can radon reenter my home?
Efforts at radon mitigation are generally very effective. However, mitigation systems can fail or stop working
over time. So individuals concerned about recurrence can identify what caused the initial radon exposure, such as cracked foundations, and have those issues addressed. In addition, random testing for radon, even after mitigation efforts have been completed, can be a costeffective and simple safety net.
(Continued On Page 27A)
(Continued From Page 23A)
well into their growth and much hardier than seedlings. It’s important to plant things that will grow well in your area. Get familiar


the flea problem before pet-sitting services can continue, but I’m already caring for the dog, so I’m stuck. What should I do? — Jane H. in Wellesley, Massachusetts
DEAR JANE: Immediately contact the client to inform them. Then ask for their permission to treat the dog. If they only want you to use a specific treatment, follow their instructions. Save your receipts for any flea treatments purchased. A flea infestation can spread to the other pets you care for, so follow these steps to reduce infestation:
— Isolate the dog from most areas of your home until he has completed treatment and you are brushing away only dead fleas.
— Mop and vacuum your entire home daily, especially the corners. (Hint: Put a brand-new flea collar inside the vacuum cleaner bag to kill the fleas that are sucked in.)
— Wash or steam clean area rugs and drapes, and the dog’s bedding.
— Wash clothes that you have worn around the dog. (Hint: Set the clothes dryer to a medium or high heat setting, which will kill most eggs and fleas.)
This is a good time to review and update your pet-sitting contract. Add a clause requiring pets to be free of fleas, ticks and communicable diseases, as well as a clause that says owners must reimburse you for expenses incurred if their pet causes an infestation.
Send your tips, comments or questions to ask@pawscorner.com. ©
with the zone you live in and what works well there. Your neighbors, local garden store and local bookstore will all have tremendous resources to help you get started. After a few years, you’ll know what you like to eat and what grows well in your environment.
The point of a home garden isn’t to give yourself another
job but to provide you with a little food for your effort. With time and practice, you can have exactly that, a cornucopia of fruits, vegetables and herbs that come straight out of your home. While you probably won’t completely change the food system, you can make a small contribution and green up your life by growing some of your own food.


Mother Nature can be harsh on a lawn, and it’s up to homeowners to nurse their lawns back to health after they endure the elements. That’s often the case when winter ends and homeowners uncover signs of damage to their lawns.
Homeowners cannot begin to repair winter lawn damage until they learn to identify it, and the following are some telltale signs that winter took a harsh toll on a landscape.
• Wilted grass: Many things can cause grass to wilt over the course of winter, so homeowners may have to put on their sleuth’s cap to determine why grass that was healthy as recently as late fall is now wilted as the spring bloom begins. Grass that’s adjacent to walkways and driveways might have wilted due to the application
of de-icing solutions. Such products can prevent the formation of ice on driveways and walkways. However, when they’re tracked onto the grass by people or animals or blown there by winter winds, grass can wilt. A deep watering in spring can flush any lingering solution from the lawn. In future winters, homeowners can be as careful as possible when applying de-icing solutions, making a concerted effort to avoid spreading any onto the grass and limited applications to areas of the driveway and walkways that are not close to the grass.
• Brown patches: The National Association of Landscape Professionals notes that brown patches in a lawn often develop after heavy snowfall. Such patches tend to develop where large piles of shoveled snow were deposited, so homeowners can inspect
(Continued On Page 27A)

New plants can add much to a landscape. Whether they’re replacing plants that are no longer thriving or being added to supplement an existing landscape, new plants are an affordable way to give a home’s exterior a whole new look.
Much consideration is given to which plants to add to a landscape. That’s understandable, as homeowners want to choose plants that will thrive and won’t compromise the health of surrounding plants and trees. Before planting or even choosing plants, it’s important to plan for new additions to a landscape. Preparing the landscape can inform homeowners about which plants to purchase and can ensure they thrive after planting.
• Document sunlight exposure. Plants have different needs, and one of the biggest differences between species is the amount of sunlight they need to thrive. According to Penn State Extension, plants characterized as “full sun” require six or more hours of sunlight per day, while those considered “partial sun” need between four and six hours of sunlight per day. Plants designated as “partial shade” need two to four hours of sun per day, while “shade”


plants need less than two hours of sunlight a day. Documenting sunlight exposure in advance gives homeowners an idea of which plants should be planted and where they should be planted. Jot down these observations in a journal over several weeks and then choose plants that will thrive in each area.
• Test the soil. A soil pH test is a simple and quick


way to determine the acidity of soil. Soil pH levels will indicate how likely a plant is to thrive in a given spot. High levels won’t necessarily mean an area should be avoided, as some plants thrive in acidic soils.
Additional soil tests can determine other characteristics, such as the nutrient levels of soil and the amount of organic matter it contains. Each of these variables can
help homeowners make the right choices as they introduce new plants to their properties.
• Consider local wildlife. If local wildlife makes its presence known on a property, homeowners may want to take proactive steps prior to planting anything new. A new fence might prevent animals like deer from getting in, but that likely won’t do much to repel smaller animals like squirrels, rabbits or foxes. If wildlife is a concern, homeowners can seek advice at their local garden center about which plants certain animals are likely to ignore.
Homeowners who want to attract wildlife can do the same in reverse, choosing plants wildlife will be drawn to. Homeowners who want to deter wildlife should erect fencing or other barriers prior to planting.
• Clear space if necessary. Plants grow up and out, and cramped quarters can make it hard for new plants to thrive. Some may thrive but only at the expense of other plants. If necessary, clear space prior to planting to ensure plants have ample space to grow.
Some pre-planting landscape preparation can ensure new plants thrive.


(Continued From Page 26A)
alongside driveways and walkways. The NALP advises homeowners to rake away part of the brown patches first. If green tissue is emerging beneath, then the lawn will likely be fine in due time. However, if the area beneath is not green and surrounding areas are already turning green, homeowners may need to rake up dead tissue before applying topsoil to the affected spots. Once topsoil is spread, some grass seed can be spread and the grass should regain its green glory.
• Gray or pink grass:
Another indicator of winter
lawn damage linked to snow is gray or pink grass. The NALP reports that this is a byproduct of snow mold caused by lingering snow. Action may be unnecessary, as the NALP notes these circular patterns often go away on their own. If not, raking the affected areas might be enough to get the lawn on the road to recovery. If the issue continues to linger after raking, a topsoil application and subsequent seeding may be necessary. These are three common signs of winter lawn damage in areas where snowfall is significant during the coldest months of the year. Homeowners concerned about their damaged lawns are urged to contact a local landscape professional to correct any issues that linger into spring.
Millions of people embrace opportunities to get back in their gardens each spring, and they might be reaping more rewards from that activity than they realize.
According to the American Institute of Stress, gardening sparks a level of creativity among enthusiasts, and that can help to alleviate stress by lowering levels of the hormone cortisol. In addition, authors of a 2022 study published in the journal Urban Forestry & Urban Greening concluded that gardening during the COVID-19 pandemic helped people cope with coronavirus-related stress through outdoor activity.
The American Cancer Society reports that possible symptoms of radon exposure include shortness of breath, a new or worsening cough, pain or tightness in the chest, hoarseness, or trouble swallowing. The lack of these symptoms should not be mistaken for evidence that a home has no radon. Periodic testing is necessary. Though radon is naturally occurring, it can pose a significant threat. More information is available at epa.gov. (Continued From Page 25A)
Does radon exposure produce symptoms?


It can be bittersweet when adult children decide the time has come to move out of the family home. Parents perhaps get their first trial run of this scenario when their children go off to college or enlist in the military. Rooms are left empty, if only for a certain period of time. Eventually, those rooms will remain empty as adult children move out of the house for good.
Converting a child’s bedroom into an area for adults may take some planning. It can be exciting to regain space, but at the same time, it can be disheartening to convert a child’s bedroom once and for all. When the time comes and homeowners are emotionally ready to tackle bedroom conversions, these tips can help the process go smoothly.
• Repurpose the space for them. Give a childhood bedroom an adult spin without changing too much. If furniture is in good shape,
Few harbingers of spring are more spectacular to look at than the variety of butterflies that take to the skies after they emerge from chrysalis.
Although it is widely known that butterflies and moths go through a metamorphosis to turn into their finished forms, many are unaware just how many steps it takes for a butterfly to be ready to fly.
1. A butterfly begins its life as an egg, which a female butterfly lays on a particular plant that the species of butterfly prefers to eat. This is called a host plant. Butterflies are very particular about the type of plant that they eat. Certain species will only eat one type of plant or closely related varieties.
2. When a butterfly hatches from the egg, it is called a larva, or a first instar caterpillar. The insect is very small and does nothing but eat from the host plant.
replace the bedding, change the flooring, swap out artwork, and remove “youthful” items like toys, trophies and other collectibles. When the

3. Caterpillars are voracious eaters, and they grow very quickly. The trouble is that their skin cannot grow. A new, larger skin must be formed. To do this the caterpillar must molt its old skin so that the new, larger skin can emerge. As it eats, a caterpillar will go through a few stages depending on the species. It may become a second, third, fourth, and fifth instar caterpillar.
4. A caterpillar that has
child comes home to visit, he or she will still feel comfortable in the space.
• Create extra storage. The bedroom can be transformed

molted several times may look very different from its initial larval form. It will be much larger and may have different colors and features.
5. During the final molt, the discarded skin will become part of the chrysalis that will house the caterpillar as it pupates. The caterpillar spins a silk girdle that attaches it to a particular location, either on a tree branch or a plant stem.
into a walk-in closet or dressing space. According to the design experts at Houzz, many clients request this type of dressing room situation. There’s a bonus if the layout allows the space to connect to the owner’s suite or bathroom. This is a major overhaul, so homeowners should enlist a professional contractor.
• Make a fitness center. A bedroom can be turned into a home gym to make working out more convenient. Home-


6. Contrary to popular belief, butterflies are not formed in cocoons. Their pupa is called a chrysalis. Only some varieties of moths transform inside of a cocoon. In the chrysalis, the caterpillar is undergoing a rapid transformation. The chewing mouthparts are turning into the sucking mouthparts of a butterfly. Wings and antennae are also forming. The pupa stage is not merely a hibernation for the caterpillar. It is a time of very active growth.
7. About 10 to 14 days later the butterfly will emerge from the chrysalis. Upon doing so the wings will be wet and small. The butterfly then pumps fluids through the wings to expand them. It also needs to get used to flying. A recently hatched butterfly is very vulnerable until its wings are ready and dry.
8. An adult butterfly eats nectar and reproduces to
owners should take inventory of equipment they may have and then figure out where existing and new equipment will go. They may need to consult a structural engineer to ensure that the flooring can bear the weight of additional equipment.
• Create a work space. One of the best ways to transform adult children’s bedrooms is to convert the spaces into home offices. Those who have been setting up “desks”
begin the life cycle anew. Relatively speaking, a butterfly has a short life span. Some species live only a few days. Others may live up to a year. This can make viewing a spectacularly hued butterfly in a spring garden even more poignant for the observer.
More than 700 species of butterflies are found in North America. In order to attract them to the backyard, homeowners can plant wildlife that nurtures all stages of the metamorphosis.
Adult butterflies looking for nectar will seek out plants in the sunlight; rarely do they feed in the shade. Plants should have red, yellow, orange, pink, or purple blossoms. Flattopped or clustered flowers are preferred, as are short flower tubes that enable the butterfly’s proboscis to fit in easily.
at dining room tables or elsewhere may be excited about the prospects of finally having a private, dedicated space to work from home.
• Turn it into a craft room. The bedroom can be converted into a space to explore hobbies and various other interests. A dedicated craft space, a reading nook, a place to store photography equipment, or another function can serve as a useful way to repurpose an empty bedroom.


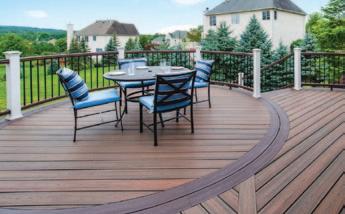
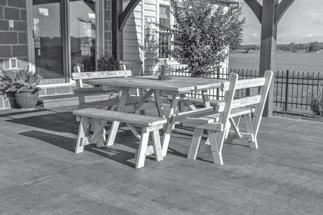
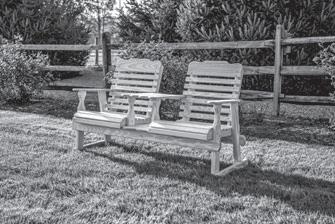
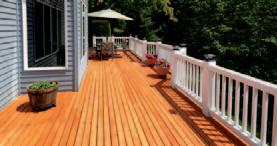
Beauty is in the eye of the beholder, and that notion is as true when renovating a home as it is when studying a piece of art. Therefore, when homeowners are looking for the best building materials for their home remodels — including backyard decks — their own personal preferences may ultimately dictate the direction they go.
Deck boards and railings can be made from a diverse array of materials, including traditional hardwood, plastic and composite materials. Here’s a deep look into some of the more popular decking materials so homeowners can make informed decisions when contracting with a decking professional for the build.
Hardwood, Softwood Or Pressure-Treated Wood
In the not-so-distant past, decks were primarily built using some type of wood. Wood is widely available and fairly cost-effective. However, as anyone with a wood deck knows, wood requires frequent upkeep and it can be susceptible to rotting or insect damage. Wood decks also may

splinter and deteriorate when exposed to the elements or pool water. Pressure-treated boards are infused with chemicals to help them endure, but that does not make them impervious to wear. Still, the traditional look of a wood deck remains appealing to many homeowners.
Composite
Composite decking materials are made from a blend of recycled plastic and wood


fibers. Since there is so much recycled content, composite decks attract those who are concerned about the environment and sustainability. Composite decking comes in uncapped and capped varieties. The capped version has an extra layer of protective capping made from high-performance polymers, says TimberTech,


a decking and outdoor furniture provider. While composite decks may have similar up-front costs to wood, they will require less maintenance over the years, but they must be scrubbed to avoid mildew growth.
Decks made of polyvinyl chloride, polypropylene or
high density polyethylene (HDPE) are collectively referred to as PVC decks. They are made entirely from environmentally safe plastic with no wood in the mix at all. PVC decks are more durable than composite and can last a lifetime. All PVC decks need is occasional cleaning. A potential disadvantage to PVC is it doesn’t always look, sound or feel like wood. Also, complex fastening systems can make the boards move as the temperature changes, resulting in squeaking as people walk on the deck. Generally, PVC is more expensive than wood or composite, but that investment may be worth it for those who never want to worry about deck repair or replacement.
Aluminum Aluminum may not be as popular as other decking materials, but it is lighter and stronger than wood, composite, and plastic. Aluminum also is resistant to mold, weather and insects, and it can be recycled. An aluminum deck will last for years, which is why it is one of the more costly decking materials.
Homeowners have many choices when picking materials for their decks. If they want a traditional look and moderate cost, wood may be the way to go. Those concerned about looks and durability may like composite. People who want very durable and longlasting may want to give strong consideration to plastic or aluminum materials.


Homeowners frequently enhance their outdoor living spaces with attractive plants and trees. When that greenery also produces food, the results can be both beauty and bounty.
People who plant vegetable gardens and fruit trees in their yards can be blessed with an abundance of fresh pickings once it’s time to harvest. In fact, many home gardeners may have visions of warm evenings pulling vegetables right out of the garden and tossing them on the grill or in salads. But insects and animals enjoy fresh produce just as people do. The joy of harvesting from a garden can be diminished when unwanted guests have gotten there first.


Homeowners can employ these all-natural strategies to protect their fruits and vegetables from lawn pests and critters.
• Plant gardens in raised beds. Though they’re not a fool-proof deterrent, raised beds can eliminate some garden infiltration by small critters that come up and
under from the ground. A raised garden bed can deter rabbits, gophers, groundhogs, slugs, and some other crawling pests. Raised beds also are ergonomical


and easily accessible by homeowners.
• Prepare homemade insecticide. The environmental information site Treehugger provides information on making a homemade insecticide from vegetable oil and a mild soap. Use one cup of oil with one tablespoon of soap (such as Dr. Bronner’s castile soap). Add this mixture to one quart of water in a spray bottle. This concoction can eradicate aphids, mites, thrips, and more by coating insects’ bodies and effectively suffocating them. Soap-and-water sprays or even neem oil sprays work similarly.
• Sprinkle diatomaceous earth. Diatomaceous earth, commonly known as DE, is an abrasive powder comprised of fossilized algae diatoms. It’s commonly used as a filter medium in swimming pools, but also makes an effective pesticide. The material’s abrasive and absorbent qualities draw moisture out of insects, essentially dehydrating them to death. DE can be sprinkled around the base of plants, but will need to be reapplied after rain and watering.
• Space out plants. One
way to reduce insect or animal pest numbers is to ensure ample space between plants. Tightly planted crops create a breeding ground for fungal diseases and also provide hiding spots and warmth for pests. Leaving room between plants can help avoid these issues, according to Gardening Channel.
• Use row covers or garden mesh. Specialized covers and meshes protect fruit and vegetables against insects and animals. Many plants can be covered all year long as long as the covers are lifted during flowering if the crops depend on pollination by bees. Veggiemesh® is a cover that can be laid over plants.
• Interplant crops in the garden. Interplanting is a technique that involves alternating crops, herbs and flowers to confuse the pests so they have a difficult time finding what they want to eat. Alternate rows of vegetables with herbs and flowers that appeal to beneficial insects.
Keeping insects and animals from damaging gardens can involve techniques that are safe and natural.


There is no denying the relief cool air provides when the temperatures outdoors are particularly steamy. In fact, having a place to cool off is a necessity for those who have succumbed to heat exhaustion or have difficulty regulating their body temperatures.
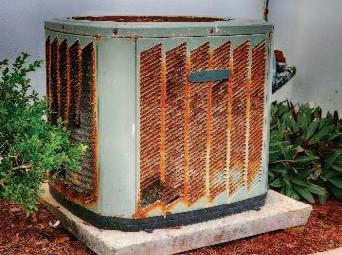
Even though air conditioning can provide relief, some people are reluctant to turn it on because of the drain on electricity and the subsequent high energy bills that come with it. Certainly running the air conditioning can be costly, but regular maintenance helps a system to work more efficiently. It also enables homeowners to recognize issues that can lead to expensive repairs if left unchecked.
Here are some air conditioning maintenance tips to keep a system in top condition.
• Change the filters. Dirty, clogged filters can cause a system to work harder to cool down rooms, compromising efficiency. Check
the HVAC system’s manufacturer recommendation for how frequently to change the filters. Some may benefit from monthly replacement if

the air conditioning is running constantly.
• Consider the MERV rating. The filter will have a minimum efficiency reporting value, or MERV, according to This Old House. The higher the number, the better the filtration. But a higher MERV rating requires more energy to pull air through the filter. Therefore, choose a balance of filtration and energy cost requirements.
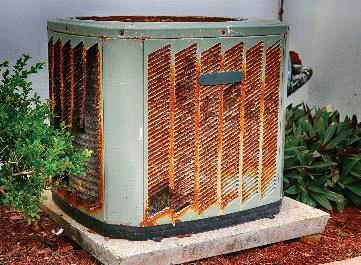
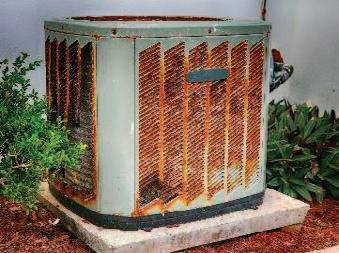
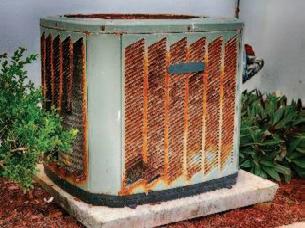
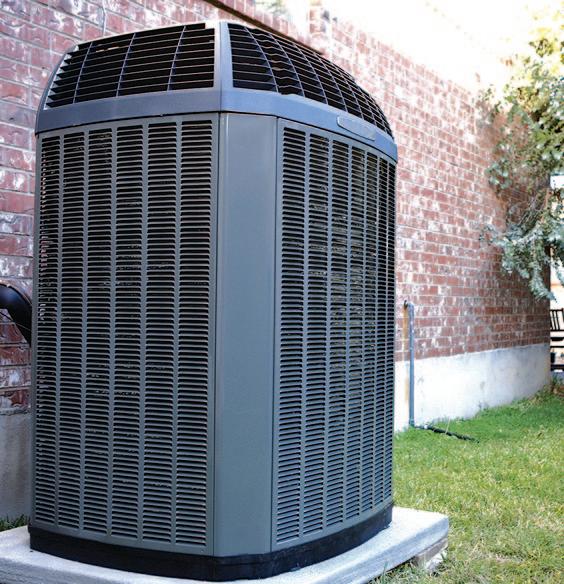
• Maintain the outdoor unit. Clean the AC unit with a soft-bristle brush and vacuum the fins at the start of the season and if the unit becomes dirty from weather, pollen and other elements. Bent condenser or evaporator fins can restrict air flow that would normally pass through the air conditioning system. Gently straighten them to improve air flow.
• Check and repair leaks. Airflow leaks through ductwork and with window AC units can reduce efficiency. Hold an incense stick or another smoldering item to check for leaks. If the smoke blows around, there is leakage. Use foil tape to seal small gaps and duct mastic for large ones. Stuff foam around a window unit and use taping as necessary.
• Schedule annual maintenance. Homeowners may be able to handle various maintenance tasks, or they may want to have an HVAC technician come out and do the following: clean and inspect coils; adjust and replace fan belts; lubricate motors and bearings; inspect controls and safeties, check refrigerant; and determine if the unit is large enough for the home.
Air conditioning systems need routine maintenance to operate efficiently and at the lowest cost possible.
• Supplement with a whole-house fan. The Family Handyman says an attic-mounted fan pushes hot air out through the attic vents and draws cooler, outside air through open windows and doors. The whole-house fan can be used to draw out most of the hot air before turning on the AC, or as a substitute on cooler days when having the AC on may not be crucial.