Damages
If an item has been damaged beyond the point of being able to be sold, this item can be removed from your inventory. Damages must be clearly segregated from regular price merchandise so the two do not get mixed together. Approved damages must be physically destroyed and under no circumstance can damages be taken by associates.

Salvaging Damaged Items
Damages cost Altar’d State about $10k per store annually in lost profitability. Where possible, try to repair or sale minor defective items. If you have jewelry tangles, please try to untangle them as soon as it happens.

Repair jewelry and place back on salesfloor to be sold. Sometimes, the chain needs to be reattached to the loop and it isn’t actually broken
Use super glue on any stones that have fallen off or OMG items that can be saved
Label minor damaged items with 15% damage discount. Suggestions for 15% off items: missing button, detached strap, minor separation at the seam, small chip on gift, small soda/coffee stain.
Items NOT to put on the salesfloor: rips (not in the seam), broken glass, and large stains. *Broken glass, blood stains, and other hazardous stains should be logged on the Hazardous Damages Log and discarded.
Identifying and Tagging Damaged Items
When a damaged item is found, first ensure that the item is unable to be repaired. If it is not able to be repaired, retrieve a Damage Tag (pictured below) and fill it out in its entirety.
Be as specific as possible with your Issue Description. Note the area where the damage is located along with any additional information as to why the item should be removed from inventory.
Damage Tags Can Be Found on the Discovery Zone in the Store Operations Folder
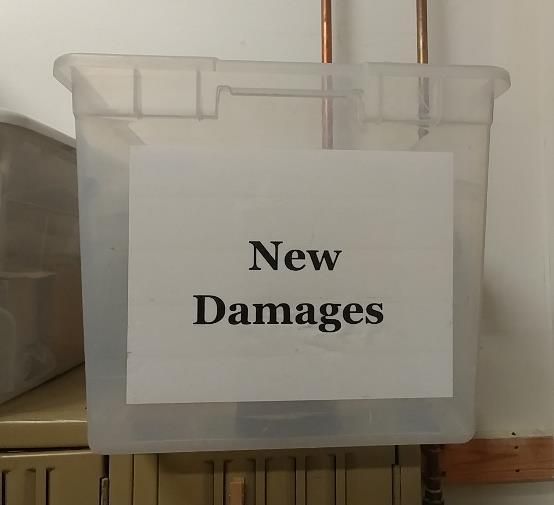
Once your damage tag has been filled out, securely attach the tag to the damaged product in a visible location and place in a clear bin labeled “New Damages.” Damages should be kept somewhere out of sight of the customer.

Place damaged jewelry into white envelopes and staple the damage tag to the envelope. This helps with organization and also prevents jewelry items from becoming tangled.
Broken glass is a HAZARD! Always ensure that any broken glass is labeled and placed in a trash bag to keep broken pieces from being loose in your damage bin. If a trash bag is used, staple damage tag to the exterior of trash bag. DO NOT USE ALTAR’D STATE SHOPPING BAGS as these are much more expensive and should be reserved for your customers’ purchases.
Scanning and Processing Damages
Before opening every Monday morning, the Operations ASL or Guest Lead will scan the damages and prepare them for inspection. The Operations ASL should also be auditing damages and removing reparable items and items with minor damages that can still be sold with the 15% Damaged Product discount. Make EVERY opportunity to repair an item before scanning it out as damaged.
When you are ready to scan damaged items, take your New Damages bin to the cashwrap and separate them into 3 categories: Apparel, OMG/Accessories, and Jewelry. (Note: You will also need an empty bin to place scanned items.) Once your damaged items have been categorized, go to a register and begin the scanning process.
At the register:
o Go to Back Office
o Select “Inventory”
o Select “Shipping”
o Click “Add New”
o Document Type: “Store Transfer”
o Ship To: “996-996 Damages”

o Select “Process”

o Begin scanning items and placing them into your empty scanned bin
Begin with Apparel items followed by OMG/Accessories and then Jewelry. This system offers easier organization and will allow you to optimize the space in your bin.
Please note that all apparel should be neatly folded and all jewelry should be untangled before they are placed into the Scanned Bin
Be sure to group items with the same barcode together. These items will be automatically grouped together on the packing list regardless of the order they are scanned.
As you scan your items, ensure that they are placed into the Scanned bin in the order in which they are scanned. This allows the packing list to act as a map to your scanned items. If completed correctly, the last item you scanned should be at the very top of the box, the first item you scanned should be at the very bottom with all items in between following the order on the Packing List. This prevents the store leader from having to go through the entire box to find a UPC and makes the approval process easier and much more efficient.
After all items have been scanned and placed into the scanned box. Note the number of items that have been scanned and the Document ID number (found on the left of the screen).
o Select Save/Exit
o Do you want to save changes? YES
o Do you want to Ship Items? YES
o Would you like to print a shipping label? NO
o Would you like to print a packing list? YES
Take your scanned bin and place a lid on top to ensure that no new items are added to the bin.
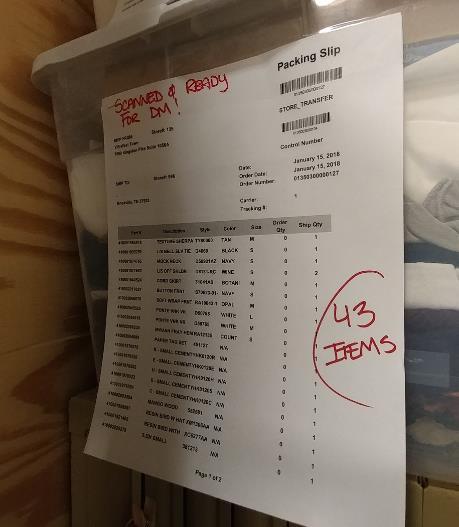
Retrieve your packing list from the printer (staple together if multiple pages) and note that the damages are scanned and ready for verification. Also list the total number of items that are included. Attach Packing list to exterior of scanned bin and store in BOH until your store leader verifies and approves. (See Picture Below). The associate who processed the damage transfer will initial and date the document. The Store Leader will also initial and date once he/she has verified the contents.
If new damages are scanned before the previous scanned items are approved/destroyed, they SHOULD NOT be added to the existing list. Start a completely new damaged process and scanned bin and keep the two separated as shown below.

Verifying and Destroying Damages

This step must be completed by the store leader or DM. Please plan time in your schedules to complete weekly, preferably Monday afternoon. A few things to check for:
Make sure the transfer is complete in the system. On the register, go to: Back Office, Select “Inventory”, Select “Shipping” and Choose “In Process”. There should be no pending transfers on the list.
As you review the transfer, check that every UPC is listed on the transfer document. If one is missing or one is not included, you must investigate why.
o If you need to add an item to the damage, place it in the “New Damage” bin and add it to the next damage
o If you need to remove an item, (missing from the transfer or a sellable item), email the Help Desk with the transfer number and the item number to be removed. Specify the quantity as well. Save the ticket number with the damage paperwork.

Every item must be physically destroyed. This will prevent someone from obtaining the item in the dumpster and returning it for credit later. To physically destroy,
o Remove all hang tags (including price tag with UPC)
o Remove the Altar’d State label wherever possible (apparel, handbags, shoes, etc.)

o Separate jewelry from the hang card and break up sets.
o Use your best judgment when dealing with OMG.
Initial the paperwork once you have verified and file in your shipping log with other store transfers. This will be audited by your DM and DTiQ.
