2 minute read
Sophie’s Florals for Spring
Kit List
◆ Dawn Bibby Designs A Spring Dream Paper Kit (750635)
Advertisement
◆ Card stock: textured purple
◆ Tonic Studios Craft
Tacky Glue
◆ 3D glue dots
◆ Pink ribbon
◆ Craft flowers
◆ 3D foam adhesive pads
◆ Paper guillotine
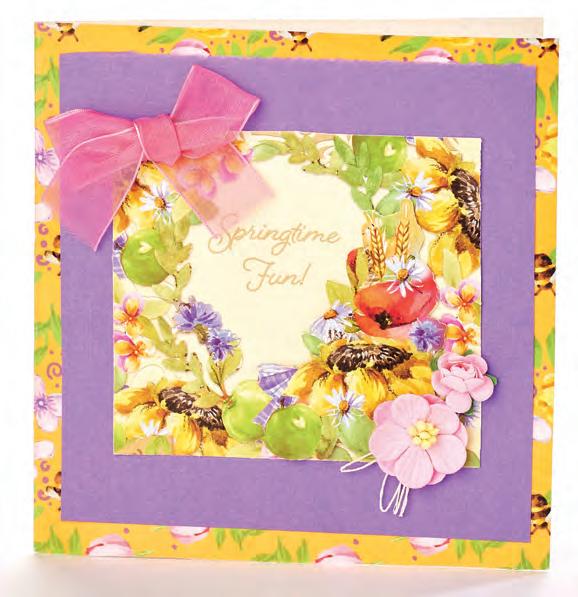
1 Take one of the patterned background card pieces and fold in half to create a gatefold card. To make a neat square shape, I used a paper guillotine.
2 Cut the purple card into a square then adhere to the background design.
3 Take one of the Springtime Fun toppers, fussy cut out the design and adhere onto the purple card.
4 Take another of the Springtime Fun toppers and fussy cut part of the floral design – I used the sunflower and poppy section from the bottom right.
5 Attach four adhesive foam pads to the back of the fussy cut floral topper. Place it over the corresponding floral section on the Springtime Fun square to create a 3D effect.
6 Finally, attach the craft flowers and ribbons to the card in each corner using glue dots – and you’re all done!
Andrea’s In Full Bloom Kit List
◆ Dawn Bibby Designs A Spring Dream Paper Kit (750635)

◆ Card stock: pink, silver mirri, white embossed
◆ 8" x 8" white card blank
◆ Dies: Dawn Bibby Winter Florals Camellia set; Tattered Lace Priceless Label Foundation Nesting Dies
◆ Scissors
◆ Ball tool and foam mat
◆ Adhesives: tacky glue, glue gel, foam pads, red liner tape
◆ Embellishments: adhesive gems, ribbon, ladybirds, bumblebees
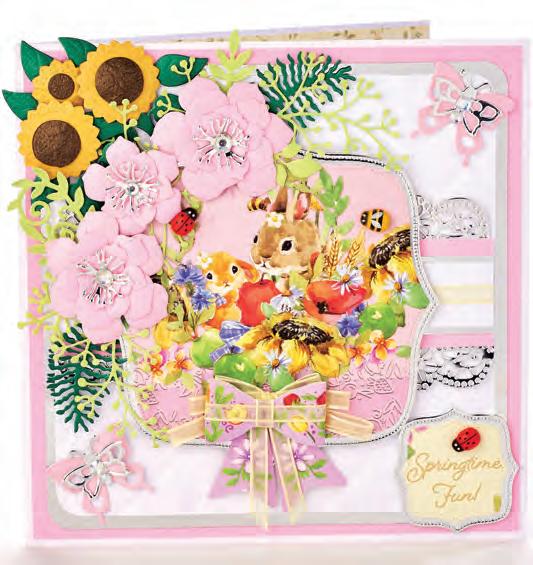
1 Take an 8" x 8" white card blank (my favourite size to work on) and choose a topper from the Paper Pack. Choose complementary coloured card stock for the matts and layers – I used silver mirri, pink and white embossed.
2 Die cut the topper, layering it with silver mirri. Cut three 7” strips in
Sophie says...
Wow! this certainly puts me to shame. I love all the 3D elements and mixed media. It’s a really lovely composition.
Andrea says...
What a beautiful vibrant card! I love how the purple mount makes the card pop, and also the pink ribbon bow and flower embellishments.
white embossed, silver mirri and pink card to matt and layer behind a length of ribbon. Die cut borders in silver mirri and place at the top and bottom of the strip then adhere across the middle of the card with the topper on top.
3 Fussy cut the sunflower and bow from the paper kit and découpage them onto the topper using foam pads – I also added some ribbon to the bow, to make it stand out more.
4 Die cut flowers and foliage, shape them with a ball tool and position them to the top right of the card using glue gel.
5 Die cut a sentiment using the same nesting die as the main topper, and layer onto silver mirri to match with the main topper.
6 For the finishing touches, die cut some butterflies from contrasting colours, layer up, adding some gemstones through the body of the butterflies, and place at the top right and bottom left of card. Add a few ladybird and bumblebee embellishments, and finally add an insert inside the card.


