2 minute read
Use scraps to stitch sweet Easter Bunny Bags


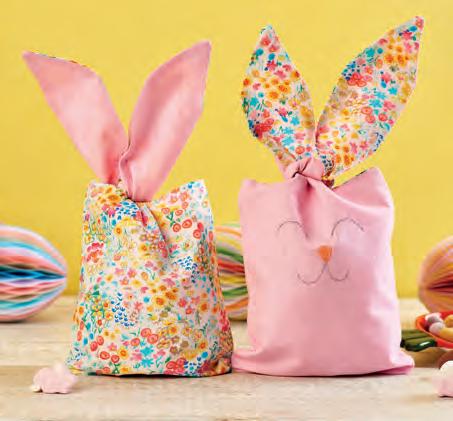
Spread a little hoppiness with these cute treat bags that are the perfect gift idea for Easter
Whip up this speedy project for some-bunny special this spring – the bags are simple to scale up or down using the template in the Members Area online, so can be filled with little treats or something larger!
Advertisement
Bunny bags
Kit List
◆ Template from the Members Area
◆ Sewing machine
◆ Iron and ironing board
◆ 0.5 metre plain fabric
◆ 0.5 metre patterned fabric
◆ Matching sewing thread
◆ 0.5 metre iron-on lightweight fusible interfacing (to buy this head to createandcraft.com and type in product code 590454)
◆ Heat erasable fabric pen
◆ Embroidery thread and needle
◆ Point turner tool (optional)
◆ Scissors
1 Cut out fabric and interfacing using the pattern piece available on the Members Area online. Cut four pieces of each fabric (plain and patterned) and four pieces of interfacing using only the bag part of the pattern piece. This will create two bags.
2 Iron the interfacing onto the wrong side of two of the plain pieces and two of the patterned pieces. Ensure you have the fusible side down on the fabric. Place a scrap of fabric over the top before you press it to protect your iron. These will be the outer sides of the bags.
3On one of the plain outer pieces draw then embroider the bunny’s face onto the bag. Make sure it’s not too near the top of the bag section and is central. You do not need to do this step for the patterned bag or if you do not want a face.
4 Placing one plain outer piece and one patterned piece right sides together, sew around the ears only. Snip into the corners and snip off the top of the point. Repeat for the other outer and patterned piece.
5 Lay the two bag sections right sides together matching the patterned and plain fabrics together. Sew around the edge leaving a gap on the patterned piece for turning the bag through.
Be careful not to catch the ears! Snip around all the curves.
6 Turn the bag right side out. Gently ease the ears through. It is helpful to poke up into the ears once they’re turned right side out, using a point turner to create the point of the ears. Press the ears to give them crisp edges.
7 Stitch up the gap left in the lining either by hand or machine. Press the bag.
8 Repeat Steps 1-7 for the patterned bag, ensuring you leave the turning through gap on the plain bag section this time.
Helping Hand
◆ Use a heat-erasable sewing pen to draw the face of the bunny on the bag freehand. Embroider along the lines you’ve drawn then the bag can be pressed on a low heat to remove the pen lines

◆ Experiment with different coloured noses, add rosy cheeks or little flowers in a crown
◆ If you are not confident adding a face, you can experiment with different patterned fabrics instead


