

Last winter, I had the pleasure of visiting with our cover guests, Rob and Barbie Jones. They graciously welcomed me into their home, production area, and storefront a few short days after Christmas! I was blown away by their well-planned workshop, amazing bad-a** Boss laser (300W!), and business model. I knew I had to share it in Laser Focused pages. And not simply because it is being done so well (it is) but more importantly because the light will come on for someone reading this story, and this business model will dramatically change their laser business. And if that’s not you, there is still solid advice on the lasering business and how to knock it out of the park. The best part is Rob is a willing mentor, so read closely and reach out if you want to know more and explore the business opportunity of the gift show world.
Meanwhile, you may have noticed a lot of holiday decking in our July/August issue. I don’t know about you but each year I tell myself I’ll get my holiday plan ready in July. I make a start, get sidetracked, get confused about what to do, and then I am just plain overwhelmed. Before you know it, it’s October, and all I can do is play catch-up. This year I am ready! I have my handy-dandy Holiday Product Planning Checklist! And take heart because you can get a free copy for yourself by clicking here or any one of several links you will find in this issue.
When you download it and get started you may find you want more support, including a team to brainstorm with. If so make sure you watch your inbox for the 5-day online Holiday Product Planning Mastery we are going to host July 24-28. You’ll have support as you make your way through the checklist and get to brainstorm with other creators enrolled and preparing for their holiday season. We will send out the details to you shortly.
And then there is the GIVEAWAY!! Yes, a big giveaway in this issue. Jason Rife of RotoBoss has donated either a RotoBoss Low Roller or Junior Rotary (winner’s choice) to one of the first 100 people who sign up as a Patron in Laser Focused’s Patreon membership. Basically, an initial $5 investment will put your name in the drawing to win a rotary valued at $750 – What a deal! Your chances are fantastic! Look for details in the magazine.
We welcome Johnson Plastics Plus, That Laser Chick, LaserCraft Fest, and Shop Review Crew to our family of advertisers. Check out all the advertisers (listed in the table of contents) and what they have to offer. Please support them as they support you!

Now go dig in and Laser On!
Robin Roberts Editor & Publisher





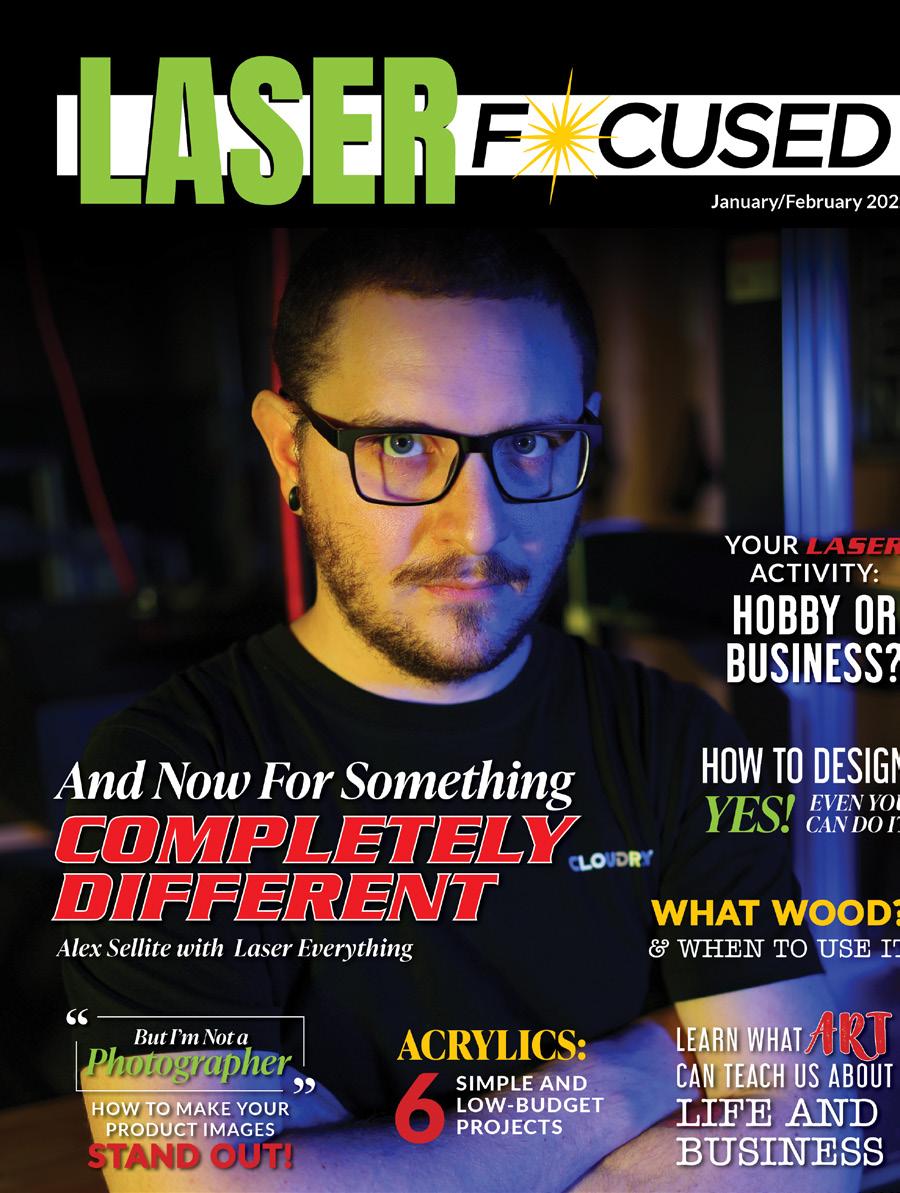
This issue, we are catching up with Alex Sellite of Laser Everything from our January issue! There have been a lot of developments in his world, so let’s get to it!
First and most importantly, heartfelt congratulations to Alex and Miranda, Mrs. Laser Everything, on the birth of their beautiful baby boy, Oliver James! He was born May 10th, and he and Mama are doing just fine.
But adding a little one wasn’t quite enough activity for this family of five as they also moved into a new home a short two weeks or so later! It’s all good, and it has definitely been a busy time for this leader in the world of lasers.
In the category of new adventures for the Laser Everything crew - Alex and the team will attend LBX (Lightburn Experience 2023) this October 27-29. They have new mobile streaming equipment, and along with some new team members, they will be live streaming from the event all day, every day! They will keep us updated on what is happening and interview industry leaders as well. If you’re there, make sure you say hi! If you can’t make it there in person, check into Laser Everything for the streaming details as the time gets closer so you don’t miss a thing.
LMA, Laser Master Academy, is also continuing to grow. There are over 3,000 members now. It is a treasure trove of laser information and assistance. It is also a great community experience where the team goes out of its way to help answer some of your tricky laser questions. You can join here (https://masters.lasereverything.net/), and at $8 a month, it’s a ridiculously good deal!

The marketplace is still a work in progress. It’s very close to being ready for the laser public – just a few more tweaks and tests to ensure it solidly delivers access to a wide range of laser-related goods and services.
Finally, check out Laser Everything’s weekday morning updates - Millijoule - for all the latest news in the laser world. You will find it on their YouTube channel, so make sure you subscribe (https://www.youtube.com/@LaserEverything) and get automatic notifications!

When receiving new materials, cut a small piece from each type you receive, and label it on the back to reference it to a list or glue it to an index card. On this list or card, keep the ‘vitals’ of that material: where you got it, how much it cost, what you plan on using it for. You can follow it up with what you did use it for, how it cut, any notes on working with it, and if you would buy it again.

Developed from a tip by Callie Gordon
I recommend using the built in tag system in Windows and Mac to organize files. Tag by topic, designer, etc. then you can pull them up by anything you want. Google your operating system and “tags” and you’ll find more details on how to use them. For a Mac, the option to add tags is right at the top whenever you save a file and give it a name. You can also right click on a file and choose “info” and add tags there.
Mark J Collier Big Blue Laser Designs
I used to tape a new tumbler and use a square to draw a line then using that tumbler, I would line up my rotary to the gantry. Now I have a oopsie tumbler set aside that I have taped and a line so whenever I need to realign my rotary I just grab that oopsie tumbler instead of retaping a new tumbler and redrawing the line.
Christina SamsTo clean up wood or MDF after cutting, use a Magic Eraser by Mr. Clean or a generic equivalent.
Dampen it and rub until the residue is removed. Wipe off excess moisture immediately, especially if you are working with MDF.
Comes right up, project saved!
Various Sources
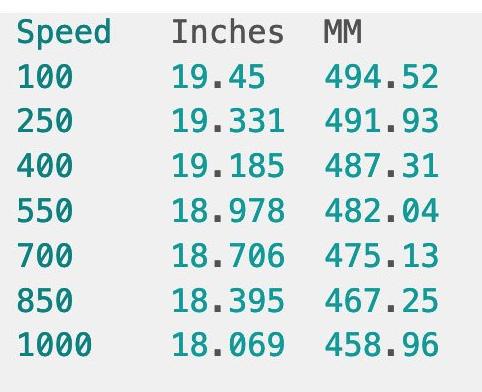
For Glowforge Users: Ever wonder why the working size of your bed seems to change - well, the speed impacts the useable space. Here is a guide, courtesy of Jonathan Gleich and the Friendliest Glowforge Group on Facebook.
Trouble lifting those magnets from your honeycomb? Sandwich them in a piece of Gorilla Tape and leave extra as a tab. This gives you something to grab and they come right up.
Liz Rivers
The Laser Outpost

When using primer, make sure you use the primer that matches your paint: oil based for oil-based paints, such as spray paint, and water-based when finishing with acrylic paints.
Various Sources


or at least that’s how he got his start in the world of lasering! Meet Rob Jones and his wife Barbie. They have a story and business model that they love which has done very well for them. If you would love the idea that every piece you make, you will sell, read on and they’ll tell you the secret...

From his childhood, Rob was an artist. In fact, he would rather draw than do anything, including his homework. So it was no surprise upon high school graduation that his lackluster academic career meant no scholarships for art school. He decided to go into the Navy, thinking that he could go to art school on the GI Bill when he got out.

Imagine his shock when, after taking the Navy’s aptitude tests, they told him he could write his ticket in areas such as nuclear field technician or electronics! He chose to go into advanced electronics, which obligated him to a sixyear stint in the service. Little did he know that the education he received would play an essential part in realizing his future artistic dreams.
Throughout his time in the Navy, he kept up his art. He was working with pen and ink drawings, even taking a booth in a San Diego market to sell his wares. It didn’t go well. People loved his work, but it wasn’t enough to build a career.

Once he left the service, he began to express his art by working with wood. His father gave him a Dremel, and he began making art pieces out of wood. Rob found it a very challenging and satisfying medium to create from.
He also returned to Thomaston, Maine, a town just outside of Camden, and all part of coastal New England communities that tourists descend upon come the summer. Rob knowing that tourists want to take something nautical and

reminiscent of Maine home with them, devised a plan. He had a favorite store in Camden, Once a Tree, and there he took his first handcrafted wood pieces - seashells - to the owner, Bernice, and asked if she would carry his products in her shop. Bernice, taken with his shells, immediately became a fan of Rob’s work, eventually becoming a mentor to him and his burgeoning business.
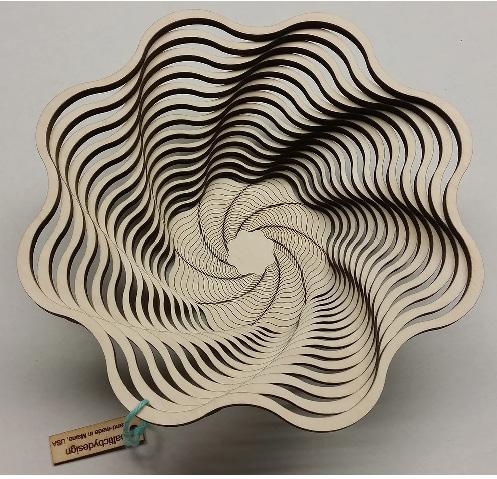
In May 2010, he designed his first bowl, inspired by a wind twirler. He made the first one with a skilled saw and then had twelve 9” bowls made by a manufacturing company an hour away from him to create the bowls with a laser.
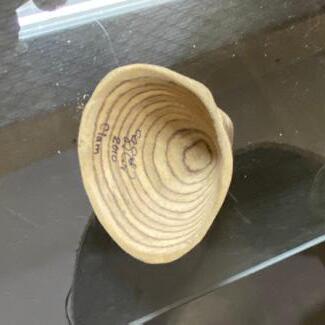
Rob signed up to sell them at a Boats, Homes, and Harbors show in August of that year and sold all 12 of them before the show even officially opened! This was a completely different experience than he had had with his drawings, and he was encouraged. Riding high on the successful debut, he took one of his bowls to Bernice. She had never seen a piece like it and was more convinced than ever that Rob needed to take things to the next level.
Bernice urged him to go to the Philadelphia gift show, explaining that he would meet buyers from all over looking to buy inventory for their stores there. He immediately researched and found the event, signed up and exhibited for the first time. The booth cost $2,000, and he wrote orders for $4,000 worth of product. Rob was thrilled! A great success!
A short time later, Rob stopped by to see Bernice at Once a Tree. She immediately queried him about going to the gift show. Of course, he explained he had gone, and it was pretty successful... except she said the show wasn’t for another three weeks. He had gone to the wrong show.
“I had spent all my money going to this other one,” Rob explained, “There were no funds for going to the show she had suggested.” But she believed in him and knew he would do well at the show, so she gave him her credit card and said to go, use the card to pay for everything, and that they would settle up afterward. Bernice was a mentor who put her money where her mouth was!
Rob did the Philadelphia show she had initially suggested and returned with $25,000 of orders. He was a sensation with his wooden art, and while it took some time to completely let go of his other income stream, he has been full-time with his company, Baltic by Design, since 2012.


The business model is now wholesale-driven. Once he found the gift shows, his business started to thrive. Today he has over 400 wholesale clients, and revenues flow from repeat orders Buyers now proactively contact them to place another order. Baltic by Design delivers solid products that sell, excellent service, and timely deliveries that keep shop owners returning for more. Later in this article, you will find a pullout section all about gift shows: where to find them, how to display at them, and more.
Always with an eye on expansion, two years ago, Rob gave Barbie a unique birthday gift – their shop, Wooden Alchemy, today to be found in the heart of Camden, Maine. The wonderful Once a Tree store is still there, although Bernice is no longer involved, having sold the business. The two businesses are great supporters of each other.

To enter their shop is to be welcomed into an experience. Everywhere you look are beautifully crafted laser products; ornaments, coasters, candle holders, watermap cribbage boards, and of course, so many variations of Rob’s amazing bowls!
The displays are as organic as the products, a feast for the eyes.
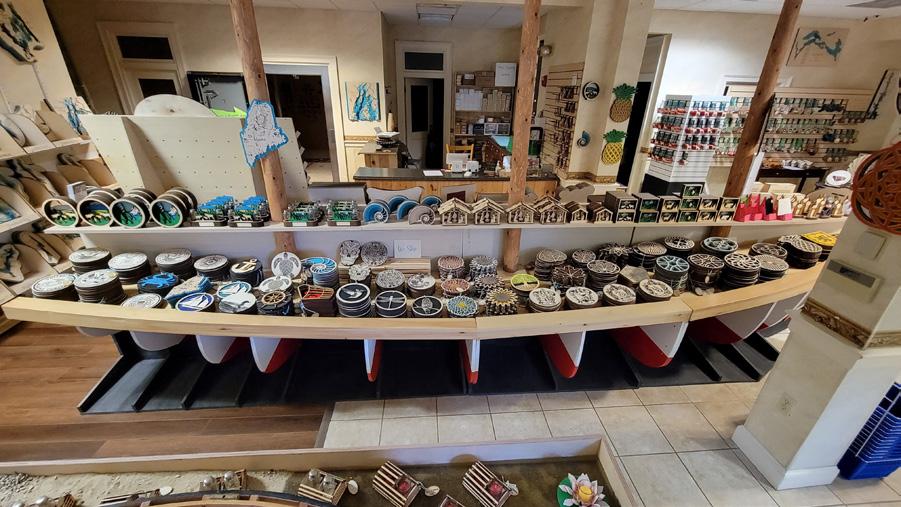
Additionally, there is a museum displaying many of Rob’s other woodwork. He has created traditionally brass musical instruments from wood, meticulously handcrafting each piece. They all play; for example, the banjo is the one Rob

played when he was in a local band.
Every day at the shop, they get to experience the delight of their visitors. Many folks return, tell others, and take home beautiful gifts they can only find at Wooden Alchemy.
One of the other aspects of having the shop is that now they can experience their products from their customer’s point of view. For example, they discovered that their single orphan coasters were top sellers! Building on this insight, they found a way to increase coaster sales by displaying them singly and letting shoppers put together their own sets. It was a wild success and is now the only way they sell coasters in the shop. It takes less display room, and people love to ‘do their own thing.’ And they have shared this marketing technique with their buyers, a service they would have never experienced without adding a retail location. Watch here to hear the story of their discovery of marketing coasters. You can borrow the idea and use it in your product displays! The story would only be complete by taking you inside Rob’s workshop. And what a space!
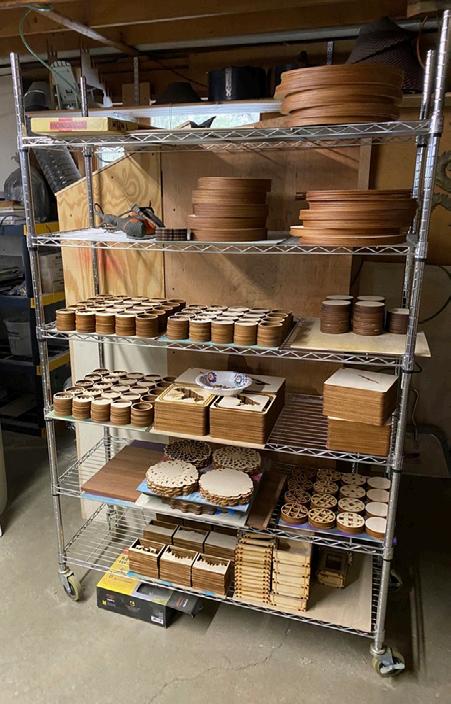
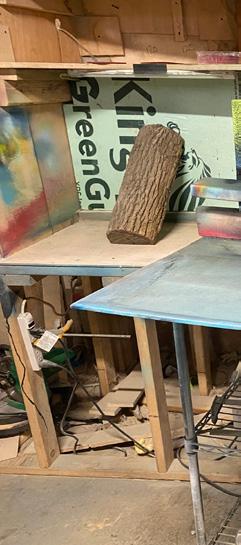
Three lasers and well-thought-out sanding, painting, and drying areas. Along with the assembly, stock, and shipping areas, this modestsized space is impressive for its production volume. Rob’s ability to meticulously plan and create made this space into an efficient, organized production machine.

Barbie keeps the operations running smoothly, leaning on her organizational skills from her Army days. Keeping track of orders and corraling the production schedule

on track is what makes quality and excellent customer service possible. The operation also has two employees: Lea, the oldest of their six adult children, who does most of the gluing and works in the store, and Zach, their other employee, runs the lasers and does some sanding and painting. Joining the team this summer is a high school art student who will work part-time in the


For the first year, Rob drove plywood to the manufacturer to have the cuts done. He would return a week later to pick up the cut pieces.
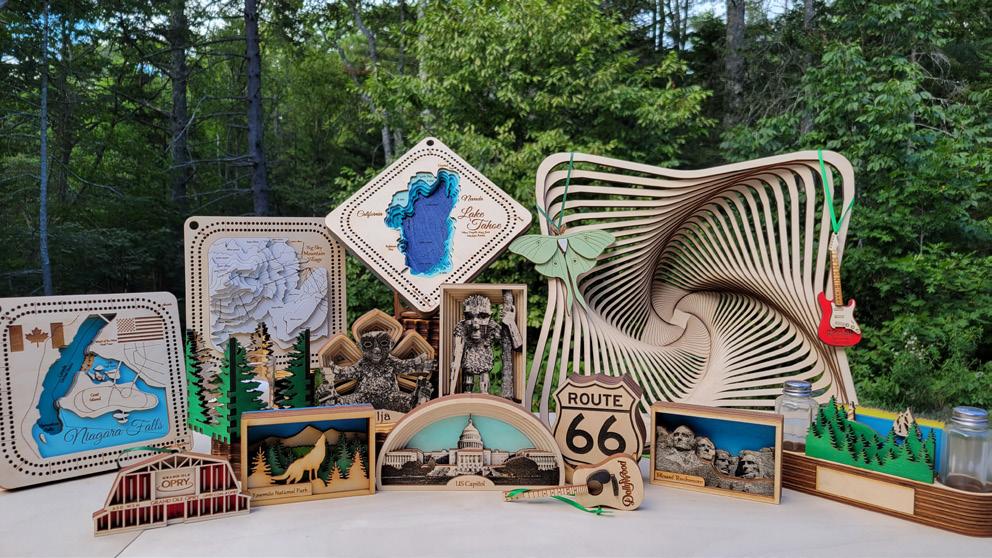
Finally, Rob could afford his own machine, a Full Spectrum 18x24 with a 60W tube. He eventually upgraded to a 90W and then again to a 150W.
His 2nd machine was one that the manufacturer he was using had bought used and couldn’t get going. They thought something was wrong with it, so they gave Rob a sweet deal on it. Figuring he’d take a chance that it could be fixed, he bought it. And fix it, he did! That electronics training from the Navy? Here is where those skills intersected with his artistry! He has been using that ‘trashed’ laser for the last eight years without issue.
Rob’s third machine is a Boss LS1630. It is his favorite one. He took this machine and butchered it up, installing a 300W eCO2 combined laser tube. He blazes through projects – I watched it laser out a five-layer design in 48 seconds. Be still my lasering heart!!


workshop. This is not only helpful to the business, it also gives the student exposure to a type of art they probably wouldn’t find anywhere else.
On the personal front, Rob and Barbie prove that online dating can work. They met more than nine years ago and are one of those couples who prove that it’s possible to find true happiness over the Internet! An interesting twist is that Barbie had seen Rob’s work well before she met him. So she knew of him but didn’t know him! Today they are inseperable and a dynamic duo!
As we wind up, Rob’s business advice is grounded in a saying by Henry Ford, “Sell to the masses, dine with the classes,” which he explains is making products that the bulk of people can afford easily - the majority of his items are in the $20-$30 range and always of excellent quality. He says, “It might not feed your artistic soul, but it feeds your wallet, and then you can work on the fancy, fun, big pieces.”
The wholesale gift show is an untapped opportunity for laser creators. Rob and Barbie invite and encourage anyone with questions and aspirations to follow this concept to reach out. The Wholesale Showman is ready to mentor motivated makers wanting to launch into one of the greatest business models on earth!
These are shows where buyers, anywhere from Mom and Pop operations to large organizations such as national parks and museums, come to shop for products to sell in their retail outlets. At an average show, there will be 1200-1300 vendors and 5,000 to upwards of 12,000 or more attendees, depending on the show. And these buyers are coming to shop. They are actively buying inventory for their stores. They will spend money with someone – it might as well be you!
Rob commented that even up to this point, he sees very few laser-based businesses selling at these shows. Consider over 1,200 vendors exhibiting, yet only 2-3 create their goods by lasering. Is there room for you, maker? Oh, yes, there is!
It is essential to understand that the market is the place to receive orders. Buyers are not attending, expecting to carry inventory off with them. This means you take one of each product you are offering to these buyers and irresistibly display them. You must catch their attention as they walk the aisles. One way to do that might be to make a large-scale version of your smaller product so it catches their eye, ensuring they can’t miss it as they walk by.
The booth setup can be simple. There is no need to spend huge dollars to deck out the booth. What you reserve is an empty space; consider it a blank canvas for you to make your products the star of the show. Rob keeps it simple by setting up his table at the front so the items are no more than 18-24 inches away from them. The customer can clearly see and is encouraged to touch and experience the pieces. Your primary goal is to get the products in these buyers’ hands, literally! See the pictures on the opposite page for three versions of Baltic By Design’s displays.
Remember the original proposition - how would you like to know that every piece you make, you sell? Gift shows are the way. What you make are the pieces that your buyers ordered. You don’t speculate on the quantity of what will sell. You don’t get stuck with dozens of a given design that didn’t sell. Buyers know their shops and customers; they know what sells in their establishments; you simply fill their orders.
Rob and Barbie gave so much more advice in our interview. Watch the videos to learn more about the gift show model including; why NOT to do summer shows, how to handle the paperwork, considerations for some of the big company buyers you might meet - whether you can address their requirements and should you. They gave many great tips for how to be successful so watch our highly detailed interview on doing this form of wholesale business and how it works.
Watch YouTube Videos Now
In the gift show business there is a name for having a piece that can be customized to different places.


The beauty of this design convention is you make a design and for each potential buyer, you customize the piece with their name or the area’s name. As an example on the left, the Las Vegas design is set but any business in Las Vegas could order this design and then during production their name would be dropped on the front, as Bellagio is here.

Watch YouTube Videos Now
One design, endless customers, streamlined production.
Acrylic; in the laser community you either love it, hate it, or have no idea how to begin using it. With makers come strong opinions that may discourage information for specific materials. Below we discuss five common acrylic myths all new and advanced acrylic users should know.
#1 Myth: If acrylic comes with plastic masking instead of paper masking, it is extruded acrylic.
Fact: Masking does NOT indicate if acrylic is cast or extruded. Manufacturers mask acrylic sheets to help protect the sheets in transit. Sheets are commonly masked with a PE (plastic) film or craft paper masking. Both masking styles come in various colors or adhesion strengths. PE film is the masking preference for manufacturers of extruded acrylic, such as mirror acrylic and iridescent acrylic. However, PE film is also used by manufacturers of cast acrylic, especially on specialty or glitter acrylic. This approach allows suppliers to easily identify styles and to do a more thorough quality check since specialty and glitter acrylic is more susceptible to manufacturing irregularities. While the primary purpose of masking is protection, these two styles are laser-safe and can be used in a CO2 laser if desired. If the masking lifted or was damaged in transit with frayed edges, it can create a fire risk and

should be reapplied. Some manufacturers use films that are NOT laser friendly, which is why we always recommend purchasing your materials from suppliers that specifically cater to the CO2 laser community.
Pro-tip: Before starting your project, test your material with the default masking. Different lasers and settings may not perform as well with plastic masking. To reduce flashback, either paper mask over the plastic masking or remove the plastic masking and apply alternative masking for your project.
#2 Myth: Acrylic is more expensive to use than wood or MDF
Fact: Your material cost is more than simply the initial cost per sheet. Depending on the style, acrylic sheets can appear more expensive than alternative materials such as wood or MDF. In addition to the initial material cost, your total cost of materials for your project should take labor and reliability into consideration. Unlike alternatives, acrylic does not require significant processing before or after cutting. When working with acrylic, you can significantly reduce your labor time by cutting down on time sanding and painting.
Acrylic is also more reliable in cutting consistency than wood or MDF. Assuming your machine is properly maintained, cutting from sheet to sheet of the same acrylic style, your settings should not have to be adjusted frequently. With milled materials
like wood and MDF, material thickness and density can vary enough to require multiple test cuts between sheets of the same style. Even when purchasing from the same supplier, wood and MDF can have void spots due to glue which you cannot cut through. This can result in a higher rate of failed cuts and required recuts, increasing your overall material cost for a project.
Pro-tip: The total material cost should be used when pricing your products. Make sure your pricing incorporates the base material cost PLUS any additional expenses related to that material, such as additional labor and variances in laser time.
#3 Myth: Acrylic is scratch-proof
Fact: Acrylic is scratch-resistant but can be polished.
Acrylic is highly scratchresistant, but scratching can still occur during the normal course of fabrication or wear and tear. Nothing is more frustrating than completing a cut only to realize there is a scratch on the finished piece. But don’t fret; acrylic is such a popular material because, unlike other plastics, acrylic can be buffed and polished. You can buff scratches with a lamb-wool pad or microfiber cloth and plastic scratch remover solution depending on the type of acrylic and scratch severity. Once buffed, the original shine can be restored with a plastic polishing solution and
microfiber cloth.
Pro-tip: Do not use magic erasers, alcohol wipes, Windex, ammonia, or generic cleaners on your acrylic sheets. Stick with plastic-specific cleaners or simple water and dish soap with a microfiber cloth.
#4 Myth: Working with acrylic is difficult to learn
Fact: With tons of resources, getting started with acrylic is easier than ever! As a maker, there’s a good chance that even before you got your laser, you worked with wood or leatherette, but probably not many plastics. This unfamiliarity, coupled with higher price points, can make acrylic seem more intimidating to new users. However, thanks to passionate community members, material education is more accessible than ever. CO2-specific content providers like LaserFocused Magazine, Big Blue Laser Designs, and several Facebook groups have helped demystify the world of laser cutting and acrylic.
Pro-tip: Check out starter bundles or sample packs to cost-effectively test out a variety of acrylic. We always say if you can figure out how to cut mirror acrylic, you can cut any acrylic.
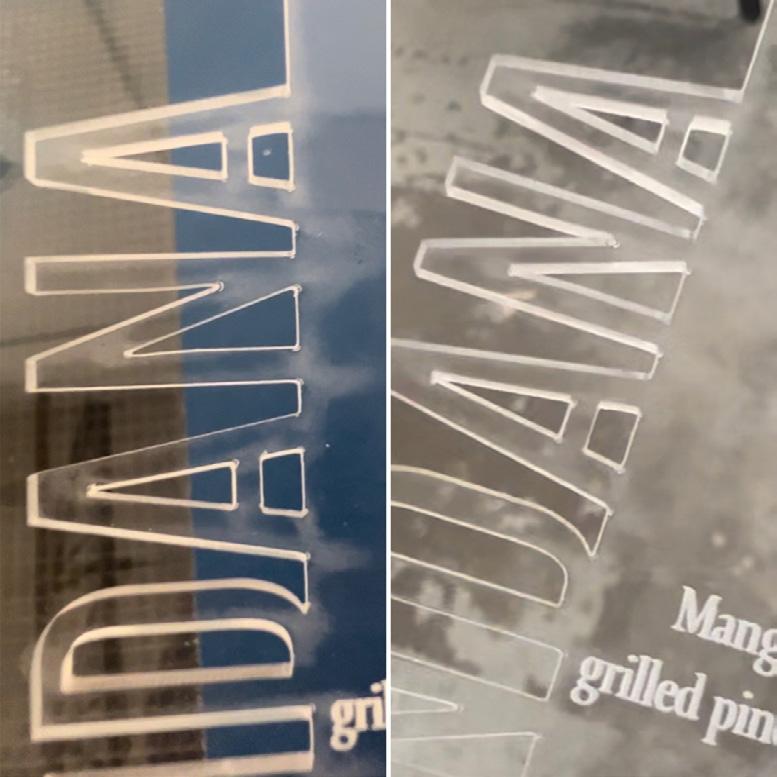
#5 Myth: All acrylic is made equally
Fact: Quality varies across manufacturers, even when comparing the same styles.
here...
It might only be July, but any seasoned laser crafter knows that this is the time to start making products to capitalize on the most profitable holiday of the year. According to market research, Christmas ornaments were the top-selling holiday decorations for 2022 in America, so it’s easy to see why holiday crafting is so popular with makers.
As the Christmas retail spending increases in November and December, it’s essential to plan and prepare early, especially if you will be making large quantities of Christmas decor and gifts to sell to meet the demands of your customers. Many Christmas lovers start decorating in November, and being prepared before that time gives you a better chance of more sales and higher income.
Determining what to sell can be anxietyinducing for many makers. Few can accurately predict what items will be popular and trending for any given time or area. With the price of raw supplies climbing higher and higher, it’s very frustrating as a small business owner to lose valuable time and materials when the product is a flop. Market research and prior experience in holidaymaker seasons can go a long way in planning this year’s product offerings.
A simple online search for current holiday market trends will bring up countless articles about what retailers expect to trend this year and can be a valuable tool in your planning. EtsyHunt is a resource I came across in my research for this article, and it looked like a promising place to look up the current topselling products on the Etsy platform. It has free and paid plans, offering different information and services depending on the plan selected.
If pouring over statistics and articles isn’t something you align with, a straightforward solution is walking into any big box craft store that sells massive amounts of holiday merchandise starting around the early summer (now!) and browsing the aisles. Here you will find ideas of the trending colors, patterns, and themes that people will decorate with this year so you can match those.
If you only plan on making a small number of ornaments to supplement your business and need some ideas, here are some quick categories:
• Occasions; such as New Home, First Christmas, and Just Married;
• Current home decorating trends;
• Memorial ornaments, especially cardinals;
• Location-oriented - if you live in an area that’s a popular destination, also an excellent idea for selling a few ornaments year-round.


You should also already have an idea of how and where you will be selling and marketing your products this year. Will you support your home community by setting up and selling at local events and markets? Do you consign with shops in your area or even have a physical shop of your own? Or, is the Internet where you focus your sales? Whatever direction you take for selling, they all have special considerations, but they can be very rewarding for your small business.
Most well-known and popular markets, especially holiday-themed ones, fill up fast and have a vendor waiting list, so signing up as soon as possible is essential. Outdoor Christmas markets invoke a nostalgic feeling with the lights, holiday music, and scents of cinnamon and cocoa wafting through the air. These events always have a high turnout of visitors, and this can mean big profits for small businesses that participate. Knowing when to submit your application, the cost to rent the space, and any licensing requirements ahead of time can help assure your spot in each one you plan on attending. If there are no available spaces, ask to be put on a mailing list to be notified if a vendor drops out and a spot needs filling.
Online sales have the greatest potential reach to retail consumers and don’t limit your sales
to city, state, or even country borders. But it can also require extensive marketing to drive buyers to your business until you have established a solid customer base. Etsy alone had 96 million buyers in 2021; repeat buyers made over 81% of purchases. Be it Etsy, Social Media, or your website, you will need time to devote to finding your target audience and getting them to your site. In planning for this season, it’s important to include time and budget for marketing and advertising.
Small businesses can easily get lost in the sea of competition, so increasing your visibility online should be a daily task. Many buyers find their holiday decorating inspiration from Social media such as Facebook, Instagram, and TikTok, and it’s hard to find someone unfamiliar with Etsy. Getting advertising started early in the year can give you a head start by posting what your customers can expect in the upcoming season, getting them excited about what you make next. Even if they put off their purchase until later in the year, a like, follow, or bookmark can mean big future income potential. As your exposure grows, so will your business.
And this is just the start. There are all the details of production, packaging, marketing, and merchandising. Look for more articles in this and future issues.


Colors: Rich jewel tones like deep red, emerald green, and royal blue combined with metallic accents of gold or silver.


Theme: Timeless and sophisticated designs incorporating elements like intricate patterns, damask prints, and luxurious textures.
Colors: Cool and muted shades like icy blues, soft grays, crisp whites, and touches of warm neutrals like taupe or beige.


Theme: Simple and minimalist designs with clean lines, geometric patterns, and Scandinavian-inspired motifs like snowflakes or reindeer silhouettes.
Colors: Natural and earthy tones such as warm browns, forest green, rustic red, and soft neutrals like beige or ivory.


Theme: Cozy and rustic-inspired designs featuring elements like burlap, twine, wood accents, plaid patterns, and natural materials such as pinecones or evergreen branches.


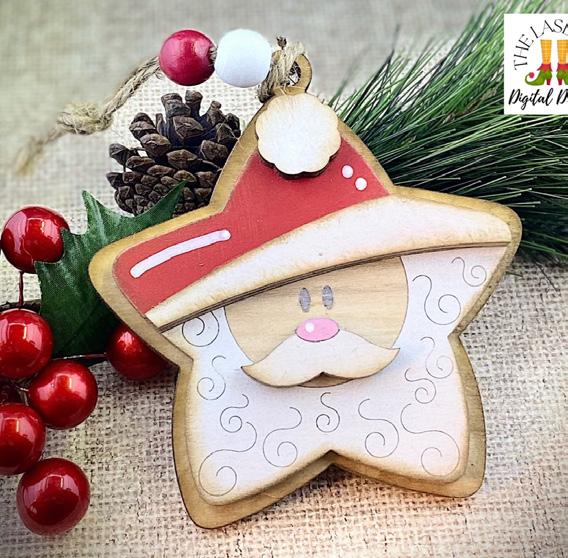
Colors: Playful and vibrant colors like candy cane red, peppermint pink, icy blue, and snowy white.
Theme: Whimsical and magical designs featuring elements like snowflakes, snowmen, Santa Claus, reindeer, and whimsical creatures like elves or fairies.




Colors: Bold and glamorous metallic shades like gold, silver, rose gold, and copper combined with rich jewel tones or deep, dark colors like navy or black.
Theme: Opulent and glamorous designs featuring metallic accents, shimmering fabrics, sequins, glitter, and luxurious textures.
Colors: Soft pastel hues like blush pink, mint green, baby blue, and vintage-inspired shades like faded red or antique gold.
Theme: Retro and nostalgic designs incorporating vintage ornaments, lace, ribbons, nostalgic prints, and delicate embellishments.

MATERIALS: ACRYLIC... continued
Several acrylic manufacturers and suppliers offer the same colors or style families. However, each manufacturer has a unique process with different molds, sheet sizes, pastes, and materials. These process variances can result in widely different qualities. For example, several styles lose pattern integrity when cast in larger molds. Suppliers who work with smaller mold batches for those styles offer more consistent patterning batch to batch. Pro-tip: We recommend working directly with CO2 laser suppliers when shopping for acrylic. If the supplier doesn’t regularly work with a CO2 laser, they may not hold the same quality standards necessary for your projects. A reputable supplier has already gone through the troubleshooting of identifying the best manufacturers for each unique style.

Now that you know the truth behind these common acrylic misperceptions, don’t be afraid to try it out yourself.
Chelsea Sauder is a partner at Houston Acrylic along with Courtney and Patrick Boren. Through Houston Acrylic, Chelsea has combined her background in entrepreneurship with her passion for the maker community. HoustonAcrylic.com

It is just the start of summer, and people are decorating with red, white, and blue. Still, as a laserfocused business owner who only makes and sells Christmas ornaments, I can attest to how quickly the next several months will blur together and get lost in ribbon, glue, and the scent of laser-cut wood filling the air. There is a lot to think about as we prepare for the season ahead!
When you plan now, even if you don’t start holidaymaking now, you can reach the success you desire this year and still be able to manage a household and sit down with your family at dinner each night.
Good luck, elves! Now harness up the reindeer and climb in your sleigh for a long crazy holiday ride into Christmas 2023!


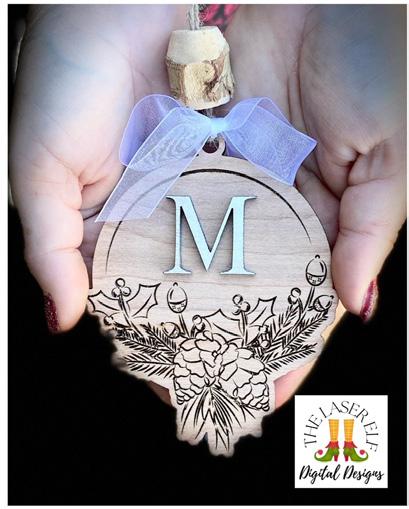
Nicole Jackson lives on the Eastern Shore of Maryland with her husband and daughter and is the founder of The Laser Elves Ornament group on Facebook. You can find her on Etsy as well.


Level
Laser Supporter Foundation Tier ($5/month): Support the free publication of Laser Focused and fuel our mission to educate and inform laser users worldwide. Enjoy access to a private community, behind-the-scenes content, and exclusive merchandise discounts. Your investment in us means content-rich issues will continue to shine!
Laser Learner
Business Tier
Take your laser to new heights live streams taught an business business networking elevating your these interactive designed to help Plus, receive a Settings Planner laser project replication.

By joining Laser Focused Patreon, you’ll also gain access to laser-focused resources, and invaluable insights
Join today and become part of that celebrates innovation, creativity, that sets us apart. Unleash make your mark in
Let’s light up the laser universe together
*Disclaimer: Side effects may include increased and a heightened sense of laser-powered Proceed at your
unlock a world of exclusive benefits Focused Patreon.
subscribe to Laser Focused Patreon: Learner ($15/month): laser knowledge heights with monthly taught by laser experts. From networking secrets to laser projects, interactive sessions are help you excel. digital, editable Planner for consistent replication.
Laser VIP Profile Tier ($25/month): Experience laser VIP treatment with your company’s name and linked logo on our prestigious sponsorship page in every issue. Gain visibility and make waves in the laser community. As a Laser VIP, enjoy all the benefits from the previous tiers and attend exclusive live streams on business and laser topics.
lasericious opportunity!

you’ll not only support our mission but resources, community engagement, insights from industry experts. of an exclusive laser community creativity, and the laser-powered brilliance
Unleash your laser potential and the world of lasers.
together and unlock limitless possibilities!
increased laser enthusiasm, unstoppable creativity, laser-powered achievement. your own risk!
In the world of ecommerce, Etsy stands out as a unique platform that offers tremendous opportunities for creative entrepreneurs and artisans. By leveraging the platform’s expansive buyer base, user-friendly interface, and builtin traffic, sellers can establish a strong online presence, reach a global audience, and thrive in the thriving handmade and vintage market. For laser owners, Etsy is a great option for your business!
One of the primary reasons why selling on Etsy is a great idea is the platform’s extensive buyer base. With over 90 million active buyers worldwide, Etsy provides sellers with a vast pool of potential customers seeking unique, handmade, and vintage products. These buyers are attracted to Etsy’s reputation as a marketplace that prioritizes craftsmanship, creativity, and personalization. This means even if you currently have your own website, setting up an Etsy shop can be an additional venue for your business.
According to Etsy’s 2021 Annual Report, approximately 60% of Etsy’s gross merchandise sales come from traffic generated by Etsy itself, indicating the substantial impact of built-in traffic on seller success. A healthy Etsy shop can see a breakdown of about 70% Etsy generated traffic vs 30% self generated. That means as a shop owner, you can focus your efforts elsewhere!
According to Etsy’s 2021 Annual Report, the platform recorded a remarkable 71.4 million active buyers in the year, representing a 56% increase compared to the previous year.
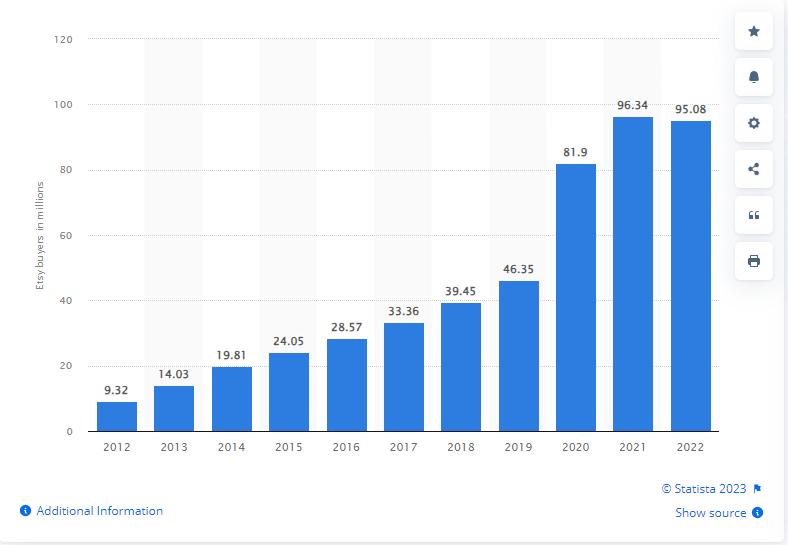
The diversity of buyers on Etsy is also worth noting, with 83% of them being women and approximately 40% residing outside of the United States. This global reach allows sellers to tap into international markets and expand their customer base. Digital shops can reap these benefits even more by offering products that can be purchased in any location!
Etsy’s user-friendly interface makes it incredibly easy for sellers to set up their online shops and manage their listings efficiently. The platform offers intuitive tools and resources that enable sellers, regardless of their technical expertise, to showcase their products effectively and provide a seamless shopping experience for buyers. There are also many forums and groups that you can join to help you along the way!
With any business, the costs to start will vary. Etsy attracts millions of visitors who are actively searching for unique, handmade, and vintage products. This traffic saves sellers the effort and expense of generating their own website traffic or investing in extensive marketing campaigns. What does this mean for a laser business? You’ll pay to
make your products, of course, but getting listings up and published is very low cost at .20 per listing per 4-month period. When you sell something on Etsy, you’ll pay fees for the transaction, for the payment method and even for shipping labels. It can add up, so a pricing formula for your shop will come in handy here, to optimize your profits! In addition, there are Etsy advertising options that can be utilized for various fees.
Because Etsy is such a large company, as they grow, they continue to add resources for small businesses that would not be available to individual and small businesses. For example, if you live in the US, Etsy now collects and remits sales tax on your behalf in almost all states. Etsy has many API partners, meaning they have allowed companies to integrate with their public data. Shipping vendors, email collection services, inventory systems, QuickBooks all can be connected to your shop for ease of use! Buyers can also get discounts on certain shipping labels by buying them through the Etsy platform.

To wrap up, selling on Etsy provides a remarkable opportunity for artisans and creative entrepreneurs to showcase their products to a vast and engaged audience. The platform’s expansive buyer base, user-friendly interface, and builtin traffic make it an excellent choice for sellers seeking to establish a strong online presence and grow their businesses. By leveraging these advantages, sellers can tap into the thriving handmade and vintage market and unlock their full potential on Etsy’s unique marketplace.
So, how can you get started? Setting up a shop is fairly easy, and you can get 40 free listings by using a referral code, like this one. You can have

a shop set up in a few hours or less! There are a plenty of resources online, but be cautious and make sure to do your own research from trusted resources like the Etsy Seller Handbook.
What should you sell on Etsy? Starting with a product that you enjoy making is a first step! Can you easily find the materials? Do you have the time to make the products as needed? How much competition is on Etsy currently? Do a quick search on the Etsy platform and look at other shops: What are they doing well? How can you differentiate your products in a way that gets the attention of buyers? Competition exists for most products on Etsy, and yet there are still plenty of buyers. You can be successful with great products and a selling strategy!

Aspiring to create stunning wood inlay art but held back by a lack of drawing skills or reluctant to invest in vector art or design files? Don’t worry, all you need is a dash of creativity and a basic understanding of digital design tools. In this guide, I’ll walk you through how you can harness the power of Corel Draw or similar design software to transform basic shapes into a complex design.
Before you embark on your design journey, it’s crucial to become well-acquainted with the software you’ve chosen for the task. Whether you’re working with Corel Draw, Adobe Illustrator, Inkscape, or Silhouette Studio, each of these tools has its unique set of features and commands. However, they all provide the essential tools you need to bring your own designs to life.
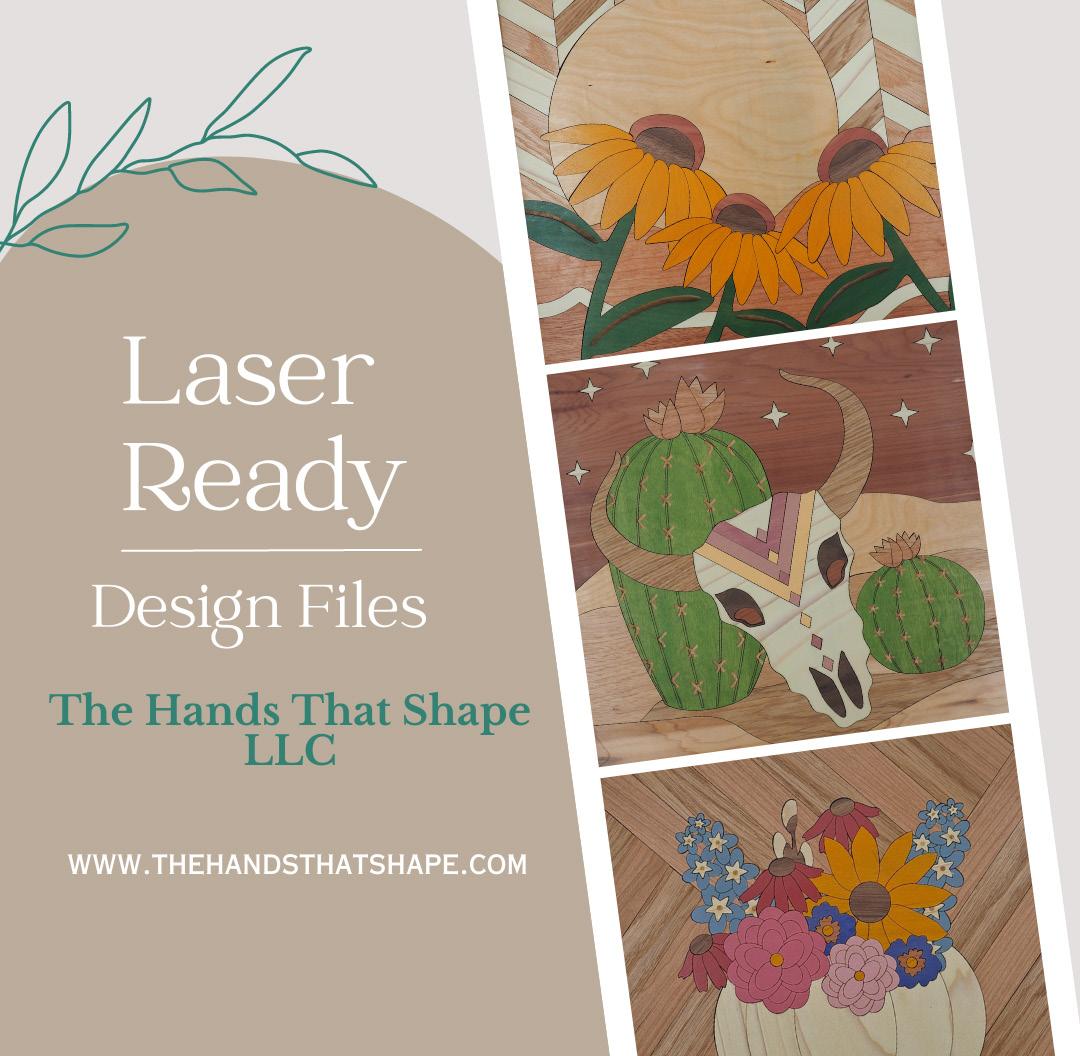
This design features a pumpkin, serving as a vase, brimming with an array of beautiful flowers - Sunflower, Zinnias, Delphinium, Coneflower, Pansies - and a Willow Branch. In order to create the Fall Floral Pumpkin I only used three shapes, an ellipse, rectangle and star. Using these three basic shapes as a starting point, I resized, rotated, and adjusted nodes. Additionally the Weld and Simplify Tool were indispensable for helping to fine tune each individual component of the design by allowing multiple shapes to be combined together, or trimmed to create a

custom shape. Lastly the Segment Delete Tool was utilized to add scored line details.
Refer to the comparison table above to locate the equivalent tool names in your chosen software. Note that while tool names may vary across different platforms, their functions remain similar. This guide will continue to reference Corel Draw tool names for consistency, but be sure to substitute the correct tool from your software as you follow along.

Building the Floral Arrangement
I began this design by creating a central pumpkin vase. The Ellipse Tool was used to create five similar sized ovals to form the body of the pumpkin. Here, the Simplify Tool was important because it allowed for overlapping portions of objects to be easily removed, leaving the visible portion of objects remaining. For this design, utilizing the Simplify Tool on five overlapping ovals creates the quintessential segmented look of

a pumpkin. Don’t be afraid to experiment with your shapes – pumpkins aren’t perfect, and a little asymmetry can lend your design a more organic and realistic look.
Next, moving on to the heart of the design - the flowers. Each type of flower was represented by multiple instances of the same basic shapes:

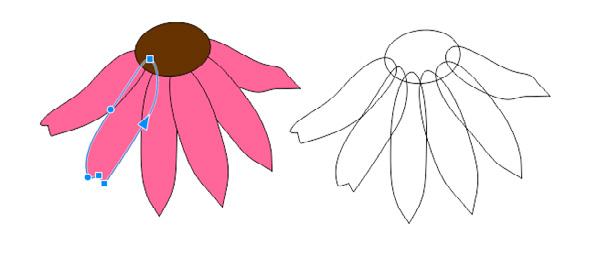
Sunflower: The sunflower was created by using various ellipses for the petals and center. Adjustments to the thickness and shape of the petals was achieved by adjusting nodes to give the petals a non uniform appearance.

Zinnias: The zinnias were made by creating a five petal flower with the ellipse tool. Various sizes of five petal flowers were then rotated and layered on top of one another.
Delphinium: The stalky delphinium was made using a combination of the ellipse tool and a star shape. Again, a five petal flower using the ellipse tool with a star as the dominant portion of the flower’s center. Multiple flowers were then arranged to resemble the tall stalky flower.
Pansies: The pansies were created by making a four petal flower with the ellipse tool and adding additional nodes to individual petals. The additional nodes were shifted inward and outward to create each wavy petal.
Willow Branch: The willow branch was created using the rectangle tool and several smaller elongated ellipses, some of which were welded to the rectangle to create a unique stem and others to create the buds.
Background: The background was created using three groups of long rectangles placed side by side and rotated at an angle. Any overlay between the rectangles was eliminated by using the Simplify Tool.
Recently I have made more of an effort during designing to reduce the number of pieces that are cut out without compromising the overall design. This is achieved by utilizing the Segment Delete Tool. This tool allows for scored line details to be incorporated onto a single shape.
Coneflower: The petals of the coneflower were made the same as the sunflower, with an additional step of dragging the node on the tip of the petal inward to create a pinched look at the end of the petals. In this case adjusting the nodes help create natural-looking petals. continued here...
When utilizing the Segment Delete Tool for this design, I created a duplicate of each flower I worked on. With the flowers still stacked on one another, I changed the perimeter outline of the bottom flower to red (for cutting) and removed the rest of

We all remember the first day our lasers arrived. As I reflect on that day, I realize that my excitement was not simply the arrival of a new machine; it was the start of a crafting adventure full of creativity and opportunities to learn the world of laser crafting. But it quickly dawned on me that despite my eagerness to have a laser in my crafting space, I had overlooked the fact that I needed guidance and inspiration to fully unleash its potential. The possibilities seemed endless, but I lacked the knowledge and creativity to explore them all.
Driven by this realization, the idea for the 2023 Laser Craft Fest was born, the first-ever virtual event dedicated solely to laser crafting. Most of us began with the basics in our laser journey, engraving names and monograms. But the laser crafting world had so much more to offer. As I dove deeper, I had many moments of, “wait, I can do that too?” or “I didn’t know you could make that with a laser!” With each new discovery, a door opened to new creative possibilities. But this took time, experimentation, and a willingness to learn something new.
With all of this in mind, this 3 day virtual event will bring together 20+ expert laser makers to

showcase their wealth of knowledge and expertise. Attendees of this event can expect a well-rounded understanding of laser crafting techniques, materials and designing principles.The Laser Craft Fest will offer a variety of crafting workshops, live demonstrations, and engaging opportunities to meet the makers and hear their stories.
Prepare to be inspired and see the possibilities of laser crafting come to life!
The goal → finally learn how to use your laser to its full potential.
Mark your calendars for September 12-14. Registration for the Laser Craft Fest is free, so join the waitlist to be the first to know when registration opens.
(https://lasercraftfest.com/waitlist)

Limited sponsorship opportunities are available for the event for businesses and organizations seeking to align their brand with laser crafting. (Contact: create@ justonemoreproject.com)

There is a delicate balance between business and friendship when it comes to selling your laser items in a consignment setting. This balance can be easily accomplished if you set yourself up for success from the beginning and the success can be felt by all involved!
Being overly friendly with your consignee may feel right but there is a delicate balance in maintaining a healthy business relationship and cultivating a friendship. The ultimate goal is to have your items sell, to be visible and to be paid on time, the goal is not to have a friendship where you expect special treatment or where the consignee expects to have leeway in paying you in a timely manner, or placing someone else’s items in a more favorable position than yours. A healthy business relationship can be friendly but you must always remember that you are in business and so are they.
When thinking about consigning your items there are three key areas on which to focus: pursuing and nurturing the relationship, compensation (yours and theirs) and visibility or merchandising.
For many of us relationships are easy and natural, but for others they can prove to be a barrier to success, especially in the maker space. Relationships in consignment come down to several simple actions: doing the research, making the introduction, closing the “sale” and nurturing the relationship. When looking for places to consign your items it can be as simple as visiting local
stores and checking out what they offer. If the store has items that would be a good fit for your work then they should go on your list. This doesn’t mean that if you make cutting boards that they have to carry cutting boards, however the store might carry other home decor or kitchen items, or gifts. I suggest creating a spreadsheet, having a notebook, or opening a note on your phone to document places you are interested in and want to pursue.
The next step is having the conversation and it can start as simply as “Do you offer local artists the opportunity to consign in your store?”. Once you have started the relationship it’s as simple as continuing the conversation, remember this is a business conversation but it’s ok to be friendly and find out what they are looking to achieve. Do they want similar products or something completely different? Maybe they have an idea that you can fulfill, remember this is just a conversation.
Once you have determined if the relationship is a good fit you can start the process of getting your items in the door! As a way to stay in touch and keep a pulse on my consignee’s I like to visit at least once a month, and not just on the day I collect a check. This allows me to have a personal touch point as well as check on things like inventory, merchandising and overall health of the store. This doesn’t need to be formal and should feel natural, almost like you just popped in to say ‘hi’ but this is your way of nurturing the relationship.
Perhaps the most delicate and uncomfortable of all areas, the details around your cut vs. their cut, how you will receive payment and how often, is one of the most important.
Establishing the payment percentage up front will avoid a lot of headaches. In my experience a typical percentage is 65/35, meaning you receive 65% of the sale and the consignee receives 35%. In some situations you may find the consignee will want a higher percentage and you will need to adjust your pricing model but you will always want to keep in mind what the market will bear. Your products may not move at a higher price point which will defeat the point of having your items in the shop, other than providing you with visibility if you are able to put identifying information like a website on the product packaging.
Next you need to discuss how you will receive your percentage and on what frequency. Some of my consignees pay weekly, while others pay monthly, and this can sometimes be negotiated depending on the situation.
do come from a business background and recommend a formal contract whenever possible.
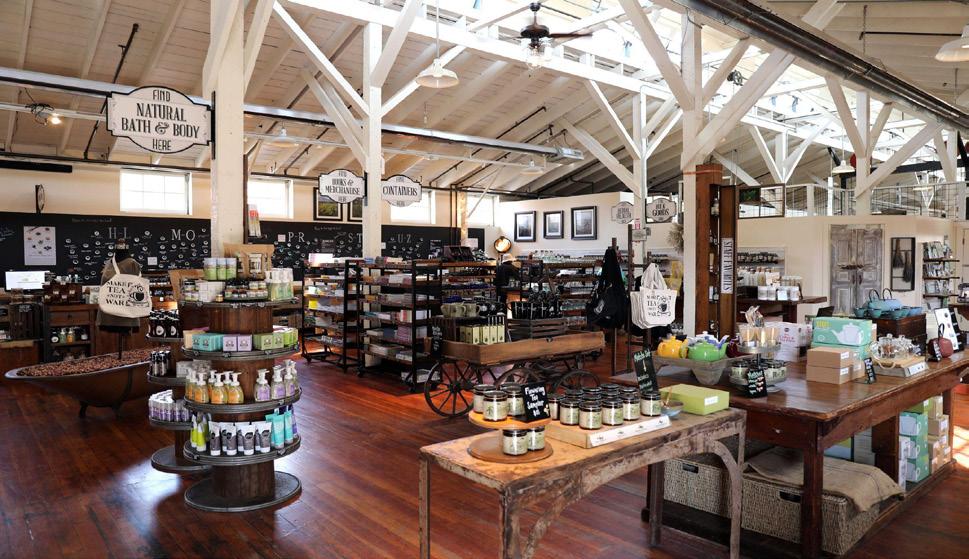
In most consignment situations your items will be available alongside other makers and in most cases what I like to call filler or products the store owner has purchased wholesale from a supplier. This is called cross merchandising and has many benefits, the biggest one being consumer experience where the consumer can easily select multiple items without having to search endlessly, and the result is more sales across the board. Think about the last grocery store you visited, perhaps you saw a display of avocados next to a display of tortilla chips or bread. These products compliment one another even though they are not organically the same. So if you are a jewelry maker your earrings may be on a table that also has folded shirts and jeans. A consumer will see a shirt they love and then also see a pair of your earrings that will match perfectly, and voila… a sale!
Here is an example of what cross merchandising looks like:
Compensation is very important and not something you should approach lighty. Once you have agreed to terms it is important that those terms are followed, don’t be afraid to revisit this discussion if you feel something is not going according to the terms of your agreement. I do not have formal written agreements with my locations but this is typical for my area and is not something I have had trouble navigating. However I continued here...
Humidity… what is it? Why is it important? How do I account for it in my laser projects?!
hu·mid·i·ty is the concentration of water vapor present in the air. Water vapor, the gaseous state of water, is generally invisible to the human eye. If there is a lot of water vapor in the air, the humidity will be high. The higher the humidity, the wetter it feels outside. On the weather reports, humidity is usually explained as relative humidity.

While wood isn’t the only thing that can be lasered, it’s one of the most common and perhaps the most susceptible to wild swings in humidity or moisture content. In its rawest form as a tree, it survives on water and has a very high moisture content until it has been logged, transported, milled and transformed into veneers to be made into plywood or other finishes.
For the sake of this topic, let’s use Baltic Birch also known as Russian Birch, as it’s one of the most commonly used materials in the industry because of its tight tolerances, uniform color and vivid grain patterns. It’s also one of the few materials you’ll find that has every layer from top to bottom the same species making it a great option for laser cutting and engraving with consistency.
As it makes its journey from tree to plywood, with many steps in between, it’s introduced
to a world of different climates, moistures and temperature environments that each cause a different reaction to its stability and performance over time. These changes can make a huge impact on the visual quality of the wood along with cupping and warping that’s a natural part of the drying process. As thin sheets of wood veneer make their way through the mill and are bonded together to make different thicknesses of plywood panels, each dries at a different rate. In the final milling stages sheets are often kiln or heat dried to speed up the process before they’re banded and end wrapped to be shipped around the world… and voila, you’ve got laser ready Baltic Birch! Not so fast… if you’re using it in your laser, you’re likely not grabbing a sheet fresh from the mill in Russia or the Baltic Region.
Now the journey begins as those bundles of plywood make their way from the mill to the port to continue their journey to countries across the world including the United States. As they’re packed into sea crates they once again face a new set of elements including temperature changes and biggest of all, humidity changes, as they travel the ocean for hundreds and sometimes thousands of nautical miles until they reach their destination ports. Once they reach their destination they’re unloaded and transported to warehouses typically along the western and eastern coast of the country, depending on the port of arrival where they experience yet another change in environment. These gargantuan warehouses are home to thousands of materials that are imported
from around the world which become the temporary home for things like Baltic Birch plywood bundles until they’re allocated and sold to distributors and trucked across the country. Add a few high-volume resellers, local lumberyards and small businesses and they’re nearly in your hands to be ready to create your finished goods!
So how does humidity come into play and make an impact in this process? It comes into play at every touchpoint throughout the traveled journey as the environment changes and the product moves from region to region. Perhaps the most important role it plays is in the final miles of the journey as it’s traveling to you to be lasered. Once you open the packaging it needs to acclimate to the environment of your home or workspace much like hardwood flooring before it’s installed.
Here’s a relatable example: In the winter months the Relative Humidity (RH) in your home or workspace is typically lower which often times requires moisture to be added to your environment with things like a humidifier. During the winter months we

add nearly 95 gallons of water a day to our warehouse through humidification to protect our materials and keep them stable between 48%-52% relative humidity! Without adding moisture you’ll notice things like dry skin and drier air which can lead to your materials drying out prematurely. In the warmer months the Relative Humidity (RH) in your home or workspace is typically higher which can lead to needing a de-humidifier to prevent that musty, sticky feeling. In contrast to the winter months, throughout the summer we pump out nearly 110 gallons of water a day to keep the relative humidity between 42%45%. Too high of humidity levels can wreak havoc on tools, lenses and your materials. Both are natural but both can have their pros and cons when it comes to protecting your materials, tools and even your laser. So what’s the solution?!
The best answer is stability. For starters, grab yourself a Hygrometer, fancy for humidity gauge, for $10-$15 at a local hardware store or online. The ideal range to store your materials should be between 38% and 53% Relative Humidity (RH). Be aware of areas in your home or work space that are prone to high swings in Humidity like around doors and windows, near air intakes or exhausts and near water sources like sinks and showers.
Inevitably, your environment will change and you should be aware of the changes to create ways to limit the volatility in those changes.
The Cannon Family are the owners of GFMaterials based out of Chaska, Minnesota. What started 3 years ago during the pandemic as a laser hobby has blossomed into a full range of laser-ready materials! You can reach them at their website, GFMaterials.com.

In the past, I used a vinyl stencil and etching cream to engrave on glass, but it was messy, and the results were often uneven. Nowadays, I’ve discovered a more effective method using a CO2 laser, which yields great results. In this article, I’ll provide beginner-friendly tips on etching a clear wine bottle using a rotary tool. While there are numerous techniques to achieve a beautifully engraved surface, I’ll share some of my favorite tips.
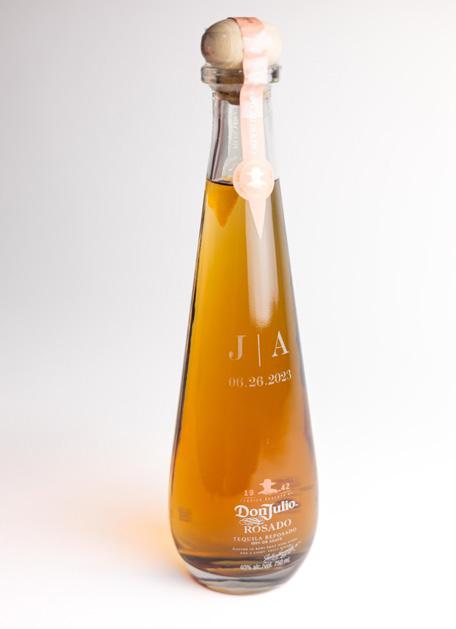
To practice the art of laser engraving on glass, the cheaper the glass, the better. Avoid anything with lead or with a titanium coating that helps resist breakage, chips, and scratches. Clear wine bottles or glasses found from the Dollar stores are a great option while mastering your craft.
(2) Clear wine or tequila bottles
Blazer Orange
Laser Mask
Roller rotary
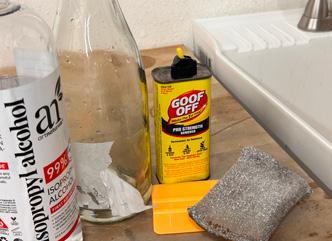
Goof Off Pro Strength Remover
Isopropyl alcohol
Lint-free cloth
Dish soap
Sponge
Scraper Gloves
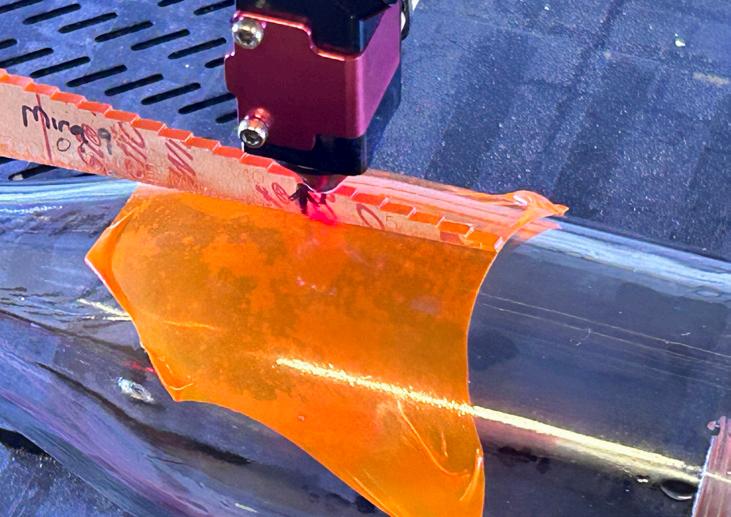
1. Applying a laser masking made for glass helps with heat dispensation, minimizing micro-fractures or sharp chards that occur without masking. This yields a smooth finish without sharp edges or flakes of glass. I have tried many different ways to mask but my favorite is using Blazer Orange Laser Mask.
2. Remove the label: Peel as much of the paper label off the bottle as possible.
• Wearing gloves, apply Goof Off Pro Strength Remover over the paper residue, and use a scraper to remove the label and glue.
• Wash the bottle with dish soap and a sponge.
• Wipe the bottle with Isopropyl alcohol using a lint-free cloth.

3. Apply Blazer Orange Laser Mask.
• Remove the clear carrier sheet from the laser mask and discard it.
• Stretch the mask and apply it to the bottle. Remove any wrinkles.
When etching glass, it’s recommended to keep a few “sacrificial glasses or bottles” handy. The results can differ depending on the type and thickness of the glass. Achieving the ideal settings requires time, patience, and knowledge of three variables: speed, power, and lines per inch (or line interval).

1. Speed - The slower you go, the deeper/ darker the engraving. Think about it practically. A slower speed means the laser will stay in one place longer.
• Pick a speed between 200-400 as your starting point.
2. Power - The minimum and maximum power for engraving should always be the same. The higher the power, the deeper/ darker the engraving.
• Pick a power between 25-45 as your starting point.
3. LPI - (Lines Per Inch or line interval) The higher the LPI, the less space between the laser beam rows, which means the higher the number, the deeper/darker the engraving.

• Pick an LPI between 300-400 as your starting point.
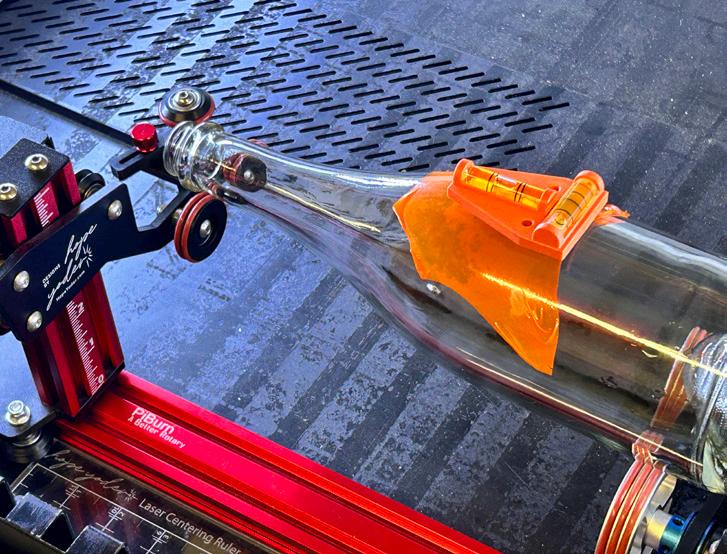
1. Using a rotary allows the bottle/glass to rotate 365 degrees while keeping the focal height constant, because you level the glass once it’s loaded onto the rotary.
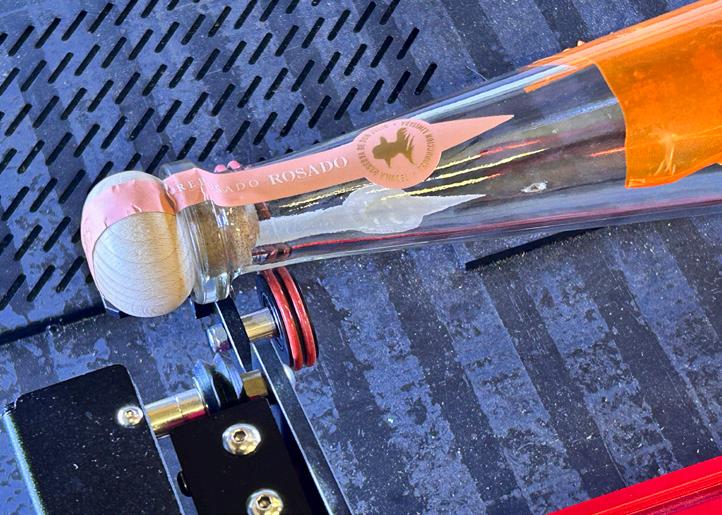
2. In our sample, we used a PiBurn 4.0 with a few simple adjustments so the bottle would rest on the wheels without any obstructions allowing it to rotate smoothly without any hiccups.
• 1.The bottle was turned so the largest diameter was closest to the motor resting on the front wheels.
• 2. The front clamp was removed.
• 3. The back-end stopper was removed.
3. Lower the laser bed as far down as it will go. If necessary, remove the honeycomb tray and grates.
4. Level the glass over the center of the engravable area.
• Please note in the photo, the back stopper was on, but we removed it as it was preventing the bottle from turning smoothly.
7. In Lightburn Software, go into Edit/ Machine Settings/Load/Load From File/ Write. Please refer to your rotary manual for installation steps.
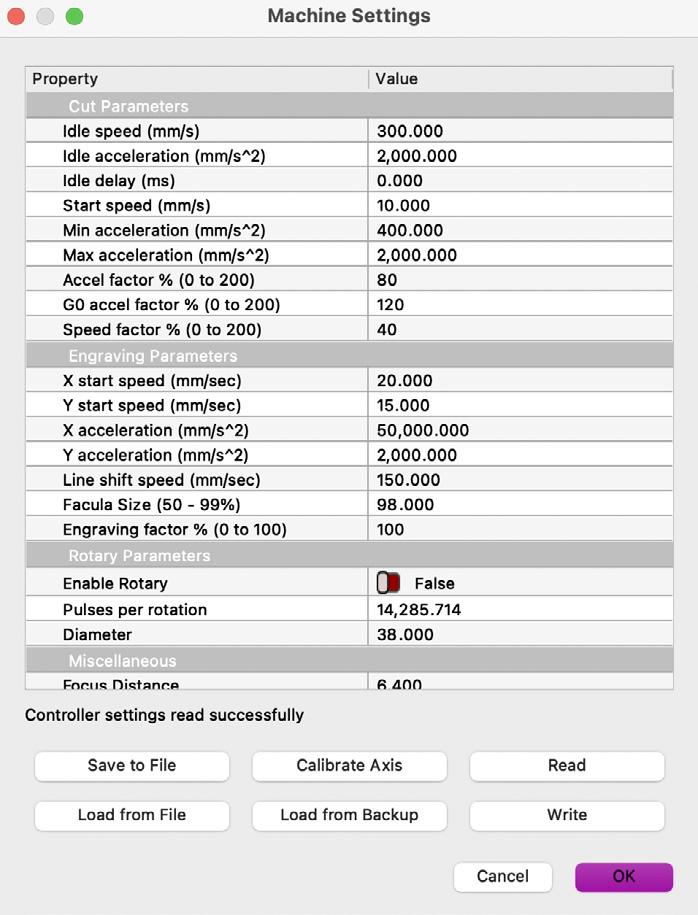

• For my sample, I am using a Mira 9 (90-watt) CO2 laser, and the manufacturer provides a “preset” Lightburn setting that includes all of the steps per rotation and info needed to switch the “flatbed settings” to rotary settings.
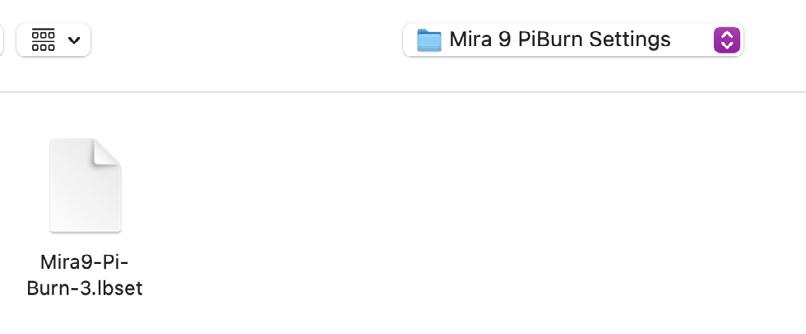
• Check with your laser manufacturer to see if they offer a “preset.”
8. In Lightburn, rotate the file so that the top of the design will engrave on the top of the bottle, being mindful of your rotary and bottle placement.
9. Pick a starting point for your speed, power, and LPI. Write your starting point settings on a sheet of paper and engrave. Our starting point was 300 speed; 45 min, and max power; 400 LPI.
10. Engrave the design.
• 1. It is not recommended to run a second pass when using a rotary. The second pass may not line up correctly.
11. Remove the bottle and the masking. Wash the glass with dish soap and inspect the engraving carefully.
• 1. Troubleshooting: If you see areas where there is no glass left, you are heating the glass up too much. Increase the speed by 50 – 100mm/sec or lower the power by 5-10. Do not change more than one variable at a time.
• 2. Troubleshooting: If the engraving is too light, you are not applying enough heat. Lower the speed by 50 – 100mm/sec or increase the power by 5-10. Do not change more than one variable at a time.
12. If you need to troubleshoot and test again, dry the glass and apply another piece of masking.
• 1. Adjust one variable only; speed, power, or LPI.
• 1.1. I tend to leave the LPI as is and adjust the speed or power.
• 1.2. My first practice on a sacrificial bottle (300 speed; 45 min and max power; 400 LPI) was too hot and part of the glass flaked off.

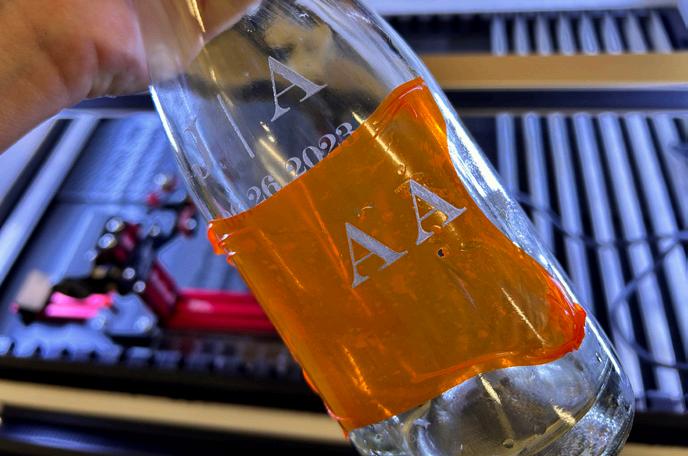
• 2. We kept the speed the same (300) and lowered the power by 10. Our new settings in Lightburn were 300 speed; 35 min, and max power; 400 LPI. Once the settings were adjusted, we sent the file to the laser and tested the new setting.
• 2.1. Engrave and then inspect the area in good lighting.
• 2.2. Does it look good? If so, GREAT! Log that setting in your laser settings notebook.

• 2.3. Does it look bad? Adjust one variable and keep testing, changing one variable at a time until you get the desired results.
14. Once you have found a setting you like, it’s time to prepare the final bottle with masking and engrave using your best setting.

13. Instead of engraving the entire design again, wasting surface area, edit the file in Lightburn and engrave one large element and one small element or the element that didn’t look good.

• 1. In our sample, we chose the “A” portion that looked bad to continue testing rather than use the entire design.
Finding the right setting is crucial, but it’s only half the equation. The other half is logging the settings in a notebook or client folder so you can reproduce the same results again and again without having to go through the testing process!
Hi, I’m Hope, the entrepreneur behind Designs By Hope Yoder. I started my journey in the embroidery and fabric industry by creating products, courses, designs, and fabric for the home market. I have had the privilege of inspiring many along the way with our magazine articles, workshop, and corporate projects. Most days, you can find me dancing to Cupid Shuffle, in front of my computer designing, or behind my laser creating handmade happiness. Find all my social links here, including our Premier Laser Membership, laser courses, files, discount codes and retreats:

I get asked this question a lot, since I make products and files for serving and displaying food. I’ve been making charcuterie boards since I started my career 2 years ago. I began with beeswax, but after continually rinsing, found it comes off and needs re-treating. I simply asked in our local hardware store and was directed to varnish for countertops, which is therefore food safe. After testing it myself, I found it worked way better than the wax and now offer the information to you.

Plywood is NOT foodsafe by itself - the adhesive between the layers are toxic and you or your customers could get sick by food that is in direct contact with the adhesive between layers. The surface however is safe, but the toxic glue can penetrate if the plywood gets wet or hot. So if you want to use plywood for these types of products, you HAVE TO make them foodsafe!
I personally love using varnishes that are meant for kitchen countertops. Not only am I able to get mine in various colors from LUXENS*, I can also get this as clear coating and clear spray, so I am able to use my regular stain/paint and make it food safe as well. Also varnish will leave a smooth and shiny surface, which is water resistant and easy to clean by simply rinsing the boards.
All stains/varnish etc. will eventually be food safe once cured for a month, but if you don’t have that patience, choose products that are already made for food contact.
How to seal your products correctly:
• Once you have cut your layers, use damp towels, baby wipes, a toothbrush or similar to scrub/ rub residue from all your cut edges. Repeat until you don’t see anymore nasty stuff coming off.
• Let dry and once dry, give everything a good sanding (I use 240 grit), blow off or wipe off dust.
• Now stain/treat your parts and remember to seal the edges that will be in contact with the food as these are the most toxic parts.
• I use foam brushes when applying my varnish, but pick what you like working with.
• After my first layer is cured, I give it a very light sand to smoothen the varnish - brush off dust and give it a second coat before gluing the parts together. Optionally you could spray it with a clear coat of your food graded sealer once dry.
Using plywood for these types of projects is more time consuming than using hardwood or food safe acrylics to begin with. But it IS possible to do it with a clean conscience as long as you treat your plywood properly and it’s a cheaper alternative to real wood.
*LUXENS is a brand by Leroy Merlin, so you might not be able to find it, where you are located, but I’m sure you can find alternative brands of varnish. (Editor’s Note: Do your research but it appears RUST-OLEUM Zinsser Bull’s Eye Clear Shellac Spray is a fast-drying, North American alternative.) Alternatively you can seal with Shellac that is labeled as food grade.
**Disclaimer: Please do your research with the products you use and check local regulations.

You may find opportunity in having discussions with your store owner about placing your items with complimentary items, sometimes we cannot always see potential until someone else points this out. Remember that this is a partnership and you may bring ideas to the table as well.
In closing, there are pros and cons to offering your items on consignment. In general you will likely see higher revenue but this may take time to build and can be a lot of work between maintaining inventory levels, to the relationship, to loss prevention. Wholesale yields an immediate payment but you are typically only going to receive 50% of what your item will sell for retail and the hope is that for those items that sell well the business will submit many re-orders. You can always adjust your pricing but again you must keep in mind what the market will bear.


Consignment has been a great way for my products to get into the community and has allowed me the opportunity to cultivate some amazing business relationships that have resulted in other opportunities. The initial work may seem daunting but the benefits have far outweighed the risks. Do the research, cultivate the relationships, have good documentation and be flexible and your consignment journey can be just as successful!
Sara is the owner of Coral and Cove Co. a small laser business based on the Outer Banks of North Carolina. You can reach out to her at hello@coralandcoveco.com or visit her website www. CoralandCoveCo.com.
the lines. The outline and details of the top flower were changed to blue ( for scoring). In the Objects Docker, the bottom object is locked so that when the Segment Delete Tool is used only segments on the top object are deleted. The Segment Delete Tool can then be used to remove the blue outline on areas intended to be cut out on the laser. After using the Segment Delete Tool red and blue outlines remain which then become the cut and score lines.


The ability to create beautiful, complex pieces of wood inlay art is within your reach, even if you feel you don’t possess the necessary drawing skills. Corel Draw, coupled with your imagination, can transform basic shapes into showpieces. So, roll up your sleeves and channel your inner artist.
Jamie Bowser owns The Hands That Shape, LLC with her husband Mathew. Their wonderful products and designs can be found at art and crafts shows in the Minnesota area, select retailers or on their website: www.thehandsthatshape.com.



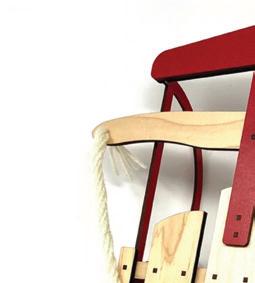
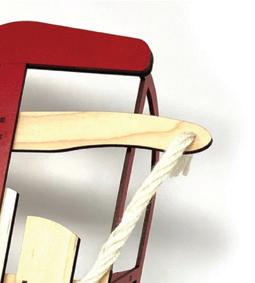


This was made with 2 sheets of 1/8” MDF and 1 sheet of 1/4“ Maple. The boards are named for their material thickness.
There is one score layer on Sled2_EighthInch. svg. Do not cut it!You will want to paint 2 boards (on both sides) Red before you cut.
Sled1_EighthInch.svg - Red Sled2_EighthInch.svg - Red Sled3_QuarterInch.svg - Natural Wood
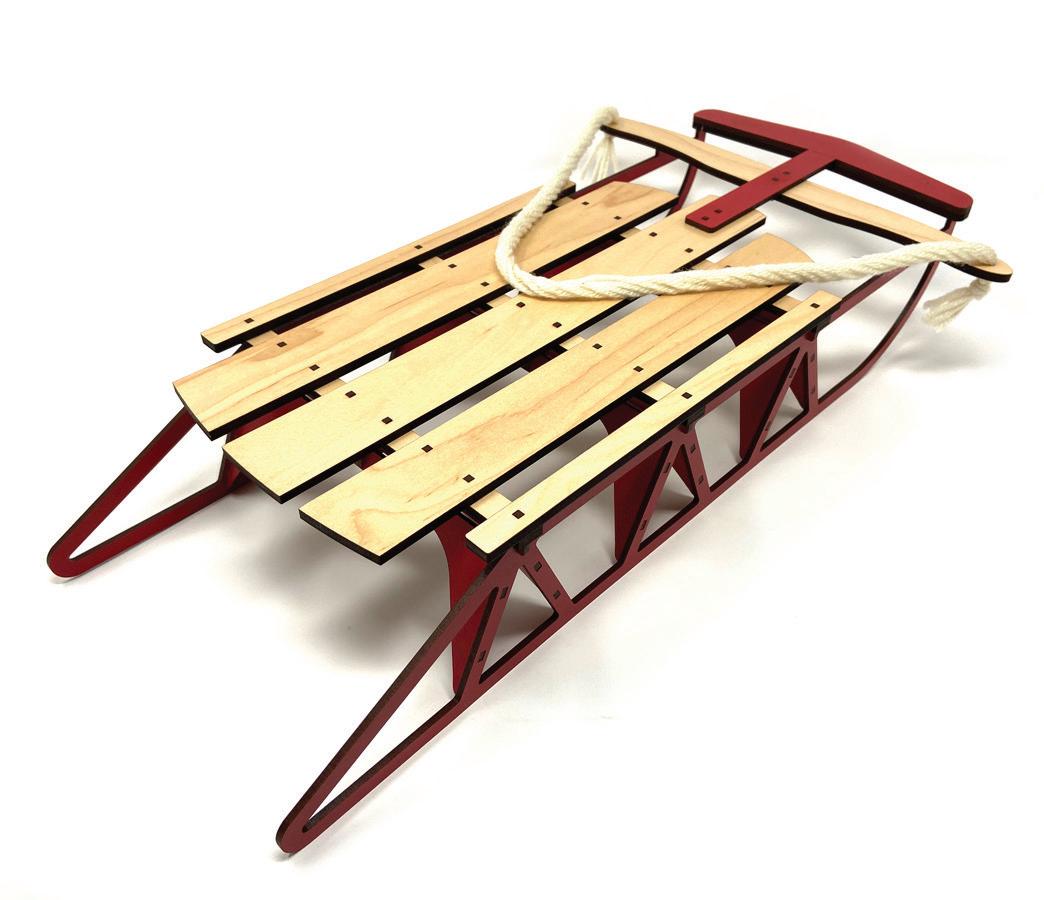
Position 2 of the Upright Support Pieces as shown and fit the Center Connector into the slots provided. You will make 3 of these.
Glue the Center Supports to one of the Outside Rails. Gluing the second Outside Rail is easier if you start at one side and line up the tabs as you go.
Slide the Tabbed Cross Pieces into place as shown. It will fit into the slots on the rails and the center support. A small amount of glue can be used in the slot to hold them in place.
Fit the Cross Braces over the Tabbed Cross Pieces. Use gentle but firm pressure. Add Glue on the Tabbed Cross Pieces to help secure the Cross Braces in place.
Glue the Top Sled Slats into place as shown. Make sure you are placing the boards in the order shown.
Glue the Front Sled Brace onto the front rails as shown.
Glue the Front Sled Overlay together as shown. The 2-Pin connector will be glued from the underneath.
Glue the top overlay onto the Front Sled Brace and the Center Board. The 2-Pin Connector with be glued from underneath the center board. The Steering arms will rest on the tabs on the Outside Rails. You can add a small amount of glue for added support.
Etsy Shop Link: https://www.etsy.com/listing/919203843
Excited Atom Design FB: https://www.facebook.com/groups/600579461674293
