
5 minute read
FEATHERSTICK TECHNIQUES AF JOE

from Magasinet Outsite 32
by Outsite.dk

Price
There is more than one way to tar a duck. There are certainly many ways to make the necessary curls to light a fire. Being a reductionist I really fixate on dialing things down to their finest point. It is always fun to try everything and access and learn from it. But my dad always told me “you can do anything you want, but you can’t do everything”.
So I will always pick one method. The one that suits me the most and to the point that I can’t get it wrong. So in my journey outdoors I have tried the gamut of ways you see plastered across social media and these 3 techniques are the ones that produce the most repeatable results. The reason why I focus on these three techniques is that at any given time in the woods we are going to have these 3 tools on us. At a bare minimum, we will for sure have at least one. If we have no tools and we need a feather stick to start a fire... well my friend, you are in a situation a feather stick isn’t gonna fix.
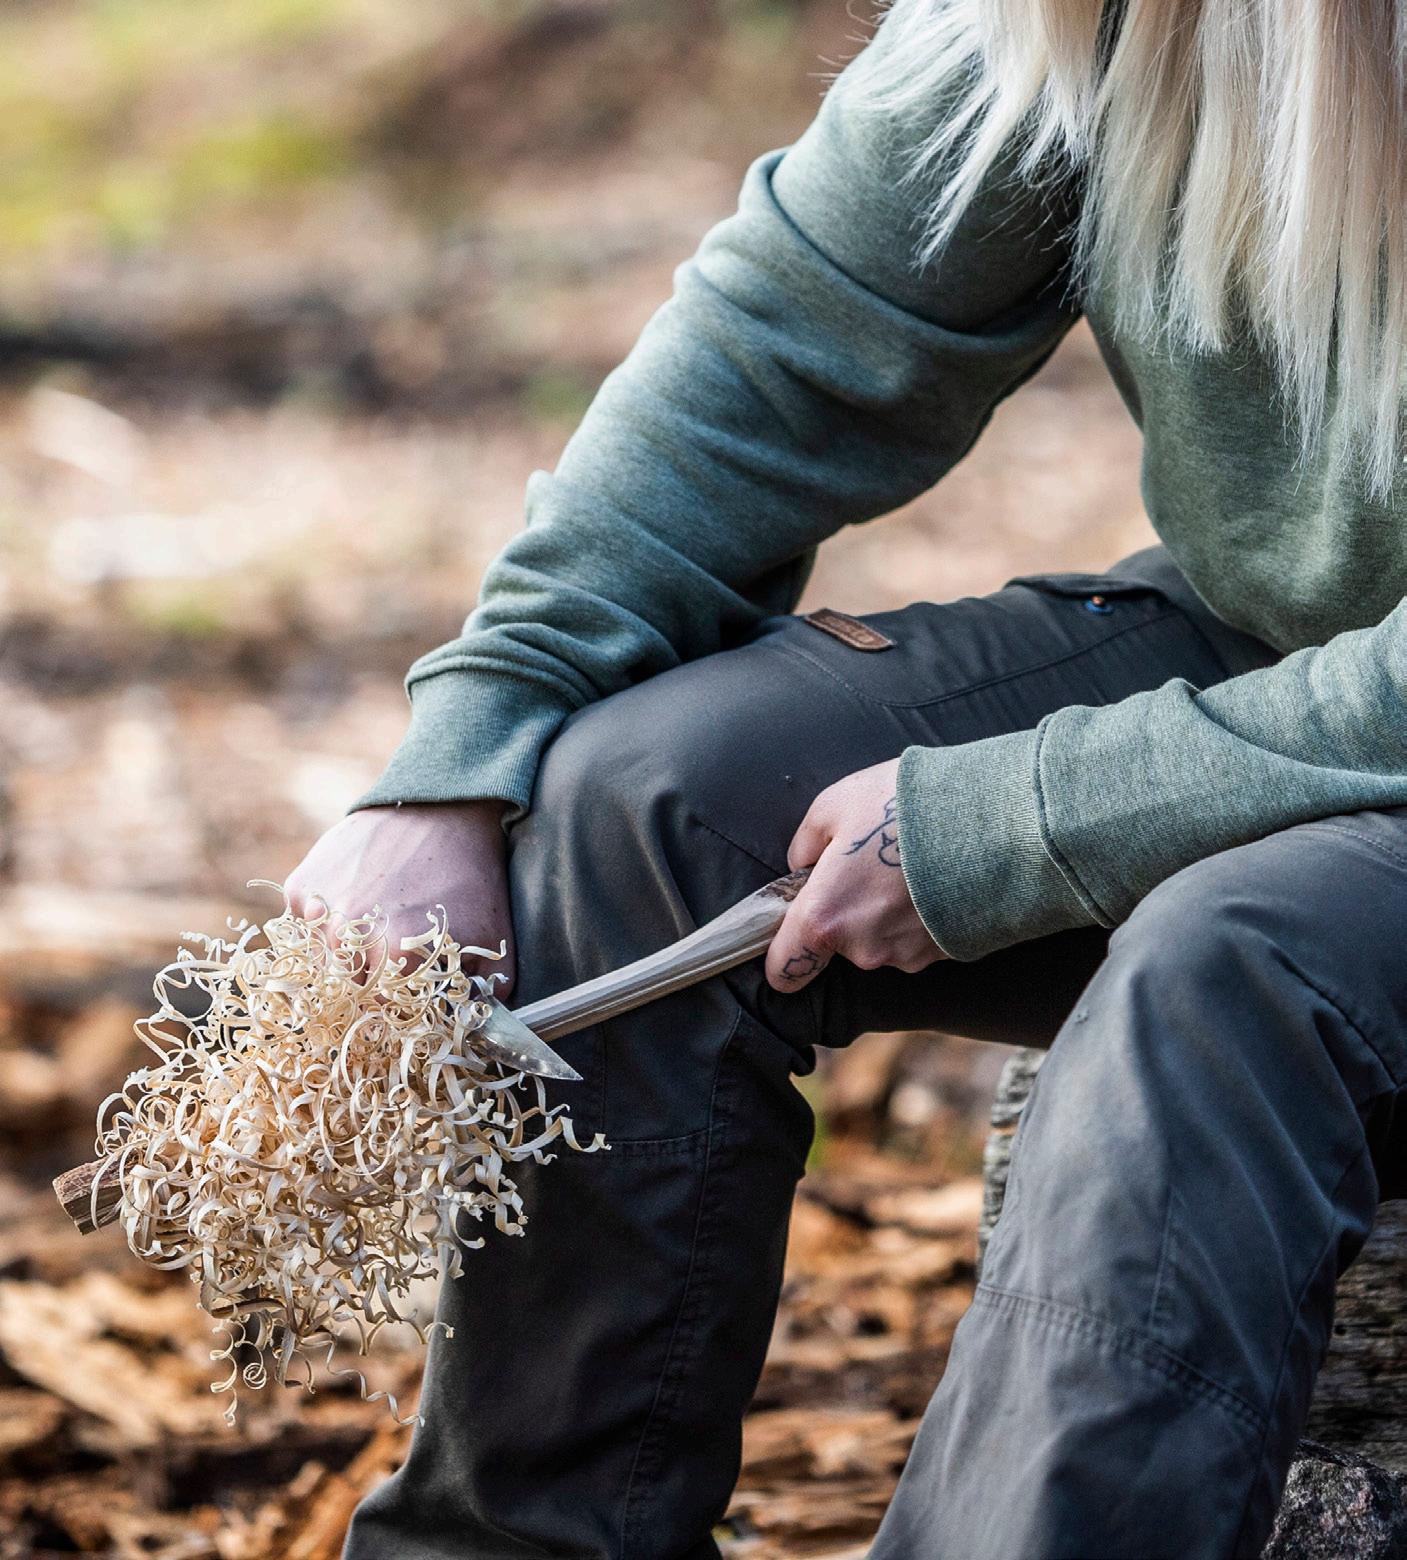
THE BUSHCRAFT KNIFE TECHNIQUE: This is my favorite technique as more often than not I find myself with a sub-six-inch knife in the woods. Even more often than that I find myself taking my daily walks and bimbles with a sturdy pocket knife. This technique works perfectly for both.
Once you have chosen the correct stick and done the correct checks GET COMFORTABLE. So many accidents and bad projects happen from being in uncomfortable positions. So find a stump, or rock, or if it’s dry take a seat. When you find yourself in a comfortable seated position you want to place the stick across your body and rest it on your thigh. With your non-dominant hand grip the “top” of the stick. The top is the end you aren’t going to carve. Then place your knife-working for hand on the same thigh as the end of the stick.
Lock your knife arm into position by having it as comfortably extended as possible. This position keeps our knife steady and safe. It also keeps the knife away from those major arteries between the legs.
The non-dominant arm is the one that does all the work. I understand that this may feel unusual to people who may never have worked like this before. A bit like rubbing your stomach and patting your head at the same time. The fun is in the practicing though and it won’t take but a few sticks before you find your rhythm. This is where you will see why choosing a stick that’s twice the size of the area you wish to feather, comes into play.
Drawing the stick in the same motion across your body and your thigh allows you to create a steady pace and repeatable stroke.
Keeping your knife hand steady begin to remove the outer layer of bark and punky wood from the complete circumference of the stick.
The next step is a two-part move. I like to call it “making the shelf”. This is why we also make our thick curls first.
When you make your first thick curls stop just before the end of the stick and roll your knife forward.
This makes a backstop or shelf and stops you from pushing through and taking cutting all your curls off the stick. As your technique gets better you can create multiple shelves and backstops along the length of the stick. From this position, you can be comfy and also fast with practice. A pro tip with this is being able to find a place to sit with a good view and admire the world.
TECHNIQUE FOR BIGGER KNIVES:
A lot of us head to the woods with bigger knives. When I first started going to the woods my first knife was a BK7. For those that aren’t aware of that knife, it’s a budget 7-inch long, 1-inch high sharpened pry bar. But... they were cheap. For two years and a lot of stubbornness, I became surgical with this type of knife. It also thought me a lot about how almost any piece of kit works once you find the technique it works best in.
For larger knives, I find it best to take as much torque out of the blade as possible. The method I found works best for this is taking a knee and locking the extra length on the blade behind the kneecap.

Kneel down on one knee preferably not your dominant knee as this gets uncomfortable and wobbly or sit comfortable on a stump. This is also why I love to carry one of those cheap foam sit pads in my backpack or haversack. With your dominant knee raised bring the knife around the outside of your body and place the back of the blade against the front of the knee. Keeping your wrist tight against the knee. Now take your stick and using the inside of your knee as a guide, begin to draw the stick back and forth against the exposed length of the blade. This position keeps everything locked into place and can produce quick results.
USING AN AXE: Another tool we find ourselves in the woods with a lot is an axe. Axes are so individual to the owner and definitely vary in size and weight more than belt knives. I prefer a small belly hatchet where as my partner like a more fullsized Scandinavian-style forest axe. But the journey to perfect results is all about equalizing the playing field. Axes are inherently more difficult to work with for finer tasks and create unbelievable amounts of torque when used outside of their remit.
So to allow us to remove that torque and make it all safe to work with. We got to find a place to take the weight of the axe and also to hold it completely in place. Too many times I see people on their knees. Feather stick inside the Blood triangle, hand choked up to the collar and shaving towards the ground. This puts not just you at risk but the valuable resource of your axes edge. One slip and the axe are in the ground. One misses judgment through tiredness and fatigue and that edge may find somewhere else to call home besides the ground. What you should always remember when it comes to feather sticks is a position like this would maybe be ok for something that requires one or two cuts. A feather stick on the other hand requires 500 cuts. Remember this for all projects. Bad form can be hidden in two or 3 cuts but will always reveal itself in sore backs, pine tree feather sticks, or worse cut digits. With this in mind, we are going to find a stump or at the least a dead standing three. If you can’t find a stump or dead standing three use the end of a sturdy log. If you have to drive steaks into the ground to keep the log steady take 5 minutes to do this.
Take a stick and pound the axe into the wood with the edge of the axe facing away from and as close to the edge of the wood as possible. This allows the curls and shavings to build up in front of the edge and not be knocked off. DONT TRY AND SWING THE AXE INTO PLACE. In all my years I have only seen someone do this once. The rest of the time the axe would either miss the wood and travel towards the person or so much of the edge would be buried that it would be useless.
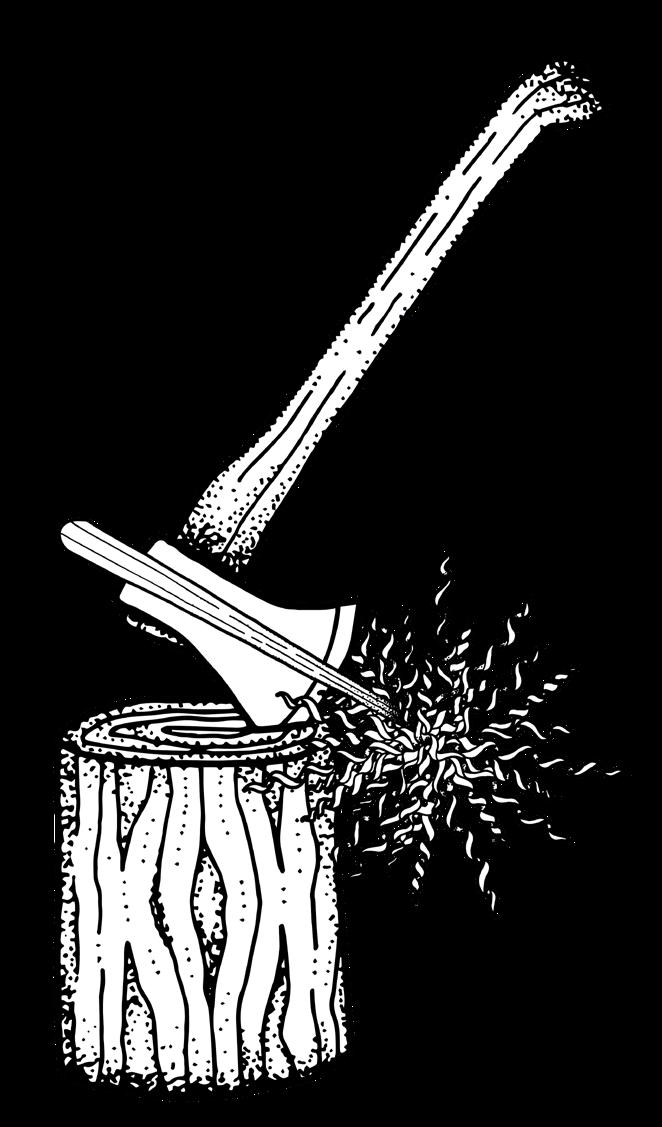
With the axe secured in the wood and with the edge facing away from you. You now can begin to draw the feather stick back and forth across the edge. Most axes do not have the same shaped edge geometry as our belt knives. So to create the surface area we need for our fire the angle of the stick needs to be very extreme. This technique will take lots of practice to get the feel for this angle and if you plan on using your axe as a main fire prep tool I recommend putting in twice the time to get this right. This technique once perfected and be used as well for larger knives.


