


Article
Photography by Ivo Popov
Ivo Popov is a full-time artist from Bulgaria, which means he’s a one-man show. He does his own social media marketing, hustles across groups to find clients, expands his own fan base, does his own sales, wraps his creations safely as he prepares to ship them abroad, and when he finds time, he does art. What he likes most about his job is the smile he imagines his customers have worldwide when they unpackage their new artwork.
by Nicole Honeycomb
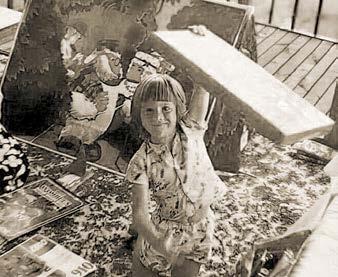
Ivo grew up in an artistic family. Both his parents, sister, grandparents, uncles and cousins are creative and artistic people. He is a third generation artist with a professional graphic design diploma that he got from his applied arts high school in Sophia. After that, he studied architecture for a while, tried a bunch of different things, and finally six years ago he decided to dedicate himself to becoming a full-time artist. It has been 16 years since he grabbed the pencil to learn how to draw. Now he uses pencils, markers, and paint.
Growing up, he also really enjoyed playing with building blocks. He remembers that at the age of five, his parents got him a construction crane by an alternative brand because they couldn’t afford real LEGO at the time. Ever since that moment, he fell in love with construction blocks.
Nowadays, he plays with LEGO, but rarely, and not as he used to. There was a moment when he decided to donate all his LEGO to a school so that kids could play with it.

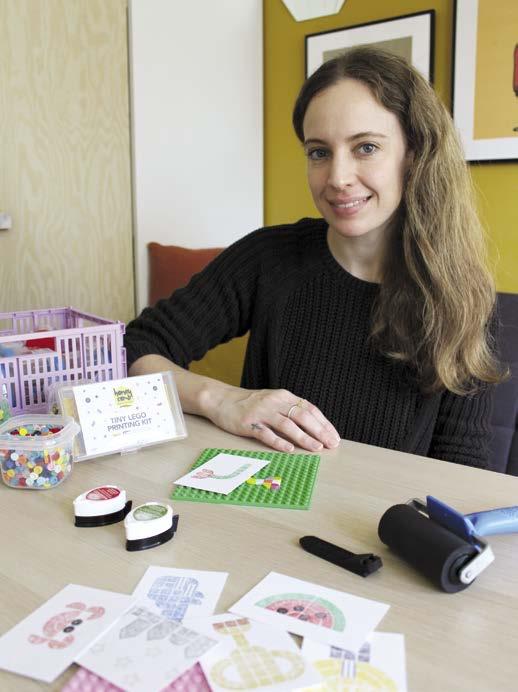
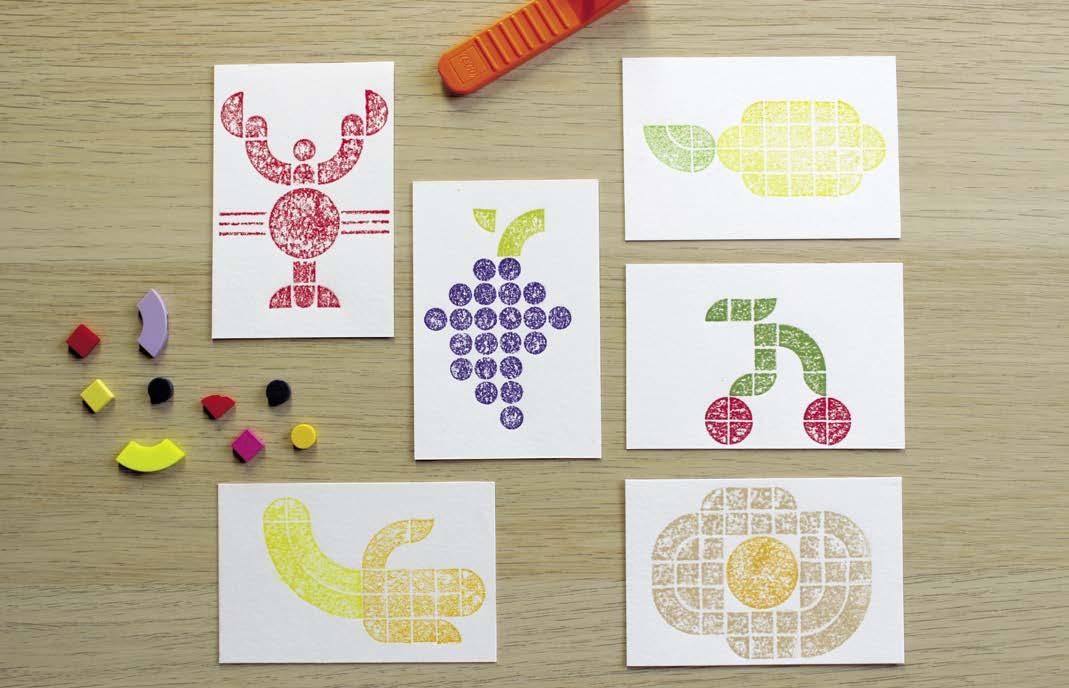
Artist and graphic designer Nicole Honeycomb uses LEGO to create, but not to create models. Using plates, tiles, and ink, she makes prints that are delightfully whimsical. She started with traditional printing methods, such as linoleum and block printmaking. She enjoyed the process and look of her prints and started her LEGO printmaking journey about a year ago. After seeing some examples of prints on Pinterest, she was intrigued by the idea of using LEGO for prints. When she found out that the company was discontinuing their LEGO DOTS sets in early 2024, she stocked up on two different sets and began experimenting. What started as a simple curiosity has since evolved into a new creative adventure for her, and she shares her printmaking process and finished artworks through videos on TikTok, and sells them at local markets and online.
Honeycomb
Nicole’s affection for LEGO began as a child. She loved playing with the only LEGO set in the house, which belonged to her brother. The set was a spaceship that opened in the back. Sometimes she would follow the instructions and build the spaceship, but mostly she would build other ideas that she had. Over the years she has enjoyed playing with LEGO whenever she came across it; she always loved how versatile LEGO was, being small bricks that could be built up into anything.
When it came to printmaking, Nicole was drawn to LEGO because of that same versatility and also the challenge it presented. The small scale 1x1 or 1x2 tiles, small shapes, and the small space of the paper size that she chose to work on push her to see whether she can actually create the designs she envisions. She loves this limitation LEGO offers for design—sometimes, when an artist has too much choice in art, a blank page can be daunting. LEGO also feels like a more sustainable option compared to traditional printmaking materials like Lino, where one actually cuts a new plate for each artwork. With LEGO, she loves that she can take the design apart and rebuild it to different designs, offering endless possibilities with the same set of tiles.
With those possibilities, Nicole found starting out that building LEGO print plates was both exciting and challenging. One of the early obstacles she faced was the constant need to adjust the placement of the tiles. She often found herself changing her mind about where certain tiles should be for the design she wanted to create, which meant frequently removing and shifting them around on the plate. This trial and error process led her to the realization that planning her prints digitally before beginning would save her a lot of time and frustration. Since the prints were also mirrored, especially with text, she had to carefully plan and build everything in reverse to ensure that it could be read once printed.
Another challenge was choosing the right ink and paper to create a clear print, which took some experimentation. Nicole started by using Lino or block inks but switched to good quality ink pads so that the clean-up was easier. One surprise to her was that the LEGO tiles would occasionally crack or break. She honestly didn’t know that LEGO would break! She thinks with the tiles she uses being so small and withstanding a fair bit of pressure when she rolls over them to create prints, they’re pushed to the extreme. Despite these challenges, this journey has been incredibly rewarding and she has gained a lot of confidence in her technique.
Public reaction to her print work has been a happy surprise for Nicole. She started by sharing the process of making the prints on social media, which quickly gave her a lot of attention. People are often amazed that LEGO can be used as a printmaking medium.
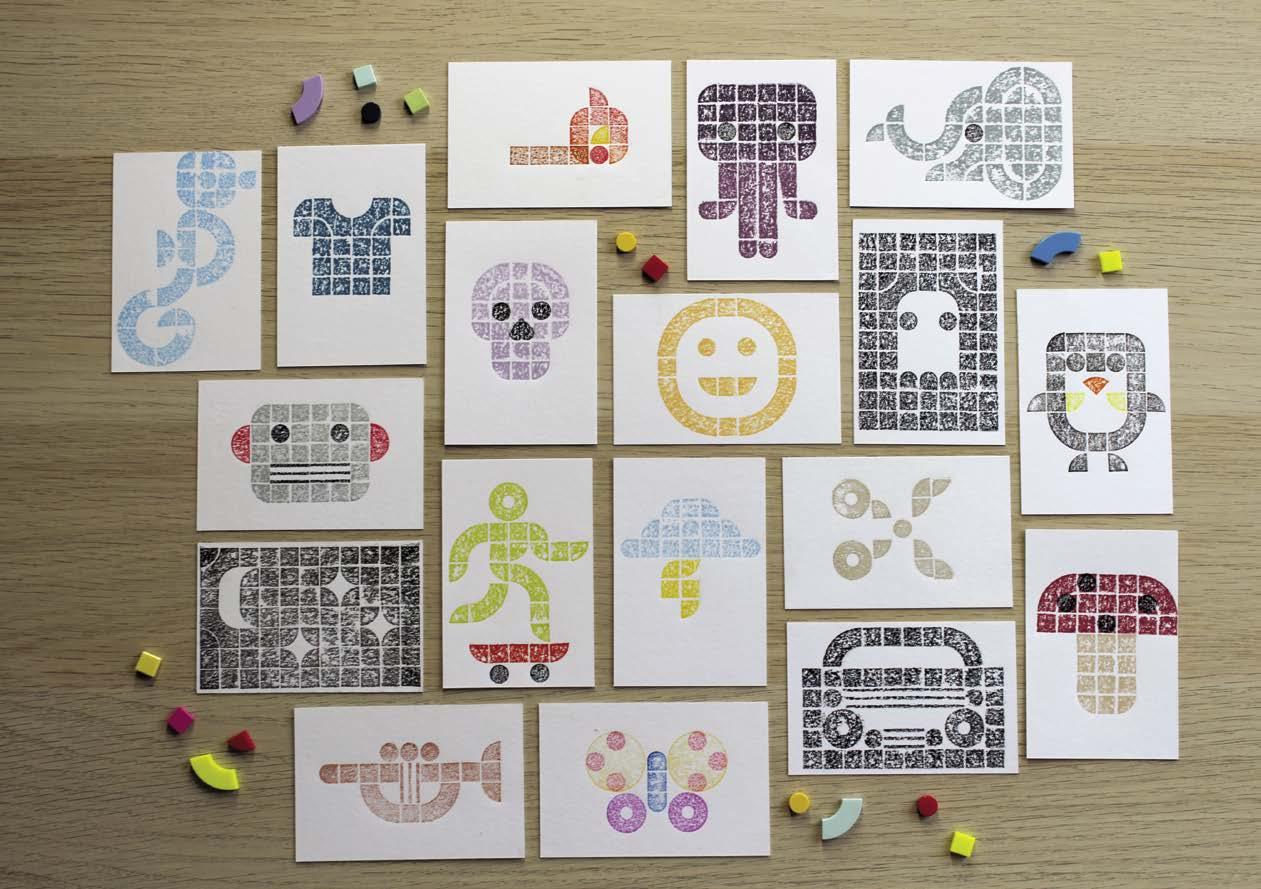
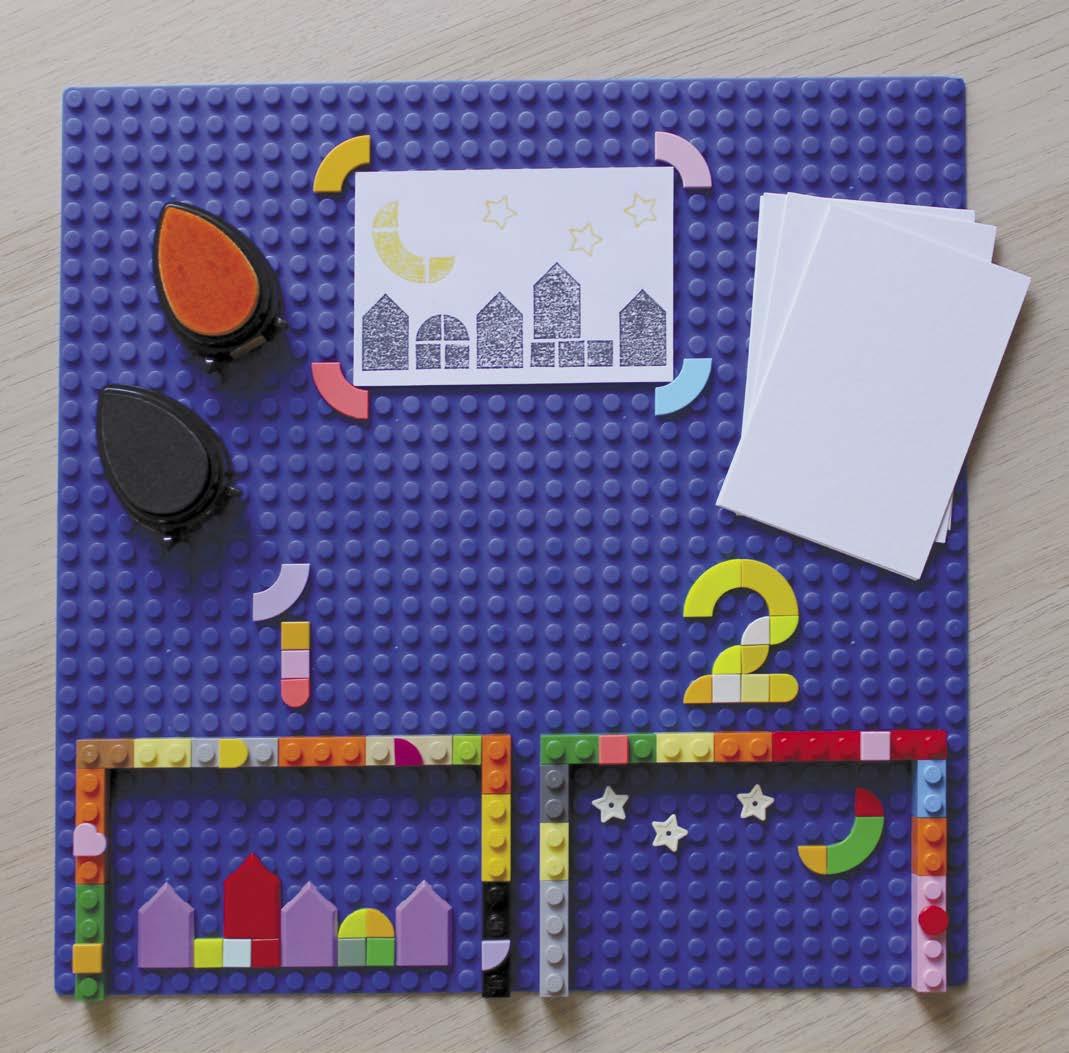
When Nicole started running classes, she realized it would be fun for people to continue exploring printmaking at home, so she recently launched a tiny LEGO printmaking kit that has everything you need to get started: a LEGO plate, tiles, ink pads, cards, tile lifter, and an instruction leaflet. The kit includes just 28 LEGO tiles, but you can make 15 designs provided in the leaflet and there’s plenty of room for creativity so you can make many more from your own imagination. It’s a tiny kit in a tiny box designed for making tiny prints, but it packs a large amount of fun reuse and potential. She’s sold them at markets so far and has amazing feedback. The kit is available at her workshop and she’s excited to see how others use it to explore the world of LEGO printmaking.
As for the future, Nicole has exciting future projects planned. One of the things she is working on is creating stop-motion animations using her tiny prints. She’s already made a few animations: a matchstick being lit, a Christmas cracker being pulled, and some others, and she plans to continue exploring with more animations in the future. She’s also excited to keep pushing herself to see if she ever runs out of design ideas for tiny prints. Every time she’s sure she must’ve run out of ideas, she manages to think of a few more. Additionally she’ll be releasing new versions of her tiny LEGO printmaking kit, including Spring, Halloween and Christmas editions, later in the year.
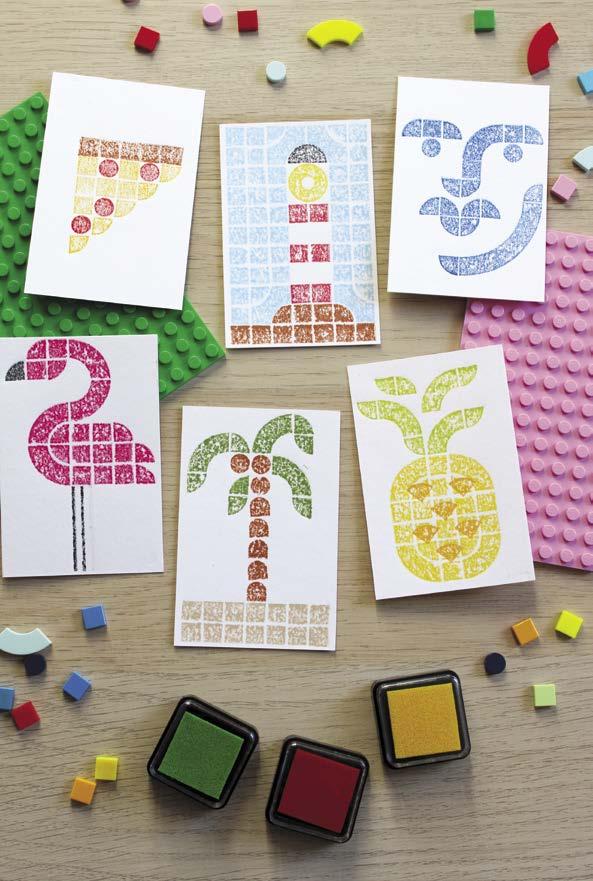
For Nicole, lots of different things inspire her printmaking—everyday moments and objects, requests from people, emojis, and even current affairs. For example, during the recent Olympics games she started printing people in various poses or engaged in different activities. As for LEGO, it represents limitless possibilities and fun to her, and both of those qualities inspire her deeply. The simplicity of the tiles paired with the endless way they can be arranged and used in printmaking encourages her to think creatively and push boundaries. Ultimately, LEGO brings out her sense of fun and encourages her to think outside the box, constantly pushing her to discover new ways of creating with it.


You can view Nicole’s Linktree page at https://linktr.ee/honeycomb.artistry or by scanning this QR code to see more of her work and shop!
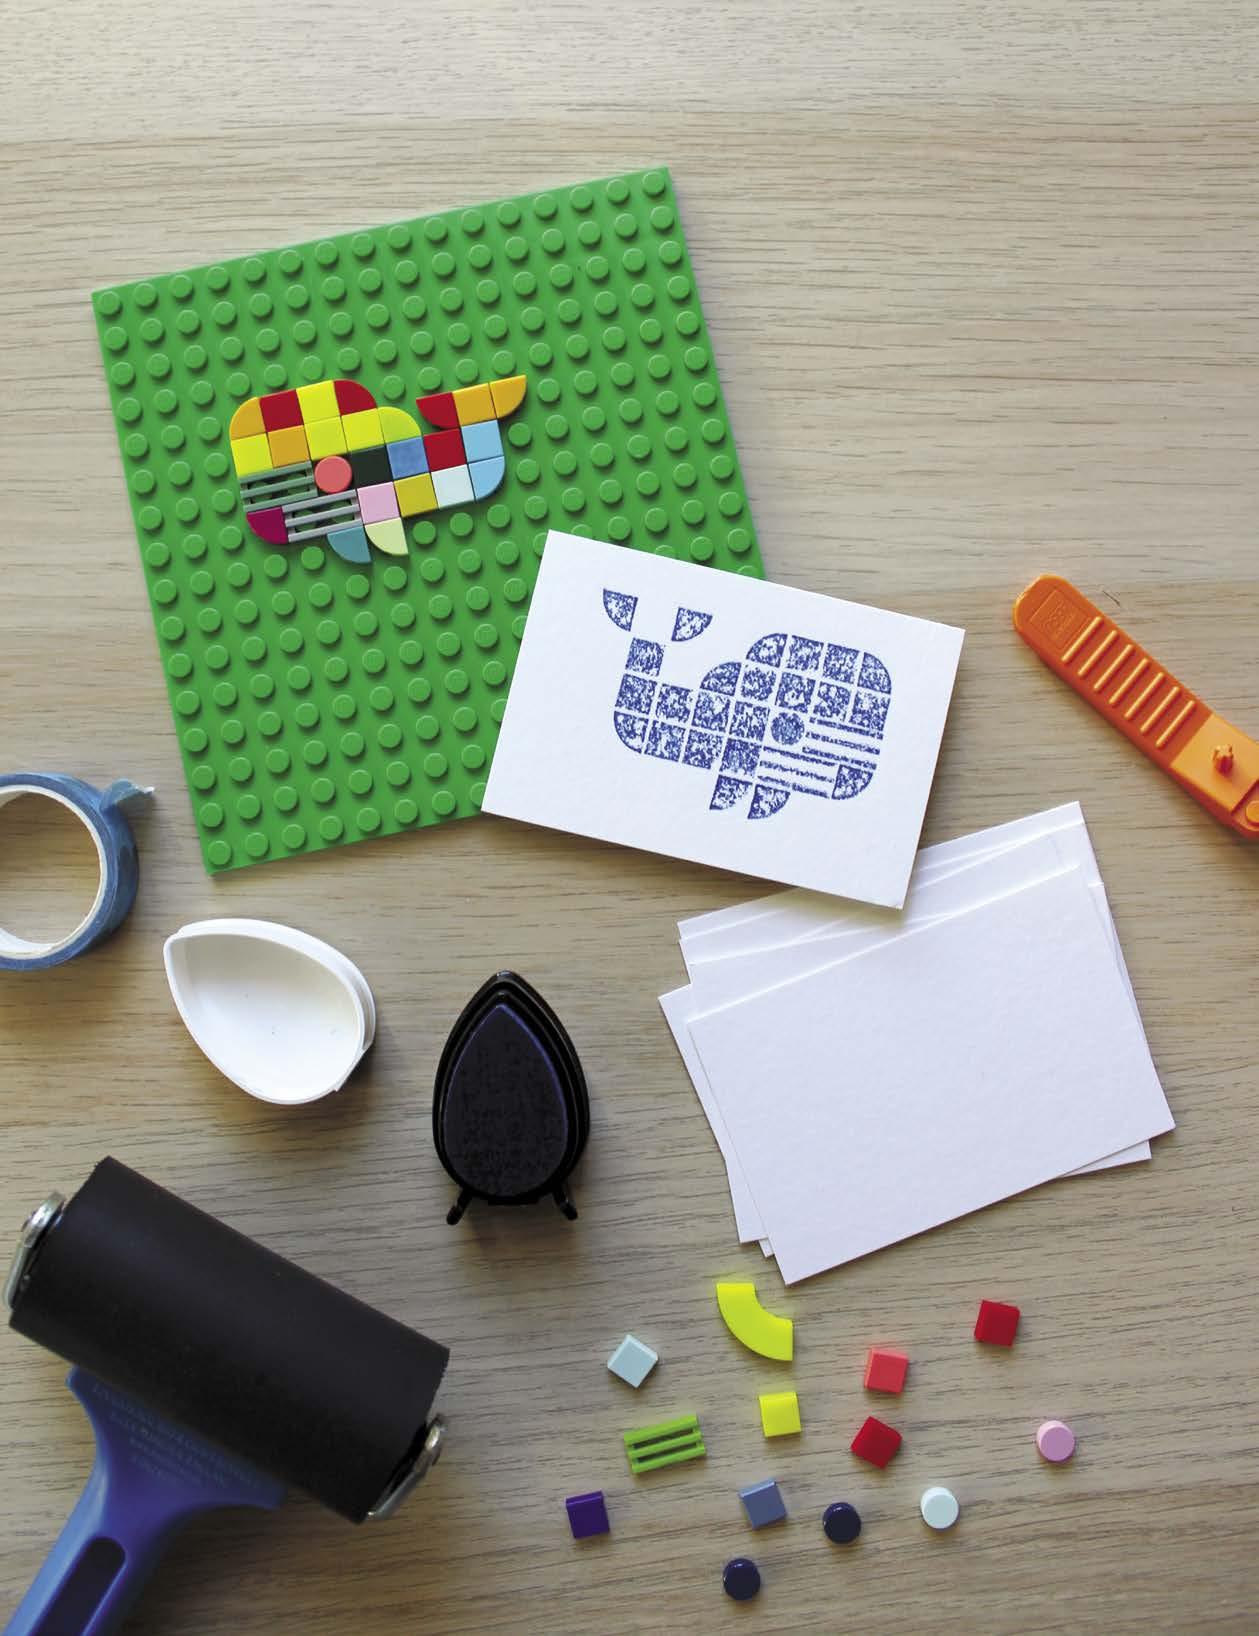
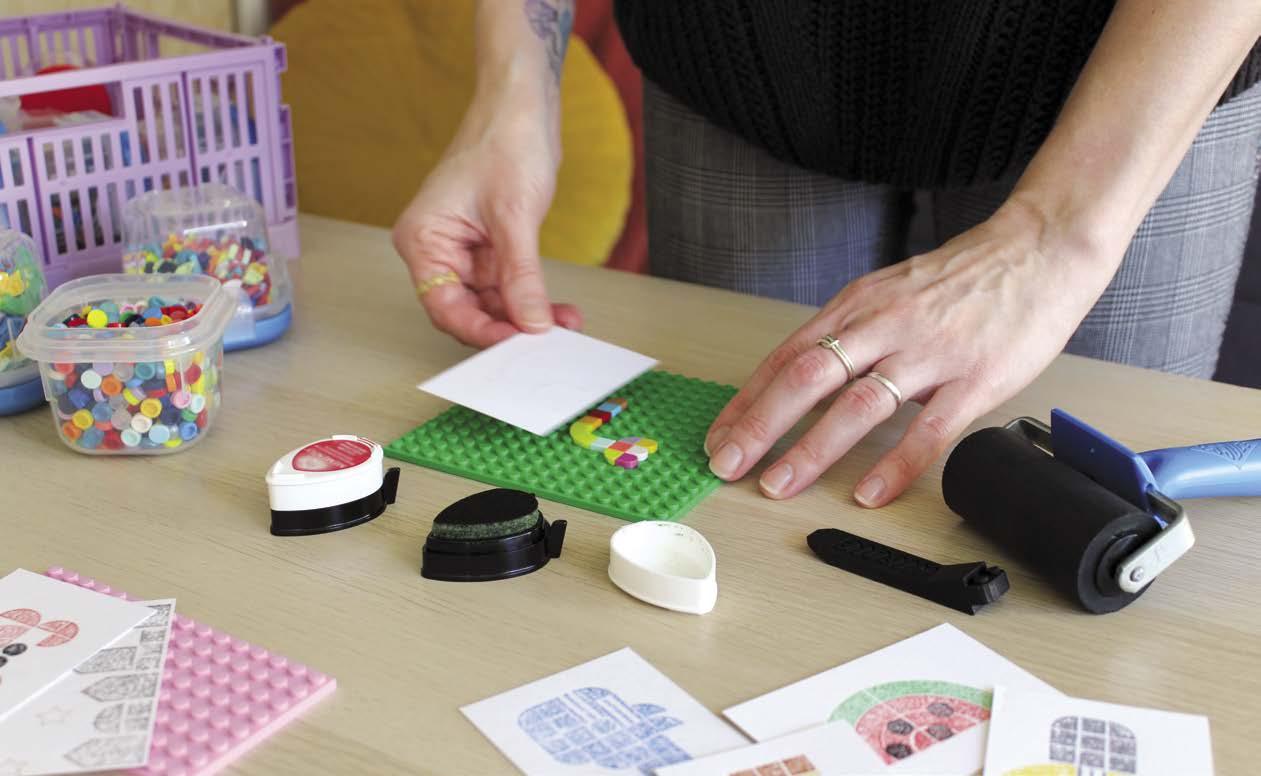
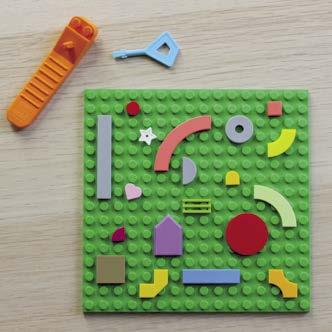
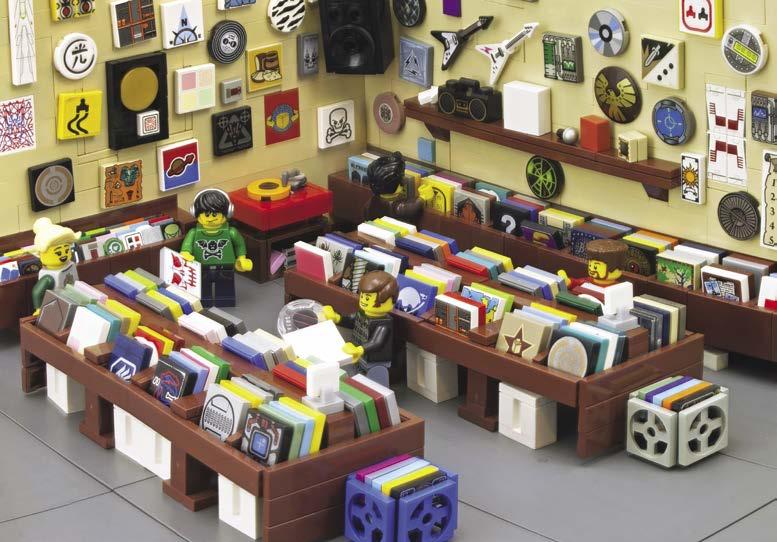
Nicole’s printing set-up, seen above, shows what is needed to make a twocolor print. The plates are numbered and are inked with the drop-shaped ink pads seen on the left side of the set-up. After inking, a sheet of paper is placed on the print plate (3.75in x 2.5in) and rolled with a roller. The size of the paper fits within the brick border, so the paper is aligned. The alignment is needed to make sure colors don’t overlap each other. In the case above, the first plate is inked black. After a print is made of the first plate, the second is inked yellow. The resulting print is seen at the top. Letters are built in reverse for printing. Tiles and some decorative parts can be used to make prints. Nicole uses the pieces seen on the right to make her prints. All of these parts have one thing in common: they have smooth tops. Specialty parts, such as the green grille tile and the star, allow for different patterns and elements. You can see the star in the print that was done above—it didn’t print a full star, but an outline!
Jon-Paul Hansen:
Article and Photos
by Jon- Paul Hansen
LEGO Masters Photos
Provided by TVNZ, & Screentime NZ/Banijay
Jon-Paul Hansen lives in Auckland, New Zealand and works in website content and digital marketing. He’s married with three adult children in their early 20s. He’s in his early 50s.
Three years ago, he was lucky enough to be employed behind-the-scenes for the two LEGO Masters New Zealand seasons, as a “Brick Builder” under the guidance of their Brickmaster, Canadian Certified LEGO Professional Robin Sather. He and the other Brick Builders got to create the LEGO set decoration and prop builds to set the scene for the episodes, and also test out some of the challenges. Some of the builds were Jon-Paul’s and the other Brick Builders’ own MOCs built to Robin’s specifications on size and height; some were from designs Robin created digitally.
Jon-Paul was born in the early 1970s. He had Danish grandparents and they would catch up with relatives in Denmark or New Zealand every year or two and bring sets from back home. He still has some childhood sets from that pre-Minifig era: the Fire Station, the Police Station, the London Bus, and some others. He’s picked up a few more vintage sets from that time and recovered a few sets from bulk lots over the years.
When his cousins used to visit, they would make “smash up derby” MOCs and race them down the hall and smash them into each other. He cringes now, but it was huge fun at the time.
The Star Wars license in 1999 brought him out of his Dark Age. He used to make MOC X-wings and TIE fighters as a kid, so official sets and minifigures were a dream come true.
His favorite theme is hard to pin down, but he does have a soft spot for pop culture nostalgia (as you’ll see in his MOCs), so he loves Scooby-Doo, Indiana Jones, The Simpsons, Stranger Things, and others. He has all the retail sets from those themes.
As an AFOL, it was probably seeing build contests at the local toy shop that inspired him to build. He was too old to enter, but it got him thinking about what he could do with all the parts he had accumulated. He started to look online at sites like Brickshelf.com and got inspired by what others were doing. Not knowing any other adult fans of LEGO at the time, it was quite liberating seeing the online communities. He had a Brickshelf profile which was very sparse, but his pop culture inspired builds were evident even way back then.
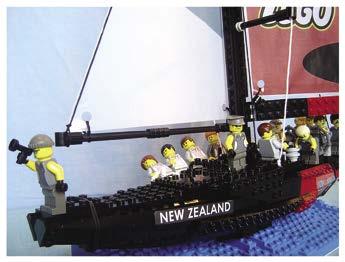
Jon-Paul’s first large MOC of note, outside of minifigs and minifig vignettes, was an America’s Cup racing yacht. He’s a bit of a frustrated artist deep
down; working with LEGO is more forgiving than paint, wood, or other traditional media. LEGO is ripe for scrapping and rebuilding and making improvements over time, especially as new parts get released.
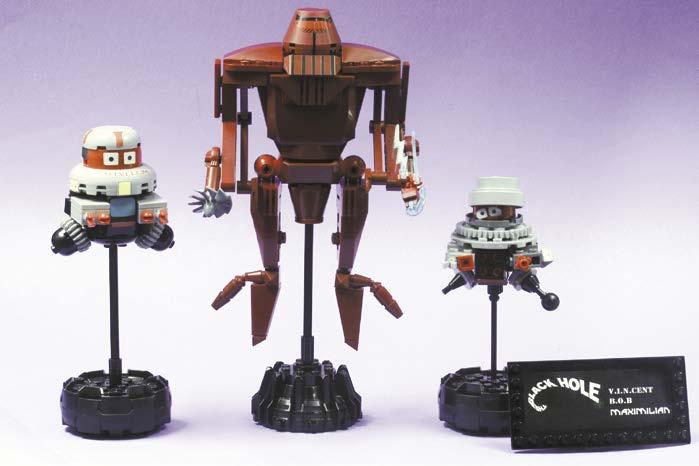
Jon-Paul’s builds are mostly inspired by pop culture nostalgia from his childhood; movies, TV, and music from the 1970s and 1980s. Generally you’ll see classic sci-fi robots like Robby the Robot and B-9 from the 1950s sci-fi movies and TV shows. Robots from the Disney movie The Black Hole, Sam the Robot from Sesame Street, and Ripley‘s power loader from Aliens also are items he has built. He’s also built scenes from George Lucas’ first movie THX-1138 and recreations of characters and scenes from Star Wars, such as a life-size Salacious Crumb and Ralph McQuarrie-inspired concept art, including the Millennium Falcon’s docking bay and the Gorax from Endor.
Musicwise, he has built MOCs of classic rock acts like ZZ Top, Pink Floyd, and his favorite, the primitive CGI characters from Dire Straits’ video Money for Nothing.
Of course, Jim Henson has been a huge inspiration to him. As Jon-Paul grew up with The Muppet Show in the 1970s, he has built lots of Muppetrelated builds.
Building a MOC often takes much longer than Jon-Paul expected. The Dire Straits set of characters, for example, was where he built the main porter Harv a year or so before building the dog. He knew he also needed to build the thinner guy, Sal, before he posted photos online, but couldn’t find inspiration and techniques for his curved head. In the end, after maybe another year, he simplified the face and just had one angle: the chin, and it looked great.
With his Muppet bust, Jon-Paul attempted twice to build Kermit the Frog, but could not get the shaping right, so as a way to clear his head, he started working on Gonzo, which was completed within the same afternoon. He still hasn’t returned to Kermit at that scale, although he has made a smaller one for his MahnaMahna scene.


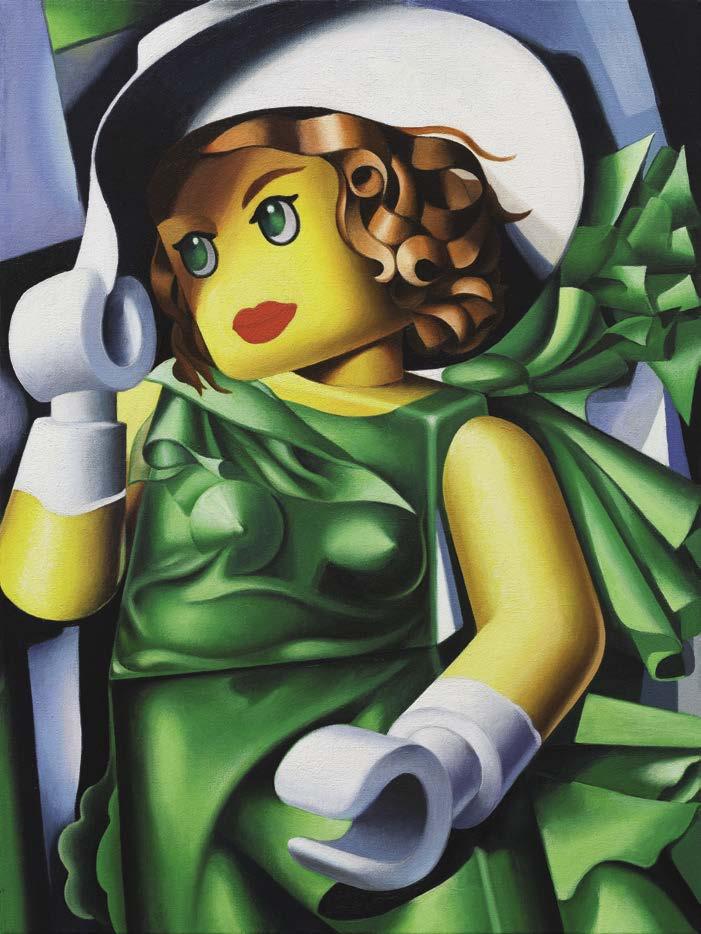
Article by Stefano Bolcato
Stefano Bolcato began his artistic practice as a painter 35 years ago he made his first painting with LEGO characters in 2006.
As a painter in terms of study and techniques, he came from an academic background. He has worked for many years on classic painting themes, such as landscape, figure, or still life. Later he thought of moving onto a painting of narrative and social denunciation. To do so it seemed to him that LEGO characters could be an effective way to talk in an original way, even about social topics. Then, always inspired by LEGO characters, in the last eight years he has dedicated himself to the reinterpretation of paintings and authors (more or less famous) in the history of art.
As a child, Stefanos’s absolute favorite toy was LEGO. He spent entire days building all kinds of houses and cars. The little LEGO characters arrived later when he already an adult have been painting for many years.
Stefano’s audience is very diverse in terms of age, interest, and social background. This aspect of his activity makes him truly happy, and makes what he creates as an artist meaningful. His works are present in important private collections, but they are also highly appreciated by people interested in art in general, lovers of the LEGO world, and no less importantly by a very young audience. Furthermore, fine art prints are available in limited editions of his paintings allowing people to be able to purchase artwork at an affordable price. For him, most of the public responds very well to his art. Some people may not take his work very seriously, but that’s normal. Obviously his art can be appreciated by many, but not by everyone.
Stefano’s first choice in painting a LEGO version has a very strong and profound motivation that refers to the protection of the common international artistic heritage. It’s linked to a sad event that occurred in November 2015 at the Castelvecchio Museum in Verona,Italy, which has an important collection of ancient and modern art. 17 paintings of great value were stolen from this
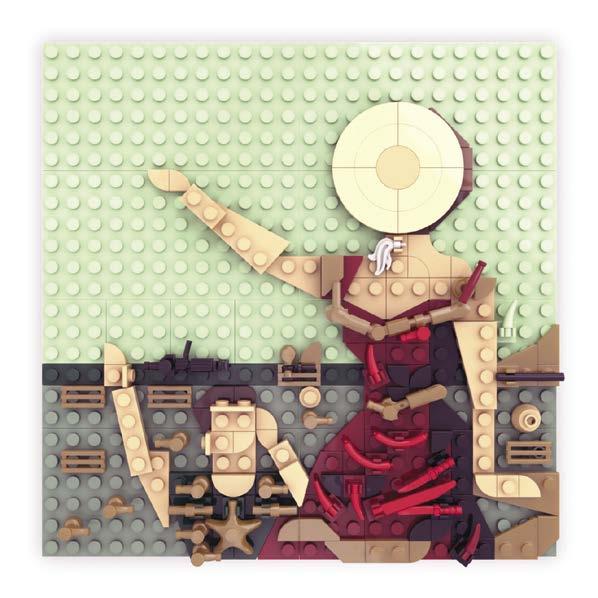
Article by Joe Meno
Images by Adnan Lotia
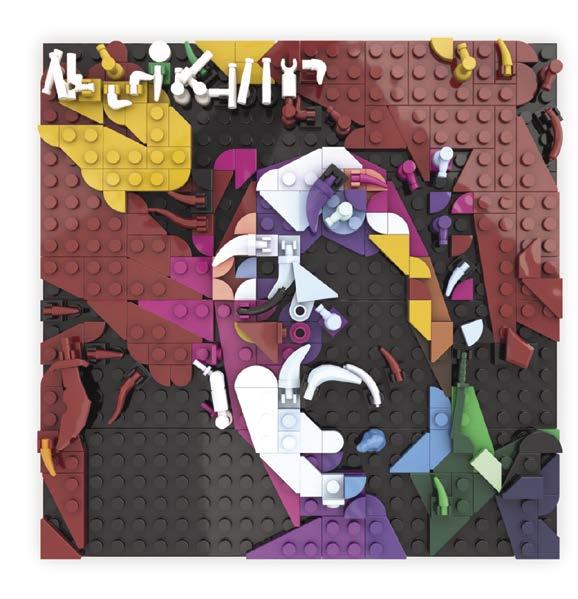
Adnan Lotia was last featured in BrickJournal 74 in 2022. His album covers, built digitally with LEGO elements, were spotlighted. Since then he has expanded his online album collection considerably and updated some of his previous work.
Within the confines of 24 stud by 24 stud footprint, Adnan has used the extensive LEGO element catalog to create portraits, art, and even typography. All of his work is done with traditional stacking. Here’s a look at some of his more recent pieces.
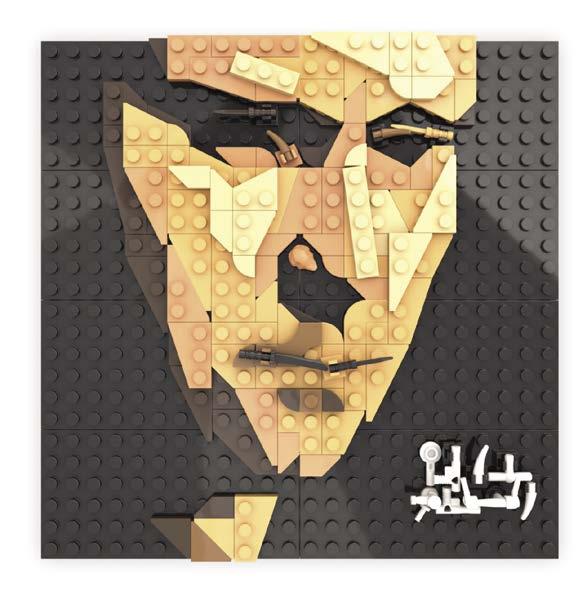

Unusual parts come into play here to make the distorted face and background. Minifigure pirate hooks and multicolored taps can be spotted here.
Adnan’s rendering of Phil’s portrait uses wedge plates to define the chinline and contours of the head. The mouth is made of minifigure blades.
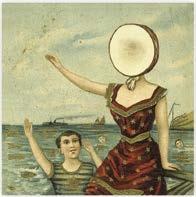
Neutral Milk Hotel In the Aeroplane Over the Sea
The limited shapes of LEGO elements makes for some creative solutions, such as the folds on the dress.
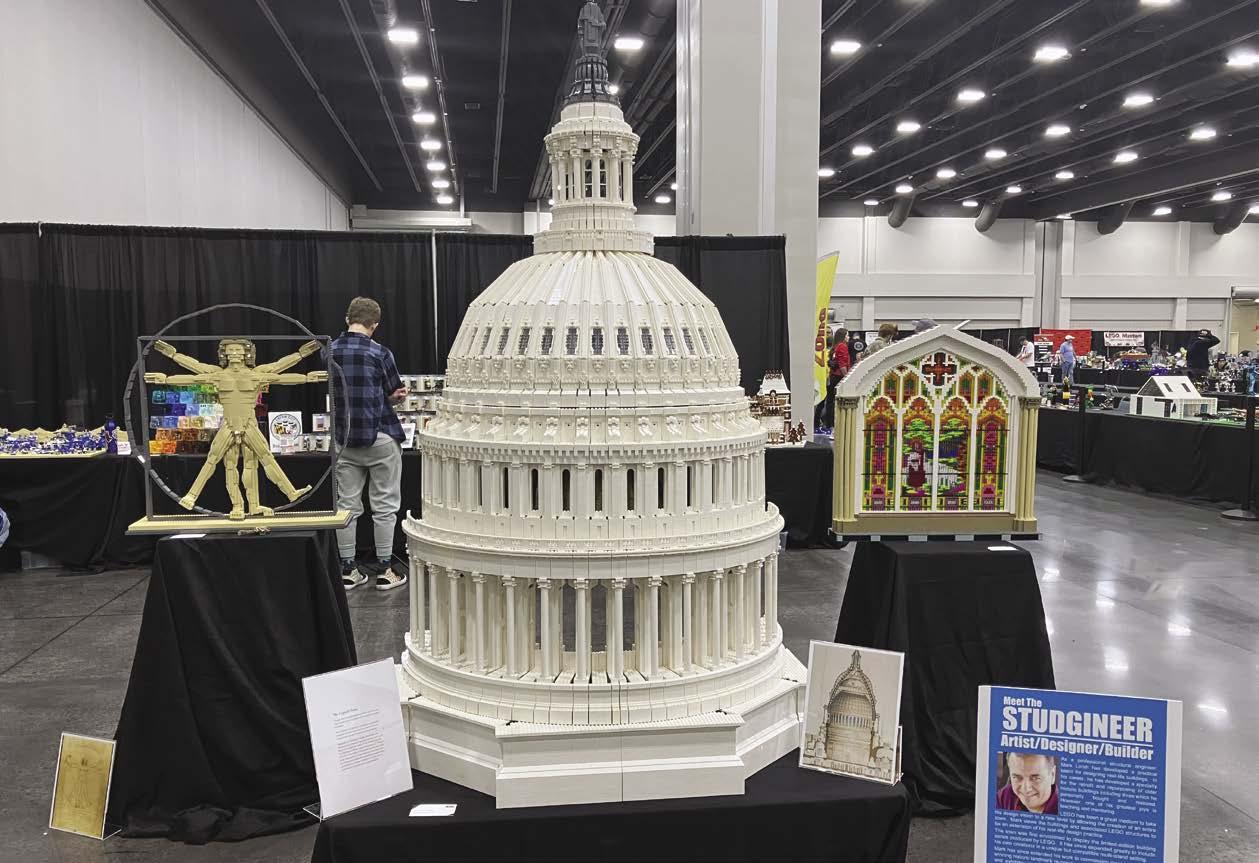
Article and Photos by Mark Lorah
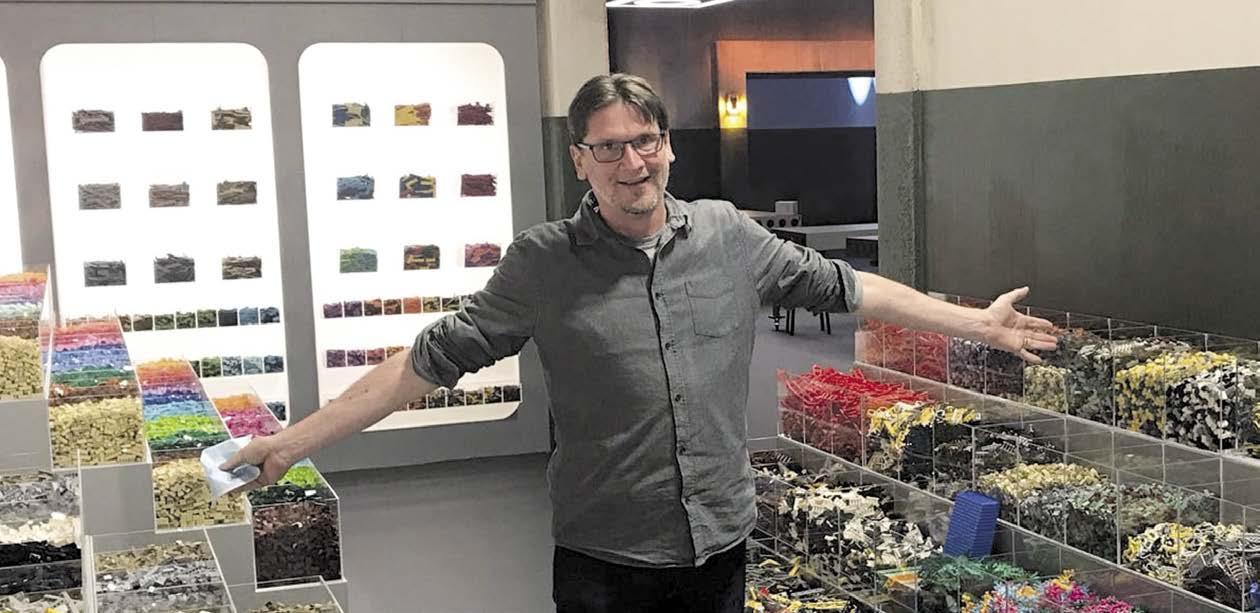
Mark Lorah is a structural engineer by profession and has developed a specialty in historic restoration and repurposing buildings. This goes hand-in-hand with his love for historic LEGO buildings, and has helped with the design and structure/strength of his new builds.
One of his favorite activities, however, is mentoring and inspiring others professionally. He teaches engineering seminars, and mentors engineering college seniors. However, to inspire the next generation of engineers, designers and planners, he was convinced that he needed to reach young people. This is where LEGO started to play an important role in his life as a mechanism to provide that inspiration. Being an engineer working with LEGO brick studs also inspired his social media handle: Studgineer.
As a child, Mark enjoyed building the now iconic 1980s LEGO space sets with his brothers. Those early sets just had bricks that came in those big cylindrical cans, if anybody remembers those (yes, that dates him!).
As an adult, Mark picked it up again in the early 2010s. Before then he had been renovating several historic homes and ended up losing a bunch of money in the 2008 market crash. He jokes with people that while LEGO is expensive, it doesn’t compare to the cost of renovating real buildings. Seriously though, he was intrigued by the LEGO modular series buildings which were targeted to adults. Not satisfied to simply build the sets, however, he decided he
needed to find a way to display them—and what more appropriate way than to build a village? The issue with a village, though, and most village builders would agree, is that they take a lot of space, particularly if you have a train—and of course you need a train. This is where his engineering came in handy. He asked the question, “What would a real city do?” Well, they have hills, retaining walls, subways, trestles, and tunnels. He could and did build all those from LEGO. He started displaying his village at a local fair and then as a local artist in a LEGO convention which came to town. It was so popular at the convention that they invited him to display at additional events.
Between his village and his profession, Mark tends to lean toward the LEGO modular series with its more traditional buildings that fit well within a Classic City theme. However, with his MOCs, it is much tougher because he can’t tell you what inspires him. He can only tell you when it does. He wants to build things that are beautiful and fill the world with beauty.
After seeing his work, and with connections made through his LEGO club, Mark was invited to re-create several local historic landmark buildings for the history museum in
Article and Photography by Isaac Wilder

Isaac Wilder has been building for as long as he can remember. Now 28, bricks of various sizes have been a part of his life since he was old enough for DUPLO! His love of bricks has only grown with him.
The release of Speed Champions got him to start building MOCs after having a two-year Dark Age. He jumped right back into building in 2016 with a model of a 1940 Ford Coupe.
Isaac’s current favorite theme is the LEGO Ideas theme. He enjoys building vehicles, but also gets enjoyment out of building different things and learning new techniques that these sets have to offer.
Article by Oscar Cederwall
Photos by Rylie Howerter
Previously posted on Bricknerd.com
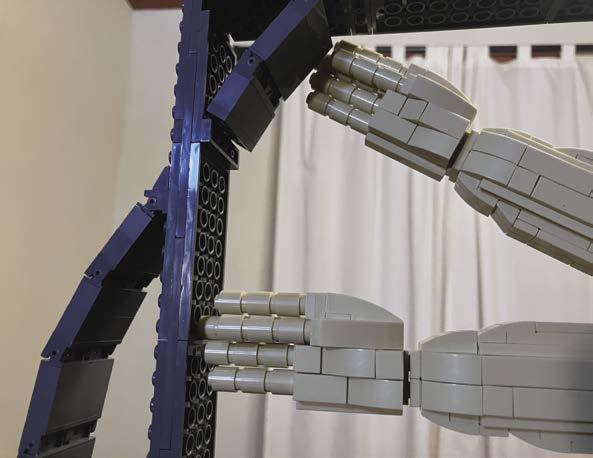
I have written numerous articles covering many aspects of SNOT that I think are necessary for an advanced LEGO builder to know about. In this article, however, I will focus on how I learned many of the tricks I know and how to think when applying SNOT to your MOCs. It’s time to talk about reverse engineering, or more specifically, the Reverse Engineering Contest (REC).
I participated in my first REC competition in 2014. It is actually one of my most precious moments so far in my AFOLhood. It was basically a LEGO SNOT puzzle that you were challenged to recreate. A new puzzle was released every week, and if you didn’t solve it, you didn’t get any points. That basically meant you wouldn’t win, so it was an equal mix of stress and delight. I made it to the final challenge, which I failed. But it was such a great experience, and I learned invaluable lessons about SNOT that I still have great use for.
What I didn’t realize until later was that REC actually gave me the tools I needed to reverse-engineer my own ideas! What I mean by that is that I can have an image in my head of what I want to achieve, and then I can mostly solve it—if I treat it as a REC challenge. It’s super useful for me as a LEGO builder.

In this article, we will look at how you can attack SNOT puzzles with a few examples. And I’m excited to reveal that helping me with this article is the one responsible for this whole REC business, Rylie Howerter!
I have been following Rylie on Flickr since my early AFOLhood, around 2013. I think the first image I saw was the Modulex/system compatibility analysis. Rylie’s feed has since then been a reference for clever NPU, connection techniques and color charts.

Oscar Cederwall: Before we focus on REC, can you tell us a little bit about yourself?
Rylie Howerter: I’m Rylie, a graphic designer from Fort Collins, USA. The part I play in the LEGO community is a mix of historian, collector, color fanatic, and sometimes-builder—I’m trying to bring back more of the
latter lately as I start working on MOC projects again!
What is your relationship to LEGO? Have you been hooked since childhood?
Basically, yes. I think my first set was a Duplo bucket in 1994, then asking for LEGO for every holiday through to the 2000s. The way I engaged with LEGO has varied; there was a time when I kept all my sets built and used them as playsets to make stories about with my brother, and another when I was deeply into making Bionicle MOCs — but LEGO has always been there for me in some way.
I see that you have been active on Flickr since 2009. Was that your first interaction with the AFOL community?
I discovered the online AFOL community around 2006 and spent all my free time poring over MOCs on BrickShelf and Flickr. The next couple of years were probably the most prolific building I’ve ever done; these days, I’m lucky to get a MOC or two in each year. But I’ve just recently unpacked my collection from the last move, so hopefully I can get something new out.
As for the community, it was mostly Flickr for a long time, but I’ve also been to many Brickworlds, one BrickCon, and this year I actually managed to visit Billund, Denmark. Hopefully I can go back soon!
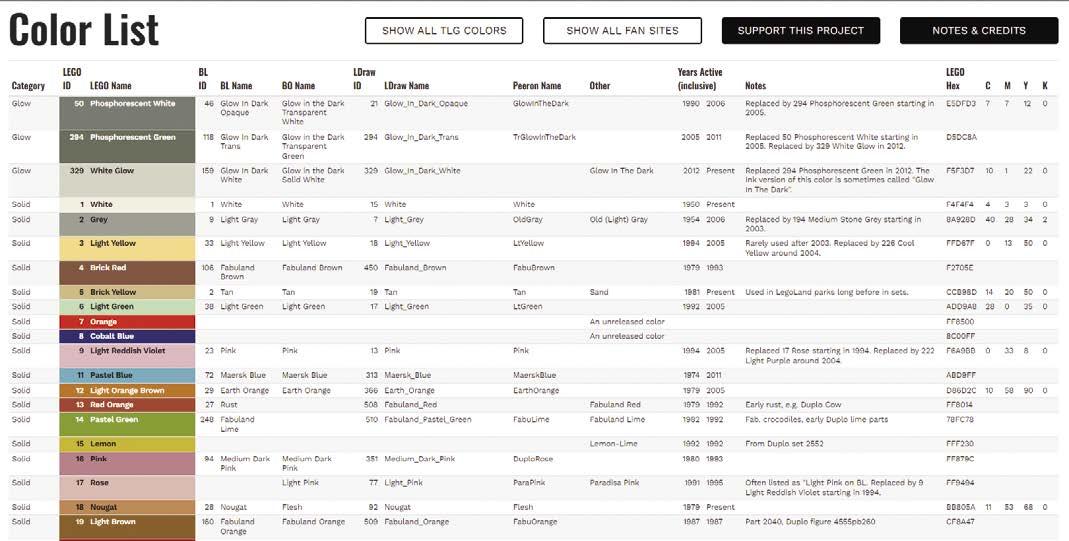
Can you tell us about your LEGO Color Project? How did you get so interested in the LEGO color palette?
That started as a graphic design class project, actually. I wanted to make a timeline infographic showing when the colors were used, but the more I dug into it, the more incomplete, outdated, and even contradictory the existing resources seemed. So I created my own spreadsheet, which after years of talking colors with other AFOLs, grew into my color database.


(Parts can be ordered through Bricklink.com by searching by part number and color)
Qty Part Color Description
2 2431.dat Black Tile 1 x 4 with Groove
1 3004.dat Trans Clear Brick 1 x 2
10 3005.dat Black Brick 1 x 1
3 3023b.dat Reddish Brown Plate 1 x 2
2 3024.dat Red Plate 1 x 1
2 3024.dat Orange Plate 1 x 1
2 3024.dat Yellow Plate 1 x 1
2 3024.dat Green Plate 1 x 1
2 3024.dat Black Plate 1 x 1
2 3024.dat Blue Plate 1 x 1
1 3069b.dat Black Tile 1 x 2 with Groove
2 3070b.dat Black Tile 1 x 1 with Groove
4 3460.dat Black Plate 1 x 8
6 4477.dat White Plate 1 x 10
4 6091.dat Black Brick 2 x 1 x 1.333 with Curved Top
2 6541.dat Lt Bluish Grey Technic Brick 1 x 1 with Hole
6 51739.dat Black Wing 2 x 4
4 52107.dat Black Brick 1 x 2 with Studs on Sides
4 86996.dat Black Plate 1 x 1 x 0.667
2 87994.dat Lt Bluish Grey Bar 3L
The cassette tape was a game-changer back in the day, making music portable and personal. To celebrate this retro classic, our design stays true to the real thing. It has curved corners, tape reels, a label, and even the little clear window that shows the tape inside.
Building this set is like hitting play on nostalgia. It’ll take you back to the days of making mixtapes for your buddies and recording your favorite song from the radio. And it ever implements a sweet little stud inversion on the sides to keep things interesting.
So get your pencils out because it is time to be kind and rewind!

“So much time and so little to do. Wait a minute. Strike that. Reverse it.”
Come with me, and you’ll be in a world of pure imagination. Take a look and you’ll see into your imagination. This is not those charlatans’ worlds, I am speaking of the “Wonderland” created by Gene Wilder, Roald Dahl, and David Seltzer. Many might not know that last individual because Dahl was credited with writing the screenplay for the 1971 film Willy Wonka & the Chocolate Factory; however, David Seltzer was brought in to do an uncredited rewrite. Against Dahl’s wishes, changes were made to the story, and other decisions made by the director led Dahl to disown the film. The musical numbers were written by Leslie Bricusse and Anthony Newley while Walter Scharf arranged and conducted the orchestral score. “There’s no earthly way of knowing which direction they are going.”
As we all know, this story focuses on Charlie Bucket, a child who is stuck in poverty, who doesn’t let his circumstance bring down his optimism, as he is a forever dreamer and innocent to the concepts of greed, lying, and misdeeds. The panacea of amazements open once Charlie finds a Golden Ticket in a chocolate bar, thus wining the chance to visit Willy Wonka’s chocolate factory along with four other children from around the world. “Is it my soul that calls upon my name?”
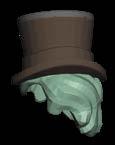
Drawing inspiration from the beloved movie and story, in this issue I will cover how I constructed a minifigure that brings the magic of the Chocolate Factory to life. The process begins with a custom minifigure featuring intricate details—from the distinctive top hat to the playful Golden Ticket, and of course, an Everlasting Gobstopper.
• Detailed top hat/hair
• Custom purple coat
• Custom Cane/Walking Stick
• Custom Bow Tie
• Custom Torso Design
• Expressive facial expression capturing Wonka’s mischievous spirit
• Wonka Bar/Golden ticket accessory
• Minifigure scale Everlasting Gobstopper
Whether you’re a LEGO enthusiast or a fan of the classic film, this guide will help you transform simple bricks into a miniature tribute to one of cinema’s most imaginative characters. Prepare to enter a world where creativity knows no bounds— just like Willy Wonka’s magical Chocolate Factory.
Hopefully with the explanation, you too can create the figure, just as I have.
To start, we need to think about Gene Wilder’s hair in the film. It is curly, wispy, and a bit classically parted and brushed, as are the other male characters, especially the children in the film. It is very hard to capture this level of detail in the figure. In order to capture the best hat-hair combo, I went with the inspiration of the tilted top hat on the hair with a left head hair part. The issue is many of the LEGO hair styles use a right head hair part, so where to begin?
Well, since “Time is a precious thing. Never waste it. Shall we press on?” I found a hair style; I refer to it as the Anakin hair, because it originally came out on an Anakin Minifigure
to my knowledge. Bricklink refers to it as, “Minifigure, Hair Swept Back Tousled” item number 61183. At issue is it has the wrong sided part, and I could have easily just flipped the hat tilt and moved forward, but I said no!

1. I found the hair piece in the LeoCAD program and exported the OBJ file and imported it into Meshmixer.

5. I now added a piece that was a cylinder that would sit inside the top hat that would not interfere with the brim.

9. ...and added this to the LEGO mirrored hair piece that had been cropped at a 12.5 degree angle.


14. From here it was time to test fit and the stud fit, but the hat did not rest at the correct height. Quickly deciding to expand the hat by 1% and shrink the hair by about the same, a second test fit was performed.

2. From here, I mirrored the hair piece and deleted the original and kept the mirror.

6. Choosing to use the LEGO top hat, I exported the OBJ and imported it too.

10. I now modeled the LEGO top hat on top or the hair...
15. I was frustrated, but decided to remove part of the shelf where the little notches of the hat had to fit into the hair, and reprinted the hair piece.
3. This was a quick way to make a LEGO part unique.
7. From here I took the cylinder and subtracted it from the top hat to get the interior of the LEGO top hat.

11. ...and decided to add a stud to the top of the hair to further strengthen the hair-hat connection.
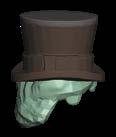
16. This is where the final test design and test fit came into place! Willy now had a hat and hair!
“I don’t understand it. The children are disappearing like rabbits. Well, we still have each other. Shall we press on?”

4. From there I did a plane cut on the hair piece to remove the bulk of the unneeded parts. I did augment one area on the side due to the wave of the hat brim I was using.
8. I then cut a stud acceptor for the top of the LEGO head...


12/13. Having read an article on how Gene Wilder specifically made adjustments to his wardrobe for the film, I knew that the hat was much shorter than many top hats, and I performed another plane cut and patched the top.


by David Strenzler, Bantha
Photography by Tom Jacobsen
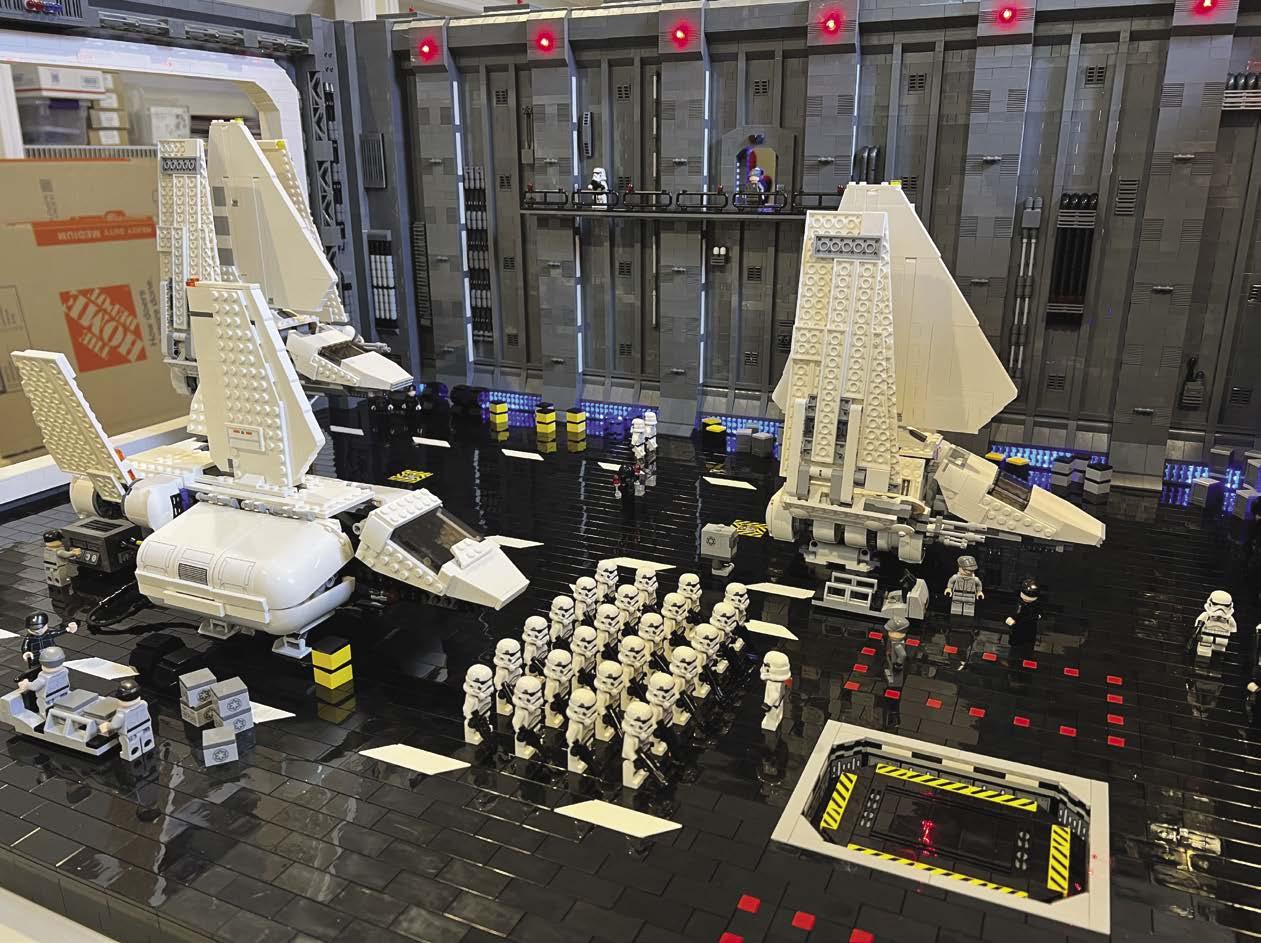
Galactic greetings! We are Bantha Bricks: Fans of LEGO Star Wars. As administrators of one of the best LEGO Star Wars themed groups on Facebook, David Strenzler, Frank Averstegge and Eloi Parizeau witness amazingly creative builds by Star Wars fans worldwide on a nearly daily basis.
This time, we would like to introduce you to outstanding MOC builder and Bantha Bricks community member Tom Jacobsen (Arc Brick Studio).
David Strenzler: Hello, Tom. Welcome to the Bantha Bricks Files! The LEGO Star Wars community has been familiar with your creative and skilled Star Wars-inspired designs for some time. Could you please introduce yourself and what you do?
Tom Jacobsen: Thanks David, I certainly appreciate this amazing opportunity for my work to be featured in BrickJournal!
Since my retirement from the pharmaceutical industry over three years ago, LEGO projects have become my new “career”, consuming much of my time. In early 2023, I was invited by Greyson Riley to build an exhibit of 9-10 MOCs and be a featured artist at twelve of his Brick Convention tour’s shows. For the 2024 tour, I agreed to participate in thirteen shows, and worked pretty much 24/7 from November 2023 through mid-March 2024 to build a whole new exhibit for it.
DIAMOND COMIC DISTRIBUTORS FILED FOR BANKRUPTCY IN JANUARY without paying for our December and January magazines and books, leaving us with enormous losses— and we still have to pay the expenses on those items, and keep producing new ones. Until payments from our new distributors begin in the Fall, we’re staying afloat with WEBSTORE SALES
Every new order (print or digital) and subscription will help TwoMorrows get through this, and emerge even stronger for 2026. Please download our NEW 74-PAGE 2025 CATALOG and order something if you can: https://shorturl.at/gA9Fv
Also, ask your local comics shop to change their orders from Diamond to LUNAR DISTRIBUTION, our new distributor. We’ve had to adjust our release dates for the remainder of 2025 while we wait for orders from our new distributor, so you may see some products ship earlier or later than originally scheduled. We should be back to normal by end of Fall 2025; thanks for your patience!
Article and Photography
by Nicole Honeycomb
Article by Brick Galleria
Photography provided by Brick Galleria, Andreea S photography and Paul Kelly
From Saturday, July 27 until Sunday, September 1, 2024, a brand new free exhibition of LEGO brick paintings was on display in the magnificent Tea Room of the Bath Assembly Rooms. This was a six-week partnership with Brick Galleria and the National Trust for Places of Historic Interest or Natural Beauty (located in the United Kingdom) to bring LEGO brick paintings to visitors and families in Bath over the Summer of 2024.
IF YOU ENJOYED THIS PREVIEW,
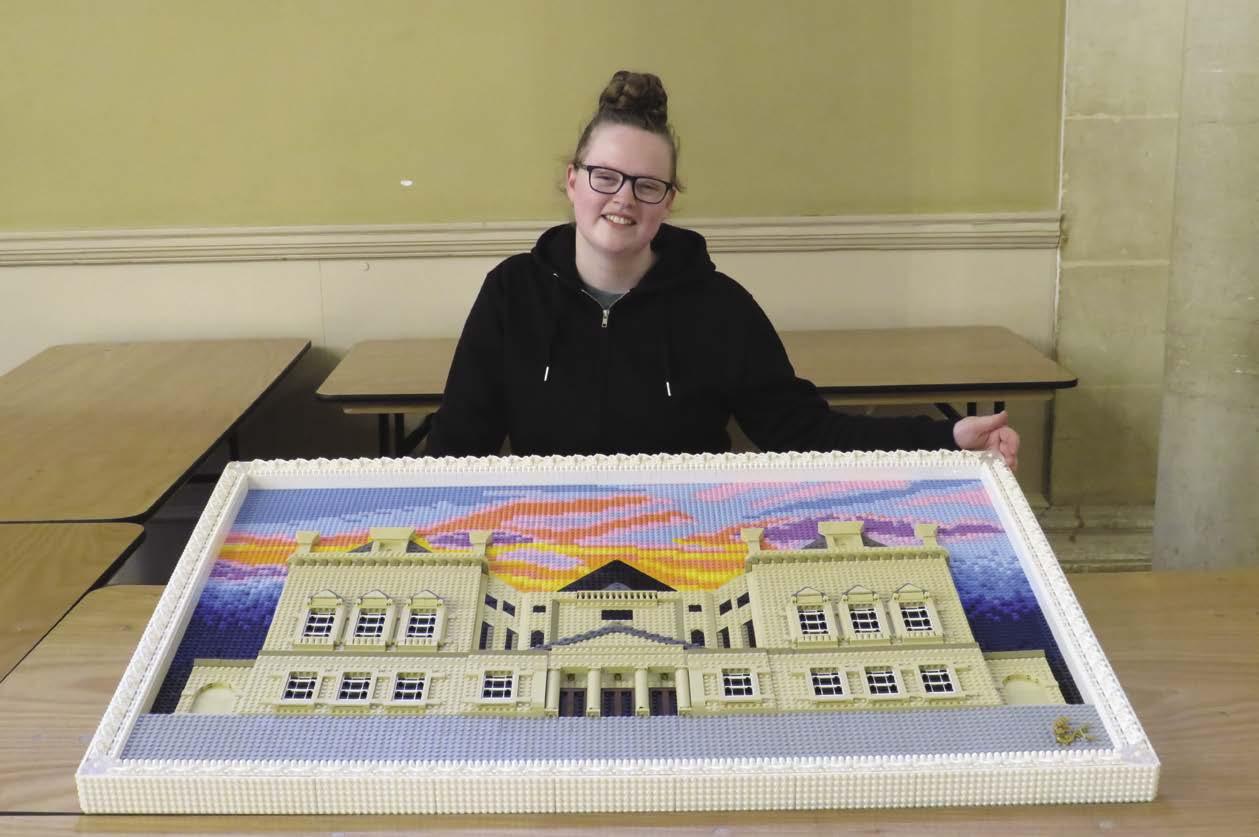
Pieces featured included “A Georgian Day Out,” based on the nearby National Trust property Dyrham Park. This painting, along with 15 others, have never been displayed before, so this was the first time anyone had seen Emily Corl’s new collection.
“As an artist, I love to push the boundaries with my art and I am so excited to be working with Bath Assembly Rooms to bring my painting to the public,” said Emily Corl, LEGO Brick Artist. “ I am inspired by the amazing countryside and architecture in the British Isles, and showing my exhibition will hopefully encourage others to be creative and get inspired as well.”
The exhibition provided inspiration to the rest of the summer activities. Kevin Hall, Brick Galleria’s professional LEGO Brick Artist, ran free LEGO Brick Painting Workshops every Wednesday and Saturday.
Families, visitors and LEGO loving adults came and had a go at creating LEGO Brick Paintings using thousands of different LEGO parts.