2 minute read
Soft focus technique


Adding a soft focus effect gives your portraits a romantic feel
Soft focus is an effect used widely in television and in the movies, as well as in many commercial and advertising photographs, for producing a dreamy romantic look. It’s also a big favourite with wedding photographers. In traditional photography the effect is achieved with a special filter fitted over the camera lens. Many digital cameras now include soft focus as a digital effect, but we can produce the same results in Photoshop with ease, using blur and layer transparency.
Advertisement
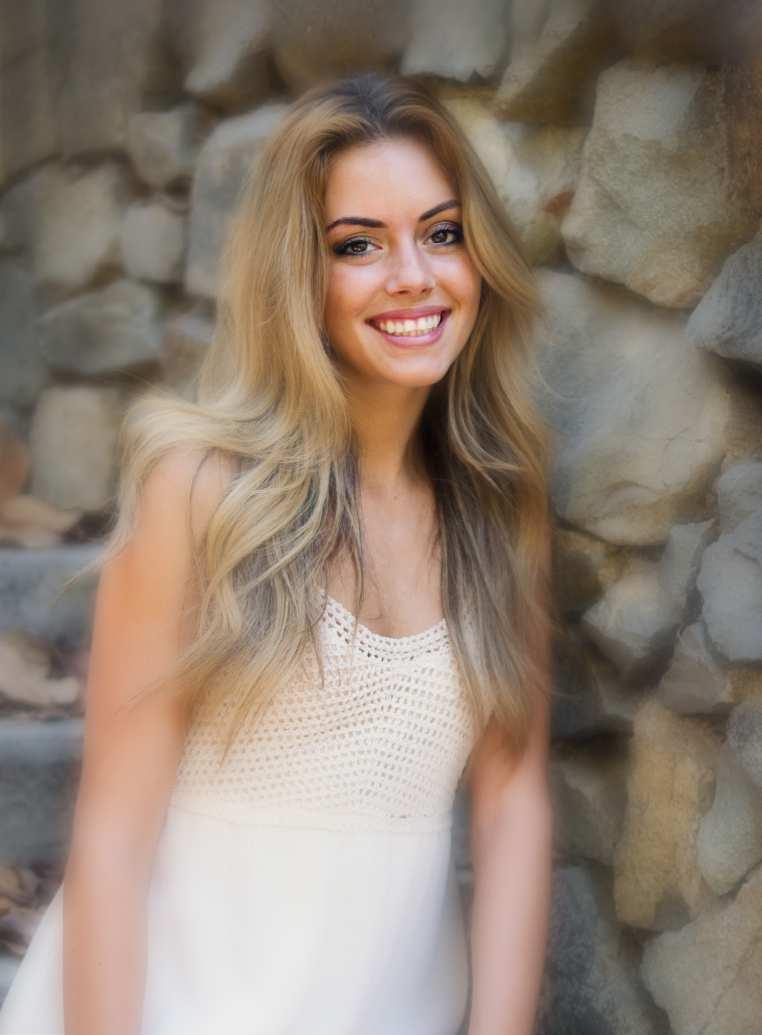
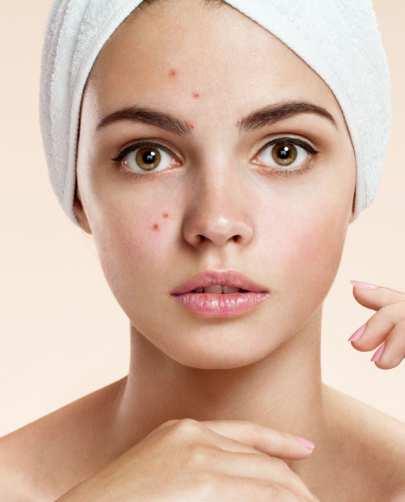
BEFORE AFTER

01 The first step is to turn the picture into two identical layers. To do this, go to the Layer menu, and select Duplicate Layer. Don’t worry about naming this layer, it’s the only one we’re going to make. In the Layers palette, set the transparency of the blurred layer to around 60 percent. This lets the still-sharp lower layer to show through, mitigating the effects of the Gaussian blur. If you feel it is too blurred, you can drop the Opacity down to about 70% if you like. Next, select Inverse from the Select menu to change the selection so that everything outside the ellipse is selected.

04

07

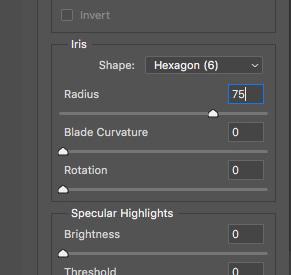
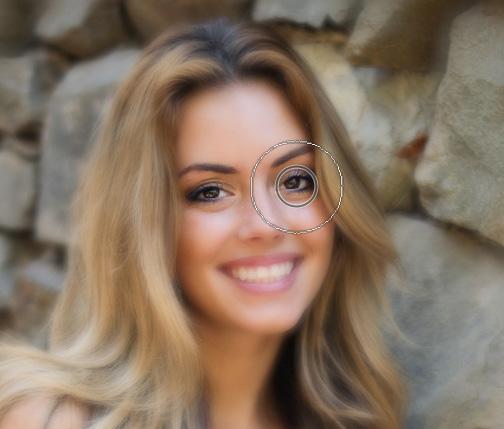
Next, go to the Filter menu, move down to Blur, and select Lens Blur. This is a special type of blurring that can be adjusted to produce certain effects which look more like true photographic lens blur. We can further enhance the look of the picture by adding an elliptical vignette of further blurring around the subject. This is a technique that portrait photographers have been using almost since the invention of photography. First, select the Elliptical Marquee tool.
02 YOu may need to experiment with the amount of blurring to produce the soft-focus effect. A radius of 75 pixels is used here. You may need a smaller radius for smaller images, but keep it subtle.

05

08 Now add a Lens blur filter to the selection, giving it a much bigger radius than before; around 100 pixels should do the job.
03

06 Drag an elliptical marquee selection around the portrait subject. This may take a few tries to get right, so use Cmd+D to deselect if you get it wrong. When you’re happy with it, go to the Select menu and click on Feather. Set a radius of about 50-60 pixels.
09 One final option is to use a soft eraser and erase areas of the blurred layer around your subject’s face to keep it sharp if you prefer.