4 minute read
Removing spots and red eye


Even the latest digital cameras can sometimes get dust inside and contaminate the sensor, leaving black spots on your images; and there’s also the problem of flash Red Eye and indoor photography. Luckily Lightroom offers tools for dealing with these problems.
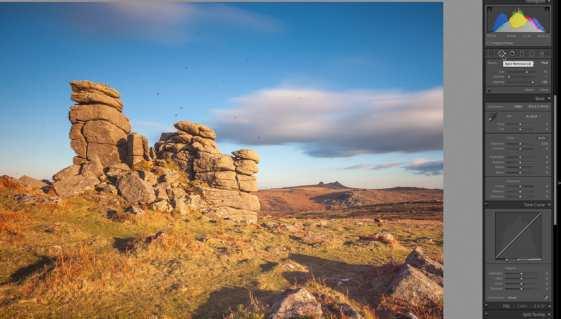
Removing Spots
Advertisement

1 If you scan film photos or use an older DSLR, you may have problems with dust and blemishes on your images. Fortunately, Lightroom includes a handy tool to get rid of them. It’s the Spot Removal tool and you use it by clicking on the icon in the editing tools panel or by using the keyboard shortcut Q. Note the icon change in the 2022 update. 3 As you click on dust spots you’ll see the position from which the replacement sample is being taken displayed on the image and you can adjust the position and size of the sample location by dragging on the visible circle. You can turn this feature off from a pop-up menu on the lower tool bar; this can help if your image is heavily spotted.

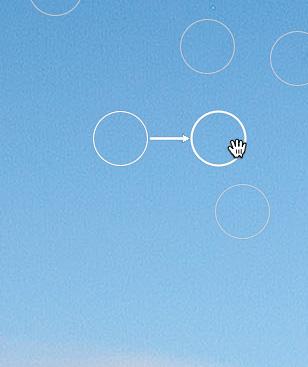

2 The Lightroom Spot Removal tool operates in the same way as the matching tool in Photoshop. You can adjust the brush size by using the slider in the control panel or by using the square brackets keys [ and ]. Simply click on a spot and it will be replaced by a matching background colour sampled from elsewhere on the image. 4 If you make a mistake or if you simply don’t like the result of one of your spot removal operations, you can undo any of them by holding down the left Alt button and clicking on the offending circle. As well as the heal function, the Spot Removal tool also offers a Clone option. If you hold the CTRL key you can move the sampling point to wherever you want.
Removing Red Eye
1 Red Eye is caused when light from your camera flash reflects off the blood vessels at the back of the eye and is most visible in low light when the pupils are widely dilated. Even if your flash has anti-Red Eye pre-flash it can still be a problem. You can remove Red Eye from your shots using the Red Eye Removal tool.
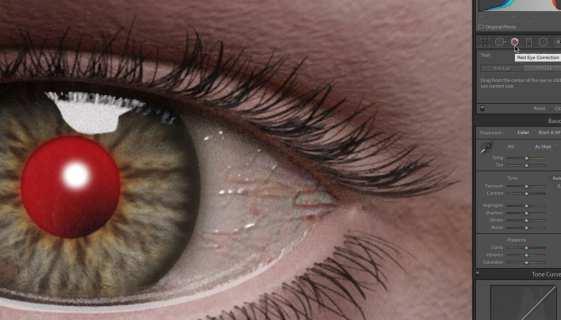
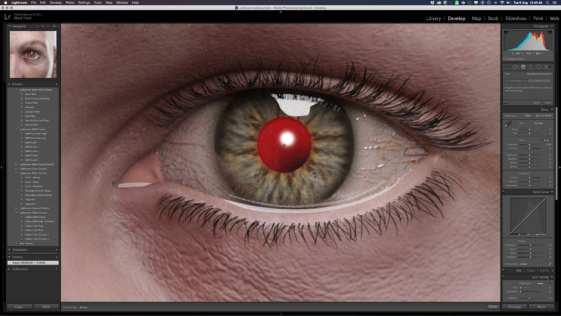
2 The Red Eye Removal tool is very simple to use. When you activate the tool you’ll see a cross-shaped mouse cursor. Simply place this over the centre of an affected eye and drag an elliptical shape outwards until it covers the entire eye. Release the Mouse button and the tool will automatically detect and correct the redness.
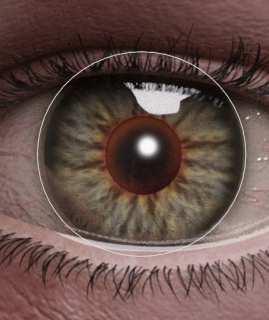
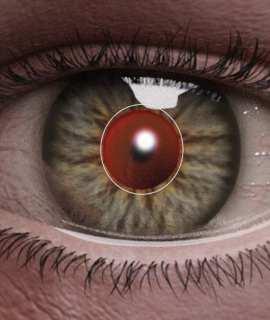
3 As noted above, make sure the elliptical shape covers the entire eye, not just the pupil. You may think you just need to cover the red area of the eye, but the tool works by using the shape of the iris and the pupil. If you drag the ellipse over the pupil alone, you will see that the redness reduction is confined to a very small area. Adjust the ellipse accordingly. 4 Repeat the same procedure with the other eye. If you’re not happy with the result, reset the image and try again; the automatic process isn’t perfect and a second try may do better. You can also manually adjust the size and darkness of the fake pupil that it superimposes by adjusting the two sliders in the tool options panel.

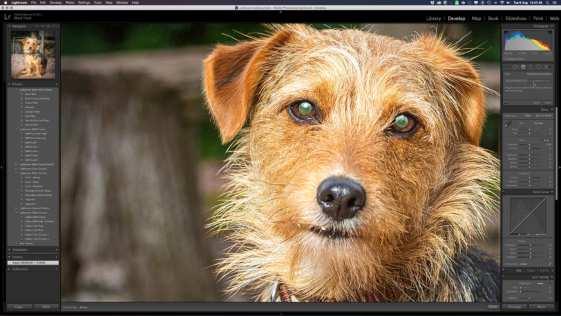
5 The Red Eye Removal tool also works with pet’s eyes, although due to the nature of cat and dog eyes, they’re usually green or yellow rather than red. Click on the Pet Eye button on the tool option panel and then use the same procedure that you did for a human eye; click and drag outwards from the centre of the eye.

6 As with human eyes you do have the option to manually increase or decrease the pupil size but there is no option to darken, since it will set to maximum darkness automatically. There is an option to add catchlights in the eyes though, which is strangely missing from the tool options for human eyes. The results are usually excellent.