13 minute read
Create an underwater scene


How to construct an underwater scene from scratch with Photoshop
Advertisement
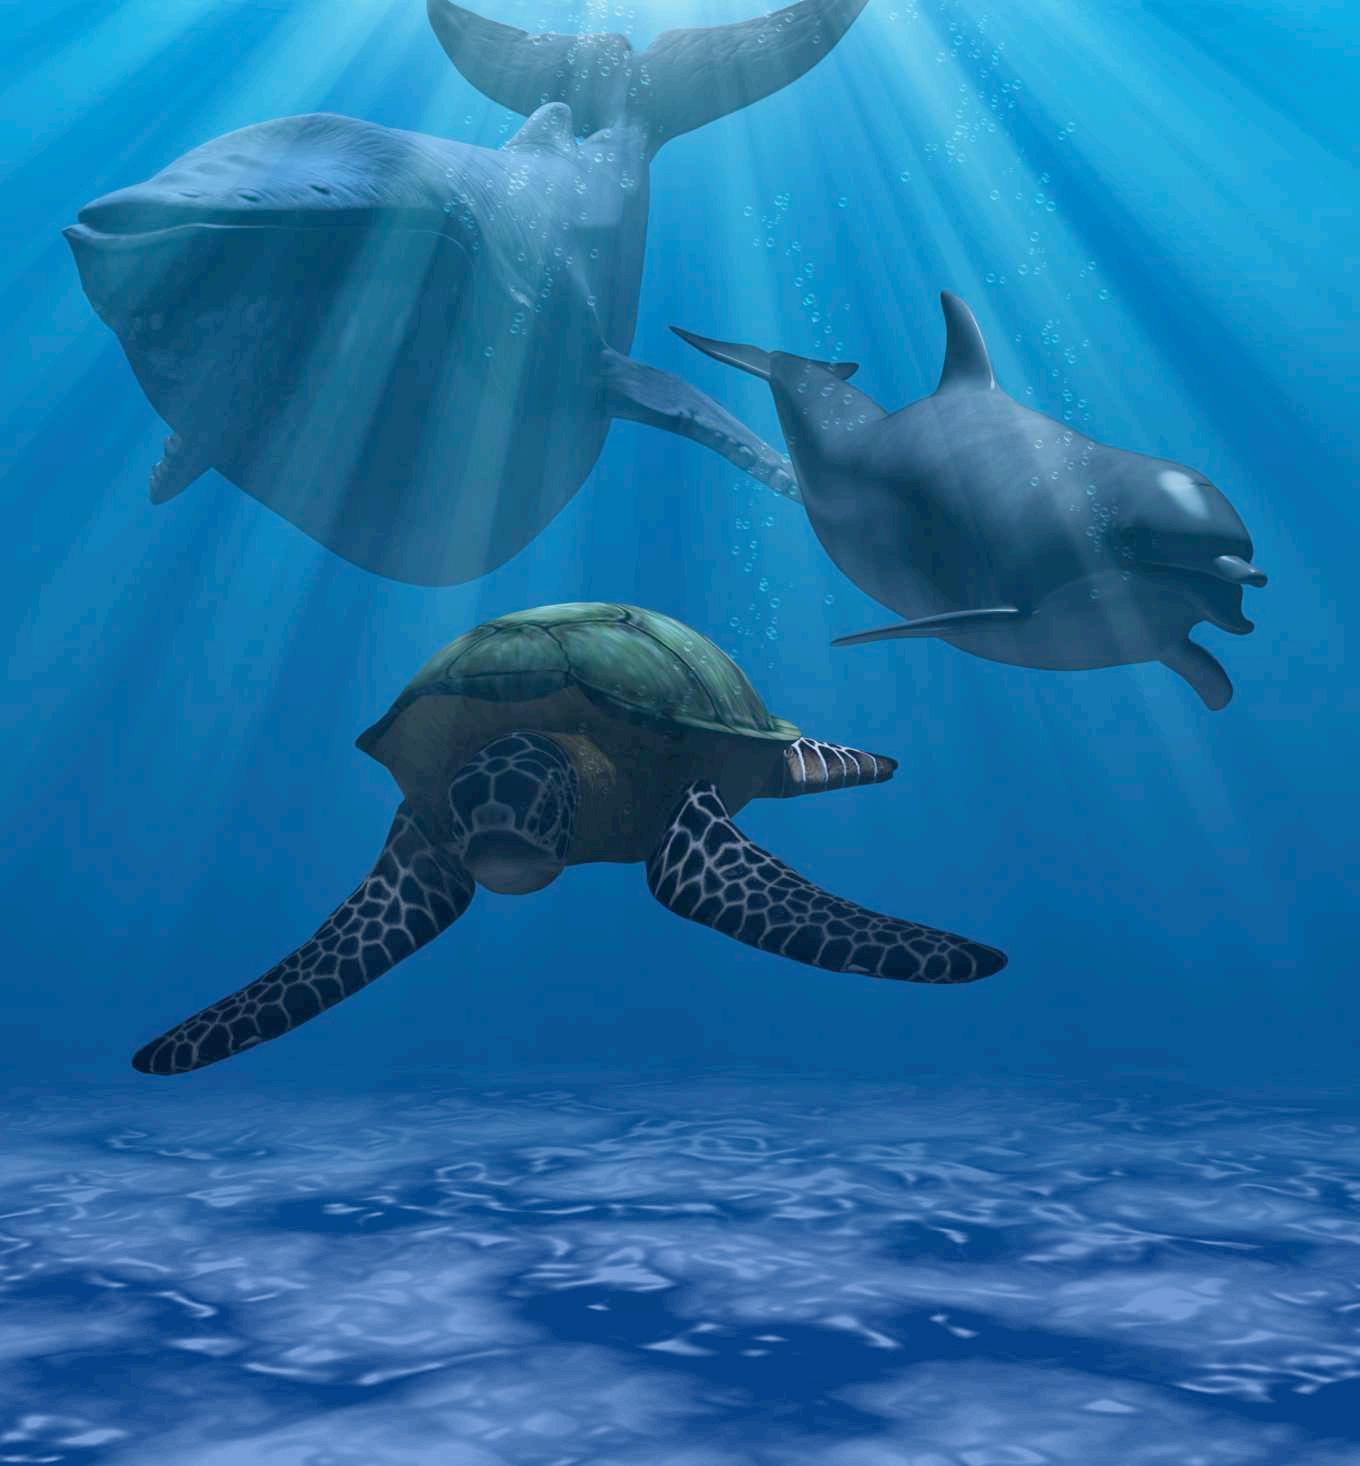
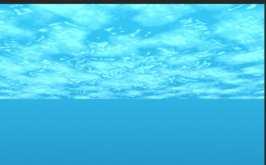
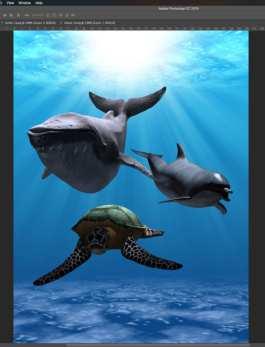
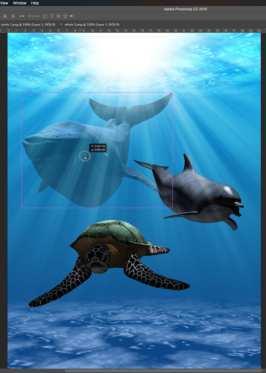
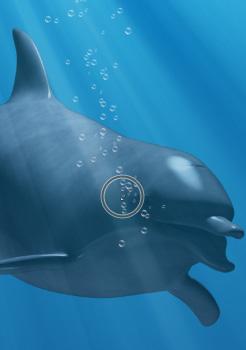
AFTER
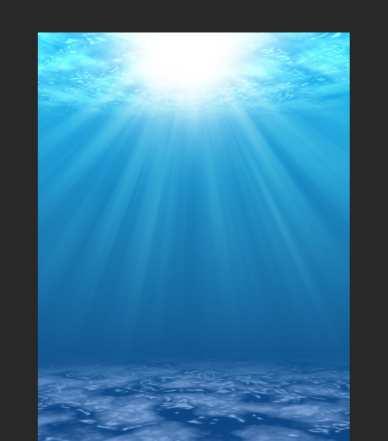
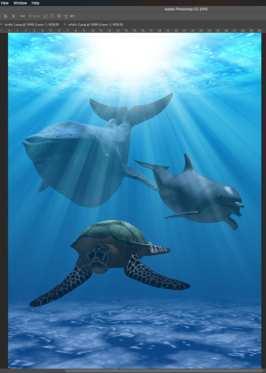
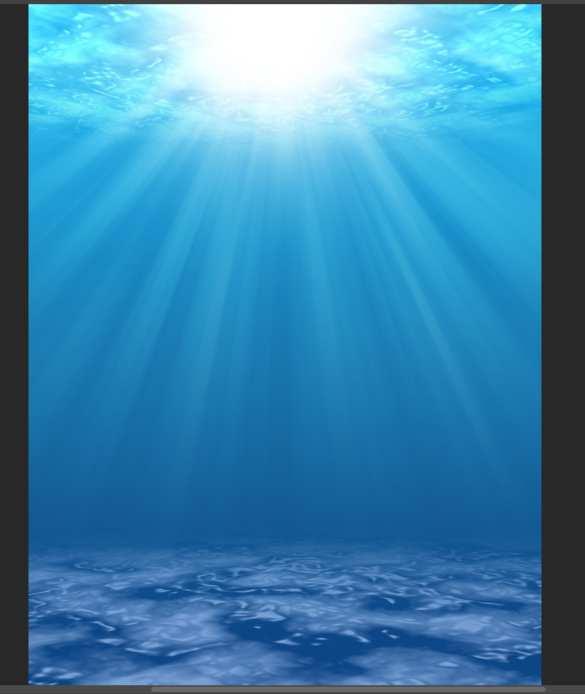
BEFORE
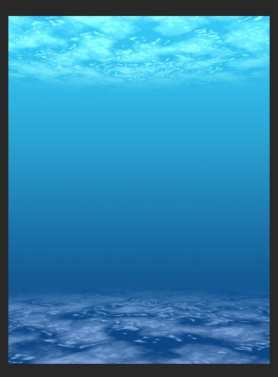
Some lucky people are able to take a camera underwater and capture the beauty of the seabed with all its life and colour. Most of us however, are not able to grab a wetsuit, camera and pressure housing, before diving into crystal clear, blue seas to photograph what’s around us, we can only dream of what it must be like. Fortunately, Photoshop give us the tools to create an underwater scene from scratch and you don’t even have to get your feet wet. This fun little tutorial will show you how to set up the basic environment into which you can add your favourite marine life. There are a number of websites that offer free images for personal and commercial work so you’ll have plenty of choice. Let’s dive in.
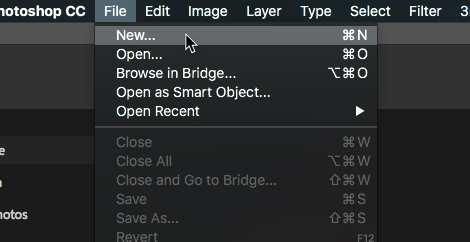
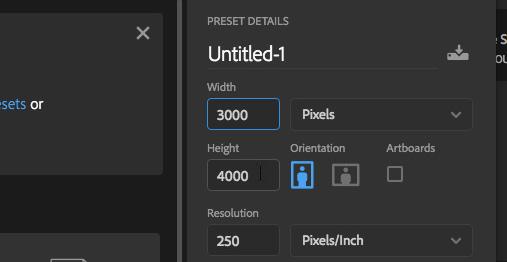
01 First, open Photoshop and go to File > New (Cmd + N) to create a new document. In our example, the scene will be 3000 pixels wide by 4000 pixels high, but you can work with whatever size suits you. Next, you are going to need some ocean.

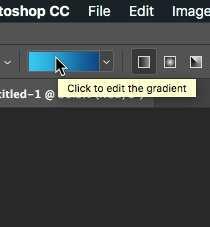

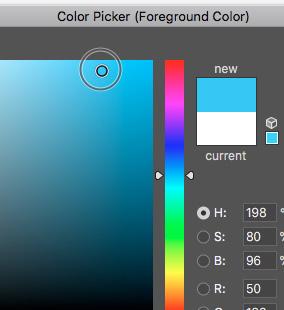
03 Next, choose the Gradient Tool from the toolbar and click the Gradient Editor in the top left of your screen to open it. Confirm that you have the Foreground to Background option selected as your gradient colour type and then click OK to continue. 02 Click on your foreground colour in the toolbar and it will open the Colour Picker. Select a nice light blue for your foreground, then click on the background colour in the toolbar and choose a strong, deep blue that contrasts well with the lighter colour.

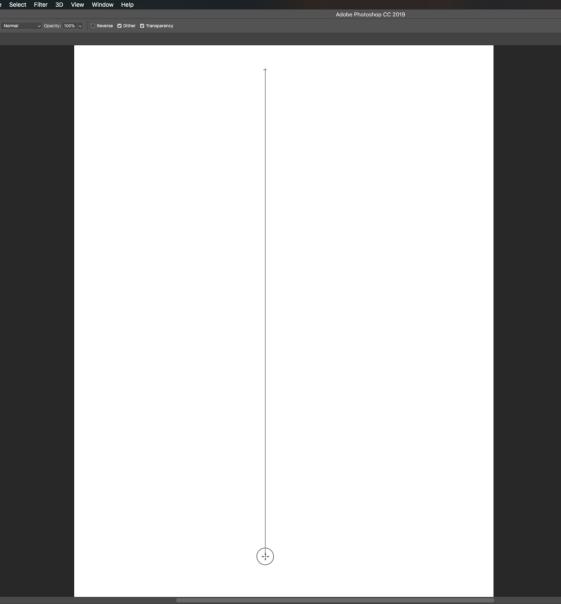
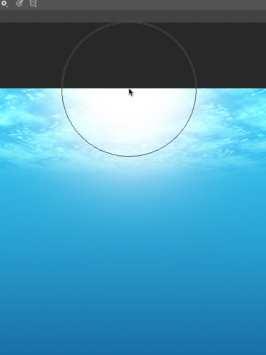
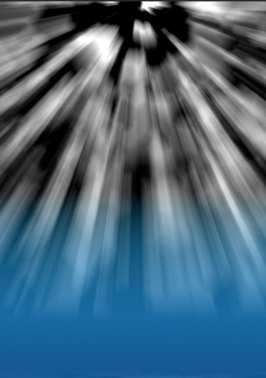
04 Left-click and hold your cursor at the top of the document then drag downwards to the bottom of the page, a vertical line indicates the direction of the gradient. If you hold Shift, you can constrain the cursor to 45-degree increments, if you wish.
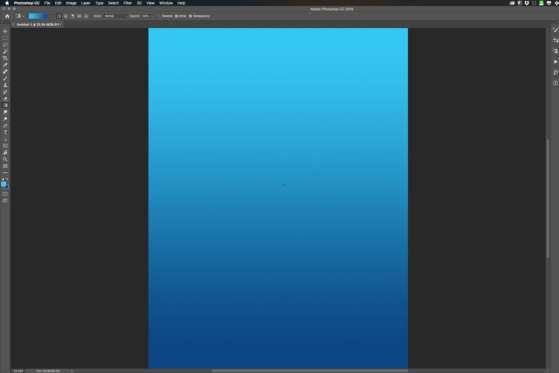
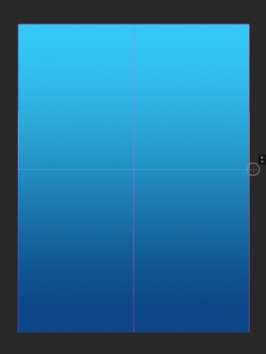
05 When you have the start and end point of the gradient ready, let go of the Mouse button to create a gradient that runs from the foreground colour to the background colour. This is your basic ocean and it should be light blue at the top and dark blue at the bottom.
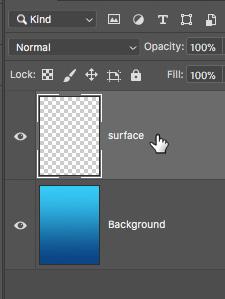
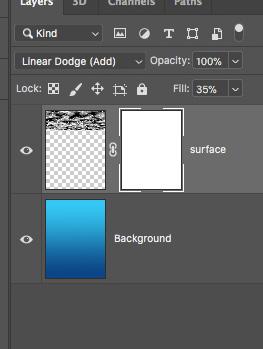
07 Click on the Create New Layer button at the bottom of the layer palette. The new layer will appear in the layer stack where you can name it ‘surface’. We are going to use this layer to create the illusion of the water’s surface as seen from below.
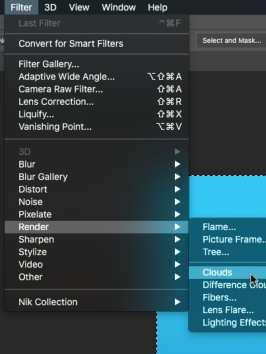
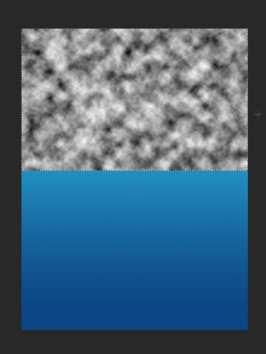
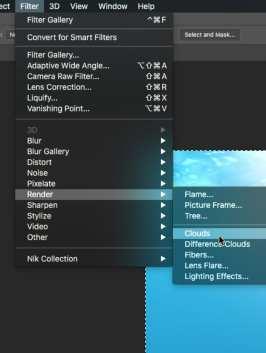
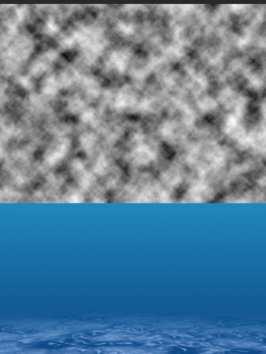
09 Keep the selection you just made active and go to Filter > Render > Clouds. This will fill the selection with a random mottled cloud pattern in black and white. This pattern can be used to mimic the texture of the water’s surface. 06 Hit the D key before you proceed to the next step. This will reset your foreground and background colours to the defaults of black for the foreground and white for the background. You will need this for the next step in the process.
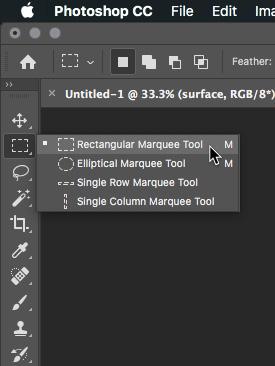
08 Make sure the ‘surface’ layer is active before you go to the next step. Go to your toolbar and select the Rectangular Marquee Tool (M), then click and drag to create a selection on the ‘surface’ layer that roughly covers the entire top half.
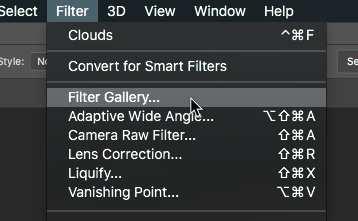
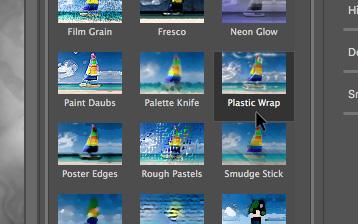
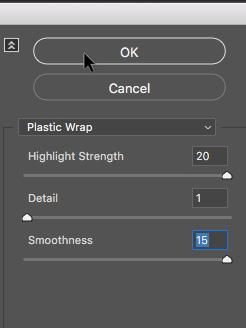
10 In the top File menu, go to Filter > Filter Gallery then choose Plastic Wrap from the Artistic range of filter pre-sets displayed in the righthand panel. From here, make Highlight Strength 20, Detail 1 and Smoothness 15, then click OK to apply the effect to the mottled texture.
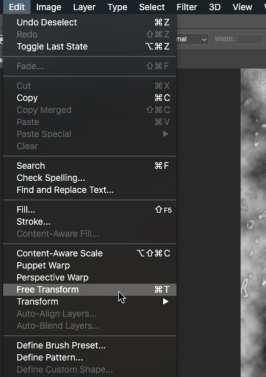
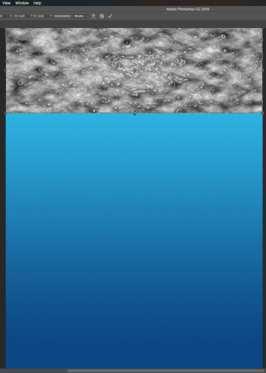
11 Your mottled cloud pattern should now have a rippled highlight effect that can be used to emulate the water’s surface. Go to Edit > Free Transform (Cmd + T) and scale the texture so that it occupies approximately one quarter at the top of the document.
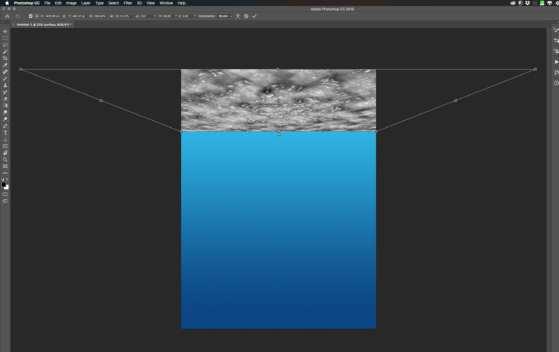
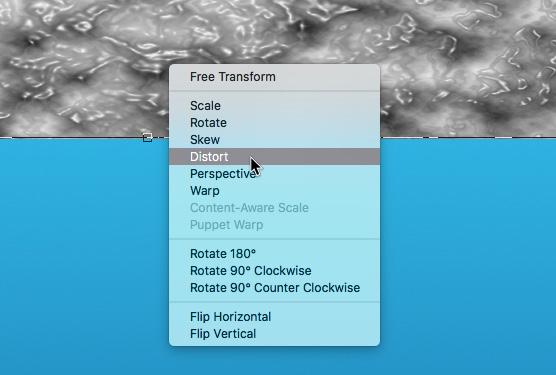
13 Take each of the top, corner control points in turn and drag them outwards to add a perspective effect that will make the ripples look like they are receding into the distance. When you are happy with how it looks, hit Enter to apply the distortion.
15 Press Cmd + D to clear any active selections then click on the Add Layer Mask button, at the bottom of the layers palette, to add a layer mask to the ‘surface’ layer. We can use this mask to blend out the hard edge of the surface texture. 12 If you right-click on the texture whilst the Free Transform tool is still active, you can access a set of additional tools that allow you to shape, alter, rotate and scale the texture. For this tutorial, choose Distort from the Context menu.
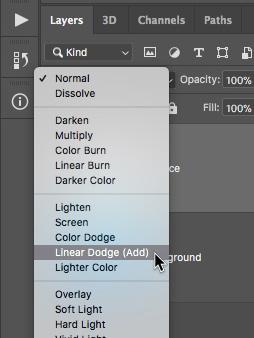
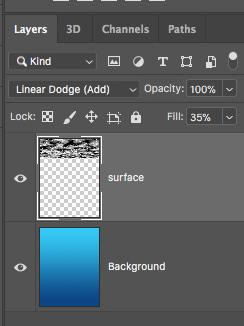
14 Make sure that the ‘surface’ layer is still active and then go to the Blend Mode menu at the top of the layer palette. Click on it and choose Linear Dodge (Add) as your blend from the menu. Then make the layer’s Fill value about 35 per cent.
16 Go to the toolbar and select the Brush Tool (B), choose a large, soft black brush. Make sure the ‘surface’ layer mask is active (not the image) and paint with your black brush on the mask along the hard bottom edge of the surface texture to blend it out.
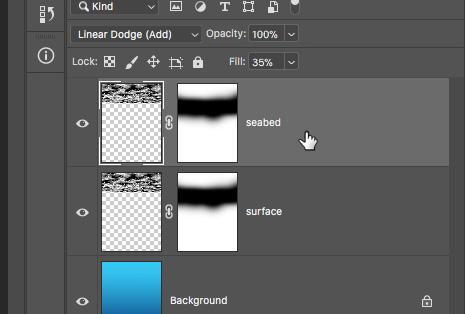
17 The ’surface’ layer texture you’ve made can also be used to create the seabed. Press Cmd + J to duplicate the ‘surface’ layer and name the resulting copy ‘seabed’. Make sure this is at the top of the layer stack and that it is the active layer.
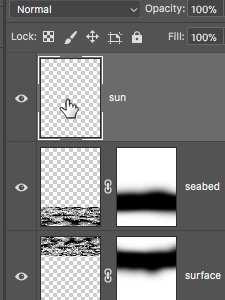
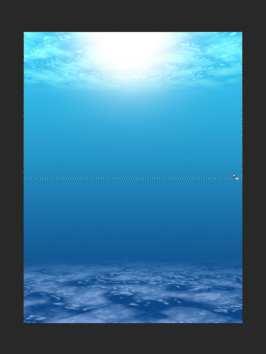
19 Now, for the addition of some lighting: Create a new layer called ‘sun’ and make sure it is the top layer. Set your foreground colour to white, press B to activate your Brush Tool and then use a large, soft white brush to paint a bright glow on the water’s surface.
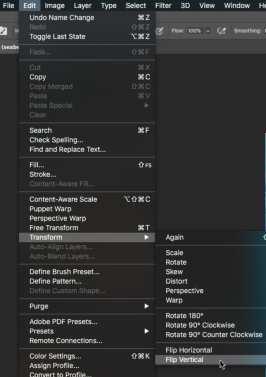
21 Go to Filter > Render > Clouds, then fill the selection with the random black and white cloud texture, as done previously in step 9. Next, we can use a quick, simple little trick to create some convincing atmospheric light rays. 18 Go to Edit > Transform > Flip Vertical, to flip the layer upside down. Press V to activate your Move Tool or select it from the toolbar and then drag the ‘seabed’ layer down to the bottom of the image. Feel free to scale and stretch it until you’re happy with it.
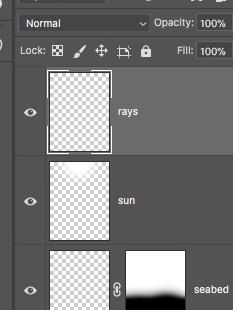
20 Next, create another layer called ‘rays’. From the toolbar, select the Rectangular Marquee Tool (M) and use it to click and drag a selection area that covers the entire top half of the ‘rays’ layer, this is where we’re going to add some more light effects.
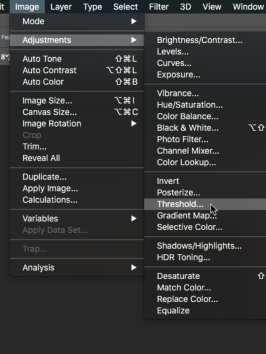
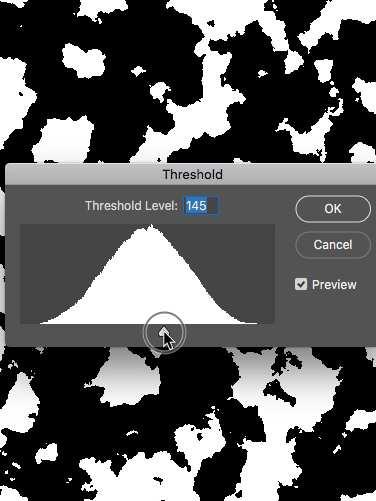
22 Go to the File menu and choose Image > Adjustments > Threshold, the texture will be reduced to black or white with no grey tones, now adjust the Threshold Level slider until you have a roughly equal amount of black and white areas.


23 Press Cmd + D to clear any active selections, then go to the File menu and choose Filter > Blur > Radial Blur. Set the Amount to 100, the Blur Method to Zoom and Quality to Best, now click and drag the Blur Centre to the top, central position.
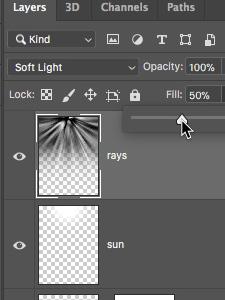
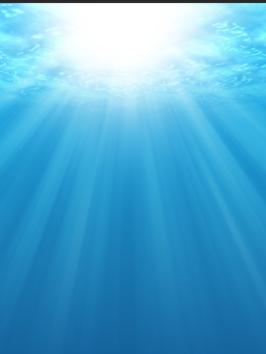
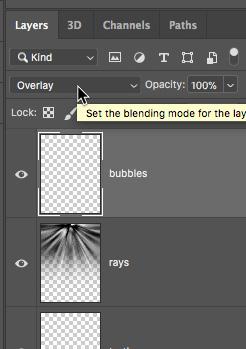
25 Set the ‘rays’ layer Blend Mode to Soft Light. Set the Fill value of your ‘rays’ layer to about 50 per cent to create the effect of sunlight filtering down through the water. If you want, you can alter the scale and position of the rays to suit.
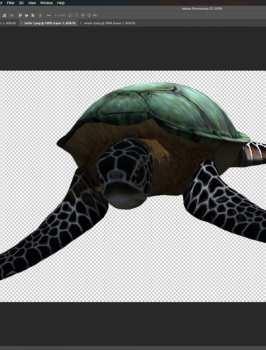

27 In the case of our own example, go to ‘turtle 1.png’, press Cmd + A to select all, then press Cmd + C to copy it. Go back to your underwater scene and press Cmd + V to paste the copied creature into your document. Name this new layer ‘turtle 1’. 24 When you hit OK, the black and white mottled texture will be blurred. It will need to be blurred a number of times for the best effect, so press Ctrl + Cmd + F (Cmd + F on older versions of Photoshop) to repeat the last action, now we have the basis of our light rays.

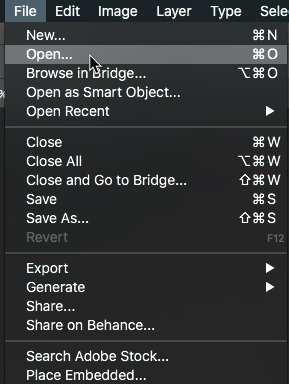
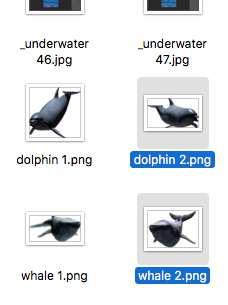
26 So far so good, but it’s looking a bit empty down here, we need some aquatic life to make it look more convincing, so now go to File > Open and navigate to where you’ve stored any images for your scene. Select them and click Open.
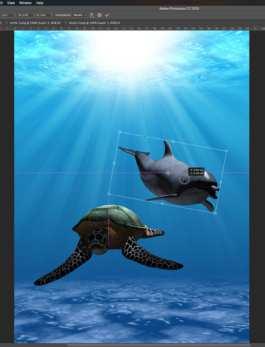
28 Repeat the process with your other creatures, then arrange and scale them until you are happy with them. At the moment, they look too obviously pasted on top of the image, so we need to make them look a more convincing part of the world that has been created.
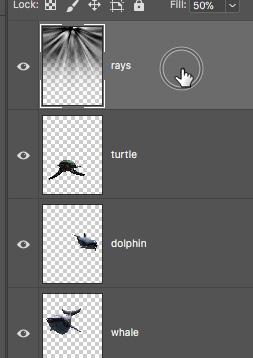
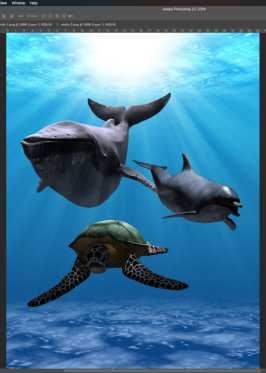
29 First, click and drag the ‘rays’ layer to the top of the layer stack so it is above the sea creatures. Now that they are above everything in the document, the light rays interact better with our aquatic friends as they slant across the surface of their bodies.

31 Our foreground ‘dolphin 1’ can have a layer Opacity of about 70 per cent. This simple trick creates the feeling that the dolphins are receding into the murky depths of the water and helps blend their colours into the watery scene around them.
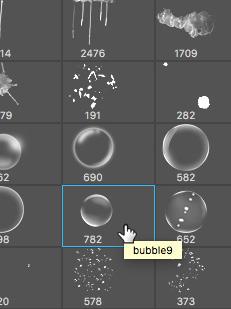
33 Go to your toolbar and make sure your foreground colour is set to white then go to your Brush Tool and choose your bubble. Now, we need to set the brush to randomly scatter bubbles for a more convincing, less uniform effect. 30 Another little trick to create a feeling of depth on a simple blue background such as this, is to click on the ’whale’ layer and make its Opacity about 30 per cent. Make the ‘dolphin’ layer Opacity about 50 per cent. Watch out for the creature’s outlines overlapping.
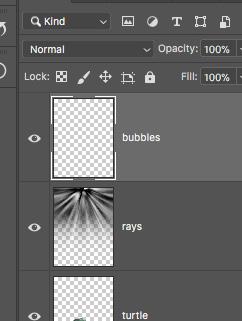
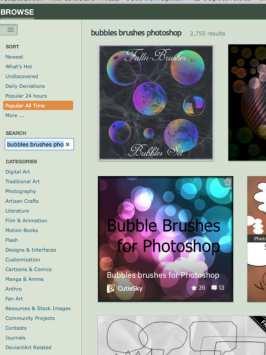
32 Next, create a new layer called ‘bubbles’ at the top of the layer stack; here we will add some bubble effects. You can obtain some great free brushes to use at www.deviantart.com. Just search for ‘bubbles brushes Photoshop’ and install them by clicking their ABR file.
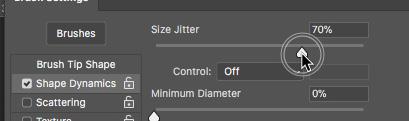
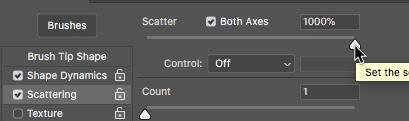
34 From the Brush Settings fly-out palette, click on the Shape Dynamics option and make the Size Jitter value about 70 per cent. Click on Scattering next, then check the Both Axes button and make the Scatter value 1000 per cent.
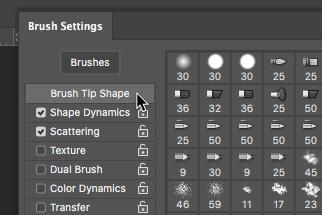
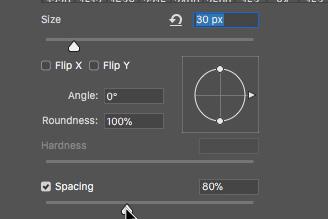
Now click on Brush Tip Shape and make Size about 30px and Spacing about 100 per cent. You will see a preview window that shows how your bubbles will be spaced when you use the brush in your scene. You can obviously tweak these settings to your own taste.
35 Finally, you can now add a scattering of bubbles to the ‘bubbles’ layer, simply set the ‘bubbles’ Blend Mode to Overlay and blend them in. If you add too many bubbles, you can always press Cmd + Z to undo your brush strokes and with that, your scene is complete.
36
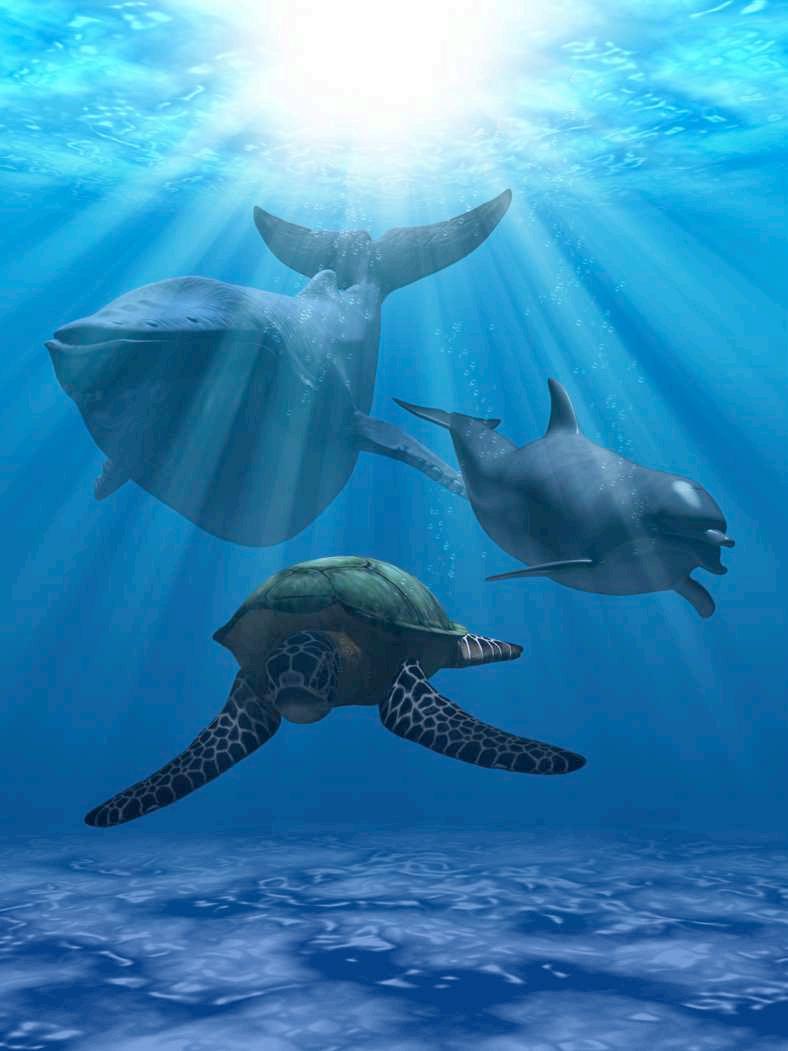
Your own aquatic world
Photoshop gives you your very own deep blue sea.