3 minute read
Using the crop and straighten tool


Using the Crop & Straighten Tool
Even the most careful photographer will sometimes rush a shot and take a photo that’s not quite level, with either a sloping horizon or a leaning building. Fortunately, Lightroom offers several effortless ways to correct those faults.
Advertisement
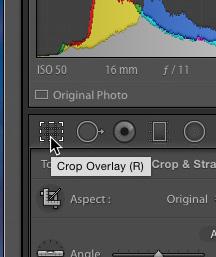
1 The main tools that you’ll need to straighten your shots are found in the Crop & Straighten tool, located on the editing tools panel that we looked at before. Click on the tool and you can see a grid with corner handles appear over your image, as well as a panel of other tools and options appear below the panel. Note the icon change in the 2022 update.
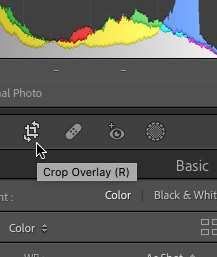
2 If you place your mouse cursor anywhere on the grey border of the workspace outside the image, you can see that it changes to a double-ended curved arrow, indicating rotation. Click anywhere in this area and you’ll see a grid appear over your image. You can simply drag the image around until your horizon lines up with the grid. 3 A quicker and more precise way to straighten a tilted horizon or leaning vertical is to use the Straighten Tool. You’ll find this on the left-hand side of the options panel below the edit tool bar when you click on the Crop & Straighten tool. It’s the circular icon with a picture of a spirit level in it. Click on this icon to activate the tool.

4 To use the Straighten Tool on a tilted horizon, simply click on one end of the horizon line and drag a line along it. As soon as you release the Mouse button Lightroom will automatically rotate the image to make the line horizontal. Note that it also constrains the rotated image within the original size of the frame.
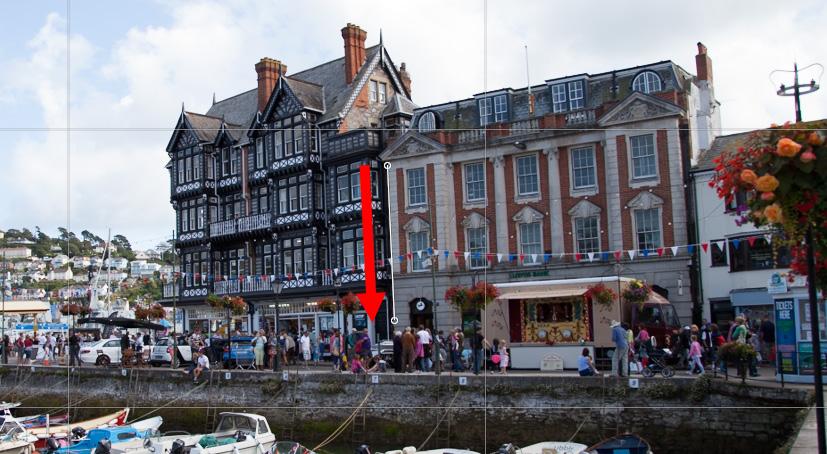
5 The Straighten Tool also works on leaning verticals. To save a toppling building, activate the tool by clicking on the icon and then click and drag a line up or down a line on the image that should be vertical, such as the side of a structure. Again, as soon as you release the Mouse button the image will automatically be straightened.

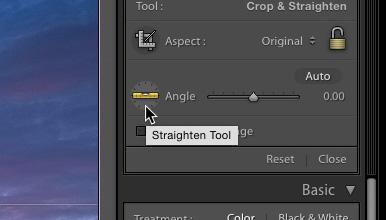
6 The Crop & Straighten tool offers a third option for rotating your image. Next to the Straighten Tool you’ll see a slider. If you drag this slider right and left, you’ll see that it rotates the image clockwise and anticlockwise. This is useful if you want to tilt an otherwise level shot. You can also enter the degree of tilt numerically.
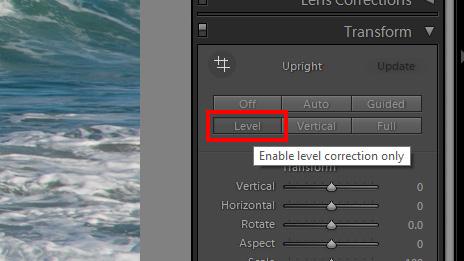
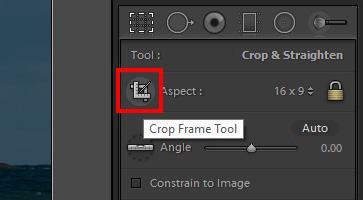
7 There is yet another option for levelling your shots. If you open the Transform tools you’ll see a panel of buttons in the options panel, including one marked Level. If you click on this button, Lightroom will attempt to automatically straighten your image. Note that this is based on pattern recognition and is therefore not 100 per cent reliable. 8 Cropping your image to improve composition is very simple. When you open the Crop & Straighten tool it defaults to the crop tool straight away; but if you’ve previously been using the Straighten tool you’ll need to click on the round icon with a picture of a darkroom crop-frame tool to switch the tool back into cropping mode.

9 You’ll see a crop frame grid overlay your image, with drag points in each corner and in the middle of each side. When you click on and drag one of these points in any direction you’ll see the cropping frame move, with the areas outside it slightly greyed out. It also includes a “rule of thirds” grid to help with classical composition.
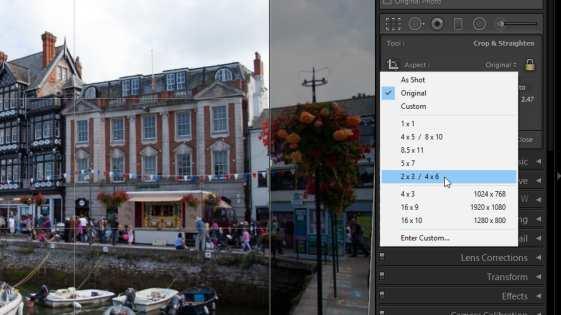
10 You can crop to a specific aspect ratio or image size by clicking to the right of where it says Aspect to open the context menu. You can select a preset ratio or size or enter your own manually. Note that the padlock icon next to the menu changes, to indicate that the aspect ratio is now locked to the dimensions that you’ve set.