5 minute read
Add your own lens flare


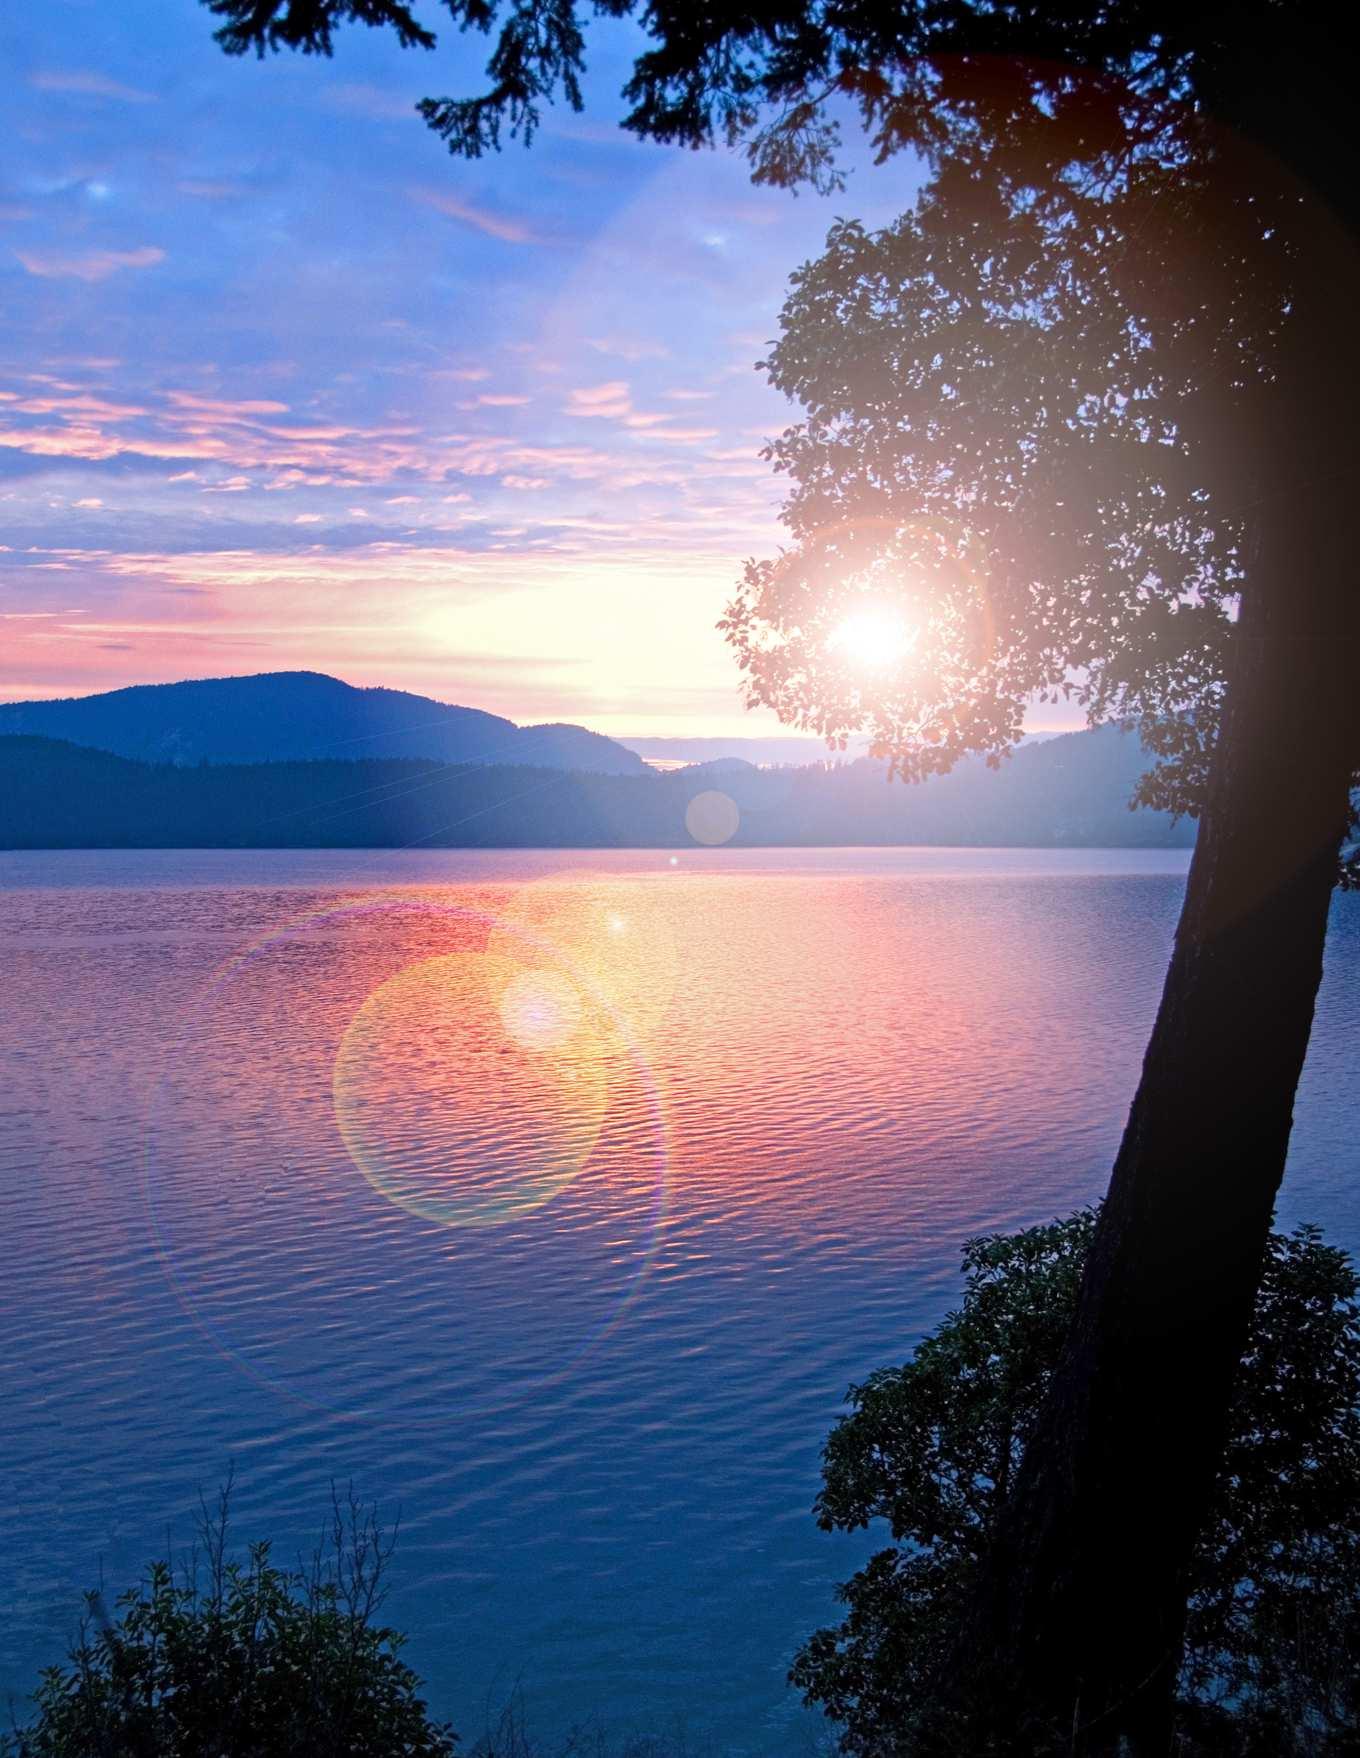
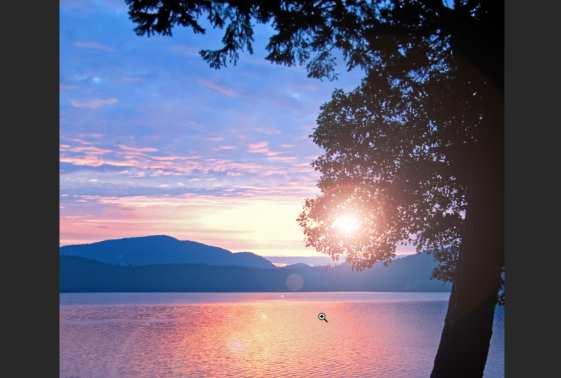
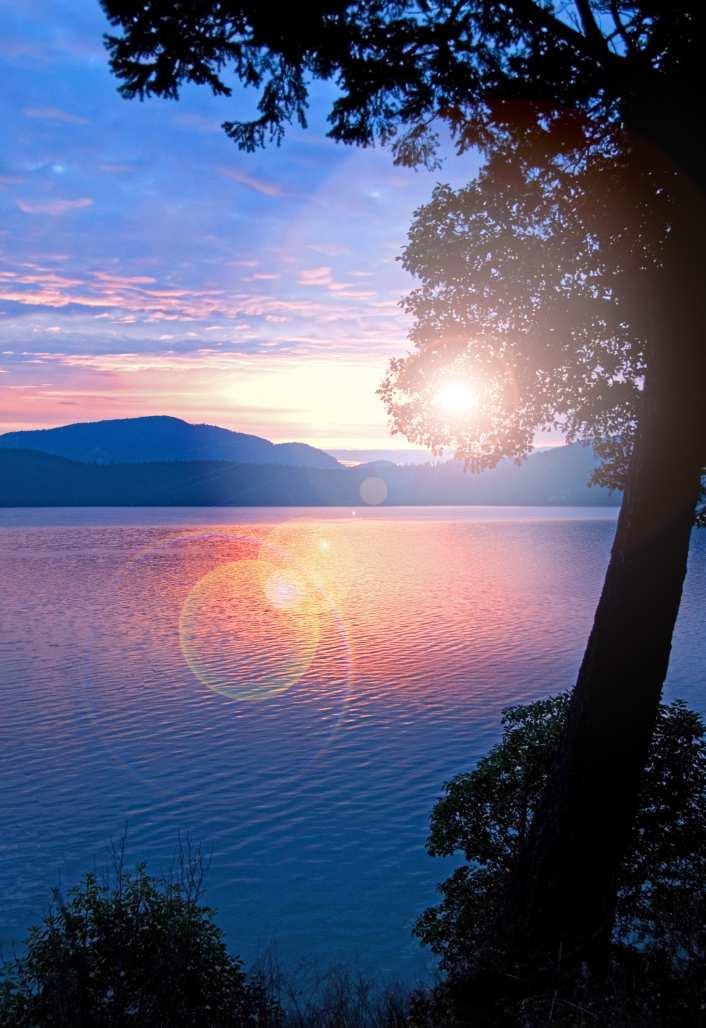
AFTER
A quick guide to creating a non-destructive lighting effect
Advertisement
Lens flare is one of those peculiar lighting effects that people either love or loathe. It is quite ironic that photographers will do whatever they can to avoid getting lens flare in their shots, whereas it is now very common to see it added back in for dramatic effect. If you’ve ever watched any television show or movie by J. J. Abrams, you’ll be aware that you can’t go 30 seconds without some form of post-worked lens flare punctuating a scene. So, let’s have a quick look at how to add lens flare, but more importantly, how to do it non-destructively.
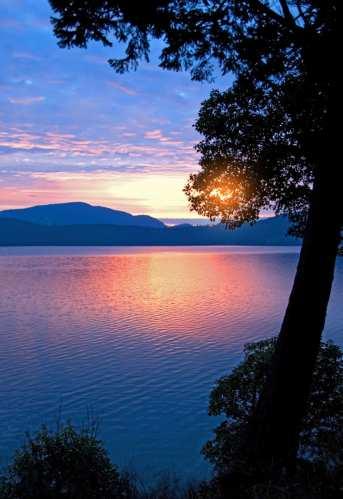
BEFORE
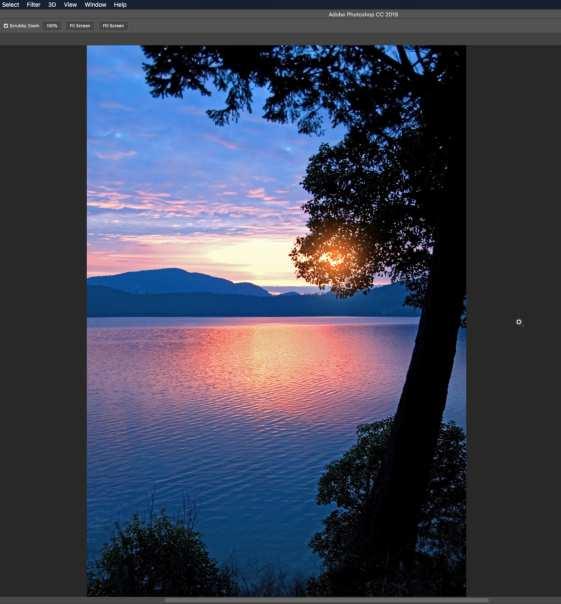
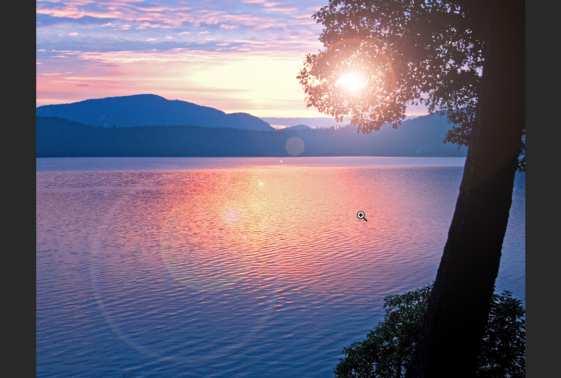
01 We’ll begin with an appropriate image. It will, of course, need to have the sun in it or at least a very bright light source that will appear to create the lens flare we are seeking to add to the image. We’re using a sunset photo with the sun peeking out from behind a tree.
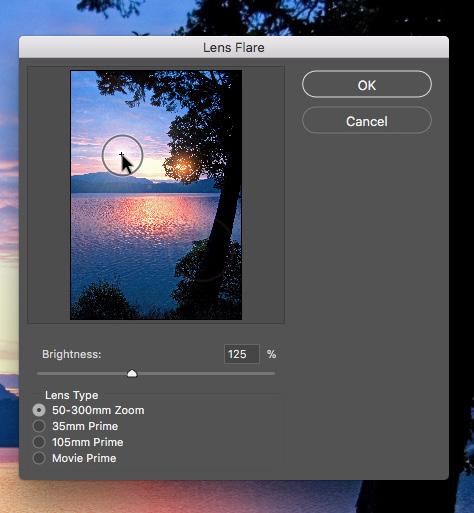
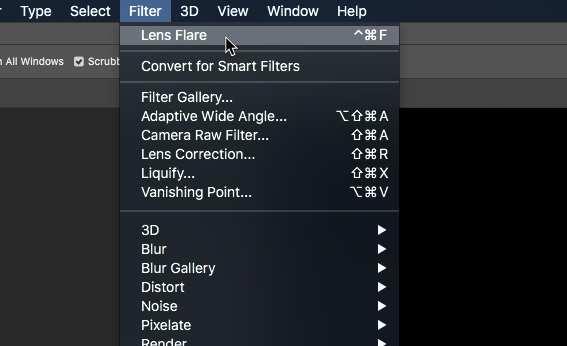
03 Here, you can choose precisely where the flare appears in your image by clicking with your cursor on a thumbnail of your photo and selecting where to place the centre of the effect. You can also choose the brightness and lens type from the options below. 02 Normally, to add the lens flare effect you need to go up to the File menu and choose Filter > Render > Lens Flare. This will open up the Lens Flare dialog box from where you can choose the various settings you prefer to create your lens flare effect on your photo.
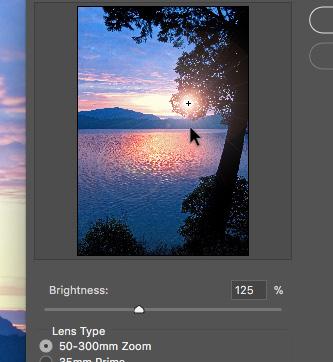
04 We’ve used the 50-300mm Zoom type as it gives a particular flare effect that we like, however you can experiment with the other options as you wish. We’ve also set the brightness to 125% and placed the centre of our flare over the sun as it appears in the sunset image.
05 When you click OK, the flare effect is added to the lake image using the settings you chose and the centre of the flare is positioned on the spot you clicked with your cursor. All well and good, except that now you’ve just merged the flare into the original image.
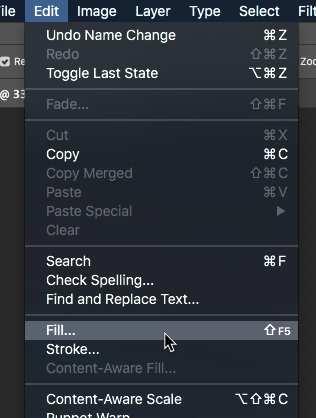
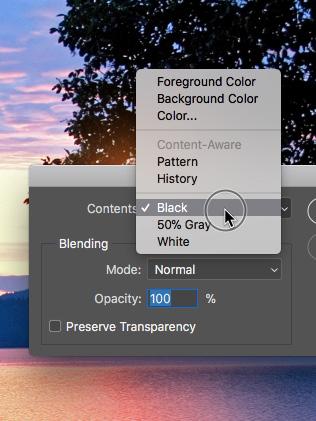
07 Make sure that the ‘flare’ layer is currently active, then go to the file menu and choose Edit > Fill (Shift + F5) and choose 100% Black as your fill colour from the Fill dialog box that appears. Click OK when you are ready to proceed.

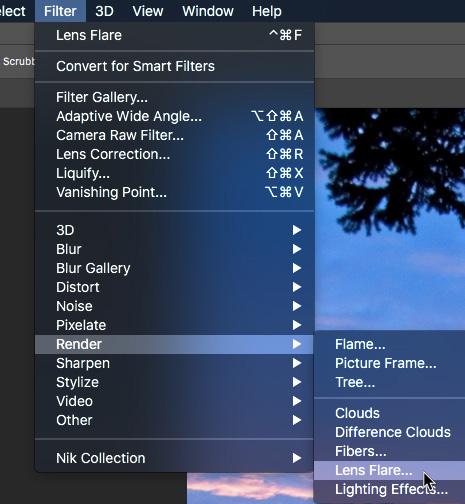
09 Click on Filter > Lens Flare (Ctrl + Cmd + F) and the flare you previously added directly to the image will now be applied to the black ‘flare’ layer. It will also utilise the settings you chose previously, including the placement of the flare. 06 Press Cmd + Z and you will be able to undo the application of that particular lens flare effect. Now, instead of applying flare to the photo directly, click on the Create a new layer button to add a new layer above the lake scene. Name this layer ‘flare’.
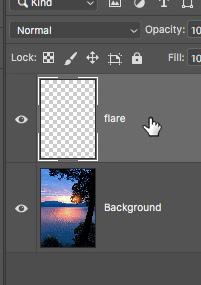
08 The ‘flare’ layer is now filled black. Photoshop has a handy habit of remembering the last effect that was applied and this is something we can use to our advantage. If you go to the top menu and click Filter, you will see Lens Flare listed directly below.
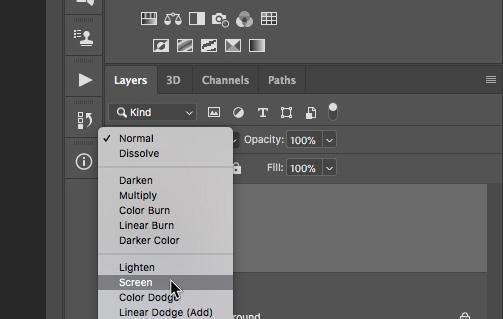
10 Now our ‘flare’ layer can be blended into the main image on the layer below. Choose Screen as your blend mode by clicking the Blend Mode options button at the top of the layers palette and the flare you created is blended into the scene below.
11 Although the flare looks like it is part of the image it is in fact safely on the layer above. Because the effect has been applied to the layer above our beach scene, it is completely non-destructive and does not compromise your original image.
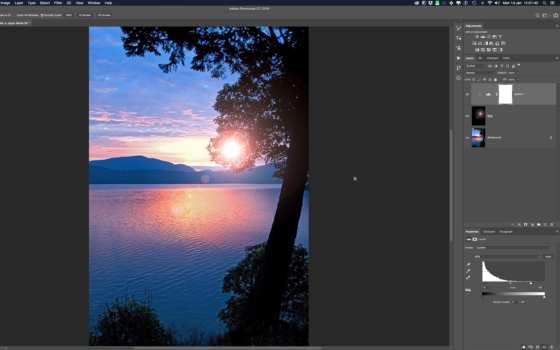
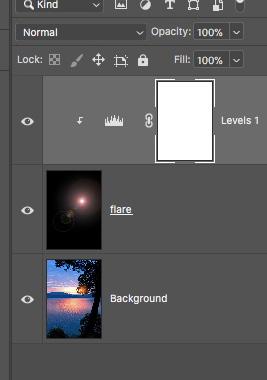
13 There you have it. In no time at all, you have made an image using simple, but effective techniques that make use of layers and blend modes, giving you a little more control of your images and effects. 12 The benefit of doing it this way is that you can move the layer around and rotate it if you want, you can also apply adjustments to the ‘flare’ layer, such as levels to control the brightness and contrast of the lens flare effect, to suit your preferences.

A bright idea for dramatic lighting

Another useful, non-destructive effect for your toolbox.
More Mega Tips
This section offers up a few more mega tips to help you and your image editing workflow step up a gear. Get to grips with some advanced cropping techniques and upgrade your skin retouching skills with some simple, yet useful, tips to make your spot healing even more effective. There’s even a fun easter egg tip to play with.
Contents
70 Bananas, monkeys, coffee and toast 72 Front image cropping 74 Improve your spot healing 76 One image, two windows 78 Transparency from blend