3 minute read
Modifying selections


Modify Selection Border
Advertisement

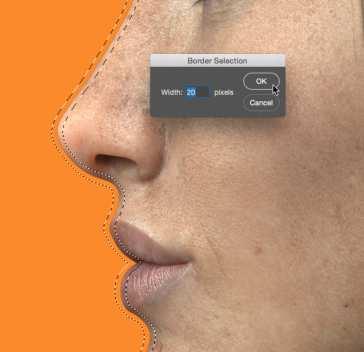
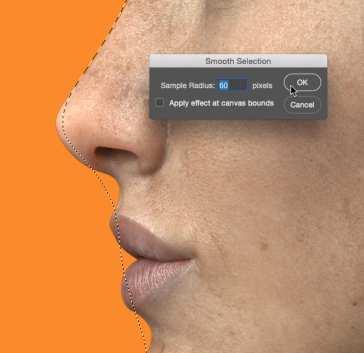
Photoshop has other tools to modify a selection which you’ll find, appropriately enough, in the Select menu, under Modify. The options include: Border, Smooth, Expand, Contract and Feather. They’re all relatively simple, but useful nonetheless. We have some examples to show you. Border converts the single-line selection into a border of the specified width. You can use this selection to create a border around your original selection by using the Paint Bucket tool. Be aware that the border extends an equal amount from either side of your original selection. Smooth removes the kinks and wrinkles from the line of your selection. It’s useful when you’re selecting smooth-edged objects, but it will round off the corners of any irregular shapes. The larger the value of Smooth Selection, the smoother and less detailed the selection becomes.
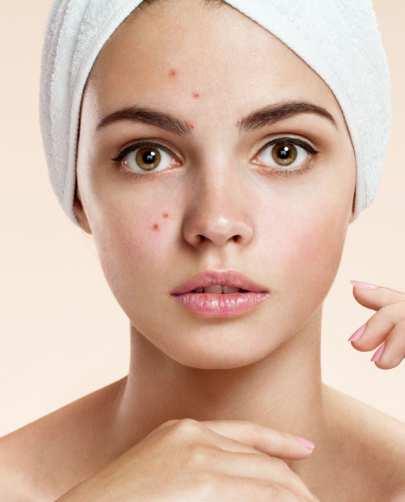
Photoshop’s standard selection tools: the Marquee, Lasso and Magic Wand, are fine for making basic selections of regular, well defined shapes, but they’re not so good at picking out soft-edged or very fine shapes. One thing in particular, that has always been a problem, is the edge of fine or untidy hair. Take this photo for example:
This model has been photographed in a typical studio setting, with good lighting and against a plain background. Photos like this are used all the time for catalogues, advertising posters and the like.
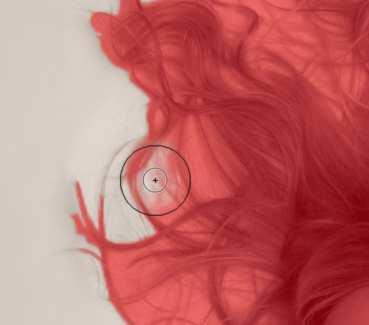
However, in order to fit these needs the model will have to be separated from the background. With a plain background like this, it would be tempting to use a normal selection tool such as the Magic Wand. However if we try it, what we end up with is something like this:
Smooth
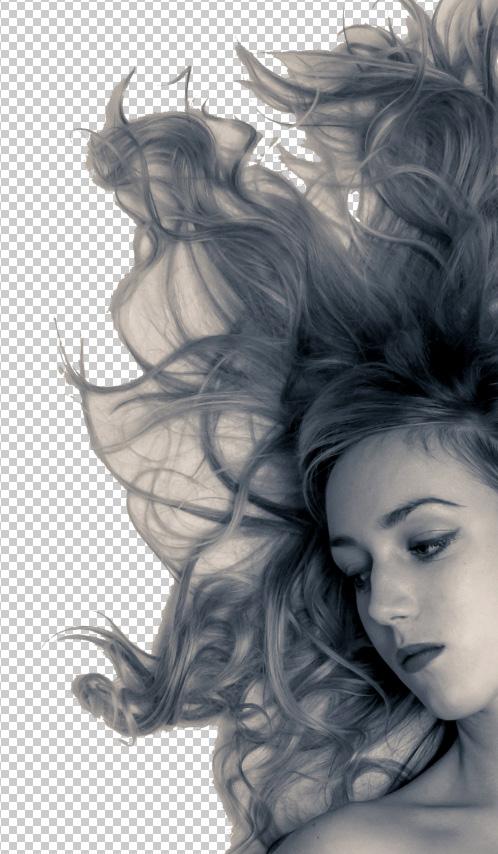

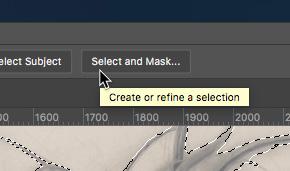
As you can see, the edge around the model’s hair looks terrible. The automatic Magic Wand selection has produced a very jagged edge, because it can’t distinguish between the fine edge of the hair and the background. Fortunately the latest version of Photoshop has a feature called Select and Mask, which is capable of making much finer distinctions. Select and Mask is very easy to use. Starting with a Magic Wand or Polygonal Lasso selection as close as possible to the edge of the hair, or any other soft edge, click on the Refine Edge button on the tool options bar. In the dialog window that opens, in Edge Definition, check the box marked Smart Radius and use the square brackets keys to set the brush size so that it’s large enough to cover the hazy edge area around the hair. Then simply paint around the edge, overlapping both the model and the background.
Expand
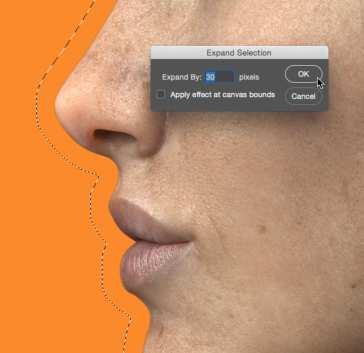
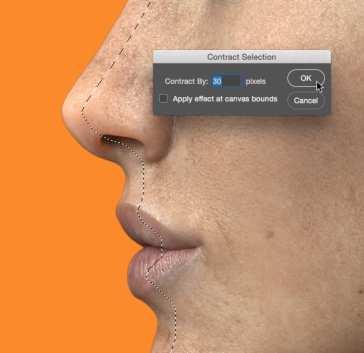
Expand, as the name suggests, expands the size of the selection by the specified number of pixels. The larger the value you expand the selection by, the more the detail and shape of your original selection will begin to decrease as it enlarges outwards. Contract is the opposite of Expand. It shrinks the size of the selection by the specified number of pixels. As with the Expand option, the more you Contract the selection, the more the original selection shape’s detail will become less well defined. We’ve looked at Feather before. It softens the edge of the selection by the radius set in the dialog box. It’s perhaps the most useful option here, particularly if you’re trying to copy and paste the selection into a background. Unlike Smooth, this creates a soft vignette effect.
Contract
When you’ve been around all the edge area that you want to refine, click OK and then wait a few seconds while the program recalculates the edge. As you can see here, the result is a good improvement over the first attempt.
Feather