


PROJECTS & IDEAS TO TRY!!! OVER YOUR EXCLUSIVE SVG! 40 6 STUNNING PROJECTS TO MAKE WITH YOUR EXCLUSIVE GIFT! 20 COMPLIMENTARY DESIGNS HOW TO BUILD A BOOK WITH THE SECRET BOOK SVG FILES HOW TO STAMP & HEAT EMBOSS ONTO FABRIC INSPIRATION • INFORMATION • EDUCATION Issue 21 DIGITAL
in this issue’s...
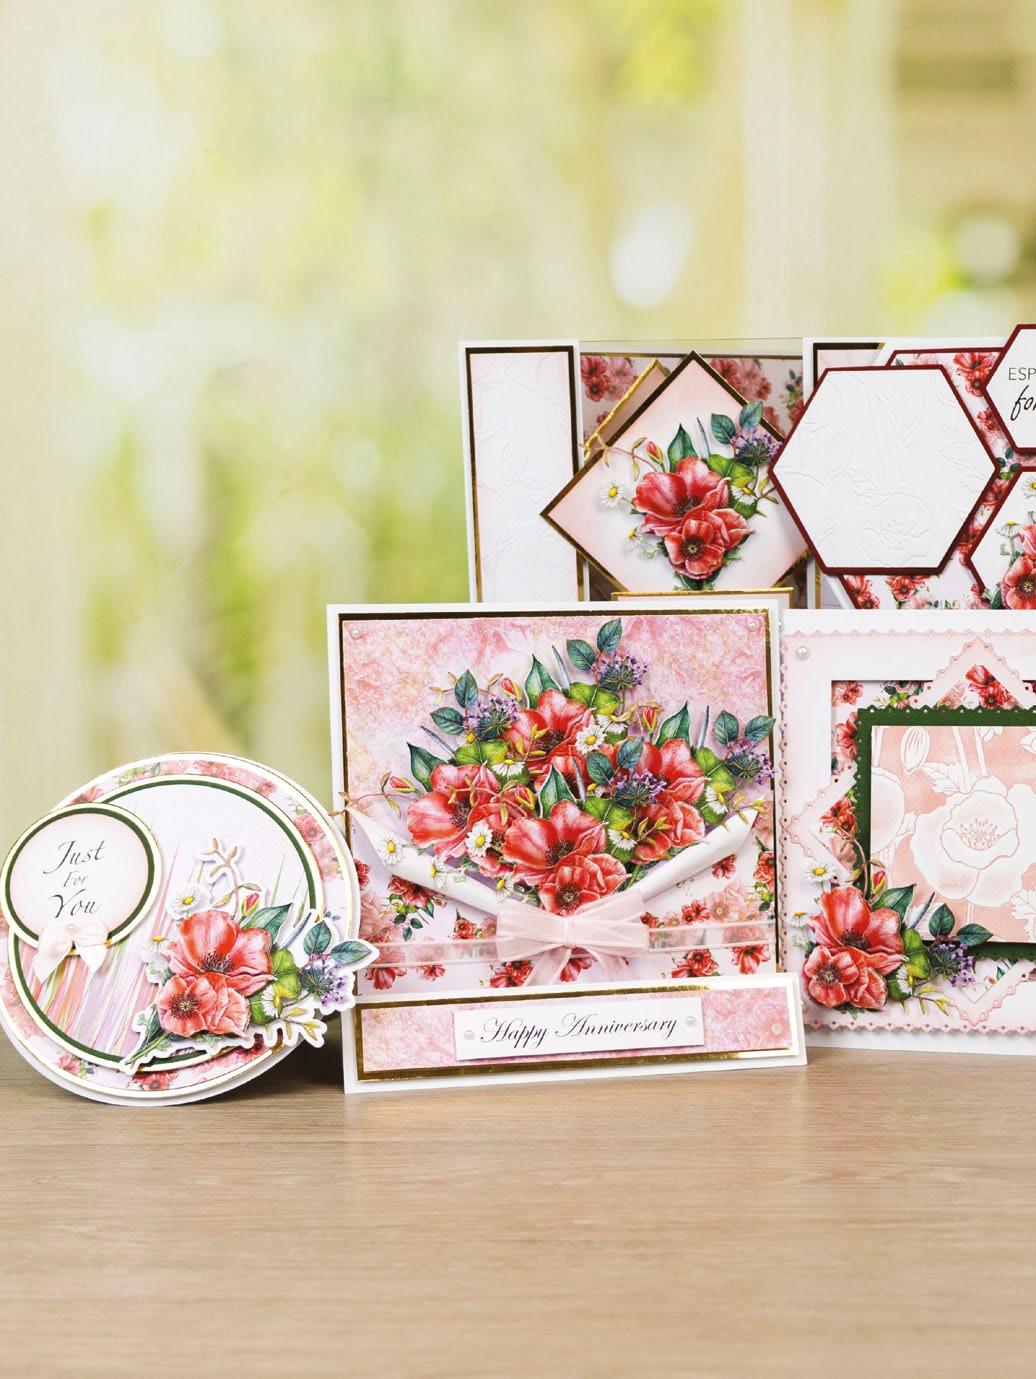
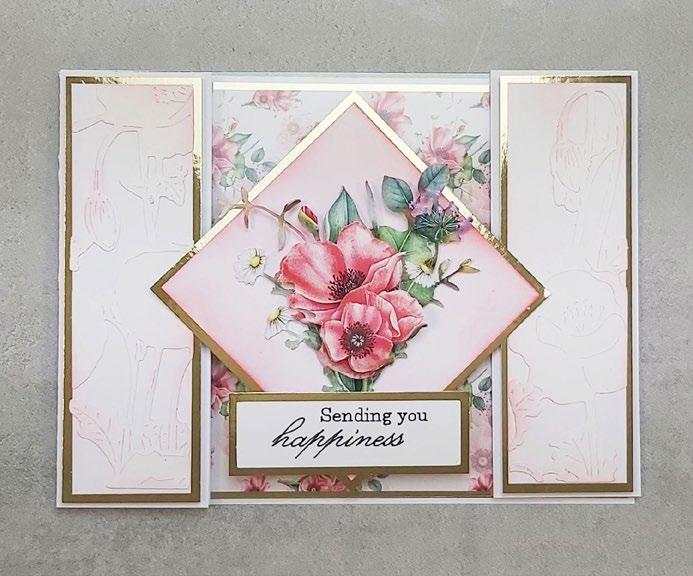
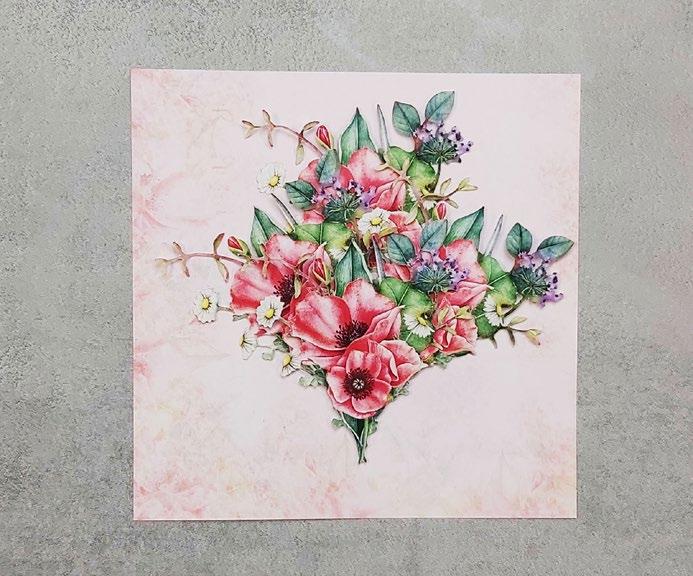
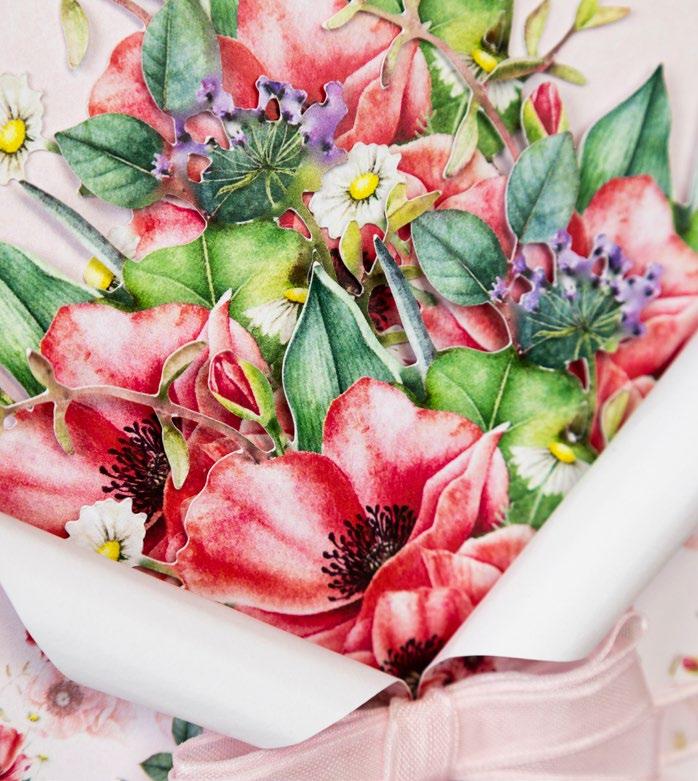
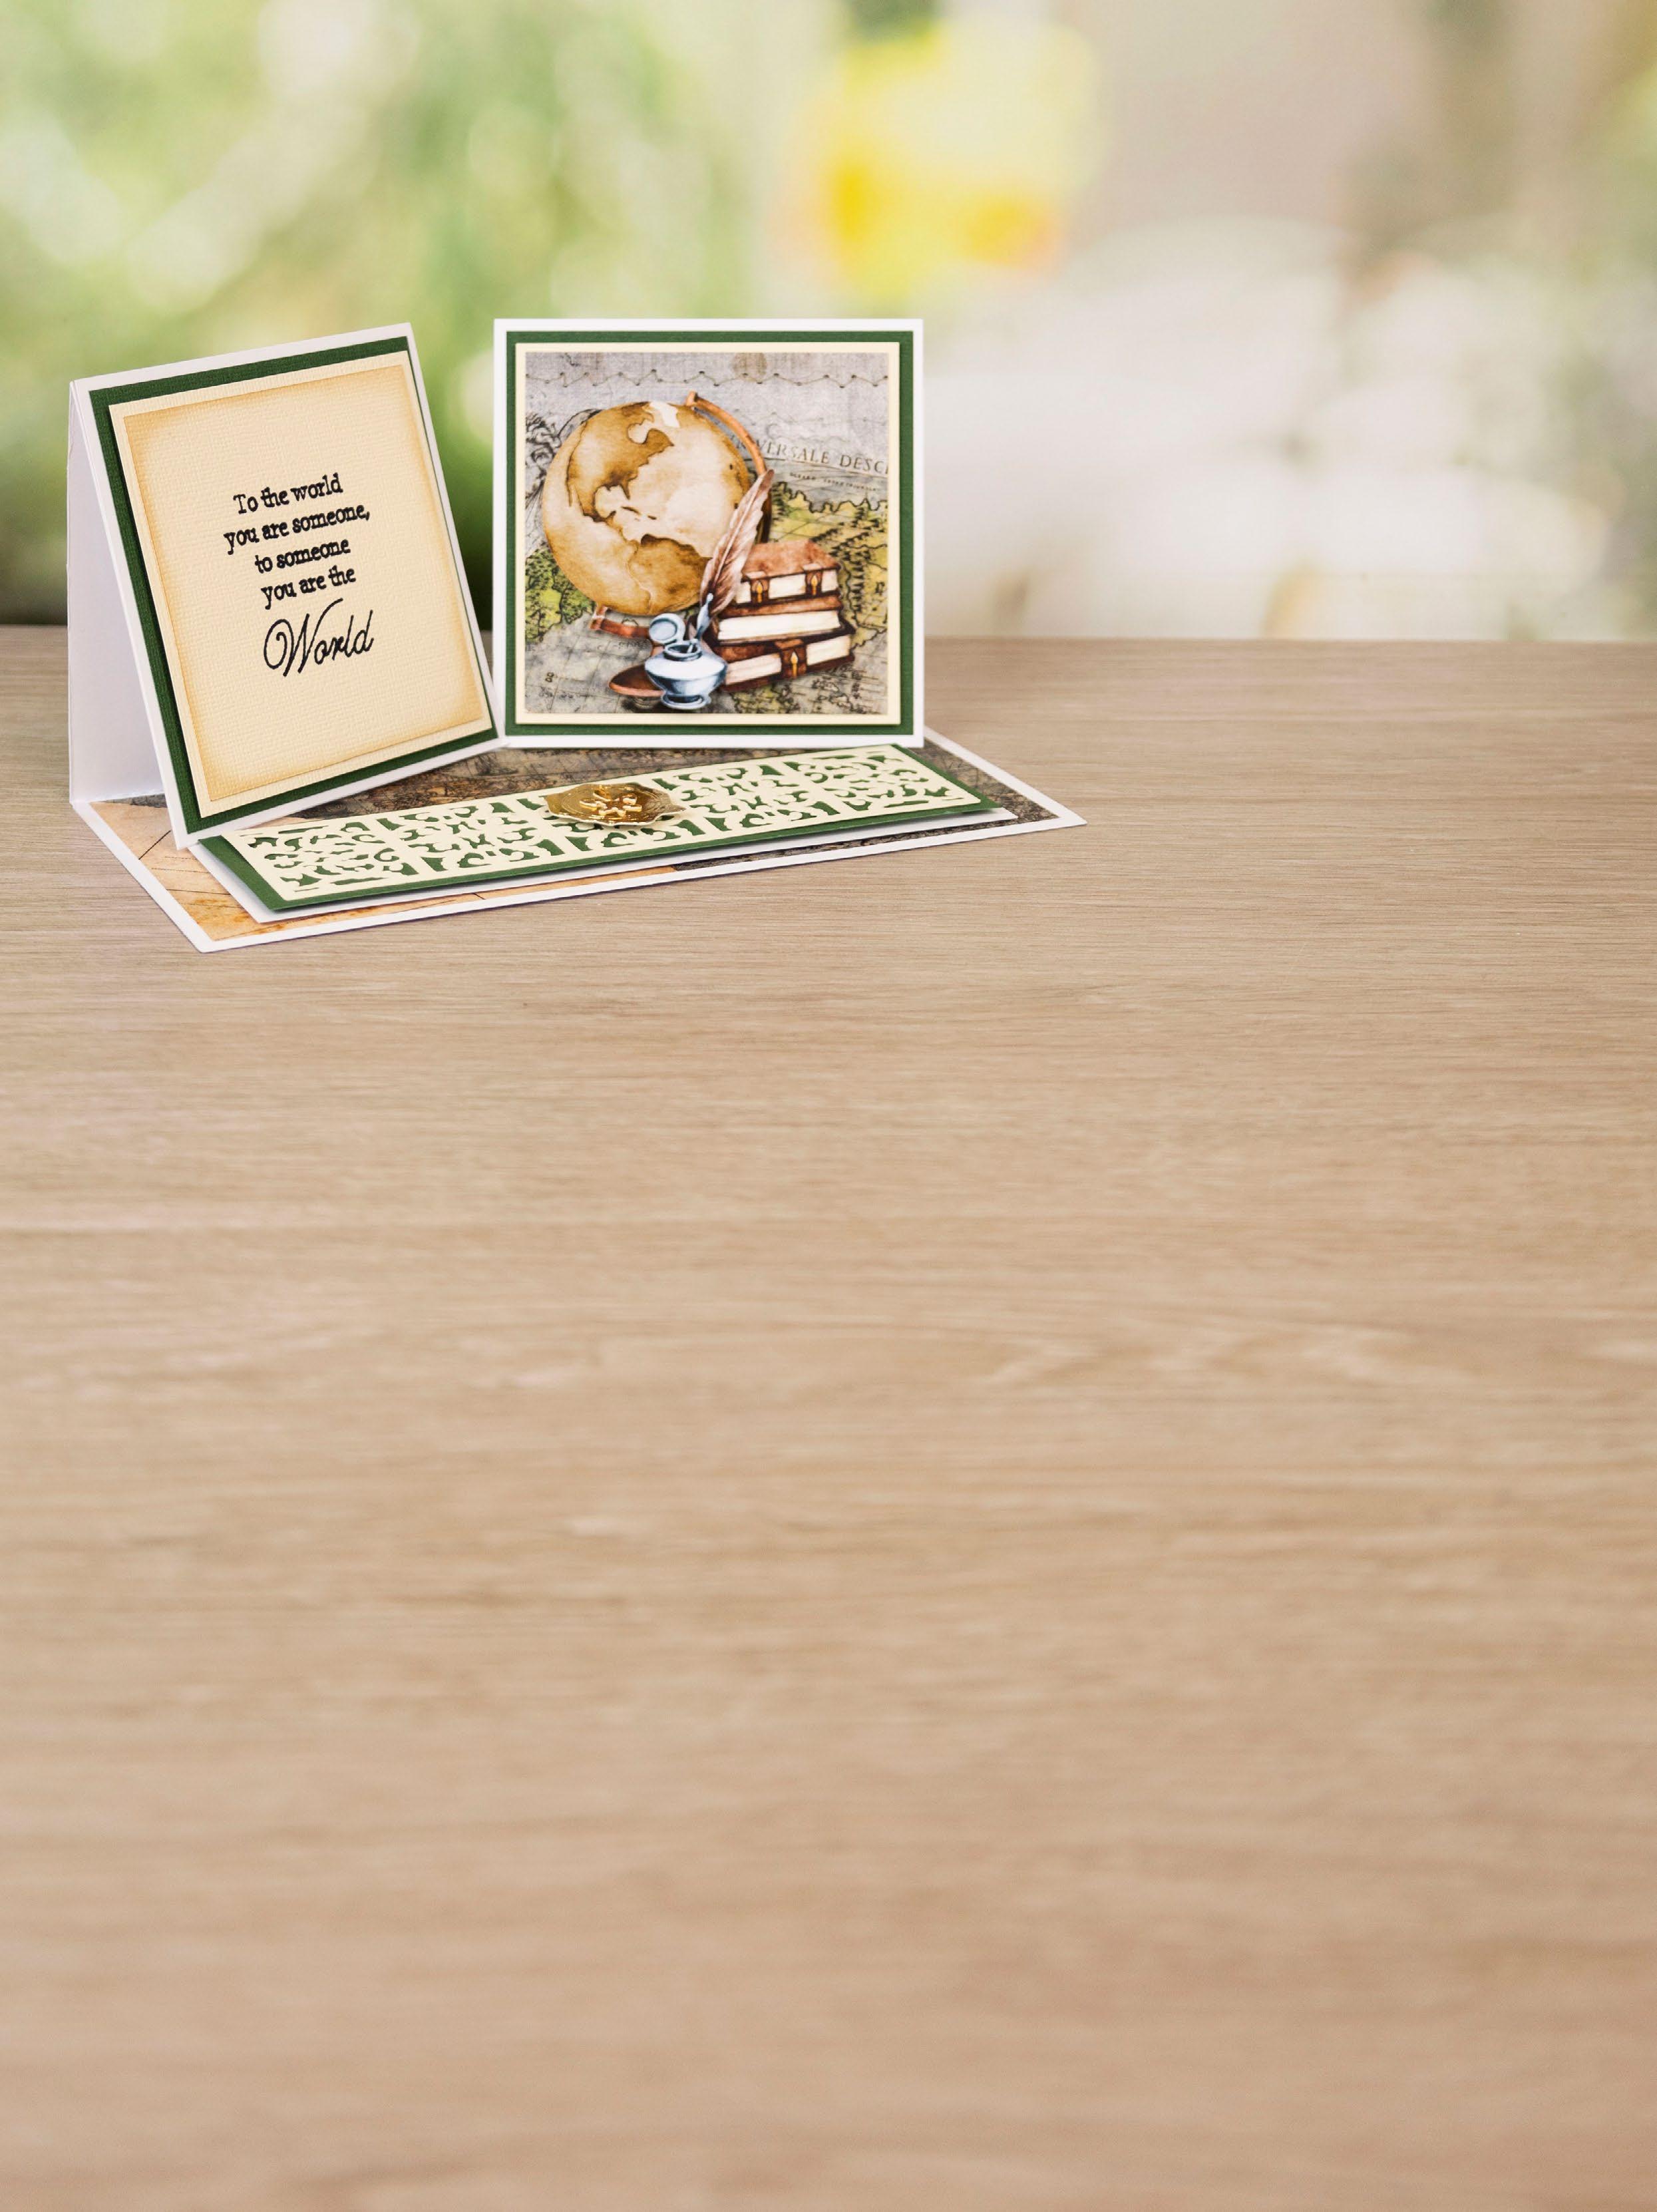
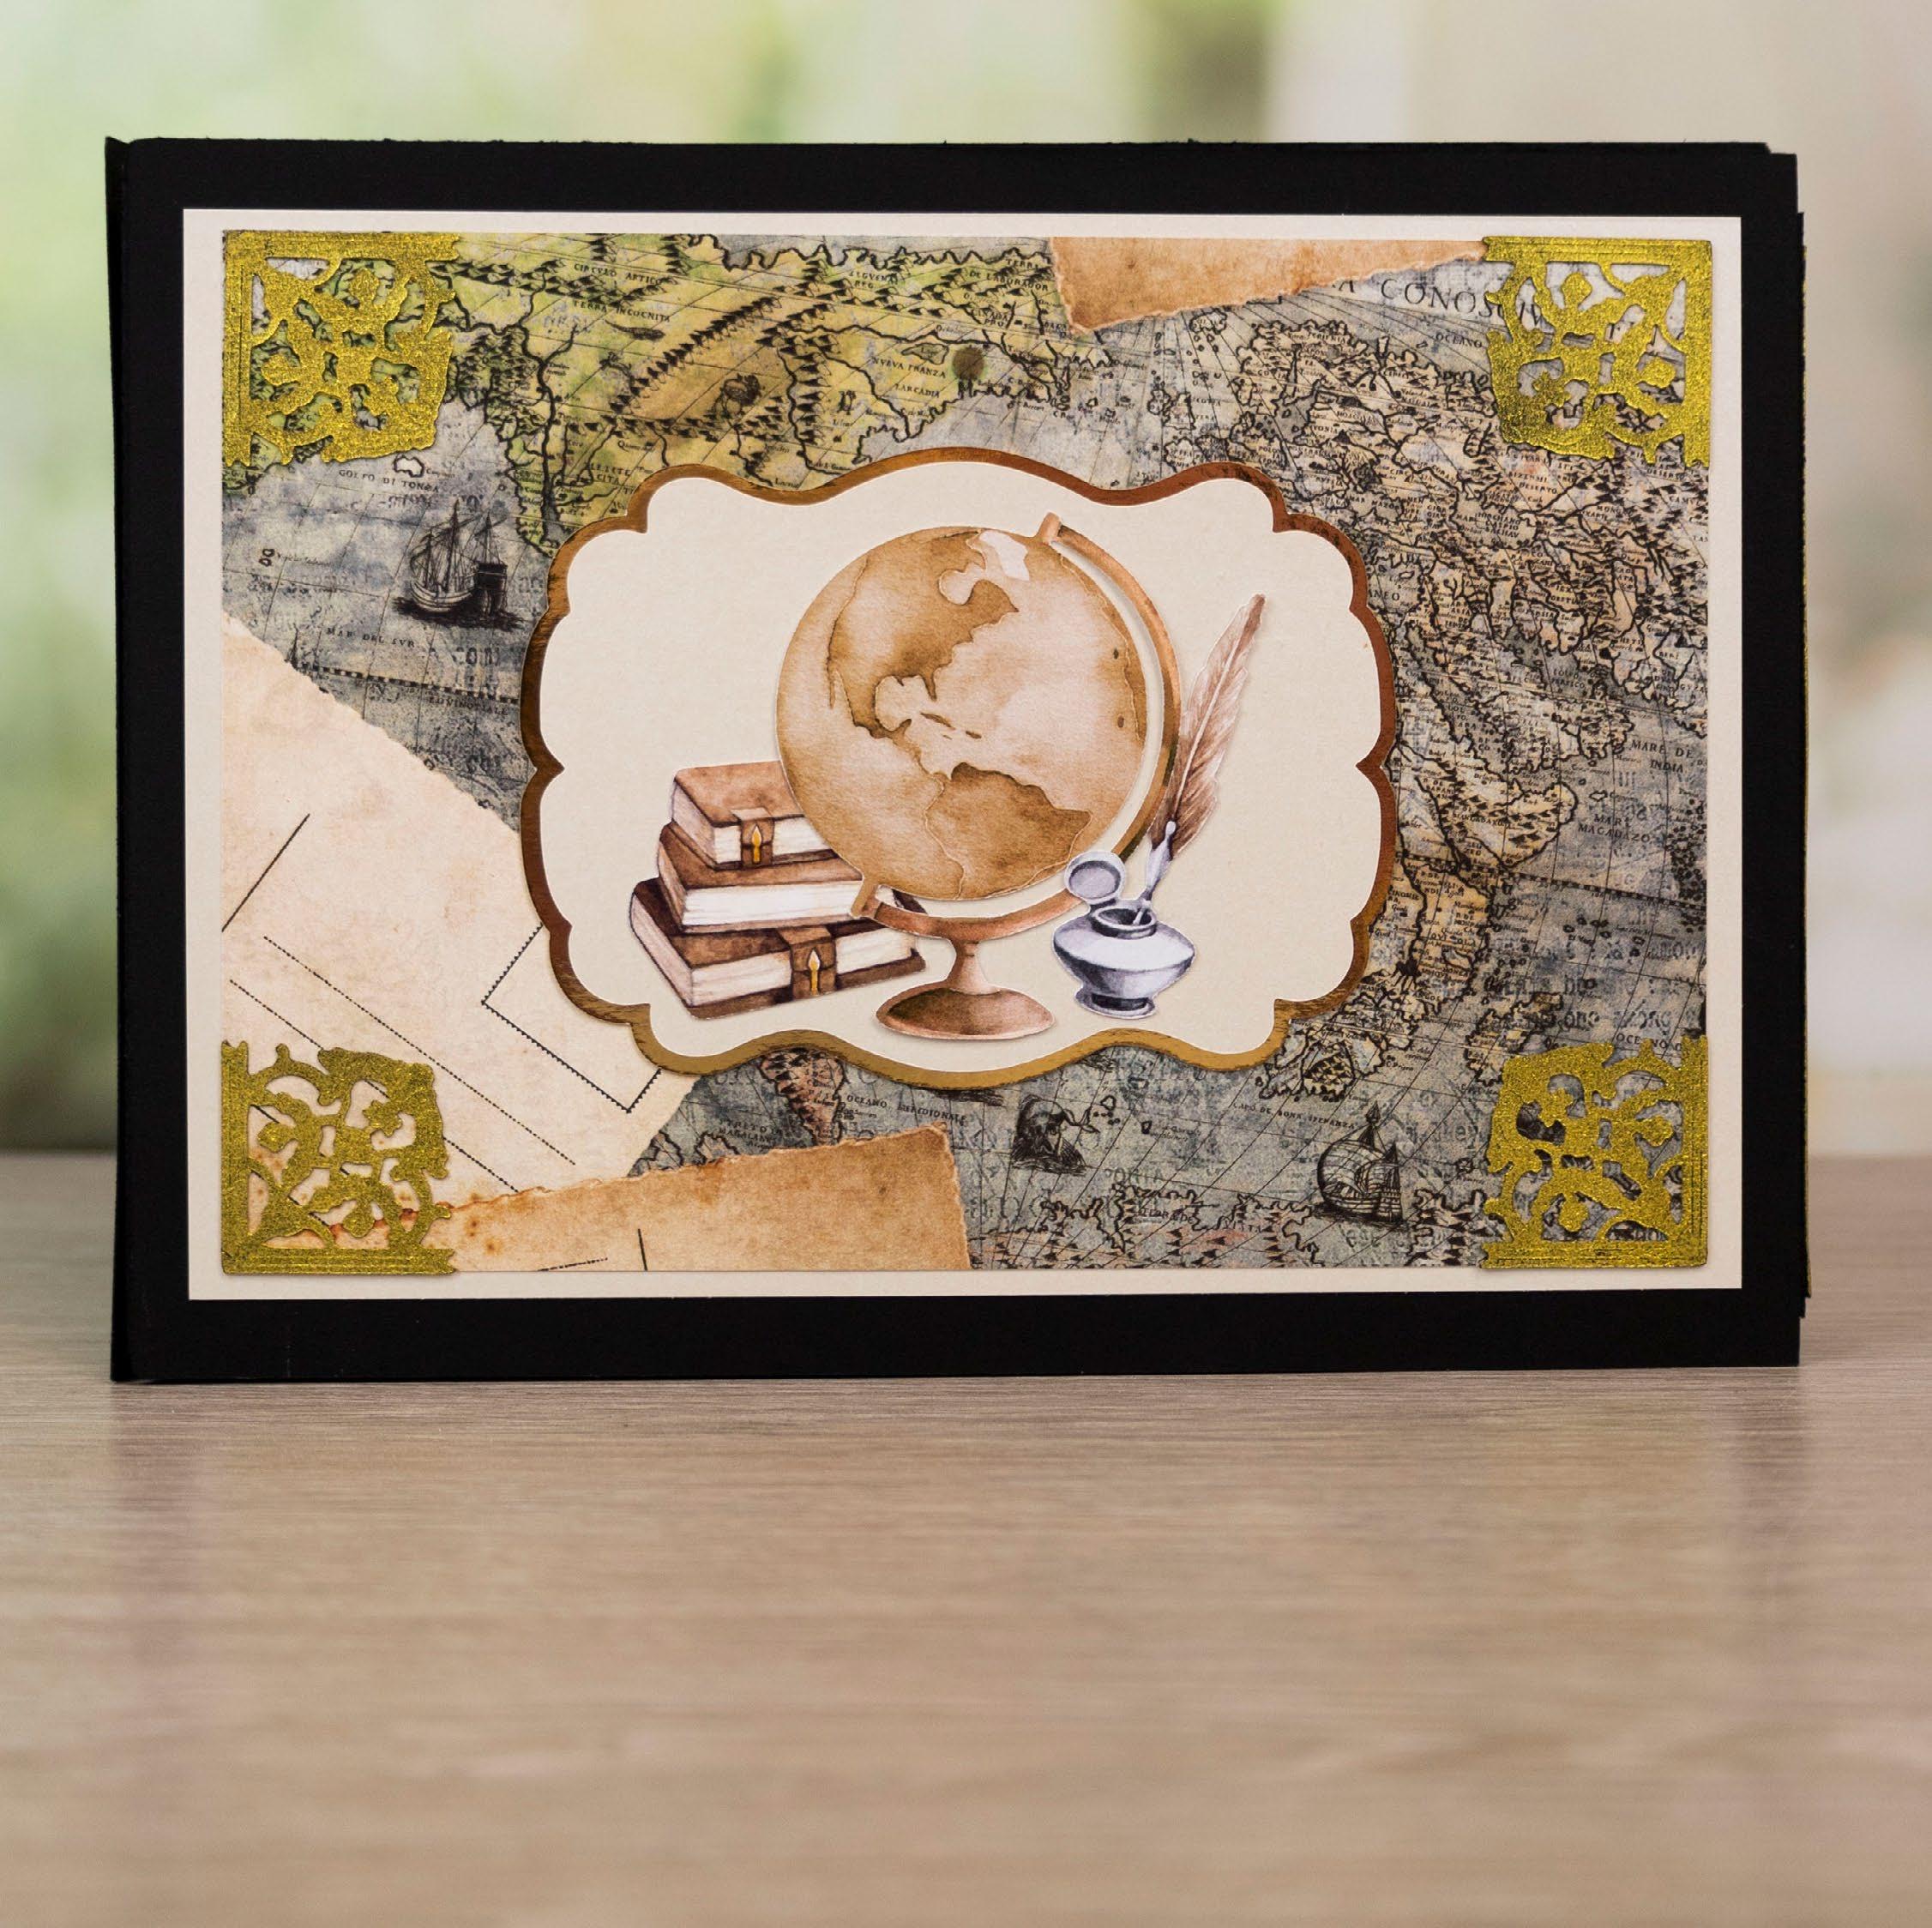
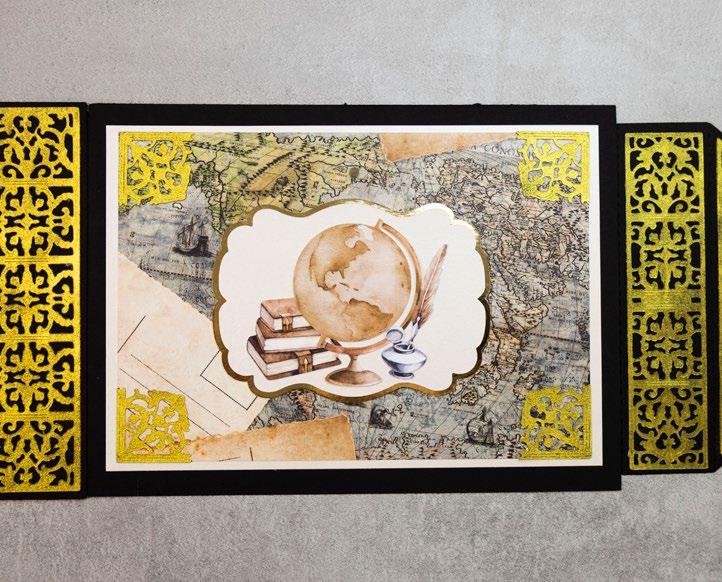
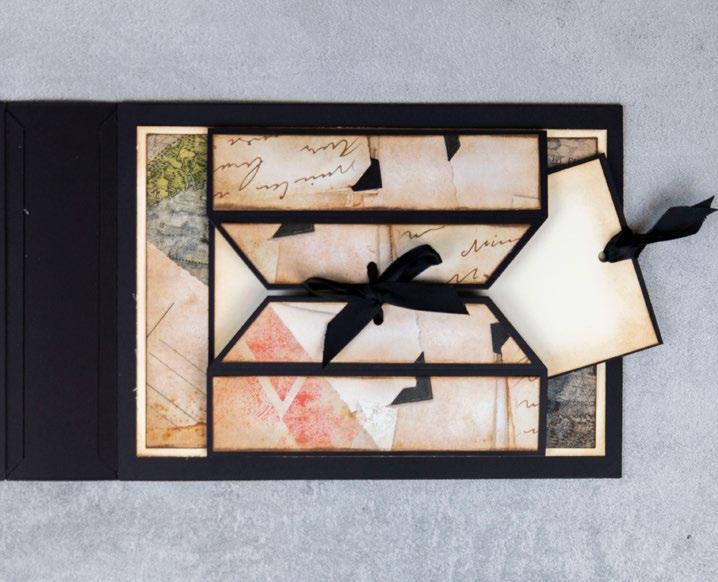
ONTHE COVER!
Hi Crafters,
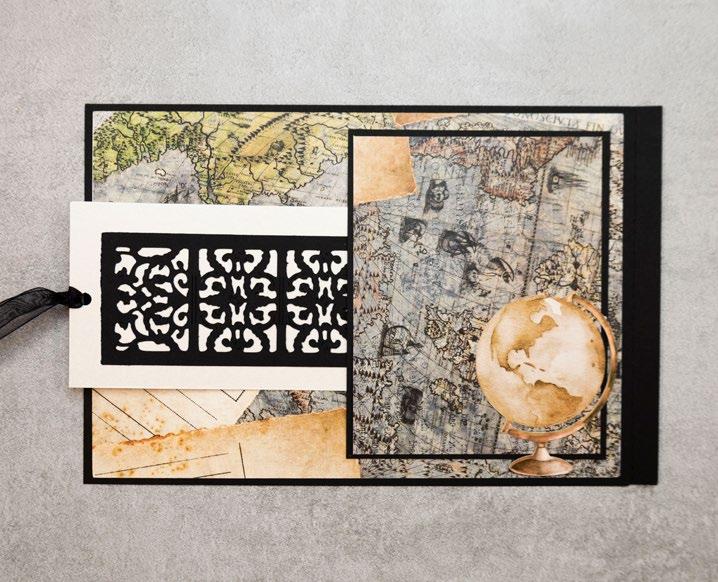
Well here we are with issue 21 and we have got some great projects in this issue for you! I have to go straight into talking about the Secret Book SVG files, which is part of the SVG collection exclusively designed for this issue! This SVG set is amazing! There is so much you can do with it. First and foremost, it is to make a book and we have included instructions on how to use it. Louise has built and decorated a stunning book for you to try. This is a mega project but once you have got your head around the build it's all about the fun of decorating! But this SVG set doesn't have to just be used to make books, we have made a gift box, a box frame and used the elements in many of the other cards!
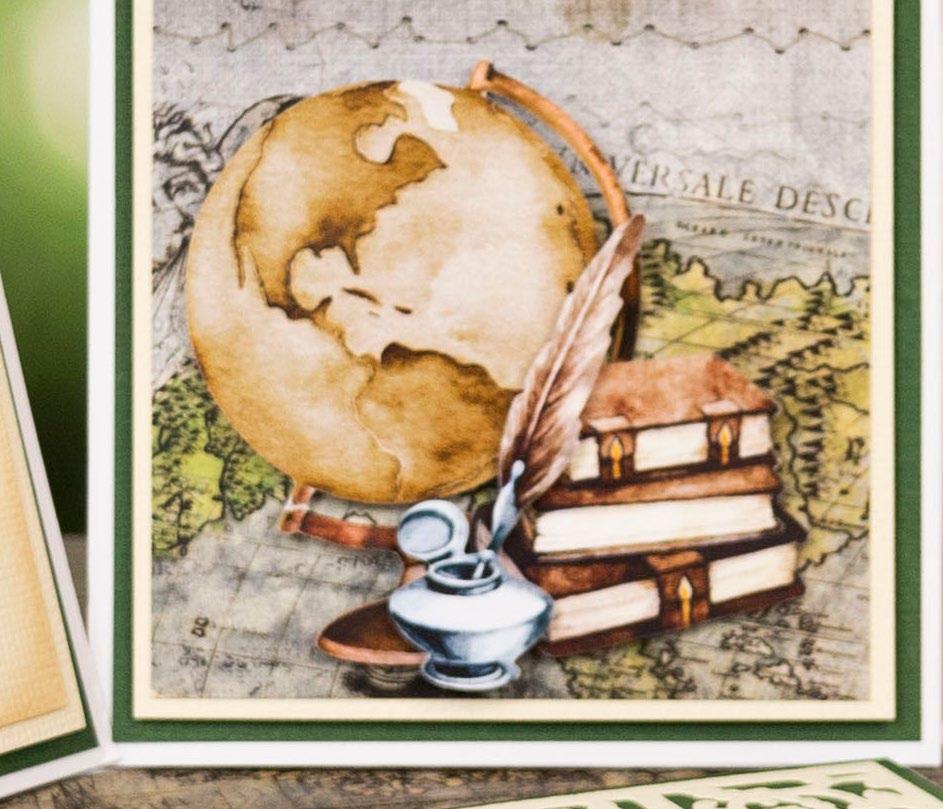
Your exclusive SVG this month is the pretty Poppy Posy SVG and stencil with some lovely papers to match. The Essential Studies, Famous Landmarks and Retro Camera SVG files have a great scrapbooking style to them and would work great when decorating pages of your book. Then finally we have some gorgeous dogs. A mummy, or a daddy, dog and three little puppies! Perfect for the animal lovers!
The Tattered Lace collections we are featuring this month are our Vintage Heirloom and Broken Edges collections. These collections feature some great matting and layering SVG files and some amazing big sentiments for those finishing touches to your projects!
Happy crafting!
CONTENTS
4-14 EXCLUSIVE GIFT: POPPY POSY
6 projects using your exclusive Poppy Posy SVG & stencil.
16-19 PROJECTS: VINTAGE HEIRLOOM
We showcase some of our favourite SVG files from the Vintage Heirloom collection.
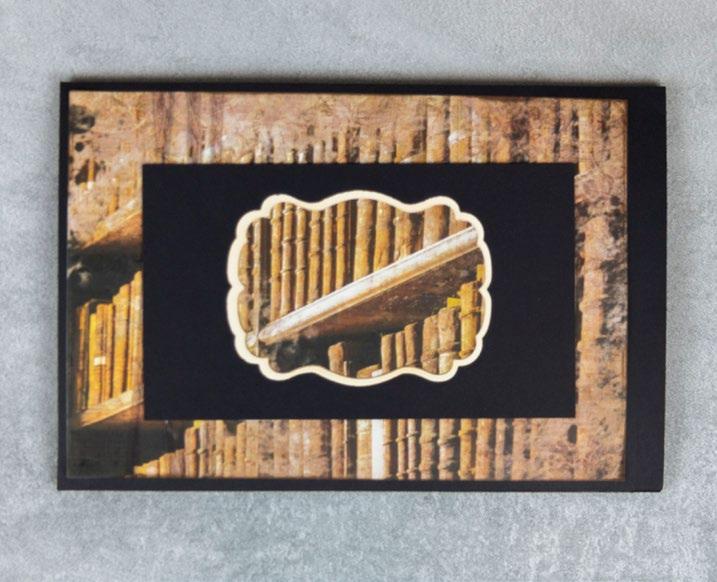
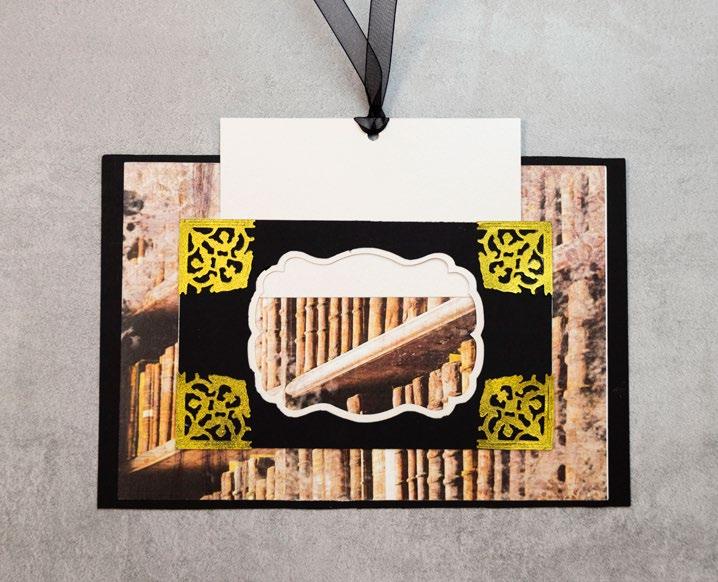
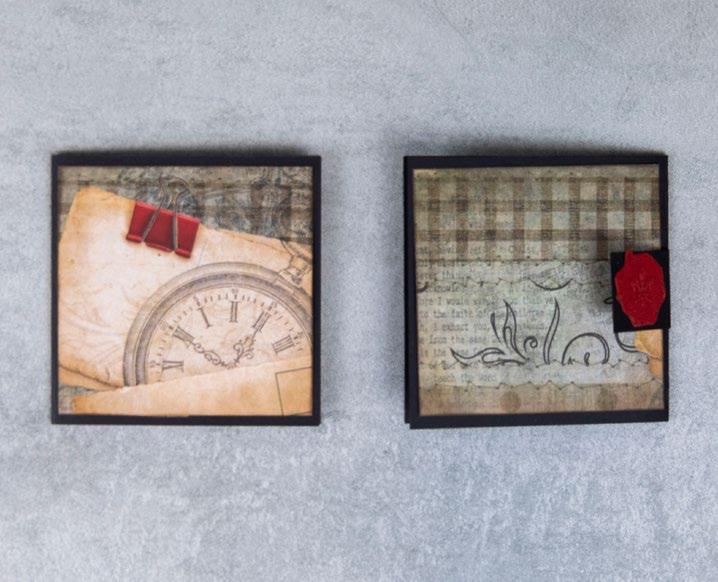
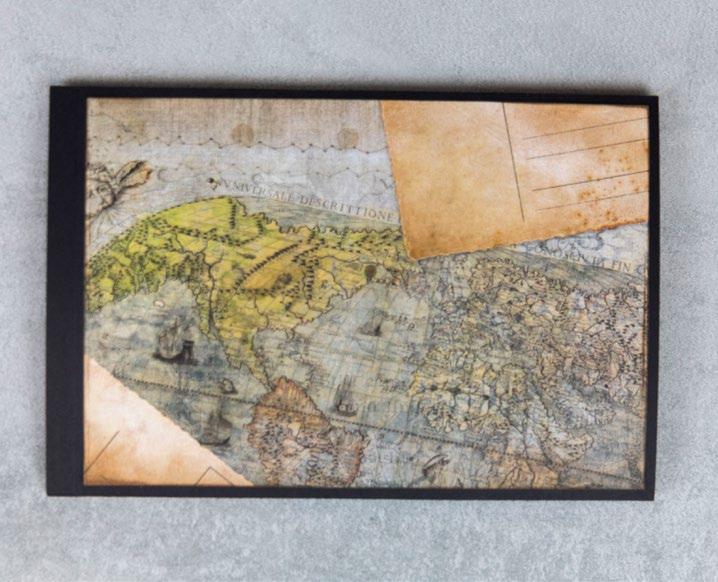
20-21 SPECIAL FEATURE: DAVID'S BOX FRAME
David Wait show’s you how to make a simple box frame using the Secret Book SVG files.
22-23 SPECIAL FEATURE: LOUISE'S BABY BOX

Louise has made a fabulous baby box, perfect for giving as a gift or saving keepsakes in! Here's how she made it!
24-27 PROJECTS: BROKEN EDGES
All about the florals and sentiments in this set of cards!
2 | www.tatteredlace.co.uk
MEL’S HINTS & TIPS!
WHICH CARDSTOCK?
Please use the guide below as an indication of which cardstock is best to use for each part of your card projects throughout this magazine.
BASE CARD: 240-300GSM
MAT LAYERS: 240GSM
STASH FILES/CHARISMA: 120-140GSM
Now that you are familiar with your machine you will find that you need to unlock the aspect ratio on the rectangle / oval to cut the shapes required for some projects. All dimensions are included in mm to give you the perfect measurements.
TATTERED LACE TEAM
Managing Editor
Beckie Warburton
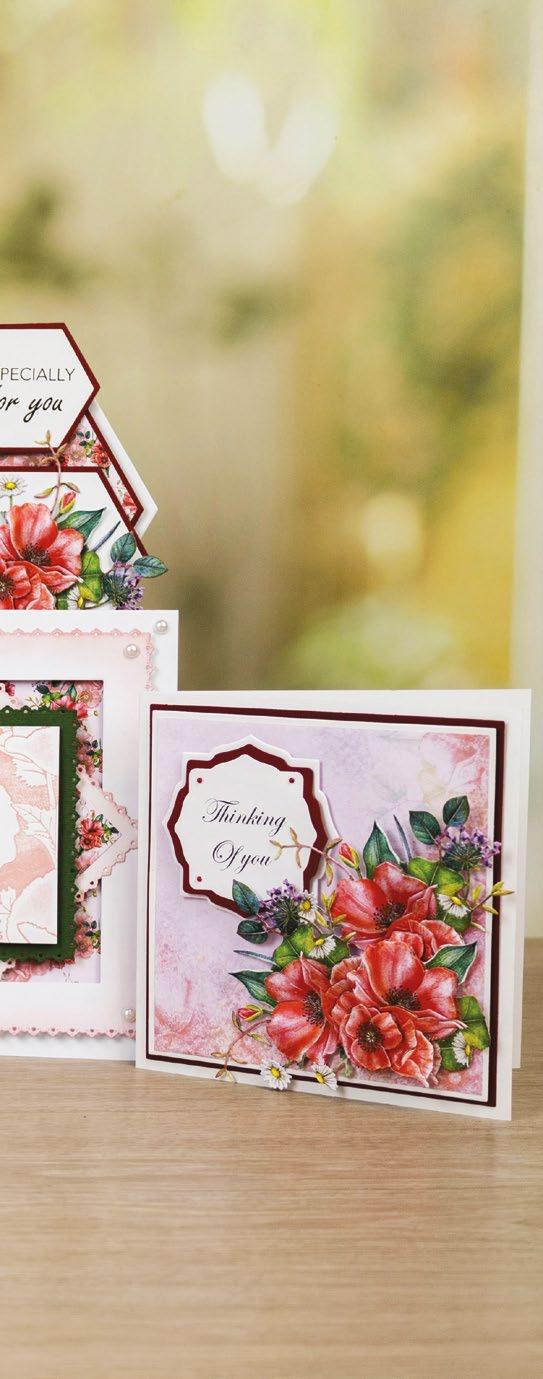
28-29 SPECIAL FEATURE: VINTAGE POPPY
This special card features a good mix of the SVG files used in this magazine.
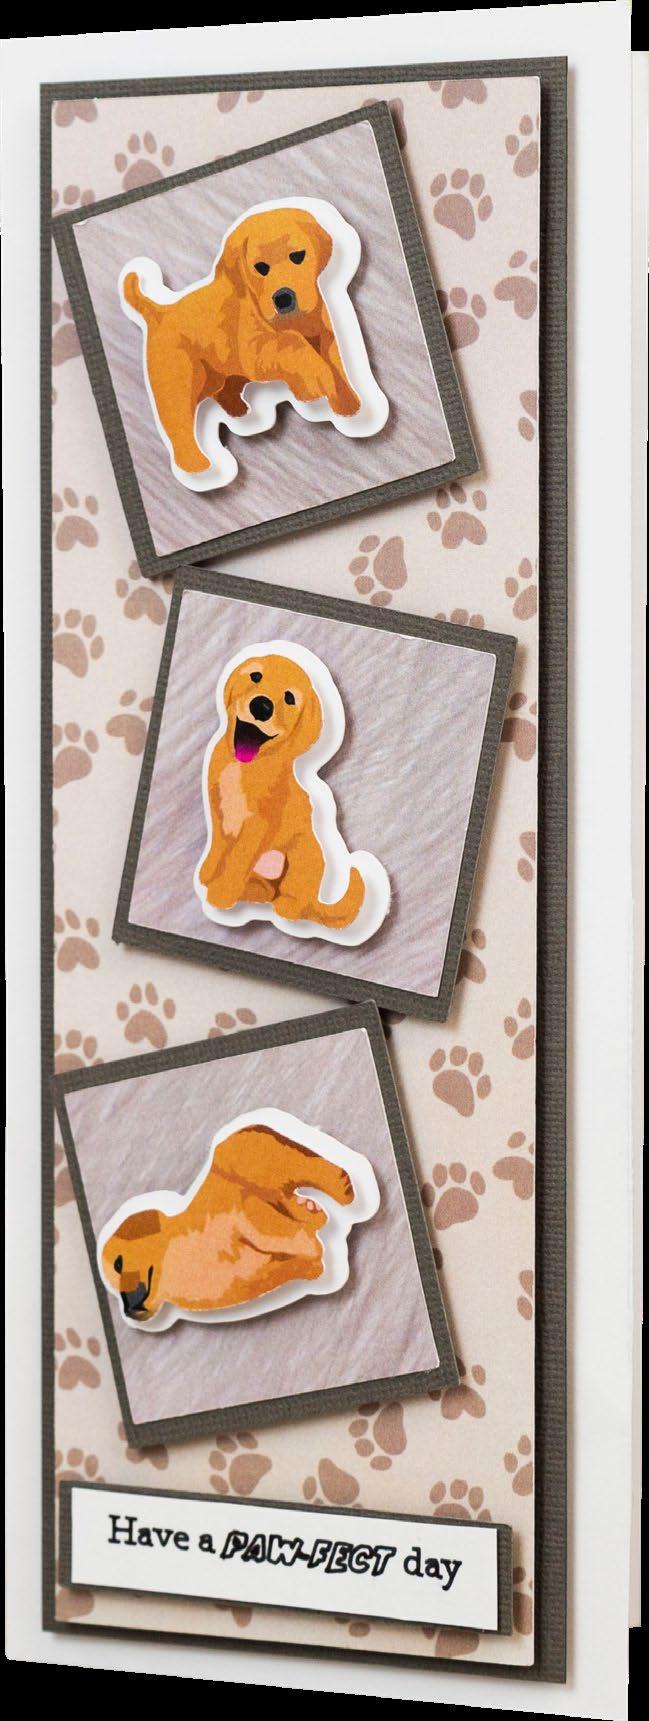
30-31 PROJECTS: MAN'S BEST FRIEND
For dog lovers everywhere, this SVG file set is just for you!
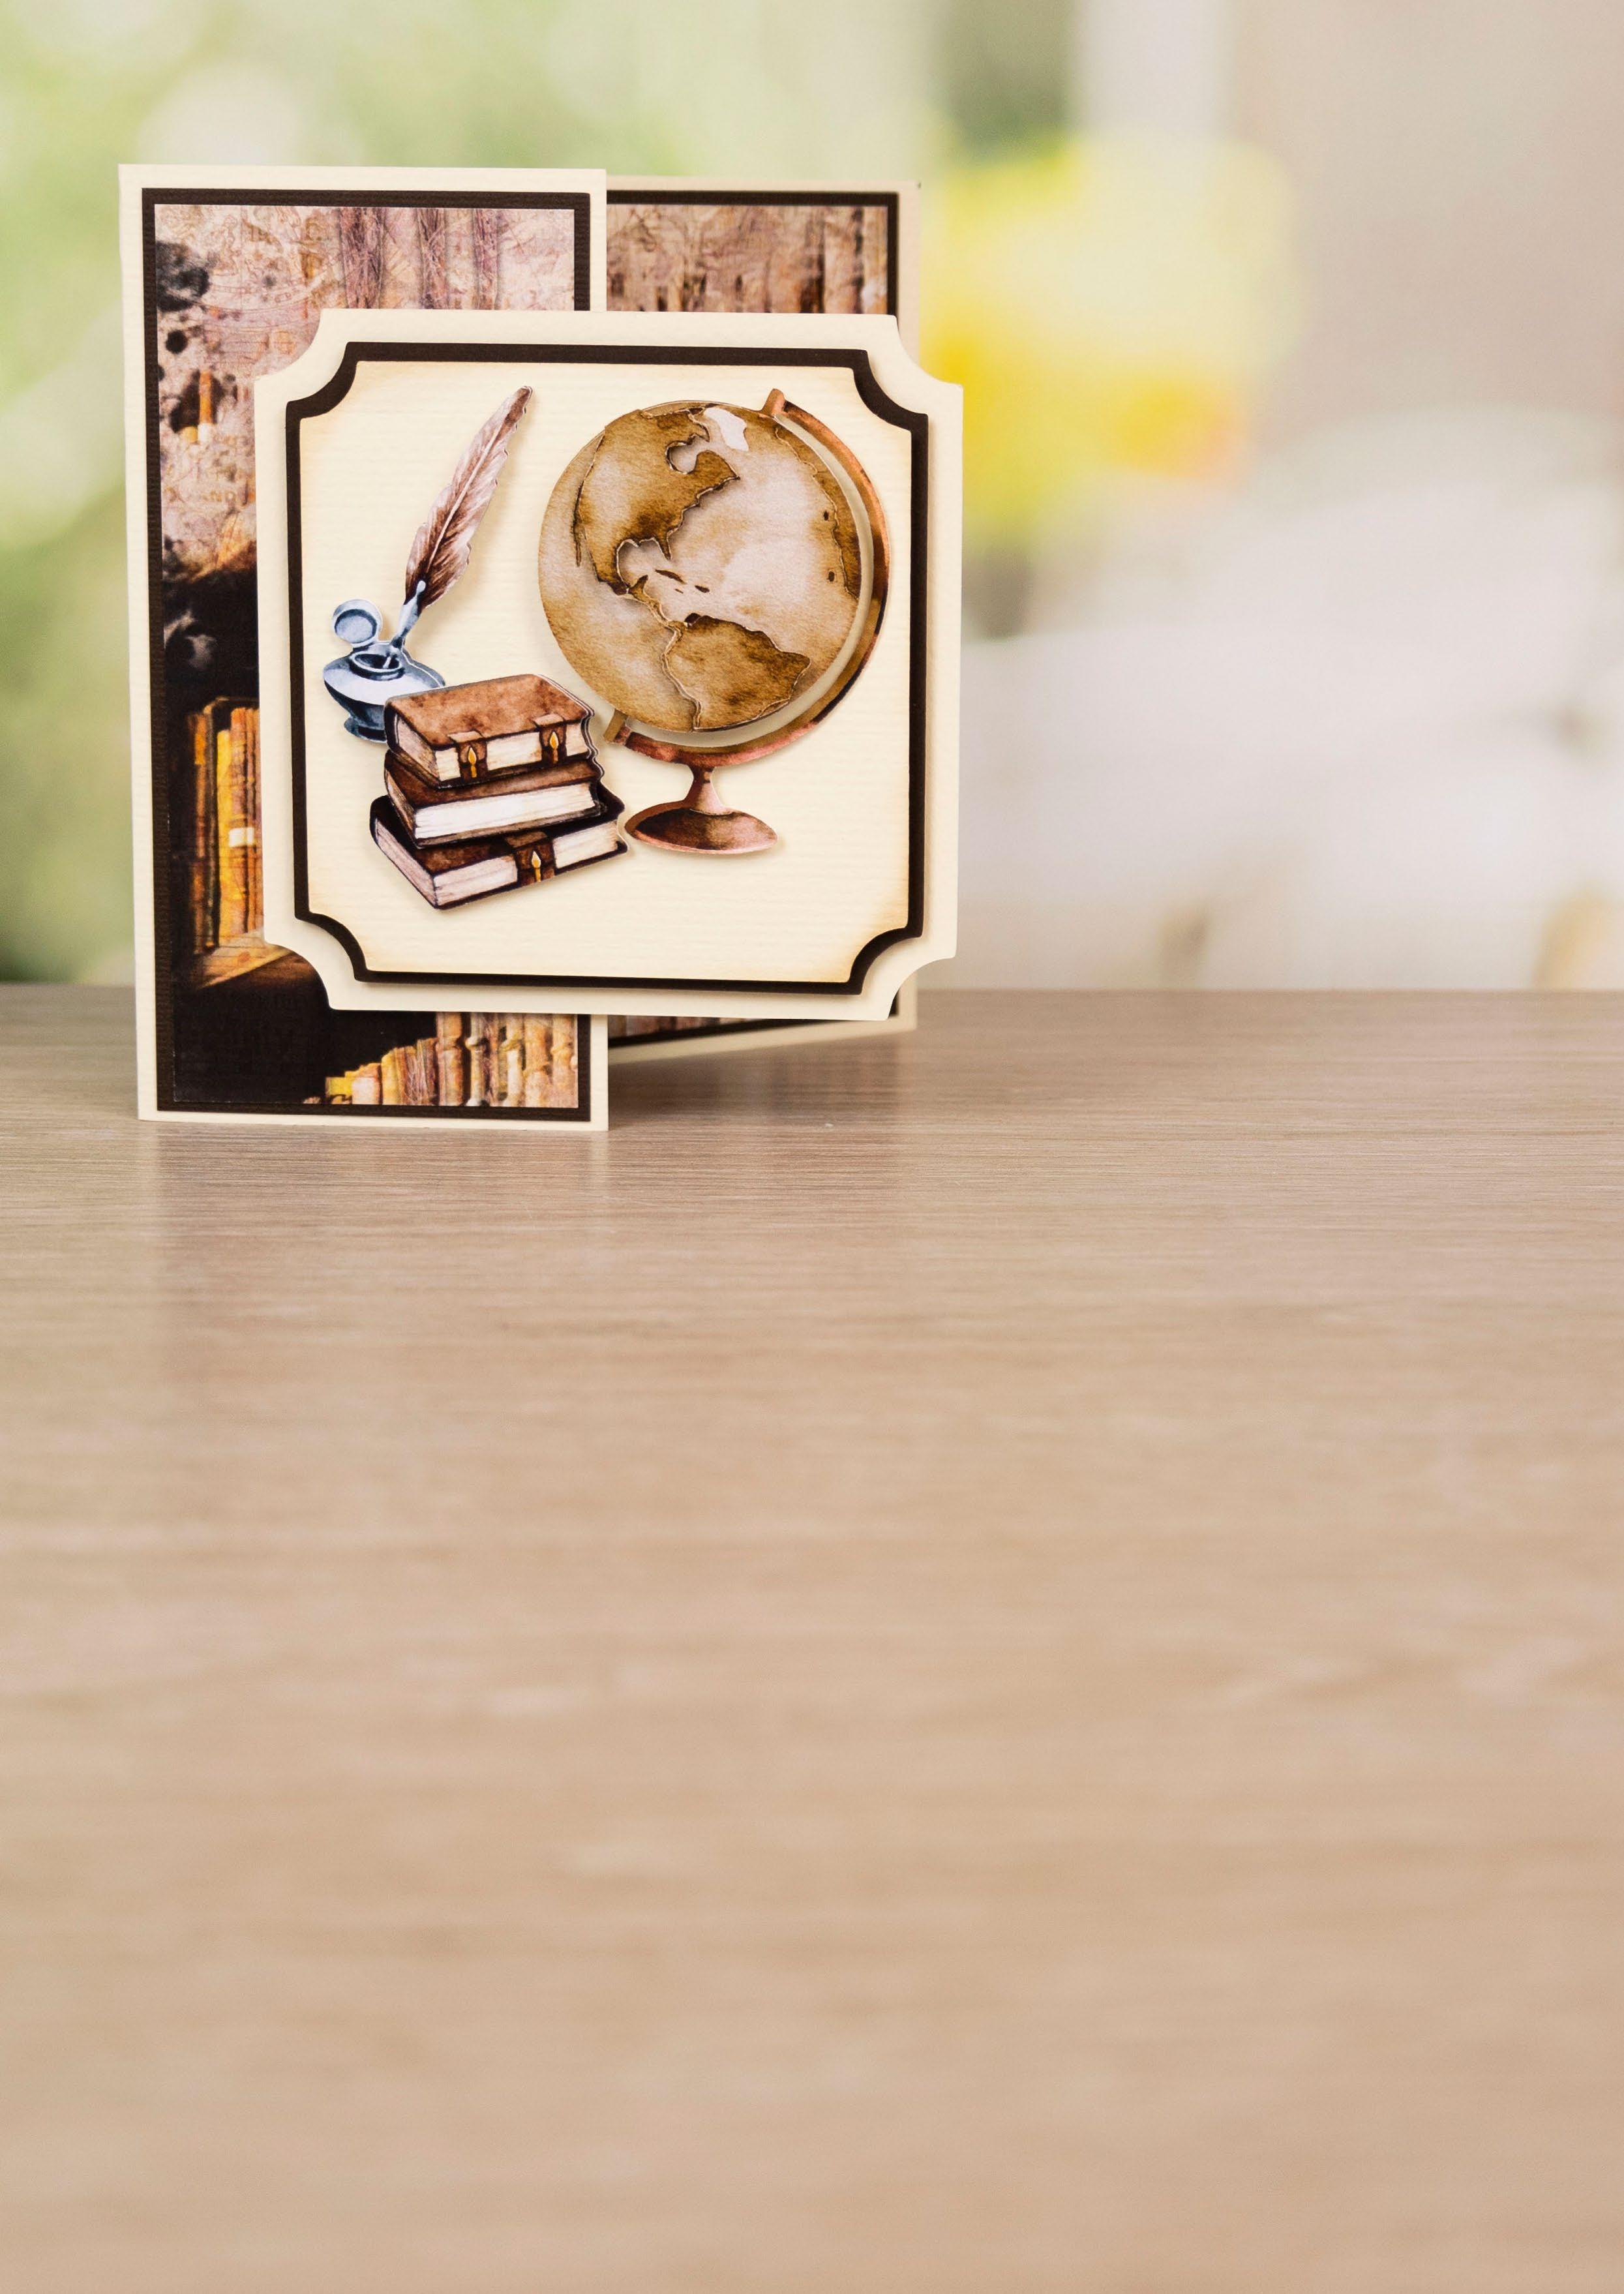
32-35 PROJECTS: FAMOUS LANDMARKS
Perfect cards to wish someone Bon Voyage!
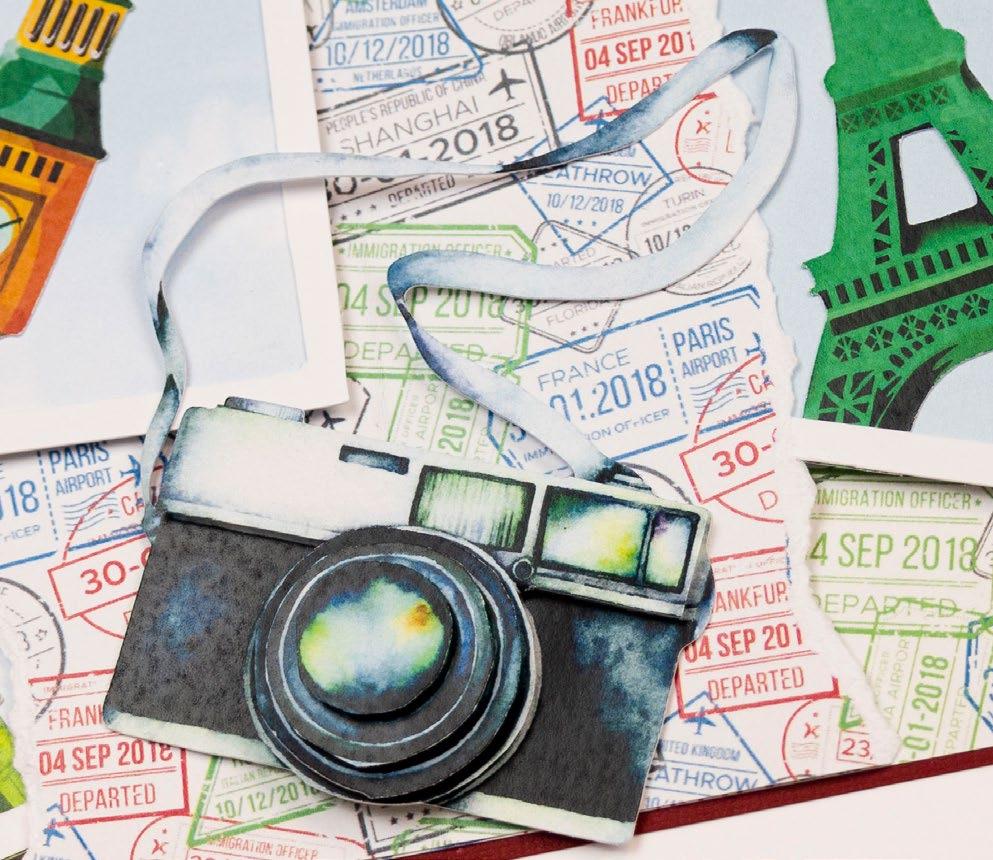
36-37 PROJECTS: RETRO CAMERA
This simple SVG set can create some flashy cards.
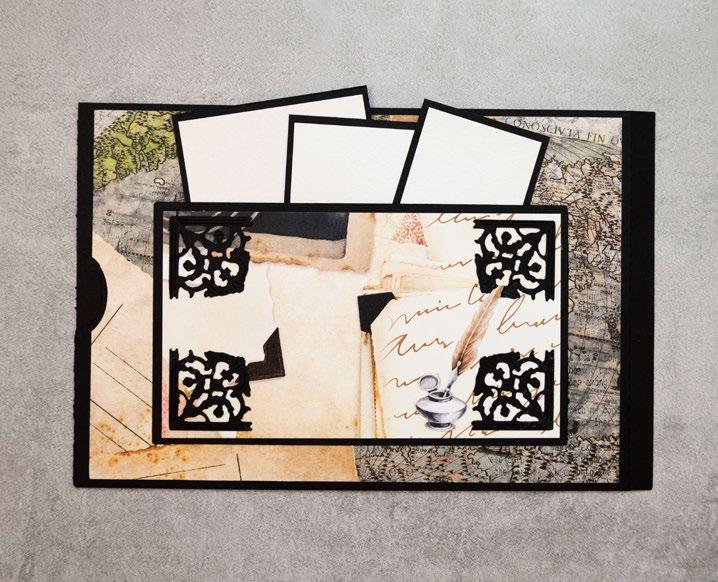
38-41 PROJECTS: ESSENTIALS STUDIES
Lovely SVGs for graduation cards.
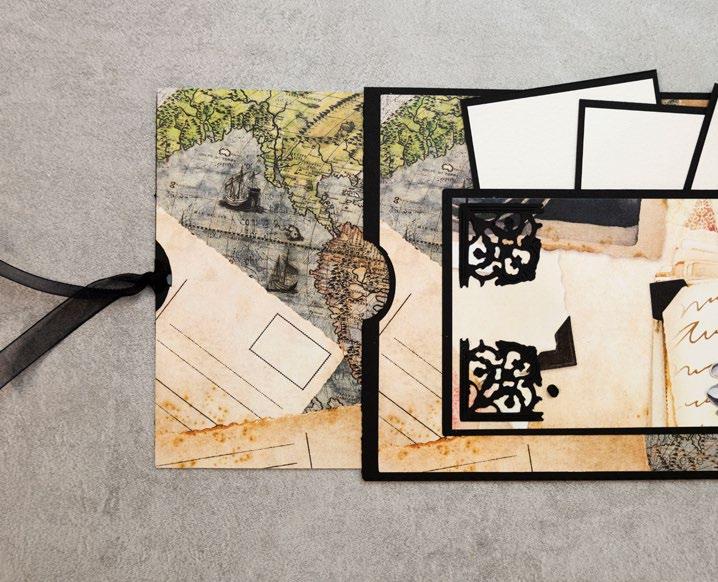
42-45 HOW TO: BUILD THE SECRET BOOK
We show you how to use the SVG set to build a simple book and get you started with some great ideas.
46-53 PROJECTS: SECRET BOOK
This ones a biggie, but it's a goodie!
54 HOW TO: STAMP & HEAT EMBOSS ONTO FABRIC
Stamping isn't just for paper!
56-57 NANCY’S COLUMN
Let’s see what Nancy has been up to lately!
58
PROJECTS: MAN'S BEST FRIEND
We loved the dogs so much, we had one more project to show you!
Editorial Assistant
Diane Peternel
Consultant Editor
Nancy Watt
Craft Consultant
Stephanie Weightman
Consultant Project Designer
Louise Patten
Graphic Designers
Jon Peters
Sam Bruce Craft Experts
Stephanie Weightman
Melanie Heaton
David Wait
Amanda Carpenter Kasia Chojnacka
Media Manager
Andrew Coates
Web Developer
Sean Platts
www.tatteredlace.co.uk | 3
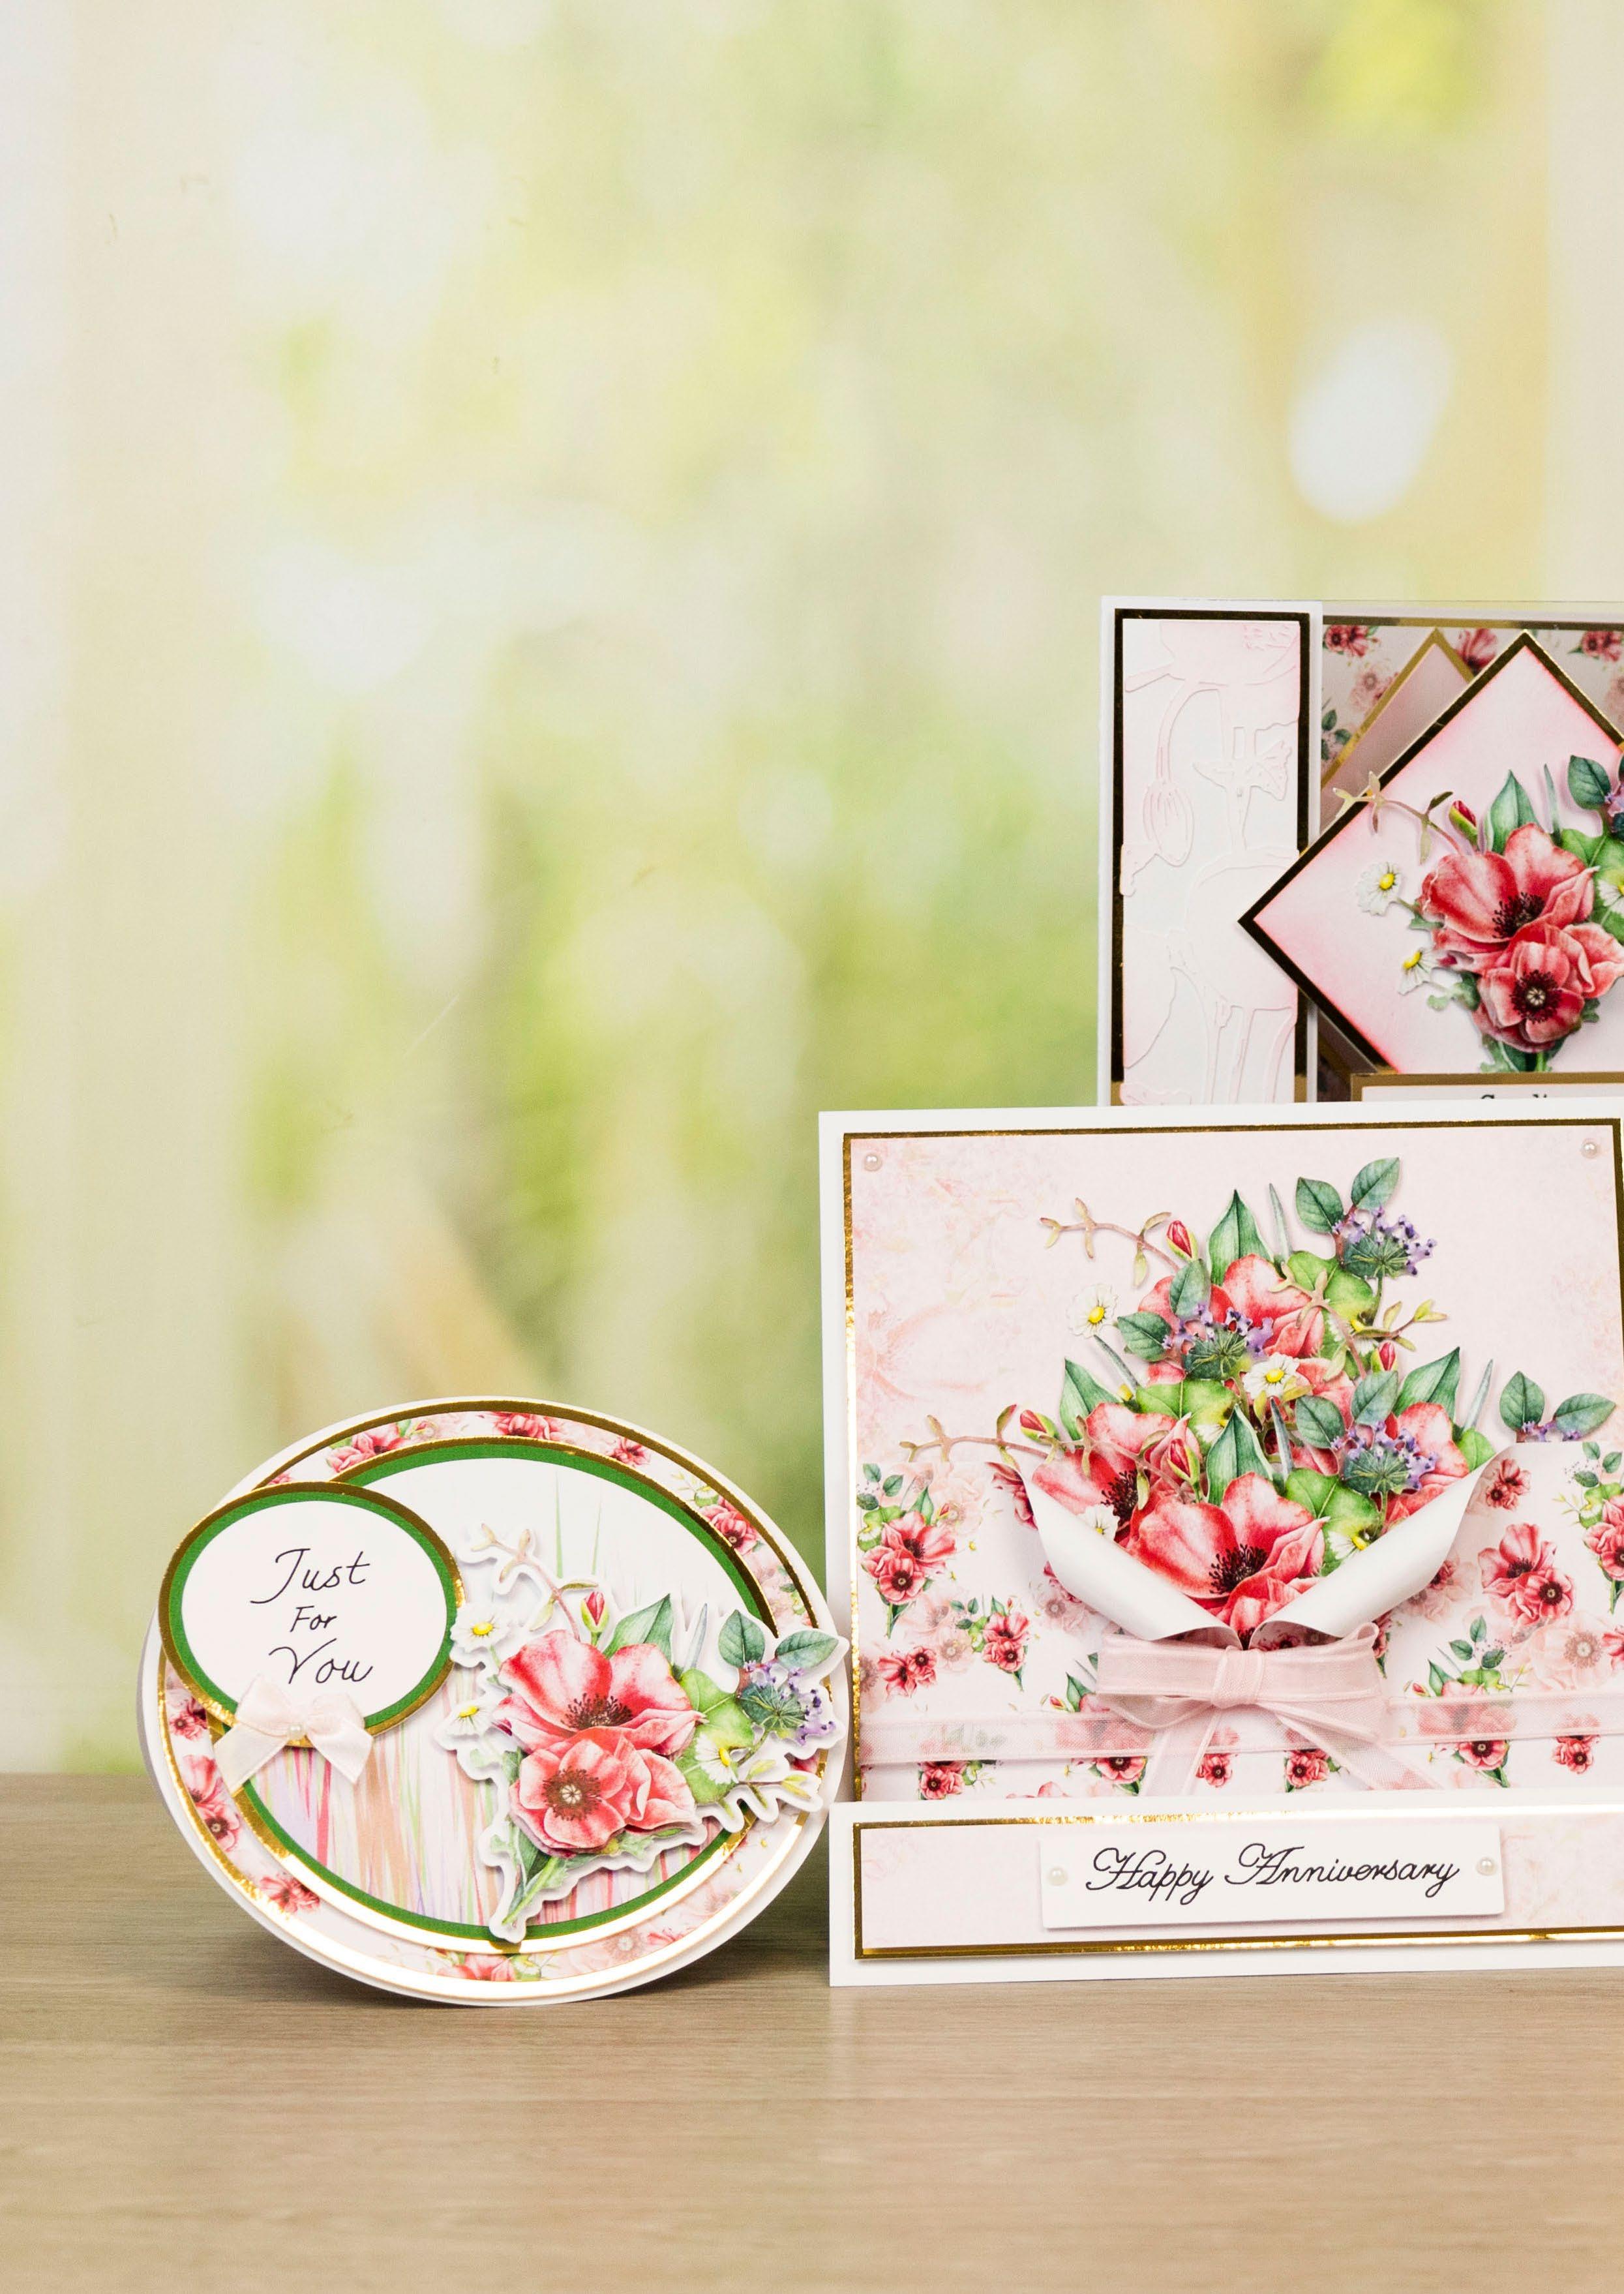
POPPY POSY your exclusive gift... 4 | www.tatteredlace.co.uk

INCLUDED WITH THIS ISSUE! www.tatteredlace.co.uk | 5
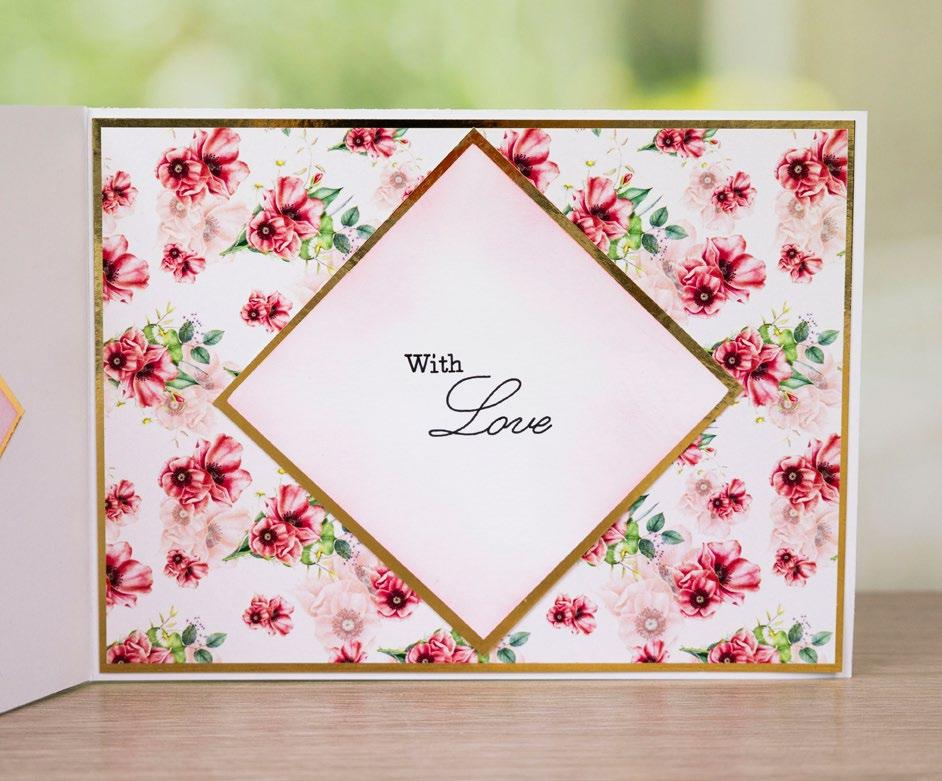
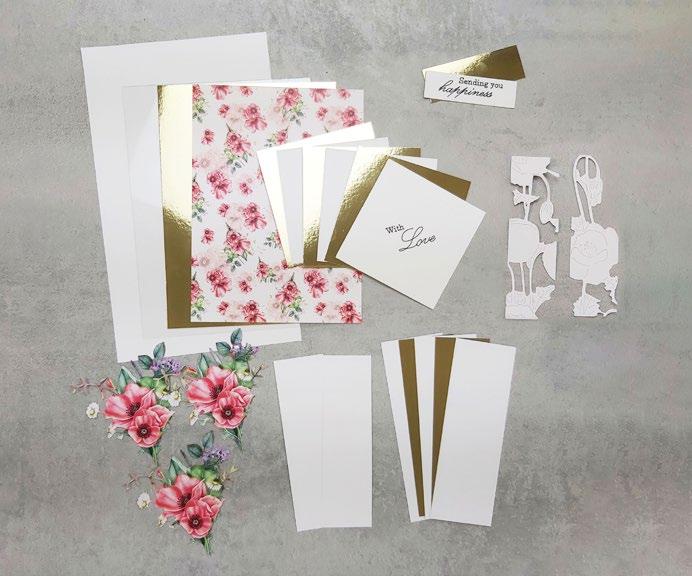
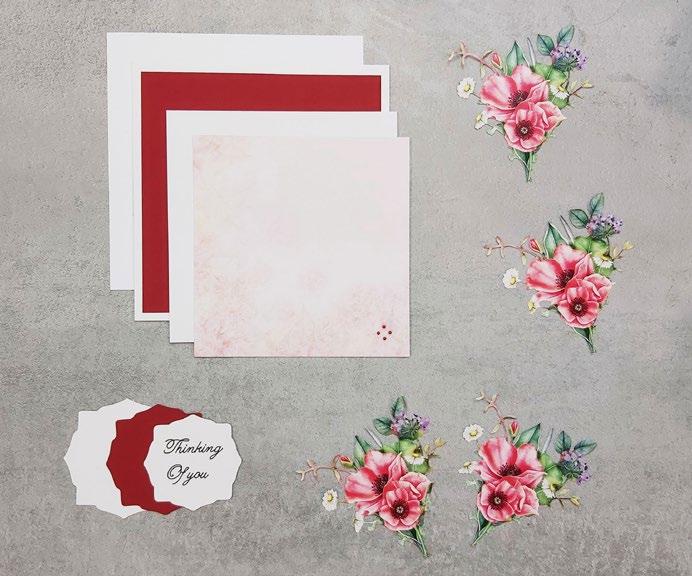
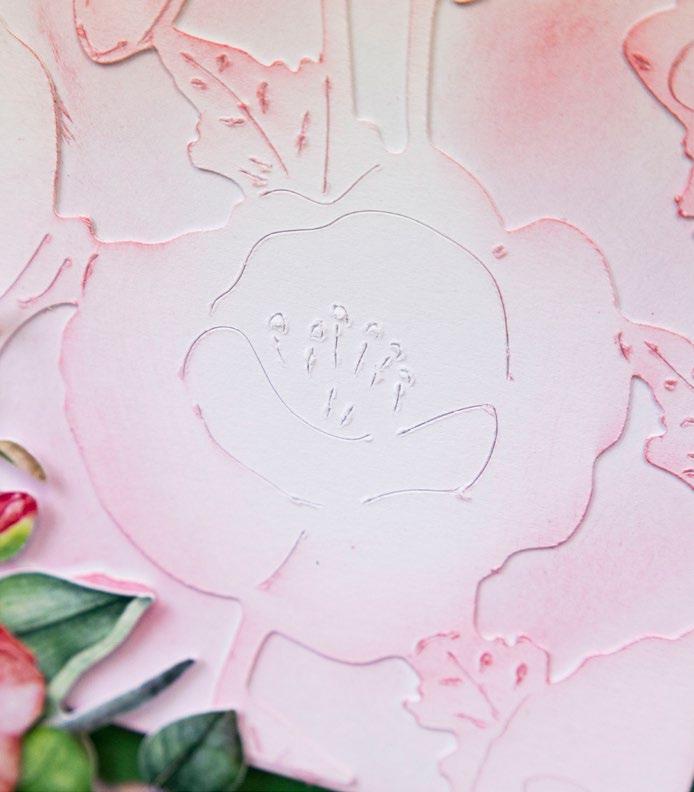
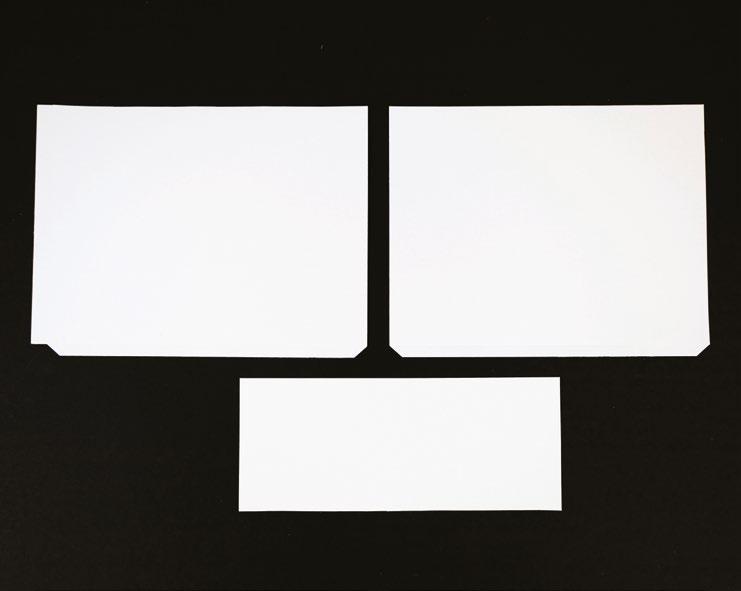
What you’ll need: • 01-01-Poppy Posy SVG files • White cardstock • Gold mirror cardstock • Construction acetate • Distress Ink – Festive Berries ----------------------------------- EXCLUSIVE GIFT - POPPY POSY ---------------------------------------6 | www.tatteredlace.co.uk
1
Cut all the pieces needed to create the project as listed below;
From SVG downloads:
• From white cardstock:
- 1 x PP-1-Emboss
• From charisma:
- 1 x PP-1-Charisma
From machine memory:
• From white cardstock:
- 1 x 245mm x 145mm rectangle
- 3 x 50mm x 145mm rectangle
- 2 x 40mm x 135mm rectangle
- 2 x 90mm square
- 1 x 90mm square (with sentiment draw file)
- 1 x 75mm x 22mm rectangle (with sentiment draw file)
• From gold mirror cardstock:
- 1 x 190mm x 140mm rectangle
- 2 x 45mm x 140mm rectangle
- 3 x 95mm square
- 1 x 80mm x 27mm rectangle
• From backing paper:
- 1 x 185mm x 135mm rectangle (poppy)
• From construction acetate:
- 1 x 195mm x 145mm rectangle
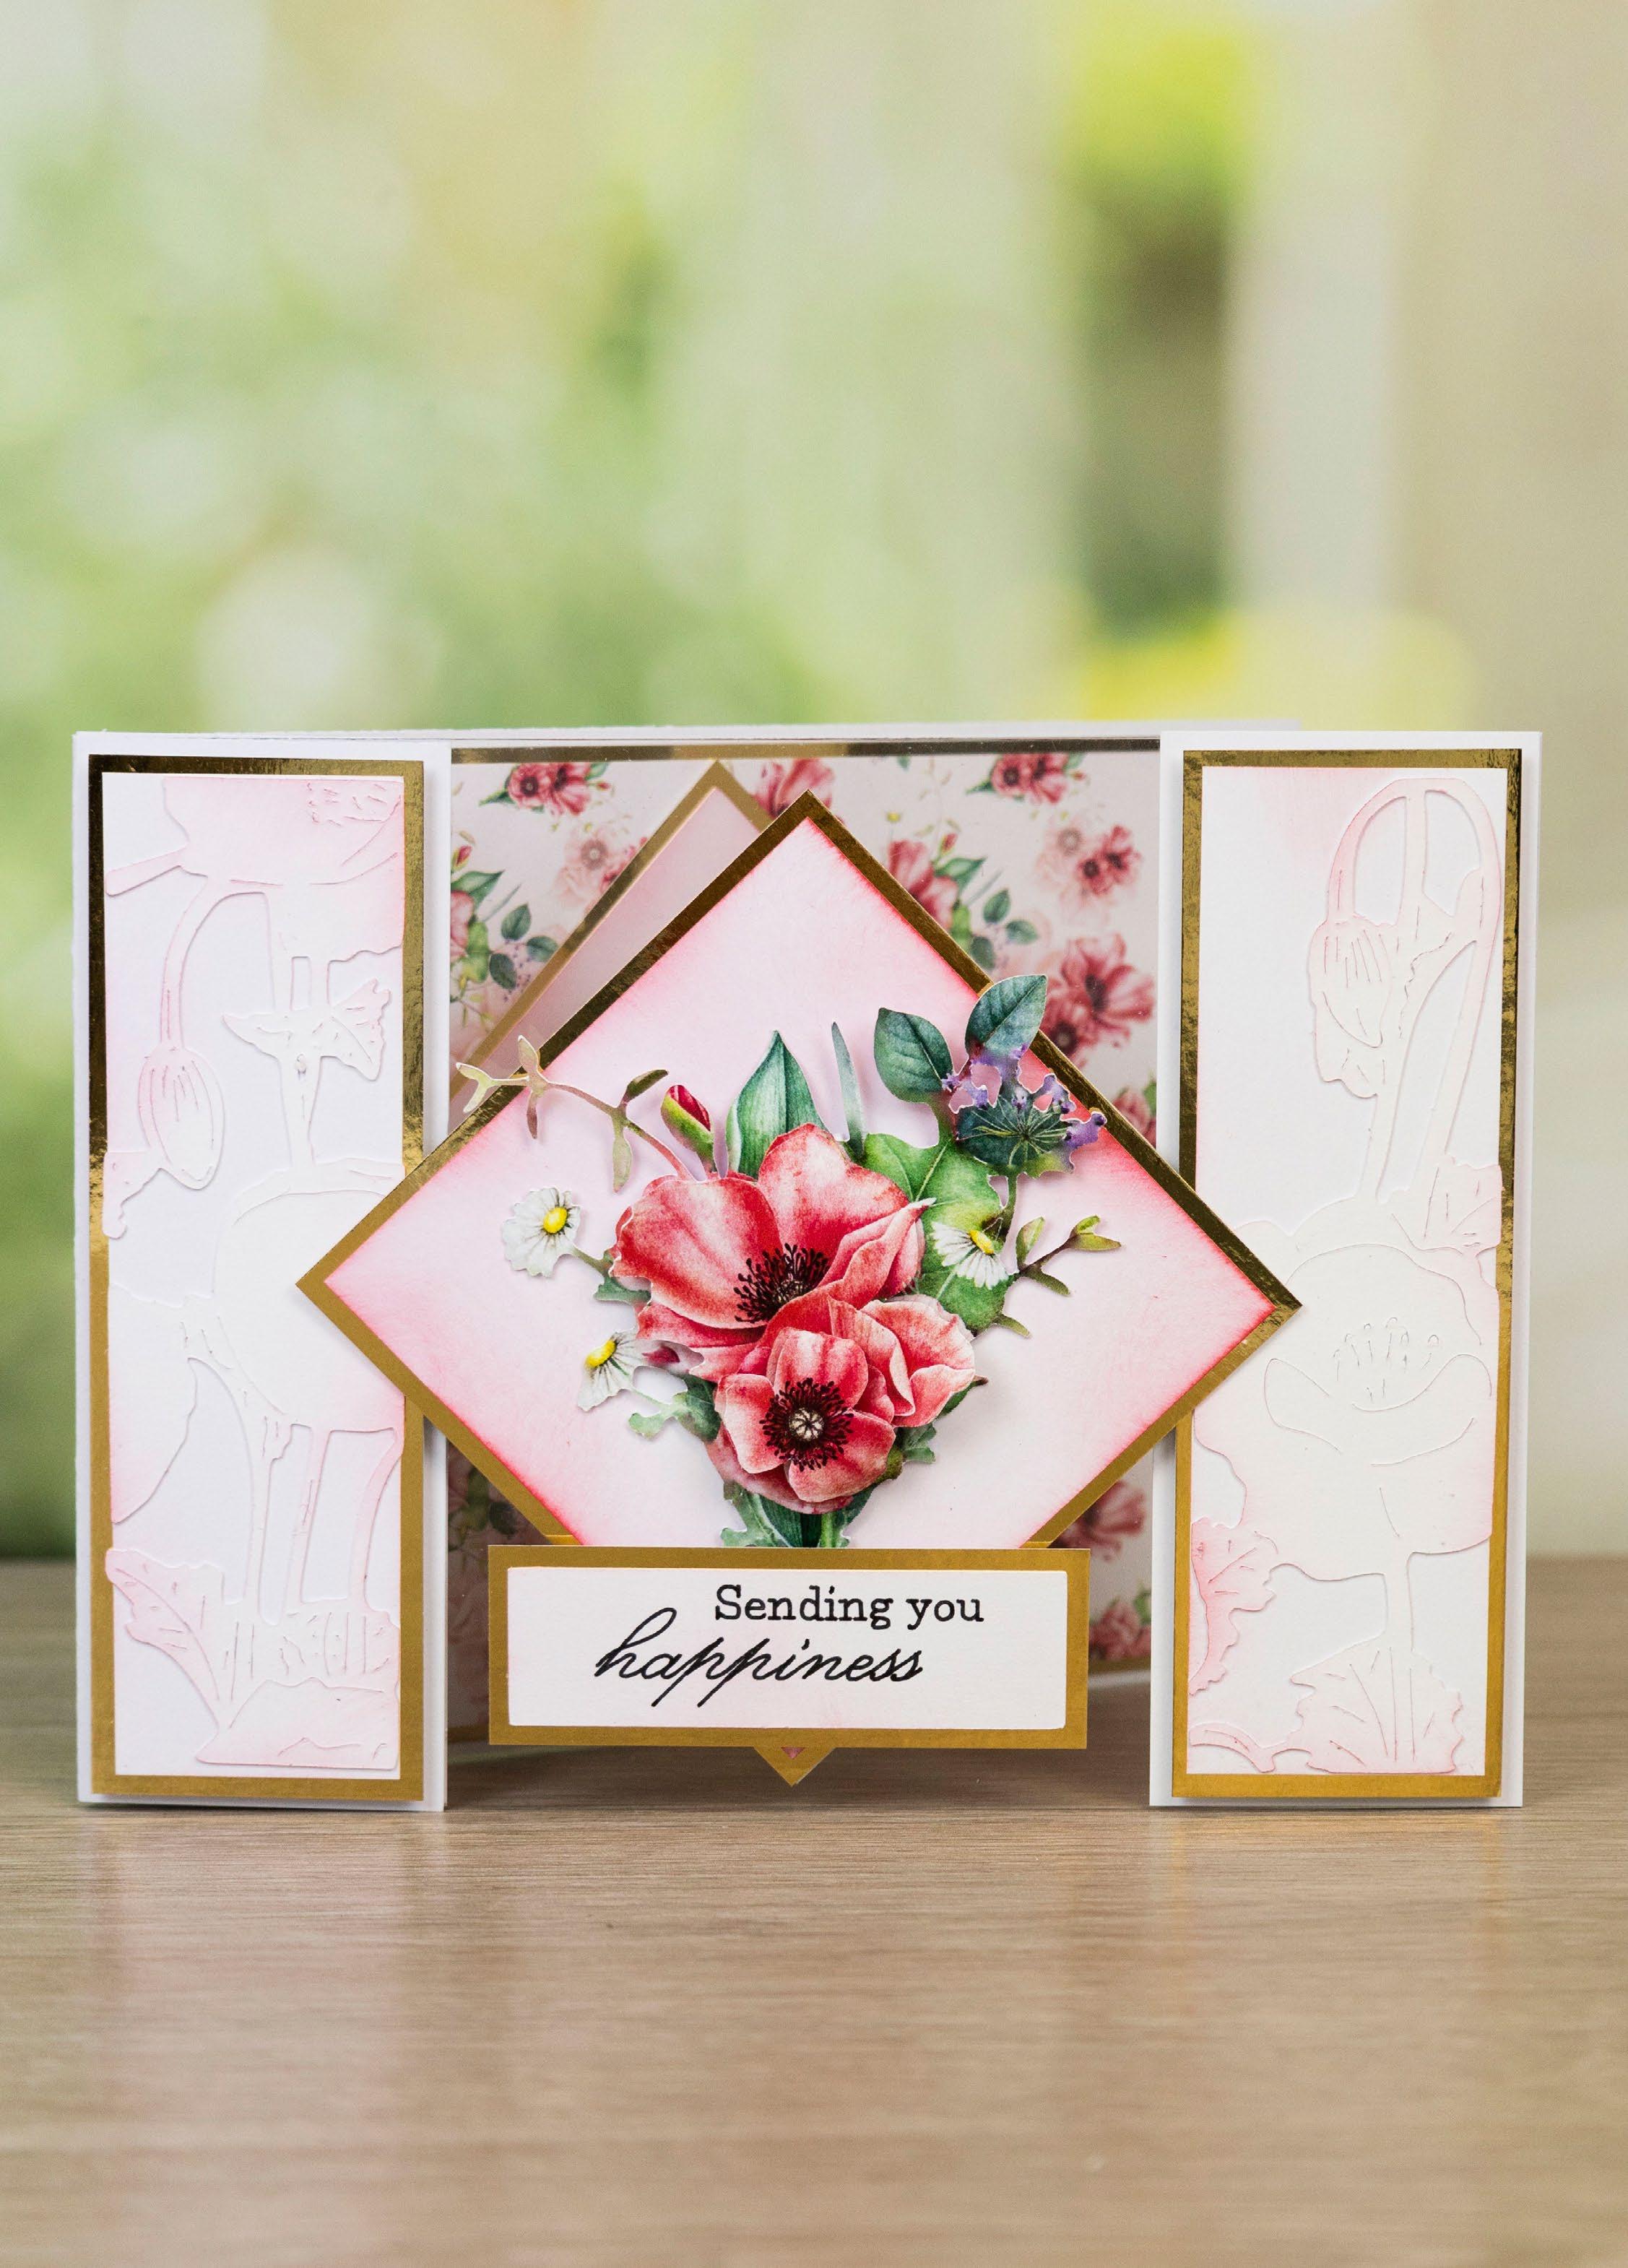
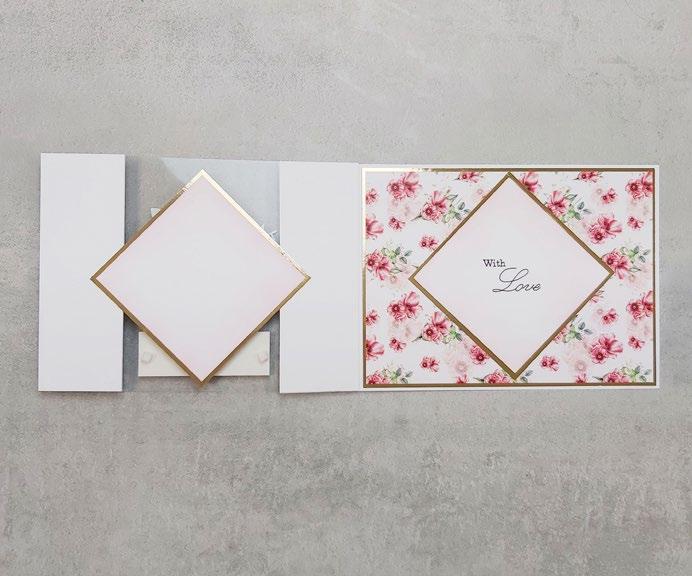
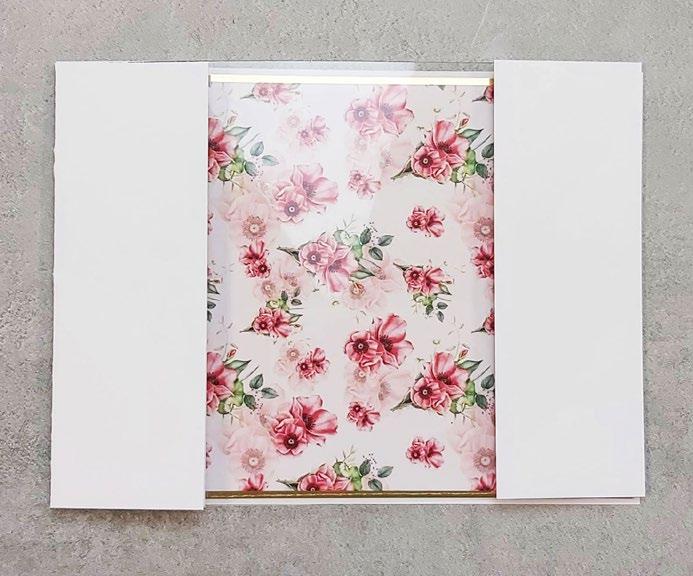
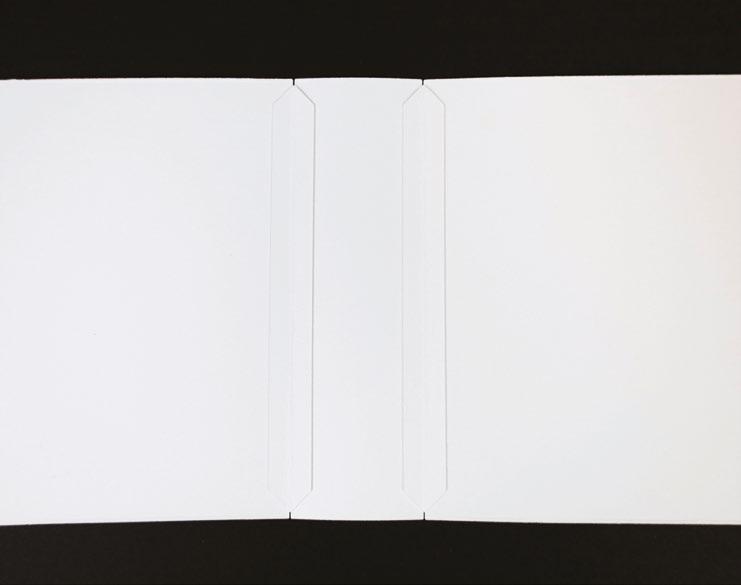
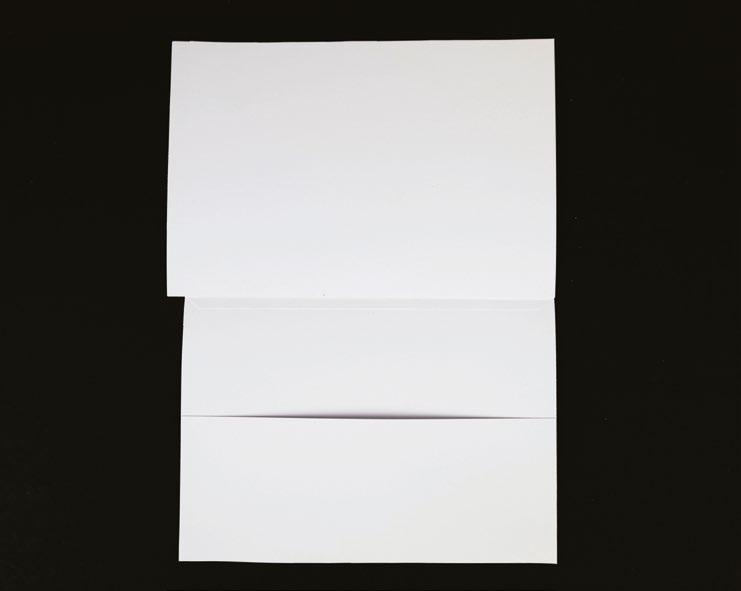
2On the large white rectangle, from the left edge, measure in 5cm and score and fold to create the card front. Mat the large poppy rectangle onto the large gold rectangle and mat onto the inside back of the card.
Step bySteps
3
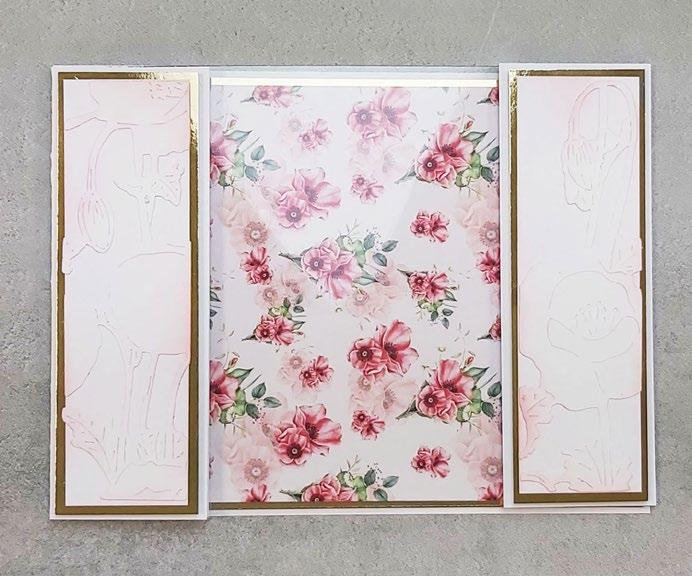
Mat the construction acetate onto the front fold of the card. Using the 50mm width white rectangles, mat one onto the left of the acetate card front and mat the other two onto either side of the right side of the acetate card front.
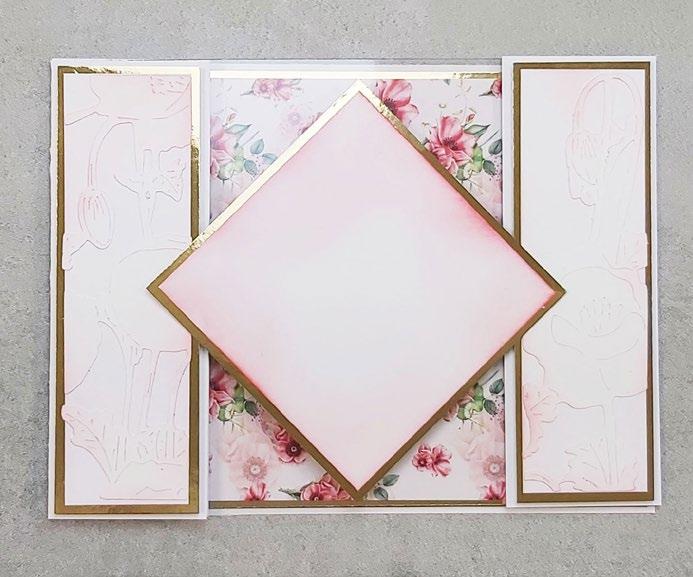
4Mat the emboss cuts onto the two 40mm width white rectangles. Mat onto the 45mm width gold rectangles and onto either side of the card front with foam tape.
5On one of the white squares, ink around the edges of the square and mat onto one of the gold squares. Mat onto the card front with foam tape.
6
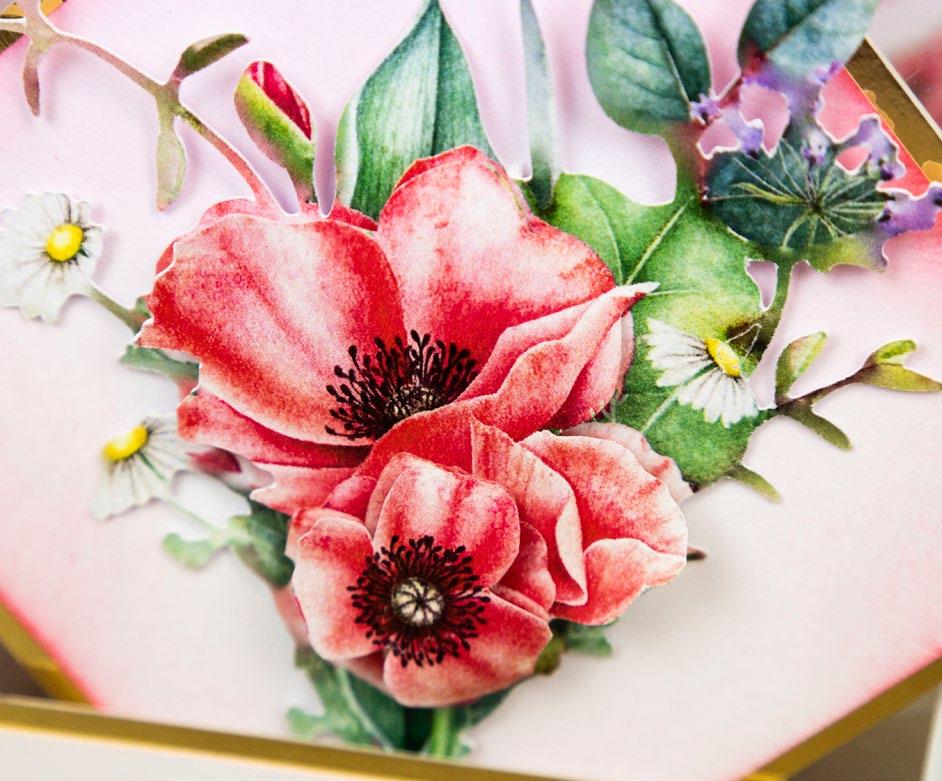
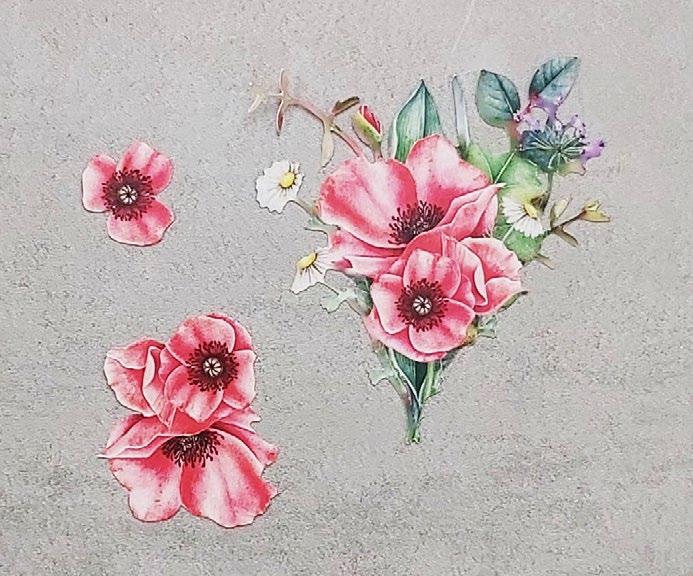
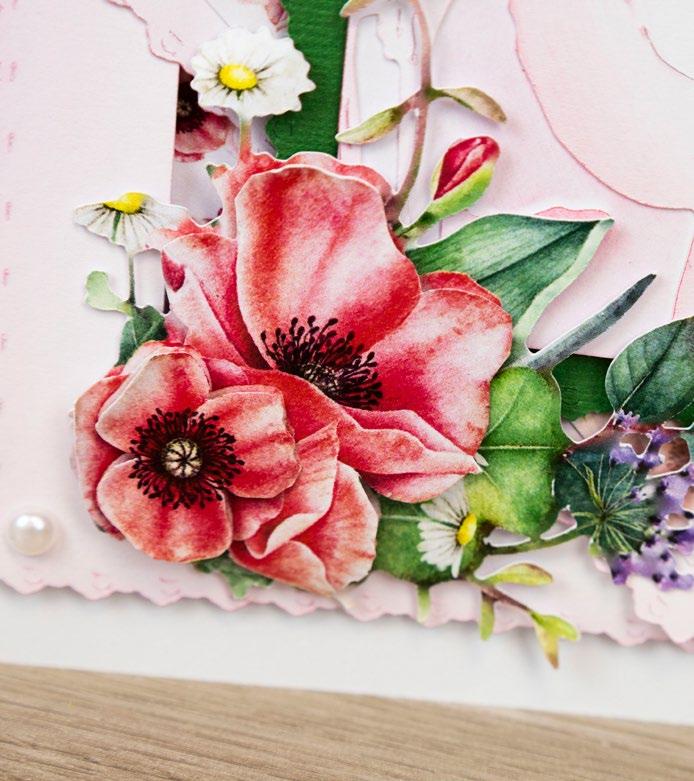
Trim the Poppy Posy cuts as shown.
7
Shape the florals and mat together onto the card with foam tape. Mat the sentiment rectangle onto the small gold rectangle and mat onto the card front with foam tape.

8Ink around the edges of the remaining white square and the sentiment square. Mat onto the remaining gold squares. Mat the sentiment square onto the inside back of the back and the other square onto the inside front of the card.
1 5 4 8 2 6 3 7 ----------------------------------- EXCLUSIVE GIFT - POPPY POSY ---------------------------------------www.tatteredlace.co.uk | 7
CLICK HERE TO DOWNLOAD YOUR SVG CONTENT PROJECT 1
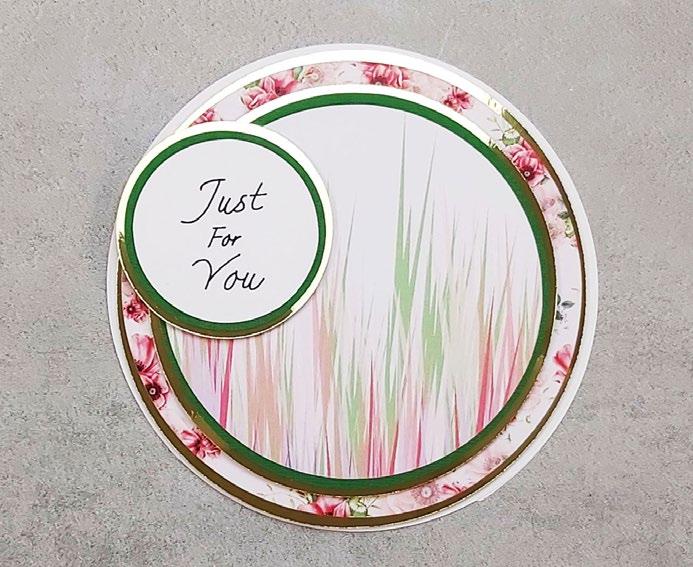
1
What you’ll need:
• 02-02-Poppy Posy SVG files
• White cardstock
• Green cardstock
• Gold mirror cardstock
Cut all the pieces needed to create the project as listed below;
From SVG downloads:
• From white cardstock:
- 1 x PP-2-Poppy Outline
• From charisma: - 1 x PP-2-Charisma
From machine memory:
• From white cardstock: - 2 x 144mm circle - 1 x 53mm circle (with sentiment draw file)
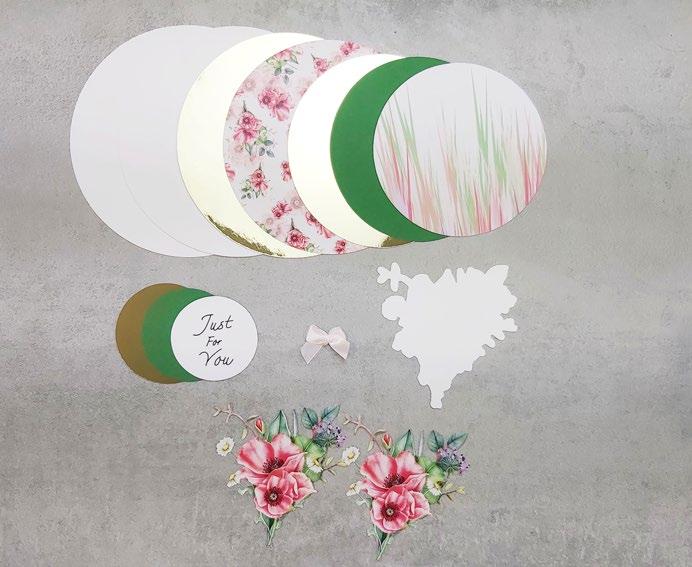
• From gold mirror cardstock: - 1 x 139mm circle
- 1 x 120mm circle
- 1 x 63mm circle
• From green cardstock
- 1 x 115mm circle
- 1 x 58mm circle
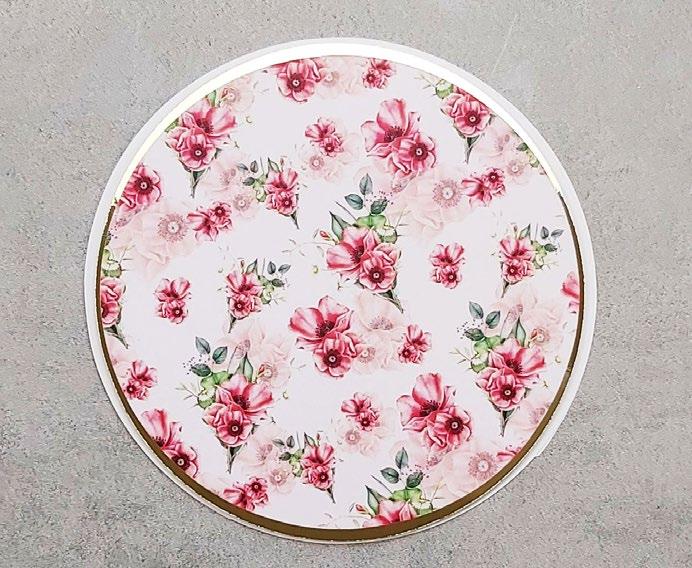
• From backing paper: - 1 x 134mm circle (poppy)
- 1 x 110mm circle (grass)
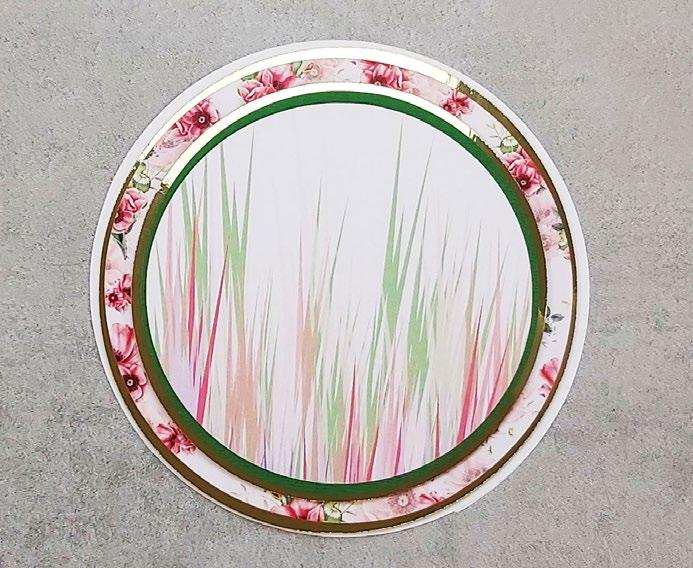
On one of the white circles, measure down 2.5cm from the
• Distress Ink – Festive Berries
• Pale pink ribbon
• Pearl gem
top edge and score and fold to create a tab. Cut a straight line across the bottom edge. Mat the circles together to create a tent card. Mat the 134mm poppy circle onto the 139mm gold circle and mat onto the card with foam tape.
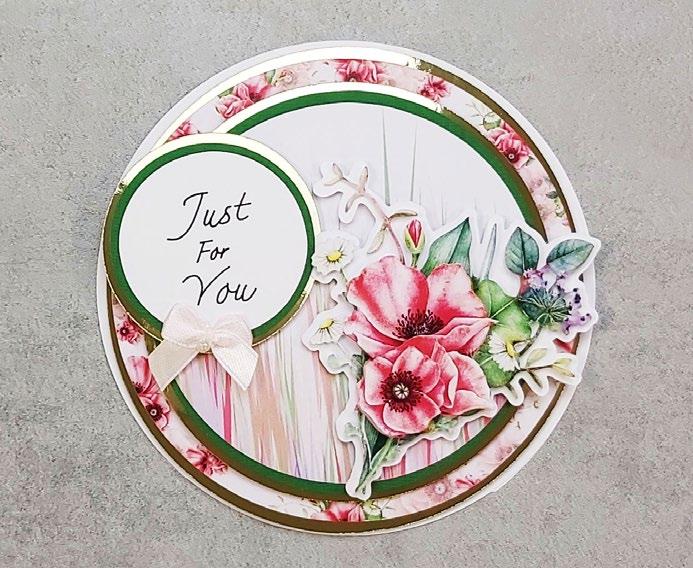
3
Mat the 110mm circle onto the 115mm green circle, and then onto the 120mm gold circle. Mat onto the card with foam tape.
4
Ink around the edges of the sentiment circle and mat onto the 58mm circle. Mat onto the 63mm gold circle and mat onto the card with foam tape.
5
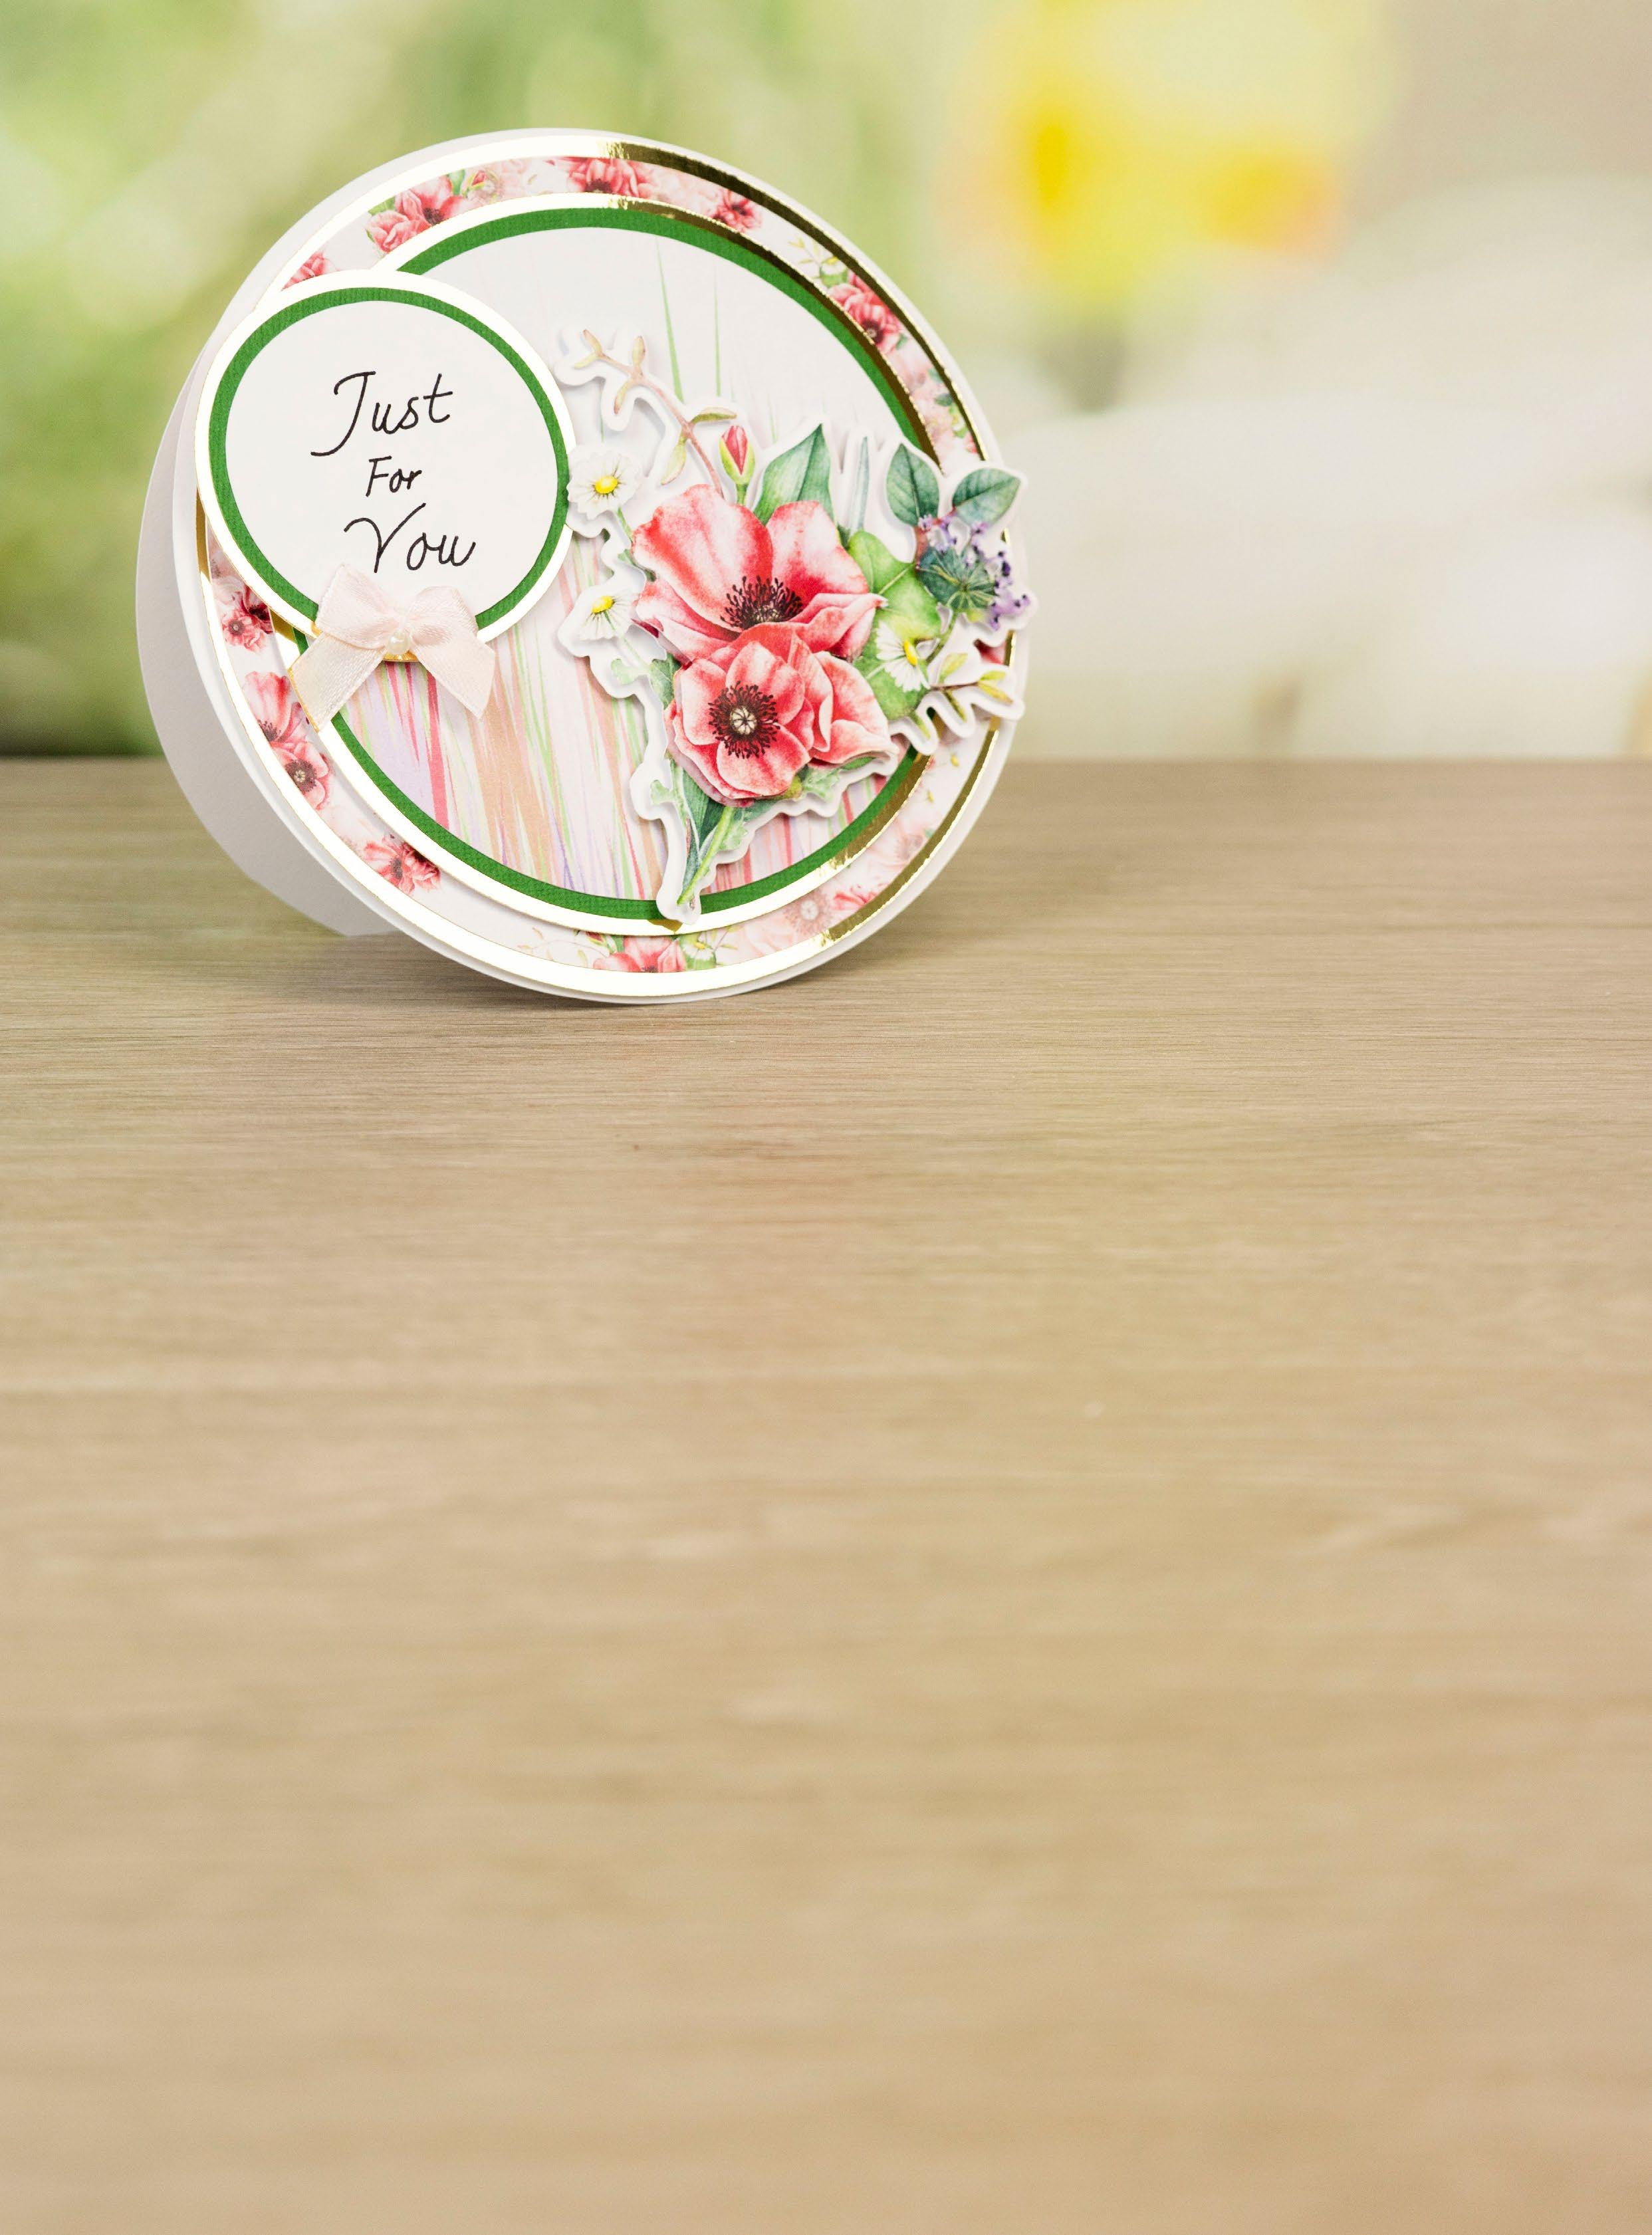
On one of the Poppy cuts, trim the foliage away to leave just the poppies. Shape the cuts, mat together and mat onto the white outline. Mat onto the card with foam tape. Tie a bow from pale pink ribbon and mat onto the card. Finish with a pearl gem in the middle of the bow.
Step bySteps 1 2 3 4 5
2
----------------------------------- EXCLUSIVE GIFT - POPPY POSY ---------------------------------------CLICK HERE TO DOWNLOAD YOUR SVG CONTENT PROJECT 2 8 | www.tatteredlace.co.uk
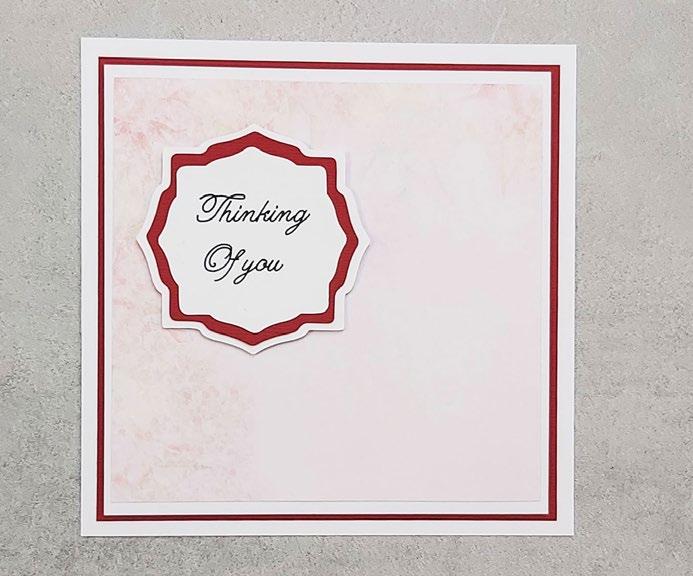
What you’ll need:
• 03-03-Poppy Posy SVG files
• White cardstock
• Red cardstock
• Red pearl gems
Cut all the pieces needed to create the project as listed below;
From SVG downloads:
• From white cardstock:
- 1 x PP-3-Sentiment (with sentiment draw file)
- 1 x PP-3-Sentiment Mat 1
• From red cardstock: - 1 x PP-3-Sentiment Mat 2
• From charisma: - 1 x PP-3-Charisma
From machine memory:
• From white cardstock:
- 2 x 150mm square
- 1 x 135mm square
• From red cardstock: - 1 x 140mm square
• From backing paper: - 1 x 130mm square (floral)
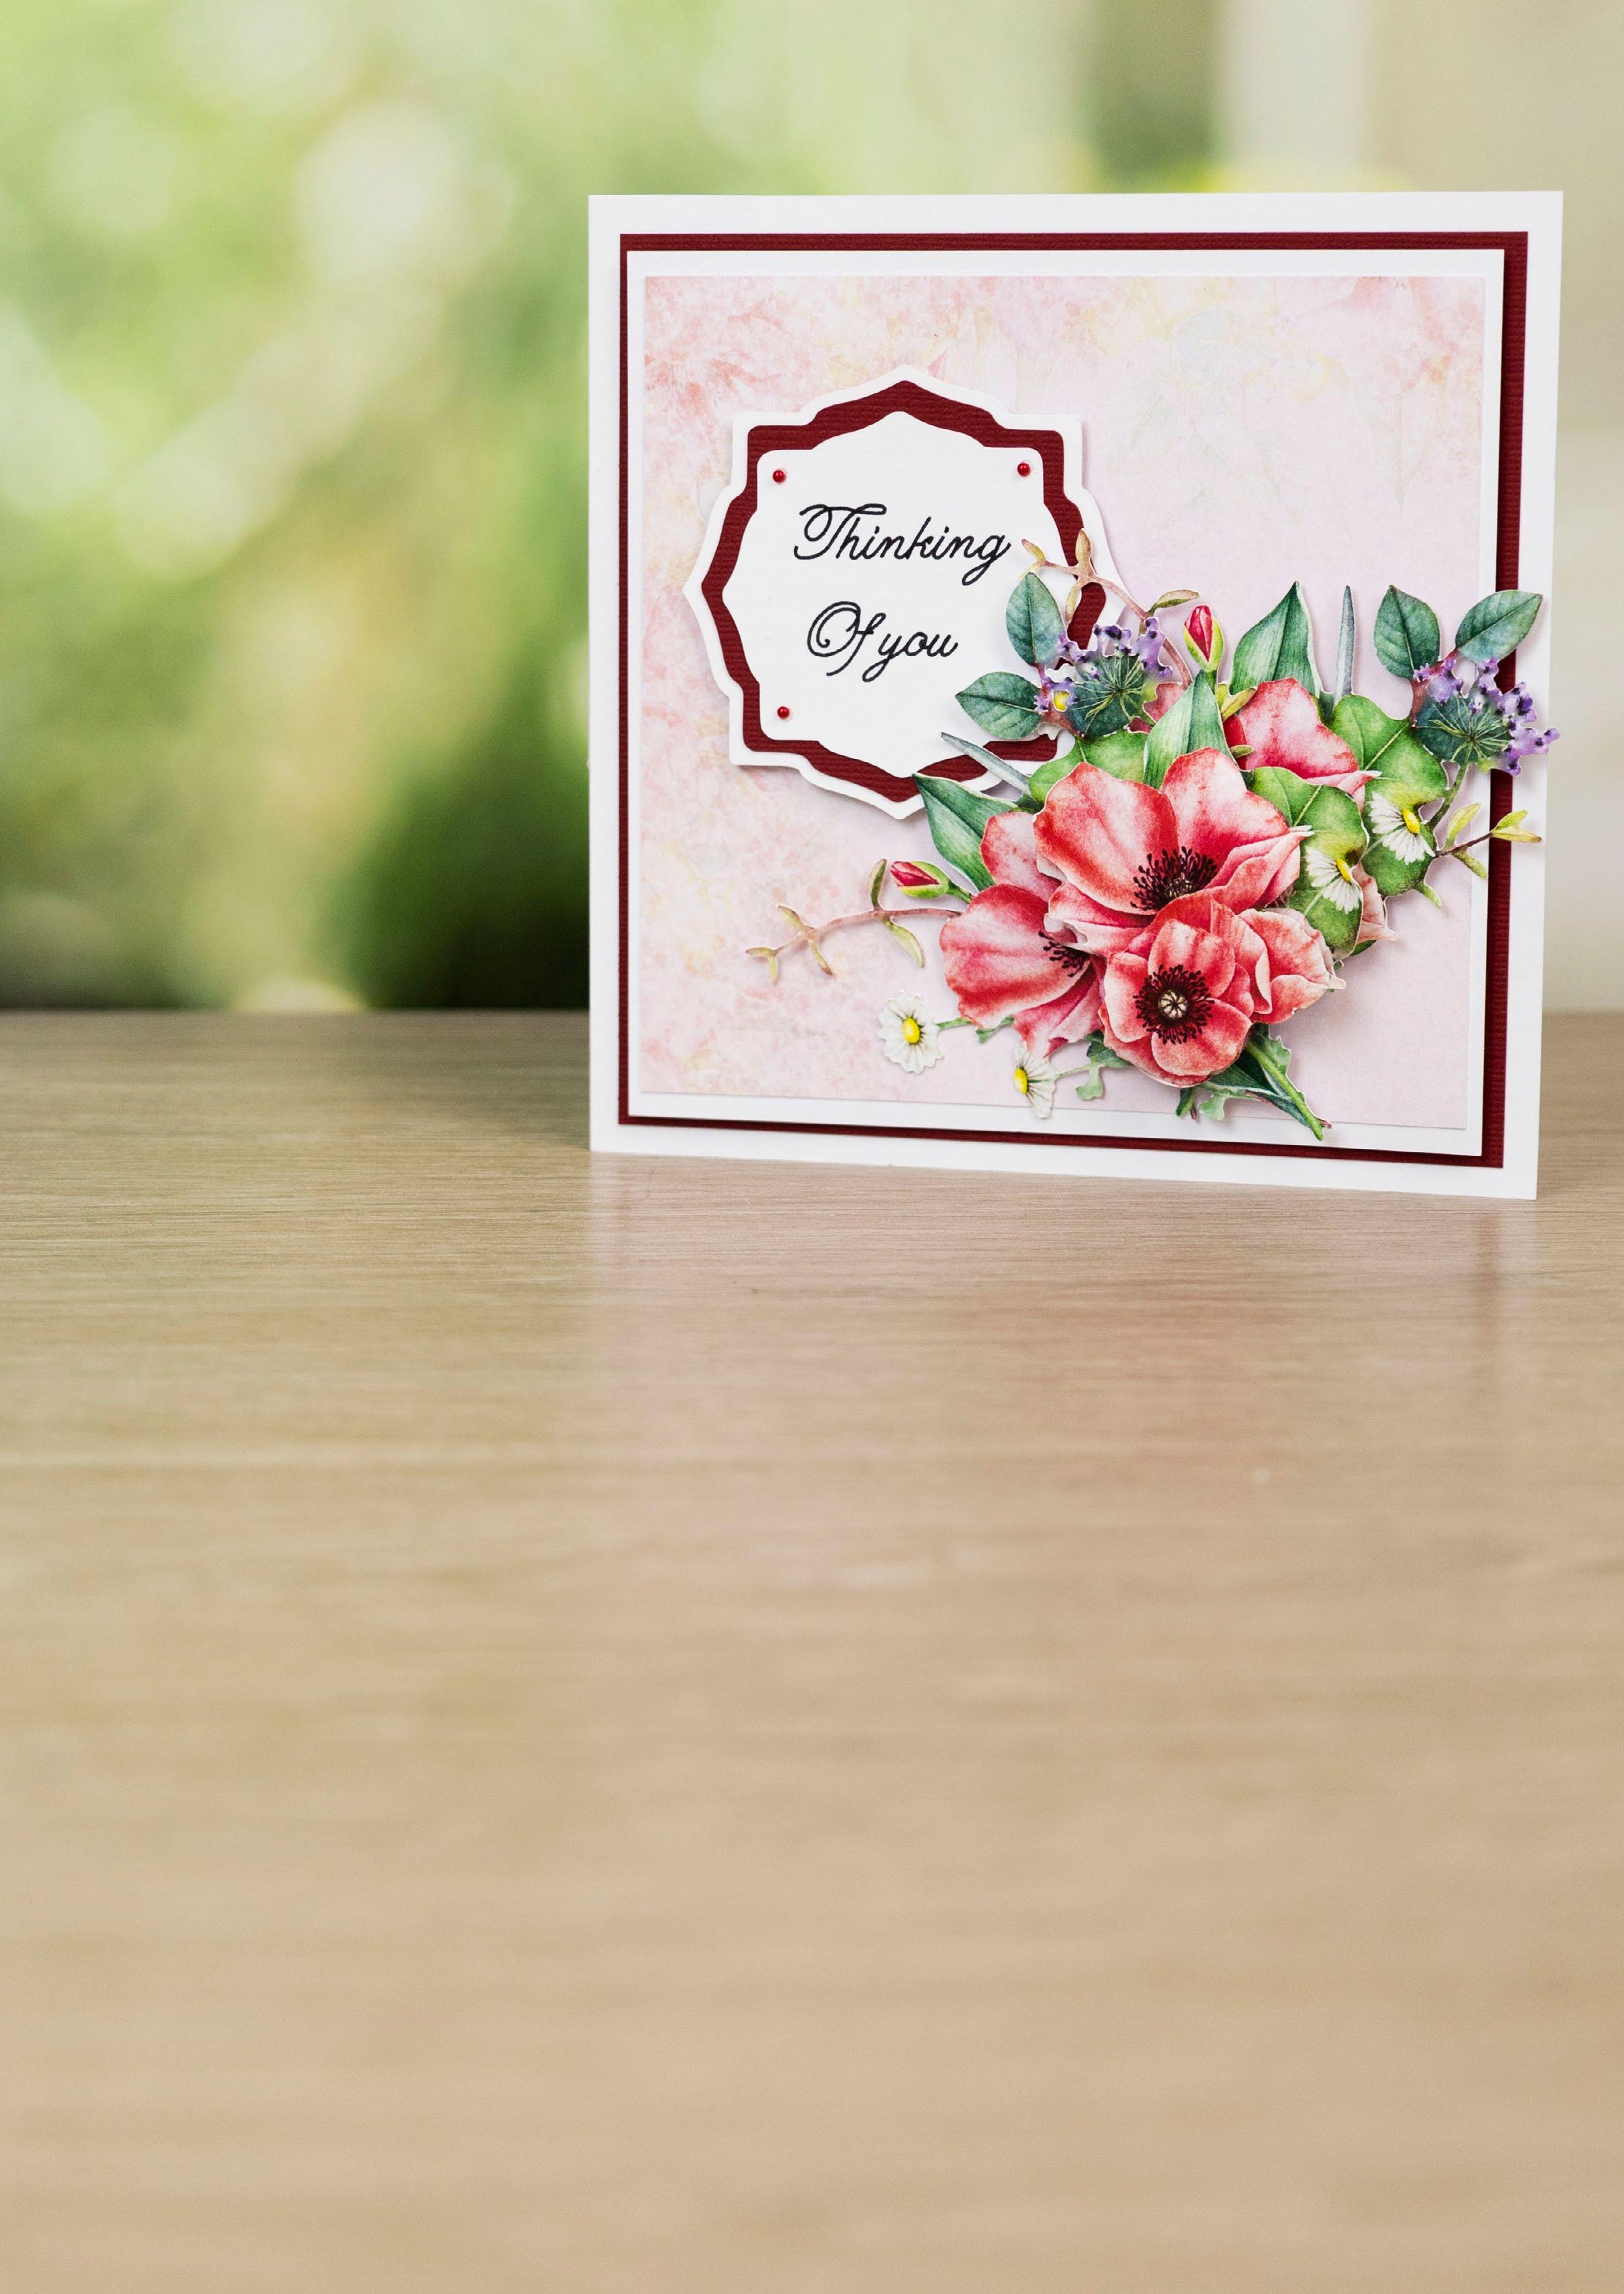
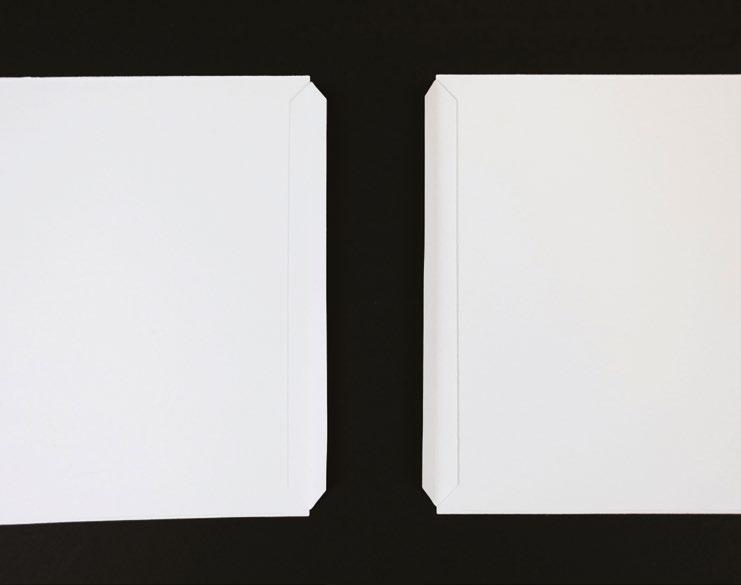
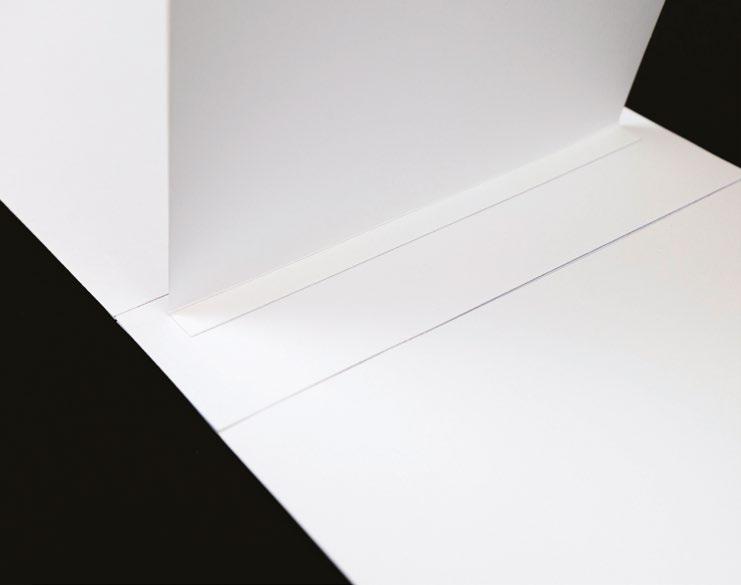
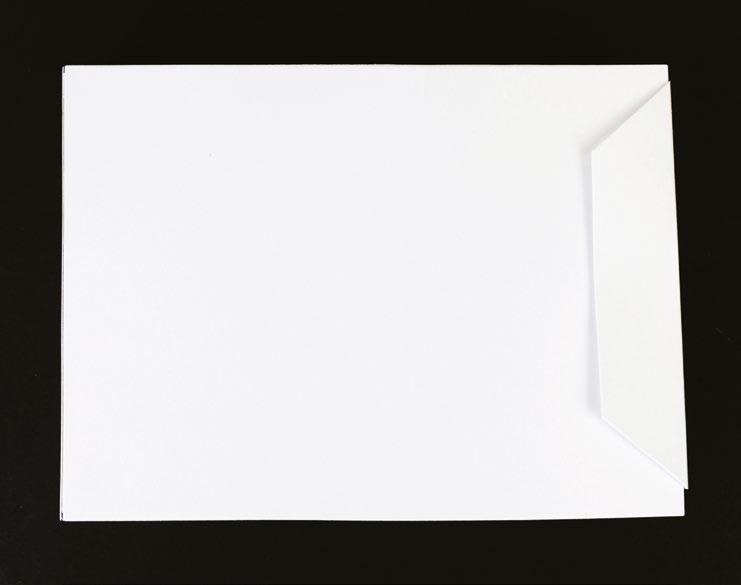
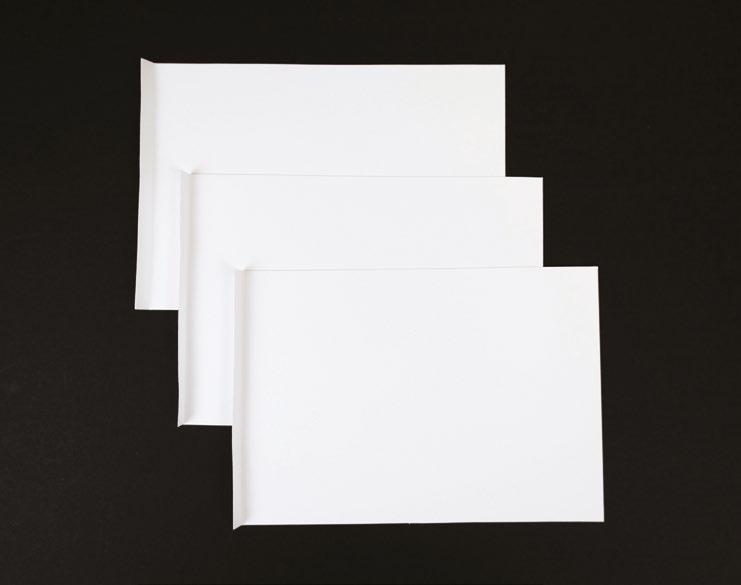
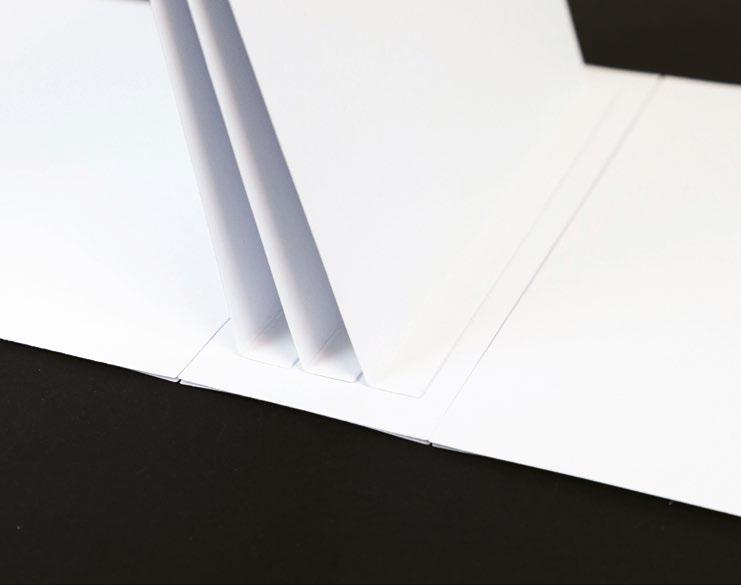
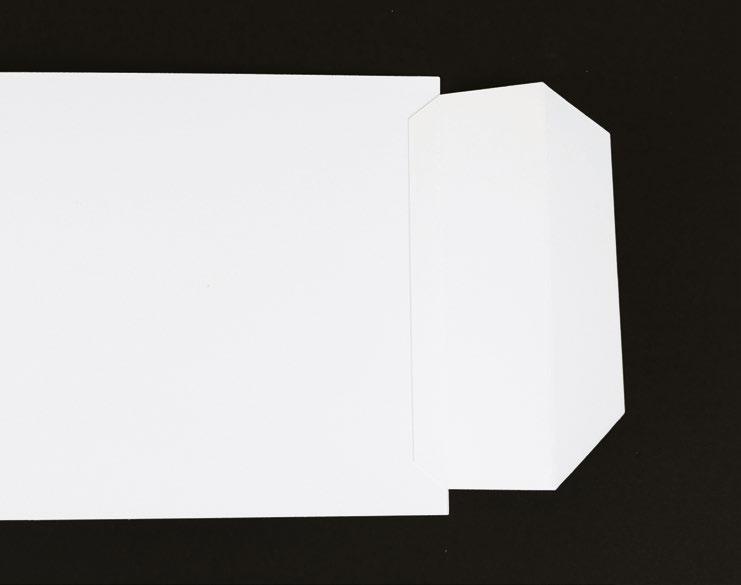
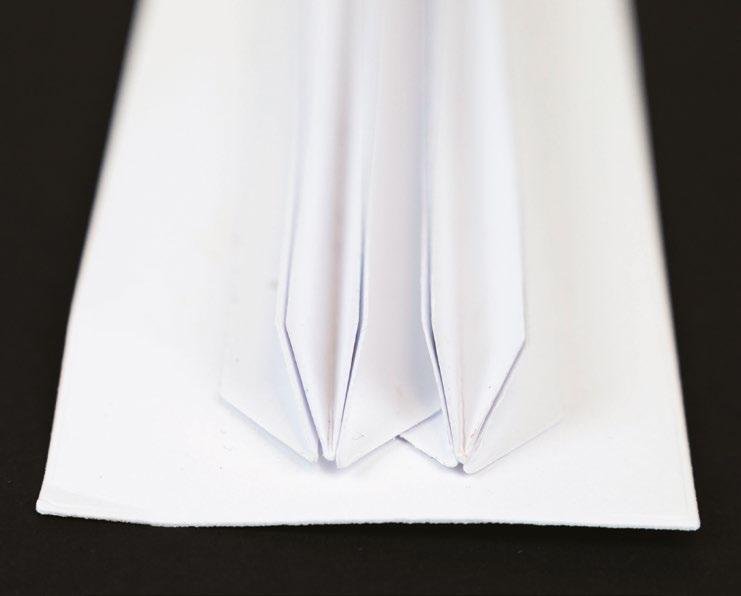
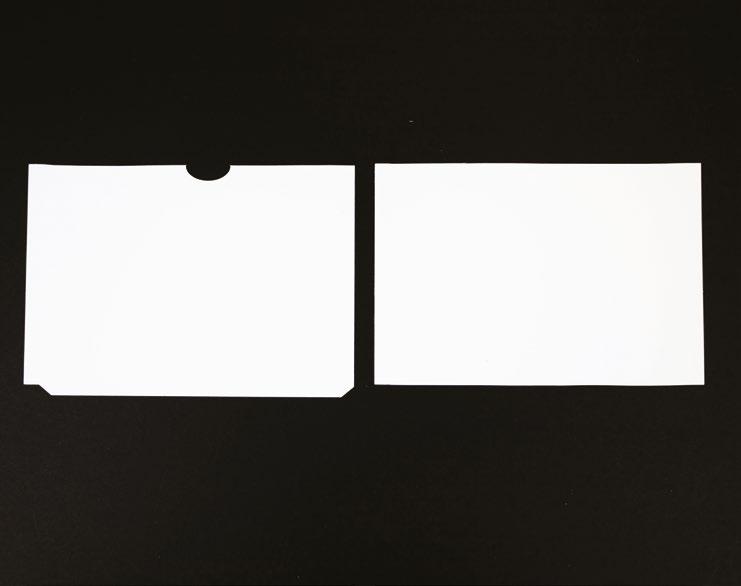
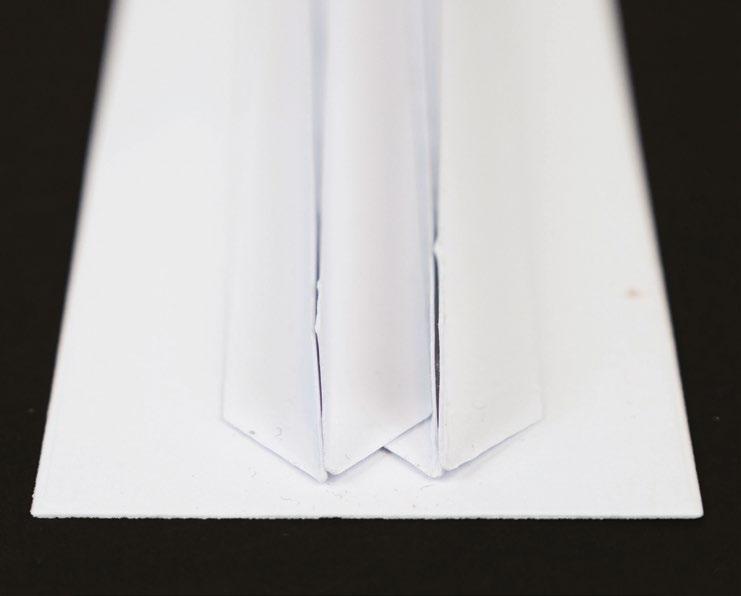
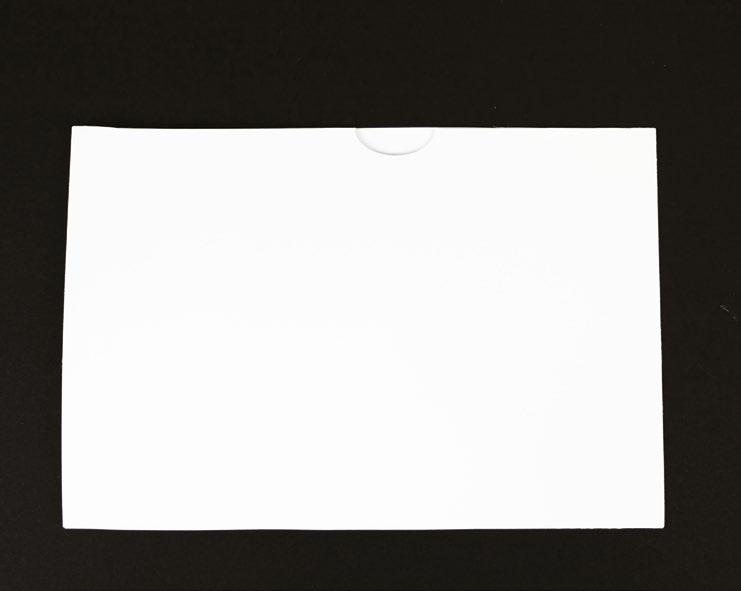
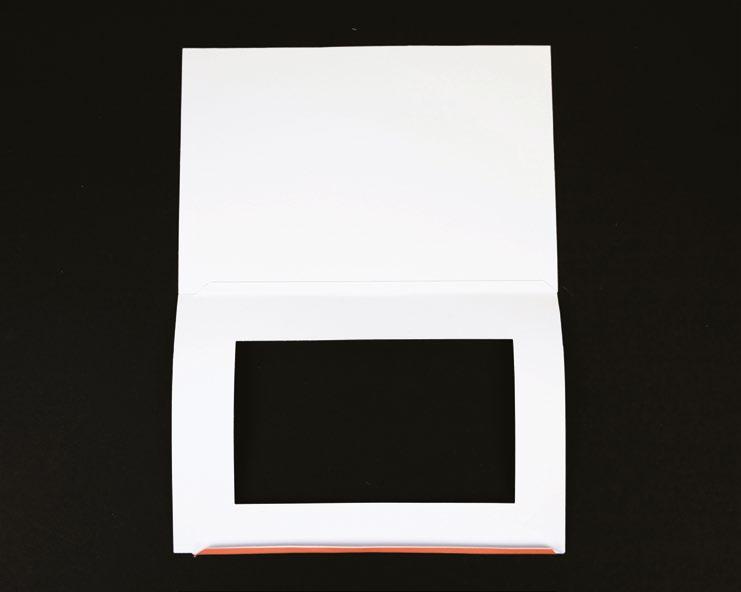
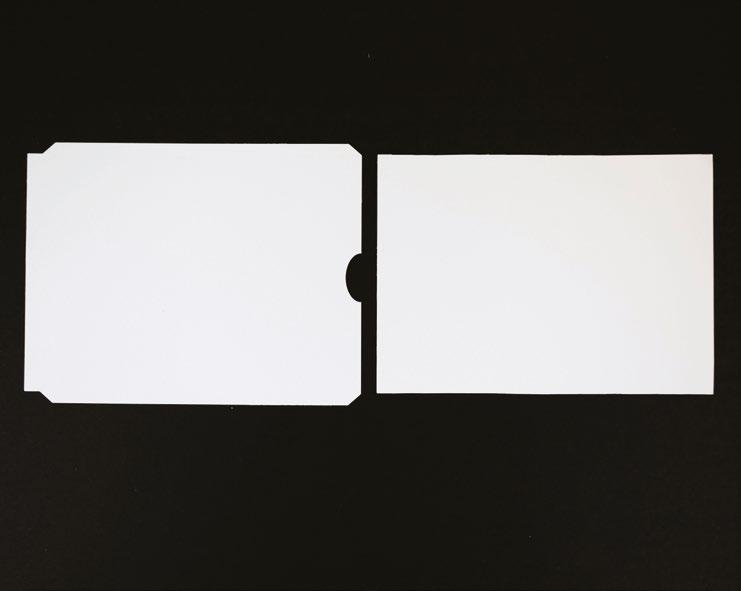
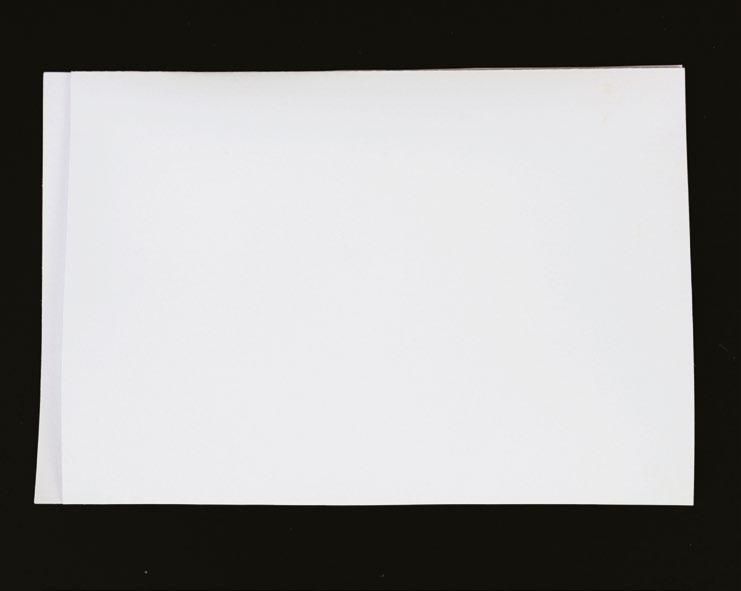
2On one of the white squares, measure in 10mm from the left edge and score and fold to create a tab. Attach to the other white square using the tab to create card. Mat the red square onto the card. Mat the floral square onto the white square and mat onto the card with foam tape. Mat the sentiment onto the red mat, then onto the white mat. Mat onto the card with foam tape.
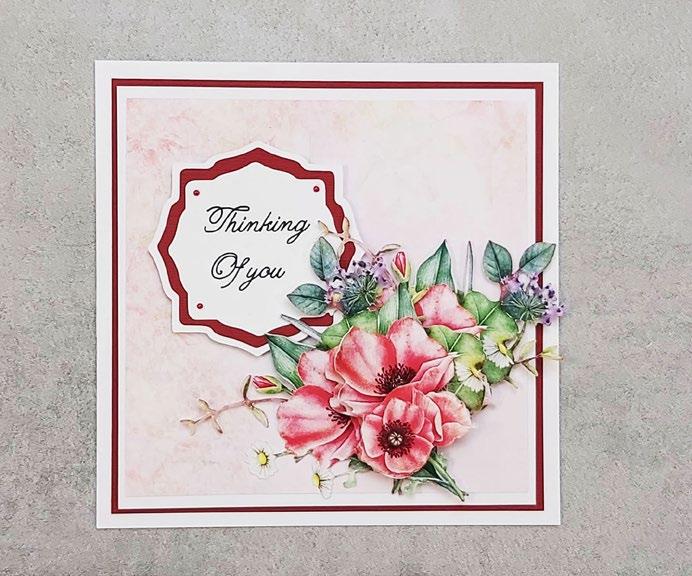
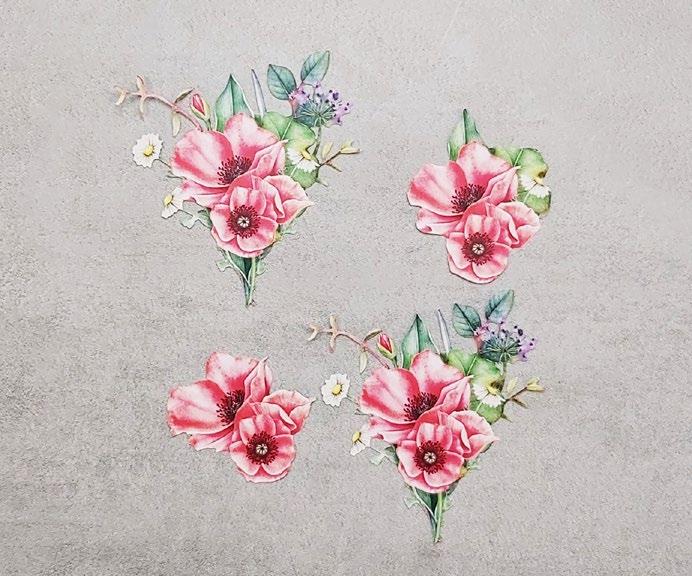
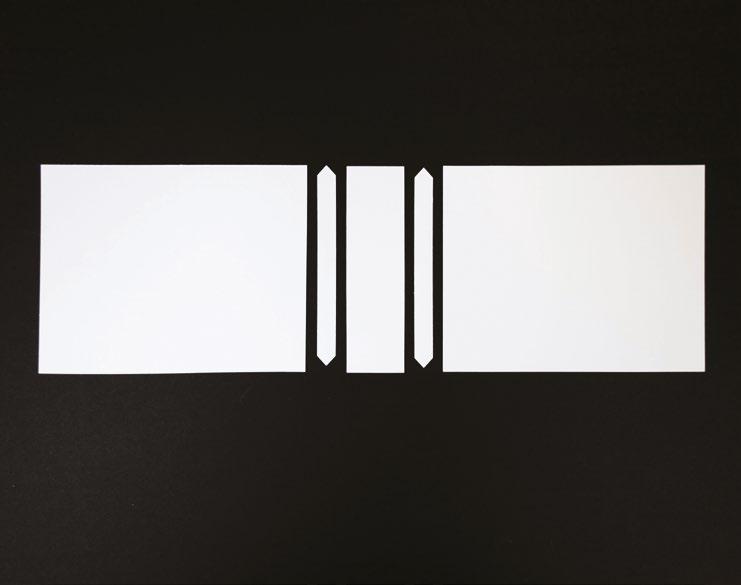
Trim the Poppy Posy cuts as shown.
Shape the cuts and mat together onto the card with foam tape. Finish by adding pearl gems onto the sentiment.
Step bySteps
1
3
4
1 3 2 4 ----------------------------------- EXCLUSIVE GIFT - POPPY POSY ---------------------------------------CLICK HERE TO DOWNLOAD YOUR SVG CONTENT PROJECT 3 www.tatteredlace.co.uk | 9
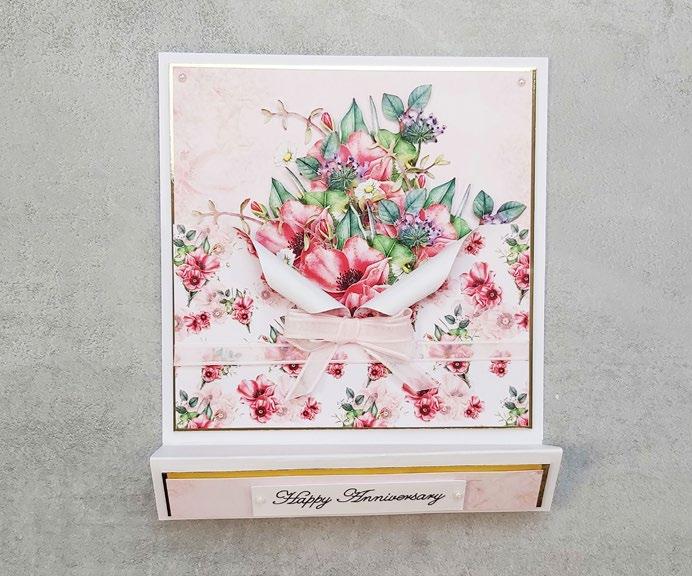
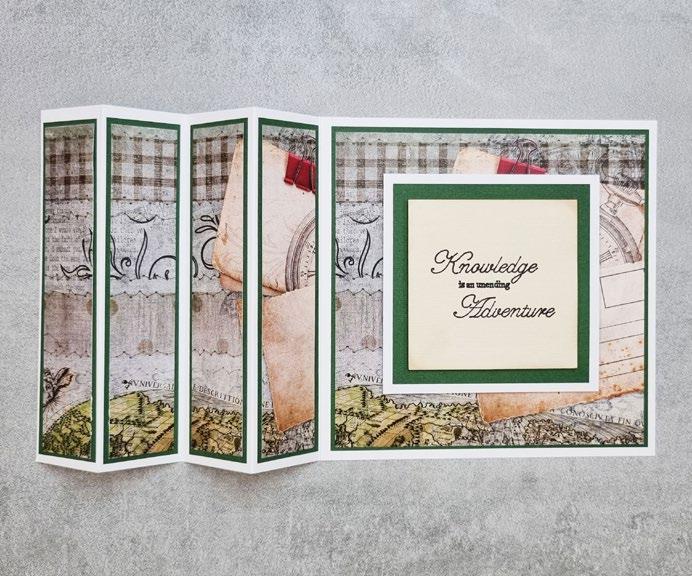
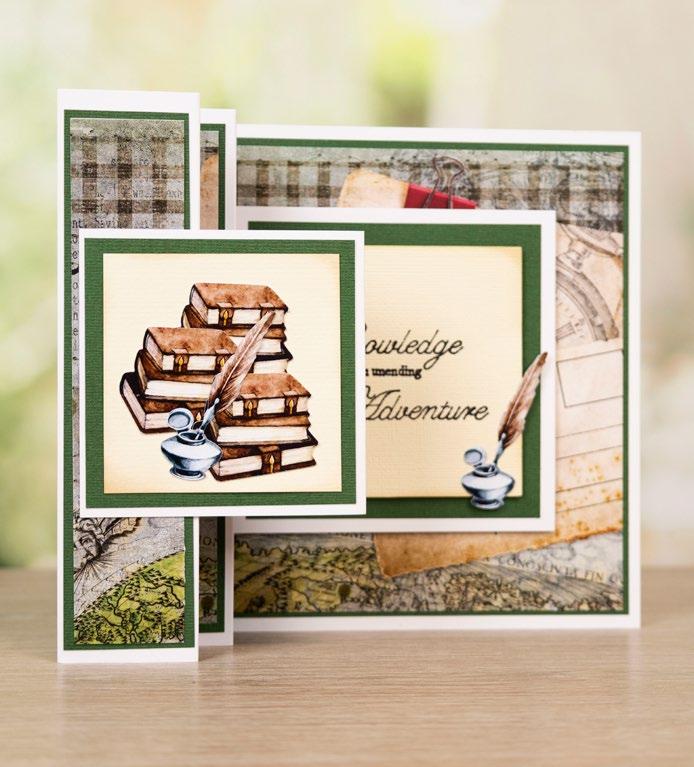
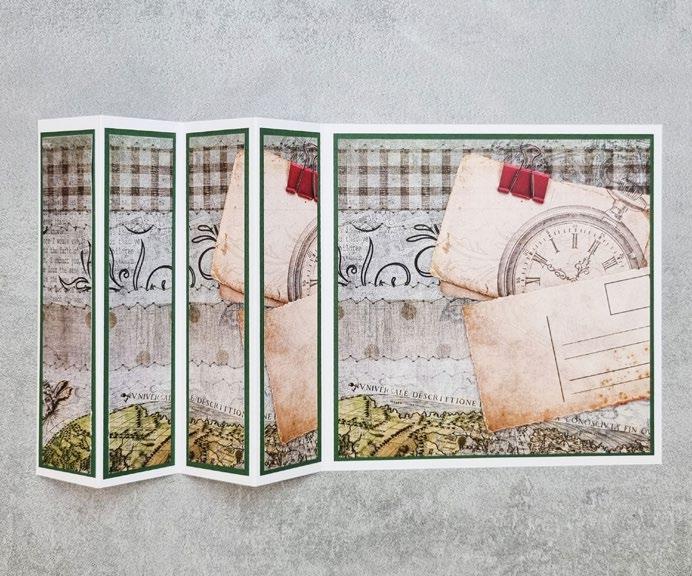
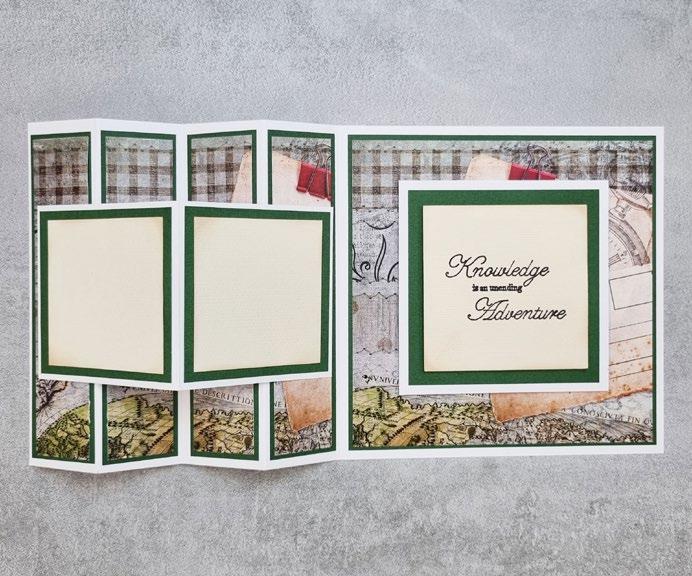
What you’ll need: • 04-04-Poppy Posy SVG files • White cardstock • Gold mirror cardstock • Pale pink ribbon • Pearl gems ----------------------------------- EXCLUSIVE GIFT - POPPY POSY ---------------------------------------10 | www.tatteredlace.co.uk
Step bySteps
1Cut all the pieces needed to create the project as listed below;
From SVG downloads:
• From charisma:
- 1 x PP-4-Charisma
From machine memory:
• From white cardstock:
- 1 x 180mm x 250mm rectangle
- 1 x 180mm square
- 1 x 95mm x 20mm rectangle (with sentiment draw file)
• From gold mirror cardstock:

- 1 x 170mm square
- 1 x 170mm x 30mm rectangle
• From backing paper:
- 1 x 165mm x 25mm rectangle (floral)

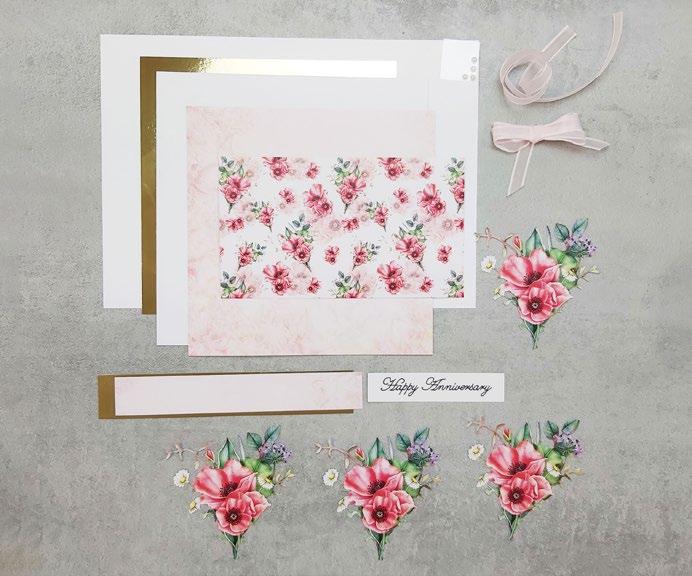
- 1 x 165mm square (floral)
- 1 x 165mm x 95mm rectangle (poppy)
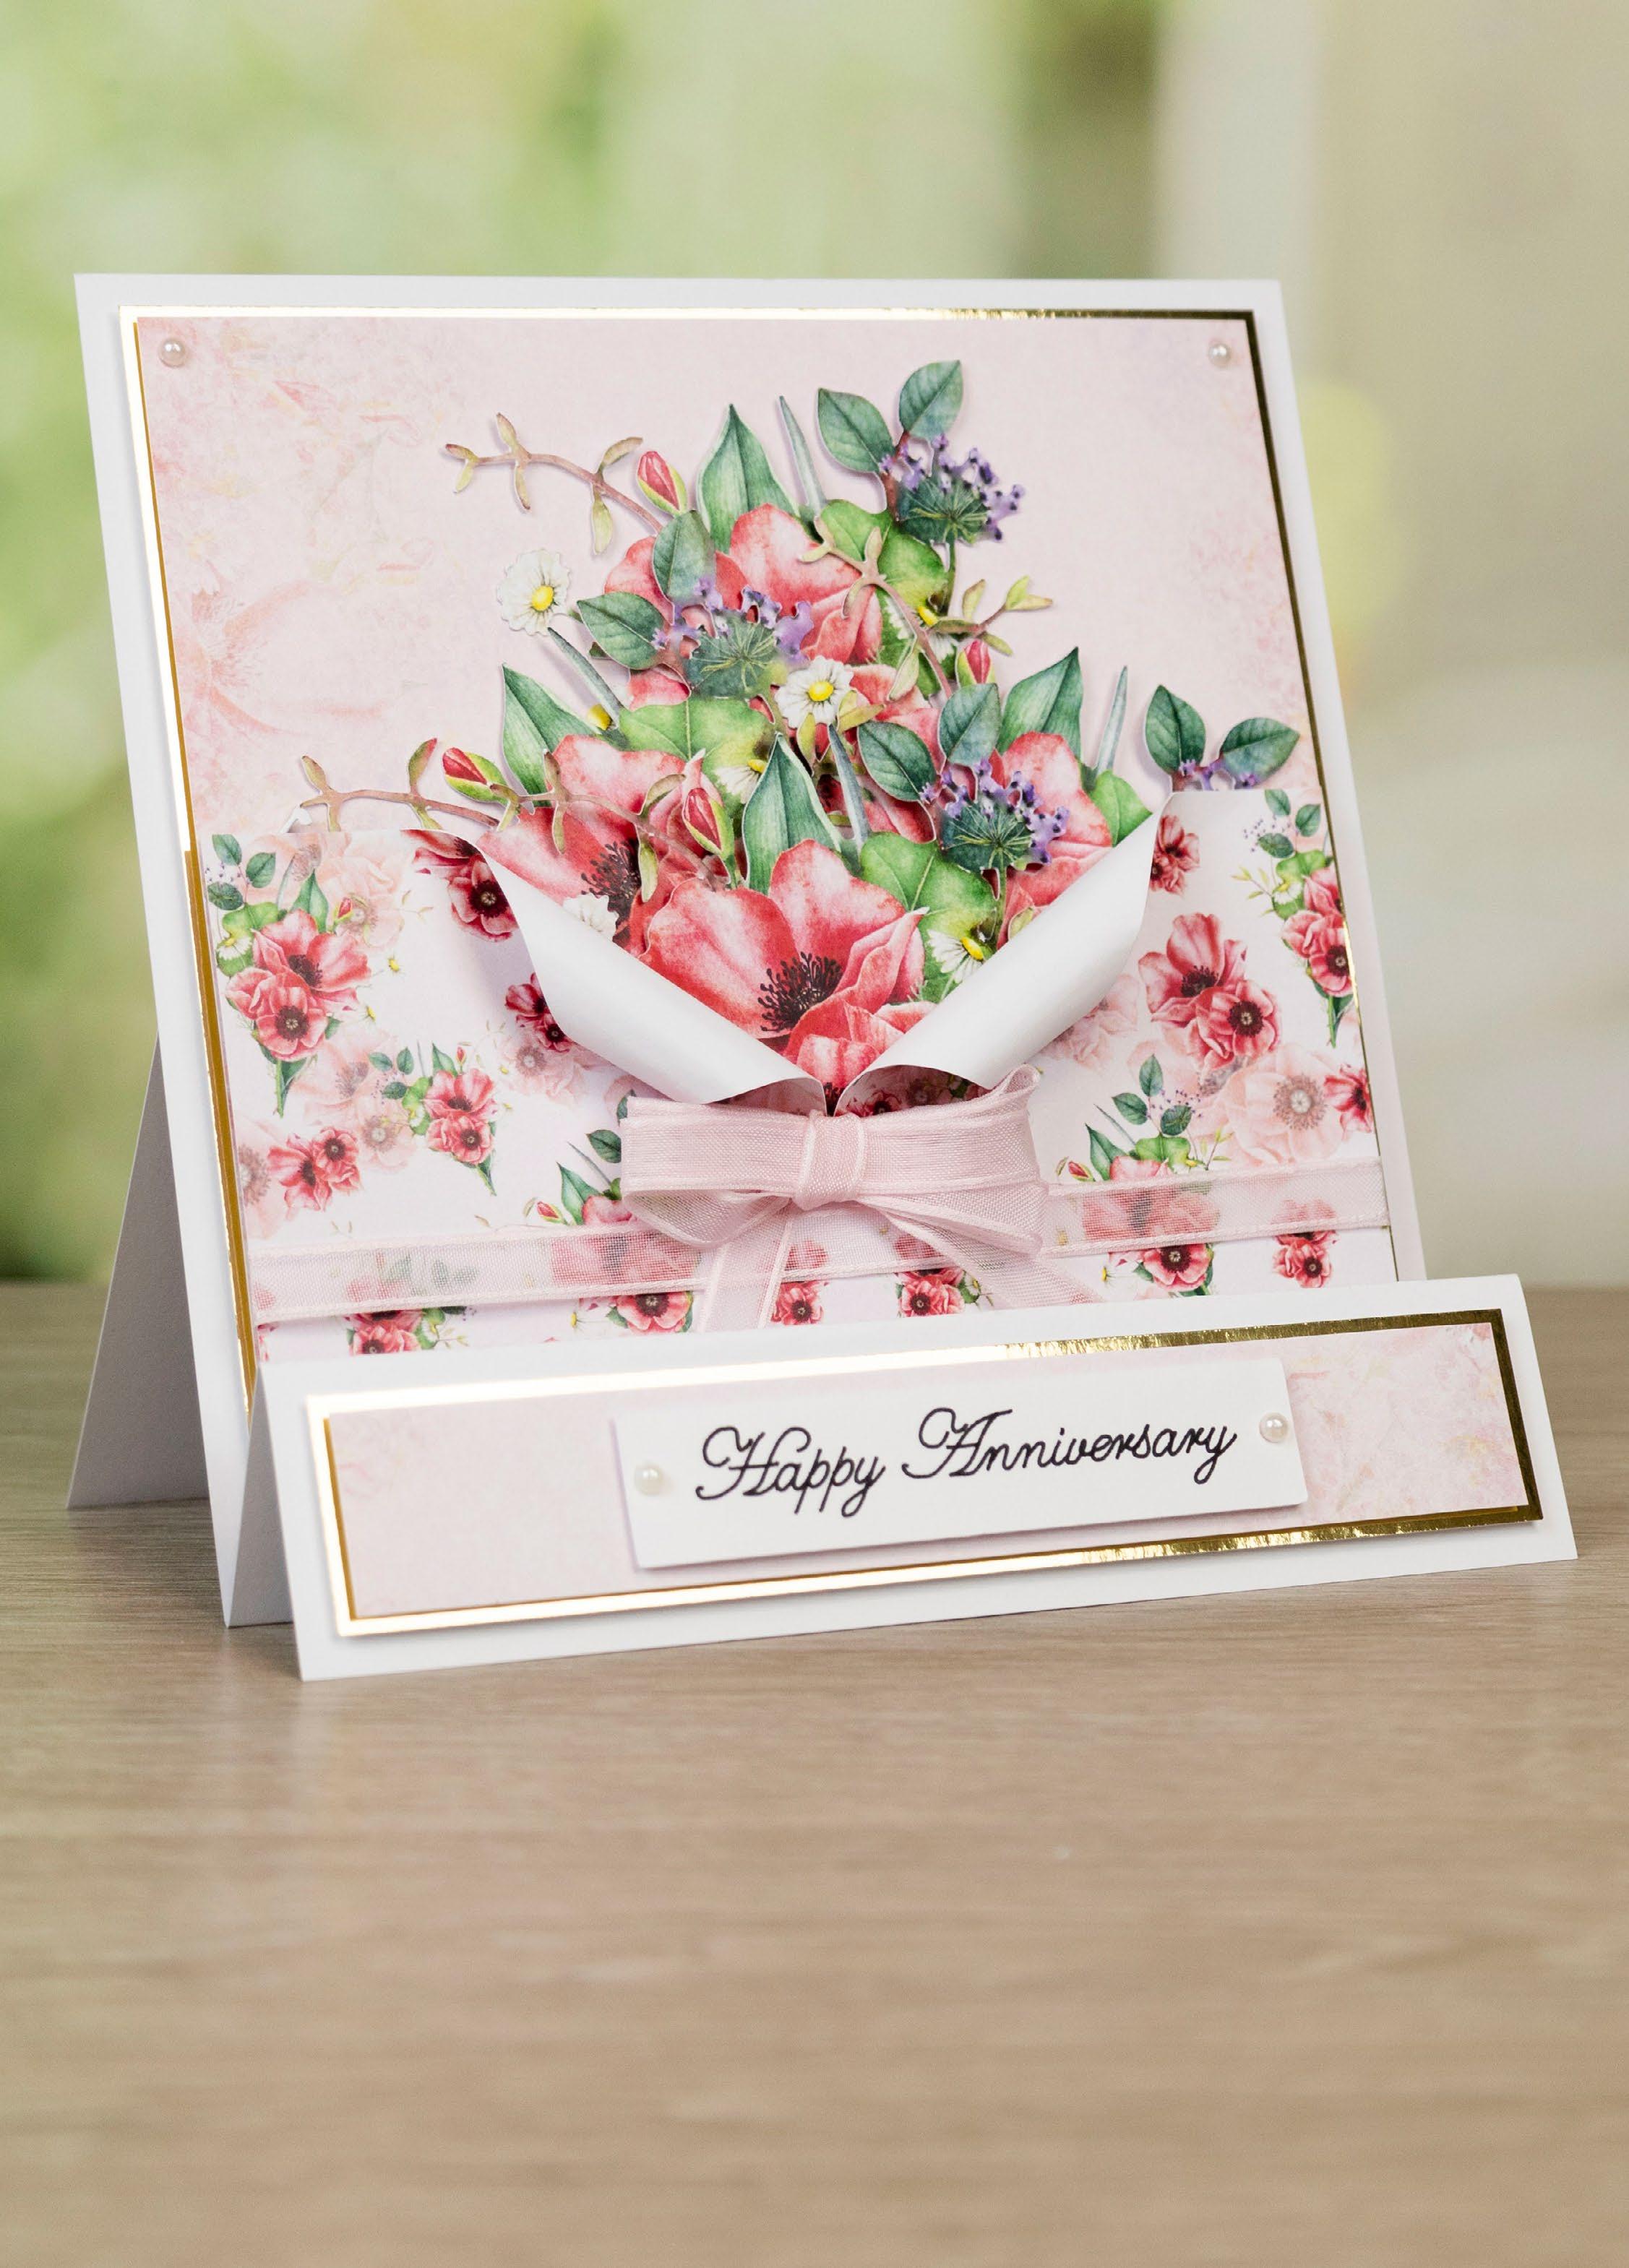
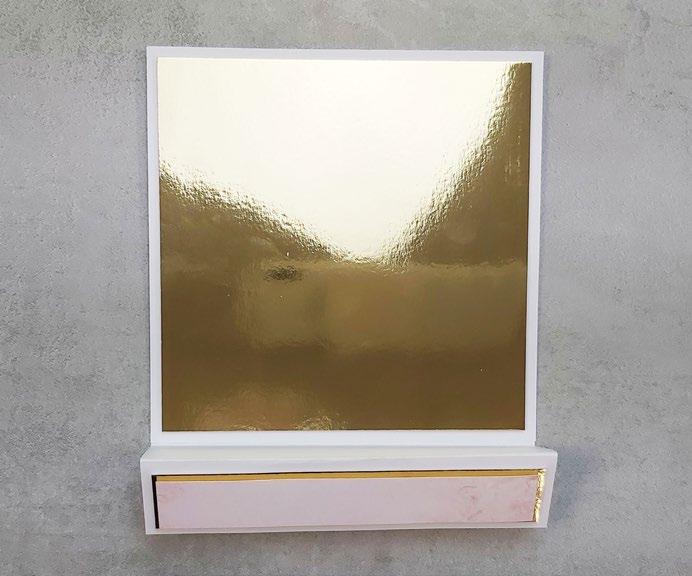
2On the large white rectangle, from the bottom edge, measure up at 4cm, 8cm and 16cm and score and fold horizontally to create a stepper card. Mat the large white square onto the back step of the card. Mat the gold square onto the back step with foam tape. Mat the thin floral rectangle onto the thin gold rectangle and mat onto the front step of the card.
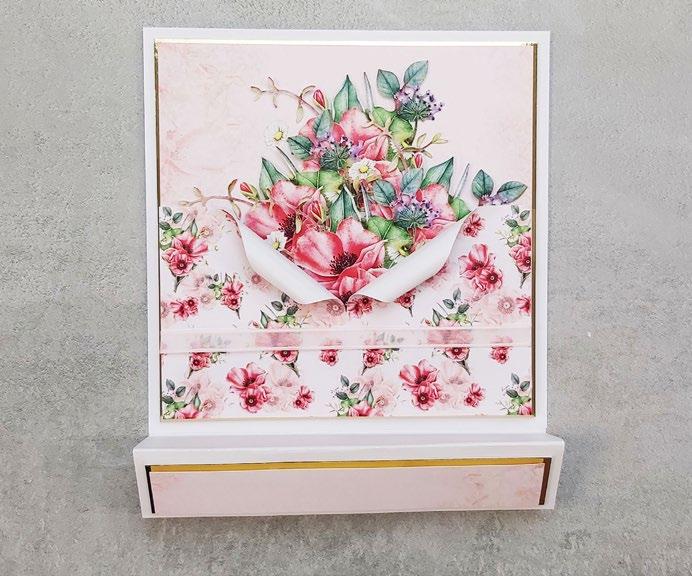
Shape the Poppy Posy cuts and mat onto the floral square with foam tape.
Cut into the middle of the poppy rectangle, stopping when you reach the centre. Roll the backing paper away from the cut line and glue to secure the roll in place.
Mat the rolled backing paper onto the square. Wrap a length of pale pink ribbon around the bottom of the backing paper squares and mat onto the back step of the card with foam tape.
6
Mat the sentiment onto the front step of the card with foam tape. Tie a multi loop bow from pale pink ribbon and mat onto the ribbon. Finish by adding pearl gems to the sentiment and the top two corners of the card.
1 3 5 2 4 6 ----------------------------------- EXCLUSIVE GIFT - POPPY POSY ----------------------------------------
3
4
5
CLICK HERE TO DOWNLOAD YOUR SVG CONTENT PROJECT 4 www.tatteredlace.co.uk | 11

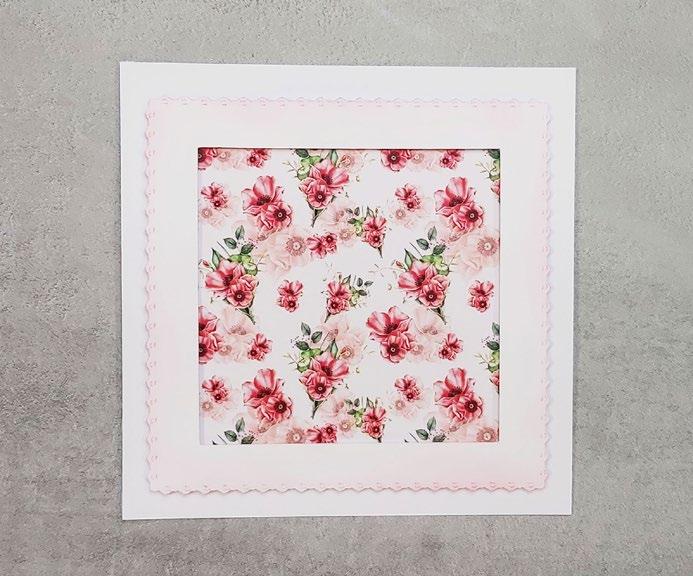
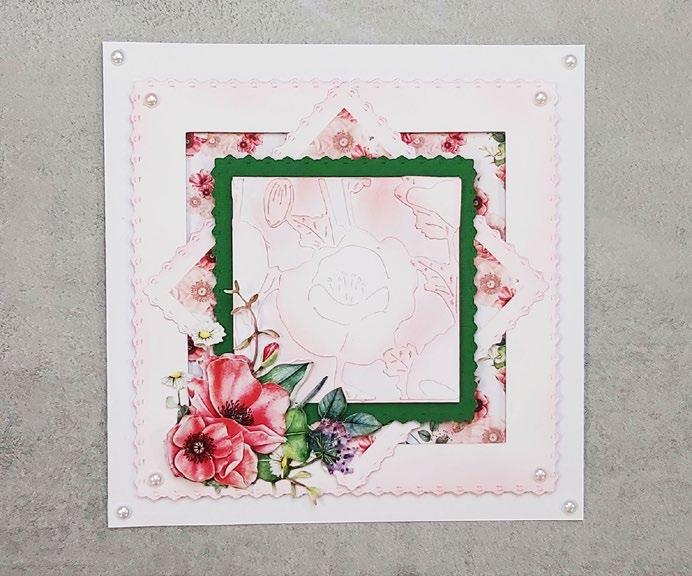
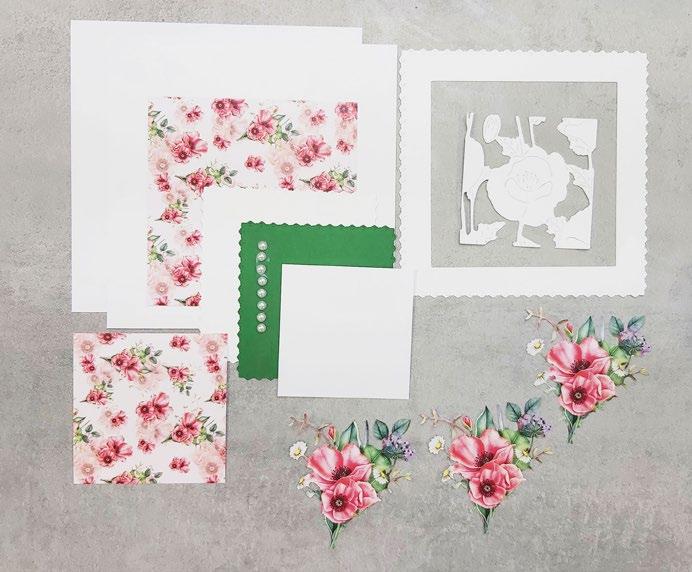
What you’ll need: • 05-05-Poppy Posy SVG files • White cardstock • Gold mirror cardstock • Pearl gems ----------------------------------- EXCLUSIVE GIFT - POPPY POSY ---------------------------------------PROJECT 5 12 | www.tatteredlace.co.uk
Cut all the pieces needed to create the project as listed below;
From SVG downloads:
• From white cardstock:
- 1 x PP-5-Fancy Frame
- 1 x PP-5-Fancy Mat 1 - 1 x PP-5-Emboss
• From green cardstock: - 1 x PP-5-Fancy Mat 2
• From charisma: - 1 x PP-5-Charisma
From machine memory:
• From white cardstock:
- 2 x 180mm square - 1 x 85mm square
• From backing paper: - 1 x 130mm square (poppy) - 1 x 95mm square (poppy)
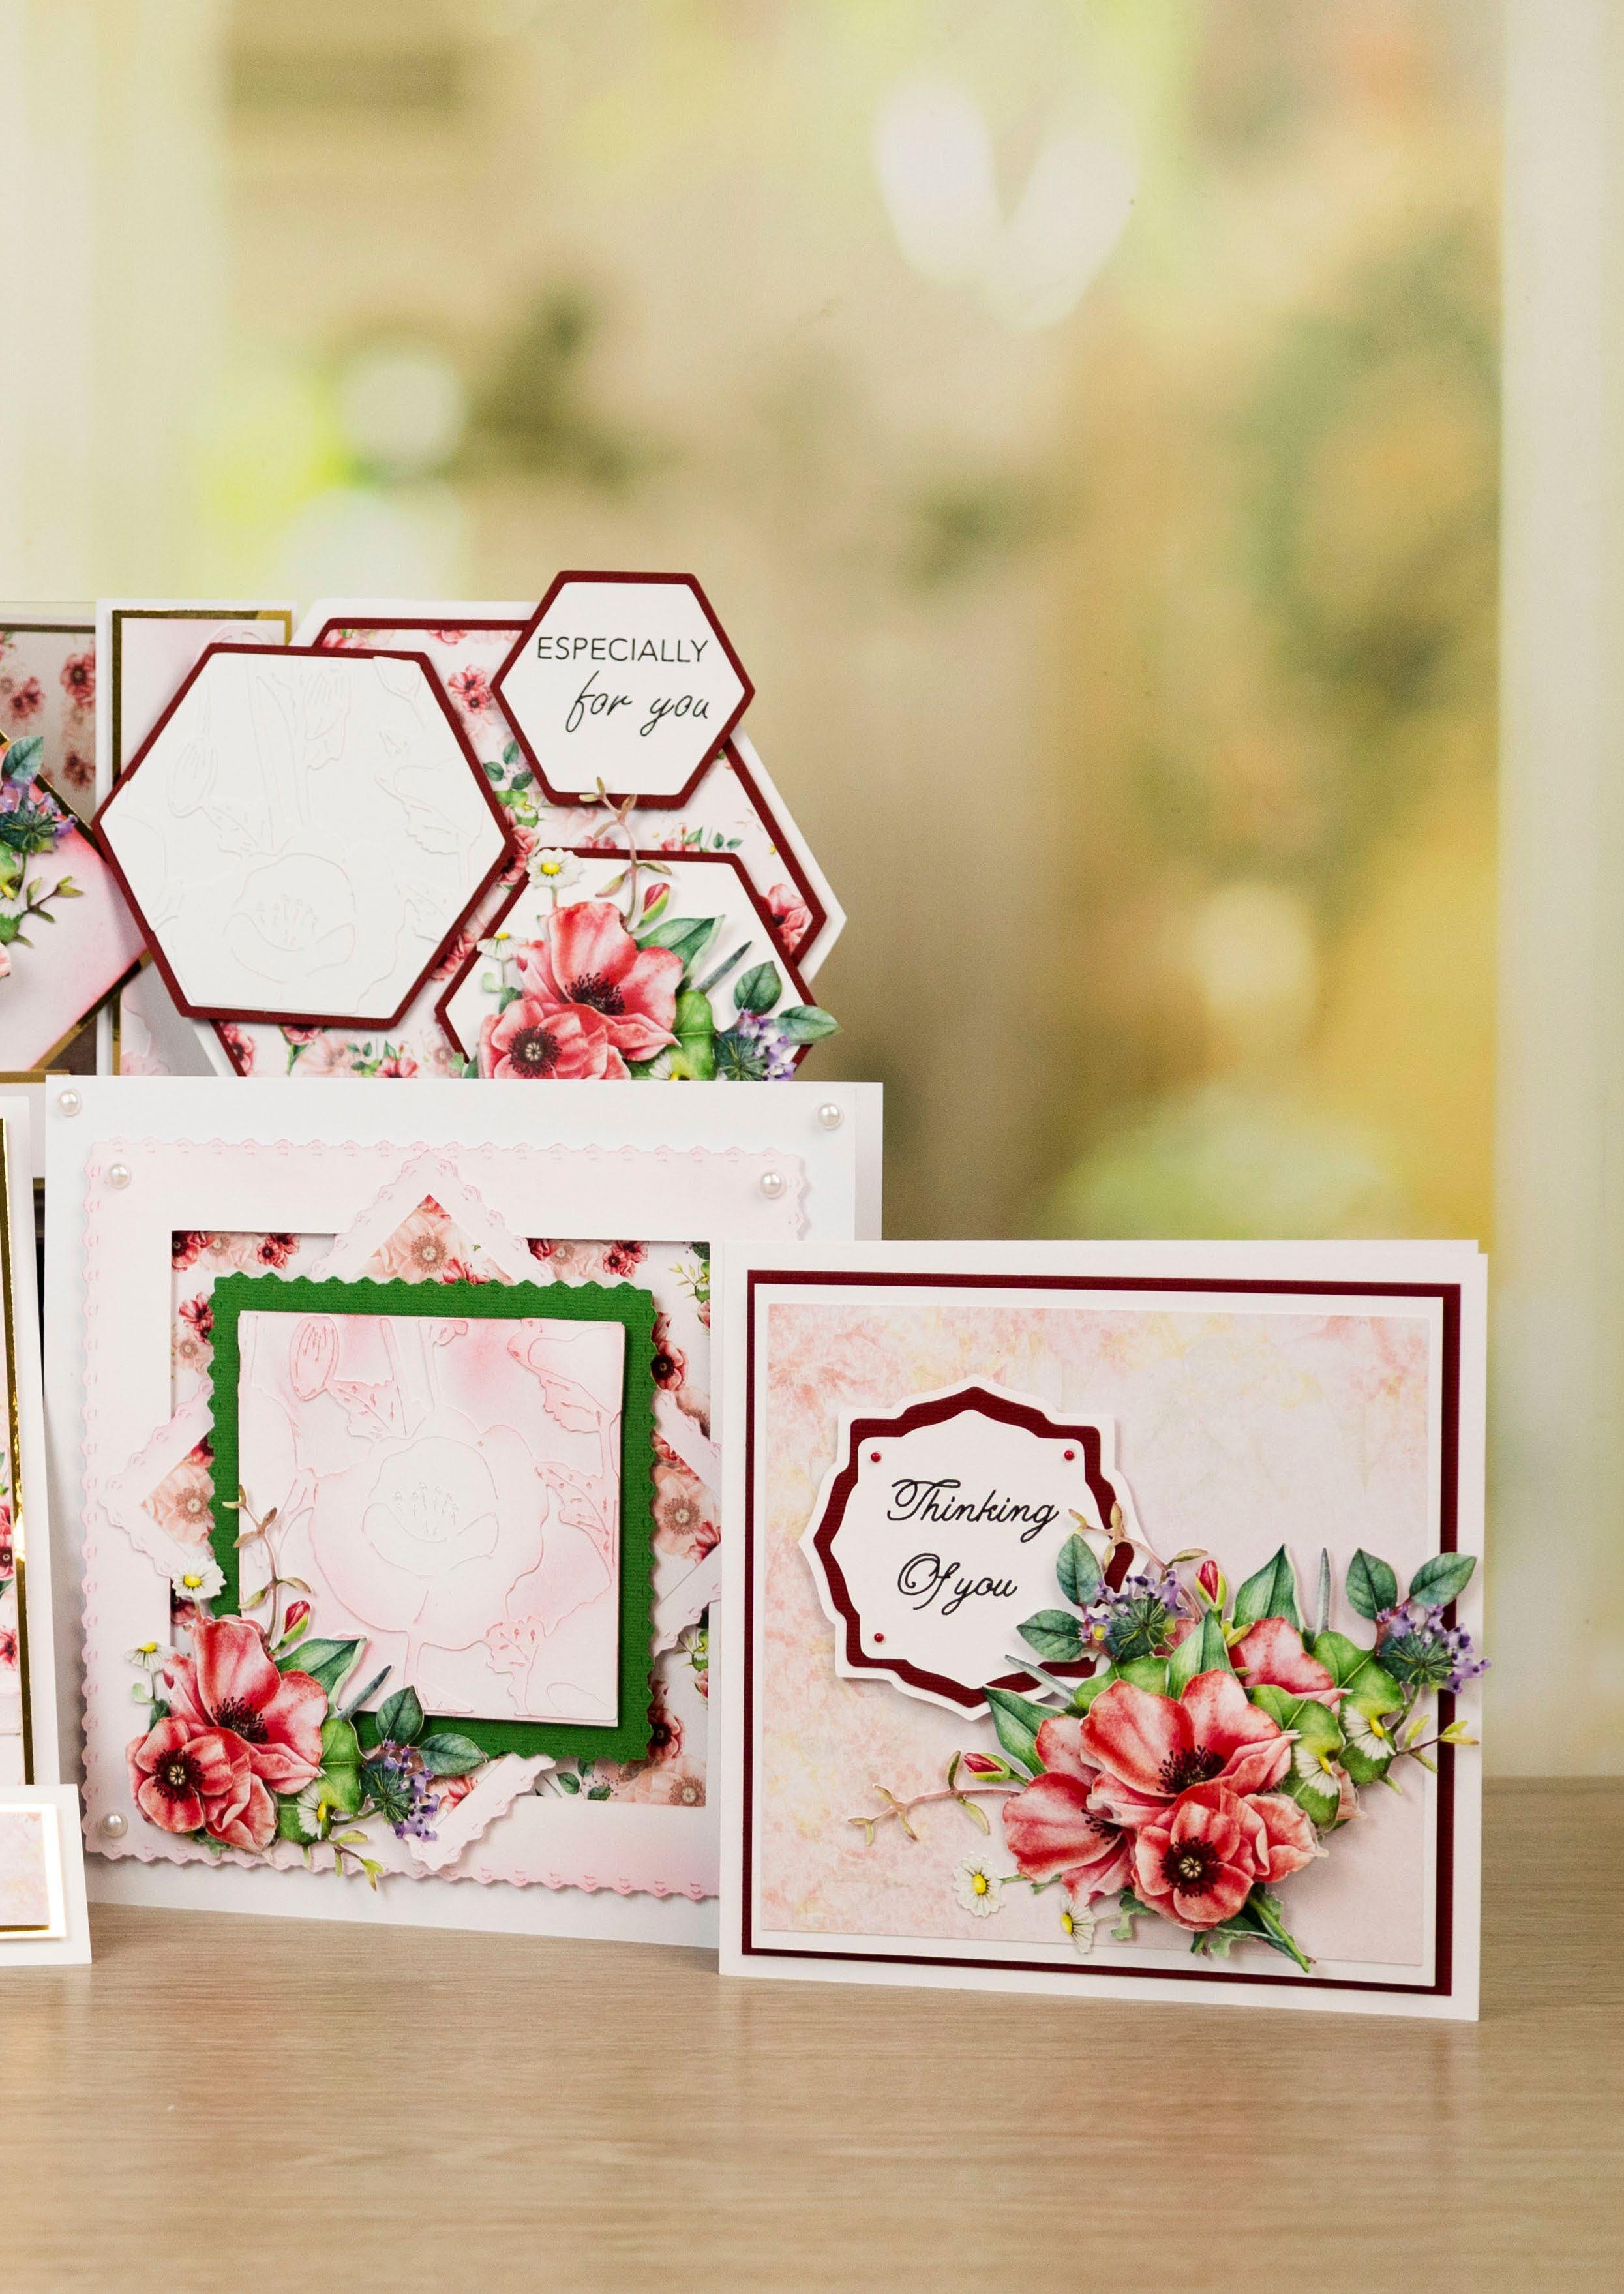
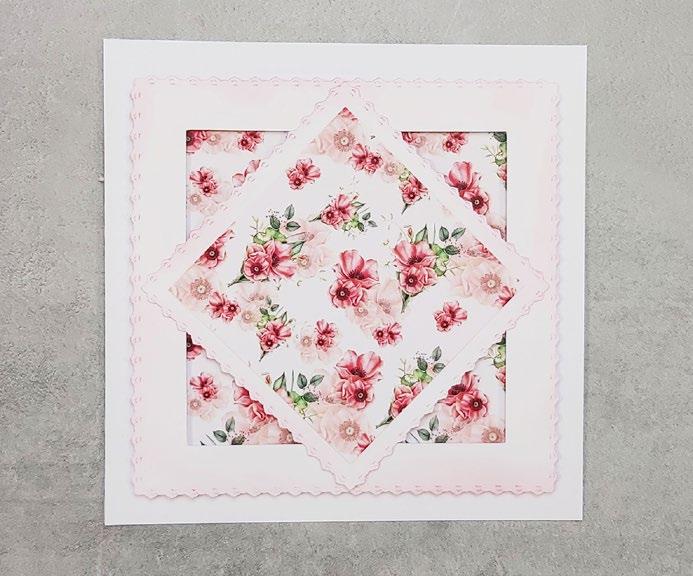
2On one of the white squares, measure in 10mm from the top edge and score and fold to create a tab. Attach to the other square to create a card. Mat the large poppy square onto the card. Ink around the edges of the fancy frame and mat onto the card with foam tape.
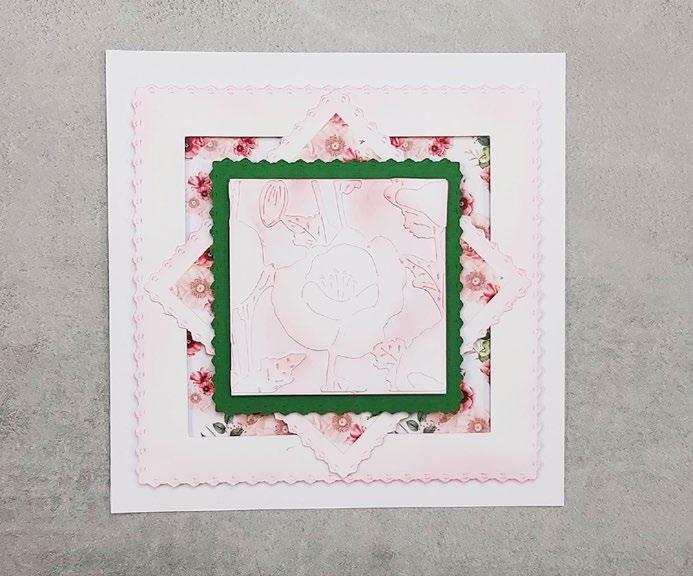
3Ink around the edges of the white fancy mat. Mat the smaller poppy square onto the fancy mat and mat onto the frame at an angle with foam tape.
Mat the emboss cut onto the small white square and ink. Mat onto the green fancy mat and mat onto the card with foam tape.
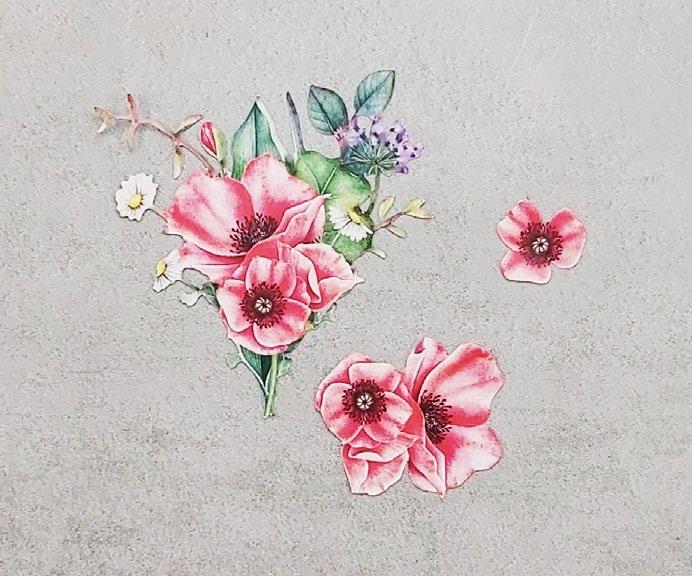
Trim the Poppy Posy cuts as shown.
Shape the florals and mat together onto the card with foam tape. Finish by adding pearl gems.
bySteps
1
Step
1 3 5 2 4 6 ----------------------------------- EXCLUSIVE GIFT - POPPY POSY ----------------------------------------
4
5
6
CLICK HERE TO DOWNLOAD YOUR SVG CONTENT www.tatteredlace.co.uk | 13
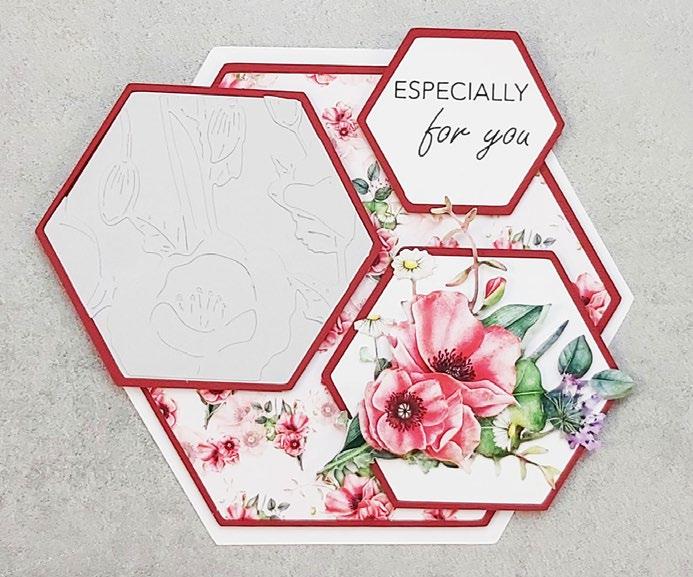
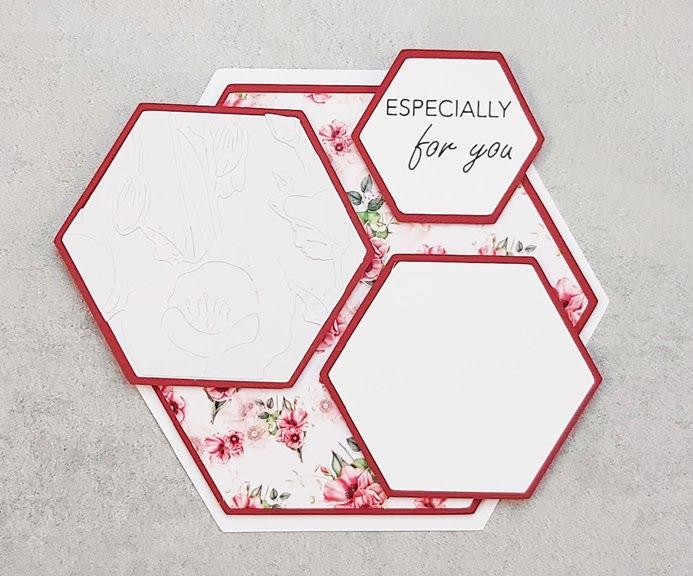
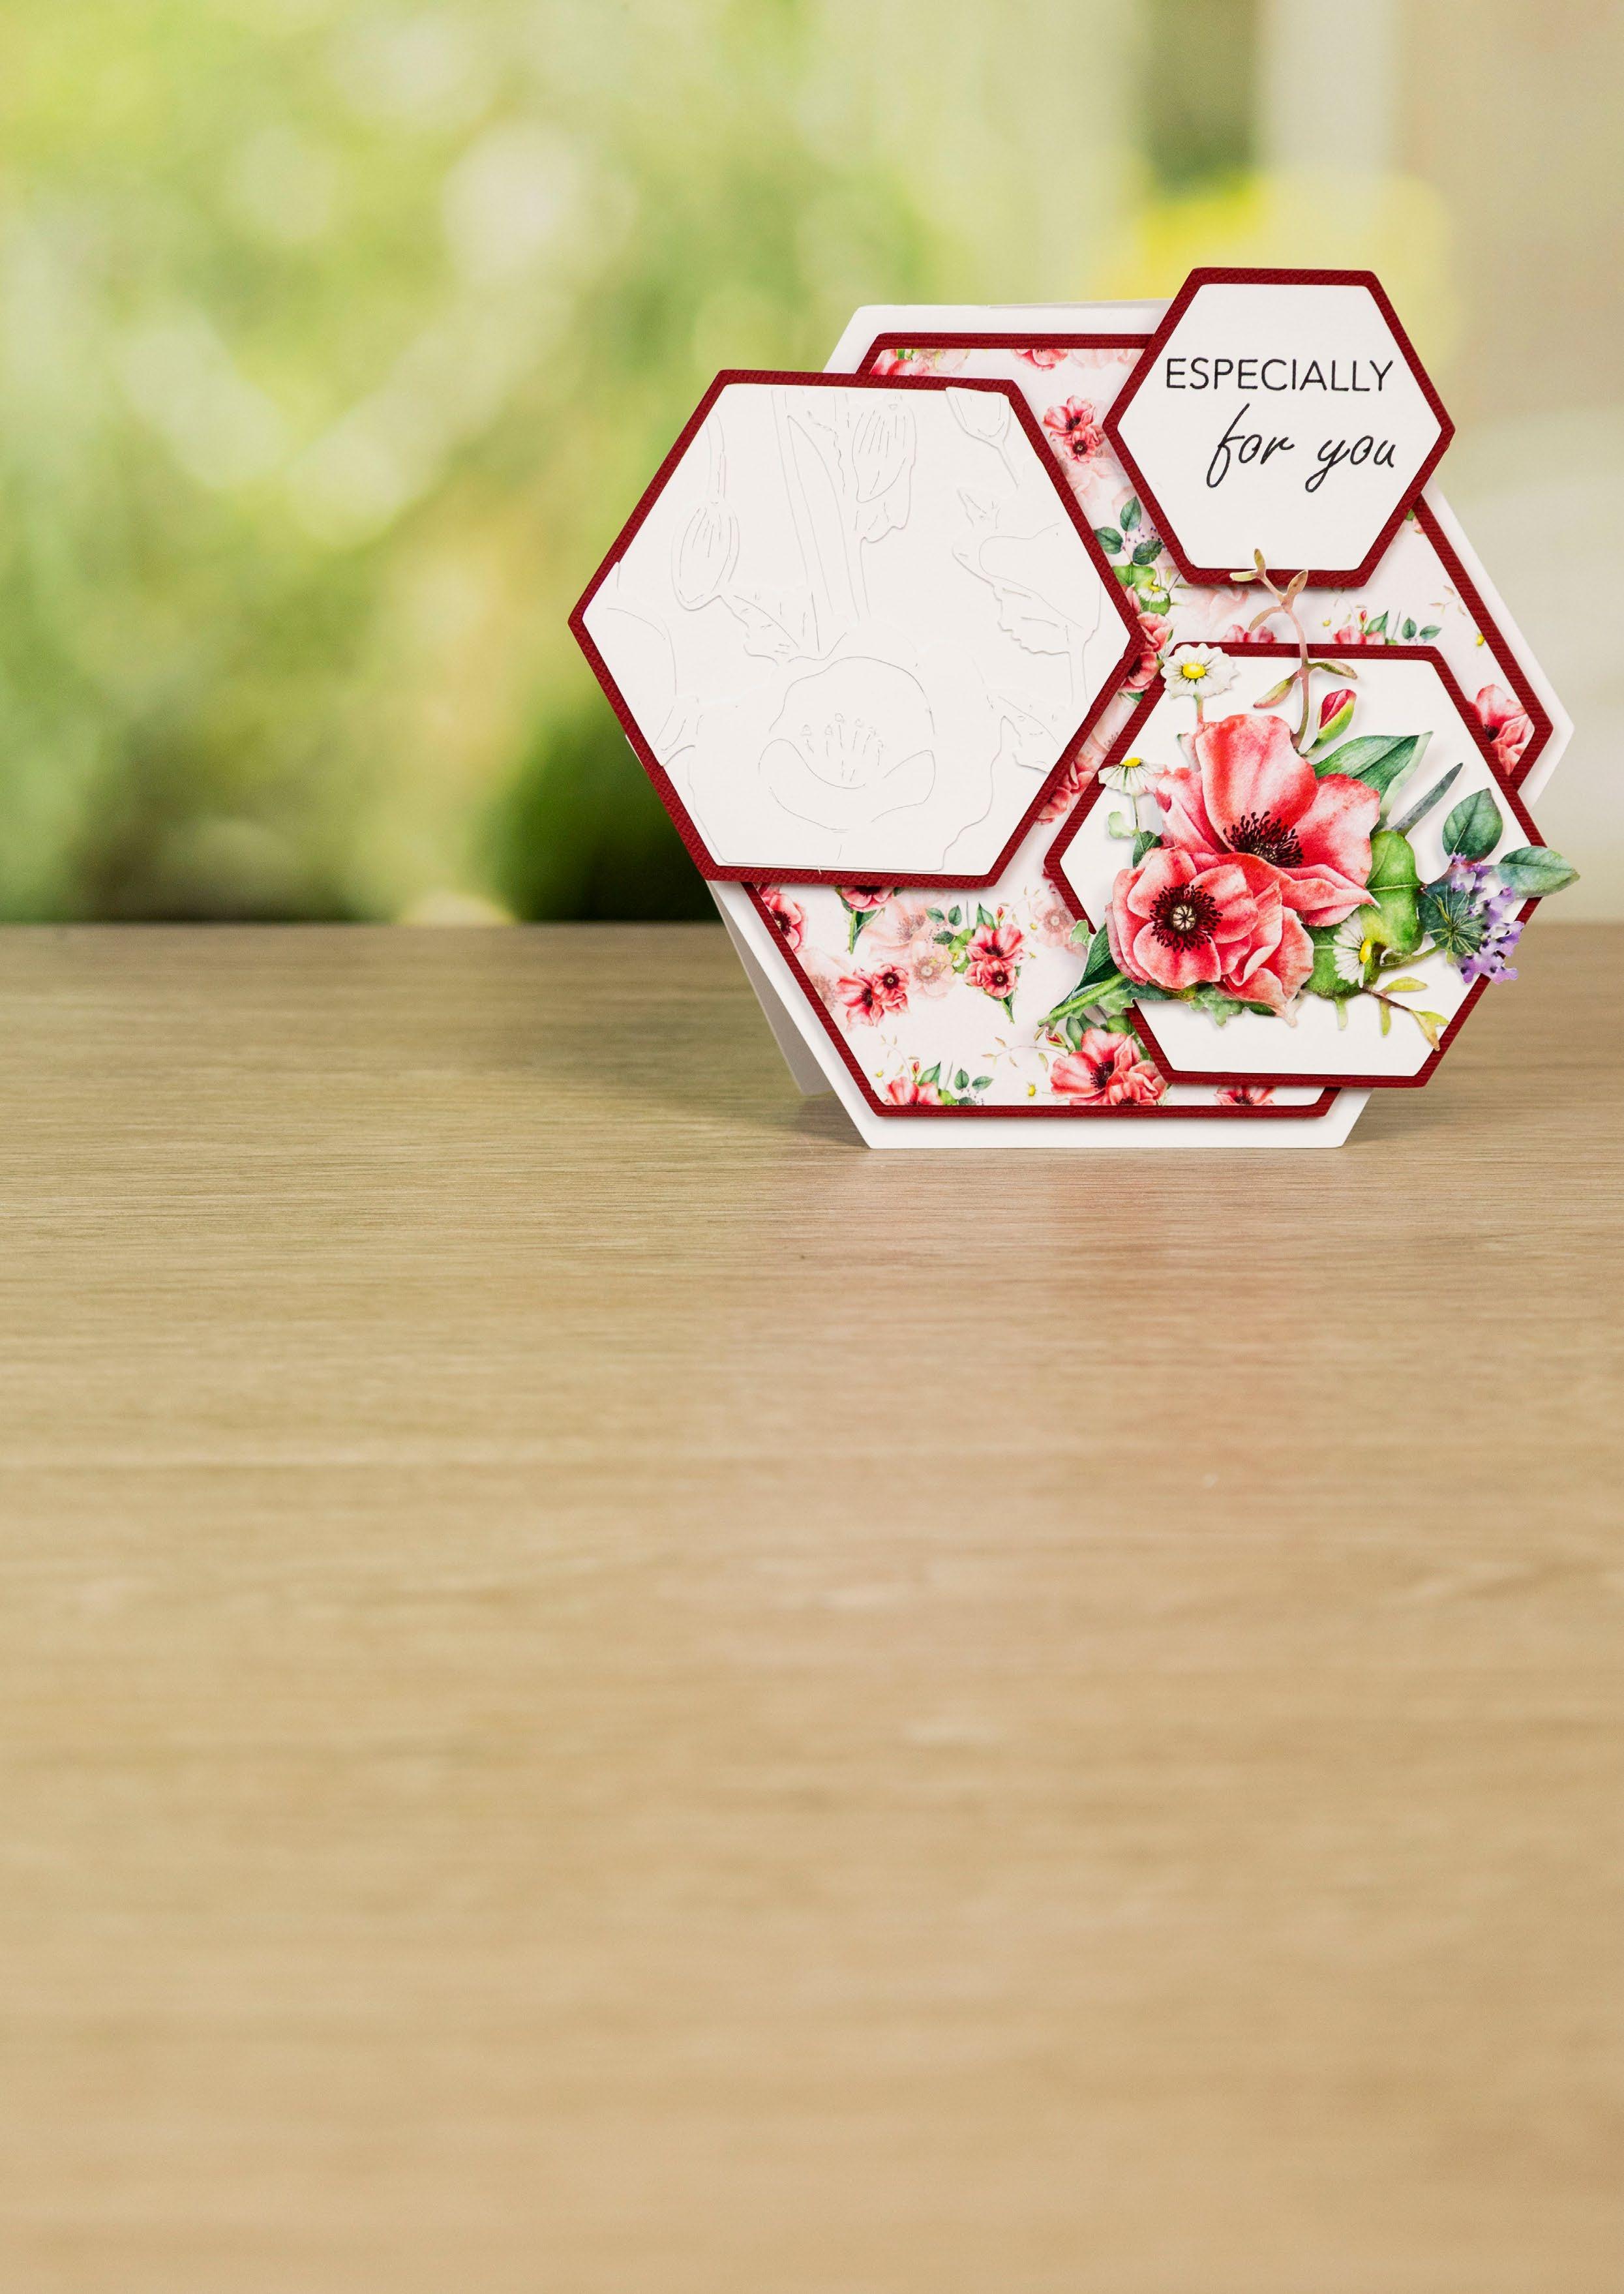
What you’ll need:
• 06-06-Poppy Posy SVG files
• White cardstock
• Gold mirror cardstock
• Pearl gems
1
Cut all the pieces needed to create the project as listed below;
From SVG downloads:
• From white cardstock: - 2 x PP-6-Card Base
- 1 x PP-6-Emboss - 1 x PP-6-Hexagon Mat 4 - 1 x PP-6-Hexagon Mat 6
- 1 x PP-6-Hexagon Mat 8 (with sentiment draw file)
• From red cardstock: - 1 x PP-6-Hexagon Mat 1 - 1 x PP-6-Hexagon Mat 3
- 1 x PP-6-Hexagon Mat 5
- 1 x PP-6-Hexagon Mat 7
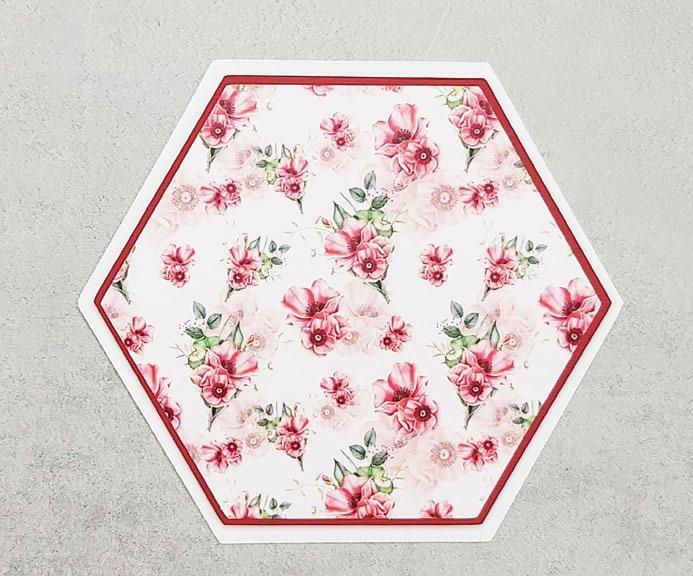
• From backing paper: - 1 x PP-6-Hexagon Mat 2 (poppy)
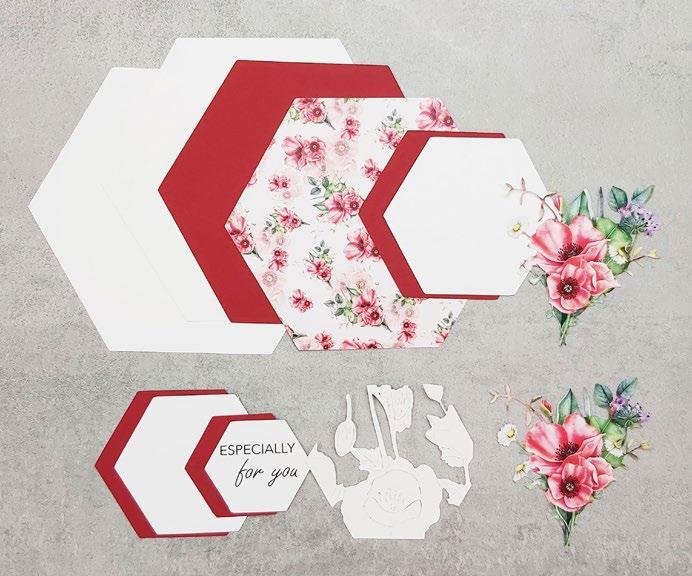
• From charisma: - 1 x GB-6-Charisma
2
On one of the card bases, measure in 25mm from the edge and score and fold to create a tab. Attach to the other card base to create a card. Mat the poppy hexagon onto the red hexagon mat 1 and mat onto the card.
Step bySteps
3
Mat the emboss cut onto the white hexagon mat 4 and mat onto red hexagon mat 3. Mat the white hexagon mat 3 onto the red hexagon mat 5. Mat the sentiment hexagon mat 8 onto the red hexagon mat 7. Mat the hexagons onto the card with foam tape.
Trim one of the Poppy Posy cuts to leave just the poppy flowers. Shape the florals and mat together onto the card with foam tape.
4
1 3 2 4 ----------------------------------- EXCLUSIVE GIFT - POPPY POSY ---------------------------------------CLICK HERE TO DOWNLOAD YOUR SVG CONTENT PROJECT 6 14 | www.tatteredlace.co.uk
Vintage Heirloom
What you’ll need:
• 07-01-Vintage Heirloom SVG files
• White cardstock
• Purple cardstock
• Glitter
1
Blue cardstock
Pink cardstock
Pale pink ribbon
Cut all the pieces needed to create the project as listed below;
From SVG downloads:
• From white cardstock:
- 3 x VH-1-Shabby Scallop Mat

- 1 x VH-1-Doily Mat 1


- 1 x VH-1-Doily Mat 2
- 1 x VH-1-Star Doily Mat
- 1 x VH-1-Teacup Outline
- 1 x VH-1-Saucer Outline
- 1 x VH-1-Sentiment (with sentiment draw file)
• From purple cardstock: - 1 x VH-1-Scallop Mat
• From blue cardstock: - 1 x VH-1-Scallop Mat
• From pink cardstock: - 1 x VH-1-Star Mat
• From charisma: - 1 x VH-1-Charisma
and score and fold to create a tab. Fold in half horizontally across the middle and attach to the card base using the tab to create the easel. Mat the remaining shabby scallop mat onto the front of the easel.
pink star mat with foam tape. Mat onto the front of the easel with foam tape.
2
Mat the white doily mat 1 onto the purple scallop mat and mat onto one of the white shabby scallop mats with foam tape. This is the card base. On one of the other shabby scallop mats, measure down 15mm from the top edge
3
Mat the white doily mat 2 onto the blue scallop mat with foam tape. Mat onto the front of the easel with foam tape.
4
Glitter around the edges of the star doily mat and mat onto the

5Glitter the teacup and saucer cuts and mat onto the white outlines. Mat the teacups onto the front of the easel with foam tape. Mat the saucer onto the card base with foam tape as a stopper.


6
Glitter around the edges of the sentiment mat and mat onto the card with foam tape. Tie two double loop bows from pale pink ribbon and mat onto the card.
---------------------------------------- VINTAGE HEIRLOOM ---------------------------------------------
•
•
•
1 4 2 5 3 6
CLICK HERE TO DOWNLOAD YOUR SVG CONTENT PROJECT 7 16 | www.tatteredlace.co.uk
What you’ll need:
Heirloom SVG files
• White cardstock
• Cream cardstock
Blue cardstock
• Silver mirror cardstock
White ribbon
1Cut all the pieces needed to create the project as listed below;
From SVG downloads:
• From white cardstock:
- 1 x VH-2-Detail Rectangle 1
- 1 x VH-2-Fancy Rectangle 5
- 1 x VH-2-Bootie Outline
• From blue cardstock:
- 1 x VH-2-Fancy Rectangle 2
- 1 x VH-2-Fancy Rectangle 3
- 1 x VH-2-Pram Outline
- 1 x VH-2-Fancy Rectangle 6
• From cream cardstock:
- 1 x VH-2-Detail Rectangle 2
• From silver mirror cardstock:
- 1 x VH-2-Fancy Rectangle 1
- 1 x VH-2-Fancy Rectangle 4
• From charisma:
- 1 x VH-2-Charisma
From machine memory:
• From white cardstock:
- 2 x 210mm x 150mm rounded rectangle
- 1 x 70mm x 20mm rectangle (with sentiment draw file)
• From blue cardstock:


- 1 x 200mm x 140mm rounded rectangle

• From silver mirror cardstock:


- 1 x 75mm x 25mm rectangle
• From backing paper:
- 1 x 195mm x 135mm rounded rectangle (knit)
2
On one of the large white rectangles, measure down 15mm from the top edge and score and fold across to create a tab. Attach to the other white rectangle to create a tent card.
3
Mat the white detail rectangle
1 onto the blue fancy rectangle 2 and mat onto the silver fancy rectangle 1 with foam tape. Mat the cream detail rectangle 2 onto the blue fancy rectangle 3 and mat onto the previous rectangle with foam tape. Mat the fancy rectangle 5 onto the silver rectangle 4 and mat onto the previous rectangles with foam tape. Mat onto the card with foam tape.
4
Mat the pram cut onto the outline with foam tape and mat onto the card with foam tape.
5
Mat the bootie cut onto the outline with foam tape and mat onto the card with foam tape.
6
Mat the sentiment rectangle onto the small silver rectangle. Mat onto the blue fancy rectangle 6 and mat onto the card with foam tape. Tie two double loop bows from white ribbon and mat onto the card.
• 08-02-Vintage
•
•
---------------------------------------- VINTAGE HEIRLOOM ---------------------------------------------
1 4 2 5 3 6 CLICK HERE TO DOWNLOAD YOUR SVG CONTENT PROJECT 8 www.tatteredlace.co.uk | 17
What you’ll need:
• 09-03-Vintage Heirloom SVG files
• White cardstock

Dark pink cardstock

• Silver mirror cardstock

Glitter
1Cut all the pieces needed to create the project as listed below;
From SVG downloads:
• From white cardstock:
- 3 x VH-3-Butterfly
• From backing paper: - 1 x VH-3-Jigsaw (clouds)
PLEASE NOTE: For the above cut you will need to cut the inner lines with the blade on a half cut before cutting the outline on a full cut.
- 1 x VH-3-Jigsaw Pieces (clouds)
- 1 x VH-3-Butterfly Outline
From machine memory:
• From white cardstock:
- 3 x 165mm rounded square
- 1 x 80mm x 25mm rectangle (with sentiment draw file)
• From silver mirror cardstock


- 1 x 160mm rounded square - 1 x 160mm x 80mm rounded rectangle
• From dark pink cardstock:
- 1 x 155mm rounded square
- 1 x 155mm x 75mm rounded rectangle
• From backing paper:
- 1 x 150mm x 70mm rounded rectangle (clouds)
2On one of the white squares, measure down 15mm from the top edge and score and fold to create a tab.
Score and fold in half horizontally. Attach to one of the other white squares using the tab to create an easel card. Mat the remaining white square onto the card front. Mat the pink square to the silver square with foam tape and onto the card front with foam tape.

3 Mat the L-shaped jigsaw piece onto the card with foam tape.
4 Add glitter to the loose jigsaw pieces and mat onto the card with foam tape. Make sure to keep at least five pieces for the base of the card.

5Trim one of the butterflies in half horizontally. Glitter the butterflies and the edges of the outline cut. Mat the half butterfly onto a full butterfly and onto the outline. Mat onto the card with foam tape. Mat the other butterfly onto the card.
6Mat the clouds rectangle onto the pink rectangle. Mat onto the silver rectangle with foam tape then onto the base of the card with foam tape to create a stopper. Add glitter to the edges of the sentiment and mat onto the base of the card with foam tape. Mat the remaining jigsaw pieces onto the card base with foam tape.
---------------------------------------- VINTAGE HEIRLOOM ---------------------------------------------
•
•
1 4 2 5 3 6 CLICK HERE TO DOWNLOAD YOUR SVG CONTENT PROJECT 9 18 | www.tatteredlace.co.uk
What you’ll need:
Heirloom SVG files
White cardstock
Dark pink
Silver mirror cardstock

Glitter
Cut all the pieces needed to create the project as listed below;
From SVG downloads:
• From white cardstock:
- 2 x VH-4-Fancy Square 1
- 1 x VH-4-Fancy Frame 2
- 1 x VH-4-Detail Square 2
• From dark pink cardstock:

- 1 x VH-4-Fancy Square 1
- 1 x VH-4-Fancy Square 2
• From silver mirror cardstock:
- 1 x VH-4-Fancy Frame 1
- 1 x VH-4-Fancy Square 3
- 1 x VH-4-Unicorn Outline

• From backing paper: - 1 x VH-4-Detail Square 1 (clouds)
• From charisma: - 1 x VH-4-Charisma
From machine memory:
• From white cardstock:
- 1 x 90mm x 20mm rectangle (with sentiment draw file)
• From silver mirror cardstock:


- 1 x 95mm x 25mm rectangle
2On one of the white fancy square 1s, measure down 60mm from the top edge and score and fold to create a tab. Attach to the other white fancy square 1 to create a tent card. Add glitter around the edges of the pink fancy square 1 and mat onto the front of the card.

3
Mat the cloud detail square 1 onto the card. Mat the white fancy frame 2 onto the silver fancy frame 1 and mat onto the card with foam tape. Glitter around the edges of the pink fancy square 2 and mat onto the card with foam tape. Mat the white detail square 2 onto the silver fancy square 3 and mat onto the card with foam tape.
5Build up the decoupage of the unicorn and mat together with foam tape. Mat onto the card with foam tape.
6Glitter the edges of the sentiment rectangle and mat onto the silver rectangle with foam tape. Mat onto the card with foam tape.
4
Trim the unicorn cuts as shown. Add glitter to the mane, tail and feet.

---------------------------------------- VINTAGE HEIRLOOM ---------------------------------------------
• 10-04-Vintage
•
•
cardstock •
•
1
1 4 2 5 3 6 CLICK HERE TO DOWNLOAD YOUR SVG CONTENT PROJECT 10 www.tatteredlace.co.uk | 19
David’s
What you’ll need:
• 11-01-Box Frame SVG files
• Red cardstock
• Black cardstock
• Cadence Dora Gilding Wax - Gold
1Cut all the pieces needed to create the project as listed below;
From SVG downloads:
• From red cardstock:
- 2 x BF-1-Hinge
- 4 x BF-1-Fastener
- 1 x BF-1-Eiffel Tower Outline

- 1 x BF-1-Big Ben Outline - 1 x BF-1-Statue Of Liberty Outline
• From black cardstock:
- 4 x BF-1-Lace Panel 1 - 4 x BF-1-Lace Panel 2
- 1 x BF-1-Eiffel Tower
- 1 x BF-1-Big Ben
- 1 x BF-1-Statue Of Liberty
From machine memory:
• From red cardstock:
- 1 x 152mm square
2
Cover all your black cuts with gilding wax and leave to dry. When dry buff them with a paper towel to give them a more matte finish.
6
Using the remaining hinge pieces, attach the top thicker tabs of the box frame together.
3
Trim the hinges into eight rectangles approximately 3cm long. Fold the trimmed hinges in half and attach two of the fastener cuts together using one of the hinge pieces. Attach the rest of the fastener cuts to each other using the hinge pieces. This will form the box frame sides.
Create the box by attaching the open ends together using another hinge piece.
Mat the red square onto the bottom thinner tabs of the box frame sides.
7
8
9
Mat the lace panel 1 cuts onto the four tabs of the box frame.
Mat the lace panel 2 cuts onto the four sides of the box frame.
Push the joined tabs into the box frame to create an inner bevel.
10
Mat the gold landmark cuts onto the outline cuts and mat into the box frame with foam tape. Add an extra layer of foam tape from the left to the right.
4
5
Box Frame
-------------------------------------------- BOX FRAME ------------------------------------------------CLICK HERE TO DOWNLOAD YOUR SVG CONTENT PROJECT 11
20 | www.tatteredlace.co.uk


-------------------------------------------- BOX FRAME ------------------------------------------------1 6 4 9 2 7 5 10 3 8 www.tatteredlace.co.uk | 21
What you’ll need:
From SVG downloads:
From white cardstock:
2 x BB-1-Fastener
1 x BB-1-Booties Outline
1 x BB-1-Box
From pink cardstock:
2 x BB-1-Fastener Mat 1
2 x BB-1-Fastener Mat 2
From silver metallic cardstock:
2 x BB-1-Corners
2 x BB-1-Lace Panel 1
1 x BB-1-Lace Panel 2
From charisma:
1 x BB-1-Charisma
From machine memory:
From white cardstock:
2 x 155mm square
- 1 x 125mm square
1 x 100mm square
From backing paper: - 2 x 155mm square (clouds)
1 x 140mm square (clouds)
- 1 x 128mm square (clouds)
• From pink cardstock:

- 1 x 130mm square
- 1 x 85mm square
- 4 x 128mm x 40mm rectangles
• From silver mirror cardstock:
- 1 x 145mm square
- 1 x 90mm square
2
Mat the fasteners pieces onto either side of one of the 155mm width white squares. Attach the other square to the left tab of the left fastener. This is the box cover. Mat the 155mm width cloud squares onto the inside of the cover to hide the tabs. Mat one of the pink fastener mat 2 to the end of the right tab.
3 Mat the 125mm width white square onto the 130mm width pink square and mat onto the inside of the cover leaving the left side open to create a pocket for the fastener. Mat the silver corner cuts onto the white square.
Turn the cover over. Mat the silver lace panels to the pink fastener mats and mat onto the fastener and spine of the cover.
Baby Gift BoxLouise’s
• 12-01-Baby Box SVG files • White cardstock • Pink cardstock • Silver metallic cardstock • Pink ribbon ---------------------------------------------- BABY BOX ------------------------------------------------1 Cut all the pieces needed to create the project as listed below;
•
-
-
-
•
-
-
•
-
-
-
•
-
•
-
-
•
-
4
CLICK HERE TO DOWNLOAD YOUR SVG CONTENT PROJECT 12 22 | www.tatteredlace.co.uk
5
Mat the 140mm width cloud square onto the 145mm width silver square and mat onto the cover. Mat the 85mm pink square onto the 90mm width silver square, then onto the 100mm width white square and mat onto the cover with foam tape.


Tie a multi loop bow from two lengths of pink ribbon and mat onto the cover.

7
Build the box by attaching the tabs to the inside of the box sides. Mat the box to inside of the box.


6
On one of the booties cuts, trim the right bootie away from the die cut and decoupage onto the other with foam tape. Mat onto the outline and mat onto the cover.
8
Mat the four pink rectangles onto the inside panels of the box. Mat the 128mm width cloud square onto the inside base of the box.
---------------------------------------------- BABY BOX -------------------------------------------------
1 3 5 7 2 4 6 8 www.tatteredlace.co.uk | 23
Broken Edges
What you’ll need:
• 13-01-Broken Edges SVG files
• White cardstock • Purple cardstock
• Green cardstock
• Gold metallic cardstock
• Acetate • Brown ribbon • Pearl gems
1
Cut all the pieces needed to create the project as listed below;
From SVG downloads:
• From gold metallic cardstock:
- 1 x BE-1-Lace Detail
• From green cardstock:
- 1 x BE-1-Happy Birthday
• From white cardstock:
- 1 x BE-1-Happy Birthday
• From acetate:
- 1 x BE-1-Lace Mat
• From charisma:
- 1 x BE-1-Charisma A
- 1 x BE-1-Charisma B
From machine memory:
• From white cardstock:
- 1 x 255mm x 180mm rectangle
• From purple cardstock:

- 1 x 45mm x 170mm rectangle
- 2 x 15mm x 170mm rectangle
2On the large white rectangle, from each edge, measure in at 60mm and 100mm and score and fold to create the card base. Mat the large
purple rectangle onto the middle panel of the card and the two thinner rectangles onto the outer panels of the card. Mat two of the floral cuts onto the outer panels of the card.


3
Mat the gold lace detail onto the acetate mat and mat onto the middle panel of the card.
4
Trim the remaining floral cuts as shown.
5
Build up the decoupage of the florals and mat together with foam tape. Mat onto the card.

6
Mat the green happy birthday cut onto the white happy birthday cut slightly offsetting it. Mat onto the card tucking it into the gold lace detail cut. Tie a double loop bow from brown ribbon and mat onto the card. Finish by adding pearl gems to outer panels of the card.
------------------------------------------ BROKEN EDGES -----------------------------------------------
1 4 2 5 3 6
24 | www.tatteredlace.co.uk CLICK HERE TO DOWNLOAD YOUR SVG CONTENT PROJECT 13
What you’ll need:
• 14-02-Broken Edges SVG files
• White cardstock
• Green cardstock
Purple cardstock
• Gold metallic cardstock
• Gold pearl gems
Charisma
1Cut all the pieces needed to create the project as listed below;
From SVG downloads:
• From white cardstock:
- 1 x BE-2-Card Base A
- 1 x BE-2-Card Base B
- 1 x BE-2-Lace Mat
• From gold metallic cardstock:
- 1 x BE-2-Middle Detail
- 1 x BE-2-Just for You
• From purple cardstock:


- 1 x BE-2-Outer Detail
- 1 x BE-2-Inner Detail
• From charisma:
- 1 x BE-2-Charisma A
- 1 x BE-2-Charisma B
From machine memory:
• From green cardstock:
- 2 x 30mm x 105mm rectangles
2Fold on the score lines of the card bases and attach together using the tabs to create a stepper card. Mat the two green rectangles onto the side steps at either side of the card. Mat the purple outer detail detail cut onto the lace mat and mat onto the middle panel of the card.


Using three of the large floral cuts, trim into the cuts as shown.

4
Build up the decoupage and mat together with foam tape. Mat onto the card. Mat the gold middle detail cut onto the card leaving some areas raised. Tuck and stick some of the smaller florals into the raised area of the gold cut.

5
Mat the purple inner detail cut onto the card making sure to leave the top areas unstuck. Tuck the remaining florals behind and on top of the purple detail cut with foam tape.
Mat the Just For You cut onto the card. Finish by adding gold pearls onto the bottom corners of the card.
•
•
3
------------------------------------------ BROKEN EDGES -----------------------------------------------
6
1 4 2 5 3 6 www.tatteredlace.co.uk | 25CLICK HERE TO DOWNLOAD YOUR SVG CONTENT PROJECT 14
What you’ll need:
• 15-03-Broken Edges SVG files
• White cardstock
Green cardstock
• Gold metallic cardstock
• White pearls
1
Acetate
White ribbon
Cut all the pieces needed to create the project as listed below;
From SVG downloads:
• From white cardstock: - 2 x BE-3-Lace Mat
• From gold metallic cardstock: - 1 x BE-3-With Love
• From green cardstock: - 1 x BE-3-Lace Detail

• From acetate: - 1 x BE-3-Lace Mat
• From charisma:
- 2 x BE-3-Charisma A
- 1 x BE-3-Charisma B
2On one of the white lace mat cuts, measure down 15mm from the top edge and score and fold to create a tab. Fold in half horizontally and attach to the other cut using the tab to create an easel card. Mat the green lace detail onto the acetate lace mat and mat onto the front of the easel.

Trim the large floral cuts as shown.
Build up the decoupage and mat together with foam tape to create two arrangements. Mat onto the front of the easel.
4
Trim the smaller floral cuts as shown.


6
Build up the decoupage and mat together with foam tape onto the base of the card to create a stopper. Mat the gold With Love cut onto the card front. Tie a double loop bow from white ribbon and mat onto the base of the card. Finish by adding pearls.


top tip...
Don't worry about cutting the decoupage exactly like in the image. As long as you cut enough layers to build up it will look great!
•
•
•
3
5
1 4 2 5 3 6 26 | www.tatteredlace.co.uk ------------------------------------------ BROKEN EDGES -----------------------------------------------
CLICK HERE TO DOWNLOAD YOUR SVG CONTENT PROJECT 15
What you’ll need:
• 16-04-Broken Edges SVG files
• White cardstock • Green cardstock

• Purple cardstock


1
Cut all the pieces needed to create the project as listed below;
From SVG downloads:
• From white cardstock:
- 1 x BE-4-Card Base A
- 1 x BE-4-Card Base B
- 1 x BE-4-Inner Detail
• From purple cardstock: - 1 x BE-4-Detail Mat


• From charisma: - 1 x BE-4-Charisma
From machine memory:
• From green cardstock:
- 1 x 95mm square
- 1 x 50mm x 95mm square
2
Attach the card bases together using the tab and fold on the score line to create the card. Mat the green square onto the front of the card and the rectangle onto the inside back of the card.
3
Mat the white inner detail onto the purple detail mat, leaving the detailed part of the cut unstuck. Mat onto the card.
4
Trim the large floral cuts as shown.
Build up the decoupage and mat together with foam tape to create two arrangements. Mat onto the card.
5
Arrange and tuck the small floral cuts under and onto the white cut and mat with foam tape.

6
1 4 2 5 3 6 www.tatteredlace.co.uk | 27 ------------------------------------------ BROKEN EDGES ----------------------------------------------CLICK HERE TO DOWNLOAD YOUR SVG CONTENT PROJECT 16
Louise’s
What you’ll need:
•
the pieces
From SVG downloads:
• From white cardstock:
2 x VP-1-Shabby Rectangle Mat
1 x VP-1-Doily Rectangle Mat
1 x VP-1-Doily Circle Mat
1 x VP-1-Doily Circle Mat 2
1 x VP-1-Doily Circle Mat
• From pink cardstock:
1 x VP-1-Shabby Rectangle Mat
1 x VP-1-Shabby Circle Mat 1
1 x VP-1-Shabby Circle Mat 2
• From charisma:
1 x VP-1-Charisma A
1 x VP-1-Charisma B
From machine memory:
• From white cardstock:
1 x 75mm x 170mm rectangle
1 x 70mm x 18mm rectangle (with sentiment draw file)
• From pink cardstock: - 1 x 70mm x 165mm rectangle - 1 x 75mm x 23mm rectangle
• From backing paper: - 1 x 65mm x 160mm rectangle (grunge floral)
On one of the white shabby rectangle mats, measure down 70mm from the top edge and score across to create a tab. Attach to the other shabby rectangle mat to create a tent card. Mat the doily rectangle mat onto the shabby rectangle mat and mat onto the card.


3
Mat the grunge floral rectangle onto the large pink rectangle and onto the large white rectangle. Mat onto the card with foam tape.
4
5
6
Mat the doily circle mat 1 onto the shabby circle mat 1 and mat onto the card.
Shape the floral cuts and mat around the doily with foam tape.
Mat the doily circle mat 2 onto the shabby circle mat 2 and mat onto the card with triple thickness foam tape.
Mat the doily circle mat 3 onto the card with foam tape.
Mat the sentiment rectangle onto the small pink rectangle and mat onto the bottom of the card with foam tape. Tie a triple loop bow from pink ribbon and mat onto the card. Finish with a pearl gem in the middle of the doily.
Vintage Poppy
17-01-Vintage Poppy SVG files • White cardstock • Pink cardstock • Pink ribbon • Pearl gem ------------------------------------------- VINTAGE POPPY ---------------------------------------------1 Cut all
needed to create the project as listed below;
-
-
-
1 -
-
3
-
-
-
-
-
-
-
2
7
8
CLICK HERE TO DOWNLOAD YOUR SVG CONTENT PROJECT 17 28 | www.tatteredlace.co.uk


------------------------------------------- VINTAGE POPPY ---------------------------------------------1 3 5 7 2 4 6 8 www.tatteredlace.co.uk | 29
Man's Best Friend
STAY PAWS-ATIVE
What you’ll need:
PROJECT
1
Cut all the pieces needed to create the project as listed below;
From SVG downloads:
• From brown cardstock:
- 1 x MBF-1-Half Oval Mat 1
- 1 x MBF-1 Half Oval Mat 2
• From backing paper:
- 1 x MBF-1-Half Oval Mat 3 (paw)
- 1 x MBF-1 Half Oval Mat 4 (fur)
• From charisma: - 1 x MBF-1-Charisma
From machine memory:
• From white cardstock:
- 2 x 143mm x 183mm oval
- 1 x 100mm x 140mm oval
- 1 x 57mm x 97mm oval
- 1 x 32mm x 60mm oval (with sentiment draw file)

• From brown cardstock:
- 1 x 138mm x 178mm oval
- 1 x 95mm x 135mm oval
- 1 x 52mm x 92mm oval
- 1 x 37mm x 69mm oval
• From backing paper:
- 1 x 133mm x 173mm oval (paws)
- 1 x 90mm x 130mm oval (fur)
- 1 x 47mm x 85mm oval (fur)
2Mat the paws backing paper oval onto the 138mm width brown oval and mat onto one of the 143mm width white ovals. This is the card base. On the other 143mm width white oval, from the top edge measure down 15mm and score across to create a tab. Fold in half horizontally and attach to the card base using the tab to create an easel card.
3Mat the backing paper half oval mats onto brown half oval mats and mat onto the top folds of the easel card.
4Mat the 90mm width backing paper oval onto the 95mm width brown oval with foam pads. Mat onto the 100mm width white oval and mat onto the card with foam tape.
5Trim into the dog cuts as shown. Build up the decoupage and mat together with foam tape. Mat onto the front of the easel.

THANKS FUR EVERYTHING
What you’ll need:
20-03-Man’s
1
Friend SVG
Cut all the pieces needed to create the project as listed below;
From SVG downloads:
• From green cardstock: - 1 x MBF-3-Hill
• From charisma: - 1 x MBF-3-Charisma
From machine memory:
• From green cardstock: - 1 x 139mm circle - 1 x 105mm circle - 1 x 7cm x 18mm rectangle
6
Mat the 32mm width sentiment oval onto the 37mm width brown oval, then onto the 47mm width fur backing paper oval. Mat onto the 52mm width brown oval with foam tape, then onto the 57mm width white oval. Mat onto the card base as a stopper. Mat the remaining puppy onto the stopper. Tie a bow from brown ribbon and mat onto the front of the easel.
• From white cardstock: - 1 x 144mm circle - 1 x 110mm circle - 1 x 65mm x 14mm rectangle (with sentiment draw file)
• From backing paper: - 1 x 134mm circle (paws) - 1 x 101mm circle (sky)
Fold the large white circle in half horizontally to create a tent card. Mat the paws circle onto the large green circle with foam tape and mat onto the front of the card.
----------------------------------------- MAN'S BEST FRIEND --------------------------------------------
•
Best
files • White cardstock • Green cardstock
• 18-01 Man’s Best Friend SVG files • White cardstock • Brown cardstock • Brown ribbon
2
CLICK HERE TO DOWNLOAD YOUR SVG CONTENT
18 PROJECT 20 30 | www.tatteredlace.co.uk
PAW-FECT DAY
What you’ll need:
• 19-02-Man’s Best Friend SVG files
• Brown ribbon
White cardstock
Brown cardstock
1Cut all the pieces needed to create the project as listed below;
From SVG downloads:
• From white cardstock: - 1 x MBF-2-Puppy Outlines

• From charisma: - 1 x MBF-2-Charisma
From machine memory:
• From white cardstock:
- 2 x 90mm x 220mm rectangle
- 1 x 60mm x 190mm rectangle
- 1 x 63mm x 13mm rectangle (with sentiment draw file)
• From grey cardstock:
- 2 x 75mm x 205mm rectangle
- 3 x 50mm squares
- 1 x 65mm x 15mm rectangle
• From backing paper: - 1 x 70mm x 200mm rectangle (paws)
- 3 x 45mm squares (fur)
On one of the large white rectangles, measure in 10mm from the left edge and score and fold to create a tab. Attach to the other white rectangle using the tab to create a card. Mat one of the paw rectangles onto the one of the large grey rectangle with foam tape and mat onto the card with foam tape.
2
3
Mat the three backing paper squares onto the three grey squares and mat onto the card with foam tape. Mat the puppy cuts onto the outline cuts and mat onto the squares with foam tape.
4
Mat the sentiment rectangle onto the small grey rectangle and mat onto the card with foam tape. Mat the remaining rectangles together and mat onto the inside of the card.
3
Mat the green hill onto sky backing paper circle. Mat the sky backing paper circle onto the smaller green circle and onto the smaller white circle with foam tape. Mat onto the card with foam tape.
Trim into the dog cuts as shown. Build up the decoupage and mat together with foam tape. Mat the large dog and two puppies onto the middle of the card. Mat the five remaining puppy cuts around the edge of the card with foam tape.

4
Mat the sentiment rectangle onto the green rectangle and mat onto the card with foam tape.
----------------------------------------- MAN'S BEST FRIEND --------------------------------------------
•
•
5
CLICK HERE TO DOWNLOAD YOUR SVG CONTENT CLICK HERE TO DOWNLOAD YOUR SVG CONTENT PROJECT 19 www.tatteredlace.co.uk | 31
Step bySteps
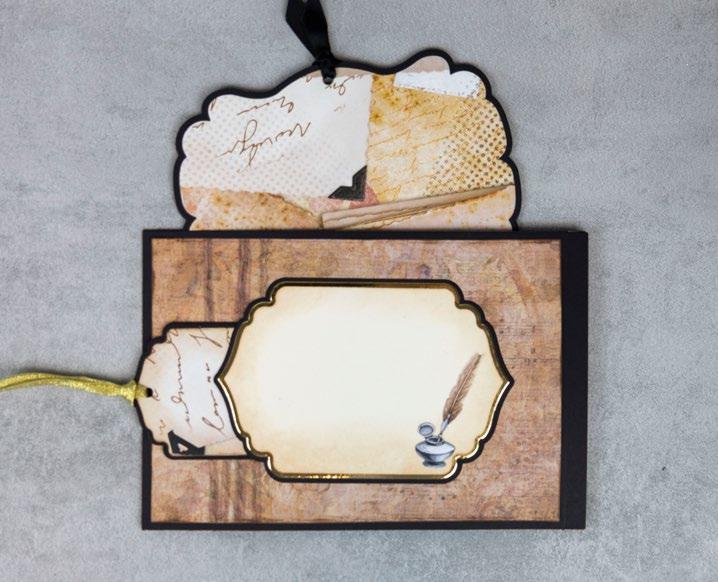
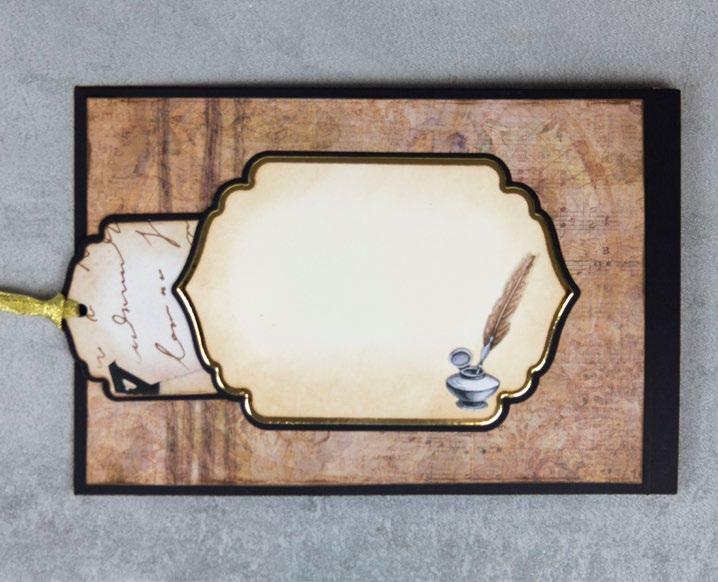
What you’ll need:
• 21-01-Famous Landmarks SVG files
• White cardstock
• Brown cardstock
• Gold mirror cardstock
• Cream ribbon
• Distress Ink – Brushed Corduroy
1
Cut all the pieces needed to create the project as listed below;
From SVG downloads:
• From white cardstock:
- 1 x FL-1-Tag (with sentiment draw file)
• From gold mirror cardstock:
- 1 x FL-1-Tag 2
• From backing paper: - 1 x FL-1-Paper Aeroplane (stamp)

• From charisma: - 1 x FL-1-Charisma
From machine memory:
• From white cardstock:
- 2 x 175mm square
• From gold mirror cardstock:

- 1 x 165mm square
• From brown cardstock: - 1 x 160mm square
• From backing paper: - 1 x 155mm square (map)

2
On one of the white squares, measure in 10mm from the left edge and score and fold to create a tab. Attach to the other white square to create card. Ink around the edges of the card front. Mat the gold square onto the card with foam tape. Ink around the edges of the map square and mat onto the brown square with foam tape. Mat onto the card.
3
Fold on the score lines of the paper aeroplane and ink the folds. Stick the middle sections together to create a pocket and mat onto the card.
4
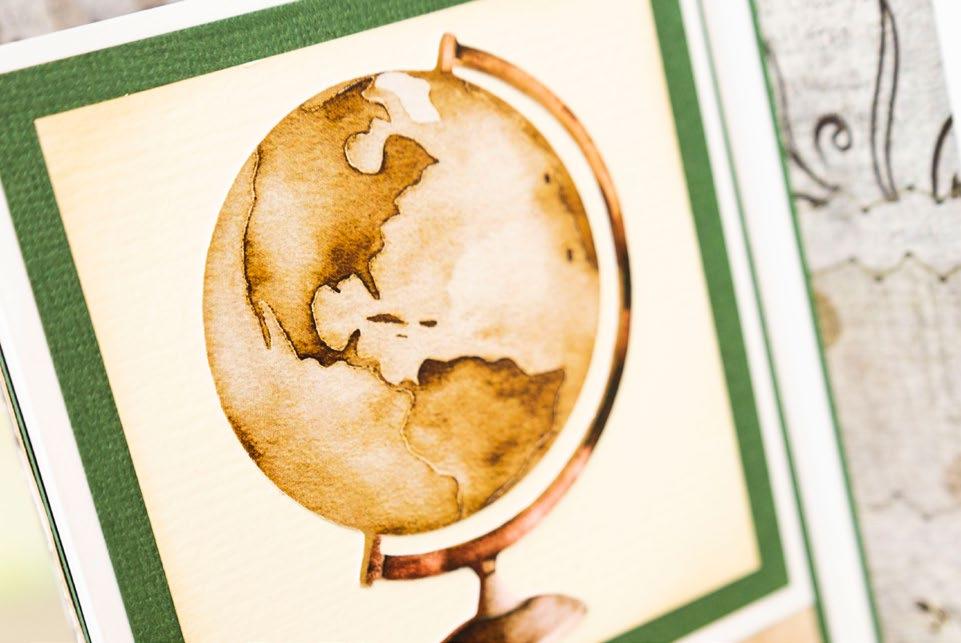
Trim the globe cut to leave just the world. Mat the world onto the card and mat the landmark cuts into the paper aeroplane pockets.


Mat the sentiment tag and the gold tag with foam tape. Loop a length of ribbon through the end of the tag and mat onto the card with foam tape.

5
1 2 3 4 5
---------------------------------------- FAMOUS LANDMARKS ------------------------------------------32 | www.tatteredlace.co.uk CLICK HERE TO DOWNLOAD YOUR SVG CONTENT PROJECT 21
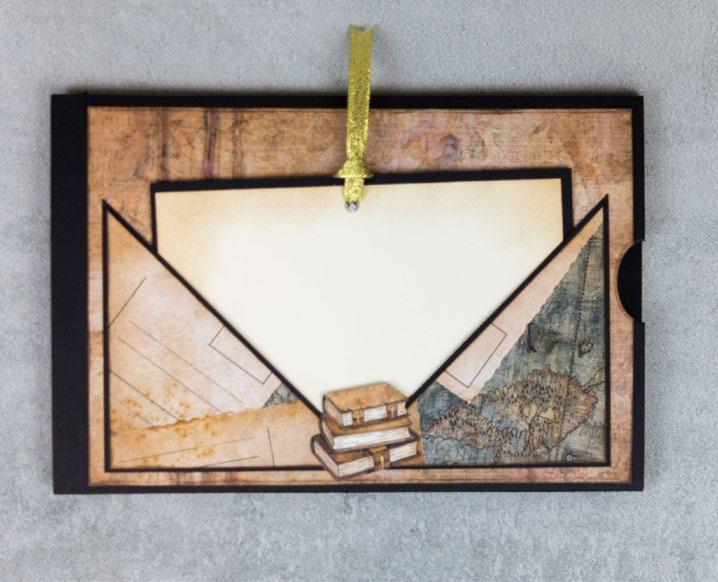
What you’ll need:
• 22-02-Famous Landmarks SVG files

• White cardstock
1
Cut all the pieces needed to create the project as listed below;

From SVG downloads:
• From charisma:
- 1 x FL-2-Charisma A - 1 x FL-2-Charisma B
From machine memory:
• From white cardstock: - 2 x 144mm circle


• From backing paper: - 1 x 139mm circle (sky)


2On one of the white circles, measure down 15mm from the top edge and score and fold to create a tab. Trim a straight edge across the bottom. Attach to the other circle to create a tent card.
3
Mat the sky circle onto the card. Mat the postcards cut onto the card with foam tape.
Trim the strap away from the camera cut. Mat all the charisma cuts onto card with foam tape as shown.
Step bySteps
4
1 3 2 4 ---------------------------------------- FAMOUS LANDMARKS ------------------------------------------CLICK HERE TO DOWNLOAD YOUR SVG CONTENT PROJECT 22 www.tatteredlace.co.uk | 33


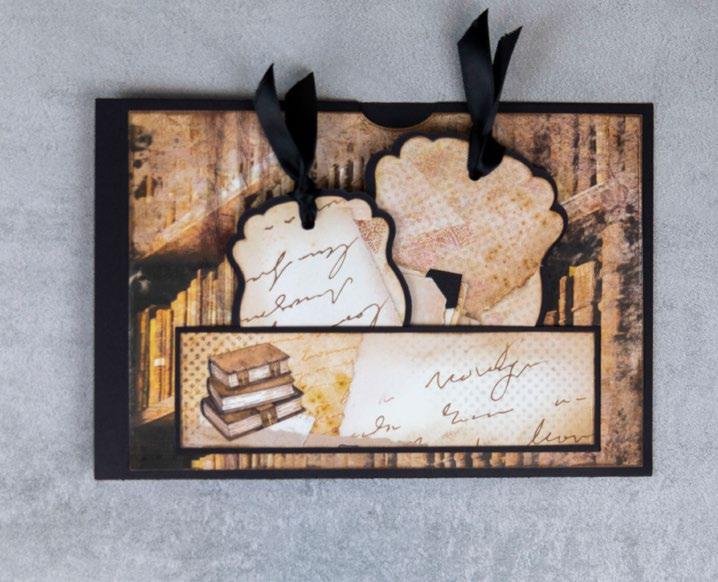
What you’ll need: • 23-03-Famous Landmarks SVG files • White cardstock • Black cardstock • Red cardstock • Distress ink – Brushed Corduroy • Ribbon - Cream and brown • Stapler ---------------------------------------- FAMOUS LANDMARKS ------------------------------------------34 | www.tatteredlace.co.uk
Step bySteps
Cut all the pieces needed to create the project as listed below;
From SVG downloads:
• From white cardstock:
2 x FL-3-Card Base
• From black cardstock: - 1 x FL-3-Card Mat 1
• From backing paper: - 1 x FL-3-Card Mat 2 (camera)


1 x FL-3-Tag 1 (stamps)
1 x FL-3-Tag 2 (camera)
1 x FL-3-Tag 3 (camera)
• From charisma:
1 x FL-3-Charisma A
1 x FL-3-Charisma B
From machine memory:
• From red cardstock: - 1 x 65mm x 45mm rectangle
• From white cardstock: - 1 x 70mm x 30mm rectangle (with sentiment draw file)
• From backing paper: - 4 x 60mm x 40mm rectangle (stamps)

2
On one of the card bases, measure in 30mm from the left edge and score and fold to create a tab. Attach to the other card base to create a card.

Ink around the edges of the camera card mat 2 and mat onto the black card mat 1 with foam tape. Mat onto the card. Mat the camera charisma cut onto the card with foam tape.
Ink around the edges of the tags and loop a length of ribbon through the hole in each tag.

Mat the tags and landmark charisma cuts onto the card with foam tape as shown.
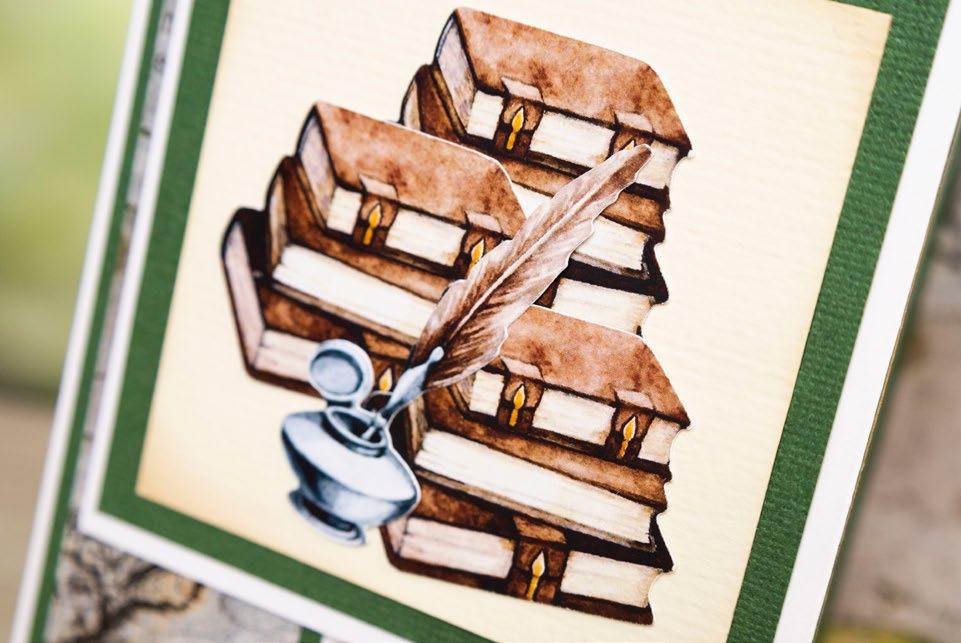
Mat the globe, quill and book charisma cuts onto the card with foam tape. Rip around the edges of the sentiment rectangles and ink the sentiment. Mat onto the card with foam tape.
5
6
Fold the stamp rectangles and red rectangle in half and staple together in the middle to create a book. Mat the book onto the card with foam tape.
---------------------------------------- FAMOUS LANDMARKS ------------------------------------------1
1 3 5 2 4 6
-
-
-
-
-
-
3
4
CLICK HERE TO DOWNLOAD YOUR SVG CONTENT PROJECT 23 www.tatteredlace.co.uk | 35
Retro Camera
JUST FOR YOU
What you’ll need:
24-01-Retro Camera SVG files
Black cardstock
Beige
mirror cardstock
Glossy
Cut all the pieces needed to create the project as listed below;
From SVG downloads:
• From charisma: - 1 x RC-1-Charisma A
- 1 x RC-1-Charisma B
From machine memory:
• From white cardstock:
- 1 x 280mm x 155mm rectangle - 1 x 70mm x 20mm rectangle (with sentiment draw file)
• From silver mirror cardstock:
- 1 x 95mm x 150mm rectangle
- 2 x 35mm x 150mm rectangle
- 2 x 45mm x 150mm rectangle
- 1 x 120mm octagon
- 1 x 80mm x 30mm rectangle
• From black cardstock:
- 1 x 90mm x 145mm rectangle
- 2 x 30mm x 145mm rectangle
- 2 x 40mm x 145mm rectangle - 1 x 116mm octagon
- 1 x 75mm x 25mm rectangle
• From backing paper:
- 1 x 85mm x 140mm rectangle (cameras) - 2 x 35mm x 140mm rectangle (cameras)
• From beige cardstock: - 2 x 25mm x 140mm rectangle - 1 x 112mm octagon
2On the large white rectangle, from each edge measure in at 55mm and 90mm and score and fold. Mat the black rectangles onto the silver rectangles. Mat the large rectangle onto the middle panel of the card and the other rectangle onto the folded side panels.
3Mat the large camera rectangle onto the middle panel of the card. Mat the other camera rectangles onto the outer side panels of the card. Mat the beige rectangle onto the inner side panels of the card.
THE WORLD IS YOURS
What you’ll need:
26-03-Retro Camera SVG files
Red cardstock
1
Glossy Accents
White cardstock
Cut all the pieces needed to create the project as listed below;
From SVG downloads:
• From white cardstock:
- 3 x RC-3-Frame
• From charisma: - 1 x RC-3-Charisma A - 1 x RC-3-Charisma B
From machine memory:
4
Mat the beige octagon onto the black octagon and onto the silver octagon with foam tape. Mat onto the middle panel of the card with foam tape.
Trim the camera cuts as shown in the image. Build up the decoupage and mat together. Add glossy accents to the lens and flash and mat onto the card.

Mat the sentiment rectangle onto the black rectangle and onto the silver rectangle with foam tape. Mat onto the card with foam tape.
• From white cardstock: - 2 x 175mm x 100mm rectangle - 1 x 80mm x 15mm rectangle (with sentiment draw file)
• From red cardstock: - 1 x 180mm x 115mm rectangle - 1 x 85mm x 20mm rectangle
• From backing paper:
- 1 x 175mm x 110mm rectangle (stamp)
- 1 x 120mm x 110mm rectangle (stamp)
- 3 x 68mm squares (sky)
CLICK HERE TO DOWNLOAD YOUR SVG CONTENT
------------------------------------------- RETRO CAMERA ----------------------------------------------
•
•
•
•
•
• White cardstock •
•
cardstock • Silver
•
Accents 1
36 | www.tatteredlace.co.uk
5
6
PROJECT 24 PROJECT 26
SNAPPY BIRTHDAY
What you’ll need:
• 25-02-Retro Camera SVG files • White cardstock
• Black cardstock • Silver mirror cardstock
1Cut all the pieces needed to create the project as listed below;
From SVG downloads:
• From white cardstock:
- 1 x RC-2-Frame
• From charisma:
- 1 x RC-2-Charisma
From machine memory:
• From white cardstock:
- 2 x 130mm x 205mm rectangle
- 1 x 55mm square (with sentiment draw file)
• From silver mirror cardstock:
- 1 x 115mm x 190mm rectangle
• From black cardstock:
- 1 x 110mm x 185mm rectangle
• From backing paper:
- 1 x 105mm x 180mm rectangle (sky)
- 2 x 55mm square (camera)

2On one of the white rectangles, on the left edge measure in 10mm and score and fold to create a tab. Attach to the other white rectangle to create a card.
3Mat the sky rectangle, the black rectangle and silver mirror rectangle together and mat onto the card with foam tape.
4Mat the sky squares behind the top and bottom apertures in the white frame and the sentiment square behind the middle aperture. Mat onto the card with foam tape.
Trim the camera cuts as shown in the image. Build up the decoupage and mat together. Mat onto the card with foam tape.
 TO DOWNLOAD YOUR
CONTENT
TO DOWNLOAD YOUR
CONTENT
2On one of the white rectangles, measure down 10mm from the top edge and score and fold to create a tab. Attach to the other white rectangle to create a tent card.
3Fold the stamp rectangles in half to resemble pages. Tear down the edges of the smaller stamp rectangle and mat onto the large stamp rectangle sticking only the fold. Curl the corners of the large rectangle and mat onto the red rectangle sticking only the fold. Raise the pages with foam tape.
4Mat the landmarks cuts onto the sky squares and trim off the excess. Mat the frames onto each of the squares and mat onto the card with foam tape tucking a couple under the pages on either side of the card.
The decoupage in all three projects is trimmed as above.
5
Trim the camera cuts as shown in the image. Build up the decoupage and mat together. Add glossy accents to the lens and flash and mat onto the card.

6
Mat the sentiment rectangle onto the red rectangle and mat onto the card with foam tape.
------------------------------------------- RETRO CAMERA ----------------------------------------------
5
CLICK HERE TO DOWNLOAD YOUR SVG CONTENT CLICK HERE
SVG
PROJECT 25 www.tatteredlace.co.uk | 37
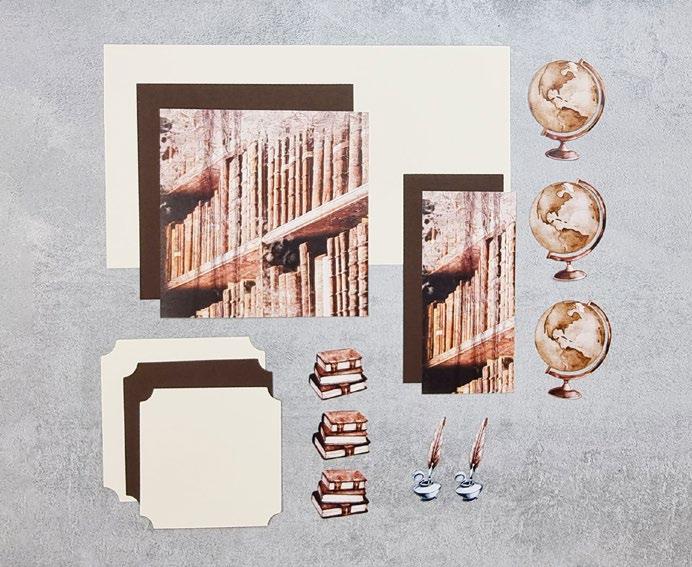
What you’ll need:
Cut all the pieces needed to create the project as listed below;
From SVG downloads:
From cream cardstock:
1 x ES-1-Notched Square
1 x ES-1-Notched Square
From brown cardstock
1 x ES-1-Notched Square
From charisma:
1 x ES-1-Charisma
From machine memory:
From cream cardstock:
1 x 230mm x 150mm rectangle
• From brown cardstock:
1 x 145mm square
- 1 x 70mm x 145mm rectangle
• From backing paper: - 1 x 140mm square (books)

- 1 x 65mm x 140mm rectangle (books)
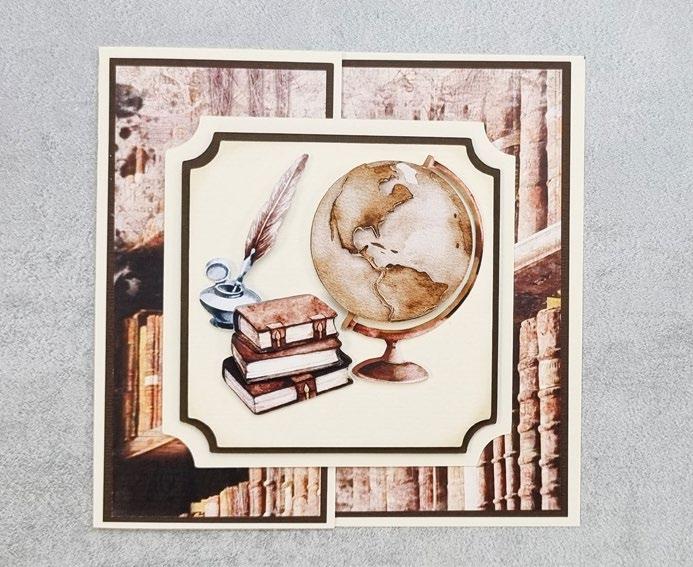
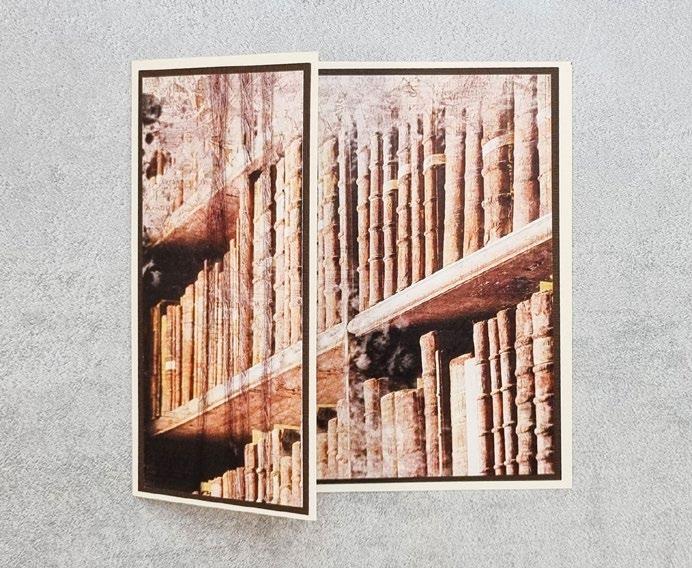
On the cream rectangle, from the left edge measure in a 75mm and score and fold to create the card front. Mat the books square and rectangle onto the brown square and rectangle. Mat the rectangle onto the card front and the square onto the inside back of the card.
Ink around the edges of the notched square 3 cut. Mat onto the brown notched square with foam tape and onto the notched square 1 cut with foam tape. Mat onto the card front with foam tape.
Trim into the charisma cuts as shown.
Build up the decoupage and mat together with foam tape. Mat the cuts onto the card front.
Step bySteps 1 2 3 4 5 1
•
-
1 -
3 •
-
2 •
-
•
-
-
2
3
4
5
• 27-01-Essential Studies SVG files • Cream cardstock • Brown cardstock • Distress Ink – Brushed Corduroy ----------------------------------------- ESSENTIAL STUDIES -------------------------------------------CLICK HERE TO DOWNLOAD YOUR SVG CONTENT PROJECT 27 38 | www.tatteredlace.co.uk
What you’ll need:
• 28-02-Essential Studies SVG files
• White cardstock
• Cream cardstock
Cut all the pieces needed to create the project as listed below;
From SVG downloads:
• From white cardstock:
- 1 x ES-2-Card Base
• From cream cardstock
- 1 x ES-2-Lace Panel
• From gold metallic cardstock
- 1 x ES-2-Wax Seal
- 1 x ES-2-Fleur-de-lis
• From charisma: - 1 x ES-2-Charisma
From machine memory:
• From white cardstock:
- 2 x 100mm square
- 1 x 175mm x 55mm rectangle
• From green cardstock:

- 2 x 95mm square
- 1 x 170mm x 50mm rectangle
• From cream cardstock: - 2 x 90mm square
- 1 x 85mm square (with sentiment draw file)
• Green cardstock
• Gold metallic cardstock
• Distress Ink – Brushed Corduroy
• From backing paper:
- 1 x 195mm x 95mm rectangle (map)
- 1 x 85mm square (map)
2
Fold on the score lines of the card base to create a double easel card. Mat the green squares onto the white squares and mat onto the front fold of each of the easels. Mat the large map rectangle onto the base of the card.
3
Ink around the edges of the sentiment square and the map square. Mat onto the cream squares and mat onto each of the easels with foam tape.
4
Mat the charisma cuts onto the right easel with foam tape.
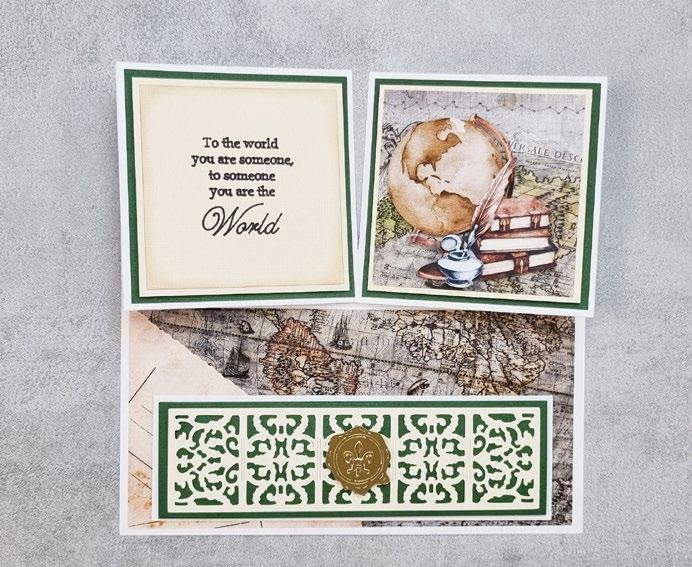
Mat the lace panel onto the green rectangle. Mat onto the white rectangle with foam tape and then mat onto the card base as a stopper. Mat the wax seal onto the card stopper with foam tape.
5
Step bySteps 1 2 3 4 5 1
----------------------------------------- ESSENTIAL STUDIES -------------------------------------------CLICK HERE TO DOWNLOAD YOUR SVG CONTENT PROJECT 28 www.tatteredlace.co.uk | 39
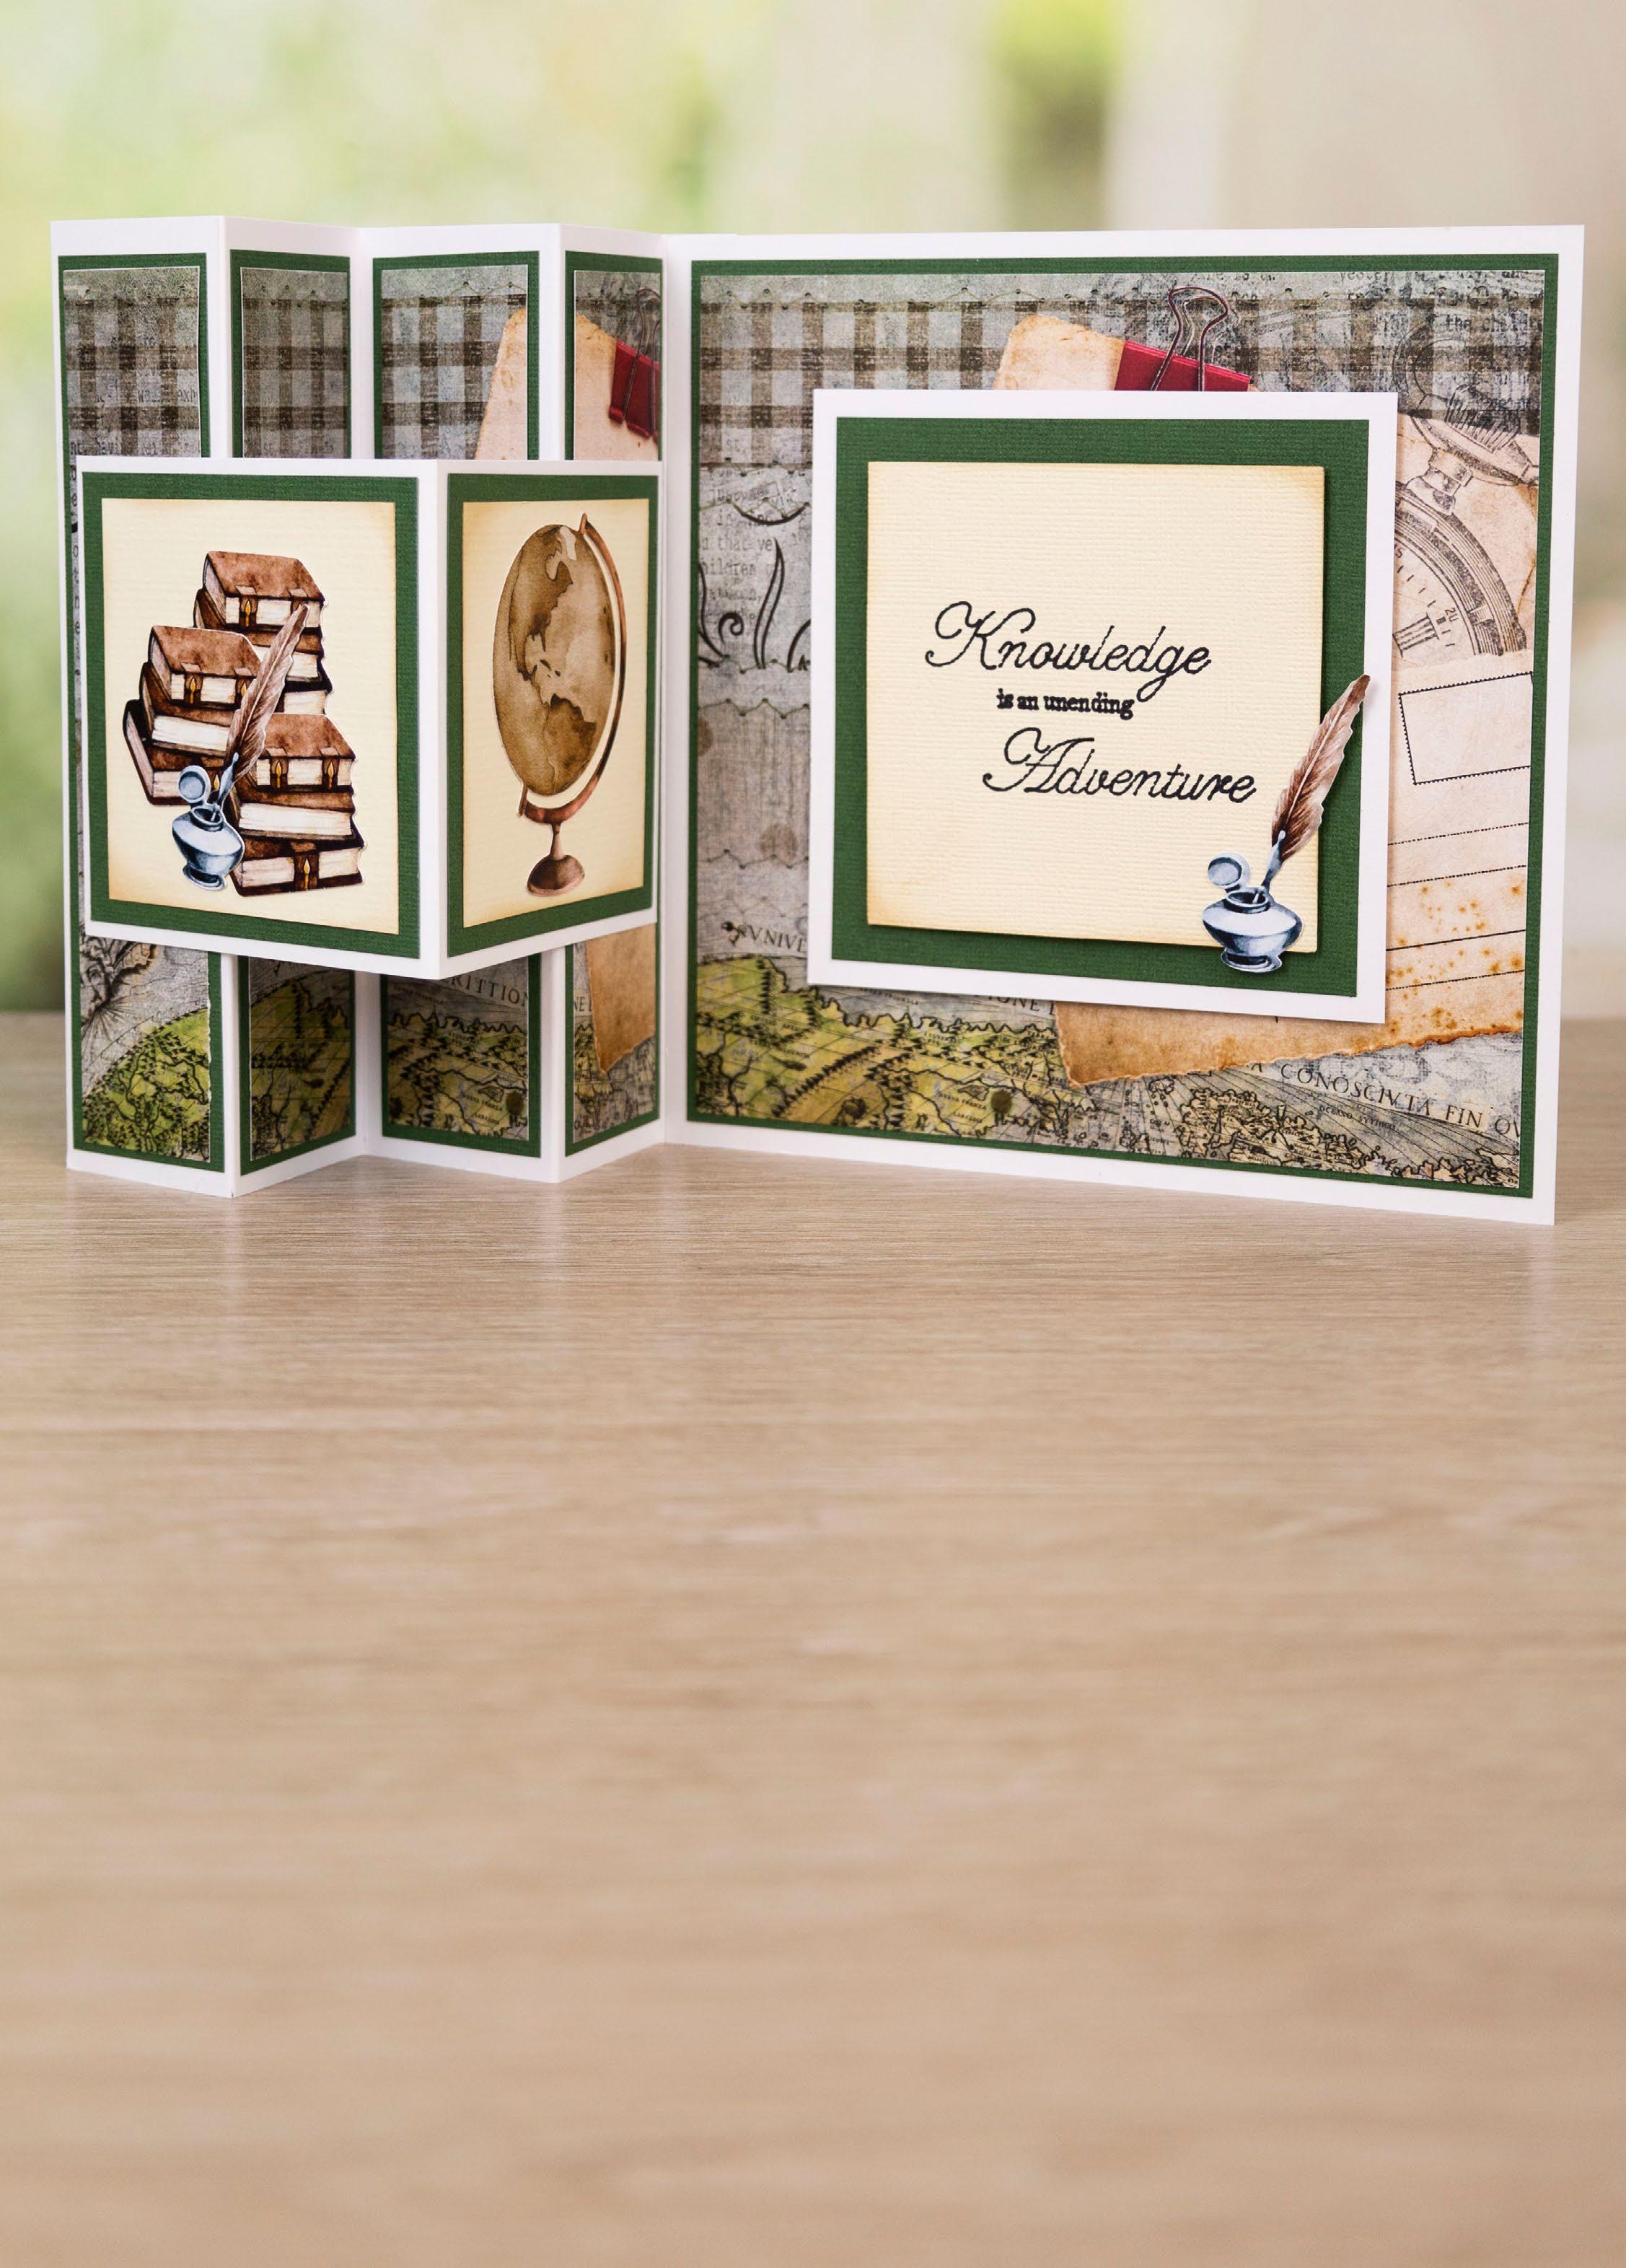
What you’ll need: • 29-03-Essential Studies SVG files ----------------------------------------- ESSENTIAL STUDIES -------------------------------------------• White cardstock • Cream cardstock • Green cardstock • Distress Ink – Brushed Corduroy 40 | www.tatteredlace.co.uk
Step bySteps
1
Cut all the pieces needed to create the project as listed below;
From SVG downloads:
• From charisma:
- 1 x ES-3-Charisma
From machine memory:
• From white cardstock:
- 1 x 195mm x 180mm rectangle
- 1 x 180mm square
- 1 x 115mm square
- 1 x 180mm x 90mm rectangle
• From green cardstock:


- 1 x 170mm square
- 4 x 40mm x 170mm rectangle
- 1 x 105mm square
- 2 x 85mm square
• From cream cardstock:
- 1 x 90mm square (with sentiment draw file)
- 2 x 75mm square
• From backing paper: - 1 x 165mm square (map)
- 4 x 35mm x 165mm rectangle (map)
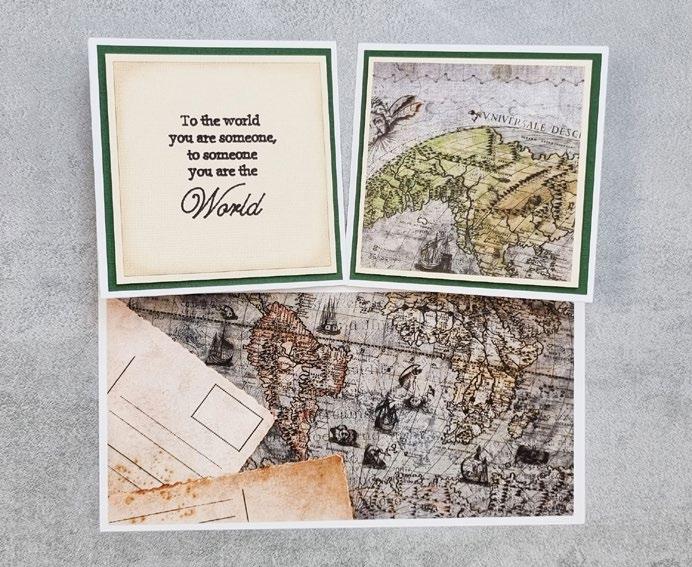
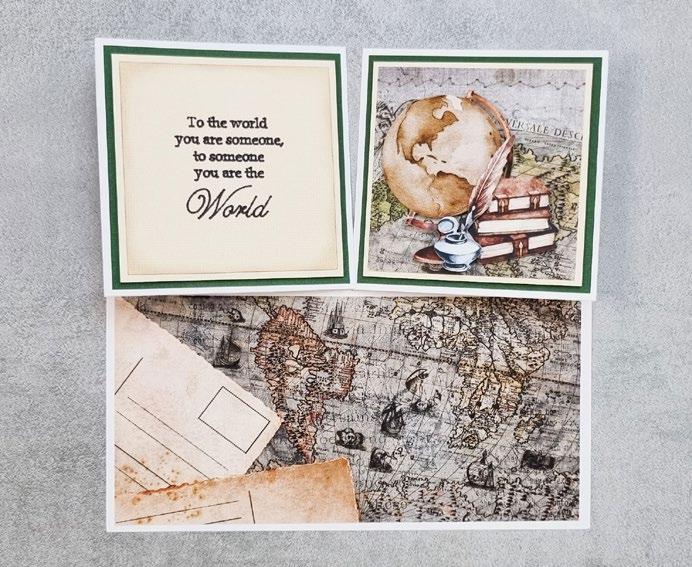
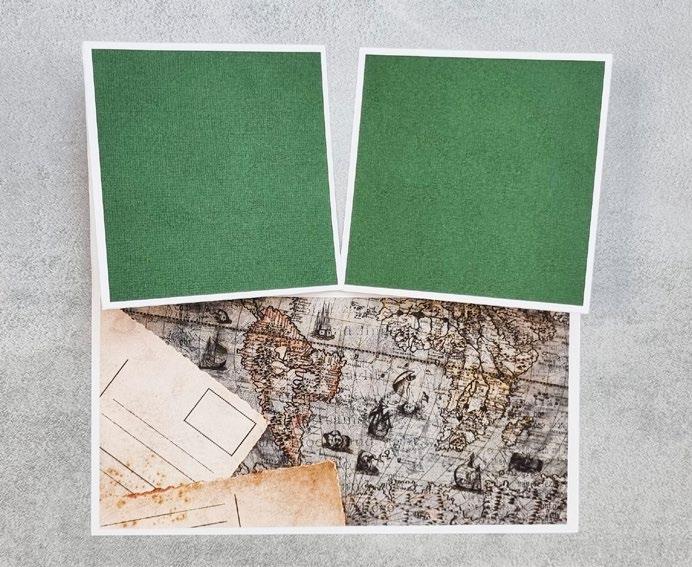
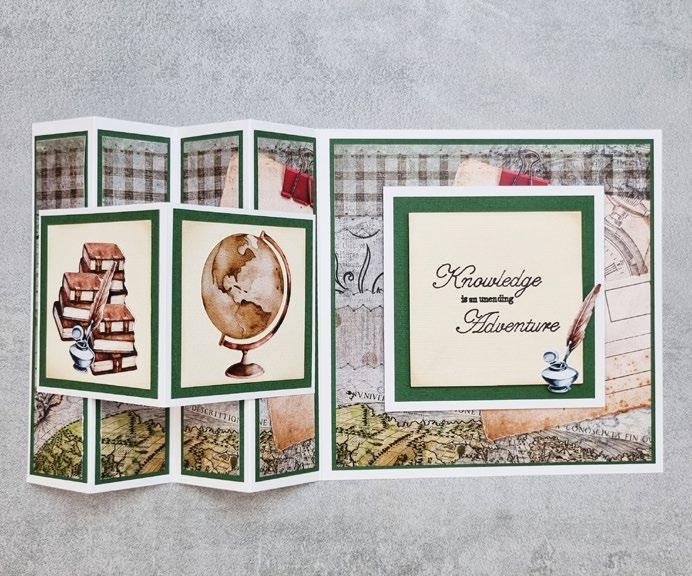
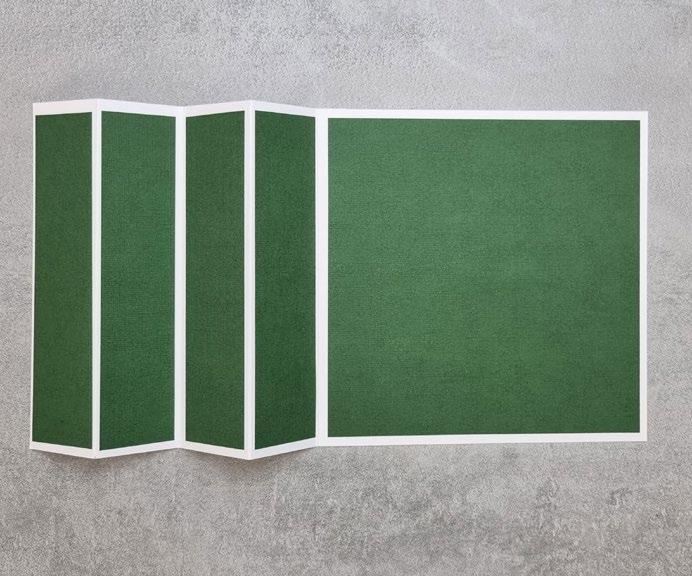
On the large white rectangle, measure in 15mm from the left edge and score and fold to create a tab. Attach to the back of the large white square to create a card. On the card front, from the edge of the card measure in 4.5cm, 9cm and 13.5cm and score and fold. Mat the large green square onto the inside back of the card. Mat the large green rectangles onto the inside folds of the card front.
2
Mat the map square onto the inside back of the card. Mat the map rectangles onto the inside folds of the card front.
Mat the 105mm width green square onto the 115mm width white square. Ink around the edges of the cream sentiment square. Mat onto the squares with foam tape and mat onto the inside back of the card with foam tape.
4
Fold the remaining white rectangle in half vertically. Ink around the edges of the cream squares and mat onto the remaining green squares. Mat onto either side of the folded rectangle. Mat the folded rectangle onto the inside front of the card mat only to the left panel and the right panel.
6
Mat the book, globe and one of the quill cuts onto the inside front of the card and the other quill cut onto the inside back of the card.
----------------------------------------- ESSENTIAL STUDIES --------------------------------------------
1 3 5 2 4 6
3
5
CLICK HERE TO DOWNLOAD YOUR SVG CONTENT PROJECT 29 www.tatteredlace.co.uk | 41
HOW TO... USE THE SECRET BOOK
SVG FILES
HOW TO MAKE A SIMPLE BOOK
1To make the outer cover you need to cut two covers, two hinges, and one spine from your chosen cardstock.
Mat the hinges onto the inside edge of each cover piece.
Mat each cover piece to either side of the spine, matting the other half on the hinge piece. This creates the outer cover.
Cut the Fastener from your chosen cardstock and mat the thinner tab onto the edge of the inside back cover.
5
If you wish, cut the Cover twice and Spine once again from white cardstock and mat onto the inside of the cover to hide the tabs.
6
Cut the Page as many times as required from your chosen cardstock. Trim away the tabs from the top and bottom edges and fold the tab on the side.

Attach the tab onto the inside of the spine.
Repeat with the rest of your pages.
Close the book and fold the fastener up onto the front cover and add your choice of fastening.
2
3
4
7
8
9
1 4 7 2 5 8 3 6 9 42 | www.tatteredlace.co.uk
SPINE OPTIONS
If you are planning on heavily decorating your pages, you might need a stronger tab to secure your pages to the spine. Below are three options for how you can use the Hinge to secure your pages to the spine.
1
PAGE OPTIONS
Cut the Hinge from white cardstock and fold down the score line. Mat the left side of the hinge onto the spine and leave the right side facing upwards. Continue until you have the desired amount you need. Mat your pages onto the tabs to attach to the spine.
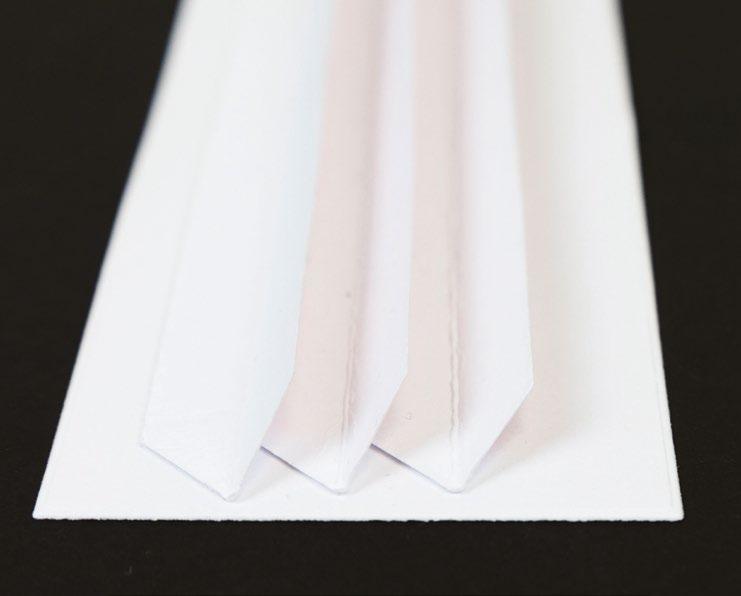
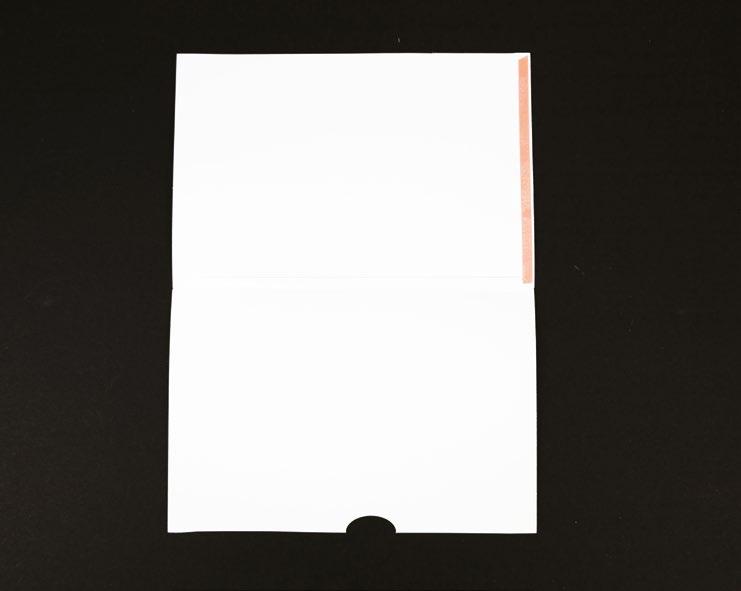
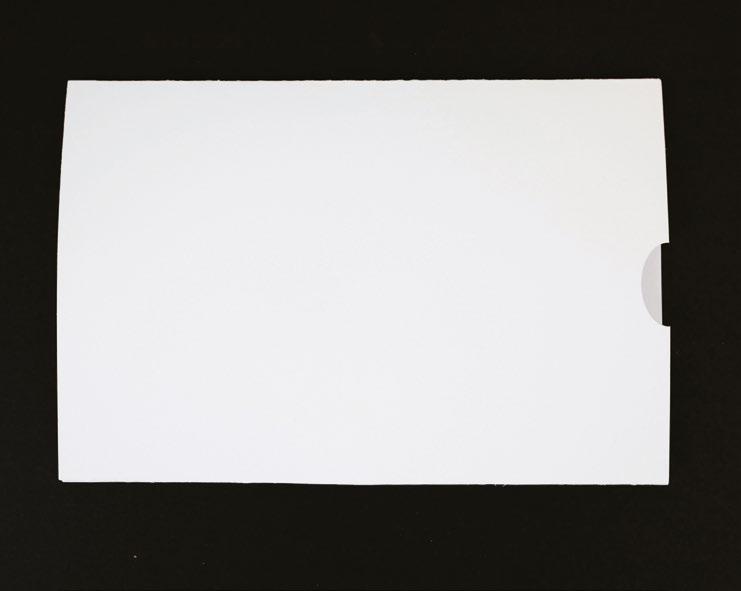
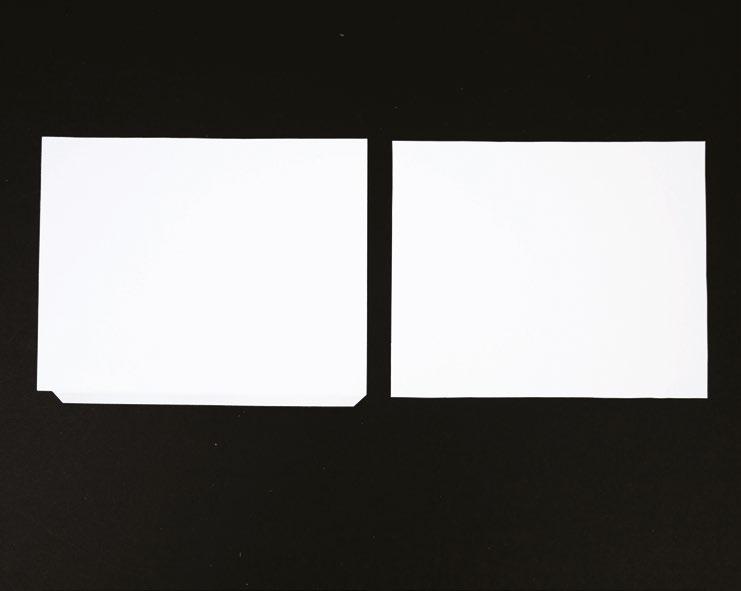
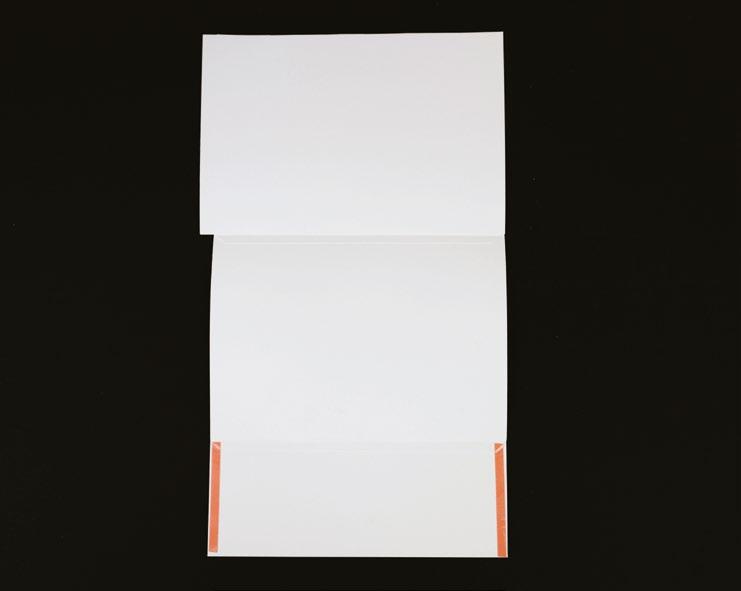
TOP OPEN POCKET
1
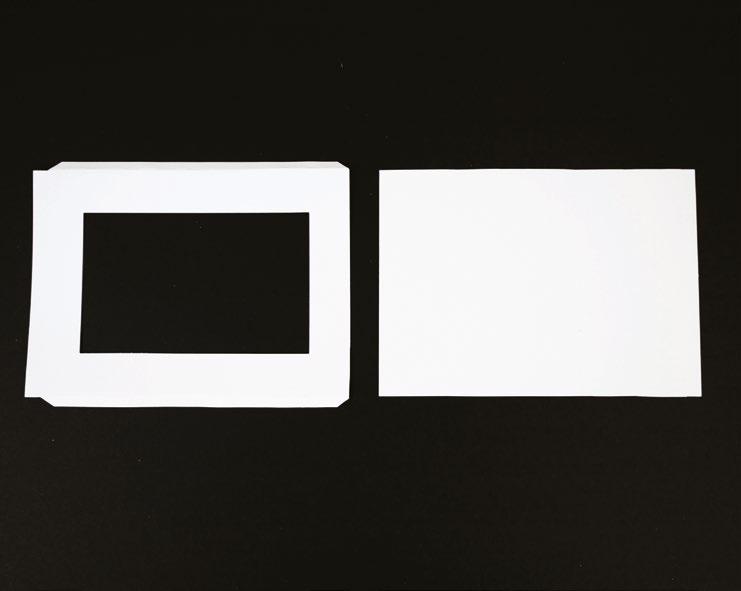
Cut the Page twice from cardstock. On one of the pages, trim off the top and bottom tabs. On the other cut, trim off the top tab and cut the Cut Out into the top edge.
For an even sturdier spine, mat two halves of a hinge piece together to create an upside down T-shape. Mat the bottom tabs onto the spine. Continue until you have the desired amount you need. Mat your pages onto the tabs to attach to the spine.
2
2 2
2
Attach the page with tabs to the bottom of the other page. Run a length of Red Liner tape down the right edge of the top page.
3
There are so many different ways you use the Secret Book SVG files to build the pages for your book, we could fill a whole magazine with the ideas we have! Here are some ways to create different pages for you book using the SVGs in the set.
1 1 Fold up the pocket and seal the right edge closed with the tape. The top edge is open for you to use as a pocket.
To add multiple pages into your book, mat two halves of a hinge piece together. Mat a third hinge onto the middle tab to create fan-like shape. Mat the bottom tabs onto the spine. Continue until you have the desired amount you need. Mat your pages onto the tabs to attach to the spine.
3 3
3
www.tatteredlace.co.uk | 43
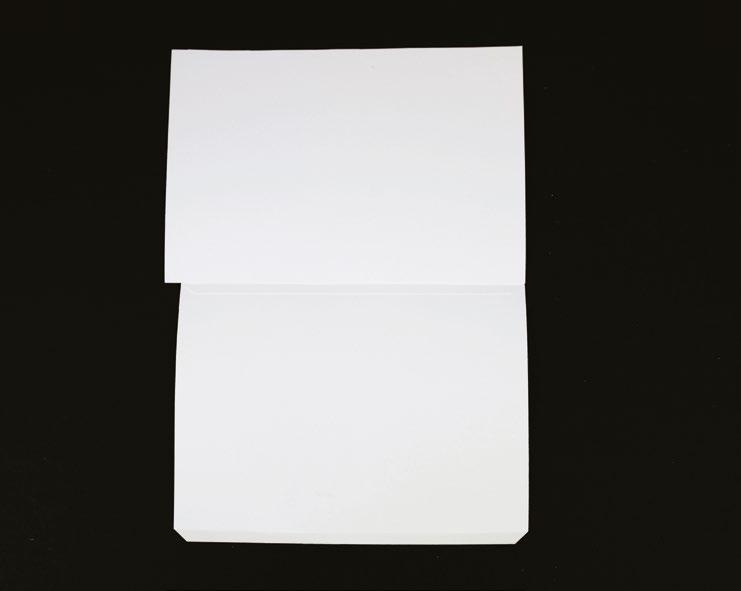
1Cut the Page twice from cardstock. On one of the pages, trim off the top and bottom tabs. On the other cut, cut the Cut Out into the right edge.
APERTURE POCKET
2 2
2Attach the page with tabs to the bottom of the other page. Run a length of Red Liner tape along the other tab.

1
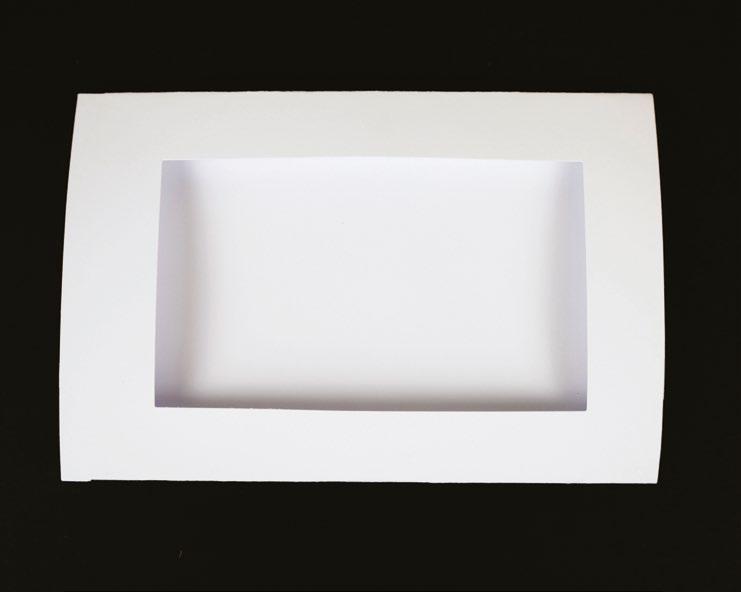
Cut the Page once from cardstock. Cut the Page and your choice of aperture together from cardstock. On the solid page, trim off the top and bottom tabs.
FOLD OUT PAGE
2Attach the aperture page to the bottom of the solid page using the tab. Run a length of Red Liner tape along the other tab.
1
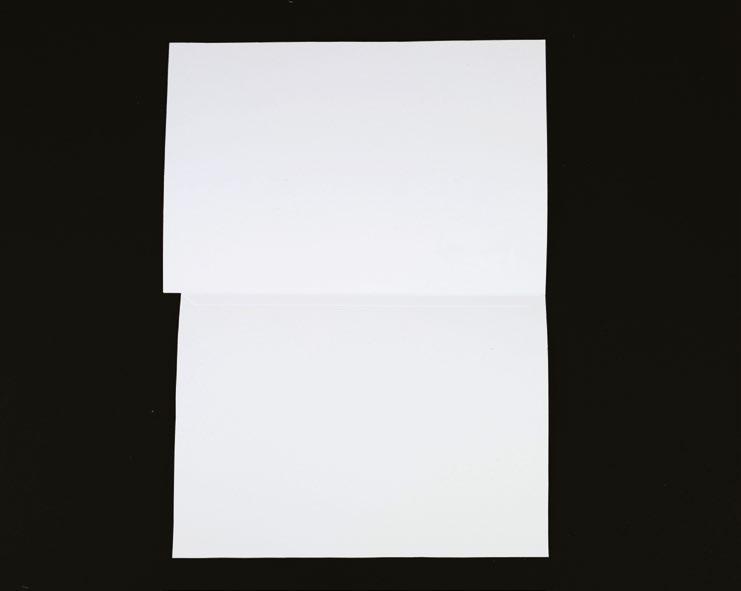
Cut the Page twice from cardstock. On one cut, trim off the top tab. On the other cut, trim off the top, bottom and left tab.
2
Attach the no tab page to the bottom tab of the other other page.
Fold up the pocket and seal the top edge closed with the tape. The right edge is open for you to use as a pocket.
3
3 3
3
Fold up the aperture page and seal the top edge closed with the tape. The right edge is open for you to slide photos into the pcoket.
3
Fold up the bottom page. Cut a small tab from cardstock and stick to the outside of the fold-out page to indicate it pulls down.
SIDE OPEN POCKET
1 1 1
2
3
44 | www.tatteredlace.co.uk
1
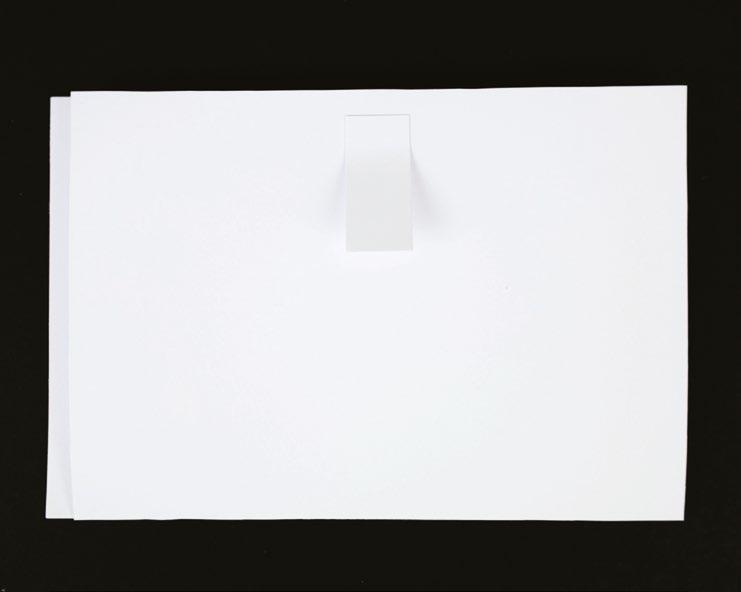
Cut the Page three times from cardstock. On one of the pages, trim off the top tab. On the second page, trim off the top and left tab. On the third page, trim off all tabs and trim the page to 8cm high.
2Attach the second page to the first page sticking the straight edge to the tabbed edge.
2 5
3 6
3
Mat the third smaller page to the bottom tab of the second page. Add Red Liner tape down either side of the smaller page.
5
Fold up the second page to the first to hide the pocket.
4
Fold up the smaller page, and stick the edges to the second page to create the pocket.
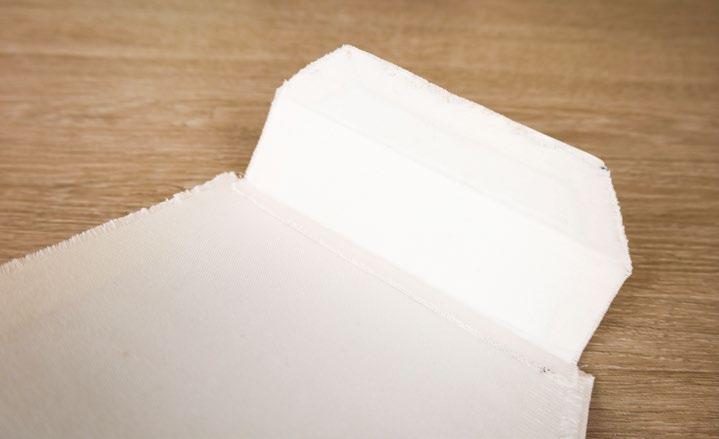
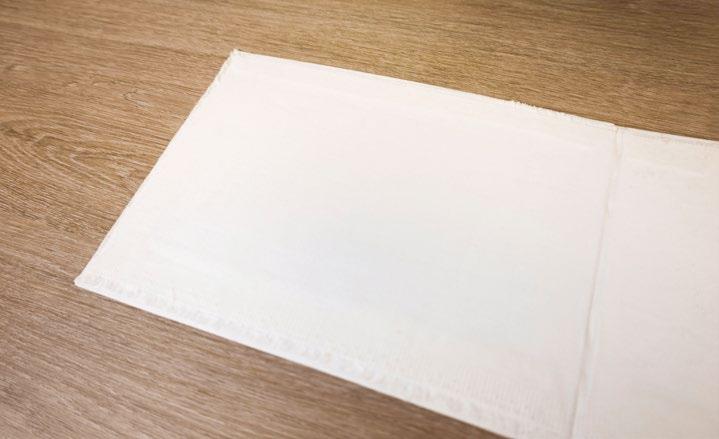
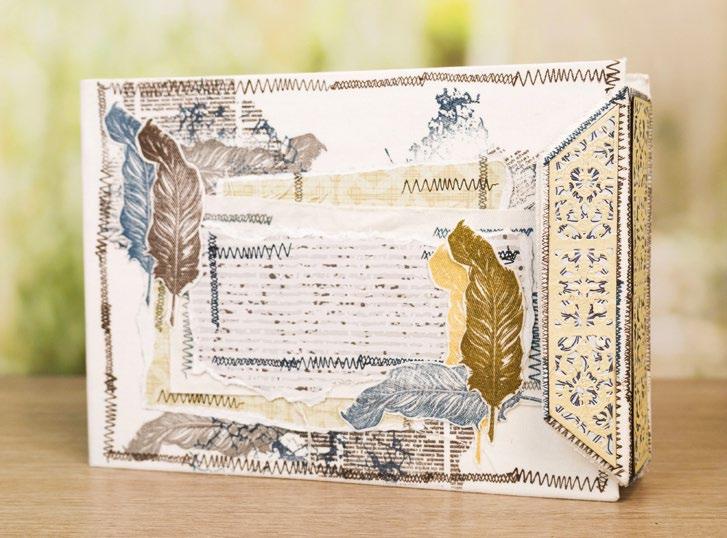
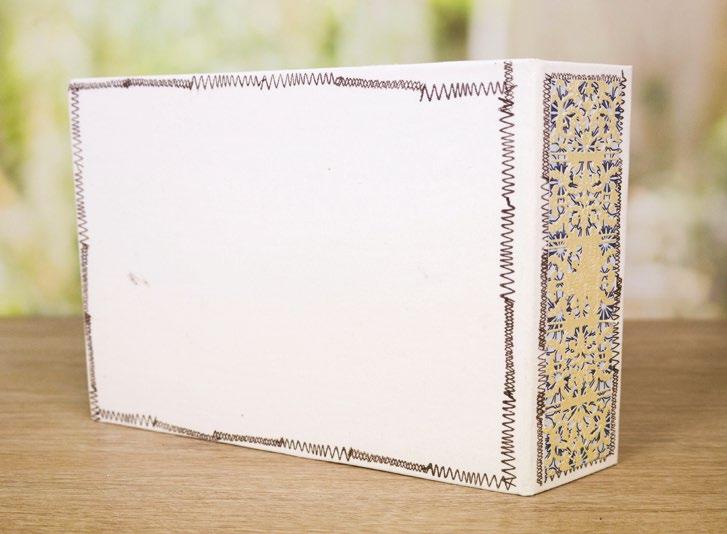
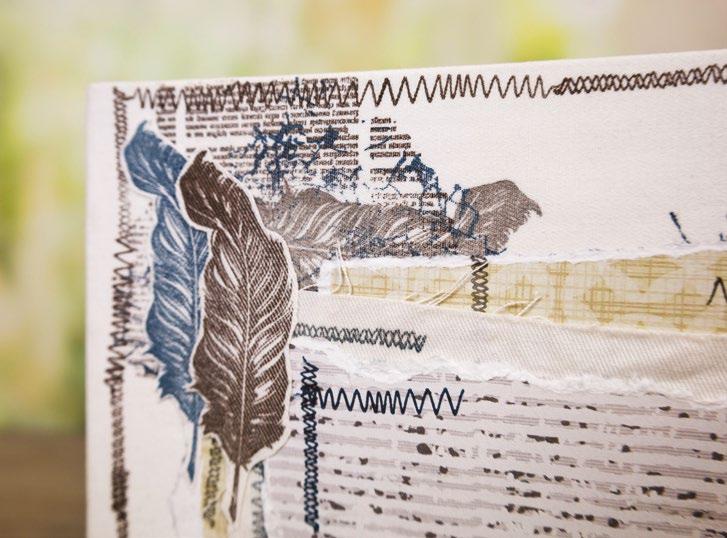
FINISHING THE BOOK
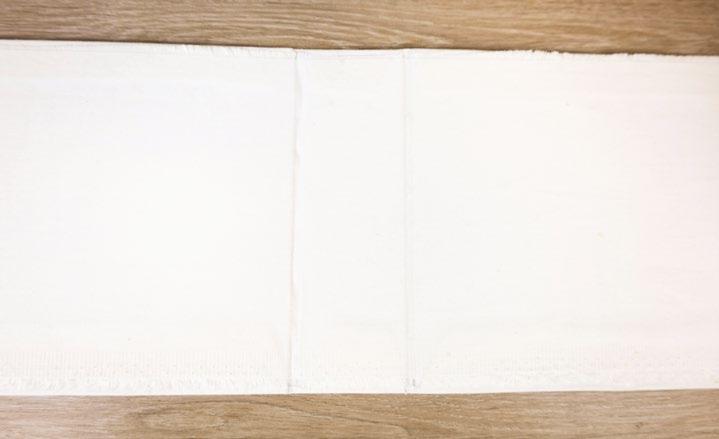
HIDDEN POCKET When you have got the hang of building the book you can go further with your decorating. Make up the cover with a 3-4 layers of cardstock and wrap the cover in fabric. You can then continue to decorate your book cover with stamps and SVG cuts as you desire.
Cut a small tab from cardstock and stick it to the outside of the fold-out page to indicate it pulls down.

6
1 4
www.tatteredlace.co.uk | 45
- 1 x SB-1-Page Mat
- 1 x SB-1-Side Pocket Page Mat
PLEASE NOTE: Cover the below cuts with gilding wax when cut
- 1 x SB-1-Spine Lace Panel 1
- 2 x SB-1-Fastener Lace Panel 1
- 2 x SB-1-Fastener Lace Panel 2
4 x SB-1-Corners
• From backing paper:
- 8 x SB-1-Page Mat (map)
- 2 x SB-1-Page Mat (books)
- 1 x SB-1-Top Pocket Page Mat (books)
- 1 x SB-1-Page Mat (music)
- 1 x SB-1-Side Pocket Page Mat (music)
- 1 x SB-1-Side Pocket Page Mat (map)
- 2 x SB-1-Side Pocket Page Mat (map) flip the file
- 2 x SB-1-Fastener Mat 1 (camera)
- 2 x SB-1-Fastener Mat 2 (camera)
- 3 x SB-1-Victoriana Label 2 (No.8) (camera)
- 1 x SB-1-Victoriana Label 3 (No.7) (camera)
What you’ll need: • 30-01-Secret Book SVG files • Black cardstock • Cream cardstock • Red cardstock -------------------------------------------- SECRET BOOK ----------------------------------------------• Gold mirror cardstock • Distress ink – Brushed Corduroy • Cream ribbon • Black ribbon • Gold ribbon • Cadence Dora Gilding WaxGold Cut all the pieces needed to create the project as listed below; From SVG downloads: • From black cardstock: - 4 x SB-1-Cover - 3 x SB-1-Spine -10 x SB-1-Hinge -4 x SB-1-Fastener - 5 x SB-1-Page - 3 x SB-1-Side Pocket Page - 1 x SB-1-Top Pocket Page - 2 x SB-1-Victoriana Label 1 (No.9) - 1 x SB-1-Victoriana Label 3 (No.7) - 1 x SB-1-Aperture Pocket 1 - 1 x SB-1-Victoria Label 1 (No.18) - 1 x SB-1-Classical Label 1 (No.17) - 1 x SB-1-Classical Label 4 (No.10) - 1 x SB-1-Victoriana Label 5 (No.13) - 2 x SB-1-Triangle Pocket - 2 x SB-1-Small Page Mat - 1 x SB-1-Spine Lace Panel 2 - 1 x SB-1-Victoria Label 3 (No.16) - 2 x SB-1-Corners
-
PROJECT 30 46 | www.tatteredlace.co.uk
- 1 x SB-1-Victoriana Label 4 (No.6) (camera)
- 2 x SB-1-Spine Mat (camera)
- 1 x SB-1-Victoria Label 2 (No.17) (camera)
- 1 x SB-1-Classical Label 5 (No.9) (camera)
- 1 x SB-1-Victoriana Label 6 (No.12) (camera)
- 2 x SB-1-Triangle Pocket Mat (map)
- 1 x SB-1-Victoria Label 4 (No.15) (music)
• From gold mirror cardstock:
- 1 x SB-1-Victoriana Label 1 (No.9)
- 1 x SB-1-Classical Label 2 (No.16)
• From cream cardstock:
- 1 x SB-1-Victoriana Label 2 (No.8)
- 1 x SB-1-Victoriana Label 3 (No.7)
- 1 x SB-1-Victoriana Label 4 (No.6)
- 1 x SB-1-Aperture Pocket 2
FRONT COVER
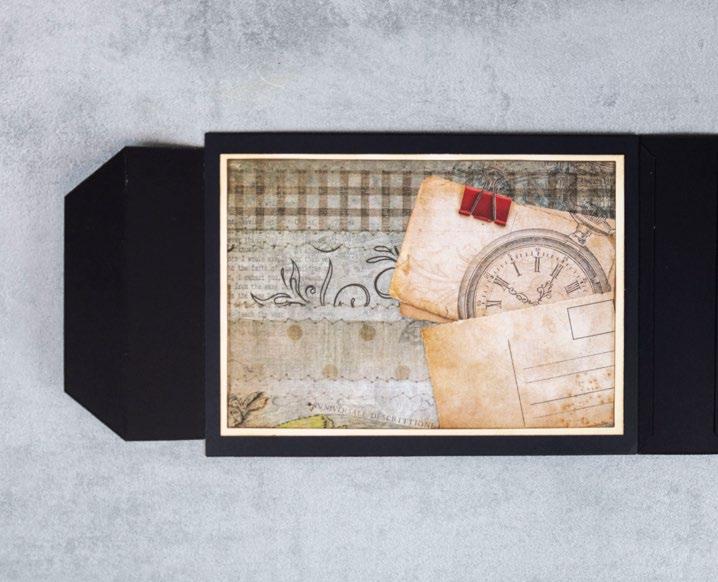
1To create the cover you will need two covers, one spine, two hinges and one fastener. Fold the hinges in half down the score line and mat one half of each hinge to either side of the spine. Mat each cover piece to the other half of the hinge piece on either side. Mat the fastener cut to the inside of the front cover.
2Turn the cover over. Ink around the edges of two of the cream 210mm x 145mm rectangles. Mat two of the map page mats onto the rectangles and mat onto front and back cover of the book. Mat the gold spine lace panel onto the spine of the book. Mat one of the fastener lace panel 1 and 2 cuts onto the fastener.
3Mat four of the gold corner cuts onto the card front mats. Ink around the edges of the cream Victoriana Label 2 and mat onto the gold Victoriana label 1. Mat onto the front cover. Using a globe, books and quill from the charisma cuts, mat onto the front cover.
INSIDE FRONT COVER
4Turn the cover over. Ink around the edges of one of the cream 210mm x 145mm rectangles and one of the map page mats. Mat together and mat onto the inside front cover.
- 1 x SB-1-Victoria Label 2 (No.17)
- 1 x SB-1-Classical Label 3 (No.15)
- 1 x SB-1-Classical Label 5 (No.9)
- 1 x SB-1-Victoriana Label 6 (No.12)
- 1 x SB-1-Victoria Label 4 (No.15)
• From red cardstock:
- 2 x SB-1-Wax Seal
• From charisma: - 2 x SB-1-Charisma
From machine memory:
• From cream cardstock:
- 4 x 210mm x 145mm rectangle
- 1 x 140mm x 85mm rectangle
- 1 x 140mm x 135mm rectangle
- 1 x 135mm x 75mm rectangle
- 1 x 150mm x 85mm rectangle
- 1 x 190mm x 70mm rectangle
- 3 x 95mm square
- 2 x 70mm x 90mm rectangle
- 2 x 60mm x 90mm rectangle
- 2 x 45mm x 90mm rectangle
• From black cardstock:
- 1 x 150mm x 145mm rectangle
- 1 x 145mm x 90mm rectangle
- 1 x 100mm x 125mm rectangle
- 2 x 200mm x 100mm rectangle
- 1 x 70mm x 30mm rectangle
- 1 x 75mm x 95mm rectangle
- 1 x 65mm x 95mm rectangle
- 1 x 50mm x 95mm rectangle
• From backing paper:
- 1 x 140mm x 85mm rectangle
- 1 x 150mm x 85mm rectangle (map)
- 1 x 150mm x 85mm rectangle (camera)
- 1 x 95mm x 120mm rectangle (map)
- 2 x 100mm square (map)
5
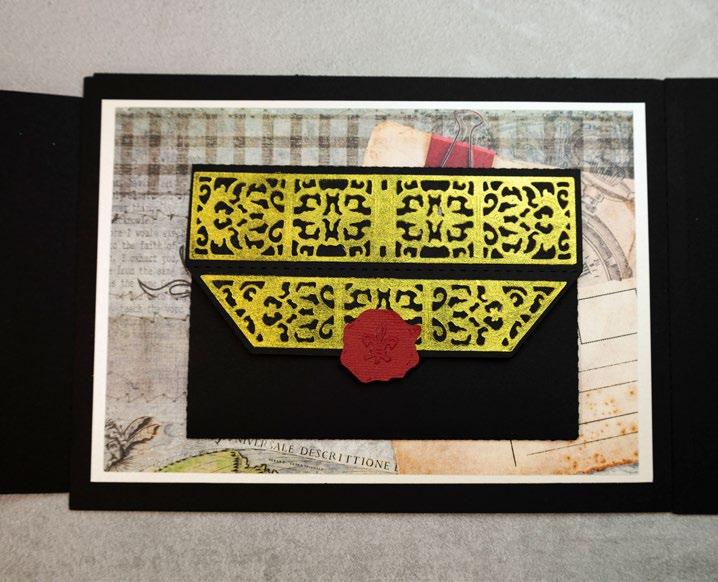
Using one of the black pages, trim to 110mm high chopping off the end with no tab. Stick a magnet onto the inside of the page piece and onto one of the fastener pieces. Fold
the tabs of the page piece and mat to the inside front cover to create a pocket. Attach the fastener placing the tab inside the pocket to create a pocket flap.
Mat the fastener lace panel 1 and fastener lace panel 2 cuts to the pocket flap. Mat one of the wax seals onto the pocket flap.
-------------------------------------------- SECRET BOOK -----------------------------------------------
5 3 1 6 4 2
6
CLICK HERE TO DOWNLOAD YOUR SVG CONTENT www.tatteredlace.co.uk | 47
INSIDE BACK COVER
7Ink around the edges of one of the cream 210mm x 145mm rectangles and one of the map page mats. Mat together and mat onto the inside front cover.
8Ink around the edges of the cream 140mm x 135mm rectangle and mat onto the black 150mm x 145mm rectangle. Attach a fastener cut together to the top and bottom of the back of the rectangle. Mat onto the inside back cover.


9Mat the fastener mat 1 and fastener mat 2 cuts onto the fastener pieces. Punch a hole into the end of each one and tie a ribbon through the hole. Ink around the edges of the cream and camera 140mm x 85mm rectangles. Mat onto either side of the black 145mm x 90mm rectangle. Punch a hole into the end of the rectangle and tie a ribbon through the hole. Place the rectangles within the tied pocket.
PAGES 1 & 2
10Using one of the side pocket pages, fold the top and bottom tabs. Using one of the pages, cut the top and bottom tabs off the page. Attach to the tabs on the other page to create a pocket. Mat one of the map side pocket page mats onto the front of the pocket.
11Mat one of the spine mats onto one of the black spines. Mat onto the page only sticking down either end to create an open bottom pocket. Ink the edges of the camera Victoriana label 2 and mat onto the black Victoriana label 1. Ink the edges of the camera and cream Victoriana label 3 cuts and mat together. Punch a hole into the top of both labels and tie a ribbon through the holes. Mat one of the quill charisma cuts onto the pocket.
12
Turn the pocket over. Mat the books page mat onto the pocket. Ink the cream aperture pocket 2 cut and mat behind the black aperture pocket 1 cut. Mat onto the card leaving the top edge open to create a pocket.
13
Mat four of the gold corner cuts onto the pocket. Ink the cream 135mm x 75mm rectangle and punch a hole in the top. Tie a ribbon through the hole and slide into the pocket.
Ink the cream and camera Victoria label 2 cuts and mat onto either side of the black Victoria label 1 cut. Punch a hole into the end of the label and tie a ribbon through the hole. Slide into the pocket.
-------------------------------------------- SECRET BOOK -----------------------------------------------
14
7 9 11 8 10 12 1413 CLICK HERE TO DOWNLOAD YOUR SVG CONTENT48 | www.tatteredlace.co.uk
PAGES 3 & 4
15
Using the top pocket page, fold up the bottom tab. Using one of the pages, cut the top and bottom tabs off the page. Attach to the other page to leaving the top edge open to create a pocket. Mat the book top pocket page mat onto the pocket.
16
Ink around the edges of one of the camera spine mat cuts and mat onto the black spine cut. Mat onto the pocket leaving the top edge open to create a smaller pocket. Ink the cream and camera Victoriana label 2 and 4 cuts, and mat onto either side of the black Victoriana label 1 and 3 cuts. Punch a hole into the end of the labels and tie a ribbon through the holes. Mat one of the book charisma cuts onto the pocket and slot the labels into the pocket.
17
Turn the pocket over. Mat the music page mat onto the pocket. Ink the cream classical label 3. Mat onto the gold classical label 2 and onto the black classical label 1. Mat onto the pocket leaving the left edge open to create a smaller pocket. Ink the cream and camera classical label 5 cuts and mat either side of the black classical label 4 cut. Punch a hole in the end of the labels, tie a ribbon through the hole and slide into the pocket. Mat one of the charisma quill cuts onto the smaller pocket.
18
Ink the cream and camera Victoriana label 6 cuts and mat either side of the black Victoriana label 5 cut. Punch a hole into the top of the label and tie a ribbon through the hole. Slide into the pocket.
PAGES 5 & 6
19
Using one of the side pocket pages, fold the top and bottom tabs. Using one of the pages, cut the top and bottom tabs off the page. Attach to the tabs on the other page to create a pocket. Mat the music side pocket page mat onto the front of the pocket.

onto either side of the one of the black small page mats. Punch a hole in the top of the rectangles and tie a ribbon through the hole. Slide into the triangle pockets.
21
Mat the triangle pocket mats onto the triangle pockets and mat onto the pocket leaving the diagonal edges open to create pockets. Mat one of the book charisma cuts between the pockets. Ink the cream and map 150mm x 85mm rectangles and mat
20
Turn the pocket over. Mat one of the map page mats onto the pocket. Ink the map 95mm x 120mm rectangle and mat onto the black 100mm x 125mm rectangle. Mat onto the pocket leaving the left side open to create a smaller pocket. Ink the cream 190mm x 70mm rectangle. Mat the black spine lace panel 2 onto the cream rectangle and punch a hole in the end. Tie a ribbon through the hole and slide into the pocket. Mat one of the globe charisma cuts onto the smaller pocket.
22
Ink the cream and music Victoria label 4 cuts and mat either side of the black Victoria label 5 cuts. Punch a hole into the end of the labels and tie a ribbon through the hole. Slide into the pocket.
-------------------------------------------- SECRET BOOK ----------------------------------------------15 17 19 21 16 18 20 22
CLICK HERE TO DOWNLOAD YOUR SVG CONTENT www.tatteredlace.co.uk | 49
PAGES 7 & 8
23
Using one of the side pocket pages, fold the top and bottom tabs. Using one of the pages, cut the top and bottom tabs off the page. Attach to the tabs on the other page to create a pocket. Mat one of the map page mats onto the side of the pocket with the cut out tab.
24
Using the two 200mm x 100mm black rectangles, fold in half vertically to create two cards. Work with one card opening to the left and one to the right. On the left card stick a small magnet towards the right edge of the card front. Mat the map 100mm squares onto the front of each card. Fold the 70mm x 30mm black rectangle in half vertically. Stick a magnet to the right side of this rectangle and mat the left side to back of the right opening card. Mat one of the wax seals onto the card flap.
25
Mat the back of the left card onto the inside front of the right card and mat onto the pocket. Ink the cream 100mm squares and mat onto the three panels of the folded card. Mat one of the quill charisma cuts onto the middle panel.
26
Turn the pocket over. Mat the flipped map side pocket page mat onto the pocket. Ink the camera 150mm x 85mm rectangle and mat onto one of the black small page mat cuts. Mat onto the pocket leaving the top edge open to create a smaller pocket. Mat the black corner cuts onto the pocket. Ink the two 70mm x 90mm rectangles, two 60mm x 90mm rectangles and two 45mm x 90mm rectangles. Mat onto either side of the black 75mm x 95mm rectangle, 65mm x 95mm rectangle and 50mm x 95mm rectangles. Slide into the pocket.
top tip...
27
Mat the other flipped map side pocket page map onto the black side pocket page mat. Mat the books page mat onto the black page mat. Mat the rectangles black sides together only sticking the edges and leaving the end open to create a pocket. Tie a ribbon through the hole and slide into the pocket.
ATTACHING THE PAGES
Fold the hinge cuts along the score lines. Attach two hinges together using the tabs and stick the other tabs flat to the spine. Attach the pages to each hinge piece matting the page tabs to either side of the hinge.
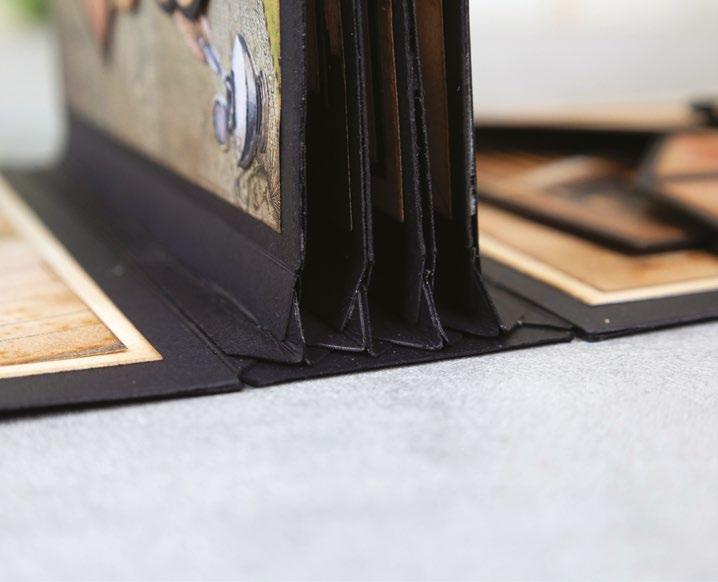
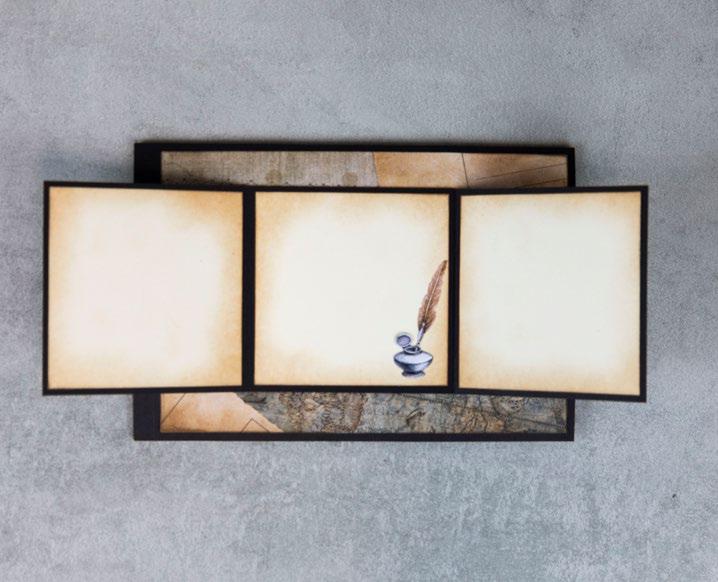
28
When cutting lace detail cuts with gold mirror cardstock, sometimes it doesn't work too well. So to get around this in this project, and others in this magazine, we have cut these files from black cardstock and cover in gold gilding wax which gives an alternative but still great effect!
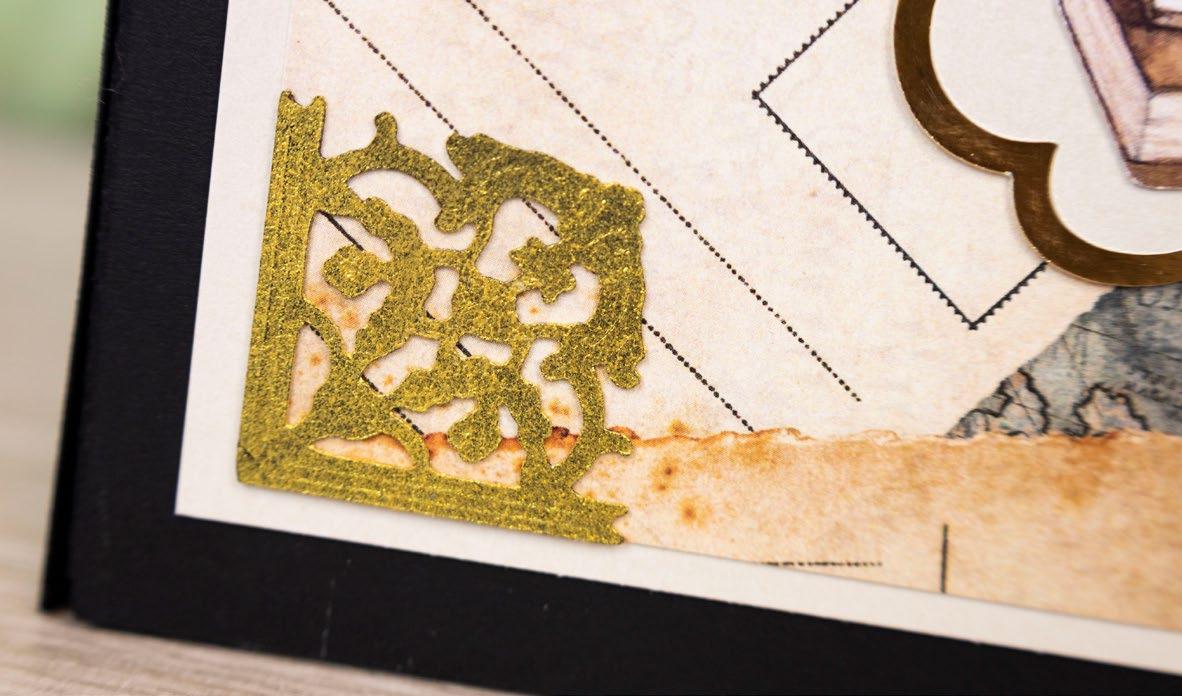
-------------------------------------------- SECRET BOOK ----------------------------------------------23 25 27 24 26 28
CLICK HERE TO DOWNLOAD YOUR SVG CONTENT
50 | www.tatteredlace.co.uk
What you’ll need:
From machine memory:
145mm
brown cardstock:
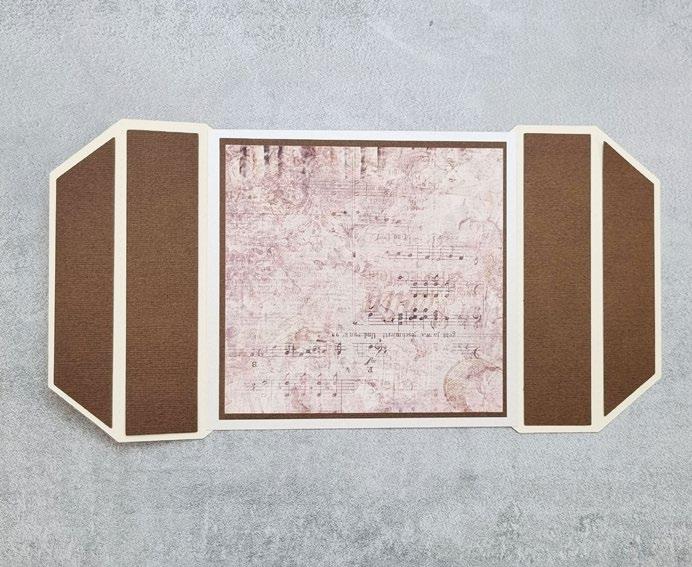
135mm
140mm
95mm square
gold mirror cardstock:
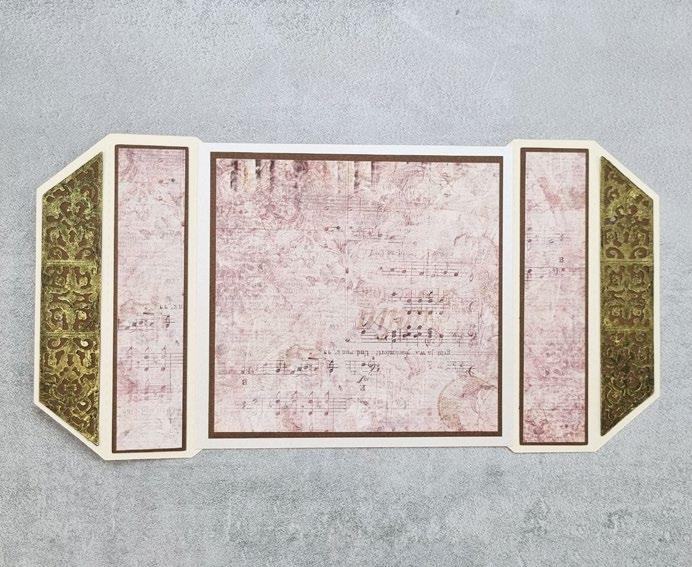
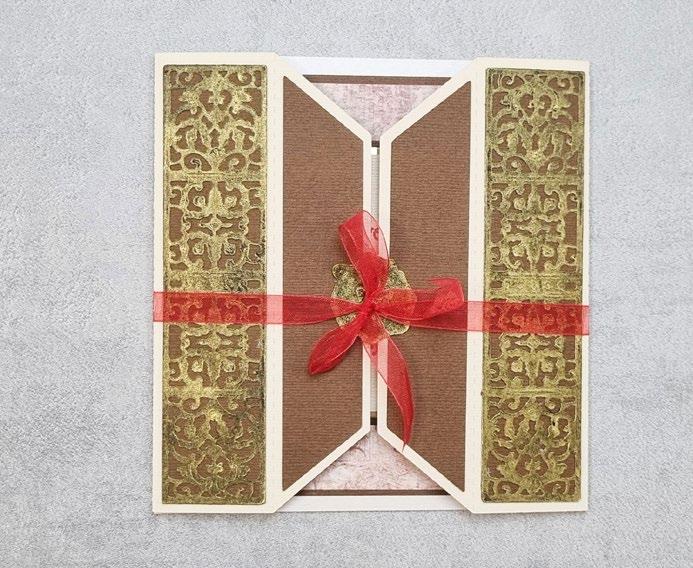
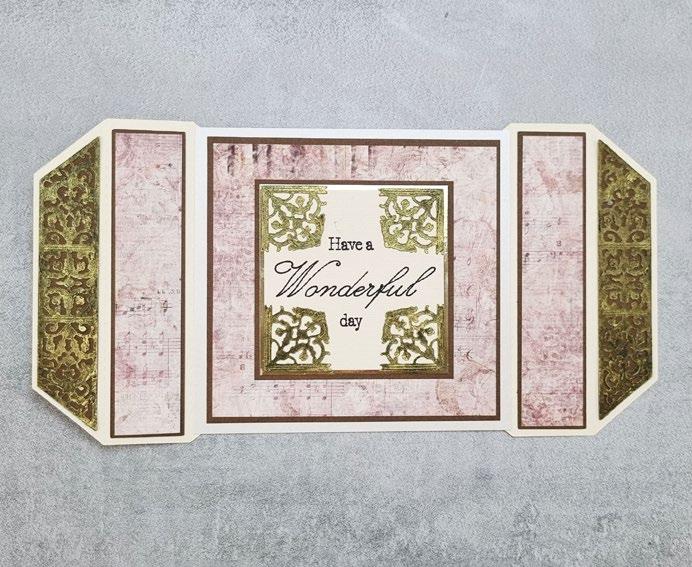
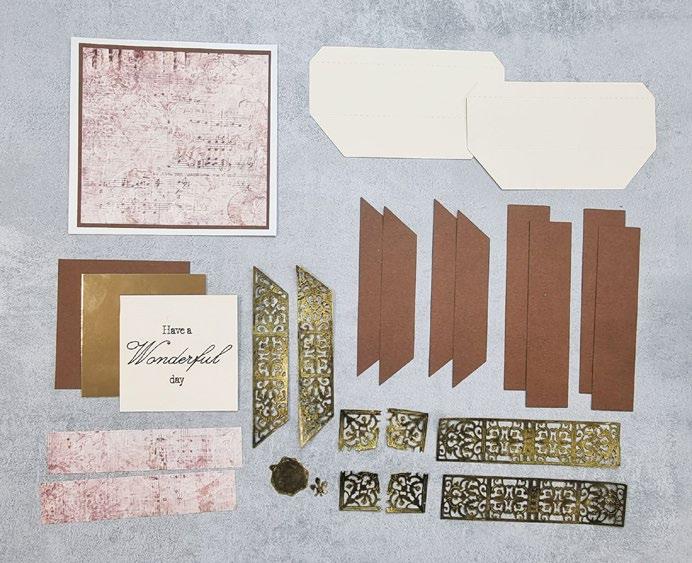
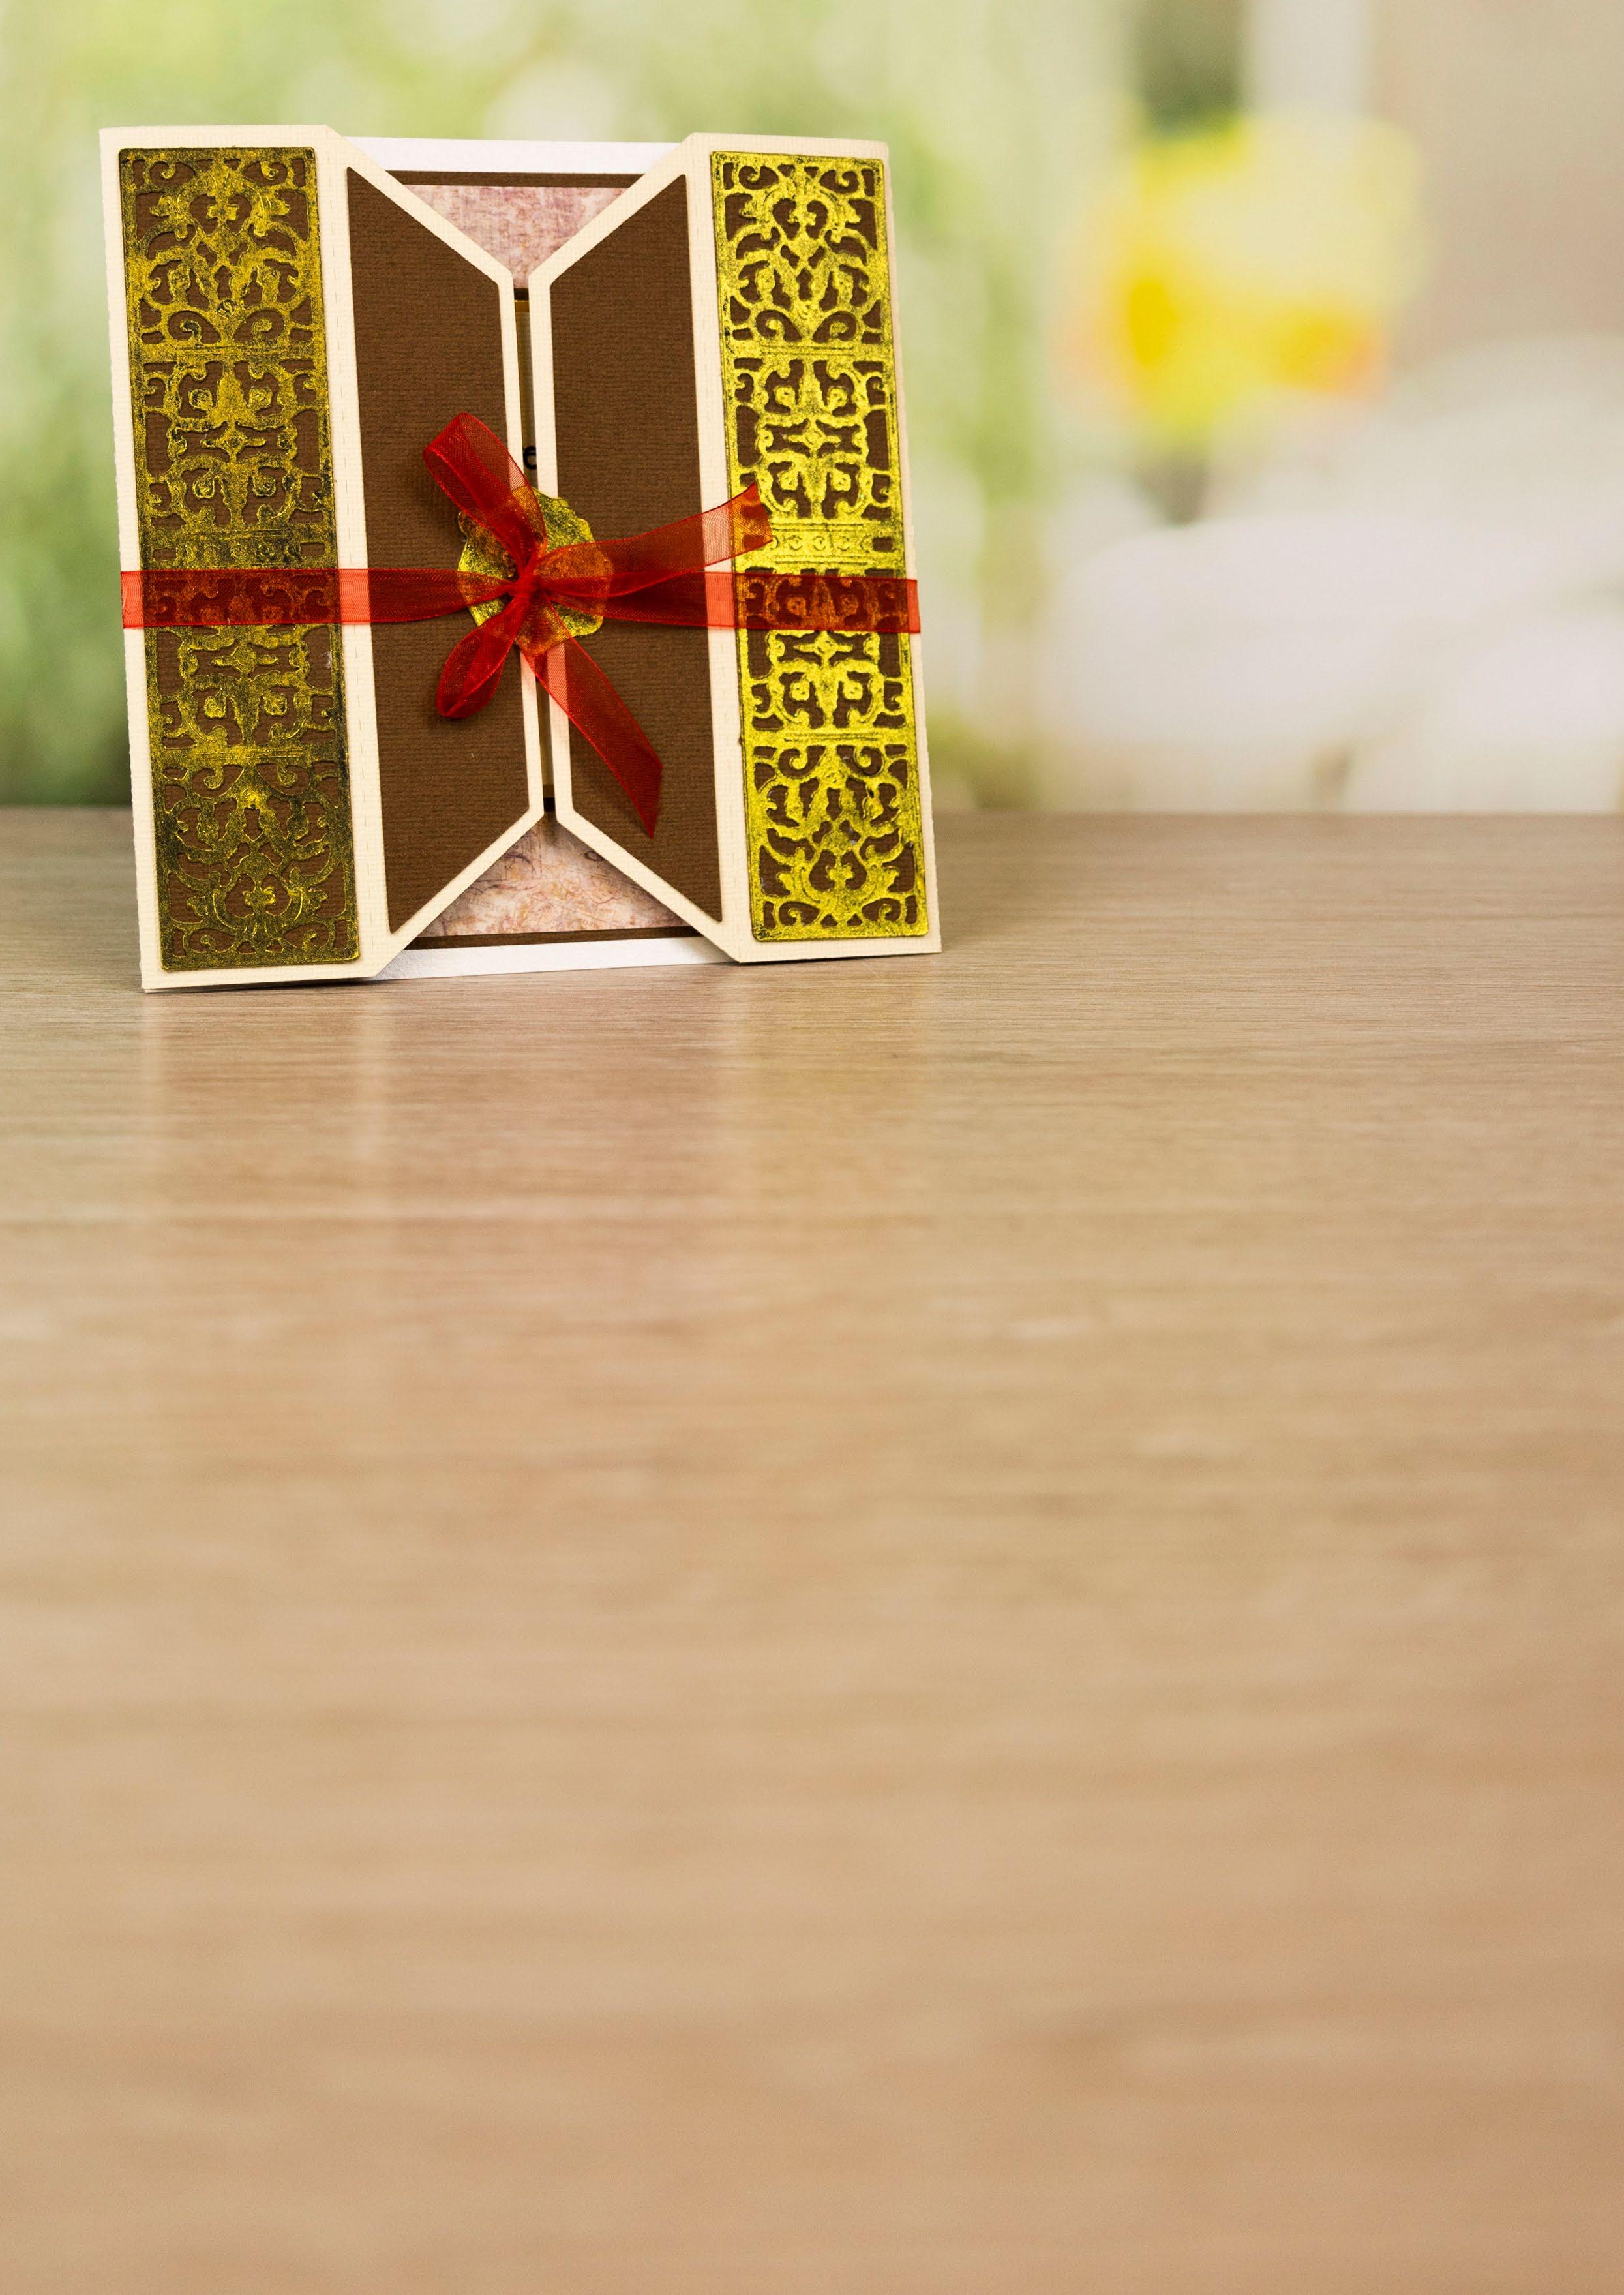
90mm square
• From backing paper:
1 x 130mm x 135mm rectangle (music)
2 x 30mm x 140mm rectangle (music)
Mat the large music rectangle onto the large brown rectangle and then onto the cream rectangle. Attach the cream fastener cuts to either side of the rectangle. Mat two of each of the brown fastener mats onto the fastener panels.
Mat the fastener lace panel 2 cuts onto the fastener panels. Mat the two music rectangles onto the fastener panels.
4
Mat the sentiment square onto the gold square then onto the brown square. Mat onto the inside of the card. Mat the gold corner onto the squares.
Mat the remaining fastener mats and fastener lace panel cuts onto the front folds of the card. Mat the wax seal onto the left side of the card. Tie the card closed with a length of red ribbon.
Step bySteps 1 2 3 4 5 1 Cut all the pieces needed to create the project as listed below; From SVG downloads: • From cream cardstock: - 2 x SB-2-Fastener • From brown cardstock: - 4 x SB-2-Fastener Mat 1 - 4 x SB-2-Fastener Mat 2 • From black cardstock: - 2 x SB-2-Fastener Lace Panel 1 - 2 x SB-2-Fastener Lace Panel 2 - 2 x SB-2-Corners - 2 x SB-2-Wax Seal PLEASE NOTE: Add gilding wax to all your black cuts.
• From cream cardstock: - 1 x
x 150mm rectangle - 1 x 85mm square (with sentiment draw file) • From
- 1 x
x
rectangle - 1 x
• From
- 1 x
-
-
2
3
5
• 31-02-Secret Book SVG files • Cream cardstock • Brown cardstock • Black cardstock • Red ribbon • Cadence Dora Gilding Wax - Gold www.tatteredlace.co.uk | 51 -------------------------------------------- SECRET BOOK ----------------------------------------------CLICK HERE TO DOWNLOAD YOUR SVG CONTENT PROJECT 31
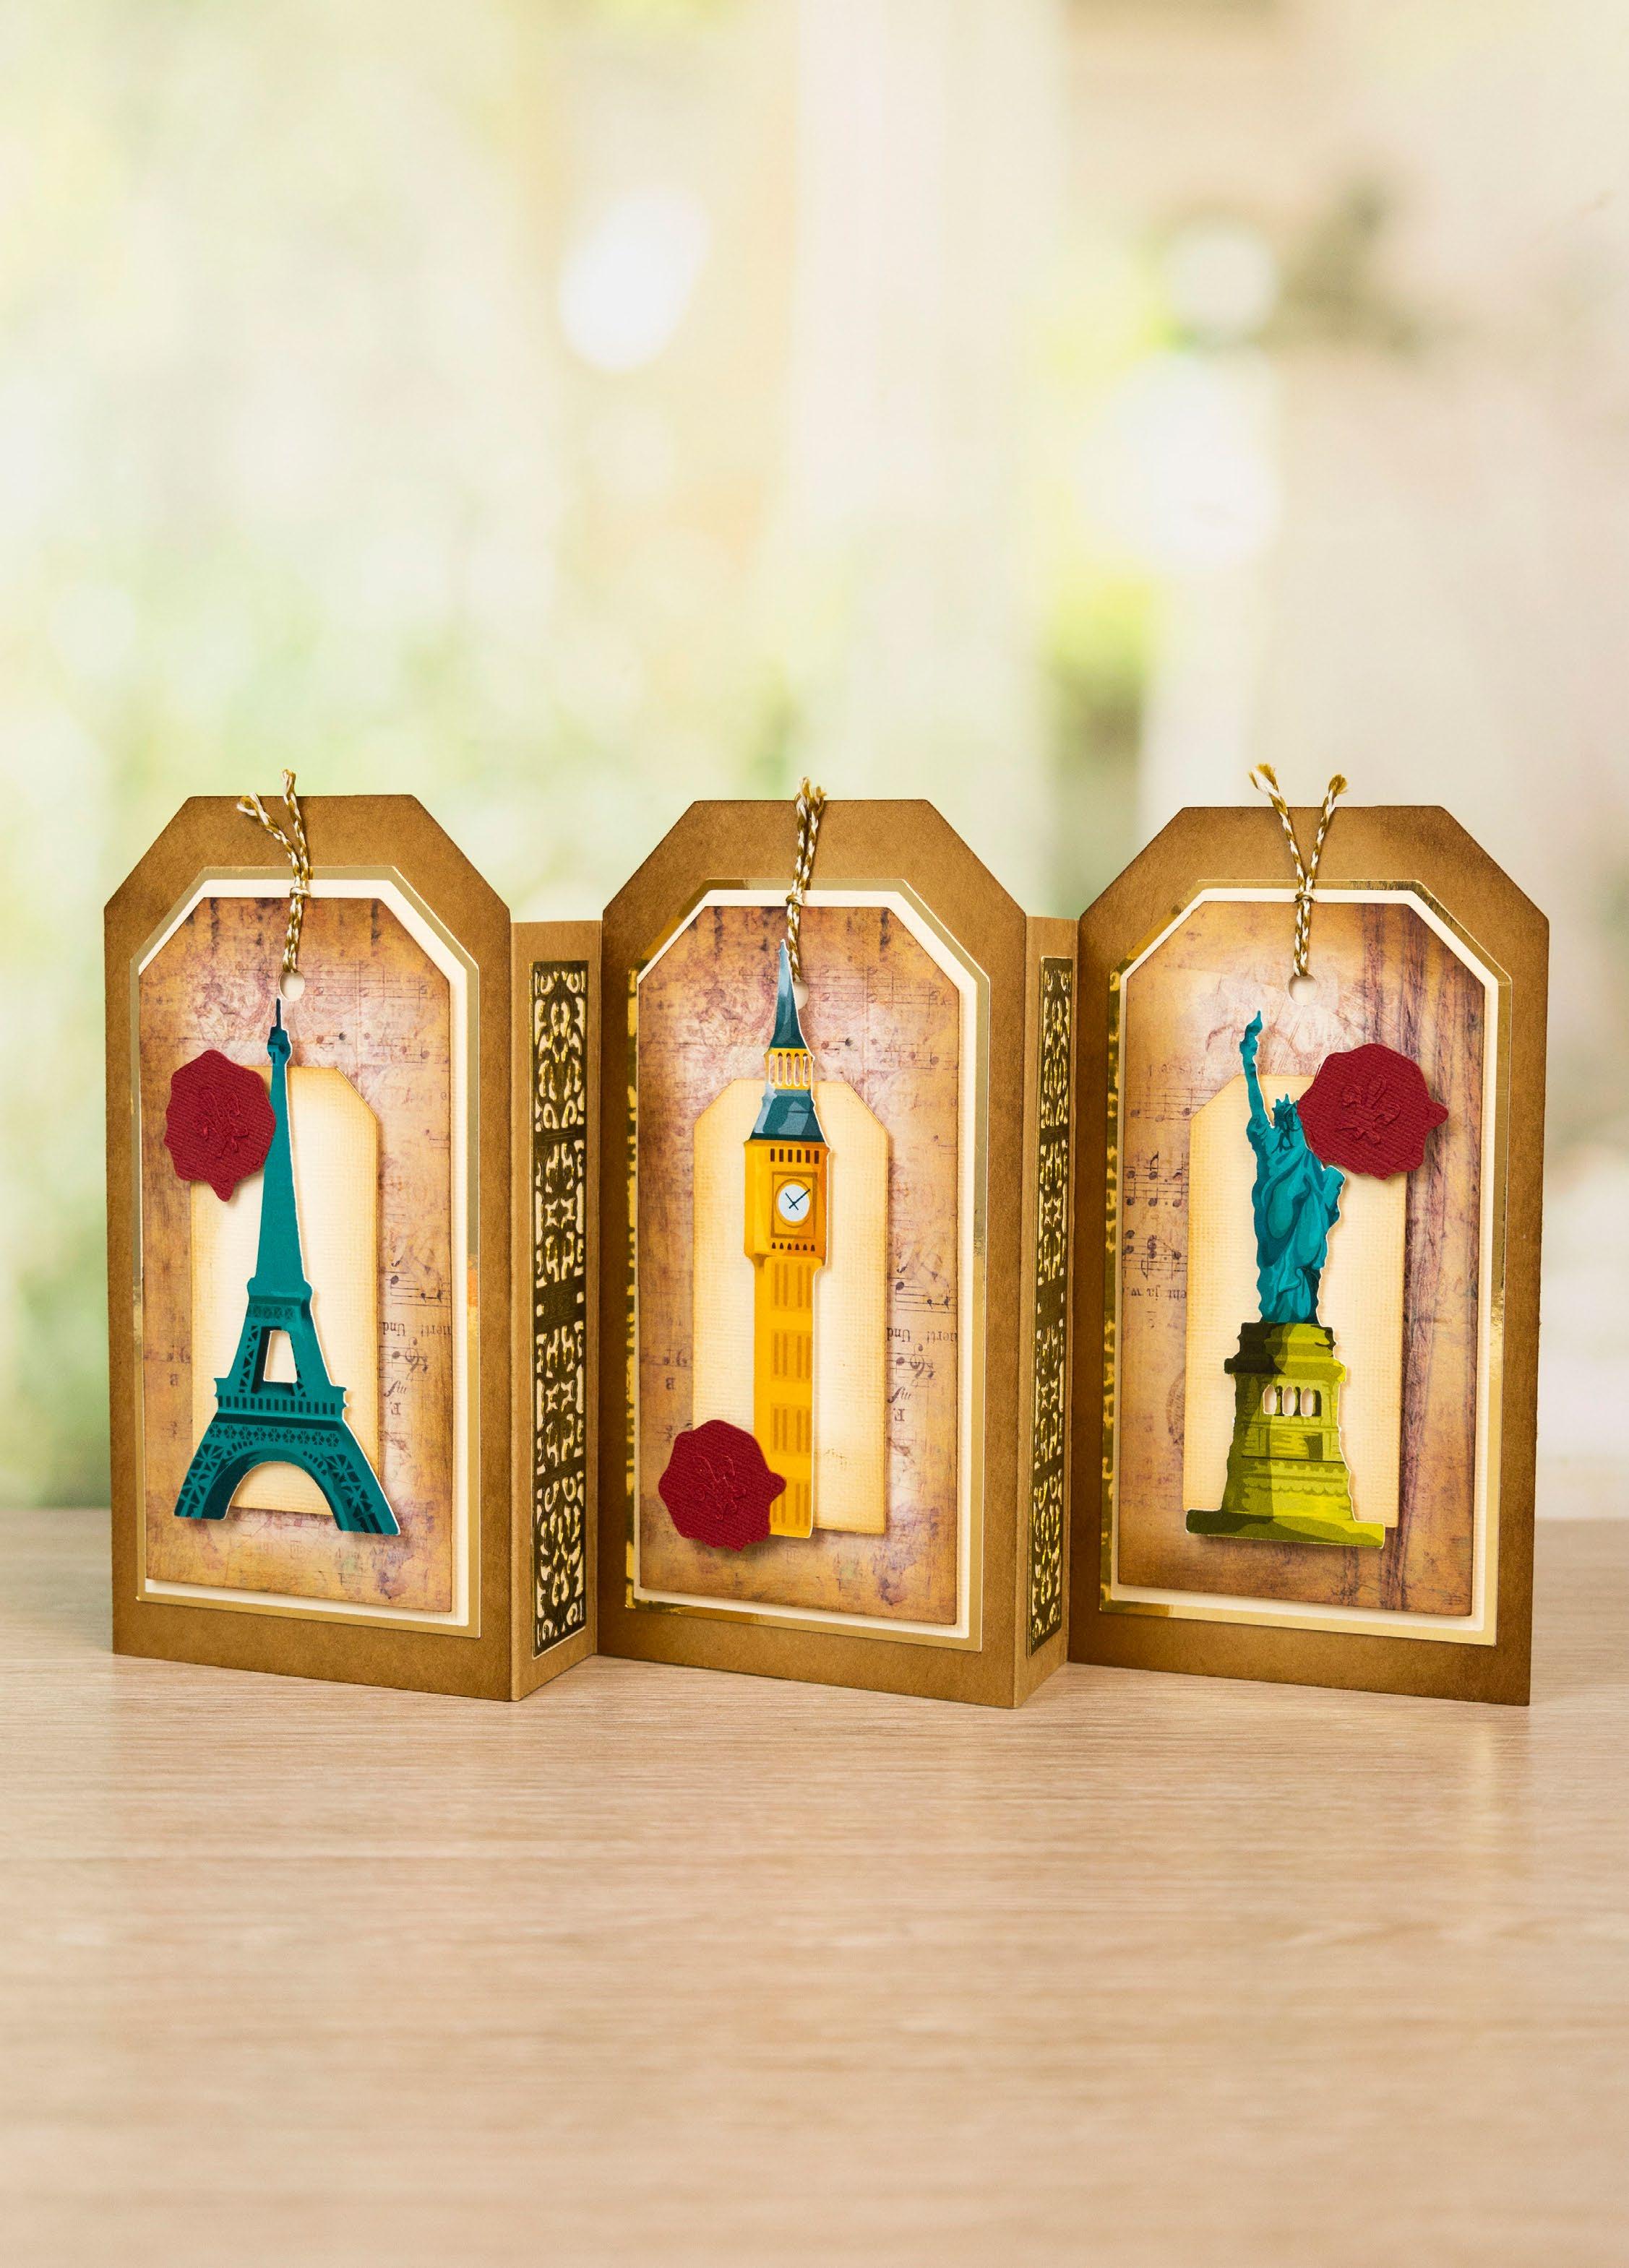
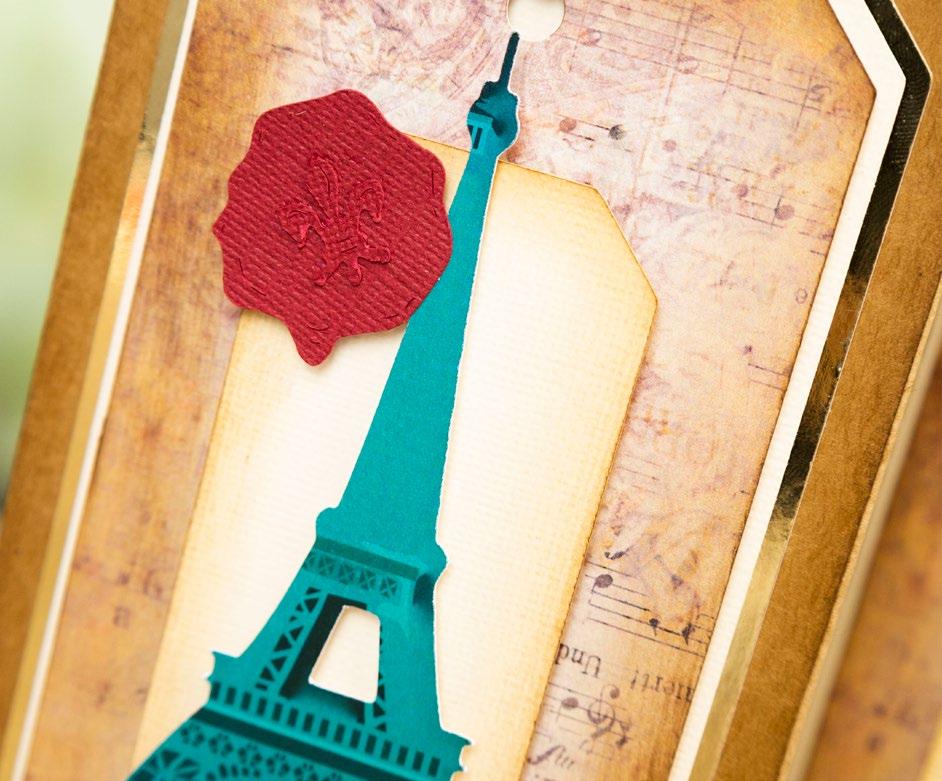
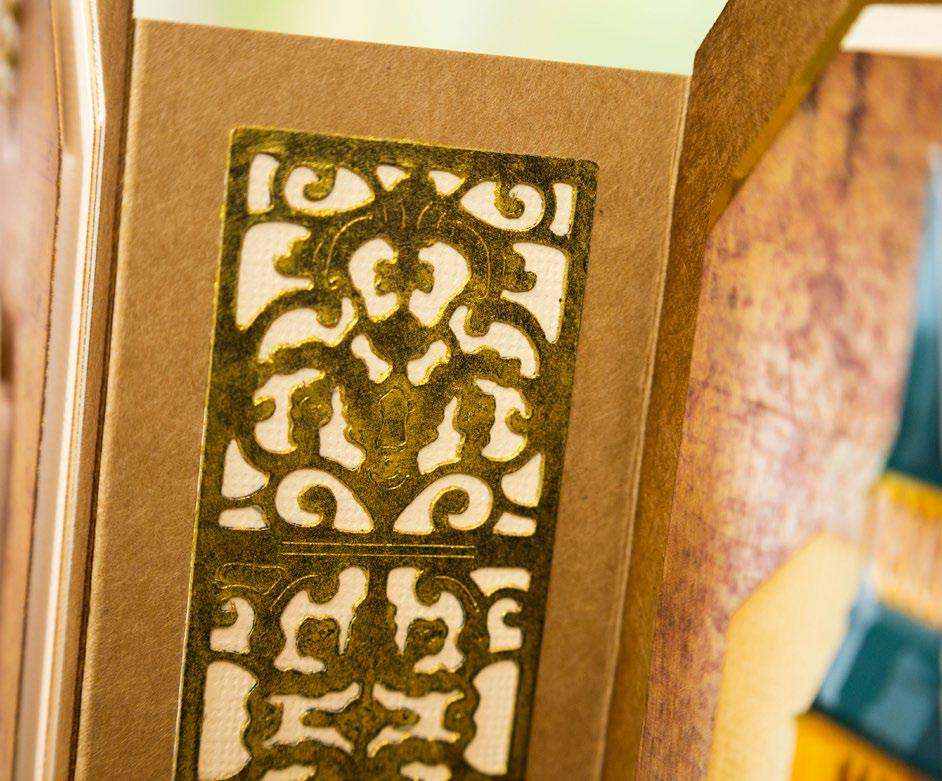
What you’ll need: • 32-03-Secret Book SVG files • Kraft cardstock • Cream cardstock • Red cardstock • Black cardstock • Gold mirror cardstock • Distress Ink – Brushed Corduroy • String • Cadence Dora Gilding Wax -Gold -------------------------------------------- SECRET BOOK ----------------------------------------------52 | www.tatteredlace.co.uk
1
Cut all the pieces needed to create the project as listed below;
From SVG downloads:
• From kraft cardstock:
- 3 x SB-3-Tag 1
• From gold mirror cardstock:
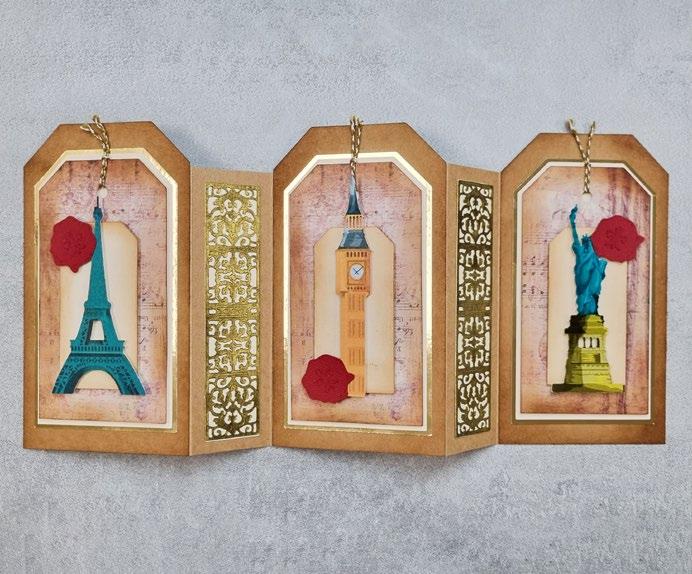
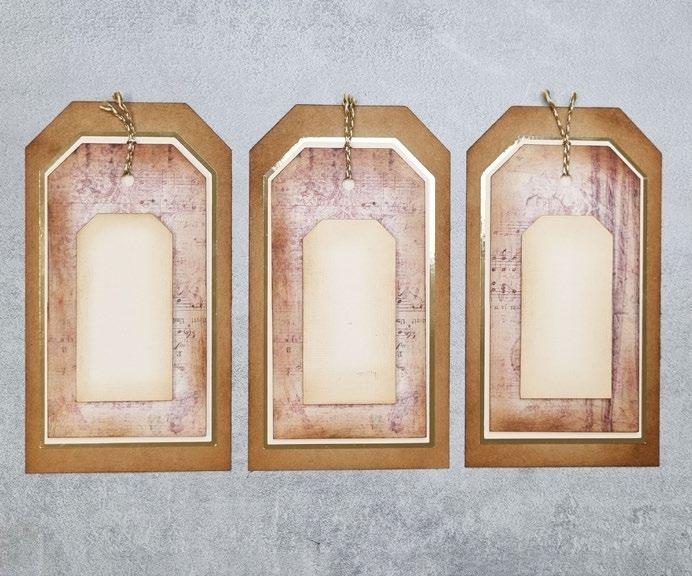
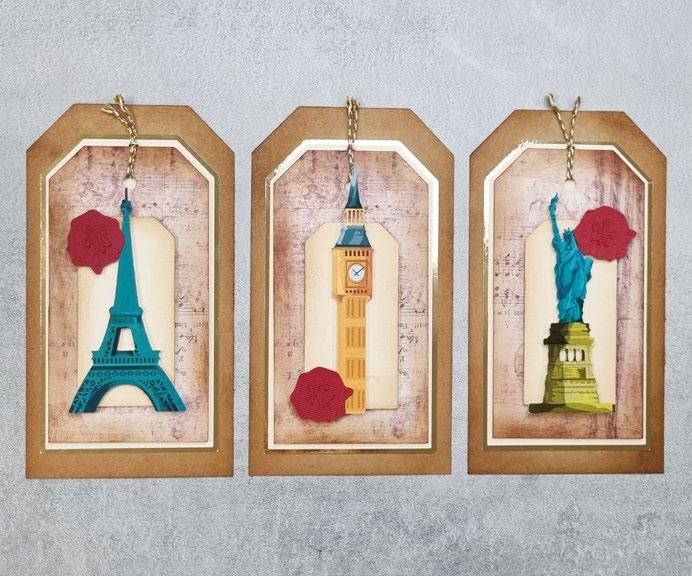

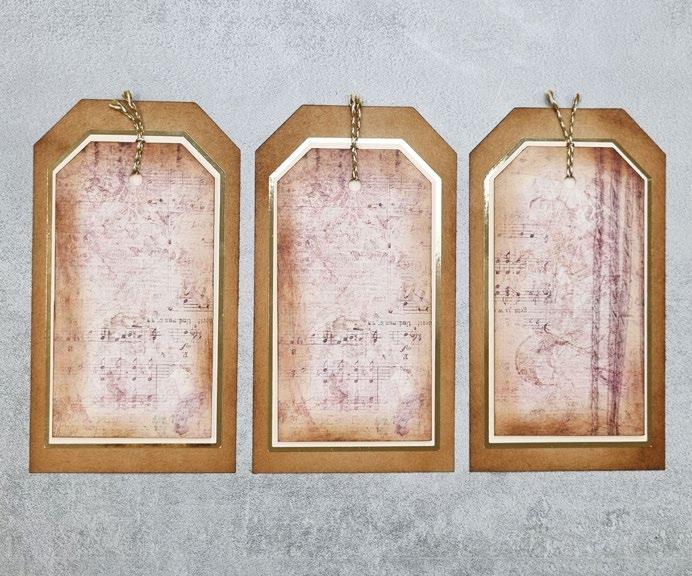
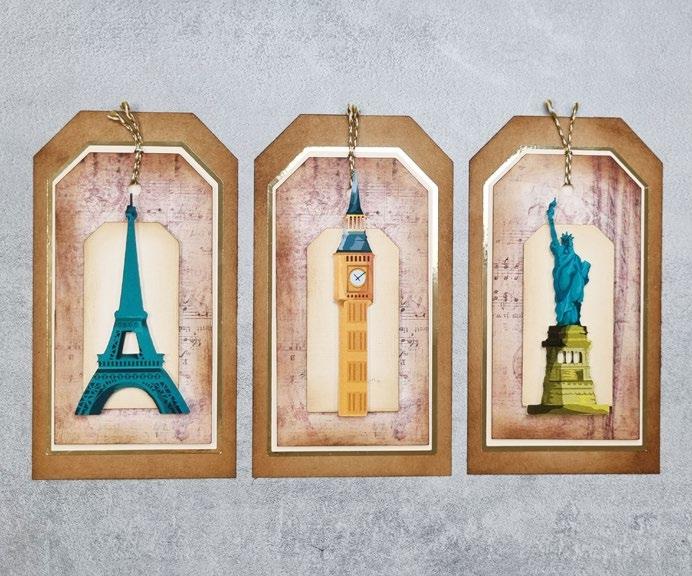
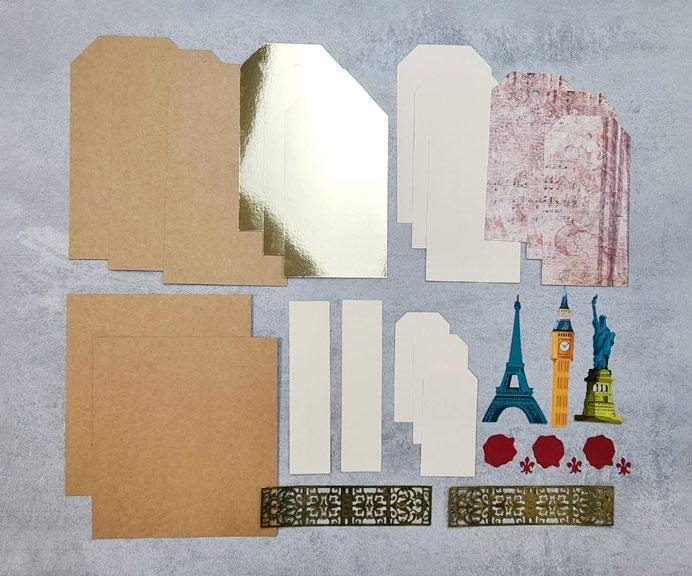
- 3 x SB-3-Tag 2
• From black cardstock:
- 2 x SB-3-Lace Panel
PLEASE NOTE: Add gilding wax to all your black cuts.
• From cream cardstock:
- 3 x SB-3-Tag 3
- 3 x SB-3-Tag 5
- 2 x SB-3-Lace Mat
• From backing paper:
- 3 x SB-3-Tag 4 (music)
• From red cardstock:
- 3 x SB-3-Wax Seal
• From charisma: - 1 x SB-3-Charisma
From machine memory:
• From kraft cardstock:
- 2 x 150mm x 160mm rectangle
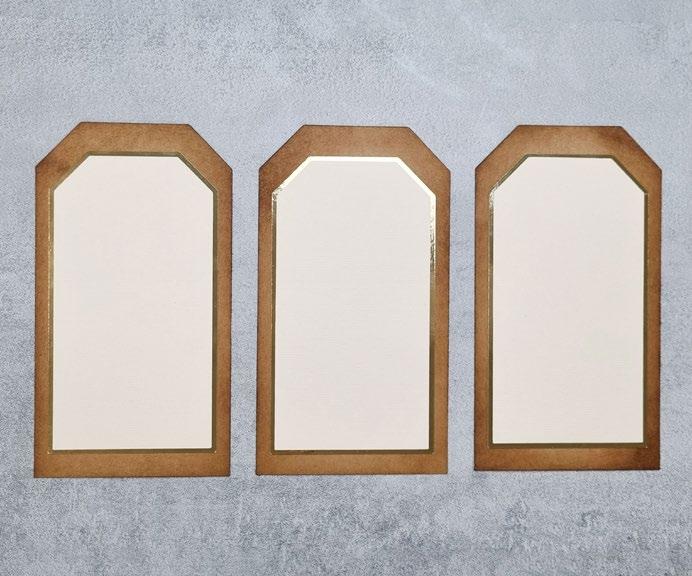
Step bySteps
2
Ink around the edges of the three kraft tags. Mat the three larger cream tags onto the gold tags and mat onto the kraft tags.
3
Ink around the edges of the music tags. Loop a length of string through the hole on each tag and mat onto the previous tags with foam tape.
Ink the three smaller cream tags and mat onto the previous tags with foam tape.
Mat the landmark charisma cuts onto each of tags.
Mat the wax seals onto each of the tags.
On the kraft rectangles, from the left edge measure in at 5cm and 10cm and score and concertina fold. Mat the gold lace panels onto the cream lace mats. Mat onto the middle panel of the folded rectangles.
Mat the tags onto the outer panels of the folded rectangles to join them together.
4
5
6
7
8
1 5 4 8 2 6 3 7 www.tatteredlace.co.uk | 53 -------------------------------------------- SECRET BOOK ----------------------------------------------CLICK HERE TO DOWNLOAD YOUR SVG CONTENT PROJECT 32
HOW TO...
STAMP & HEAT EMBOSS ONTO FABRIC
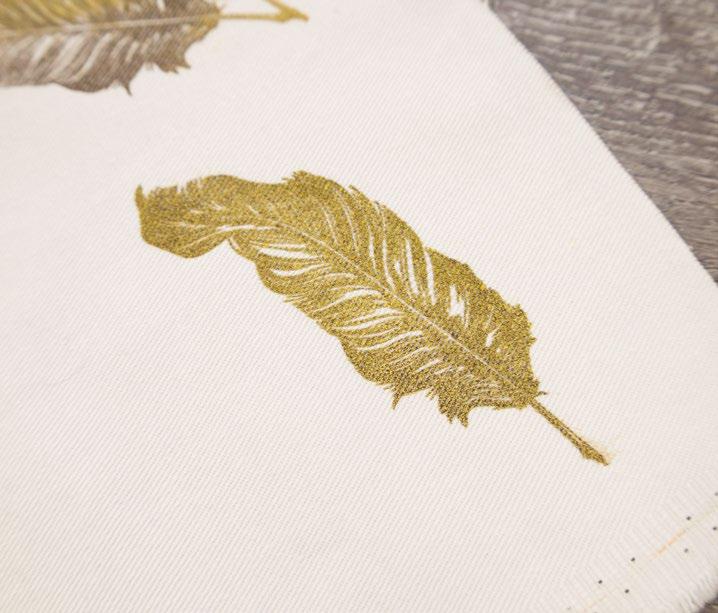
1
Place your chosen fabric on your work surface. Attach your stamp to a stamping block, and load up with ink.
2
Press the stamp into the fabric, pushing down firmly to make sure the ink transfers well.
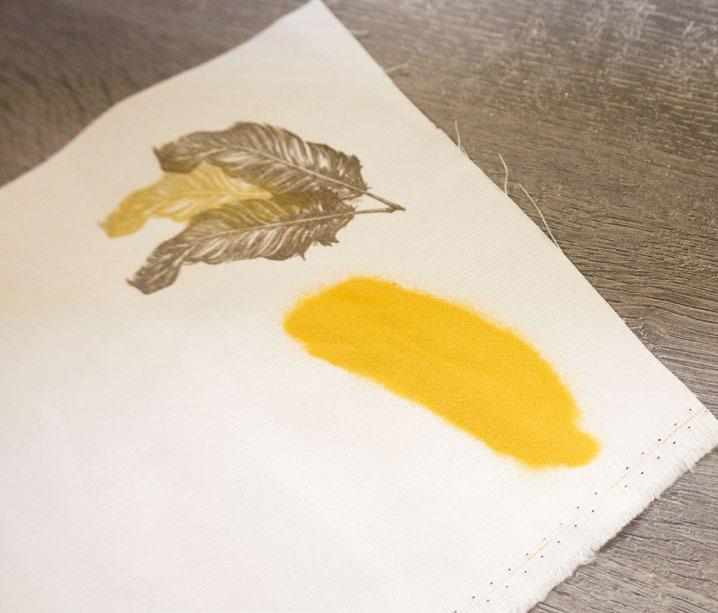
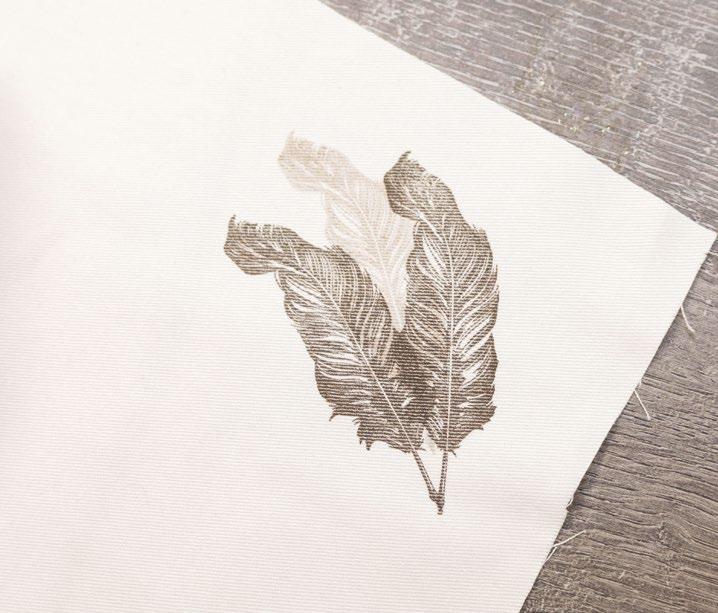
3Remove the stamping block to see your stamped design.
Continue stamping with your chosen ink colour, if you wish to do so before moving on to clear ink for embossing.
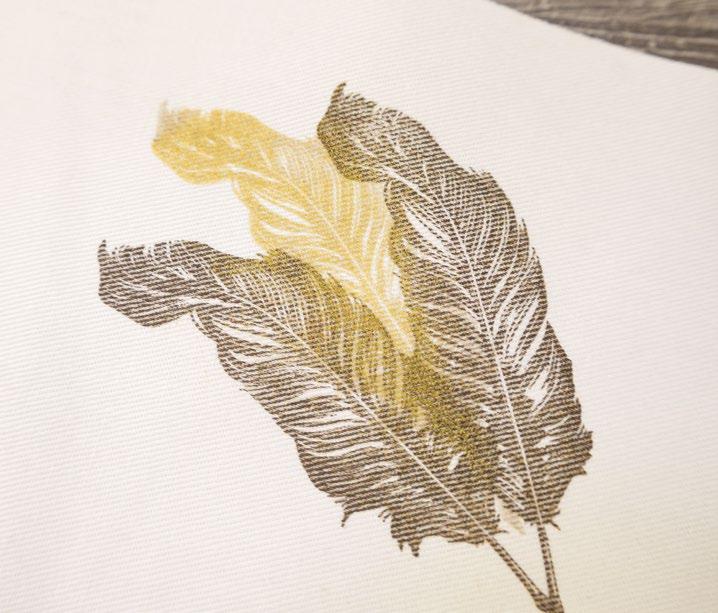
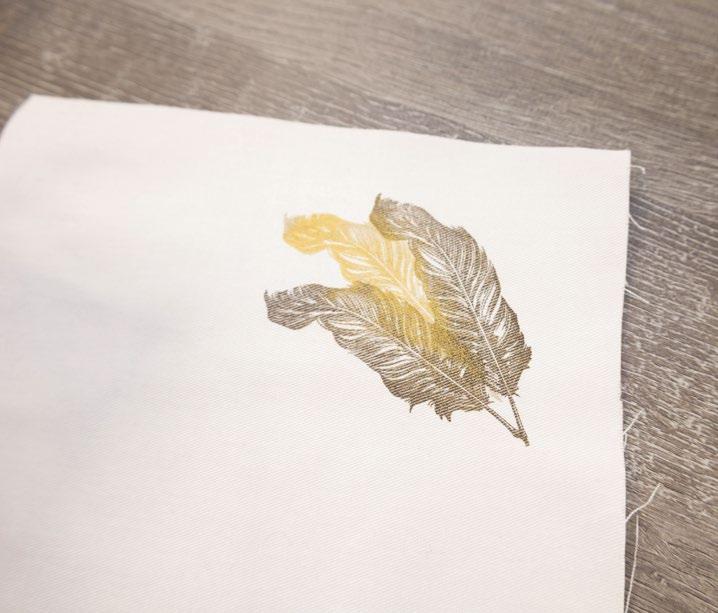
4
5
Load up your stamp with a clear ink pad and press the stamp into the fabric. If you are wanting to heat emboss near stamp designs that you don't wish to emboss, make sure your first stamps are fully dry so that the embossing powder doesn't stick.
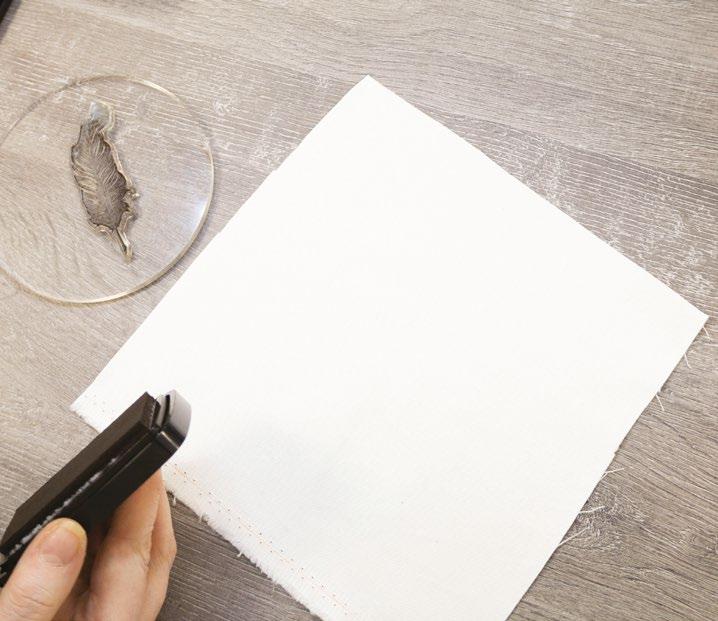
6Cover your clear, inked design with embossing powder and tip off the excess. Make sure to brush off any extra embossing powder that clings to the fabric.
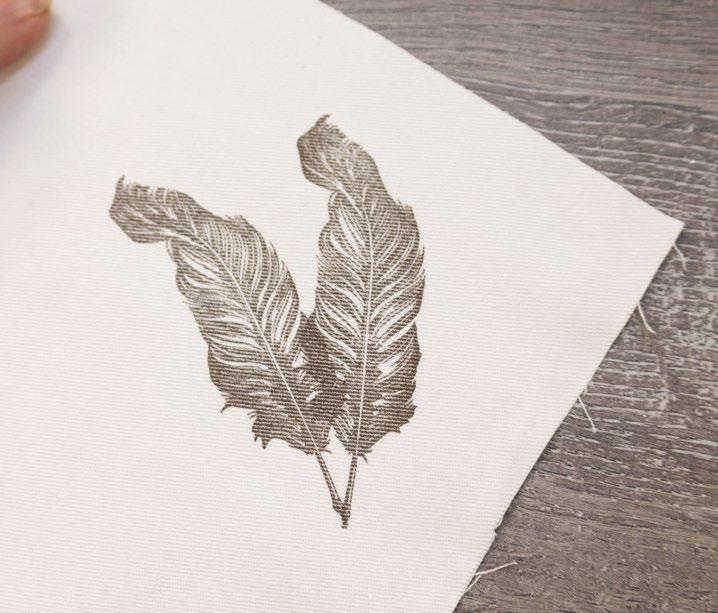
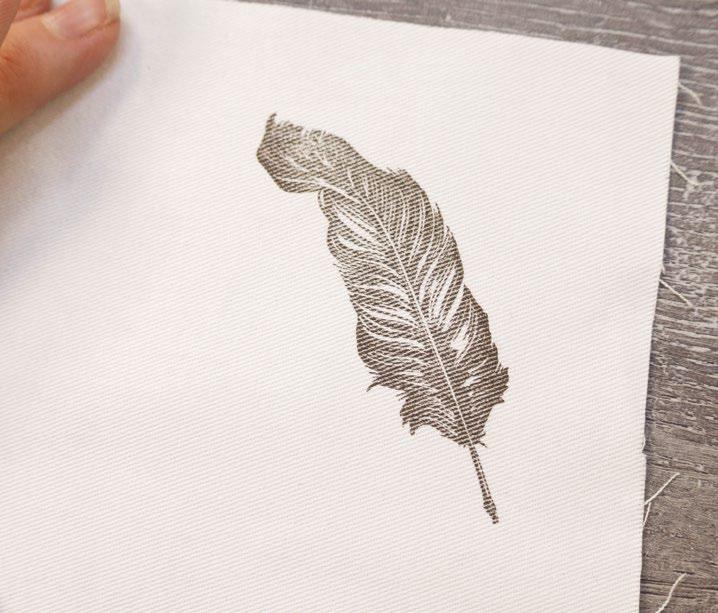
7
Heat your powdered stamp design with a heat tool until the powder completely melts and goes shimmery.
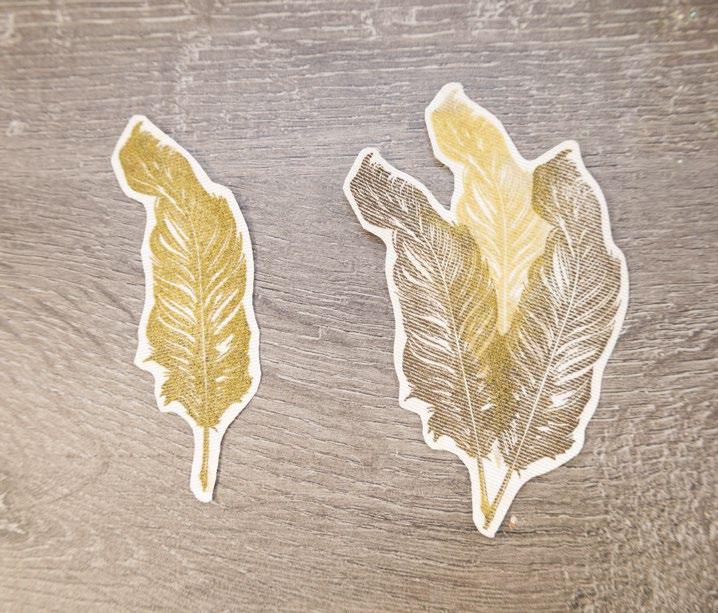

8


For a different effect, stamp with a coloured ink pad and cover in embossing powder.
Tip off the embossing powder and heat the stamped design. The darker ink colour will show through the shimmery embossing powder.
10
Cut out your designs from the fabric with scissors to use on your projects.
9
------------------------------ HOW TO - STAMP & HEAT EMBOSS ON FABRIC ------------------------------
1 5 2 6 3 7 9 4 8 10
54 | www.tatteredlace.co.uk


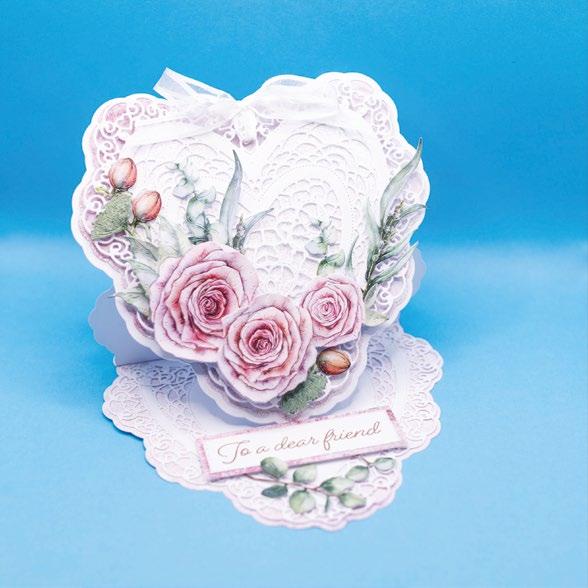
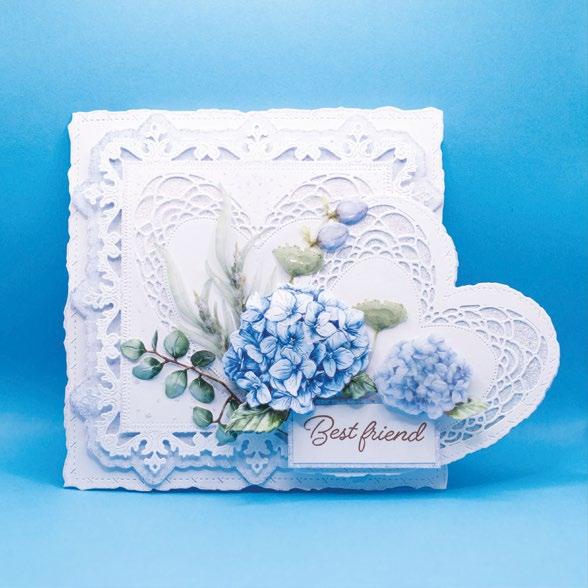


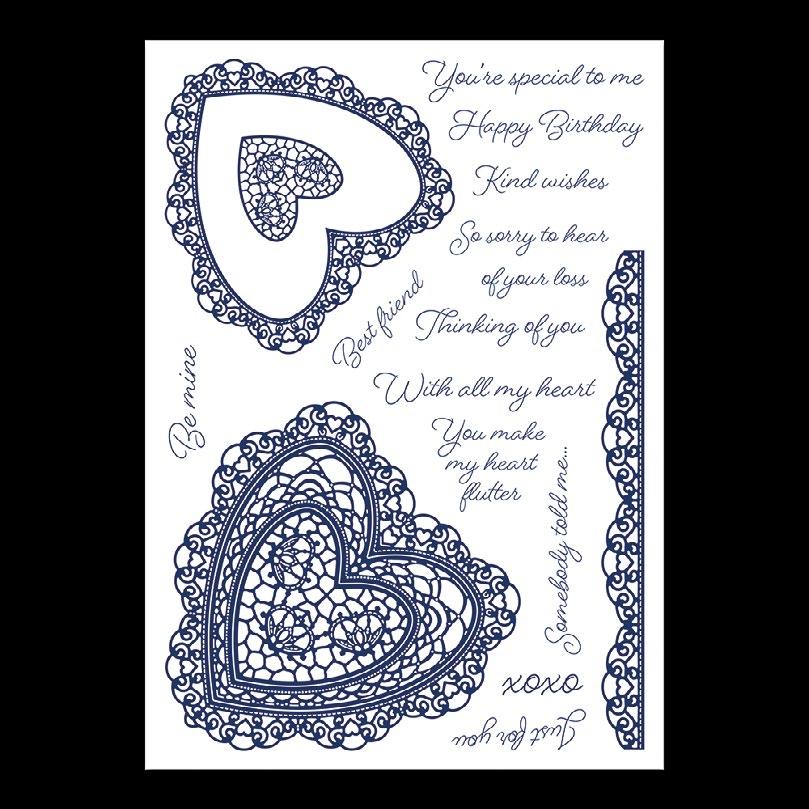

www.tatteredlace.co.uk IS NOW A RETAIL WEBSITE!!! AND SO MUCH MORE AVAILABLE TO BUY NOW AT WWW.TATTEREDLACE.CO.UK MAGAZINES DIE RANGES PAPER PACKS & KITS STAMPS TOOLS & ACCESSORIES
COLUMN
The team over at Tattered Lace HQ have given me a page to keep you up to date with me and my crafty antics. So keep an eye out and I’ll be here for a general chit chat, to answer any questions you might have or to share any projects with you that I’ve been working on!
Hi Crafters, Hope we're all doing well and have enjoyed the summer, haven't we had some lovely weather? Me and Gordon recently left the UK for some more sunshine on a lovely holiday in Gozo with Stephanie & Karl. We had a great time! We hired a boat for a day and Karl took us out on the Blue Lagoon. Check out our Banana bus too which we used to drive around the island. It's always fun to get away with friends, many laughs were had!


Me & Stephanie having

Before I went away, the team sent me these gorgeous doggies! Aren't they the cutest? You all know how much I love my little Jazbo, so anything dog related is a winner with me! Hope you like them as much as I do.
On one of the white rectangles, measure down 15mm from the top edge and score across to create a tab. Attach to the other white rectangle using the tab to create a tent card. On the black rectangle, from the bottom edge measure up at 80mm and 160mm and score and fold. Mat onto the card.
Mat the large paws rectangle onto the back of the folded rectangle and the two smaller paws rectangles onto the folds of the card front.
Mat the dog and puppy cuts onto the black outline cuts. Mat the puppies onto the card front with foam tape and mat the large dog onto the front fold of the card with foam tape.
 Me & Gordon enjoying a boat trip on our recent holiday.
• 33-01-Nancy’s Project SVG files 1 Cut all the pieces needed to create the project as listed below; • Black cardstock • White cardstock Pawsome Family
a dip! The Banana Bus!
From SVG downloads: • From black cardstock: - 1 x NP-1-Puppy Outlines - 1 x NP-1-Dog Outline • From charisma: - 1 x NP-1-Charisma From machine memory: • From white cardstock: - 2 x 120mm x 150mm rectangle • From black cardstock: - 1 x 110mm x 300mm rectangle • From paper download: - 1 x 105mm x 135mm rectangle (paws) - 2 x 105mm x 75mm rectangle (paws) 2
3
4
CLICK HERE TO DOWNLOAD YOUR SVG CONTENT PROJECT 33 56 | www.tatteredlace.co.uk
Wagging Tail
1
Cut all the pieces needed to create the project as listed below;
From SVG downloads:
• From paper download:
- 1 x NP-2-Frame (paws)
• From charisma: - 1 x NP-2-Charisma
From machine memory:
• From black cardstock:
- 1 x 165mm x 150mm rectangle
- 1 x 150mm square - 2 x 105mm square
Woof Woof!
•
• From white cardstock:
- 1 x 60mm square (with sentiment draw file)
• From paper download:
- 1 x 145mm square (spots)
- 1 x 70mm x 145mm rectangles (spots)
- 1 x 70mm x 145mm rectangles (paws)
- 1 x 100mm square (paws)
On the black rectangle, measure in 15mm from the left edge and score and fold to create a tab. Attach to the back of the large black square to create the card. Score and fold the card front in half vertically to create a Z-fold card.
2
3
Mat the 145mm spots square onto the inside back of the card and mat the spots and paws rectangles onto the folds of the card front. Mat the paws squares onto one of the smaller black squares and mat the paws frame onto the other black square with foam tape. Mat the frame onto the inside back of the card and the other squares onto the front of the card.
4
1
Mat the sentiment square into the frame with foam tape and mat the dog cut onto the front fold of the card with foam tape.
Cut all the pieces needed to create the project as listed below;
From SVG downloads:
• From charisma: - 1 x NP-3-Charisma
From machine memory:
• From white cardstock: - 1 x 160mm x 145mm rectangle - 1 x 145mm square - 1 x 48mm circle (with sentiment draw file)
• From brown cardstock:

- 1 x 140mm square
- 2 x 65mm x 140mm rectangle - 1 x 290mm x 50mm rectangle - 1 x 53mm circle
• From paper download: - 1 x 135mm square (paws)
- 1 x 60mm x 135mm rectangle (paws)
On the large white rectangle, measure in 15mm from the left edge and score and fold to create a tab. Attach to the back of the white square to create the card. Score and fold the card front in half vertically to create a Z-fold card.

2
3
Mat the brown square onto the inside back of the card and the brown rectangles onto the front folds of the card. Mat the paws squares onto the inside back of the card the paws rectangle onto the front fold of the card.
4
On the long brown rectangle, fold in half vertically and then on the right side of the fold, fold in half vertically again. Mat onto the card sticking the right panel to the inside back of the card and the left panel to the front fold of the card.
5
Mat two of each dog and puppy cut together with foam tape and mat onto the brown strip with tape. Mat the sentiment circle onto the brown circle and mat onto the card with foam tape.
DOWNLOAD YOUR
CONTENT
DOWNLOAD YOUR SVG CONTENT
• 34-02-Nancy’s Project SVG files • Black cardstock • White cardstock
35-03-Nancy’s Project SVG files
• Black cardstock • White cardstock
CLICK HERE TO
SVG
CLICK HERE TO
PROJECT 34 PROJECT 35 www.tatteredlace.co.uk | 57
What you’ll need:
• 36-01-Essential Studies SVG files
• White cardstock
Cut all the pieces needed to create the project as listed below;
From SVG downloads:
• From dark brown cardstock: - 1 x MBF-1-Heart Mat 1


• From light brown cardstock
- 1 x MBF-1-Heart Mat 2
• From white cardstock: - 1 x MBF-1-Heart Mat 3 (with sentiment draw file)

• From charisma: - 1 x MBF-1-Charisma
From machine memory:
• From white cardstock:
- 2 x 180mm square
• From dark brown cardstock: - 1 x 165mm square
• From light brown cardstock: - 1 x 160mm square
• From backing paper: - 1 x 155mm square (paws)
• Light brown cardstock

• Dark brown cardstock
• Brown ribbon
2
On one of the white squares, measure in 10mm from the left edge and score and fold to create a tab. Attach to the other white square to create a card. Mat the dark brown square onto the card. Mat the paws square onto the light brown square and mat onto the card with foam tape.
3
Mat the light brown heart onto the dark brown heart and mat onto the card with foam tape.
4
Mat the sentiment heart onto the card with foam tape.
Mat the dog cut onto the card within the cut out on the sentiment heart mat. Tie a bow from brown ribbon and mat onto the card.
5

Step bySteps 1 2 3 4 5 1
----------------------------------------- MAN'S BEST FRIEND -------------------------------------------CLICK HERE TO DOWNLOAD YOUR SVG CONTENT PROJECT 36 58 | www.tatteredlace.co.uk
CLOSING DATE: Entries from Issue 21 will end on 31/01/23. The winners will be contacted by phone/email and will also be announced on Tattered Lace® Facebook and Tattered Lace® website the following week.


£100 MYSTERY BOX CANVAS WORKSPACE £50 VOUCHER 1 LUCKY WINNER WILL WIN £50 TO SPEND ON ANY PRODUCT AT WWW.TATTEREDLACE.COM 2 X WINNERS OF MYSTERY BOX WORTH £100 10 X WINNERS OF MADE FROM MEMORY USB 2 LUCKY WINNERS WILL WIN A MYSTERY BOX FILLED WITH CRAFTY ITEMS AND PRODUCTS FROM A VARIETY OF BRANDS! CONTENTS OF EACH BOX WILL VARY! Please visit www.tatteredlace.co.uk, click MAGAZINE GIVEAWAY and follow the instructions. Please use code MEMORY21 to enter the competition online. HOW TO ENTER
Join Mel as she takes you through 10 bespoke Scan ‘n’ Cut classes & teaches you how to create amazing projects using only the shapes from the machine’s memory!

