

Hi Crafters, Here we are with Issue 24, and our last issue before the Tattered Lace magazine takes a break. I have been with the Tattered Lace magazine right from the start and it has been a pleasure to bring this magazine to you each month. We are finishing off this subscription with the Woodpecker SVG and Woodgrain stencil. The Woodpecker will hopefully offer something different to your Tattered Lace SVG collection, while the stencil is a great, versatile design that will work across the board. We're featuring the amazing On The Safari collection in this issue. Louise has made another great book using these SVGs as well as some gorgeous cards. Also featured is the Carpe Diem collection which includes some stunning card-shapes. Your exclusive SVGs designed for this issue are the Silk Ribboned Rose, Betsy Bear, Ferris Wheel, Sweet Treats and Ground Shaker. They're a good mix of SVGs that, when used with the complimentary backing papers, can create cards for a variety of occasions.
I wanted to finish off this issue by making a project especially for you! So, I’ve made the Mailbox Gift project on page 52, and I’d love for you to have a go at making it for yourselves. It really would make the perfect little gift box for sending Valentine’s treats (and, other occasional treats, too!).
From me and the team, thank you for your support over the years, and we'll see you soon!
6 projects using your exclusive Woodpecker SVG & stencil.
Beautiful florals and butterfly cards from this TL collection.
David Wait shows you how to make a spinner card with the Carpe Diem collection.


Hello everyone, I couldn’t let us take a break from the magazine without writing a few words. I owe you all a huge thank you for your love of this magazine which we have truly felt and valued through the challenges earlier in the year. That support was what got my amazing team though the weekends and extremely late nights while we worked with limited creative assets and yet tried to bring you a magazine we could be proud of. The team pulled it off and I need to thank them all. Jon, Sam, Amanda, David, Vikki, Louise, Andrew and Beckie keeping everyone on track. Diane and Di for proofreading and of course our lovely Nancy. Plus, everyone, too many to mention, who dipped in and out when we were really up against the deadlines. It is the spirit and passion for the Tattered Lace brand which will see it continue, and we can’t wait to bring you the seasonal specials we promised.
Thank you everyone.
Stephanie


1
Cut all the pieces needed to create the project as listed below;
From SVG downloads:
• From brown cardstock: - 1 x WP-1-Emboss
• From white cardstock: - 1 x WP-1-Woodpecker Outline

• From charisma: - 1 x WP-1-Charisma
From machine memory:
• From white cardstock: - 3 x 125mm circle


- 1 x 65mm x 15mm rectangle (with sentiment draw file)
• From black cardstock: - 2 x 120mm circle
- 1 x 105mm x 140mm rectangle
• From backing paper: - 1 x 116mm circle (trees)

- 1 x 116mm circle (logs) 2

Mat the log circle onto one of the black circles, and mat onto one of the white circles. This will be the card base. On one of the other white circles, measure down 15mm from the top edge and score and fold across to create a tab. Attach to the card base using the tab to create an easel card.
Mat the trees circle onto the remaining black circle, then onto the remaining white circle. Mat onto the front of the easel.
Mat the brown emboss cuts onto the black rectangle, and trim in half, vertically.
Roll each rectangle to form “logs.” Mat one of the logs onto the card base as a stopper, and the other log onto the front of the easel. Trim off any overhang on the card front.

Trim the woodpecker charismacuts, as shown in the image.
Build up the decoupage of the charisma cuts and mat together with foam tape. Mat onto the card front so the woodpecker’s feet sit on the log.

Ink around the edges of the sentiment rectangle, and mat onto the stopper log.

From SVG downloads: • From white cardstock: - 1 x WP-2-Card Front • From light green cardstock: - 1 x WP-2-Card Mat 1 • From backing paper: - 1 x WP-2-Card Mat 2 (woodgrain) • From charisma: - 1 x WP-2-Charisma
From machine memory: • From white cardstock: - 1 x 200mm x 145mm rectangle - 1 x 34mm circle (with sentiment draw file)


Mat the woodgrain card mat 2 onto the brown card mat 1, and mat onto the white card front. Attach the white card front to the white rectangle using the tab to create the card.
Mat the trees rectangle onto the light green rectangle, and mat onto the inside back of the card.
• From backing paper: - 1 x 190mm x 135mm rectangle (trees) - 1 x 39mm circle (woodgrain) PROJECT 2 8 | www.tatteredlace.co.uk
1
• 03-03-Woodpecker SVG files

• White cardstock
• Black cardstock
• Dark green cardstock

Cut all the pieces needed to create the project as listed below;
From SVG downloads:
• From white cardstock: - 1 x WP-3-Woodpecker Outline

• From light brown cardstock: - 1 x WP-3-Emboss
• From charisma: - 1 x WP-3-Charisma
From machine memory:
•From white cardstock: - 1 x 210mm x 150mm rectangle - 1 x 33mm oval (with sentiment draw file)
• From black cardstock: - 1 x 135mm x 145mm rectangle - 1 x 65mm x 145mm rectangle - 1 x 38mm oval
• From dark green cardstock: - 1 x 130mm x 140mm rectangle - 1 x 60mm x 140mm rectangle
• From backing paper: - 1 x 125mm x 135mm rectangle (trees)

• From dark brown cardstock: - 1 x 55mm x 135mm rectangle
• Brown cardstock
• Complimentary backing paper
• Charisma
• Distress ink – Vintage Photo
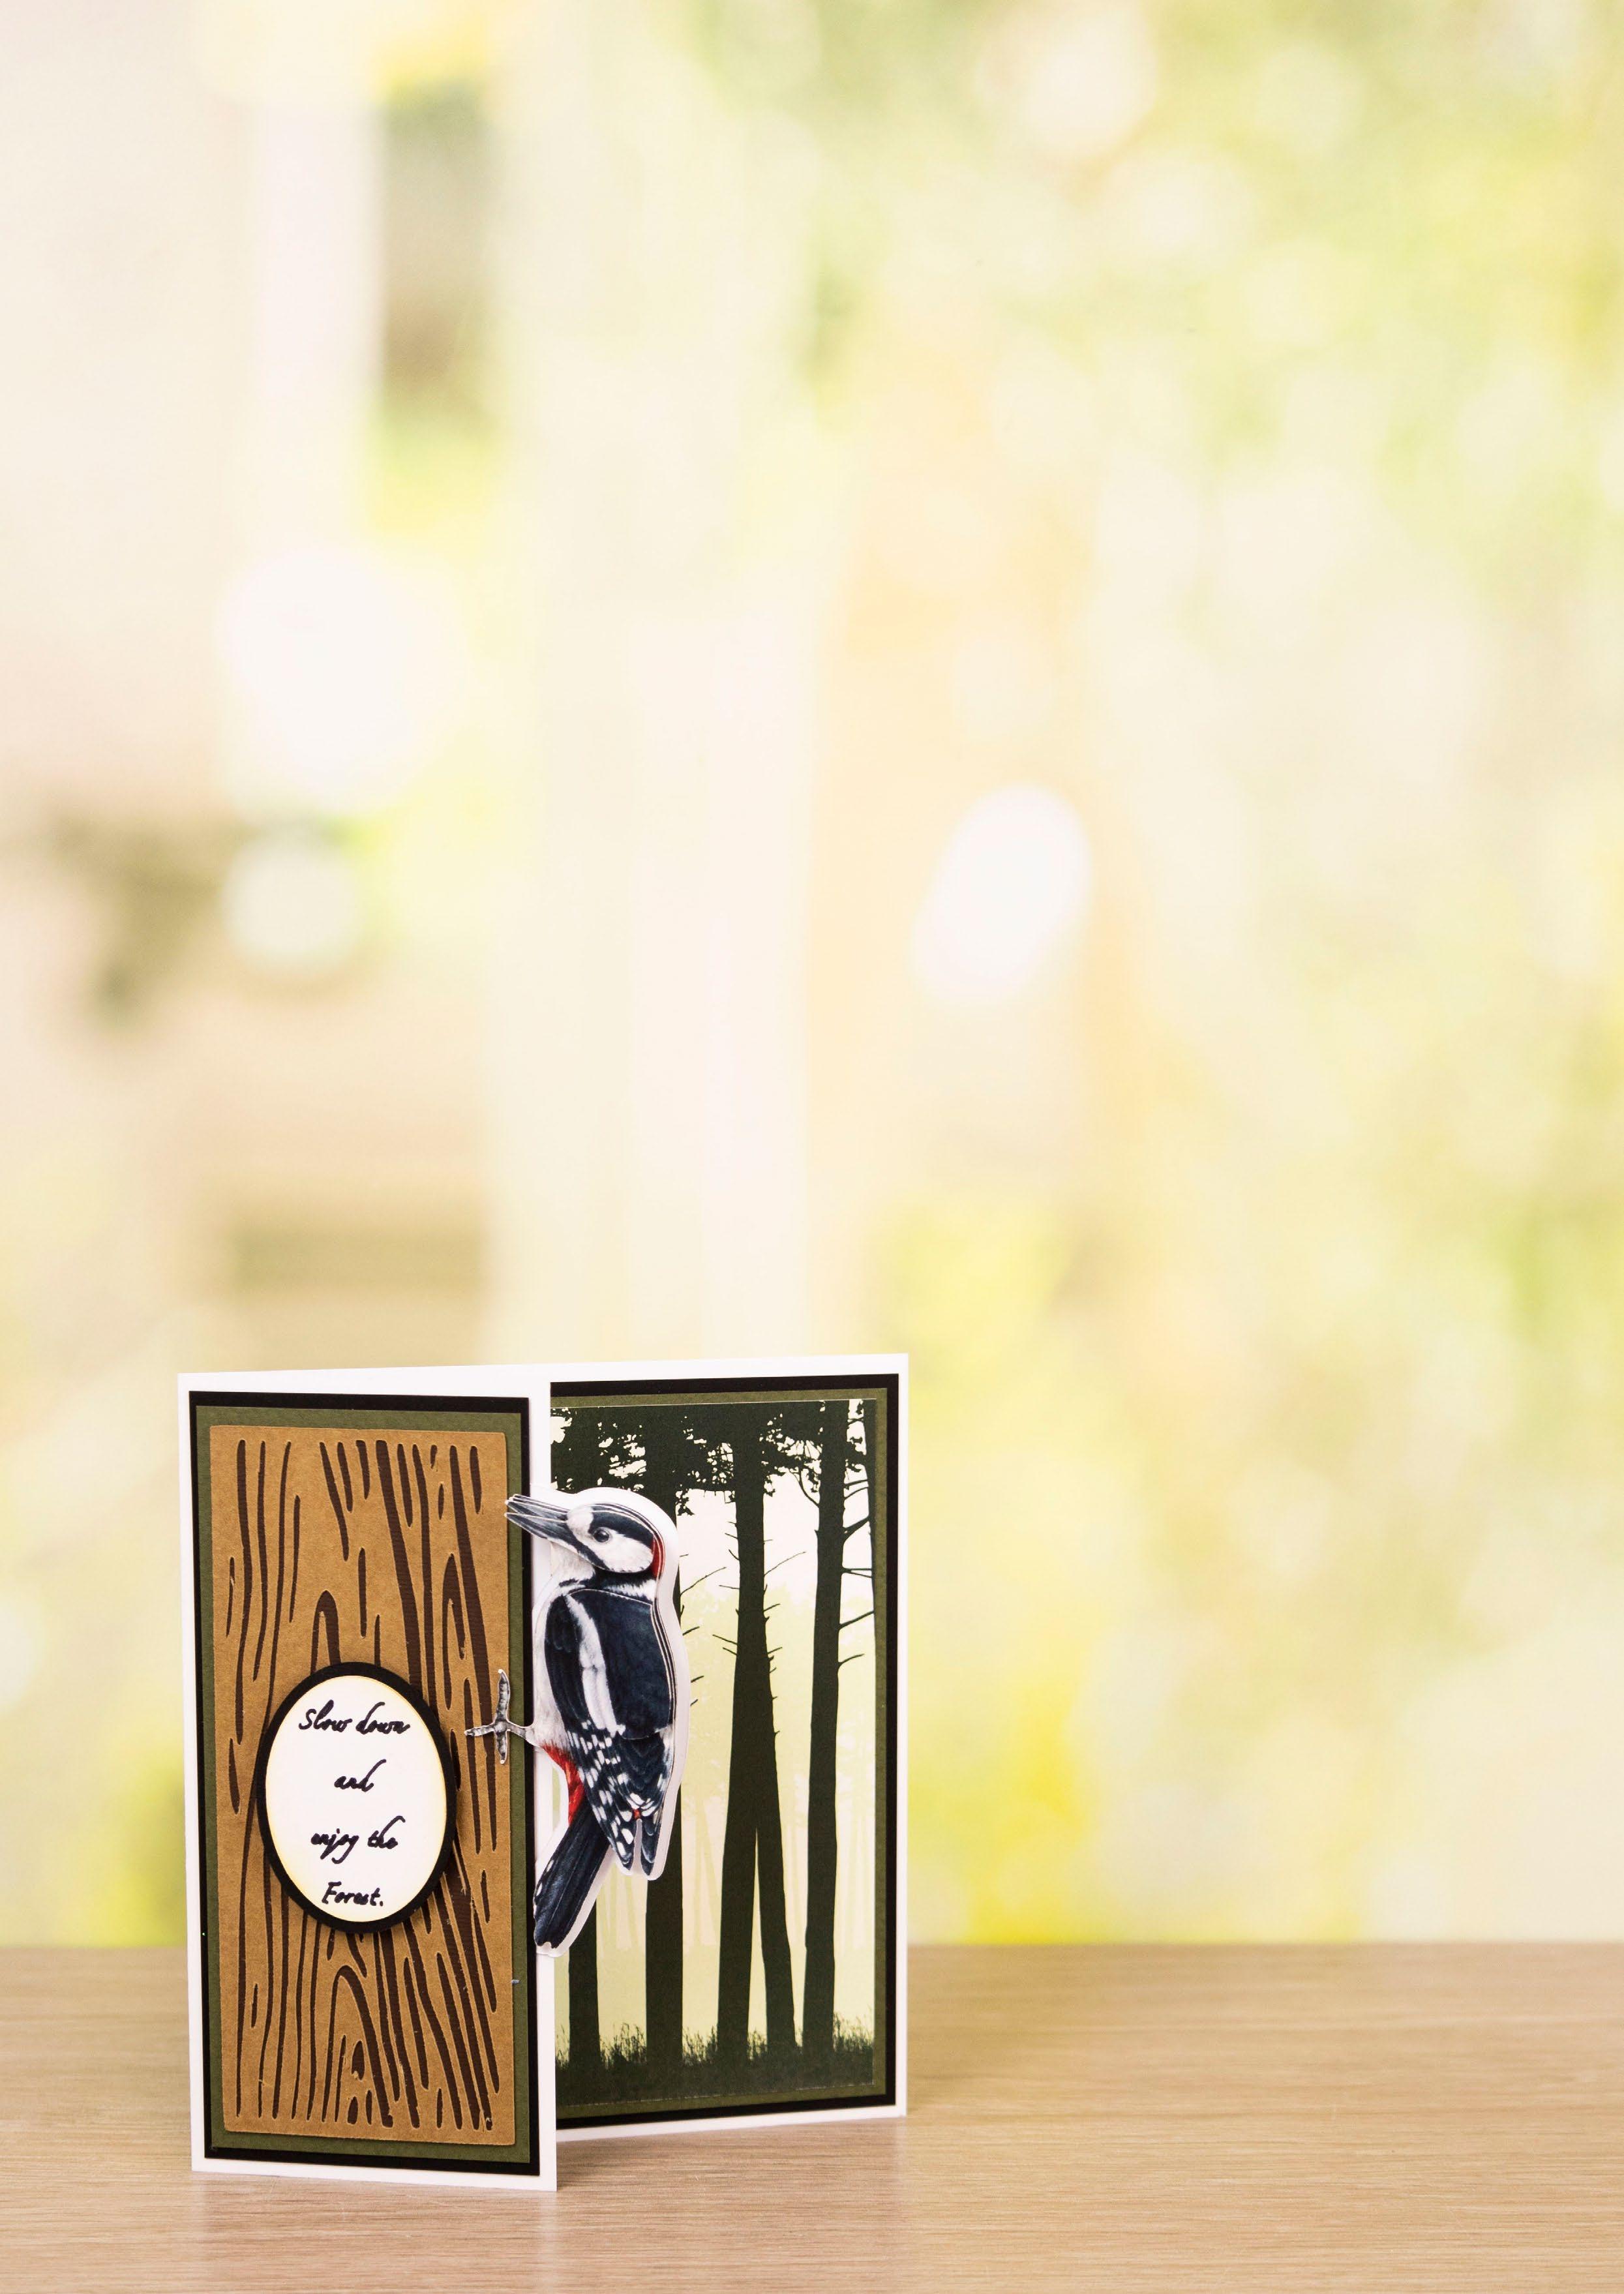
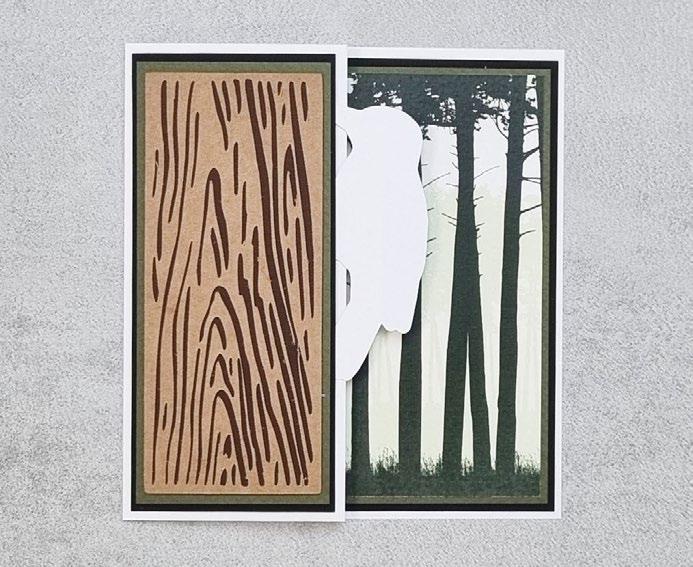
On the white rectangle, measure in 70mm from the left edge, and score and fold to create the card front. Mat the trees rectangle onto the large green rectangle, then onto the large black rectangle, and mat onto the inside back of the card. Mat the Woodpecker Outline onto the right edge of the card front, as shown. 3
Mat the emboss-cut onto the brown rectangle. Mat onto the smaller green rectangle, then onto the smaller black rectangle. Mat onto the card front. 4
Trim the woodpecker charisma-cuts as shown in the image. 5
Build up the decoupage of the charisma-cuts, and mat together with foam tape. Mat onto the card front with foam tape. Ink the sentiment oval, and mat onto the black oval. Mat onto the card front with foam tape.
Cut all the pieces needed to create the project as listed below;
From SVG downloads:
• From light brown cardstock: - 2 x WP-4-Emboss
• From charisma: - 1 x WP-4-Charisma
From machine memory:
• From white cardstock: - 1 x 200mm x 145mm rectangle

- 1 x 120mm x 80mm rectangle
- 1 x 39mm circle (with sentiment draw file)
• From light green cardstock: - 3 x 95mm x 140mm rectangle - 1 x 44mm circle
• From backing paper: - 1 x 90 x 135mm rectangle (woodgrain) - 2 x 90 x 135mm rectangle (trees)


• From brown cardstock: - 2 x 45mm x 75mm rectangle
Using the large white rectangle, score and fold in half, vertically, to create the card. Mat the woodgrain rectangle onto one of the green rectangles, and mat onto the front of the card.
Mat the trees rectangles onto the remaining green rectangles, and mat onto the inside-front and inside-back of the card.
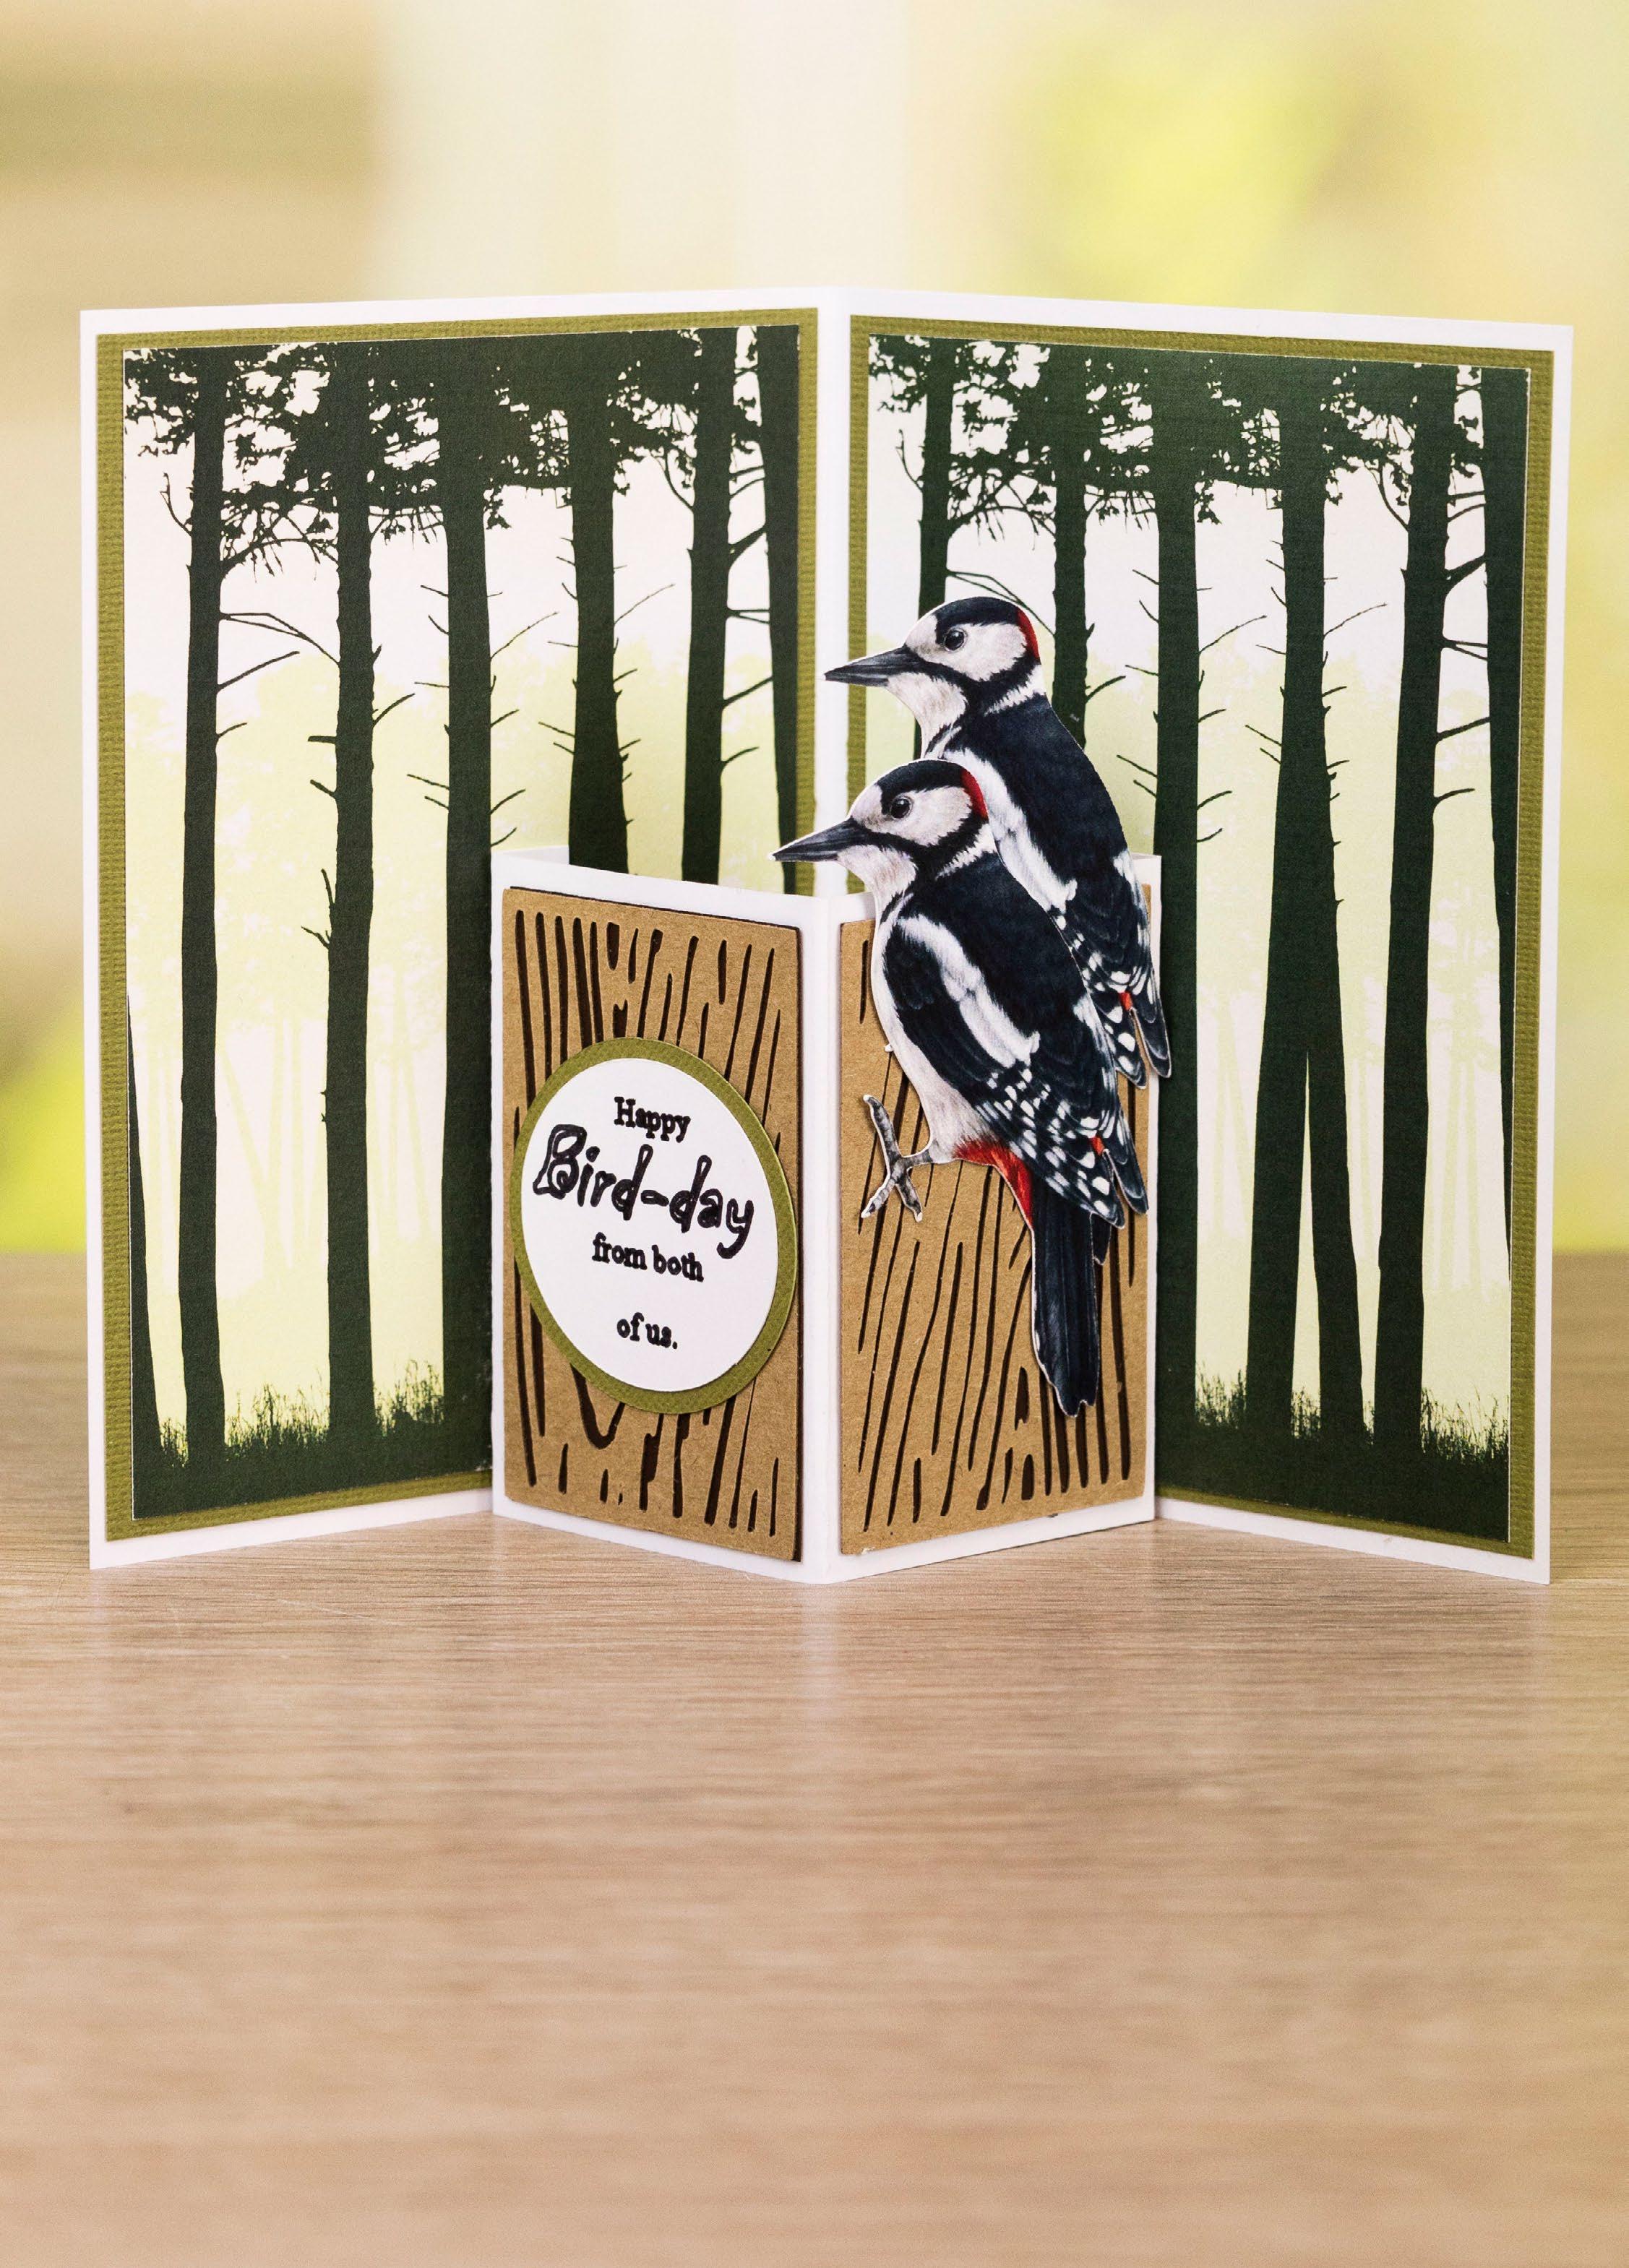
On the 120mm width white rectangle, fold in half, vertically, and measure in 10mm from each edge and score and fold. Mat the emboss-cuts onto the two brown rectangles, and mat onto the folded panels of the white rectangle.
Mat the folded rectangle onto the inside of the card using the tabs to create a pop-up. Mat the sentiment circle onto the light green circle, and mat onto the left side of the pop up.
Mat two of the woodpecker charisma-cuts onto the right side of the popup, and the third one onto the front of the card.


From SVG downloads:
• From white cardstock: - 1 x WP-5-Card Mat 1

• From black cardstock: - 1 x WP-5-Card Mat 2


• From brown cardstock: - 1 x WP-5-Emboss
• From charisma: - 1 x WP-5-Charisma
From machine memory:
• From white cardstock: - 2 x 130mm x 170mm rectangle - 2 x 65mm x 15mm rectangle (with sentiment draw files)
• From red cardstock: - 1 x 125mm x 165mm rectangle - 2 x 75mm x 25mm rectangle
• From black cardstock: - 1 x 120mm x 160mm rectangle - 2 x 70mm x 20mm rectangle

On one of the large white rectangles, measure in 10mm from the left edge and score and fold to create a tab. Attach to the other white rectangle to create a card. Mat the large black rectangle onto the large red rectangle, and mat onto the card.
Mat the emboss-cut onto the black card mat 2. Add ink around the aperture on the white card mat 1. Mat behind the black piece and and mat onto the card with foam tape.
Mat the woodpecker charismacuts into the aperture with foam tape.
the sentiment rectangles onto the black rectangles, then onto the red rectangles with foam tape. Mat onto the card with foam tape.

• 06-06-Woodpecker SVG files

• White cardstock
• Light brown cardstock
1 Cut all the pieces needed to create the project as listed below;
From SVG downloads:
• From light brown cardstock: - 1 x WP-6-Emboss
• From backing paper: - 1 x WP-6-Card Mat 1 (woodgrain)


• From charisma: - 1 x WP-6-Charisma
From machine memory:
• From white cardstock: - 1 x 200mm x 210mm rectangle - 1 x 27mm square (with sentiment draw file)
• From gold mirror cardstock: - 1 x 95mm x 205mm rectangle
• From light brown cardstock: - 1 x 90mm x 200mm rectangle - 1 x 80mm x 185mm rectangle - 1 x 32mm square
• Gold mirror cardstock
• Distress ink – Vintage Photo
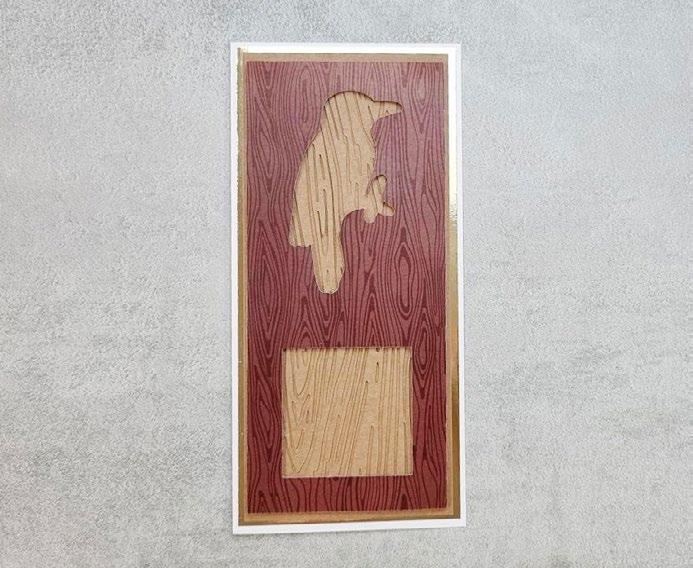
Score and fold the white rectangle in half, vertically, to create the card. Mat the large light brown rectangle onto the gold mirror rectangle, and mat onto the card. Mat the emboss-cut onto the light brown rectangle, and mat onto the card, as shown.
Mat the woodgrain card mat 1 onto the card with foam tape.
Trim the woodpecker charismacuts as shown in the image.
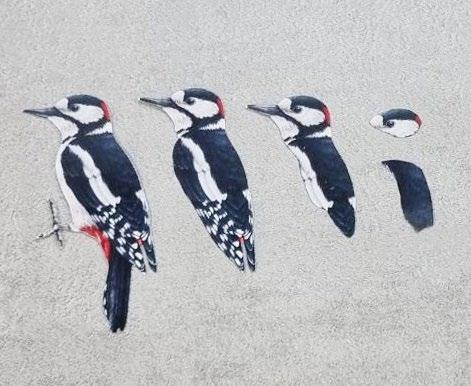
Build up the decoupage of the charisma-cuts, and mat together with foam tape. Mat onto the card. Ink around the edges of the sentiment square, mat onto the light brown square, and mat within the square aperture with foam tape.

What you’ll need:
• 07-01-Carpe Diem SVG files
• White cardstock
• Cream cardstock
1 Cut all the pieces needed to create the project as listed below;
From SVG downloads:
• From cream cardstock: - 3 x CD-1-Lace Panel 1 - 1 x CD-1-Lace Panel 2


• From gold mirror cardstock: - 1 x CD-1-Card Mat 1 - 1 x CD-1-Card Mat 2
• From charisma: - 1 x CD-1-Charisma
From machine memory:
• From white cardstock: - 2 x 210mm x 145mm rectangle
• From gold mirror cardstock: - 1 x 205mm x 140mm rectangle
• From backing paper: - 1 x 200mm x 135mm rectangle (old paper)
• Gold mirror cardstock
• Pearl gems
On one of the large white rectangles, measure down 10mm from the top edge and score across to create a tab. Attach to the other white rectangle to create a tent card. Mat the old paper rectangle onto the gold mirror rectangle, and mat onto the card.

Using two of the cream lace panel 1 cuts, trim both in half. Mat the cuts onto the corners of the card.
Mat the lace panel 2 onto the card mat 1, cut with foam tape, and mat onto the card with foam tape. Mat the remaining lace panel 1 cut onto the card mat 2 cut, and mat onto the card with foam tape.
Arrange and mat the charisma flowers onto the card with foam tape, as desired. Finish by adding pearl gems.

• 08-02-Carpe Diem SVG files
• White cardstock
• Red cardstock
• Gold mirror cardstock
1 Cut all the pieces needed to create the project as listed below;
From SVG downloads:
• From white cardstock: - 1 x CD-2-Card Front - 1 x CD-2-Lace Heart - 1 x CD-2-Lace Oval - 1 x CD-2-Banner (with sentiment draw file)

• From red cardstock: - 1 x CD-2-Heart Mat
• From charisma: - 1 x CD-2-Charisma
From machine memory:
• From white cardstock: - 1 x 145mm x 210mm rectangle - 1 x 35mm x 200mm rectangle
• From red cardstock: - 1 x 140mm x 205mm rectangle - 1 x 40mm x 200mm rectangle - 1 x 20mm x 200mm rectangle
• From backing paper: - 1 x 135mm x 200mm rectangle (red florals)


• From gold mirror cardstock: - 1 x 25mm x 200mm rectangle
3 Mat the 40mm width rectangle onto the card front. Mat the other red rectangle onto the gold rectangle, then onto the remaining white rectangle, and mat onto the card front with foam tape.
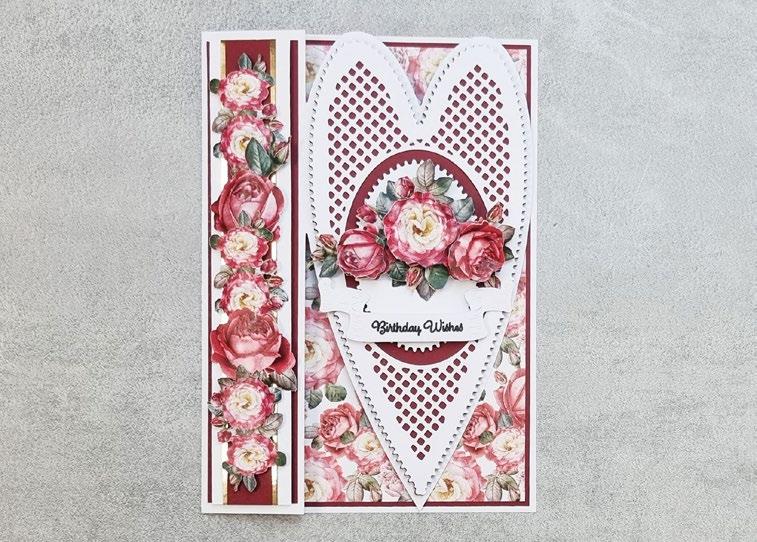
Trim some of the floral charismacuts as shown in the image.
2
Attach the card front cut to the large white rectangle using the tab to create the card. Mat the red floral rectangle onto the large red rectangle, and mat onto the inside back of the card.
4
Mat the white lace heart onto the red heart, and mat onto the card front with foam tape. Mat the white lace oval onto the card with foam tape.
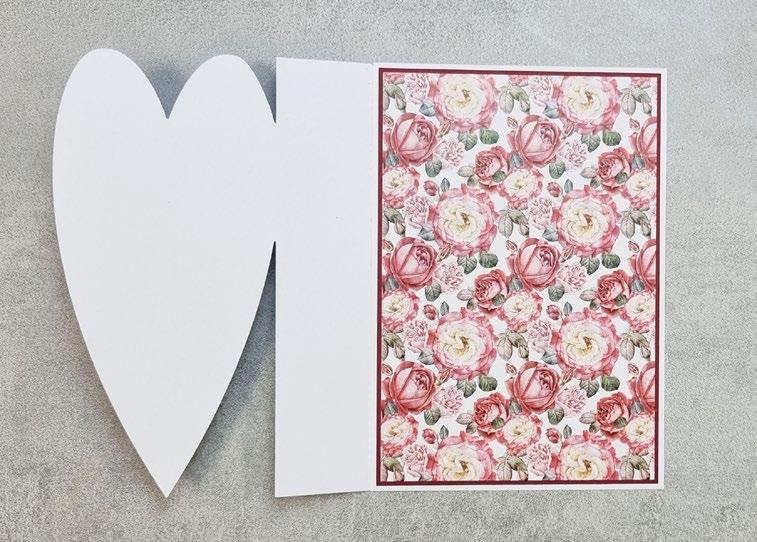
Build up the decoupage of the floral charisma, and mat together with foam tape. Mat onto the heart panel of the card, and mat the other flowers down the left side panel. Mat the embossed sentiment onto the card with foam tape.

• 09-03-Carpe Diem SVG files
• White cardstock

• Lilac cardstock
1 Cut all the pieces needed to create the project as listed below;
From SVG downloads:
• From white cardstock: - 1 x CD-3-Easel Base
- 1 x CD-3-Easel Front - 2 x CD-3-Lace Panel 1 - 1 x CD-3-Lace Panel 2
- 1 x CD-3-Card Mat 3 - 1 x CD-3-Lace Panel 3 - 1 x CD-3-Scalloped Frame - 1 x CD-3-Banner 1 (with sentiment draw file)

• From backing paper: - 2 x CD-3-Card Mat 1 (pink & purple florals)


• From lilac cardstock: - 1 x CD-3-Card Mat 2 - 1 x CD-3-Banner 2
• From charisma: - 1 x CD-3-Charisma
• Lilac ribbon
• Lilac pearl gems
3Mat the white lace panel 1 cuts onto the pink and purple florals card mat 1 cuts. Mat onto the base of the easel and the other onto the front of the easel with foam tape.
Mat the lace panel 2 cut onto the lilac card mat 2 cut with foam tape, and mat onto the front of the easel with foam tape. Mat the white lace panel 3 cut onto the white card mat 3 cut with foam tape, and mat onto the easel front with foam tape. Mat the white Scalloped Frame onto the base of the easel.
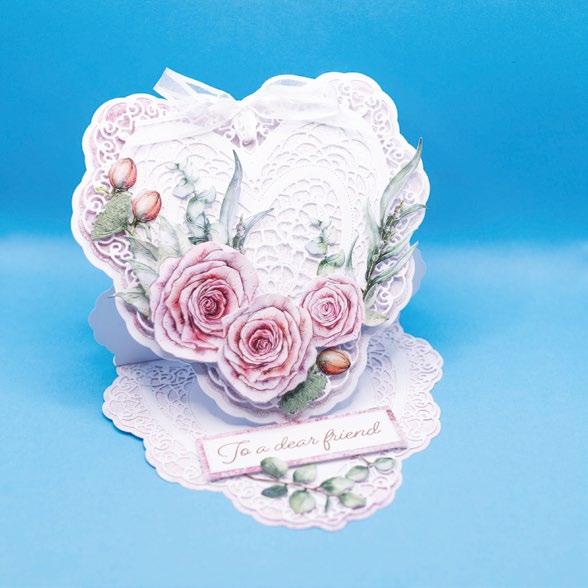
Fold the easel base in half. Attach the tab of the easel front to the top of part of the easel base to create the easel card.
2
Arrange and mat together the floral charisma-cuts onto the front of the easel with foam tape. Mat the white banner under the florals with foam tape. Mat the lilac banner onto the base of the card with foam tape. Tie a double-loop bow from lilac ribbon, and mat onto the banner. Finish by adding pearl gems.
• 10-04-Carpe Diem SVG files
• White cardstock
1 Cut all the pieces needed to create the project as listed below;
From SVG downloads:
• From white cardstock: - 1 x CD-4-Card Base
- 1 x CD-4-Lace Panel 1 - 1 x CD-4-Card Mat 3 - 1 x CD-4-Banner (with sentiment draw file)
• From backing paper: - 1 x CD-4-Card Mat 1 (purple florals)


• From lilac cardstock: - 1 x CD-4-Card Mat 2
- 1 x CD-4-Lace Panel 2
• From charisma: - 1 x CD-4-Charisma
• Lilac cardstock

• Lilac ribbon 2
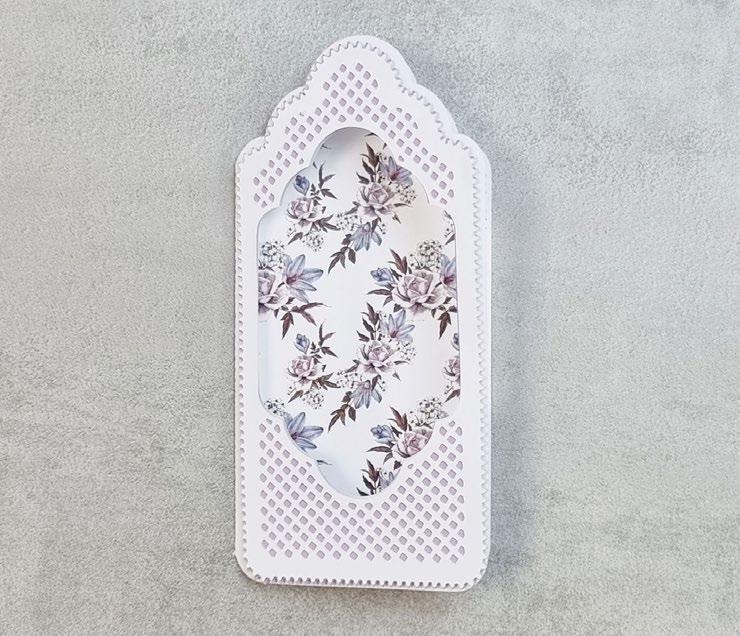
Fold the card base in half to create the card. Mat the purple florals card mat 1 onto the inside back of the card. Mat the white lace panel 1 onto the lilac card mat 2, and mat onto the card front with foam tape. 3
Mat the lilac lace panel 2 onto the white card mat 3 with foam tape, and mat onto the inside back of the card with foam tape. 4
Mat the banner onto the inside back of the card with foam tape. 5
Arrange and mat the floral charisma-cuts together on the card front with foam tape. Tie a double-loop bow from lilac ribbon, and mat onto the front of the card.
1 2 3


Using the four white large rectangles mats, ink the rectangles, as shown. 5


Mat one of the tree charisma-cuts onto one of the inked rectangles, and mat onto the inside front of the cover. Mat one of the No.2 Tree charisma-cuts onto a backing paper rectangle, and mat onto the inside back of the cover. Mat the safari trucks onto the inside of the cover. 6

Using one of the trees and the monkey set of charisma-cuts, mat onto one of the inked rectangles. Mat two of the leaves onto the corner. Using one of the tree and the giraffe set of charisma-cuts, mat onto one of the backing paper rectangles.


Using one of the trees and the lion set of charismacuts, mat onto one of the backing paper rectangles.
Using one of the tree, the hippo set and one of the Tuck In charisma-cuts, mat onto one of the inked rectangles. Mat two of the leaves onto the corner.
8

Using one of the trees and the birds set of charismacuts, mat onto one of the inked rectangles. Mat the remaining flowers and leaves onto the corner of the card. Using one of the tree, the meerkat set and last Tuck In charisma-cuts, mat onto one of the backing paper rectangles. 9


Mat one page of each set onto each of the black rectangles. Fold the middle section of the concertinacut in half, and mat onto the back of the rectangle. Mat the other page from each set onto the back of the page. 10
Mat each page onto the inside of the spine to finish the book.


• 13-01-On The Safari SVG files


• Black cardstock
• Gold mirror cardstock
1 Cut all the pieces needed to create the project as listed below;
From SVG downloads:
• From black cardstock: - 3 x OTS-1-Large Rectangle Mat - 2 x OTS-1-Concertina
• From backing paper: - 3 x OTS-1-Small Rectangle Mat (sunset)
PLEASE NOTE: Louise scaled this background up to 110% before printing it landscape.
• From charisma: - 1 x OTS-1-Charisma A - 1 x OTS-1-Charisma B - 1 x OTS-1-Charisma C
From machine memory:
• From gold mirror cardstock: - 3 x 80mm x 130mm rectangle 2 Fold the two concertina pieces in half. Mat the black large rectangles mats together using the folded concertina pieces to create a Z-fold card.


3
Mat the sunset small rectangle mats onto the gold rectangles, and mat onto each panel of the card. Mat the three tree charisma panels onto each panel of the card.


Mat the giraffe charisma-cuts onto the left panel of the card with foam tape, as shown.
5
Mat the lion charisma-cuts onto the middle panel of the card with foam tape, as shown.
Mat the monkey charisma cuts onto the right panel of the card with foam tape as shown.
• 14-02-On The Safari SVG files
• Black cardstock
• Light brown cardstock
• Dark brown cardstock
• White cardstock
• Gold mirror cardstock
• Distress ink – Vintage Photo
1
Cut all the pieces needed to create the project as listed below;
From SVG downloads:
• From dark brown cardstock: - 1 x OTS-2-Ground Mat 1 - 1 x OTS-2-Ground Mat 2

• From light brown cardstock: - 1 x OTS-2-Ground Mat 3
• From charisma: - 1 x OTS-2-Charisma
From machine memory:
• From black cardstock: - 2 x 200mm x 150mm rectangle - 1 x 144mm circle - 1 x 55mm circle
• From gold mirror cardstock: - 1 x 200mm x 130mm rectangle - 1 x 140mm circle - 1 x 48mm circle


• From backing paper: - 1 x 200mm x 125mm rectangle (stripe) - 1 x 135mm circle (sunset)


• From white cardstock: - 1 x 44mm circle (with sentiment draw file)
On one of the large black rectangles, measure down 10mm from the top edge, and score and fold to create a tab. Attach the tab to the other black rectangle to create a tent card. Mat the stripe rectangle to the gold rectangle, and mat onto the card.
Mat the sunset circle onto the gold circle, then onto the black circle. Mat onto the card with foam tape.
Ink the ground mats and onto the card with foam tape. Make sure to leave space towards the top to tuck in charisma-cuts later on.
Tuck and mat the grass charismacuts onto the card as shown. Tuck and mat the meerkats and giraffes onto the card, as shown.
Mat the sentiment circle onto the gold circle. Mat onto the black circle with foam tape, then onto the card with foam tape.
• 15-03-On The Safari SVG files
• White cardstock
• Light green cardstock
• Distress ink – Salty Ocean & Peeled Paint
• Glaze Drops
1
Cut all the pieces needed to create the project as listed below;
From SVG downloads:
• From white cardstock:
- 1 x OTS-3-Truck Outline
• From charisma: - 1 x OTS-3-Charisma A - 1 x OTS-3-Charisma B - 1 x OTS-3-Charisma C
From machine memory:
• From white cardstock:

- 2 x 143mm x 184mm oval
- 1 x 134mm x 174mm oval
- 1 x 76mm x 116mm oval
• From light green cardstock: - 1 x 138mm x 179mm oval 2


On one of the large white ovals, score and fold in half, horizontally, and trim a straight edge across the bottom back of the card. Mat the other large oval onto the front of the card. 3

Mat the next large white oval onto the green oval with foam tape, and mat onto the card. Ink the small white oval, as shown and mat onto the card with foam tape. 4
Trim the hippo charisma-cuts to fit the inked oval, and mat onto
the card. Mat the floral and leaf charisma-cuts around the oval with foam tape, and glue, as shown. Make to leave at least four leaves to one side for the last step. 5
Trim the safari truck charismacuts as shown, in the image. Add Glaze Drops to the truck window and lights.

6
Build up the decoupage of the truck, and mat together with foam tape. Mat onto the outline, and mat onto the right edge of the oval card. Mat the saved leaves behind the truck. Mat the bird charisma-cuts onto the card with foam tape.


• 16-04-On The Safari SVG files
• Black cardstock
1 Cut all the pieces needed to create the project as listed below;
From SVG downloads:
• From charisma: - 1 x OTS-4-Charisma A - 1 x OTS-4-Charisma B - 1 x OTS-4-Charisma C
From machine memory:
• From black cardstock: - 1 x 295mm x 155mm rectangle
• From light brown cardstock: - 1 x 200mm x 150mm rectangle - 1 x 85mm x 150mm rectangle - 1 x 45mm square
• From backing paper: - 1 x 195mm x 145mm rectangle (trees)
- 1 x 80mm x 145mm rectangle (trees) - 1 x 90mm x 145mm rectangle (sunset)


• From white cardstock: - 1 x 40mm square (with sentiment draw file)
• Light brown cardstock
• White cardstock
onto the large light brown rectangle, and mat onto the inside back of the card. Mat the small trees rectangle onto the small light brown rectangle, and mat onto the card front.


Mat the sunset rectangle onto the right side of the inside back of the card. Mat two of the tree panel charisma-cuts together with foam tape, and mat onto the right side of the of the card. Mat the tree parts of the monkey set onto the right side of the card.

Mat the remaining tree panel charisma-cut onto the right side of the card with foam tape. Mat the remaining monkey charisma-cuts onto the card. Mat the charisma frame onto the right side of the card with foam tape.
On the large black rectangle, measure in 90mm from the left edge, and score and fold to create the card front. Mat the large trees rectangle
Trim the luggage off the top of the truck charisma-cut, and mat onto the card with foam tape. Mat the sentiment square onto the light brown square, and mat onto the card with foam tape.
• 17-01-Louise’s Pop up Card SVG files
• White cardstock
• Light brown cardstock
• Construction acetate
• Distress ink – Salty Ocean, Peeled Paint & Vintage Photo
• Glitter
Cut all the pieces needed to create the project as listed below;
From SVG downloads:
• From white cardstock: - 1 x LPC-1-Pop Up Card Base
• From light brown cardstock: - 1 x LPC-1-Emboss 1 - 2 x LPC-1-Emboss 2
• From charisma: - 1 x LPC-1-Charisma
From machine memory:
• From backing paper: - 1 x 85mm x 95mm rectangle (red and white stripe)
- 2 x 30mm x 95mm rectangle (red and white stripe)
• From white cardstock: - 1 x 93mm x 130mm rectangle
- 3 x 113mm x 20mm rectangle - 1 x 35mm square (with sentiment draw file)
• From dark brown cardstock: - 1 x 85mm x 75mm rectangle - 2 x 30mm x 75mm rectangle
• From construction acetate: - 2 x 50mm x 150mm rectangle - 1 x 10mm x 90mm rectangle - 2 x 20mm x 160mm rectangle - 1 x 10mm x 130mm rectangle
• From red cardstock: - 1 x 40mm square
Mat the red and white stripe rectangles onto the lower panels of the pop-up card base, as shown.
Turn the card base over. Ink the large white rectangle, and mat onto the left panel of the card base. Mat the wheel charisma-cut onto the panel of the card base.
4
Mat the light brown emboss-cuts onto the dark brown rectangles, and mat onto the top folded panels of the card base. 5
Fold up the card base to make the pop card. Using the three small white rectangles, measure in 10mm from each end and score and fold. Fit each rectangle within the pop-up card to create the inner supports. 6
Mat the sweet cart charisma-cuts onto the 50mm x 150mm strips of acetate. Mat onto the front inner support, and onto the back inner support within the pop-up card. Mat the bear charisma-cut onto the 10mm x 90mm acetate strip, and mat onto the inside front of the pop-up box. 7

Print the sweet backing paper at 200%, and cut out six sweets. Mat the 20mm x 160mm acetate strips behind two of the larger sweets, and the 10mm x 130mm acetate strip behind a smaller sweet. Mat the sweets on the back and middle inner supports, and save the rest of the sweets for the last step. 8
Glitter the edges of the sentiment square, mat onto the red square, and mat onto the front fold of the pop-up card with foam tape. Finish by matting the remaining sweetcuts to the front fold of the card with foam tape.


PROJECT 18
• 18-01-Silk Ribboned Rose SVG files
• Cream cardstock
• Pink cardstock • Pink ribbon
• Pearl gems
• Distress ink – Vintage Photo 1
Cut all the pieces needed to create the project as listed below;
From SVG downloads:
• From cream cardstock:
- 1 x SRR-1-Card Base
• From charisma: - 1 x SRR-1-Charisma
From machine memory:
• From pink cardstock:
- 2 x 40mm x 95mm rectangle
- 1 x 115mm x 95mm rectangle
- 1 x 205mm x 40mm rectangle
- 1 x 65mm x 40m oval
• From backing paper: - 2 x 35mm x 90mm rectangle (vintage floral)
- 1 x 110mm x 90mm rectangle (vintage floral)
- 1 x 200mm x 35mm rectangle (vintage floral)
• From white cardstock: - 1 x 60mm x 35mm oval (with sentiment draw file) 2
Fold on the score lines of the card base to create the card. Ink around the edges of the backing paper rectangles, and mat onto the pink rectangles. Mat onto the card, as shown. 3
Ink around the edges of the sentiment oval, and mat onto the pink oval. Mat onto the middle of the card with tape. 4
Build up the decoupage on two of the corner charisma-cuts with foam tape, and mat onto the middle of the card. Trim the ribbons off the remaining corner charisma cuts and build up the decoupage with foam tape. Mat the florals onto the card, as shown. Finish by adding a multi-loop bow tied from pink ribbon, and pearl gems.

PROJECT 20
• 20-03-Silk Ribboned Rose SVG files • White cardstock
• Pink cardstock • Pearl gems
Cut all the pieces needed to create the project as listed below;
From SVG downloads:
• From charisma: - 1 x SRR-3-Charisma
From machine memory:
• From white cardstock: - 1 x 205mm x 200mm rectangle
- 1 x 80mm x 30mm rectangle (with sentiment draw file)
• From pink cardstock:
- 1 x 200mm x 95mm rectangle
- 1 x 85mm x 35mm rectangle
• From backing paper: - 1 x 195mm x 90mm rectangle (vintage floral)
Score and fold the large white rectangle in half, horizontally, to create a tent card. Mat the vintage floral rectangle to the large pink rectangle, and mat onto the card with foam tape. 3 Mat the sentiment rectangle onto the small rectangle, and mat onto the card with foam tape. 4
2
Mat the floral charisma-cuts, around the sentiment with foam tape as shown. Finish by adding pearl gems.
• 19-02-Silk Ribboned Rose SVG files
• White cardstock • Pink cardstock
• Construction acetate • Pearl gems
1 Cut all the pieces needed to create the project as listed below;
From SVG downloads:
• From charisma: - 1 x SRR-2-Charisma
From machine memory:
• From white cardstock:
- 1 x 120mm square - 2 x 100mm square - 1 x 35mm square (with sentiment draw file)
• From pink cardstock: - 1 x 115mm square - 1 x 95mm square


• From backing paper: - 1 x 110mm rectangle (vintage floral) - 1 x 90mm rectangle (vintage floral)
• From construction acetate: - 1 x 140mm x 120mm rectangle
2
Mat the large vintage floral square onto the large pink square. and mat onto the large white square to create the card back. On the construction acetate rectangle, measure in 20mm from the left edge and score and fold to create a tab. Attach the tab to the back of the card back. The acetate becomes the card front.
Mat the small vintage floral square onto the small pink square. Mat onto one of the 100mm white squares with foam tape, and mat onto the front of the card. Mat the other 100mm width white square onto the inside front of the card.
Mat the sentiment square onto the front of the card. Trim the ribbons of the charisma-cuts, and mat around the frame with foam tape as shown. Finish by adding pearls.


Watercolours are a great way of colouring stamped designs. And, when combined with embossing powders, it's really easy to stay within the lines! Here are some simple techniques on how to use stamps, embossing powders and watercolours together to create beautifully coloured designs.


5. Using a water brush pen, squeeze water onto your stamped design within the embossed lines.


6. When the area you want to paint is flooded with water, load your brush with your chosen colour and drop paint into wet area.
7. The paint will spread where the water is. Pick up different colours and drop them in and let them naturally bleed into each other.
8. The raised, embossed stamp design will act as a barrier, which will stop the paint from spreading onto the rest of the paper.
9. Continue adding colour until you have filled your whole stamped design. Let the design sit for a while to let the paint sink into the paper and dry thoroughly.
10. Another way would be to simply pick up the paint with the brush pens and paint straight onto dry, watercolour cardstock. This method gives you a bit more control over where you place your colours.


1. Another technique is using colour resit. Stamp your chosen design onto watercolour cardstock.
2. While the ink is still wet, cover with white or clear embossing powder.


3. Tip off the excess embossing powder and pour it back into the pot.
4. Heat the embossing powder until it melts and goes glossy.

5. Fill a water brush pen with water and start to flood the paper with water. You will notice that water will only sit in droplets on top of the embossed design.
6. Load your brush with your chosen colour and add drops of paint onto the wet paper. Let the paint spread around the paper. The paint will run off the embossed design.
7. Add different colours or shades to your design until all the paper areas of your design are covered. Leave to dry.


8. Again, if you want more control of the colour you are painting onto your stamped design then you can paint straight over the embossed design.

9. Cover your whole design with your chosen colours and the paint will resist from sticking to your embossed design.
10. Once dry, if you find any paint drops have dried on the embossed design, simply wet a paper towel and just gently rub over the embossed design to clean them off.

It is s good idea to tape down your cardstock on your work surface. When watercolour cardstock gets wet it can pucker, causing the water to run where it wants!


Have plenty of paper towels to hand. If you flood your paper with too much water, fold up a paper towel into a point and gently touch it onto the water to soak up some of the excess water.
If you make a mistake you can lift the colour off the cardstock with a paper towel. Wet a paper towel and gently rub the area to simply remove some of the colour from that area. The paper will not return to 100% white, but it may just lighten it enough to rectify your mistake.

On the large white rectangle, measure in 15mm in from the right edge, and score and fold to create a tab. Attach to the back of the large white square using the tab to create the card. Score and fold the card front in half, vertically. Mat the 155mm square onto the insideback of the card. 3


Ink the 95mm lilac square, and mat onto the 100mm square. Mat onto the 105mm width purple square. Mat onto the 110mm white square with foam tape.

Using the two 60mm x 70mm rectangles, score and fold in half, vertically, and mat half of each rectangle onto the underneath of the squares from the previous step. Do not stick the other halves to each other.
Attach the squares to the card front by matting the tabs either side of the fold.

6
Mat two of the patchwork rectangles onto two of the 70mm width lilac rectangles and mat onto the either side of the card front covering the tabs.
Trim the bear charisma-cuts as shown.

Build up the decoupage of the charisma-cuts, and mat together with foam tape. Mat onto the outline with foam tape, and mat onto the card front with foam tape. 9
Mat the remaining patchwork rectangle onto the last 70mm width lilac rectangle, and mat onto the inside back of the card with foam tape. Mat the sentiment rectangle onto the small purple rectangle, and mat onto the inside back of the card with foam tape. Finish by adding a double-loop bow tied from purple ribbon.


Cut all the pieces needed to create the project as listed below;
From SVG downloads:
• From white cardstock: - 1 x BB-2-Banner (with sentiment draw file)


• From charisma: - 1 x BB-2-Charisma
From machine memory:
• From white cardstock: - 2 x 145mm x 167mm hexagon - 1 x 106mm x 122mm hexagon - 1 x 101mm x 117mm hexagon
• From lilac cardstock: - 1 x 140mm x 161mm hexagon


• From backing paper: - 1 x 135mm x 156mm hexagon (patchwork)
On one of the large white hexagons, measure down 20mm from the top edge and score and fold to create a tab. Attach to the other large white hexagon to create a tent card. Attach the patchwork hexagon to the lilac hexagon, and mat onto the card with foam tape.


Ink the smaller white hexagon, and mat onto the remaining white hexagon with foam tape. Mat onto the card with foam tape.
Trim the charisma-cuts, as shown in the image.
Build up the decoupage of the charisma-cuts, and mat together with foam tape. Mat onto the card with foam tape as shown.
Mat the banner onto the card with foam tape.
• 23-03-Betsy Bear SVG files
• White cardstock
• Dark green cardstock
• Light green cardstock


1 Cut all the pieces needed to create the project as listed below;
From SVG downloads:
• From backing paper: - 1 x BB-3-Folded Curtain
• From white cardstock: - 1 x BB-3-Bear Outline
• From charisma: - 1 x BB-3-Charisma
From machine memory:
• From white cardstock: - 1 x 250mm x 210mm rectangle - 1 x 53mm circle
- 1 x 44mm circle (with sentiment draw file)
• From dark green cardstock: - 1 x 120mm x 205mm rectangle

• From light green cardstock: - 1 x 115mm x 200mm rectangle


• From lilac cardstock: - 1 x 48mm circle
• Lilac cardstock
• Glitter
• Green ribbon
Score and fold the large white rectangle in half, vertically, to create the card. Mat the light green rectangle onto the dark green rectangle, and mat onto the card with foam tape.

Concertina-fold the folded curtain-cut, and secure in place with tape on the back. Tie a bow from a length of green ribbon, and mat around the folded curtain. Secure the ribbon onto the back, and mat onto the card with foam tape. 4
Glitter the bear charisma-cut, and mat onto the outline with foam tape. Mat onto the card.
Glitter around the edges of the lilac circle, and mat behind the sentiment circle. Mat onto the other white circle with foam tape, and mat onto the card with foam tape.

What you’ll need:
• 24-01-Sweet Treats SVG files
• White cardstock • Pink cardstock
• Complimentary backing paper
• Charisma • Enamel Drops
• Glitter
1
Cut all the pieces needed to create the project as listed below;
From SVG downloads:
• From backing paper: - 1 x ST-1-Frame (sweets)
• From white cardstock: - 1 x ST-1-Sweet Cart Outline

• From charisma: - 1 x ST-1-Charisma
From machine memory:
• From white cardstock: - 2 x 200mm square - 1 x 145mm square - 1 x 45mm square (with sentiment draw file)
• From pink cardstock: - 1 x 195mm square - 1 x 150mm square - 1 x 60mm square
• From backing paper: - 1 x 190mm square (candy cane) 2
On one of the large white squares, measure in 10mm from the left edge, and score and fold to create a tab. Attach to the other large white square to create the card. Mat the candy cane square onto the largest pink square, and mat onto the card.
CLICK HERE TO
What you’ll need:
• 26-03-Sweet Treats SVG files • Turquoise cardstock
• Construction acetate • Glitter
1
Cut all the pieces needed to create the project as listed below;
From SVG downloads:
• From charisma: - 1 x ST-3-Charisma
- 1 x 145mm x 35mm rectangle - 1 x 145mm x 20mm rectangle - 1 x 58mm circle
3
Glitter around the edges of the next largest white square, and mat onto the pink square. Mat onto the card with foam tape. Add Glaze Drops and glitter to the sweets on the frame, and mat onto the card with foam tape. 4
Glitter around the edges of the small pink square and the sentiment square. Mat together, and mat into the aperture. 5
Glitter the sweet cart, and mat onto the outline with foam tape. Mat onto the card with foam tape.
From machine memory:
• From white cardstock: - 1 x 150mm x 290mm rectangle - 1 x 53mm circle (with sentiment draw file)
• From turquoise cardstock: - 1 x 145mm x 75mm rectangle
• From backing paper: - 1 x 140mm x 70mm rectangle - 1 x 140mm x 30mm rectangle - 1 x 140mm x 15mm rectangle
• From construction acetate: - 2 x 55mm x 65mm rectangle
On the white rectangle, from the bottom edge, measure up at 25mm, 50mm, 90mm, 130mm and 210mm, and score and fold to create a stepper card.
Glitter around the edges of the turquoise rectangles. Mat the backing paper rectangles onto the turquoise rectangles, and mat onto the steps of the card.
• 25-02-Sweet Treats SVG files
• White cardstock
• Blue cardstock
• Red cardstock
• Distress ink – Festive Berries, Salty Ocean & Peeled Paint
1 Cut all the pieces needed to create the project as listed below;
From SVG downloads:
• From white cardstock: - 1 x ST-2-Sweet Cart Outline
• From charisma: - 1 x ST-2-Charisma
From machine memory:
• From white cardstock: - 2 x 145mm square - 1 x 39mm circle (with sentiment draw file)
• From blue cardstock: - 1 x 140mm square
• From backing paper: - 1 x 135mm square (sweets) - 1 x 72mm circle (red & white stripe) - 1 x 55mm square (red & white stripe)

• From red cardstock: -1 x 44mm circle
Glitter the sweet cart charismacuts. Mat onto the two acetate rectangles, but do not stick the bottom half of the cart. Mat one cart onto the front step of the card, and the other onto the middle step, sticking the acetate behind the step and the cart onto the front.

Glitter the edges of the turquoise circle and the sentiment. Mat together, and mat onto the back step of the card. CLICK
On one of the white squares, measure in 10mm from the left edge, and score and fold to create a tab. Attach to the other square to create a card. Mat the sweets square onto the blue square, and mat onto the card with foam tape.
triangles and around the edges of the red and white stripe circle. Fold the triangles in half and mat onto the edges of the circle. Mat onto the card with foam tape. Mat the sentiment circle onto the red circle, and mat onto the middle of the sweet.
Trim the small red and white stripe square in half, diagonally, to create two triangles. Ink the top points of the
Ink the sweet cart outline. Mat the sweet cart charisma-cut onto the outline with foam tape. Mat onto the card with foam tape.

Cut all the pieces needed to create the project as listed below;
From SVG downloads:
• From charisma: - 1 x FW-1-Charisma
From machine memory:
• From white cardstock: - 2 x 170mm square - 1 x 160mm square - 1 x 120mm circle
• From red cardstock: - 1 x 165mm square - 2 x 70mm x 145mm rectangle - 1 x 125mm circle


• From backing paper: - 1 x 65mm x 140mm rectangle (fairground) - 1 x 65mm x 140mm rectangle (red & white stripe)


Mat the backing paper rectangles onto the red rectangles, and mat onto the remaining white square, as shown.
On one of the large white squares, measure in 10mm from the left edge, and score and fold to create a tab. Attach to the other large white square to create a card. Mat the large red square onto the card. 3


Cut two lengths of twine approximately 1000mm long. Wrap one length around the square, vertically, on the righthand side and secure on the back. Wrap the other length around the square, horizontally, towards the top so the two lengths overlap, and secure on the back. Mat onto the card with foam tape. 5
Glitter the edges of the red circle, and ink the white circle. Mat together, and mat onto the card with foam tape. 6
Add Glaze Drops, as desired, to the wheel charisma-cut, and mat onto the card.


Cut all the pieces needed to create the project as listed below;
From SVG downloads:
• From white cardstock: - 1 x FW-2-Wheel Outline
• From charisma: - 1 x FW-2-Charisma
From machine memory:
• From white cardstock: - 1 x 290mm x 150mm rectangle - 1 x 210mm x 40mm rectangle
- 1 x 110mm x 25mm rectangle
- 1 x 100mm x 15mm rectangle (with sentiment draw file)
• From red cardstock: - 1 x 125mm x 145mm rectangle - 4 x 35mm x 145mm rectangle - 1 x 205mm x 35mm rectangle - 1 x 105mm x 20mm rectangle
• From backing paper: - 1 x 120mm x 140mm rectangle (fairground) - 4 x 30mm x 140mm rectangle (red and white stripe)


On the large white rectangle, from each edge, measure in at 40mm and 80mm, and score and fold. Mat the fairground rectangle onto the 125mm, width rectangle and mat onto the middle panel of the card.


Mat the four red and white stripe rectangles onto the four 35mm width rectangles, and mat onto the folded panels on either side of the card.
Ink the wheel outline. Mat the wheel charisma-cut onto the outline, and mat onto the middle panel of the card with foam tape.
Mat the 205mm width red rectangle onto the 210mm width white rectangle, and attach to the outer panels of either side of the card.
Mat the sentiment onto the small red rectangle, and mat onto the small white rectangle with foam tape. Mat onto the lower panel of the card.
Finish by adding star gems.
What you’ll need:
1 Cut all the pieces needed to create the project as listed below;
From SVG downloads:
• From kraft cardstock: - 1 x FW-3-Card Base
• From silver mirror cardstock: - 1 x FW-3-Card Mat 1
• From backing paper: - 1 x FW-3-Card Mat 2 (red and white stripe)

• From charisma: - 1 x FW-3-Charisma
From machine memory:
• From kraft cardstock: - 1 x 144mm circle

• From backing paper: - 1 x 140mm circle (fairground)


• From silver mirror cardstock: - 1 x 120mm circle - 1 x 105mm x 25mm rectangle
29
- 1 x 100mm x 20mm rectangle • From white cardstock: - 1 x 95mm x 15mm rectangle (with sentiment draw file)
Fold the card base along the score line to create the card. Mat the red and white stripe card mat 2 onto the silver card mat 1, and mat onto the card.
Mat the fairground circle onto the kraft card circle, and mat onto the card. Mat the red circle onto the silver circle with foam tape, and mat onto the card with foam tape.
Mat the wheel charisma-cut onto the card.
Mat the sentiment onto the red rectangle, and mat onto the silver rectangle with foam tape. Mat onto the bottom of the card with foam tape.
• 30-01-Ground Shaker SVG files

• White cardstock
• Black cardstock
• Grey cardstock
PROJECT 30
• Silver mirror cardstock


1
Cut all the pieces needed to create the project as listed below;
From SVG downloads:
• From white cardstock: - 1 x GS-1-Car Outline
• From charisma: - 1 x GS-1-Charisma
From machine memory:
• From white cardstock: - 1 x 140mm square - 1 x 75mm x 20mm rectangle (with sentiment draw file)
• From black cardstock: - 1 x 130mm x 60mm rectangle - 1 x 90mm x 35mm rectangle

• From backing paper: - 1 x 125mm x 55mm rectangle (car tracks)


• From silver mirror cardstock: - 1 x 85mm x 30mm rectangle
• From grey cardstock: - 1 x 80mm x 25mm rectangle
2
Score and fold the white square in half, horizontally, to create a tent card. Mat the car outline onto the top-left corner of the card. Mat the car tracks rectangle onto the silver mirror rectangle, and onto the large black rectangle. Mat onto the card. 3 Mat the sentiment rectangle onto the grey rectangle. Mat the small white rectangle onto the small black rectangle. Mat together with foam tape, and mat onto the card with foam tape. 4
Trim the charisma-cuts, as shown. 5
Build up the decoupage of the charisma-cuts, and mat together with foam tape. Mat onto the card with foam tape.

From SVG downloads:
• From red cardstock: - 1 x GS-2-Card Mat 1
• From blue cardstock: - 1 x GS-2-Card Mat 2

• From white cardstock: - 1 x GS-2-Banner (with sentiment draw file)
• From charisma: - 1 x GS-2-Charisma
From machine memory:
• From white cardstock: - 1 x 144mm circle - 1 x 120mm circle - 1 x 106mm circle - 1 x 92mm circle - 1 x 87mm circle


• From red cardstock: - 1 x 116mm circle
• From blue paper: - 1 x 101mm circle
On the large white circle, score and fold in half, horizontally, to create a tent card. Mat the blue card mat 2 onto the red card mat 1, and mat onto the card.


Mat the red circle onto the 120mm white circle and mat onto the card. Mat the blue circle onto the 106mm white circle and mat onto the card with foam tape.
Ink the 87mm white circle, and mat onto the 92mm circle, Mat onto the card with foam tape. 5


Trim the charisma-cuts, as shown in the image. 6
Build up the decoupage of the charisma-cuts, and mat together with foam tape. Mat onto the card with foam tape. Mat the banner onto the card with foam tape.
Cut all the pieces needed to create the project as listed below; Step bySteps


1
Cut all the pieces needed to create the project as listed below;

From SVG downloads:
• From charisma:
- 1 x GS-3-Charisma
From machine memory:
• From black cardstock:

- 1 x 280mm x 140mm rectangle
- 1 x 280mm x 50mm rectangle
- 2 x 50mm x 25mm rectangle
• From silver mirror cardstock:



- 1 x 135mm square
- 2 x 65mm x 135mm rectangle
- 1 x 135mm x 45mm rectangle
- 2 x 65mm x 45mm rectangle
- 2 x 45mm x 20mm rectangle
• From backing paper:
- 1 x 130mm square (tyre tracks)
- 2 x 60mm x 130mm rectangle (tyre tracks)
- 1 x 130mm x 40mm rectangle (tyre tracks)
- 2 x 60mm x 45mm rectangle (tyre tracks)
• From white cardstock: - 2 x 40mm x 15mm rectangle (with sentiment draw file) 2
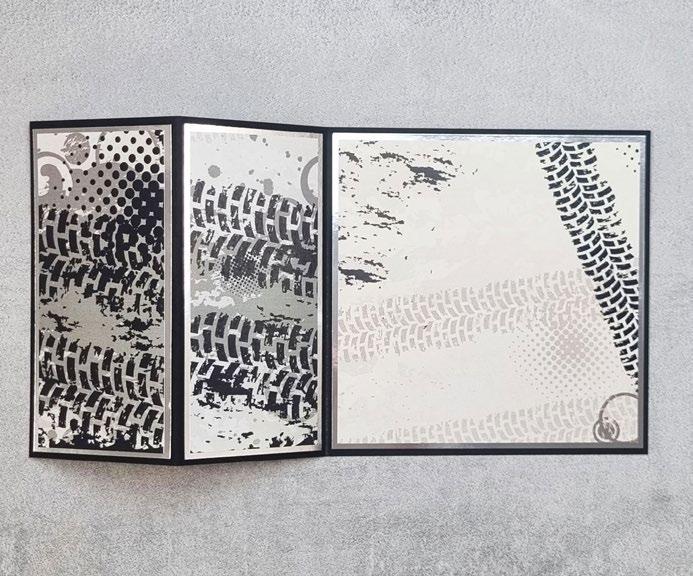
Score and fold the large black rectangle in half, vertically, to create the card. Score and fold the card front in half, vertically, to create a Z-fold card. Mat the tyre tracks square onto the silver square, and mat onto the right side of the card.

Mat the two 60mm width tyre tracks rectangles onto the two 65mm width silver rectangles, and mat onto the two folded panels of the left side of the card.

On the 280mm x 50mm width rectangle, from the right edge, measure in at 70mm and 140mm, and score and fold. 5
Mat the 130mm width tyre tracks rectangle onto the 135mm width silver rectangle. Mat the two 60mm width tyre tracks rectangles onto the two 65mm width silver rectangles. Mat onto the folded panels of the folded rectangle.
Mat the folded rectangle onto the card by attaching the right panel to the right-side of the card, and the left panel to the left-side of the card.
Mat the sentiment rectangles onto the small silver rectangles, then onto the small black rectangles. Mat onto the card, as shown.
8
Mat two of the car charismacuts onto the left side of the card, matting the top one with foam tape. Mat the remaining charismacut onto the right-side of the card with foam tape.


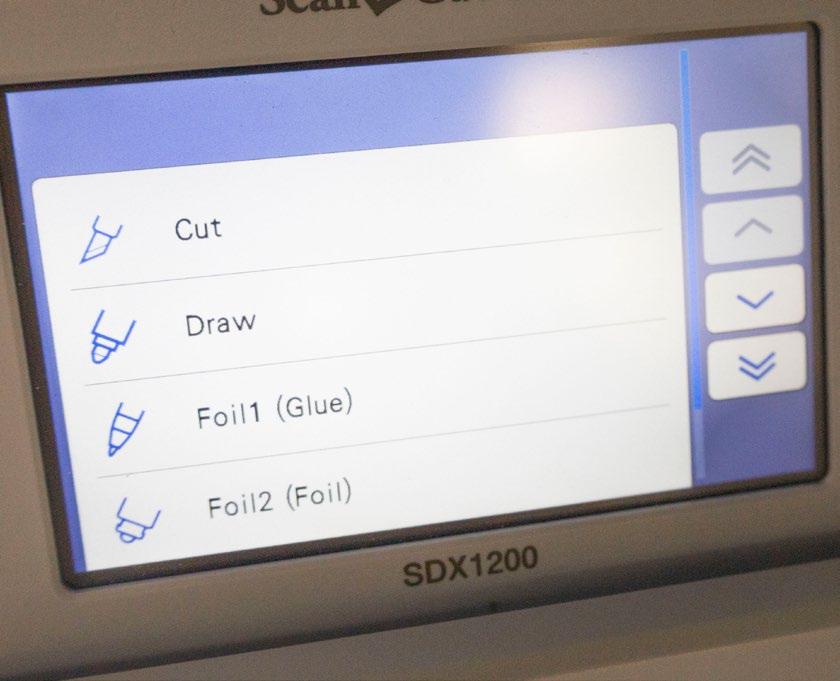
Before you start to using the glue pen with your machine, you need to activate the glue pen setting. Go into the settings on your machine. Search for Premium Settings, turn ON the Foil Options. Go into the Foil Settings and if you are using a new pen, they should read as follows. Place the glue pen into the universal pen holder and place in your machine.
Open your chosen sentiment and banner file onto the machine.


Place the sentiment in the middle of the banner. You may need to zoom in to make sure it is in the centre.
Press Select All, and select Group.
Go into Object Edit, select Group again.
Press the Scale button and change the height to 85%.


Press the Group button again to ungroup the files and press OK. Save the file to the machine.
Delete the banner from the mat.
Press Draw and select Foil 1 (Glue). 10
If you are using an old pen, change the scale on the pen to wherever the glue comes up to on your pen.
Draw the sentiment. Make sure you leave the glue to turn clear before placing the foil on.


Place the foil onto the glue and rub over the sentiment.

Peel off the foil to reveal the sentiment.
Open up the saved file back onto the machine.


Delete the sentiment so you are left with just the banner file. 16
Cut the banner from the foiled sentiment.
The die versions of the Carpe Diem cards use a foiled sentiment kit. The sentiments are too small to draw with the glue and foil for those particular projects, but you can scale them up and use them in other projects.

The team over at Tattered Lace HQ have given me a page to keep you up to date with me and my crafty antics. So keep an eye out and I’ll be here for a general chit chat, to answer any questions you might have or to share any projects with you that I’ve been working on!


Hi Crafters, Hope you are all doing well. I've been enjoying attending some baby classes with Noah recently. They've been so much fun! I'm so happy I am able to go along and join in with these activities with him and Cat. He's growing up so fast, I'm cherishing every moment! We recently took Jazbo over to the coast. Was very nice enjoying some walks on the beach in the wintery sun. I love walking, especially along the coast looking out at the sea, it's so peaceful!

• 35-02-Nancy’s Projects
SVG files
1
• White cardstock
• Black cardstock
Cut all the pieces needed to create the project as listed below;
From SVG downloads:
• From black cardstock:
- 1 x NP-2-Frame - 1 x NP-2-Sentiment
From charisma: - 1 x NP-2-Charisma
From machine memory:
From white cardstock: - 2 x 150mm square
From black cardstock: - 1 x 145mm square
From backing paper: - 1 x 100mm square (pink florals)
On one of the white squares, measure in 10mm from the left edge, and score and fold to create a tab. Attach to the other white square to create a card. Mat the black square onto the card.
Mat the floral square onto the middle of the card. Mat the black frame onto the card with foam tape.
Mat two sets of two corner charisma-cuts together, and two sets of three corner charismacuts together with foam tape. Mat these onto the corners of the black frame. Add the rest of the decoupage-cuts to the corners and around the rest of the frame, as shown. Mat the sentiment inside the frame.
• 36-03-Nancy’s Projects SVG files
• White cardstock
• Black cardstock
Cut all the pieces needed to create the project as listed below;
From SVG downloads:
• From black cardstock: - 1 x NP-3-Sentiment
• From backing paper: - 1 x NP-3-Oval Mat (pink florals)
• From charisma: - 1 x NP-3-Charisma
From machine memory:
• From white cardstock: - 2 x 150mm x 145mm rectangle
From black cardstock: - 1 x 145mm x 140mm rectangle - 1 x 62mm x 102mm oval
• From backing paper: - 1 x 140mm x 135mm rectangle (pink florals)
On one of the white rectangles, measure down 10mm from the top edge, and score and fold to create a tab. Attach to the other white rectangle to create a tent card. Mat the florals rectangle onto the black rectangle, and mat onto the card with foam tape.
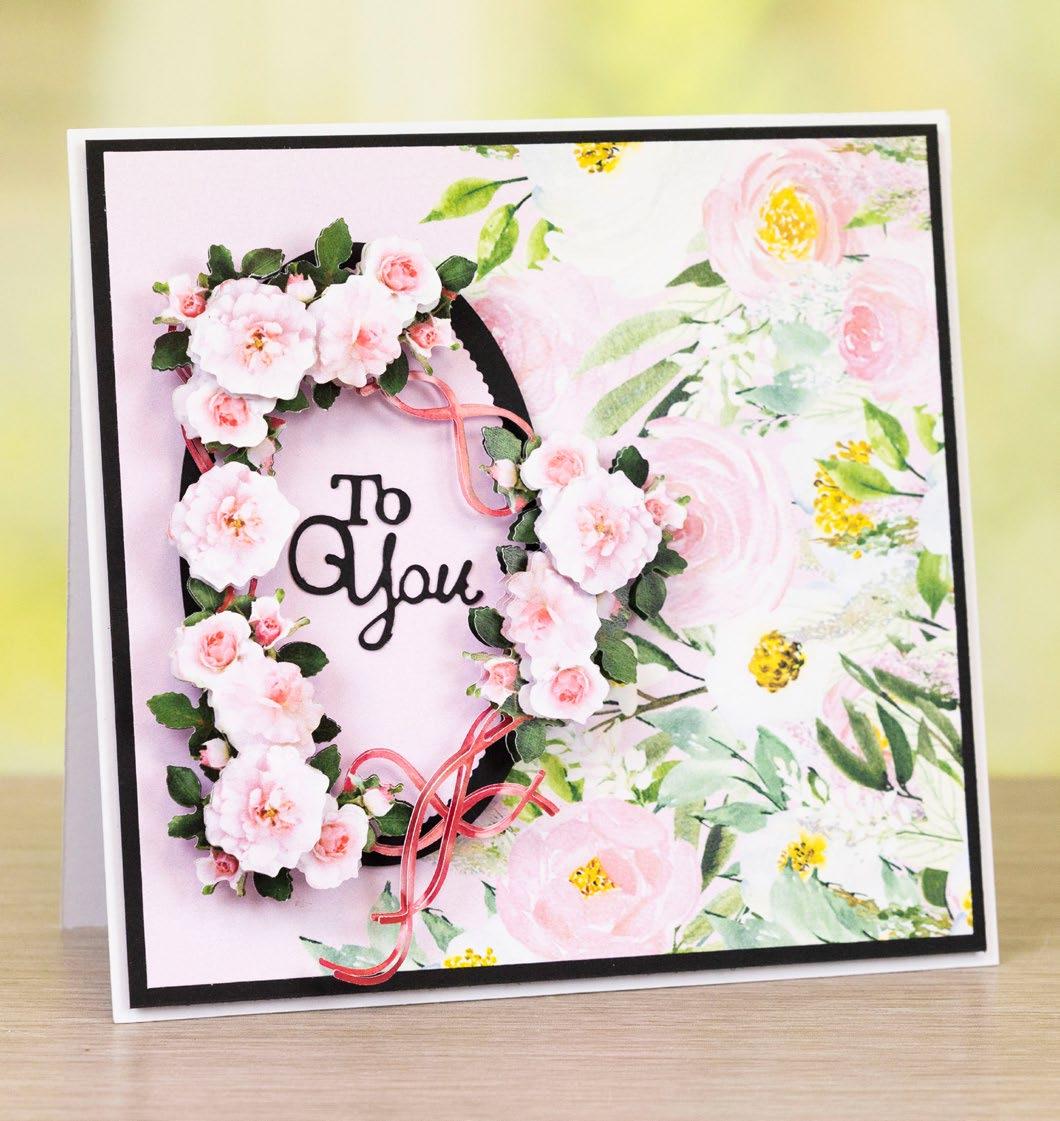

Mat the pink florals oval mat onto the black oval, and mat onto the card with foam tape. Mat the sentiment onto the ovals. 4
Mat two sets of two corner charisma-cuts together with foam tape, and trim the ribbons off the other two. Build up the decoupage onto the corners with foam tape, and mat onto the card. Add any of the remaining cuts to the card with foam tape as shown.


