
HOME IMPROVEMENT ANDREPAIRS TM PERGOLAS: DIY VS. PRO ¢ ¢ ¢ ¢ ISSUE #19 SEPT/OCT 2022 HomeImprovementAndRepairs.comU.S. $7.95 CAN $9.95 INSIDE INTERIOR DESIGN TIPS THAT ADD VALUE TO YOUR HOME 15 HOT PRODUCTS FOR HOME IMPROVEMENT PAINTING KITCHEN CABINETS TLC FOR LAWNS IN THE FALL




LETTER FROM MATT WEBER
START SMART
TOOL TECH
32 PAINTING KITCHEN CABINETS
TLC FOR LAWNS IN THE FALL

IN
INSIDE: LEVEL 1 EVEN FIRST-TIMERS CAN PULL THIS OFF LEVEL 2 WITH THE RIGHT TOOLS AND A LITTLE RESEARCH, YOU CAN DO THE JOB LEVEL 3 THESE CHALLENGING PROJECTS ARE FOR EXPERIENCED DIY’ERS LEVEL 4 DUE TO THE SIZE OF THE JOB, THE EQUIPMENT OR SPECIAL SKILLS REQUIRED, IT’S BEST TO CALL A PRO SKILL LEVEL 2 MODERATE SKILL LEVEL 3 HARD SKILL LEVEL 1 EASY SKILL LEVEL 4 PRO KNOW YOUR SKILL LEVEL: PERGOLA CONSTRUCTION 101 1624 32 24 COVER FEATURE 04 Home Improvement and Repairs | The Fall Issue 42 06
08
• INTERIOR DESIGN TIPS THAT ADD VALUE TO YOUR HOME • WHAT MILLENNIALS WANT IN A HOME • INFLATION REDUCTION ACT INCLUDES SOLAR TAX CREDIT • NEW OPTIONS IN SOLAR PANELS • FLOODS ARE HITTING HOMES HARD • ASK MATT 16
15 HOT PRODUCTS FOR HOME IMPROVEMENT
HOW TO PAINT POLY-COATED CABINETS LIKE THE PROS 42
LAWN MAINTENANCE
AUTUMN WILL PAY OFF IN THE SPRING

It’s a shame that calamity and devastation can put life into perspective more than anything else. This thought occurred to me while reading news coverage of Hurricane Ian. I’m writing this “editor’s letter” right after the monster storm ravaged across Florida, then swept into the Atlantic Ocean, and is now heading straight for South Carolina with “hurricane
LETTER
 FROM MATT WEBER
is still being assessed, and the death toll is climbing, but there’s no doubt that it will take billions of dollars and years for Florida to rebuild.
When you see such hardship befall others, it tends to put minor personal matters in a different light. When your neighbor’s roof blows away, suddenly that squeak in your floorboards doesn’t seem as annoying. My house needs to
feel sorry for them and count your blessings. You can act on those feelings by contributing to the forthcoming rebuilding efforts via a reputable charity. Right now, my big-hearted mom is pack ing up to travel with her team of American Red Cross volunteers to aid in Florida’s relief efforts. That’s a great place to send donations to help the cause; visit https://www.redcross.org.
MY HOUSE NEEDS TO BE PAINTED, BUT AT LEAST IT ISN’T FLOATING IN PIECES IN THE GULF OF MEXICO
conditions” and a “life-threatening storm surge” expected.

Ian brought record-breaking storm surge highs for Key West, Fort Myers, and Naples several feet above previous high-water marks, causing catastrophic flooding as it crossed over eastcentral Florida. The shocking images and story coverage will make your heart sink, with so many homes consumed by floods or washed into the bays. Damage
be painted, but at least it isn’t floating in pieces in the Gulf of Mexico. In fact, I live in Alabama and postponed a trip down south to visit my parents due to the risk of this very storm. It was only because of finicky weather pat terns and dumb luck that it didn’t nudge westward and hammer their place near the Alabama coast.
A near-miss that spares you and hits someone else can make you
And keep the storm victims in mind as you slog through some of the more mundane or aggravating chores around your house this fall. Compared to some, you’ve got it really good.
06 Home Improvement and Repairs | The Fall Issue
PINE MOUNTAIN MEDIA GROUP LLC Home Improvement & Repairs is published by Pine Mountain Media Group LLC, 130 Inverness Plaza, Suite 226, Birmingham, AL 35242. All rights reserved. Neither this publication nor any part of it may be reproduced, stored in a retrieval system, or transmitted in any form or by any means, electronic, mechanical, photocopying, recording, or otherwise, without permission. The editorial content is intended to explain and simplify home-improvement tasks. Tools, products, materials, techniques, building codes and local regulations change. We assume no liability for omissions, errors or the outcome of any project. The reader must always exercise reasonable caution, follow current codes and regulations that may apply, and is urged to consult with a licensed professional if in doubt about any procedures. PUBLISHER JEREMY HOLLINGSWORTH jeremy@HIRpub.com EDITOR-IN-CHIEF MATT WEBER matt@HIRpub.com CREATIVE DIRECTOR WESLEY GLASSCO wesley@HIRpub.com ADVISORY BOARD JIM BUTTERS RANDY STEPHENSEN DUSTIN SCHWAIGER RICHARD HAMILTON EDITORIAL CONTRIBUTERS CARTER SWIFT TOM MATTHEWS COPY EDITOR DIANE WEBER AD DESIGN/COORDINATION SPECIALIZED MEDIA SERVICES, INC. ads@HIRpub.com PRODUCTION MANAGER SHANNA QUIGLEY ONLINE/SOCIAL MEDIA DEVELOPMENT GLORIA BERRIO

INTERIOR DESIGN TIPS THAT ADD VALUE TO YOUR HOME
People looking to sell their homes are searching for small changes they can make to increase the price, with searches for “what will increase the value of my home” shooting up by 200% over the past 12 months. Whether you’ve just bought a house or you’re looking to improve the one you’ve been living in for years to help sell, the experts from MyBespokeRoom.com have put together a list of six things you can do to make your house look amazing.
PICK THE IDEAL WALL PAINT
When it comes to walls there are a few points to consider. Bright colors such as red, orange, yellow, and purple are less popular amongst homeowners. Sticking with neutral colors or green and blue tones can, however, increase a potential buyer’s likeliness to fall in love with the property.
WALL PANELING
Wall paneling has recently become popular, with searches for ‘full wall paneling ideas’ increasing by

+80% in the last 12 months. Timber paneling can add a “wow factor” to certain properties, especially period properties. Half-height, full-height, or painted wall paneling can add interesting detail to rooms, like hall ways and bedrooms. Well-made paneling adds a more high-end feeling to a property and can make it appear more expensive.
THE RIGHT FLOORING CHOICE
Pick between hardwood or tiles, or even high-quality vinyl flooring which is often hard to distinguish from wood or tiles. If your home has carpets with stains or wear and tear, it’s a good idea to replace these to fresh en up the space and add extra value to your house.
INSTALLING SMART FEATURES
The number of smart homes is expected to rise to 478.2 million by 2025. As more homeowners move toward smarter homes, installing features such as smart lighting or a smart tap in your kitchen can raise your home’s value. They also make homes more convenient
08 Home Improvement and Repairs | The Fall Issue STARTSMART
for the current homeowners. However, it is important to remember that such technology can become outdated fast.

SHOWER, BATH, OR BOTH?
Not having a bath will not necessarily devalue your home, however, installing a bath can make it more attrac tive to families with younger children. Many homeowners prefer a larger walk-in shower, but the option of being able to have a relaxing bath can be tempting too.
If you have the option, then having both can be an ideal solution.
BESPOKE FURNITURE
When it comes to choosing furniture for your home, custom-made storage solutions can add value, specifical ly built-in wardrobes, or coat and shoe storage cup boards. They’re also a great way to make use of dead space, such as under the stairs.
In the kitchen, a bespoke dining bench seat or window seats are a great way to utilize smaller areas, as these can also be used as additional storage. A good choice of kitchen cabinets, worktop, kitchen island, and tiles will also add value.
However, one thing to remember is that large pieces of furniture or too many items can make a room feel cluttered and potential buyers may feel put off.
WHAT MILLENNIALS
IN A
According to the National Association of Home Builders (NAHB), 36 percent of millennials’ preferences have changed due to the pandemic. So, what exactly are Millennials looking for in a home? Here are the top 10 most wanted features below.
1. Laundry Room
2.
Flooring on Main Level
space for eating in the kitchen
10. Double Kitchen Sink
>
WANT
HOME
Hardwood
3. Exterior Lighting 4. Ceiling Fan 5. Patio 6. Walk-In Pantry 7. Front Porch 8. Table
9. Dining Room
Read our magazine online at HomeImprovementAndRepairs.com 09
INFLATION REDUCTION ACT INCLUDES SOLAR TAX CREDIT
After passage of the legislation, the Inflation Reduction Act includes a new Solar Tax Credit. This means you can subtract 30 percent of the cost of installing solar heat ing, electricity generation, and other solar home products from your federal taxes. The credit is sceheduled to last through the end of 2032. No dollar limit is placed on the expenses, meaning you’re entitled to the 30 percent tax break whether you spend $20,000 or more than $80,000 on costs associated with a residential solar sys tem. Eligible expenses for the tax credit include:
• Solar photovoltaic (PV) panels.
• PV cells used to power an attic fan (but not the fan itself).
• Contractor labor for onsite preparation, assembly, or original installation.

• Permitting fees, inspection costs, and developer fees.
• All equipment needed to get the solar system running, including wiring, inverters, and mounting equipment.
• Storage batteries. (You can claim the tax credit for these even if you buy and install them a year or more after you install the solar system.)
• Associated sales taxes.
— Source: www.energy.gov
NEW OPTIONS IN SOLAR PANELS
After investing in the home of their dreams, many homeowners cringe at the thought of seeing large, bulky solar panels on the roof, yet there haven’t been many options without undergoing a full roof replacement. In response, Sunflare has created the PowerFit 20 peel-and-stick solar pan els that are light, thin, flexible and nearly invisible from the ground when installed on a standing seam metal
roof. The new PowerFit 20 lies flat and nests in between the ridges of your standing seam roof. Sunflare panels produce more energy and are more storm- and damage-resistant than traditional silicon panels, which can be cracked by hail or damaged in extreme heat or cold. Sunflare guar antees the reliability of the PowerFit panels for 25 years. Learn more at www.sunflaresolar.com.

STARTSMART 10 Home Improvement and Repairs | The Fall Issue










3X FASTER DECK INSTALL USING OUR ELIMINATOR RCSTM PNEUMATIC TOOL! 30 YEAR TRANSFERABLE WARRANTY THE BEST IN THE BIZ PERFECT FOR USE IN MOST MAJOR COMPOSITE DECK BRANDS ANOTHER INNOVATIVE PRODUCT FROM SURE DRIVE USA® SUREDRIVE.COM CHOOSE COATED CARBON OR STAINLESS STEEL • HIGH STRENGTH COATED CARBON STEEL FOR ENDURANCE • STAINLESS STEEL FOR SUPERIOR CORROSION RESISTANCE 4 CLIP PROFILES • PRECISE FIT ELIMINATES LOOSE DECK BOARDS • INCREASES HOLDING POWER ELEVATES YOUR DECK BOARDS • BETTER AIR FLOW REDUCES ROT • RELIEVES LATERAL LOAD STRESS
FLOODS ARE HITTING HOMES HARD
Recent surveys from home insurance group Hippo found that less than half of homebuyers consider the location of floodplains when purchasing their home, yet flood risk is one of the fastest growing risks for homes in certain areas of the country. According to the report, one in three homeown ers have experienced damage due to severe weather or climate-related issues. But only two in five have made updates to their home to protect against such climaterelated damage.
If you’re concerned about your home, you can check with FEMA to determine if you’re in a highrisk area for flooding by entering your address at https://msc.fema.gov/portal/home. Check your homeowner’s insurance to see what perils your policy covers. If it doesn’t cover flood damage, consider adding it to your coverage, especially if you live in a flood plain.
Homeowners can also take a number proactive steps 8 to 24 hours before a flood:
• Use duct tape to secure water-resistant barriers around the home and to seal off electrical components.
• Apply expanding foam to gaps and cracks around doors.
• Stock up on sandbags, and use the pyramid place ment method to form a barrier with them in the shape of a pyramid.
• Clean your gutters so they drain water rather than spill it over due to clogs from accumulated leaves and debris.
• Install downspout extensions that direct water downhill and away from the house foundation
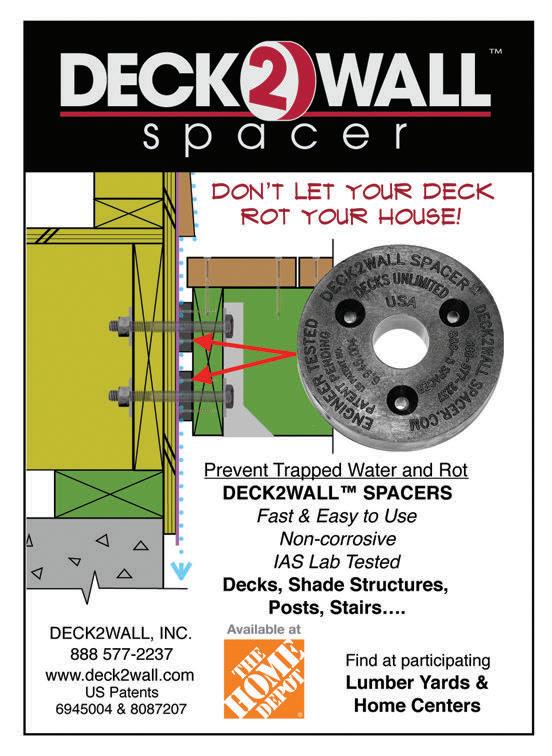

• Clean all ground-level drain inlets. Straw, leaves, grass, twigs and silt call all close them off, if the drain is not maintained.
• Caulk around the exteriors of windows and doors.
• Raise your appliances a few inches off the ground if possible or duct-tape their doors to seal them shut.
– Source: www.Hippo.com
12 Home Improvement and Repairs | The Fall Issue STARTSMART

QUESTION: My neighbor recommended that I get a check valve installed in my house plumbing. What does a check valve do?


ANSWER: A check valve, also called a non-return valve, is a small device installed in your pipes to make sure water flows only in one direction. When a flood occurs, sewers can overfill, pushing water back through your plumb ing system. Installing the check valve lets water pass through your pipes as it was meant to do, but prevents it from flowing back up the pipes to a toilet or sink.
QUESTION: Is there a way to extend the life of a water heater tank?


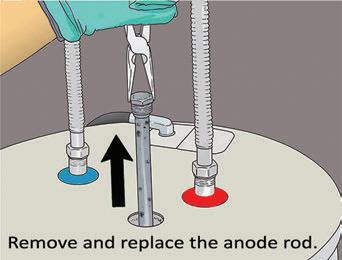
ANSWER: Manufacturers take two approaches to extending the life of a steel water-heater tank. The baked-on porcelain tank lining is the first line of defense. A sacrificial anode rod, often made of magnesium, is the second line of defense, and many homeowners don’t realize that this anode can be replaced to extend the life of the tank. The rods are typically less than an inch thick, about 42 inches long, and are usually threaded into the top of the tank. As long as the anode rod is degrading in the tank, the tank lining will be protected from rusting. This is accomplished through a process called electrolysis, by which the met als in the anode rod attract ions that normally cause rust in iron and steel.

These ions are what cause the anode rod to degrade over time. Eventually, the anode rod will degrade to the point where it can no longer attract the ions that cause rust. At that point, the rod will need to be replaced in order to maintain protection for the tank. Replacement anodes are avail able for purchase, and some are sold as flexible rods for easy installation.
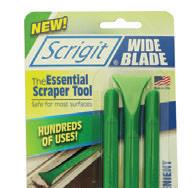

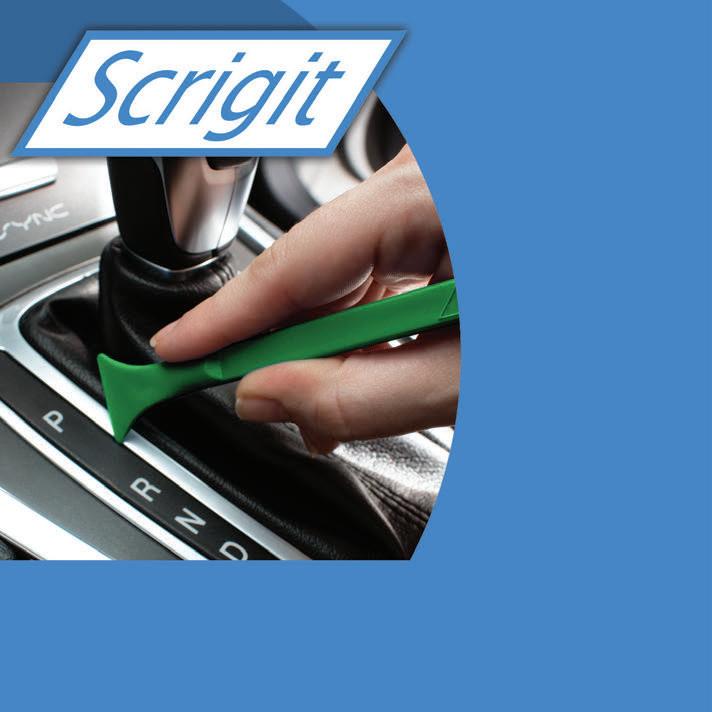
Need more info? Visit Matt’s blog at HomeImprovementAndRepairs.com. STARTSMART < ASK MATT H 14 Home Improvement and Repairs | The Fall Issue Available in original 2-packs, 5-packs and new wide blade 3-packs Effort When Cleaning Small Surfaces, Edges & Grooves! ORIGINAL MODEL AND NEW WIDE BLADE FEATURES: ROUNDED TIPS—BETTER SCRAPER THAN A FINGERNAIL FLAT-EDGED TIPS—WON’T SCRATCH LIKE A SCREWDRIVER POINTED TIPS—BETTER THAN A TOOTHPICK FOR CLEANING GROOVES AND CORNERS ! YOUR FAVORITE NON-SCRATCH SCRAPER TOOL JUST GOT Remove stickers, tape,caulk, putty, grime & more! Find us at www.scrigit-scraper.com, local hardware stores, and Amazon! ®

TOOL
RIDGID 18V SUBCOMPACT BRUSHLESS LINE
The new generation of 18V SubCompact tools from Ridgid is equipped with the most advanced brushless motor technology.
• The new R87012K 18V SubCompact Brushless 1/2-in. Drill/Driver is 15 percent more compact and 25 percent lighter weight compared to the 18V Brushless R86114 1/2-in. Drill/Driver.
• The R872311K 18V SubCompact Brushless 4-Mode Impact Driver features three speeds and a self-tapping mode, and it’s 25 percent more compact and 30 percent lighter than its larger counterpart.
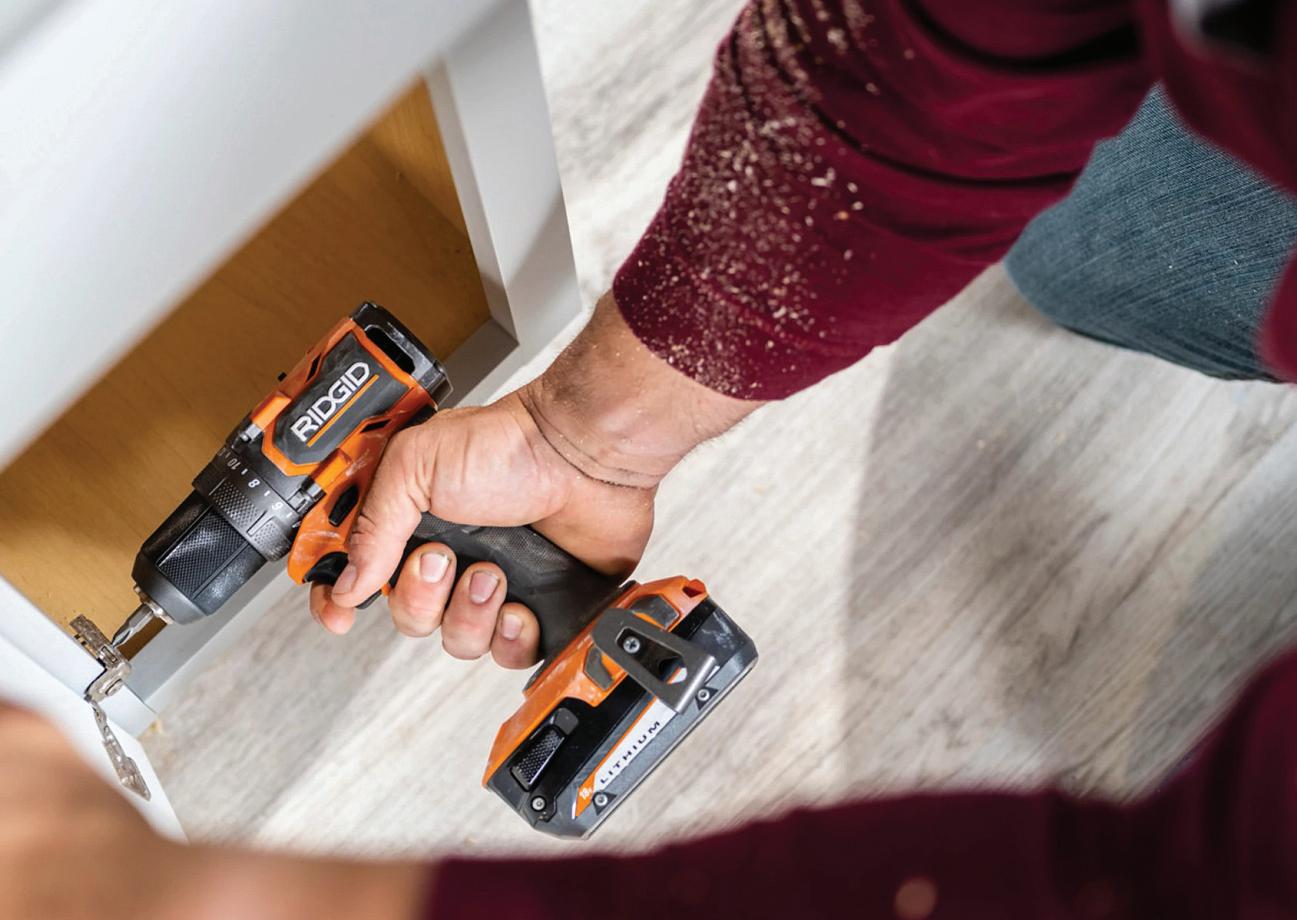
• The SubCompact Brushless 1/2-in. Hammer Drill/Driver delivers 500 in.-lbs. of torque and is 25 percent lighter than Ridgid’s R86115 model.
FROM NEW POWER TOOLS AND CAR CHARGERS TO BUILDING SUPPLIES AND WATER SYSTEMS, WE’VE GOT YOU COVERED.

The tools are compatible with all Ridgid 18V batteries, and the kits are eligible for the Industry’s Best Lifetime Service Agreement. Register within 90 days of purchase for free batteries, free parts, free service for life. Visit www.HomeDepot.com.
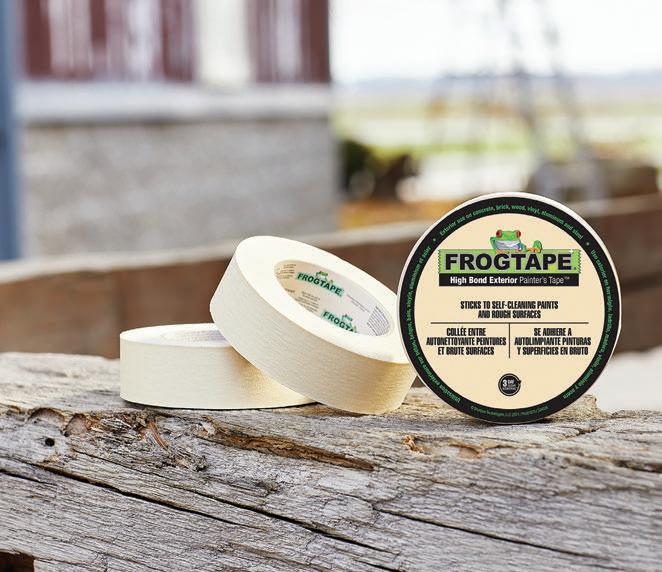
FROGTAPE HIGH BOND EXTERIOR PAINTER’S TAPE
Known for its industry-leading painter’s tapes, FrogTape brand introduces High Bond Exterior Painter’s Tape to its portfolio of paint solutions. Engineered to consistently adhere to difficult surfaces such as self-cleaning paints and rough textures, including stucco, brick and concrete, FrogTape High Bond Exterior Painter’s Tape is ideal for outdoor projects that require a strong, conformable tape that offers clean removal without shredding. Not only does it stick to difficult, uneven substrates, but it also adheres well to painted wood, aluminum, steel
16 Home Improvement and Repairs | The Fall Issue
TECH 15 HOT PRODUCTS

TOOL TECH
and vinyl. Plus, its crepe paper backing allows it to conform easily to bends and turns, making a quick task of masking around exterior doorways and windows. This unique, time-saving flexibility makes High Bond Exterior Painter’s Tape an ideal toolbox staple for painting contractors. Visit FrogTape.com/HighBond.
AMERICOVER PRO CRAWL ANTI-MOLD VAPOR BARRIER
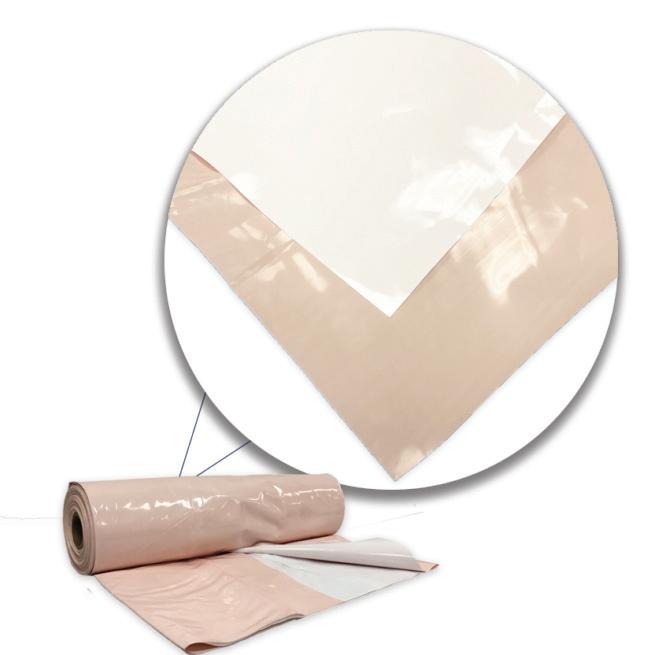
Americover’s new Pro Crawl Anti-Mold Vapor Barrier embedded with Mold Prevention Technology (MPT) is a high-performance vapor barrier that began with the Original Pro Crawl Barrier designed to reduce vapor transmission in the crawl space. Up to 70 percent of homes and buildings have mold, and it can be found almost anywhere. Over time, mold can cause serious health issues like asthma, acute bronchitis and allergic rhinitis, especially in children and those with health concerns.
Americover’s Pro Crawl Anti-Mold Vapor Barrier passes ASTM G21 mold resistance standards to prevent the growth and spread of toxic mold and mildew. Mold Prevention Technology doesn’t expire, so the vapor barrier will continue protecting the crawl space years after installa tion. Americover’s 10-mil Pro Crawl Anti-Mold Vapor Barrier also passes ASTM 1745 Class A, B & C and is a Class I vapor retarder with a permeance rating of .022, which reduces more vapor transmission than the leading competitor’s 10 mil vapor barrier. Visit www.Americover.com.
LECTRON EV CHARGERS
AT HOME DEPOT
Lectron charging accessories for Electric Vehicles (EVs) are now available at Home Depot. Each option is made to provide a fast-charging, high-quality option for electric vehicles made more accessible than ever for the average con sumer. The 240-Volt 40 Amp Level 2 EV Charger (MSRP $330) surpasses your standard factoryissued charger, cutting total charge time by 7.5
18 Home Improvement and Repairs | The Fall Issue
times. It features an LED display which notifies you of any charging faults, and an extra-long 18 feet of cable to better ensure reachability. The J1772 charging protocol of the 110-Volt 16 Amp Level 1 EV Charger(MSRP $200) allows it to charge almost all electric cars and plug-in hybrid vehicles. It provides the users with shock protection and safety while charging in wet conditions. It is perfect for users that own more than one electric vehicle or buildings with docks for EV charging. Learn about all the Lectron EV charging options at https://ev-lectron.com.

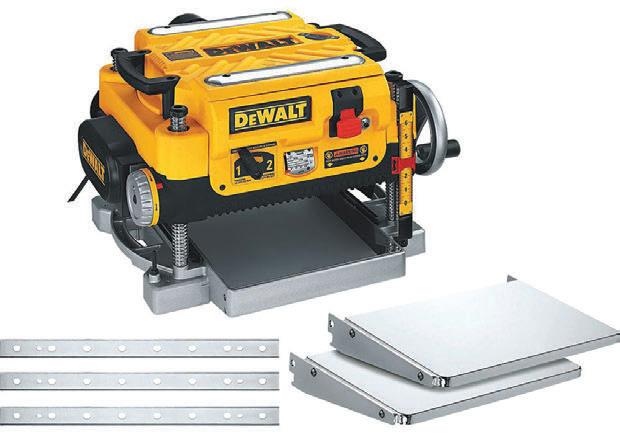
DEWALT DW735X 13'' 2-SPEED PLANER
The DeWalt DW735X planer has become indispensable for the HIR crew. We use it to plane boards for all manner of wood projects, including table tops, window shutters, barn doors and more. With a powerful 15-amp, 20,000-rpm motor (10,000-rpm cutterhead speed) the DW735X can easily handle large cuts in wide material. The planer features a three-knife cutter designed to deliver 30 percent longer life and make blade changes faster and easier. The two-speed gear box allows users to change the feed speed to optimize cuts per inch at 96 or 179 CPI, for whether you’re dimensioning boards or finishing smooth. A fan-assisted chip-ejection system vacuums the chips off the cutter-head and exhausts them through an outlet port, which you can connect to a dust collector. Plus, the 19-3/4-in. cast aluminum base is twice as rigid as a standard 10-in. base.

Read our magazine online at HomeImprovementAndRepairs.com 19 >15 HOT PRODUCTS
TOOL TECH
The DeWalt DW735X includes infeed and out feed tables and an extra set of knives. Highly recommended for woodworkers. Visit www.dewalt.com.
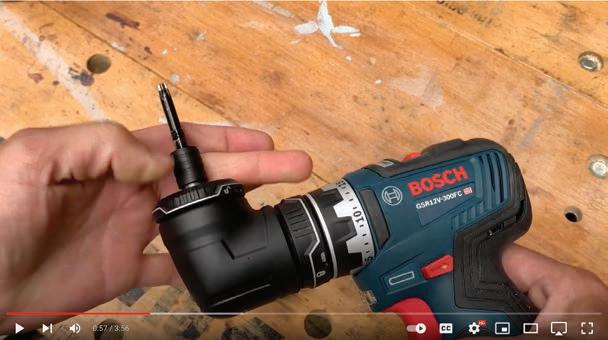
THREE INNOVATIVE CORDLESS TOOLS FROM BOSCH
This quick video review covers three new releases from Bosch Power Tools:
MILWAUKEE M12 LASER
The new Milwaukee M12 Green Cross Line & 4-Points Laser is engineered to offer users the brightest green beams, all-day runtime, and easier setup.When paired with an M12 RedLithium CP 3.0 Battery, users get at least nine hours of continuous runtime for ultimate productivity. The high-intensity green laser offers superior visibility for long-range applica tions up to 125 feet.The vertical and horizontal lines allow for easier alignment and leveling applications, while the plumb points help with floor-to-ceiling point transfer. The horizontal dots squaring points give users the option for

• The Chameleon, a modular multi-angle 12V drill/driver with interchangeable tool heads;
• The Freak, an 18V impact driver/impact wrench combo with a brushless motor;
• The 18V Oscillating Multi-tool (AKA a “buzz cutter”) with a brushless motor and the easiest blade-change interface we’ve seen yet.
quick and accurate squaring alignment. The M12 Laser is fitted with amplified rare earth magnets, providing a secure hold and ensuring it won’t slide on steel studs. It is impact-rated for drops up to one meter, and the IP54 rating helps protect it from harsh jobsite conditions. Visit www.milwaukeetool.com.
DREMEL ELECTRIC SCISSORS
Dremel released its new Electric Scissors to help DIY’ers tackle a range of cutting needs around the house and for crafting, too. The HIR team got our hands on a test sample, and the scissors are an ideal tool for making short work of pesky clamshell packages. The scissors are powered by a 4V MAX rechargeable lithium-ion
20 Home Improvement and Repairs | The Fall Issue
battery and have ultra-sharp blades to cut easily through materials from cardboard to fabrics and hard plastics. With a slim tool body design, the electric scissors can be carried in a toolbox or pocket.The tool set comes with a USB charger to power up in only 90 minutes, and includes an extra-set of replaceable shears. The Dremel Electric Scissor kit is now available on Amazon.com and in-store and online at The Home Depot and Lowe’s.

RYOBI 18V ONE+ SWIFTCLEAN SPOT CLEANER
The new Ryobi SWIFTClean is ready for life’s everyday around-the-house spills and messes. This cordless spot cleaner delivers rapid stain removal with powerful suction for quick cleanups. The powered scrub brush agitates
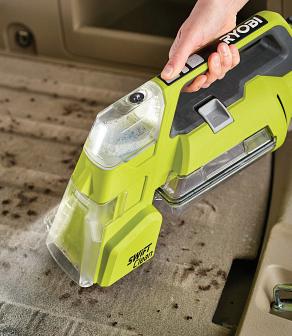
and lifts debris for effortless cleaning on uphol stery, car seats, stairs, carpets and more. The included 6-oz. Ryobi OXY Cleaning Solution is a ready-to-use formula, which means there’s no diluting, no mixing, and no hassle involved. The cordless portability and lightweight design make it perfect for cleaning on the go. All clear compo nents of the ONE+ SWIFTClean Spot Cleaner are top-rack dishwasher safe for easy tool mainte nance and cleaning.Visit www.ryobitools.com.
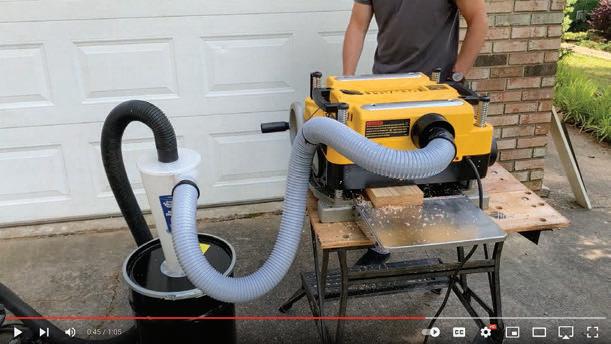
DUST DEPUTY 2.5 DELUXE CYCLONE SEPARATOR KIT
For the avid woodworker, the Dust Deputy’s new, larger cyclone design is optimized for
today’s larger wet/dry vacs to deliver up to twice the airflow of smaller cyclones and lid-style sep arators. It stops over 99 percent of fine dusts and bulk debris from clogging your vacuum’s fil ter, which eliminates suction loss while saving you time and money on expensive replace ments. The kit upgrades any make or model shop vacuum with 2.5-in. hose fittings. Check out our video spotlight.
Read our magazine online at HomeImprovementAndRepairs.com 21 >15 HOT PRODUCTS
TOOL
INSPIRE RAILING FROM FORTRESS BUILDING PRODUCTS
To provide DIY homeowners and residential contractors with an aluminum railing that is easy to order and install, Fortress Building Products’ Inspire Railing is offered in a readyto-assemble kit for a straightforward, no-fuss installation. Inspire Railing features twist-andlock balusters and pre-assembled stair panels. Pre-punched posts further support a quick install while guaranteeing consistency and quality along the perimeter of a deck. A durable, low-maintenance building material, aluminum won’t rot, warp, deteriorate or rust, which means Inspire Railing can resist the damaging effects of weathering. Offered in Black Sand and Brown, DIY homeowners and residential contractors can safely enclose a deck in a high-quality railing solution that melds style and function. The Fortress Lock powder-coated finish provides
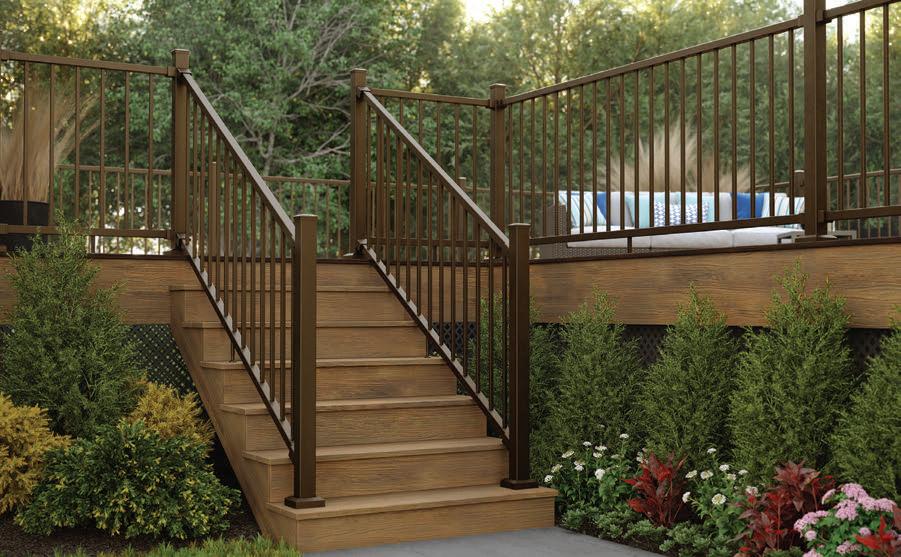
enhanced corrosion resistance and UV protec tion. Inspire Railing is backed by a limited lifetime manufacturer warranty for ultimate peace of mind. Visit www.fortressbp.com.
KNIPEX SNAP KNIFE WITH STABILIZER
Unlike other snap-style utility knives, the new 6-1/2-in. model from Knipex Tools features an innovative stabilization bar that keeps the blade from bending for quicker cutting. The handle features two separate thumb sliders; one to extend the blade and the other to extend the stabilization bar. The standard 18mm snap-off blades can be easily replaced without tools with just a push of the button. The lightweight magnesium housing has non-slip gripping sur faces, and two spare blades are stored in the handle. Visit www.knipex-tools.com.

TECH 22 Home Improvement and Repairs | The Fall Issue
AQUASENTIAL SMART REVERSE OSMOSIS DRINKING WATER SYSTEM

Water contamination can happen at any time and/or through a local municipality, an under ground well, or a homeowner’s own pipes. Water treatment solutions, such as reverse osmosis systems and specialty filters, reduce specific impurities that may be found in your water. Look for options that offer multiple stages of filtration, like the Culligan Aquasential Smart Reverse Osmosis (RO) Drinking Water System, which is marketed as the World’s Most Efficient RO Drinking Water System. With up to seven stages of filtration and 12 different filter options, it is certified to reduce 59 contaminants includ ing lead, arsenic, pharmaceuticals, volatile
its back with the heat port up, if needed. Three nozzles are included (round, curved, flat). The tool accepts both 18V and 18V/36V MultiVolt batteries from Metabo HPT (batteries and charger sold separately). Visit www.metabohpt.com.
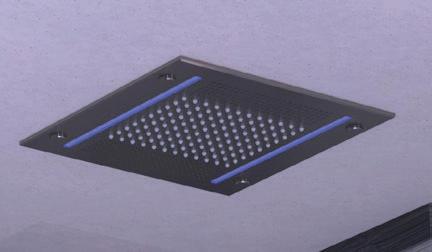
THERMASOL HYDROVIVE 14
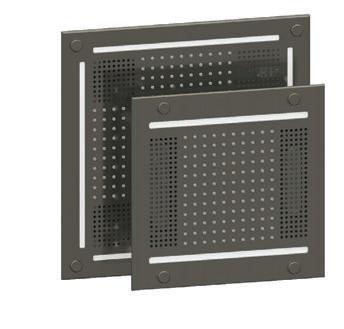
ThermaSol has introduced a new product to its family of steam and smart shower ing categories: a slightly smaller version of its HydroVive rainhead called "HydroVive 14.” HydroVive and the new HydroVive 14 both are designed to bring the multi-sensory powers of light, sound, and water under the user’s com plete control. Like the 18-in. version, HydroVive 14 has a clean, integrated look, and when paired with ThermaSol’s Smart Shower Valve
organic compounds (VOCs) and PFOA/PFOS, plus 15 emerging contaminants that may be in your water. The Aquasential Smart RO is also being offered for $9.95 per month for the first three months through October 15, 2022. Visit www.culligan.com.
METABO HPT 18V MULTIVOLT CORDLESS HEAT GUN
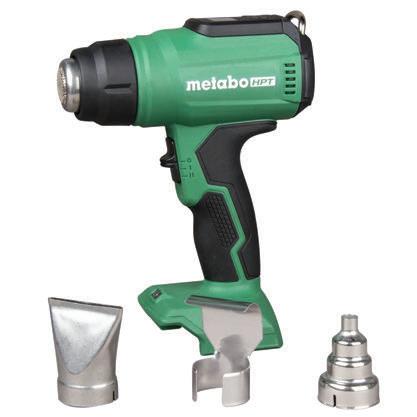
The Metabo HPT MultiVolt Heat Gun (RH18DAQ4) is packed with features, including an LCD backlit display that showcases selected temperature, fan setting and remaining battery charge. Temperature ranges from 86°F up to 1022°F and adjusts in 18°F increments for more control per the application. The gun is designed to be used hands-free by resting on
and ThermaTouch interface, anyone using the system can personalize every element of their shower. The HydroVive 14 delivers a gentle falling water sensation with 120 easy-clean neoprene jets, and the premium hi-fi sound settings include volume, treble, mid-range, and bass. Visit www.thermasol.com.
Read our magazine online at HomeImprovementAndRepairs.com 23 >15 HOT PRODUCTS H
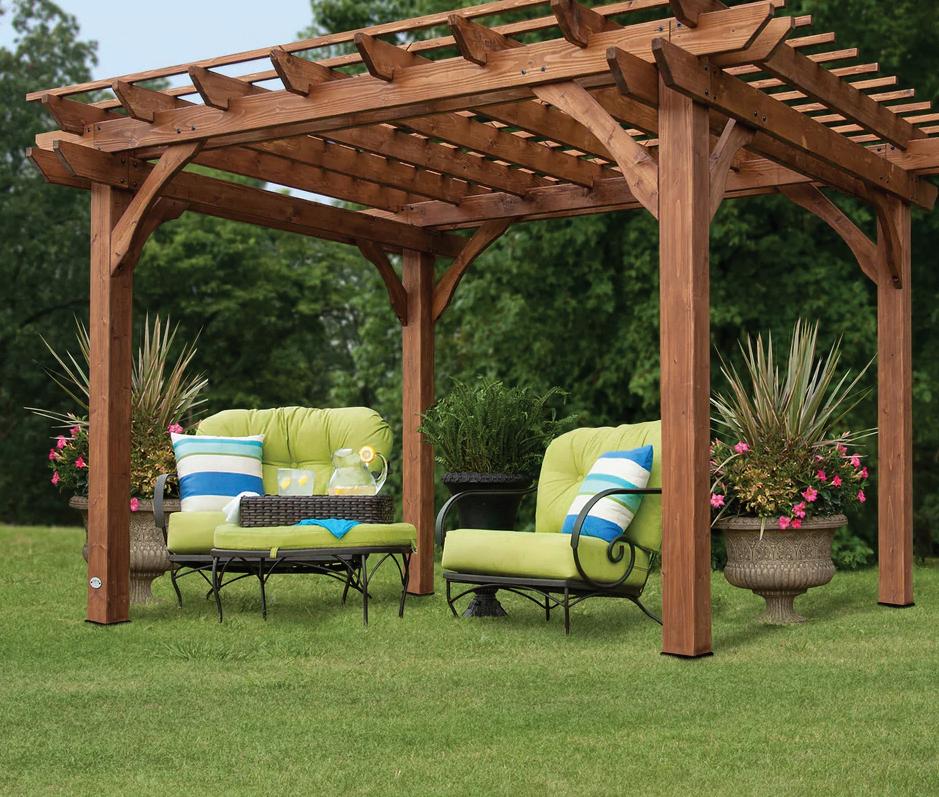
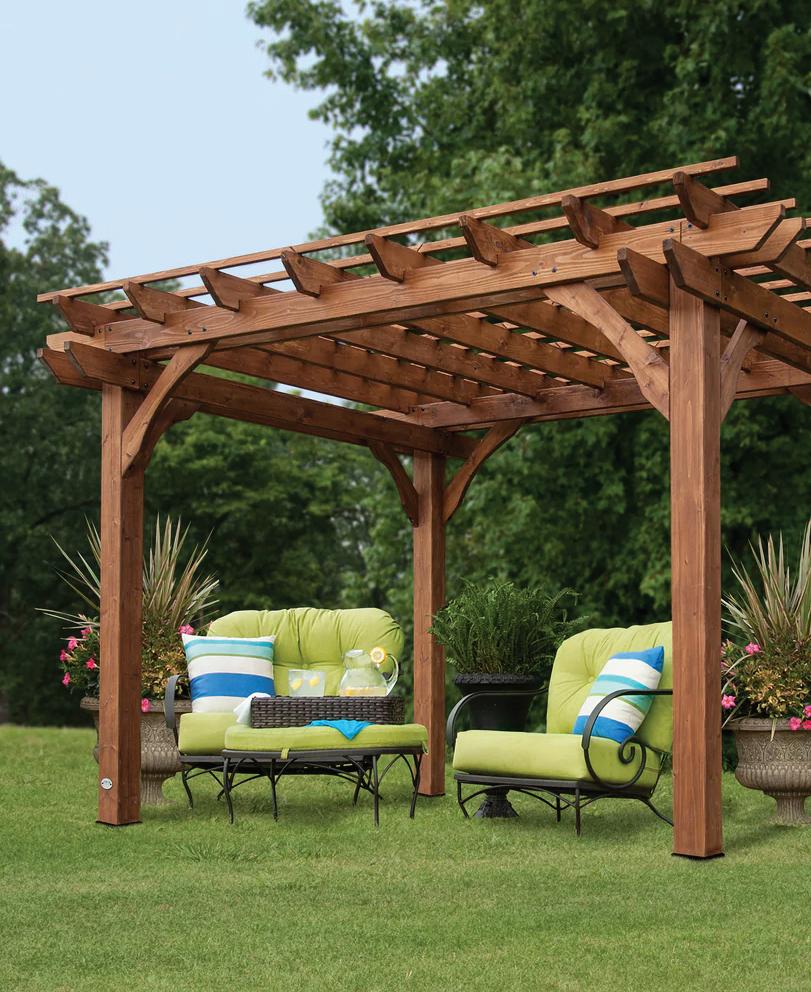 Pergola kits from Backyard Discovery are shipped to your home complete with all fasteners, hardware, and accessories ready for do-it-yourself assembly.
> 24 Home Improvement and Repairs | The Fall Issue
s
PERGOLA CONSTRUCTION
 By Carter Swift
A pergola can make an impressive visual statement in an outdoor space. The sweeping lines and strong, sturdy frame provide an attractive focal point that provides shade for relaxing and entertaining.
If you’re considering adding a pergola to your property, you can build your own, hire a contractor, or assemble one from any number of widely available kits.
DIY VS. PRO
When assembling your project from a kit, all the cutting and notching has been done for you. All fasteners and materials are shipped directly to your job site. The kits include step-by-step instructions, saving lots of time and planning, and the wood usually comes prefinished from the factory. All you need to do is recruit an assistant, unbox the parts, and start build ing. Because all the prep work

Read our magazine online at HomeImprovementAndRepairs.com 25
SKILL LEVEL 2 MODERATE
101
PERGOLA CONSTRUCTION
If budget is not an obstacle, a professional can be enlisted to construct your ideal pergola as you sit back and relax. Homewyse.com estimates labor for a 10x10’ pergola to range from $1,500 to $5,000, depending on where you live.
is done, it’s usually a quick job to build a pergola from a prefab kit. Depending on its size, a pergola kit can be assembled in a weekend or less.
Although the kits can occasionally cost more than purchasing the raw materials, by the time you spend the time and fuel to source materials from different suppliers, the potential savings may become negligible. And this assumes you already own the necessary tools for construction.

To build a custom pergola from raw lumber will require much more work, but you can design it to suit your needs and personal aesthetic taste, adding details that make it uniquely your own.
Hiring a contractor is the costliest way to get the job done, yet for countless pergola owners, having the project completed by a professional is well worth the expense.
LUMBER
The most economical and widely available material to build a pergola is pressure-treated pine. However, professional pergola contractors
A common variation is a pergola roof attached to a home with a ledger board, similar to a deck, and supported by two posts.

>
26 Home Improvement and Repairs | The Fall Issue
s s
101
often build only with Western Red Cedar, which has a consistent wood grain that resists warp ing and splitting. The wood also has natural oils that deter insect and moisture damage.
Another sought-after pergola material is redwood lumber. Depending on your location, redwood might be difficult to find and expen sive if you find it, but it has similar preservative oils as Western Red Cedar, plus it’s an even stronger species of wood.
LOCATION
Pergolas are often used to cover a deck or patio, protect an outdoor dining area, provide shade for a pool or hot tub, or adorn a back yard garden. To integrate the pergola into the existing landscape, they’re typically built square to the house or a nearby structure.
DESIGN

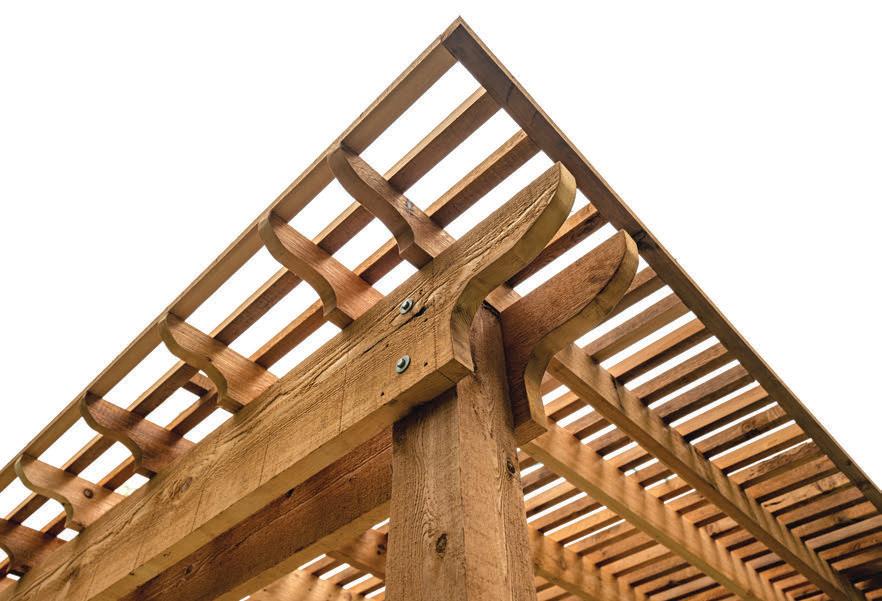
Pergolas are built in a wide range of sizes and styles, but most are constructed with four support posts connected at the top with beams (AKA girders), rafters, and smaller cross-mem bers called purlins. Pergolas are fairly simple structures in design but can be embellished with decorative accents.
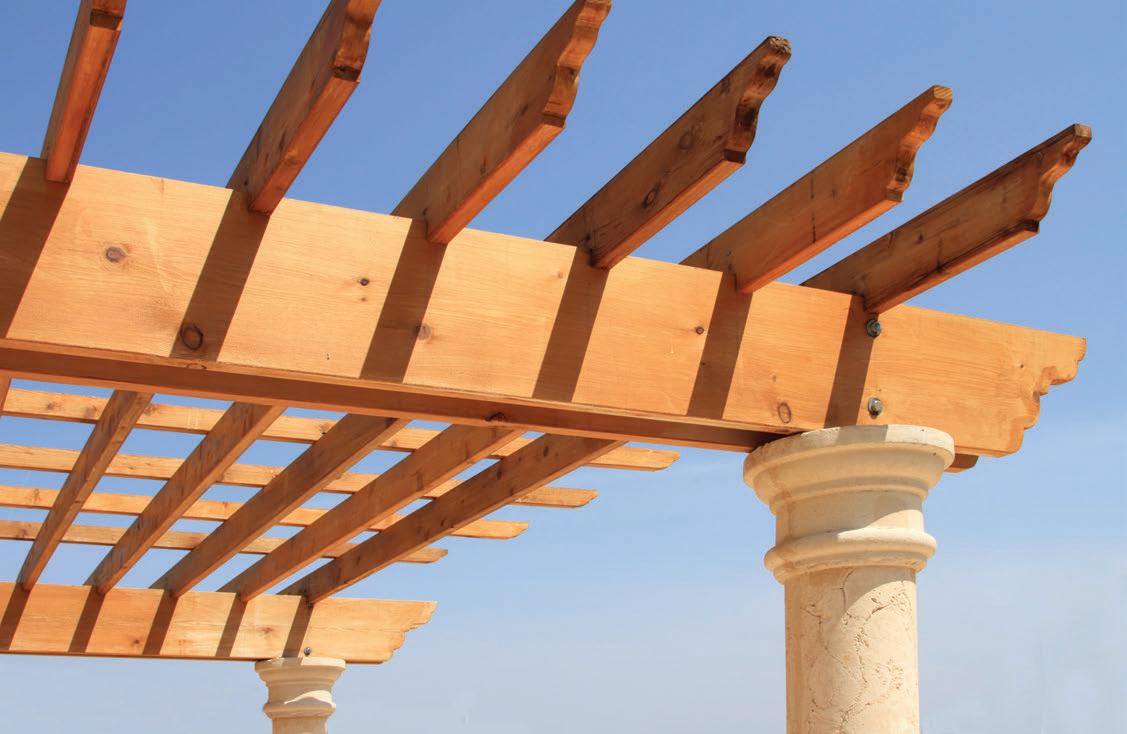
PROS OFTEN PREFER TO BUILD PERGOLAS USING WESTERN RED CEDAR
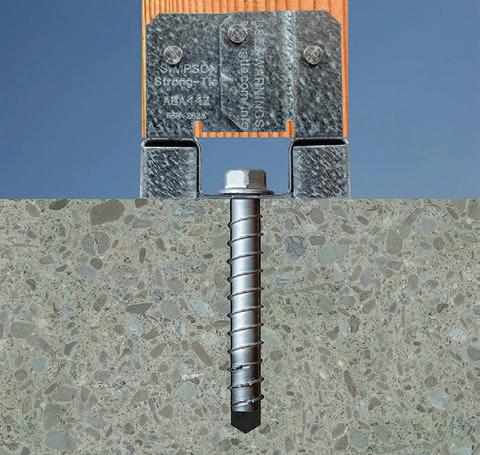
Best practice to protect the posts from rot and moisture damage is to make sure they avoid direct contact with the ground. A metal base like this one from Simpson Strong-Tie provides a standoff that anchors to a concrete pier and fastens to the sides of the post so the wood doesn’t wick water into the end grain.
Read our magazine online at HomeImprovementAndRepairs.com 27
s
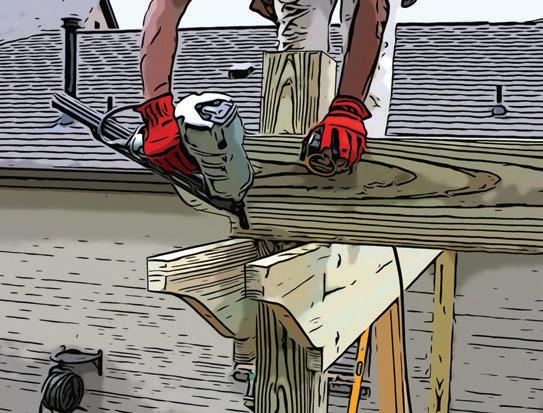
Use 2x4 diagonal bracing to help stabilize the posts while you adjust them into plumb and square position.

Visual proportion is the key to designing a pergola. The 6×6 posts will need larger beams and rafters so the top of the pergola will look strong and regal rather than under sized. Also consider allowable span based on the size of the pergola you’re building.
For example, a 12-foot span is too long for a 2×6 board, which will not only look small and weak but will sag over time. Most builders use a minimum board size of 2×8 for the upper framing members, and that’s for a small pergola. Common lumber sizes for a large pergola include doubled 2×12 for the beams, 2×10 for the rafters, and 2×4 for a layer of decorative purlins fastened atop the
The rafters can be toe-nailed or toe-screwed to the beams. The follow ing course of purlins will help keep the tops of the rafters in vertical alignment.
s > PERGOLA CONSTRUCTION 101 28 Home Improvement and Repairs | The Fall Issue s
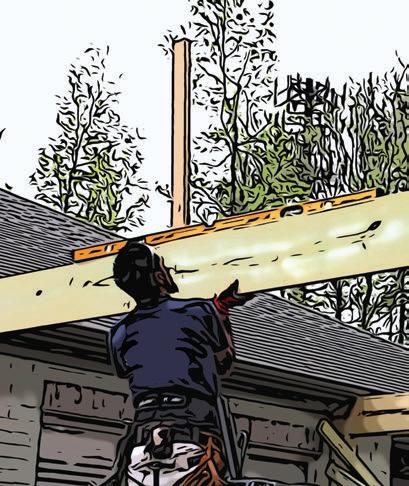
Doubled beams made of lumber as large as 2x12 are used to carry the joists.
rafters. Explore online building plans or even compare your design to ready-made pergola kits to help determine your project’s size and appropriate proportions.
APPLY PRESERVATIVE
Best practice is to stain and seal the wood with a waterproof finish before assembling the pergola. This will add your choice of color while also protecting the pergola from water
s
Tail Spin
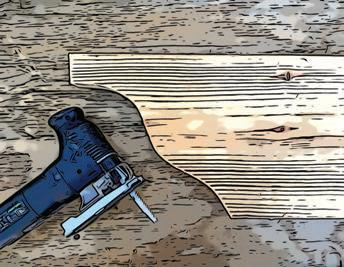
Many pergola designs have the tails of the horizontal boards cut with a decorative pattern.
To put your own spin on the design of your rafter tails, practice sketching a few different trial shapes on paper. The tails give the pergola its signature design and can be cut to a curved, scalloped profile, a more angular design, or anything in between. The only rule of thumb is that the longest edge of the boards should be positioned at the top. The rest is up to you.
When you’ve decided on your design, cut out a cardboard template to transfer onto the board. Cut the board to length, then trace the deco rative shape on its end. Make the cut using a combination of a handheld circular saw and jig saw (for making tight curves and intersecting cuts). Once the first board is cut, use it as a template to cut the tails on each matching board. The beams, rafters and purlins can have different tail patterns, but each type of board should match.
and insect damage, and even UV discol oration (with some products). It will be much easier to stain the wood while it’s still on the ground. Plus, you’ll be able to access all sides of the boards, including the areas where the wood will meet at a joint.

Treated lumber should only be coated with a protective finish after it has dried from the treatment process. Although cedar and red wood have natural preservative oils, the
wood will turn silver over time if not main tained with a UV-blocking stain/sealer.
SUPPORT POSTS
Most pergolas are supported by 6x6 posts. For a small pergola, 4×4 support posts will work, but the 6x6 has a beefier look that most homeowners prefer whereas 4x4 posts can appear spindly on large pergola designs. Furthermore, the 6x6 posts can be notched to support the beams and rafters from below, creating very strong, reliable joints for the pergola construction. If you’re building with treat ed lumber, make sure the post material is rated for ground contact.
Rafters are commonly spaced 16 to 20 inches apart.

Read our magazine online at HomeImprovementAndRepairs.com 29
s
CONSTRUCTION
The Hawthorne Steel Pergola from Backyard Discovery comes as a kit constructed of galvanized steel with a powder-coat finish to be maintenance-free.
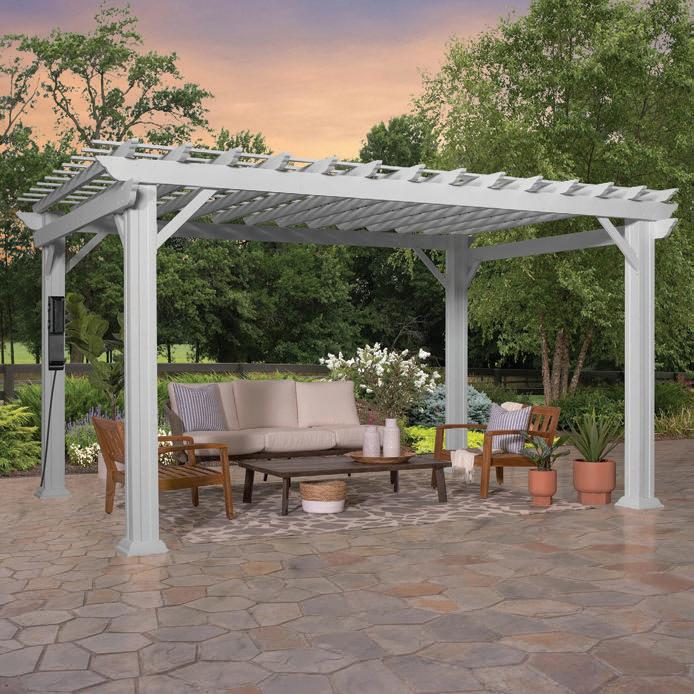
Pergola construction is not a one-man job. The large, heavy lumber requires assistance lifting and fastening in place. Even setting a tall 6×6 post is a two-man job. One worker plumbs and aligns the post while a second secures the bottom and attaches 2x4 diago nal brace boards that hold the post plumb and square. The braces are nailed to each post on adjacent sides and can be adjusted as the post is moved into plumb position. Once the post is set, the braces can be held in place by staking them to the ground.
To ensure the most longevity of your posts, it’s best for them to avoid direct con tact with the ground. A metal post-base can be bolted and epoxied on top of a concrete pier to protect the post’s end grain from wicking up moisture from the ground. The post rests on the galvanized metal instead
of concrete, and the base is fastened to the sides of the posts. You can then conceal the post base by adding trim boards to the bot toms of the posts.
CONNECTIONS
The beams can be fastened to the posts using a number of methods. You can utilize metal brackets or a number of 1/2-in. car riage bolts, but the strongest means of sup porting the load is to cut notches in 6x6 posts that carry the roof from below.
The rafters (and purlins to follow) should all be evenly spaced and centered over the pergola frame. Spacing 16 to 20 inches apart is common. The easiest way to fasten the rafters is to drive 3-inch screws or ringshank nails through the boards and into the beams at an angle (called toe-screwing or tow-nailing). An even stronger connection and a sharp-looking aesthetic detail is to notch the rafter bottoms so they fit over the beams with a lap joint.
The top layer of purlins (AKA louvers or runners) is installed 90 degrees to the rafters. The purlins are usually made from 2x2, 2x3 or 2x4 boards standing on edge. The taller boards can be toe-screwed, while 2x2 size purlins can be face-nailed from the top.
Corner bracing is typically installed to arrest movement between the posts and beams. The corner bracing strengthens the pergola and maintains squareness of the frame.
DETAILS
The shape and contours of your corner bracing and rafter tails present two opportu nities to add some customized character to your pergola. You might prefer angular, geometrical shapes for your rafter tails or softer swoops and curves for a more ornate look. The size and shape of the corner-bracing boards can complement the pergola style in similar fashion.
Skilled carpenters might even challenge themselves by engineering mortise-andtenon connections to give the post-andbeam connection a timber-frame look. For an all-wood look, you can countersink the metal fasteners and conceal them with stain-matched wood plugs.
s > PERGOLA
101 30 Home Improvement and Repairs | The Fall Issue
How to Notch a 6x6 Post
To cut a notch in a 6x6, lay it on a couple of sturdy sawhorses and clamp it in place. At the end of the board, mark a notch that matches the size of the beam it will receive.
On a handheld circular saw, set the blade depth to the thickness of the beam. Beginning at the end of the post, make a series of kerf cuts from one side of the board completely
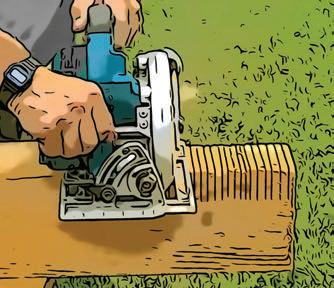
through to the other side. Space the cuts about 1/4 inch apart. Continue making kerf cuts until the blade reaches the marked bottom of the notch.
Leverage a hammer-claw or pry bar against the bottom of the notch and break the kerfed boards of the 6x6, snapping off the thin wood.
Use the hammer claw to remove excess wood, then use a chisel to clean the notch for a tight wood joint.
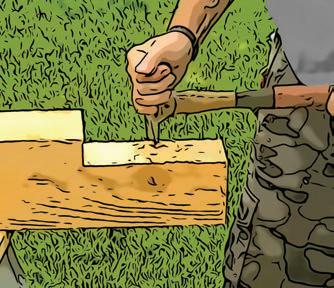
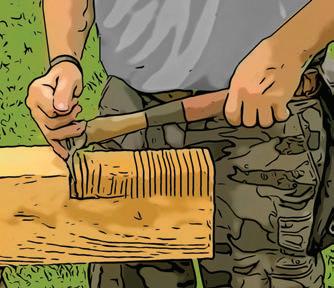
To double the beam, repeat the procedure on the opposite side of the post.

Connections can be made with carriage bolts, and the hardware can be concealed with wood plugs.
On the other hand, you might want to purchase painted decorative hardware that serves as ornate accents to make your pergola more distinct.
The aesthetic details that you incorporate into your pergola design is where you can elevate your project to a thing of beauty.
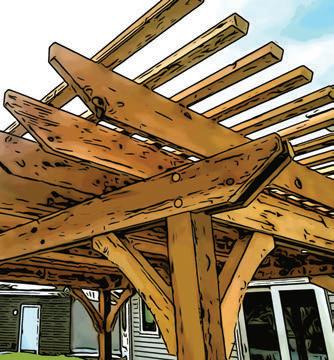
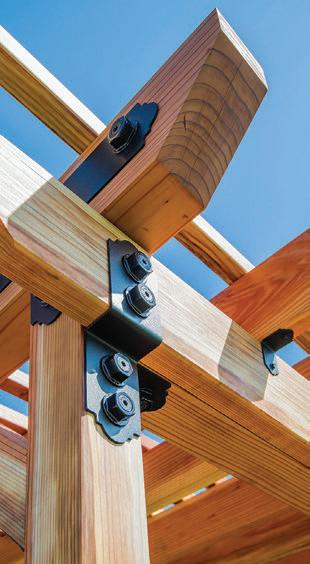
One stylistic option is to enhance your pergola with decorative hardware. The new outdoor selections from Simpson Strong-Tie provide secure structural attachments and amazing looks with premium corrosion resistance.

Read our magazine online at HomeImprovementAndRepairs.com 31
s
H
PAINTING KITCHEN CABINETS


HOW TO PAINT POLY-COATED CABINETS LIKE THE PROS
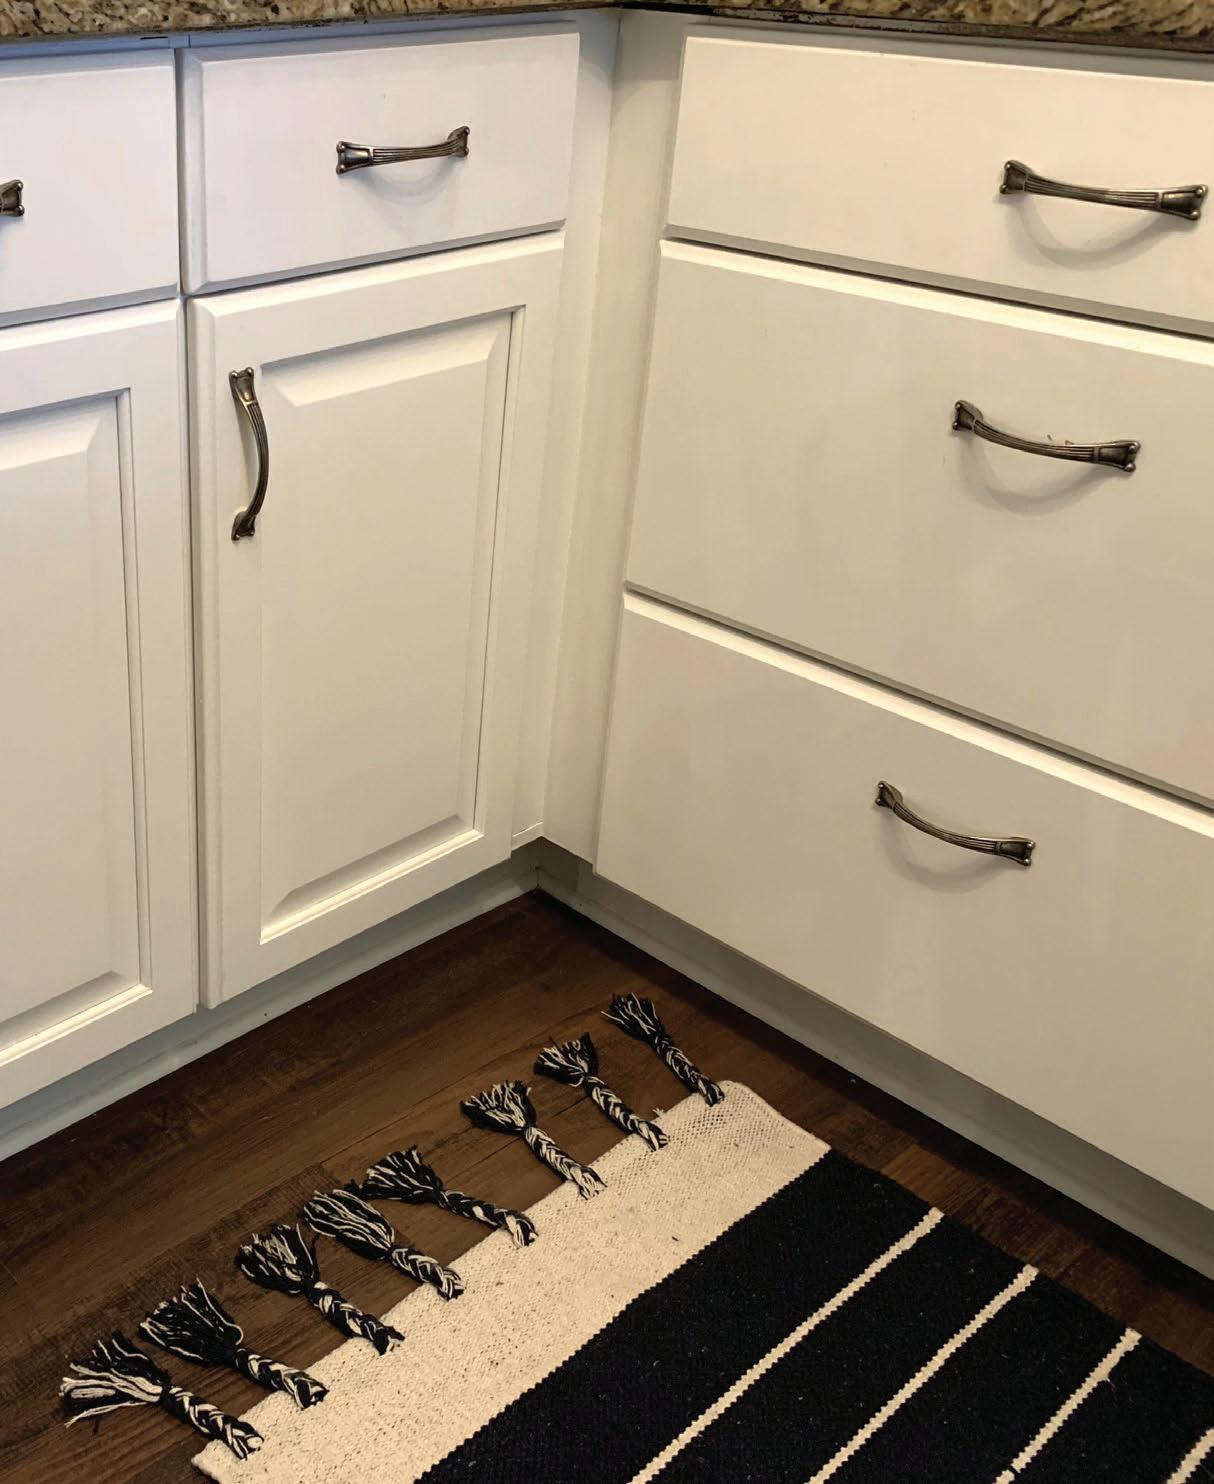
Changing the cabinet color is one of the more impactful alterations you can make during a kitchen remodel. Cabinets occupy so much square footage along the wall that they inevitably serve as a focal point for most kitchen designs. The cabinet finish should integrate perfectly into a surrounding decorative scheme, so a color change is usually on the wish-list whenever the room gets a major renovation. Professional painters make good money painting kitchen cabinets because the job involves a lot of work and they know there’s a right way and wrong way to achieve lasting results. Here’s a look at what the pros know.
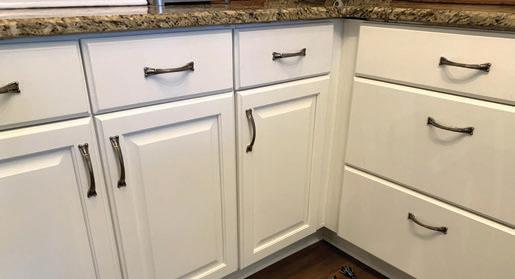
Before: Oak cabinets in need of a facelift.
After extensive surface prep and two new coats of paint.

> 32 Home Improvement and Repairs | The Fall Issue
Read our magazine online at HomeImprovementAndRepairs.com 33 SKILL LEVEL 2 MODERATE
PAINTING
CHANGING THE FINISH
A word of warning to anyone who has yet to paint cabinets: The job requires a lot of time and labor. The work is not exactly difficult, but it is repetitive, requires meticulous attention to detail, and there is no way to speed up the process or cut corners without sacrificing the integrity of your paint finish. DIY’ers should expect to spend roughly a week working on the project, allowing for drying times.
To change the color of pre-painted cabinets, they might only need a thorough cleaning, a coat of primer/sealer, and two new coats of paint. That situation, or painting unfinished cabinets, is the easiest circumstance to work under.
However, cabinets finished with polyurethane, varnish, or a glaze have been given a protective coating to prevent stains and water penetra tion—meaning the surface resists anything bonding to it. To ensure the new paint will bond to the cabinets requires several phases of sur face preparation. Because of this extra work involved, the cost for a professional to paint 144 square feet of poly-finished cabinets could range between $2,800 and $3,500, according to the estimates listed at Homewyse.com.
An effective but labor-intensive approach would be to use a chemical stripper or power sander to remove the old finish entirely, then to begin anew as though painting unfinished cabinets. Caustic paint strippers generate a lot of fumes and a great deal of mess, though. Sanders create a mess too, albeit a dryer and dustier one. Nevertheless, for basic shaker-style cabinets with flat and square edges, sanding off the finish might be the simplest way to remove the poly and prepare for paint.
However, sanding the swoops, edges, and ogees of decorative trim is more difficult. Sanding the detailed profiles of frame-andpanel doors and other similar styles can result in accidental damage to the trim.


Drawer removal may not be necessary if the faces can be detached.
Number the doors with painter’s tape for easy identification when reinstalling them.
>
KITCHEN CABINETS 34 Home Improvement and Repairs | The Fall Issue
The project requires substantial prep work, including TSP cleaning, scuff-sanding, “liquid sandpaper” and primer.
An alternative to sanding poly-finished cabinets is to give them a thorough cleaning, to scuff-sand the surface, then to apply a liquid surface-bonding product that professional painters generically call “liquid sandpaper.”
CHOOSE THE RIGHT PAINT
Purchase a high-quality paint intended for cabinets, which will provide a smooth finish. The best cabinet paints have self-leveling properties. A gloss finish will give your cabinets a sheen but may show a lot of dents or dings. Semi-gloss or satin finishes are typically used for kitchens. Flat finish paints can be difficult to clean.
Edges and trim can be painted with a brush. To achieve a smooth finish on flat surfaces, you’ll get the best results using a High-Volume/Low-Pressure sprayer or using a 4-inch paint roller with a 1/4-in. mohair nap cover.
PREPPING THE SURFACE
Remove the doors and drawers, beginning at the bottom hinge and working toward the top on each one. Use painter’s tape to label the doors in sequence for easy identification when rein stalling them. Unscrew all the metal handles or pulls and store safely along with the hinges and other hardware.
Depending on the construction of your cabi net drawers, it may not be necessary to remove the entire drawer. In some cases, the decorative faces are screwed onto the drawer fronts from the back, and you can remove the faces only.

Gather all supplies, paint, primer and TSP (trisodium phosphate). Mask off the cabinet case with painter’s tape and the surrounding work area with plastic drop cloth. Arrange plenty of work space and designate a covered area for the doors to dry during the various prep and paint phases.
First step is a thorough scrubbing with a TSP solution and a stripping pad. Rinse the surface after washing.

Read our magazine online at HomeImprovementAndRepairs.com 35
PAINTING
CABINETS
Wil-Bond is the brand name of our “liquid sandpaper.” When using the prod uct, wear safety equipment and work in a well-ventilated area away from flame.

Sand the entire surface with 220-grit abrasive.
You’ll need a variety of sanding equipment. A 220-grit stripping pad will flex to conform to curved profiles.
Blow the dust off the surface with com pressed air and wipe the residue away with a tack cloth.
First step is a thorough cleaning. Mix 1/2 cup powdered TSP with 2 gallons of water. Using gloves and 220-grit stripping pad, scrub all surfaces to be painted with the TSP mixture. Be thorough; you’ll be surprised how much grease and grime builds up on cabinets that is not always visible to the naked eye. Use a clean damp cloth to rinse off the TSP.
After all the cabinet surfaces have been cleaned and dried, front and back, scuff-sand those same surfaces with 220-grit abrasive. Sand in the direction of the wood grain. Work the surface so a white powder shows on the surface, which indicates that the poly coating is coming off. This phase is called “de-glossing and etching,” and the abrasion gives the sur face “tooth” that aids in bonding the paint to the surface.
Sanding blocks cover the most surface area for door faces and case sides. Flexible stripping


>
36 Home Improvement and Repairs | The Fall Issue
KITCHEN
Apply the liquid surface preparer with a saturated cloth, rubbing until the rag drags or pulls, indicating the surface is ready for application of the primer.
Apply the primer within 30 minutes of applying the liquid sandpaper.
A lightweight orbital sander can speed up the sanding of the cabinet case.

pads can conform to the curved shapes of decorative trim. The sides of cabinet cases are sometimes covered with a laminate material, which doesn’t have a true woodgrain, making the surface more suitable for an orbital power sander. All surfaces should be scuff-sanded to improve the bond with the paint.

Once sanding is complete, it’s important to remove all the dust from the surface. Spray off the sanded surfaces with a leaf blower or com pressed air, then wipe all surfaces down with a tack cloth to remove any remaining residue.

Next step is to apply the “liquid sandpaper.” Available from a variety of manufacturers, the brand of Liquid Surface Preparation we used is called Wil-Bond (recommended by our friend Rob Robillard, “The Concorde Carpenter”). Note that a primer/sealer must be applied to the cabinet surface within 30 minutes of applying

Don’t overlook the corners, which you can access with a square sanding block.
Read our magazine online at HomeImprovementAndRepairs.com 37
PAINTING KITCHEN CABINETS
Mask off anything that you don’t want painted. Our staff prefers using Frog Tape because it creates a seal when it comes in contact with paint.
The cabinet case gets the same preparation as the doors: cleaning, sanding, liquid sandpaper, then primer.
Your choice of cabinet paint should be a key consideration. The new C2 Cabinet and Trim Paint is specifically designed to achieve an easy, smooth finish with a short drying time. Paint tools also clean up easily with soap and water.

the Wil-Bond, so during this phase, plan on working with three or four doors at time.
Work in a well-ventilated area wearing safety gloves, eyewear and a respiratory mask, because the liquid surface preparation produces noxious fumes. Stay far away from open flames.
Saturate a rag with Wil-Bond and rub it over the cabinet surface until the rag “pulls” or “drags.” This stickiness will help ensure the primer coat goes on smoothly and lasts longer.
Change the rag frequently as it picks up lint or debris.
Make sure you have all of your priming supplies set up and ready to go. Remember once you start applying the “liquid sandpaper” you have half an hour for the “tack” to remain active and for you to apply primer with a sprayer, roller or brush.
Repeat the liquid prep/primer application procedure on all doors, cabinet case, and any surface to be painted.

Once finished, promptly dispose of the chemically soaked rags outdoors in a metal container, because they are a fire hazard.
The good news is that after the primer has been applied, all the extra prep work due to the poly-coat finish is over. You’re now dealing with a freshly primed batch of doors ready to paint with the same standard procedures as any interior painting job.

> 38 Home Improvement and Repairs | The Fall Issue
PAINT APPLICATION
Although a mohair roller with a 1/4-in. nap can achieve a nice, smooth coat, you’ll probably appreciate the faster time-saving speed of a HVLP sprayer.
You can pick up a quality Wagner sprayer with an integrated air turbine for as little as $80. This design keeps the airflow consistent and the pressure regulated for ideal spray performance. Faster than a brush to provide quick and easy coverage, the HVLP sprayer typically has a nozzle that adjusts the spray pattern for either vertical or hori zontal fan.
Strain the paint when loading the sprayer. Before painting the cabinets,


always check the fan pattern and flow rate to make sure you have the sprayer’s pressure and material flow dialed in to deliver the smooth finish you expect. Make
Once the primer has dried, you’re ready to roll with your new top coat.
As with any painting project, first cut in the edges with a brush.
Read our magazine online at HomeImprovementAndRepairs.com 39
PAINTING
CABINETS
Stand the doors so you can spray them without paint collecting along the edges. Shown here, we lean the door against blocking and rest the bottom on triangular wood strips so all edges can be sprayed without paint accumulation.
A 4” roller with a 1/4” mohair nap will achieve a smooth paint finish in areas where you want to avoid using a sprayer due to its overspray.
Increase the productivity of your paint project by arranging a large, sheltered work area where you can spray multiple doors at once.
any necessary adjustments according to the manufacturer’s instructions. Hold the HVLP nozzle perpendicular to the surface and 7 inches away, applying the paint using a back-and-forth motion in a consistent pattern and overlapping to ensure coverage.
Don’t skimp on the second coat of paint. Kitchen cabinets should get a coat of primer plus two coats of quality top-coat.
Once the second coat is dry, you’re ready to reassemble the cabinets. Hang the doors, beginning at the top hinge and working downward. Consider applying felt pads to the backs of the door corners so they close softly and protect the new paint.

TOOL RECS
WAGNER FLEXIO 3500 HVLP SPRAYER
Any joints or seams in the case can be sealed with caulk after the painting is complete.


Homeowners who tackle paint and stain projects will appreciate the performance and easy use of the Wagner FLEXiO 3500. It applies a smooth, consistent finish to a wide range of interior and exterior projects and applies paint 10X faster than a brush. It can spray unthinned paints and stains right from the can. The sprayer features a compact, lightweight design that makes it easy to handle. It includes two nozzles: the iSpray nozzle for spraying broad surfaces like walls and a Detail Finish nozzle for spraying a smooth, fine finish on projects like cabinets and furniture. It also

> 40 Home Improvement and Repairs | The Fall Issue
KITCHEN
features multiple adjustable settings to suit your project needs, including an adjustable flow control, spray width, spray pattern and variable speed power dial.
Visit www.wagnerspraytech.com.
DIABLO SANDERS
Diablo Tools has a full line of sanding sponges and pads, which conform to round or uneven surfaces better than a standard flat, rigid block.


Diablo also offers sanding blocks made of a flexible, sponge-like material. They’re lightweight and dual sided with a “stiff” side and “soft” side, each of which can be fitted with a different abrasive so the tool can function as two sanders in one. Kitchen cabinets require a lot of sanding, so reusability is a nice feature in sanding equipment, and the blocks use Diablo’s SandNet sanding sheets with reusable technology. The SandNet sheets offer up to 10x longer life versus standard
sandpaper. Each SandNet sheet features a clog-reducing nylon net design coated in a ceramic-blend grit for fast material removal while reducing buildup. The sheets are easy to clean and reuse multiple times by shaking, vacuuming, or rinsing the sheet to remove any pitch buildup. Visit www.diablotools.com.
BOSCH 18V BRUSHLESS 5” RANDOM ORBIT SANDER

The new 18V GEX18V-5 random orbit sander from Bosch is lightweight and easy to use, even on vertical surfaces such as cabinet cases. The new sander features a well-balanced ergonomic palm grip, which allows your hand to be closest to the work material to avoid tilting and pressing down, for best results. The easy-to-reach on/off switch offers intuitive operation. It has a vibrationdampening element to help minimize user fatigue. The powerful 18V brushless motor delivers similar stock removal to a corded sander. The speed selector delivers best results in different materials and applications. The sander has a 5-in. 8-hole sanding pad, which provides optimal dust collection when the sander is attached to a vacuum or a dust bag. Visit www.boschtools.com

Read our magazine online at HomeImprovementAndRepairs.com 41 H
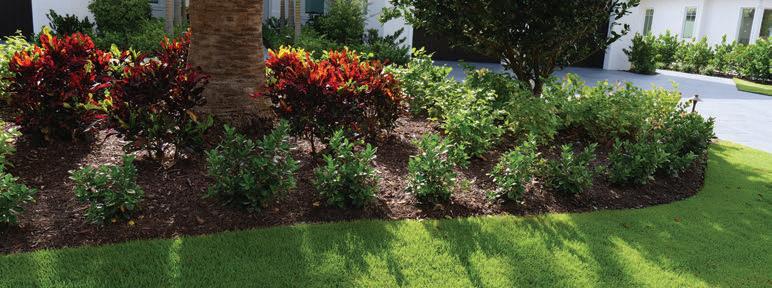
> 42 Home Improvement and Repairs | The Fall Issue LAWN MAINTENANCE IN AUTUMN WILL PAY OFF IN THE SPRING. TLC FOR LAWNS IN THE FALL
By Valerie Smith
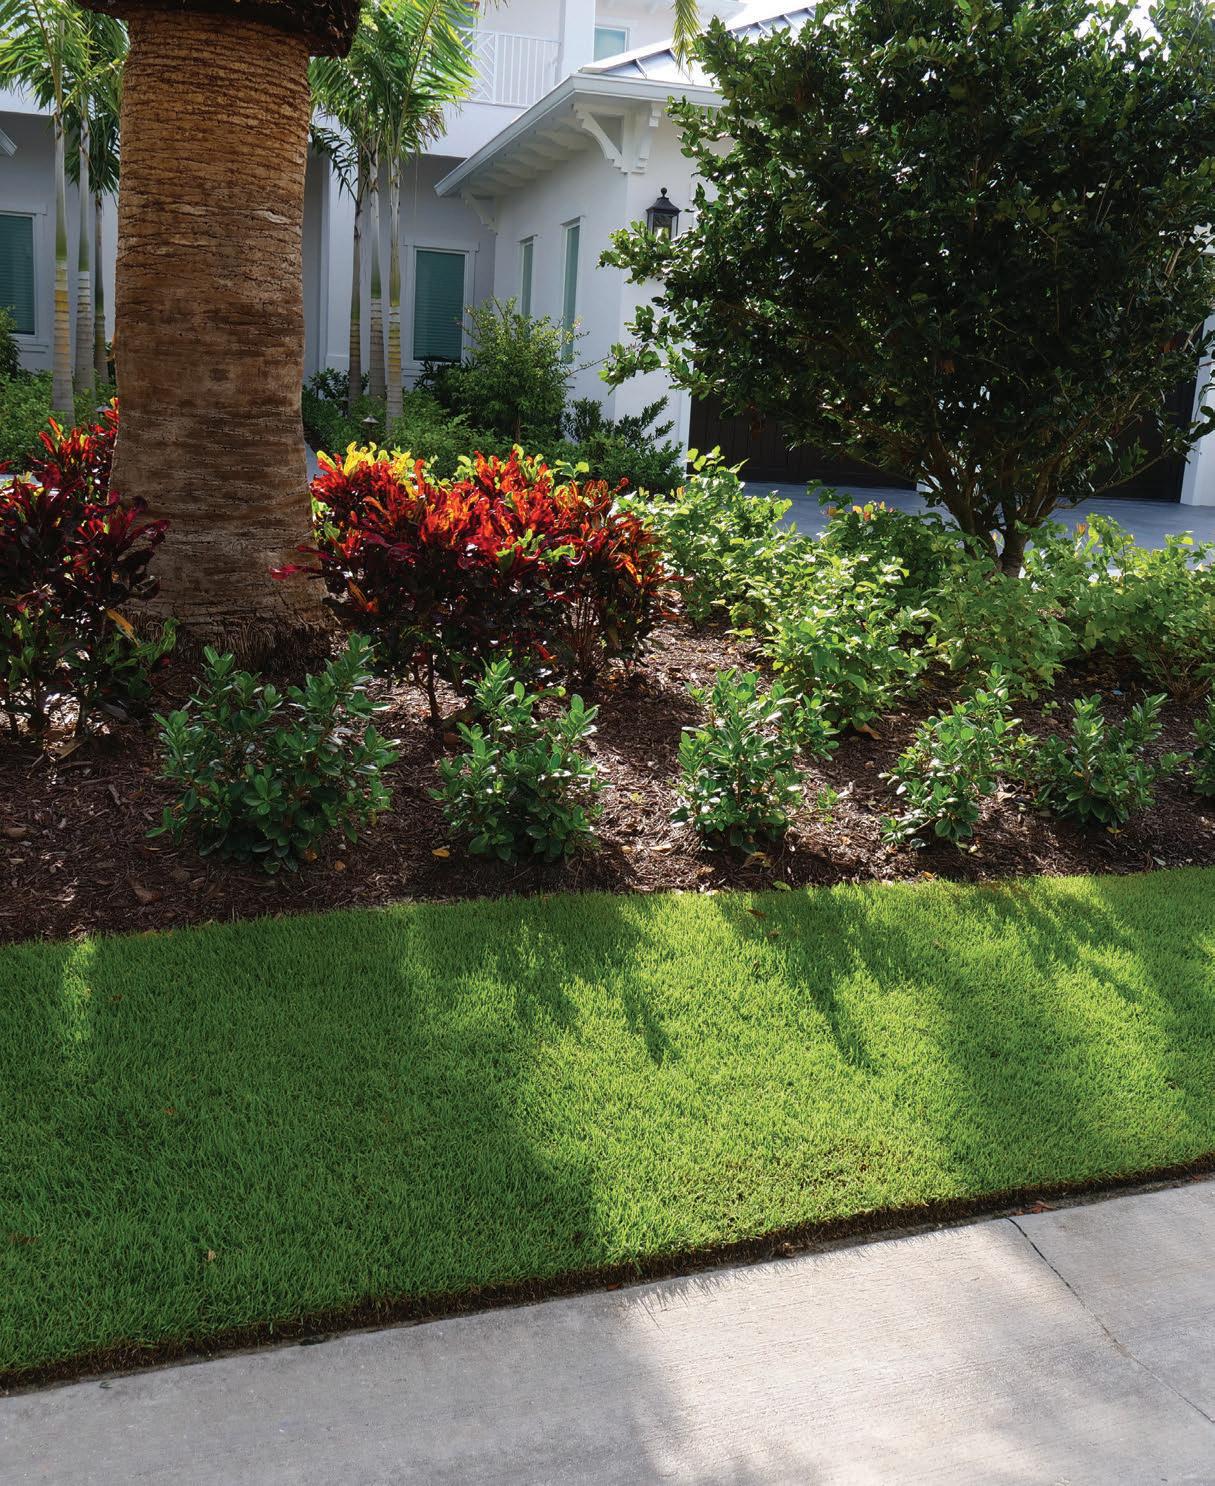
One of the best things you can do to ensure a beautiful, thriving lawn in the springtime is to show it some love during the fall. Here is a list of some of the most important tips from the experts at Sod University to help your warm or cool season lawn transition into the cooler months ahead.


1 REDUCE MOWING FOR DEEPER ROOTS

It’s actually recommended that you mow your lawn a lot less during the fall months. This is good for warm season lawns like zoysia, bermuda grass, St. Augustine and centipede grass. Keeping your warm season lawn slightly higher will encourage deeper root growth during the fall so that the grass will survive through winter dormancy.
For cool season lawns like bluegrass and fescue, a mowing height between 2.5–3.5 inches dur ing the fall is ideal. This mowing height will also help prevent snow mold in snow-prone regions. However, if it gets too long, the grass will create a mat layer, which can lead to disease breakouts.

Read our magazine online at HomeImprovementAndRepairs.com 43
2
WATER LESS AS TEMPERATURES DROP
It’s important to water your lawn less as temperatures drop because too much water can lead to disease. As temperatures drop, soil conditions also change, and fall is one of the most likely times of the year for lawn disease to start appearing—especially when overwatering combines with shade from fall leaves.
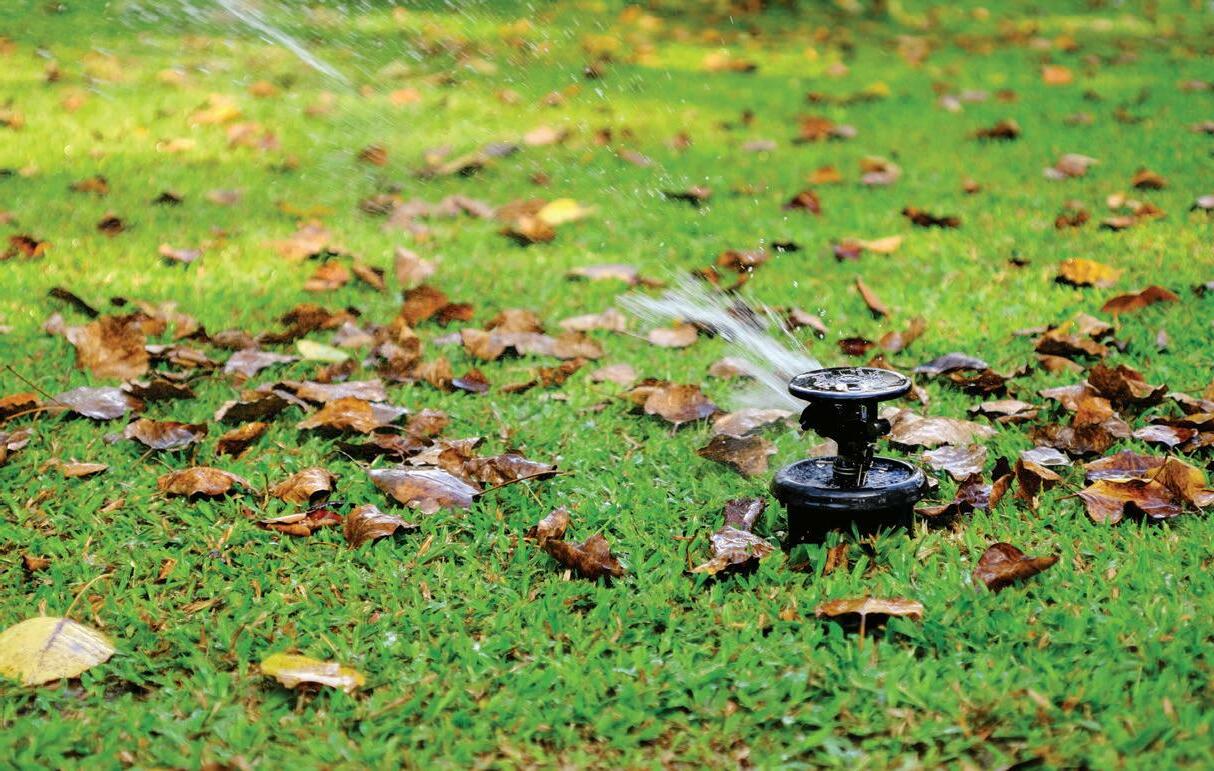
Regardless of disease outbreaks, you’ll still want to water your lawn to prevent drought stress while the grass is actively growing. Even though a warm season lawn will begin to enter stages of dormancy, light watering will prevent dehydration. Warm season grass typically requires one inch of water per week including rainfall. In comparison, cool season lawns require about 1–1.25 inches of water per week including rainfall. Watering both types of grasses in the early morning will decrease the risk of certain turfgrass diseases.
3 FERTILIZE WITH THE RIGHT NUTRIENTS
Fertilization differs this time of the year compared to the other active growing seasons (spring and summer). Warm season grass will likely enter a state of dormancy and cool season grass will still endure cold temperatures. Throughout the seasons, the nutritional needs of your lawn vary as temperatures, soil conditions, and other environmental demands change.In early fall, the lawn needs a good boost of nitrogen to enhance the color, density and health.
A mid-fall fertilizer should provide the lawn enhanced color with iron and nitrogen, fortifying plant and root zones with potassium, amino acids, and carbon for increased microbial activity and soil health.


A late-fall fertilizer delivers micronutrients such as iron along with nitrogen and carbon needed to regrow damaged lawn areas and withstand stressful conditions.
Homeowners can simplify product selection by purchasing fertilizers pre-mixed with the specific nutrients intended for the time of year. For example, Sod Solutions offers a Fall Fertilizer Box with three pre-mixed bottles for early, mid, and late fall application, all of which work with a time-release formula to feed the lawn throughout the active growing season. The slow-release formula gradually feeds your lawn over an extended period of time without overwhelming it with nitrogen.

TLC FOR LAWNS IN THE FALL 44 Home Improvement and Repairs | The Fall Issue
4 CONTROL WEEDS

Your warm or cool season lawn has just made it through the summer months when herbicide applica tions damage grass due to hot temperatures. Now that it’s starting to cool down, you are free to apply both post-emergent and pre-emergent herbicides without risking any damage to your lawn, if applied properly. You may even notice that the weeds from summertime are starting to die off. Unfortunately, there are winter weeds that will start to pop up when the months are colder. Some hard-to-control weeds that may appear around this time include Poa annua, sedge, crabgrass, goosegrass, chickweed or henbit.

We recommend applying a pre-emergent during the fall to prevent winter weeds. A post-emergent herbicide controls any current weeds you are currently experiencing, whereas a pre-emergent herbicide, as its name suggests, serves to prevent weeds from appearing.
Fall is actually the best time to apply a pre-emergent—especially if winter weeds have been a big prob lem in the past years. You can also do this in the springtime around March or April. Refer to the directions on the packaging for proper application.
5 KEEP AN EYE OUT FOR INSECT INVASIONS
Although there could be a variety of insects that may be invading your lawn at this time, the main ones to look out for include grub worms for both warm season and cool season lawns, as well as chinch bugs. Chinch bugs are usually the most active in the months of June to early September, but may still be present in some lawns such as St. Augustine. Other insects that may appear in the fall are sod webworms, fall armyworms, and mole crickets.

If you have insect activity, treat with a broad-spectrum insecticide labeled to treat the insect you are seeing. Be sure to read product labels thoroughly before application. If you use a granular variety of insecticide, water the lawn immediately after application to help with absorption.

> Read our magazine online at HomeImprovementAndRepairs.com 45
TLC FOR LAWNS IN THE FALL



6 PREVENT DISEASE OUTBREAKS AS TEMPERATURES CHANGE
We recommend applying a systemic fungicide at preventive rates around the beginning of the fall season or right beforehand. This helps the grass enter colder months in a healthier condition by keeping disease out breaks at bay.
If you’ve had a problem with disease around this time in the past, you may need to make multiple applications of the systemic fungicide in affected areas. If “spring dead spot” is a problem, apply a fungicide at high rates to the problem area(s). Spring dead spot is caused by a disease that damages grass during the winter—you just can’t see the damage because the grass is brown and dormant until the spring when everything greens up again. Applying a fungicide at a preventive rate will keep it from coming back.
Consider mapping those areas, because fungicide treatment can be expensive. If you use a granular variety, water the lawn immediately after application to help soil absorption. Above all, read the product label thoroughly before application for detailed instructions.
7
ALWAYS REMOVE DEAD LEAVES
As dead leaves accumulate on the ground during the fall, they create shady, darker spots on the lawn. Light cannot reach these areas, and moisture becomes trapped. This quickly damages the grass underneath these spots. When warm season grass goes dormant, it can be difficult to notice any discoloration after the leaves are removed. Come springtime, you will notice the damaged areas while the rest of the grass turns green again. Depending on how many trees are nearby, consider raking once a week.
Fall lawn maintenance differs from that of spring and summer. With the changing of the seasons and soil conditions, it’s important you make changes in maintenance so that your grass is prepared for the cooler months ahead. For more specific information for each grass type, view fall lawn maintenance tips for zoysia, St. Augustine, bermuda grass, centipede grass, bluegrass, or fescue at Sodsolutions.com/sod-university.

46 Home Improvement and Repairs | The Fall Issue
Fall Gardening Tips
Whether you’re growing a vegetable garden, flower bed, or even trees and shrubs, these fall garden maintenance tips will ensure your entire landscape is ready for temperatures to drop.
1. Clean Up Vegetable/Herb Gardens

The best place to start is by removing all dried plants and weeds in your garden bed. Keeping such plants in your garden over the winter could lead to pests and disease. Look for any spent crops, as well as plants infested with disease. Tilling your garden soil is an excellent way to expose any dried plants or weeds, and will reveal any pests hiding in your garden, including army worms, which are most active during the fall.
2. Prepare Your Perennials
Your perennial plants will continue growing until they go dormant in late fall. To prepare them for the colder temperatures, be sure to remove all weeds and any damaged parts of the plant infested with disease or pests. If you’re planning on adding more plants to your garden, consider planting springblooming bulbs while the soil is still warm.
Don’t forget to continue watering your perennials at least once a week until the ground freezes. Once the ground does freeze, cover the crown of your newly planted perennials with a 4- to 5-inch layer of bark mulch. This mulch may also be used to cover perennials that are sensitive to frost.
3. Care for Trees and Shrubs
One way to care for your trees this fall is to cover the soil around them with mulch. Adding a fresh layer of mulch around the base will protect the roots from harsh winter conditions. Avoid covering the trunk with mulch, however, as this could cause rot and disease. In addition to mulching, fall is also an ideal time to prune your shrubs once dormancy has started.
If you’re looking to establish more trees and shrubs, fall is the best time to plant while the ground is still workable. Generally, the ideal time to plant new trees is six weeks before the first sign of hard frost. Planting any time between September through November will allow your new trees to establish their roots before winter sets in.
4. Plant a Cover Crop
A cover crop may be spread over your garden to prevent erosion and weed growth. It may consist of mustard, clover, peas or even a combination of cover crops. Once spring arrives, the cover crop may be turned over to add nutrients to the soil.
5. Plant Fall Crops
While the summer growing season may be over, there are still many plants you can grow over the winter. The most common frost-tolerant crops for fall planting include broccoli, cauliflower, kale, lettuce, parsnips, garlic, cabbage, collards and spinach. Many of these crops not only grow well during the fall, but they taste better after a light frost. Be sure to cover your plants as soon as any frost is forecast to ensure your garden survives the winter.
6. Apply Pre-Emergents
Pre-emergent weed killers are used for controlling weeds before they appear above the ground. To pro mote a weed-free garden next year, consider apply ing a fall pre-emergent to your garden once all plant debris is removed.
7. Apply Fertilizer
Similar to fall lawn care, many gardens and trees can benefit from fertilizer before winter sets in. Fall fertilizer is best applied in late autumn before the first frost, as it will help plants endure the approaching cold temperatures.
Following these simple fall maintenance tips will help your plants survive the cold temperatures of winter. Whether you plan on growing a cool-season crop, or you simply want to protect your plants, this fall checklist will ensure a healthy, thriving garden next spring.
Editor's Note: This article was written by Valerie Smith on behalf of Sod Solutions. Visit www.SodSolutions.com.
Read our magazine online at HomeImprovementAndRepairs.com 47
>
THE LAST DECK YOU WILL EVER NEED

Last-Deck
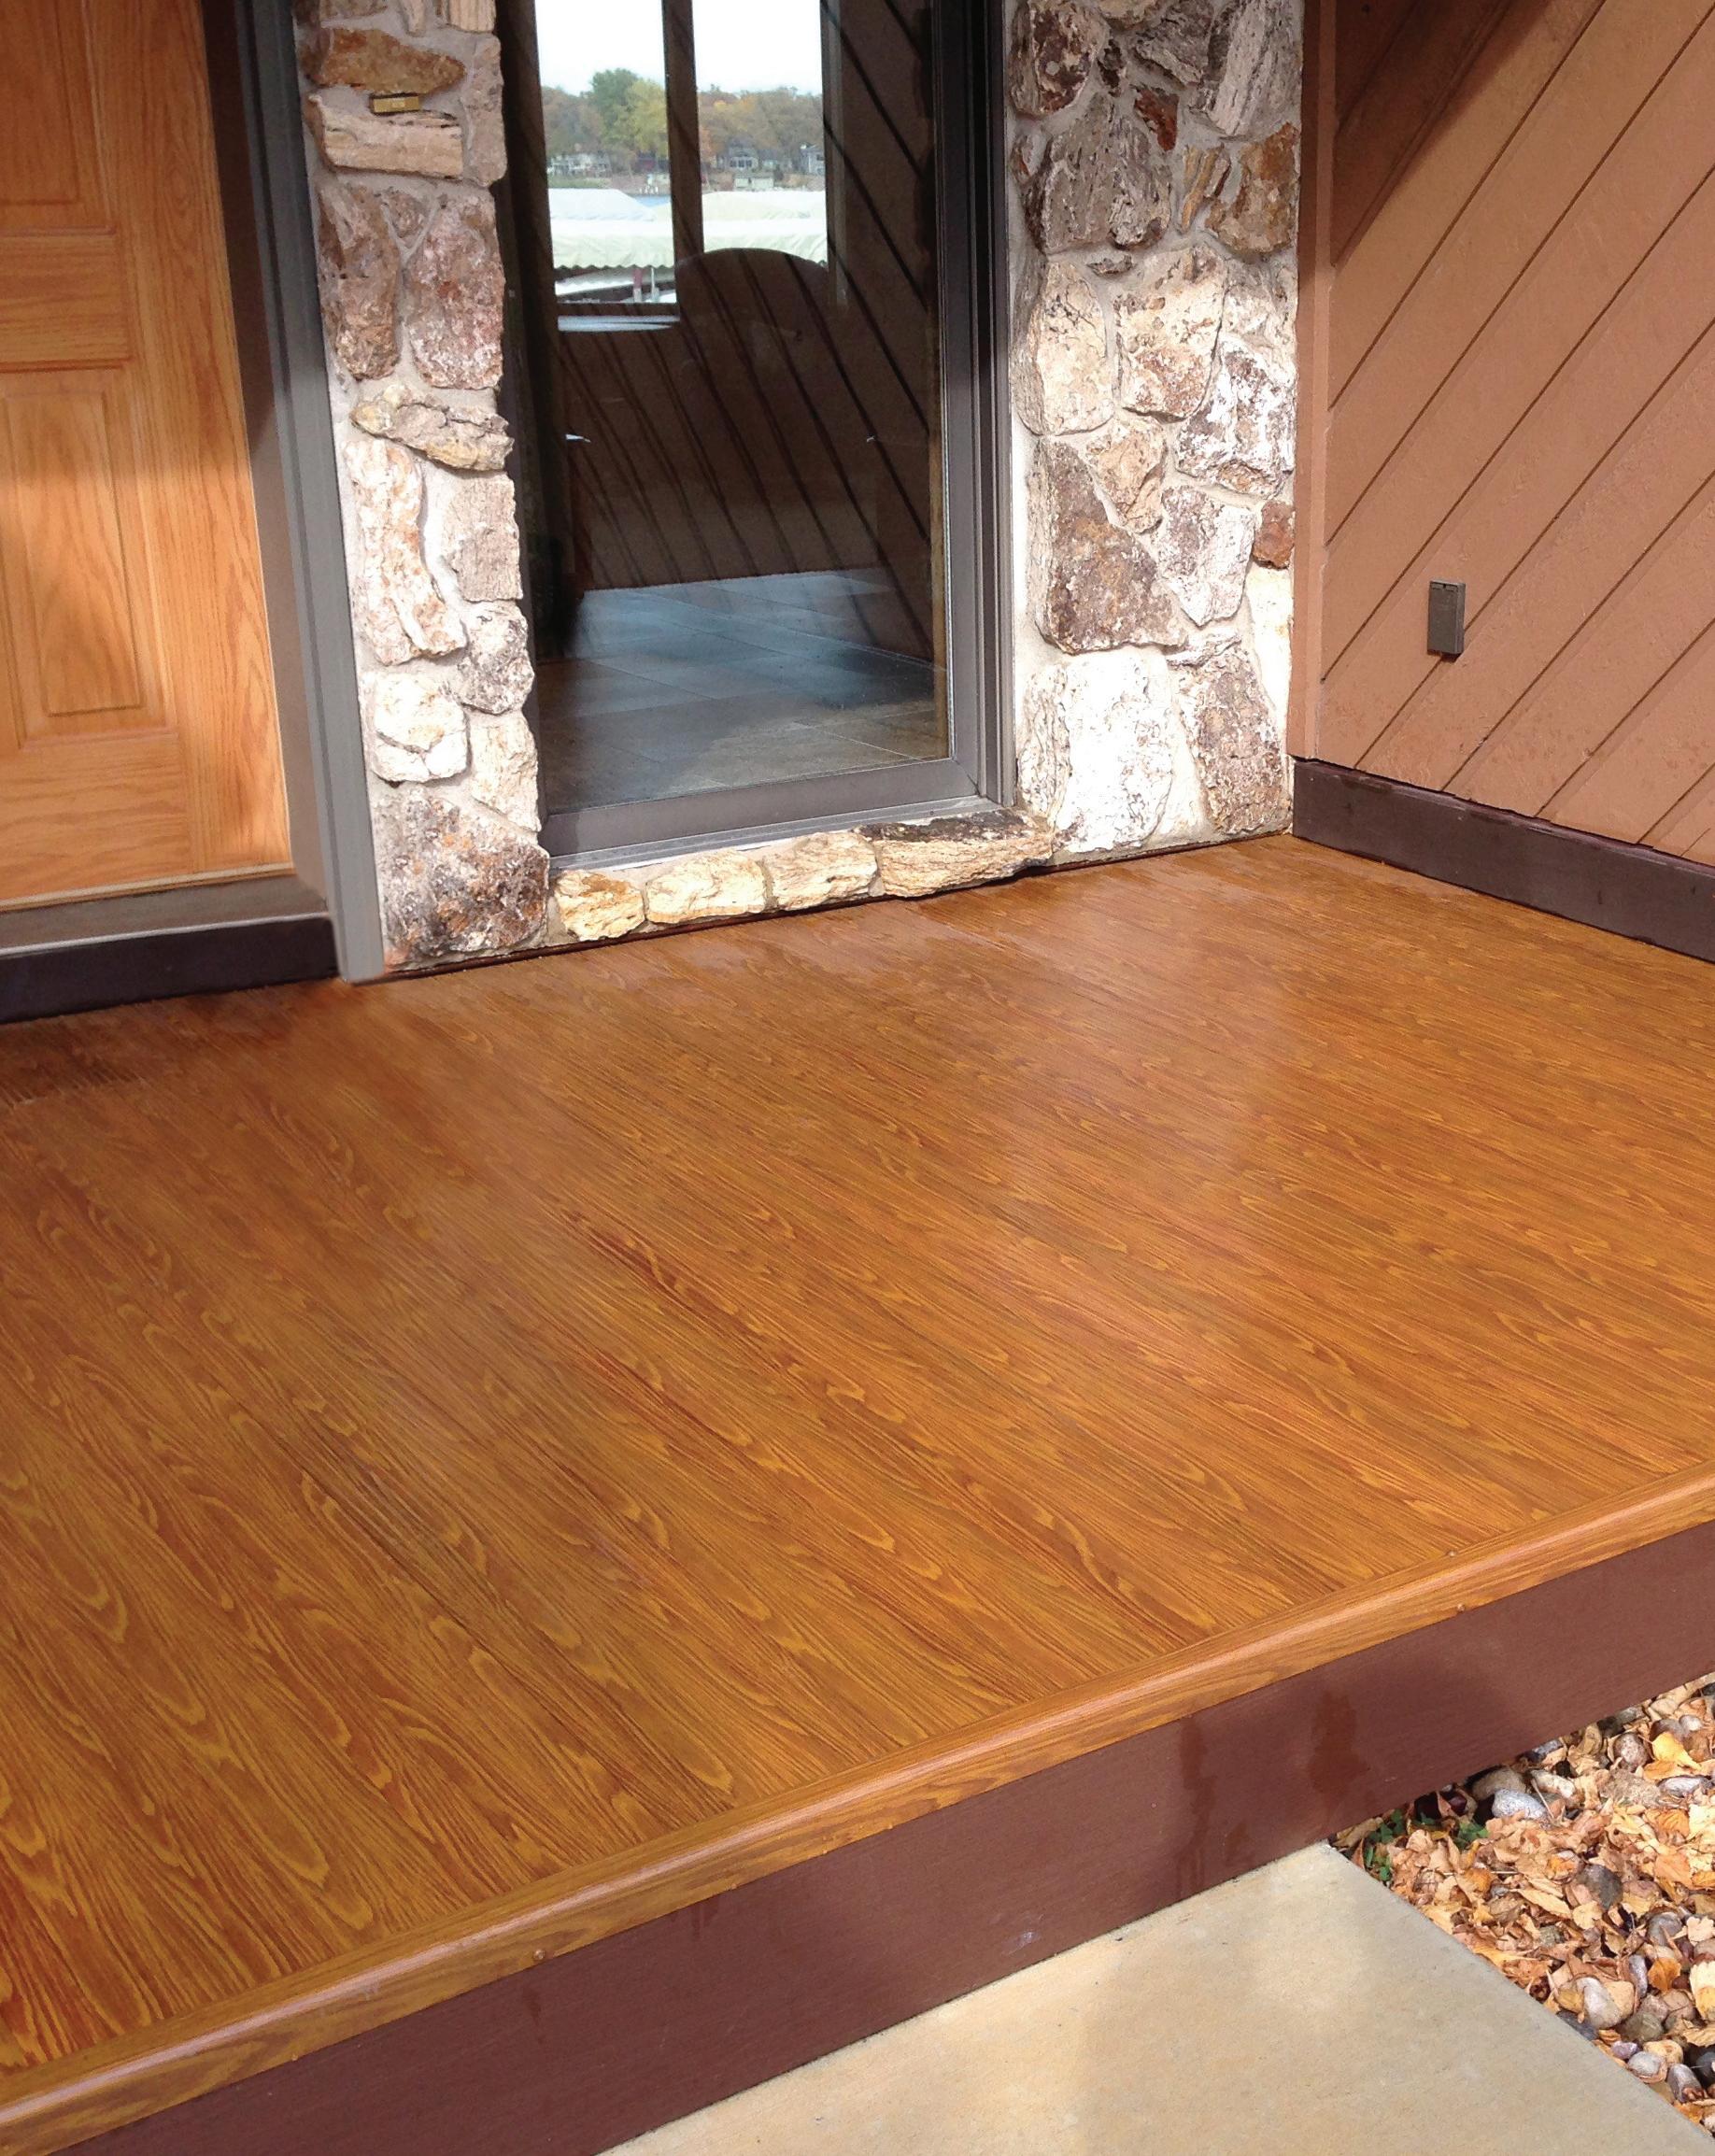
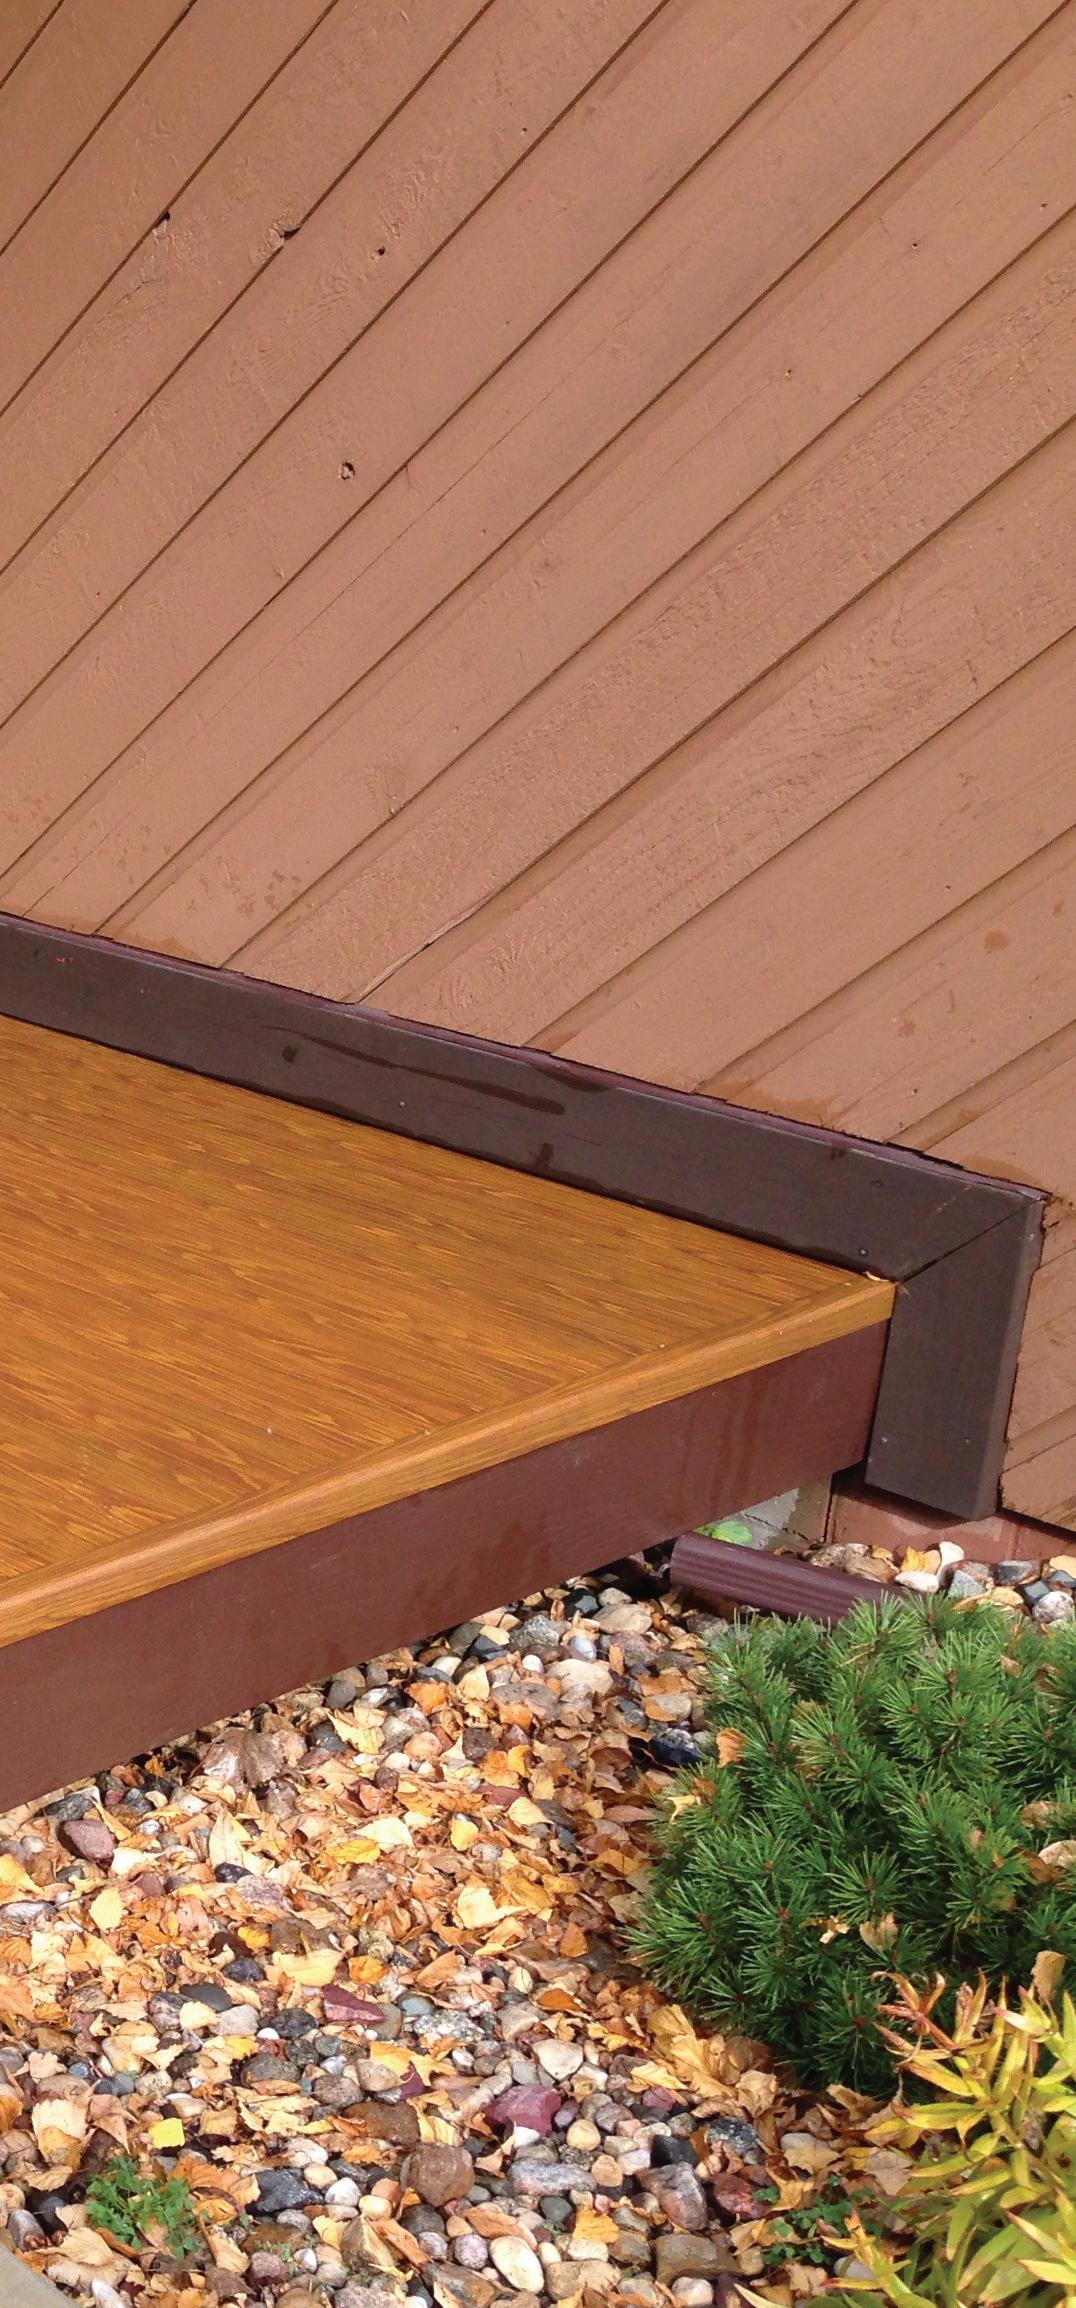
last-deck requires no staining or sealing, just mild soap and water for cleaning. No warping, splitting, cracking, rotting, molding, lightweight and fire-resistant. LastDeck is available in a multitude of options allowing you to design your own luxury outdoor space.
Manufactured in the Midwest of all American made structuralgrade aluminum – the same as an aircraft; Last-Deck is built with high quality standards from our family to yours.
last-deck 300 series

The 300 series is a patented, watertight product that has the ability to be replaced without having to start at one end. Should you receive damage at the mid-way point of your deck, simply pop up 2 joiner strips, replace the bad plank, snap the joiner strips back down, and your repairs are finished!
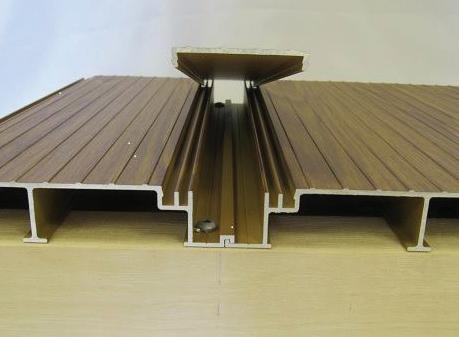

www.lastdeck.com information@lastdeck.com toll free: 866-527-8332 pat# 9,803,376 300 serieseasily popup and snap back down!



 FROM MATT WEBER


 Pergola kits from Backyard Discovery are shipped to your home complete with all fasteners, hardware, and accessories ready for do-it-yourself assembly.
 By Carter Swift


