




HOME IMPROVEMENT AND REPAIRS TM ¢ ¢ ¢ ¢ ISSUE #20 NOV/DEC 2022 HomeImprovementAndRepairs.com U.S. $7.95 CAN $9.95 INSIDE CLEAR PLUMBING CLOGS QUICKLY REPAIR A LEAKY TOILET TANK IN 10 STEPS PLAN AND PRACTICE FIRE ESCAPE DRILLS AVOID DÉCOR DISASTERS HIR ULTIMATE GIFT GUIDE 12


THE LAST DECK YOU WILL EVER NEED
Last-Deck
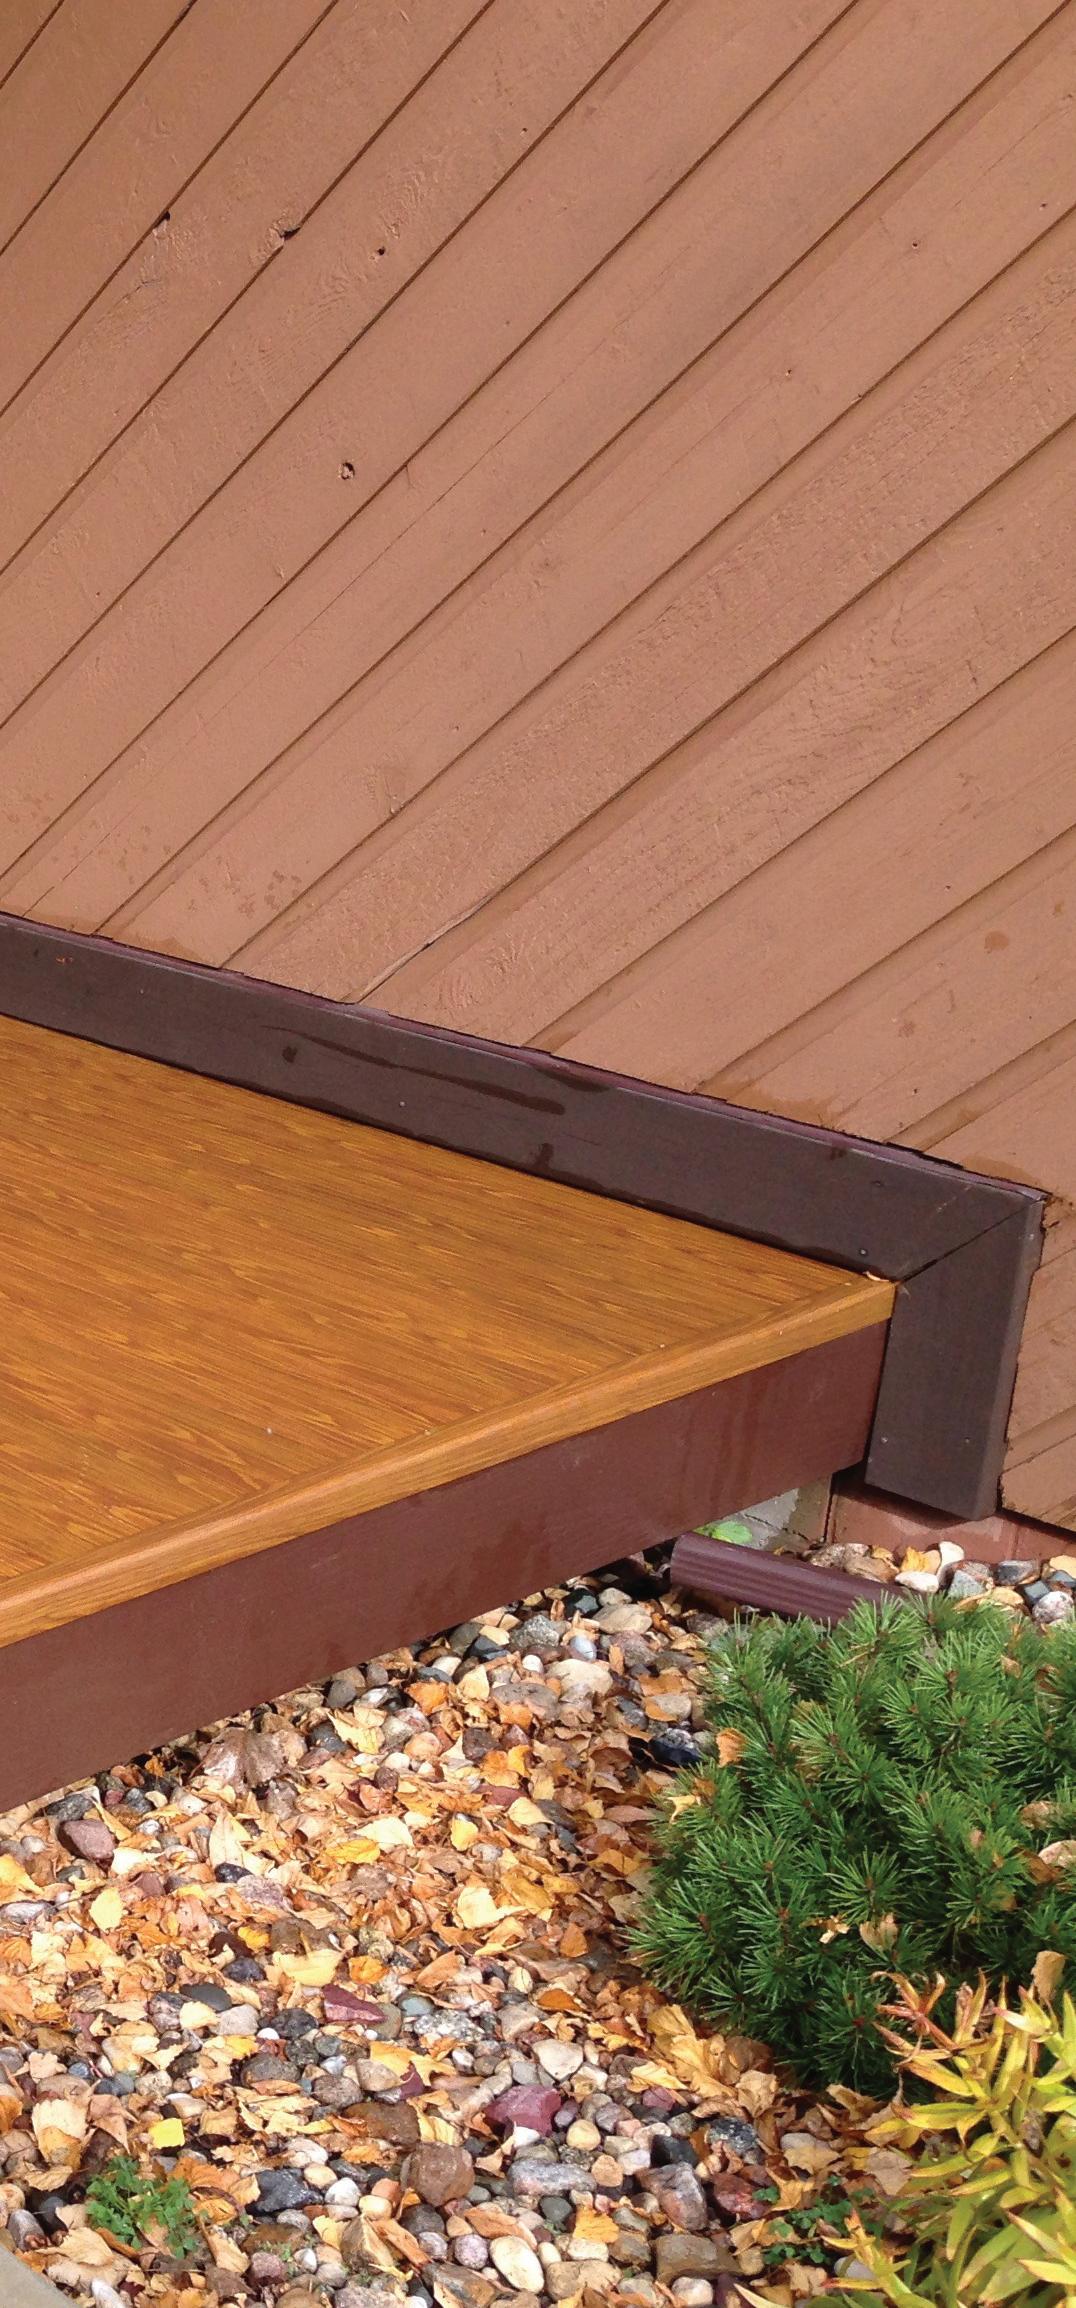
last-deck requires no staining or sealing, just mild soap and water for cleaning. No warping, splitting, cracking, rotting, molding, lightweight and fire-resistant. LastDeck is available in a multitude of options allowing you to design your own luxury outdoor space.
Manufactured in the Midwest of all American made structuralgrade aluminum – the same as an aircraft; Last-Deck is built with high quality standards from our family to yours.
last-deck 300 series

The 300 series is a patented, watertight product that has the ability to be replaced without having to start at one end. Should you receive damage at the mid-way point of your deck, simply pop up 2 joiner strips, replace the bad plank, snap the joiner strips back down, and your repairs are finished!


300 series easily pop up and snap back down!
information@lastdeck.com toll free: 866-527-8332 pat#
www.lastdeck.com
9,803,376





INSIDE: LEVEL 1 EVEN FIRST-TIMERS CAN PULL THIS OFF LEVEL 2 WITH THE RIGHT TOOLS AND A LITTLE RESEARCH, YOU CAN DO THE JOB LEVEL 3 THESE CHALLENGING PROJECTS ARE FOR EXPERIENCED DIY’ERS LEVEL 4 DUE TO THE SIZE OF THE JOB, THE EQUIPMENT OR SPECIAL SKILLS REQUIRED, IT’S BEST TO CALL A PRO SKILL LEVEL 2 MODERATE SKILL LEVEL 3 HARD SKILL LEVEL 1 EASY SKILL LEVEL 4 PRO KNOW YOUR SKILL LEVEL: THE ULTIMATE GIFT GUIDE 08 22 31 22 COVER FEATURE 04 Home Improvement and Repairs | The Holiday Issue 14 06 LETTER FROM MATT WEBER 08 START SMART • AVOID DÉCOR DISASTERS! • PLAN AND PRACTICE FIRE ESCAPE DRILLS • ASK MATT 14 SKILL SET CLEAR PLUMBING CLOGS QUICKLY 31 STEP-BY-STEP REPAIR A LEAKY TOILET TANK IN 10 STEPS

This issue of HIR comes out between Thanksgiving and Christmas, when most of us take stock of the year and count our many blessings.
I’m thankful for all the little things, like Moon Pies, RC Cola, and the 24-hour “Andy Griffith Show” channel I found on the Pluto Network. I’m thankful for the important things, like my
I’m thankful for our readers. That’s YOU. We literally could not have done it without you.
Finally, I’m thankful that, at least sometimes, I’m able to maintain perspective of the big picture and focus on what’s important, rather than get bogged down with all the noise and negativity of the modern era. I believe that everybody in America has something to be

we all have today. We should never lose sight of that.
When I was a kid grousing about having to finish my peas at dinner, Mom would always tell me I should be thankful for the food I got because there were children in Ethiopia who had nothing at all to eat. I’ve never been to Ethiopia, but something tells me she was right about
beautiful wife Shanna, my three wonderful children, and a loving extended family with whom I maintain close ties over time.
I’m thankful I have the necessi ties covered, such as having a job with the team here at “Home Improvement and Repairs,” and I’m grateful for the growth we’ve accomplished with this magazine since launching in January 2020.

thankful for. If you’re reading this magazine, then you’re probably a homeowner or a professional tradesman who gets paid to work on homes—either of which are blessings.
If you live in the United States, then you reside in a country where millions of people travel for many treacherous miles in hopes of gain ing the same opportunities that
that, and I’m glad I live in the States.
This holiday season, we should all be thankful for everything we have.
I’M THANKFUL FOR OUR READERS. THAT’S YOU. WE LITERALLY COULD NOT HAVE DONE IT WITHOUT YOU. 06 Home Improvement and Repairs | The Holiday Issue LETTER FROM MATT WEBER PINE MOUNTAIN MEDIA GROUP LLC Home Improvement & Repairs is published by Pine Mountain Media Group LLC, 130 Inverness Plaza, Suite 226, Birmingham, AL 35242. All rights reserved. Neither this publication nor any part of it may be reproduced, stored in a retrieval system, or transmitted in any form or by any means, electronic, mechanical, photocopying, recording, or otherwise, without permission. The editorial content is intended to explain and simplify home-improvement tasks. Tools, products, materials, techniques, building codes and local regulations change. We assume no liability for omissions, errors or the outcome of any project. The reader must always exercise reasonable caution, follow current codes and regulations that may apply, and is urged to consult with a licensed professional if in doubt about any procedures. PUBLISHER JEREMY HOLLINGSWORTH
EDITOR-IN-CHIEF MATT WEBER matt@HIRpub.com CREATIVE DIRECTOR WESLEY GLASSCO wesley@HIRpub.com ADVISORY BOARD JIM BUTTERS RANDY STEPHENSEN DUSTIN SCHWAIGER RICHARD HAMILTON EDITORIAL CONTRIBUTERS CARTER SWIFT TOM MATTHEWS COPY EDITOR DIANE WEBER AD DESIGN/COORDINATION SPECIALIZED MEDIA SERVICES, INC. ads@HIRpub.com PRODUCTION MANAGER SHANNA QUIGLEY ONLINE/SOCIAL MEDIA DEVELOPMENT GLORIA BERRIO
jeremy@HIRpub.com

AVOID DÉCOR DISASTERS!
With internet searches for ‘interior design trends 2023’ on the rise, people are already looking for ways to refresh their homes in the new year.

But, with countless Pinterest boards and influencers providing home décor inspiration, it can be all too easy to make quick design decisions. Snap decisions based on something seen online can often lead to regret if it does not suit someone’s style or requirements long-term.
Interior design experts Lucy Henderson and Milena Vallier at My Bespoke Room, the UK's No.1 rated profes sional Interior Design service, share the most common design mistakes they see and offer top tips on how to avoid them.
TOP 5 INTERIOR DESIGN MISTAKES
1. No clear vision
This common mistake often happens when people rush into a room transformation without a clear vision of the end result. People tend to design their spaces from
the details upwards, rather than the other way around, but we would always suggest having a very holistic approach to the design to avoid the final results looking disjointed. Mood boards are a wonderful way of creating a design scheme for a room, and we advise having one before starting a project.
2. Buying the wrong size furniture
Another common design mistake, and one that many are guilty of making, is buying furniture that’s the wrong size for the room. This can really alter a space; for exam ple a banquet-size dining table in a small room will only make it feel smaller. Equally, a tiny sofa in a lofty space will look comical! Make sure you measure correctly and use a floor plan before you buy. Don’t spend lots of money on huge items before you know if they will fit.
3. Mixing too many styles
With so many different styles out there, it can be over whelming when deciding how you want a room to look and feel. From contemporary to art deco to maximalism
08 Home Improvement and Repairs | The Holiday Issue STARTSMART
and thousands more décor styles, there’s lots to take inspiration from, but having too much of a mix can cause the end to look like a real mess. This is one of the biggest mistakes we see regularly. One trick for mixing styles together is the 70/30 rule, so use about 70 percent of the space in one style and then add the 30 percent of a different style. For example, you could spice up a very traditional space with a few contemporary pieces.
4. Not enough contrast
Not having enough contrast in your home décor can make a space dull and flat, which can then reflect on your mood. Contrast is key to highlight certain features in a room. It’s largely about color, but contrast can be achieved whether you’re mixing shades or adding texture with different materials or plants. Contrast is key to

adding depth to your space. For example, in a neutral scheme, natural elements can make a lovely contrast without being too overwhelming.
5. Relying on trends
We all love an interior trend, but they can come and go very quickly. If you’re too quick to buy into a fad, you may then realize too late that’s it’s not really your style. Relying heavily on trends can have a negative impact on how we feel in our homes. Your home should be unique to you, so use trends as inspiration rather than a strict formula to follow.
“We have clients that come to us and they’ve created a space but it really doesn’t feel like them. They’ve maybe been influenced by someone else's home or somebody’s house they’ve seen on social media,” says Lucy Henderson, Head of Design at My Bespoke Room. “You need to take your time to consider what you enjoy and how you want your house to feel—unless you want to constantly be updating your home.” Find out more at https://blog.mybespokeroom.com.
>
Read our magazine online at HomeImprovementAndRepairs.com 09
PLAN AND PRACTICE FIRE ESCAPE DRILLS
When it comes to a fire emergency, the Window Safety Task Force reminds everyone that a home’s doors and windows are the primary and secondary escape routes. This is an especially important topic, as the West Coast has been experiencing higher risks of wildfires impacting communities.
"The Window Safety Task Force encourages everyone to develop and test an escape plan at least twice a year. And remember, the plan should include accommodations for loved ones with special needs and for cherished pets," says Angela Dickson, Co-chair of the Window Safety Task Force and Marketing and Communications Director for the Fenestration and Glazing Industry Alliance (FGIA).
7 FIRE SAFETY TIPS
1. Create a fire escape plan that includes two exits from every room in your home, through a door and a window.
2. Practice your fire escape plan during the day and at night, as many home fires occur at night.
3. Practice opening and closing windows that may be designated as emergency exits to ensure they’re in good working order and that no sashes are stuck in place.
4. Attempt to open a window first, rather than break the glass, if you must exit through it in an emergency.
5. Plan another exit route if your home features fixed windows with impact-resistant glass, commonly used in hurricane-prone areas.
6. Check with local code officials when remodeling your home to understand emergency escape and rescue (egress) building-code requirements. Egress windows are those designated by code as large enough for you to escape through or for rescue workers to enter in emergency situations.
7. Consult your local building code official to determine proper placement of window guards or fall prevention devices if you equip windows in your home with these. Look for devices that comply with ASTM F2090 (www.astm.org/f2090-21.html).

STARTSMART 10 Home Improvement and Repairs | The Holiday Issue
P db f P s err eref y ed b r ro











tit
bd|18003474583
3
ebond.com | 1 800 347 4583
Titeb ookto ook t L y o s wh That ebond has Tit dless o Regar ’ tgluef t glue f ortherigh or the righ bondf efe e pr ood glues ar ur w o g ou need t the glue y illlevelinwood our sk
bond f f y t. tprojec t pr ournex our ne ory or y e than os mor y pr ed b err on et the job done with c epai ing or home r ork
dw o 1. 7 t e.nfidenc ,
ir
QUESTION: I want to add a couple of partition walls downstairs and finish our basement into a living area. I know if I build the wall frames to the exact height between the floor and ceiling, then I’ll never have the clearance to tilt them into place. So, how much shorter should the walls be than the floor-to-ceiling height?


ANSWER: Many pros recommend cutting the wall studs 5/16 inch short for your basement application, which allows space for a sill gasket and a little wiggle room when tilting the wall into place.


QUESTION: Can you lay sod in the winter?

ANSWER: The winter is one of the best times to lay sod throughout the southern parts of the United States. There are even a few benefits to winter installation of warm season turfgrass sod, such as zoysia, Bermuda grass, and St. Augustine. It’s true that freezing temperatures could mean the sod’s roots/rhizomes freeze, harming your newly laid sod. However, more sod is actually lost to heat stress in the summer than to winter’s moderate freezes. Even if outdoor temperatures reach the freezing point in certain areas, it is still okay to lay sod. However, it’s ill-advised to install sod when temperatures start to reach the teens on a frequent basis. A geographic line can be drawn right before Greenville, SC. In fact, some of the best areas to install sod during the winter are located in growing zones 8b–11, located throughout the lower US. Laying sod in winter can provide a head start with establishment in the spring—and require less water and fertilizer while it establishes. – Source: www.sodsolutions.com. Need more info? Visit Matt’s

STARTSMART < ASK MATT H 12 Home Improvement and Repairs | The Holiday Issue Available in original 2-packs, 5-packs and new wide blade 3-packs Effort When Cleaning Small Surfaces, Edges & Grooves! ORIGINAL MODEL AND NEW WIDE BLADE FEATURES: ROUNDED TIPS—BETTER SCRAPER THAN A FINGERNAIL FLAT-EDGED TIPS—WON’T SCRATCH LIKE A SCREWDRIVER POINTED TIPS—BETTER THAN A TOOTHPICK FOR CLEANING GROOVES AND CORNERS ! YOUR FAVORITE NON-SCRATCH SCRAPER TOOL JUST GOT Remove stickers, tape,caulk, putty, grime & more! Find us at www.scrigit-scraper.com, local hardware stores, and Amazon! ®
blog at HomeImprovementAndRepairs.com.

SKILL SET CLEAR PLUMBING CLOGS QUICKLY
By Matt Weber
Here are a few quick tips for DIY'ers who need to repair a clogged drain.

BATHROOM DRAINS
Need to unclog a bathroom sink? To fight a sink clog, most folks start by using a simple cup-shaped bathroom plunger. Pick a plunger with a large enough suction cup to completely cover the drain and create an airtight seal against the surrounding sink. Seal off any other outlets, such as the overflow drain in sinks, with a wet rag to create a vacuum, then fill the sink with enough water to cover the suction area. Push out any trapped air beneath the cup, then give the plunger 15 to 20 up-and-down pump ing strokes to jolt loose the clog. You might have to repeat this three to five times to work.
If that doesn’t unclog the problem, you can remove the drain cover which closes the drain. The drain cover operates using a ball-and-sock et lever at the back of the sink’s drain pipe.
To remove the drain cover, first place a buck et beneath the sink to catch water. Unscrew and remove the retaining nut that holds the “ball” of the lever to the socket on the rear of the drain pipe. This should allow you to slide the lever rod out of the keyhole on the bottom of the drain cover. You should then be able to pull the drain cover freely out of the sink drain, which is often what traps hair, objects and other debris in the drain. Use a plumbing auger (or a wire coat hanger) and hot water to clear out the drain pipe and thoroughly wash the drain cover before replacement.
14 Home Improvement and Repairs | The Holiday Issue

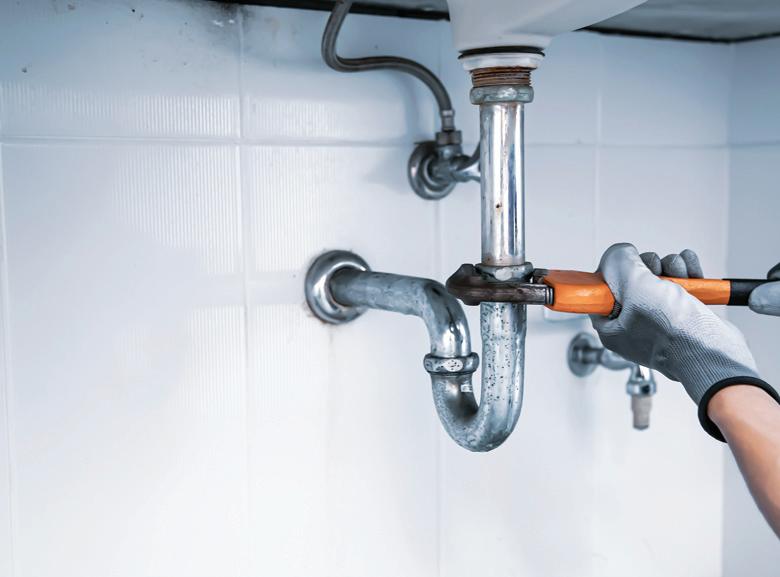
If that still doesn’t work, you can use a pipe wrench to remove the P-trap beneath the sink, in which a foreign object may have gotten trapped in the turn of the pipe. You can also run a plumbing auger or plumbing snake into the drain pipe past the P-trap to rout out clogs farther down the line.


First step in clearing a drain with an auger is to remove the drain cap.
This inexpensive plastic plumbing auger is one of the best $3 or $4 pur chases a DIY homeowner is apt to make. Available at most hardware stores, the augers are hooked to grab hair and gunk, stiff enough to shove through a pipe, but flexible enough to follow the turns in a P-trap or S-trap. Run the auger repeatedly down the pipe along all sides, and rotate the tool as you do. These things often get the job done.
16 Home Improvement and Repairs | The Holiday Issue SKILL SET
TUBS
To unclog a bathtub, the same basic steps apply as when unclogging sinks. However, depending on the type of bathtub you have, a trip-lever tub stopper might be connected to the overflow plate. If so, remove the screws from the overflow plate and pull it out to access the drain.
With the stopper out, scoop out any visible hair or soap scum from the drain. A plastic auger or straightened coat hanger can make a good tool to hook and remove obstructions.
If the clog remains, seal the overflow with a towel or rag, then plunge the drain with a cup-style plunger.
If there is still no change, move on to a plumbing snake. A plumbing snake is basically a flexible steel cable that worms its way through the drain pipe and forces its way through clogs.

In the case of a tub, inserting the plumbing snake into the overflow opening provides a
CLEAR PLUMBING CLOGS QUICKLY
KITCHEN SINKS
Due to the nature of a kitchen, snaking out a kitchen sink might not be necessary. Kitchen sinks are less susceptible to hair clogs and more susceptible to built-up fat and grease from food. For this reason, you might want to pour boiling water into a clogged kitchen drain to see if that melts the problem away.
Kitchen sinks are generally built like bath room sinks and have a P-trap, but they may also be connected to a dishwasher's drain line or to a garbage disposal.
better angle to the trap beneath the drain. You should snake both the overflow and the drain opening to make sure all pipes are clear.
Push the snake into the pipe until you hit the obstruction, then try to hook the clog by twisting the snake’s handle. When the clog is hooked, push the snake back and forth until the obstruction breaks up. Then flush the pipe with water. Plumbing snakes are available in different sizes, but the thinner augers are best for bending around corners.
A plumbing snake doesn’t work well in tight turns, so it might help to remove the P-trap and insert the snake directly into drain pipe. Snake the pipe until you hit the obstruction and break it up, then flush the pipe with water.
If this doesn’t fix or locate the problem, then check the other household drains to make sure the clog is only in one fixture. (If more than one drain is clogged, then there is a clog in the main drain pipe.)
LIQUID CLOG REMOVERS
Frequent use of chemical cleaners can damage your plumbing, but they can be helpful opening the occasional plugged pipe. If water is slowly draining, but the pipe is not completely clogged, then a liquid cleaner may solve the issue. Be wary, however, of the thin liquid drain cleaners. You risk pouring the watery cleaner down a sluggish drain only to hear the product rush straight past the clog, leaving the problem stuck in the drain. That's a big waste of money.
Choose a thicker foam or gel product rather than the cheapest, thin liquid plumbing agents.

HomeImprovementAndRepairs.com 17
Read our magazine online at
>
The thicker products stick to the inside of the pipe and give the chemicals better coverage and longer contact with the blockage. Allow the product to sit as directed, usually about 30 minutes, and follow with running water to test the drain.
Be aware of red flags when it comes to chemical cleaners. The active ingredient is often chlorine bleach, which is bad news for septic tanks, because bleach can kill the beneficial bacteria of a septic system. These products are best suited for systems con nected to a sewer system.

Furthermore, liquid clog removers aren’t intended for all household clogs. They are not designed to remove the waste that may be clogging your toilet. Also, laundry drain clogs are often due to accumulated clothing fibers, and liquid drainers don’t dissolve these fibers.
The general rule of chemical cleaners: Read the instructions on the label and only use it as intended. Always use in a wellventilated area and wear rubber gloves. Don’t use a plunger if a liquid cleaner is in the drain, or you risk splashing caustic chemicals on your skin. And don’t pour in a liquid cleaner if the drain is completely blocked, because if it doesn't work, you'll be stuck with a sink full of caustic water.
Septic Tank Tip: Although chemical clean ers can harm septic tanks, treating a clog
with vinegar and baking soda will not. First, pour hot (but not boiling) water into the drain to loosen the clog. Add 1/2 cup of baking soda into the open drain. Then, pour 1 2 cup of white distilled vinegar down the drain. You will hear the mixture fizzle as it begins to foam. Allow the mixture to act on the clog for 15 minutes to an hour, then try to rinse the obstruction away with hot water. A solid clog, such as hair buildup, will need to be broken up manually.
TOILET CLOGS
Toilet clogs can often be handled with a plunger, but you've got to use the right plunger. Plungers have different shapes to conform to different surfaces, i.e. the flat bottom of a sink or the funnel-shaped drain of a toilet. You'll find it difficult to create a plunging seal if you use the wrong shape.

If plunging doesn't work, you might try using a closet auger, which is a tool similar to a plumbing snake, but the end of the auger is bent to fit through the tight curves of a toilet trap. A closet auger operates using a hand crank to rotate a cable encased in a rigid shaft.
MAJOR CLOGS
If more than one fixture is clogged, then you may need to clean out the main drain line. To do this, locate the clean-out plugs on the large drain pipes in your basement or crawlspace. These drain lines may be found
18 Home Improvement and Repairs | The Holiday Issue SKILL SET
in a garage or outdoors, along the foundations of the house. Each plug has a cap with a square fitting at the top.
Remove the cap with a wrench. Be ready with a bucket to catch dripping water. Also, make
CLEAR PLUMBING CLOGS QUICKLY

I rented a plumbing snake to clear out the main sewer line of a relative’s house. Tree roots had encroached into the drain line and clogged it. This resulted in smelly, dirty water backing up toward the house. To grind through the roots, I recommend the larger 5/8” auger size rather than a 1/2” or small er, which is more likely to break against the roots. Plumbing snakes have a coil of steel rope with a cutter-head on the end to drill out the blockage. You feed the rope into the drain (through the clean-out plug, in our case) until it hits resistance, and then use the machine's foot pedal to spin the auger. I fed the auger into the pipe several times, ground through some blockage, then pulled out the auger to measure its length and mark our progress. After repeating this pro cedure several times, we finally broke through the clog so the water could drain. Note that if you attempt to use the machine, always wear gloves and be careful of the metal auger, which can crush your fingers if they get caught in the rope. - M. Weber

absolutely sure no one is going to be using the facilities while you have the main drain line open. Use a plumbing snake or auger to break up any clogs in the open main line, running it in both directions of the pipe.
PROFESSIONAL PLUMBERS
When all else fails, you can always resort to the Yellow Pages.
Hire a qualified, full-time professional and not just a “handyman” that does the work on the side. This especially applies to bigger jobs, but even the smallest job can become expensive if not handled correctly.
When choosing a plumber, request an estimate and talk to them about the overall cost of the job, even if it seems like it's going to be a small proj ect. Also, check for a license, ask for a time-frame and professional references, and confirm their insurance credentials.
Read our magazine online at HomeImprovementAndRepairs.com 19
>
"Hey, boss ... This job STINKS!”
H
Pressure-Blast Plumbing Tools
If you don’t have a plumbing snake handy, or you want to avoid removing the P-traps, you might try a clog-removal tool that utilizes water-pressure or compressed air.

A common tool is a plumber's blow bag (AKA a drain flush bag, plumbing bladder, or pipe bladder). This is a heavy-duty rubber balloon that is attached to a garden hose to clear drain clogs using water pressure. The bladder is like an uninflated balloon, which expands to seal the drain opening and forces pressurized water into the pipe to power through the clog.
Hardware and home stores now sell products that shoot compressed air into a drain to force the clog to move. Some

compressed-air products are sold in dis posable cans, which often work quite well. However, if the air-burst doesn’t work and requires repeat treatments, the compressed air cans can get expen sive. Other tools use a pump design to generate up to 150 lbs. of pressure.
Another type of compressed-air product is a reusable device that uses cartridges of compressed CO2. Once the tool is loaded with a CO2 cartridge, just press down firmly on the handle, and a needle punctures the cartridge, sending a powerful burst of air into the drain, instantly unclogging it. The advantage is that you can keep the tool for future clogs, and all you have to replace are the individual cartridges.

20 Home Improvement and Repairs | The Holiday Issue
SKILL SET CLEAR PLUMBING CLOGS QUICKLY >


> 22 Home Improvement and Repairs | The Holiday Issue HIR ULTIMATE GIFT GUIDE
By Carter Smith


Read our magazine online at HomeImprovementAndRepairs.com 23
GOT A HANDYPERSON ON YOUR HOLIDAY GIFT LIST? HERE ARE A FEW SUGGESTIONS FROM OUR EDITORIAL STAFF TO SPREAD THE CHEER AS WE APPROACH THE NEW YEAR.
ULTIMATE
GIFT
GUIDE
DREMEL ELECTRIC SCISSORS

Dremel released its new Electric Scissors to help practically anyone tackle a range of cutting needs around the house, and for crafting too. The HIR team got our hands on a test sample, and the scissors are an ideal tool for mak ing short work of pesky clamshell packages. The scissors are powered by a 4V MAX rechargeable lithium-ion battery and have ultra-sharp blades to cut easily through materials from cardboard to fabrics and hard plastics. With a slim tool body design, the electric scissors can be carried in a toolbox or pocket. The tool set comes with a USB charger to power up in only 90 minutes, and includes an extra-set of replaceable shears. The Dremel Electric Scissor kit is now available on Amazon.com and in-store and online at The Home Depot and Lowe’s.
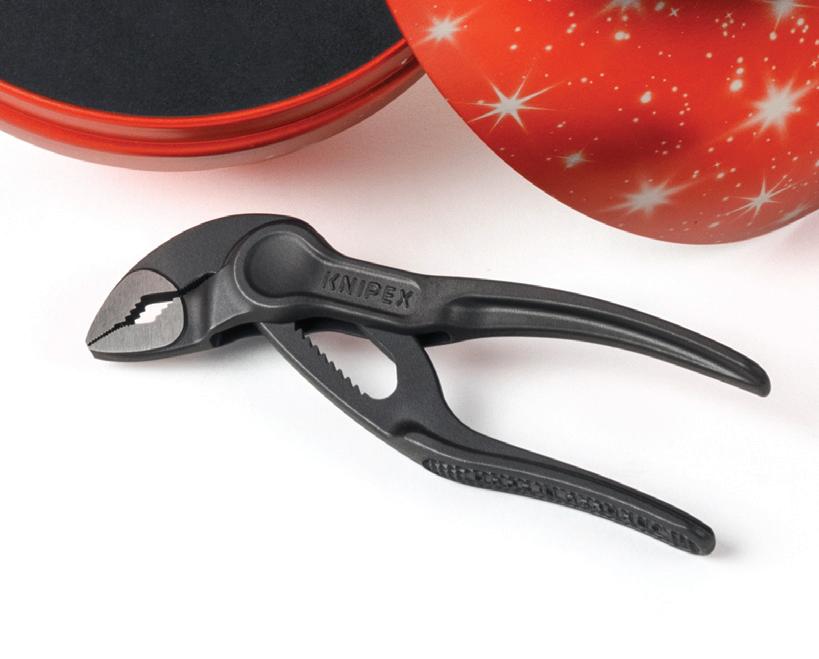
KNIPEX COBRA HOLIDAY ORNAMENT
One of the most popular products from the Wuppertal-based tool manufacturer KNIPEX are the Cobra pliers. This year, the smallest tool in the lineup, the Cobra XS, is available in a limited-edition holiday ornament (part number 87 00 100 XMAS). The festive metal ornament features white stars on a red background and has a diameter of roughly 4.5 inches. Hidden inside the ornament is the 4-in. Cobra XS. The ornament comes packaged in a matching box that sits nicely on countertops and is easy for gift wrapping. The KNIPEX Cobra XS is the world’s smallest, fully functional pair of water pump pliers and offers eleven adjustments positions, 1-in. jaw capacity, and one-handed quick adjustment. Like all products in the KNIPEX Cobra family, it is self-locking to pipes and nuts, which means no slipping from the workpiece and low hand force required. The compact design and slim head allow users to work in confined spaces, and the box-joint design provides high stability. Visit www.knipex-tools.com.

24 Home Improvement and Repairs | The Holiday Issue
HIR
METABO HPT

18V
MULTIVOLT RECIPROCATING SAW
Any home handyperson can use a good reciprocating saw, and Metabo HPT offers a new 18V MultiVolt model (CR18DBQ4) that features a counterbalance gear housing to significantly reduce vibration. Besides pro level cutting performance, this lightweight reciprocating saw offers an orbital cut mode, an LED light, variable speed trigger and tool-less blade change for quick transitions. It’s part of the expanding MultiVolt System of 18V and 36V power tools. As an 18V bare tool, the user can decide to go lighter by using a compact 18V battery or work longer with the flexible 18V/36V MultiVolt battery to double the runtime per charge. The tool’s “smooth as silk” low-vibration design makes it more comfortable to use for demolition and rough cutting applications. The user can decide between straight cutting or an orbital cut mode to boost performance. It delivers a no-load speed up to 3,000 SPM, and the variable speed trigger allows you to cut through various materials like plywood and PVC pipes with more control. Visit www.metabo-hpt.com.
DUST DEPUTY CYCLONE SEPARATOR KITS

The home woodworker now has a budgetfriendly way to keep their workshop tidy, thanks to the Dust Deputy Cyclone Separator Kits from Oneida Air Systems. The patented separator system attaches to the user’s exist ing wet/dry vac to collect wood dust and stop over 99 percent of fine particles and bulk debris from clogging the vacuum's filter. The dust separation eliminates suction loss while saving time and money on expensive filter replacements. The system also reduces cost and maintenance, since it has no motorized parts of its own. Two versions of the Dust Deputy 2.5 are available; one that mounts to the wall and collects dust in disposable bags, and another that collects dust into a rolling bin. Upgrade any make/model shop vacuum with 1.5- to 2.5-in. hose fittings by connecting it to the separator’s 6-foot hose. All parts come packaged in a compact box ready for easy assembly. Visit www.oneida-air.com.

> Read our magazine online at HomeImprovementAndRepairs.com 25
ULTIMATE GIFT GUIDE
DIABLO’S DEMO DEMON SPADE BITS
Demo Demon Spade Bits provide one of the most durable, effortless, and longest lasting hole-drilling solutions on the market for nail-embedded wood. The DEMO-Edge dual cutting edges coupled with the selffeeding Dura-Tip will power through nails for a smooth drilling experience and up to 60X longer life. A curved paddle design enhances the chip-evacuation process for more holes per drill-battery charge. The Demo Demon spade bits are “Impact Strong” for increased shank stability and durability in cordless and corded impact and drill drivers. Visit www.diablotools.com.

BOSCH 12V MAX CHAMELEON
The Bosch Chameleon functions as four tools in one. This 12V Max Drill/Driver fea tures the FlexiClick 5-in-1 Attachment System and a brushless motor for extended runtime and upgraded power—300 in.-lbs. of torque. It weighs only 1.2 lbs. (tool only, not including battery), has a max speed of 1,750 rpm, and offers two speed settings—0-460 rpm for high-power driving tasks and 0-1,750 rpm for high-speed drilling. The Chameleon includes a magnetic bit holder for basic driving and four attachments; a locking bit holder, a keyless chuck, an offset-angle and a right angle. Each attachment connects to the tool securely and easily with the One-Click interface. The right-angle attachment is for tight spaces, and it works with all three other adapters. The offset-angle attachment delivers precise screwdriving close to edges. Both of these attachments rotate to 16 positions without removing them. The locking bit holder attach ment locks hex bits for high-torque drilling, while the keyless chuck provides standard 3/8-in. drilling and driving. Visit www.boschtools.com.

26 Home Improvement and Repairs | The Holiday Issue
HIR
MAYHEW 3 PIECE DEMO DRIVER SET
Mayhew Steel Products’ new 3 Piece Demo Driver Set is made in the U.S.A. and features a unique hybrid design of a screwdriver and pry bar in one, making the tools ideal for various lifting and prying applications. Each of the Demo Drivers is comprised of Mayhew’s patented two-composite, ergonomic Dominator handle, providing superior comfort and a secure grip. The han dle’s capped end allows for striking without damaging the handle, while simultaneously serving as a shock absorber to reduce user hand fatigue. A hardened and tempered alloy steel shaft runs from the prying edge straight through the handle for maximum durability and prying power, while also providing the added usefulness of a screwdriver. All Demo Drivers are backed by a life time warranty. Visit mayhew.com.

RYOBI 18V ONE+ HP COMPACT BRUSHLESS 6-1/2"
CIRCULAR SAW
Ryobi introduces the 18V ONE+ HP Compact Brushless 6-1/2" Circular Saw to its new line of brushless prod ucts. The 18V ONE+ HP Technology delivers more power, runtime, durabil ity, and speed utilizing brushless motors, advanced electronics, and high-performance lithium technology. The new tech enables this saw to deliver up to 32 percent faster cutting speeds of up to 4,900 rpm. An adjustable cutting-depth gauge allows for cuts up to 2-1/4-in. deep and a bevel capacity of 0° - 50°. In addi tion, this saw can provide up to 350 cuts on a single charge. The saw is 25 percent lighter weight than its predecessor, and it runs on the 18V ONE+ System of over 260 cordless products that all use the same battery platform. Visit www.ryobitools.com.

Read our magazine online at HomeImprovementAndRepairs.com 27 >
ULTIMATE GIFT GUIDE
MILWAUKEE M12 LASER
A tool of many uses, the new Milwaukee M12 Green Cross Line & 4-Points Laser is engineered to offer users the brightest green beams, all-day runtime, and easier setup. When paired with an M12 RedLithium CP 3.0 Battery, users get at least nine hours of continuous run time for ultimate productivity. The high-intensity green laser offers superior visibility for long-range applications up to 125 feet. The vertical and horizontal lines allow for easier alignment and leveling applications, while the plumb points help with floor-to-ceiling point transfer. The horizontal dots squaring points give users the option for quick and accurate squaring alignment. The M12 Laser is fitted with amplified rare earth magnets, providing a secure hold and ensuring it won’t slide on steel studs. It is impact-rated for drops up to one meter, and the IP54 rating helps protect it from harsh working conditions. Visit www.milwaukeetool.com.

WORX 13 AMP, 1800 PSI ELECTRIC PRESSURE WASHER
The Worx 13 Amp, 1800 PSI Electric Pressure Washer delivers plenty of cleaning power, along with lightweight and user-friendly operation. Use it to tackle a wide variety of outdoor power washing jobs around the house and property, including cleaning whole-house exteriors, driveways, paved patios and more. Weighing only 17.2 lbs., the portable pressure washer is equipped with a powerful 13-amp motor and heavy-duty axial cam pump for durability and long life. The pressure washer delivers 1.2 gpm of water-flow (1.4 gpm. max) at a pressure of 1800 psi (1980 psi max). For cleaning mud and grime, it includes an onboard, 0.6 gal. soap tank and soap nozzle. The pressure washer is equipped with a turbo nozzle to apply maxi mum pressure and a 40-degree nozzle for washing windows and other lighter-duty applications. Swapping out the quick-connect nozzles is literally a snap. The compact pressure washer’s tubular steel frame has an integrated carry-handle, rubber feet, onboard wand holder, nozzle holder, and integrated cord-wrap for a 35-ft. power cord (included). Visit www.worx.com.

28 Home Improvement and Repairs | The Holiday Issue
>
HIR
H


REPAIR A LEAKY TOILET TANK IN 10 STEPS

 By Tom Matthews
Toilets usually leak from one of two locations— either the wax gasket at the floor or at the connection between the tank and bowl. If you find that the bowl is getting wet from a tank leak, then the most likely problem is a broken seal at the tank-tobowl gasket or around the washers of the bolts. Here’s how to fix the problem with some simple hand tools.


STEP 1: Purchase a tank-to-bowl toilet repair kit. They’re usually available at hardware stores and most include a new gasket plus replacement bolts.
STEP 2: Shut off the water supply to your toilet by turning the valve handle on the wall clockwise. Then flush the toilet and hold the lever down to drain the water from your tank. Remove any excess water with a cup and rag. Place a bucket beneath the tank to catch any excess water.
STEP 3: Disconnect your water supply line from the threaded connection at the bottom of the tank.
STEP 4: Remove the pair of old nuts, bolts, and
Read our magazine online at HomeImprovementAndRepairs.com 31
REPAIR A LEAKY TOILET TANK IN 10 STEPS

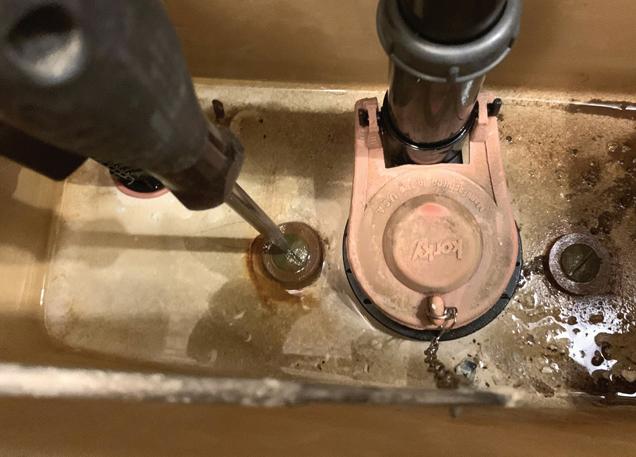
washers from the toilet tank. Use a wrench to hold the nut at the bottom of the tank so it doesn’t spin, as you unscrew the bolts inside the tank using a screwdriver.
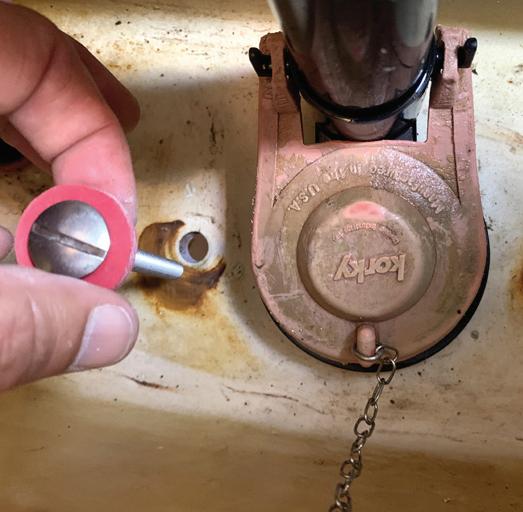

STEP 5: Carefully lift the empty tank from the bowl and remove the old tank-to-bowl sponge gasket. Take the opportunity to clean off any grime or mildew left by the leak from the surface of the bowl and tank.
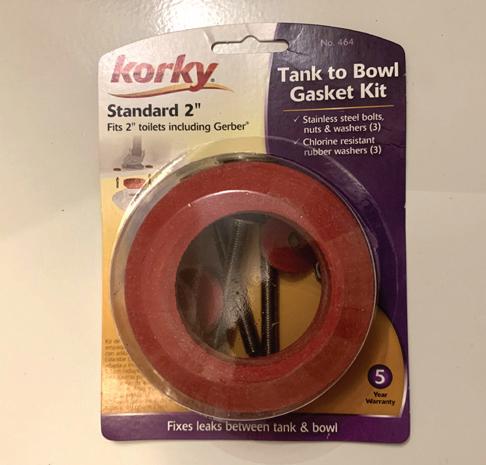
STEP 6: Place the new red sponge gasket over the mounting nut threads.
STEP 7: Carefully center the tank and set it onto the
bowl so the gasket seats snugly into the bowl’s water inlet.
STEP 8: Use the new bolts, rubber washers, washers, and hex nuts, to reattach the tank to the bowl. Apply downward pressure to keep the tank level as you tighten the bolts, alternating from left side to right side, until the tank is stable. Be careful you do not over-tighten the nuts, which may cause the porcelain to crack.
STEP 9: Reattach the water supply line.
STEP 10: Turn the water supply to complete the repair, then marvel at the beauty of your work. H
32 Home Improvement and Repairs | The Holiday Issue


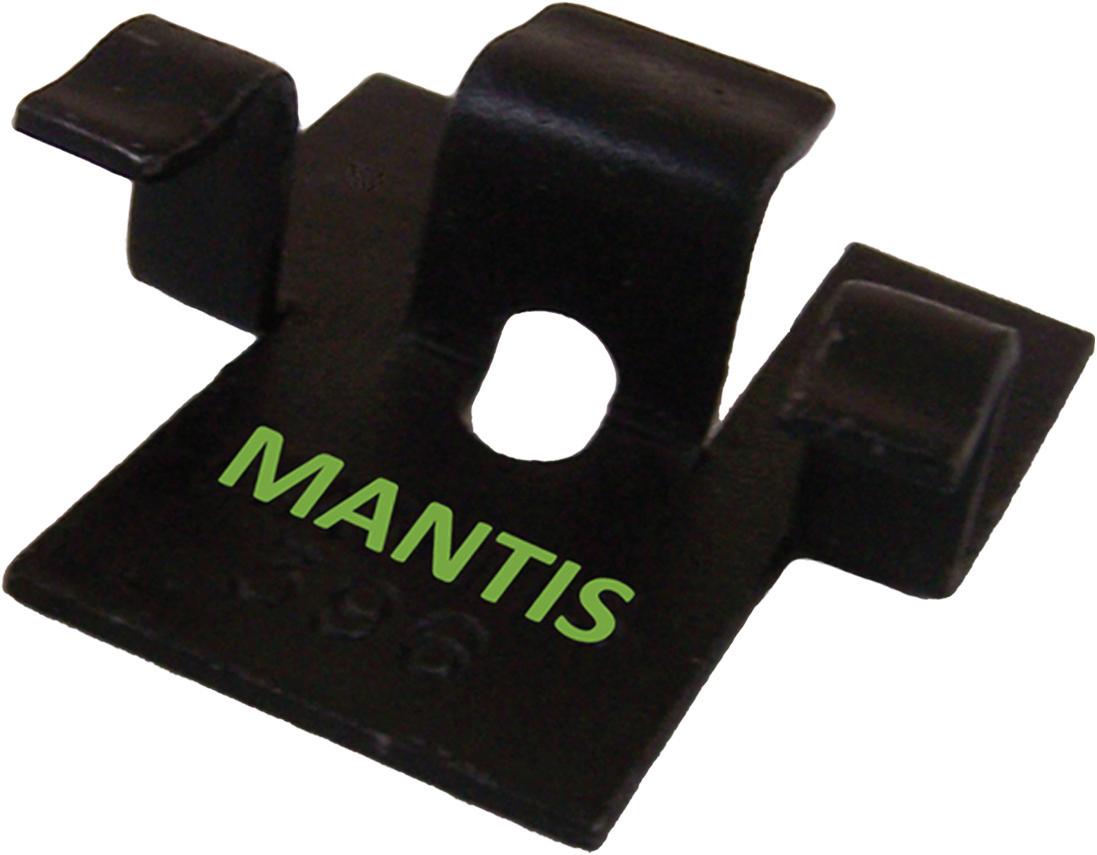


3X FASTER DECK INSTALL USING OUR ELIMINATOR RCSTM PNEUMATIC TOOL! 30 YEAR TRANSFERABLE WARRANTY THE BEST IN THE BIZ PERFECT FOR USE IN MOST MAJOR COMPOSITE DECK BRANDS ANOTHER INNOVATIVE PRODUCT FROM SURE DRIVE USA® SUREDRIVE.COM CHOOSE COATED CARBON OR STAINLESS STEEL • HIGH STRENGTH COATED CARBON STEEL FOR ENDURANCE • STAINLESS STEEL FOR SUPERIOR CORROSION RESISTANCE 4 CLIP PROFILES • PRECISE FIT ELIMINATES LOOSE DECK BOARDS • INCREASES HOLDING POWER ELEVATES YOUR DECK BOARDS • BETTER AIR FLOW REDUCES ROT • RELIEVES LATERAL LOAD STRESS



 By Tom Matthews


